Zsomething
Free Member
-
Joined
-
Last visited
Everything posted by Zsomething
-
So, I am up and driving with the round top carburetors on my '73. The car fires up perfectly after sitting for a couple of weeks when I was too busy to drive it. But, I have a problem now with starting facing uphill. At first, I thought it was just me being rusty with the 5-speed. Now, I think there is no torque at low rpm under load. When I went out to a quiet hill to test it out, it would lurch forward with each engine rotation (sort of like it is only using one cylinder). If I hit the clutch fast enough (after a few rotations), the engine won't even die sometimes. On flat roads, it's perfect. On substantial hills, it's undrivable. and everything in between. I just put new round top su's on. So, the 'smog stuff' is still present on the balance tube. But, none of it is attached yet. I have a mind to hook it back up when all is running well, because I don't particularly hate clean air. So, I have rubber vacuum boots (probably not fuel resistant) over the currently unused vacuum ports. So, is there a good set of steps to go through, or a list of things to check for a vacuum leak? Is my problem something else entirely? Edit: I started to try to spray carb cleaner near the places that might leak. But, the can that I had wasn't atomizing very well (at all). So, I'll grab another can tomorrow. Thanks.
-
Who would have guessed: regulator regulates? I thought maybe my electrical system alternates between working and not working. Seriously though, thanks for confirming my suspicions. It helps to have someone say what you knew was true, but didn't want to believe. I'm not too scared of the wiring. I'll probably go with the ZX alternator, or a similar adaptation. This parallel thread has a discussion: http://www.classiczcars.com/forums/showthread.php?t=27677 Just doing a quick google search these came up too: http://www.nk.ca/~zcar/pages/articlepages/alternator.html http://www.zcarcreations.com/howto/voltreg.htm
-
The battery is new. So, I don't think that is the problem. The ammeter goes from 1/2 to 3/4 depending on the rpm. To test this should I just measure the amps and volts at the battery and at the alternator? The brightening lights and slow-to-fast blinkers are annoying, but tolerable. Can this affect spark too? It seems like the coil would put out a hotter spark with more amps, at least. (and I have to think an MSD system- which I don't have- would barf all over itself.) Will a new regulator fix the problem, or is it something that I should just get used to? Thanks.
-
I tried to avoid using the thick spacers because I heard that they don't allow the proper flat washer-lock washer-nut, although I did not try it. I am sure that lots of people have had this exact problem. But, I didn't find much info on it searching. So, hopefully the next person will find the two solutions: use thick spacers, or experiment with a combination linkage setup. Sounds like a pretty good deal to me.
-
I was out driving today (a minor success in itself), and I noticed that the ammeter rises with engine rpm. Additionally, the headlights get somewhat brighter and the period of directional blinking varies, which leads me to believe that the amps are indeed increasing (as opposed to a gauge issue). Should I suspect the alternator or does the voltage regulator control the amperage as well? Is this even a problem? Thanks.
-
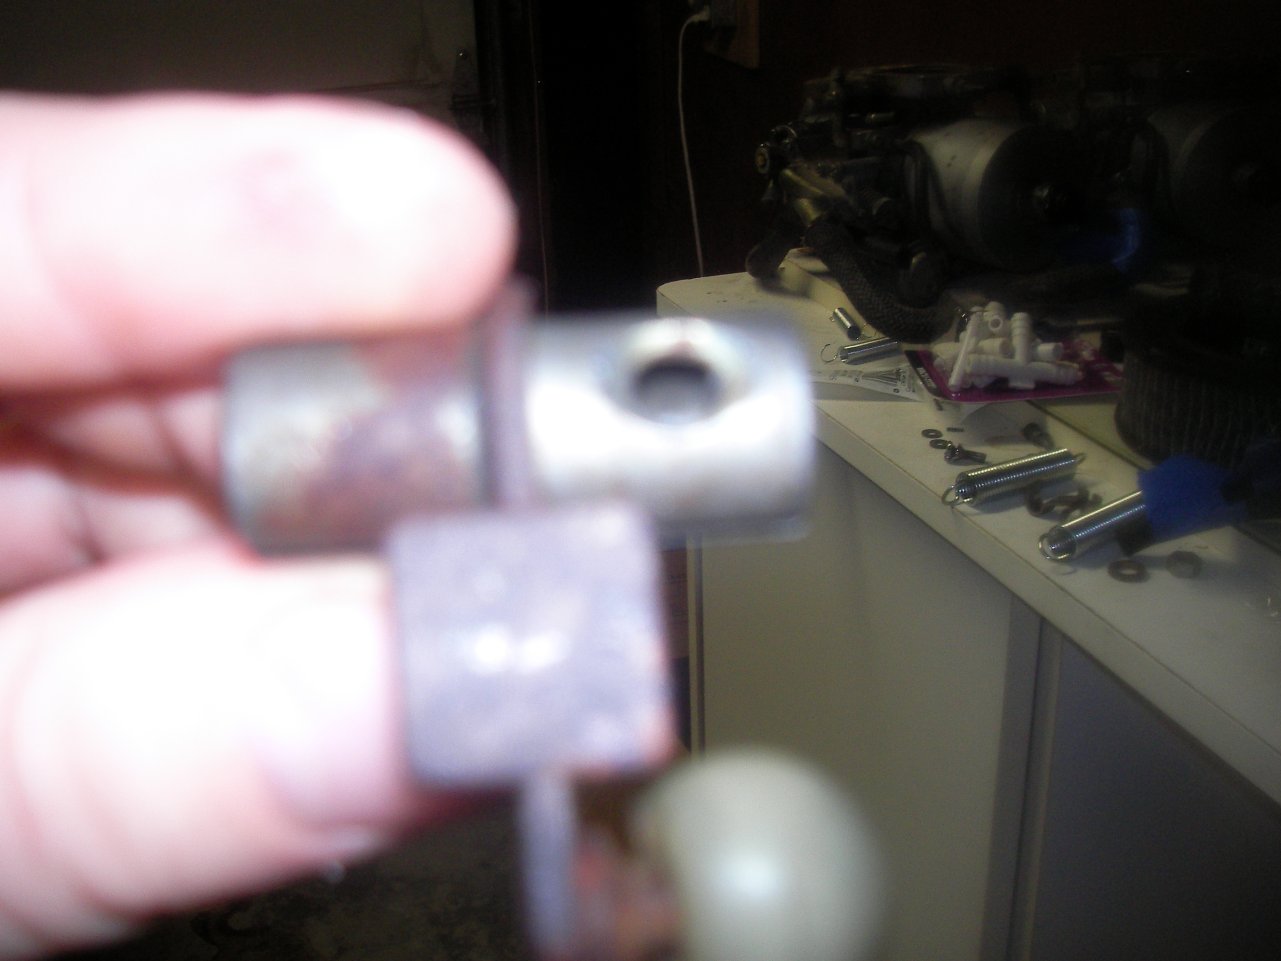
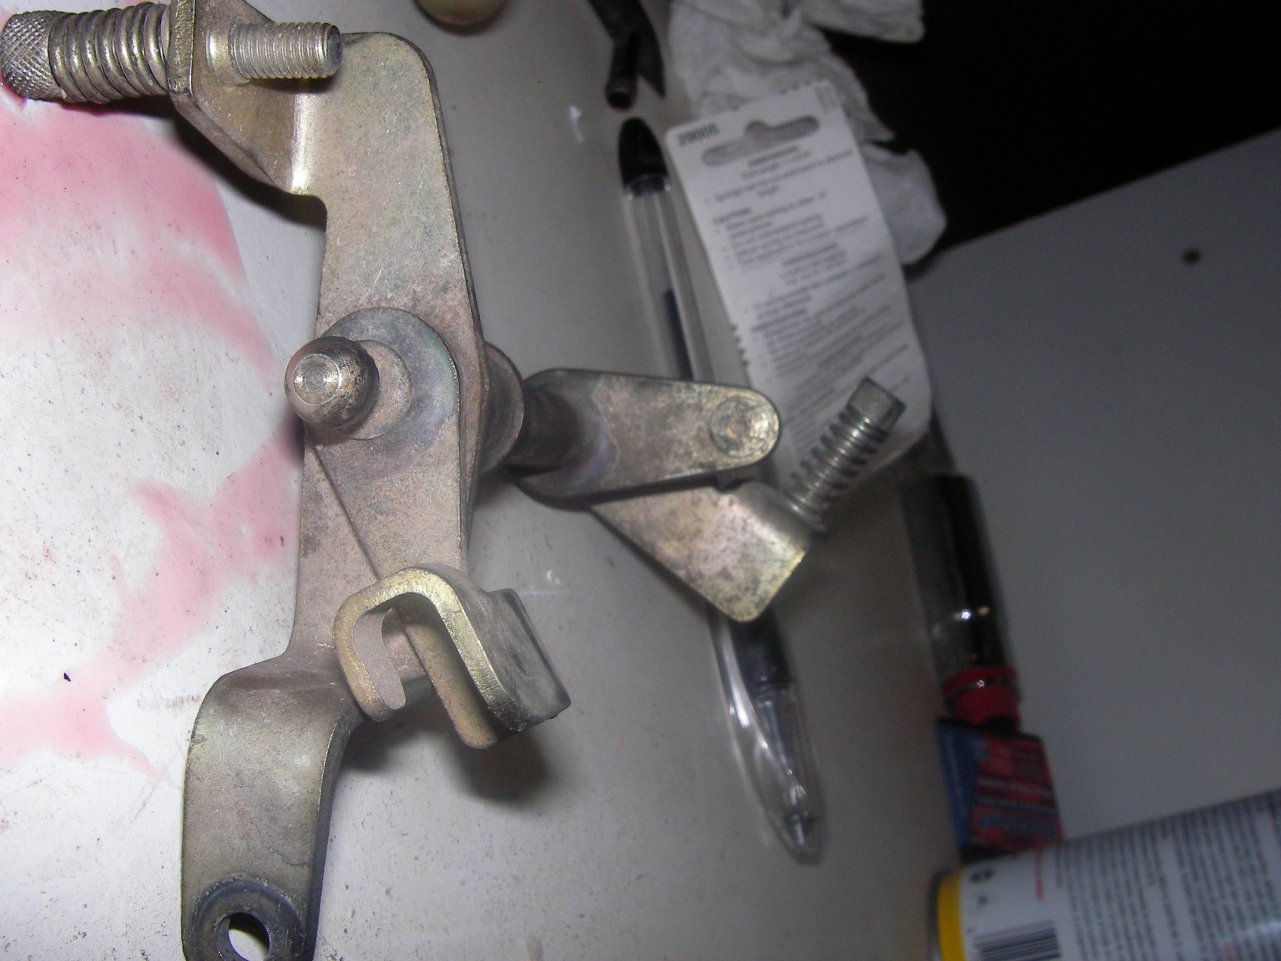
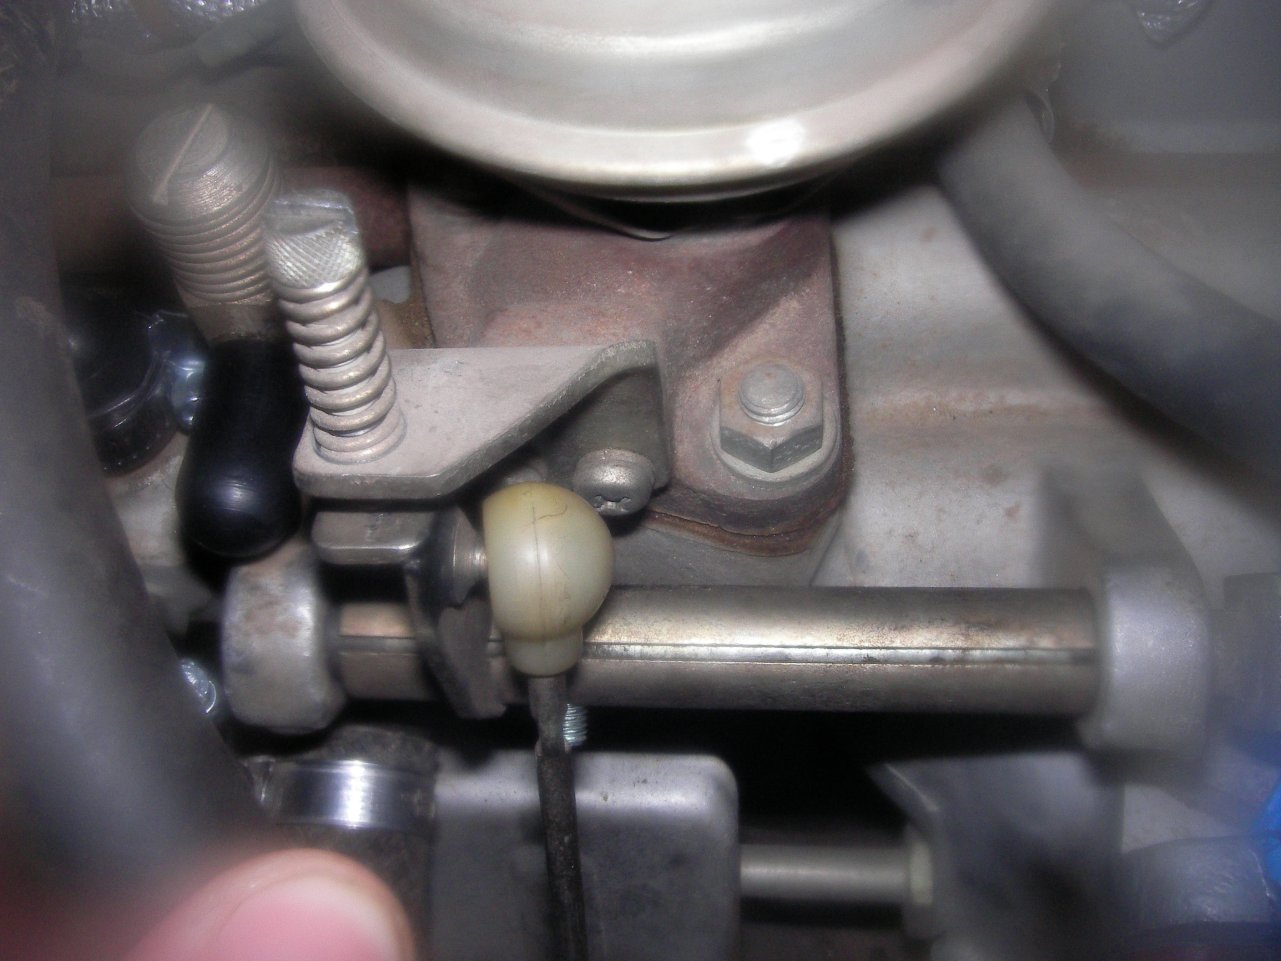
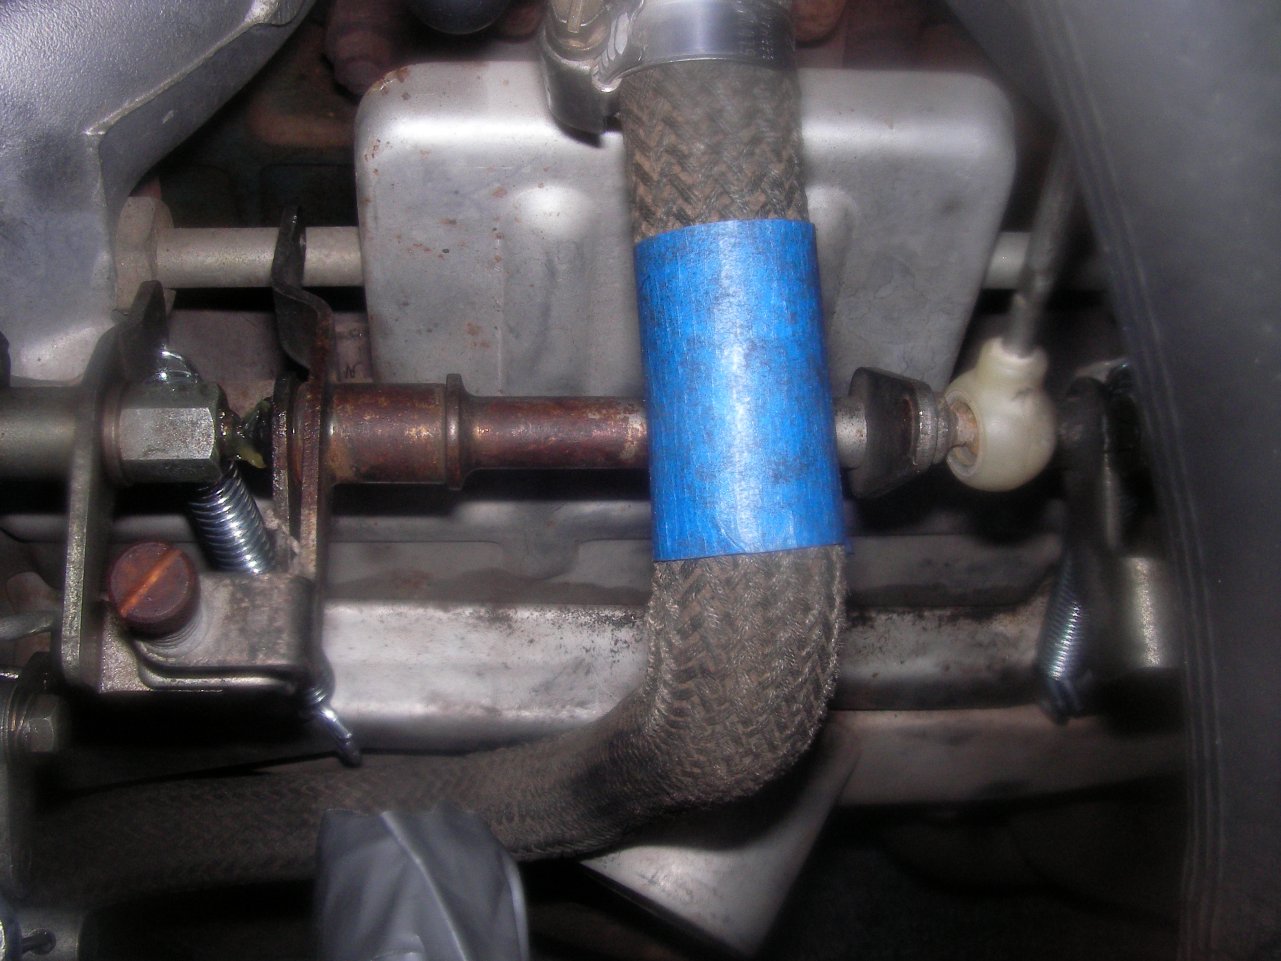
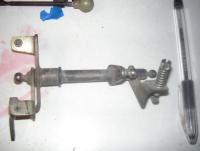
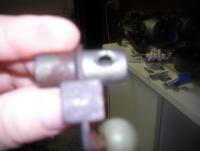
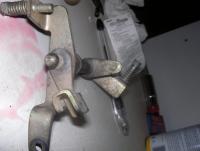
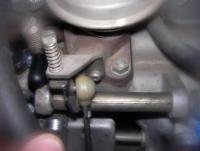
Basically, the problem was that I was using the short linkage from the round tops (second picture). The shorter linkage had two problems. First, it allowed too much axial movement. Second, it did not allow the existing maintenance screw to be used (fourth picture). Third, it did not allow the carburetor to return to full close, because the angle is incorrect. The third problem was unacceptable. So, I fixed it by combining the round top lower linkage (which matches the carburetors) with the flat top upper linkage (which matches the balance tube). After doing this, I adjusted the threaded rod on the firewall to be the correct length with no slop, and now all three problems are fixed. The first picture is the flat top carburetor linkage, which does not fit the round top carburetors. The third picture is an axial picture of the flat top linkage. The angle between the ball end and the screw that pushes the carburetor butterfly open appears to be greater than the linkage for the round top carburetors. The fifth picture is the round top linkage that is on the car now.

-
I'll see if I can get a picture tonight. After thinking about it a bit. I think the problem is basically that the round top su setup had thick spacers, and the angle on linkage between "the ball shaft" and "the opener" was appropriate for the bigger spacers. But, the small spacers moved the carburetors closer. Basically, the carburetors moved closer with the smaller spacers. So, the throttle linkage is no longer correct. Anyway, a picture is worth a thousand words (or a million of my words). So, I'll get those up.
-
I finally got the round top su's on this evening. I've plugged all the hoses to the extra stuff on the balance tube, for now. The pieces are intact. The egr is still present and hooked up. But since I removed its vacuum source, I don't think it will be opened. I turned the key and it started running. It is popping gas out the carburetors a bit. But, I think this is expected for being completely unbalanced? So, I am feeling good and the rpm's start to rise to 4,000 with choke and 3,000 without. So, I attempted to adjust the ilde screw. It didn't seem to have an effect -- all the way in or all the way out. Looking a little closer, I realized that the tab that should oppose the idle screw is about 1/4" away from the carburetor body with the screw all the way out! The throttle linkage that goes from the balance tube to the carburetors is the same length. But, the angle between the ball joint to the pad appears to be something like 10 deg. difference (just guessing). So, it looks like I will have to adjust the screw on the firewall linkage. Hopefully, I have enough extra room to make it work. Are there any other places that I will be able to add slop? Should I try those first?
-
When I was putting the su's back together, I put a bit of grease on the needle to lube it. But, it occurred to me that may not be a good idea, because any grease stuck in the nozzle or on the needle will affect the mixture profile. It seems like the fuel will dissolve the grease pretty fast. However, the precision of the needle ground makes me think it might still have an effect that will decrease over time. Further, it seems like a non-oil-based lubricant could have a long lasting effect on the carburetor performance. Does anyone have any thoughts? Am I missing something?
-
I picked up 3.25" springs with 1" S hooks. I'll play around with the geometry and geometry and how much tension to keep on it when the butterflies are closed when I get some time tomorrow. I should have plenty of heat shield to work with to make it as tight as I want. Maybe 5x80 means something different to the referenced poster. But, 80mm is WAY too long (which anyone that looks at the screw, or thinks about it a little, will realize). I got a 5x25 which is also too long. It looks like it is probably 5x20. Anyway, I figure that I can get a nut and a lock washer on the end now, since I couldn't find the star washer and the extra 5mm doesn't hit anything. As for the firewall linkage, there is a little bit more back and forth play than I would like. So much, in fact, that the linkage can come completely out of the far pivot point. I'll probably put a shim of some sort on the firewall, if I get around to it. But, it doesn't seem like too big of a deal. Next step is to static set the carburetors, hook them up, plug the extra vacuum holes, and (with some luck) tune them.
-
I think the screw attached to the egr that I was worried about is what is referred to as the "maintenance screw" in the ztherapy video. It sounds like I can get away without this by using the brick on the accelerator method suggested in the video. I'm heading to the hardware store now to get the stainless springs. I am going to shoot for something like this (or a little bit less so I can put in sturdy S hooks): I'm also going to pick up a 5x80 countsunk screw with "external star" lock washer (which I mangled during the removal of the old throttle linkage). Source: http://www.classiczcars.com/forums/showthread.php?t=17320 Thanks for the help guys.
-
Thanks. I was pretty sure that I could chuck most of the stuff. But, I wanted to be sure. And since I have already broken off one screw and stripped/mangled several others, it seems unlikely that the things will go back on. I would like to keep the egr, if possible. Because, I think that plugging the exhaust hole might require a little more than jbweld. Do you have any ideas on where to run the metal tube that went from the egr servo to the port on the rear carburetor. I think it is carburetor vacuum (maybe?). But, the round tops don't have a port on the rear carburetor. Perhaps the egr is more trouble than it is worth... Will any good springs work? I'd hate to wait in the mail for something I can get at the local hardware store. Thanks!
-
Bruce Palmer answers some of these questions here: http://www.classiczcars.com/forums/showthread.php?t=27596
-
I finally got all the old gaskets off the round tops that were bolted to another manifold. I hooked up the linkage and I was feeling good until I realized that things don't match exactly right. First, I realized the screw that limited the return motion (attached to the egr) does not hit the pad on the firewall throttle (not sure how to call it) shaft. It looks like the pad is supposed to oppose a screw. But, it doesn't match the flat-top assembly and I don't know what the earlier style looks like. Is this a problem? The picture below looks like it has the flat-top stopper. What is the function of this screw? Second, when I fiddles with the assembly a bit, I realized that the butterflies don't return to closed after releasing the throttle. After reading this thread http://www.classiczcars.com/forums/showthread.php?t=25818 and this thread http://www.classiczcars.com/forums/showthread.php?t=17320&highlight=fast+idle+screw, it looks like I am missing return springs. My manifold more-or-less looks like this one from the thread http://www.classiczcars.com/forums/attachment.php?attachmentid=17997&d=1177913434, except I don't have the springs. Can anyone suggest a quick-term and/or long-term fix for either of these problems?
-
Haynes calls the screw the "Slow running adjustment screw". I think I'm going to see if this will come off and then jb-weld it. Also, I'll probably just remove the "Throttle closure delay" and be done with it. But, I don't think it will hurt to leave it there for now unconnected.
-
I finally ripped off the flat top Hitachis, and I want to make sure I am handing the emissions stuff right. First, the egr solenoid valve has a bend metal hose that connected to the rear carburetor. What should I do with this on the round tops? Second, I have the flapper air cleaner, and it has one less large port and one less small port. The large port came from the flat top carburetor, so no worries there. But, the 4 small hoses are: from the throttle opener control, from the flame trap, from the balance tube to the "idle compensator" in the air cleaner, and a mystery hose that hooks to a device that Tees into the PCV manifold port and a metal tube to somewhere (maybe gas tank or A/C related). (I assume the vacuum port that went to the intake air temperature control from the front carburetor can be safely plugged.) So, my thought is the hose from the balance tube to the idle compensator (which isn't on the new air cleaner) has to go. How should I go about eliminating the vacuum port? Should I go ahead and remove the entire throttle opener control system? Or should I just plug the hole in the balance tube? Should I use gasket maker or jb weld to close holes in the balance tube? Also, adjusting screw for the carburetors and the rail connecting the float bowls (maybe?) on the carburetors can be removed safely? Thanks!
-
I just realized that the unmarked (by unmarked I mean clearly labeled and ignored) device on the carburetor side of the valve cover is a pressure regulator. The regulator isn't exactly late model and it doesn't look like a Nissan part. And, I doubt that I'll be able to find too much information on it. Should I keep it or ditch it? If I should keep it, will it fail and how will I know? It's got numbers 1-5 with tick marks in between. I assume that these are psi. Is there any other unit they could be? rods/hogshead, etc. It's set to 2.5 at the moment, which makes me think it is psi, because I've heard 2-4 psi is a good number for fuel pressure. The car has the flat-tops on it at the moment and they are way rich. Should I try to adjust the regulator before the swap? after? Thanks.
-
I tried using some liquid wrench twice a day for a couple of days. I don't think it did any good. The kroil is in the mail... I tried the mallet. But, that wasn't very effective because I couldn't hold the wrench steady while using the mallet. I took my wrench and wrapped it with a ~1.5' aluminum pipe and wrapped that with a 1.0' aluminum pipe with larger diameter. BINGO! Easy as pie. It looks like the bolt was overtightened to compensate for the omitted washer. I replaced the 22mm bolt with a new 21mm bolt w/ washer that got from Autozone. I couldn't find any torque specs for the oil drain plug. So, I torqued it to 15 ft-lbs. Let me know if that is correct. Thanks for all your help.
-
Thanks for the picture. I got it straightened out now. It's not technically an error, though. Because the cylinder numbers are correct. The diagram is just very misleading if you are glancing at it. I know I have read some of people getting a poorly running car with the 3 and 6 wires flipped. So, hopefully they will find this thread with your picture, if they do a search in the future. Here is an "artist rendering" of the diagram, if you imagine the top row being the location around the distributor (without the cylinder numbers), and the bottom row is where the cylinder number are shown (the x is where 3 and 6 cross): .......1_____ __5....4__..| |..3.....2..|..| |...|..6..|..|..| |...|..|...|..|..| |....x....|..|..| |...|..|...|..|..| 5 6 3 2 4 1
-
I still have nightmares about the time I tried to over-tighten the oil drain plug when my dad was showing me how to do it on my first car. Apparently, the previous owner of my 73 did not have a similar experience. The bolt is cranked on pretty good. I think the car has sat for a few years too. So, it may be rusted a bit too. I have never had this happen on any car that I have owned (for an oil plug!). So, it is somewhat new territory. Does anyone have any advice how to loosen the plug? I bought a replacement plug, (naively) planning to replace a slightly rusty plug. So, I don't care how it gets off, as long as it gets off. I didn't try a cheater bar yet. So, that's still an option. Should I just go ahead and replace the whole oil pan and be done with it? I really hate torquing on bolts when I am under the car. So, I am not against this. I thought about applying some heat with a torch. But, I changed the fuel filter earlier and I didn't want so set the thing on fire. Thanks!
-
I used bosch plugs. Should I go with NGK in the future or ASAP? Yeah, I have come to the conclusion that the flat-tops have to go. But, the carbs were not the only problem, and that was kind of my point at the beginning. Everyone (myself absolutely included) wants to mess with carb adjusting/swapping (SUs, weber, holleys, flat-tops, etc.) when they (I) should set the timing properly and replace the plugs and wires (which I did with a huge improvement). For example, the above post which suggested that I check the compression was right on, and I would be/am a fool for not doing that first. I think the flat-tops are dumping too much gas. Rather than rebuild the flat-tops, I think this is a great time to swap for round-top SUs. I can get the ZTherapy kit and benefit from the knowledge of everyone on the subject of SU carburetors. But if I went with flat-tops, I would be going it alone which might be fine for someone who knows a lot more than me, but not for me. Now I can start and idle the car which will make the tuning of the new carbs easier/possible. I'll go back and check the vacuum now that the engine is running a lot better. As far as I know, it's a stock cam. Thanks a lot for everyones help!
-
When I was removing the plugs to test the compression, I broke the #1 plug (and began cussing the fuel pump). So, I went ahead and put a new set of plugs and wires on. It will rev all the way up to 4,500 in neutral now. I think it is still 'popping' a bit. But, the fouled plugs were definitely causing a lot of problems. I haven't run it under load yet. So, we'll see how much of the problem was the plugs.
-
I am not sure if anyone else has had this confusion. But, I thought I would share. And maybe someone can set me straight as to why in the world anyone would do this. In the Haynes manual, the distributor firing order is illustrated in a silly way, although it is correct. The plugs are listed along the bottom as 5-6-3-2-4-1. The lines are connect to the correct positions on the distributor. But, this is confusing because the firing order is actually 1-5-3-6-2-4. So, it is just one off of the actual order. The diagram has the lines from the 6 and 3 plug crossing for some reason. It seems to me that if you just drew the lines straight down, you would read the correct order, 5-3-6-2-4-1 (starting from 5, from left to right, or clockwise).
-
I finally got a chance to check the compression. I checked it warm. But, I wasn't able to rig the piston or throttle open. results: 6- 140 5- 150 4- 145 3- 150 2- 160 1- 155 These numbers seem fairly decent. So, I guess the carbs are indeed the problem? Now, I am going to change the wires, plugs, fuel filter. The distributor is new. I'll replace the air filter when I put on the flapper air cleaner with the round top carbs after I get the rebuild kit from Ztherapy.
-
Story checks out: http://http://en.wikipedia.org/wiki/Horsepower#Relationship_with_torque Also, it seems like most cars (Camaros, Mustangs, etc.) have gotten a bad rap for losing horsepower through the '70s. When in reality, automakers were just no longer allowed to make up numbers (ok, not completely make up, but exaggerate definitely). Personally, I think people just want to hate the more complex engines, since they are harder to repair. But, the more complexity you add, the more you can do. (which is why it isn't even shocking now to see new production cars push out 500hp stock.)