EverRude
Free Member
-
Joined
-
Last visited
Everything posted by EverRude
-
 PM sent JohnnyO
 -
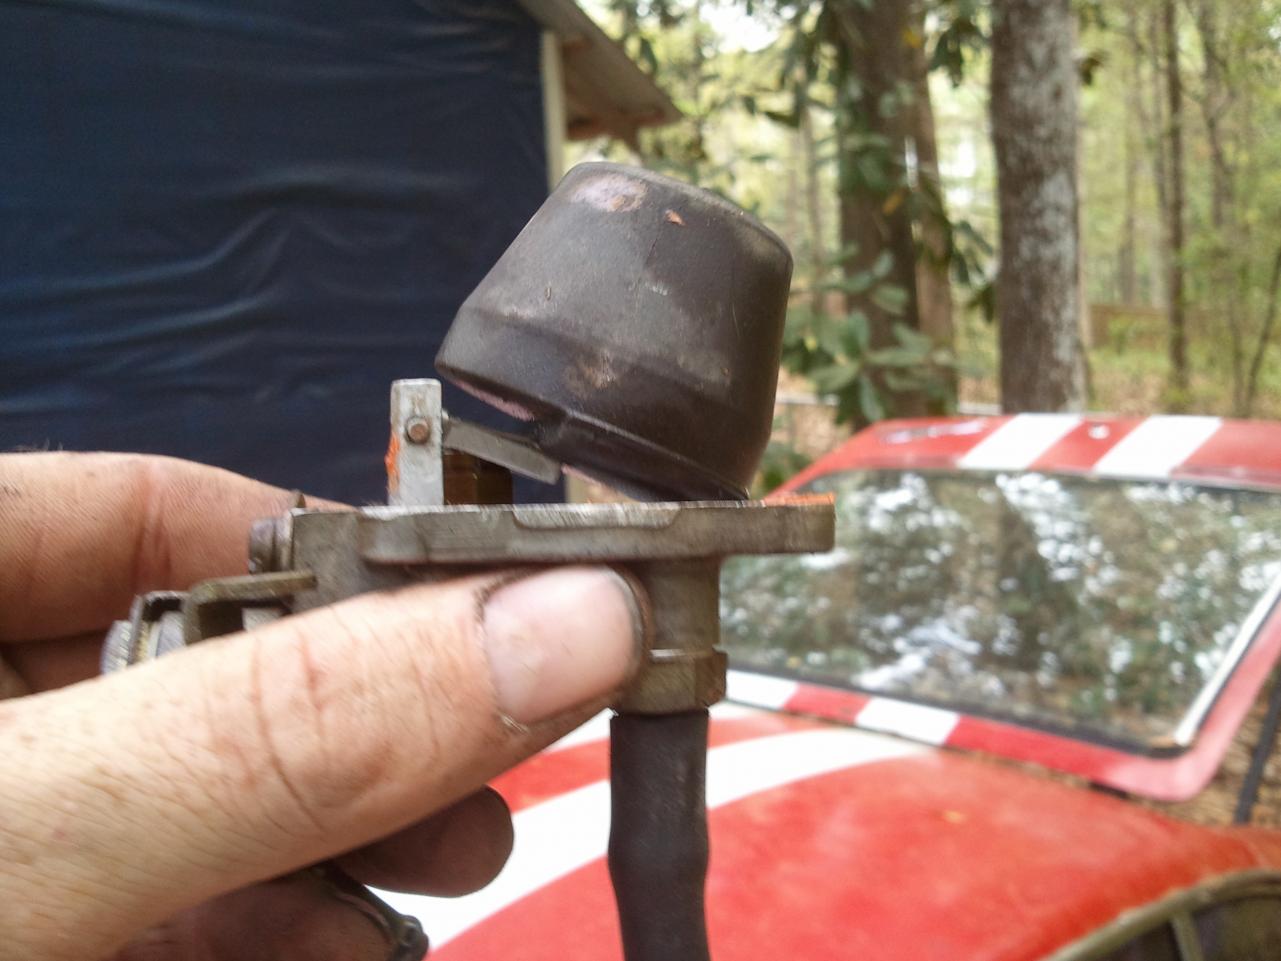
So I need a hazard switch? there's no way to use a jumper wire to bypass the flasher switch to allow power to continue past the missing switch in the interim?
-
My brake light circuit was bypassed by a PO. The brake lights work but he bypassed the blinkers and 4 way flashers to do it. Blinkers don't work. They still appear to be wired normally. No 4 way flasher switch is installed. Could this be a reason the blinkers dont work and the brake light circuit was bypassed with a splice? If so can I jumper the flasher switch to get things working till I get a 4 way flasher switch or should I just locate a flasher switch and keep things the way they are till I have it? Thanks BTW I asked this as part of the daily update to my "3 years of sitting..." thread in the members help forum. Don't mean to double post the question but want to make sure I get answer as fast as possible.
-
Got my float gaskets in. Thanks Bruce. Nice to see you guys were really awesome about tossing gaskets into a envelope and just charging me for a stamp rather than tossing them and a big box like some places and charging me twice the price of the gaskets for shipping and handling an uneccessary box. Adjusted floats and installed. Sat down in car ready to crank her over and got nothing. Battery was dead. Dang it. Coulda sworn I disconnected that thing. Never good idea to leave a battery in an old car connected for days knowing it'll just be sitting there. Especially one with known wiring issues. So the battery is now charging. It'll be the morning to actually crank her up. Meanwhile I tested brake lights. They work fine. Seems a PO bypassed the harness for brake lights and wired them with a bypass wire. So there's either a short in the harness or it was a bad attempt to avoid fixing another issue that was causing the brakelights not to work. There's no Flasher switch in the car. Would not having a flasher switch cause issues for blinkers and brake lights?
-
And this is especially true if I was the previous owner!
-
That is a nice looking car. Very cool that you have those pictures and paperwork included. The car simply oozes history. Would almost make me want to leave the vinyl top. Welcome
-
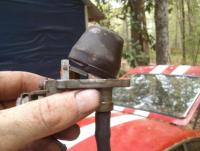
Thanks for the tip JohnnyO. The booster rod adjustment is fairly simple. Remove the master cylinder. You will see a rod. It has a small 7mm nut at end of rod. The rod also has serated teeth just below the nut. You will see the threads between the nut and the teeth. Just hold the teeth with a pair of pliers and turn the nut counterclockwise till it extends the amount you need. Finally reinstall the master cylinder and test. I did have an issue trying this. My rod was corroded badly and I could not get the rod to turn. A more patient person would use something like PB Blaster or Liquid Wrench and made the adjustment after the a day or 2. I however am not patient. Thus I partly disassembled the booster to get the rod out. I then held the rod by the nut in a vise till I could turn it with a huge set of channel lock pliers. Worked like a charm. But I created alot more work for myself and potentially ruined the booster. It was all dirty and corroded so I took the opportunity to clean up a bit. Just hope everything sealed up when I got done. Just a word of warning. There is a rubber disk at the end of the adjustment rod inside the booster. You can't see it normally. But it sometimes falls out and causes the brakes to feel weak. It will almost certainly fall out if you pull the rod in order to make the adjustment. To reach the rod with the pliers and wrench, have someone press the brake pedal so the rod sticks out enough for you to reach it. Or place a brick or something or something on the pedal to cause it to stick out. You can leave the lines hooked up to the master if you are careful. They will flex and bend enough just don't bend them too much. So you can do thius job without having to bleed brakes again afterward. Also may want to have some gray rtv to seal the master cylnder back down to booster when you're done. Here's a pic of the page about this in the FSM. I got it from this thread by Zedyone_kenobi. He's goes into alot of detail about the adjustment when he replaced his booster. http://www.classiczcars.com/forums/showthread.php?t=40535&highlight=brake+booster Good luck.
-
I wont be the one changing tires. Just hate enlarging hole for a plug. It's in a bad spot too. Edge of tread and sidewall. Still in tread but that area gets more stress than any other in the most critical situations. I will get new tires but the car needs so many other things first. I'll check around local used tire places. Maybe can find a used one or a whole used set for a reasonable price and enough tread to warrant the effort.
-
Figured out the brake problem. After a bit of seaching I discovered the adjustment to the booster rod. It was adjusted almost all the way in. Making a good 3 or 4 inches of travel at the pedal before the rod even touched the master cylinder. Adjusted it out and now I travel maybe 2 inches before I feel the brake pressure and it stops firm well before the floor. Happy with that result atleast. Found another issue though. There's a nail stuck in the tread of the drivers rear tire. Not actually leaking but I aint gonna leave it. It's a tiny nail and I would have to enlarge the hole to use a plug. Thinking about using that green slime stuff. I have 2 cans of it I've never used. The tires will only be on the car another 500 miles or so before I get new ones. So it shouldn't hurt to use that crap since I have some already. Anyone use this product? Does it work to patch a tiny nail hole?
-
Still waiting on my float bowl gaskets. Decided to clean the garage this last couple days rather than continue work on the Z. Hopefully I'll be able to park and work in my garage rather than constantly laying on dirty, often wet, concrete. Did manage to drag my wife out to help me bleed brakes again. Usually use a mightyvac. I'm no longer get air from bleeding and just get a solid and firm stream. Brakes seem better but still not quite what I am expecting. Carbs are disassembled so I can't crank her. So without power booster affecting the pedal I expected something harder. But it's not. It's like I have 5 inches of pedal throw but brake only applies in the last 1 or 2 inches. That seem normal? Please keep in mind I've never driven a Z. No real clue how the brakes on this car should feel. I could actually use help with this one.
-
Welcome to the group Nice Z. Looks to be in better condition than mine. Your pics are showing in your gallery. The "My Z Photos" link under your name. You can add them to your messages by using the add photos button when you create a message. I find that simply uploading the pics via the attachment manager, in the advanced messages section when posting message, is best way to deal with the starving pics-please monsters . No "approval" needed and you can post any picture from your computer. Very helpful when you need help about something and you can post a picture in your message showing the item you need help with. Attachment Manager for the win
-
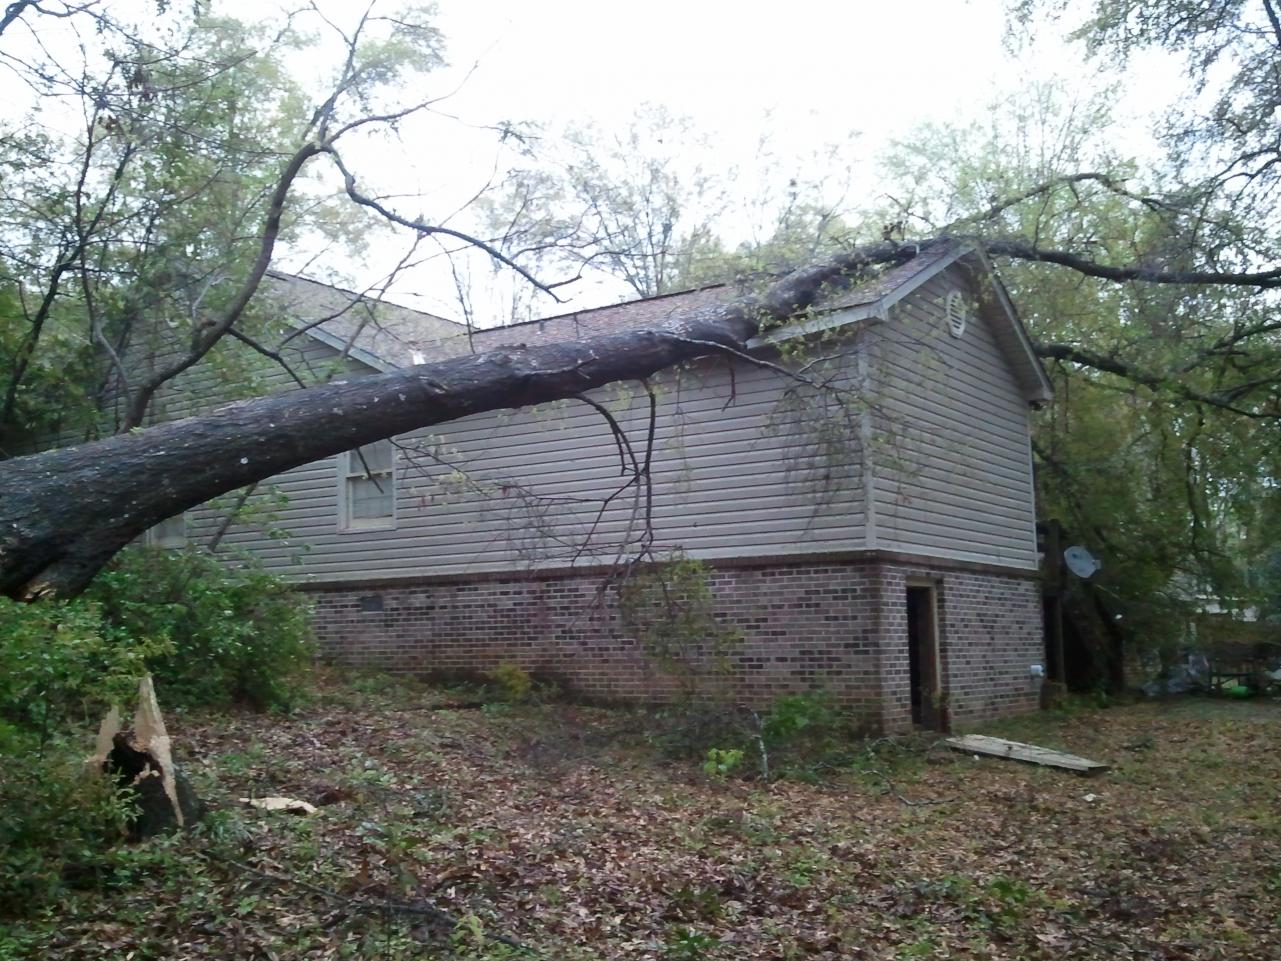
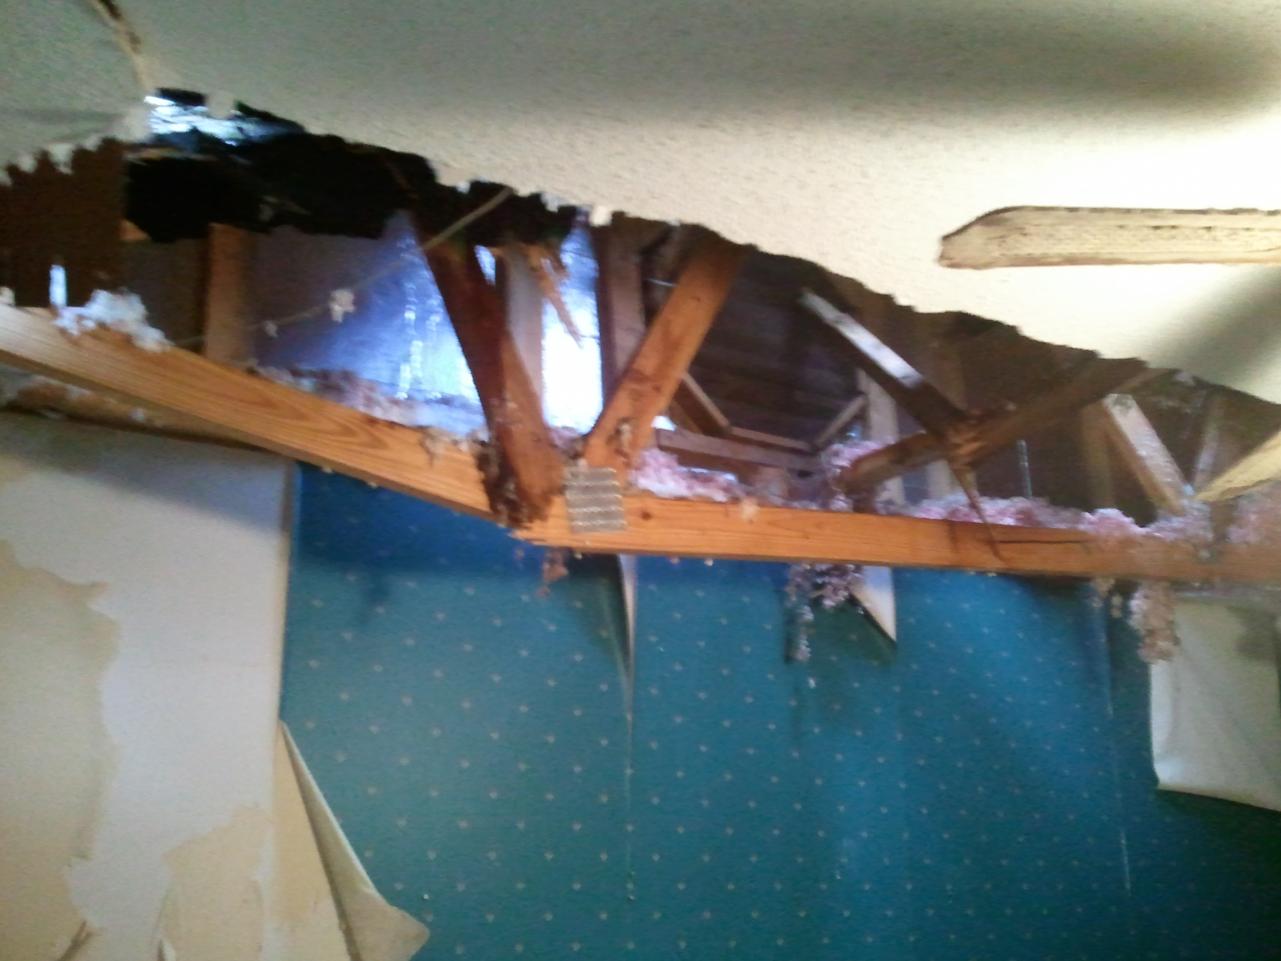
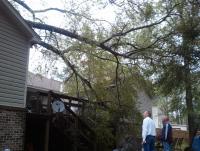
Carbs wouldn't tune. Pulled float bowls and discovered the floats were maxed out high. Car would run faster if I raised the cylinder while she idled. Running extremely rich. Including a pic of the float levels below. Now I need new gaskets before I can continue. Should have thought of this when I ordered the Unisyn amd Just SU dvd. Didnt want to buy whole rebuild kit though it could use it. But shoulda atleast bought float gaskets. Lesson learned. I can play with wiring while I wait for gaskets. Not like I lack work on this car. Weather yesterday was horrid. Alot of high wind and hail. We have alot of trees in our yard. Oak and Magnolia. Only owned this house 4 months now. With spring coming the trees were finally showing leaves again and it was starting too look nice. One of those good size oaks decided to fall over on the neighbors house. Clearly it was rotten and weak at the base. But there was no sign on the outside. It appeared to be a healthy tree. Praying insurance does it's job on this. The car has now offically dropped low on my concerns list. There's some pics below. BTW noone was hurt and the room below was empy except for a few items stored inside.


-
Brakes completed as well as clutch hydraulics. Brakes very soft and need more bleeding. Guess that's to be expected with a complete rebuild of the whole system. Hopefully sitting over night will let the air bubbles settle to toward the bleeders. Took it for the first drive. Just did a quick tune on carbs with Unisyn and Just SU info. Airflow was in balance but idle is still to high. Was too impatient to continue the tune so I just hopped in and drove her around the block. Man those brakes are soft. She shifts great but still need a little more throw on the clutch. She grinds going into reverse with clutch down if there is any forward movement. Another thread or two on the slave shaft should solve that. Disappointed in how it ran though. Not surprising since she hasn't been on the road in years and I'm still working out a ton of bugs in her system. Going back to ground zero and setting valve lash cold and hot. Then setting timing. Then tuning carbs as best I can without removing them. Hope I can get her to run smoother on the road. Little concerned about the oil pressure continuing to drop on the guage. Wouldn't worry me much except there seems to be a corresponding change in engine noise. Like she really is loosing oil pressure. Have a new sender I'm going to install. Maybe that'll solve that issue. Oil level is full and it's a new pump. Wish I had bought the L28ET pump. Get more flow and piece of mind. Oh well. That money is spent already. Running out of cash fast on this project. As expected, just kinda hoped I be further ahead at this point. Still have a mass of wiring issues to work out. Like why is the fuse panel in the glove box? Why are so many connectors not connected and what do all the extra wires running through the car go too? Schematics are useless at this point cause it seems few of the circuits are actually working as designed. Instead extra circuits and inline fuses are throughout the mismatched and heavily spliced harness. This part is gonna be a nightmare. Wish I had a whole stock harness I could just cleanup and drop in so I could start off stock. Oh well. I knew wiring was gonna be an issue from the start. One thing I had known about these cars. They rust and they have wiring issues. If anything is gonna make me give up on this car it'll be wiring.
-
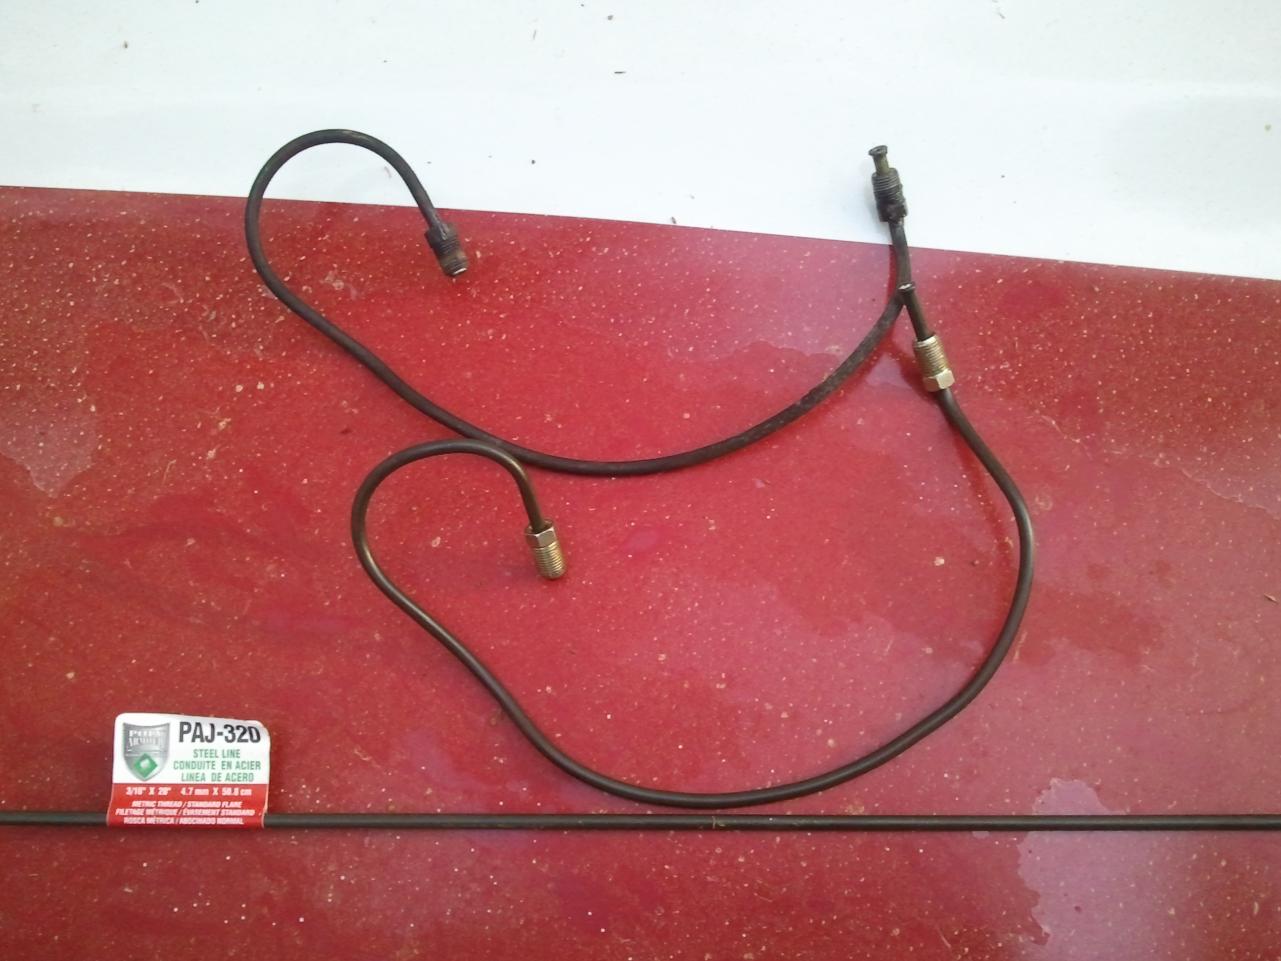
I was right about those drums sucking. First wheel cylinder took me some time. Realized, after a bit of pondering, that it was best to install the rubber on the back as you install the cylinder from the front. Once cylinder get to a certain point getting the rubber on becomes impossible. Just best to slide them together as you go. First set of shoes took too much time as well. Made the mistake of trying to put the lower spring in last. Oops. Had to remove the shoes completely and install both with lower spring installed already. Everything went smoothly afterwards. No pics right now but the new hardlines fit pretty good. Removed old brake and clutch master cylinders. Will be installing those this morning. After their installed, going to use some coke bottles and a ton of old (good but opened a long time ago) DOT 3 brake fluid to flush the hard lines before I make the connection to the wheels. Decided to go with DOT 4 fluid rather than silicone DOT 5. Don't want the hassle of silicone being hard to bleed and possible sponginess. And it seems if I flush and bleed my brakes once a year or so I can mitigate the moisture issue and make even a glycol based last a long time without having to rebuild everything every 4 or 5 years. Have to do driveshaft ujoints after brakes while still on the jackstands. Going to buy the ball joint tool from harbor freight everyone seems to recommend. I want to do all 6 but I will probably just to the main shaft since the forward shaft joint is the one with all the play. I want to have this car on the road soon and it's going to rain today and tommorrow and the next day...bleh. Been watching the Just SU DVD so I can be ready to tune the carbs once the mechanicals are done. Also bought DeoxIT to start working on the wiring. First by disconnecting and cleaning the existing connectors. Finding grounds and cleaning them. Then making since of the wiring mods that have been done so I can figure what needs to be fixed there before I can do my own mods for headlight and parking light harness. You know the more stuff I complete then more I figure I have to do. Haven't even mentioned steering and suspension, rust repair, interior install.... My wife just might forget she has a husband. Nah. Not possible. According to her I leave grease track in the house just by looking at it. So there's proof of my existence
-
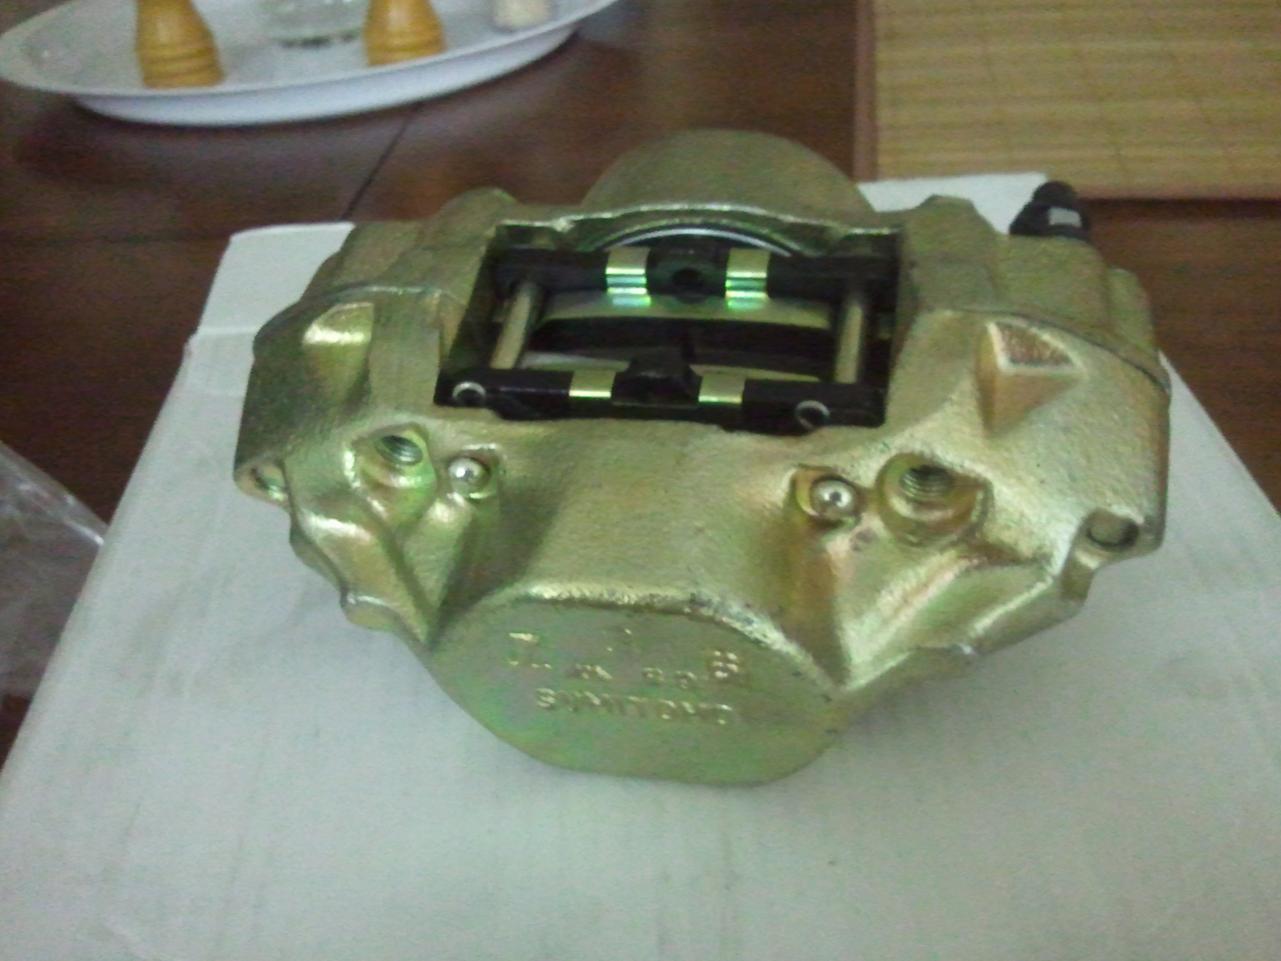
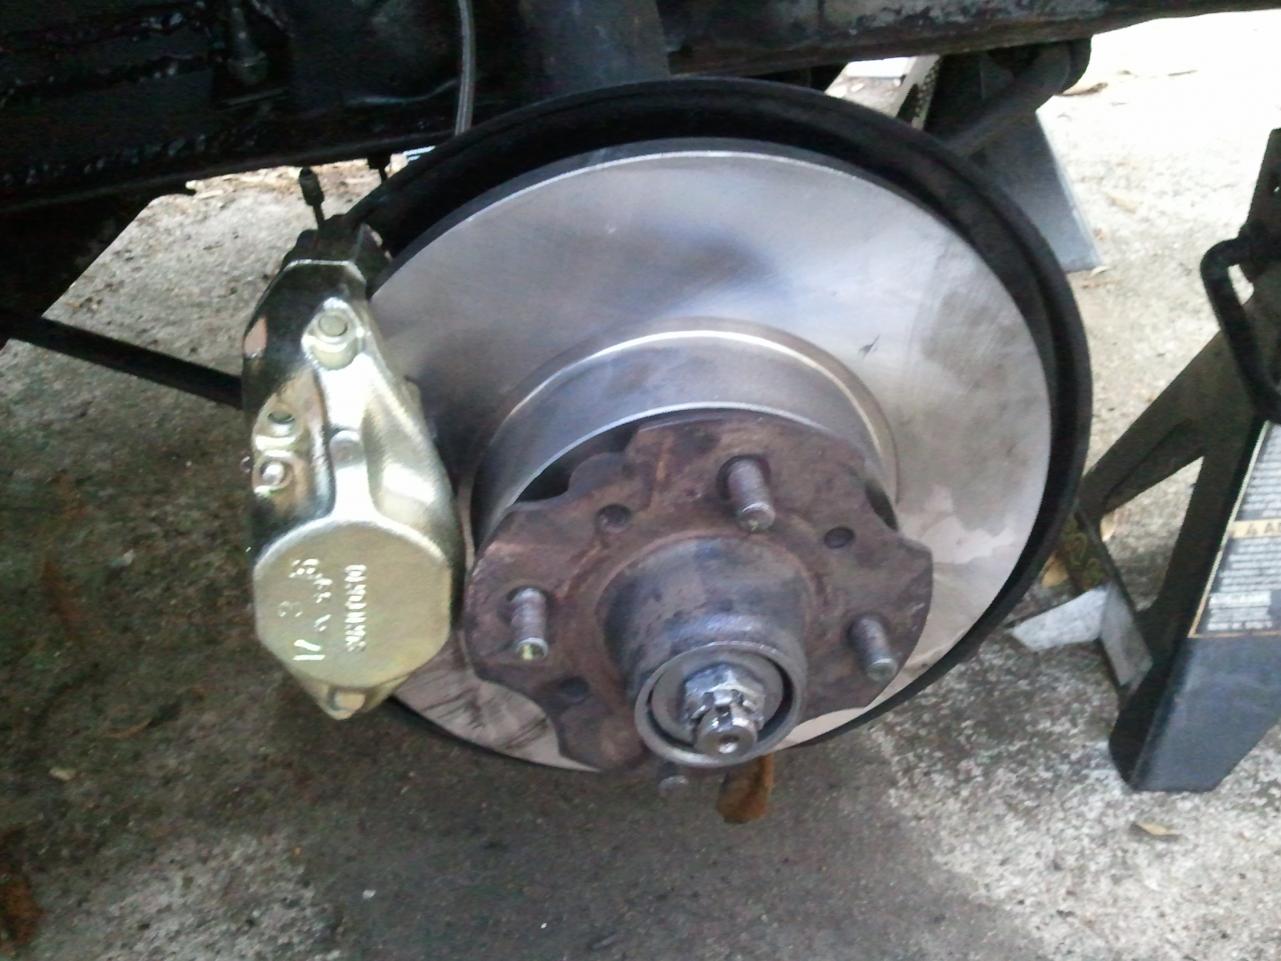
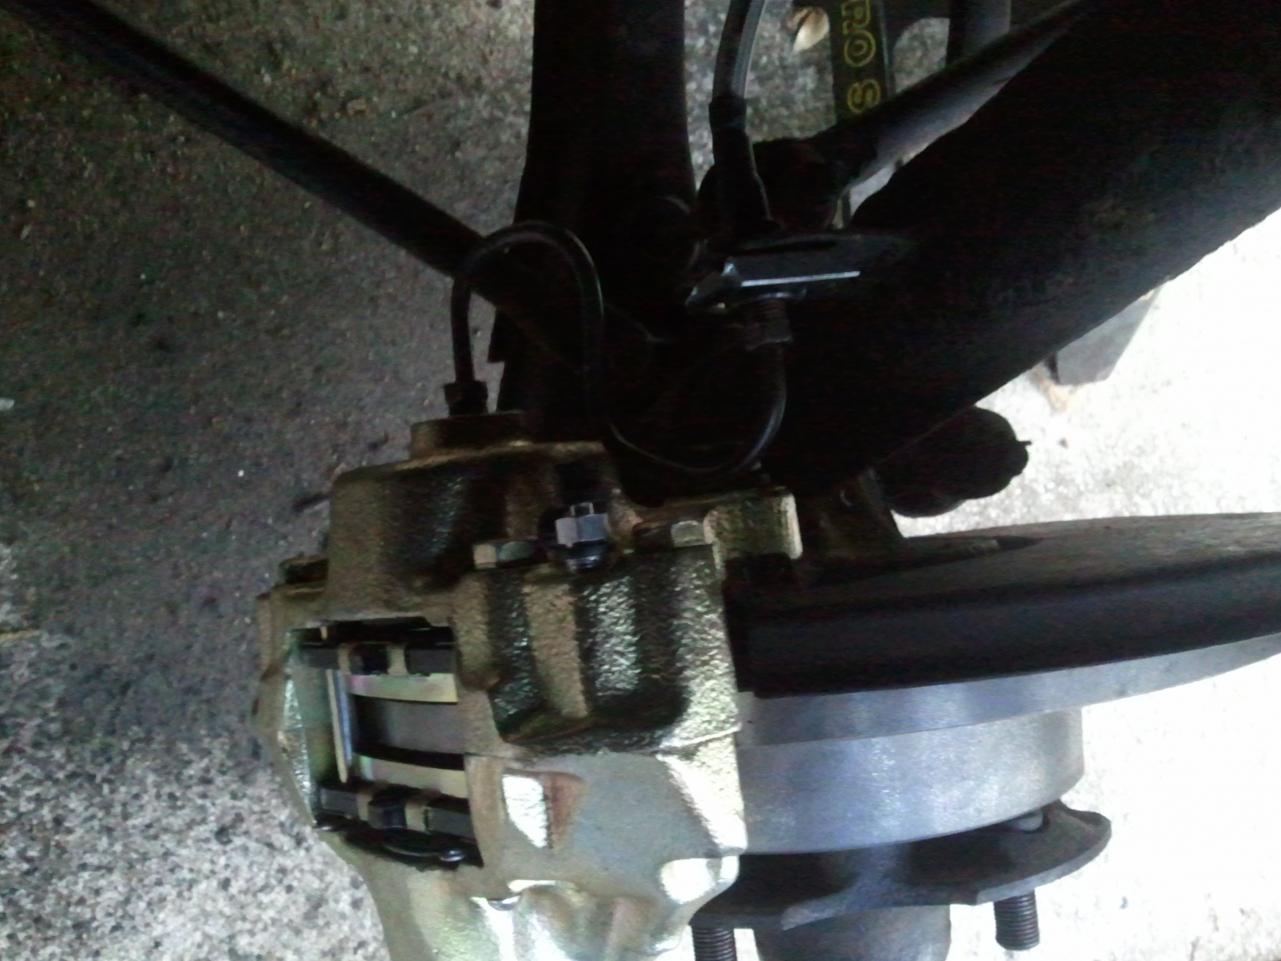
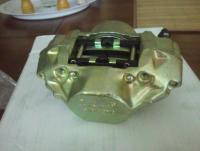
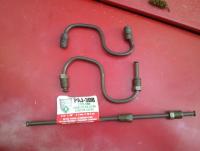
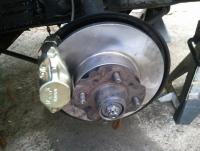
Not going as fast as I'd hoped. One of the old rotors did not wanna let go of its hub. But a chunk of wood, 2 jackstands and a 10lb sledge convinced it otherwise. The second saw what I did to the first and practically fell apart once the bolts were out. I like the new Centric posi-quiet calipers. They pretty. Coming loaded they simply dropped right in. Easiest calipers and pads I've ever installed. Made some new hardlines for the wheel. Could not get the exact length needed in a premade line but got close. Installed my new lines in the front. The look pretty good. Got the feeling the rear drums are gonna kick my butt. Those wheel cylinders look complicated. Seriously? Floating wheel cylinder held in place with opposing c clips? Bleh. And that emergency brake / self adjuster mechanism intergrated in the wheel cylinder. Shoot me now. It's gonna suck. Oh btw, there's alot of rain predicted for this weekend. I'm working outside on a concrete slab. I had to turn up the speed and ignore my plans to clean, polish and paint while I have pieces apart. So the front hub got a quick clean but not much else. I did take the time to clean the backing plates and dust shield and do a quick repaint with some high temp black paint. Hopefully slow the rust somewhat. Here's a few pics.


-
I suspect, you suspect the booster. If engine idle changes when you press on brake I suspect booster as well. The booster uses engine vacuum to increase braking power. When booster develops leak the vacuum leak affects how the engine runs. More you press pedal the bigger the leak and greater more noticible effect on engine. Good luck. PS check our your photographs. Really beautiful work. Have any like that of your Z?
-
Oh forgot to mention forward ujoint on driveshaft has a ton of play. I had heard to clunk when I drove the car to it's current spot for brake work. Guess that's why he gave me 6 new ujoints when I bought car. One was bad and he was going to replace all 6. Noticed a growl in rearend when I spin it by hand at either rear hub. That normal? I'll see how to drain and refill it.
-
Well brakes are disassembled. Ready for cleaning and painting then reassembly. Think I'll make new hard lines at the wheels. The little ones are chewed up the worst. But they're so small I should be able to make my own well enough. 3 of the 4 brake hoses were cracked through rubber sheilding and braiding underneathe one was cut and clearly had been ballooning. The new braided steel hoses look great. Missing those "C" clips that hold the hoses in place on the front lines. Already replaced points, rotor cap, disto cap, NGK wires and NGK plugs. I had cleaned the old stuff so it would run but I doubt I was getting a really good spark. Should be much better now. Waiting for Unisyn and Just SU's dvd to complete the tune up. All goes well by Saturday or Sunday I will have a fairly good little driver Z. Wish me luck.
-
And sure Steve. I never even thought to ask the colors. He's says he's had to car since only slightly used (worked at a dealership in early 80's and it was a tradein or something). But has had it parked outside under a tarp in north florida. So basically now it's a ball of rust.
-
I thought 260 was literally a transistion car? Early 260's were really 240's and later 260's were 280's. I'm understanding that wrong?
-
Have a bead on an early 260 parts car. But I primarily need interior pieces. Console, door panels, etc... will they fit my car. Not concerned with originality just function. Unrelated to interior but guy says he has l28 5 speed but doesn't know whether it came from z or zx. Where are numbers I can look up located on tranny or is there and easy way to determine what it is? Thanks
-
Sounds like you have a solid project car. And there's a definitely a huge amount of knowledge and experience to be had here. A search in the various section can yield a alot of good info. Like doing a search for rear disk upgrades in brake section turns up a ton of good posts on swap for moderninzing the rear brakes fairly cheaply. If you're seriously considering engine swaps and turbos you may wanna check out HybridZ.org as well. That's there thing over there. They love Z cars like us but have a more laissez-faire attitude about the originality of the powerplant. I post a similar post a couple weeks ago. Here's a great post I was given then to read up on starting one of these cars that's been sitting for years. http://www.classiczcars.com/forums/showthread.php?t=22619 post #8 really have a alot of info. Hope all this helps and welcome.
-
Not sure if this would interest you. I asked about bolt kits in a previous thread of mine. I was provided this link. Not sure if they have OEM spec stuff but maybe it'll help. http://www.mmsacc-stainless.com/html/Datsun.htm Good luck
-
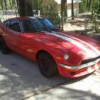
Guess that's one advantage of a beater Z with zero history (or rather an unknown history). Once I have the bugs worked out she will be a daily driver. Clearly she has and has had rust issues. Unknown mileage. Unkown accident history and is valued about what I have in her. I have every intention of being rough on her but I will pamper her as needed. Kinda like my wife My previous old car daily driver was my 70 Mustang fastback. I had no problem driving her even though she was a rust free survivor with 140k miles. She isn't rare or sought after. Just a good driveable mustang. Had she been a Boss 302 or something I'm sure she woulda spent more time in garage. If you love driving Z's but want to preserve your baby. Buy a beater Z for a couple grand and beat that one
-
Tyraa I would recommend you find someone that has done brakework to help you. Brakes are a critical system that really has to be done right. You can buy a Haynes Datsun 240z repair book and it will explain alot with some pictures. But those and other books are really intended to teaach people that are already mechanics to learn datsun 240 brake repair specifics. Find a friend or family member to help that is already familiar with brake work and get the manual.