


MEZZZ
Free Member
-
Joined
-
Last visited
Everything posted by MEZZZ
-
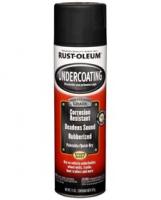
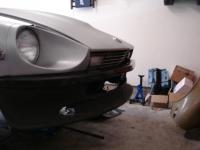
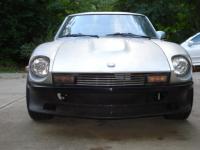
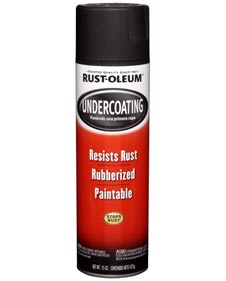
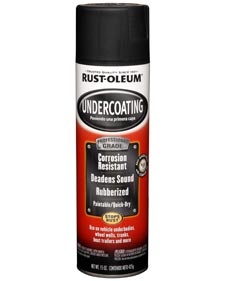
 The "paintable" one is what I used first. It went on fairly smooth but had a little texture. It dried pretty flat. I used that under the entire rear of the car after removing the suspension and gas tank (after cleaning, wire wheel and wire brushing) The "professional" undercoating is the one I bought by mistake. I just grabbed a can late at night at my local Walmart. When I started to spray it, I knew something was wrong, it went on totally different. Thats when I realized I had picked up the wrong product. After looking at it the next morning though, I liked the look so much I went out and bought more and resprayed all that I had done with the "rubberized" paint. It dried hard and fairly glossy. Maybe I am biased with it because I am comparing it to how the car looked before but it really turned out nice IMO. (the stuff I liked it is the photo on the right, its hard to see the "professional grade" written above corrosion resistant)
-
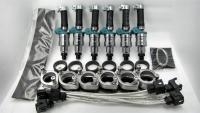
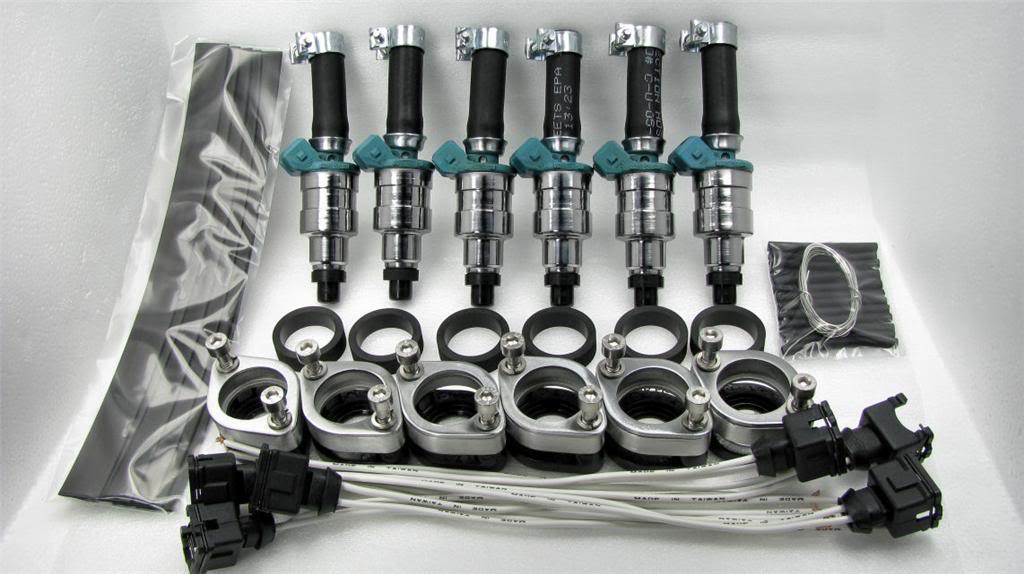
I thought I would jump in. I bought this set off of Ebay a couple years ago for $144.00 shipped. I was very happy with them. They are stock units, cleaned, tested and then matched up in a set from the data with a difference of no more than 1% (or so they claim on the website). I was really impressed with them, came with everything needed, although the connectors were like the stock ones, I would have liked it if they had come with the quick release BMW/Volvo style. Other than that, very complete and very high quality. The sellers name is osidetiger on Ebay, you could contact him on there and see if he has any. For the price of cleaning them, you could buy this kit.
-
I finally got mine installed yesterday Dave, cant wait to get it out on the road. The mount went in without a hitch, fit perfectly! I had to pull the diff out after the initial try as I had put the mustache bar in backwards ( I swear the picture in my Haynes manual is wrong ). Then, I had to take it out a 2nd time becasue I had the stock mount in backwards and the cross member bar didnt line up. Then, I had to remove it a 3rd time as the cross member bar was not flush with the underside of the floor. I learned the hard way, you cannot use the R/T mount, GM poly mount combo with the stock lower mount, not enough clearance. So finally, sans stock lower mount, everything lined up perfect and the diff feels solid as a rock. I dropped about 5-6 pounds as my car had that stacked metal weight attached to the lower factory mount. Now, all thas left is rebuliding the rest of the rear end. Everything is cleaned, painted and ready to be reinstalled, new poly bushing, Tokico Illuminas, Eibachs, all new brake hardware. I dropped the tank, cleaned everything, closed up the holes from the 280 bumpers, undercoated...I swear, I never knew what I was getting into! The ole "While I am at it" certainly comes into play. Just wanted to thank you again for the initial build Dave! If you are hedging on getting one, dont wait!
-
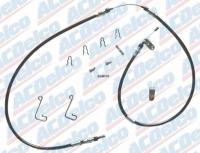
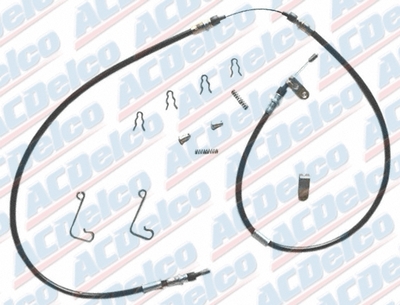
According to Ac Delco's website, the cable fits 75-78 models. It came with everything needed. The springs went on using the "keyring" method, just a little taxing but they went on. The stock hangers are rubber, mine were torn. The Ac Delco kit came with hire hangers, other than that, it seems like it should work fine. I have it installed and now will start on putting the rear suspension back together. Next step is the R/T mount.
-
Thanks guys. I figured that to be the only way, the "keyring" method" My nephew was here last night and tried that and it was digging into the plastic sheathing of the cable so he stopped. I didnt want the plastic all scraped up and exposing the bare wire, the stock cable had rusted and broke. I'll try this again. Thanks!
-
I have my whole rear suspension out. WHile back there, I cleaned as much of the old crud, (dirt, grease, old undercoating) off that I could. I did this from the driveshaft tunnel to the rear panel. Then I sprayed it with a Rustoleum product that is basicaly a paint with rubber in it. It dries flat and really cleaned it up, especially the wheel arches. I ran out and had about 2 sq. feet to paint and needed 1 more can. I mistakenly bought their undercoating instead of the rubberized paint (cans look the same). I didnt notice it until (obviously) I started to spray. Long story short, this stuff went on really nice. Dries hard, a little sheen to it. I went out and bought more and ended up re-doing the entire rear with it. Sorry for the long story but to your point, the plastic inner fenders on the front. I will use it on them as well. They are out of the car (I rebuilt the front end last fall). It should really clean them up. I think you would like the outcome.Oh, and the stuff is alot cheaper at your local Walmart rather than a part store. They have 3 products, rubberized paint, undercoating and a truck bed liner, they all look similar (tall cans).
-
I bought an aftermarket parking brake cable from Rockauto,com I couldnt justify the $300 + for a stock one from MSA, the aftermarket was around $65. My question lies with the springs that came with it. The stock cable has the springs aft of the clevis pin. The replacement had the springs inside a plastic bag. The clevis pins are groved on the side for the cable to slide through. I cannot figure out how I am supposed to get the spring on the cable. It is too small in diameter to fit over the pressed fitting on the cable end. Any ideas?
-
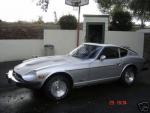
Seeing where you are from, I doubt you will find any early Z's in a junkyard. Best bet is craigslist. I found a couple hatchs on there. Still not perfect but much better than what the original was. Very little surface rust. I plan on having them both stripped at a shop and using the better of the two as you never know whats under the paint, Good luck
-
I had a 1/2 cover on mine when I got it and it was very obvious. I went to replace the tach and the only way to get it out the front was to remove the cover, gave me a reason to buy a full cover from MSA. The full cover is much better, less detectable but still not as good as a decent dash. Removing the 1/2 was a pain. The P.O. must have used 2 tubes of silicon to put it down, it came up in about 100 pieces, taking chunks of the original dash from time to time. I had a couple pics but cant seem to find them. I did have an issue installing it, having to dremel out the opening around the drivers side vent a little to get it to lay down. I bought it from MSA and the club discount was applied, I am thinking it was around $90.
-
I just went back and referenced the Atlantic Z tech tip. The photo clearly showed the hose going in the top plug, not the breather tube as I had thought earlier. It states to fill unitl it comes out of the top hole. I assume now thats the fill plug. I stand corrected and I appreciate the help.
-
thank you guys! I will drain and refill with 1.3 liters per your suggestion Carl. Not sure if it is a R180 or R200, it is a '77. From the amount of filth that came off of it and the entire underside, I would think its stock I swear I had enough dirt to pot a plant just from the diff. I have pulled the entire rear including the tank and scrubbed the underside with degreaser, wire brush, wire wheels, etc and then resprayed. It had been undercoated when new and it has held up well. No visible rust anywhere including the diff, gas tank, drums, control arms, etc...just filthy. Everything has been cleaned, repainted and ready to install. New R/T mount from Dave, brake shoes, wheel cylinders, s/s brake lines, fuel lines, poly bushings, Tokico shocks, Eibach springs, etc. I did similar to the front end last fall and have a new set of Rewinds with Toyo Proxes and a new exhaust system as well. Cant wait to get it back together and take it for a spin. Thanks again
-
I am confused and need some direction. I am in the process of tearing out and rebuilding the rear end. I have a question on the level of gear oil to put in the differential. I have read on here (yes, I did a search) and I remember reading in the past on the tech tips section of Atlantic Z...to fill the diff through the plastic tube on the top of it. I remember seeing a photo using the IV method, a hose and turning the bottle uside down. Both that tip and some post on here read to fill it until the plastic tube overflows, or as I read it, fill up the diff with gear oil. Mine is out of the car ( '77 280 btw) and drained, cleaned and painted. I went to put the fluid in, it took 2 quarts and still did not fill to the top of the plastic tube. At that point, I pulled out the Haynes manual and the specs call for 1 liter or 2.1 U.S. pints! Hence, my confusion. I have 2 quarts in this thing. Should I drain and refill 2.1 pints? Should I fill to the top? I have read about a typo in the past in the Haynes manual, is this one of them? Is it a case of the more the better? Any help is greatly appreciated.
-
yes, I did read about that. I didnt do it with the front end rebuilt but have put less than 10 miles on it since then. I asked my wife (and received) a set of ramps for a christmas gift just for that purpose. Thanks!
-
I bought edead as well after reading a series of test on several sound deadeners. It came in 2nd and was much cheaper than Dynamat. I picked up to rolls, 60 sq/ ft for $70.00 shipped on Ebay.
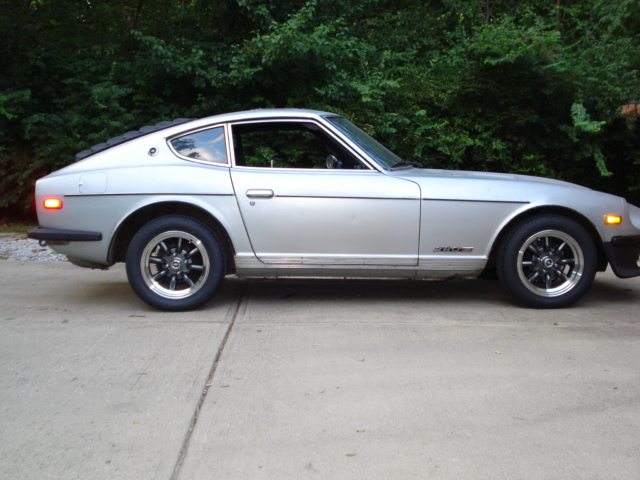
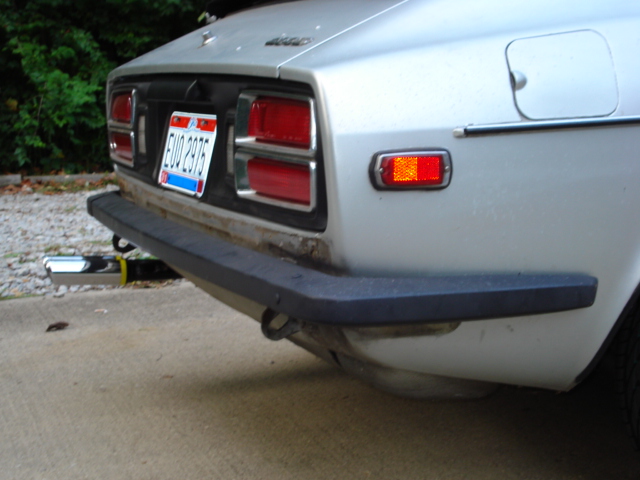
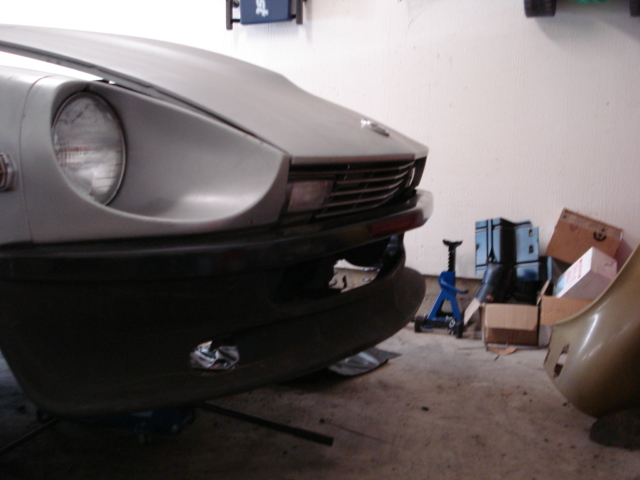
I swapped mine out last fall. The front was fairly easy, I used a fiberglass one that I bought from MSA, couldnt find a decent original without paying through the nose. The rear is a bit harder. I took it off and had to remove the mounts for the original. The drivers side was easy enough, the passenger side requires dropping the gas tank to remove the bracket. (I cut the bracket flush, still need to remove it). My problem lies (still) in getting the passenger side to mount. You have to remove the interior panels to drill nad bolt in the 240 bumpers. Once again, the driver side is easy. The passenger side is a pain because the fuel filler tube runs down and is covered by another palate behind the interior panel. For mounting both the front and rear, I used the brackets from this link, they bolt up very easily. http://www.zccjdm.com/catalog.php/azcarbum/ct26899/Z.C.C._CUSTOMIZED_PRODUCTSe Here are a couple photos..


 Thanks for the tip on Ralph guys, I will check him out. moonpup, I tried a search on Courtesy last night before posting this request. I dont have the part numbers though. I pulled out my F.S.M. and thats about all I had to go on. Without a part number, its almost impossible to source through any of the Nissan dealers around here. I have called a couple in the past and they act like I am from another planet when I tell them its for a '77 model.
I am trying to find a couple rear brake items. I am in the middle of redoing the rear end of my car, struts, diff mount, bushings, spindle pins, etc. I am also tearing down and rebuilding the rear brakes. I have them taken apart, cleaned, sanded, painted. I am replacing the wheel cylinders, lines, shoes, springs, etc. In taking them apart, I found what is refered to as a dust boot, it attaches to the rear outside of the drum where the adjusting rod enters the brake. I have only found it one place, EBAY, and it is offered up for sale by REDDAT and I really do not want to go through him for (to alot of you on here) obvious reasons.:stupid: I looked at MSA and Black Dragon to no avail. Any one know of another source? I am also looking for (for lack of better words) the rear hanger rubber for the e-brake cables as one of mine is in need of replacement. Any help is greatly appreciated!
I will agree to that. Of the 12 or so Ive seen, 3-4 might have qualified for the category though
Same here, try finding one in Ohio! After I had mine shipped from the Great Northwest, they started popping up all over the place. In the past 2 years, I have seen 12 S30's in my city! They are around, just not up for sale that often
Not to jack this thread but to throw out this option that I have read up on in some forums. Not sure that it is show quality but have read good things, especially for the price. http://www.paintforcars.com/urethane_base_clear_kits_5star.html
What color did you go with? I really like it and it is similar to what I have been looking for when(ever) I get around to painting(hopefully this summer) my car.
As a 10 year old, I remember seeing a new '70 model and thinking it was "cool". In high school, a "hot" teacher from my freshman year drove a '73 and I though it was cool. In '77, my senior year, my best friends dad gave im a '70, totally rusted out, ran like crap and I still thought it was "cool". Now as a 49 yr old, every time I go out in my garage, see my car in various forms of disarray, I look at it and thinks its "cool"
I would have to add my vote for rust first and foremost. I am in the "rust belt" and bought one out west that was "rust free". I figured I would rather pay the shipping than deal with rust repair. I looked at the few examples for sale within a 2 hour drive of Cincinnati and wouldnt touch any of them. While my car wasnt totally rust free, it was relatively so and worth the freight I paid to get it here. I will say, that by the time I am finished with it, I am sure I will have more in it than I should but it has been a learning experience. I only wish I had more time, money and energy to put into it. Work, family, life gets in the way too much
Thanks for the info, I will give that a try. I am thinking the nuts are 12mm that I am attempting to bust free on the driveshaft. I will grind one down and see if I can get your tip to work for me. Thanks!
Thanks for the tip on Ralph guys, I will check him out. moonpup, I tried a search on Courtesy last night before posting this request. I dont have the part numbers though. I pulled out my F.S.M. and thats about all I had to go on. Without a part number, its almost impossible to source through any of the Nissan dealers around here. I have called a couple in the past and they act like I am from another planet when I tell them its for a '77 model.
I am trying to find a couple rear brake items. I am in the middle of redoing the rear end of my car, struts, diff mount, bushings, spindle pins, etc. I am also tearing down and rebuilding the rear brakes. I have them taken apart, cleaned, sanded, painted. I am replacing the wheel cylinders, lines, shoes, springs, etc. In taking them apart, I found what is refered to as a dust boot, it attaches to the rear outside of the drum where the adjusting rod enters the brake. I have only found it one place, EBAY, and it is offered up for sale by REDDAT and I really do not want to go through him for (to alot of you on here) obvious reasons.:stupid: I looked at MSA and Black Dragon to no avail. Any one know of another source? I am also looking for (for lack of better words) the rear hanger rubber for the e-brake cables as one of mine is in need of replacement. Any help is greatly appreciated!
I will agree to that. Of the 12 or so Ive seen, 3-4 might have qualified for the category though
Same here, try finding one in Ohio! After I had mine shipped from the Great Northwest, they started popping up all over the place. In the past 2 years, I have seen 12 S30's in my city! They are around, just not up for sale that often
Not to jack this thread but to throw out this option that I have read up on in some forums. Not sure that it is show quality but have read good things, especially for the price. http://www.paintforcars.com/urethane_base_clear_kits_5star.html
What color did you go with? I really like it and it is similar to what I have been looking for when(ever) I get around to painting(hopefully this summer) my car.
As a 10 year old, I remember seeing a new '70 model and thinking it was "cool". In high school, a "hot" teacher from my freshman year drove a '73 and I though it was cool. In '77, my senior year, my best friends dad gave im a '70, totally rusted out, ran like crap and I still thought it was "cool". Now as a 49 yr old, every time I go out in my garage, see my car in various forms of disarray, I look at it and thinks its "cool"
I would have to add my vote for rust first and foremost. I am in the "rust belt" and bought one out west that was "rust free". I figured I would rather pay the shipping than deal with rust repair. I looked at the few examples for sale within a 2 hour drive of Cincinnati and wouldnt touch any of them. While my car wasnt totally rust free, it was relatively so and worth the freight I paid to get it here. I will say, that by the time I am finished with it, I am sure I will have more in it than I should but it has been a learning experience. I only wish I had more time, money and energy to put into it. Work, family, life gets in the way too much
Thanks for the info, I will give that a try. I am thinking the nuts are 12mm that I am attempting to bust free on the driveshaft. I will grind one down and see if I can get your tip to work for me. Thanks!

Important Information
By using this site, you agree to our Privacy Policy and Guidelines. We have placed cookies on your device to help make this website better. You can adjust your cookie settings, otherwise we'll assume you're okay to continue.