


TomoHawk
Free Member
-
Joined
-
Last visited
Everything posted by TomoHawk
-
 I think that was a great photochop. It still looks basically like a Zed, and you can't see any obvious bllending or blurs. I just would prefer to have BOTH headlights on it, since they do come in pairs. I still prefer the original equipment, tho.
 -
The cold start valve is controlled more or less by the thermotime switch. The thermotime switch senses the coolant temperature and until the coolant reaches a certain temperature, the cold start valve will inject fuel, richening the mixture. An open cold astart valve seems to be a problem on many Zeds with a rich mix.
-
Is there a place that sells replacement T/C rods that arent $200 each? Not used ones from an old car that are in who-knows-what condition, or that might be in worse condition than the ones they're replacing. I wouldn't want a racing product that makes handling difficult or a rougher ride, either. the alternative would be to have the ones that are on there magnafluxed. You shouldn't have to worry about losing a wheel in the midle of nowhere. thx
-
Not a good idea, man. Especially since there is a great need for original-style T/C rods.
-
that sounds nice, but what can we do for the people who just like the stock setup for classic cruising? there's really no need for superb cornering when you just like to drive casually.
-
Oops... Those intercoolers probably make up for the weight of the bumpers...
-
Without the bumpers, it must be 400-500 lbs. lighter? that equates to 0.5 seconds off the e.t....
-
They said the same thing to me. I told them they just lost a LOT of customers....
-
funny, Mike! I was stupid and tossed mine out when I was told they were out of business
-
I remember seeing that stuff in Tweeks catalog. Remember Tweeks? they carry Porche stuff now.
-
You're in the poor part of town when: there's a pickup in every driveway that's up on blocks with the transmission out. You're in the rich part of town when: there's two pickups in every driveway up on blocks with the transmission out.
-
Oops.... Sorry, typo. Yeah, it looks like it would be a '79, but the title says it's a '78.
-
My '78 280Z has a build date of 11/78, so would that make it a '79 instead?
-
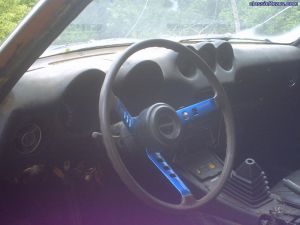 My 280Z wheel didn't havethe holes in it.
 -
It sounds like you and your neighbors need to organize yourselves and maybe get some professional help. This seems to get getting out of control.
-
that kind of thing can happen to any of us. In my neighborhood where you can "leave your car unlocked" I wonder what might happen to my Zed after I get the GTO body with flashy red paint on there. Not to mention the knock-off wheels (eventually), the interior is scheduled to have some custom aluminum door panels, & the carpet will get mods for the vinyl hump cover, shifter boot, maybe others. You hear about things happening, during the summer, when kids are out of school & looking for stuff to do... Bill- how about a chainmail car cover?
-
So by the same reasoning, a Mustang would be an American girl, Audi would be a German, BMW would be Bavarian, SAAB would be scandinavian, etc.? Amd my bros '34 blown street rod would be my grandma? ??
-
What is that supposed to mean!??? :devious: Something wrong with my gf??? or my 280Z??
-
If you ask me, I'd say it would have to be an eastern-european girl. No.... WOMAN. My gf is of czechoslovakian heritage, and she is beautiful, lean with curves, yet a little rough in just the right places. Simple, yet elegant. But mostly reliable and fun! She seems to like a little roughness.
-
My associates at work know me for being very thorough in my research. I have all the info I need, thx. I think we're thoroughly discussted about this subject?
-
It sounds like it's not too hard. But it'll take me a few hours to do. thx.
-
When you take the fan off, do you have to first remove the fan shroud? there doesn't seem to be much room to work inside the shroud. I assume using some spanners, you can get those long bolts out? thx
-
Why not take the propeller idea all the way and extend a shaft through the radiator and put some kind of prop on the end? If you even add some kind of duct, you'd get a kind of 'ram-air' huh? how easy would it be to put a round hole in the (middle) of the radiator core? BTW, thanks for all the info. I'll have to try it all out if/when I get my car back. I have a long list of stuff to do... thx
-
Ok, I read it, again. I have that (article) in my notebook already, it's dated in January. ther ewas no reason to remember because I still don't have my car back.
-
i saw that info somewhere else, too.