Lazeum
Free Member
-
Joined
-
Last visited
Everything posted by Lazeum
-
 your curves are very interesting, I wouldn't have guessed such a difference between the 2 cases. The change seems to have translated the whole curve up by 1 to 2 AFR points, that's a lot! If it is a WOT trial, isn't AFR level too high? I'm also wondering what could be the reason for the rich spot at 20s on the leaking trial. It does not exist on the second run so I would imagine it could come from accel circuit. I can see as well that despite your mains coming early you have a lean spot in between 2500 & 3000 rpm, would it be the progression circuit being out too early? hence the importance of progression port back to throttle plate position you're talking about. If you have read the post on webers on HBZ, maybe you've seen my AFR results (p13-15 if I recall), I'd got a rich spot at 4000/4500 rpm for some reason I cannot really explain besides engine dynamic... it appears this rich spot has disappeared with my new head. how do you measure AFR also? with a copper pipe used as a sniffer or with a bung welded around the transmission area?
 -
I read your posts and I don't understand why you rely on AFR at idle. I always setup idle at best lean condition then play with idle screw to set the idle speed correctly. I also was having issue with unproper idle jets but change in size fixed everything on my case (I'm having DCOE 18, maybe that's why) AFR at 2500rpm cruising has always been around 14:1 / 14.5:1 this way. I'm measuring AFR with a clamp at exhaust tip so it makes even less sense to bother but would it be crazy to believe you might have reversal flow even close to the engine because of engine low operation? That could lead to false reading. So to come back to idle adjustment, idle is always ok once set - whatever the idle mixture screw settings are - but good progression needs to have proper jets. It appears progression is almost always perfect when I'm near 1.5 turn from fully closed with the proper idle jets (50f9 with previous skock N42 head on L28 & now 45f9 on modified P79 head). So in my particular case, I'm just experiencing what the weber books are stating. I also check plugs after some gentle sessions, Comparing plugs allows me to fine tune AFR balance also. Regarding sealing of the throttle plates at idle, I observed they are not really sealing fully the bore. I've adjusted & sync'ed my carbs while they were all on a bench; I was looking thru them while closed with a light behind. You can then clearly see the light spreading around the throttle plate allowing me to get similar pattern accross carbs. BTW, this method did not bring any good result to me (so don't waste your time ) Regarding accel jet leakage at WOT, should we be worried? if it is repeatable, we should just take them into consideration while tuning, shouldn't we? Last comment, I've also checked the bleed jet at the bottom of my bowls, they are sealed to avoid any bleeding operation with solder & I've got great response from my engine at tip in (with some limits though such as super quick tip in at 1500rpm in 2nd gear). Maybe that's something to investigate as well on your side if you have issue while accelerating. I love webers for the same reasons as yours but ultimately, the most enjoyable moment is the reward to have a car running great or making progress They never let me down so it helps also since I've never been frustrated with them.
-
I guess it is the acid property on the lemon juice that removes the aluminum corrosion. So some vinegar or other acid stuff would do the trick. I clean my coffee pot with vinegar, it stinks but it works very well. Ultra sonic cleaners will take care of dirts more than corrosion IMHO. It is not a cheap solution if you're using it once for carbs (you need a big one) but it works very well. I'm using one for glasses & watches, they look like new after such process. A friend with a shop is having one, you should find one, that would be your best option.
-
I'm the owner of 18's and they run great. I also have some missings if I slam open the carbs below 2500rpm. To create the "gasp", I really have to slam the throttle faster than I would ever do it at that rpm. I'm with you regarding the trial of the 18's to check if they perform good but you have to make sure they're in perfect shape with the same jets to compare apples to apples. and then, you report to us since I'm afraid I would never purchase another set of 40DCOE "just to compare"
-
Hahaha! he's lucky, the spark could have fallen on his lips!!!
-
Topic has been discussed on the following link. I've got fantastic results with glass-beading followed by ball-beading method.
-
that was my first thought: you're having big chokes. your next move could be to source smaller units but you would have to tune everything again...
-
to make sure we're on the same page. the air inlet is the side hole, the gas inlet is the bottom hole and the outlet is the top hole. see diagram below:

-
go look at the chart in the link below Then we need to do some maths to find out what is which. Lat's take an example to compare __f11 & __f9 with same inlet orifice (the 55 in front of 55f9). they have only one hole each so it is easy to compare. F9 is having air hole at Ø1.00mm & outlet at Ø2.00mm. whereas F11 is having air hole at Ø1.20mm & outlet at Ø1.50mm So for the facts: f11 is having more air going inside it ==> leaner than f9 On the other side: Outlet orifice is smaller on f11, it means suction is higher with f11 than f9 at same intake pressure. It means to me gas & air would be sucked harder. Gas being more dense than air (and inlet orifice being a restrictor for gas), more air versus gas will be added to the flow compare to f9. So to me, f11 are definitely leaner than f9. Maybe I'm wrong with my theory but this is how I analyze idle jets. I'll be pleased to hear what everybody's thinking. To try something new on my car, I wanted to try richer jet than f9. So I went with f6 since outlet orifice are the same size, only air orifice is changing so it is easy to find out. Same goes for f8 jets, they are leaner than f9, only air orifice is changing so analysis is straightforward.
-
That's why they look beautiful, it is because they are powerful! The reward is the power & the sound out of them. When you tune them right, their sound becomes better also. You can use O2 sensor, butt dyno but ear is also a good tool to know if they are healthy.
-
The main on the stock setup has to be big since 35mm choke does not provide enough suction to pull enough gas out of carbs. So we have to open up jet size. bigger jet does not always mean more fuel on different setups. The 115 on my current P79 setup is pulling more fuel than the 140 on stock setup for instance.
-
you're not specific enough about what you've already done to fix your issue. I would get back to basic stuffs: - do you have gas? ==> clogged filter, bad lines, dirt/rust in tank or in lines, bad fuel pump, bad fuel regulator, bad/dirty injectors? - do you have spark? and when? ==> shape of your plugs, timing at idle & at 3000rpm, bad coil, good energy supply (alternator OK? good ground?) Most of the item from the list could be checked easily. then you can bother on more challenging items such as timing chain, valve adjustment, etc...
-
Too bad I'm the other side of the ocean but we do that also here in Europe I've tuned 3 different configurations of L28 always with 40DCOE. I always found idle jets 50f9 or 55f9 working the best over xxf8 units for instance which are too lean for our L-engine. F11 emulation tube always works good also. My car was always healthy during accel with bleed jet (the one on the bottom of the fuel bowl) being clogged with solder. The rest of the configuration depends on choke size, carb size. with 32mm choke, N42 head, flat tops & Schneider stg2 cam: Main: 135 Air: 200 idle: 55f9 => good AFR but timing was low to avoid ping. setup was undercarbed after 5500tr/m (rich AFR at high rpm whatever the air jet was) then with P79 milled/port/polished, Rebello street cam & flat tops, still 32mm chokes: Main: 115 Air: 185 idle: 50f9 => New setup is much more efficient, I had to restrict fuel a lot to get good performance (= good AFR). car is undercarbed for now after 5000rpm. Stock setup with 35mm choke (too big!) Main: 140 Air: 180 idle: 50f9 => not very efficient, a lot of fuel required since vacuum is not so good during operation, idle is easy to tune.
-
A friend of mine was having some issues like this one. We fought with dizzy to setup timing accordingly with no good results. At the end, the car died on the road; the alternator wires were corroded. they did not provide enough energy to the coil to create a spark under load. My friend had to destroy the plastic cover of the alternator to access the corroded area. Without destroying the alternator, it might be worth a check
-
The coil I'm using with my dizzy is a 1.5kOhm if that could help. I also have a voltage regulator to protect the dizzy supplied by Mallory. If you don't have one, it is a cheap insurance.
-
I've seen this picture a long time ago, I believe it was in Z sport magazine. I'd need to dig up old magazines to find out for sure....
-
I rebuilt my engine last winter. I took 100's of pictures, specs of every pieces, bills from machine shop, every process used to clean parts, to paint parts, to shotblast parts, to plate parts, , every clearance I have checked by myself (piston/bore, ring gaps, crank bearing, piston/deck, etc.) I believe the goal of such process is to demonstrate you did the rebuild with state of the art process. In Europe, To guarantee proper car value for insurance in case of accident or thief, you need to have an insurance expert to check what you've done to your car. I did every in this perspective in a MS word file document (over 35 pages almost only for the bottom end).
-
Don't try with paper, the infra-red laser will go through. I've spend 4hrs to figure this out last July. Use the rotor lip as a shield instead. To check the module, you don't need to make a spark; you need to make sure tension at the coil drops when the laser is shut. Do you also have proper tension around the coil as well? Have you also checked the resistance between terminals on your coil?
-
Timing is linked to the crank with the crank sprocket. Your timing shoudn't have moved with the chain swap operation. But since you have removed the dizzy with the cover, you might have moved slightly the dizzy. 4° timing difference is a rotation of 2° at the distrubutor which is a small offset. If the engine runs good I wouldn't be worried. You could just check that bolts are all tightened correctly for peace of mind.
-
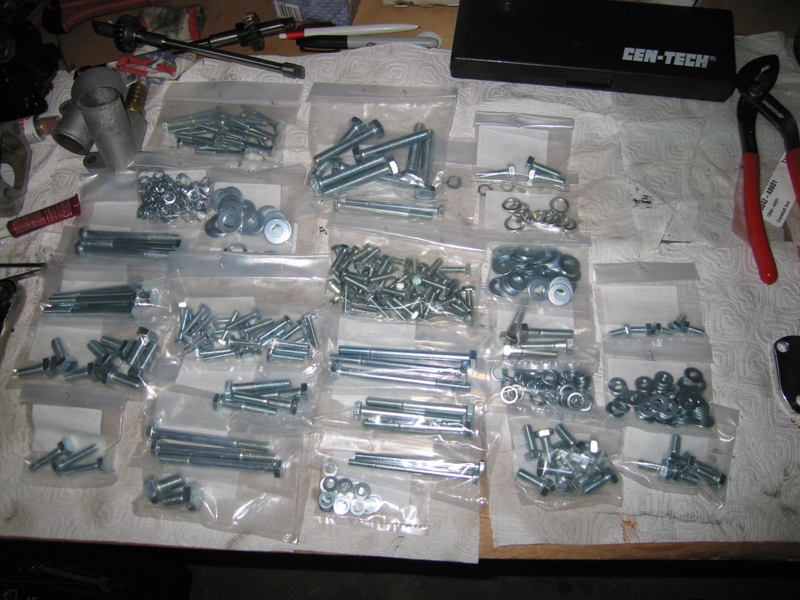
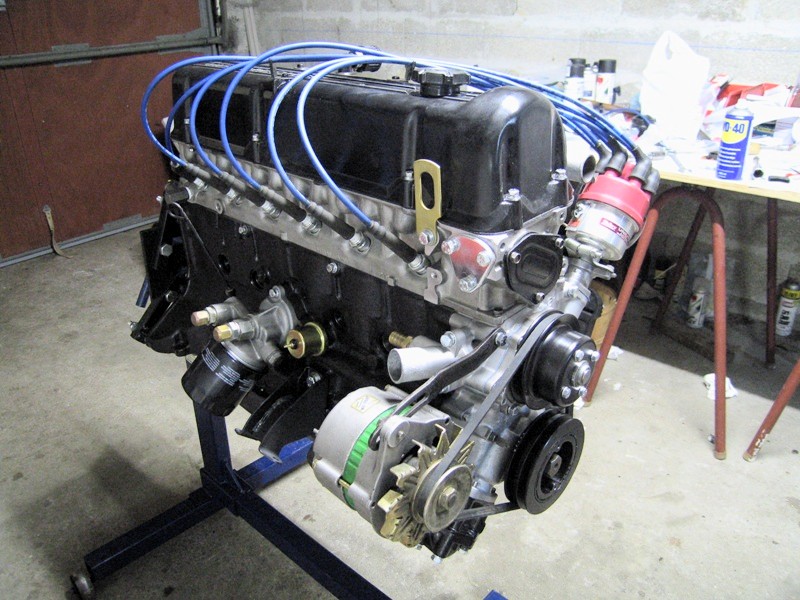
I was having the same situation 1 year ago. I decided to do it on my own. Go for it, it is rewarding project. As everybody said, you need some tools, from the list above, I would add a dial indicator also & some gage feelers. Read at least 3 times "how to rebuild your OHC Nissan engine" & get a FSM next to you. For the process, I've torn the whole engine by myself, including oil plugs. I put everything in bags, keep also all pieces in order to make sure they will match again once you'll have to put back everything together. I then brought the crankshaft, the block & pistons to machine shop. They identified my block as in need to be rebored, surfaced & piston clearance to be out of specs. Machine shop took care of the block & crankshaft. They machined everything back to surrounding parts such as new pistons since I had to change them. They removed every plugs from the crankshaft to clean up the galleries & installed new plugs. They also milled the pistons to get proper pistons to head clearance (I'm running flat top with P79 head). Measurement was done by myself, I went many times with parts to the shop, take one nearby. I got everything back at home & did the full clean up & assembly by myself. A lot of measuring needs to be done during the process: rings gap, bearing clearance, pistons height vs. deck, crankshaft fore/aft. lash, etc. There's no shortcuts here. Take notes about everything you do & take pictures of everything even if it is obvious. Total cost for your info was 1,000€ for machine shop work & around 500€ for parts (new oil pump, new squill shaft, new bearings, rings, pistons, gaskets, paint, new hardware) + dedicated tools (ring compressor & pliers to install/expand rings). You could take the same costs and put a dollar sign to get an estimate from the US (especially since all parts comes from the US + shipping) Total time in hours from start to finish was around 250 hrs (2 months working only during weekends), I took my time to do it right. I've cleaned every aluminum parts with sand blasting followed by ball beading. I also replated the small steel pieces such as the hooks to lift the engine. restored the oil pan also. I would not be cheap on small stuffs that matters (even if it could be overkill) such as rod bolts (ARP kit is $45) or head bolts (ARP at $120), compared to project cost, I believe it is ridiculous to do not do it. I would also purchase new hardware elsewhere. Get all your bolts, measure them all with a caliper & pitch gage (they are all regular metric thread pitch bolts on engine), make a list and get new hardware (bolts + washers). Grade 8.8 is fine for all the hardware except the one around crankshaft. Those details will make sure you won't have problem afterwards, those details are also important. If you need a starting list, I might have mine somewhere but I've made many mistake during the order (but I ordered extras just in case which were very handy). Total cost for the full set was around 35€; ridiculous also to do not do it. I've been lazy and I did not share my build in English (only in French :stupid: ) but here's the link if you'd like to see some pics. (Google translator could probably translate most of it) The engine runs for 600mi since rebuild (and went to Le Mans Classic ) , it's very nice feeling (and quite unbelievable!!!) to hear it starting every time I turn the key. It is MY engine now Bottom line, do it!


-
Good to hear! I will have to perform some test as well.
-
I would fix it but you need to make sure no burrs would go into your engine during the operation. The load to push the valves down are counteracted by the towers so there're definitely loads going thru those parts.
-
I've got the same issue with my car. It whines for 10s with the first revs when I get the car out of the garage then the whine stops. I guess alternator gets load to charge the system after start up. My alternator is a rebuilt item.
-
I haven't run SU's so I can really compare them. Fact is I love my DCOE, I barely have to touch them, they stay tuned and the sound!!!! You need however to understand how they work & find a way to tune them: Jets library ($$$) + wideband were my tools. Driveability with DCOE could be great, MPG could also be reasonable but you need to have carbs AND timing setup correctly. I made a 200mi trip at 21 mpg average. Don't forget you can set your side draft with bigger or smaller chokes, you don't have to get super large carbs & chokes to enjoy your engine (it's actually quite the opposite). Smaller carbs would provide a good torque at low rpm. This choice will also depend on our head setup (comp ratio, cam profile, etc.) So think also about what would have to go around with side-drafts: recurved dizzy or fully adjustable, timing light, jets library, wideband, books, etc. That would add up some hundreds of $$$ more.
-
My bad, I though you were saying you could save it . Since it is difficult with pictures to really tell if the gasket is in shape, I just provided a comment. Good to hear for sure it will be replaced.