7277
Free Member
-
Joined
-
Last visited
Everything posted by 7277
-
new joints for the 1/2 shafts are easy to do yourself (just a pain in the a** IMO) if you have a press or a good bench vise. the smaller ones on the propeller shaft are a bit tougher as they are smaller. if you do them yourself, they're about $20 each from MSA. IMPORTANT: DON'T FORGET TO GET THE MAIN PROP SHAFT BALANCED at a good speed shop after install. any out-of-balance on the main shaft will cause a nasty vibration all the way through your trans and engine. when doing the half shafts, just squeeze them in so the outer races are evenly distanced, no need to run on a balancer. i had a speed shop do the main prop shaft joints with a spin on the balancer for $145 total.
-
C'mon everybody!! that car is SO unique is HAS to be found. who would dare drive it around ?even with a VIN swap and repaint, it's very unique. hope it isn't on a SeaLand container going overseas.....
-
to help on the basics of troubleshooting.... use a 1gal metal (metal-for safe grounding) tank (Auto-zone, or whatever you choose to fill your lawnmower) and place it (filled) besdie the car with a length of fuel hose going into it. crank the engine to prime the system. pull off the hose to each carb at the float bowl and see if they're peeing fuel...connect them back on and try to start the car. if that works, the problem is in your tank.
-
as Carl stated DETAILS! COLOR, YEAR, ETC sorry man......bummer!!!
-
SAME thing happened to me during my resto. found a magnetic box inside the front bumper..voila! an original that worked!! the PO i bought it from owned the car for 20years (!) and only gave me the one original he had...he didn't even know about the one in the bumper
-
if you're SURE the lines aren't clogged and the pump is operable, then it's the tank/tank outlet to the hard lines. there really isn't much else to the system: tank, tank lines, filter, mechanical pump, fuel rail,carbs. could be crud in the tank clogging the outlet OR did you run out of gas?
-
i went with 100grit to start...it takes everything down to a common level, then 220, 400, 600, 1200, 2000, then to buff to a shine i used 2000dry. the clogged 2000 paper kind of creates it's own weird-sort-of-buffing surface..
-
would love to go, but i'm a little burned out from the 1100 miles RT from cleveland..richmond would be another 700RT. i know...weak excuse, maybe next year, as i'll pass on the Texas convention. probably fly out to see the MSA west coast show though...
-
biddljj: about a 60hrs (total) of hand polishing....just to say "i did it myself"... ....never again mbarjbar: Lowe's or Home Depot... just buy some fuel line and get creative with some barb fittings. i got oversized ones so the fuel line would fit RRREEEEAAALLL tight so i didn't need hose clamps (cleaner look). they're on so tight i CAN'T pull them off no matter how hard i try.
-
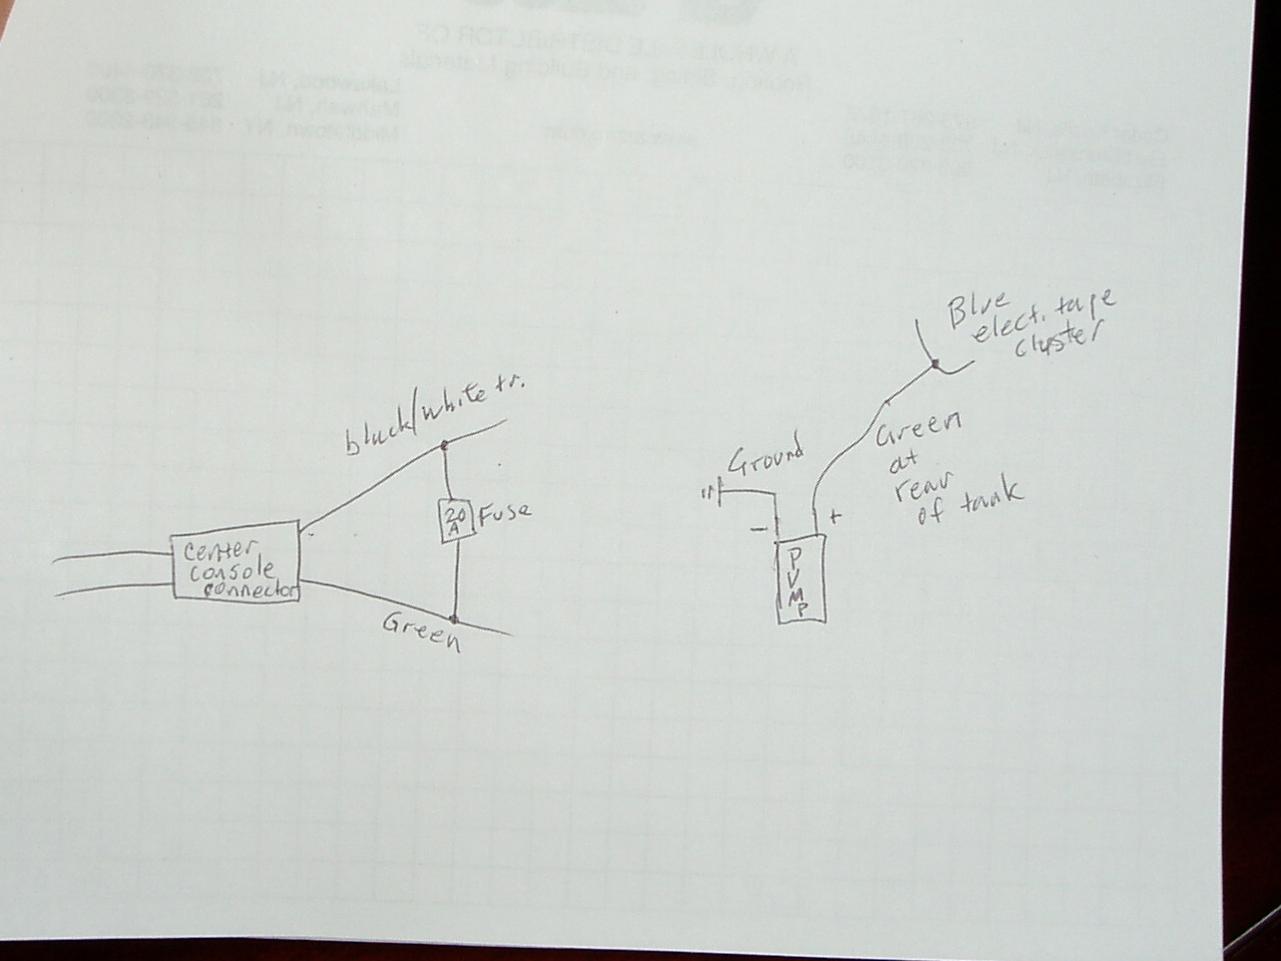
thanks steve! now to get a pump. i usually test-connect everything in a temporaryily connected way, before perminently cutting soldering/adding connectors, etc. turns out i had that schematic in my arsenal, just wasn't sure what to look for (the fuse block diagram) i let you know how she goes
-
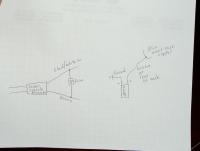
hey steve, so i climbed under there and located everything. just to confirm: is this right? (pic)
-
thanks guys. i'll snoop around the car and locate the wires as you described and see what happens. perhaps i'll try the Facet pump since i can get it locally. i'll keep you posted with progress.
-
hey xray, thanks for the detailed answer. however, as i interpret your writing, 1) "there's a green wire and a black with a white tracer"... do you mean basically, connect them together with a fuse in between, at the console area?. does that 'jumped' connection then travel to the 'green' wire in the rear of car as described in your # 2). basically, so as not to have to run a solo (+) wire from the console to the rear underside of the car. pardon my interpretation, but that's how i read it ) i'm also a tad custy with the hand drawn schematic depicting inertia switch and relay.....not sure i follow that one... i may have to hit up my dad on that. he's a retired electrical engineer....weird guy, my dad, but i respect his 170+ I.Q. ...(if YOU can't design a military-grade spy satellite...why should HE bother explaining to YOU basic electrical....)..unfortunately, i never inherited that gene....
-
hey all, would like advice on installing this sucker into my 240. http://www.jegs.com/i/Carter/180/P4070/10002/-1?CT=999&sendroicid=1b2a8f2f-b67c-4565-bcce-c050beadb5cd&sendroiad=1664067099&sendroikwd=Carter+P4070&gclid=CJGz2bOep5YCFSUqHgodRW-Dzg according to the datsunzgarage site, the author gives it good marks. just curious on the electrics. a + from the keyed "ON" and "START" position and ground to body? i'd hang it right off the undercarraige, close to the tank with an additional filter. just need advice on electrics. thanks!
-
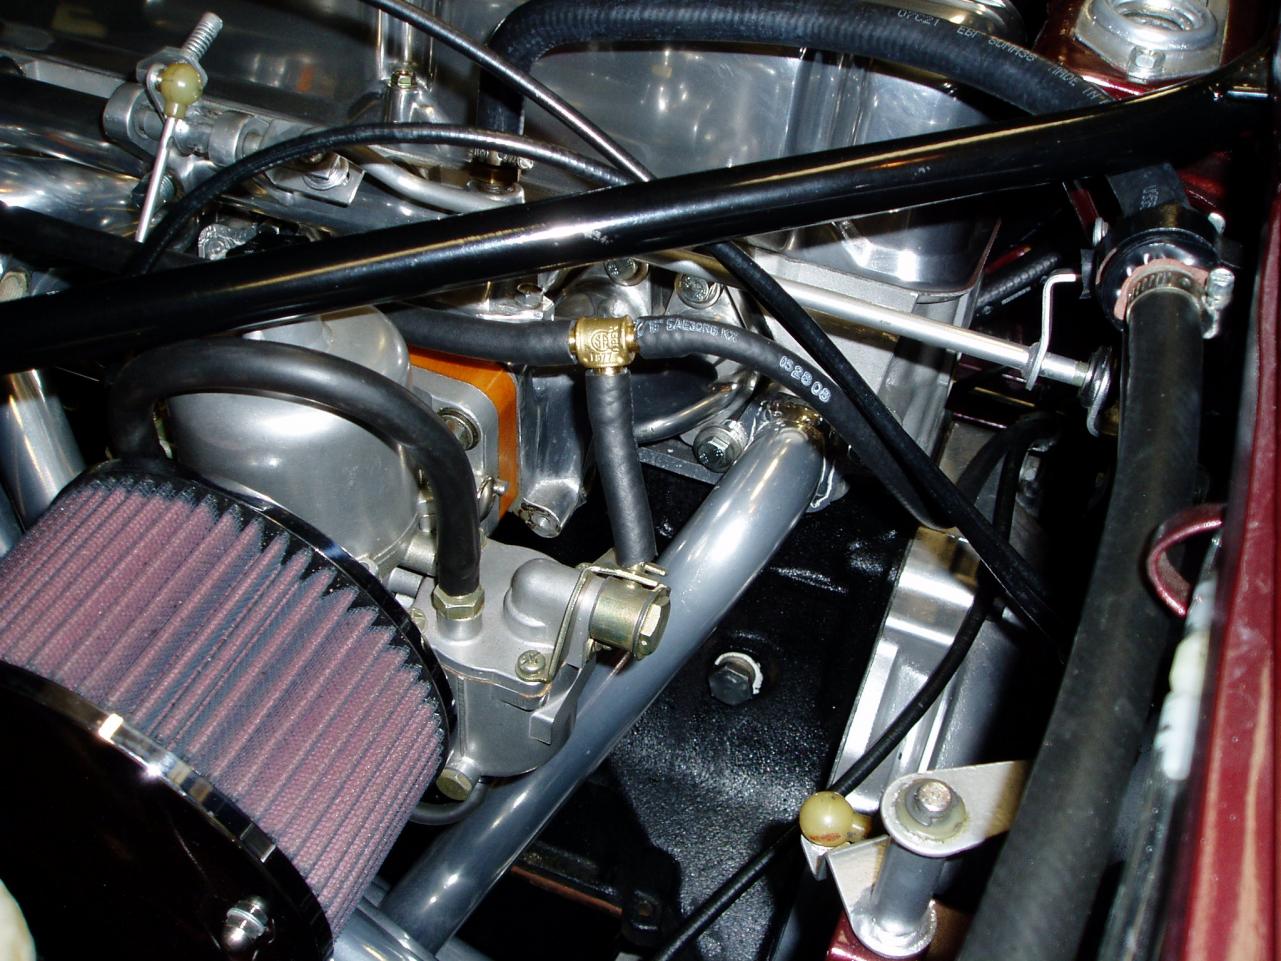
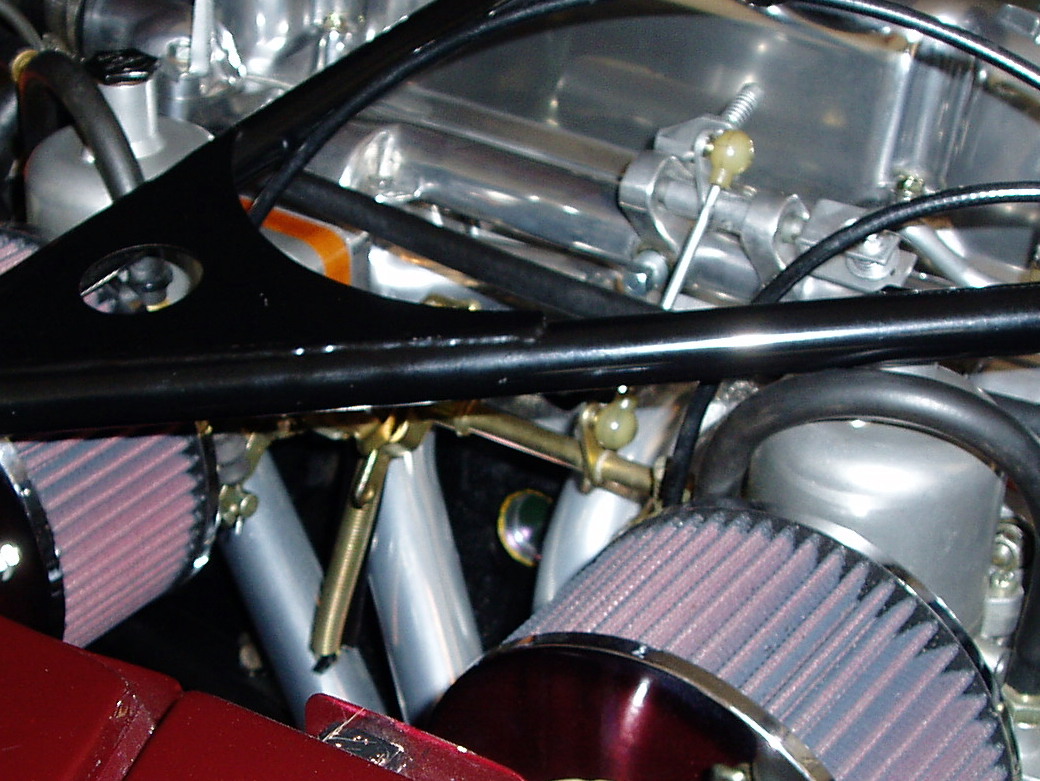
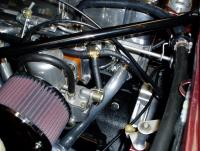
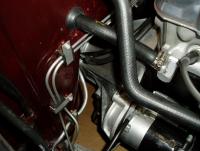
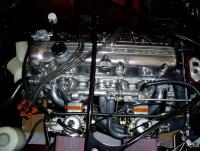
Ahh yes. i knew you'd ask about fuel overflow... i ran the 1/4" line from the fuel pump to carb #1 then straight on to #2. THEN, i ran a 3/16 line from carb #2 to the steel line (cut above trans bellhousing) that was normally the upper 'return' of the stock fuel rail. NOW you'll notice on the stock fuel rail return end it gets crimped down to ~1/16 diameter. it is crimped like that so fuel from the pump doesn't just fly by the carbs leaving them starved and refilling your gas tank. i then cut that little 1/16" diameter end off and inserted it into the new 3/16" rubber return line, just prior to hose clamping it to the steel line above the bellhousing.....this way it STILL functions as intended, both as a (restricted) overflow line and a vapor lock relief.. pic #1 shows rear carb with 3/16" line to return over bellhousing. pic #2 shows where i cut the steel line that would have normally gone to the front of the engine bay. stuffed inside the rubber line at the hose clamp is the cut-off-crimped-1/16" end of the stock fuel rail overflow/vapor line. look closely. i do have a breather filter on the crankcase tube...
-
you're fine. i live in NJ. keep in mind that the stock exhaust manifold is much smaller in surface area, giving off heat...the headers have much more surface area...thereby giving off heat ALL OVER the driver side of the engine bay, so the shield is kind of negligable with headers installed IMO. i fabbed up some 1/8" thick steel bar with tabs to mount to the SU's, to hold the throttle return springs down (pic) i ditched the SU coolant tubes as well. just think by doing this you eliminate ELEVEN possible sources (all the fittings/juntions associated with them) for coolant leak !!!!

-
ditch it all...fuel rail and heat shield too! the only pricey thing are the coated MSA headers.... walter moore: love the shotgun shell !!!
-
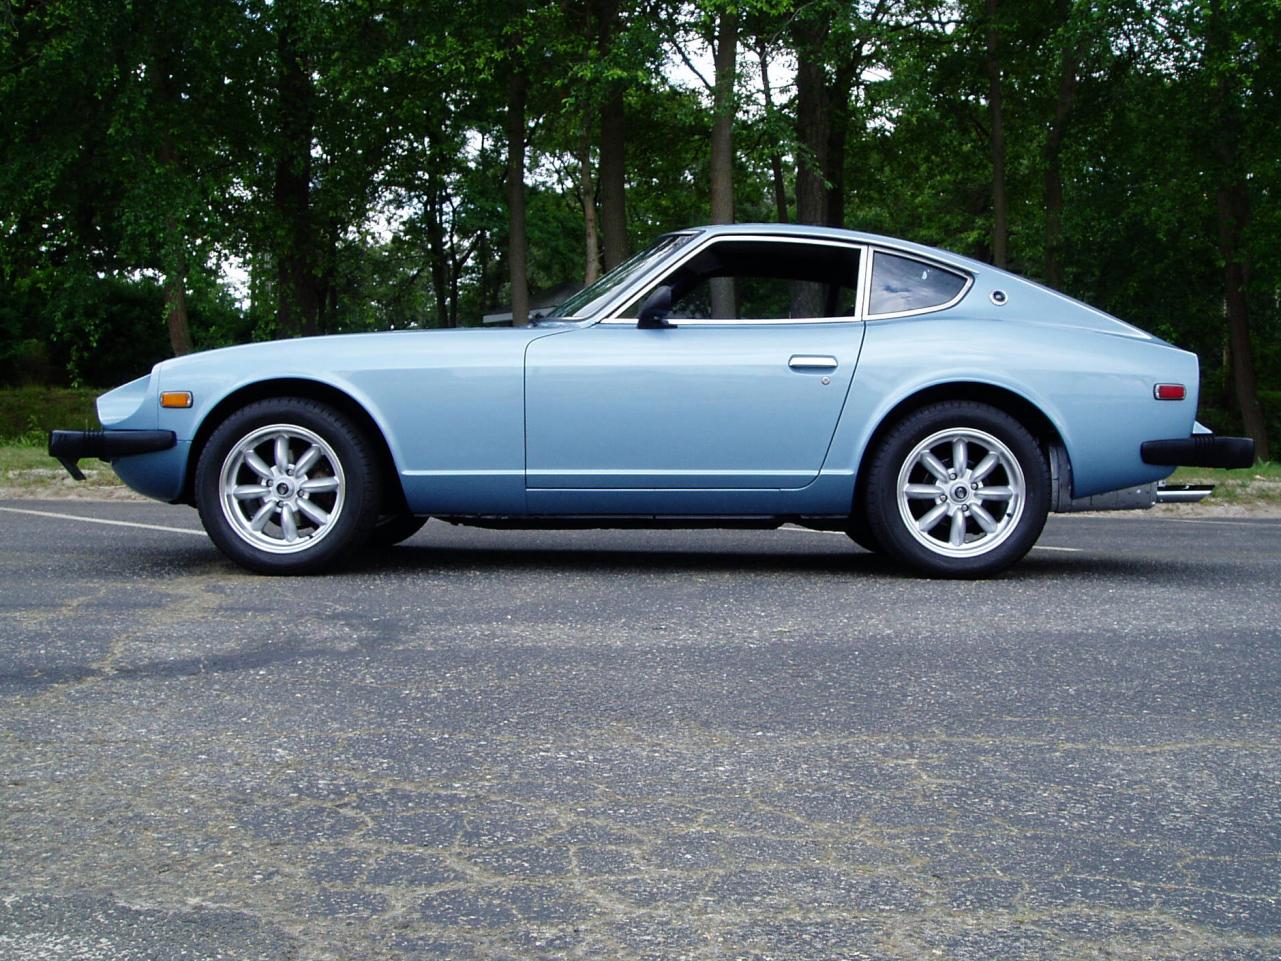
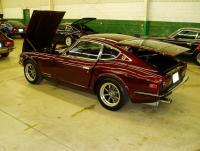
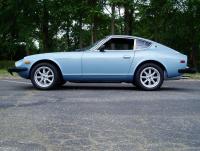
hey tom, i agree....they (Z's in general) definitely look better lowered. however, i sold my light blue '77 in favor of keeping just my 240 (pic). i had enough of maintaining 2 Z's. my 240 is lowered with 5way tockico shocks and just about every other MSA performance part out there... the 240 has 15" Konig rewinds w/ 225/50's
-
here they are on a 77Z, stock suspension 16" +4 offset Rota RB's w/ 225/50...they were a little tight for clearance up front during turning. if i'd do it again i'd go with 225/45 on a 77Z. *****keep in mind that a 77 sits higher than a 240. you'll probably be ok with 215/50, 215/45....ish better off taking the new wheels to a tire store and have them test fit a set or two, rather than buying the tires through a catalog
-
i truly believe i could do better BLIND FOLDED..... as others mention, if it's too good to be true it is. i see similar crap like that in the home improvement business.. several times i come in AFTER a CHEAP guy cuts and runs from a job he didn't have experience with or underestimated the job...and leaves the homeowner with a mess...
-
...i have a Rebello 2.9L L28. i installed an MSA 10.4lb Fidanza aluminum body/steel surface flywheel (on sale..yay!)with a stock 280Z clutch setup. works fine no issues. the lightweight flywheel requires a few more revs to get the car going from a stop, but i got used to it pretty quick. not sure on MSA's recommendation for Cent II setup.. the stock clutch holds just fine...and i hammered the throttle several times. i have about 1200miles on the goods since install...once again, no issues hope this helps p.s. if you go with the Fidanza flywheel, you'll have to insert the pressure plate pins (3 of them) around the perimeter. careful, as the alignment with the pressure plate holes only fits ONE way, there are SIX possible..test fit with bolt patterns before pressing in the alignment pins. once you get them right, use a sharpie marker and label them 1,2,3 so you don't have re-fit the pressure plate when you're on your back under the car installing..
-
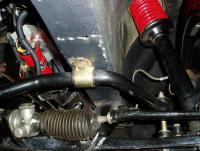
Z's ondabrain: sorry to 'jack' your thread, and no disrespect...i just kinda skimmed the reply posts... anyway, i just stressed the improtance of beefing up the frame rail, rather than just address the clearance problem... troutman: weld the plate if you could. it is better and couldn't hurt. therefore the plate is PART of the frame metal. think about it... without welding, any downward 'pulling force' the bar exerts while cornering will still depend on the bolt holding itself to the nut on the inside of the rail and the spacer plate, in theory, could flex away from the rail, offering less support. if it's welded, the nut and bolt will be pushing/pulling against appx 10 sq inches of solid 1/8"-1/4" thickened frame rail
-
i agree with Arne, if you have your nice green one, keep it. ditch the other one. i thought i'd have more 'fun' as well buying a 77 to restore. i got through it and enjoyed the car, but then got tired of fixing a second Z. i sold it before i sick of Z's in general. now i thoroughly enjoy pampering my one-and-only 240, and also restored my love for Z's. your car in question looks like a major dollar 'learning experience' IMO
-
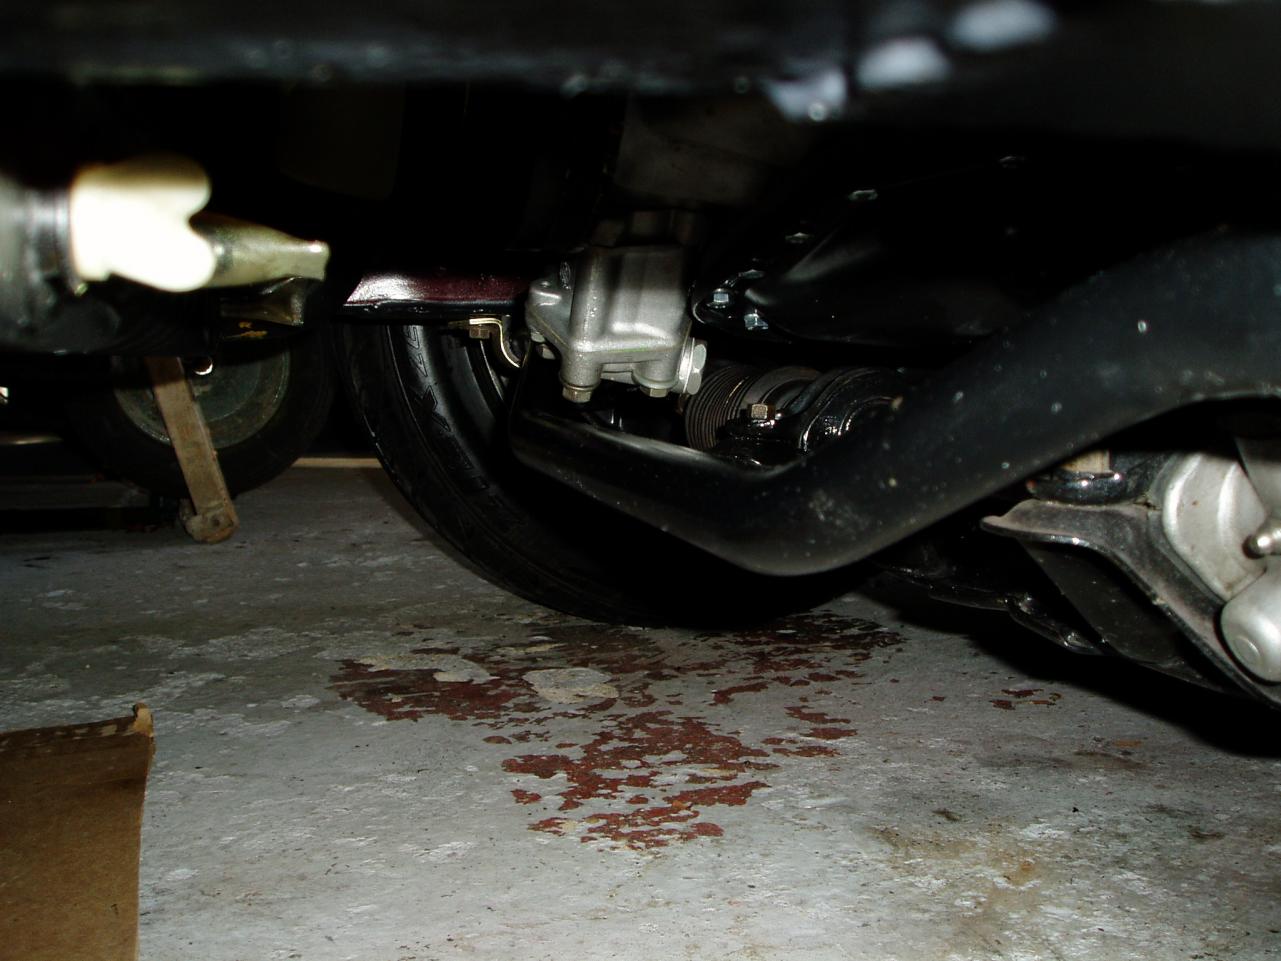
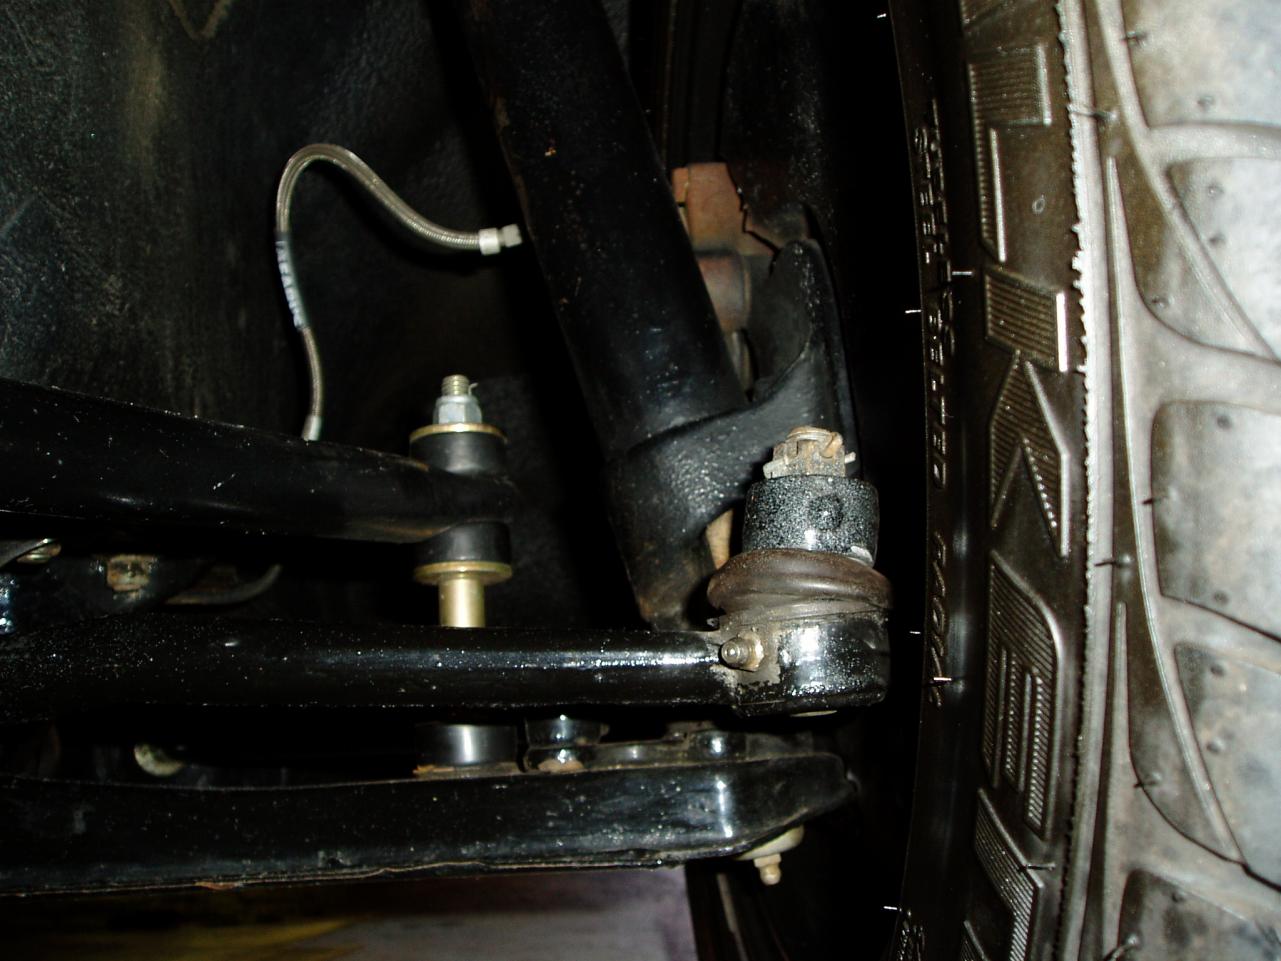
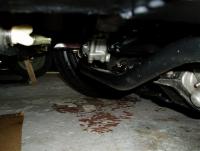
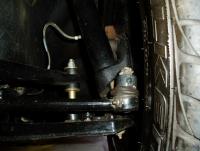
hey man, i had the EXACT same problem with the EXACT same sway bar. i put it on and it hit the pump. reinstalled, came down lower. try it this way: IMPORTANT note below (p.s.) 1. jack up car and support the whole front end on jack stands at the cross member. 2. mount the bar on the frame rails loosely, then stack up your end links on the bar ends throught the control arm. then i used a scissor jack under the control arm/end link bolt head and jacked the wheel suspension up (while the car was on jack stands at the cross member). once i turned the scissor jack under the control arm and the car started rising off the jack stands, i knew it was under normal load. do the same for the other side. 3. if it's still hitting it WOUND BE WISE to weld on 1/8" - 1/4" plate steel to the underside of the frame box. if you don't add metal there, the ~600% higher torsional rigidity of the new bar will rip itself out of the frame rail due to metal fatigue while cornering.. if you're installing on a 240Z, the very THIN frame metal WILL rip through if you don't add extra metal...it's only a matter of time...see pics. p.s. there are many opinions about frame box stiffening (welding 'C' channel and using 'through' bolts, etc), but if your frame box nuts (on the inside of the rail) are in good shape, the extra frame box patch of plate steel i mentioned above should give adequate enough stength for the frame rail...i used 1/8" stainless plate on mine
-
...a guy in a 350 landed in the tire wall....nuff said