Richard McDonel
-
Posts
362 -
Joined
-
Last visited
-
Days Won
3
Content Type
Profiles
Knowledge Base
Zcar Wiki
Forums
Gallery
Events
Downloads
Store
Blogs
Collections
Classifieds
Everything posted by Richard McDonel
-
Thanks fellows. Richard
-
I'm going through the hand-gouging ordeal of replacing two instrument light bulbs, specifically the left-side turn-signal indicator, and the high-beam warning light. A friend has suggested that given the difficulty of access, perhaps I should renew them all (good idea), but with LED rather than incandescent. He feels that LED will last forever, but given that we've had one household LED die on us, I tend to doubt that. Anyone have any experience with LED bulbs in dashboard applications?
-
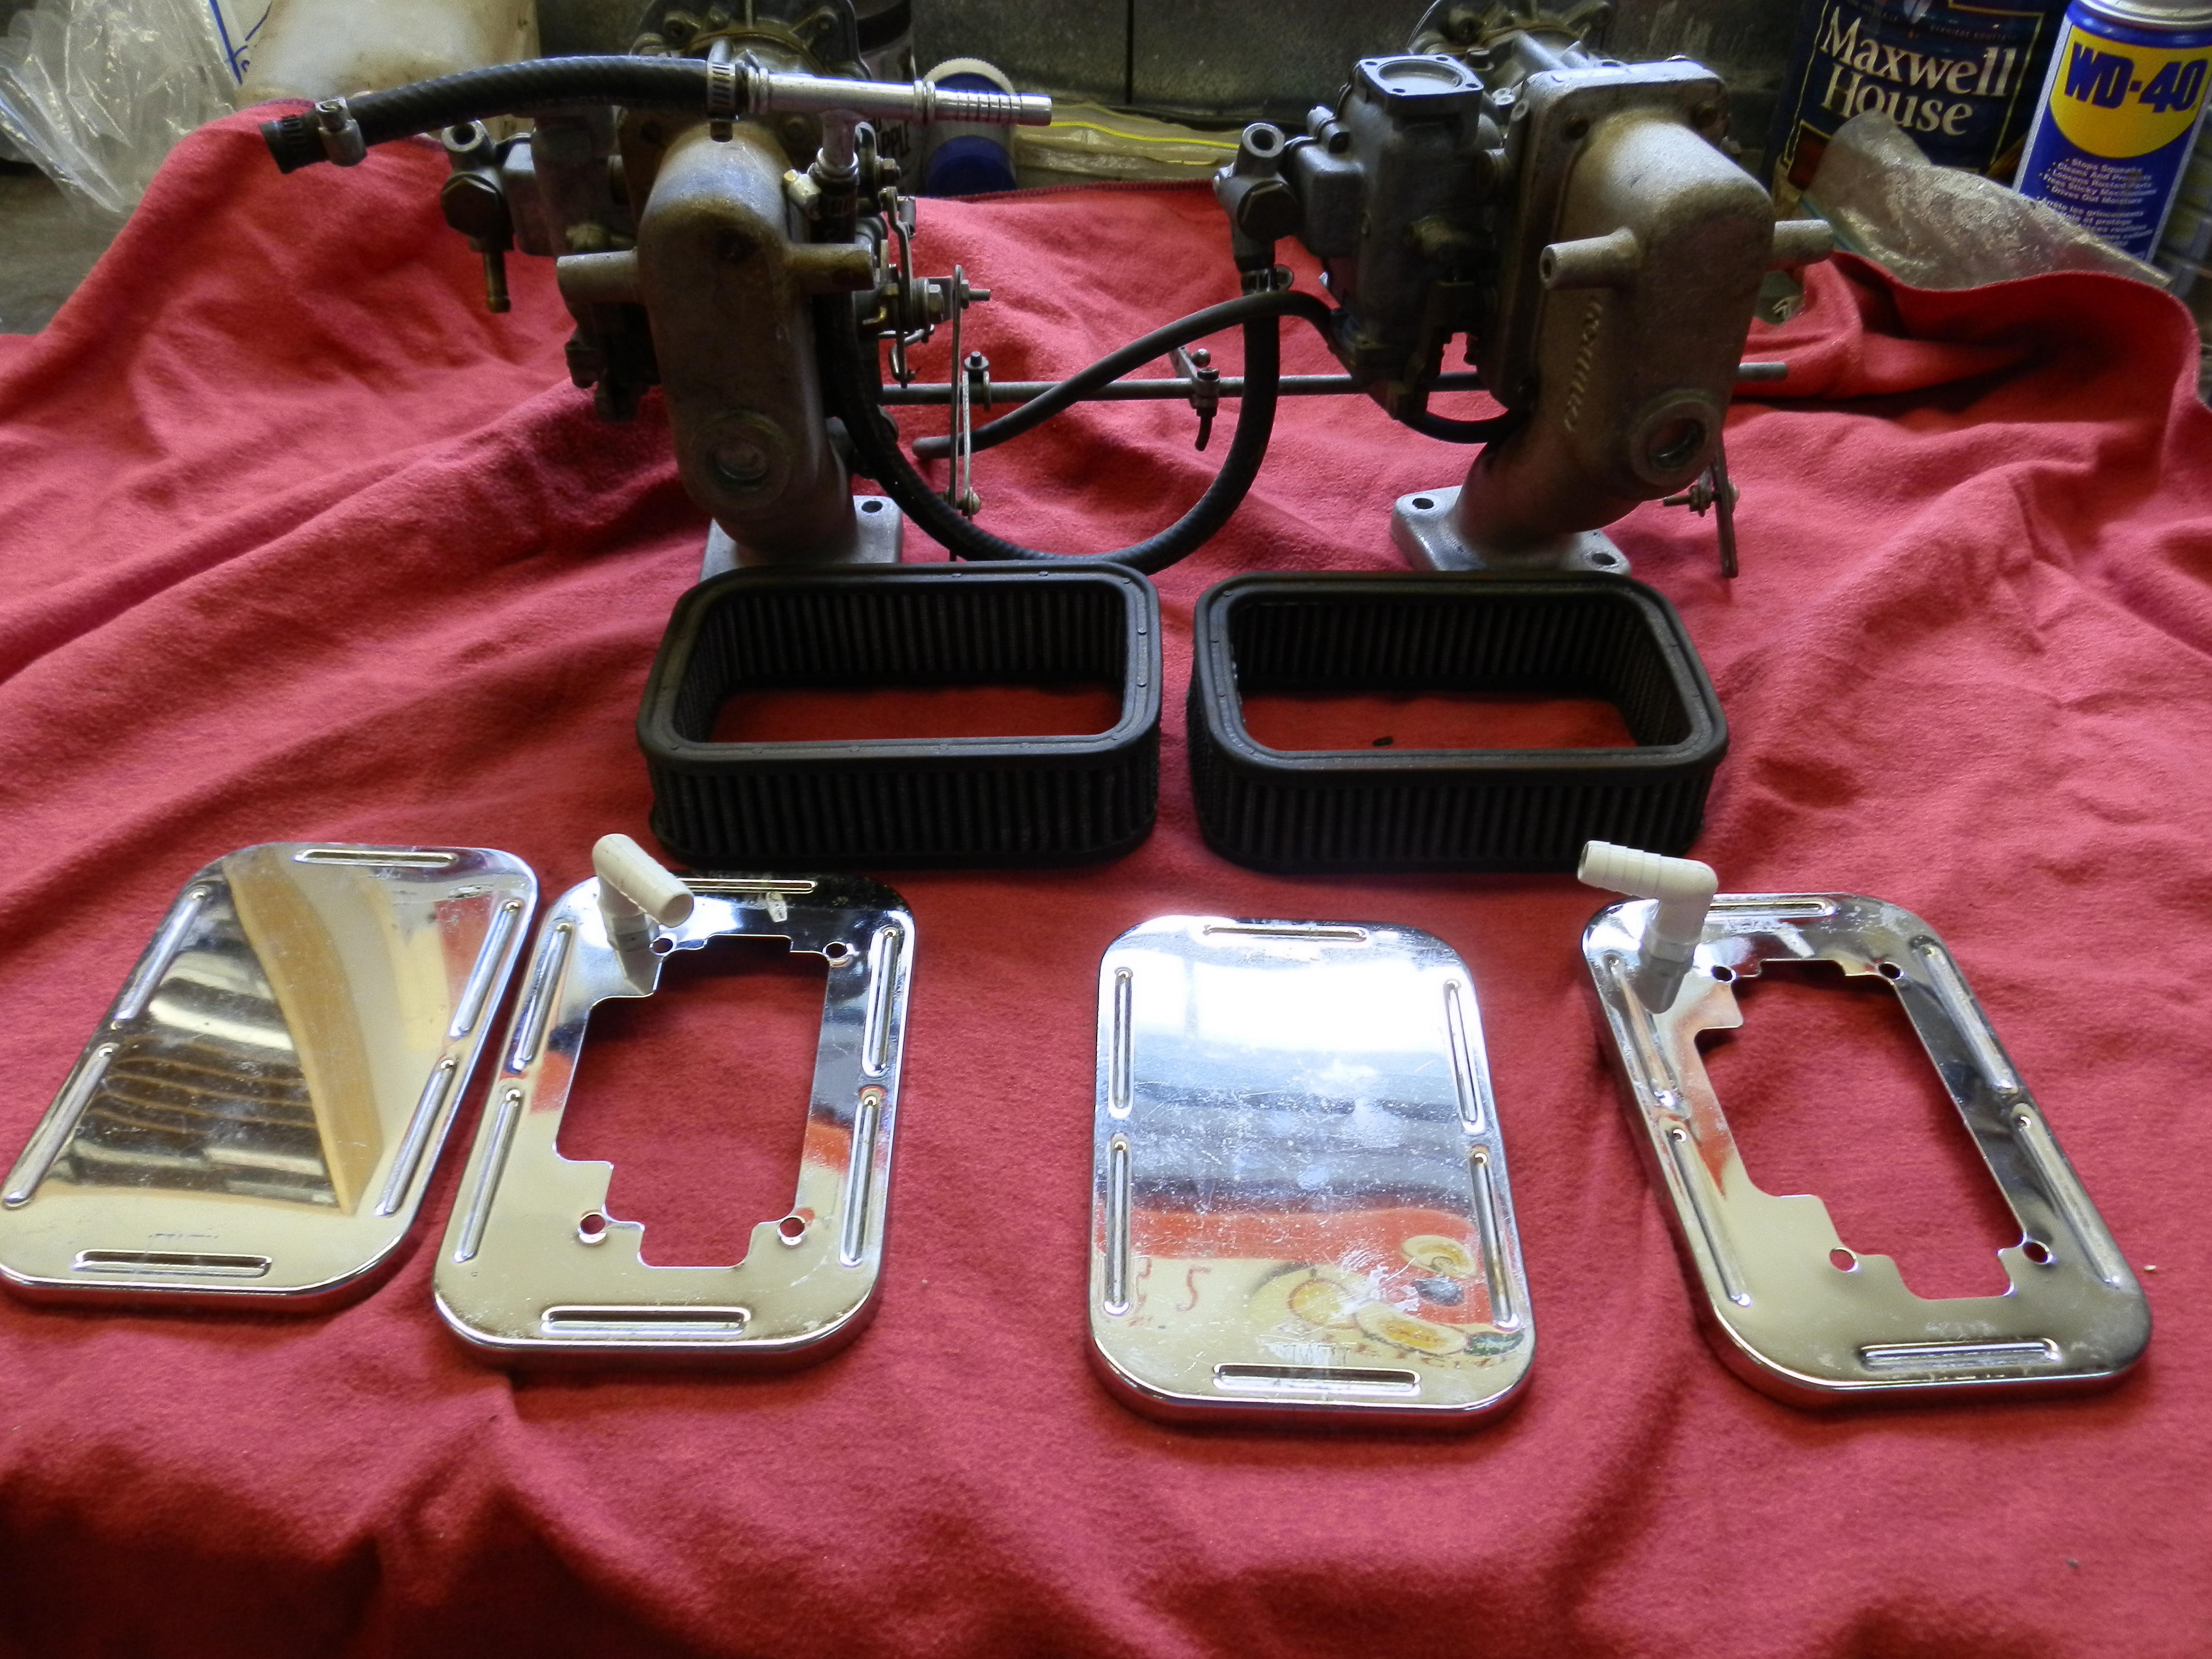
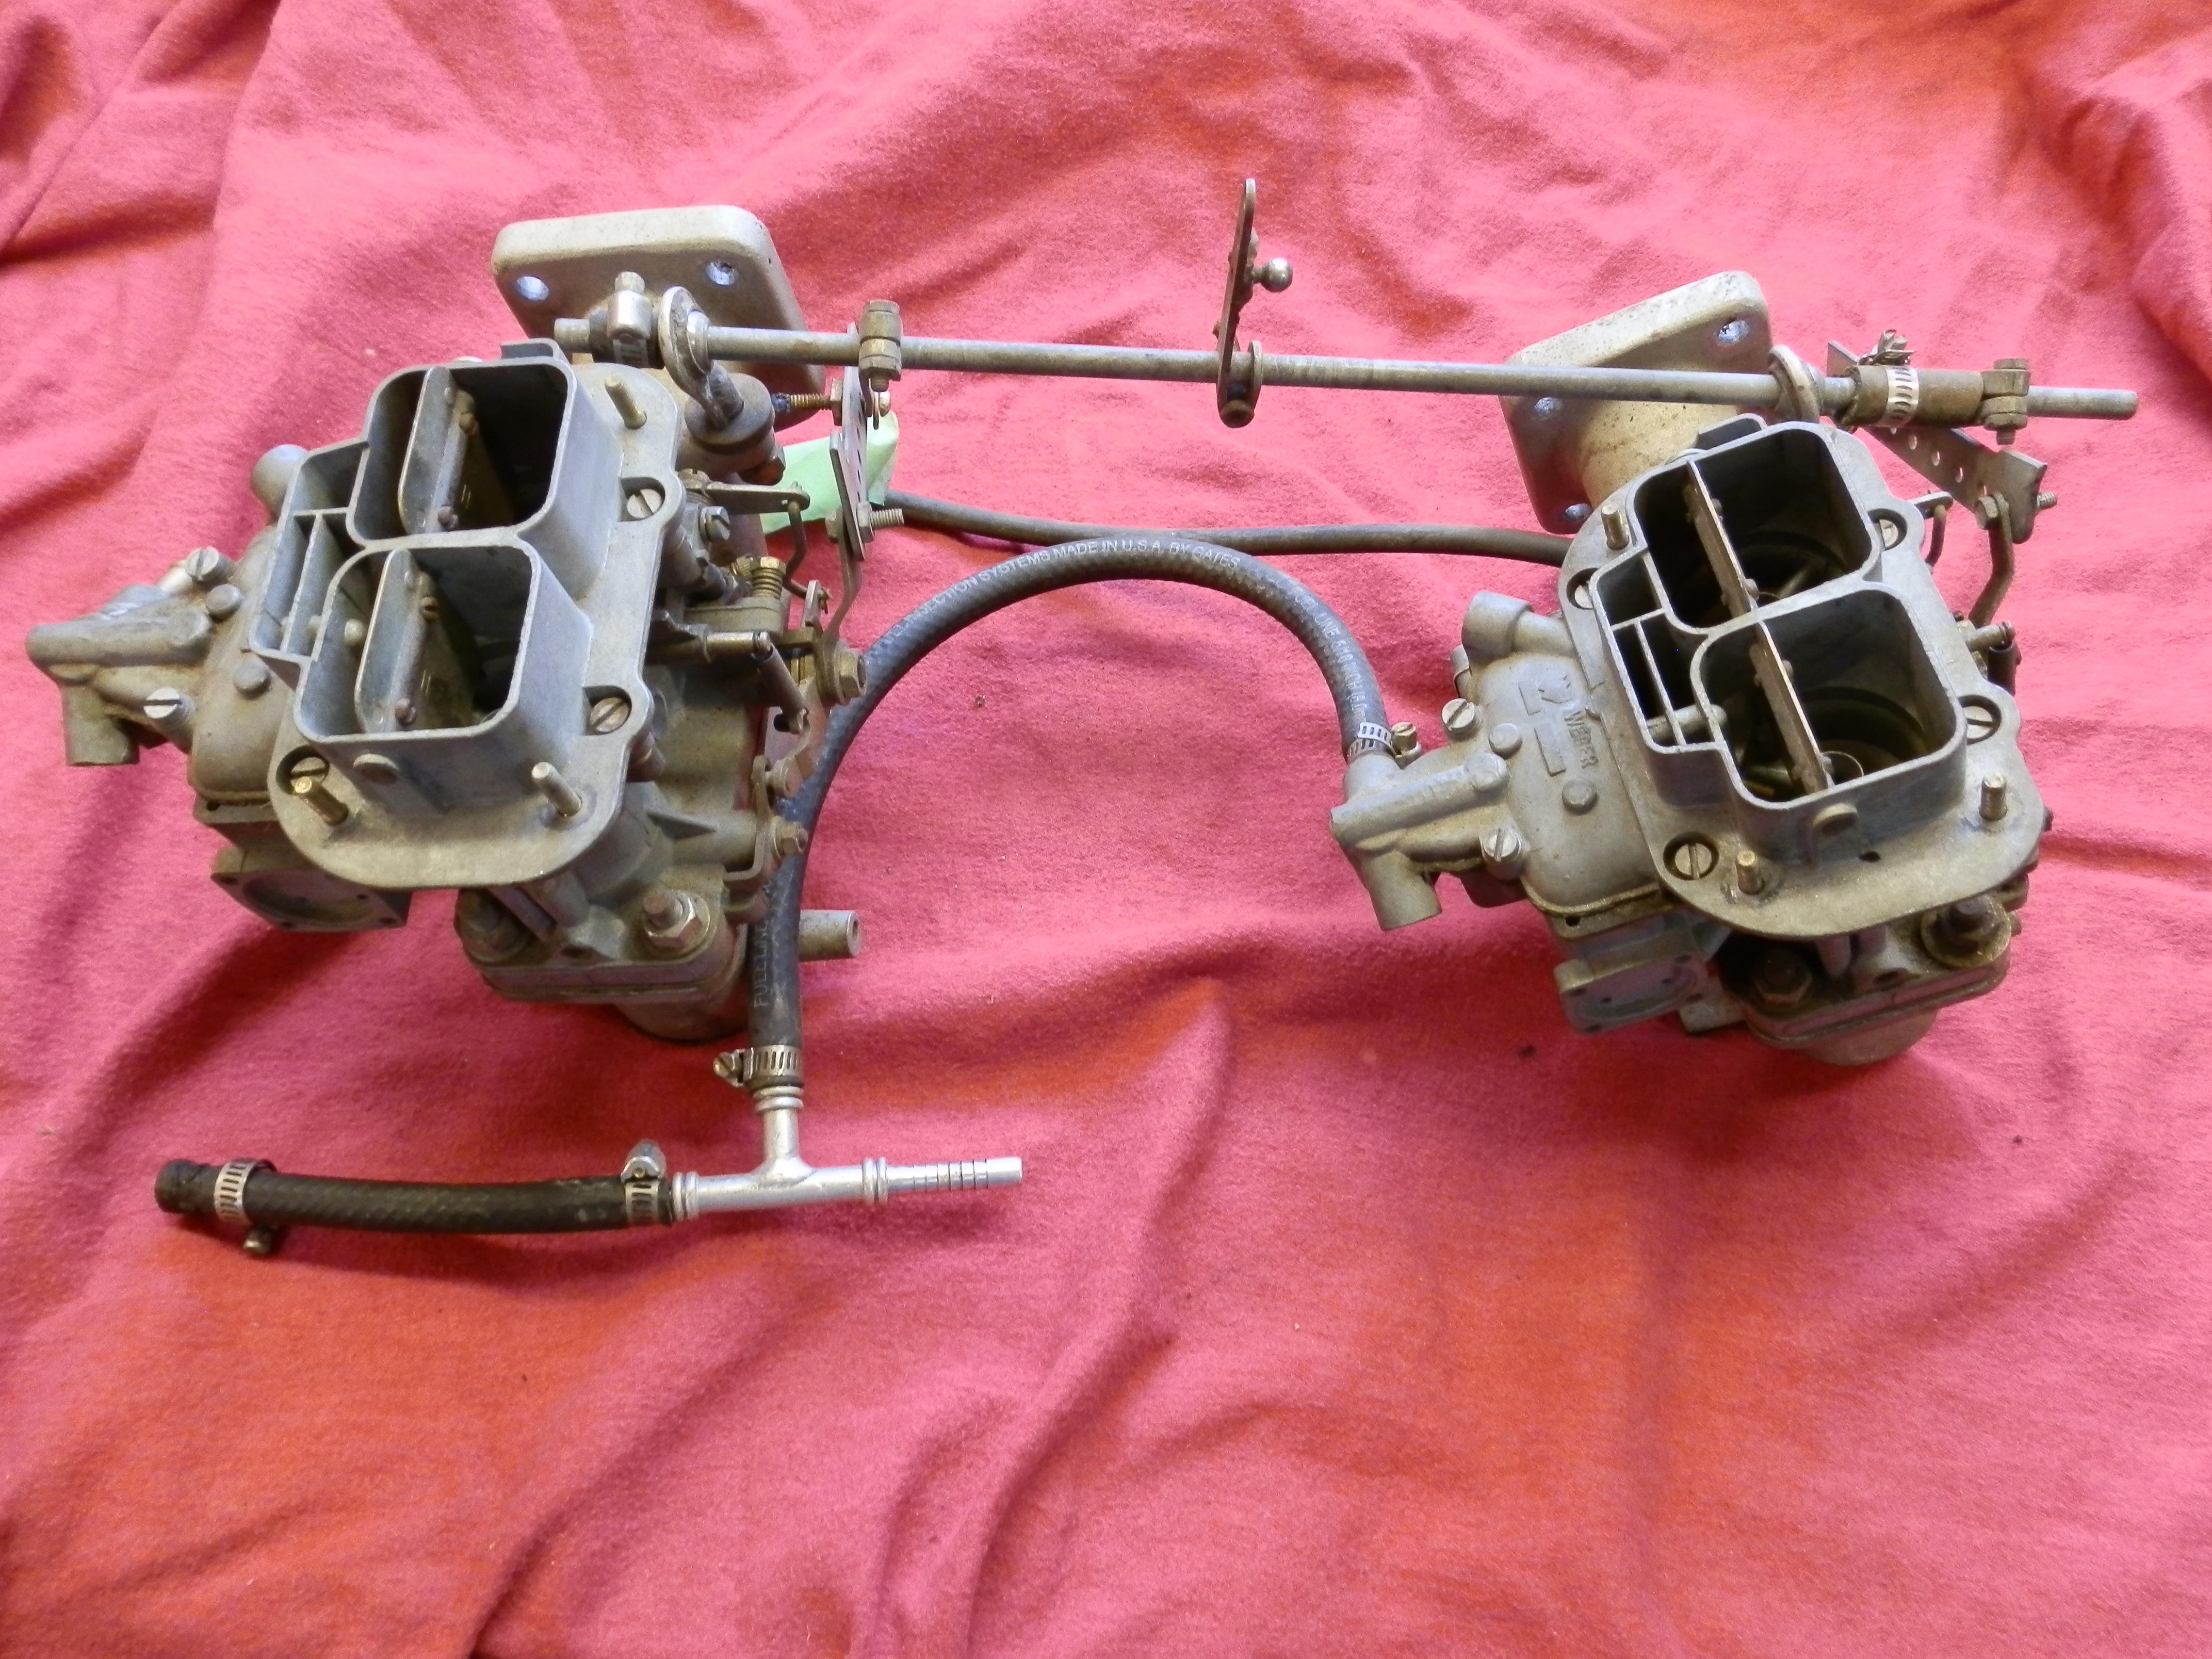
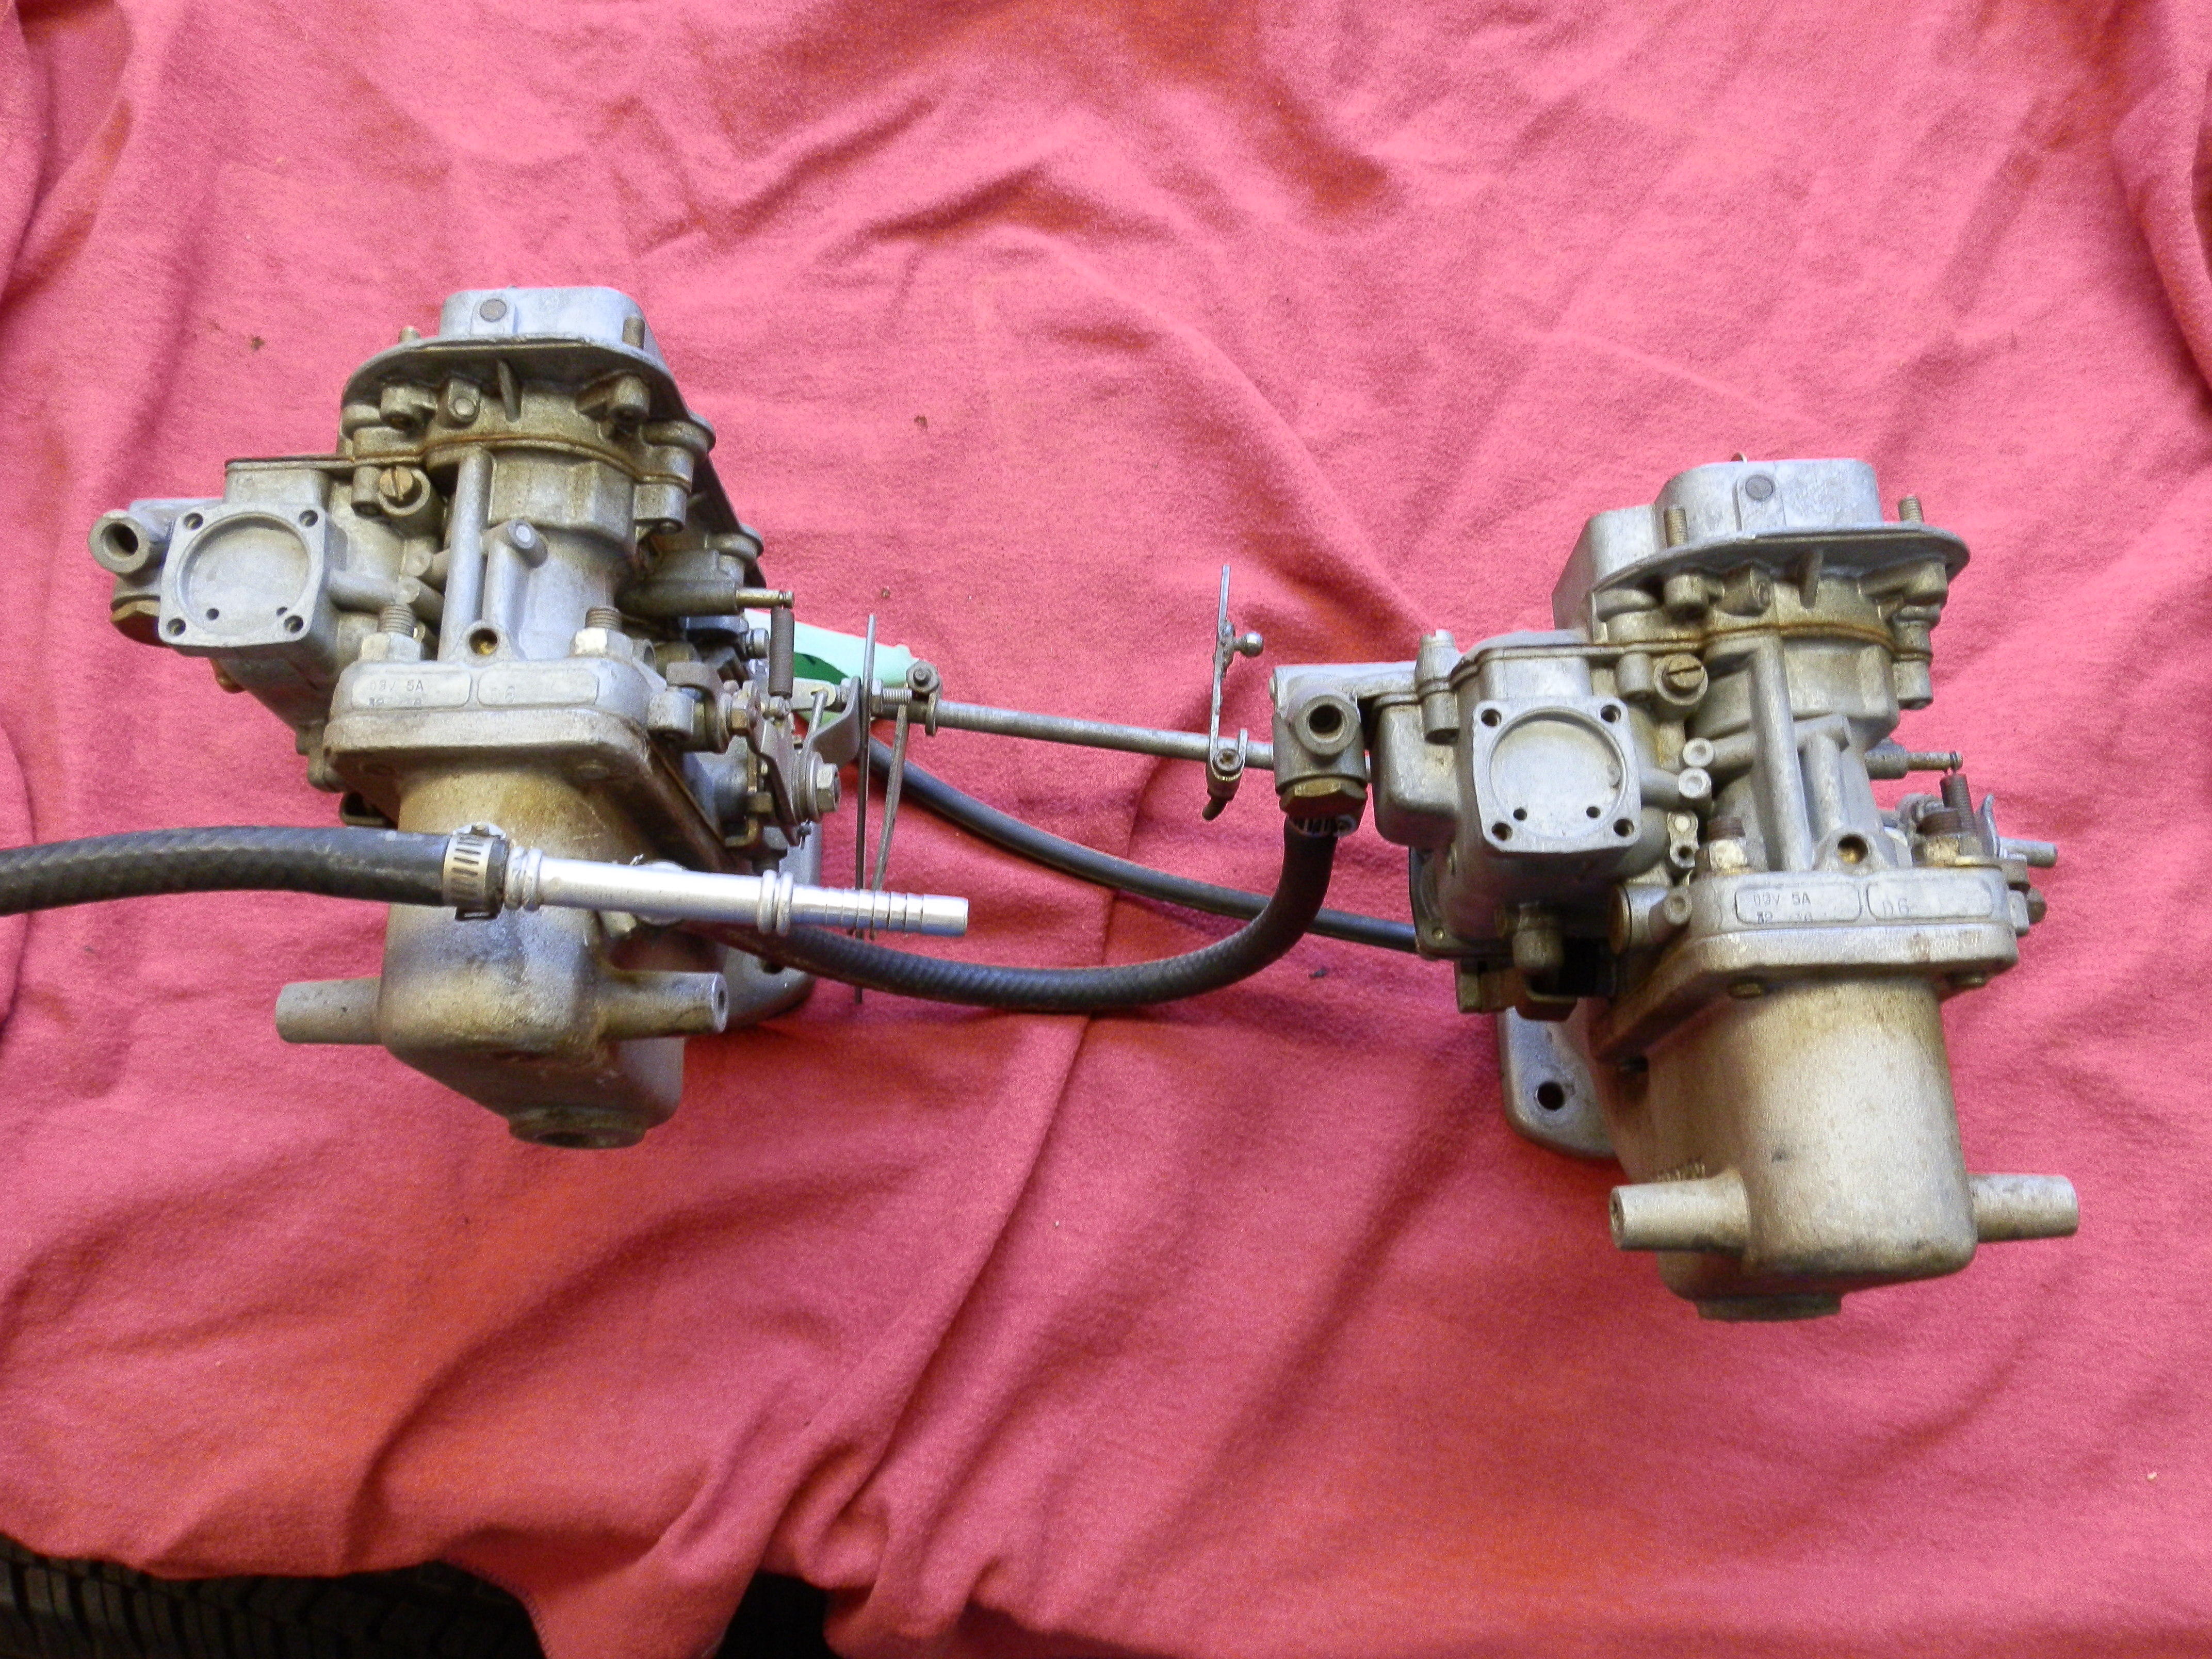
For sale, twin, two-barrel Webers set up for Z cars. Imprinted on one side of each is the word "cannon," and on the other side "2830." The stampings on the outer ends of both are are left: "DGV 5A 32/36" and to the right: "D6." These came to me with a parts car I bought, and I have never run them. They do appear complete, and come with air cleaners. Asking 350 U.S.$, or 450 CAD$


-
I have a pair of Weber carbs set up for a 240Z. These came with a parts car I bought several years ago. I have never run them, but they look to be complete and operable. Individual chrome air cleaner housings, together with what appear to be K&N cartridges are included. The number 2830 is stamped on one side, and the word "cannon' on the other. Anyone have any idea of their value? Thanks
-
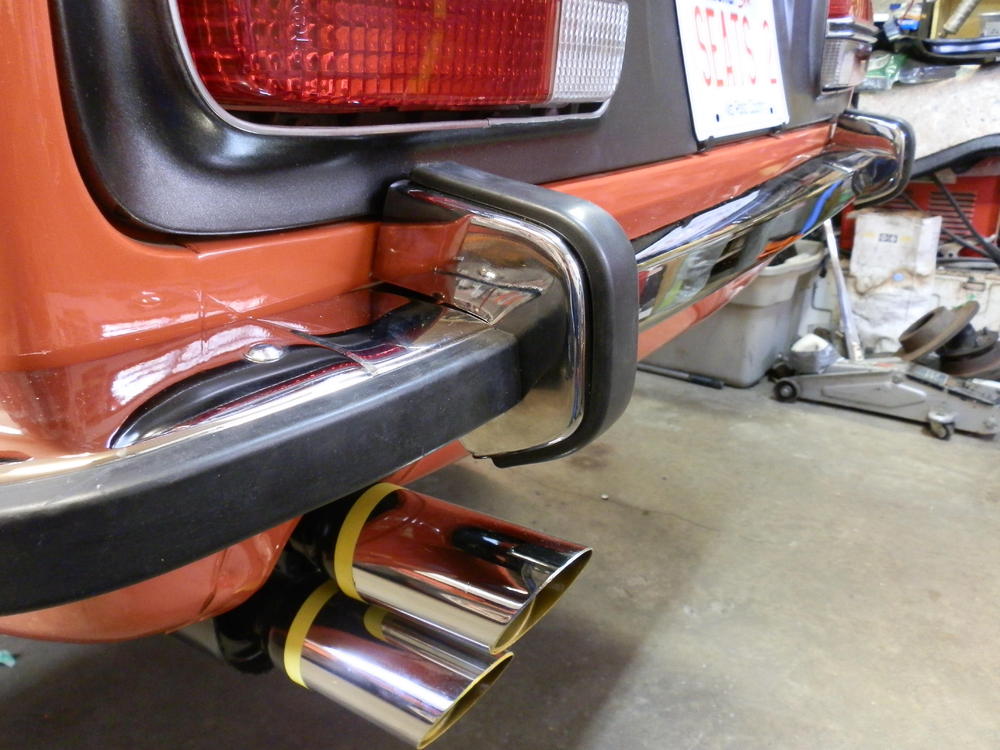
Job done, photo attached.
-
I fixed the problem by - initially with some reluctance - drilling two new holes in each bumper guard. I measured the spacing between the studs built into the rubber, then with a tailor's cloth tape measure (metal tapes kink going around curves) marked where I needed two new holes in the guards. One new hole is straightforward, but the one adjacent to the bumper-guard mounting stud is tricky. I got the hole drilled at the "right" place, and it does provide a place to bury the rubber stud. That stud isn't long enough to get a nut on, but at least it enables the curve of the rubber to match that of the guard. and prevents the rubber from moving laterally. I then used a file to slightly lengthen the the original two holes. Drilling chrome isn't easy, but several whacks with a heavy hammer on a sharp punch gave me a place to start drilling. After blunting the ends of a couple of common drill bits, I bought a 1/4 inch carbide bit (the jobber referred to it as a "locksmith" bit), and that got it done. I think the result looks good; it's late and I'll post a photo(s) tomorrow.
-
I had the bumpers and bumper guards for my '71 Series 2 chromed, and everything looks nice and shiny. Ordered the front and rear rubber caps, and everything fits, except the rubber on the rear guards. My rear bumper guards have three mounting holes for the rubber; the caps Z-Car Source sent me have four studs each. I called them and all they were able to tell me was that four-stud is all they have or can get. I went on MSA's site and their part photo clearly shows four-stud. Can anyone tell me, do I have the wrong bumper guards? Anyone know where I can get a pair of good rubbers? Is drilling new holes in my chrome the best option? Thanks, as always
-
Mart, Thank for this. Potentially very handy -I'm going to save it. And yes, I pretty much figured out that there were no passenger car tires 2,000 inches around! Cheers,
-
Thank you gents, Yes, the Michelin chart gave me what I wanted. I'm going with the 195/70 R14s - less than a third of inch variation from the 175 HR14s. Getting closer.
-
I'm at the need-tires stage of my Series 2 240 restoration. I have the stock steel wheels and a set of 6" mags. What I want to do is fill the wheel well the way it would have been originally, but I can't seem to find the diameter of the stock, now obsolete, 175 HR-14 tires (no aspect ratio) tires. Anyone have that data handy? Thanks
-
@w3wilkes Thanks for the travel tip. The route sounds interesting - If I'm down there again, I'll try it. I had not heard of Levan, Utah before so I googled it. Neat pictures. I imagine real estate is quite reasonably priced in Levan.
-
Follow up to my earlier post: Again, my thanks to Zup Frosquisher (Come on, that's not your real name? Is it?) for suggesting a loose cam / eccentric. The manual I reference in this case is the ubiquitous Haynes book, and it does indeed say that the cam-sprocket bolt should be torqued to 40 ft.lb, which is likely what I did back when I put the engine together. Today I ran that by the local Guru of our faith, zKars (Jim), and he had not heard of such a thing. You really heave on the wrench when tightening that one, he counselled. When I told him where I got the 40 number, we checked other manuals (I don't have a factory engine manuals, but I do have two chassis manuals if anyone is interested in a trade). Chilton pretty much echoes Haynes, calling for 36 - 43 ft. lb, but Clymer came through with a more logical answer - 101 - 116 ft. lb. So, it's now back on, torqued to 105, the pump is re-installed, and the engine runs, again with much thanks to Jim. So with the cam-sprocket cam now firmly in place, the risk I spoke about earlier, i.e., the potential loosening effect of the pump lever rubbing the eccentric the wrong way would seem to have been minimized, if not eliminated. I think we're going to be on the road this spring (spring comes late in central Alberta).
-
ZUP, Thank you! You get post of the day - no, the post of the month - award! Yes, I pulled off the valve cover, and there was the eccentric, spinning free. Should be problem solved, but I'm a little nervous about how it functions. The bolt is large - 14 mm - but the manual only calls for 40 ft.lbs. of torque, as compared to 60 ft.lbs. for the skinnier head bolts. I did what the book said, and used loc-tite. But I look at the overall setup and it occurs to me that the natural friction of the pump lever on the eccentric would tend to loosen, rather than secure the bolt. Anyone have any thoughts or experiences with that?
-
Actually, it's #3. #1 was my son's - about a dozen years ago. He thought he could restore it at the same time he was relying on it for day-to-day transportation. You can guess how that worked. I bought it off him so he could make a down payment on a car with just one special thing: a warranty. My intent was to restore, but between running two businesses and writing a book it took me years to get to it. I had the local hot-rod fraternity's auto-body shop look at it and he said it would cost a minimum $20k, and maximum $40k. That wasn't going to work. That's when I went internet shopping and found #2, the "100% rust free" '73 north of Toronto - that's about 2,500 miles from me. It turned out to be a fraud; for instance the rockers were stuffed with steel wool and fiber-glassed over. Pictures looked good. It did, as I mentioned earlier, come with a pallet-load of parts, some of which I'm going to be offering for sale once the present car is up and running. So I stripped and scrapped that body. By now I had rebuilt my son's engine, and really wanted to get on with it so I decided to search the 'net daily for a "rust free" in a desert climate. I figured if I could find three at one time in the same area, I'd fly down -- no more long distance believing everything the seller said. I did find three in Phoenix and went to have a look. The first was another fraud. The guy told me if I sent him the money, he would save me the trouble of going down, because his son was driving a truck north and would meet me at the border. When I got to Phoenix, the guy never answered the phone. Second car was pretty decent but it did have some rust bubbles above the doors and quarter windows. Not sure how that happened. The third car was a '71 Series 2 at a repair garage and was being sold because the owner had died. It ran rough, and the interior was baked from four decades in the desert, but the body was sound. When I asked about rust the guy put it on the hoist, handed me a trouble light, and said "take as much time as you need." I looked, bought, and flew back home. A few weeks later I re-habed my old race car trailer, hauled it down there, picked up the 240, and came home. Driving alone I did 5,200 km (3,200 miles) in five days, four hours. As an aside, that road trip reminded me of how much more there is to see on the road as opposed to flying. If anyone wants to take the trip, hopefully in a Z car, I recommend turning east off Interstate 15 at Cedar City, Utah onto Hwy 14 (big signs "Not recommended for semi-trucks") and connecting with Hwy 89 south to Phoenix.It is a road meant for sports cars, it rises to 10,000 feet altitude, and is quite scenic. So that's the story of Z Car 28726, which I hope to have on the road later this spring.
-
Cap't. With respect to your new-or-old question, the pump came new in a box along with a rust bucket 240Z that was beyond restoration. The previous owner in rust-belt Ontario had apparently decided that he had this neat old car that could be restored - all he had to do was buy all kinds of shiny new parts and bolt 'em on - just like on the "reality" TV shows. So in my car, I now have a new clutch, wheel cylinders, brake discs and drums, brake and clutch cylinders and lines, water pump, oil pump, u-joints, shocks, tie-rods, etc. Hopefully it's on the road later this spring. Many thanks for your advice and assistance.
-
Cap't. Yes, that's what I mean. Fuel came out the back as I removed the pump and gasket from the head, I disassembled the pump, and to my untrained eye, the diaphragm looks OK, but there is no way I'm putting that pump back in. I hope I get a better lifespan out of its replacement. Might want to pack a spare when travelling. Anyone else had a fuel pump fail after 20 minutes?
-
240... Tried priming, but it would only run as long as the primer fuel would allow. I ran a short length of hose from the pump into a container and twice spun the engine on the starter for a good 10 seconds, and not a drop came through. Based on that, it is logically the pump, but if I'm questioning it's because I haven't had a mechanical fuel pump fail on me since April 1968 ('57 Chev BelAir four-door hardtop, wedding night - story for another night)
-
Since first firing my rebuilt 2.4 engine back is September, I''ve probably run it for about 20 minutes. But now it won't start, and the problem seems to be that the new, Kyosadenki mechanical pump has stopped pumping. There is fuel to the filter side, but none comes out the carb side. Anyone know of any reason why a new pump would fail? I took if off the car and bench tested by pushing the lever while hold a thumb against the inlet. Sounds OK. Also, when I removed the pump, it appeared that some fuel may have back-flowed into the engine - likely oil change time. Any thoughts or suggestions would be appreciated. With respect to the carbs, both the SU book and the Haynes manual call for setting the float level by holding the top upside down and measuring the gap between the rim and the lever. But all the comments here seem to concentrate on measuring the fuel depth in the bowl. Any particular benefits one way or the other. Thanks
-
JLPurcell, Can you post a photo? Thanks, Richard McDonell
-
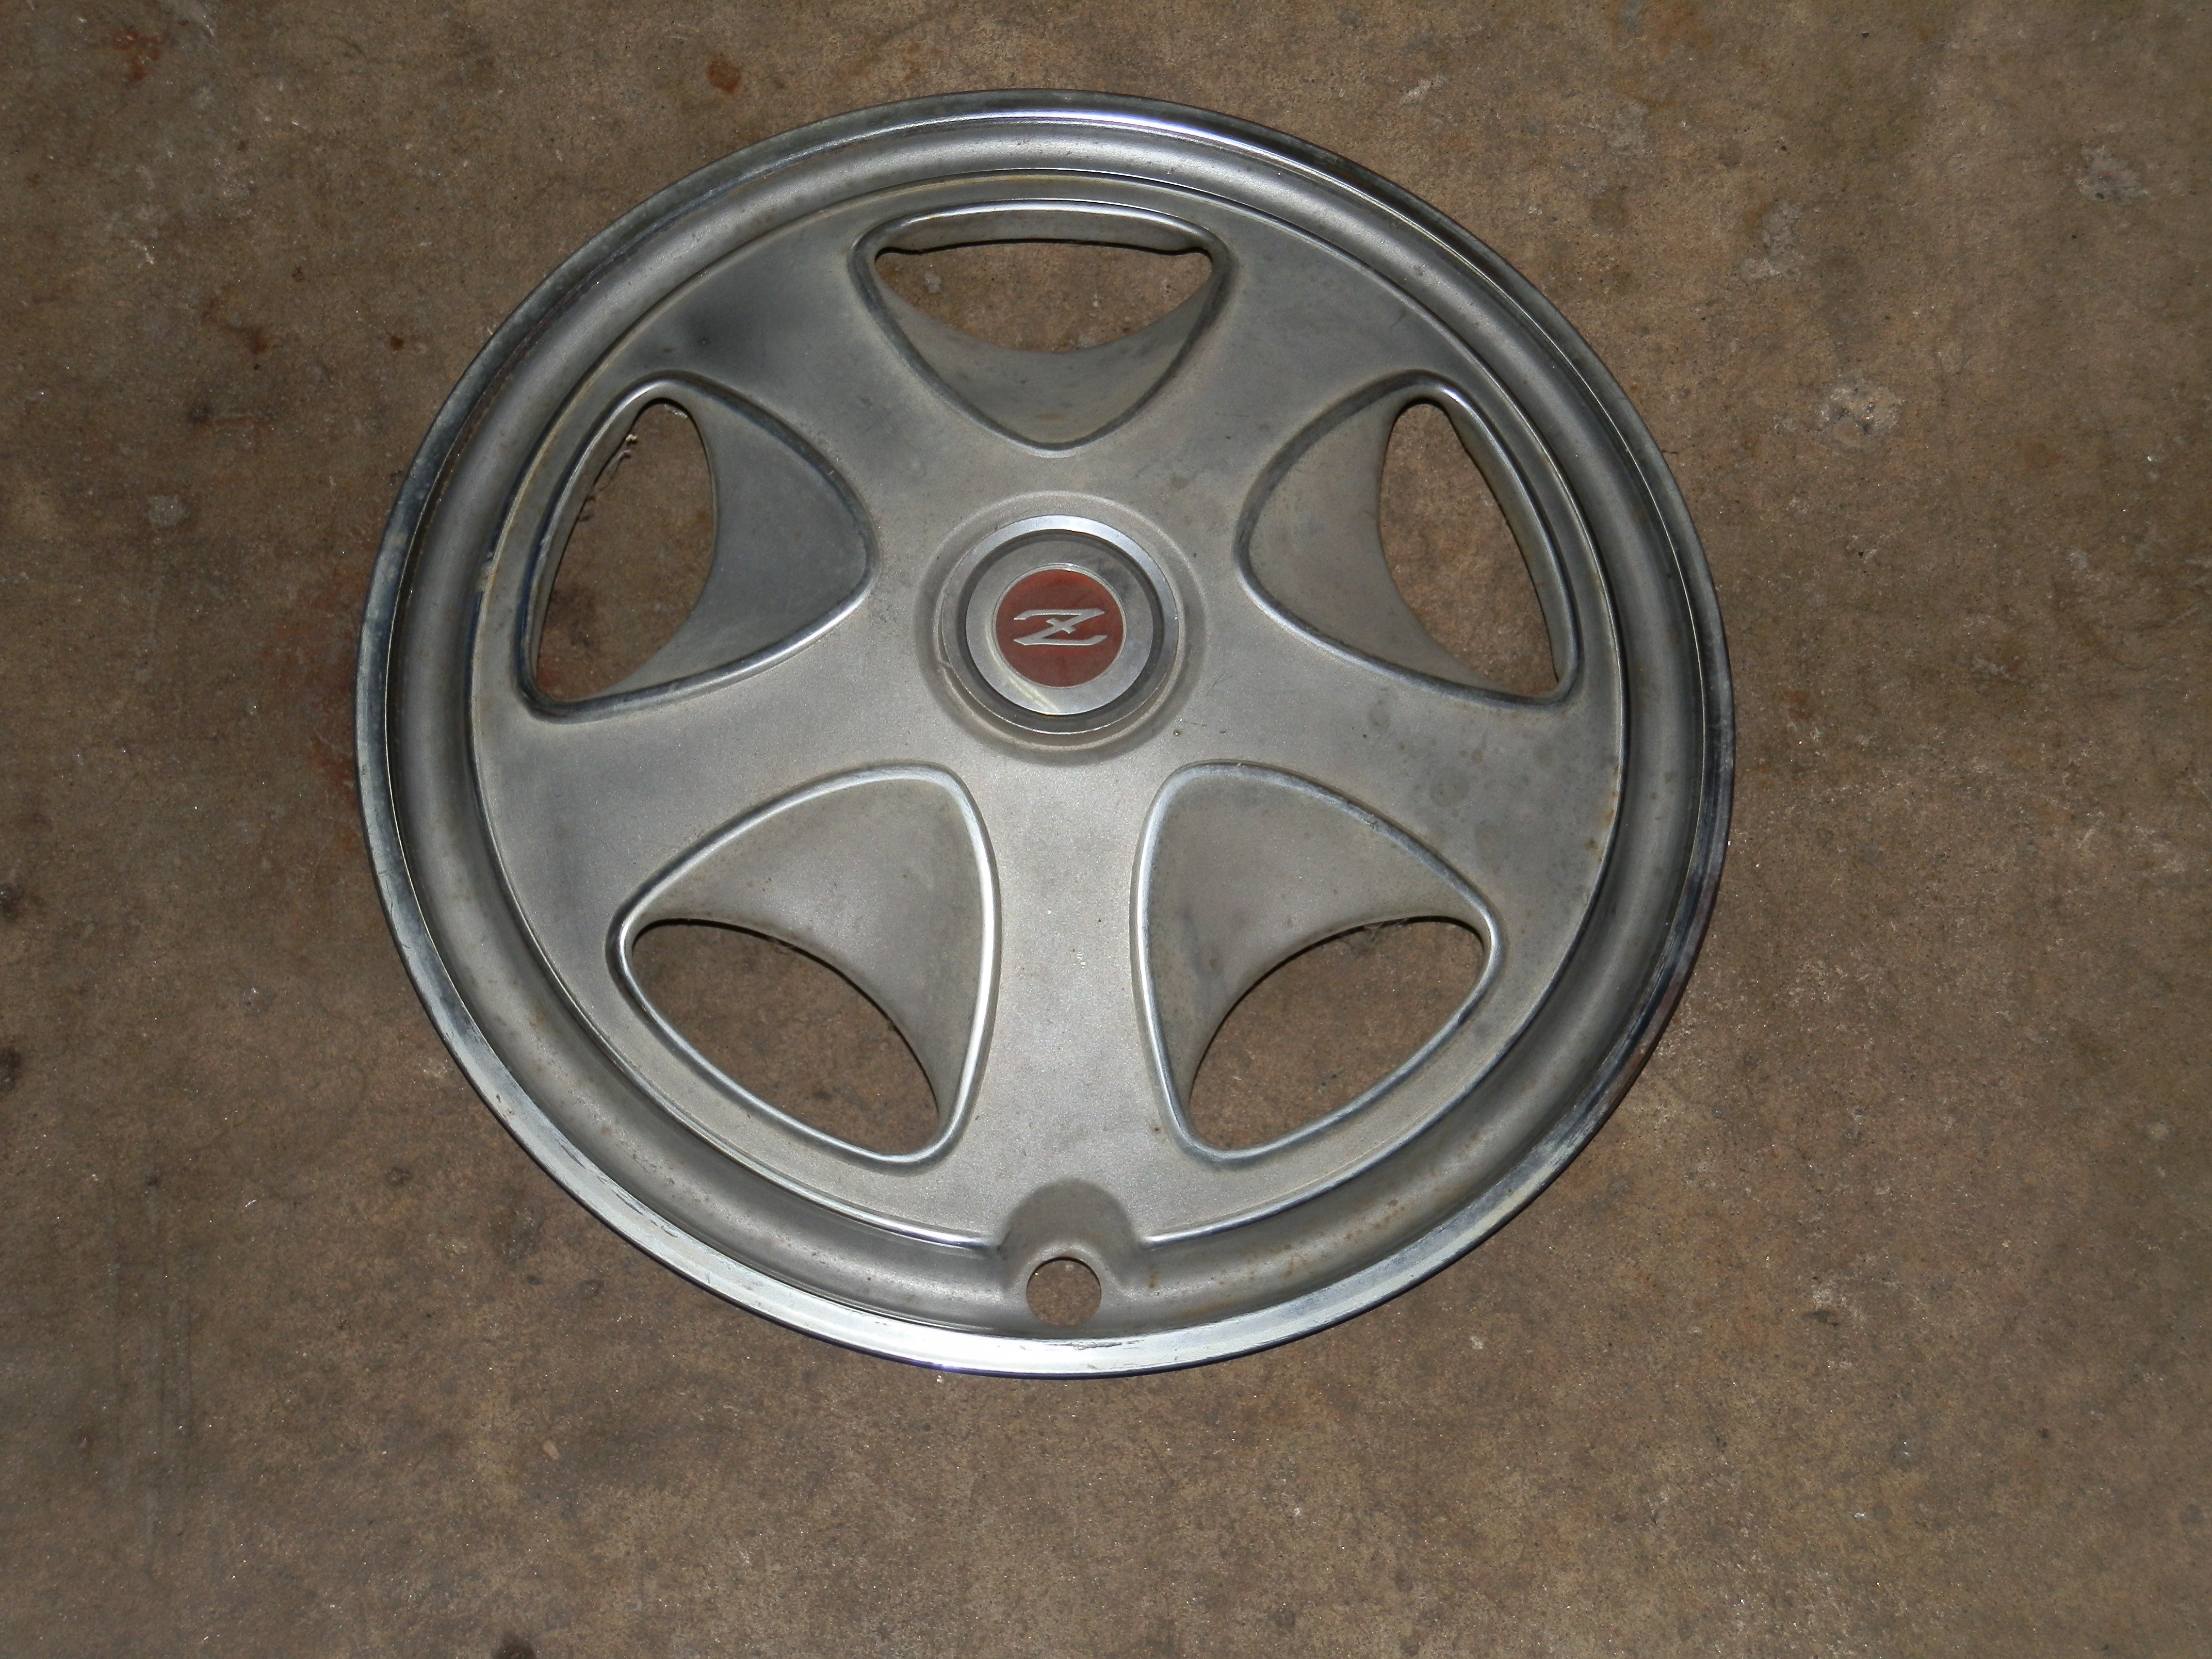
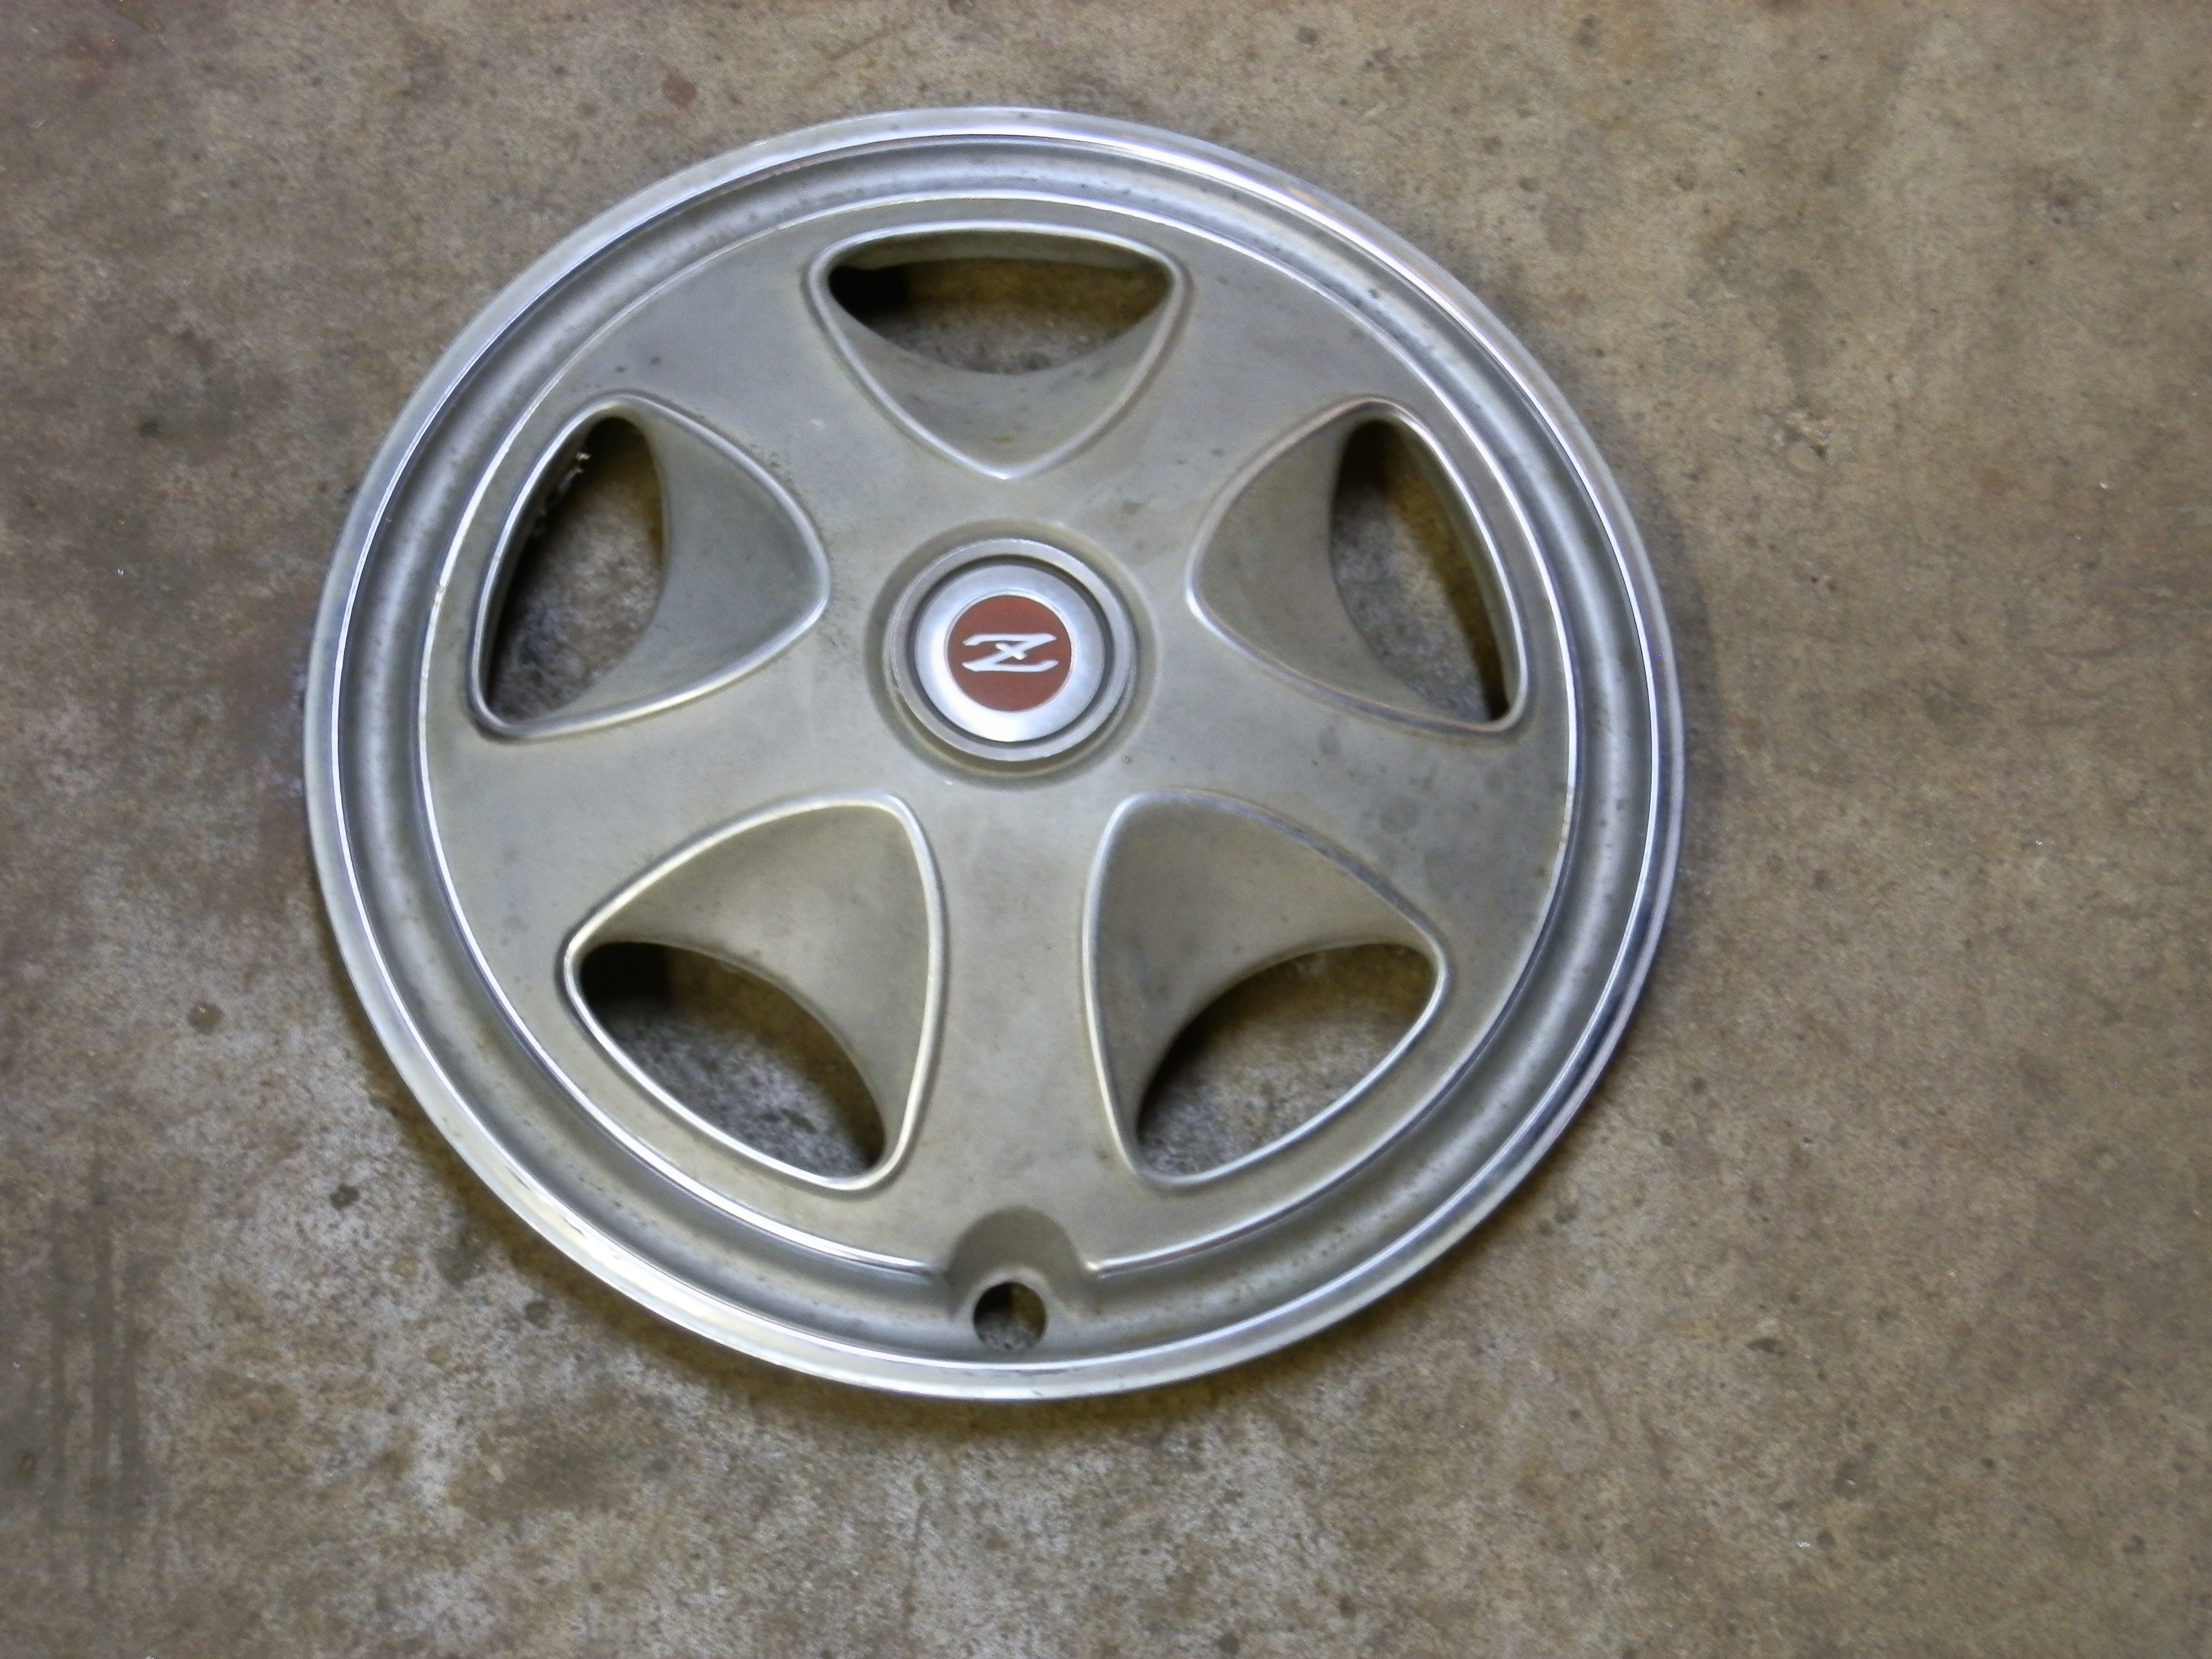
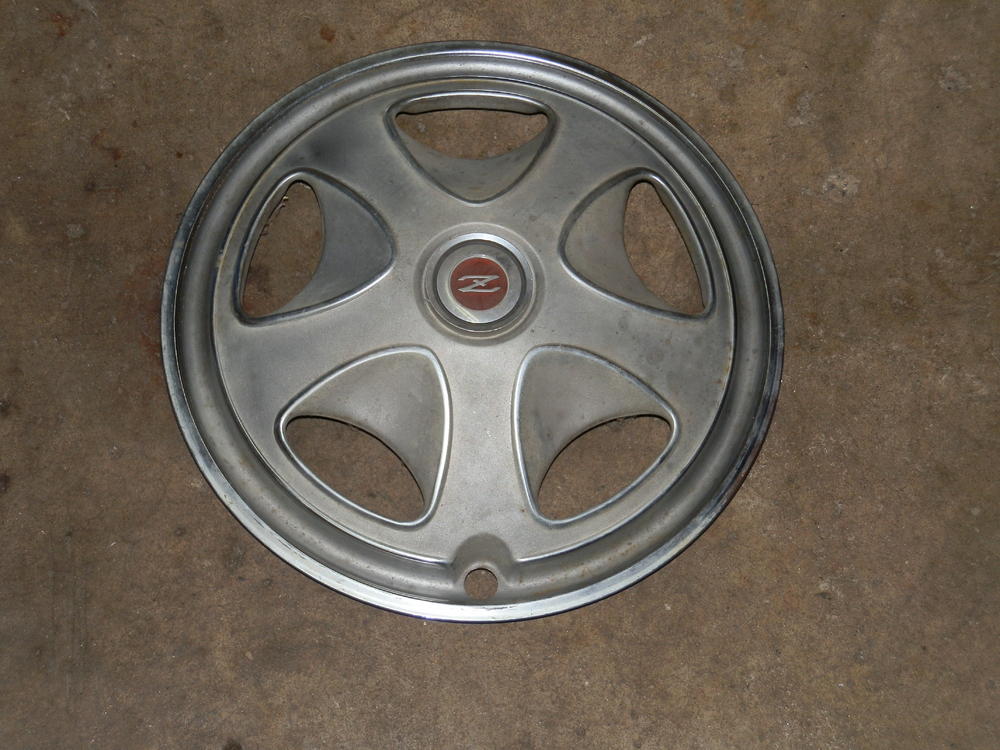
I have two "Z" hubcaps - see photo. I would be interested in buying two more to complete the set, thus maintaining the originality of my car. If I am unable to find a pair to buy, I would then offer these two for sale and join the mag-wheel masses. Any interest, either way?
-
Thank you Chuck. Appreciate the information. Wanna buy (or sell) some?
-
Great work - on the car and the presentation. Thank you!
-
I am nearing the too-many-years completion of my bare bones 240Z restoration. There have been two donor cars involved, so I have quite a mash-up of parts, including two 14-inch hubcaps. A photo is attached. Can anyone tell me what series these are from? Also, would anyone have two more that they might be prepared to sell? Or alternatively, would anyone be prepared to offer me copious amounts of cash for these two? Many thanks,

-
Good looking car(s) Uli. Enjoy the ride!
-
Latest news about precision weatherstrip door seals
Richard McDonel replied to zKars's topic in Body & Paint
Thanks for the replies folks. Guess I'm off to the Kia dealer tomorrow. I also have a brand new, still in the original packaging, set of MSA /Precision door weatherstrips. Good price too!