cafebaltimore
Free Member
-
Joined
-
Last visited
-
It is all about the angle with which you raise the tank. I raised it slightly filler-tube first. Then I twisted so the filler neck rotated back and forth inside the rubber filler neck. I do not have access to pics at the moment. If one single person is able to look at their gas tank and see the rubber filler neck butted against tank body, then my mystery is solved. Anybody?
-
Hi, I have searched and been unable to find a definitive answer to an issue I am having with my fuel tank. The gas tank fill port does not seem to go all the way into the rubber filler tube. It looks like it can go another 1/2 inch before it reaches the base of the port. I am fairly certain that it should go on further, but I wanted to see if anyone knew exactly how this is supposed to go on. Others have left it with a 1/2 inch gap and reported no problems, but it seems to me that the top of the gas tank will fit better against the underside of the body (specifically the curved bracket that is covered in rubber and welded to the underside of the body with the intent of cupping the front top leading edge of the gas tank. Plus the vent tube port seems like it would have more clearance next to that rubber coated bracket. Thanks, Jeff
-
In the link below BMW has published a torque spec chart by bolt size and grade. For an M8x1.00 grade 10.9, they recommend a torque of 34 Newton Meters (25 pound feet). I believe the Nissan factory service manual was incorrect, and the aftermarket manuals repeated the error. http://www.scribd.com/doc/7691662/BMW-Torque-Specifications
-
I got my plating back a few weeks ago. March 5th: Bolt left Baltimore MD USPS March 14th (8 business days later, 10 total days): Package arrived in Surrey BC. May 15th: Package registered with Postal Service. May 27th: (10 business days later, 13 total days) So it was about 2.66 months total, including a month of transit. I did not have a lot of luck getting a hold of him during the 2 months, but I was not aggressively trying. I just failed to obtain a lead time, and was trying to get that for planning purposes. There were a few minor issues but I was happy. I send all bolts for underside of car (everything below unibody) which was a significant amount. I also send all hardware for 2 seats. It was about 80 pounds total (including heavy rear hubs). So that is a a lot of work. Remember most people who provide trick parts and services for these cars are really just working out of their homes (with maybe a good connection from their working lives).
-
The reason: These door panels are not approved for the US market and that is why the US dealers are not allowed to sell them. They are only approved for Canadian 240z cars. It may be a safety issue (maybe the US version had to have a cutout for a lamp and maybe Nissan decided later to cover over the hole and let dealers punch the vinyl when the lamp went in during panel installation, NHTSA might have balked) or it could be something related to a part number (meaning they are the same, but some clerical error got caught up in bureaucracy once upon a time). For whatever reason, our government is the reason we cannot get these. Or maybe those door panel lamps were required by the US government and the early 240z cars were rigged up with door lamps to get past regulators with the intention of being removed from the production line after regulators went away. I bet a cantankerous old engineer thought they were stupid. In the 70s, folks would track down Canadian cylinder heads for racing because they had higher compression than the US versions.
-
I am pretty sure the founder got out 2 years ago. http://liquitec.gsdesign.com/auctions/crane-cams-inc/category.php
-
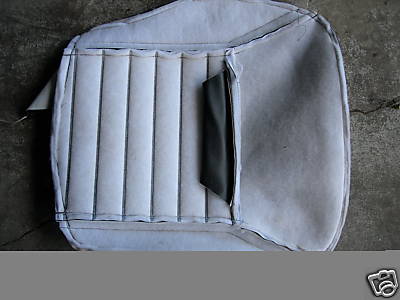
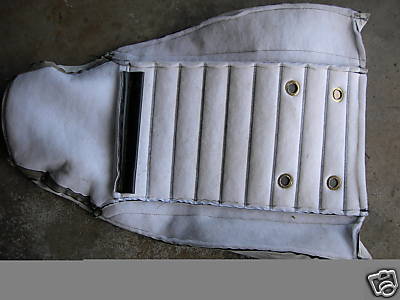
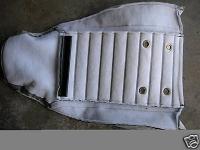
On the Datsun 240z seat, there is a hem/loop sewn into the seat cover between where your butt crack and knees go. A metal rod goes through the hem/loop, and that metal rod has loops on each end that stick out from the hem/loop. When the seat cover is installed, the hooks on the end of the rod are pulled downwards and tied to the bottom seats straps or spring in the case of the 1973 240z giving the seat a proper contour. (there is one for the head rest also). Does anyone know the original material for the hem/loom? When I removed a previous recover (with plush fabric center/vinyl outside), I noted that the material used for the hem/loom was regular fabric that had ripped. I have a recover kit that I recently purchased (not from MSA) that also has a thin fabric hem/loop. So thin that they seem pointless to use. There is a set on eBay right now that appears to use vinyl as the material for the hem/loop. The one on eBay with the vinyl hem/loop is sold by ninfiniti.com and pics are posted below. What else have you guys seen (if you remember)? I could sew in a hem/loop with vinyl (or possibly a stronger material for the purpose).

-
Hey Garagegoon, You don't have to take one of yours apart. I asked my boss and we ended up taking mine apart. It comes apart very easily, and looks like it will go back together just as easily. Thanks,
-
That would be awesome. Thanks so much. Please be very careful. Jeff
-
I was curious if anyone has ever taken apart (or heard of someone taking apart) the hinge mechanism (reclining style) on the inside? There exists a large spring inside that mechanism that serves to pop the seat forward when pull the side lever. It is a very strong spring wound into a coil. When the center pivot pin is removed the diameter of that spring is increase. But I have no idea by how much. I plan to use a wide hose clamp (and a blast shield) around the hinge body and the spring when I remove the pivot pin. Then I will slowly open the wide hose clamp. Assembly should be the reverse of disassembly, but if the unladen spring diameter is too large I can foresee difficulties. I was hoping someone had disassembled one of these springs and might share insight. My reason is to be able to powder coat the spring housing completely, and I am fully aware that I am being really anal. I did decide against removing the seat frame (under butt) springs for lack of desire to find or make a crimping too to cleanly crimp them back on. Thanks, Jeff
-
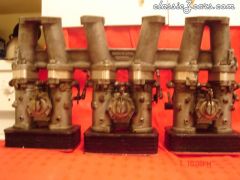
Does anyone know the manufacturer of this triple Mikuni manifold? It has "Datsun 240z" cast into top. Thanks, <img src="http://www.classiczcars.com/photopost/data/501/medium/DSC01498.jpg" />
-
 pulled from hybridZ classified ad
 -
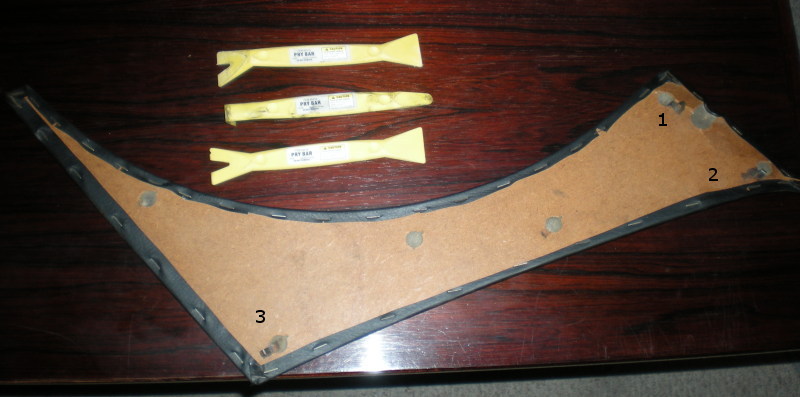
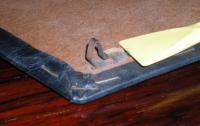
It seems to me that there is optimal order to remove the clips. I looked at one of the dog leg pieces and noticed something about the direction of the clips. It has a keyway that is punched out of the hard board. The keyway seems to indicate which direction to put the clip prior to manufacturing/installation, but this also shows which way you have to apply pressure with your tool. If you look at the second picture, you can see the little tab (tool is facing the direction you would push on the clip). You have to push on that tab and gently pull the clip out of the hole. Use extreme caution because it is very easy to pull too hard on the panel, while the metal tab hasn't been released, and this can cause the hard/cardboard to break. Just remember, if you relieve pressure on the clip, the clip will pull out very easily. If it does not pull out easily, you are putting pressure on the hole in the cardboard. If you look at the clip labeled #3, in picture 1, it seems like that clip would be much easier to access in clip #1 and clip #2 were removed first. The tools shown in picture 1 are from Harbor Freight. It cost $5 for the set. I have not used the set to remove Datsun panels, but they are very cheap so you could sand them down with a belt sander to customize. The plastic is very strong, and I have used these for tons of random tasks. http://www.harborfreight.com/cpi/ctaf/displayitem.taf?Itemnumber=95214 Maybe if someone has a door panel, they could post a picture of that one in this thread.

-
Gav240z, you said Mikuni was stamped into the manifold. Did you mean it was part of the casting?
-
Has anyone ever mounted the long runner Mikuni Manifold in their car? Do you have any pictures. As best as I could tell, there were only two people in the thread who have even seen one of these manifolds in person (Ron Carter; though I think I may have misread, and Gav240z, who found one on eBay). I have seen hundreds of Cannon long runner manifolds, and a few other brands as well, but I have never seen another Mikuni stamped long runner intake manifold. I have always understood that the short runner Mikuni manifold was only intended to allow clearance between the carbs and the brake master cylinder (when used with brake master vac).