Mikes Z car
Community Member
-
Joined
-
Last visited
Everything posted by Mikes Z car
-
Generally output stages that aren't transformer isolated use an electrolytic capacitor to do the isolation. I have never seen a car radio that used a transformer, all I have seen use an electrolytic capacitor. Is the impedance of the power amplifier on the connection that would go to the radio very low, like below 8 ohms? KM-1520 Car Radio Hitachi Ltd.; Tokyo, build 1973, 4 picture
-
What is wrong with the radio?
-
I love Dave's headlight harness that I put on my car.
-
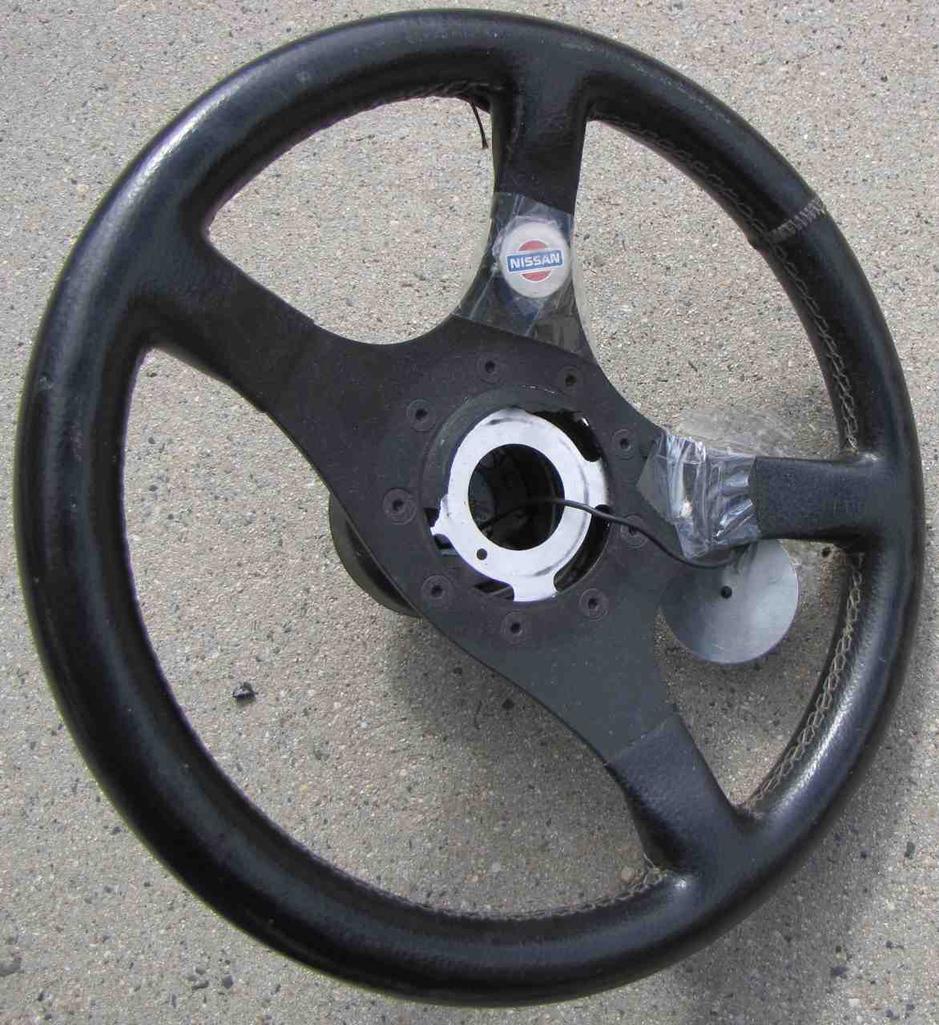
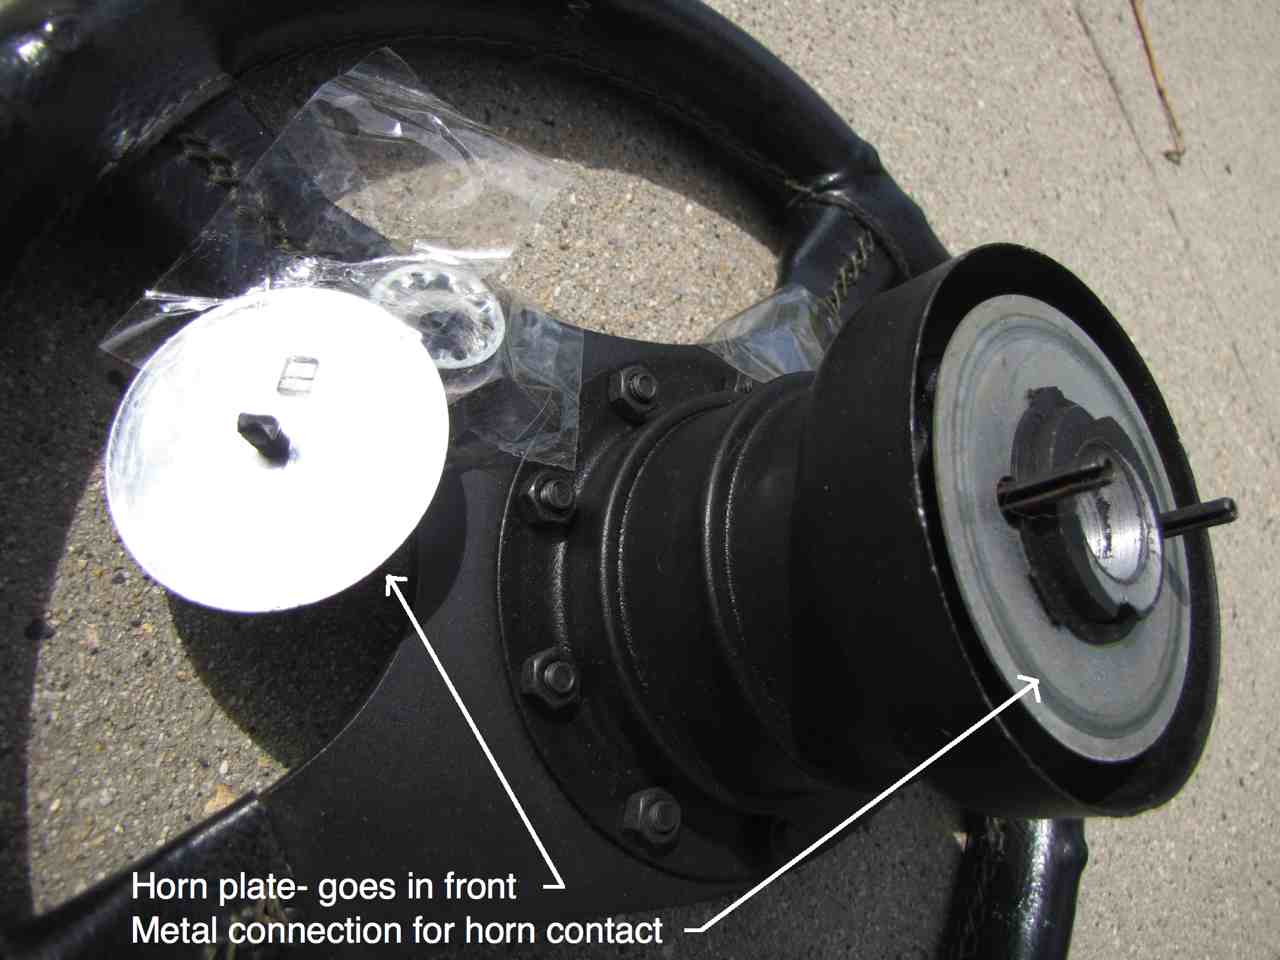
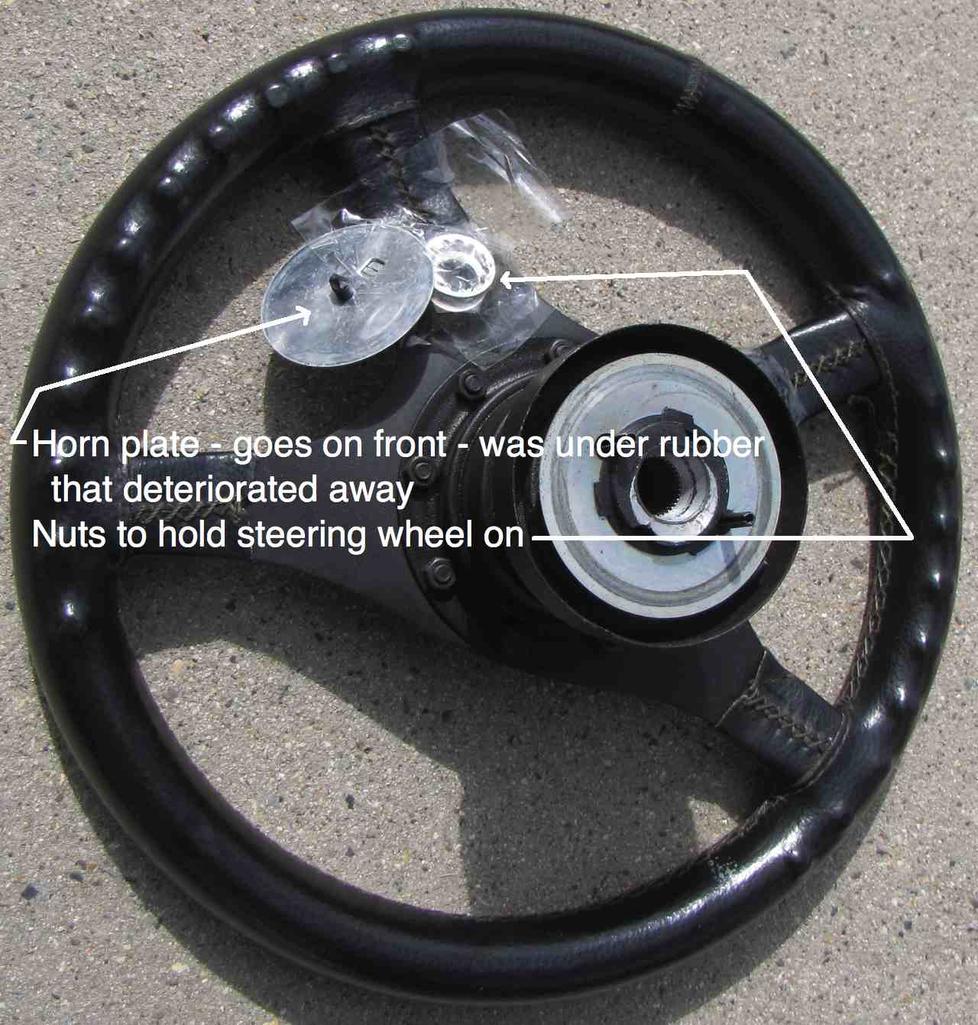
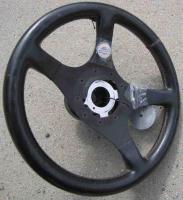
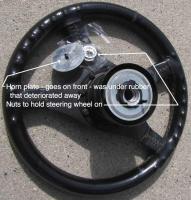
This steering wheel is available for shipping costs. The weight for shipping will be 39 lbs plus at least 5 lbs for the box, figure a total of 45 lbs to be on the safe side. It was on my car when I bought it and did work until the horn button rubber deteriorated. I put an original steering wheel on the car. The Nissan emblem was in the middle of the rubber that deteriorated. Front View:_____________________Back View closeup: Back View:______________________Nissan Ornament:

-
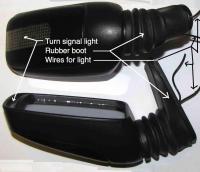
I have a pair of after market plastic door mirrors that came with my Z that the previous owner had installed. They are the ones on my car in the avatar picture. They are available for shipping costs and include the four phillips screws (two for each mirror) that mounted them to the car. They have turn signal lights forward and rear facing which the original mirror did not have. These mirrors have two flaws. 1. The mirrors flop around and tightening the adjustment screw to make the mirror secure is only a temporary fix. A drastic, but possible solution might be to make sure they are pointed the way you like and then glue the hidden ball and socket mechanism in that position. Gluing in only one spot might make them re-doable if the glue could be cut off and re-done. This glued joint would not be visible with the mirrors on the car. 2. The rubber boot keeps popping off the mount on the car of where it is supposed to stay. It does stay on the mirror okay. There is a lip on the rubber boot that is supposed to keep it in position but it keeps coming off. A possible, fairly drastic solution would be to glue them on to the mounting base and then poke tiny slits right where the two screws are to allow removal with a phillips screwdriver.
-
No problemo Captain. I didn't want to leave this thread making it look like I might be besmirching the fine name of Lincoln Welders so I tried the same welding again after testing on a scrap piece of sheet metal. This time I had the current at maximum, the metal wire wheeled to clean it and more light on the subject. I sped up the wire feed rate a bit too. The arc sustained much better and there was no problem with blowing holes in the metal. The picture below was taken after I partially ground off some of the welds. I left a couple of the holes I didn't fill for drainage since the sheet metal here is at the bottom of the car. The holes were hard to fill due to the awkward welding position on the bottom of the car plus I was having trouble seeing even in the daylight with a work light.
-
I love those short circuit finder type of things, I was hoping someone would chime in with an explanation for how it works. I guess it looks for minimum signal as that is where the short is? I have the other kind of device that traces wire, I don't know if it would be any good at finding a short but it is good at finding the other end of a wire.
-
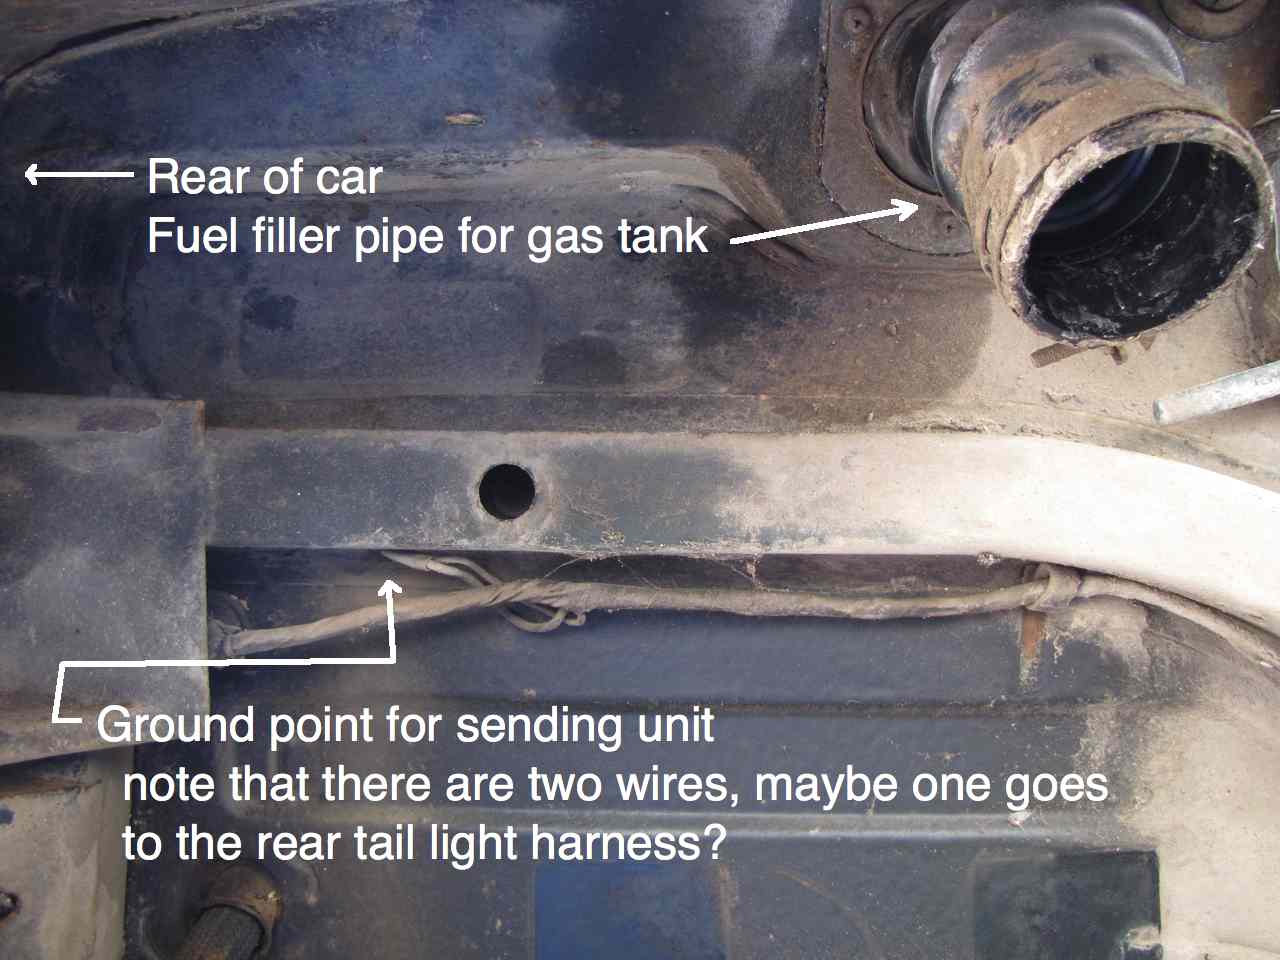
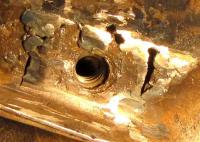
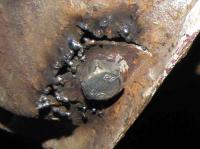
Dan, The picture below I believe is a side view of the ground point. I took pictures of everything when I had the tank out. Mike This should be the ground point the tank usually hides.

-
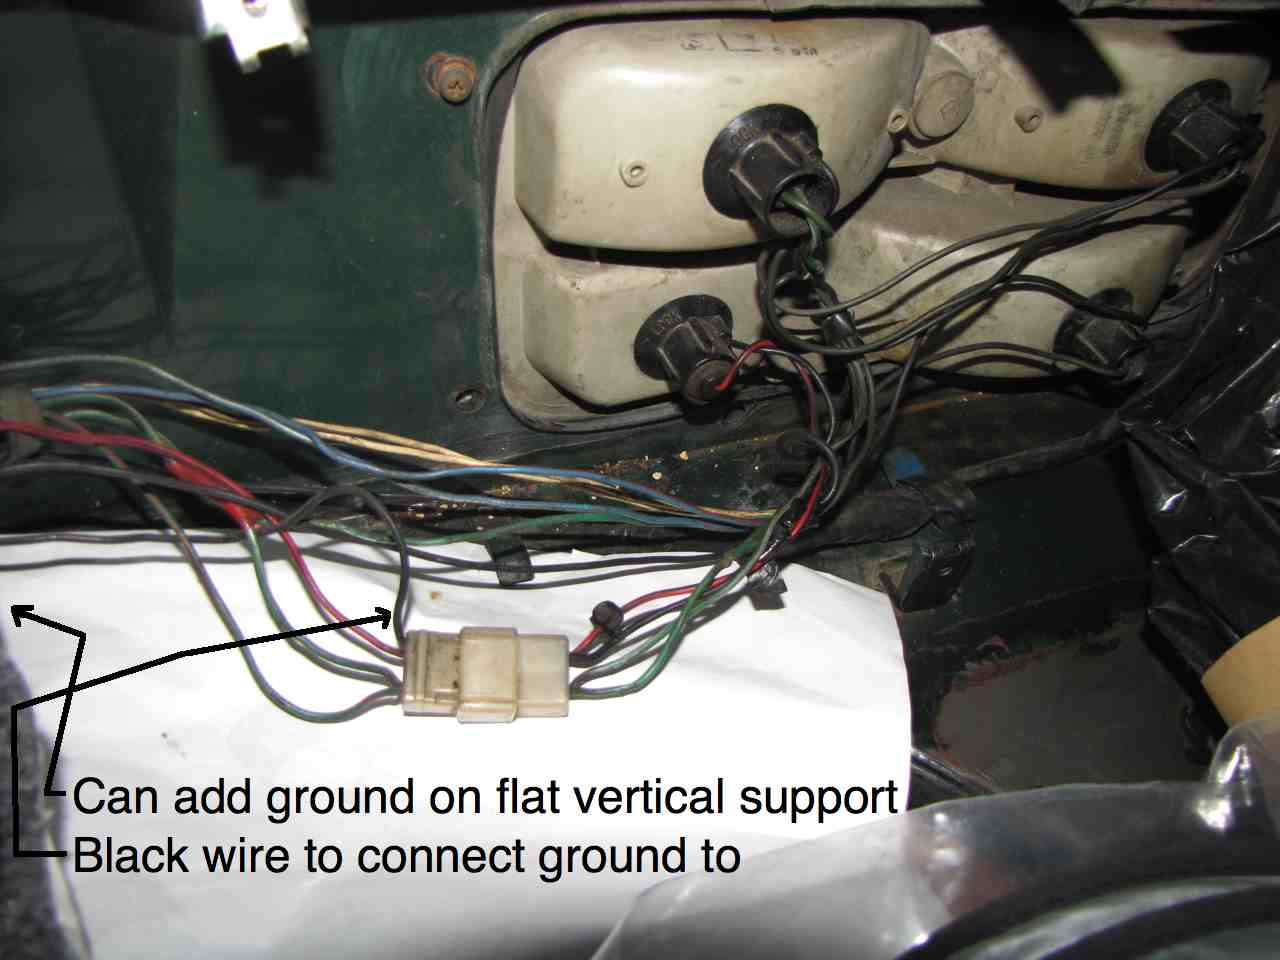
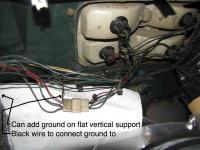
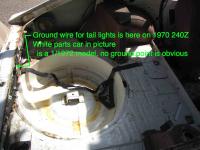
dpascual1986, Sorry, I realized after that post that I didn't describe where that ground wire is. Are both left and right tail lights doing exactly the same thing? On my '70 model the ground for the tail lights appears to be where the green arrow points on the attached picture on the floor on a piece of metal that sticks up about an inch. On my 72 parts car all of the wiring, nuts and bolts have been stripped, I can't see an obvious separate place for the ground as on my '70 model. I notice on the '73 FSM electrical schematic the ground for the tail lights is shown near the fuel sending unit. I know there is no guarantee that that means the ground is near the tank sending unit but it might be a hint. The ground might be underneath the car on the sending unit. If you can't find a ground you could add one by connecting one end of a wire to the black wire on either tail light connector on the car harness side of that connector, see picture. The other end of the new ground wire would connect to the metal car body perhaps where the vertical support is in the middle (after hole is drilled and paint scraped off) with maybe a bolt, nut and lock washer to make it very secure. The wire would go to a "ring connector" or whatever they call those which would fit under the bolt. Or you could temporarily make this connection to verify it solves the problem. If only one tail light is behaving that way the connector for that tail light assembly might be cleaned, especially the two halves of the connector for the black wire. Anyone else see troubleshooting alternatives or solutions? Mike Ground location on my '70 model (hopefully this wasn't added by a PO) New tail light ground connection:
-
jmortensen, What is the air compressor you used rated for in terms of SCFM? I am asking because a coworker bought a harbor freight HVLP gun (as did I but he actually has used his) and he claimed it needed as much air SCFM as a standard spray gun. From what I read HVLP guns aren't supposed to require as much air flow as a standard gun. That finish on your car looks great!
-
In my experience when one circuit affects another like that it is because of a poor ground that the two circuits share. I don't know for sure about the '73 model but my '70 model has a ground wire hidden behind the tail light finisher inside the car. There is a wire that comes from the tail light assemblies that goes to a screw near the middle of the car. Scraping the connection clean on the wire connector, the screw and the body of the car with a wire wheel or knife should help.
-
Patcon, Thanks for typing those tips in, I watched some videos on welding but they didn't mention techniques that you did. I don't know if a better welder is an option for me (for one, don't have a ready access to 230V) but for the work I need to do a crappy one might be okay especially if I can improve technique. I'll clean the rust off of the metal next time. I mostly get popping, not sizzling so I know the arc isn't sustaining well. Captain Obvious, I will get a bottle of the CO2/argon mix, thanks for pointing out the effect of the gas. Just when I thought I didn't know anything about welding it turns out I was right.
-
Is it like the railroad locomotives in the old days, you have to have a guy in the back shoveling coal?
-
Patcon, It is a Lincoln "handy mig" with two switches which give four amperages. The box says it is good for between 35 and 88 amps. I have a pure argon tank I use for the shielding gas and I can hear the gas coming out of the end of the "wand" when I pull the trigger to weld. The wire is set to a slow speed, about a "2" on the speed dial that goes up to "10". I use the next to the highest amp setting, I have never used the maximum amperage setting as I have been afraid of blowing holes in the sheet metal. I may be being overly cautious. Didn't want to put a hole in the z car.
-
bartsscooterservice, Nice idea to keep the original size thread. Grinding off the bolt would have worked for me on the driver's side bolt (didn't know about the grinding off idea). The passenger side bolt was shrouded by the fender and the fender didn't want to pull a few inches out of the way over the sticking out broken off bolt for some reason. EuroDat, I am also glad the repair is not structural! I know where I can get a proper welding job. I won't mind putting up with any comments about my welding, maybe they will look at it as a compliment on how they weld. That is a great idea on shortening the helicoil to the size of the nut. I had already put the helicoil in on the passenger side (welding worked on the driver's side) before I read your post. I put a couple of practice helcoils part way in to make sure they would go in okay before I put the loctite on and the tag broke off more easily than I would have thought just by turning. Both practice helicoils got stuck and didn't want to unscrew, maybe because the coil pushes out on the threads when unscrewing and/or because I didn't shorten the helicoil to the size of the nut. Both of their tags broke off, had to pull them out with pliers. Maybe some tags are easier to break off than others. The tap turned freely in the new threads before putting the practice helicoils in. Next I get to break the tag and put the bolt in. ajmcforester, Great idea on warming up to a welding task VIA a scrap of metal. I will put a piece of scrap metal with the welder and do that next time I weld. I guess this is related, I was just told that for exhaust bolts an acetylene torch can be used on the bolt because the bolt will flow out of the hole leaving the threads intact in the block metal.
-
hmmm I jumped a forum somehow. ah I see, tried to reply to a page 1 post.
-
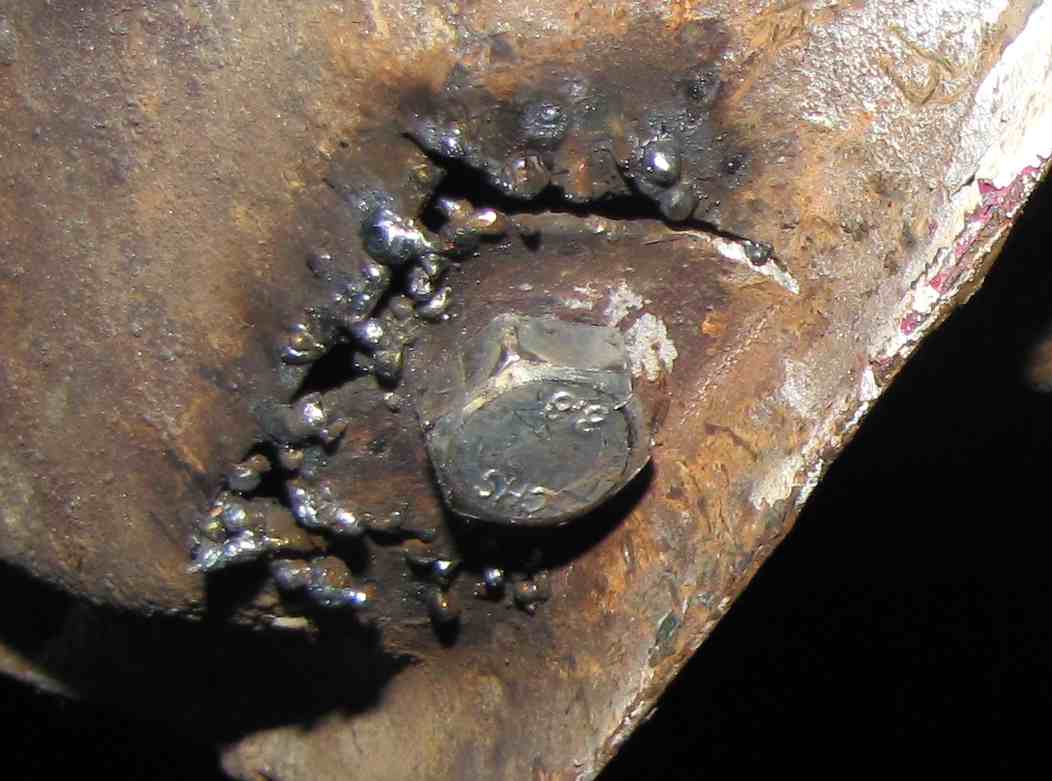
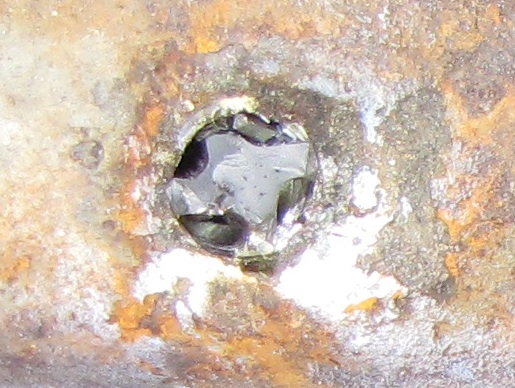
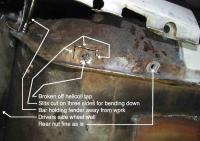
EuroDat and Grannyknot, Thanks! I will print what you two said about going extremely slow with the tap and tape it to the tap kit I have. You two probably saved me from breaking another tap. I wondered if the coil might turn itself out with the bolt, I will be using locktite on it. Great idea. Here is a picture of the weld on the sheet metal after the nut was welded on. I may redo what is visible here though I think the nut got welded on better since the bolt tightened down fine. I was laying on the sidewalk holding a flashlight to do this last part on the sheet metal. Mr. Lincoln Welder is probably turning over in his grave. (File name should read after welding drivers side nut)
-
Someone should write a book on various repair techniques. I don't think I have seen a book like that anywhere. I probably should have tried the propane heat on the passenger side bolt. Anyway I wound up drilling that bolt out like I did the driver's side bolt. I hope this weekend to carefully tap that passenger side hole to avoid breaking the tap by backing it out frequently. I have the helicoil for an 8MM bolt ready to put in the hole. I am a lousy welder but on the driver's side it seems I got the nut welded on to the sheet metal and the sheet metal pushed back into position and welded back flat with surrounding metal . That was fun! Doesn't take much to give me a feeling of accomplishment.
-
AZ-240z, I really appreciate your posting your fix action for the backboard cracing. Would like to fix mine so they never break again.
-
Thanks Patcon, Thanks for the info. Didn't know the nuts can break loose! What have you seen done to fix hidden nuts that break loose? The anti seize is a good idea. I might spray some anti corrosion on the inside sheet metal too though I don't want it too close to the work if I have to weld it. Mike
-
I hadn't thought of modifying a screwdriver either. Well I get another chance on the passenger side, I got a new tap in the mail yesterday to do that side with.
-
siteunseen, I hadn't thought of welding a nut onto the extractor, thanks for the idea. I wound up cutting open the body and cutting off the nut from the back. The angle grinder cut off wheel went through the hardened extractor metal it just took a little while. After that to get off what was left of the nut I used the angle grinder with a grinding wheel on it. It made lots of neat sparks. Some of them got on me. ajmcforester, I only thought of the self tapping screw as a cheap easy solution but didn't like the trend away from originality so went with welding a new nut on. When I am done it will look original except for the zinc colored bolt.
-
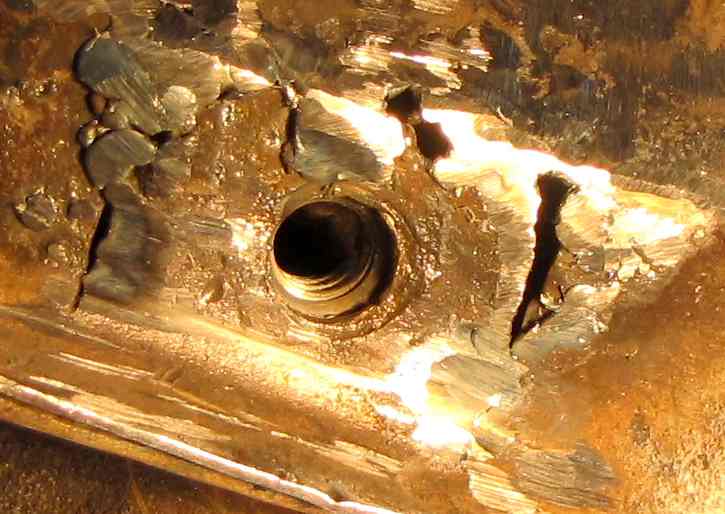
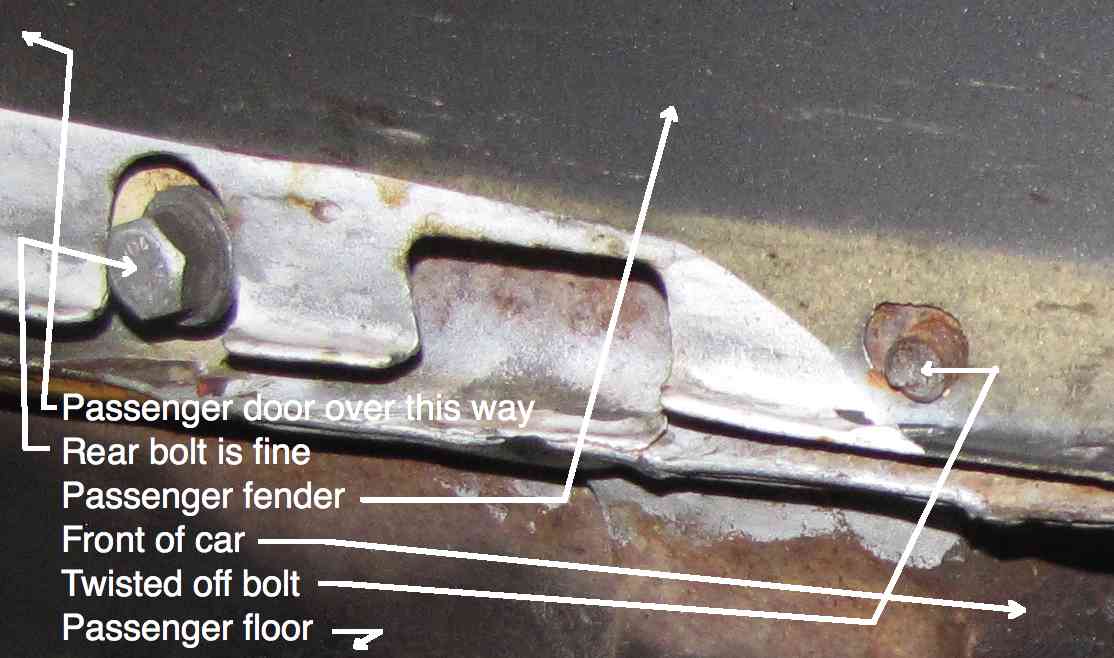
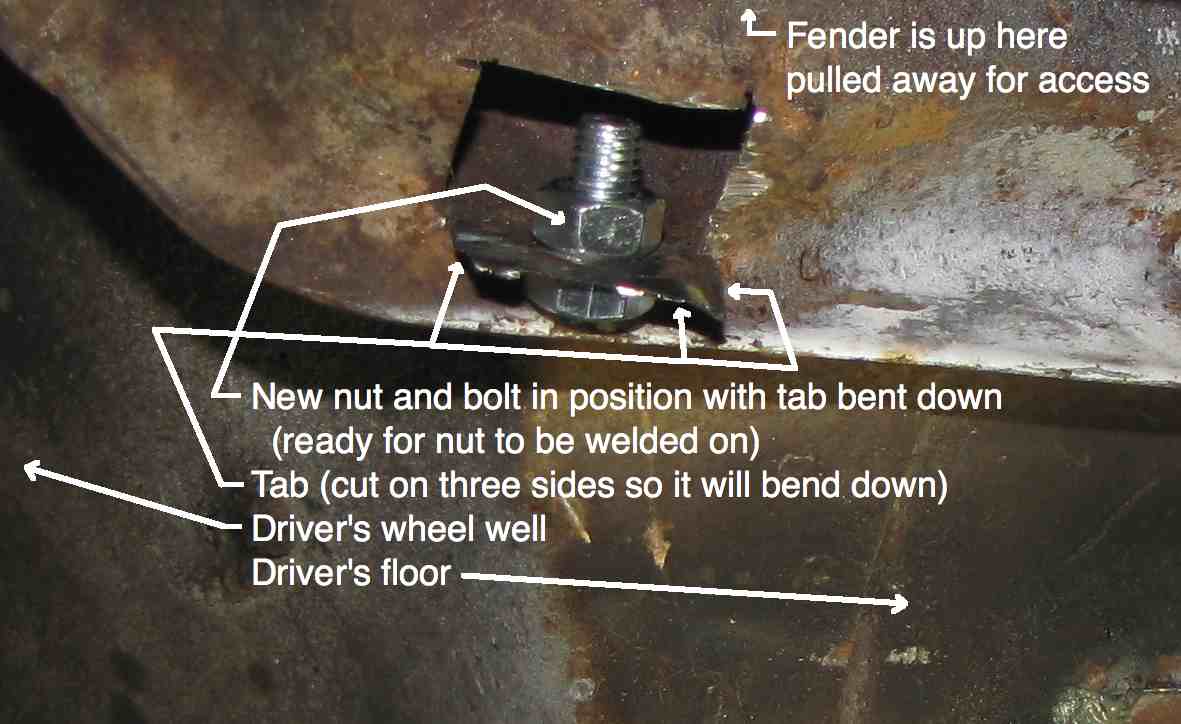
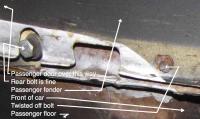
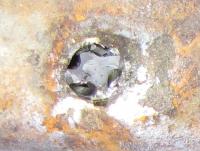
Hi all, What have any of you done to repair rusty bolts that twist off? My twisted off fender bolt (passenger side): I had a lower fender bolt twist off on both sides of the car, the front bolt on both sides. Each side has two bolts at the bottom. After drilling out the old 8MM bolt on the driver's side I bought a helicoil but the tap that came with it broke off when tapping the new threads probably because I didn't know to back it out frequently to clear the shavings. Broken off helicoil tap:_________Close up view: The easiest way to fix this I guess would be to ignore the twisted off bolt and put in a large #12 self drilling screw (AKA tech screw) with a washer right next to the twisted off bolt to hold the fender on if the sheet metal is solid. Or use (shudder) a moly bolt if the sheet metal isn't that strong. Has anyone else had to fix a twisted off bolt in an inaccessible area? How did you fix it? This is how I am fixing my twisted off bolt: After the nut is welded on the bolt will be removed and the tab bent back up flat with the body of the car where it was in the first place.

-
SteveJ, If I can ask, to test the ammeter do you have to take it apart? I have one to test but don't know how to put 45 amps through it to test. Mike
-
There are a few Zs on the local craigslist for sale now. Someone posted that google can help find things on classiczcars.com. To find the I spy a Z thread type into google: I spy a z site:classiczcars.com I just tried that and it worked for me. I also save threads to the hard drive and I notice from experimenting from your question that if a thread is multipage like I spy a Z I can open the saved web page and when I click on a different page it is correctly loaded from classiczcars.com. I guess bookmarks could help but I have so many I can't find anything with them.