Mikes Z car
Free Member
-
Joined
-
Last visited
Everything posted by Mikes Z car
-
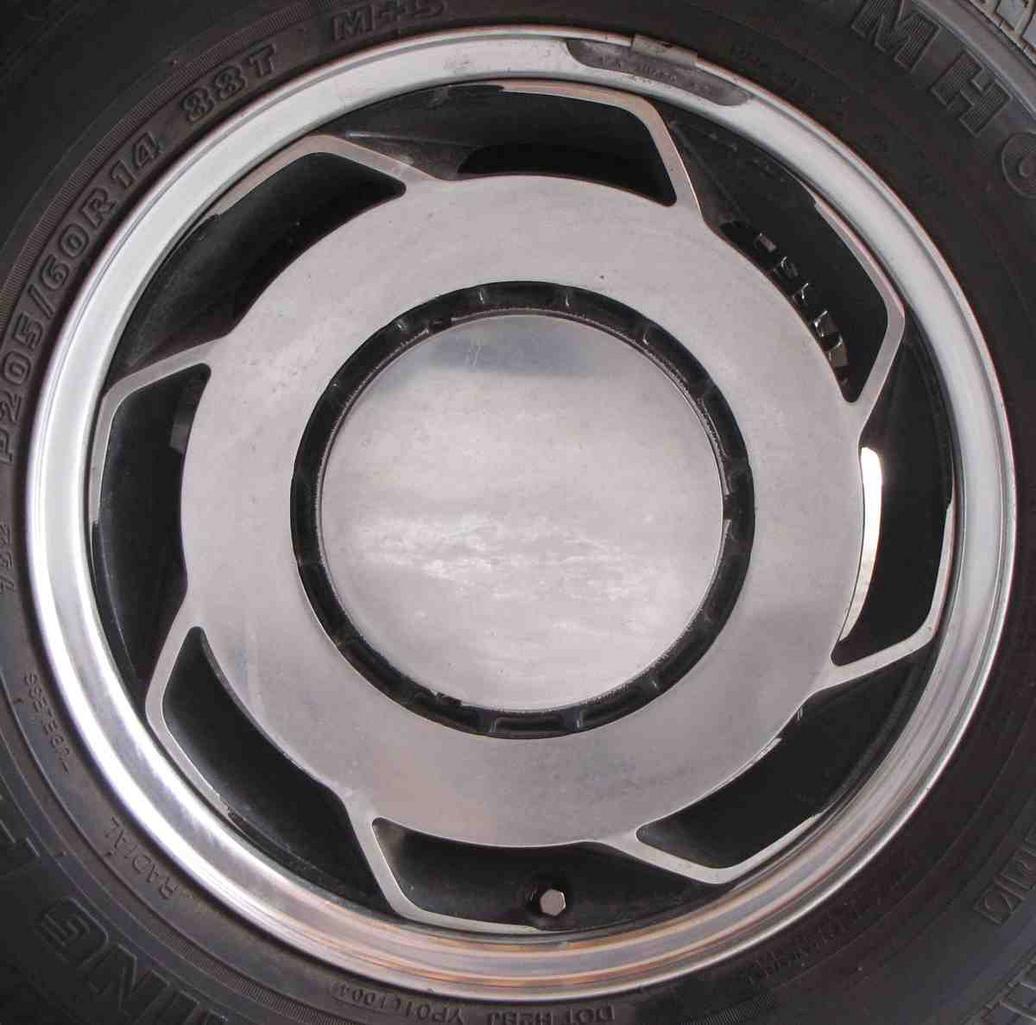
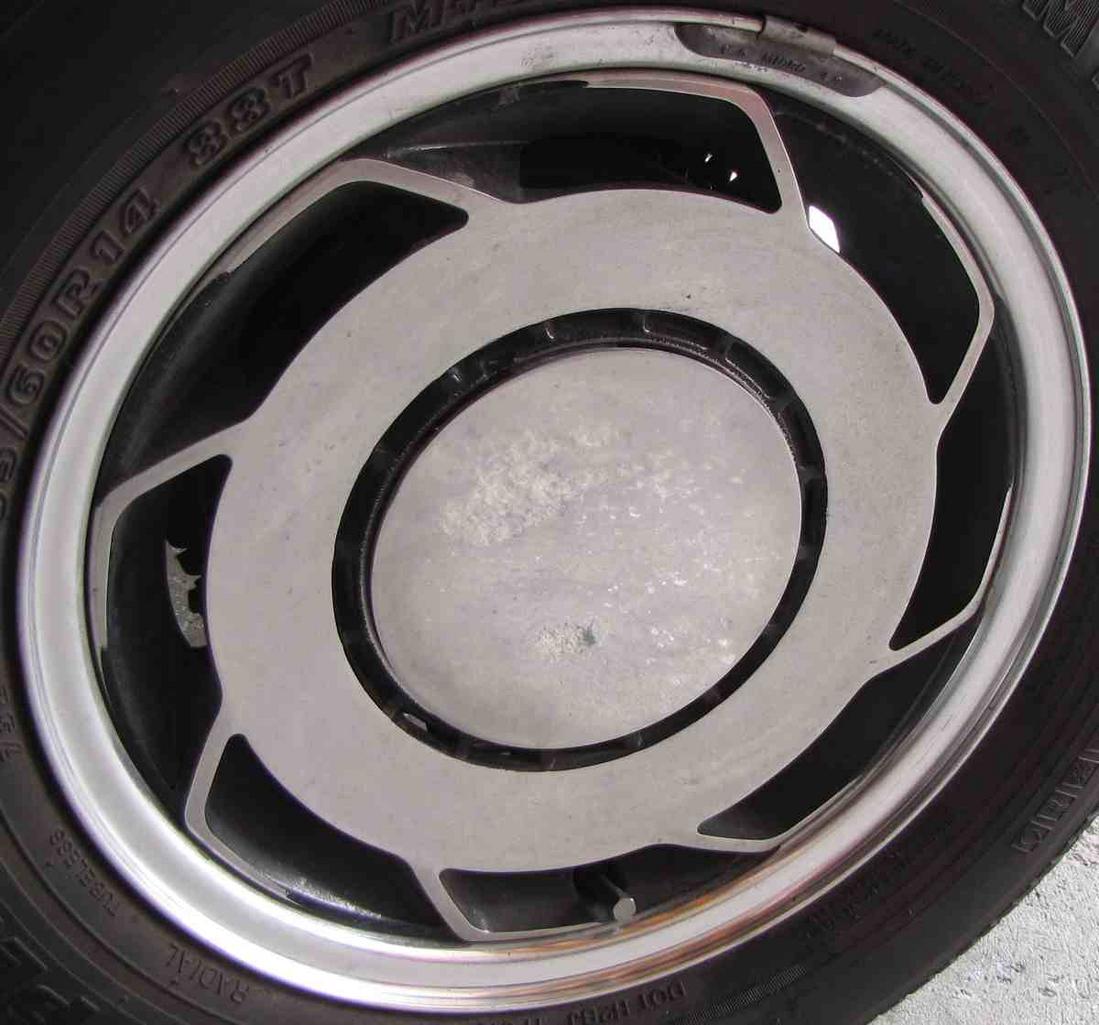
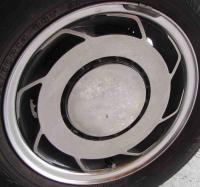
 Can anyone identify these 14" wheels? They came with my car.
-
Wow! That is neat as heck! Thanks for taking the time to post how you made the lens.
-
My other 240Z 30 years ago blew black smoke for a while and got lousy mileage. It wouldn't pass smog because it was running way to rich because the choke pistons had gotten stuck in the down position (choke always on).
-
What a collection, and donation based too.
-
Hopefully free beer and pizza. Usually I leave ads on unless there is so much distracting movement (like a movie ad with lots of action) that it makes it hard to read what I want to read. Sometimes I shove the browser window partly off screen if it gets bad enough.
-
240Z's are fairly rare around where I live. Yesterday I saw the remains of some 240Zs that had been cut up for further parting out. Today I saw a light green 240Z with faded paint going the other way down the road. The window in my DD has to be encouraged to go down through the use of a hand so I couldn't get the window down fast enough to give the car a thumbs up. I just stuck my hand out the window and wiggled the fingers. Heh heh.
-
Hi all, This has been done before by others, the following is my experience. I added a second hood release cable so now I have two of them in case the original cable breaks. Getting the hood open after the cable breaks is not particularly easy in my view of how others have done this. The easiest way to do this IMO is to do what someone else did, loop a steel wire through where the original hood release cable attaches to the latch under the hood, run it through the firewall grommet for the speedo and make a loop in the end inside the car. I didn't do it that way as I wanted to use a spring sheath pull cable like the original with a knob on the end hidden above the existing hood release handle. Materials needed: A. 5 foot long pull cable from auto parts store, eBay etc B. Wire cutters if desired, to shorten "spring like" sheath and center steel wire. C. Needle nose pliers for wrapping steel center wire around hood pull point D. Clear packing tape used to slide new cable through hood release firewall grommet using existing cable as a pull tape. The new cable was pulled through the same firewall grommet the original hood release uses to make it look like it belongs there, painting it black would also help. An easy way to pull the new cable through the grommet is to use slippery clear packing tape to tape the new cable to the old one and then use the old one to pull the new one through the grommet. This has to be after the old one is unfastened from the hood latch connect point so it can be partially pulled back inside the car. Don't use duct tape! That stuff will never go through the grommet unless there is a big hole in it. I shortened the spring like cable sheath to be the same length as the existing cable so it would lie next to it all the way to the latch assembly to hide it. An idea to shorten the sheath would be to pull on the knob to pull the solid center wire out of the way before cutting the spring like sheath (NOW I think of it). I did this the hard way, I carefully used wire cutters while the center wire was still there. The easiest way is to skip this and let the extra cable loop in the engine compartment avoiding the carb linkage or anything else that moves. I clamped the new and old cables together 10" from the hood latch though it wasn't clear to me that a clamp was needed. I tried clamping them together at the hood latch and that didn't work; too much friction for the return spring. I made a clamp out of a small piece of sheet metal about 2"X1" that I clamped around the cable pulls with vice grips. Another idea might be to use a very small hose clamp with a rectangular piece of solid metal held between the two cables, otherwise the cables are too small for most hose clamps. The pull knob for the new cable is right above the handle for the original to keep it invisible until it might be needed. It has a spring holding it up out of sight and is zip tied to the original cable closer to the firewall to keep it from flopping around. I was driving with the hood ajar before adding a backup hood release but the new cable works great and I now get to drive with the hood closed. Inside car:________________________Spring to hold new knob up out of sight: Hood latch: ***** Fixing stripped threads on handle mount***** I may be the only one who has had this problem but, the threads the chrome colored nut under the pull handle screws onto on my car were stripped when I bought the car. This nut secures the handle pull to the frame of the car. The loose nut allowed the handle to flop around which I didn't like. The threads (10MM, pitch=1) were too far gone to be fixed by chasing them with a die. A new cable was going for $75 so to fix the loose handle I used two washers about 1 inch in diameter, one chrome and one ordinary steel both with large center holes in them. The chrome washer was used under the pull handle to improve appearance and is slightly larger than the steel washer, all hardware came from Thrifty (Ace) hardware. Two tiny pilot holes were drilled in the chrome washer in line with where two holes were going to be drilled in the steel washer with 3/4" self tapping screws. The steel washer was cut through on one side with a bench grinder (could use a hacksaw) to allow the washer to fit over the cable behind the handle mount. Further enlargement of this cut was done with an ordinary file. The drilled holes in the chrome washer were made a little larger than the self tapping screws I used to drill into the steel washer to allow alignment. Note that the screws have to clear the flange on the back of the cable mount; mine didn't entirely clear the flange so to fix this I used a file to grind off the side of the flange to get it out of the way. The steel washer was placed behind the handle mount, the chrome put in front and the self tapping screws securely hold the two together. Although this violates a prime directive of not drilling holes in the car they are only visible with the door open. Also, the drilled part can be easily replaced as it is attached to the car with two screws. The handle is very secure now. Front exploded view:_________________Side view showing stripped threads: Back view: Picture of install:
-
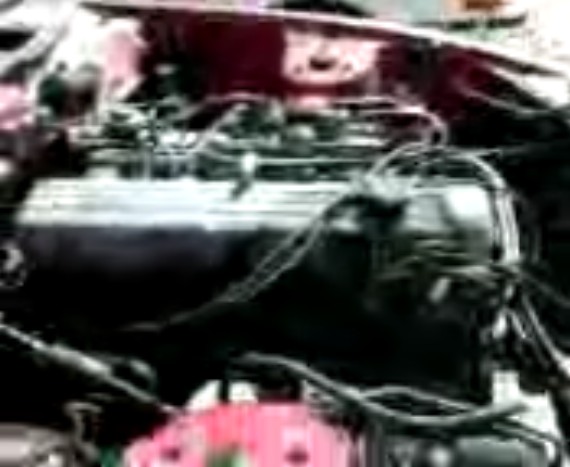
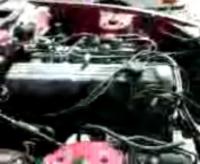
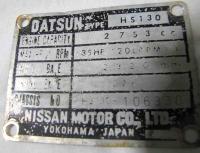
Saw a nice dark gray 240Z today. Also spotted a 79 280ZX in a JY here. Still has engine and transmission. Car used leaded fuel based on no restrictor under gas cap so must have softer bronze valve seats? Transmission seems to be a 4 speed at least when I shifted it I couldn't find a 5th gear. Reddish orange in color. Stripped instruments but Master Vac is still there removed but laying inside car for some reason. Casual inspection didn't reveal damage. Both side mirrors are still there. Missing driver's glass. No seats, no steering wheel or radio, no decals. Plastic tail light assemblies there but one has a small broken spot. Rear view mirror there but plastic holder has a broken corner, glass looked ok. Blurry cell phone picture of engine. RIP.
-
I hope to see these cars around a long time so if someone makes changes I don't like to see if it means keeping a Z on the road I might want to own later by all means I hope they make the change. I might want to reverse some of the changes. Just how I view it. The car I have now has changes I would never make but on the other hand it is rust free.
-
I tend to go easy until warmup so as to preserve the engine. I coast down hills in neutral if it is a long run (against the safety recommendation in that video). I actually got pulled over for going too slow once on the East Coast. I was driving a Triumph GT6 and it was overloaded and not handling too well so I was going slow and getting constantly passed on the multilane freeway. An odd thing further because I had just gotten pulled over ten minutes before that pullover but I never knew why for the fist one, I wasn't straying from the limit and had just pulled out of a parking lot where I had spent the night. Out of state sports car?
-
That looks good, and fun too. Would you consider posting the details of how you did that perhaps on your blog?
-
Nice pictures, great explanation, wish my camera worked that well.
-
If I understand, when you make retopology it allows you to push and pull on the model to adjust it?
-
I had to go look up that word retopology, which seems to mean the polygon count is reduced to make it ready for painting or animation?
-
Turns out the threads were stripped on the cable mount, not the chrome nut. The threads are 10 MM with a pitch of 1, bought a metric nut to test.
-
Hi all, A PO cross threaded the threads the chrome nut screws onto that secures the hood release cable to the bracket just under the dash on my 1970 car. What MM size is the chrome nut and its pitch? I want to chase the threads with a die to fix the threads. I measure the pitch as 1 and the diameter of the threads as 9.5 MM. I can't use the nut to figure this out because I damaged it before I figured out what the real problem was. I would think the 9.5 MM measurement means the nut is a 10 MM nut however the tap and dies set I have does not have a 10 MM nut with a pitch of 1, it only has a 10 MM with a pitch of 1.25. I probably am the only Z car owner in history who has a car with this problem. Mike
-
If you had purchased the car already with one of those colors which color would you not paint over?
-
For me it is just spare parts for the car I have. I want a coil, distributor, water pump etc.
-
I wonder if a magnet would help hold the seat mounting nuts on by putting a magnet on top of the bolt, if that area can be reached? Or maybe magnetize the nuts and washers by briefly dragging them across a magnet. I added a second hood release cable in case the original breaks. After I bought my car 4 years ago I read what others had gone through to get the hood to release after their cable broke so I have been driving with the hood ajar (until today).
-
I love electrical gremlins, fun to troubleshoot (laughs maniacally). I found the following test (a brief excerpt from the much longer article) by typing into a search engine "alternator light slightly glowing". It strikes me that the same test could be done for the ground connection by connecting the meter between the negative post of the battery and the frame of the alternator using extreme care to stay away from any rotating parts of the engine: charging_system_woes So what’s the deal when the light just glows dimly? The reason the light glows dimly is the there is only a slight difference in voltage potential. This occurs, when for instance, there are 12 volts at one side of the bulb and only 9 volts at the other side of the bulb. The 3-volt difference creates the low voltage glow. But where did that missing 3 volts go? It got lost in a bad connection somewhere in the electrical system. Somewhere is the operative word and where a great deal of time can be lost in repairing this problem. Fortunately you do not need a big fancy (See expensive) piece of diagnostic equipment to locate the problem. All you need is a $12 Digital Multi Meter (DMM) from Radio Shack and a spool of 16-gauge wire to extend the leads as necessary. To test the wiring from the alternator to the battery you would hook one meter test lead to the battery positive and one up to the alternator B+ connection. (This is a parallel voltage test) The electrons leaving the alternator that are being blocked at a bad connection (a burnt alternator to starter wire for instance) will see the voltmeter as a easier way to the battery and travel through the voltmeter. The reading at the voltmeter indicates how much extra resistance is in this electrical circuit. ************** my comment: Back in the old days I tested my alternator at a hobby shop with a waveform tester that showed bad diodes without taking the alternator apart. I don't know if that kind of tester is still available anywhere. Not everyone would be familiar with the operation of that kind of tester limiting its usefulness. Can't help wonder if an oscilloscope could be used.
-
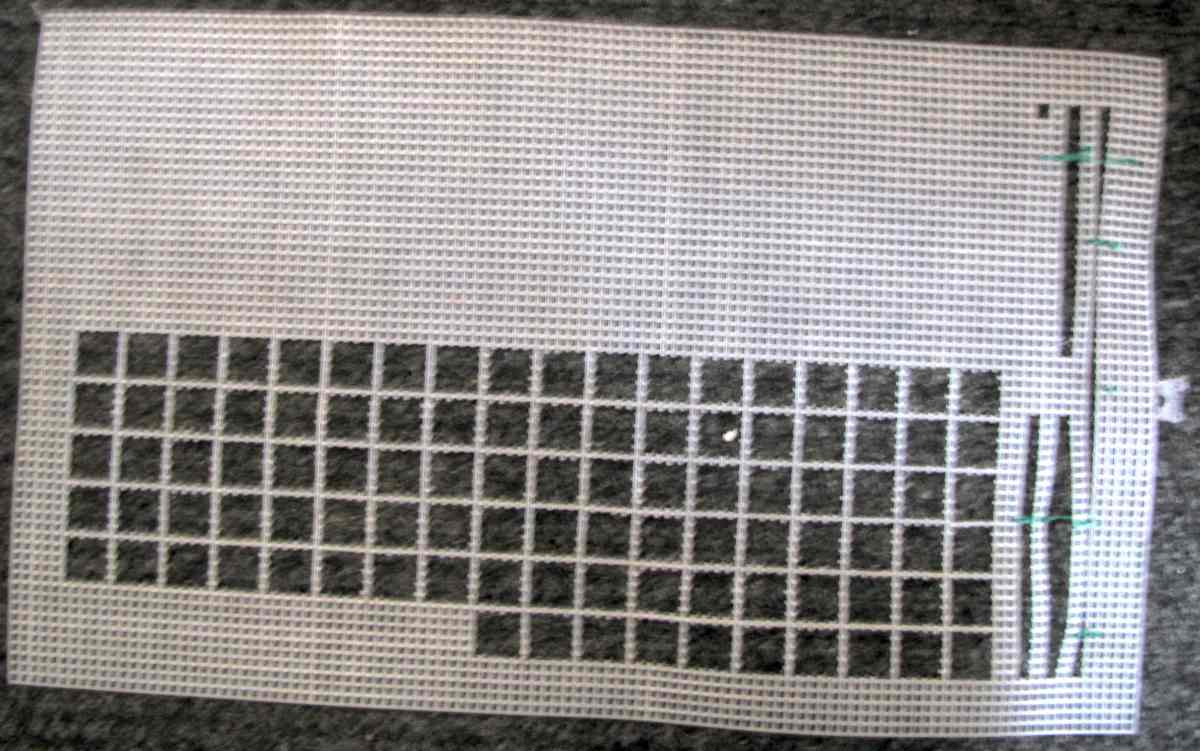
I am willing to make measurements for you on my #907 Vin car if it helps but you may still want to quit before going further. I don't know if this is worth mentioning but when I was making a drawing of the frame of my car I would sometimes take pictures with flash with a square pattern overlay to get accuracy with odd shapes. I used something called plastic canvas (see below) available here at a fabric store. It was tedious work breaking out the little squares but I could take a picture of an area of the car and then count the squares to a particular joint in the frame to get accuracy with the drawing. I imagine this could be used to verify placement of metal work in some situations:

-
A Z car owner was launched today into low earth orbit due to a wiring malfunction, news at 11. Only wire in my 1970 model in that location is the emergency brake switch for the red warning light in the speedometer.
-
I admire your work and am also amazed. I have been wondering about this for a long time, when you replace a portion of the frame that has bolt holes for mounting other parts such as the steering rack how do you locate the bolt holes so they are where they need to be?
-
Hi George, Thanks for the post. That was a good explanation. This sort of electrical failure is like my version of CSI. Looks like the coil that is broken off is compressed a bit and discolored at the broken off end. I wonder if a brief short across the light bulbs it was feeding might do that. Hi Blue, I can see the rheostat. That one is open in the back. Mike
-
Dr. 240Z, Thanks for taking the time to write up what you did to get the rheostat out. I am probably the only one who is dying to know why it quit working. Mike