Mikes Z car
Member
-
Joined
-
Last visited
Everything posted by Mikes Z car
-
 That is amazing.
 -
Rob, I did the same thing you did when I found a 240Z in the local junkyard, I grabbed some things I don't need just to preserve them. Mike
-
Many thanks to Jeff G 78 and postings by others for help with this. I noticed the instructions on the standard tank seal can called for thoroughly stirring the tank seal which I thought I had done but when I poured the seal in the tank there were a few lumps. If you look closely at the flat surface on the right (tank baffle) in the completed picture below you can see a couple of small lumps likely from lack of stirring. I used a pint and a half which is a half pint more than what POR says you need so it should be fine. I spilled some tank sealer on the outside of the tank and thereby discovered how durable the POR standard tank sealer is when I started wire wheeling the exterior of the tank in preparation for painting. Mike Original dirty tank: After acid cleaning with hydrochloric acid (per the bottle, this is a substitute for muriatic acid commonly used for this): After marine clean and metal ready: Completed (pink color from camera light): More details of my experience: Gas tank seal process.txt
-
I remember someone saying they blocked the air vents in the cowl and still got air into the car okay, hopefully they might see this thread. With the fan on air should be drawn from around the cowl in other areas as there isn't an airtight seal between the cowl and the car body.
-
I have wondered about the idea of making a very small 1/2" tall fiberglass dam hidden under the windshield side of the cowl to divert water to the sides instead of letting it run into the wiper motor area in addition to putting a water catcher tray right under the cowl air induction holes. Not sure the idea makes sense but it is an idea anyway. Mike
-
Mike, Is there a contact point for the person you spoke with? Mike
-
Sounds like it should be cleared for takeoff
-
It is mushier than I would like. I don't have the machining skills to make the replacement part so I was trying to see if there was another way to tighten up the existing brass part.
-
This is a WAG (wild arse guess) but I wonder if the spring might have hopped out of its retainer at one end?
-
Great pictures too. Does anyone know if it might be possible to solder the original brass looking part to the pot metal pivot (or whatever that metal is called) the handle is mounted in?
-
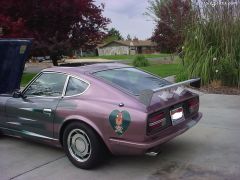 I took that wing off
 -
I want him to give my early Z battery back, looks like he is making off with it.
-
Wonderful looking car, same color as my first Z.
-
Where did you last see the hairy guy? I want to make a controversial video of him.
-
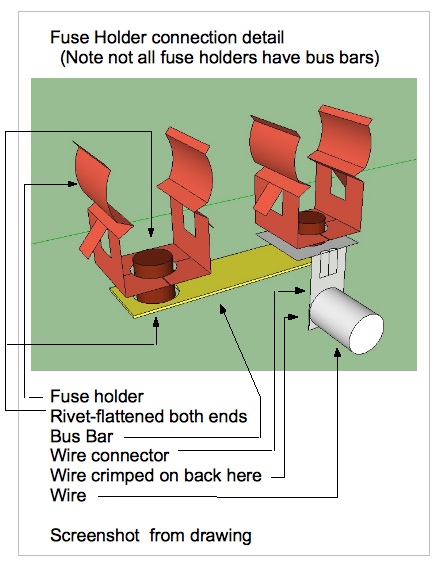
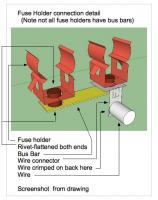
I took each fuseholder out and soldered both ends of the rivets and the connections each wire made to the fuseholder assemblies. I also did the headlight relay upgrade to make the headlight switch last forever. I also soldered the two heavy white wires to their connectors (alternator and battery wires I believe) that are plugged together above the passenger's right knee area (USA models) and then plastered them inside with dielectric grease. The clear vinyl covers of those two connectors showed signs of overheating (black) giving me a clue they needed attention. I sure can see the wisdom of other routes such as fuse box replacement. I used to have a (69?) Triumph GT6 Mk3, the headlight switch kept falling out of the dash. Can't remember if there were other issues but I was amazed anyone would build a car with such lousy switches. Did Lucas have no sense of quality? Mike This is a drawing I made of what I saw when I took the fuseholder assemblies out:
-
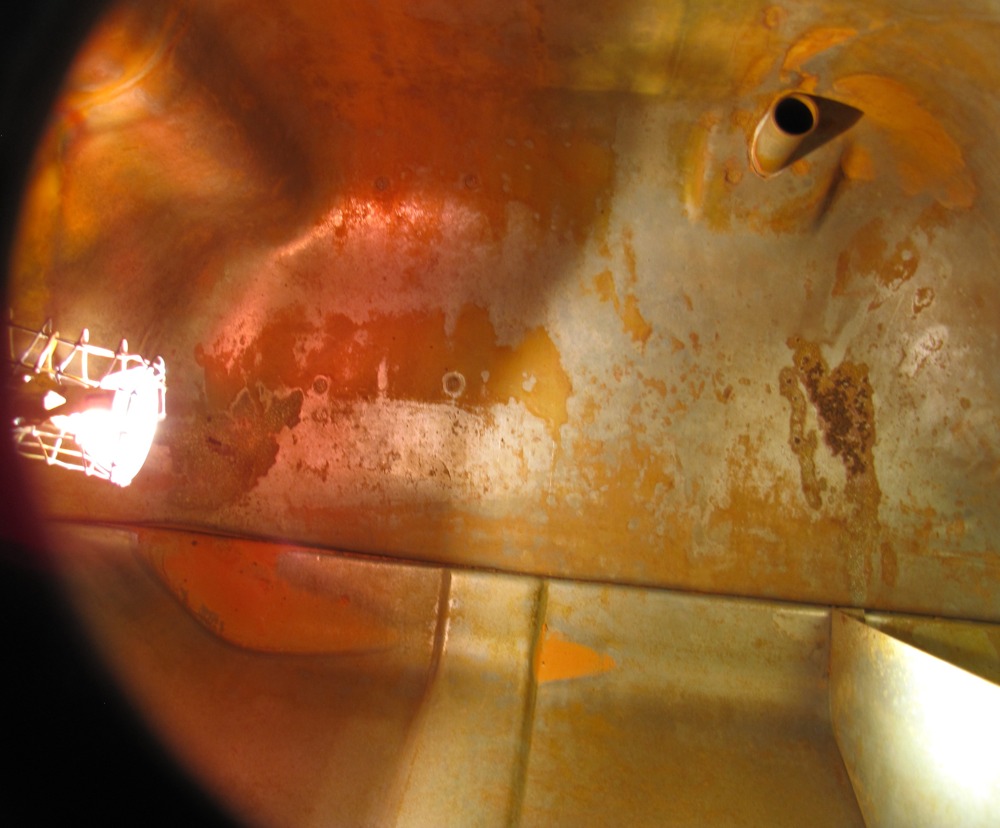
I took pictures of the inside of my gas tank as I am nearly done cleaning it prior to sealing it with the POR15 sealer. This picture was taken after running 2 gallons of hydrochloric acid through it (muriatic acid substitute according to the label) in four 1/2 gallon applications over two days and a quart of marine clean the third day. Thanks Jeff G 78 for your assistance with this. My tank wasn't bad to start with as no particles or chunks came out, just rusty water. Doesn't, er, everybody do this for entertainment?

-
On my car when I had the horn button off I could ground the metal plate that was behind the horn button with a wire and I could hear the click from the relay in the passenger foot well easily. One metal plate gets pushed into the other to ground the horn relay, I don't know if they all work like that.
-
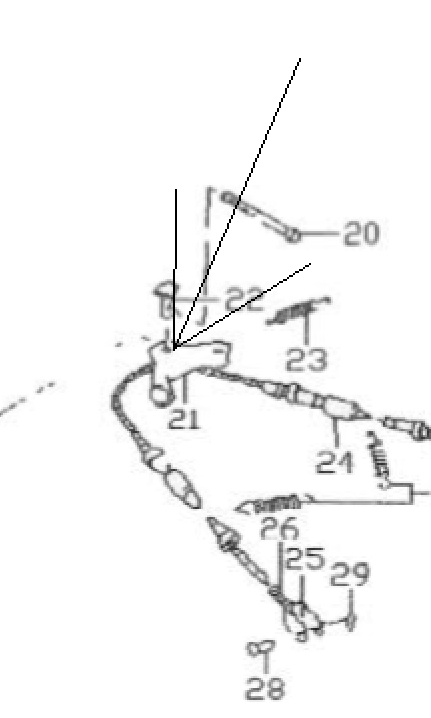
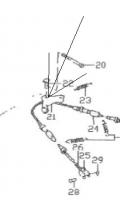
Blue, I looked at my car and there is a tiny hole right in front of part #22 towards the back of the car. It is maybe 1/16th of an inch from it so it is very close. Mike
-
I have used the lead replacement fluid.
-
I am about to use that same POR-15 kit. You guys are going to think I am pulling your leg or am involved in the production of the red green show but a co-worker says he has cleaned gas tanks by dropping a couple of handfuls of pointy shaped pebbles into a tank and then has strapped the tank to a tractor tire with the tractor jacked up off of the ground. Then he starts the tractor and runs it for a an hour or two and lets the turning tank and tire cause the rocks clean the tank out. I wonder how that would look with a tank strapped to the tire on my old car in the driveway? Not sure how red green would solve the fender clearance though
-
Those guys on top gear are a lot of fun. I love their approach to cars.
-
I put a 10" piece of 1/4" copper tubing in the end of the 5/8" hose and bent the hose by hand. The copper is stiff enough to hold the hose in a 180 degree turn. It flattens the hose a bit but I can blow air easily through it. It isn't as neat looking as some other methods might yield though.
-
I used to live there but didn't have a Z back then. Good luck on your search.
-
I have had good luck using that kind of device to find the other ends of wires. I think I remember the trick is to turn the transmitter down so you can barely detect it at the other end of the wire to prevent getting off on the wrong wire. If it can't be turned down just disconnect the transmitter connection to the wire but have it very close to reduce the signal level being injected.
-
This is an old thread but an idea to lenghten the life is to slightly shorten the copper swing arm so that it slides across a different arc of resistance wire in the case where there is a lot of wear on the wire from the copper contact arm. This can be done by removing the cover over the copper arm and bending it to look like (side view): Original from factory ____________ New look _____/\_____ I am putting details and pictures of this on my blog in case anyone else wants to see it.