motorman7
 Subscriber
-
Posts
2,198 -
Joined
-
Last visited
-
Days Won
56
Content Type
Profiles
Knowledge Base
Zcar Wiki
Forums
Gallery
Events
Downloads
Store
Blogs
Collections
Classifieds
Everything posted by motorman7
-
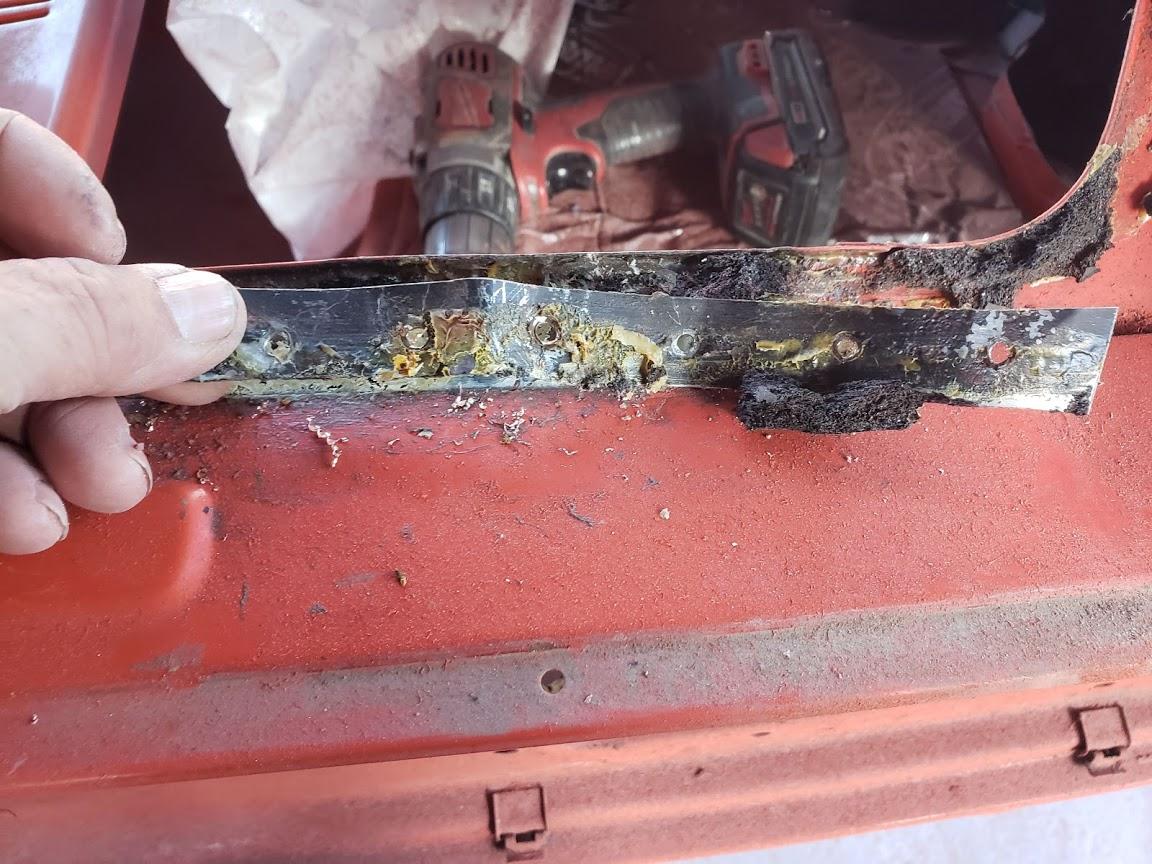
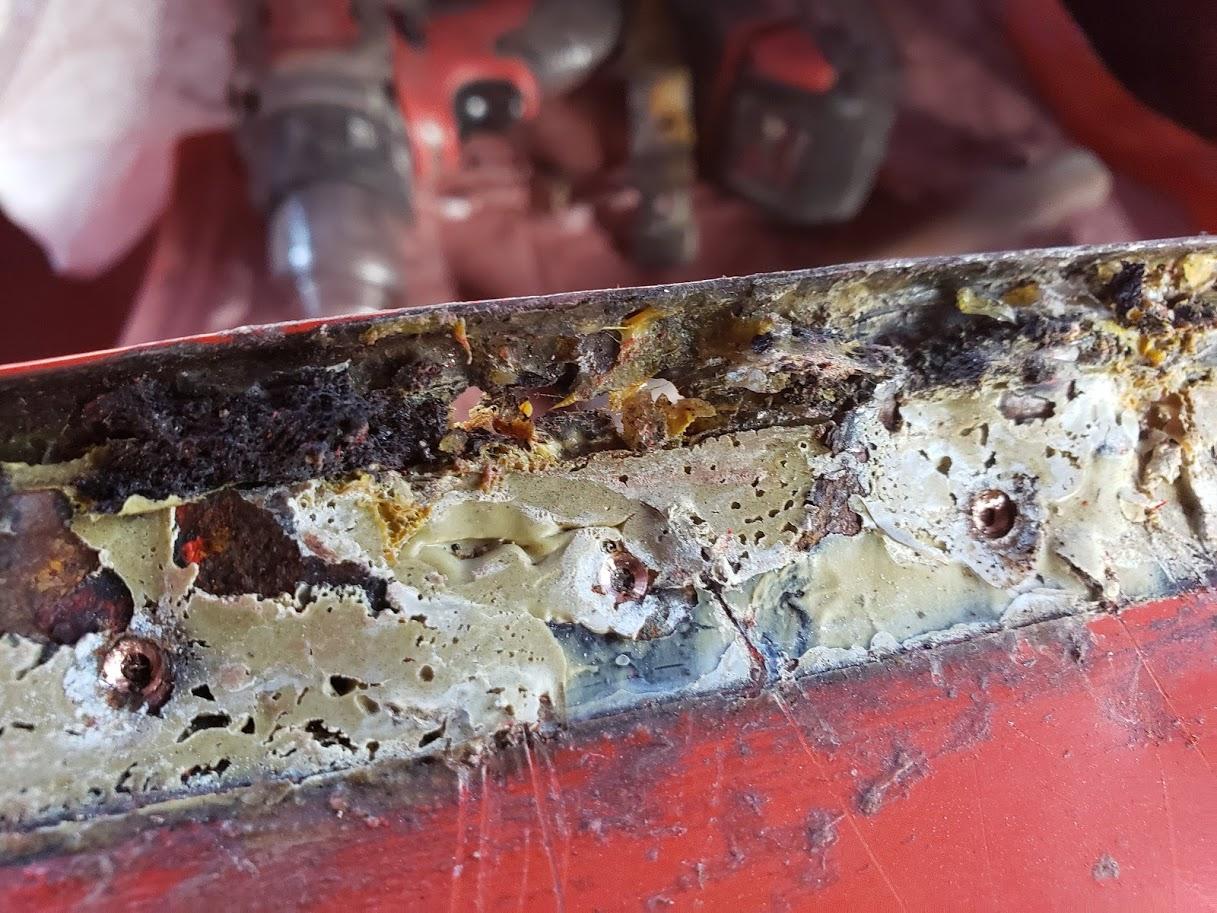
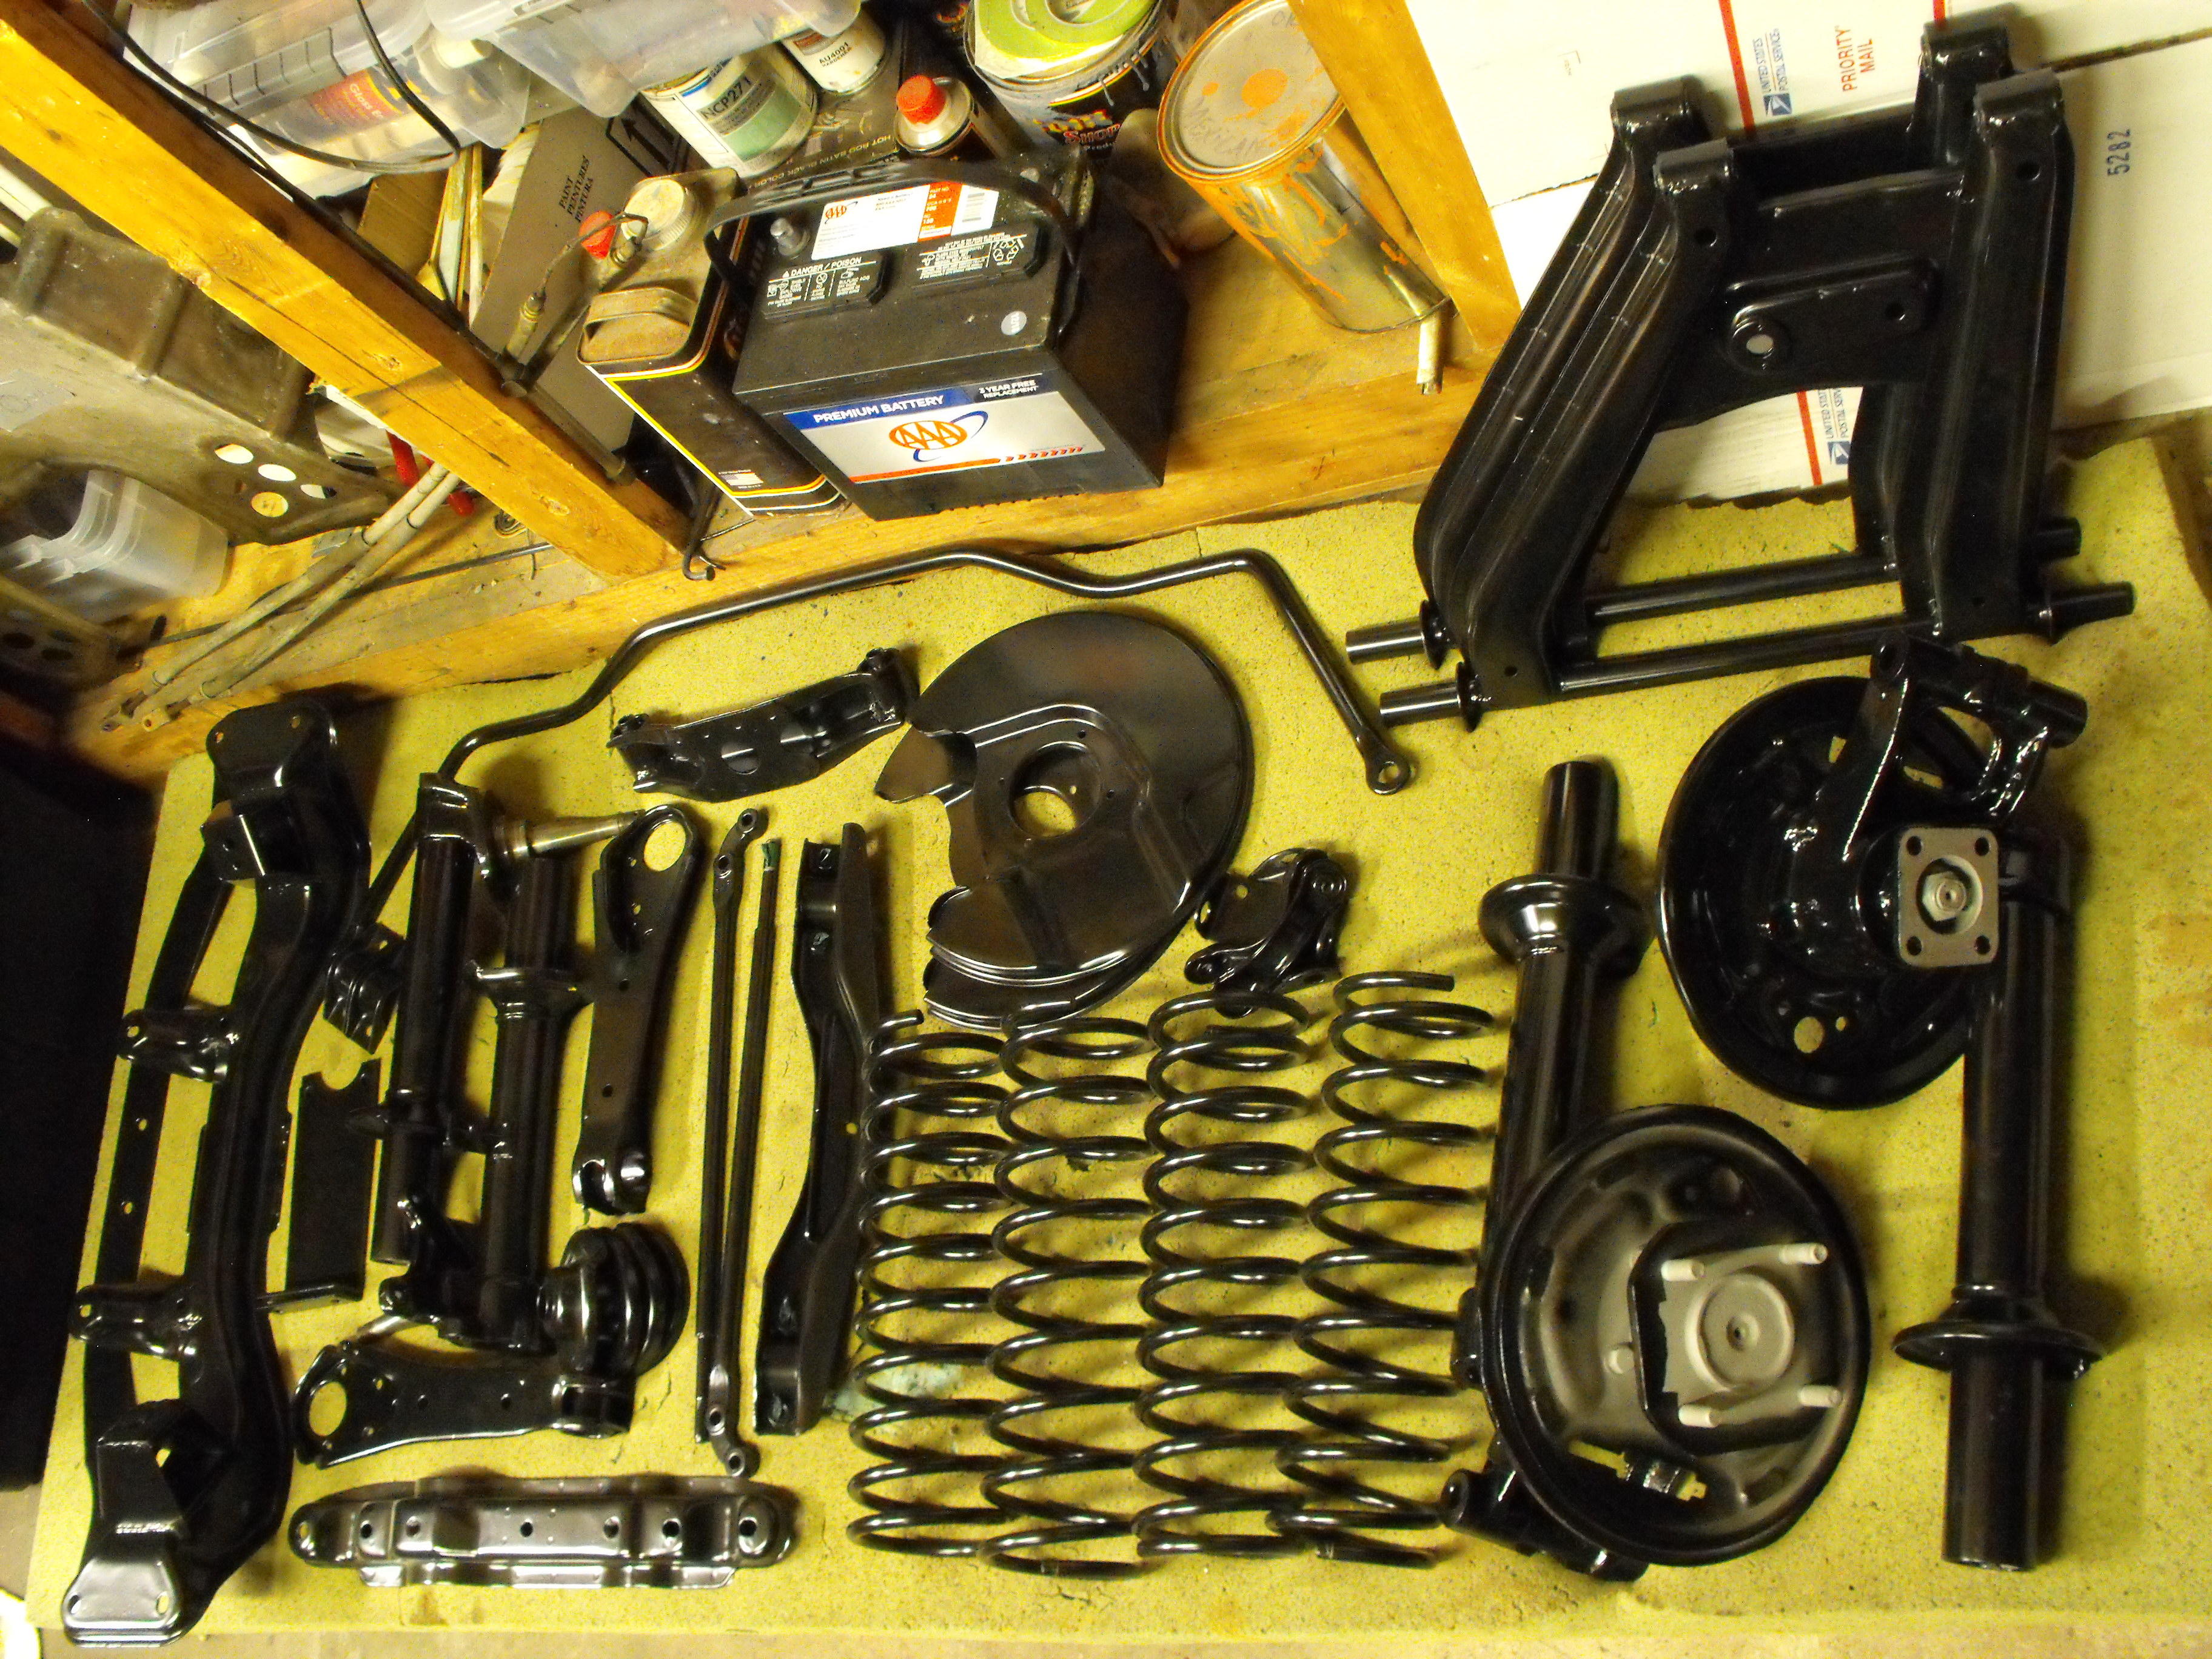
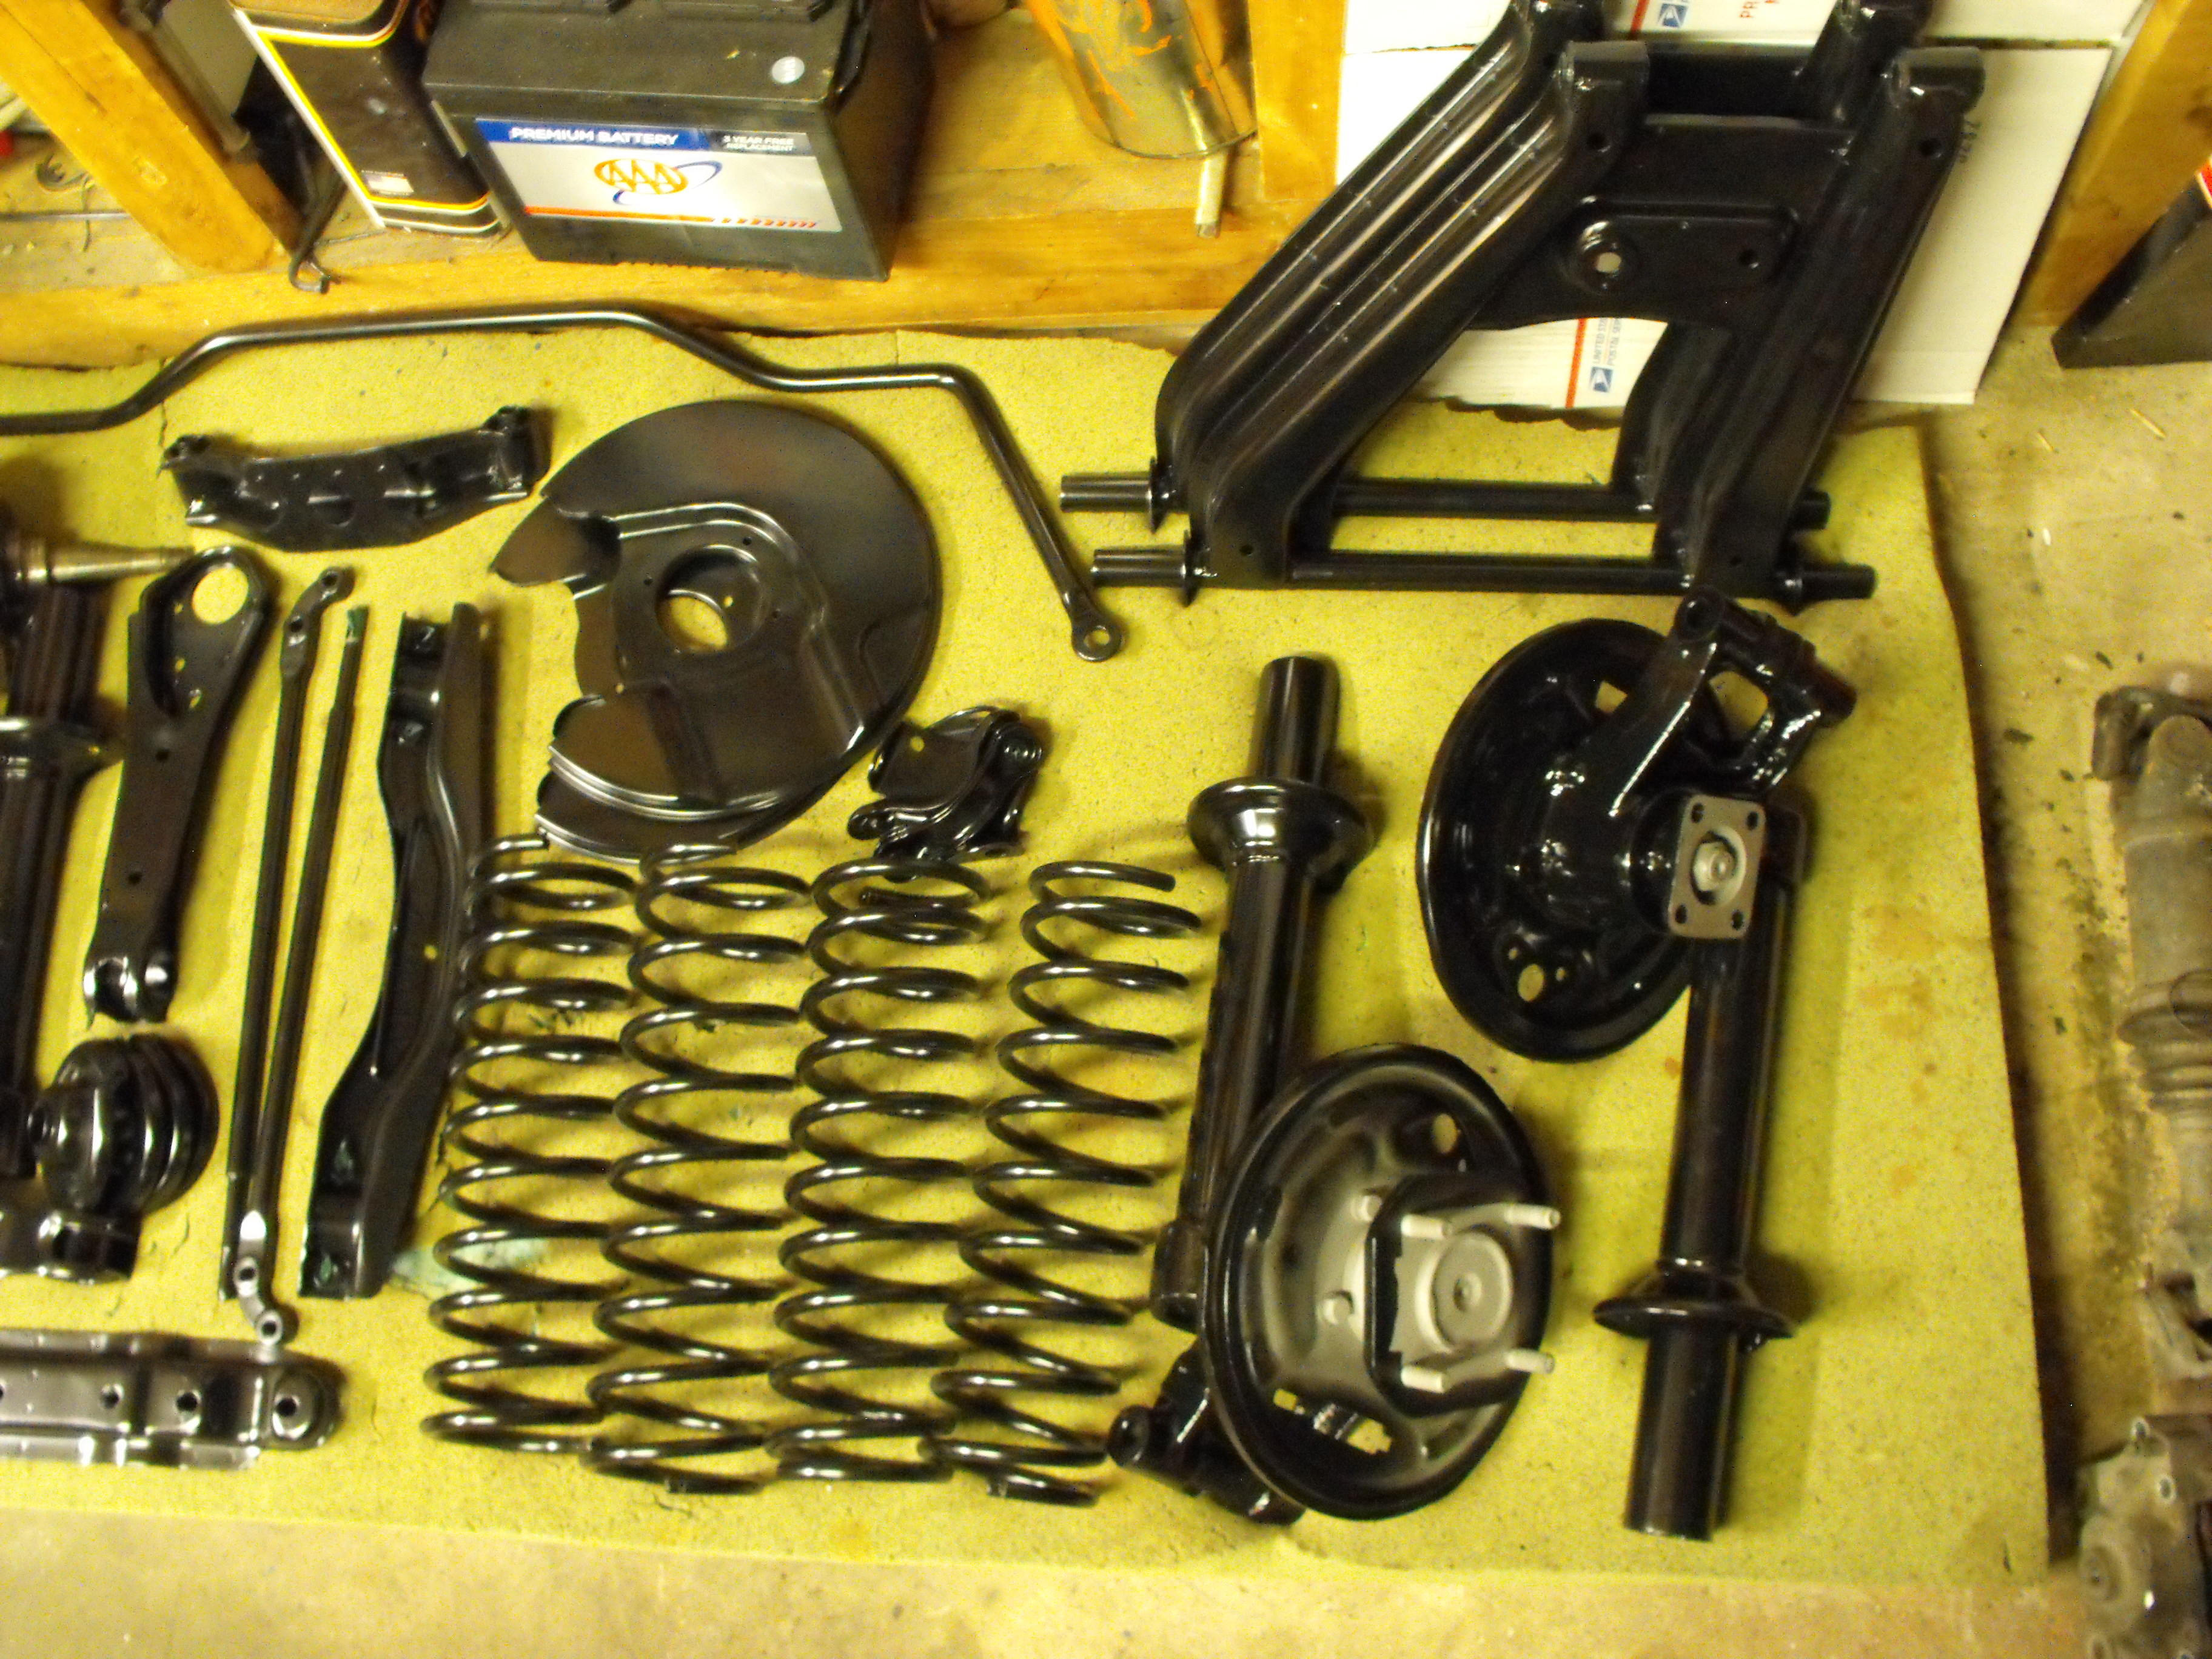
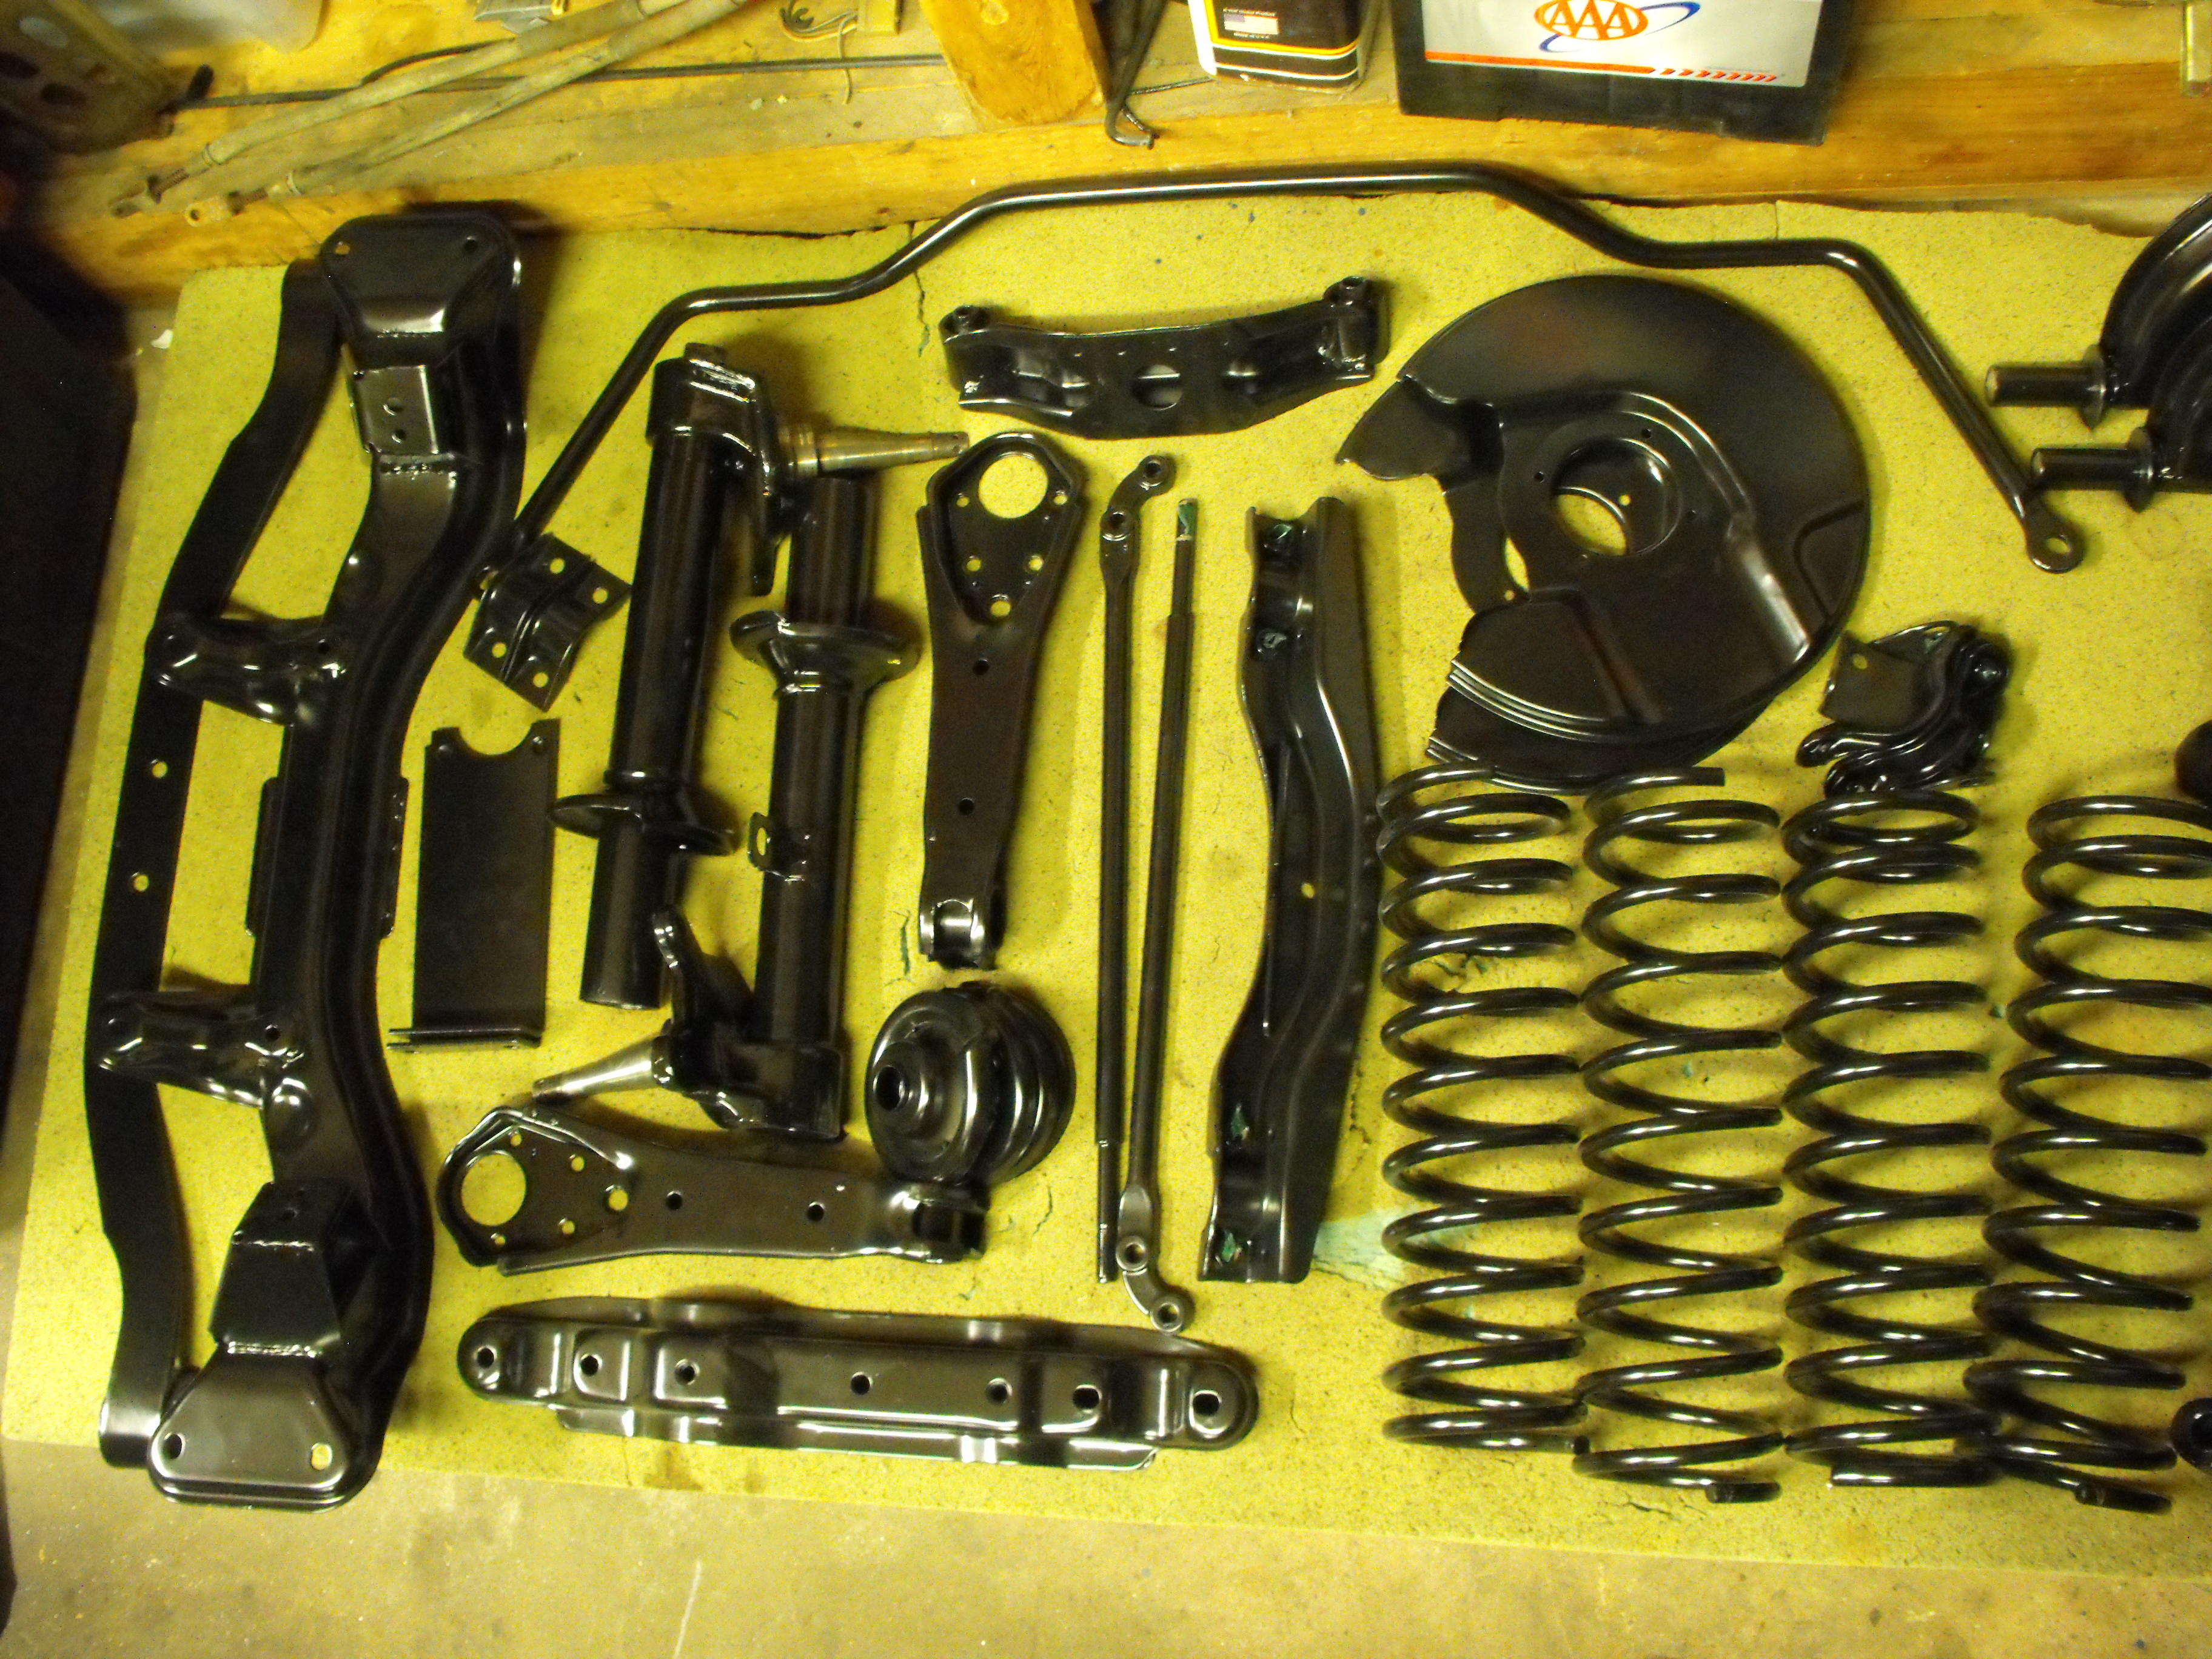
Yes, definitely some serious rust. Nice to have that cut out and new metal welded in. Got the parts back from the Powder Coater. That was quick. Best deal in town....I send them dirty, rusty parts and they come back all nice and clean and powder coated.


-
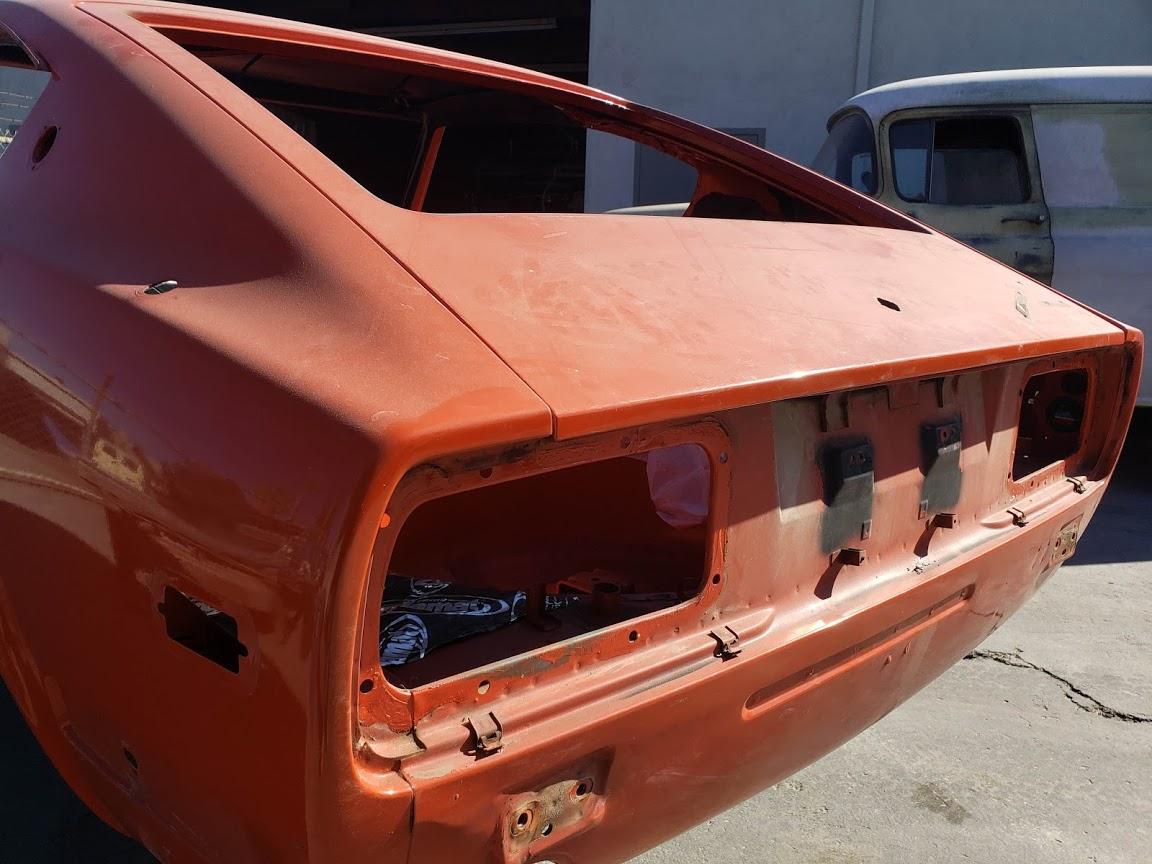
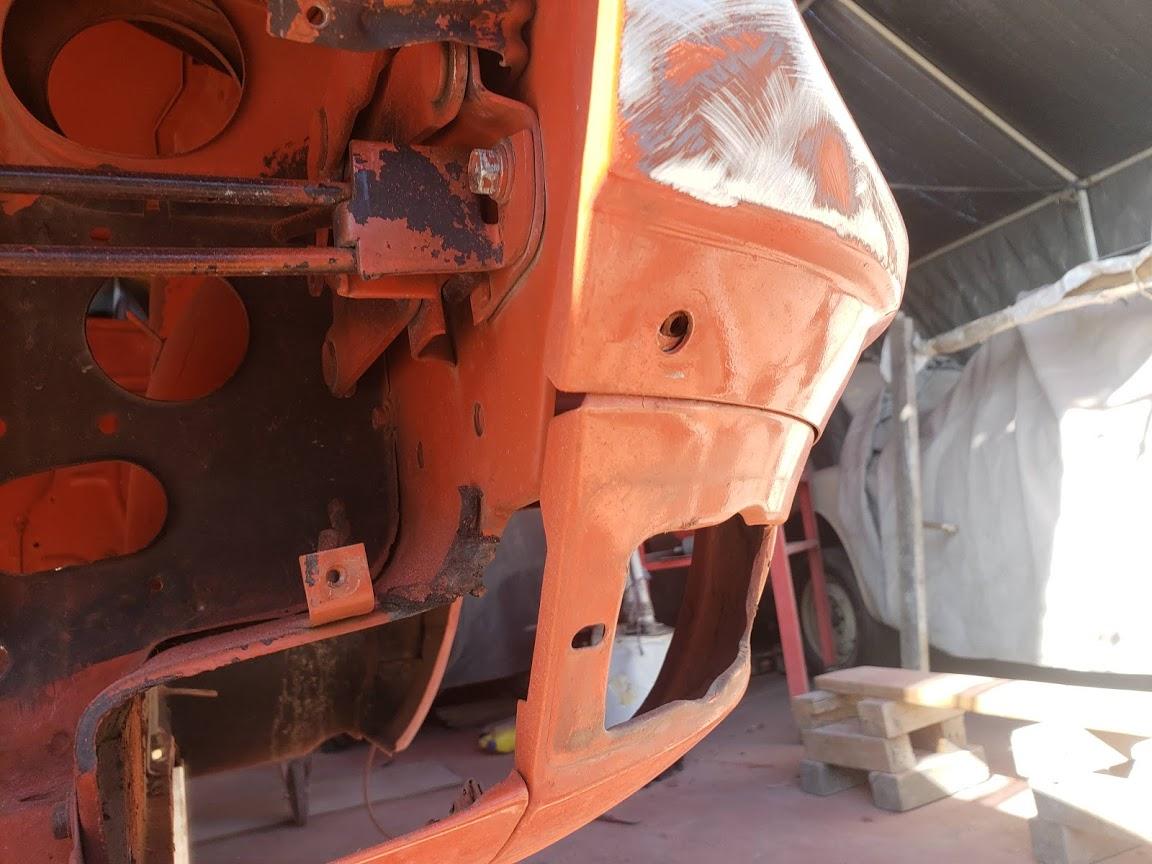
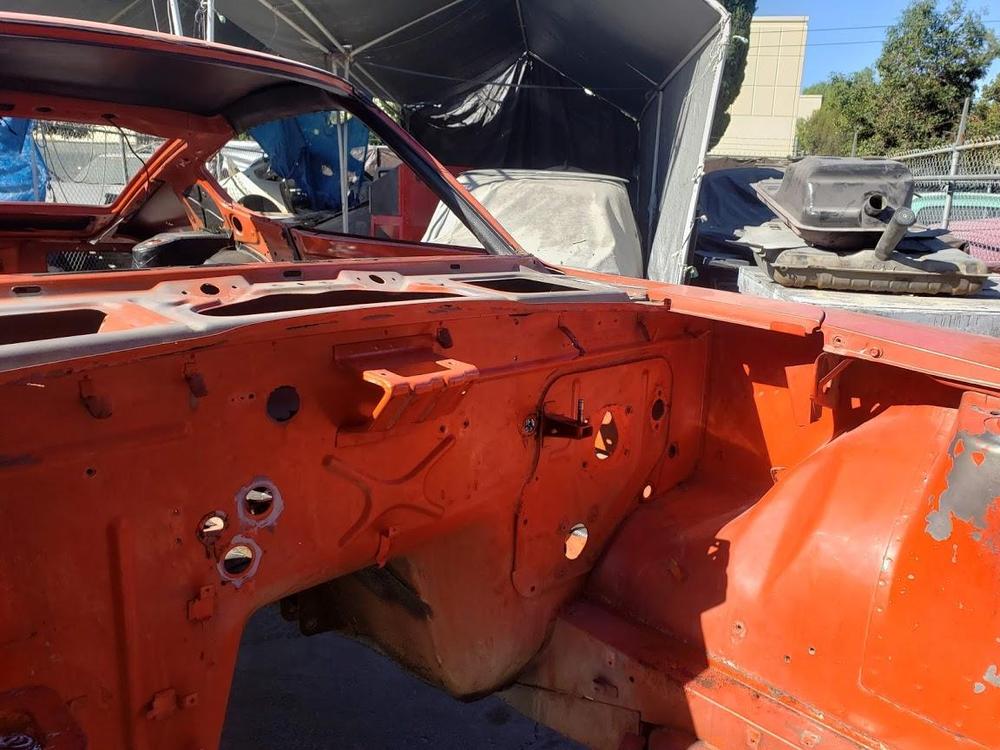
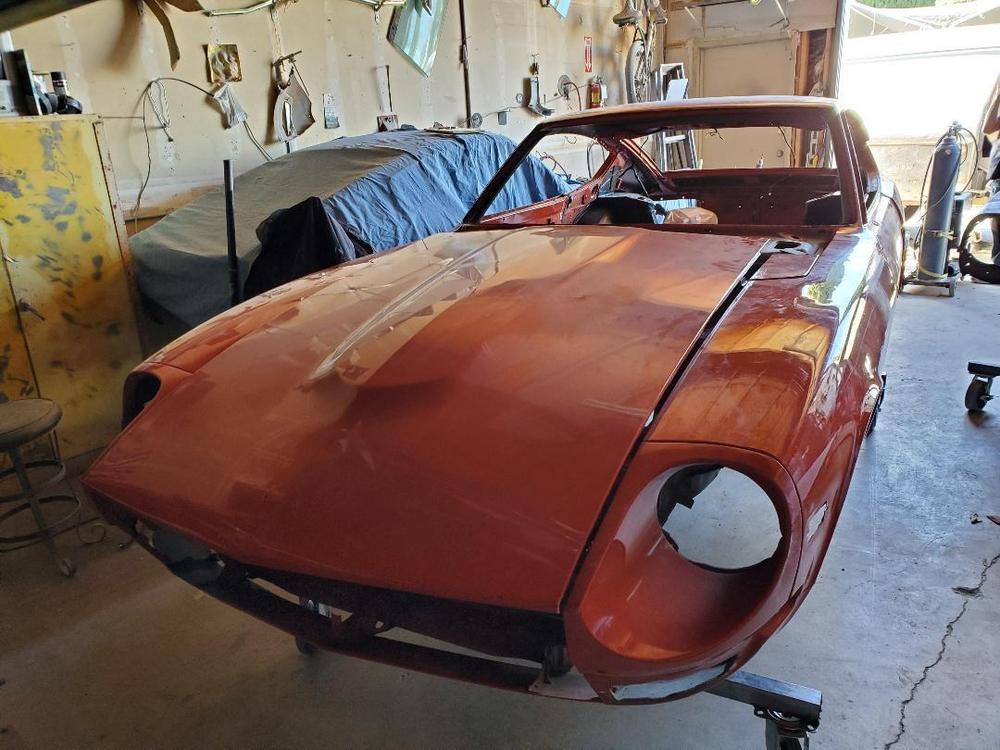
Fresh pics from the body shop. Lots going on there. It will go to the sand blaster pretty soon to clean up the deep crevices. Also, I pick up the powder coated suspension tonight. Will show pics of that later.
.thumb.jpg.fb5d048b0c54c1230c9a2d557a99e396.jpg)


-
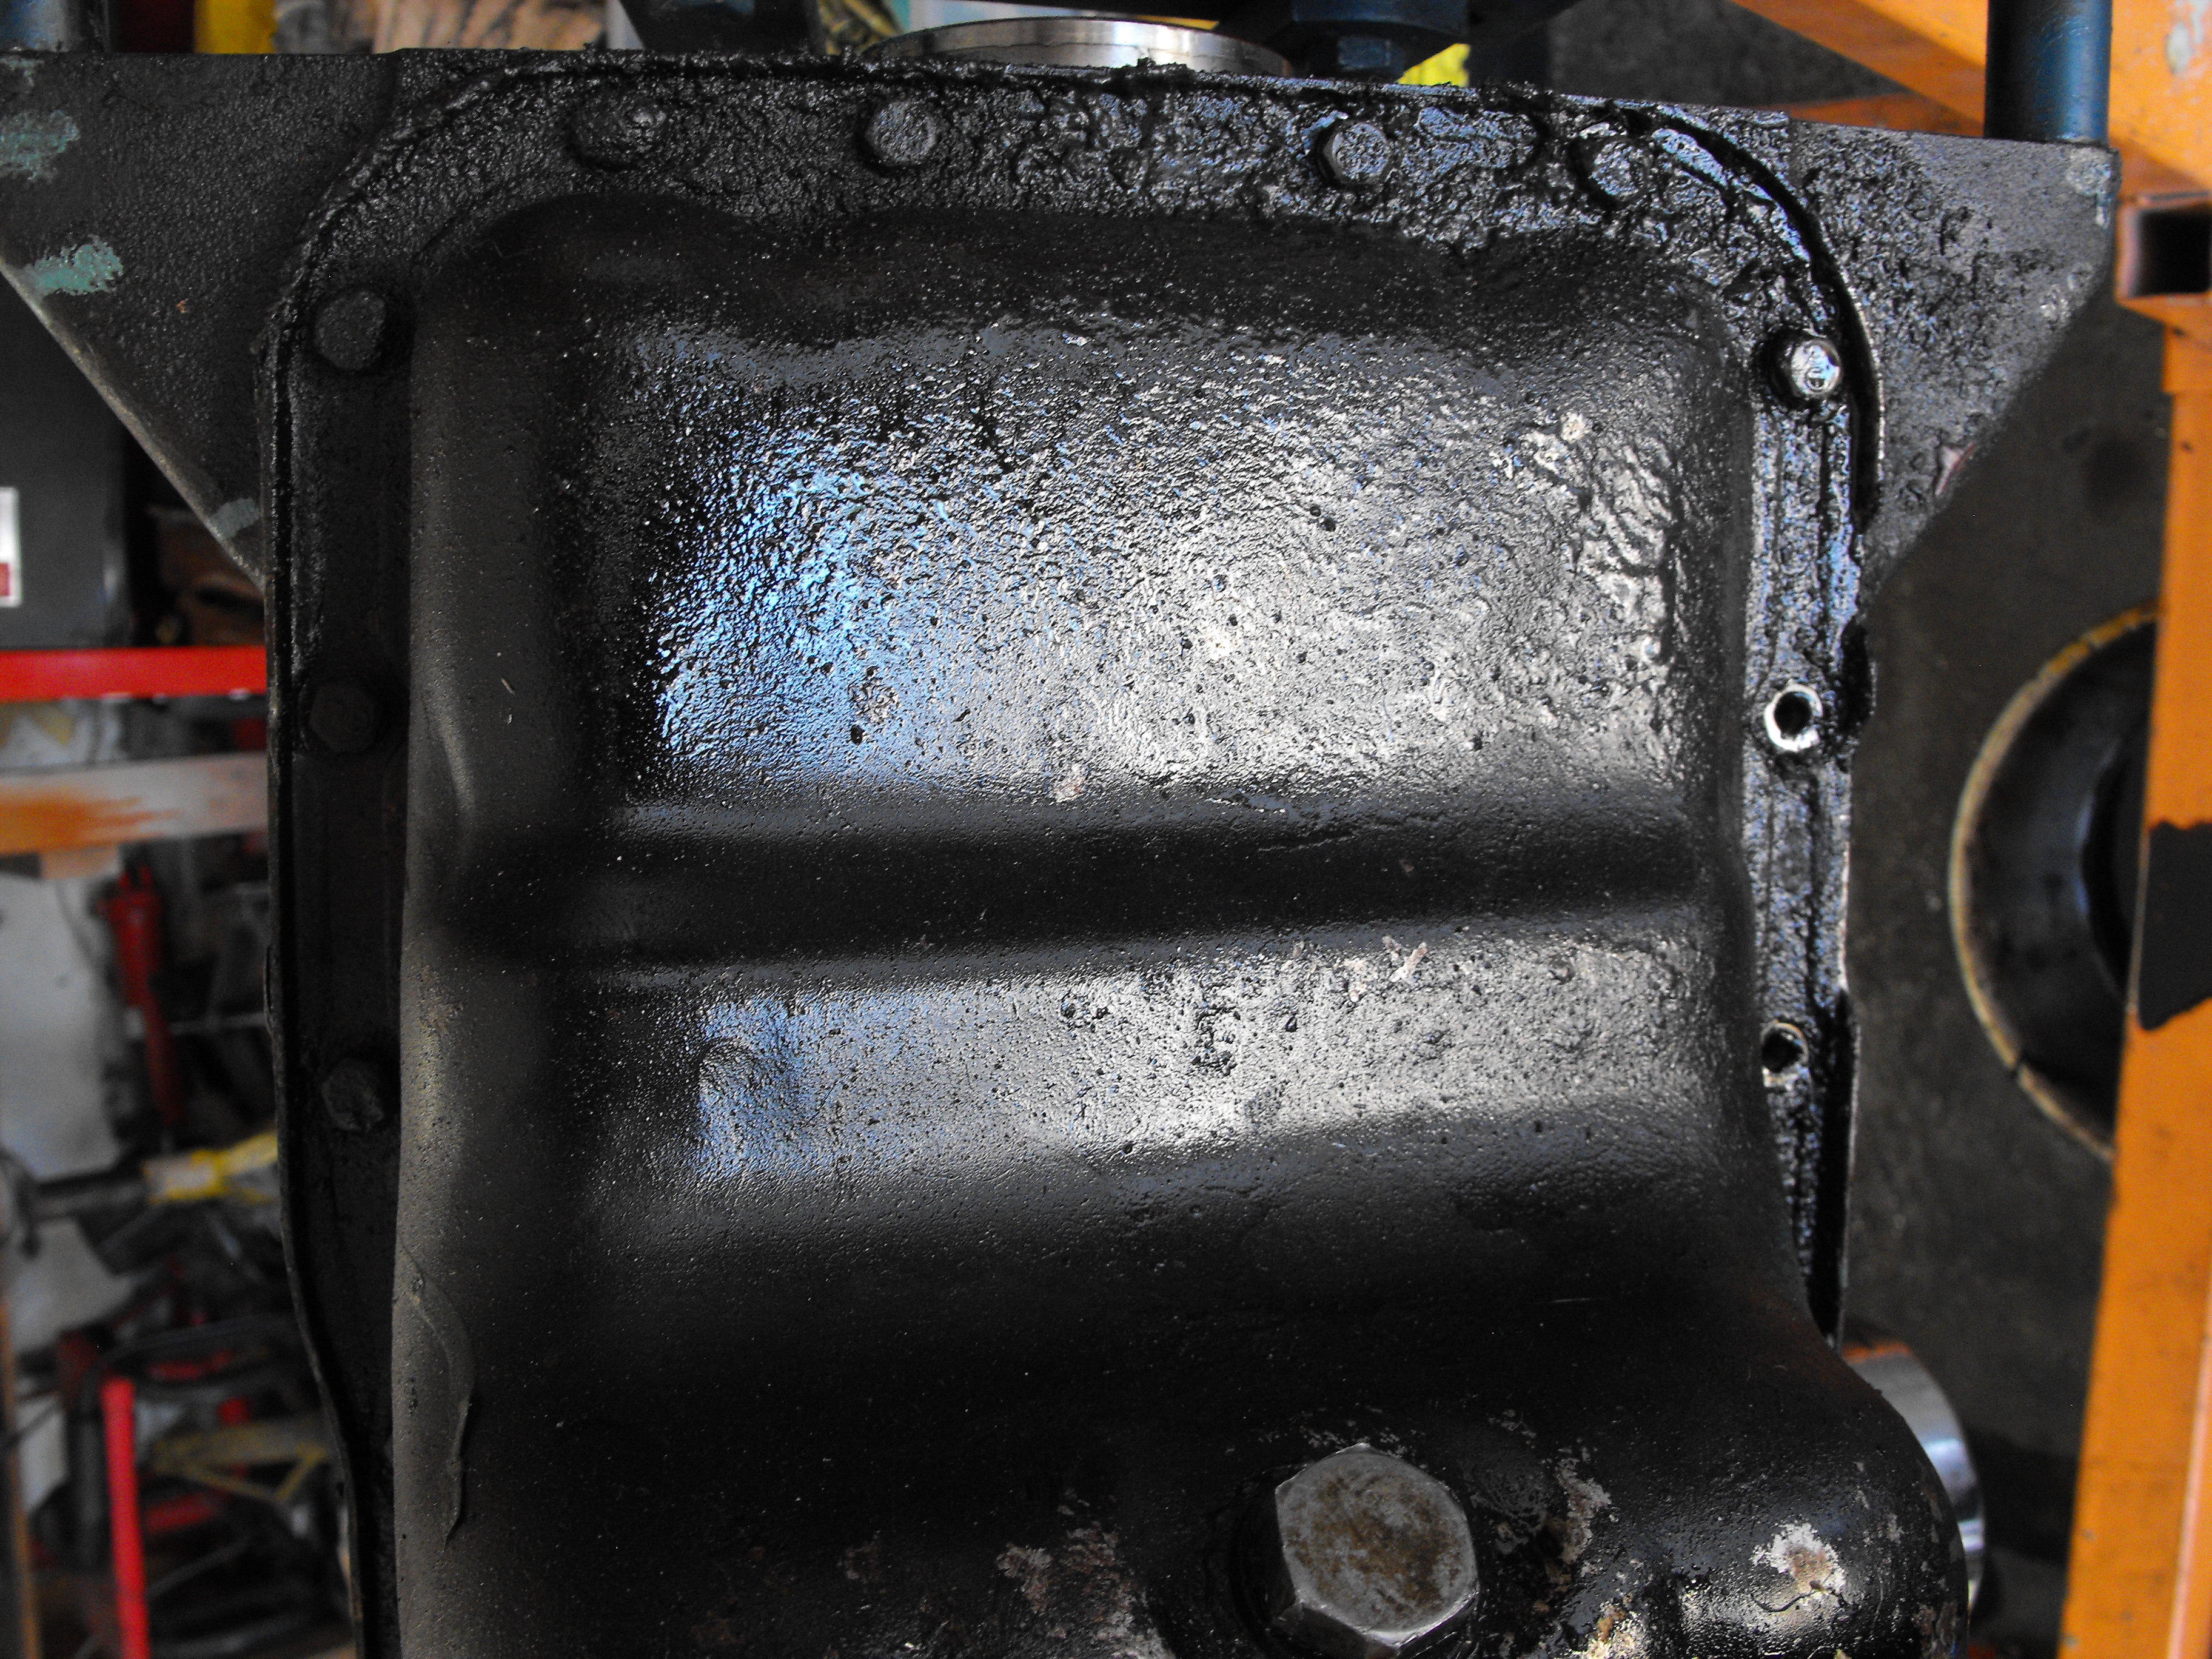
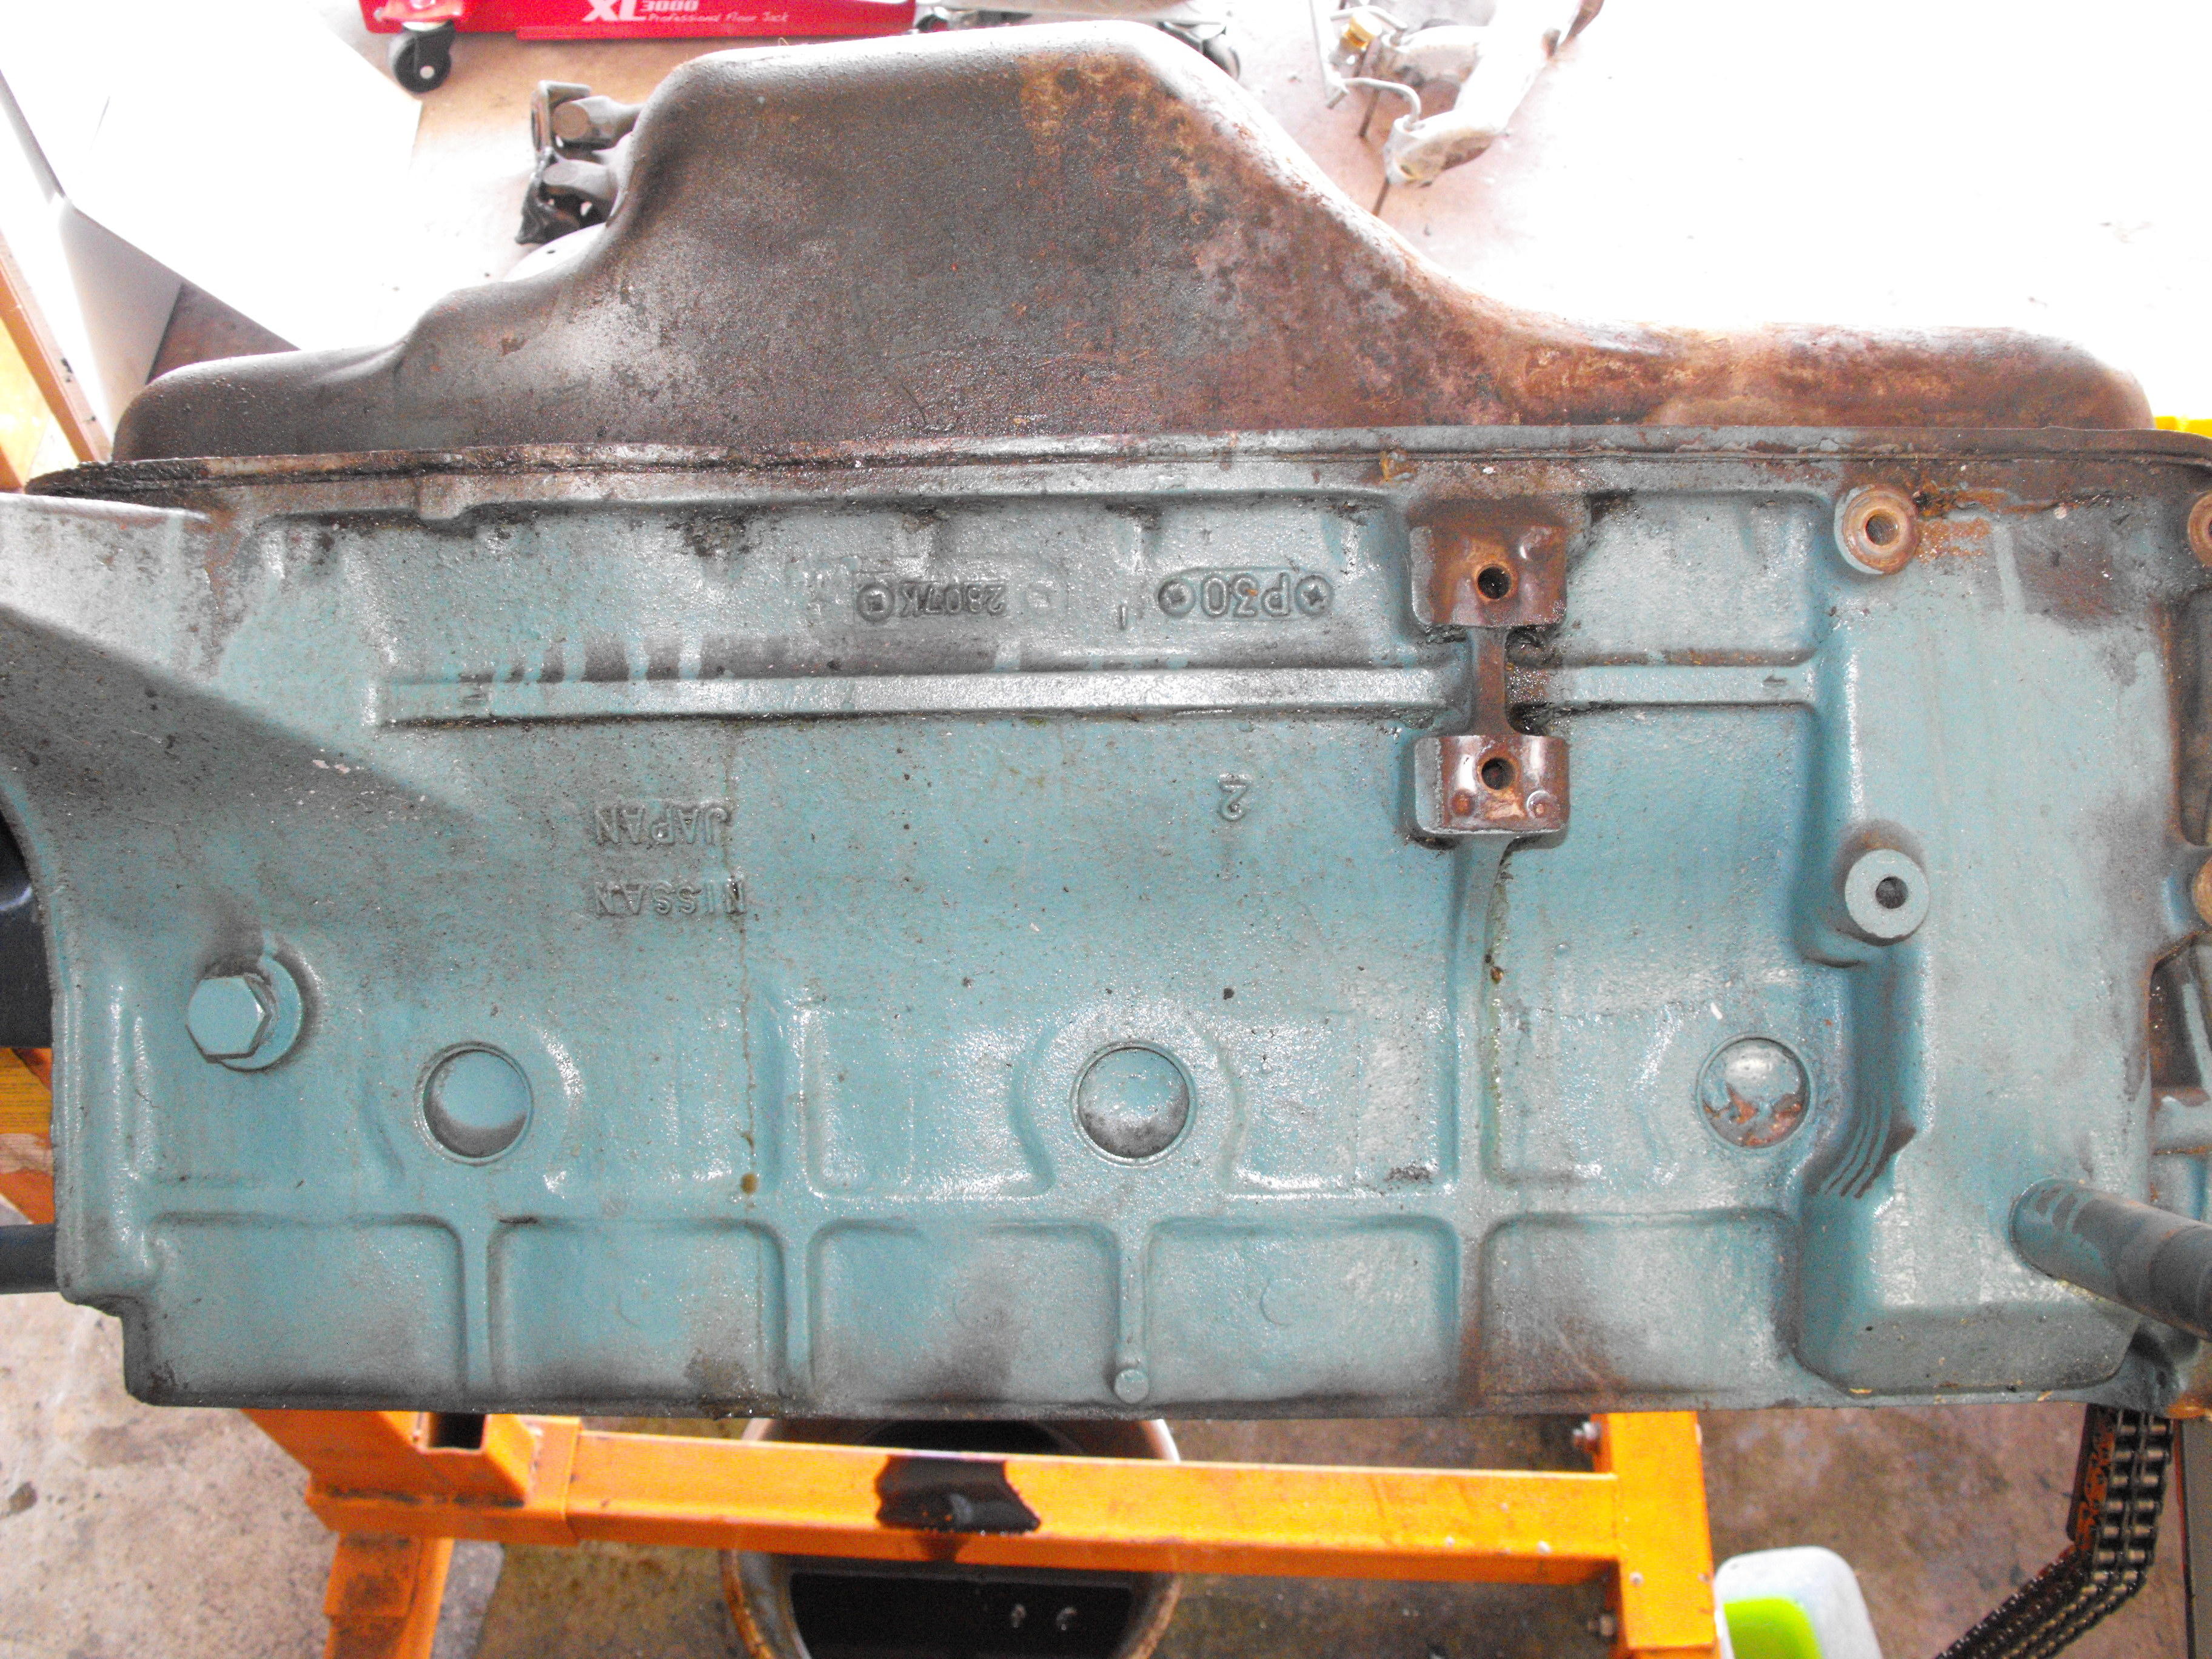
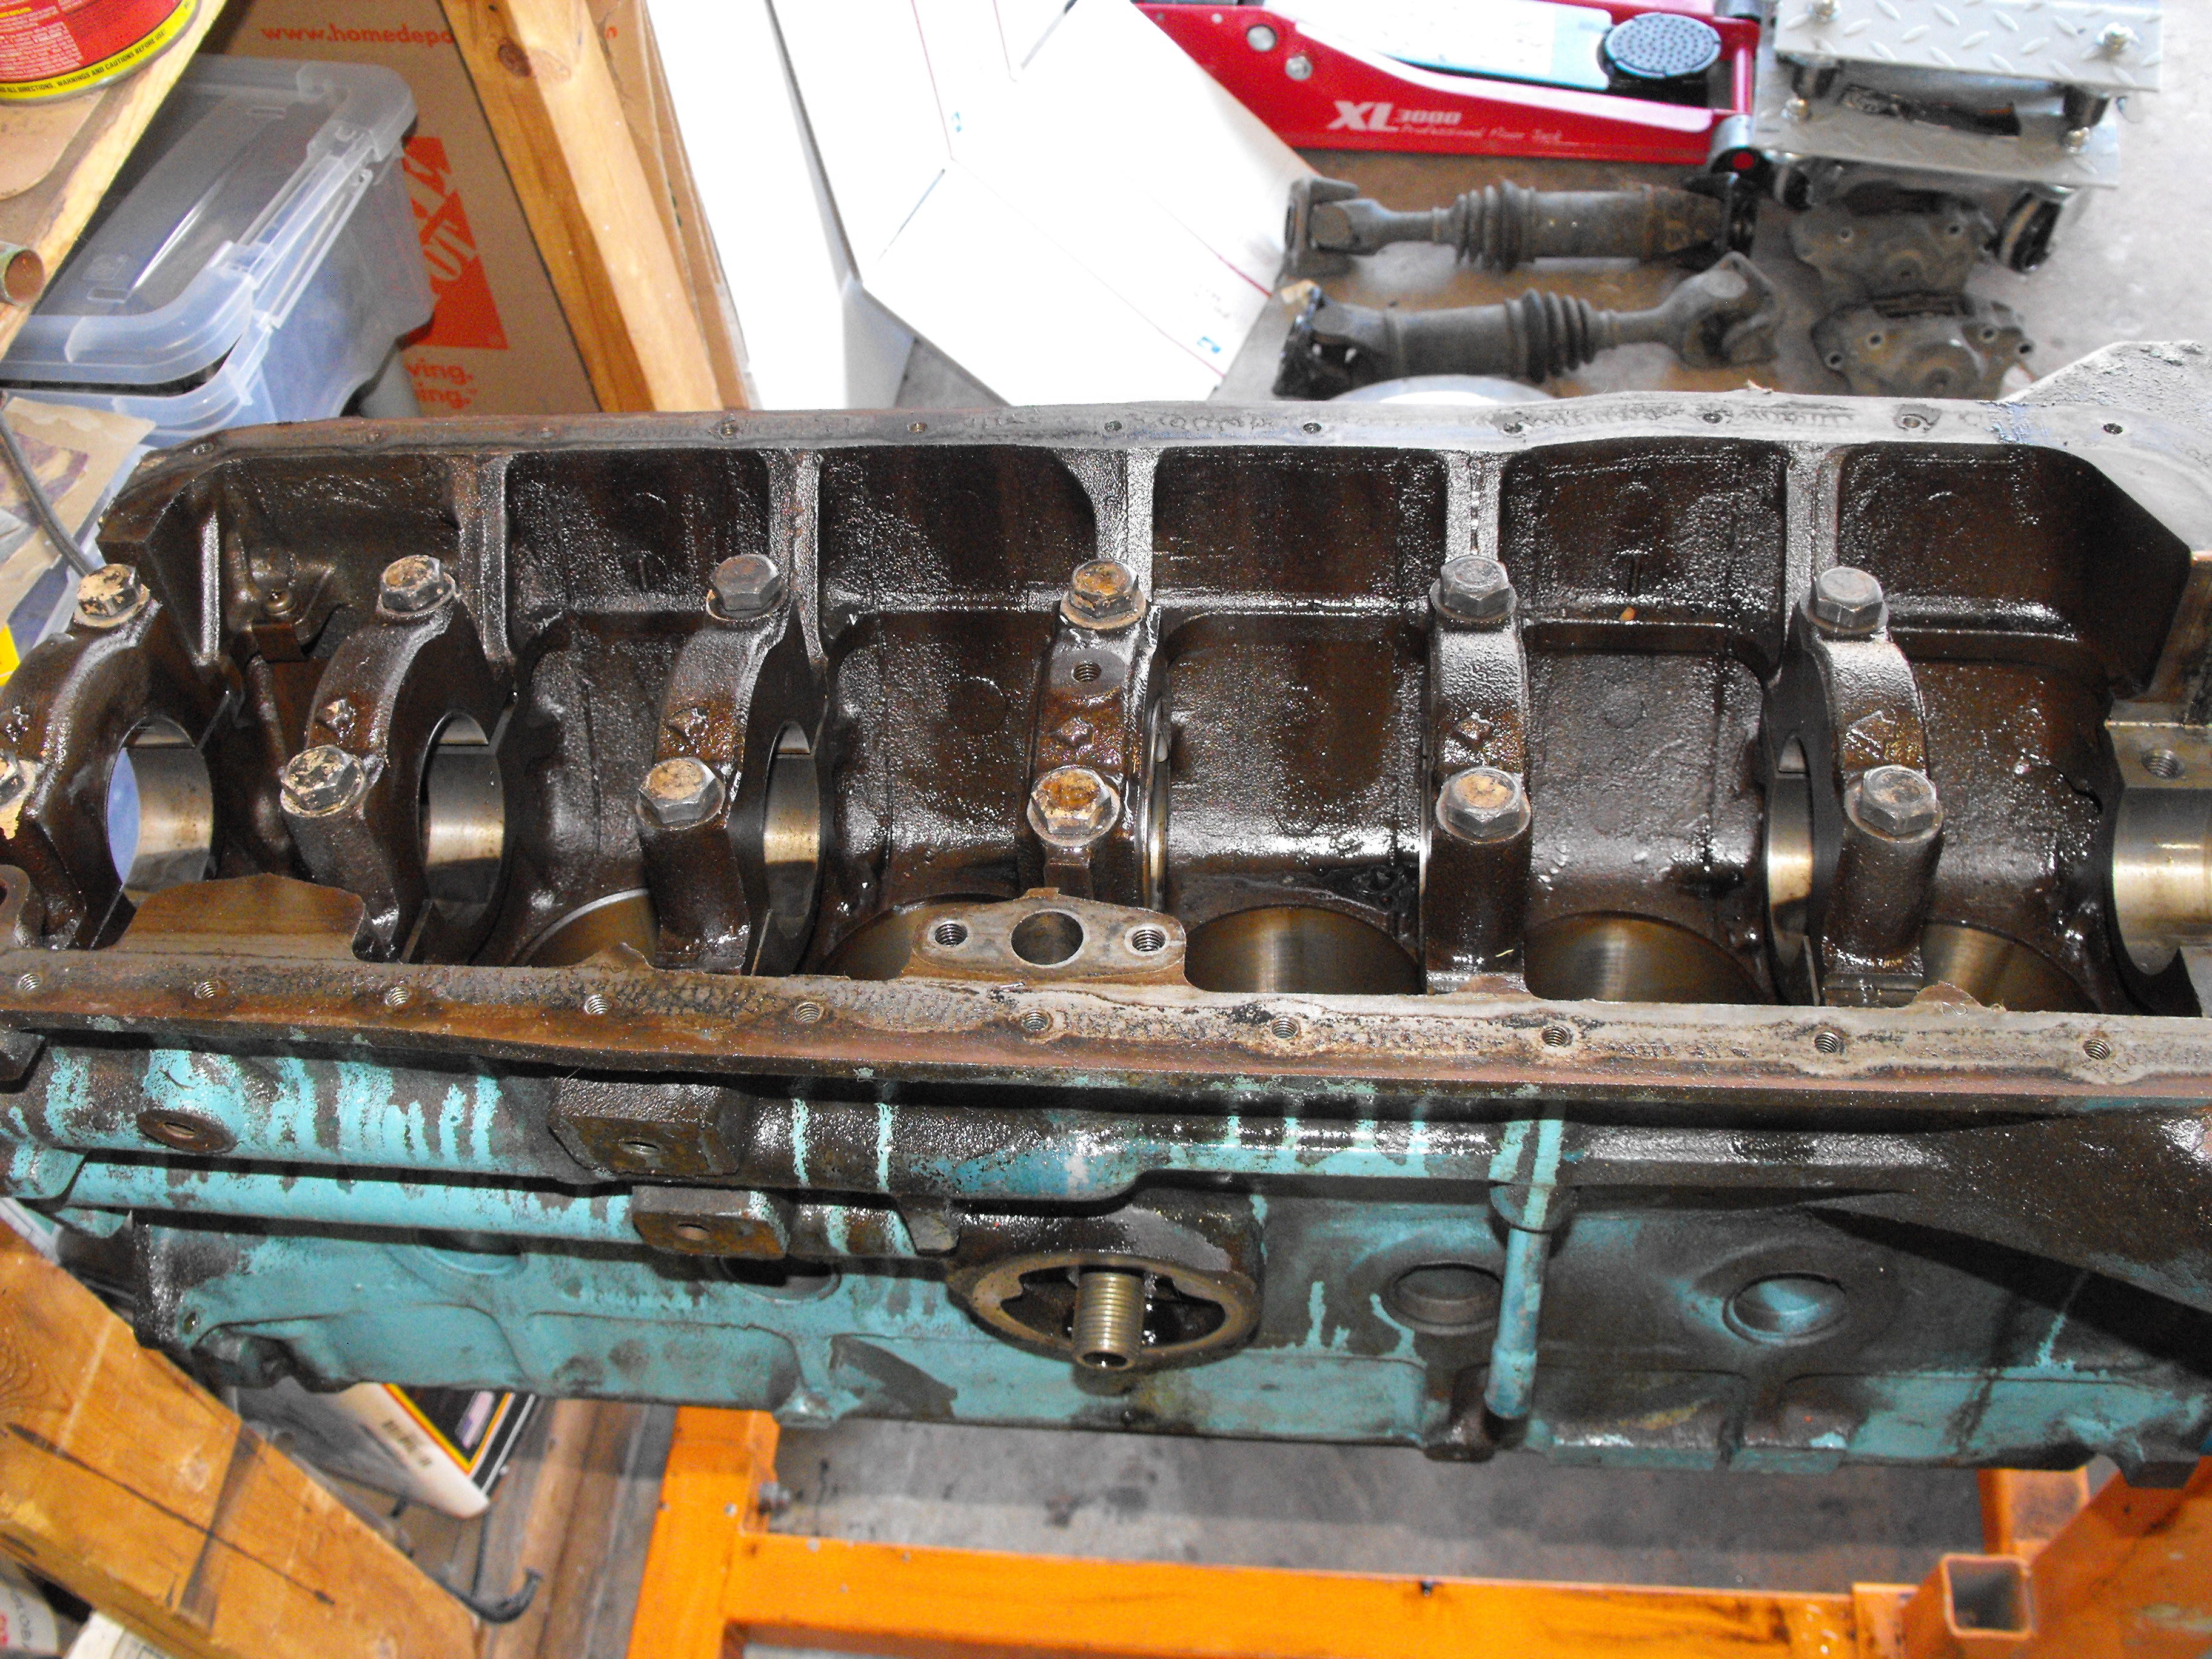
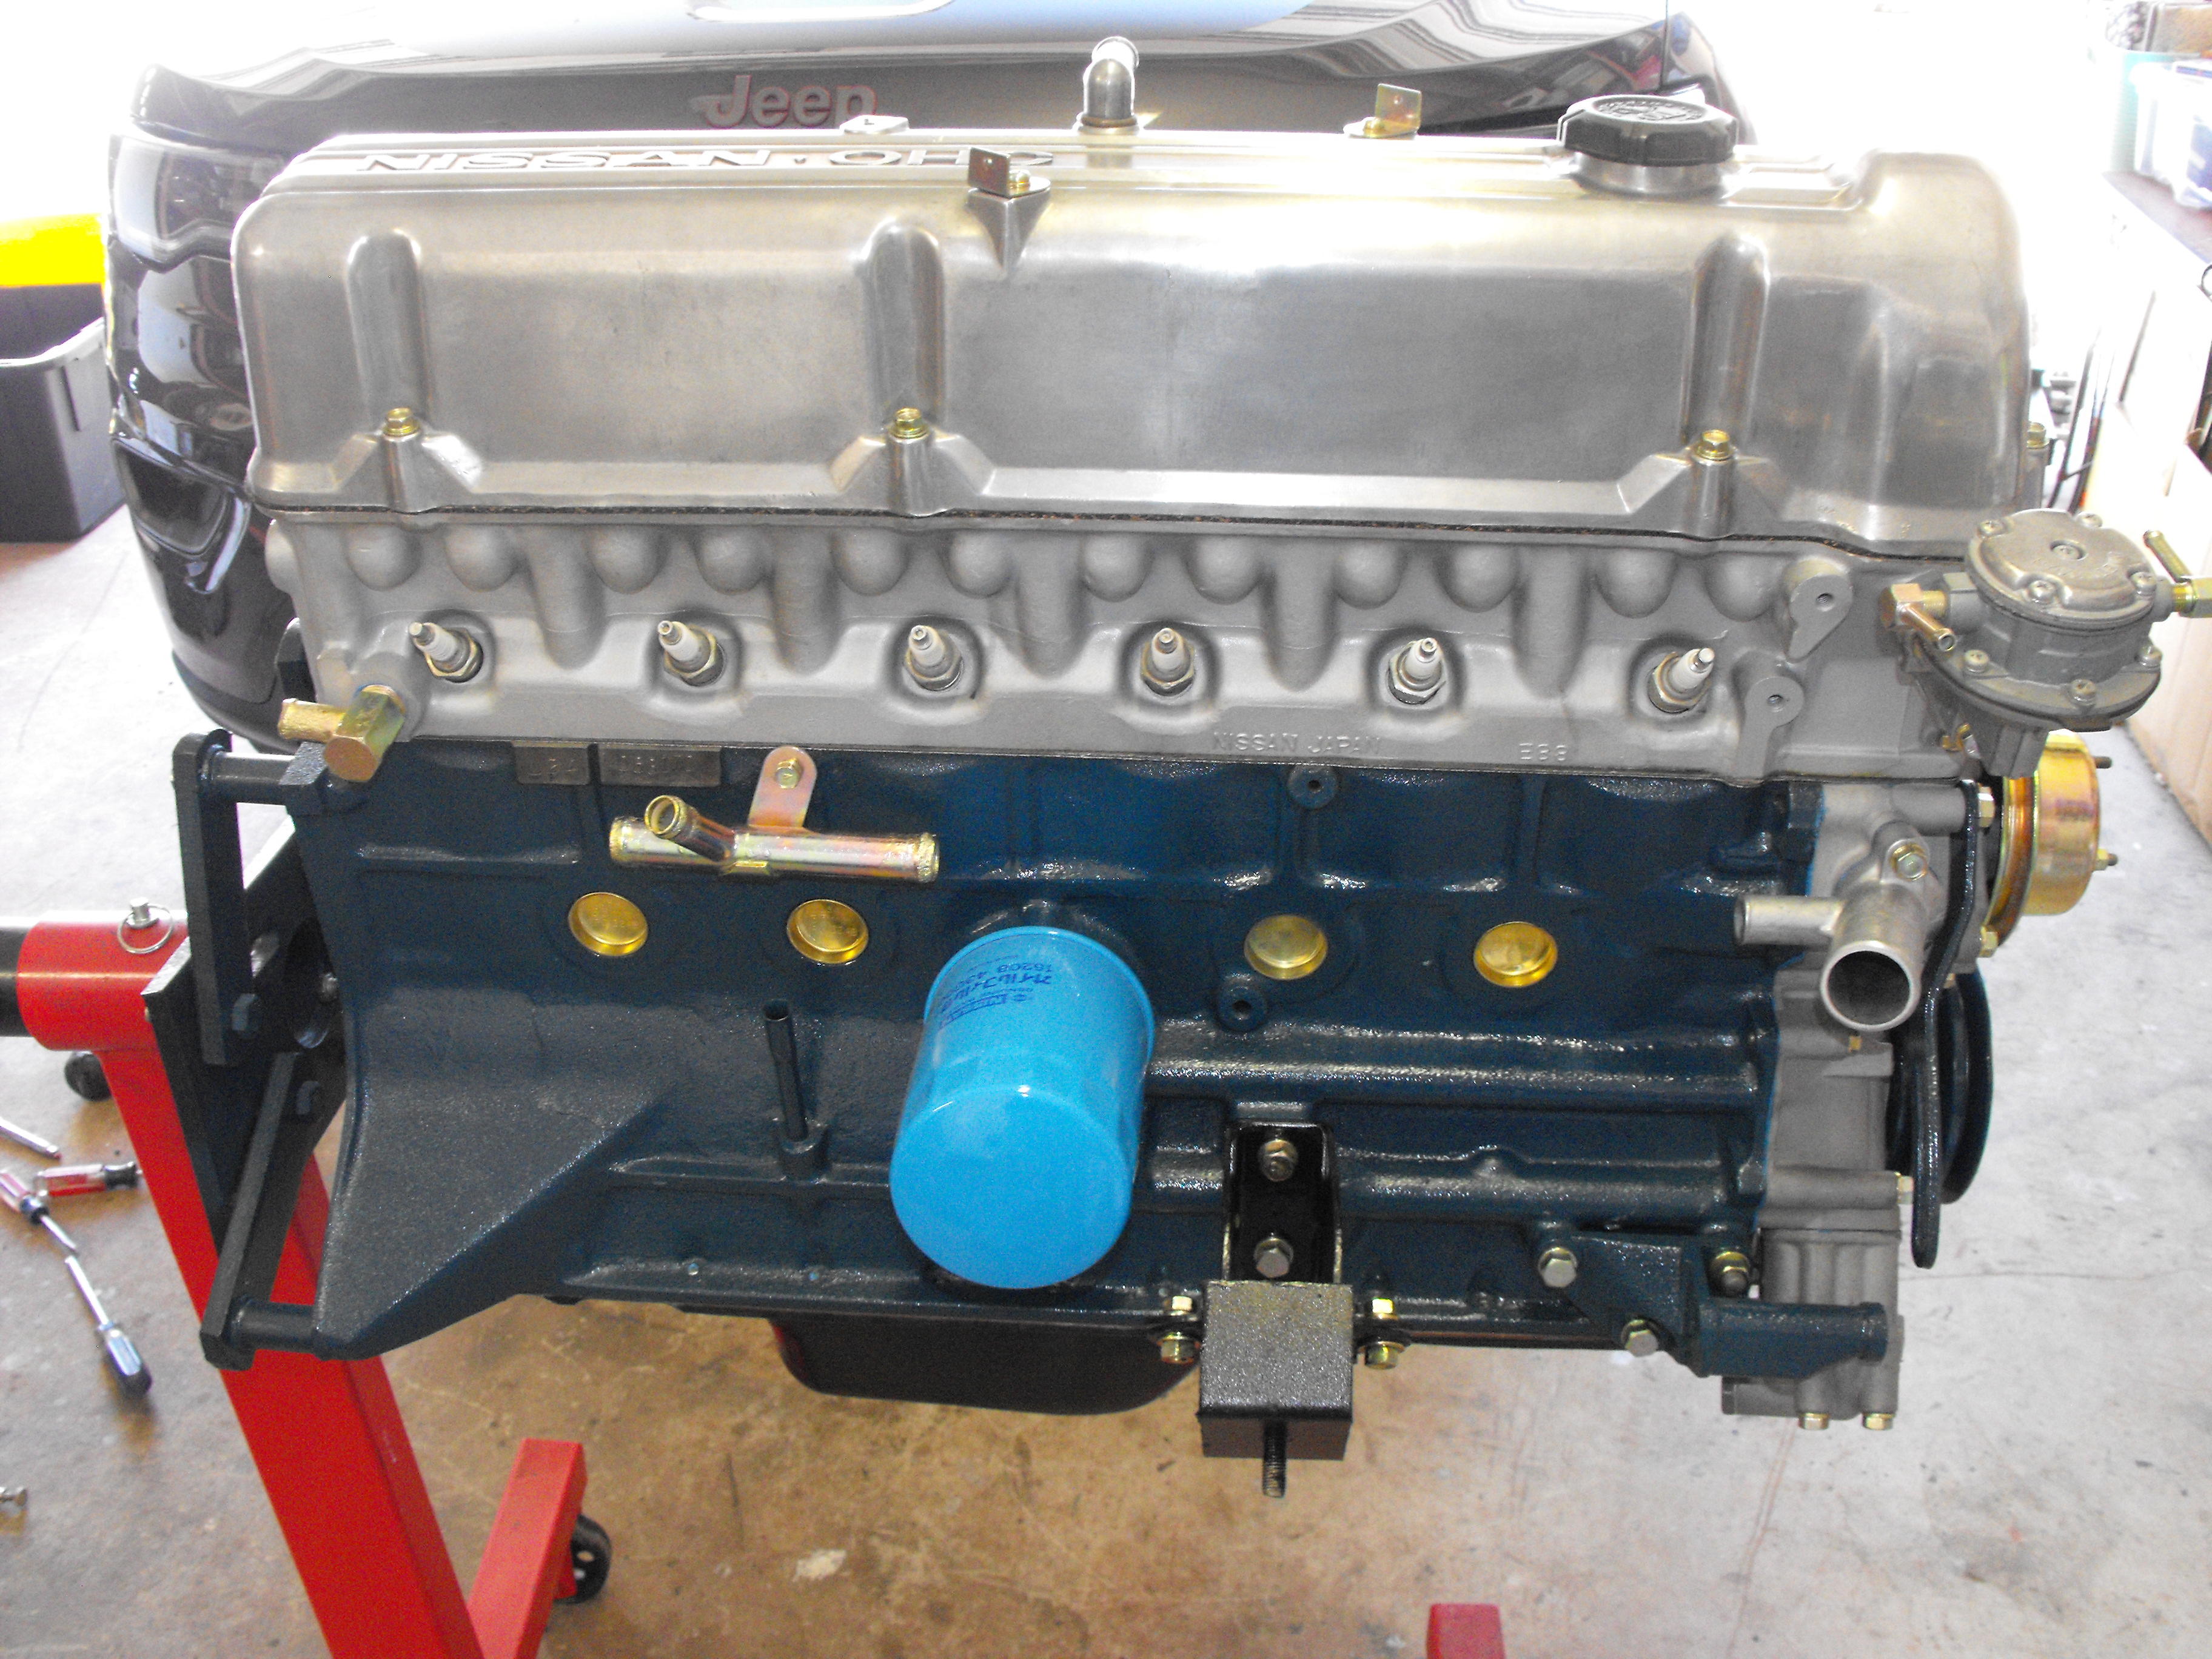
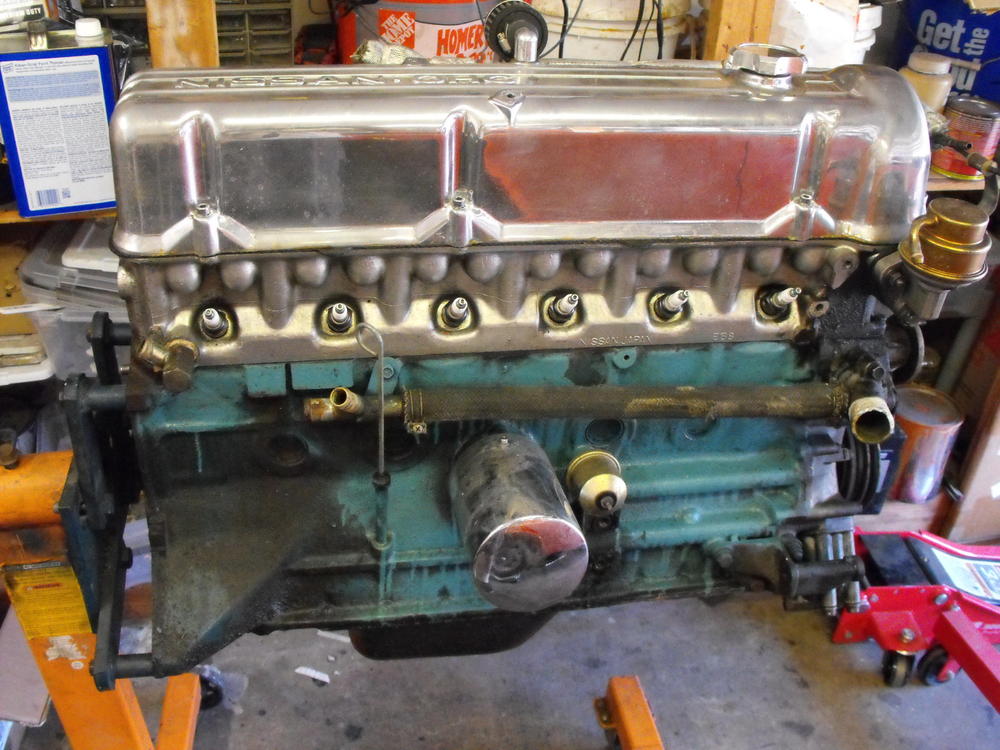
Got the engine disassembled and will bring to the machine shop tomorrow AM for block hone and and head work. Will also bring the discs and drums and have them turned. Started clean-up on the yellow zinc parts and should have those sent out for plating this week.


-
Yes, I typically use the complete Energy Suspension kit, except for maybe the steering arm piece. I prefer the original rubber in that location if the part is in good shape. https://www.energysuspensionparts.com/7.18101
-
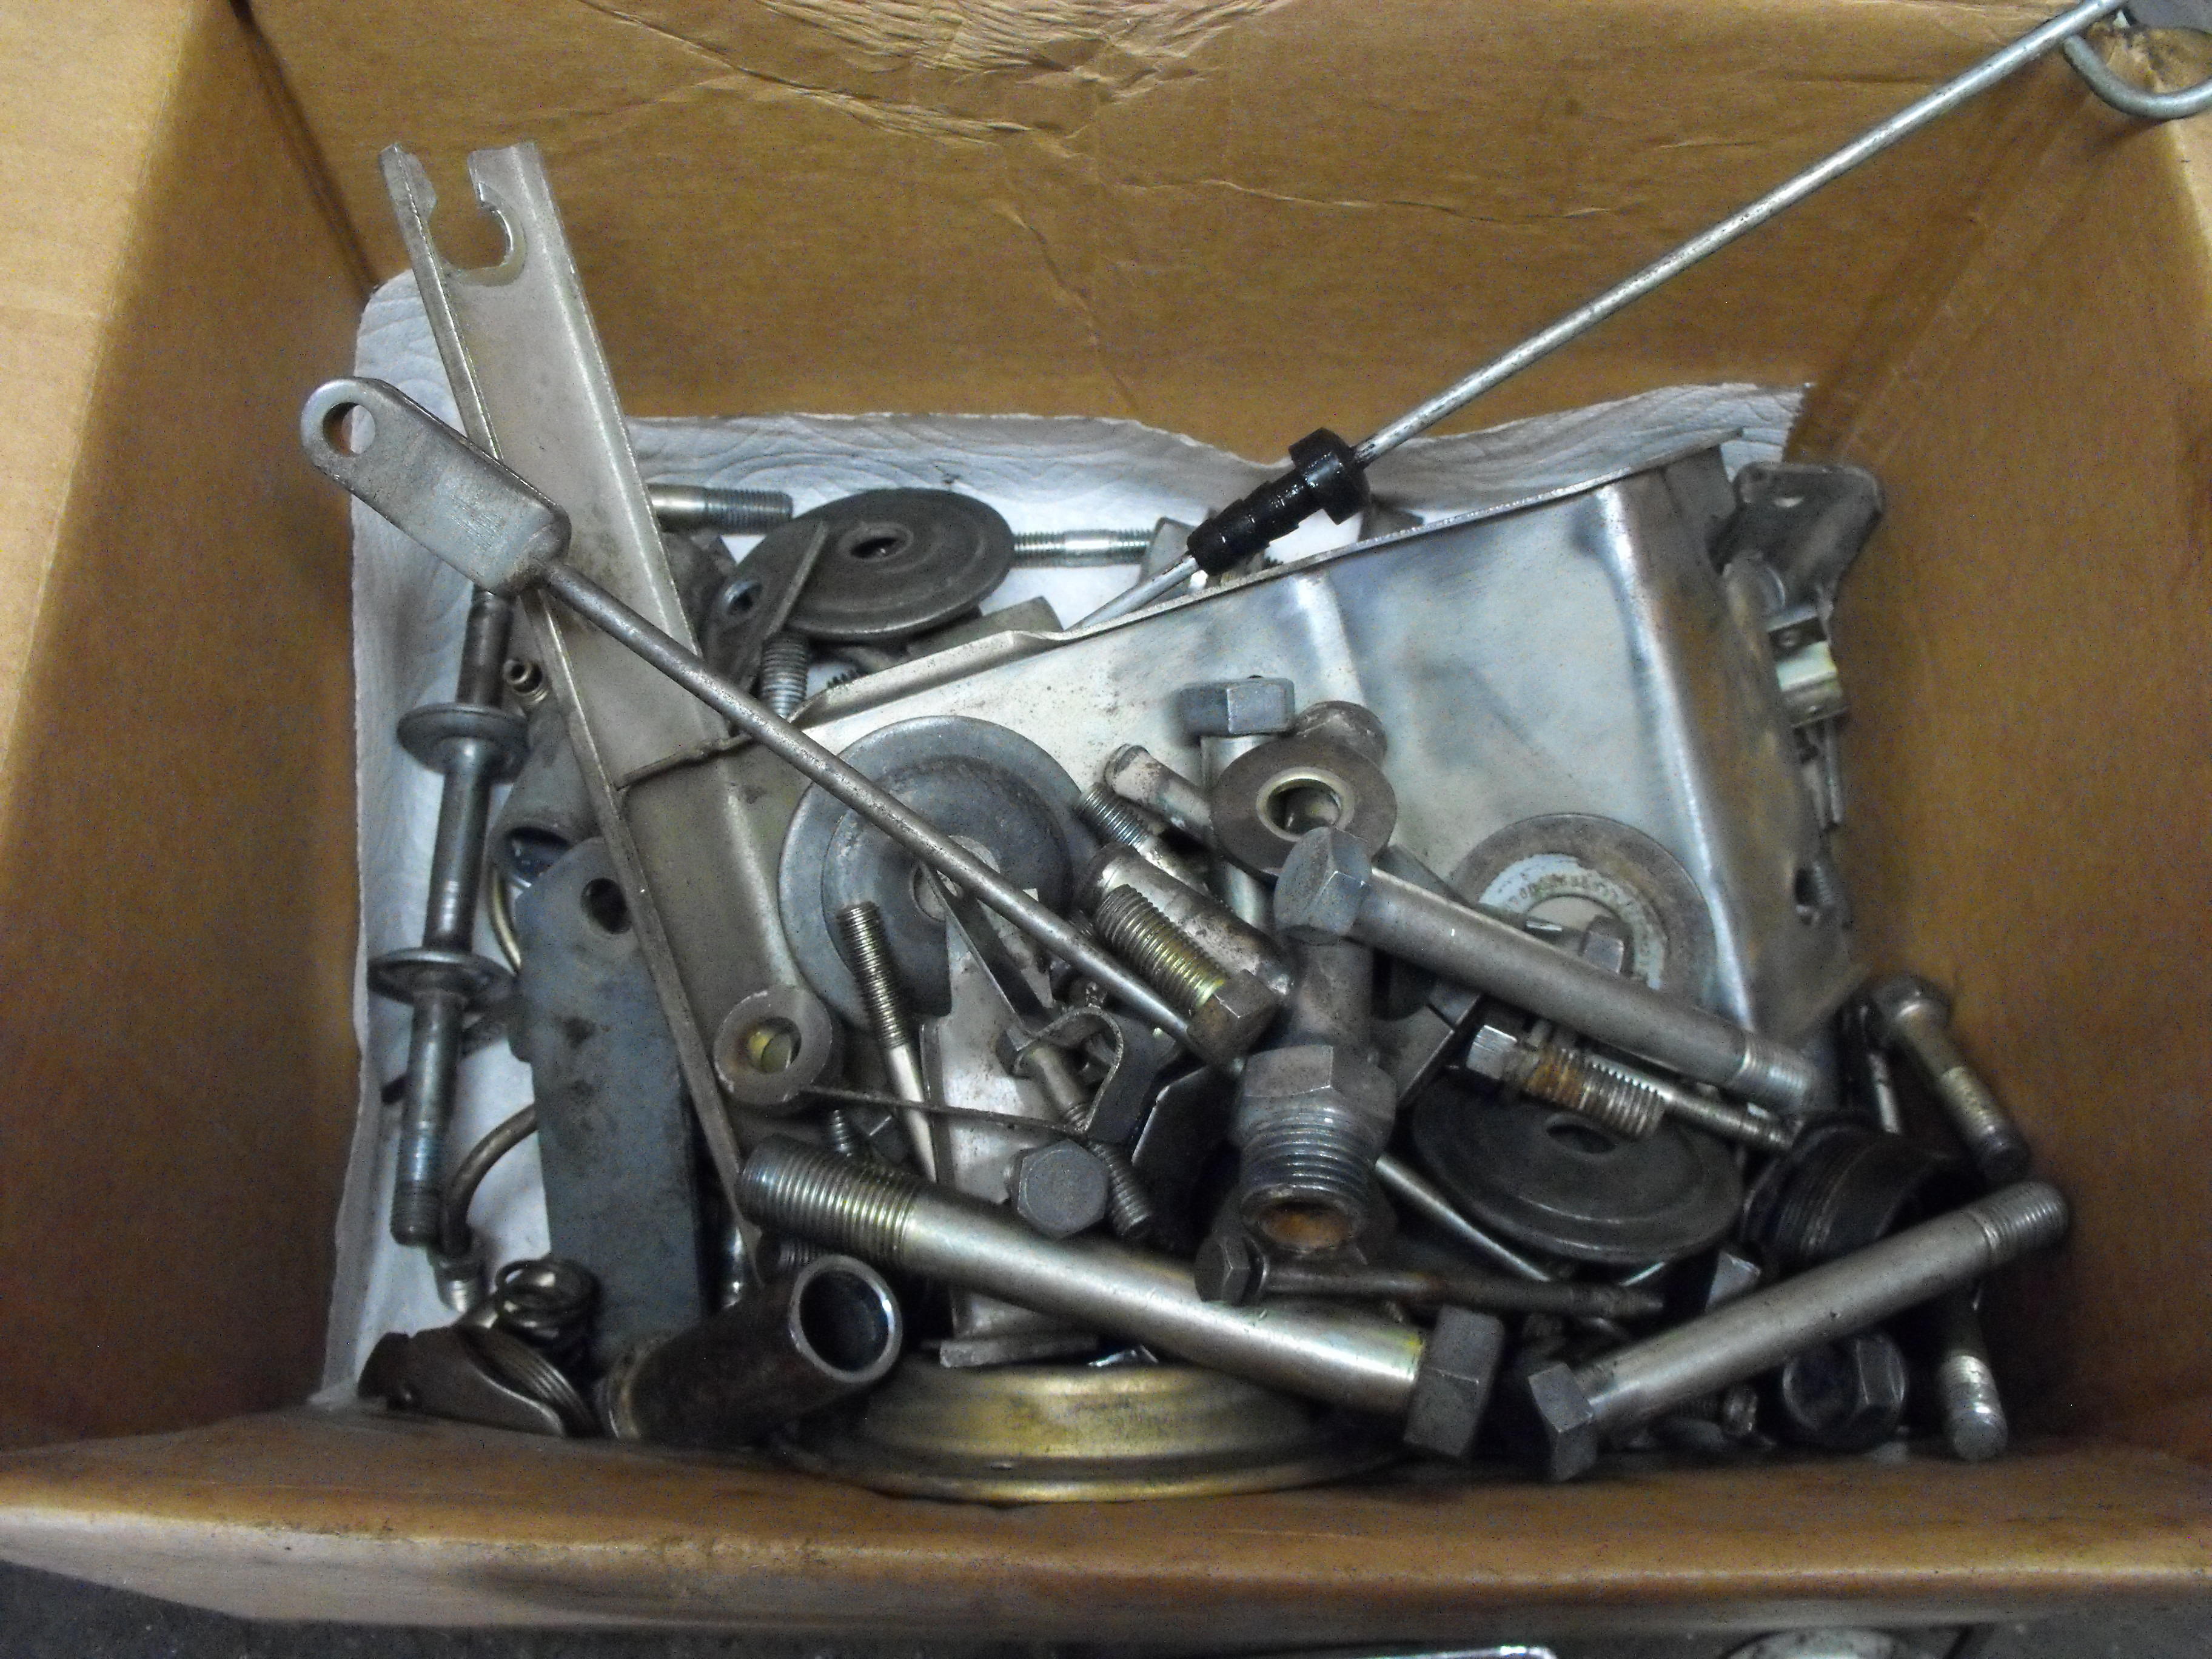
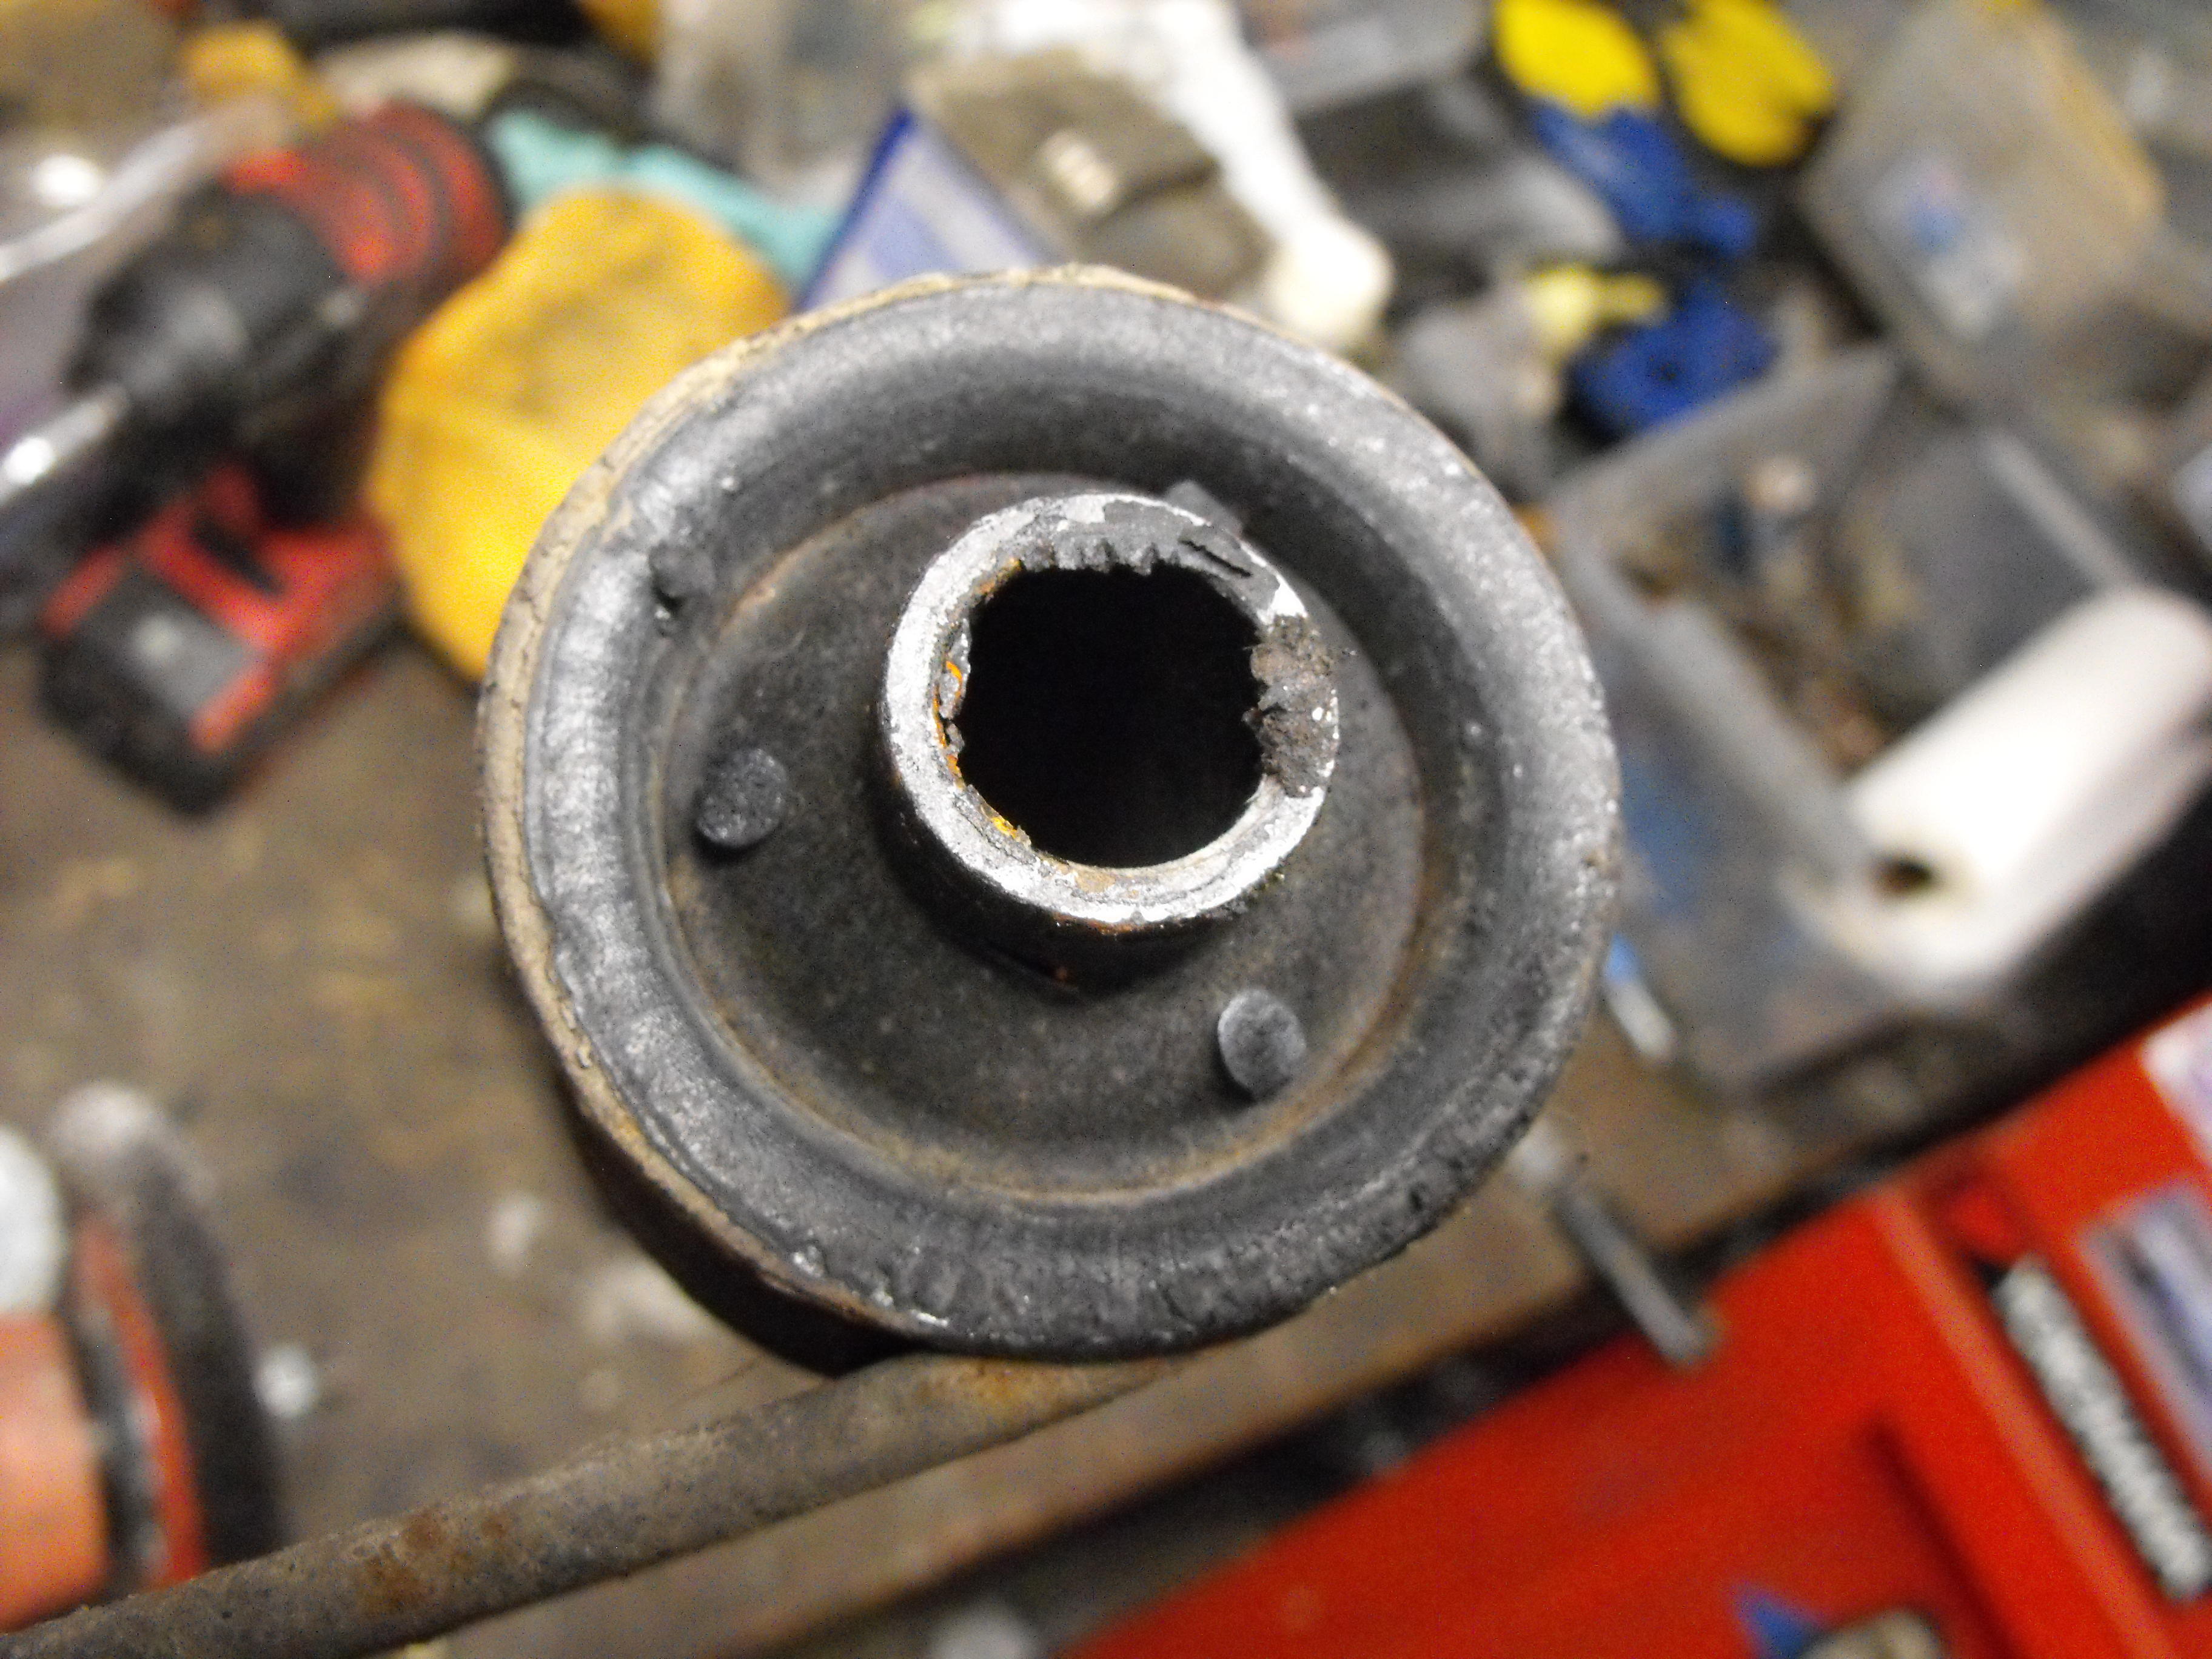
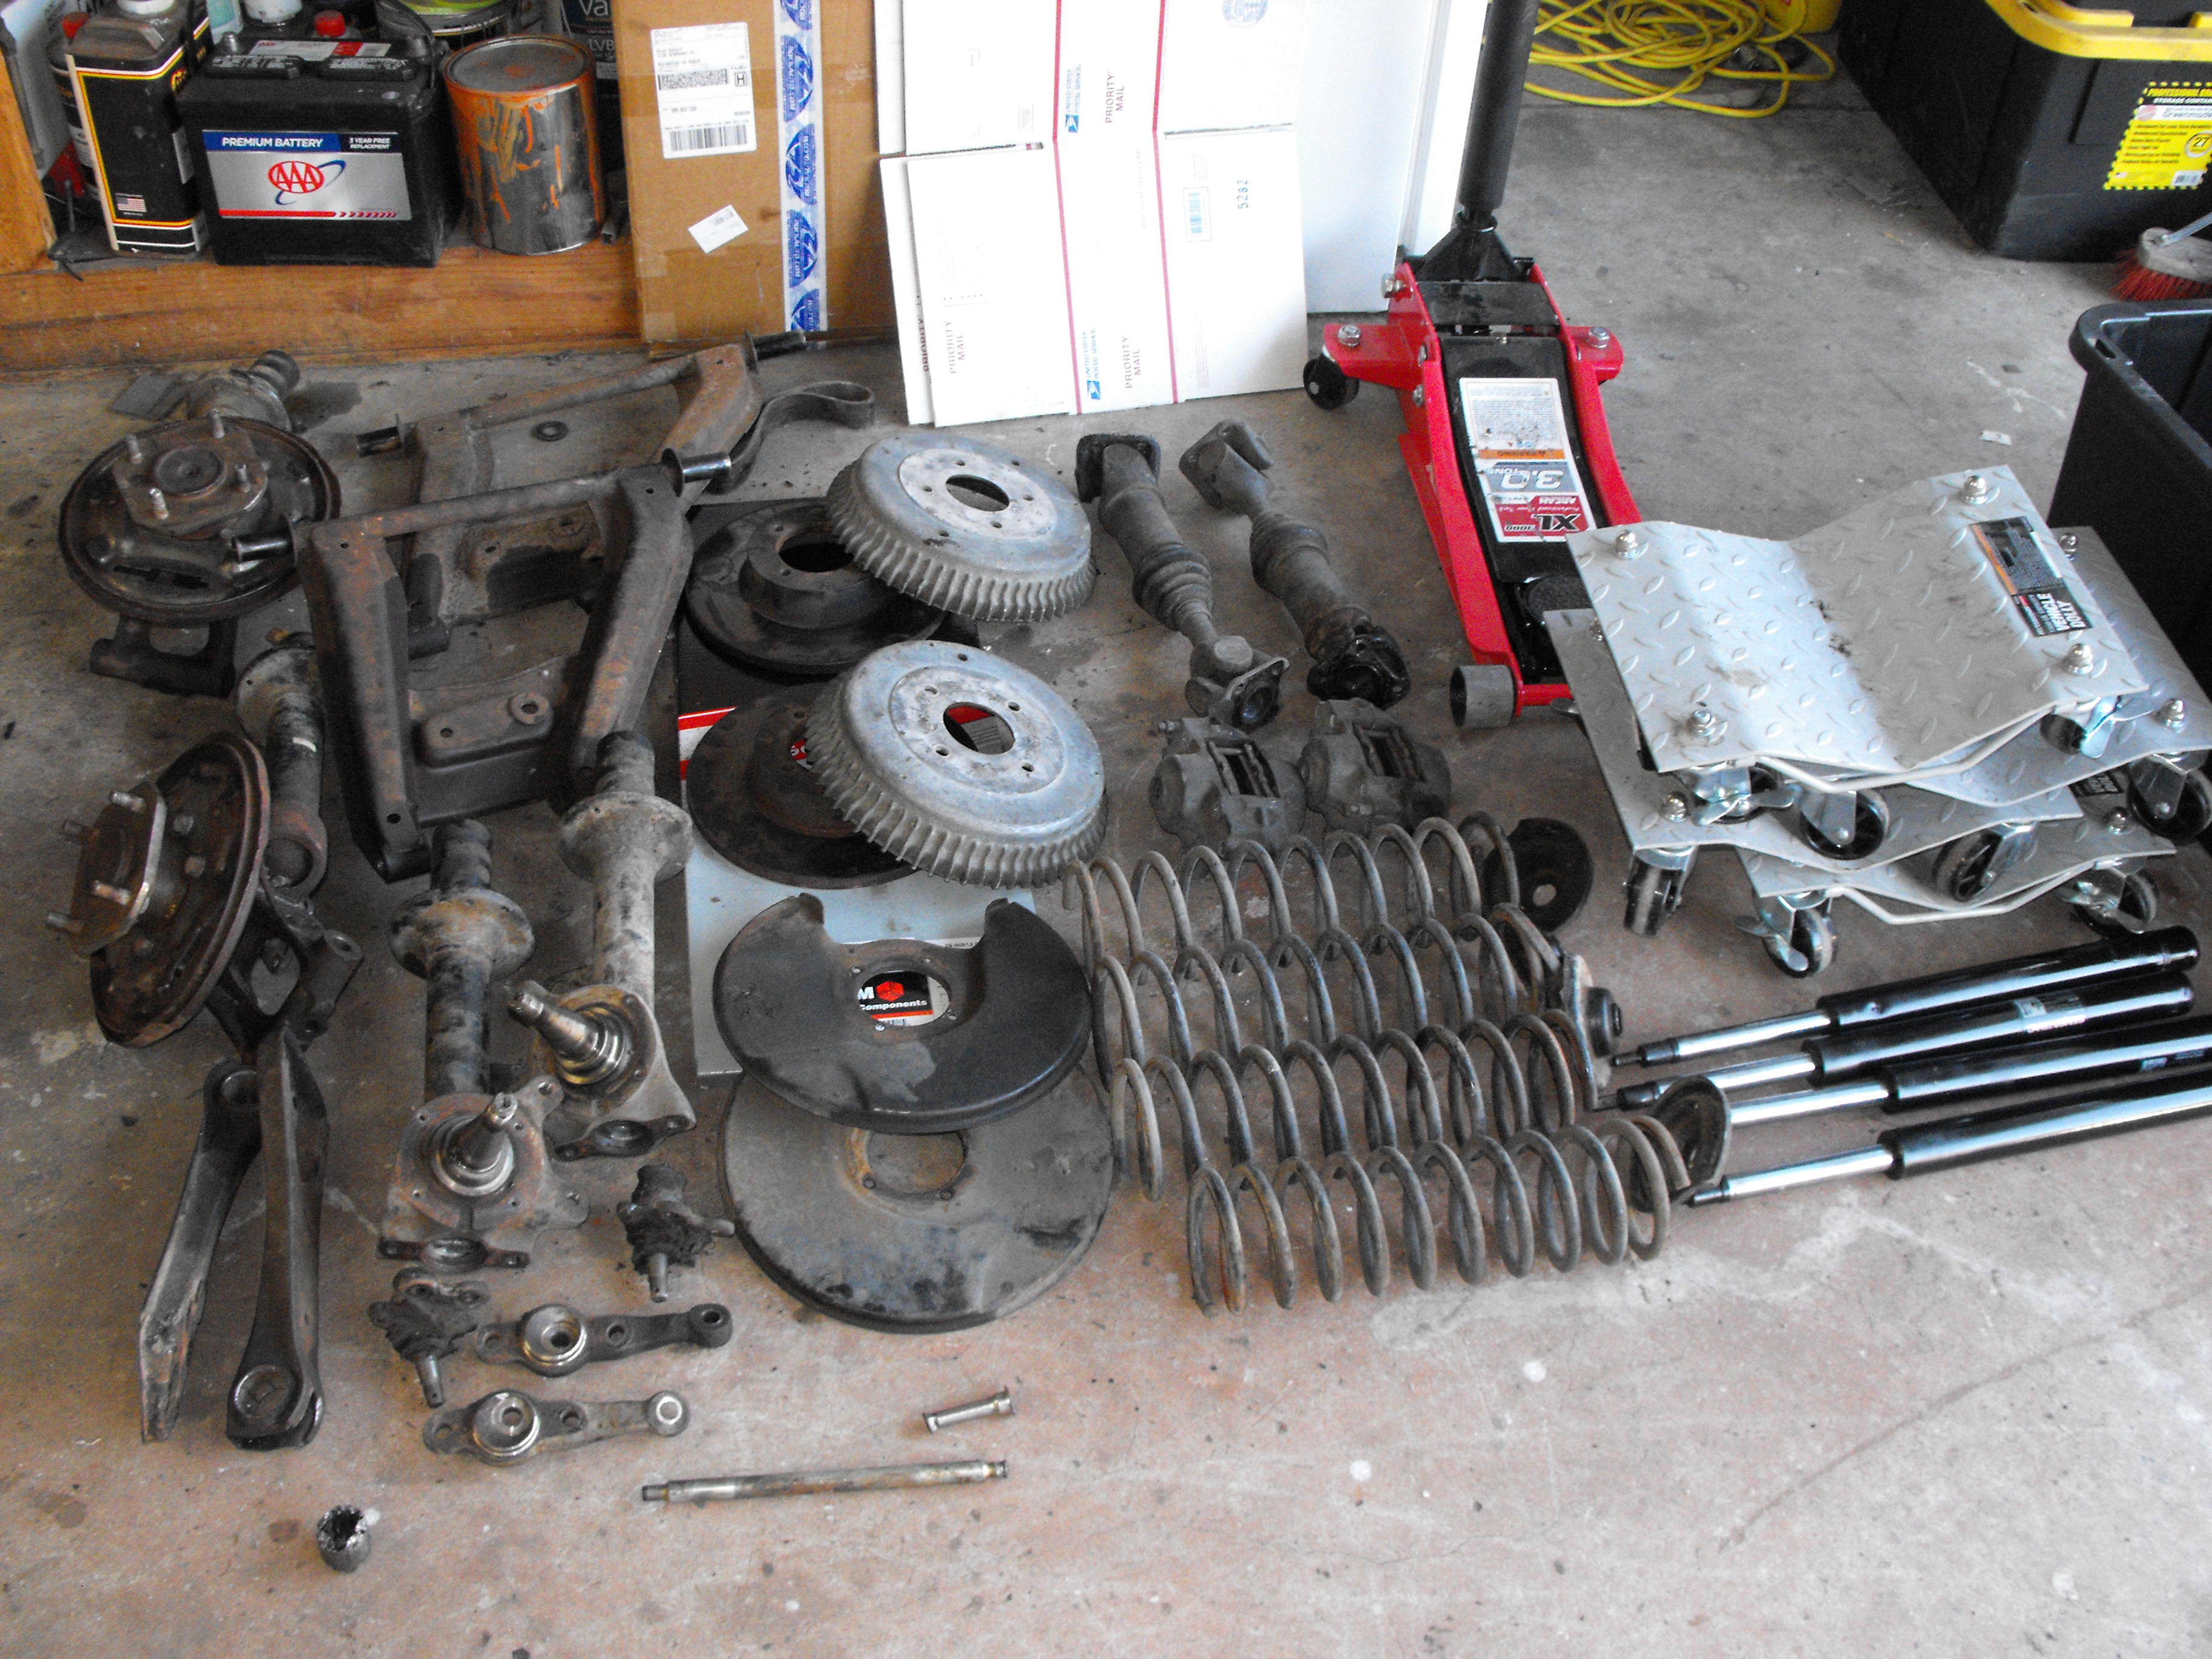
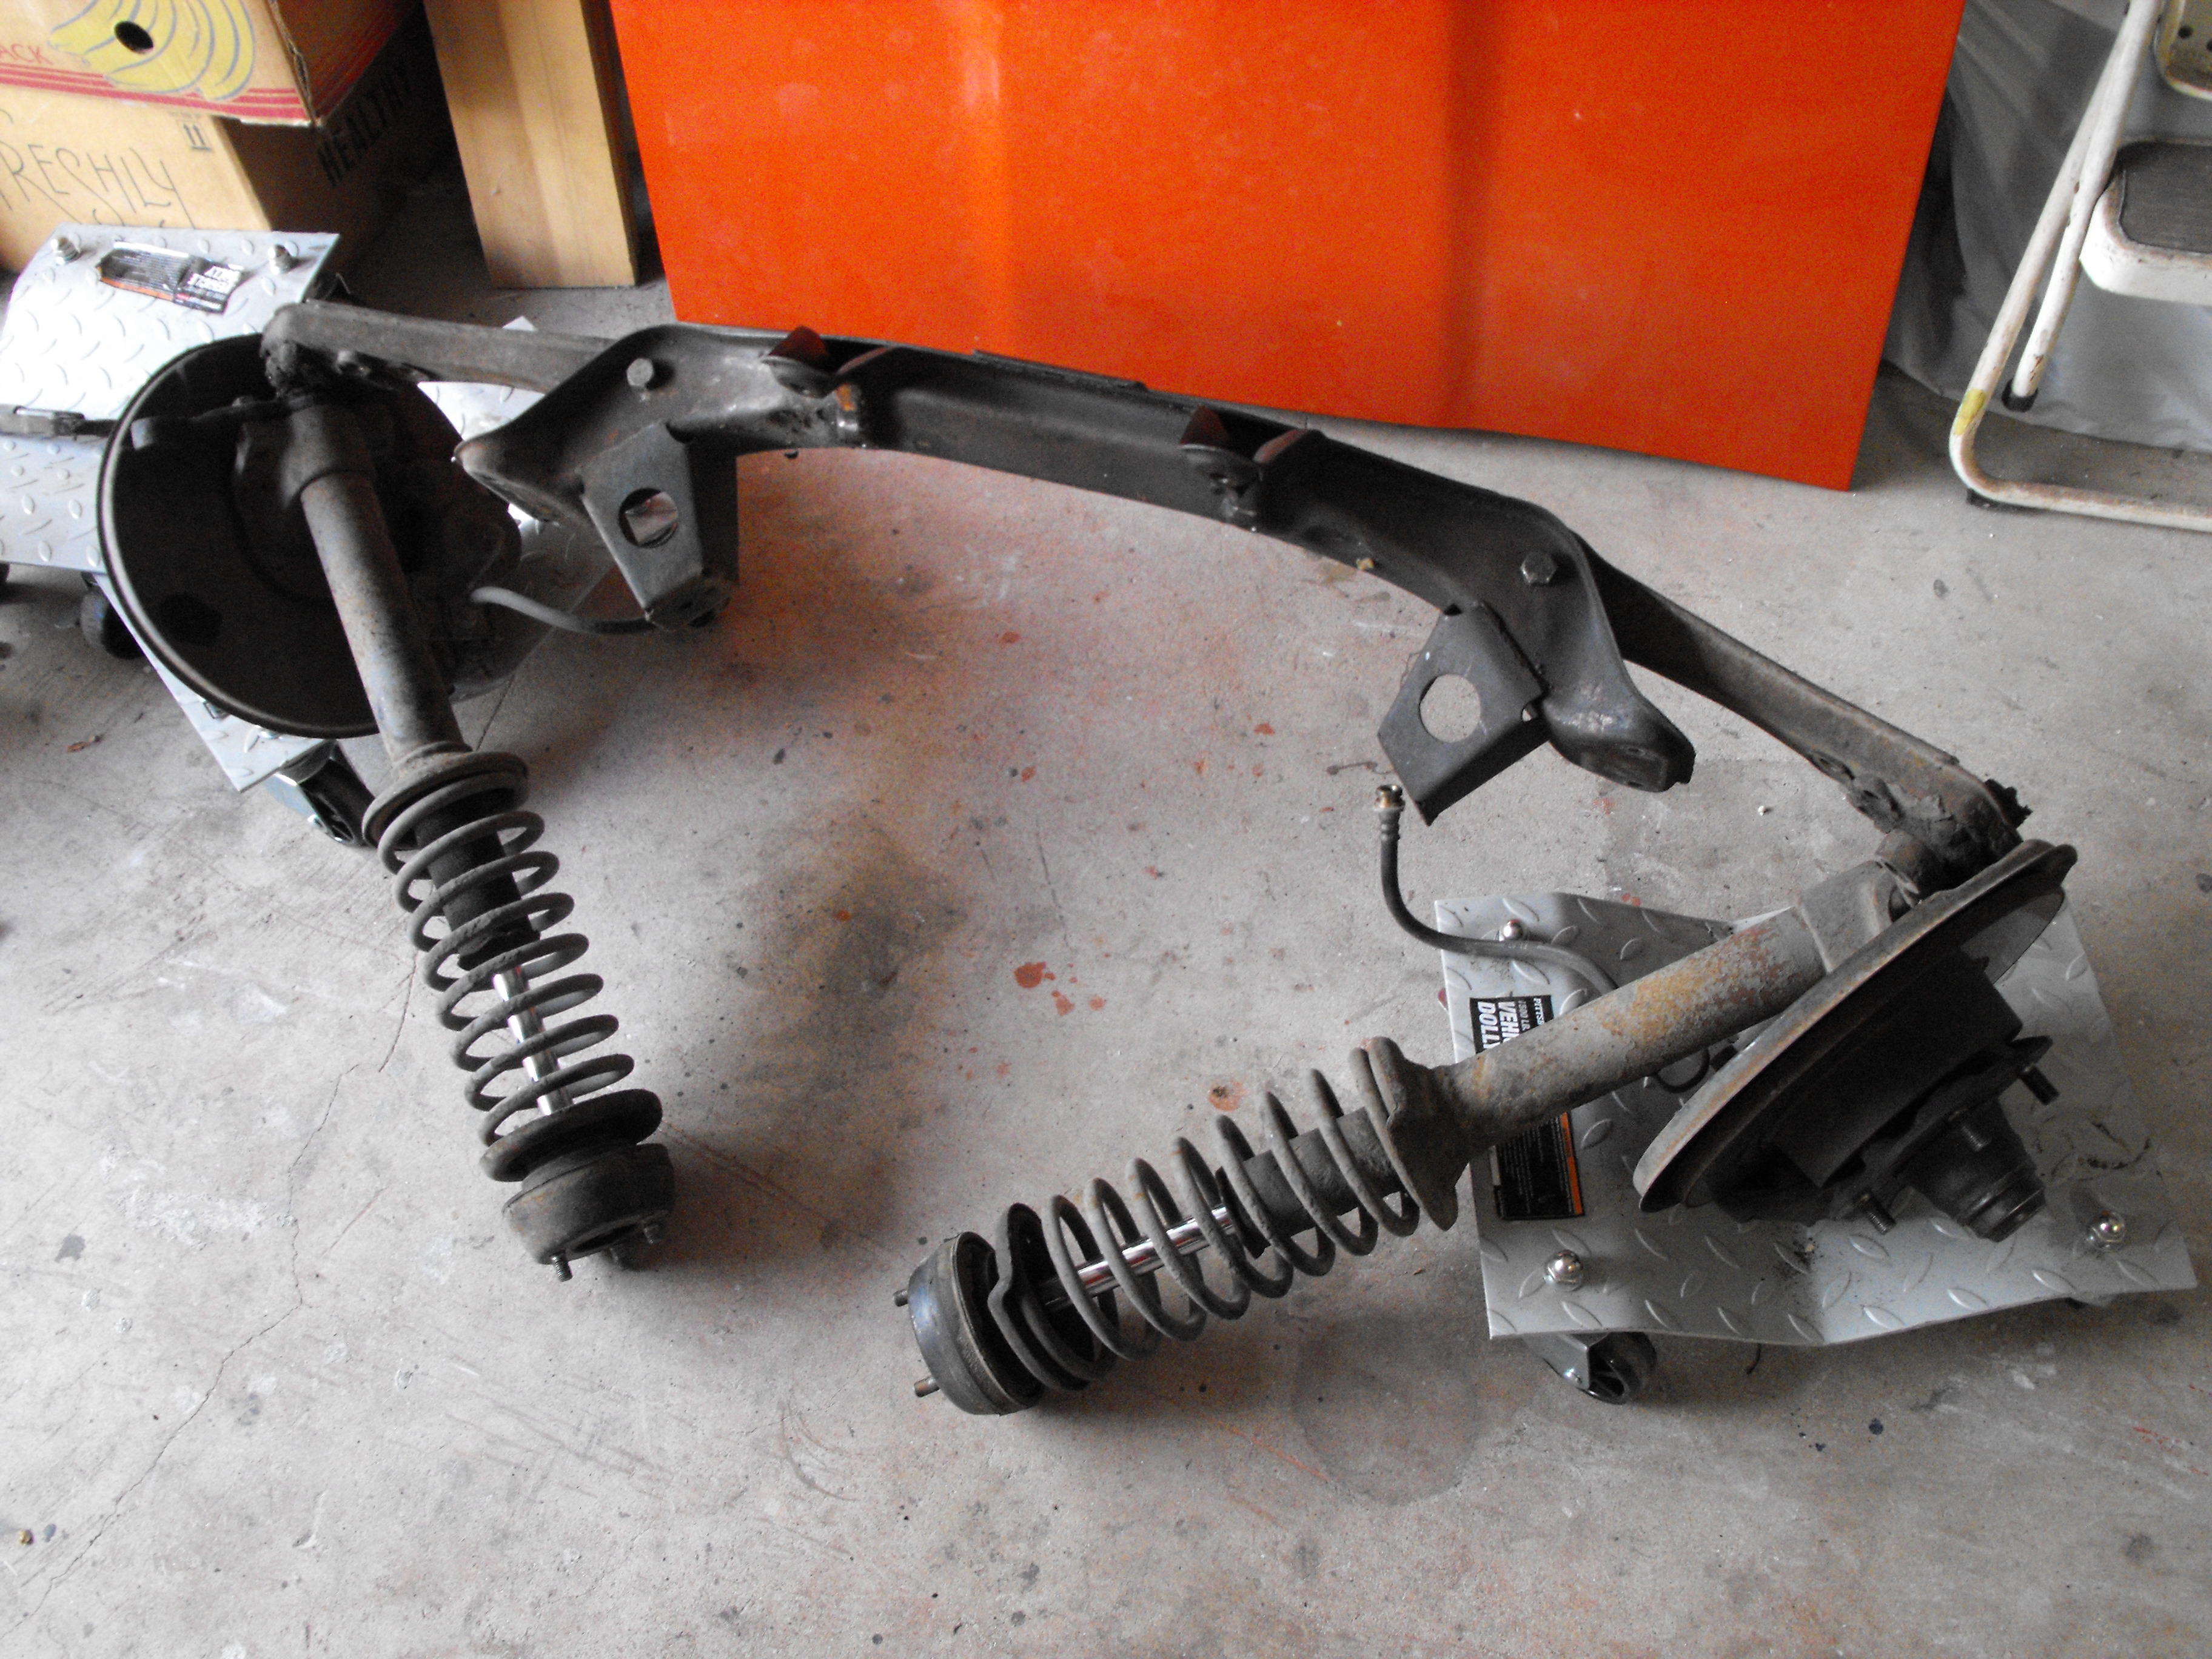
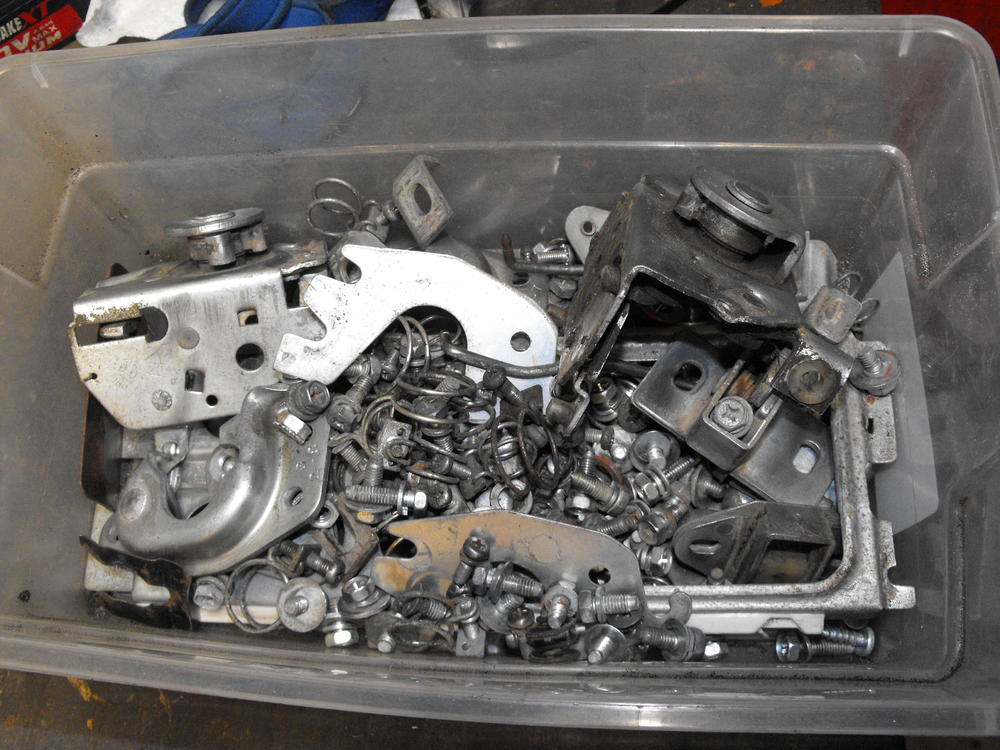
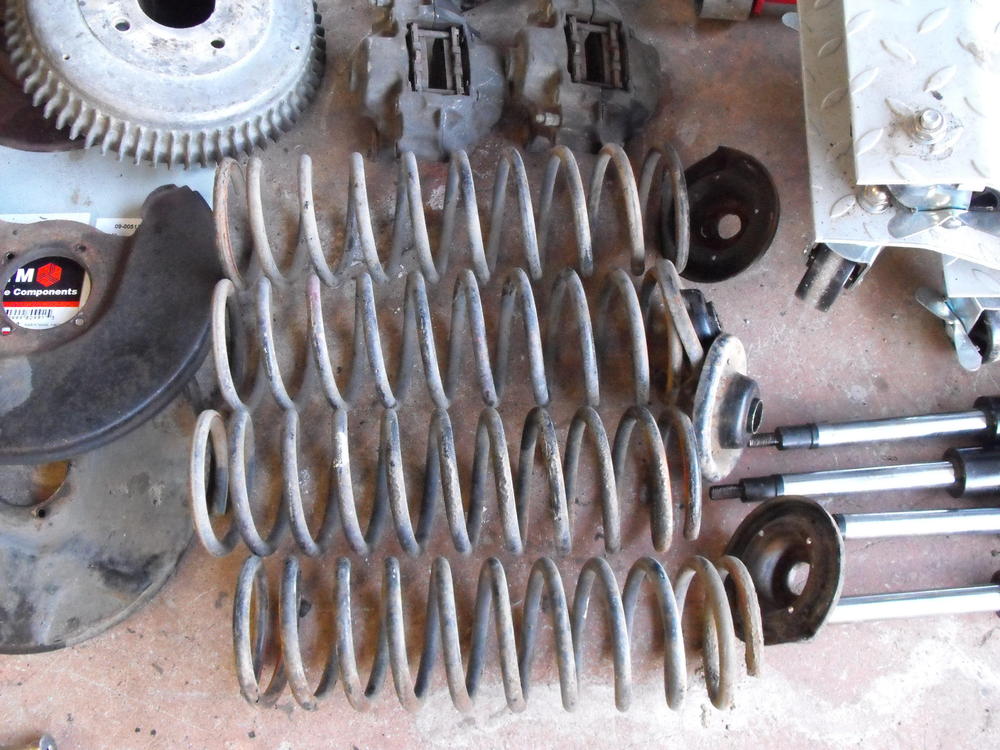
Got all the suspension parts prepped and ready to take to the powder coat shop. Drilled out the mustache bar bushings using a .25" drill and then cleaned up the inside with a small wire wheel on the drill. We will put in all new bushings for the suspension.


-
Yes, I saw that on BaT, very impressive!
-
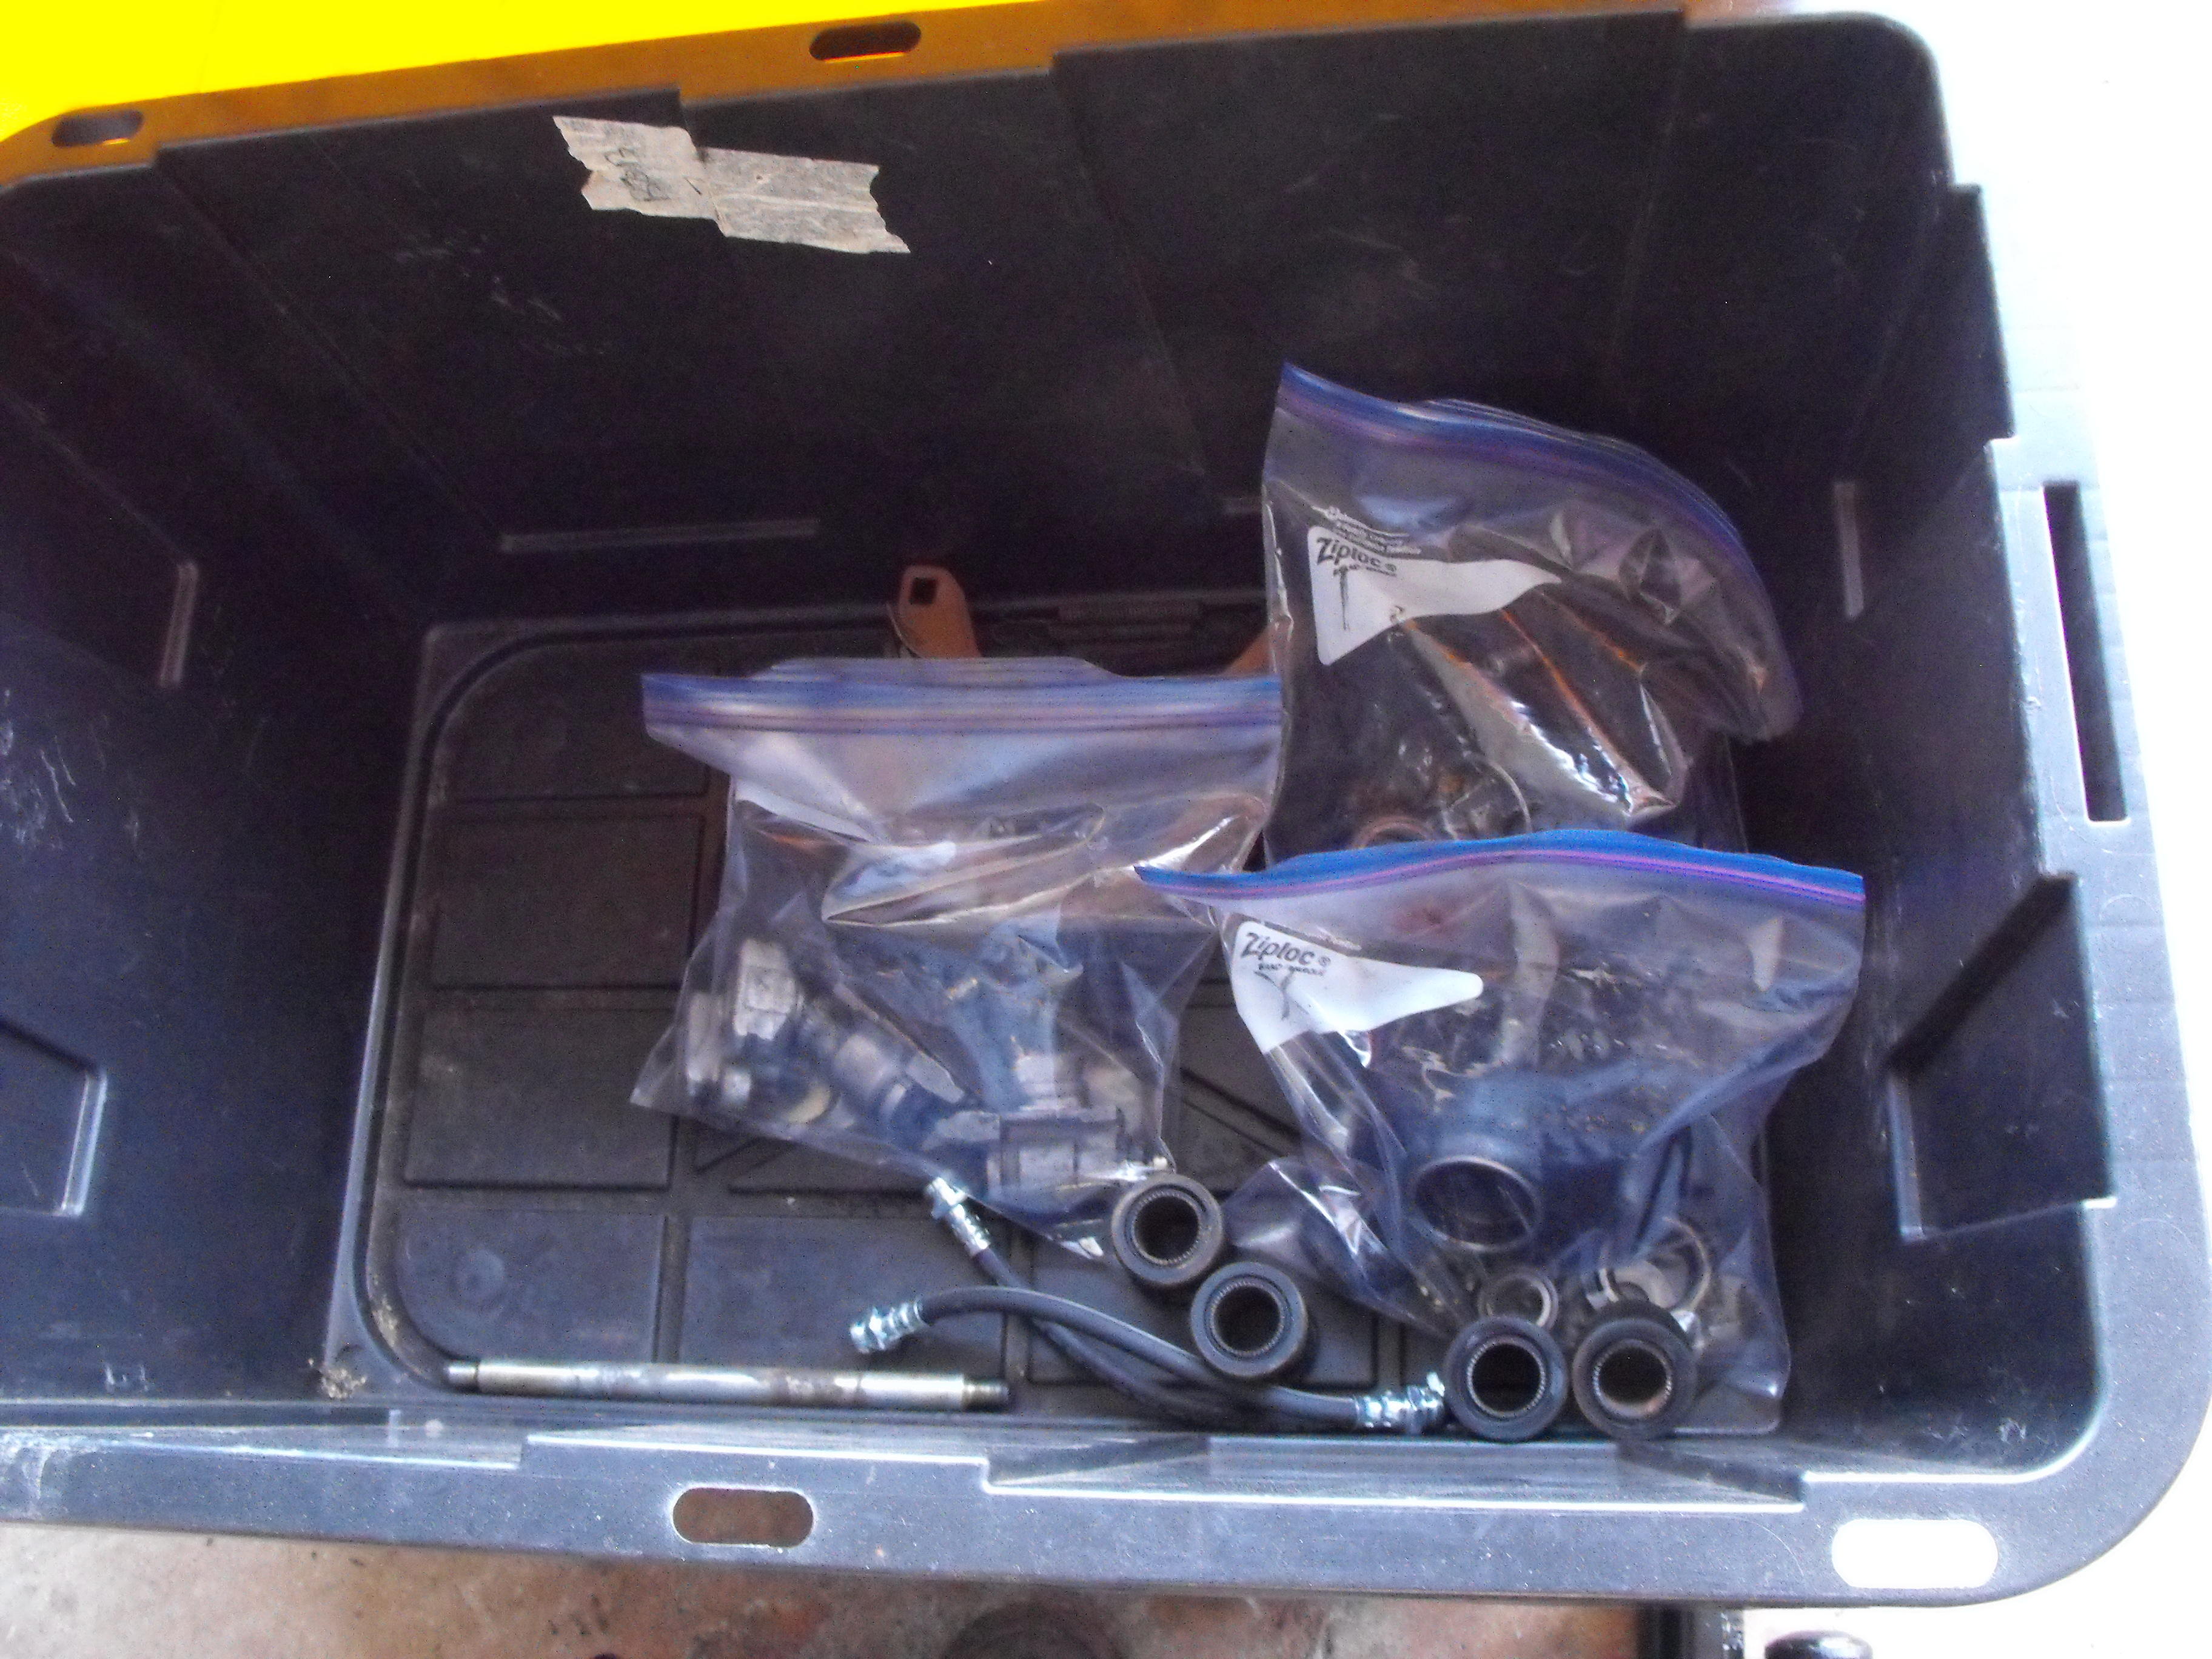
Got the silver zinc parts prepped and ready to send out for plating. Just had to clean off some over-spray from the previous paint job and heavy dirt from the parts. The plating company does the rest.

-
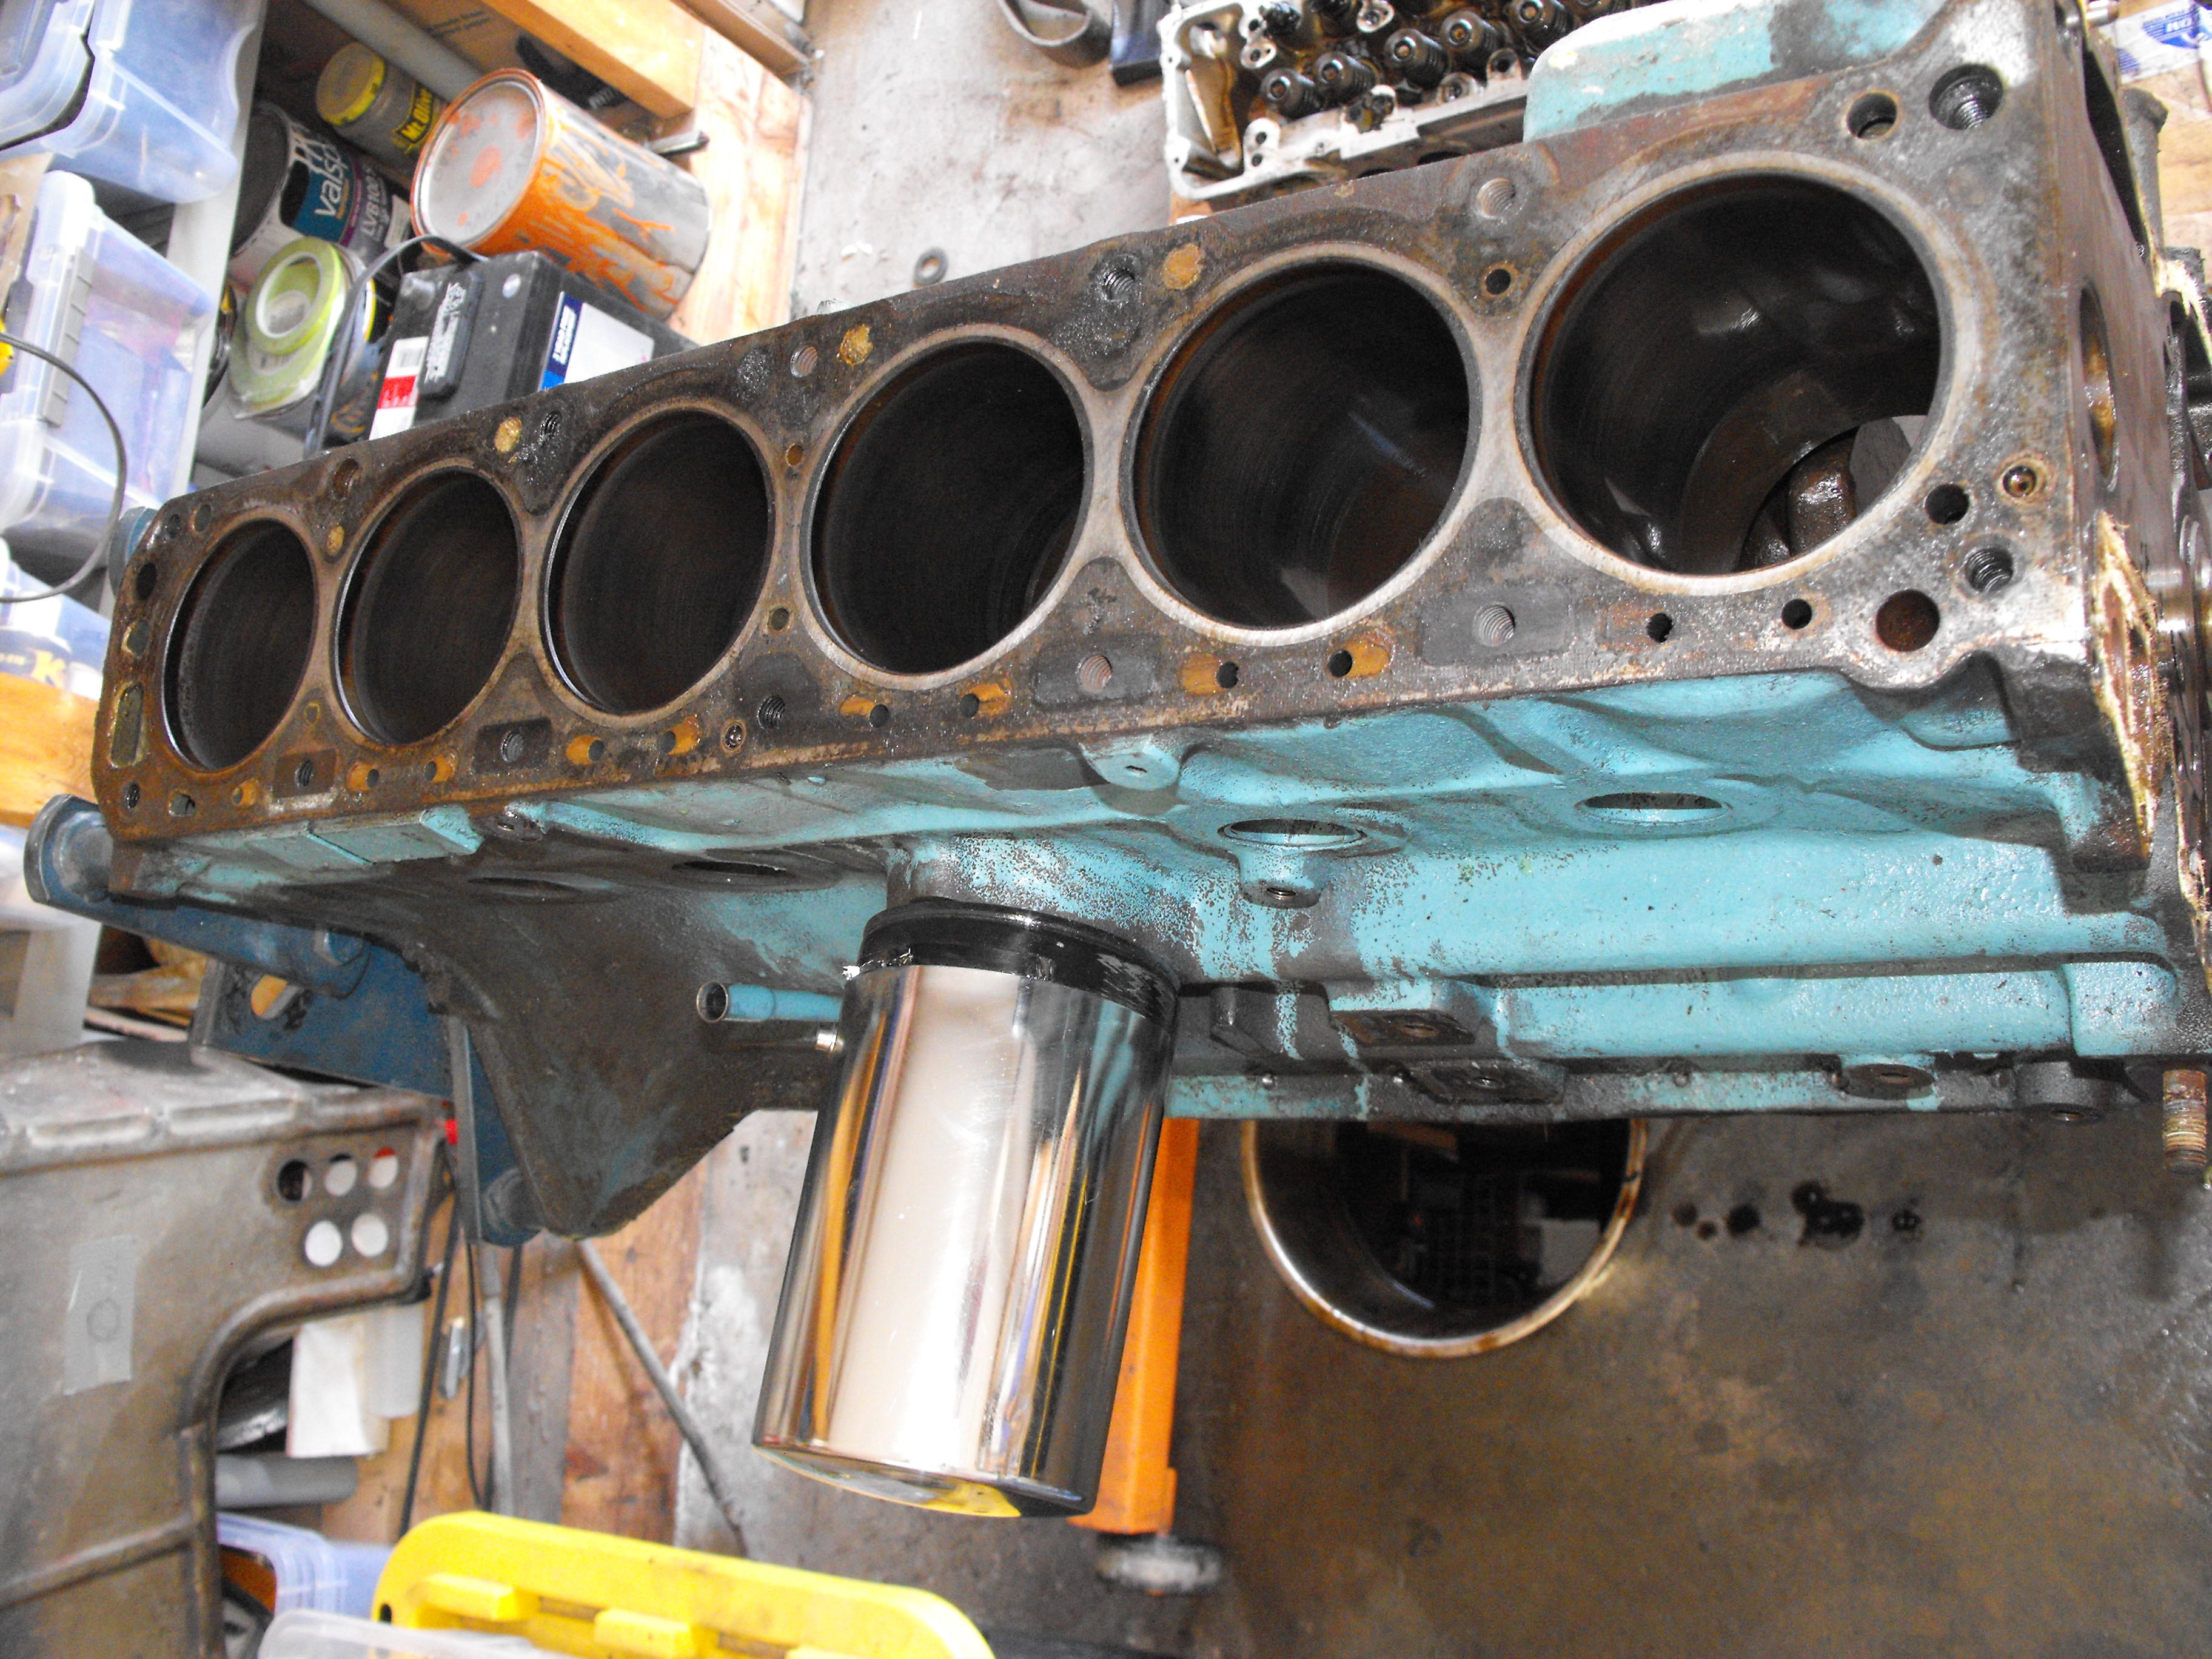
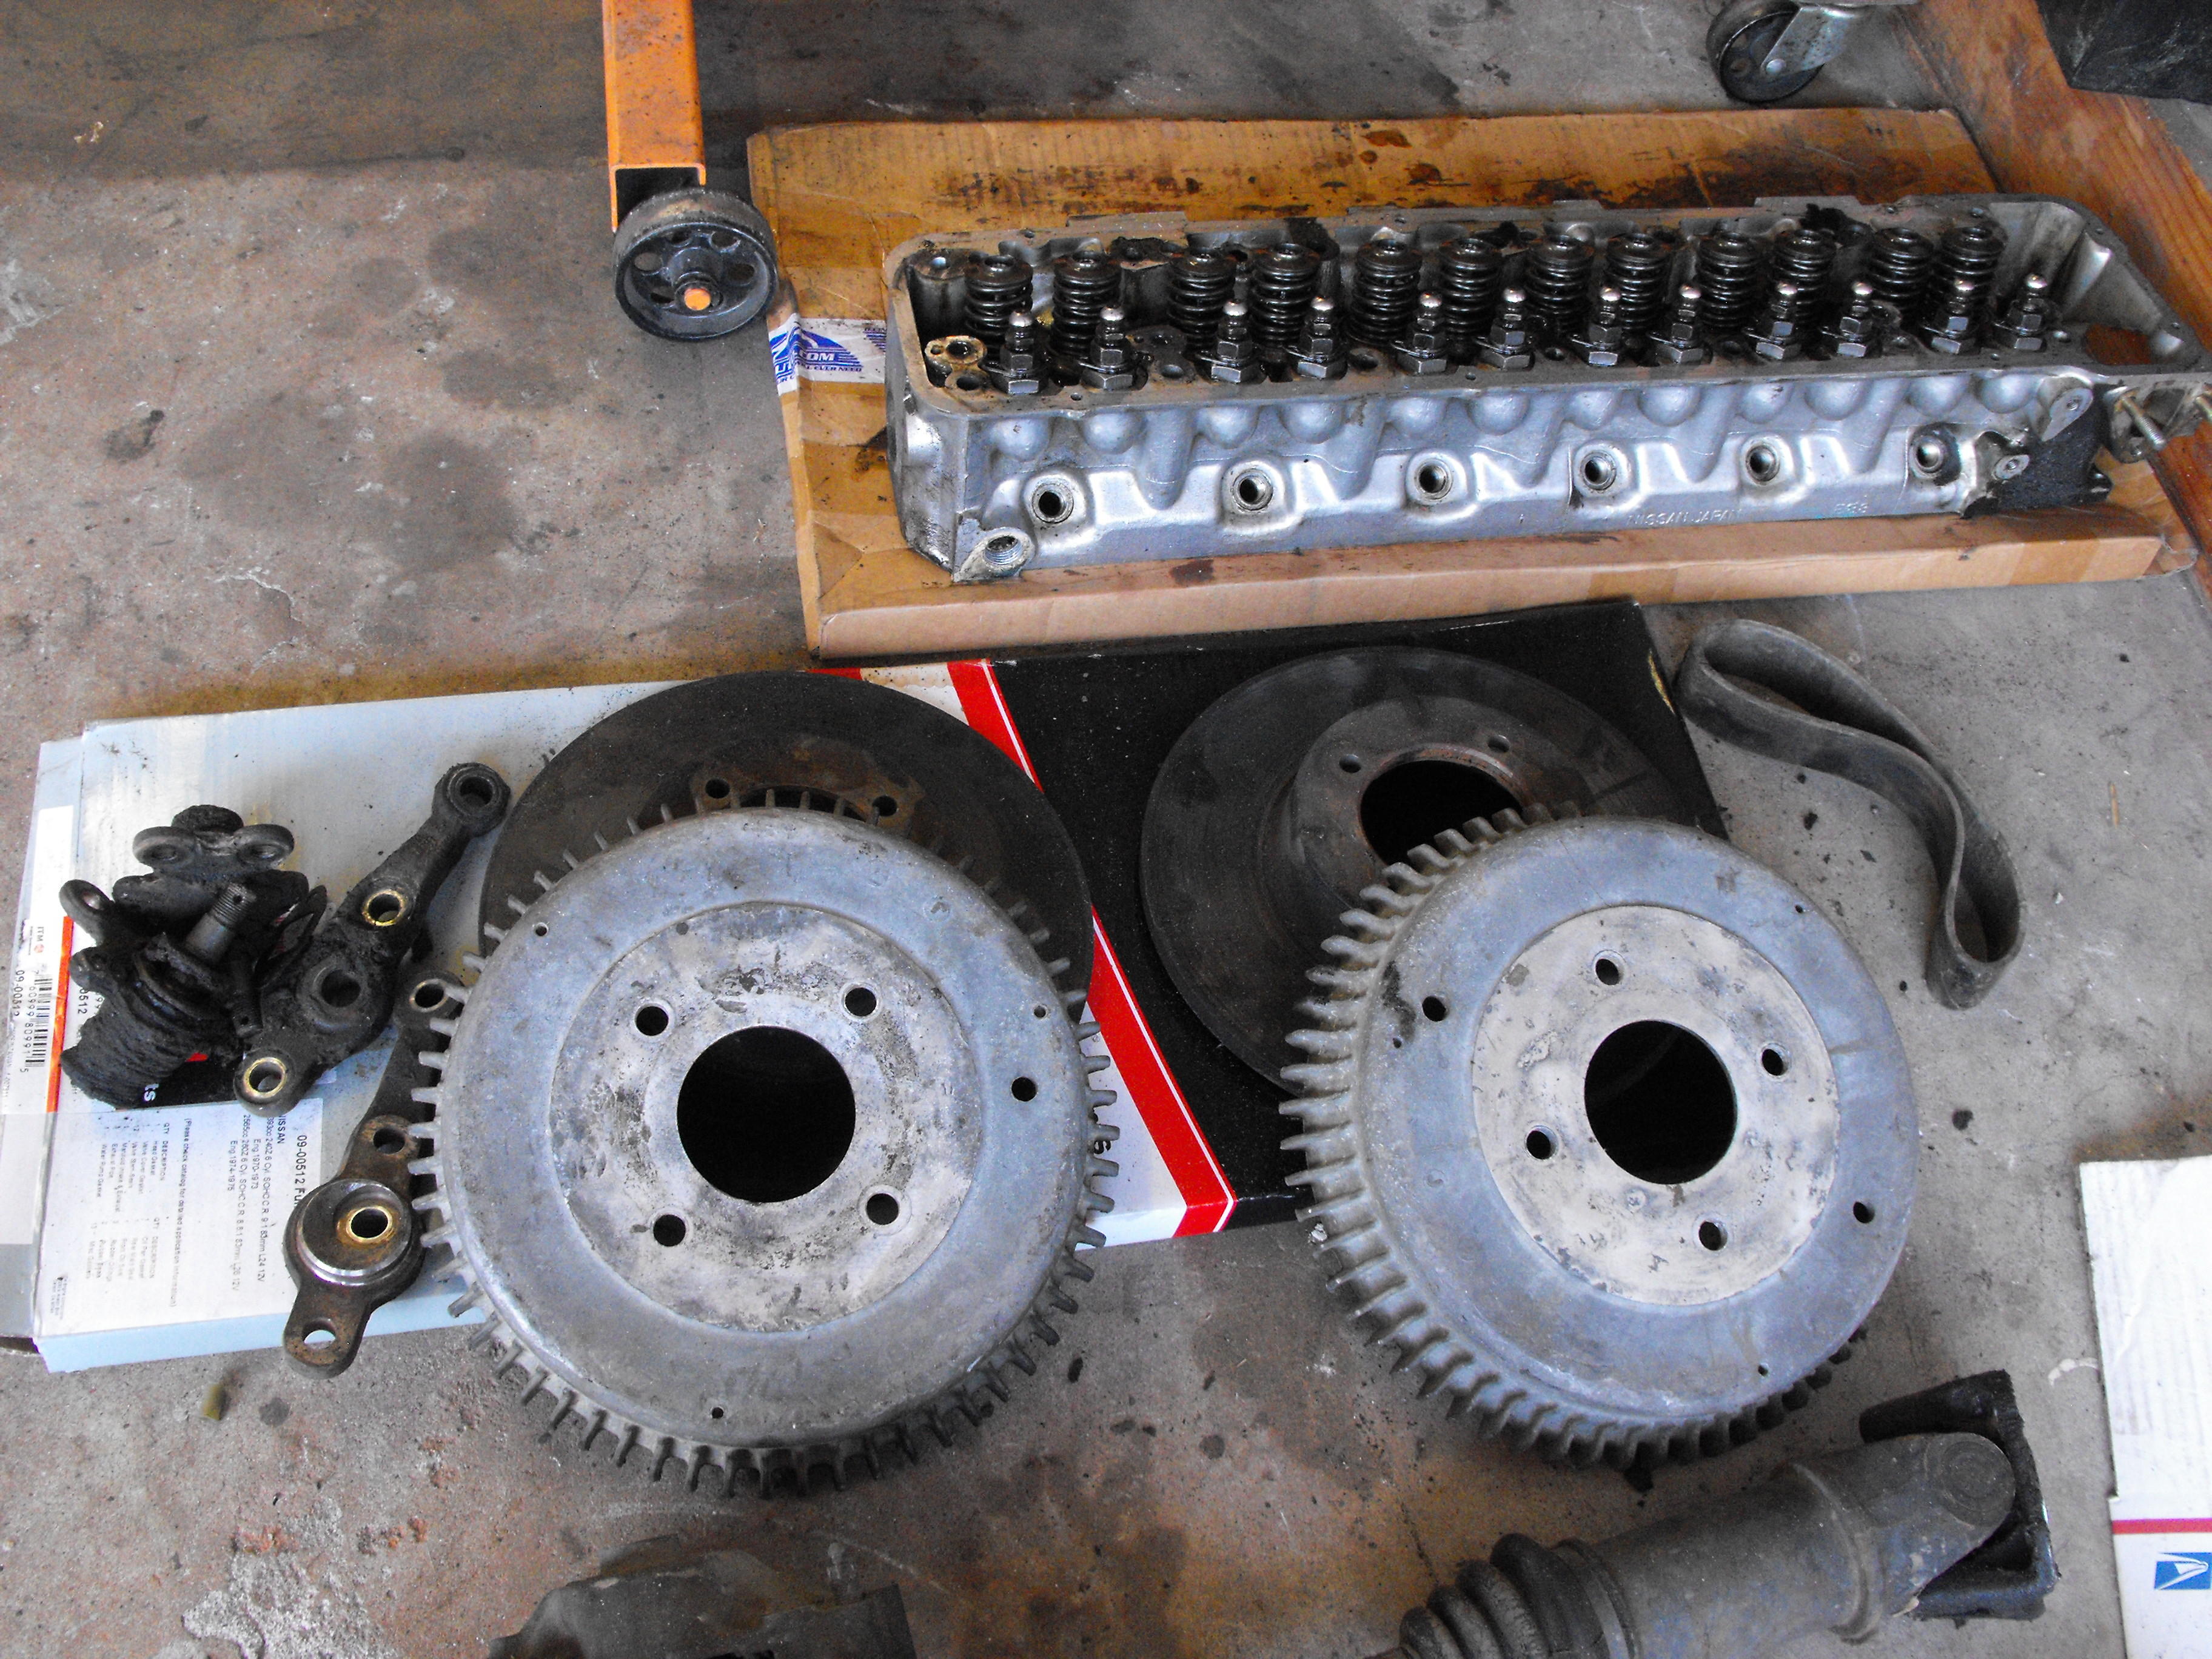
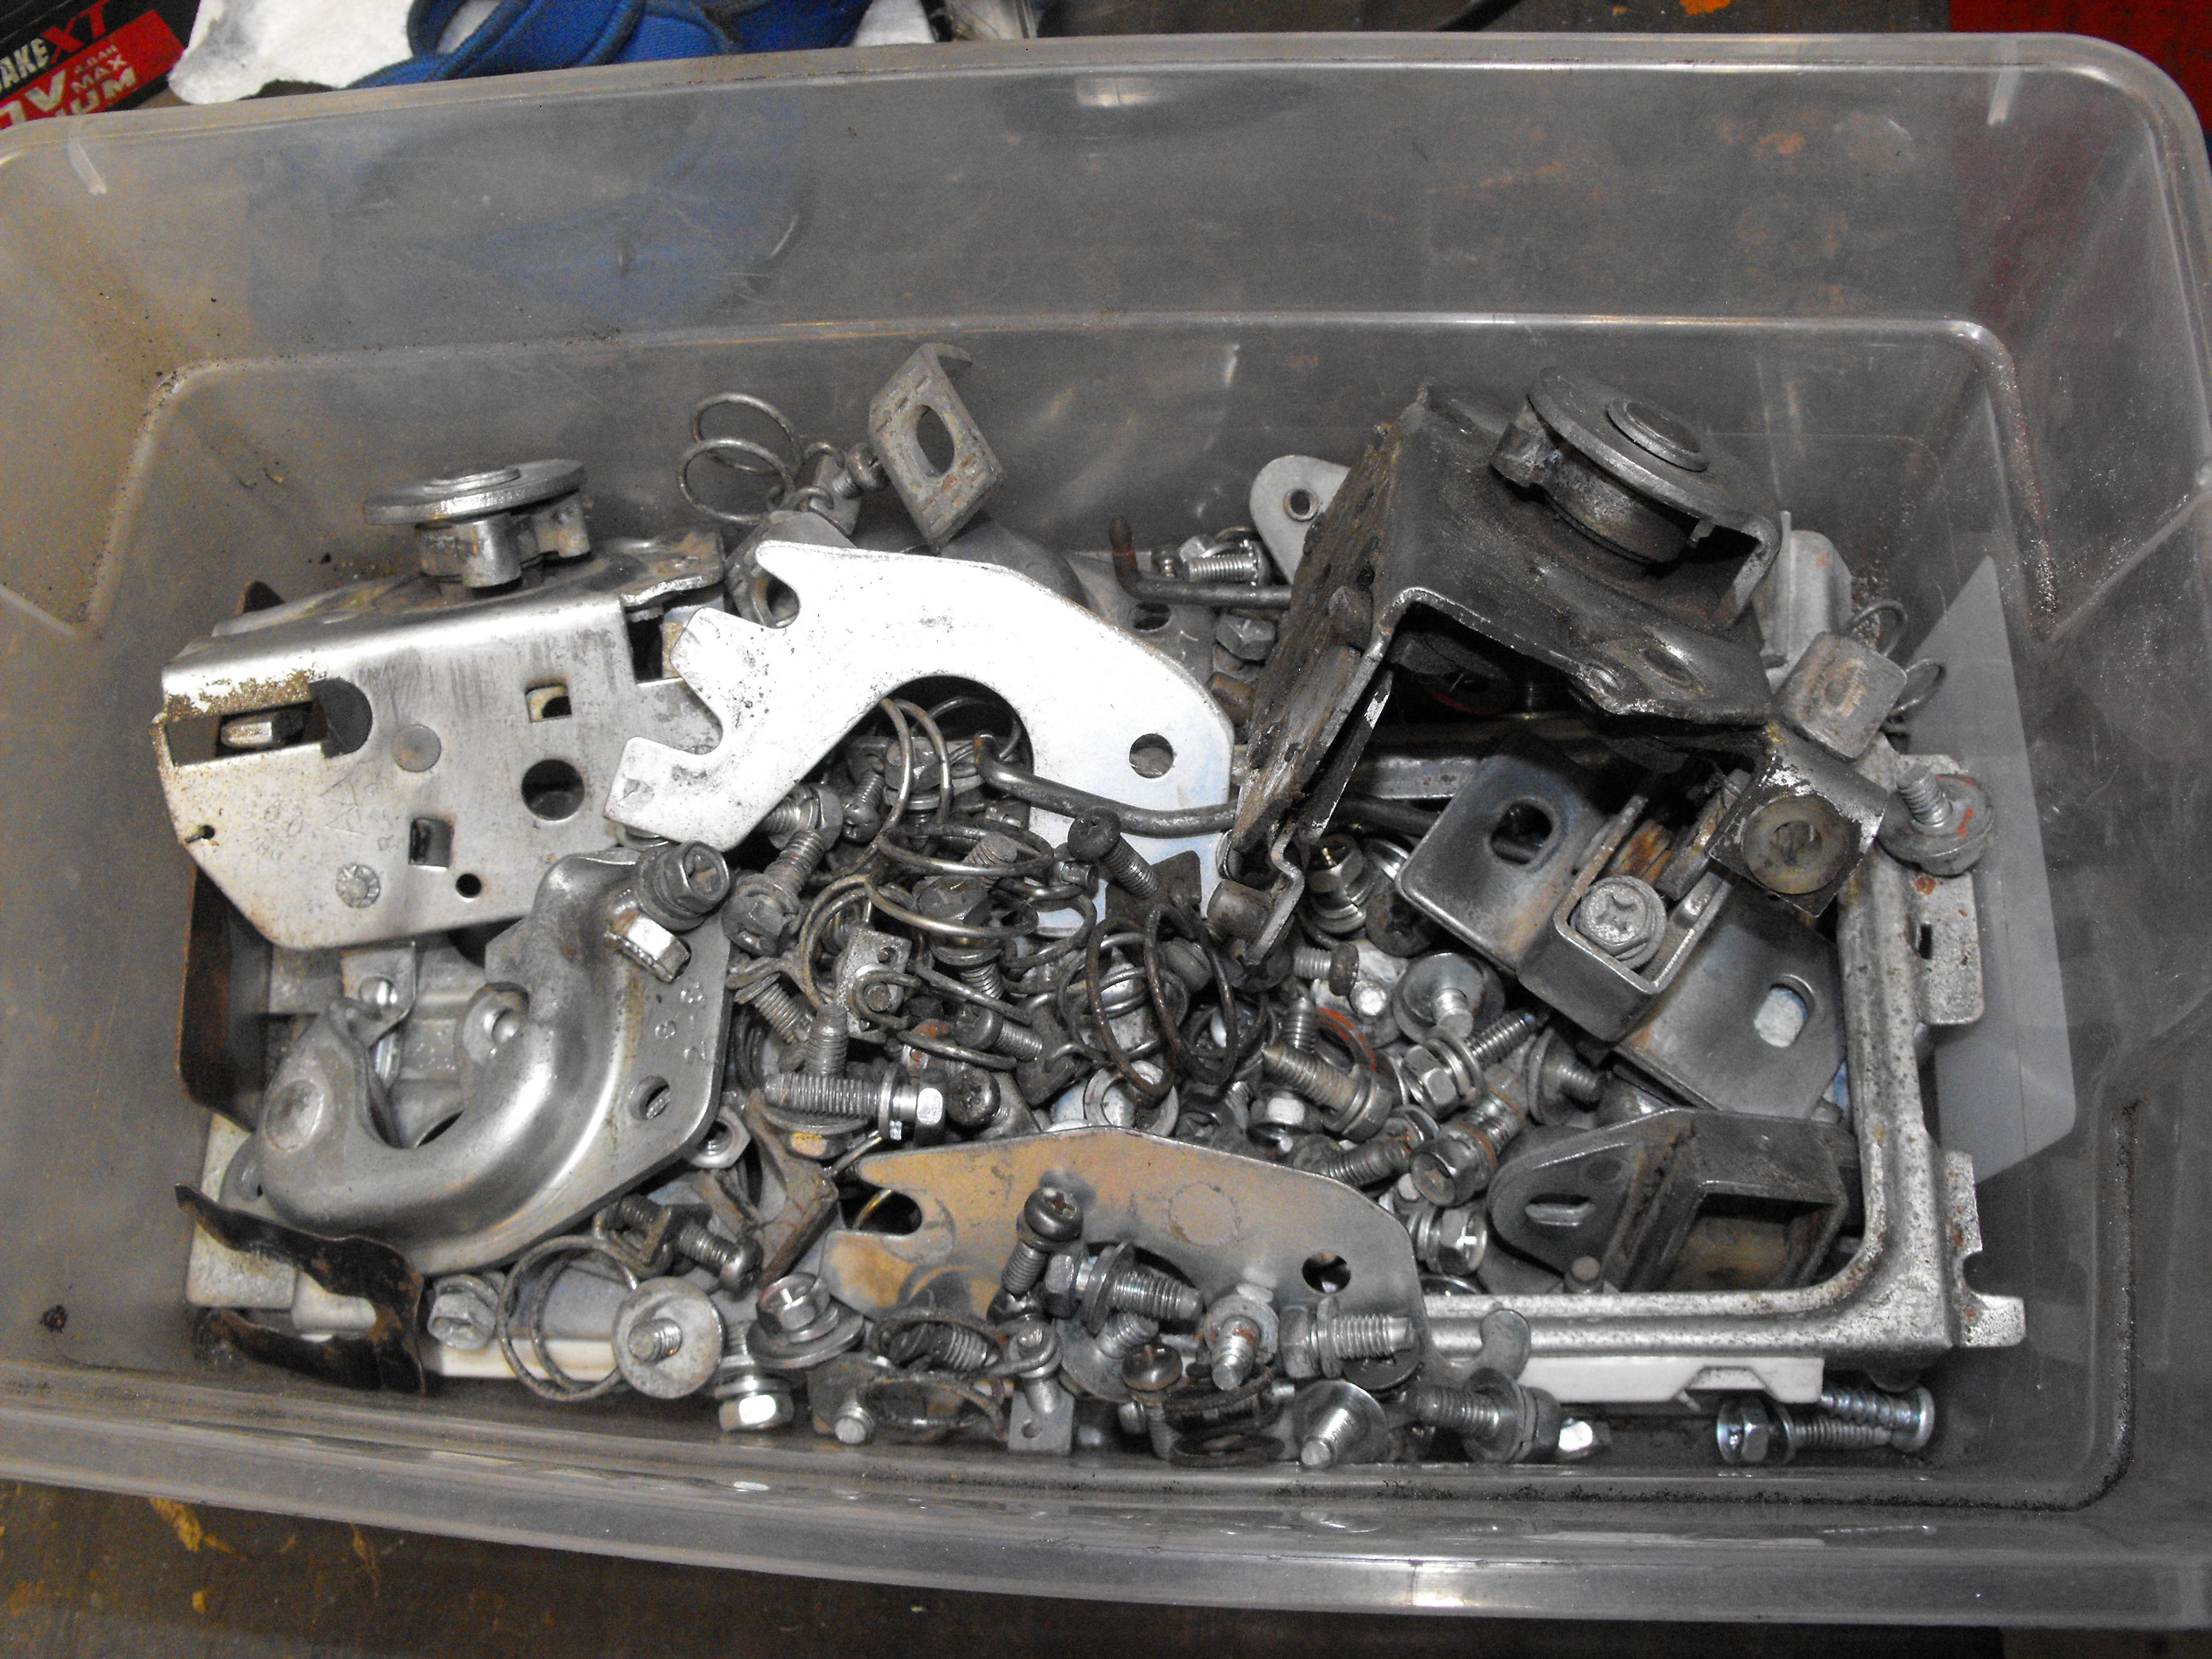
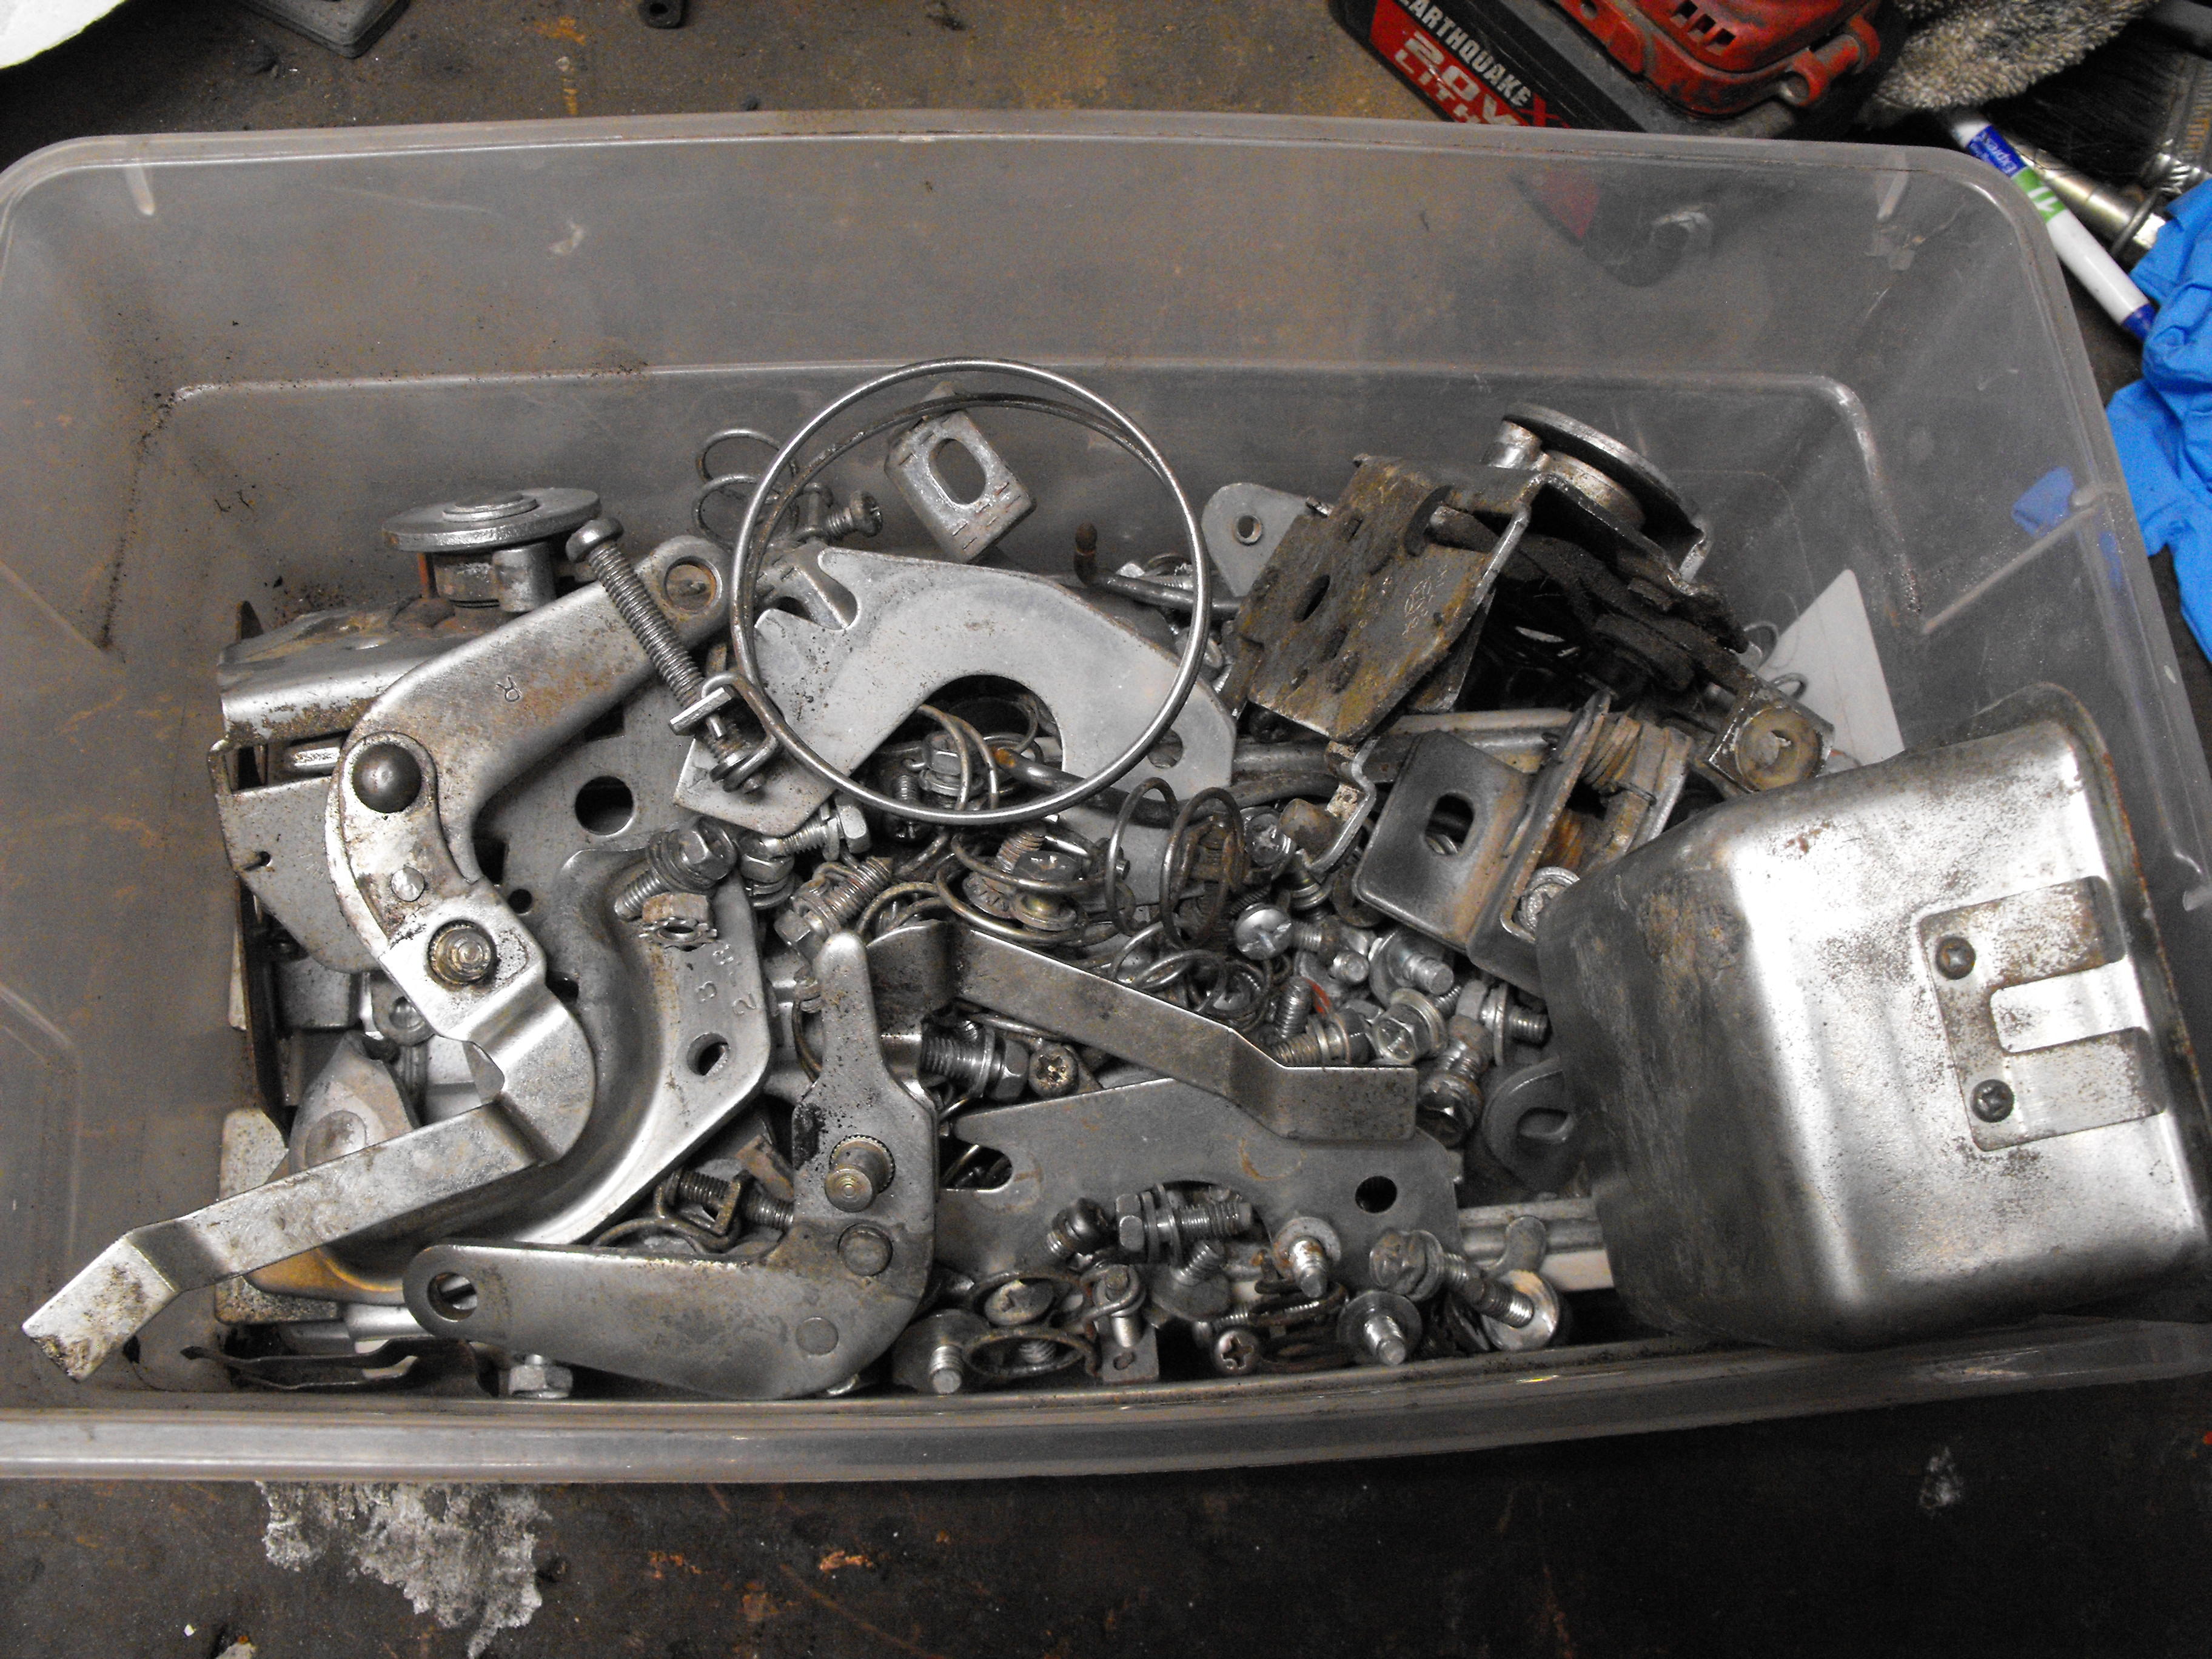
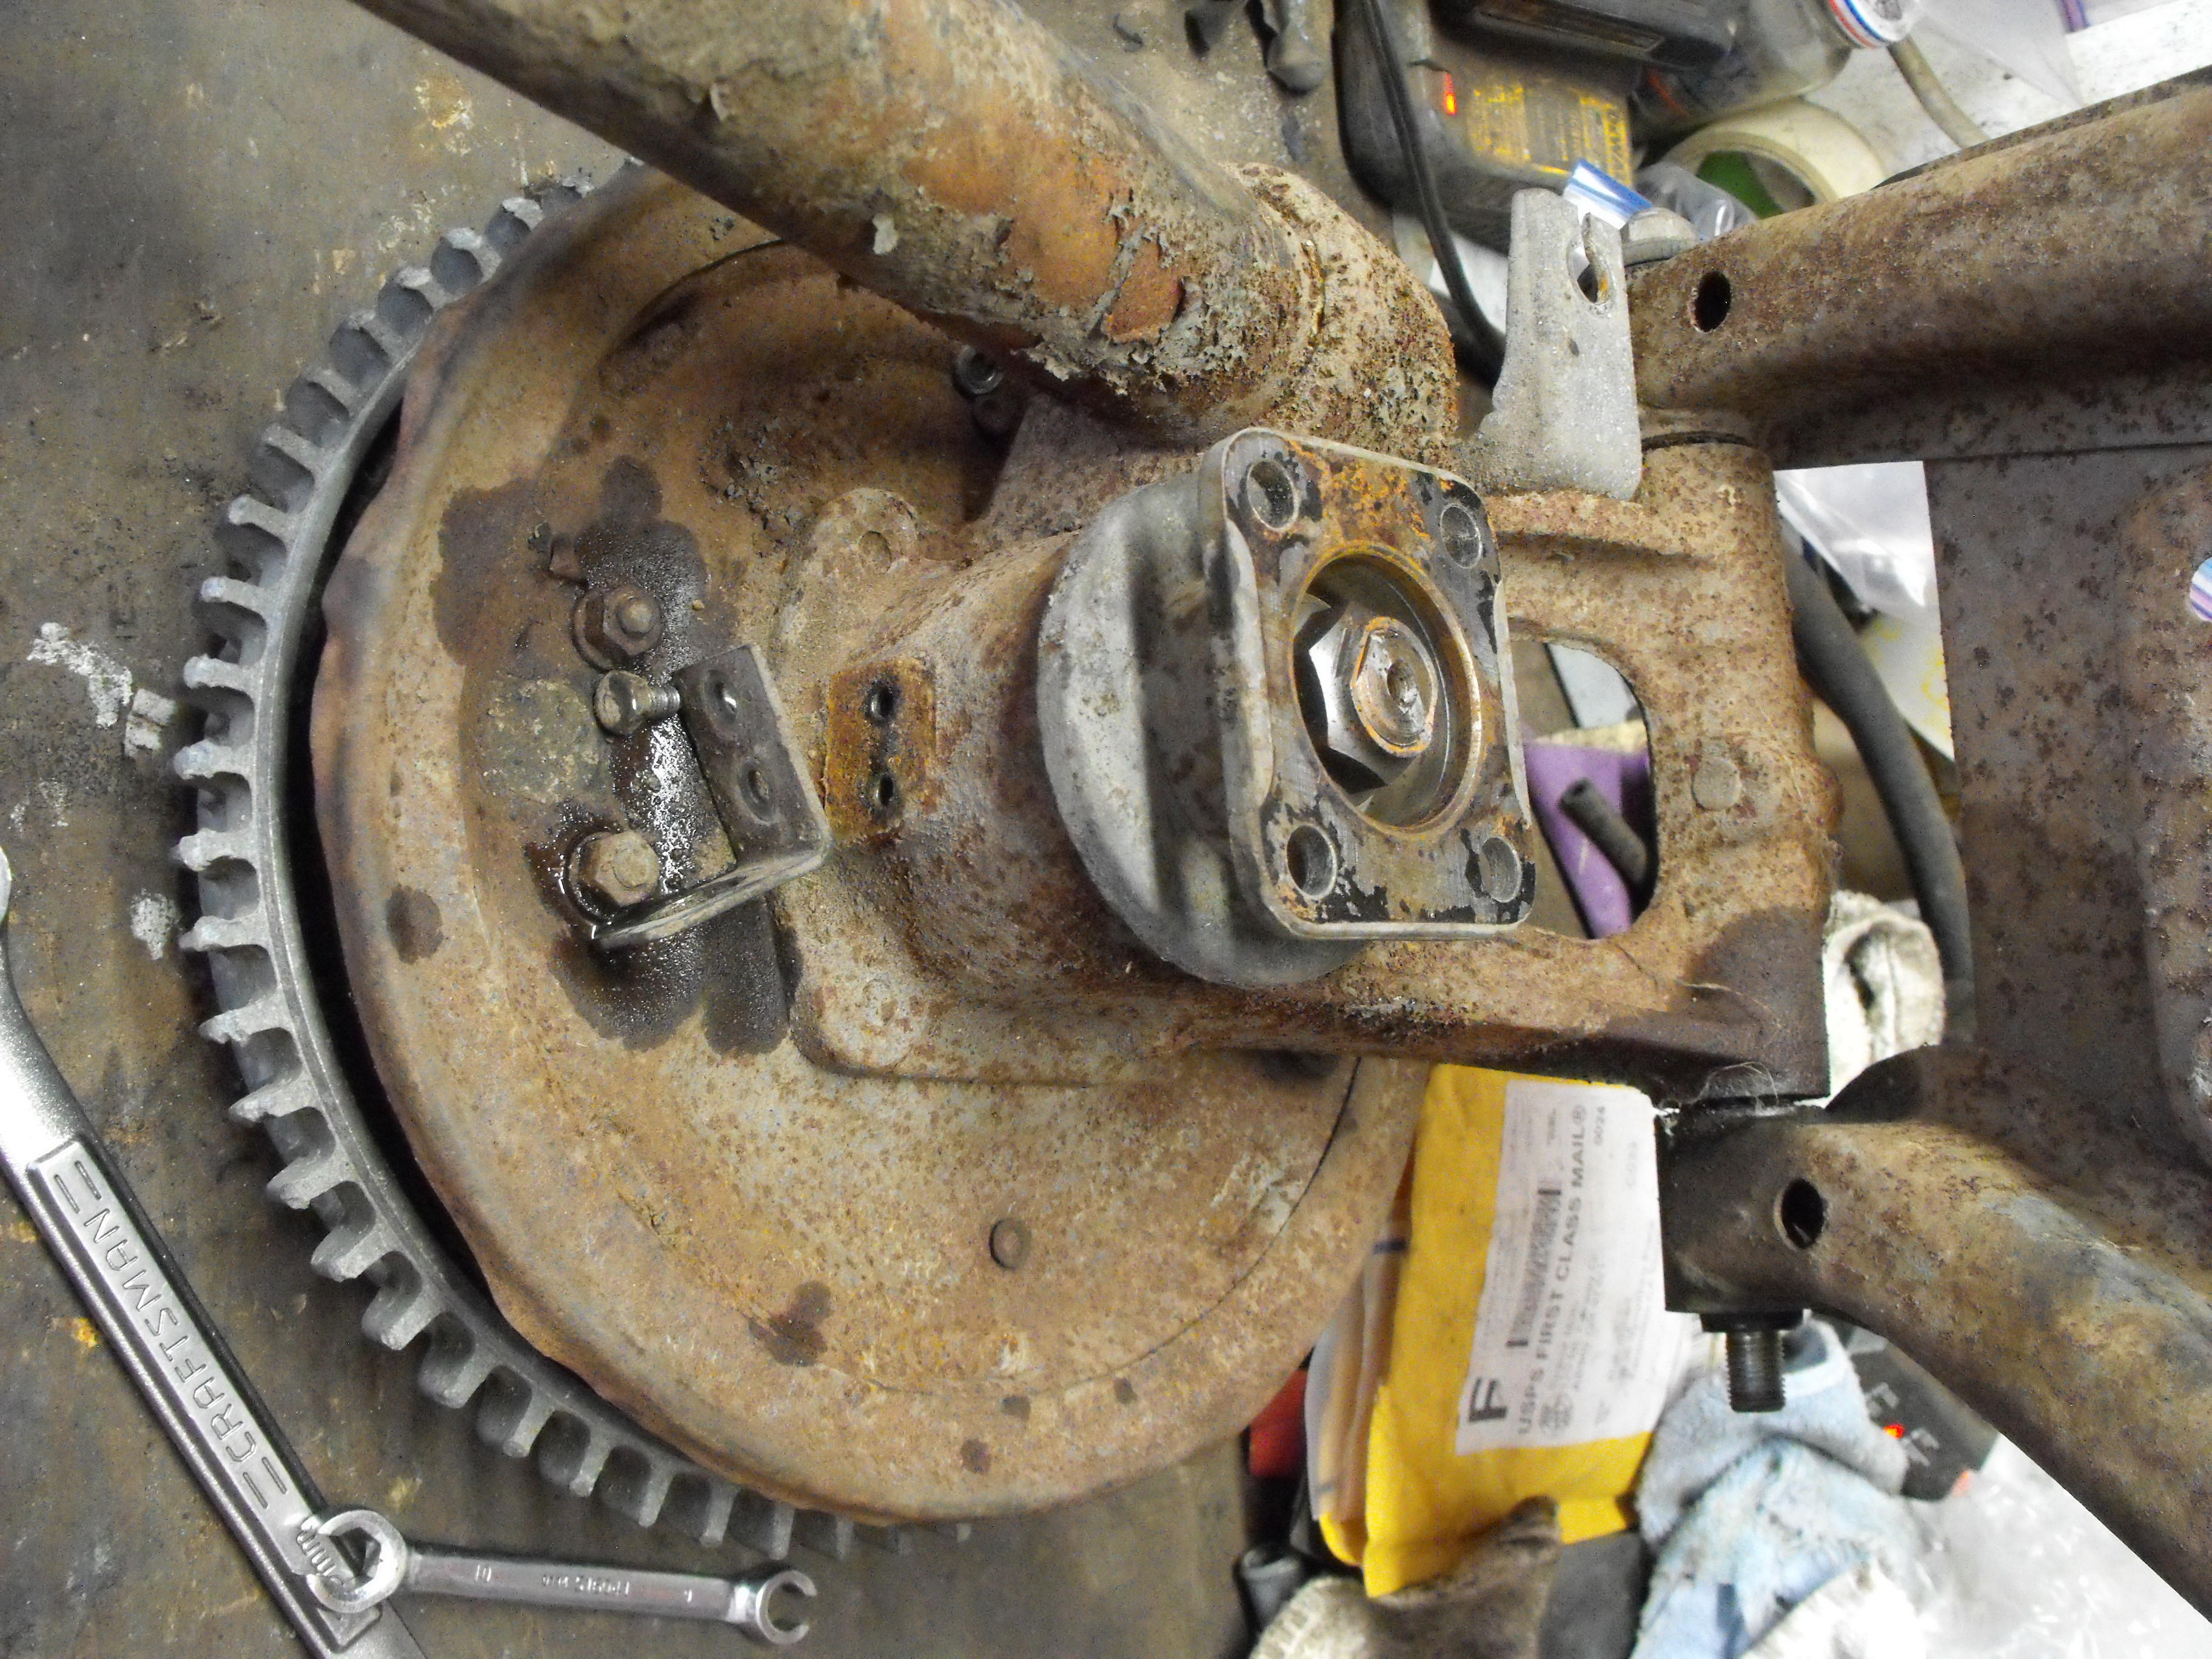
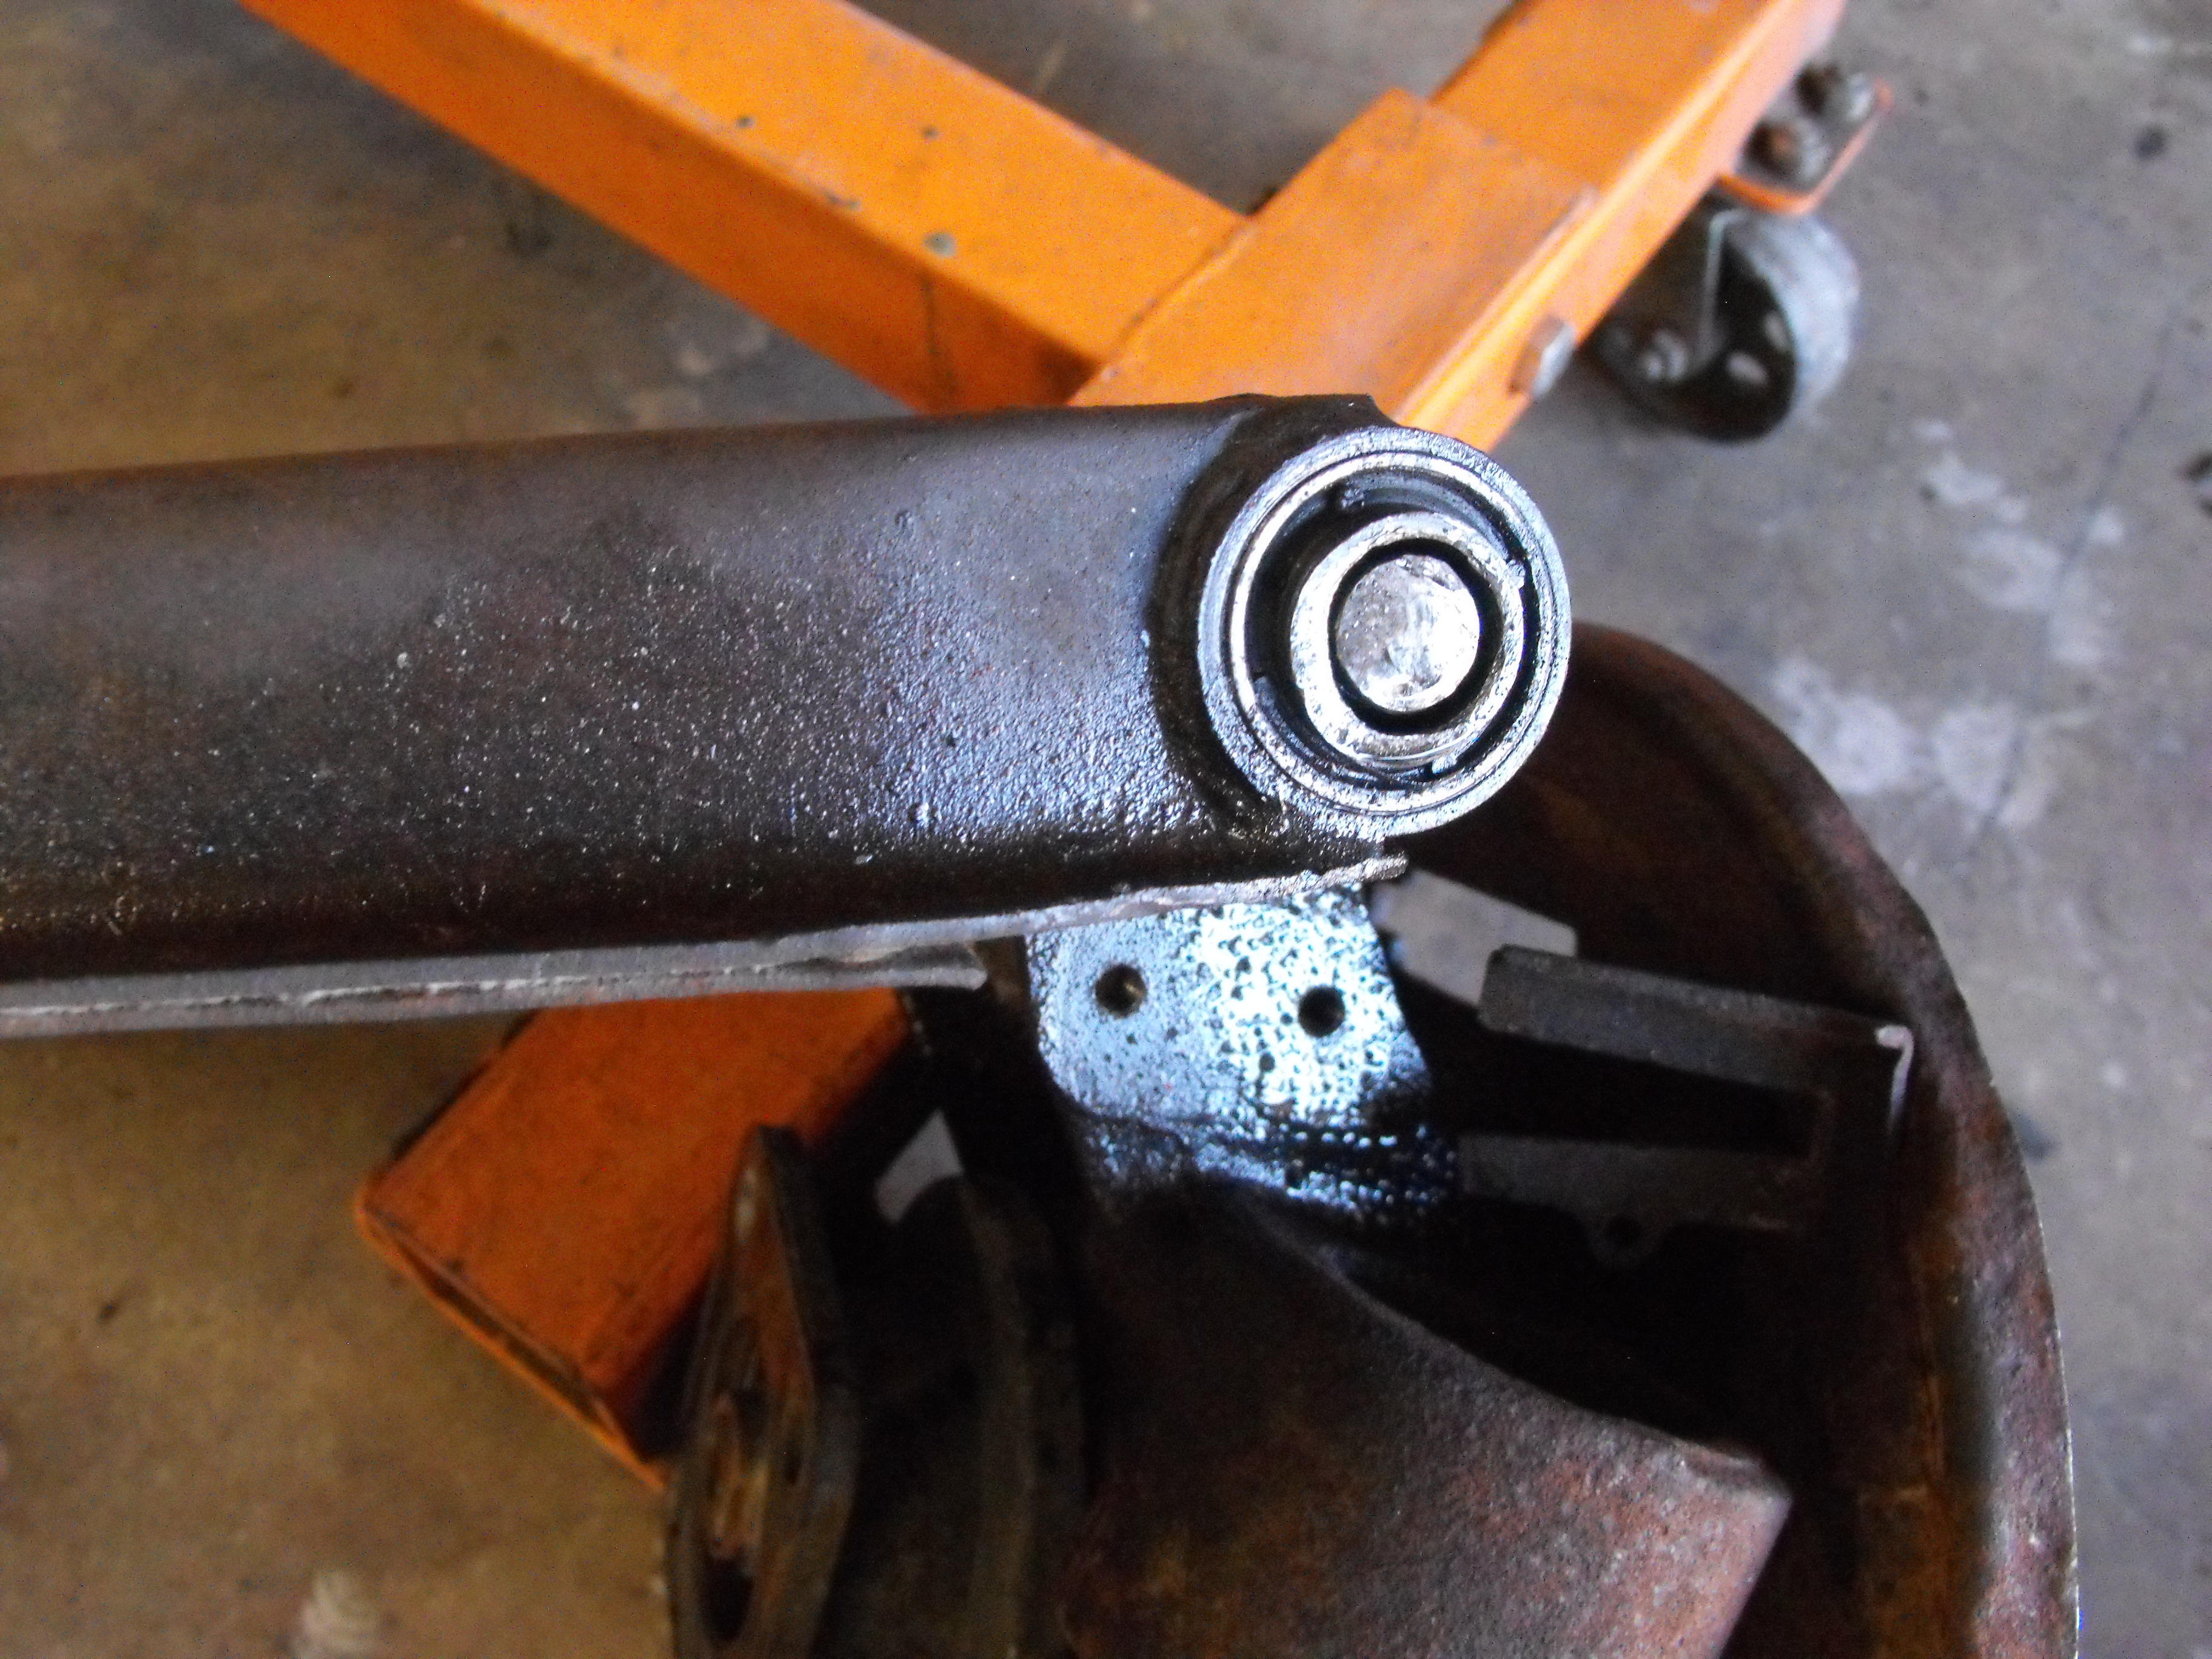
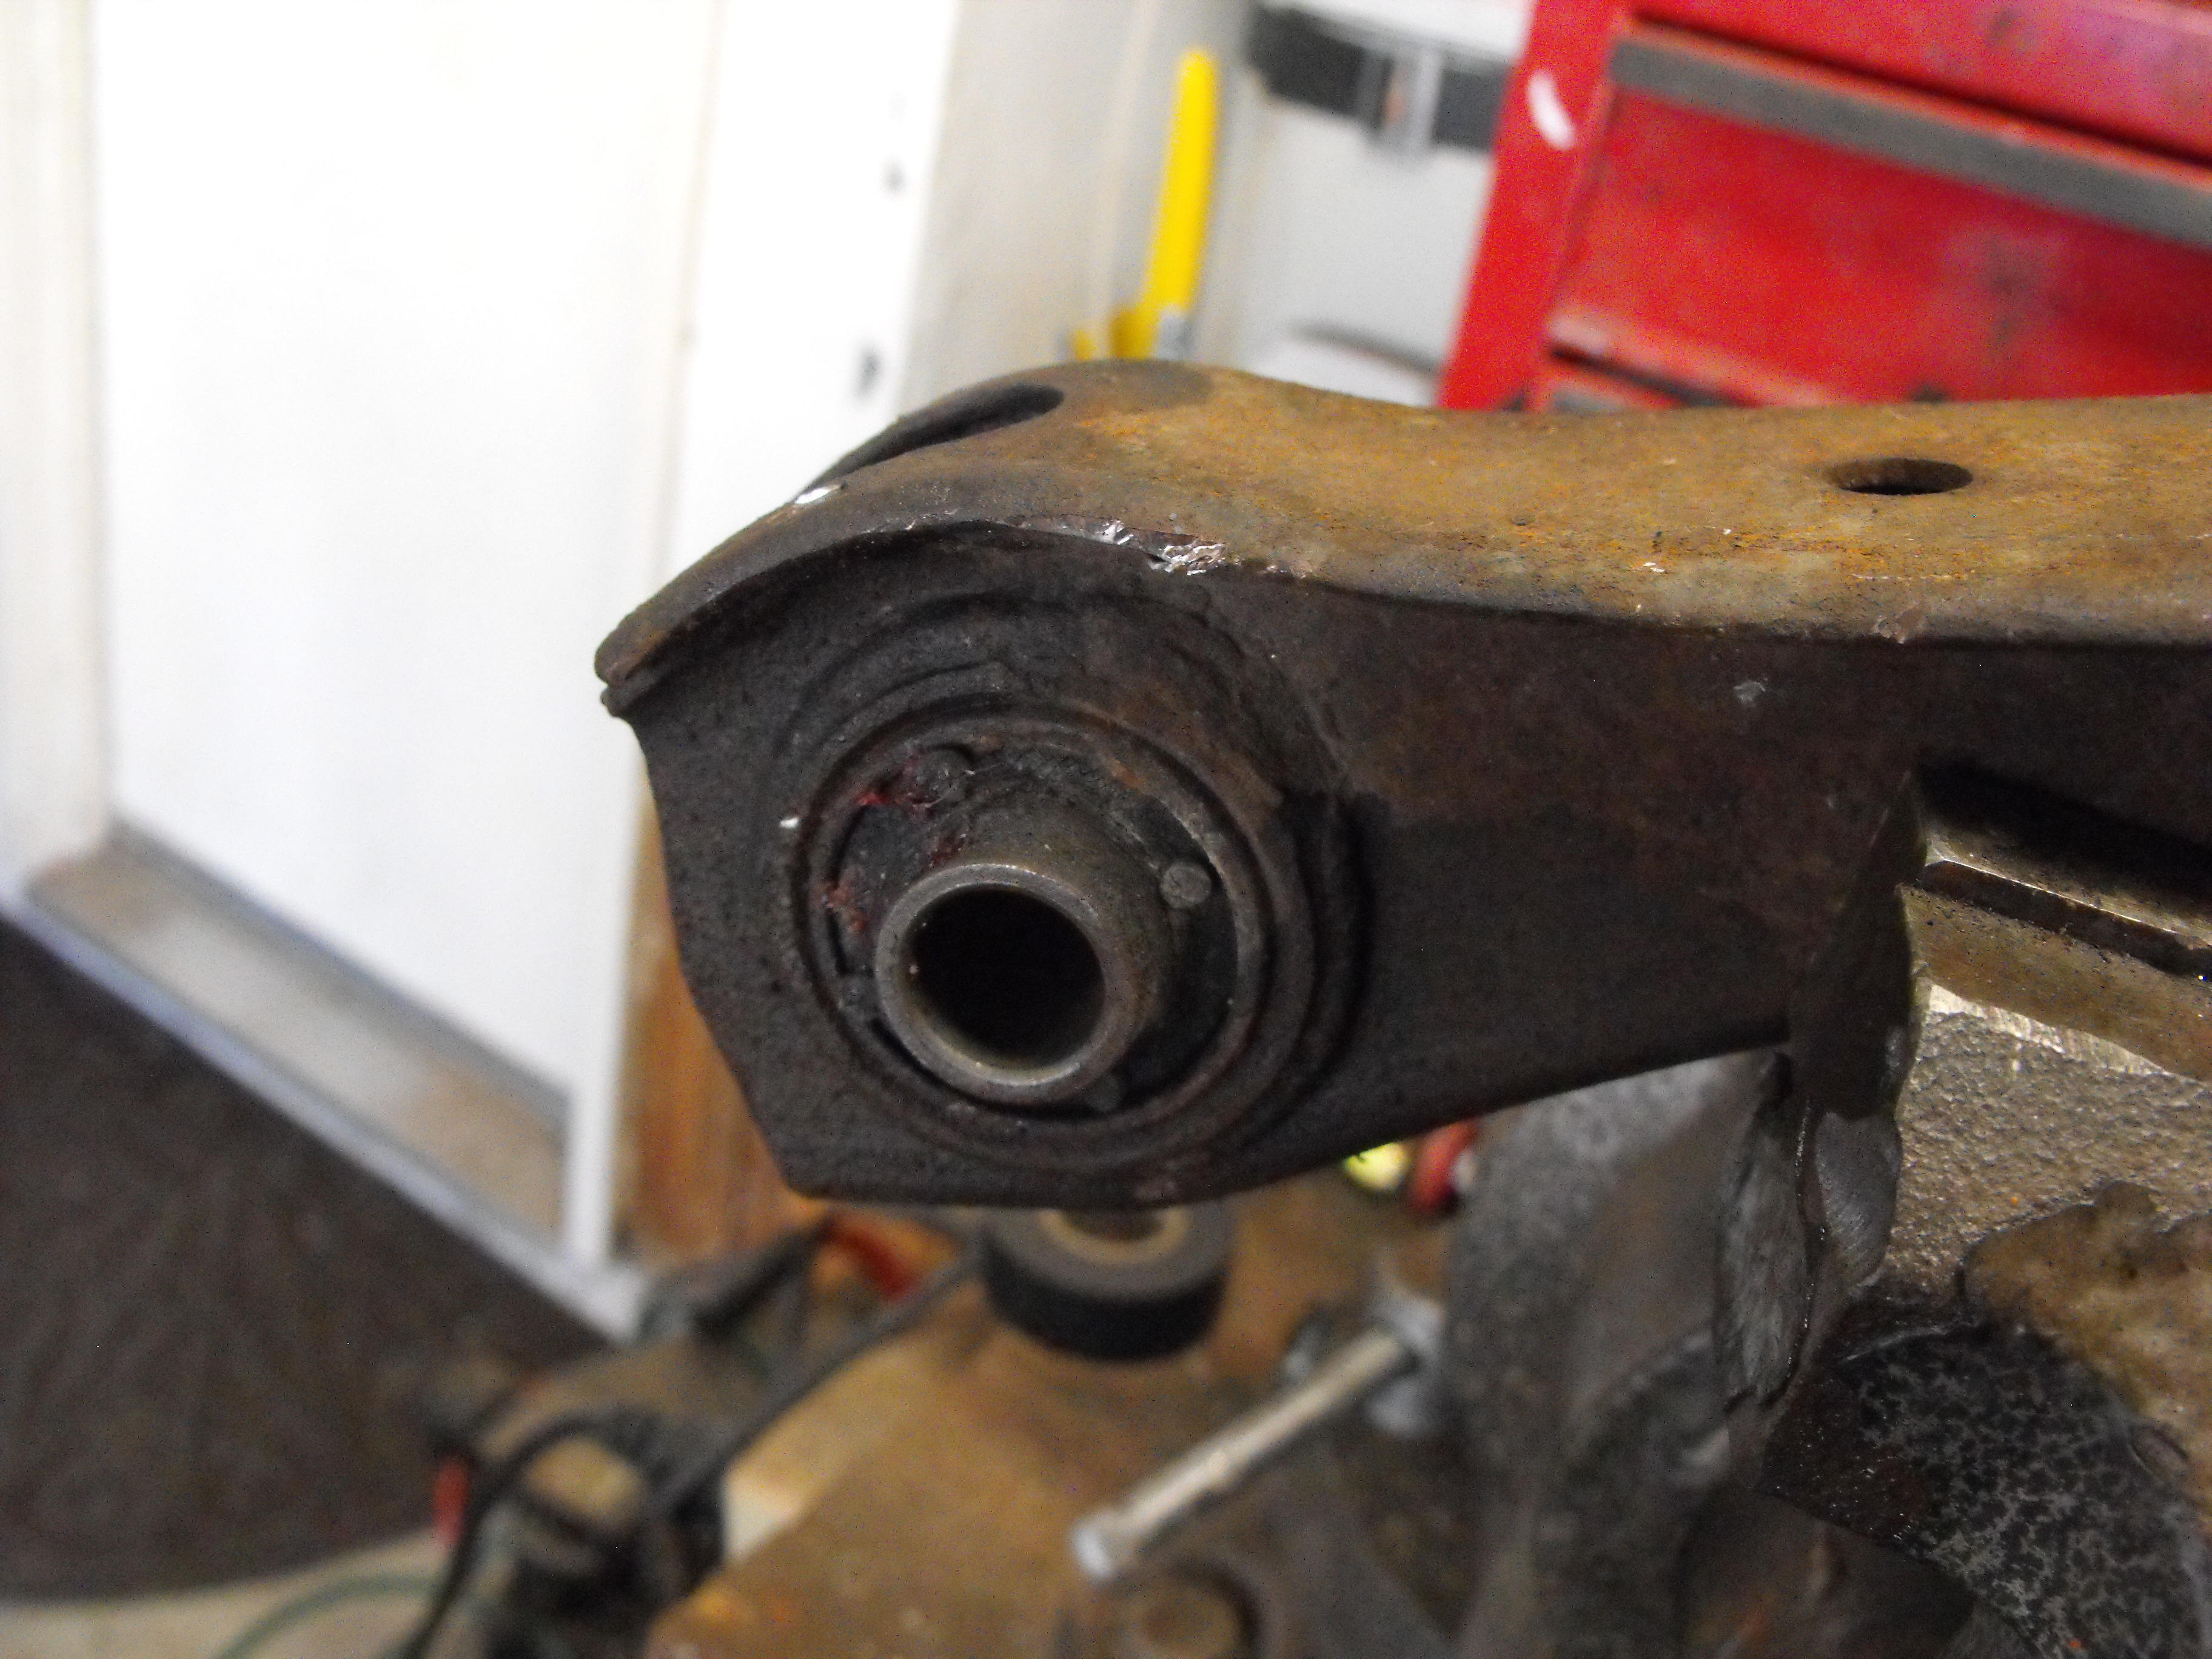
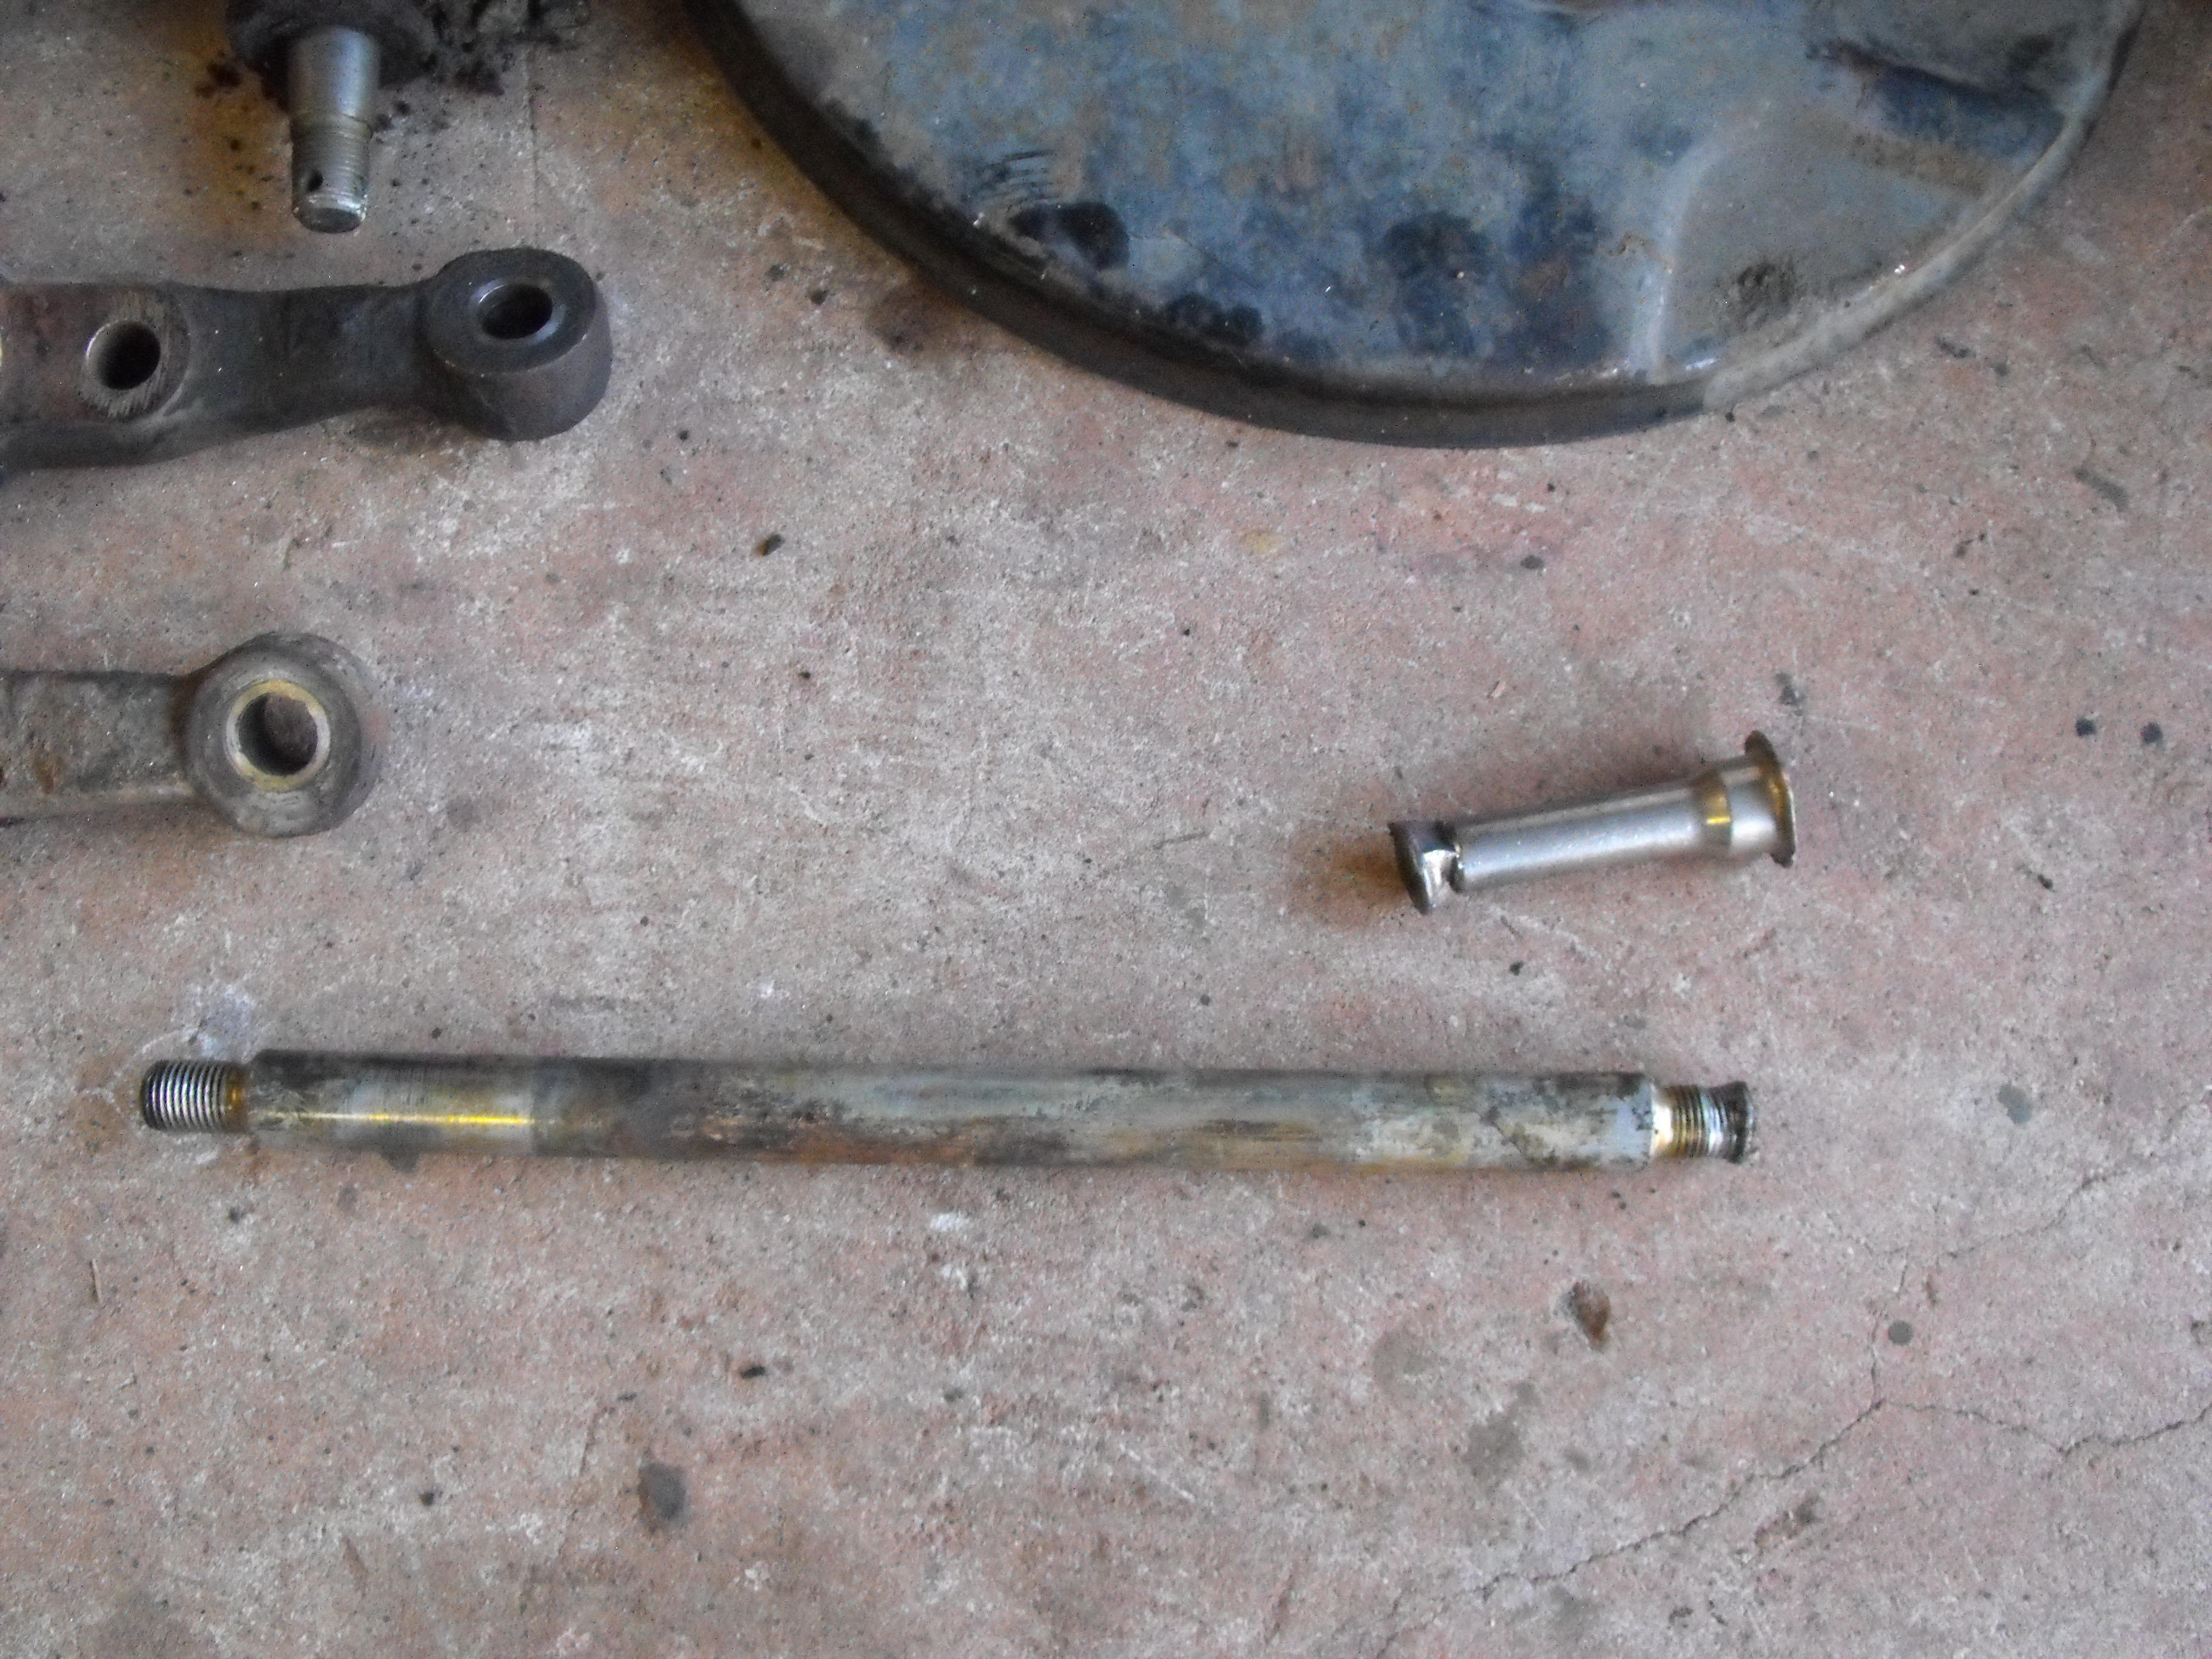
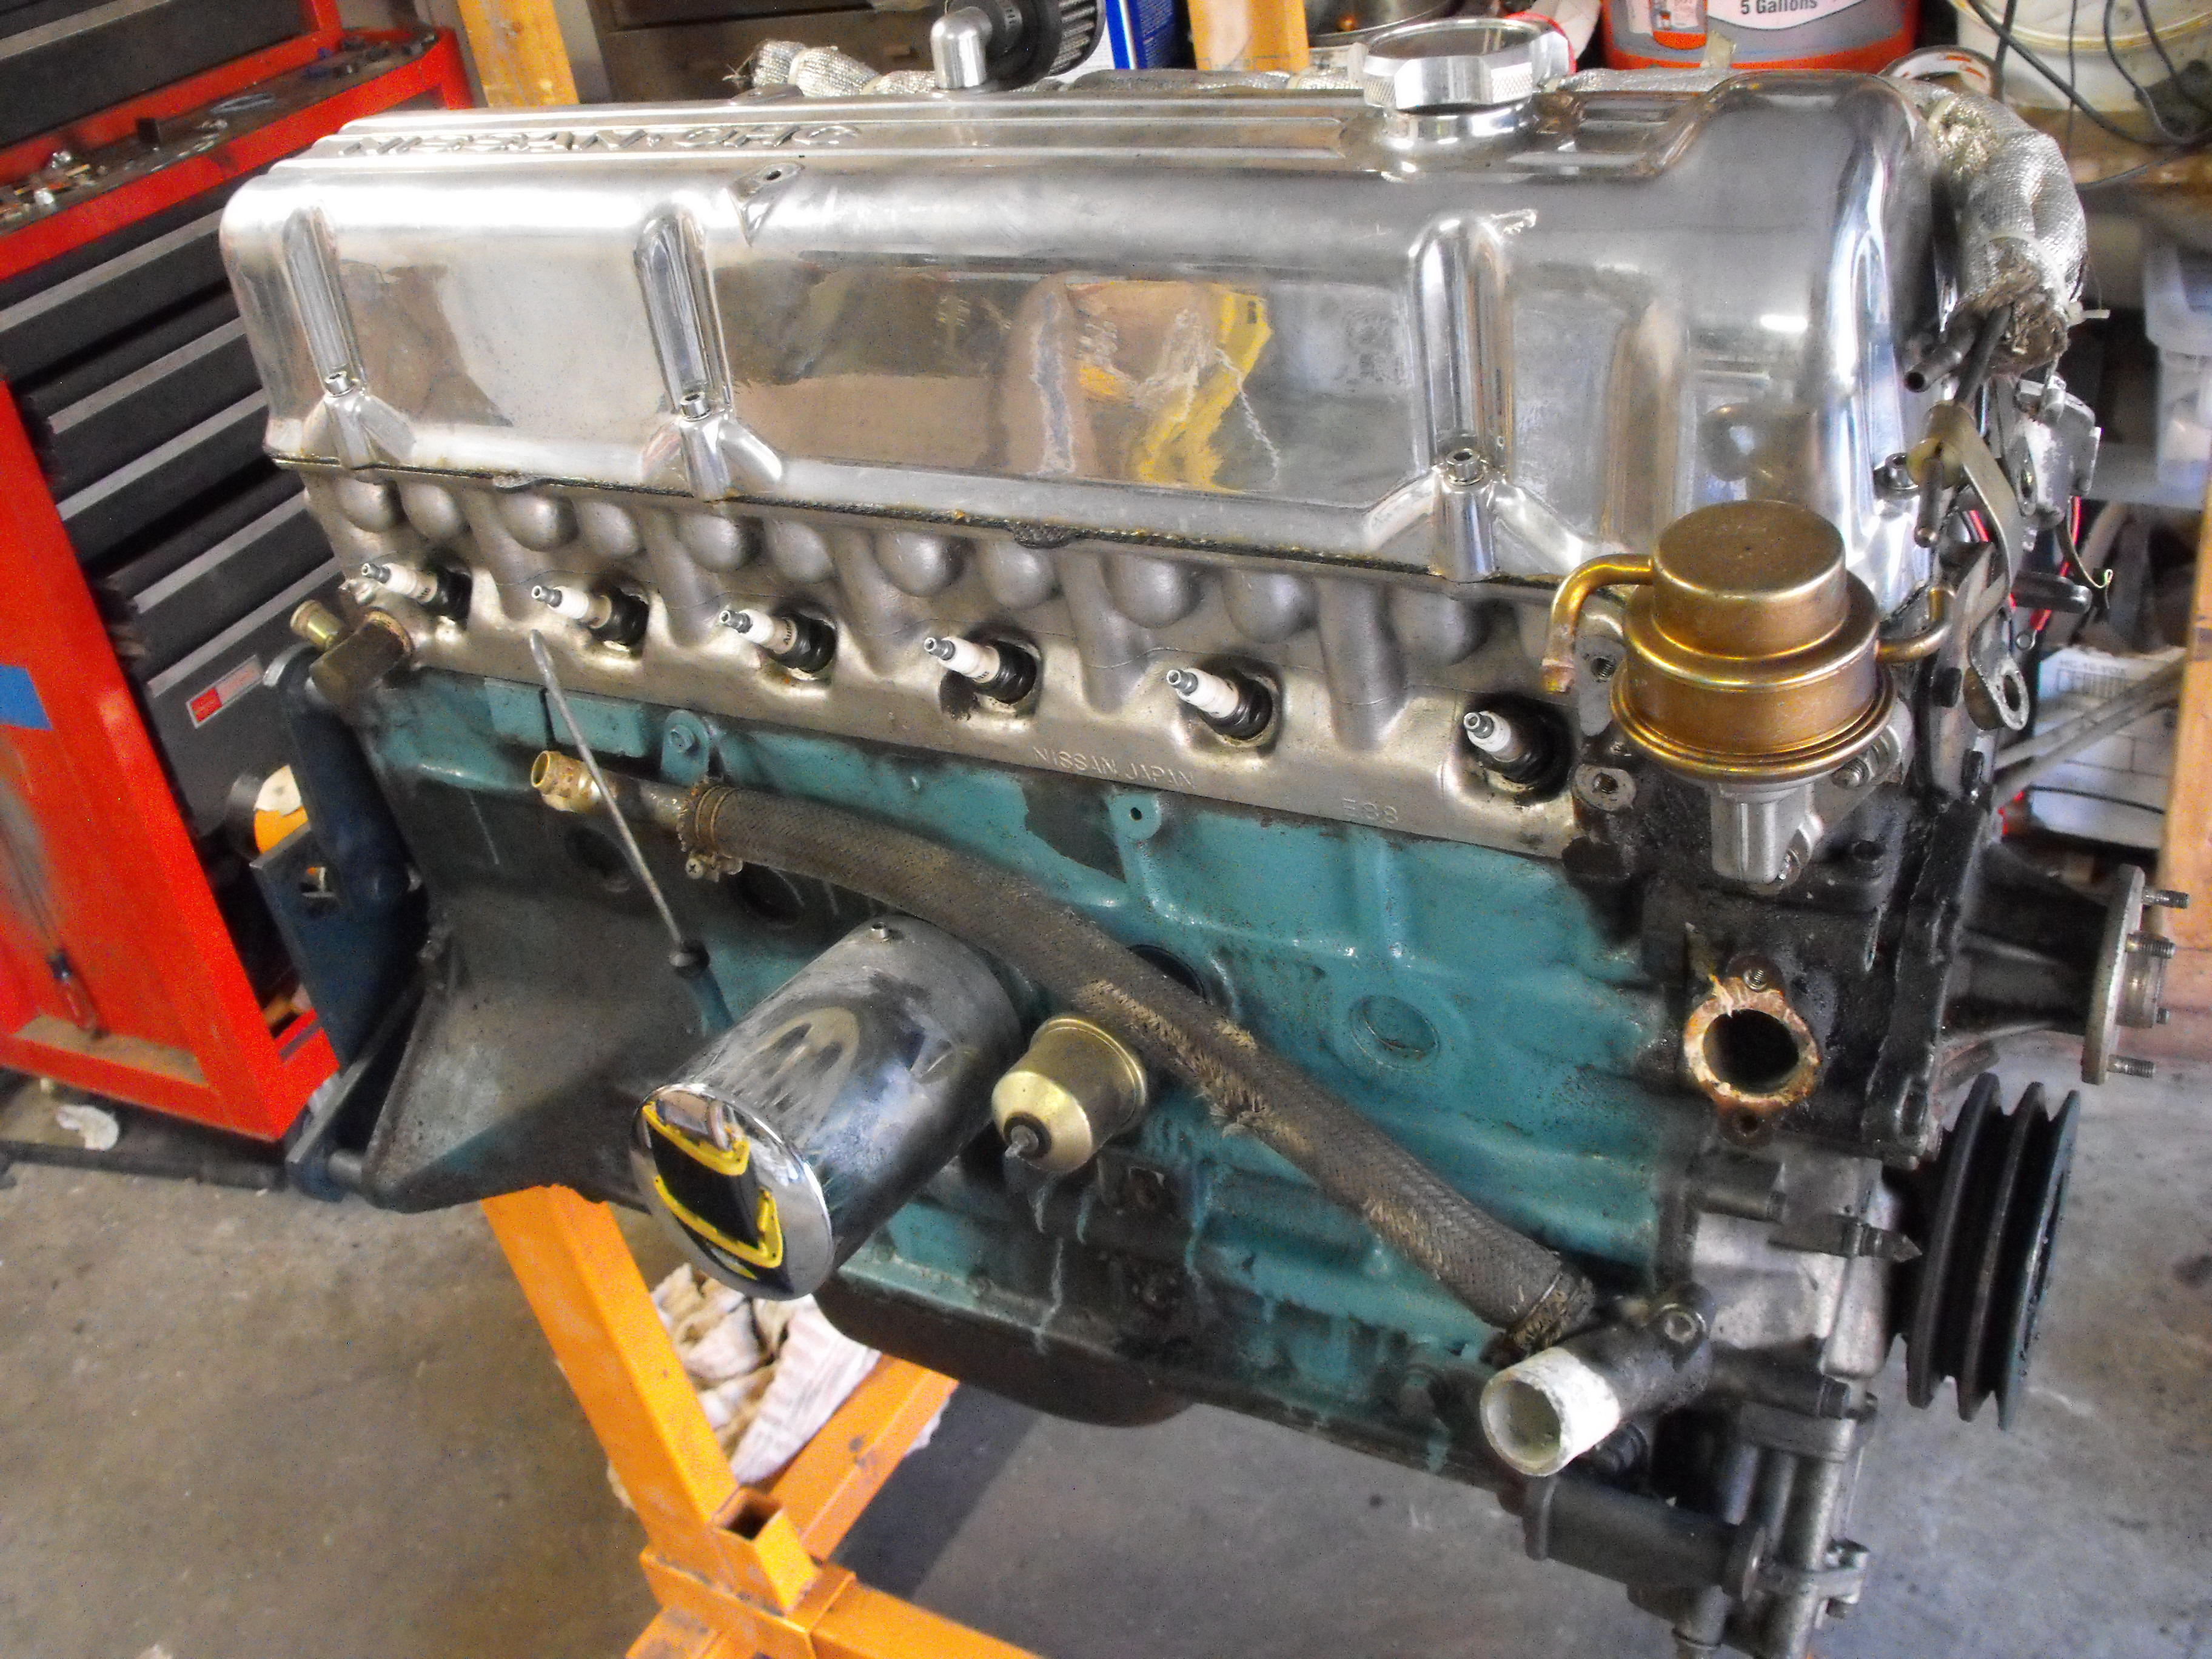
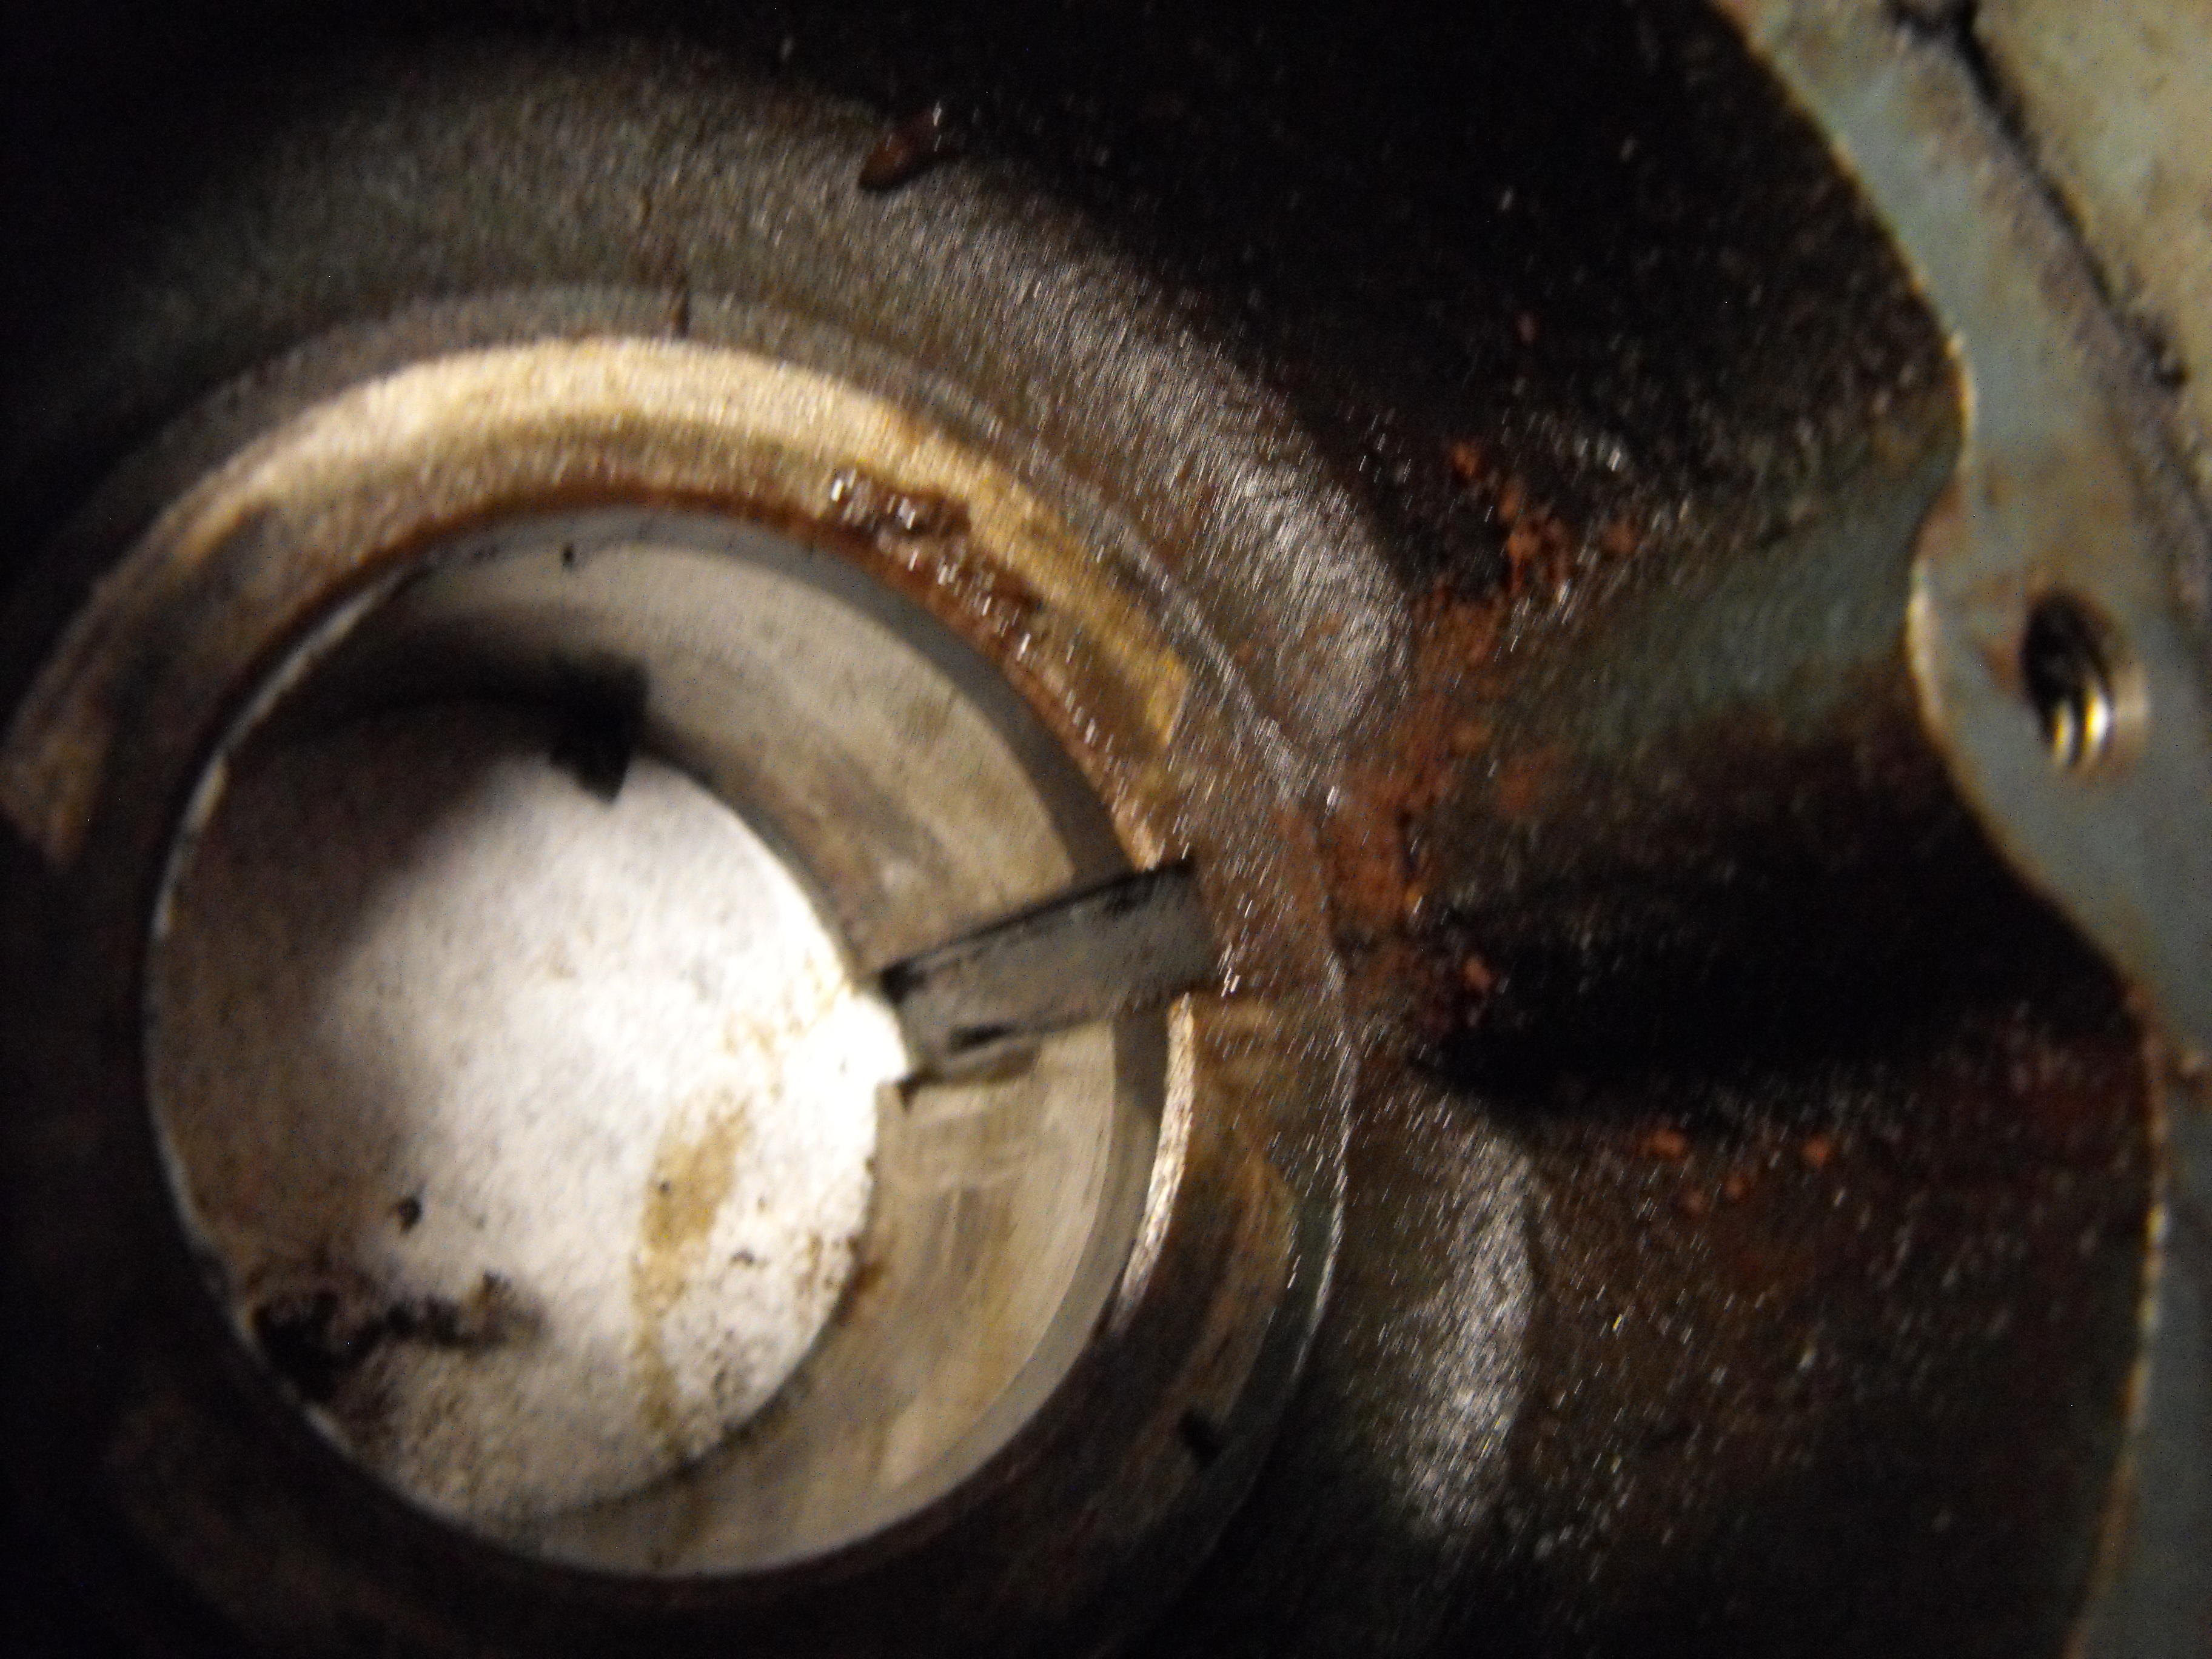
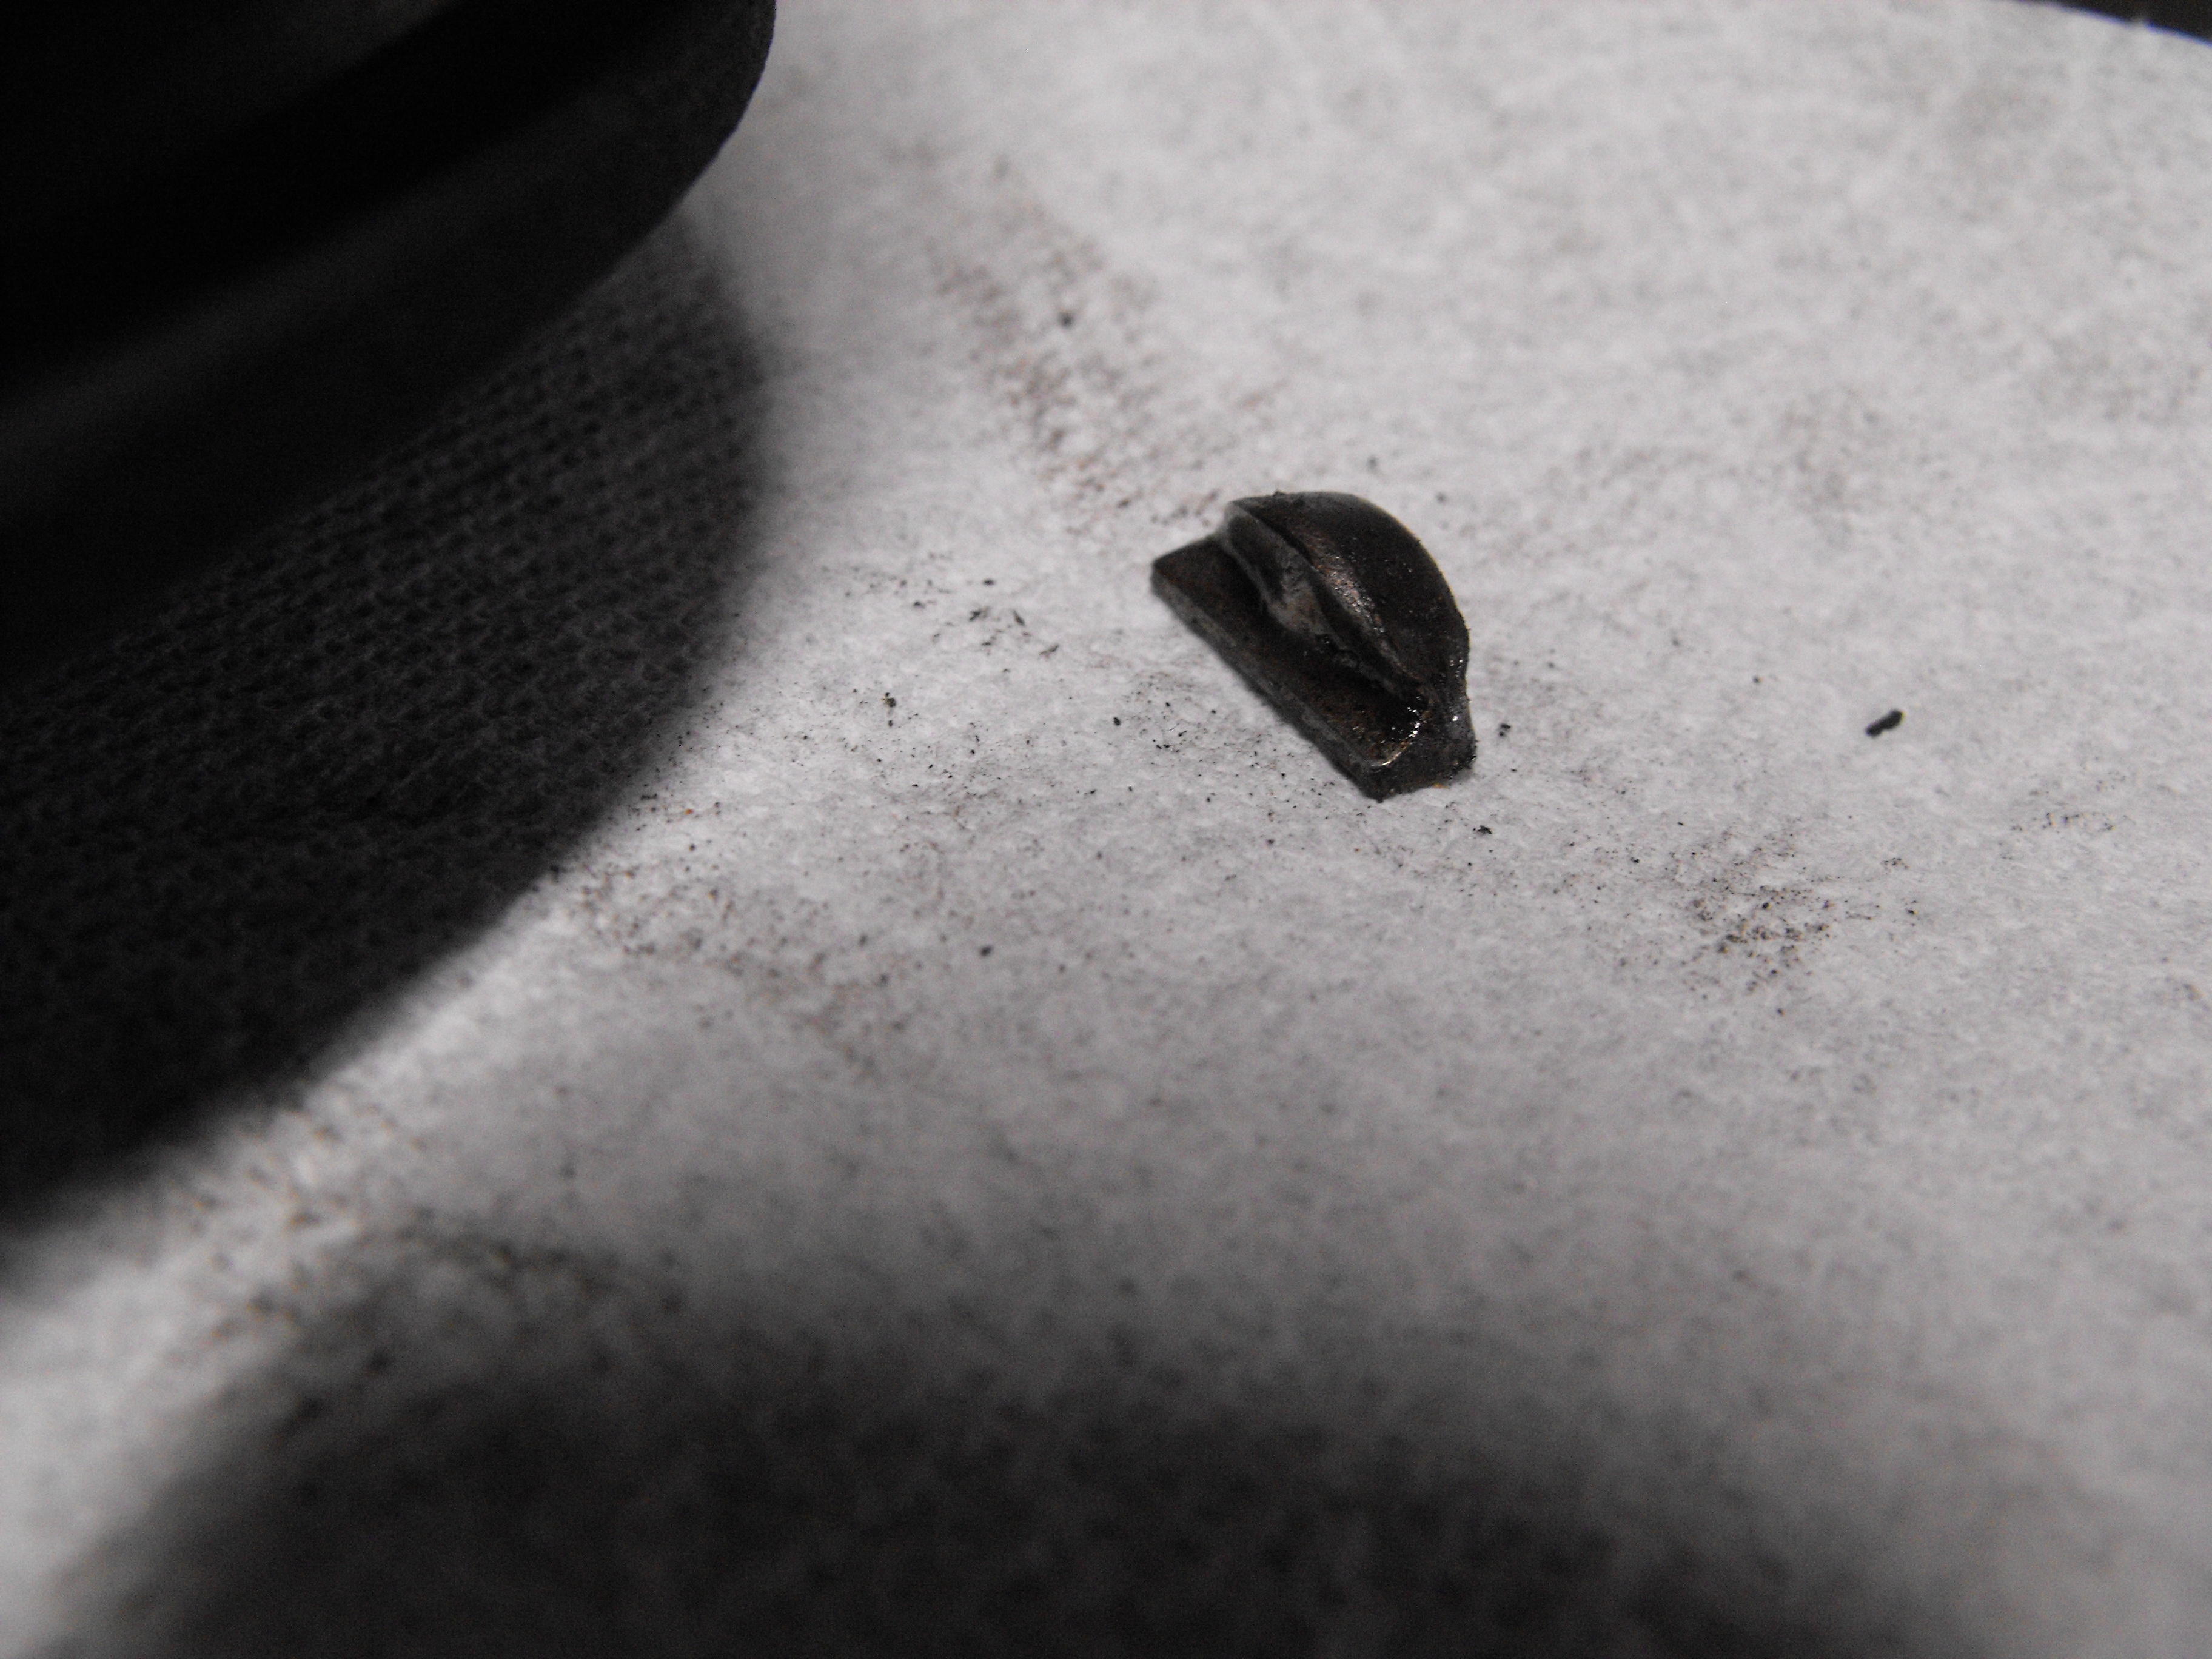
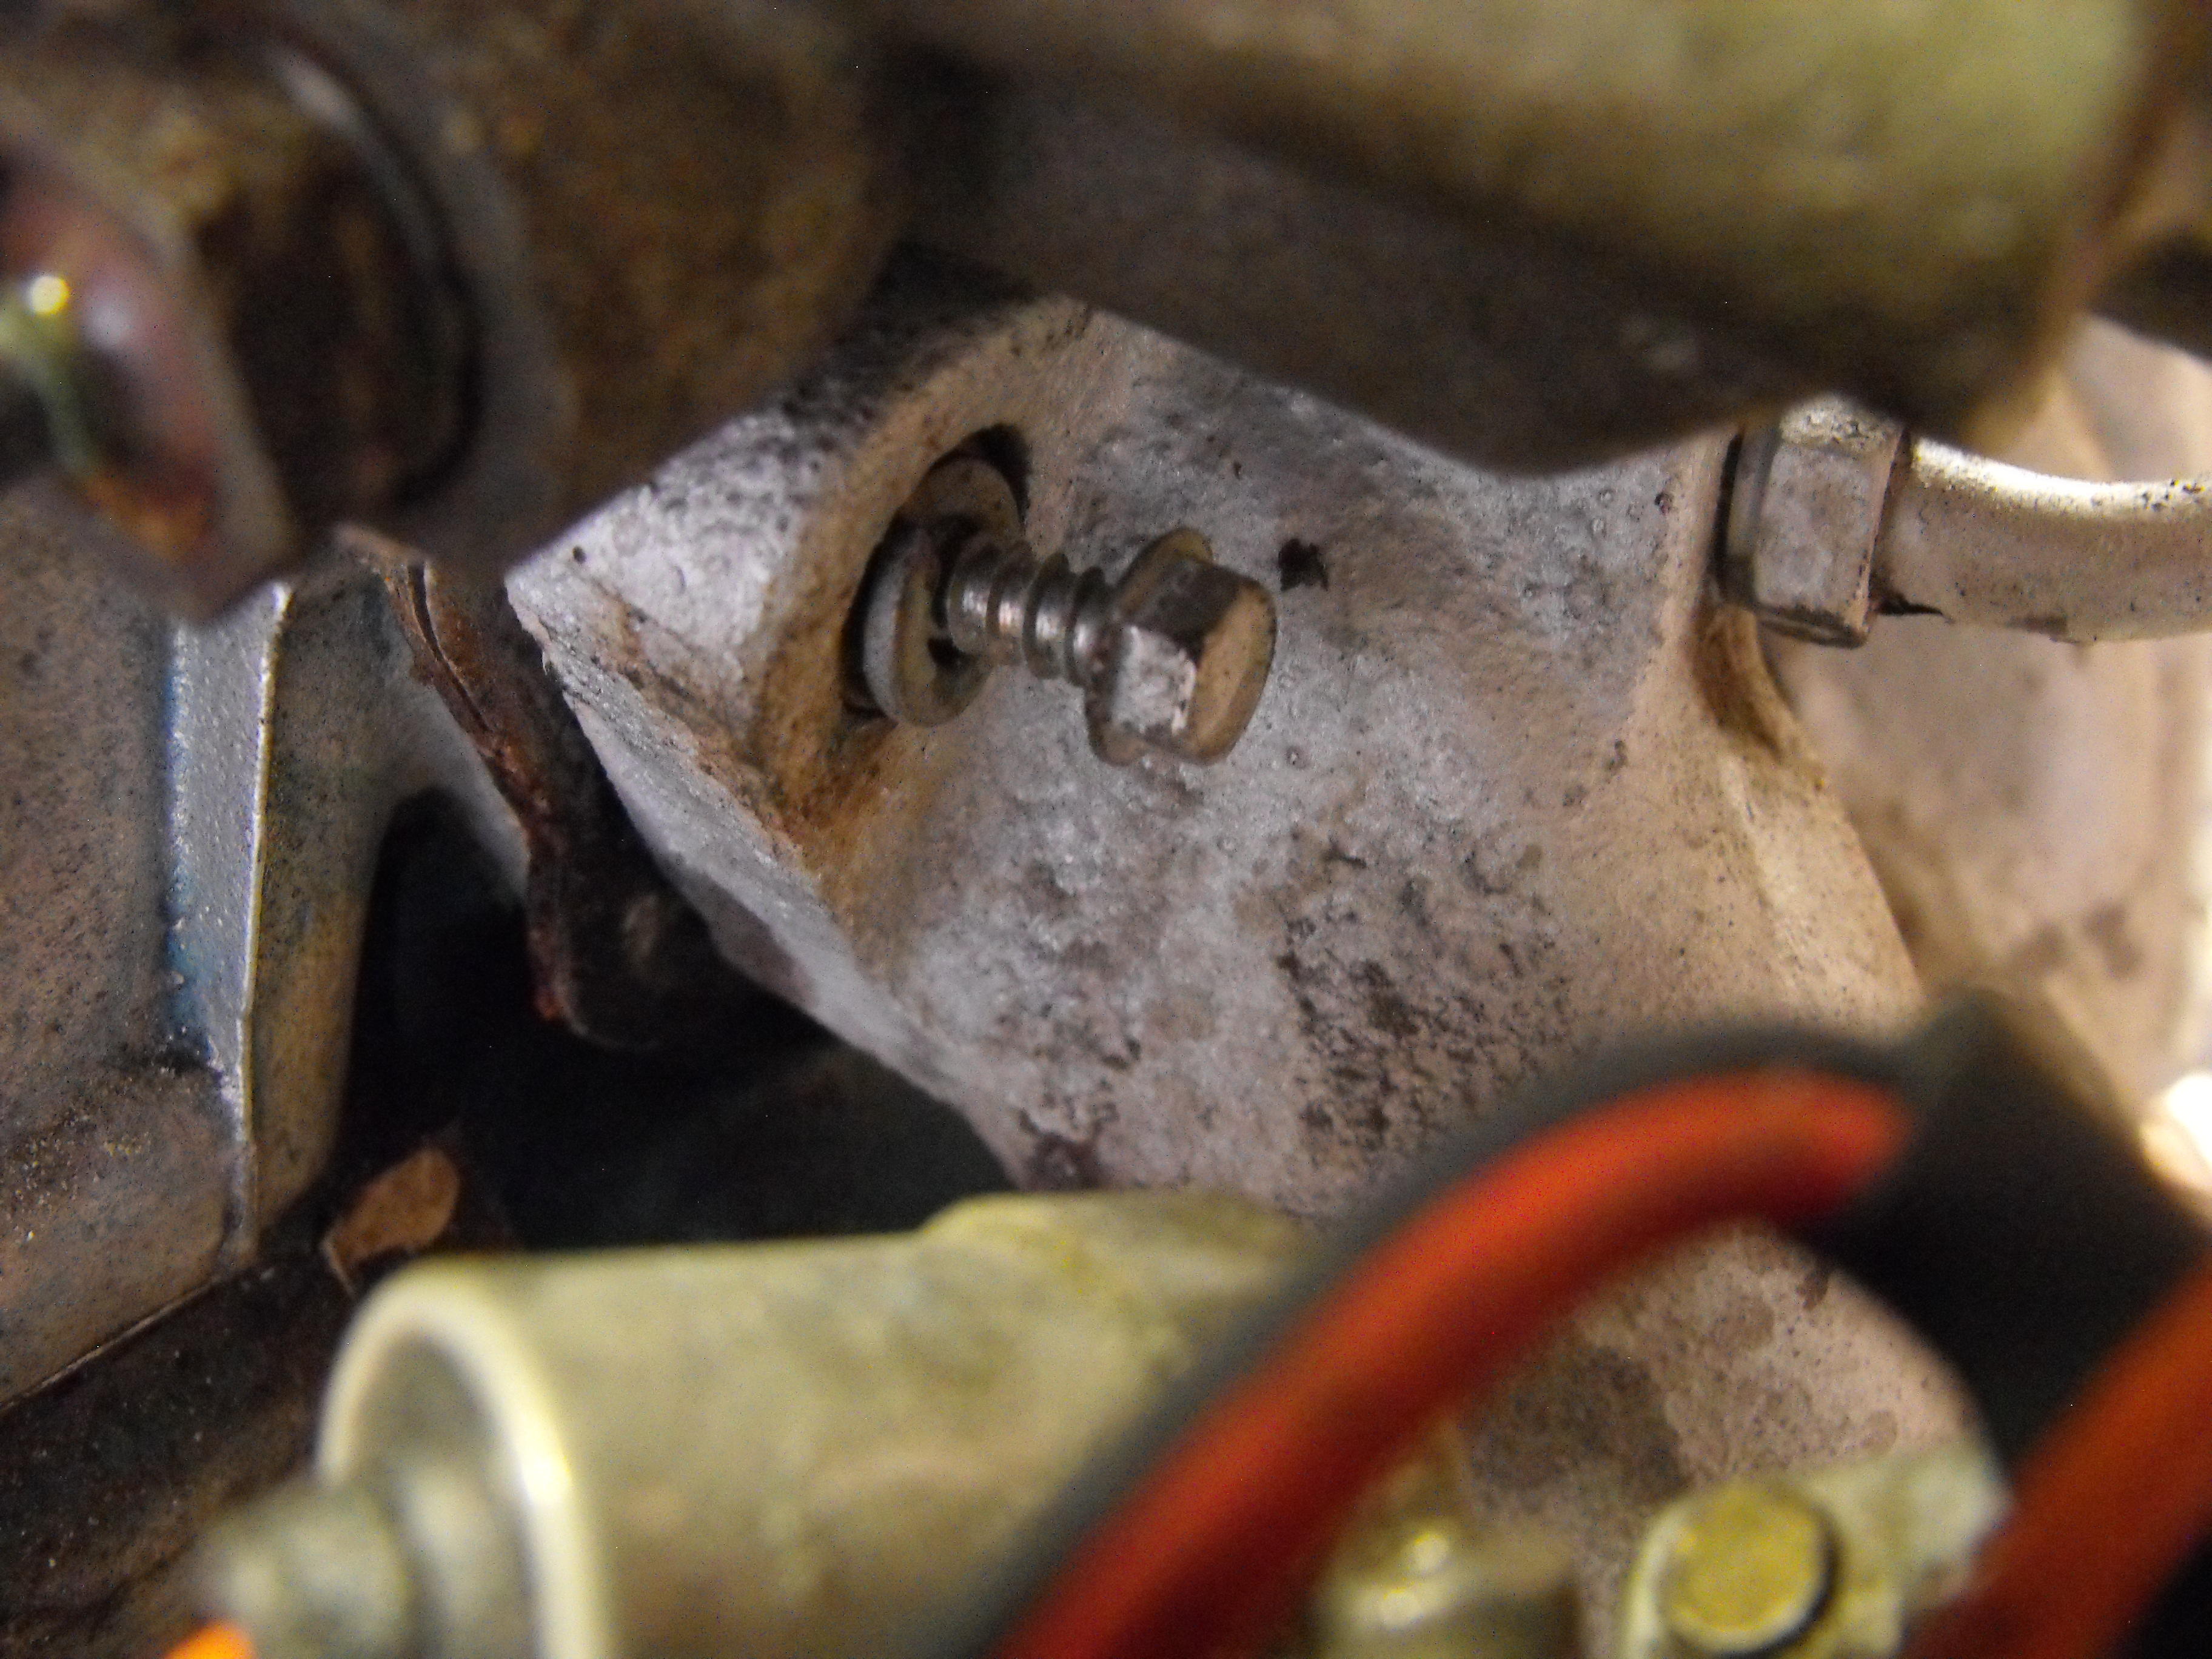
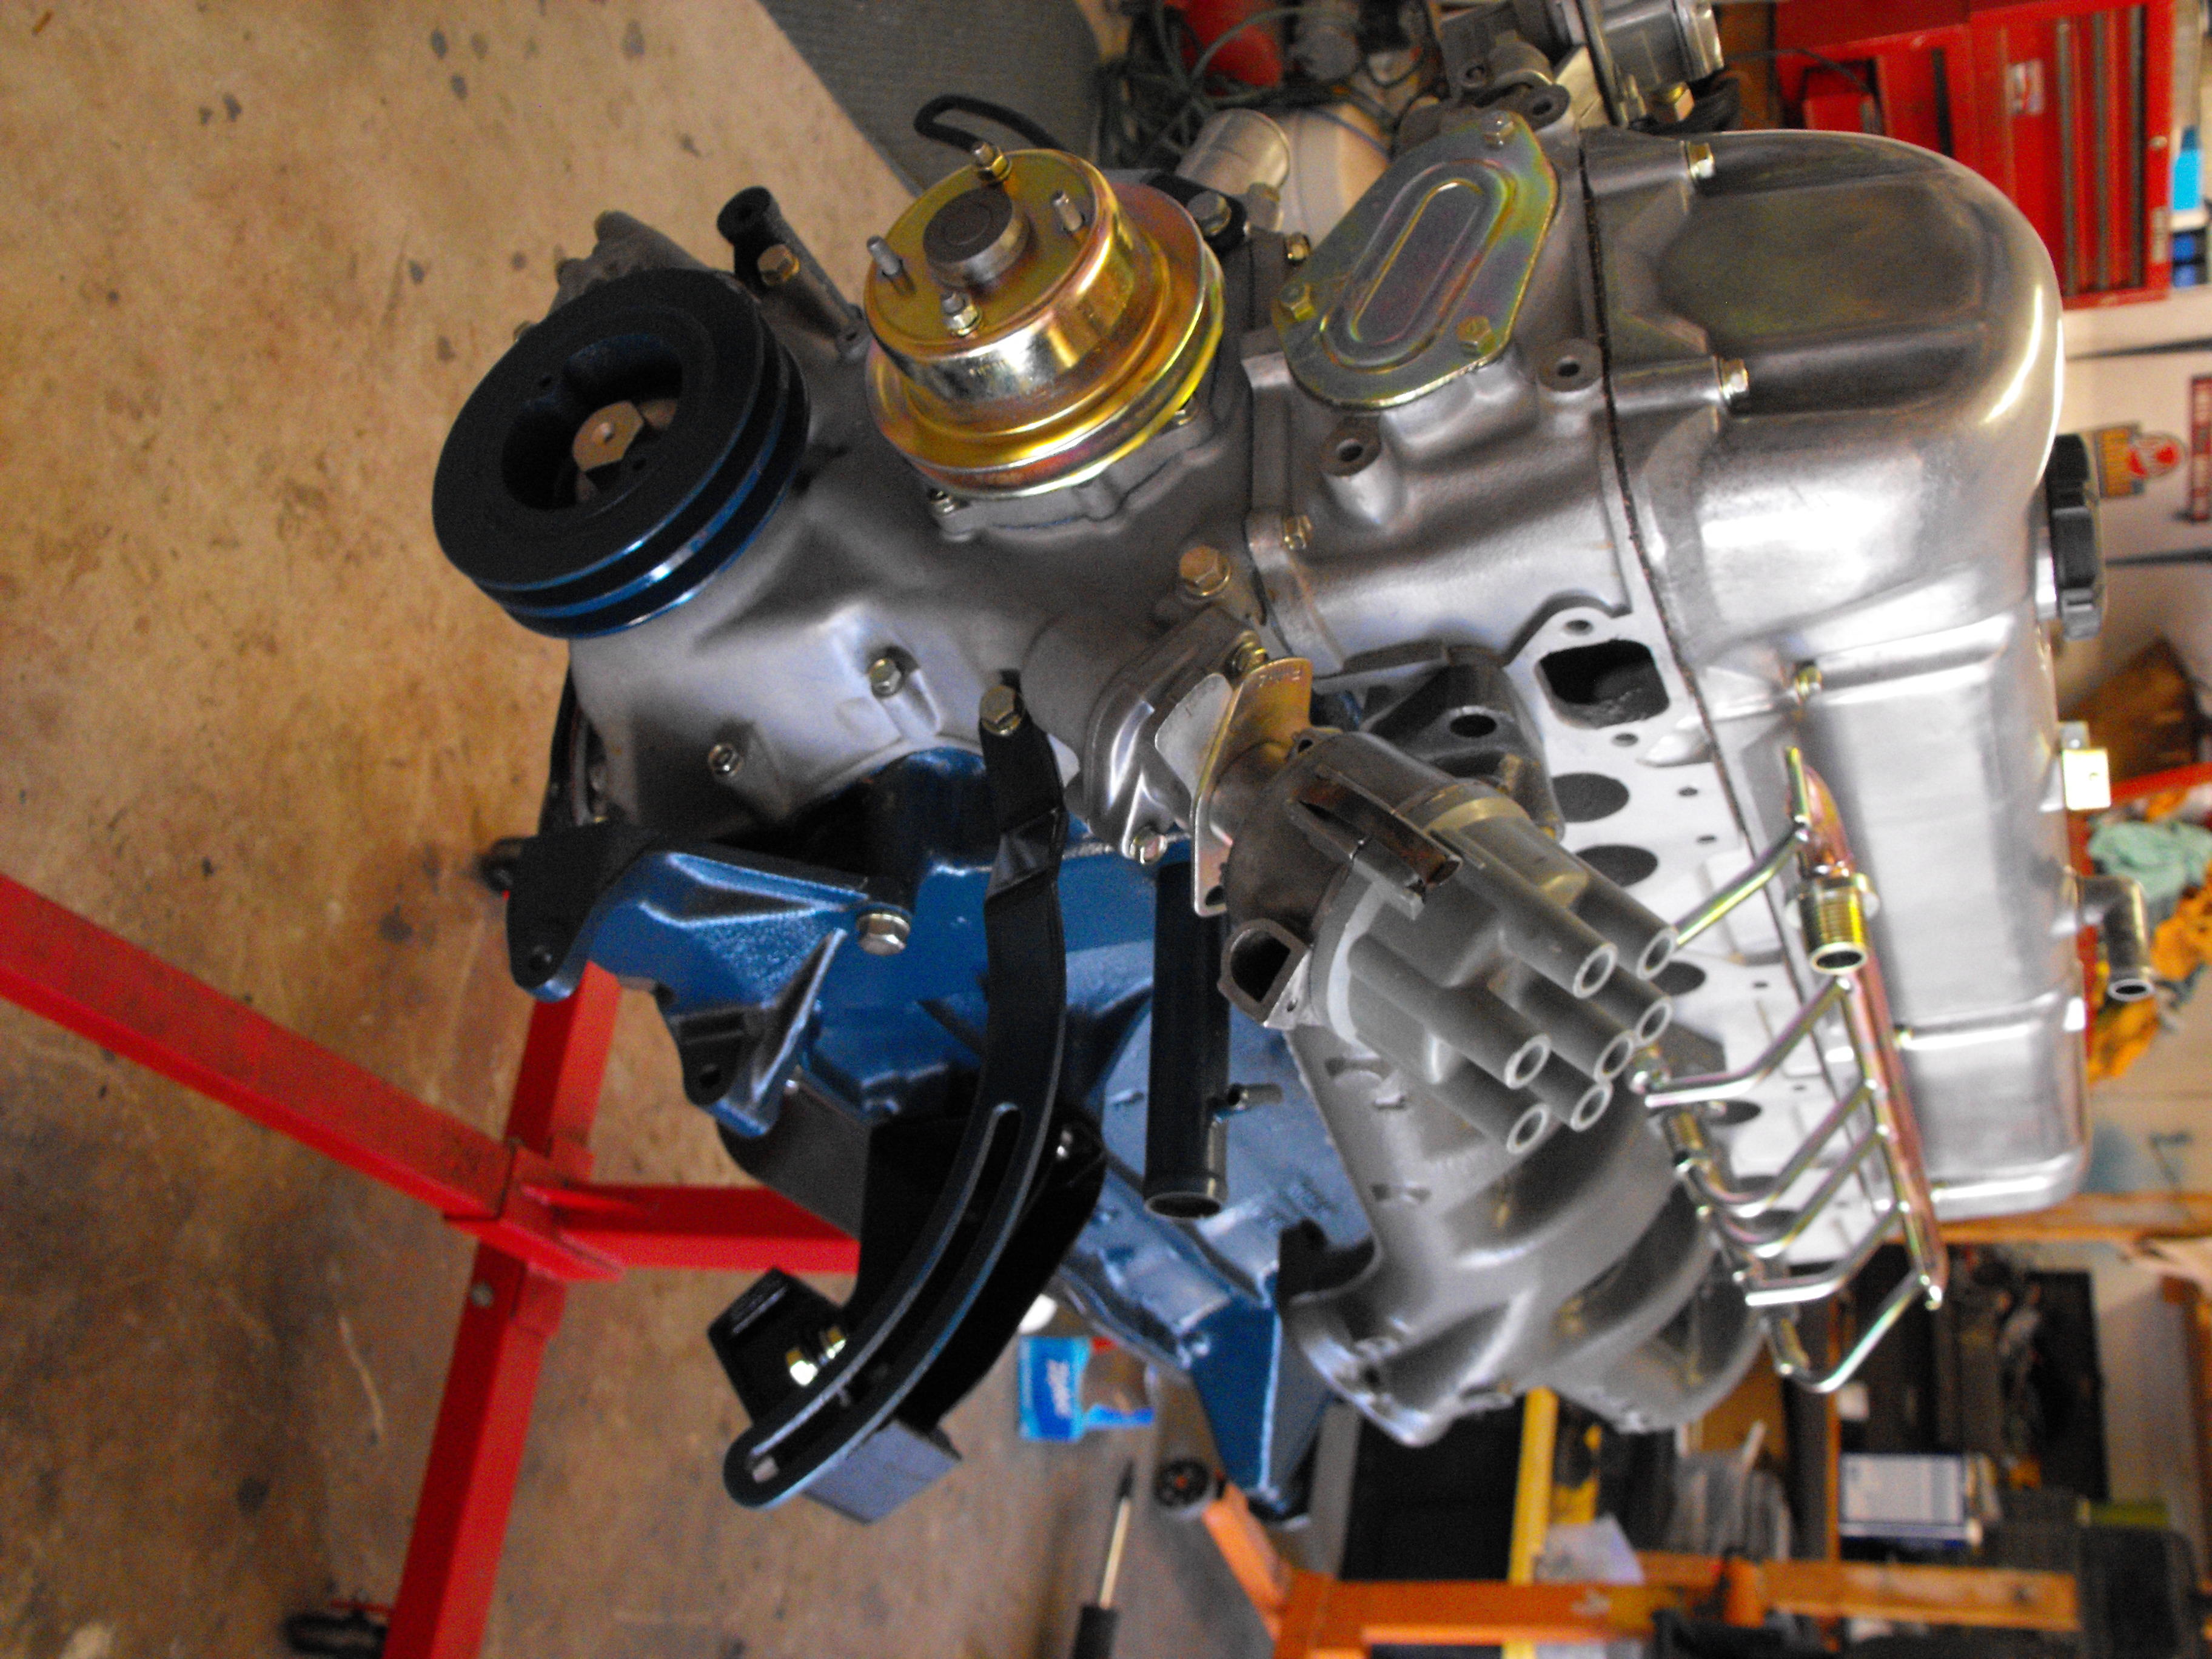
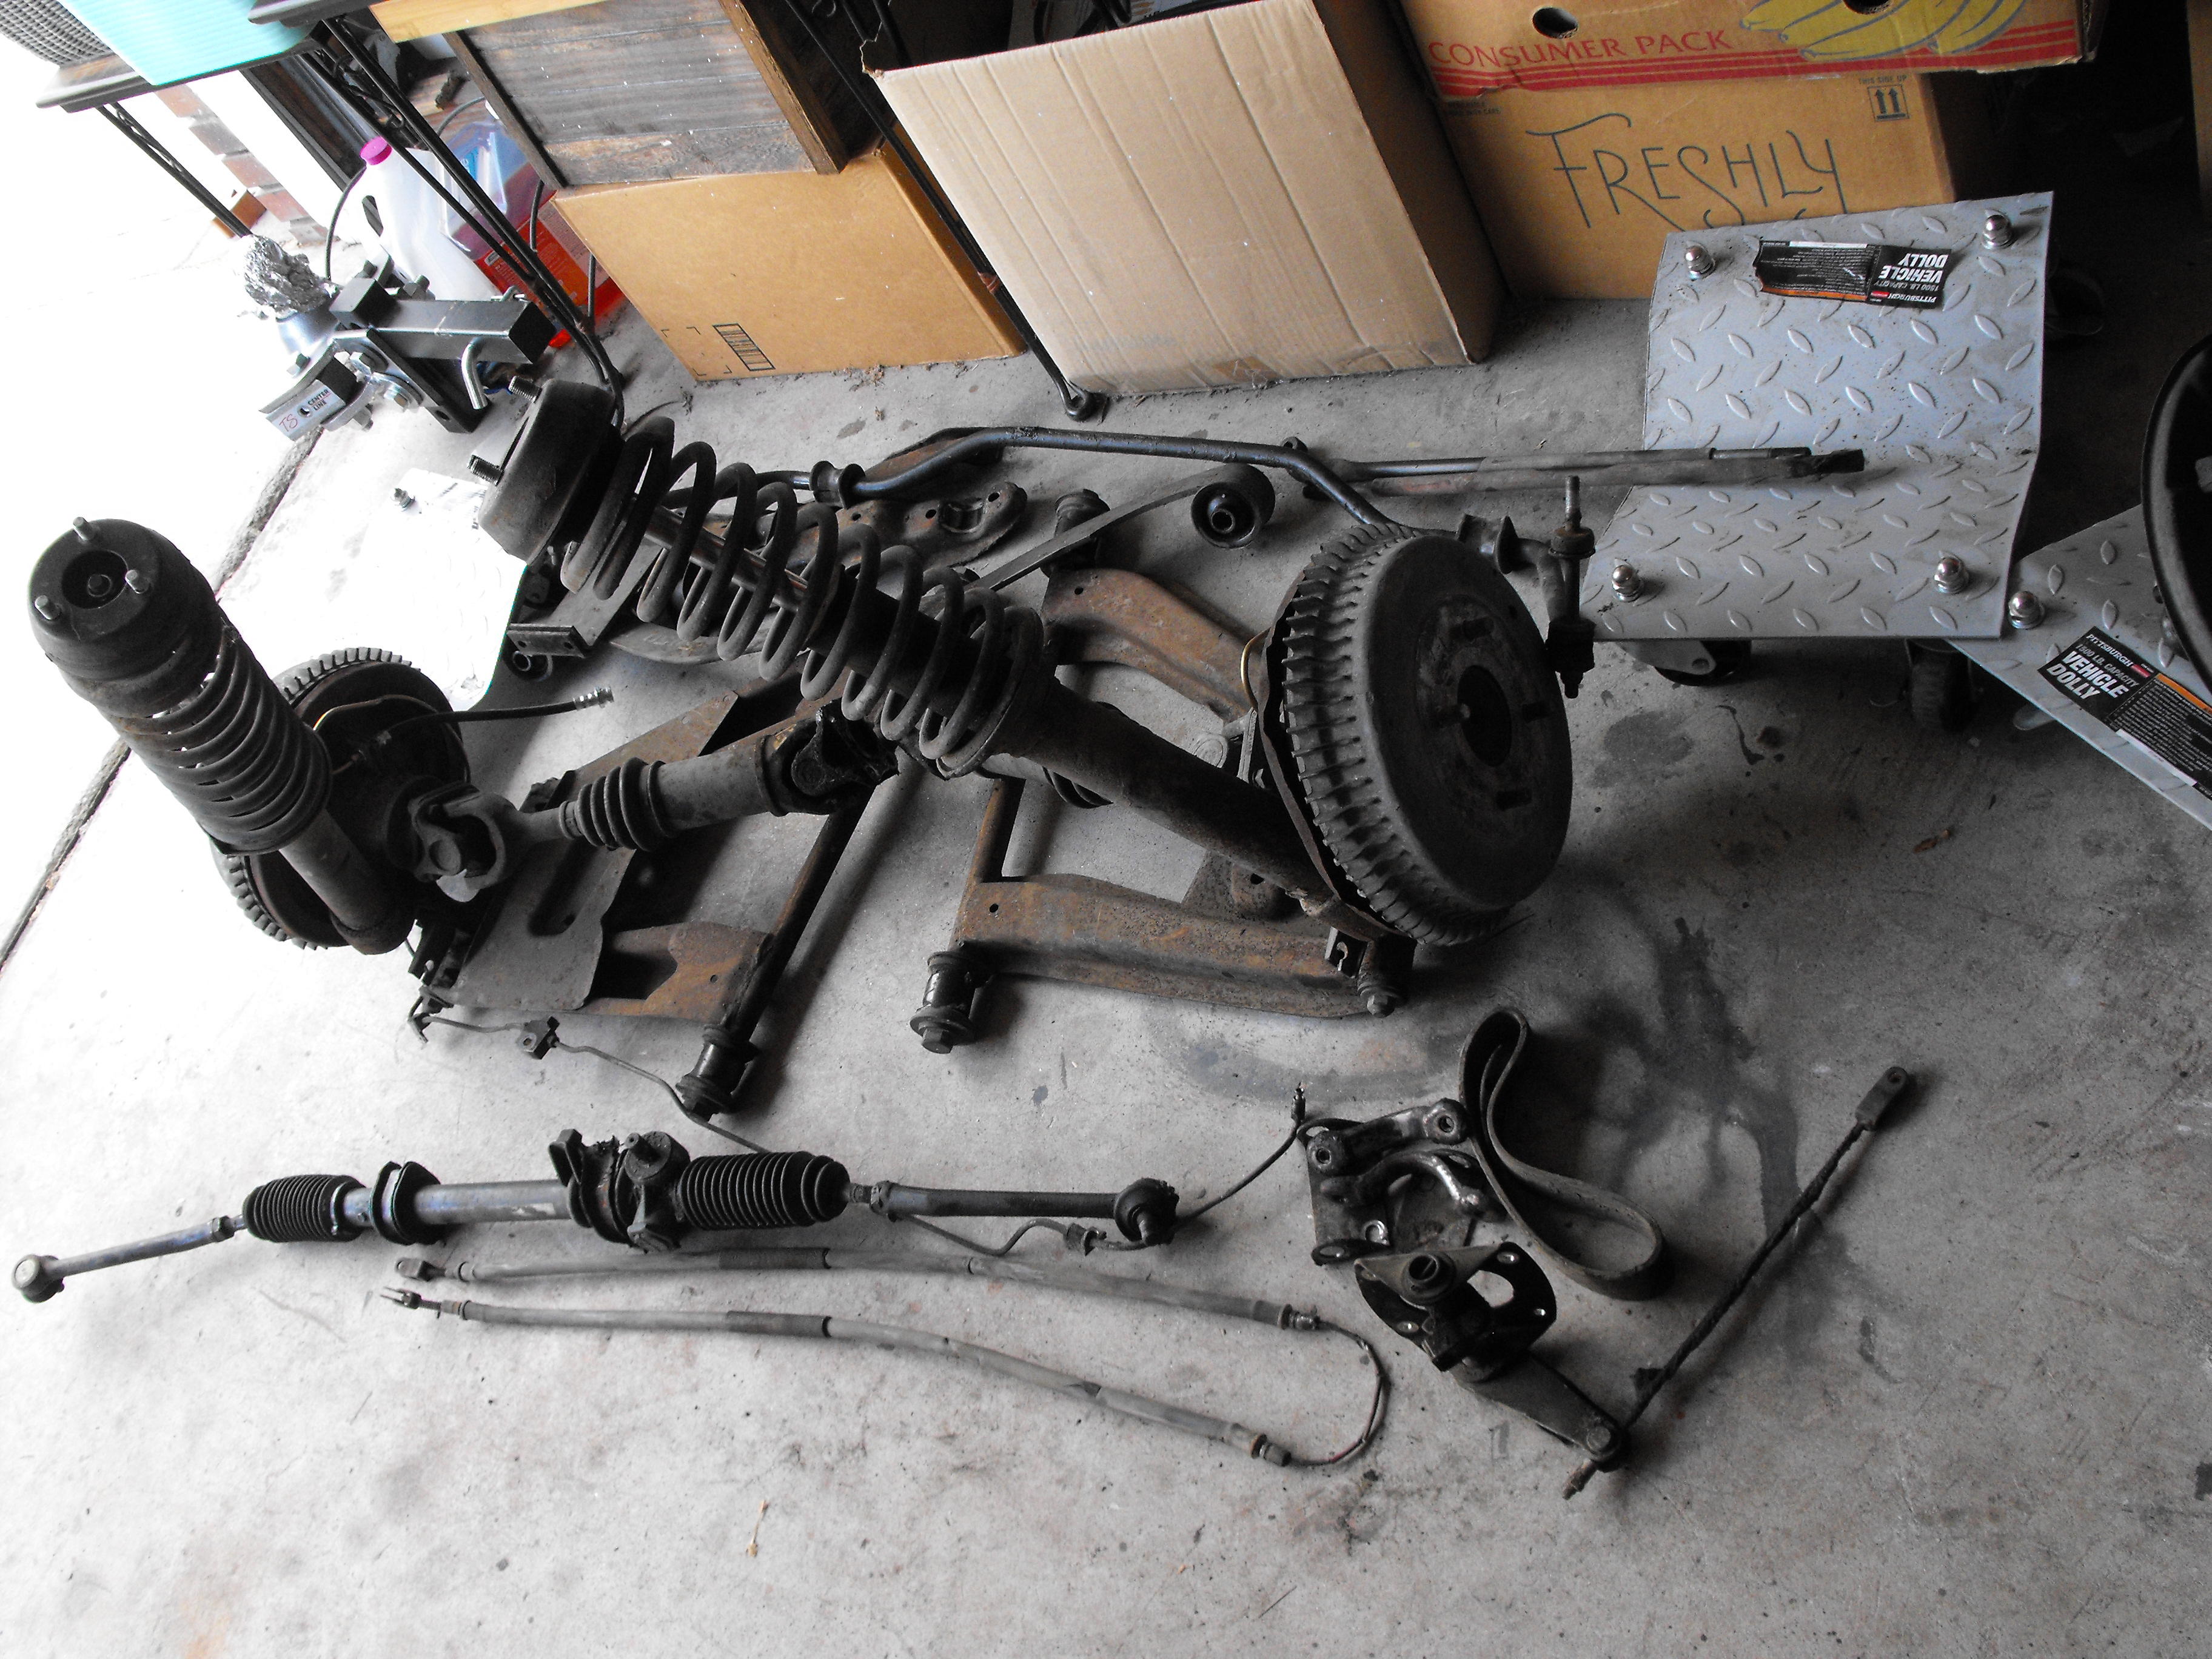
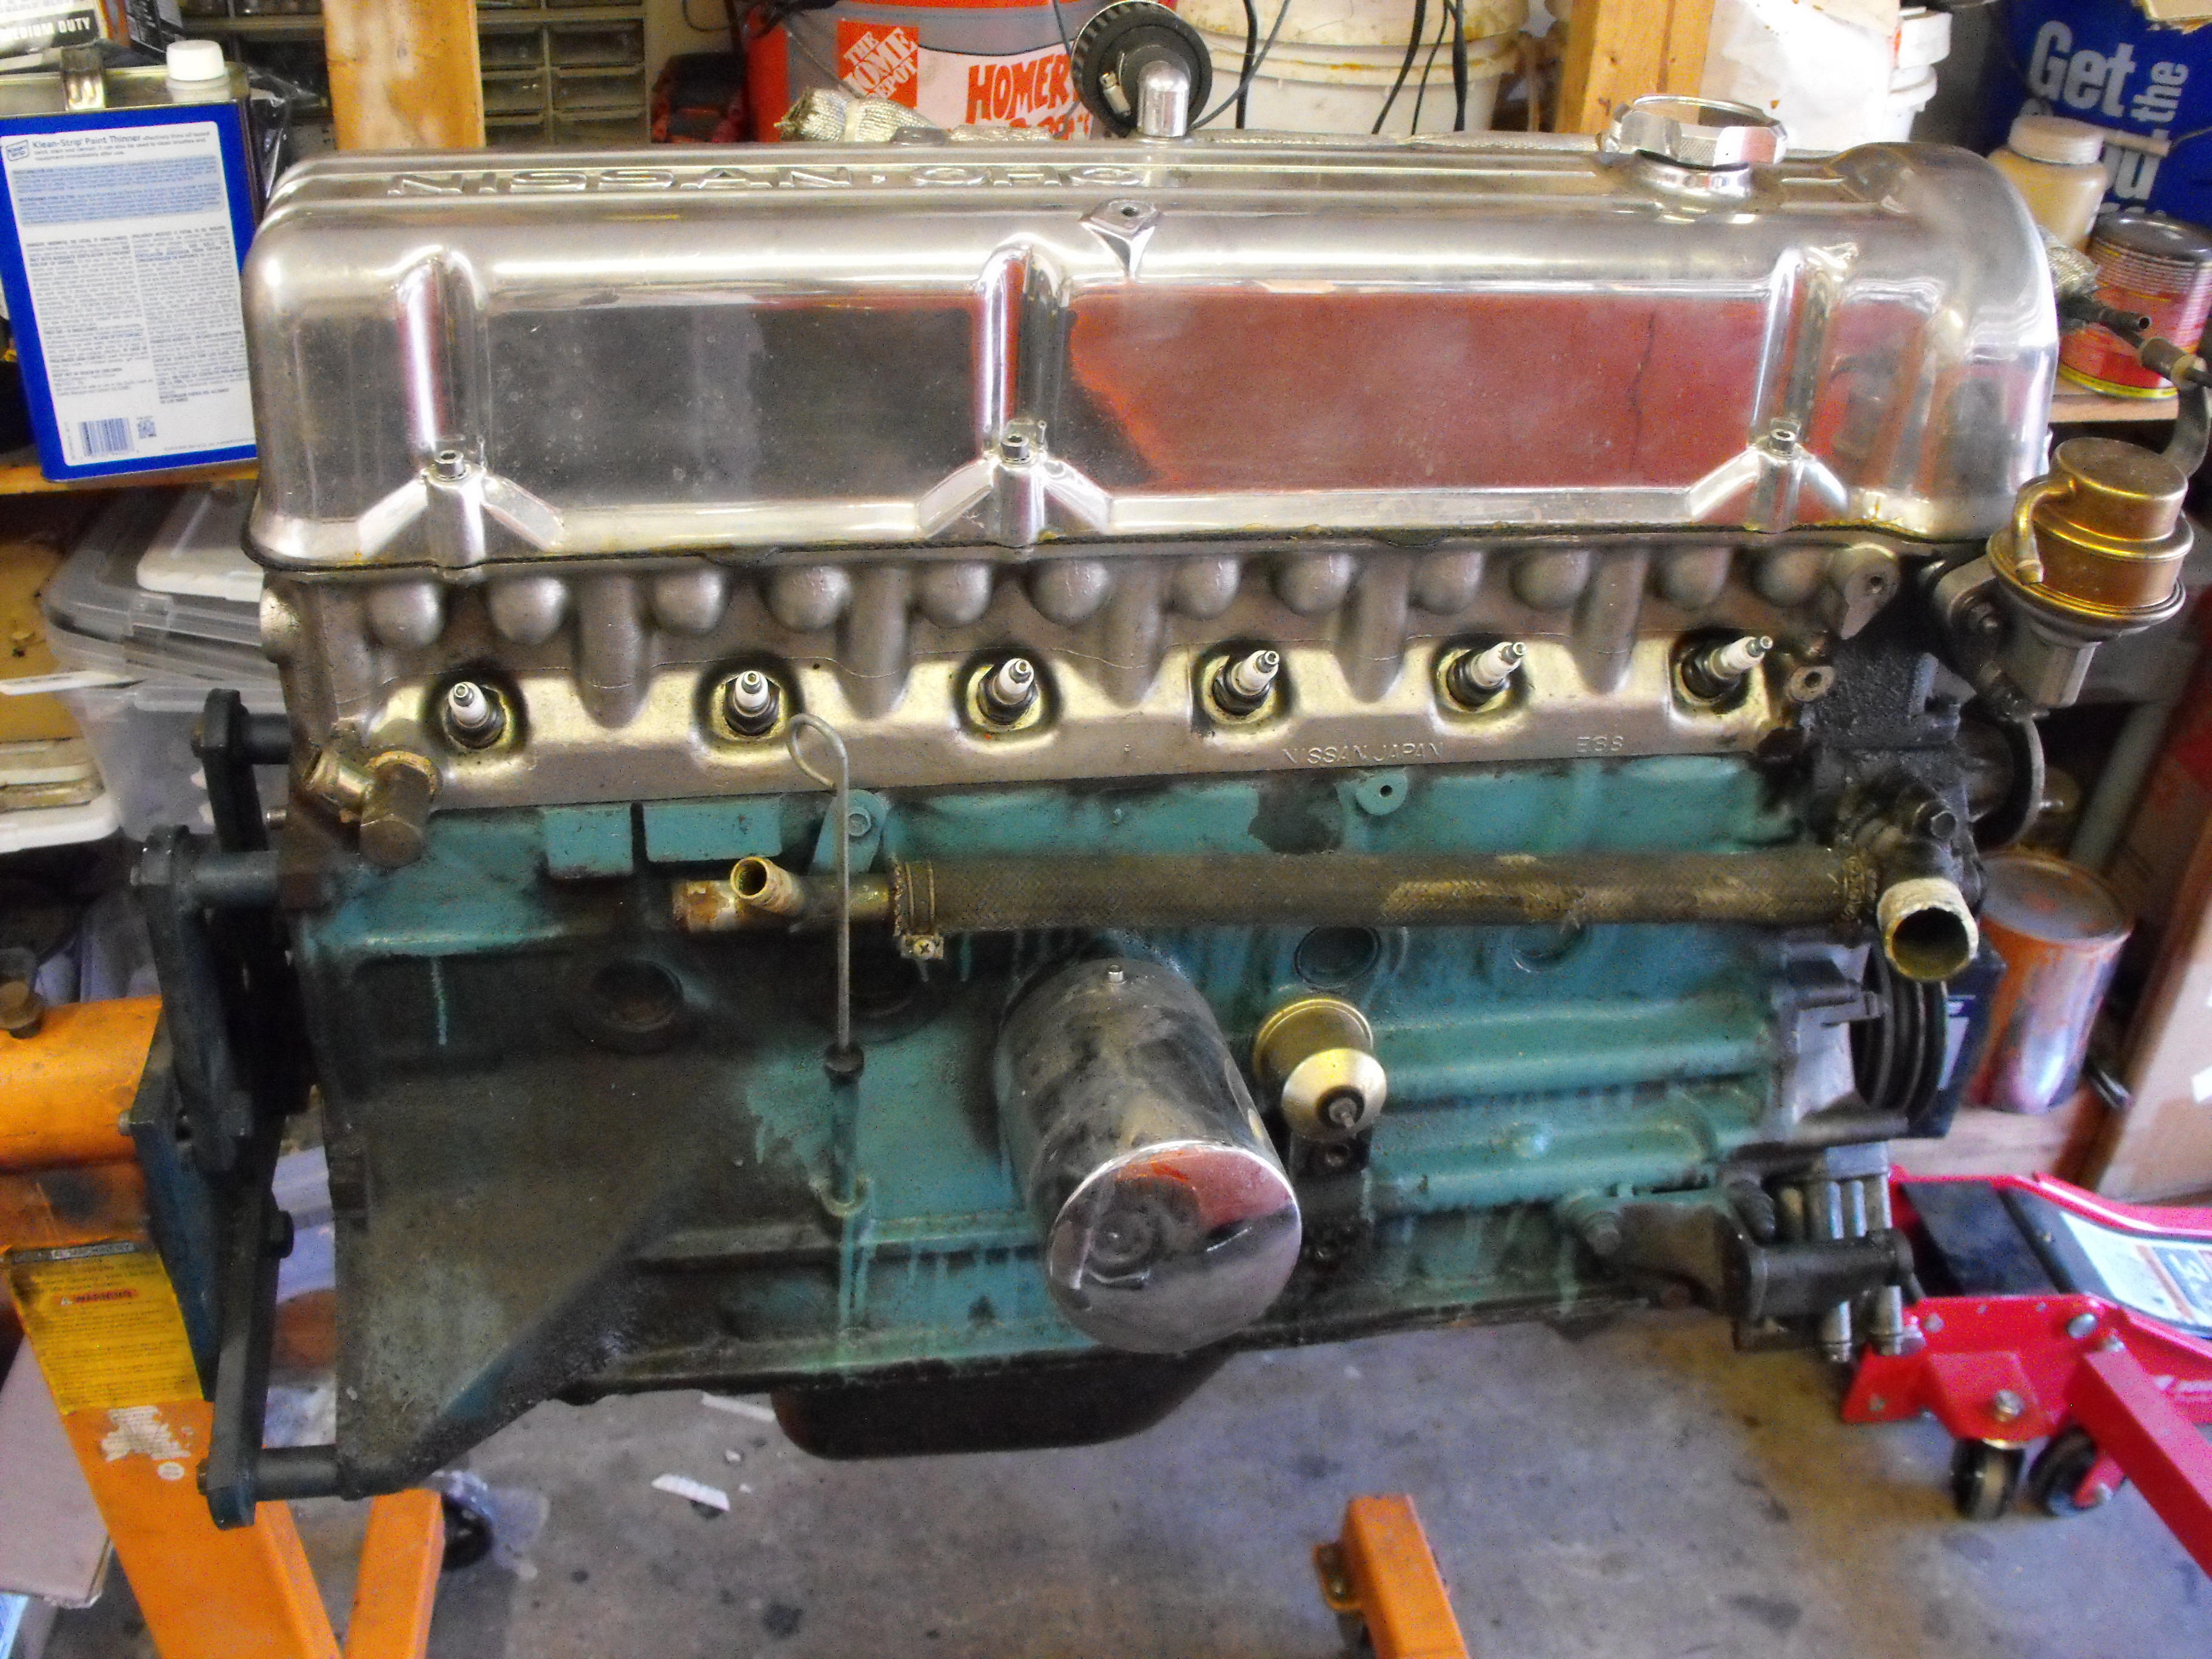
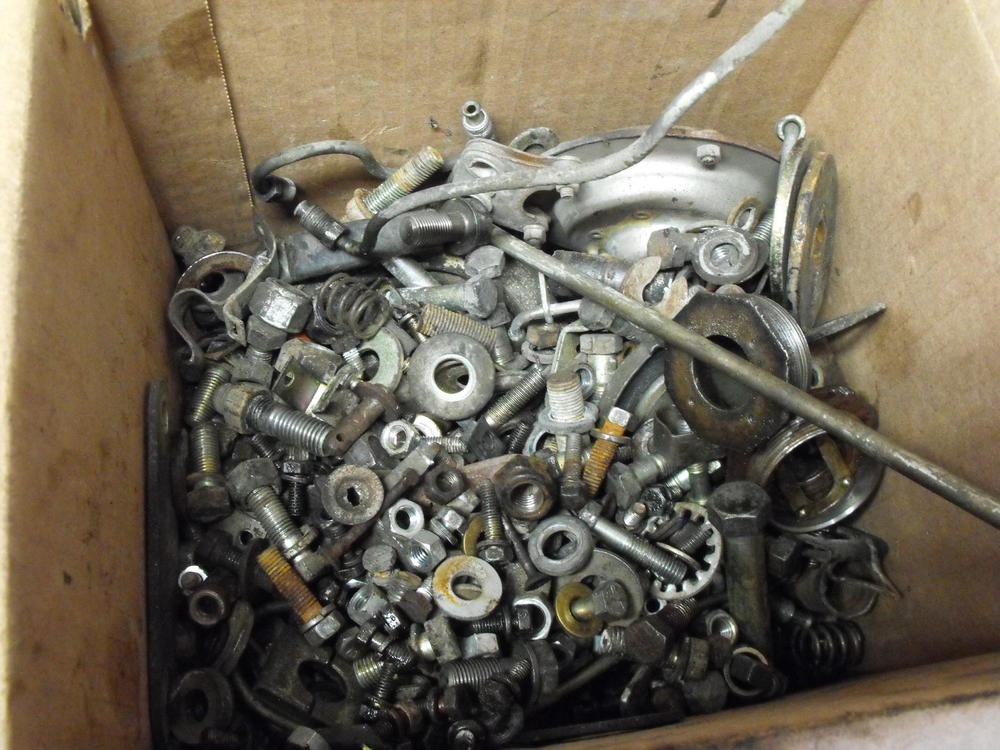
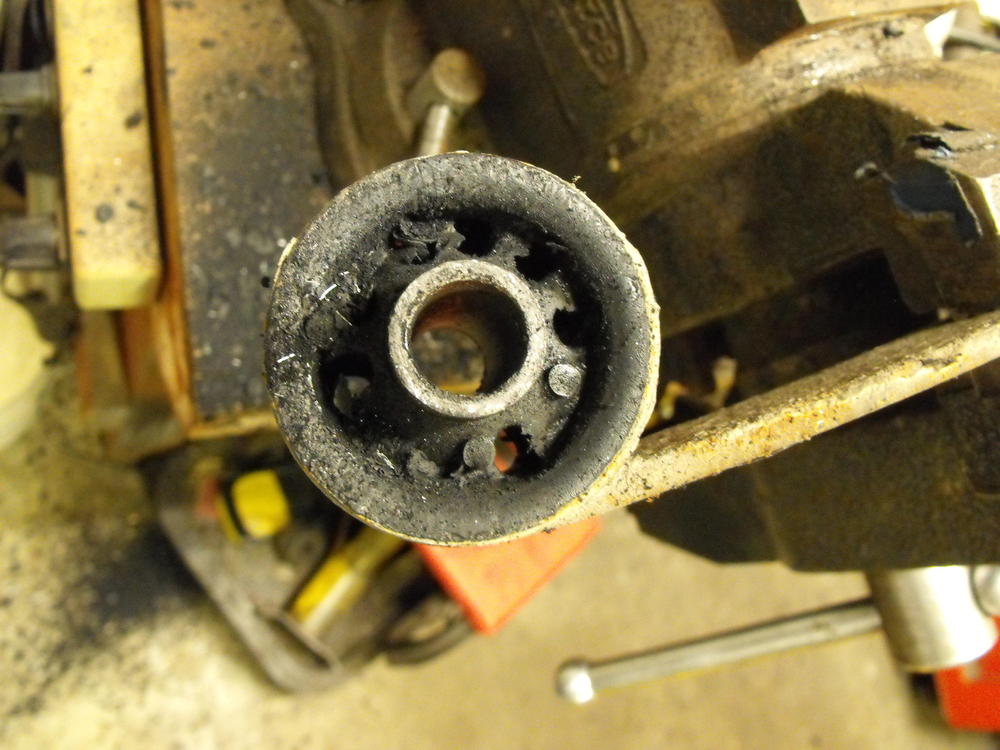
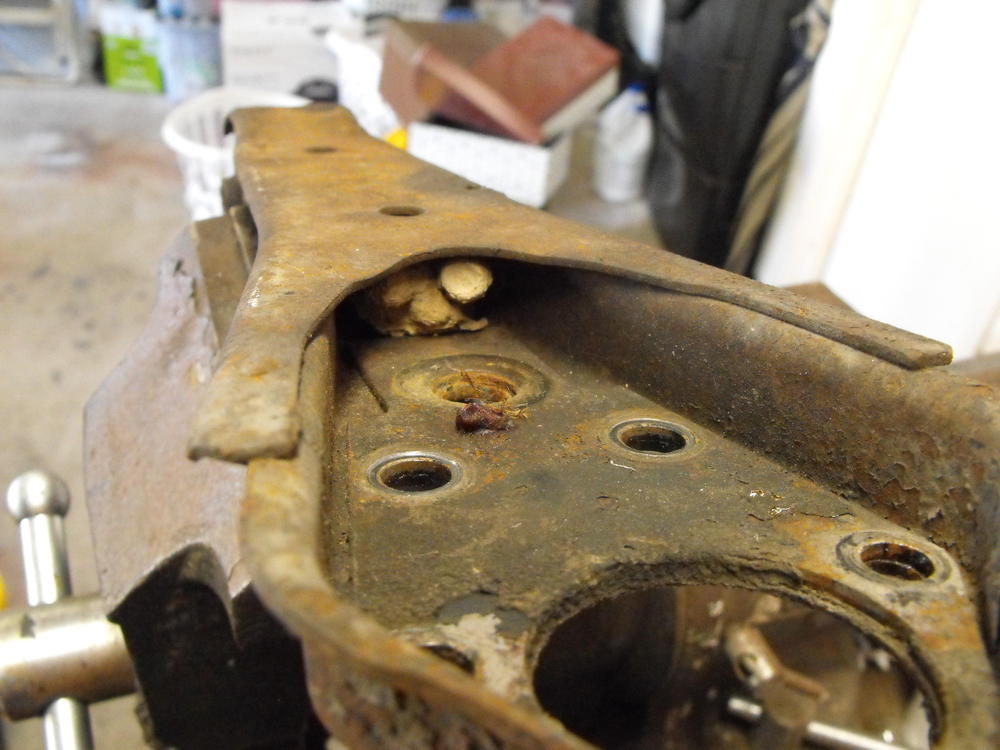
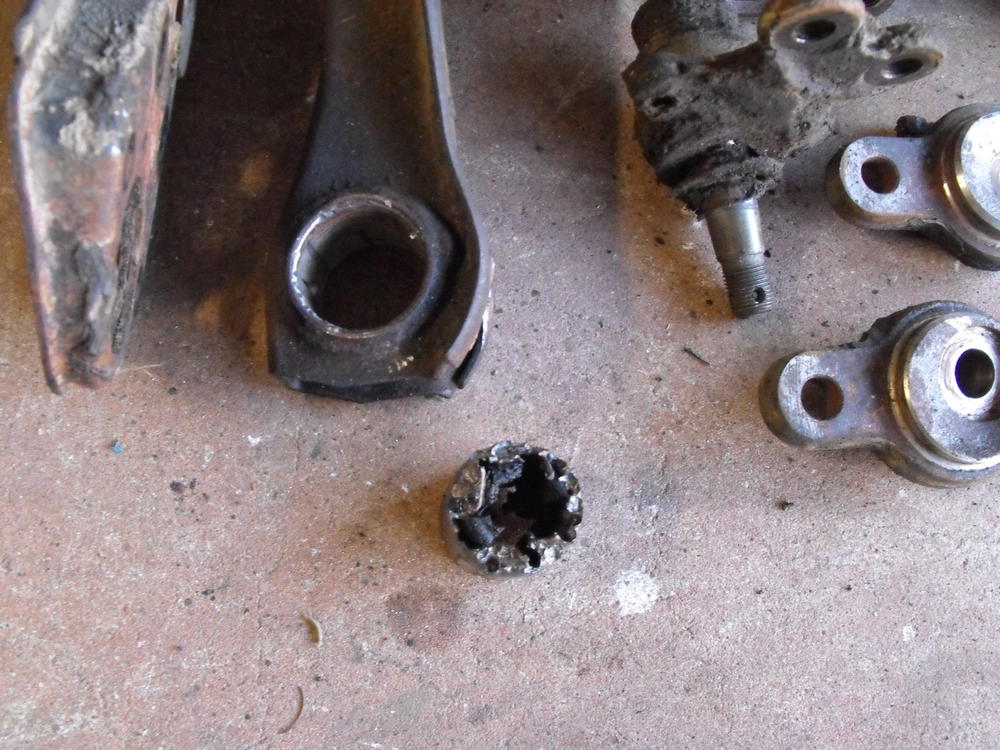
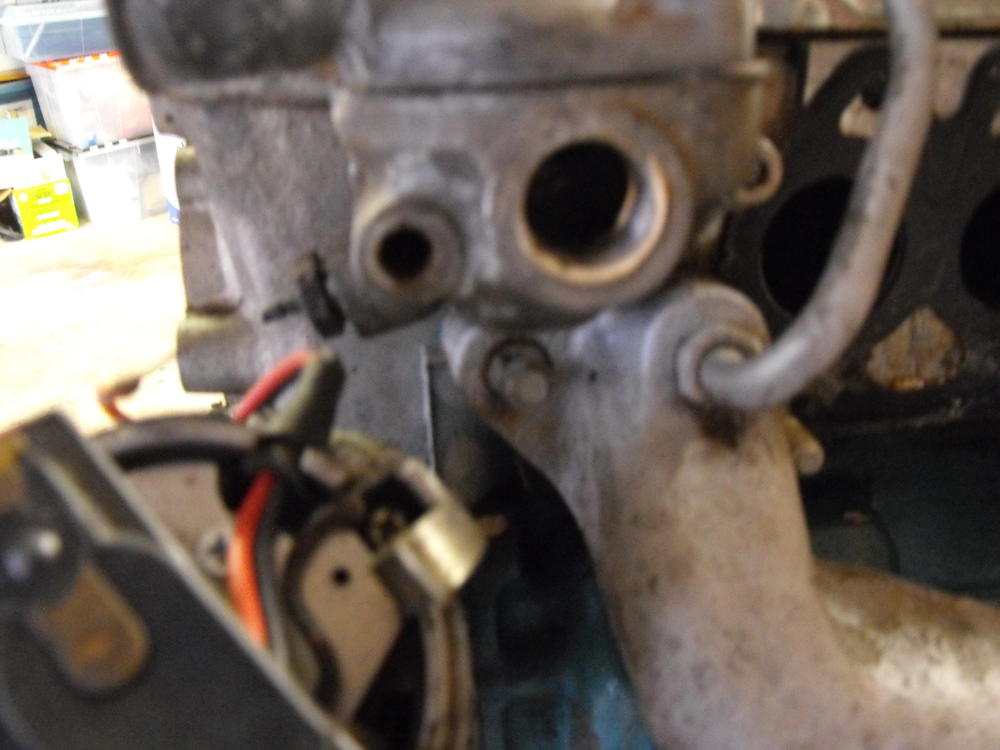
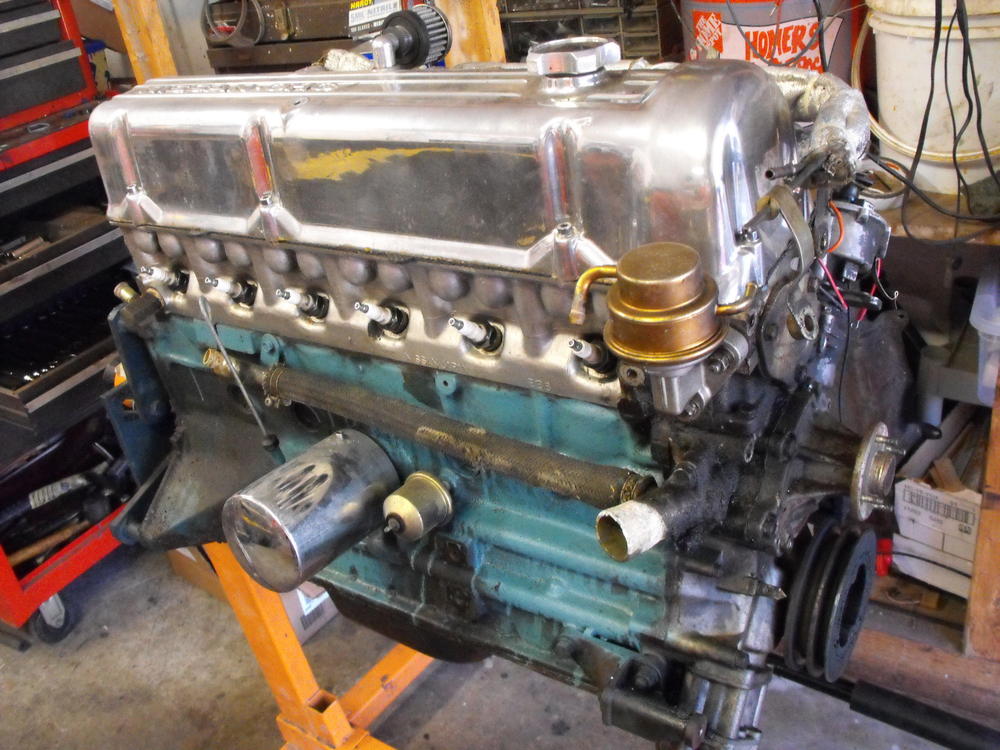
Disassembled all of the suspension components today. Most of this will be sent out for powder coating. Will look nice when it comes back. Got both the spindle pins out. As always, one was pretty easy to remove and is probably re-usable. The other took a lot of pounding to remove as you can see in the pics. Probably won't be using that short extension anymore. Same thing with the front suspension lower arm, one bushing came out pretty easy, the other was a challenge. (wasp nest included) Not sure why this happened to the front crank key, but definitely will replace this part. I am thinking that the pulley bolt was not torqued which led to the key being deformed. Interesting, first time I have seen that. And yes, that is a wood screw 'securing' the manifold to the head. Probably just need to tap the hole so I can put in the correct fastener here.


-

To buy or not to buy...that is the question
motorman7 replied to motorman7's topic in Open Discussions
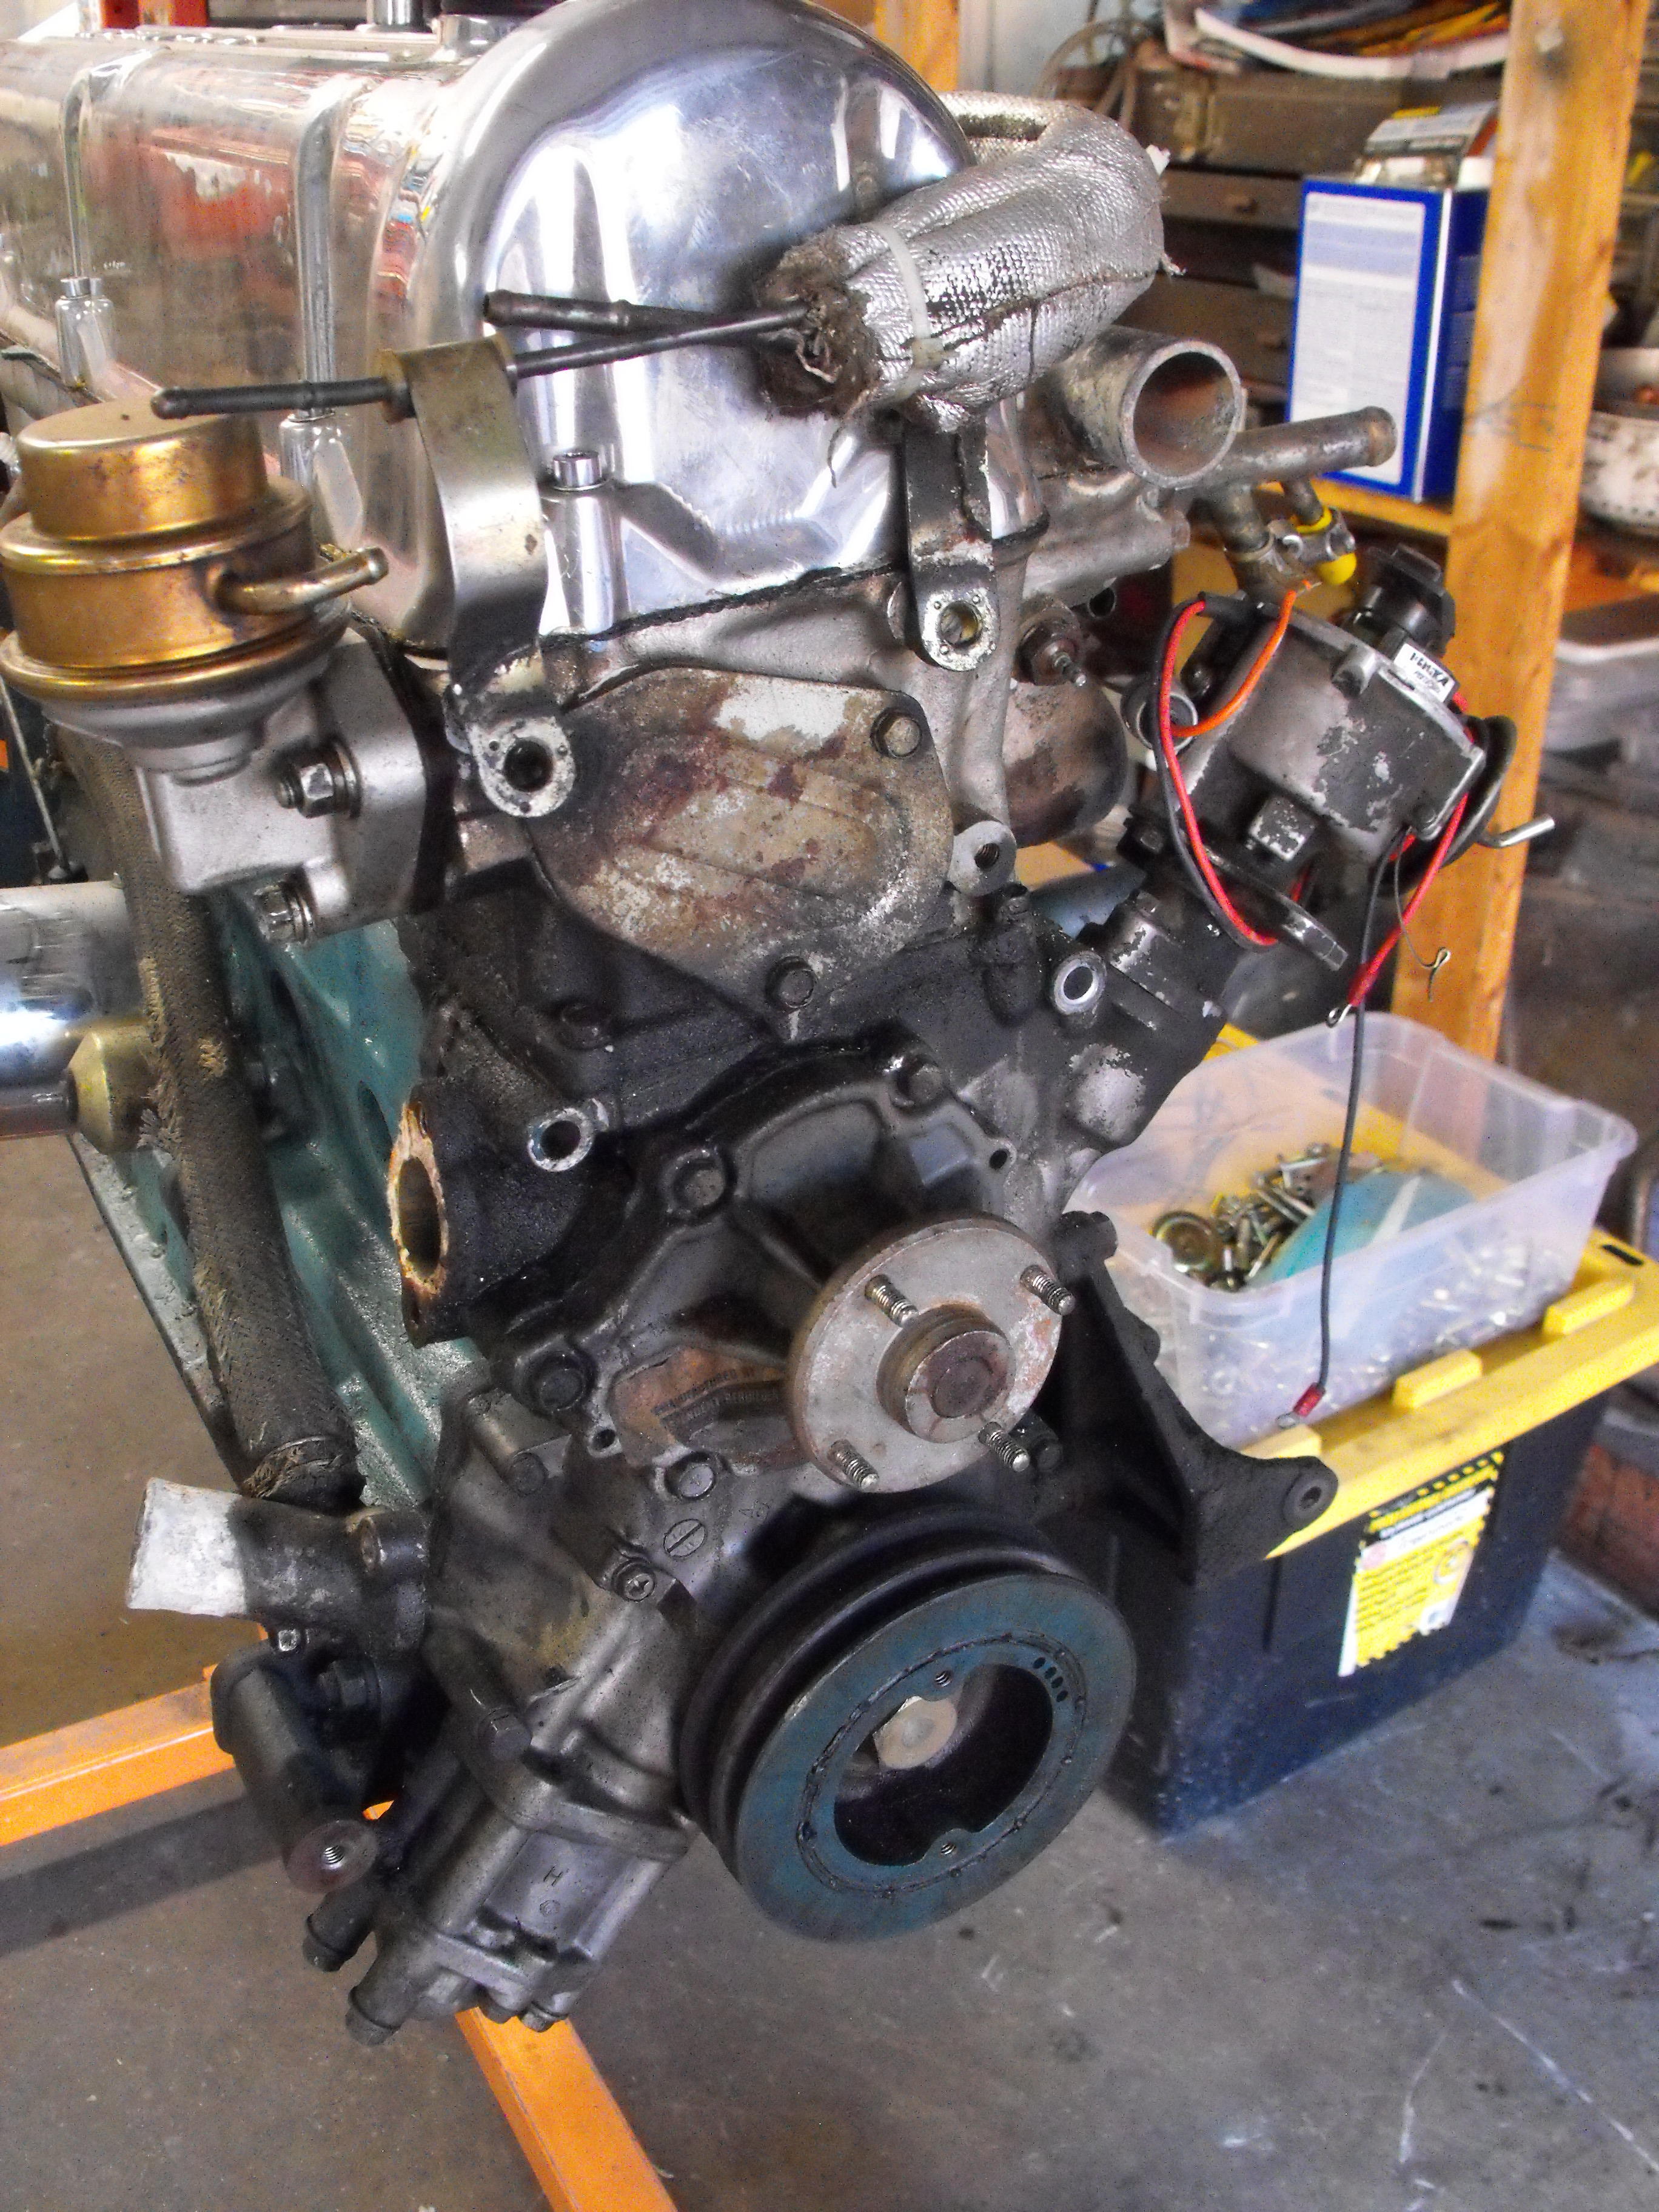
And a few more engine pics. Haven't really done that much here....just temporarily added a few parts to the block so i can keep track of them.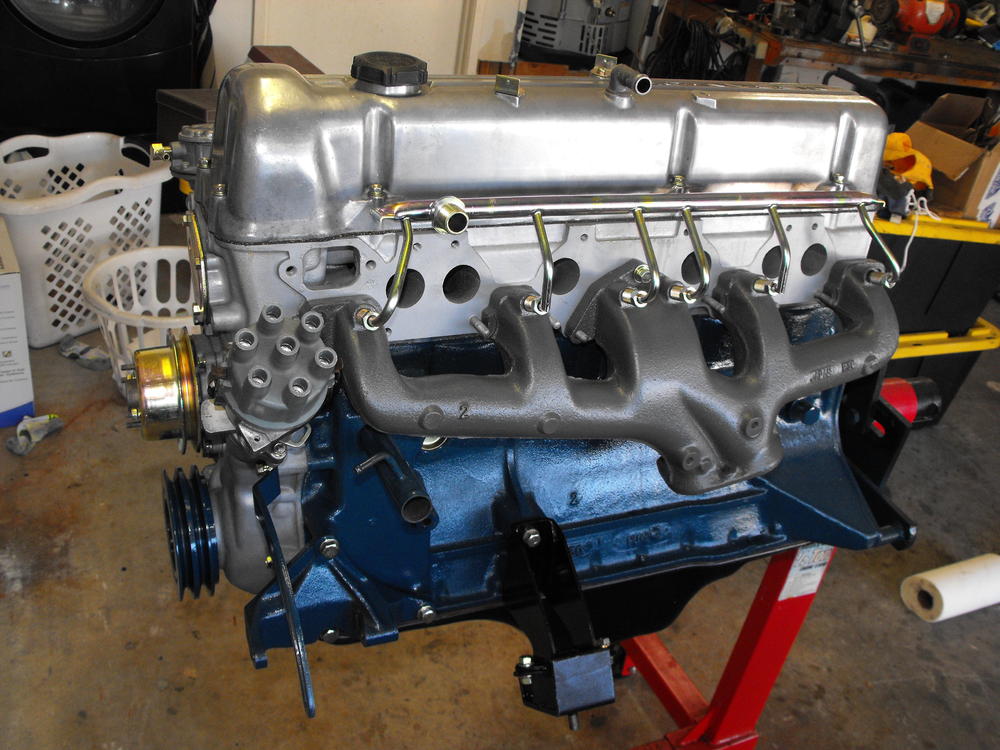


-
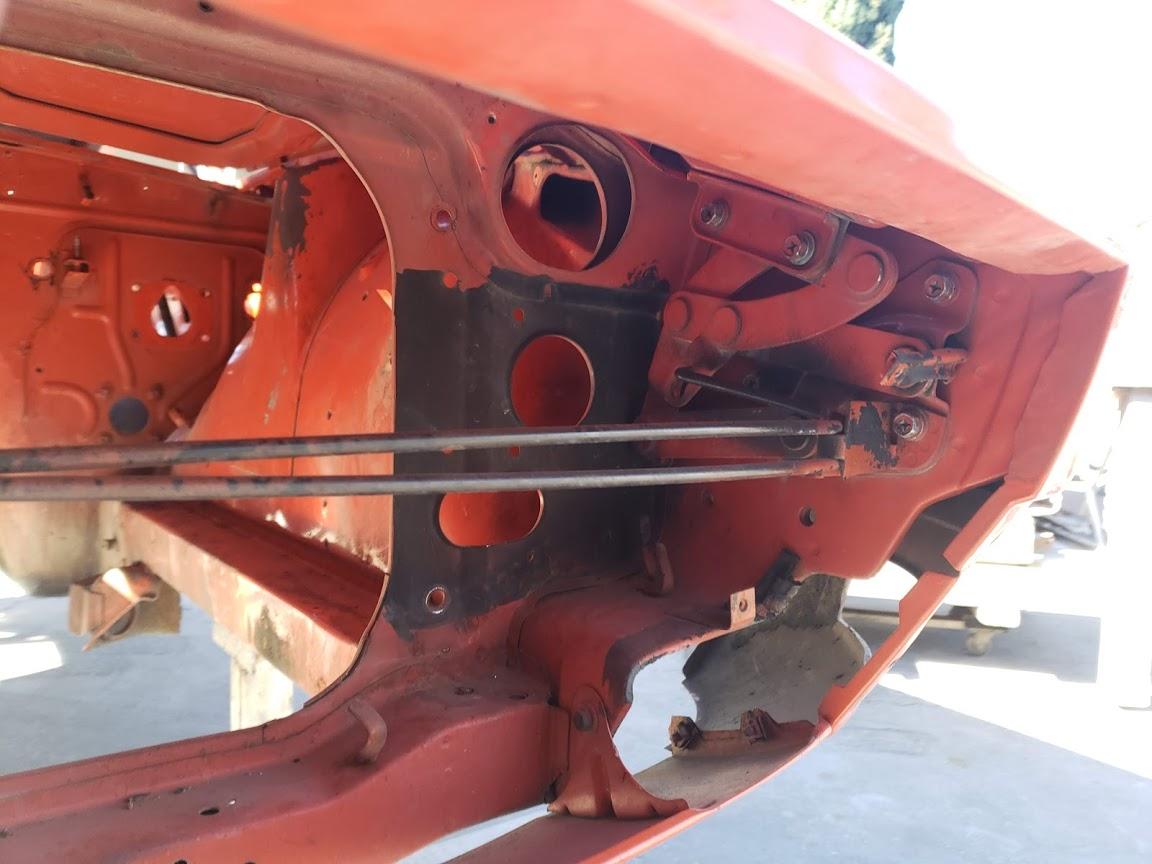
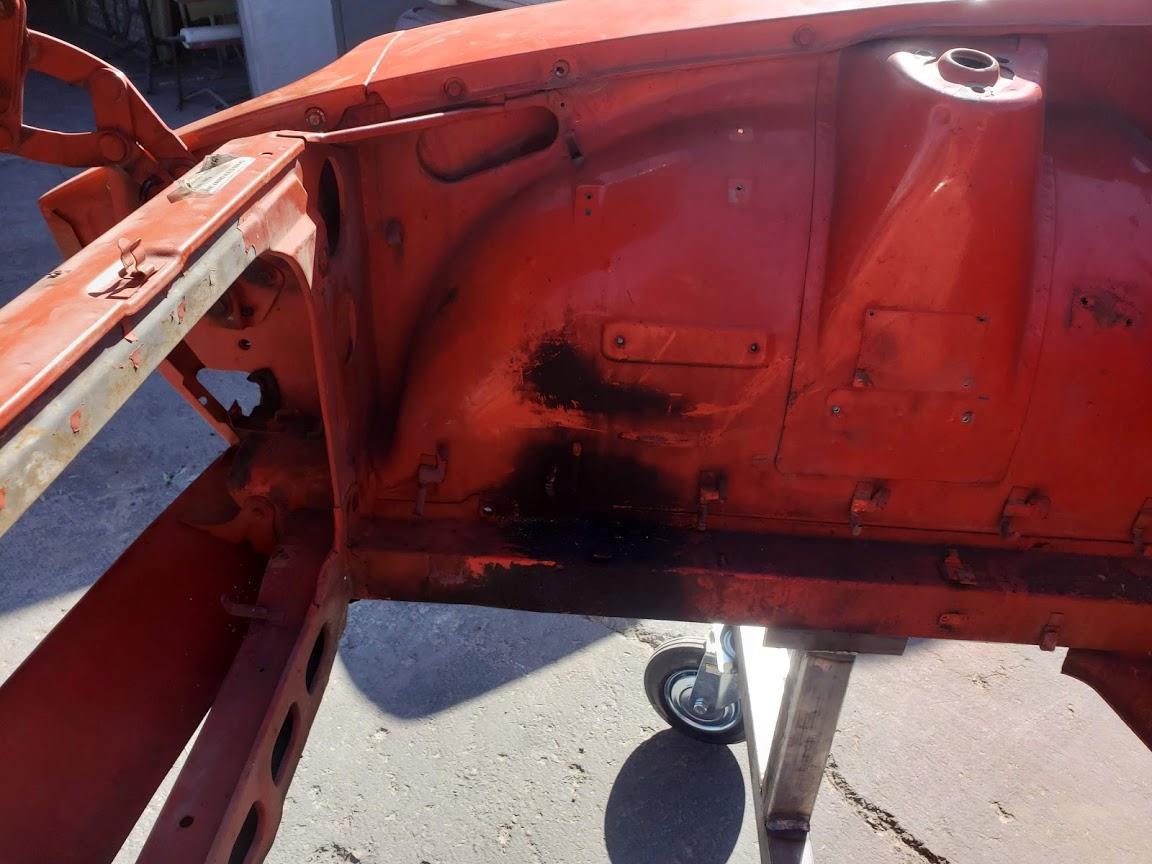
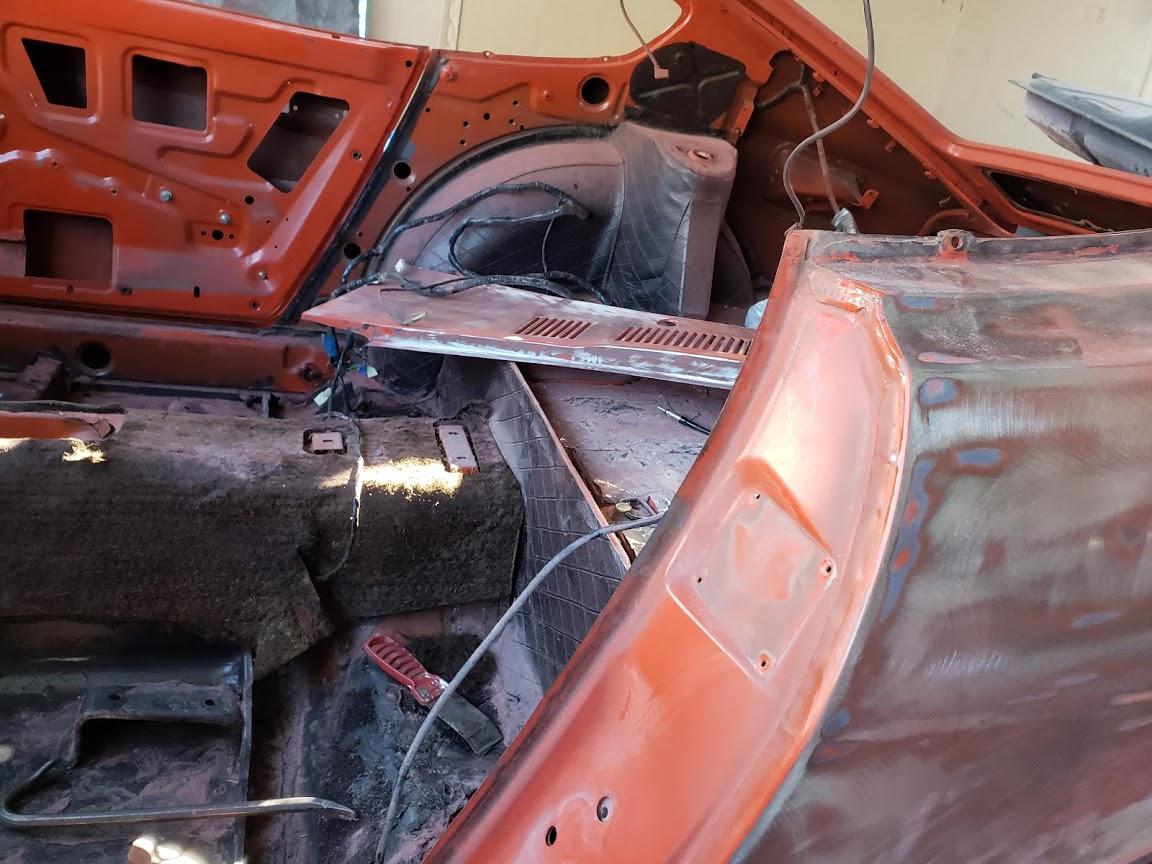
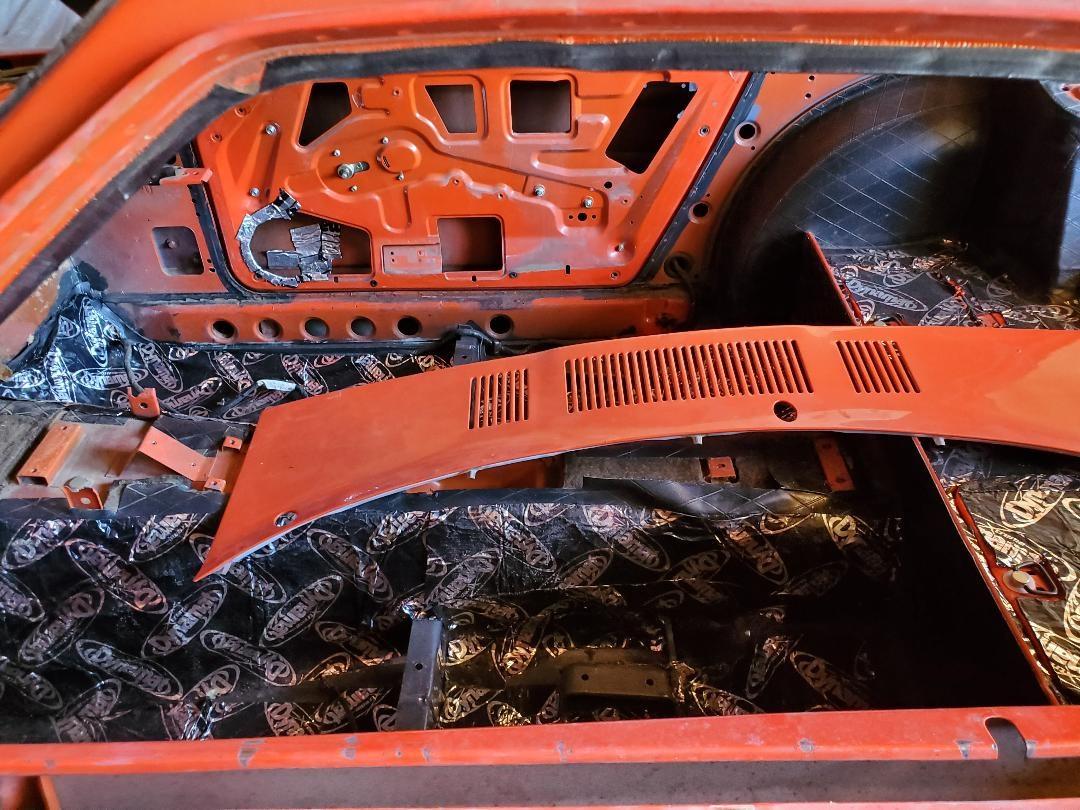
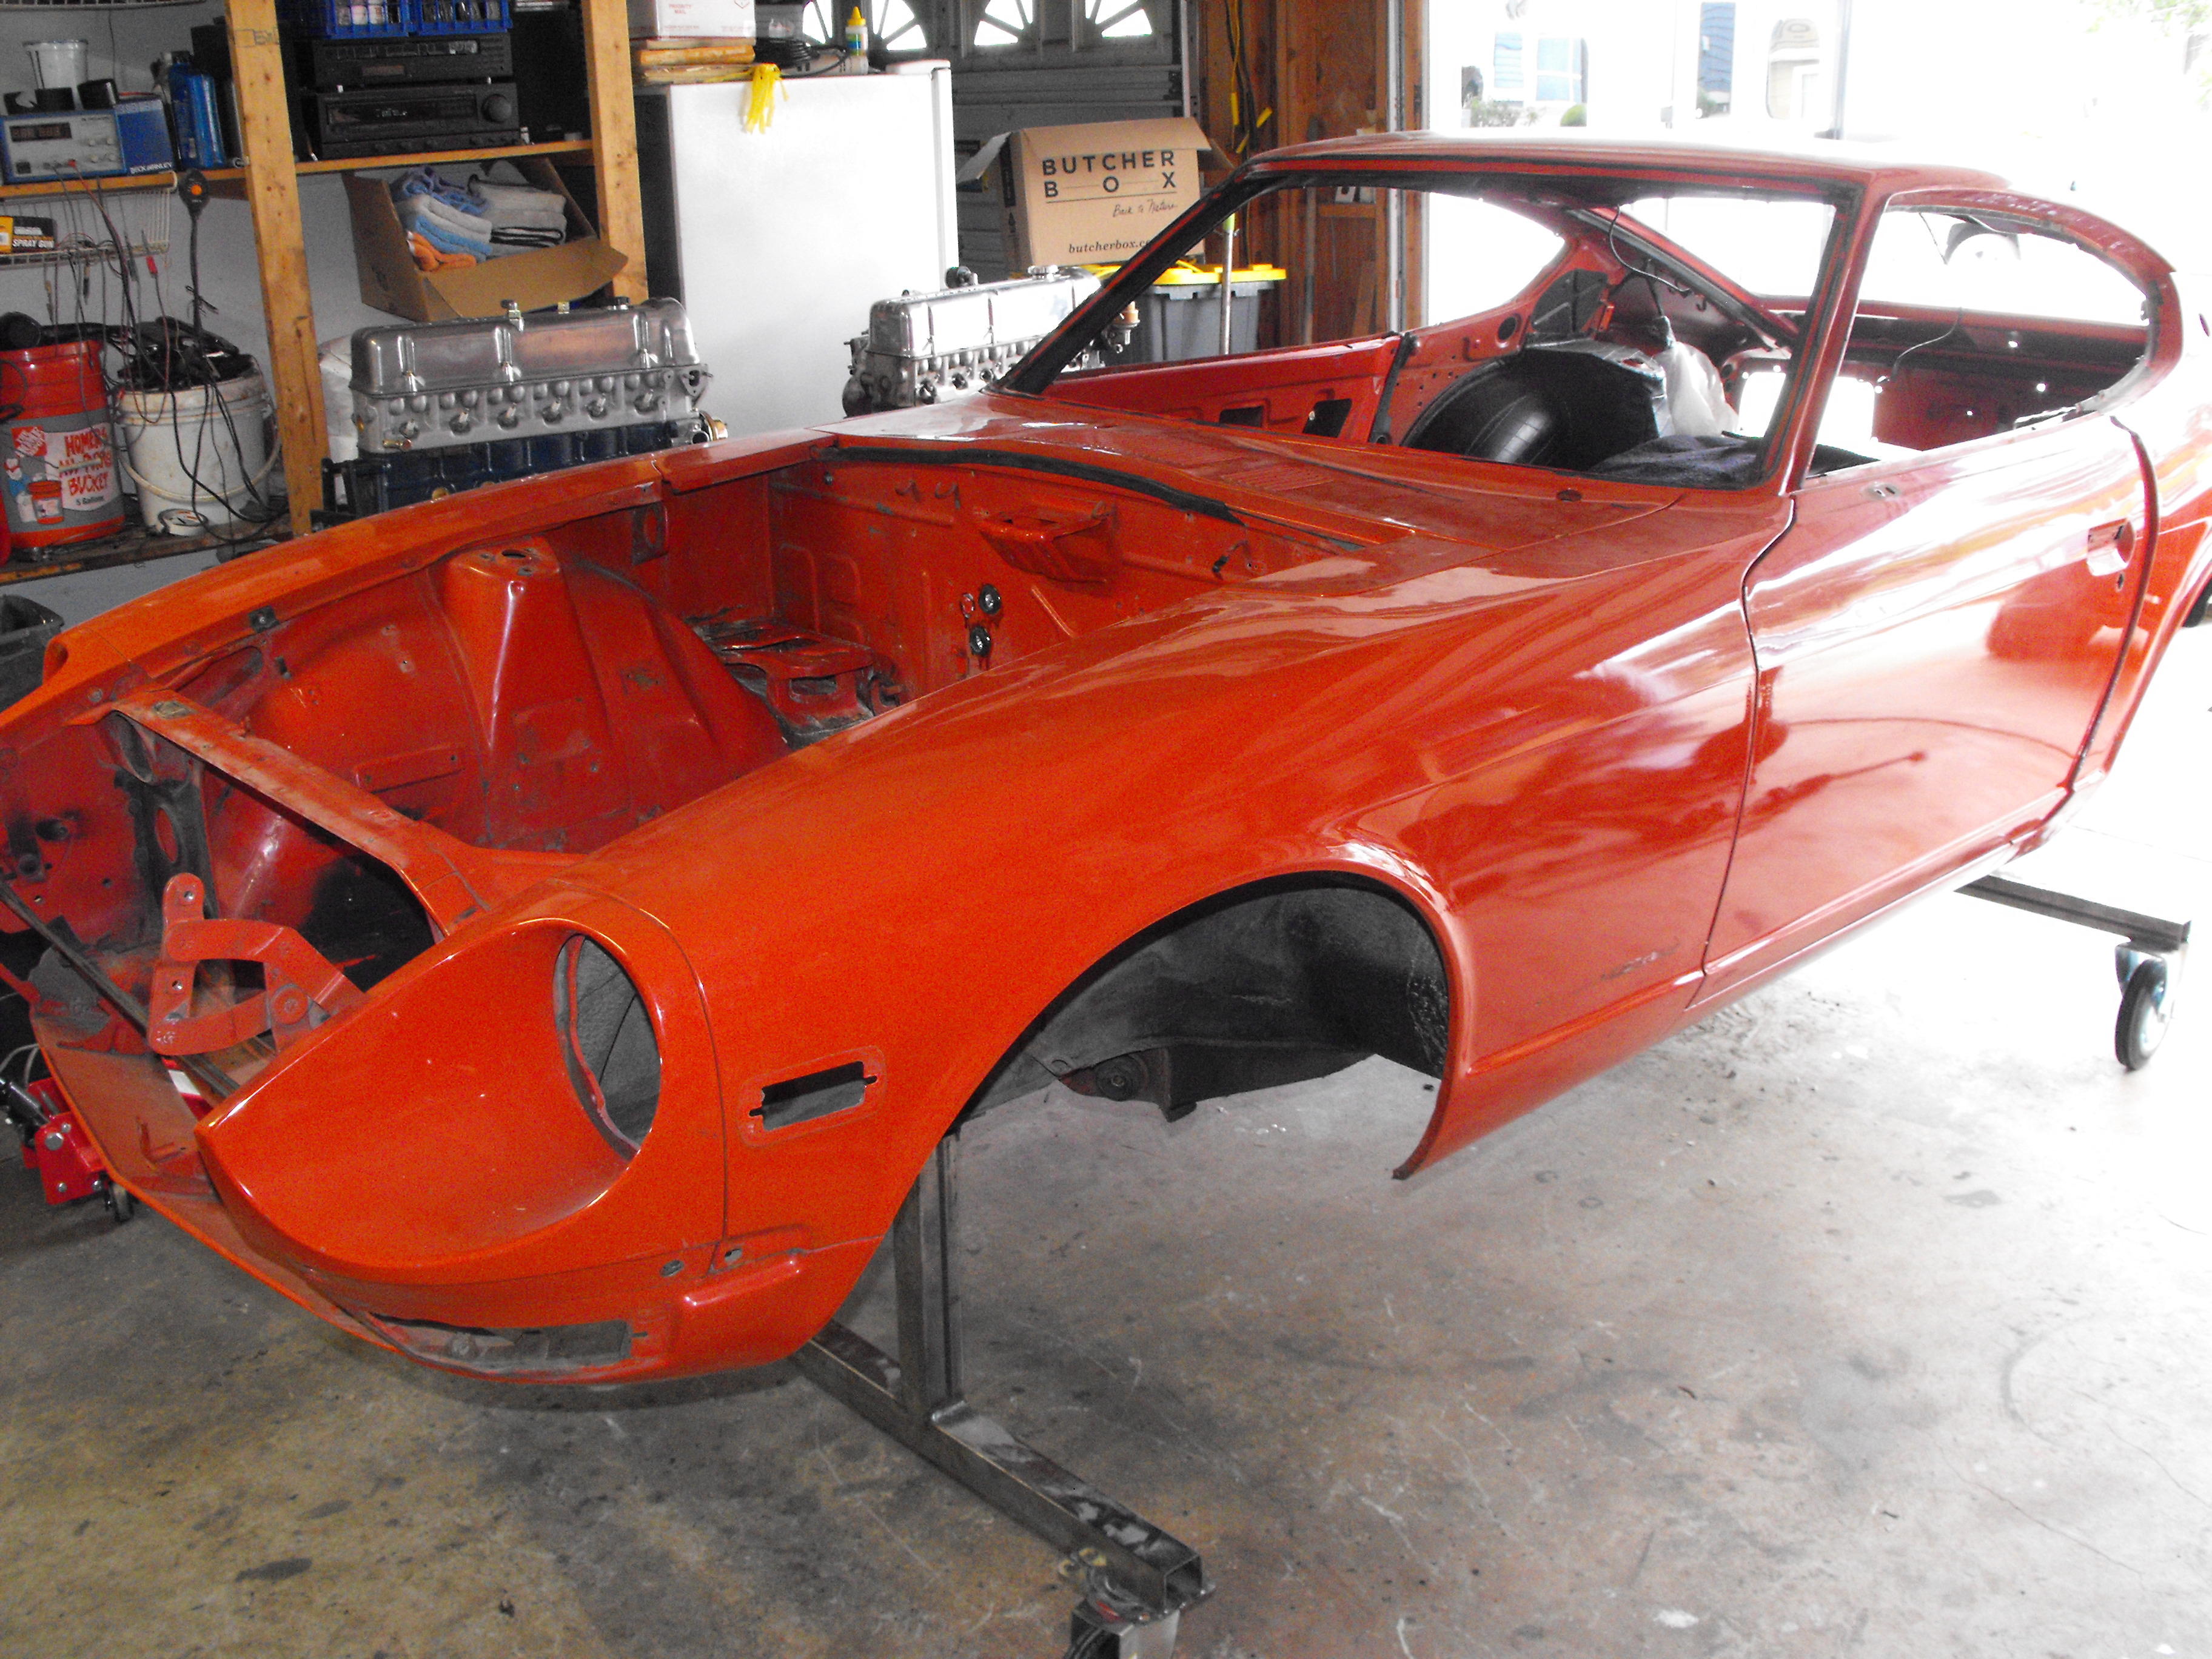
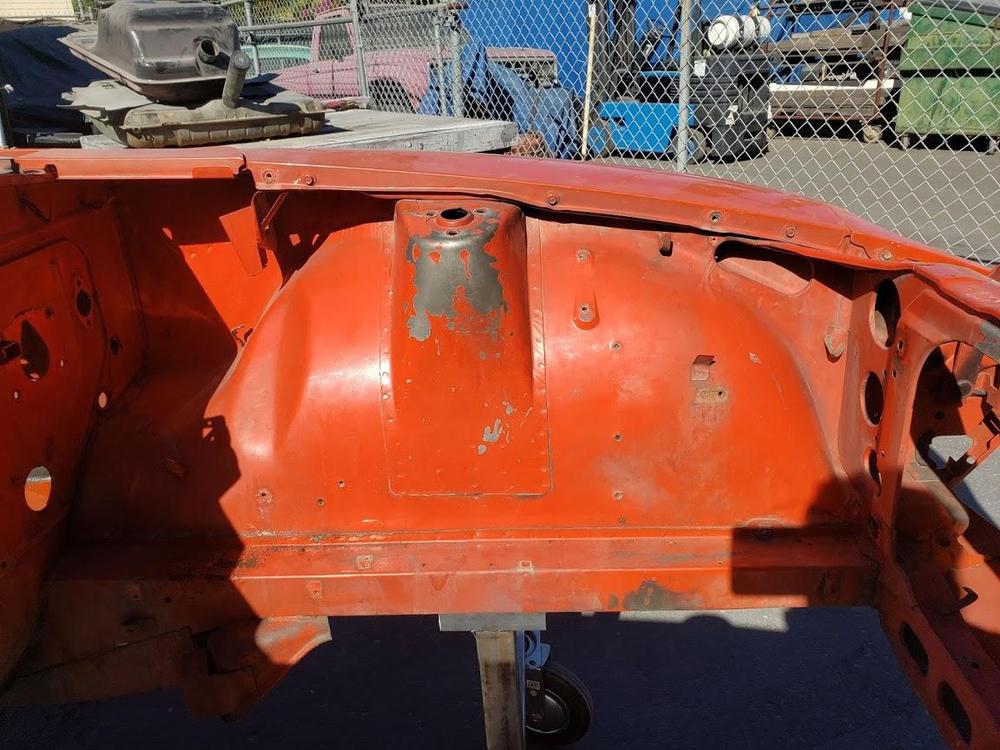
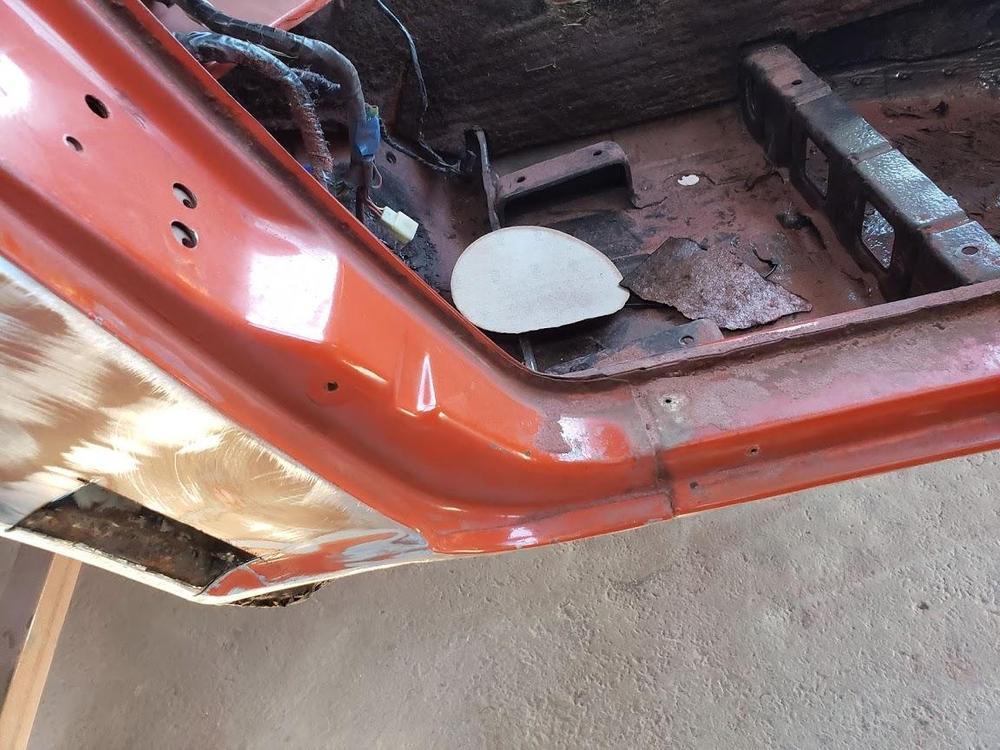
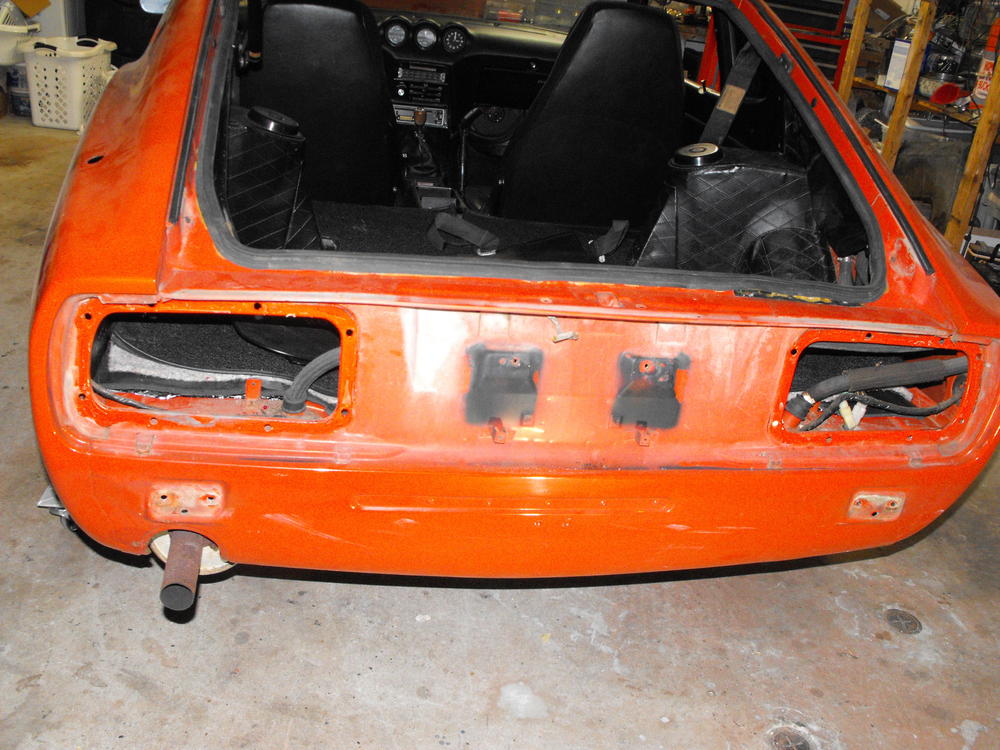
Here are a couple pics from the shop. Went over the car with Miguel and discussed the plan with the body. Ironically, he said the body looks pretty reasonable with rust in the typical areas which was good to hear. However, the floor was not as nice as I had thought. Apparently the nice flat floor is new and was welded in on top of the existing floor. Will know more once the Dynamat is removed from the drivers and passenger floor and the car comes back from sandblasting. In some of the earlier pics that were posted, you can see where the original undercoating was removed (It's very thick) and the newer area is thinly coated.


-
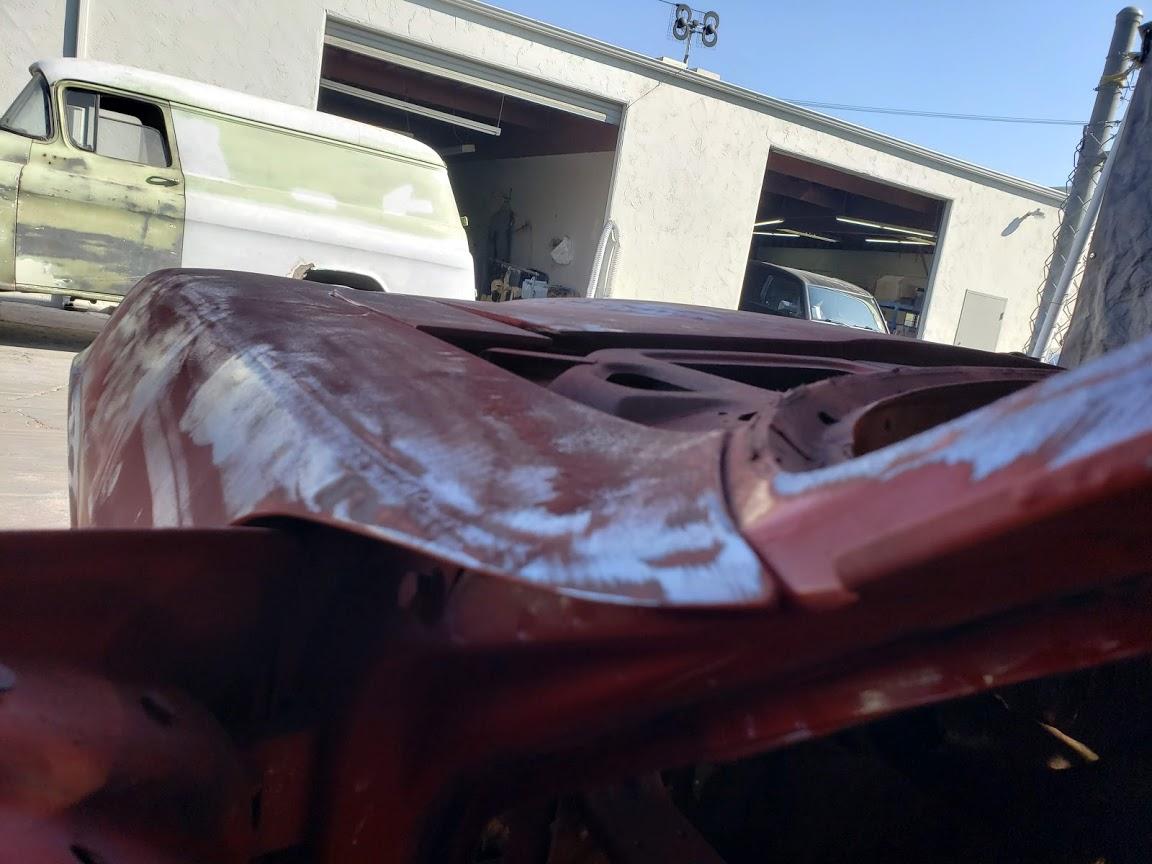
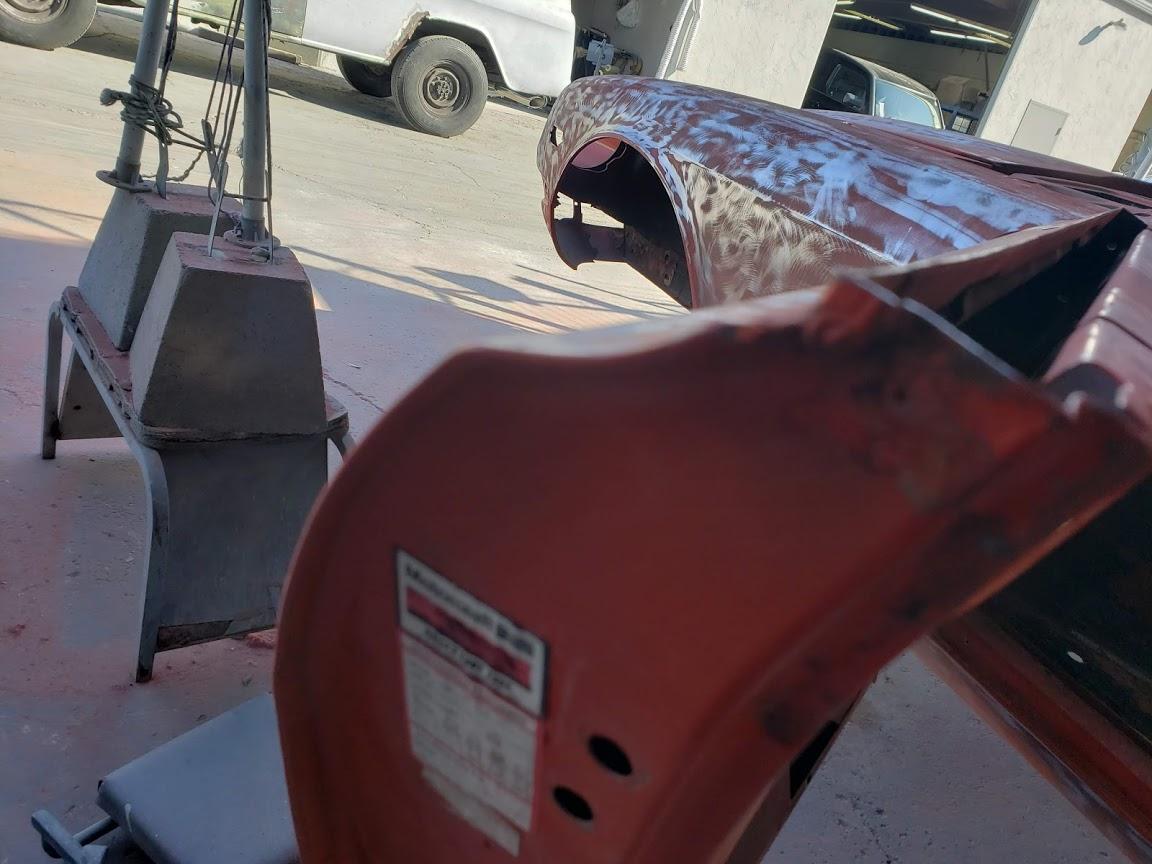
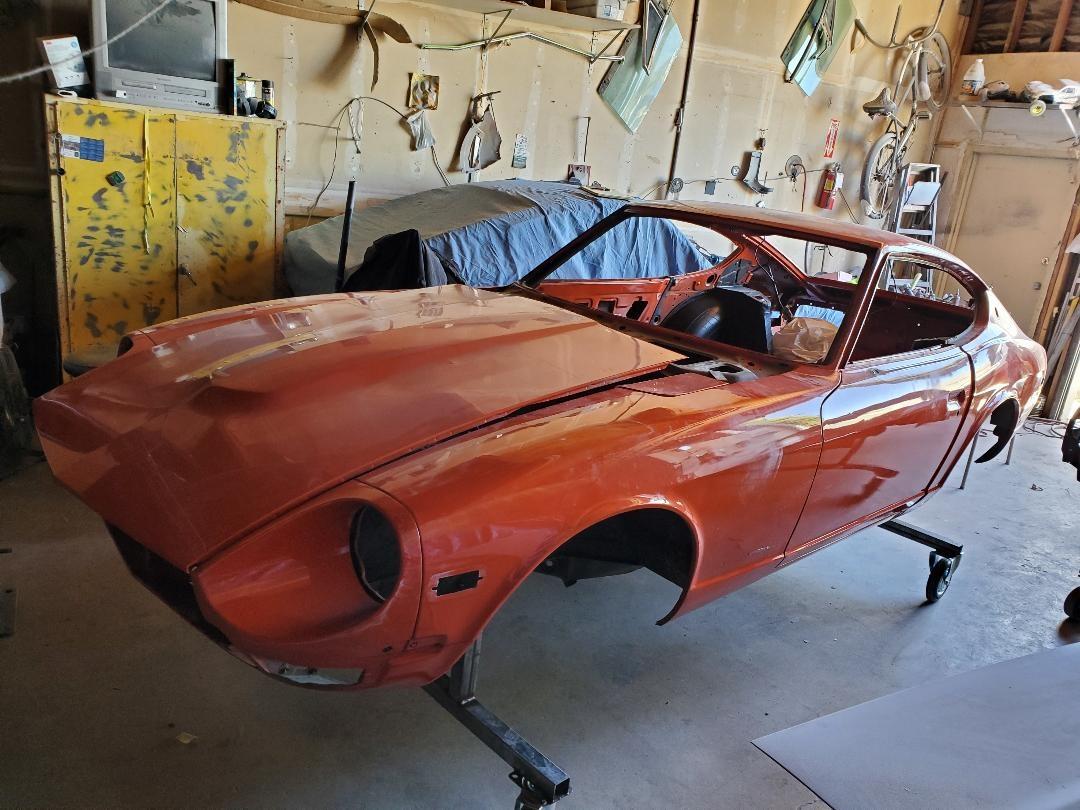
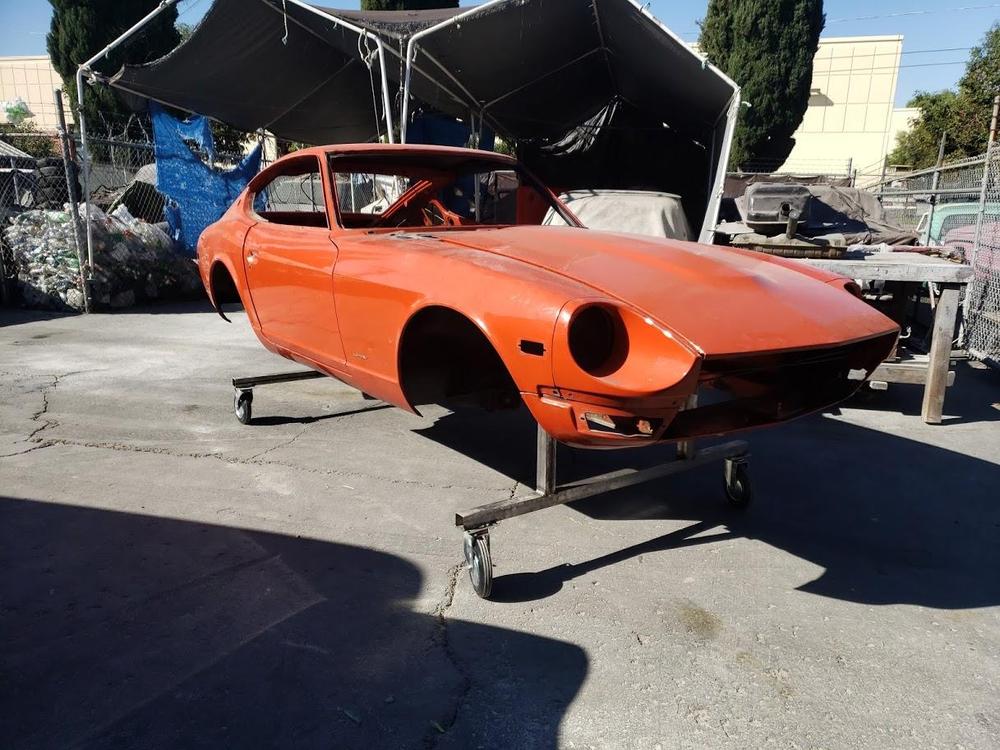
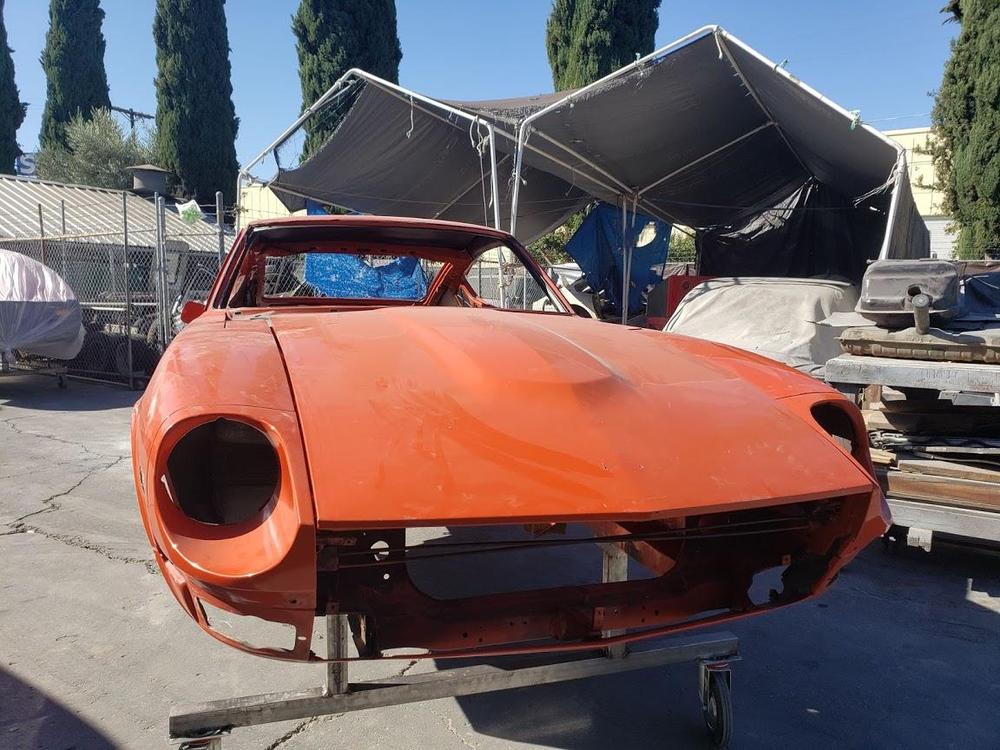
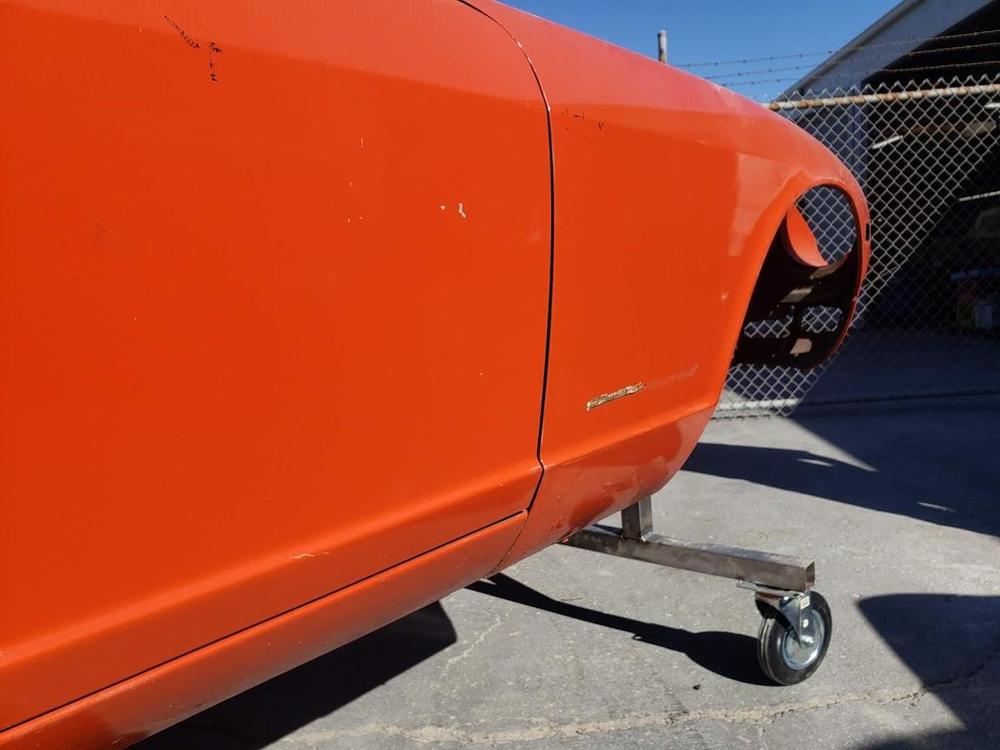
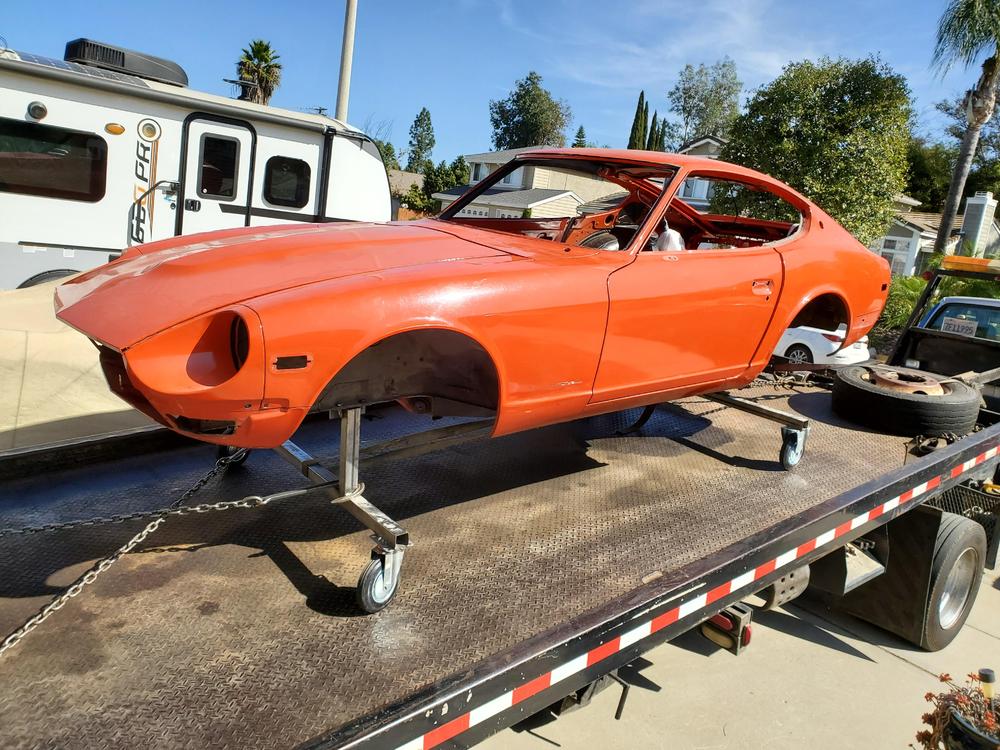
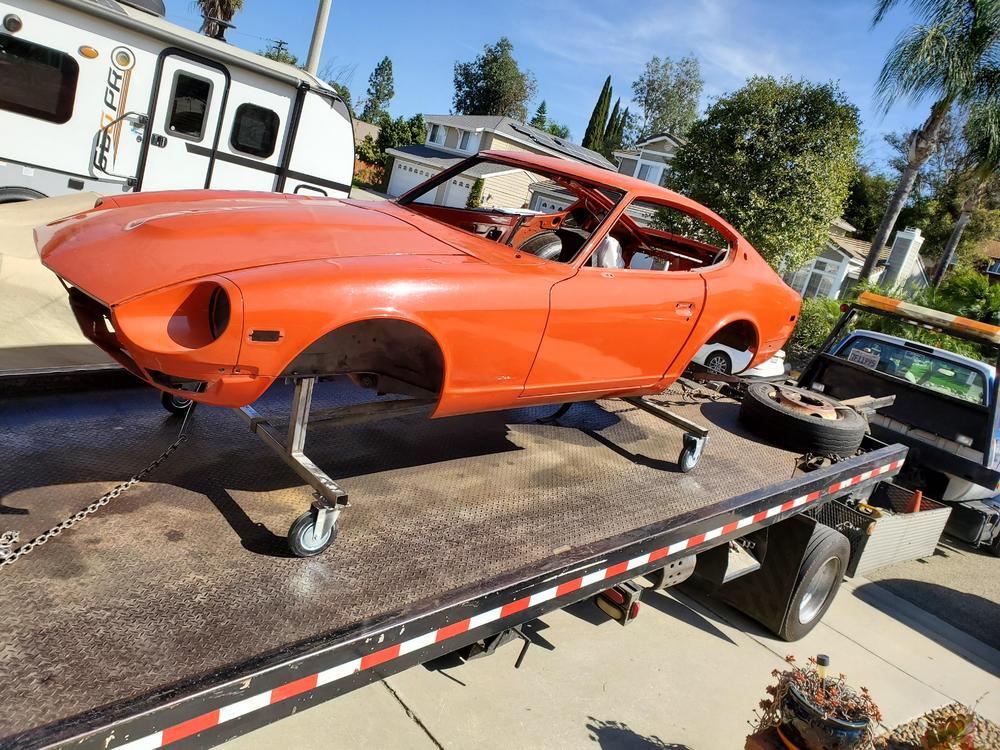
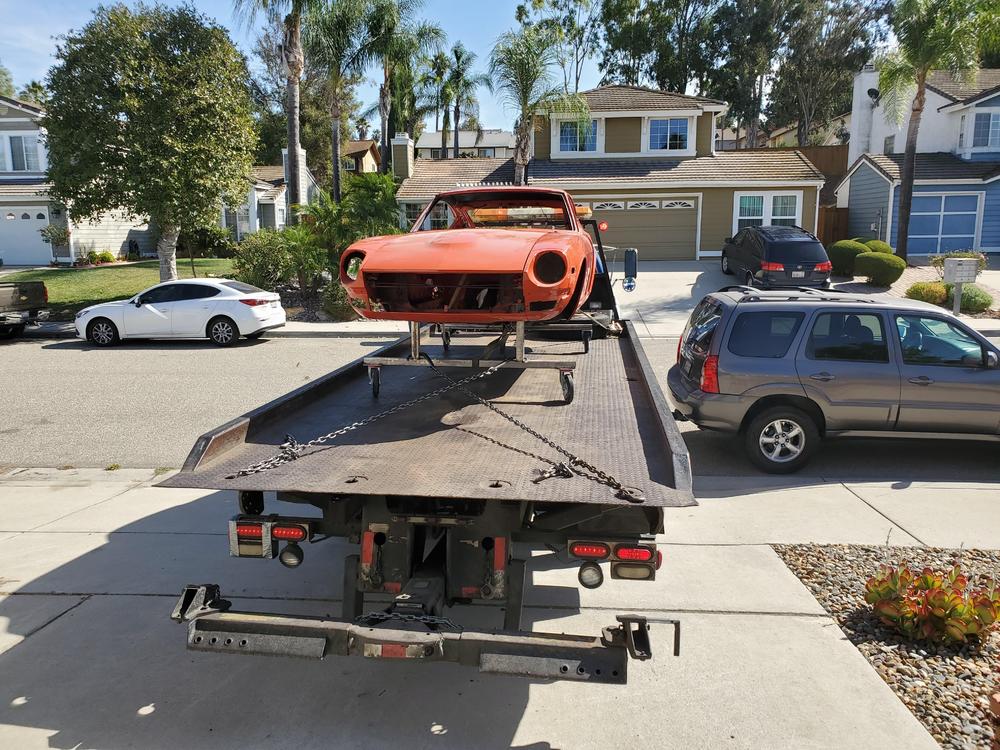
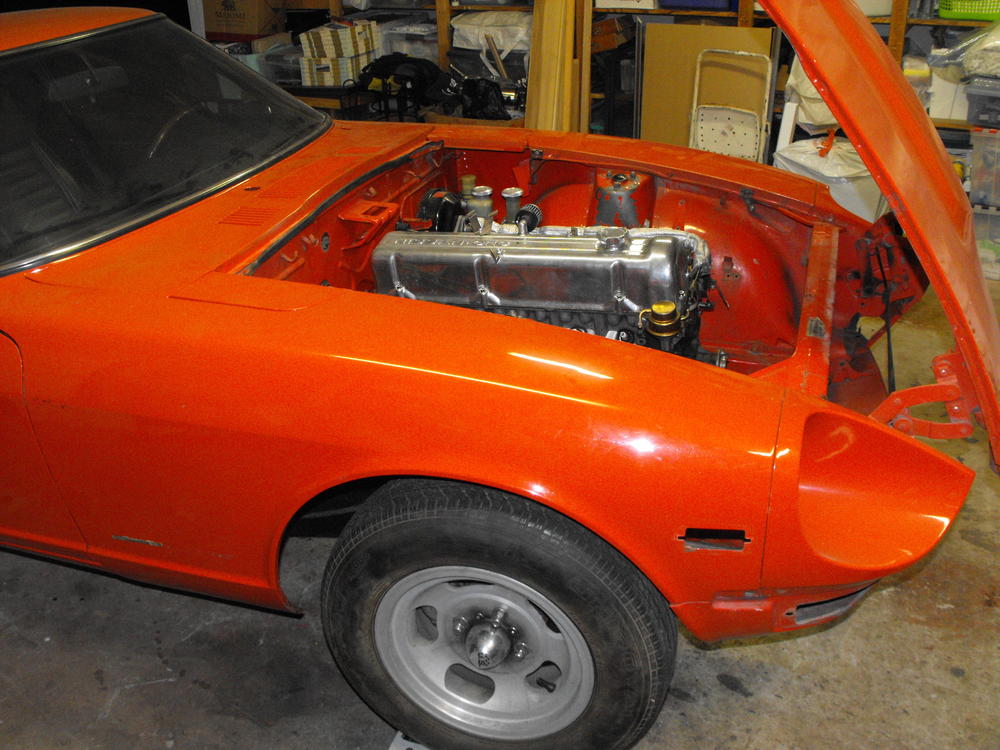
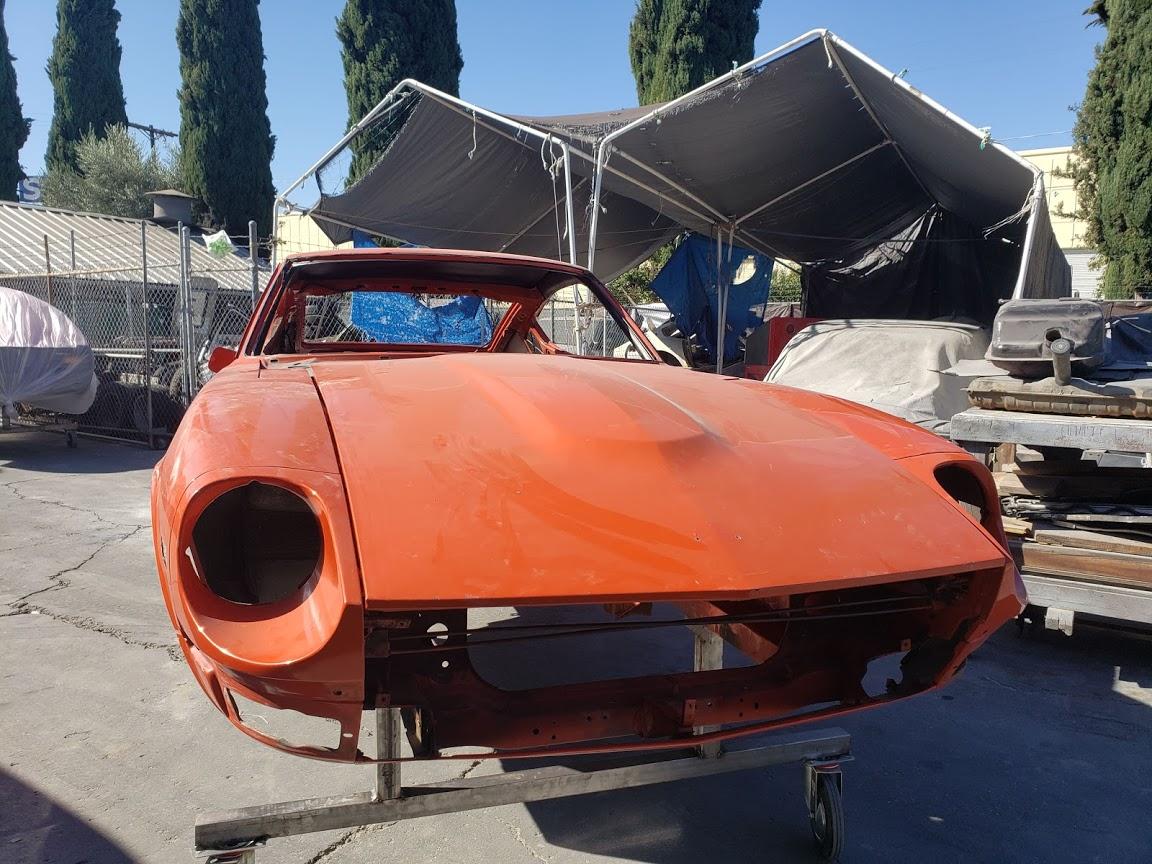
And she's off to the paint shop! Will switch to part detailing here while Miguel starts work on the body.

-
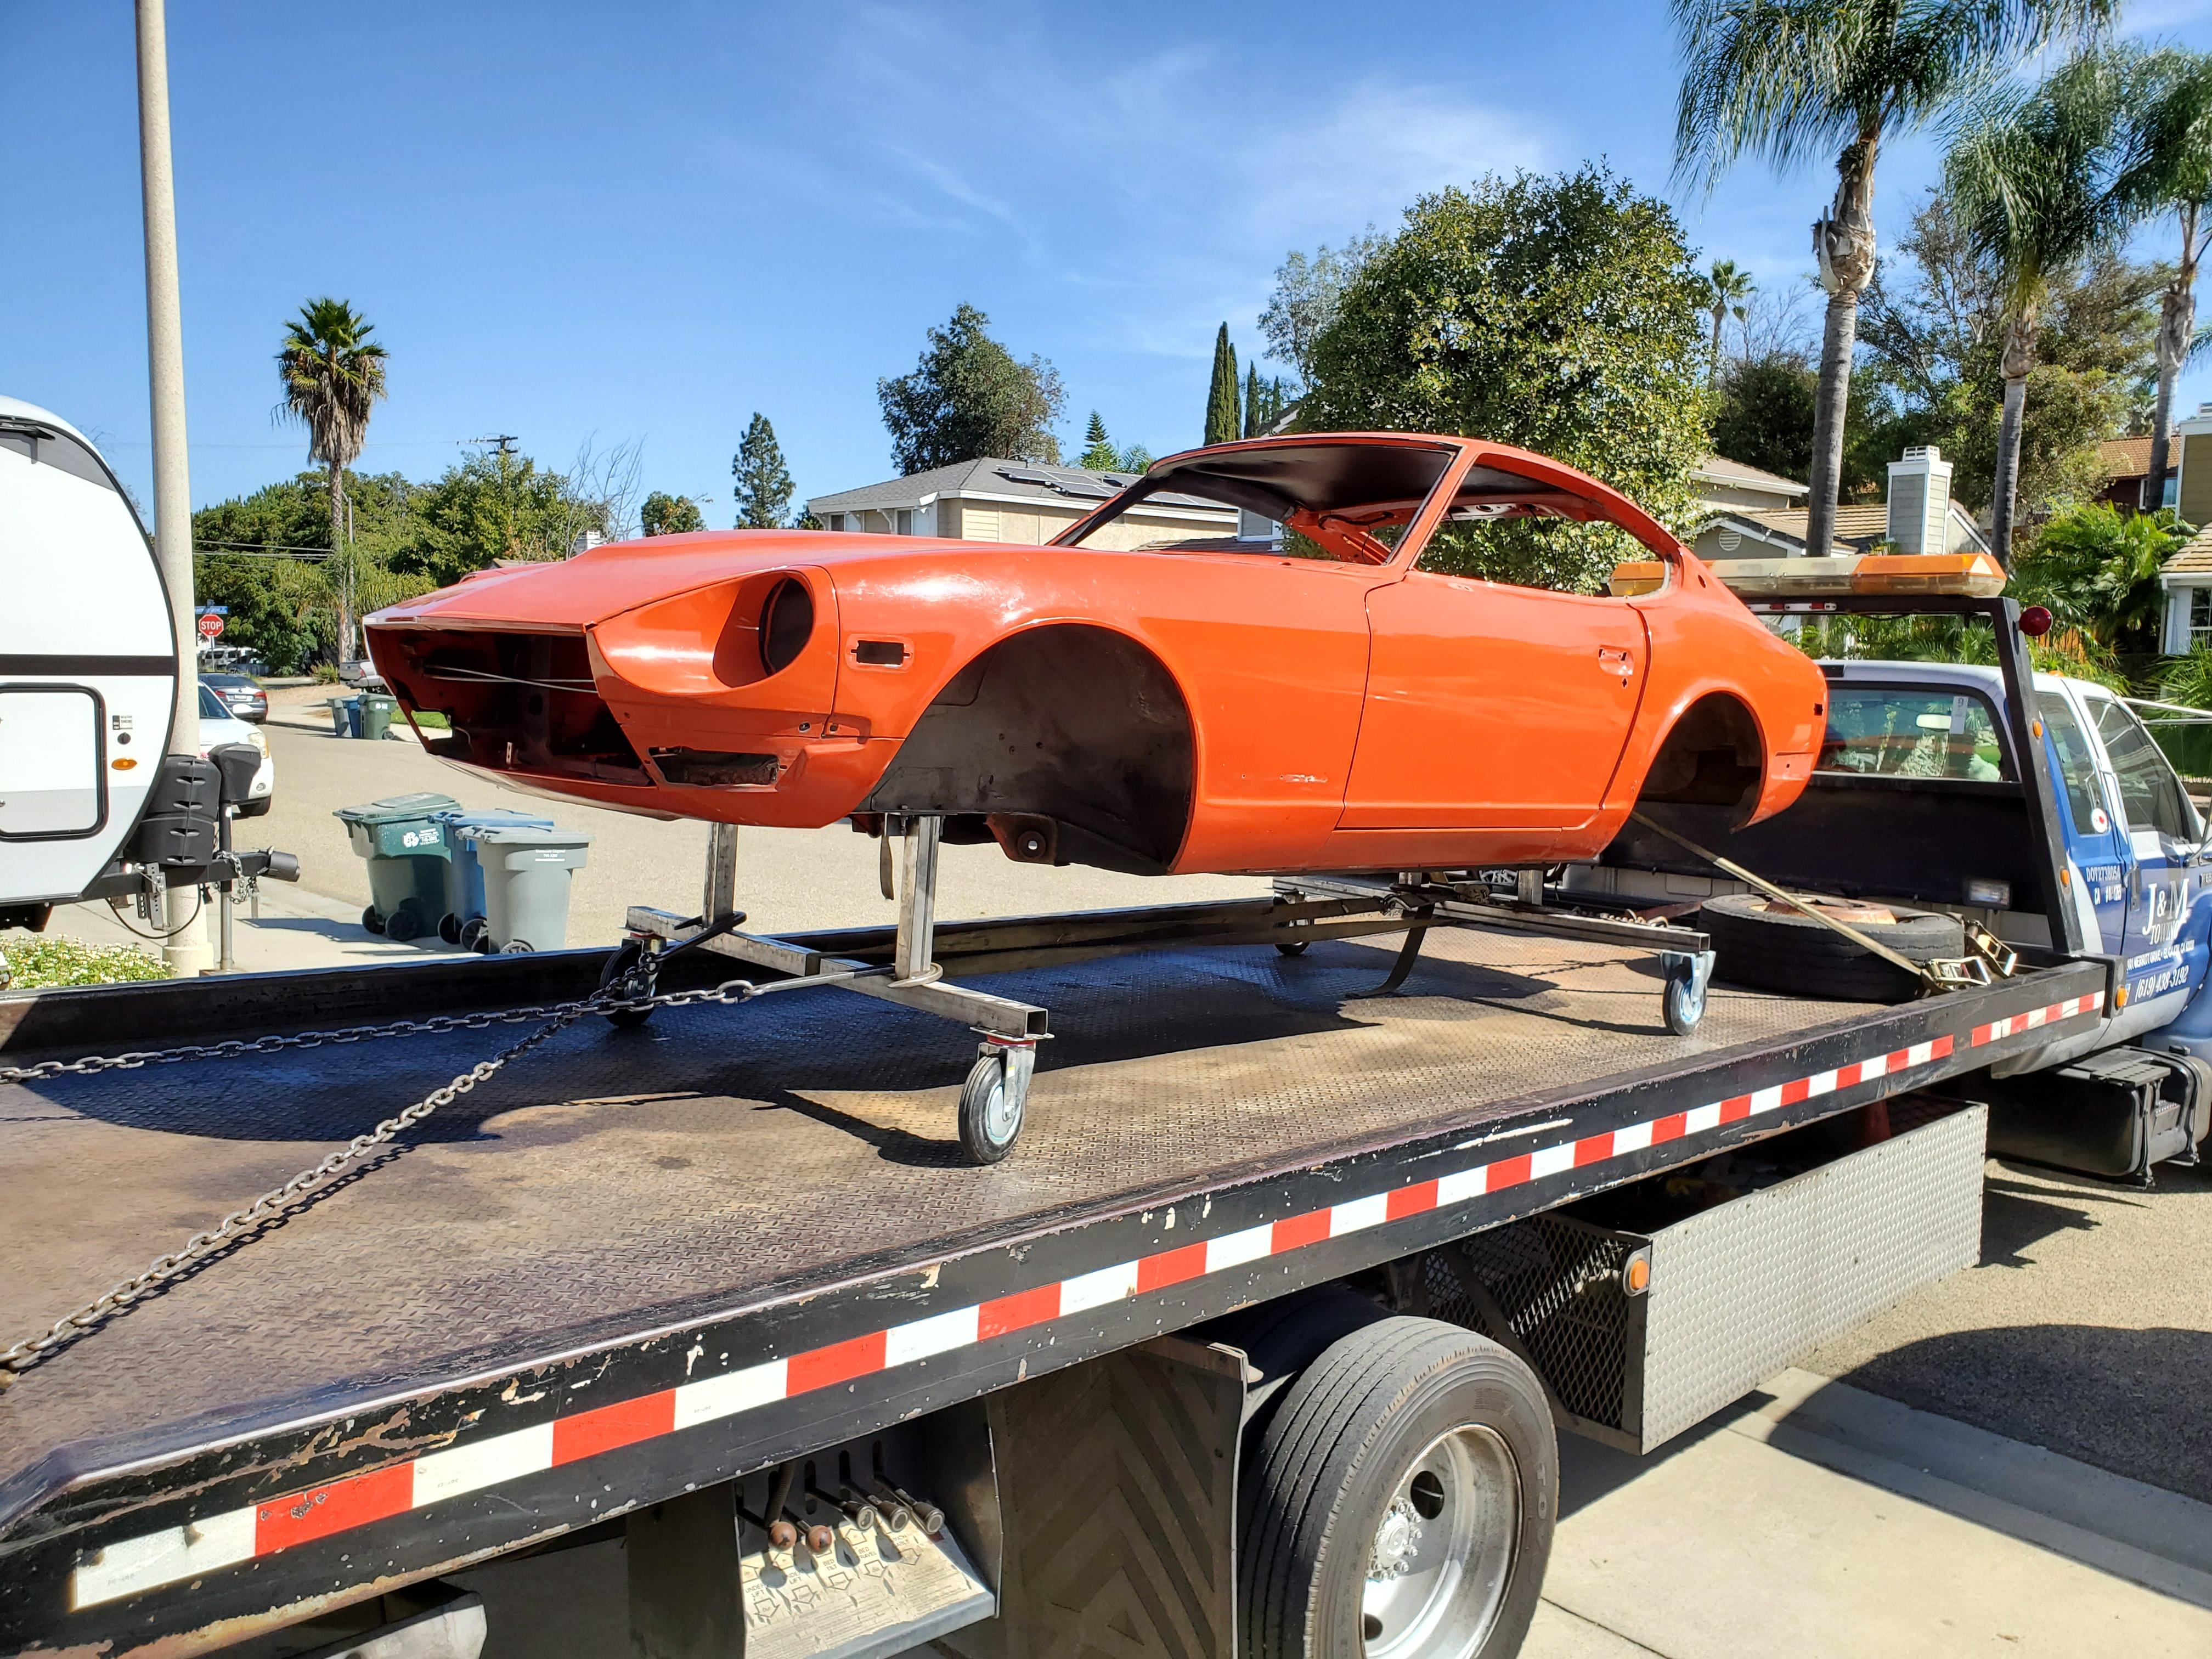
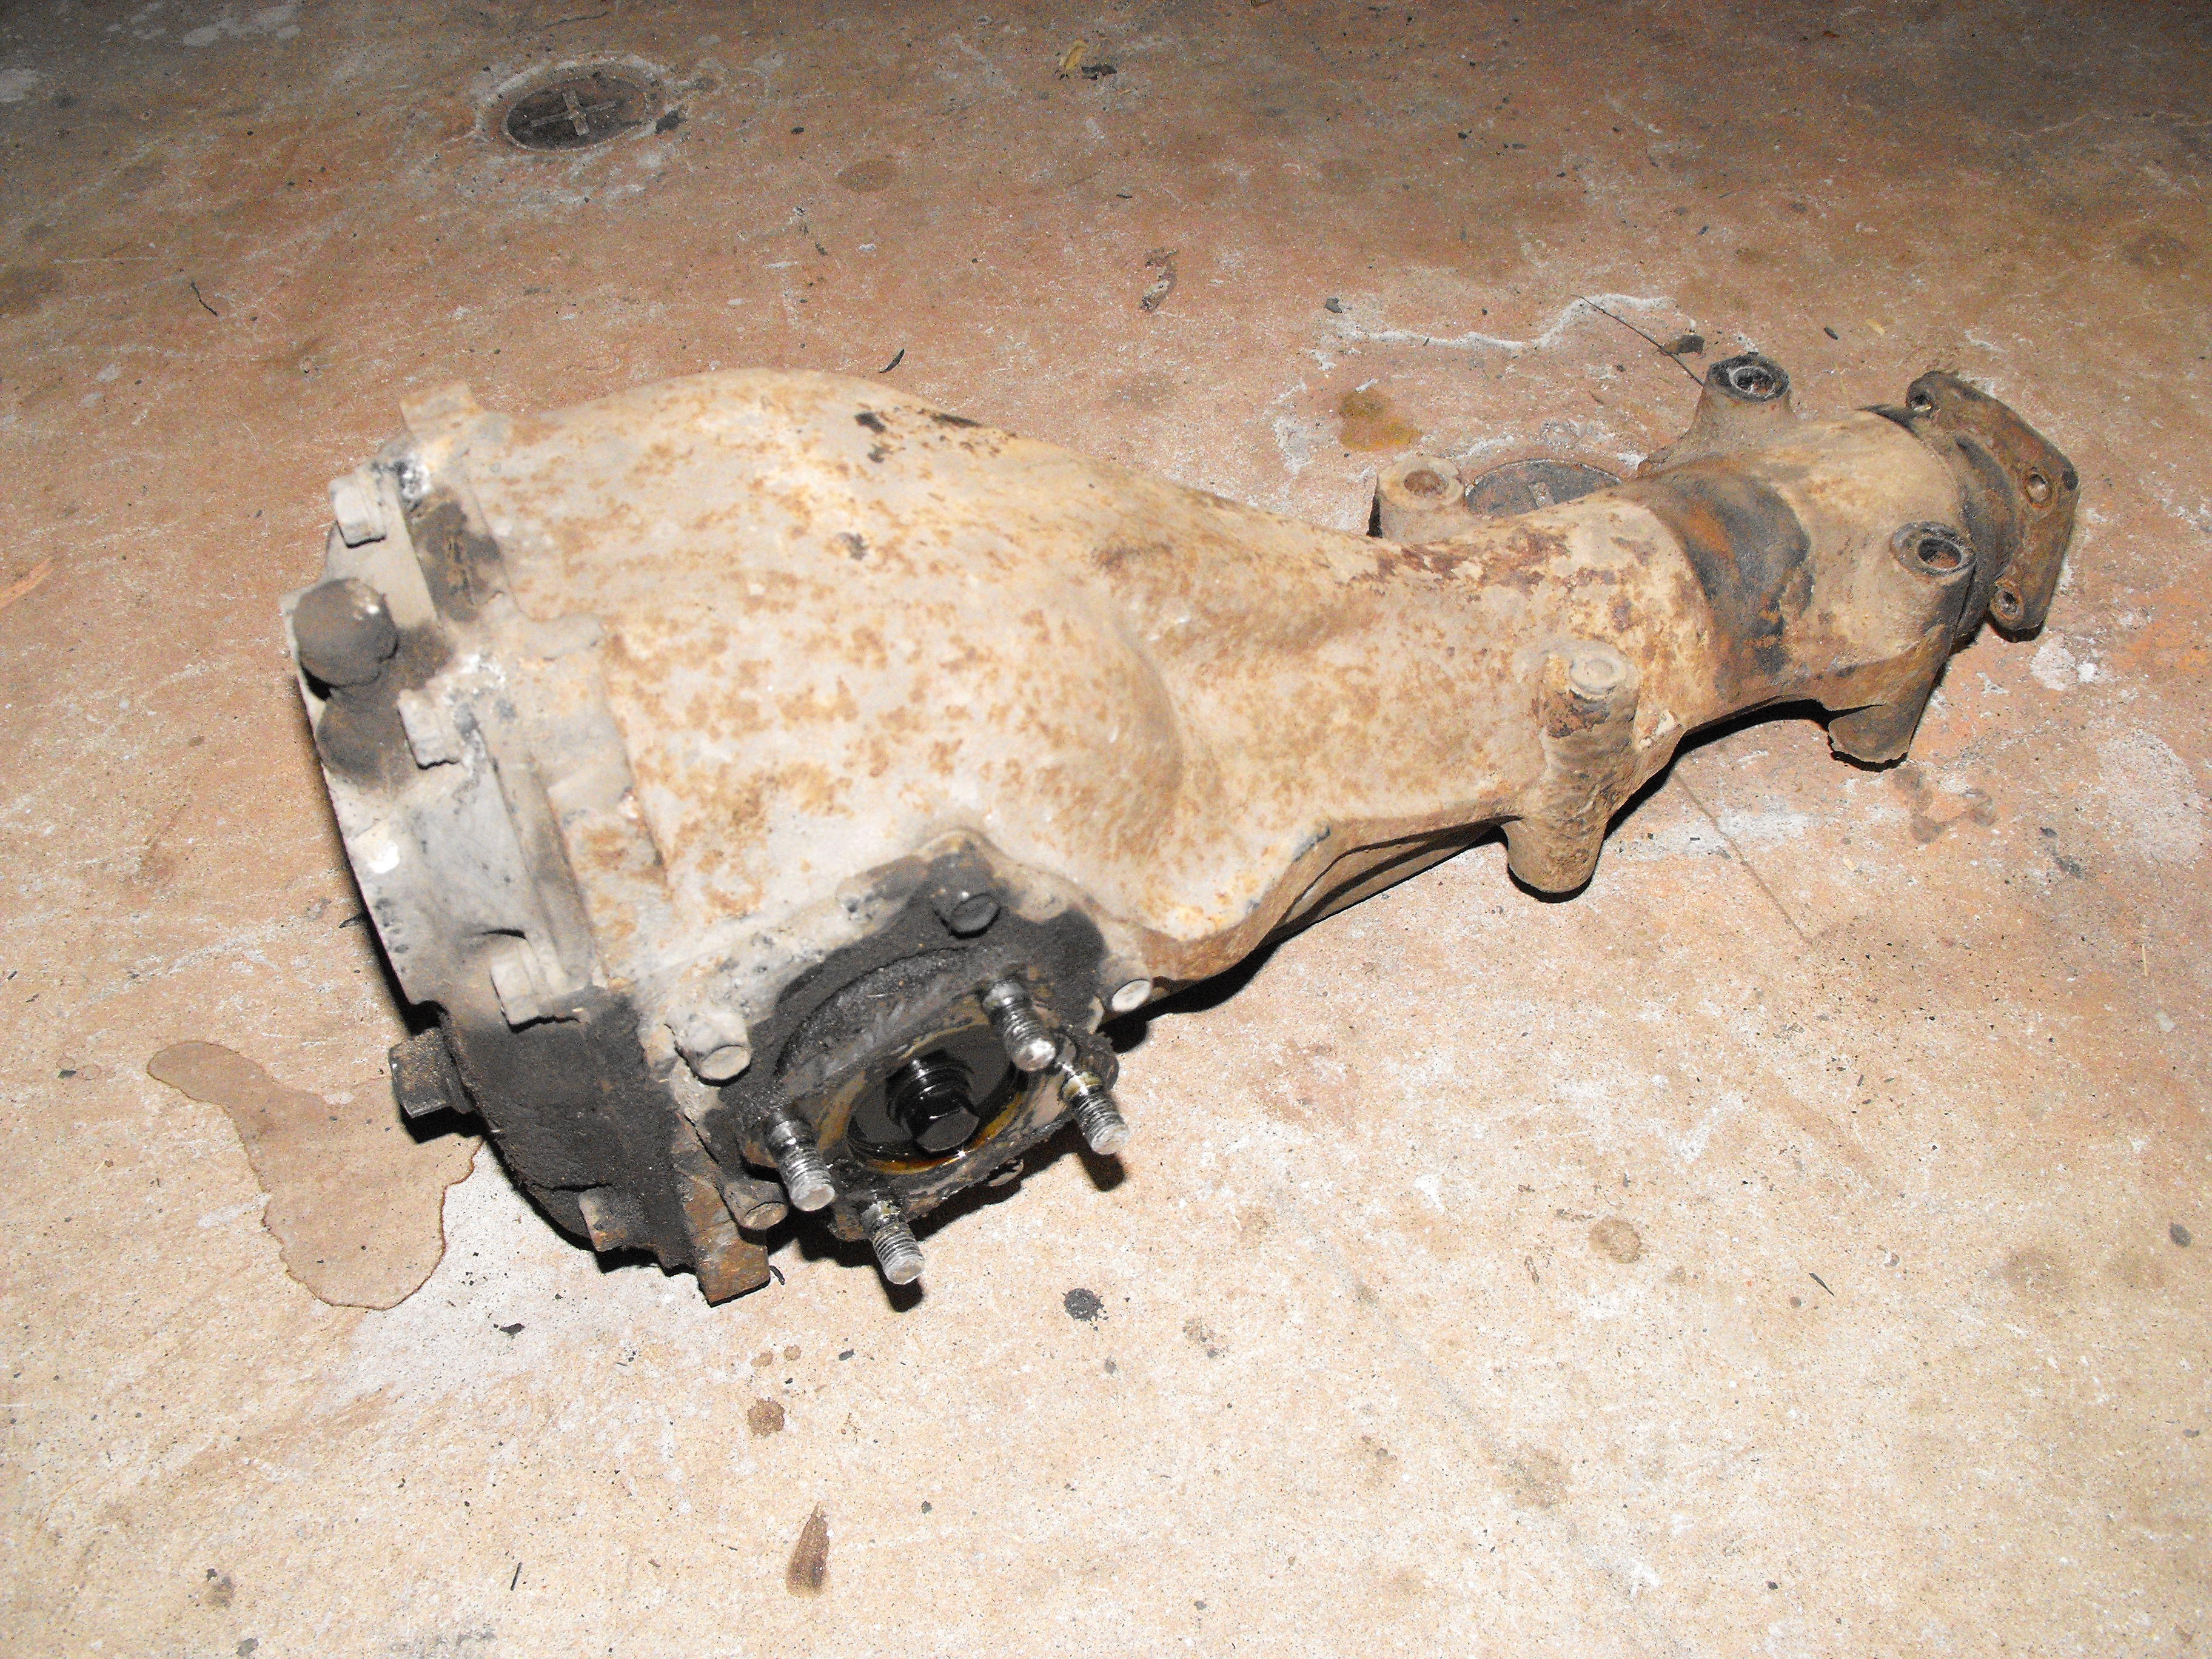
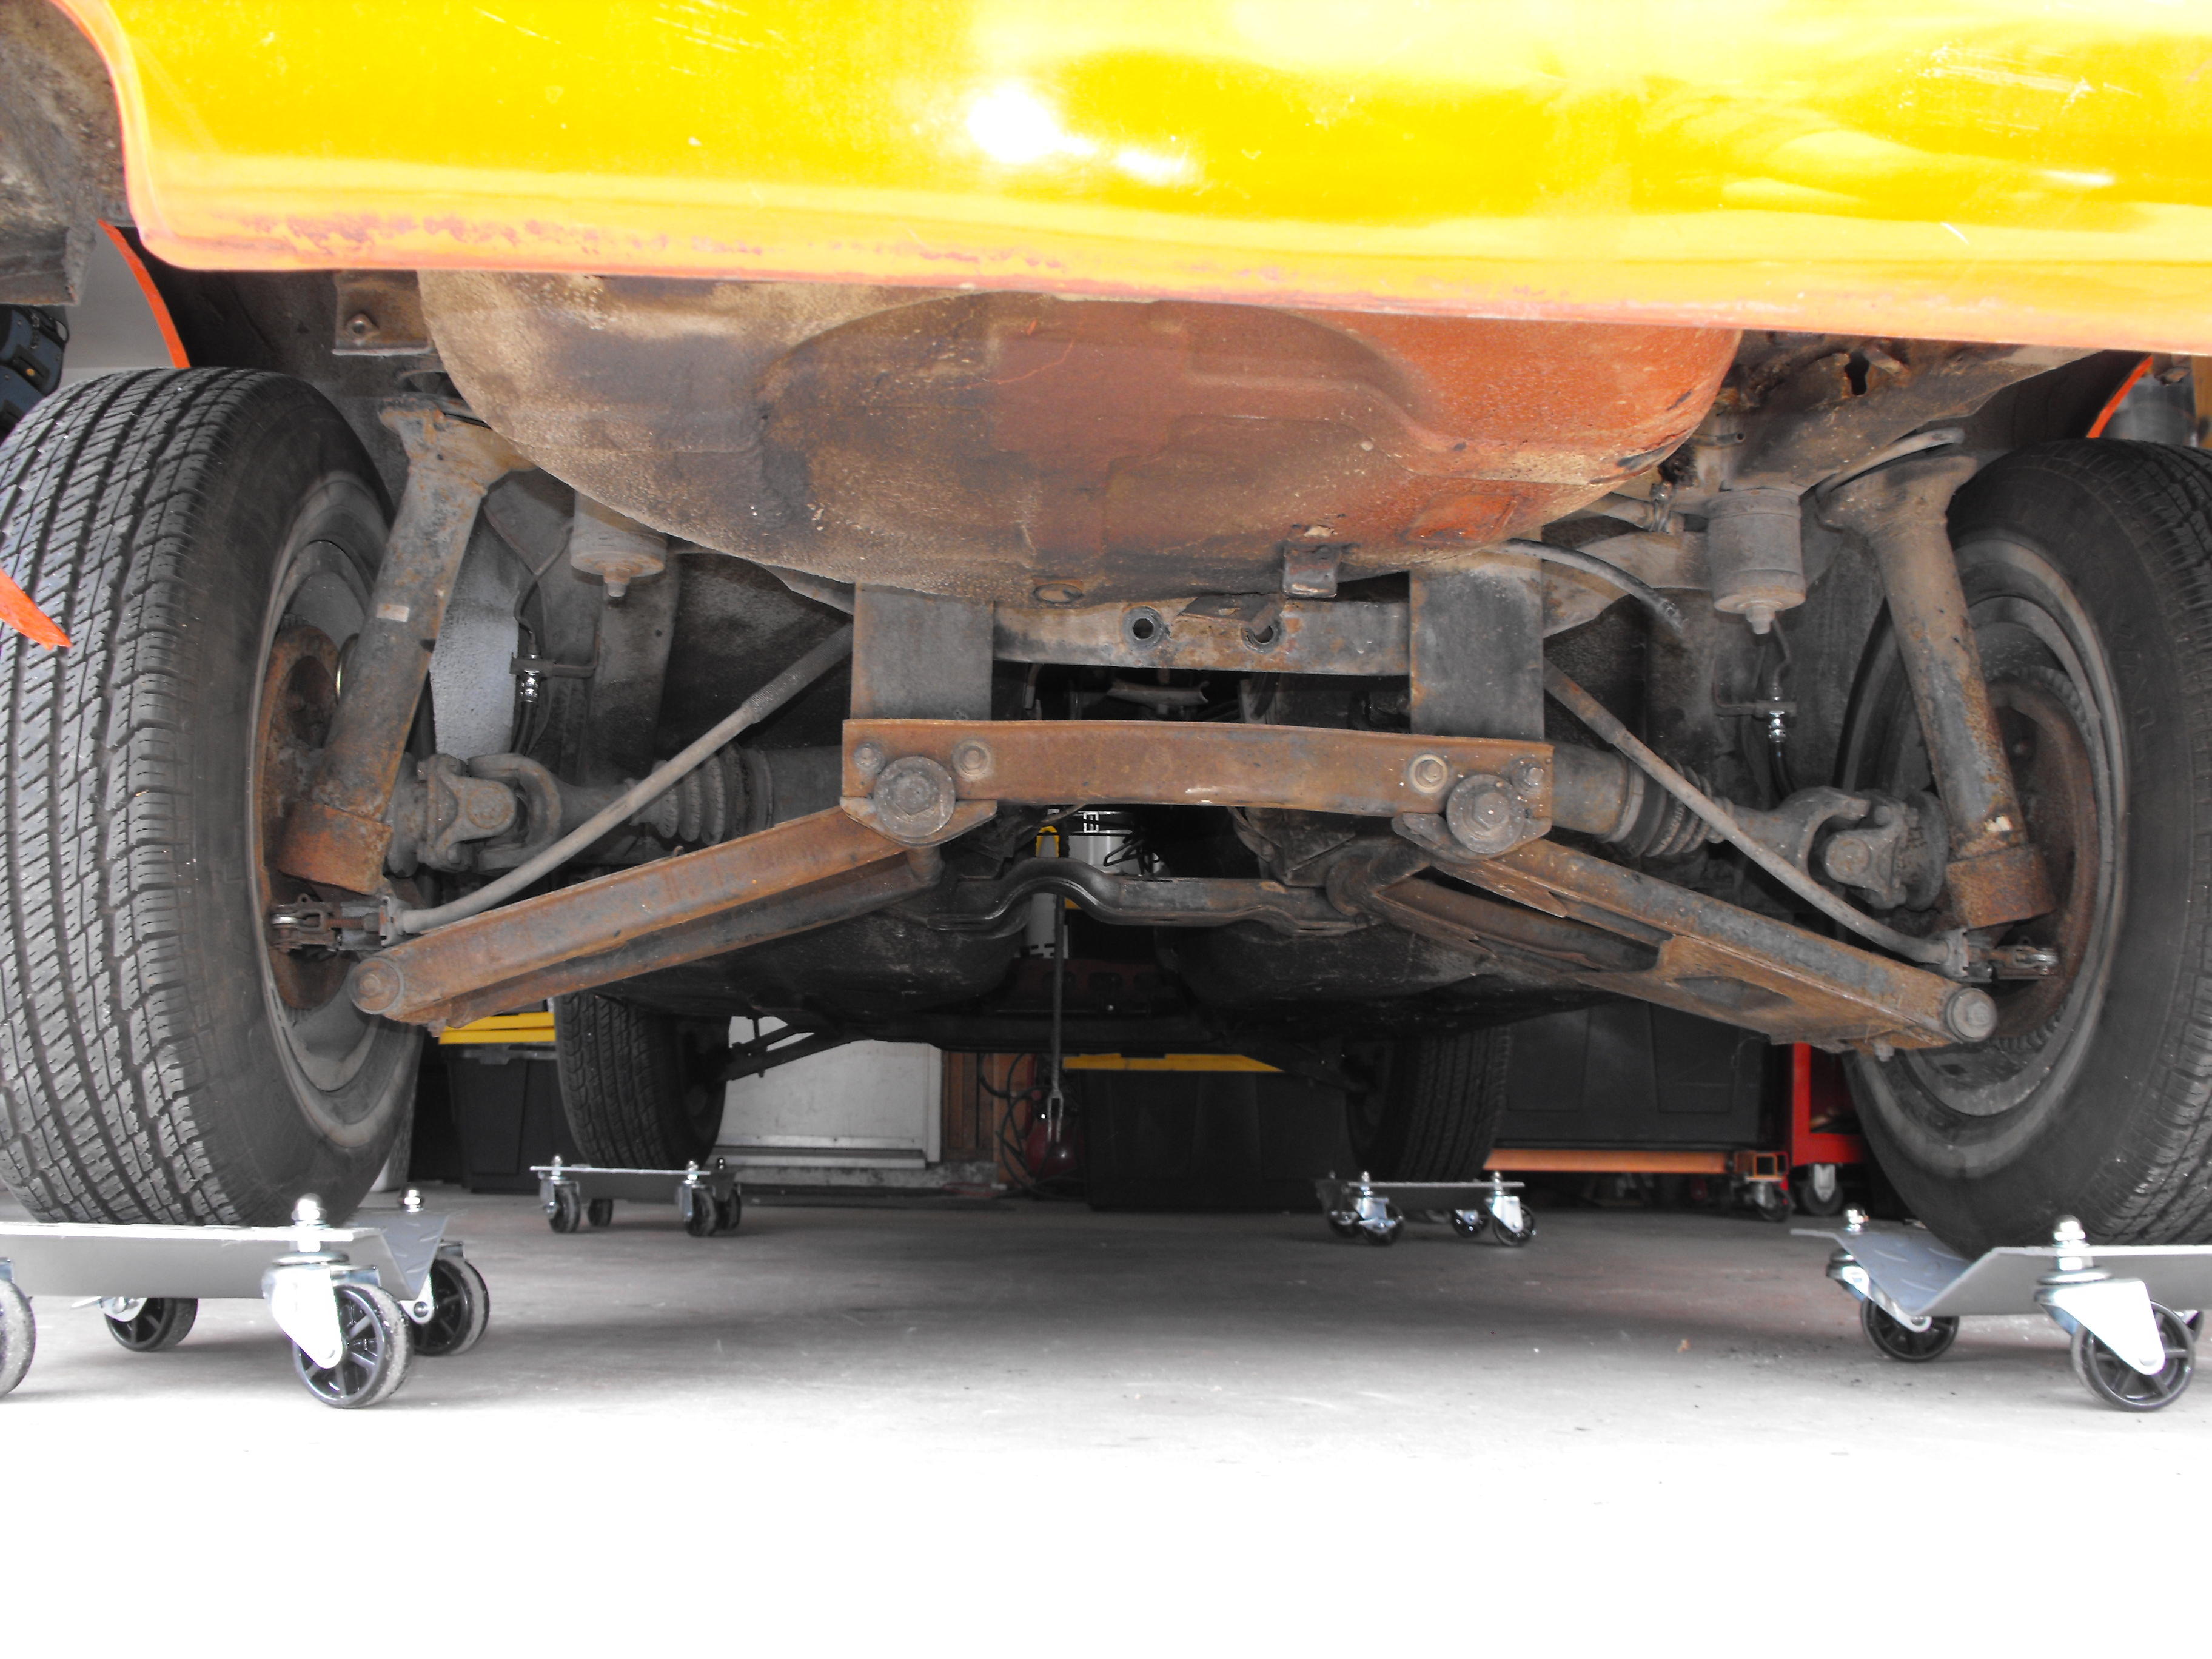
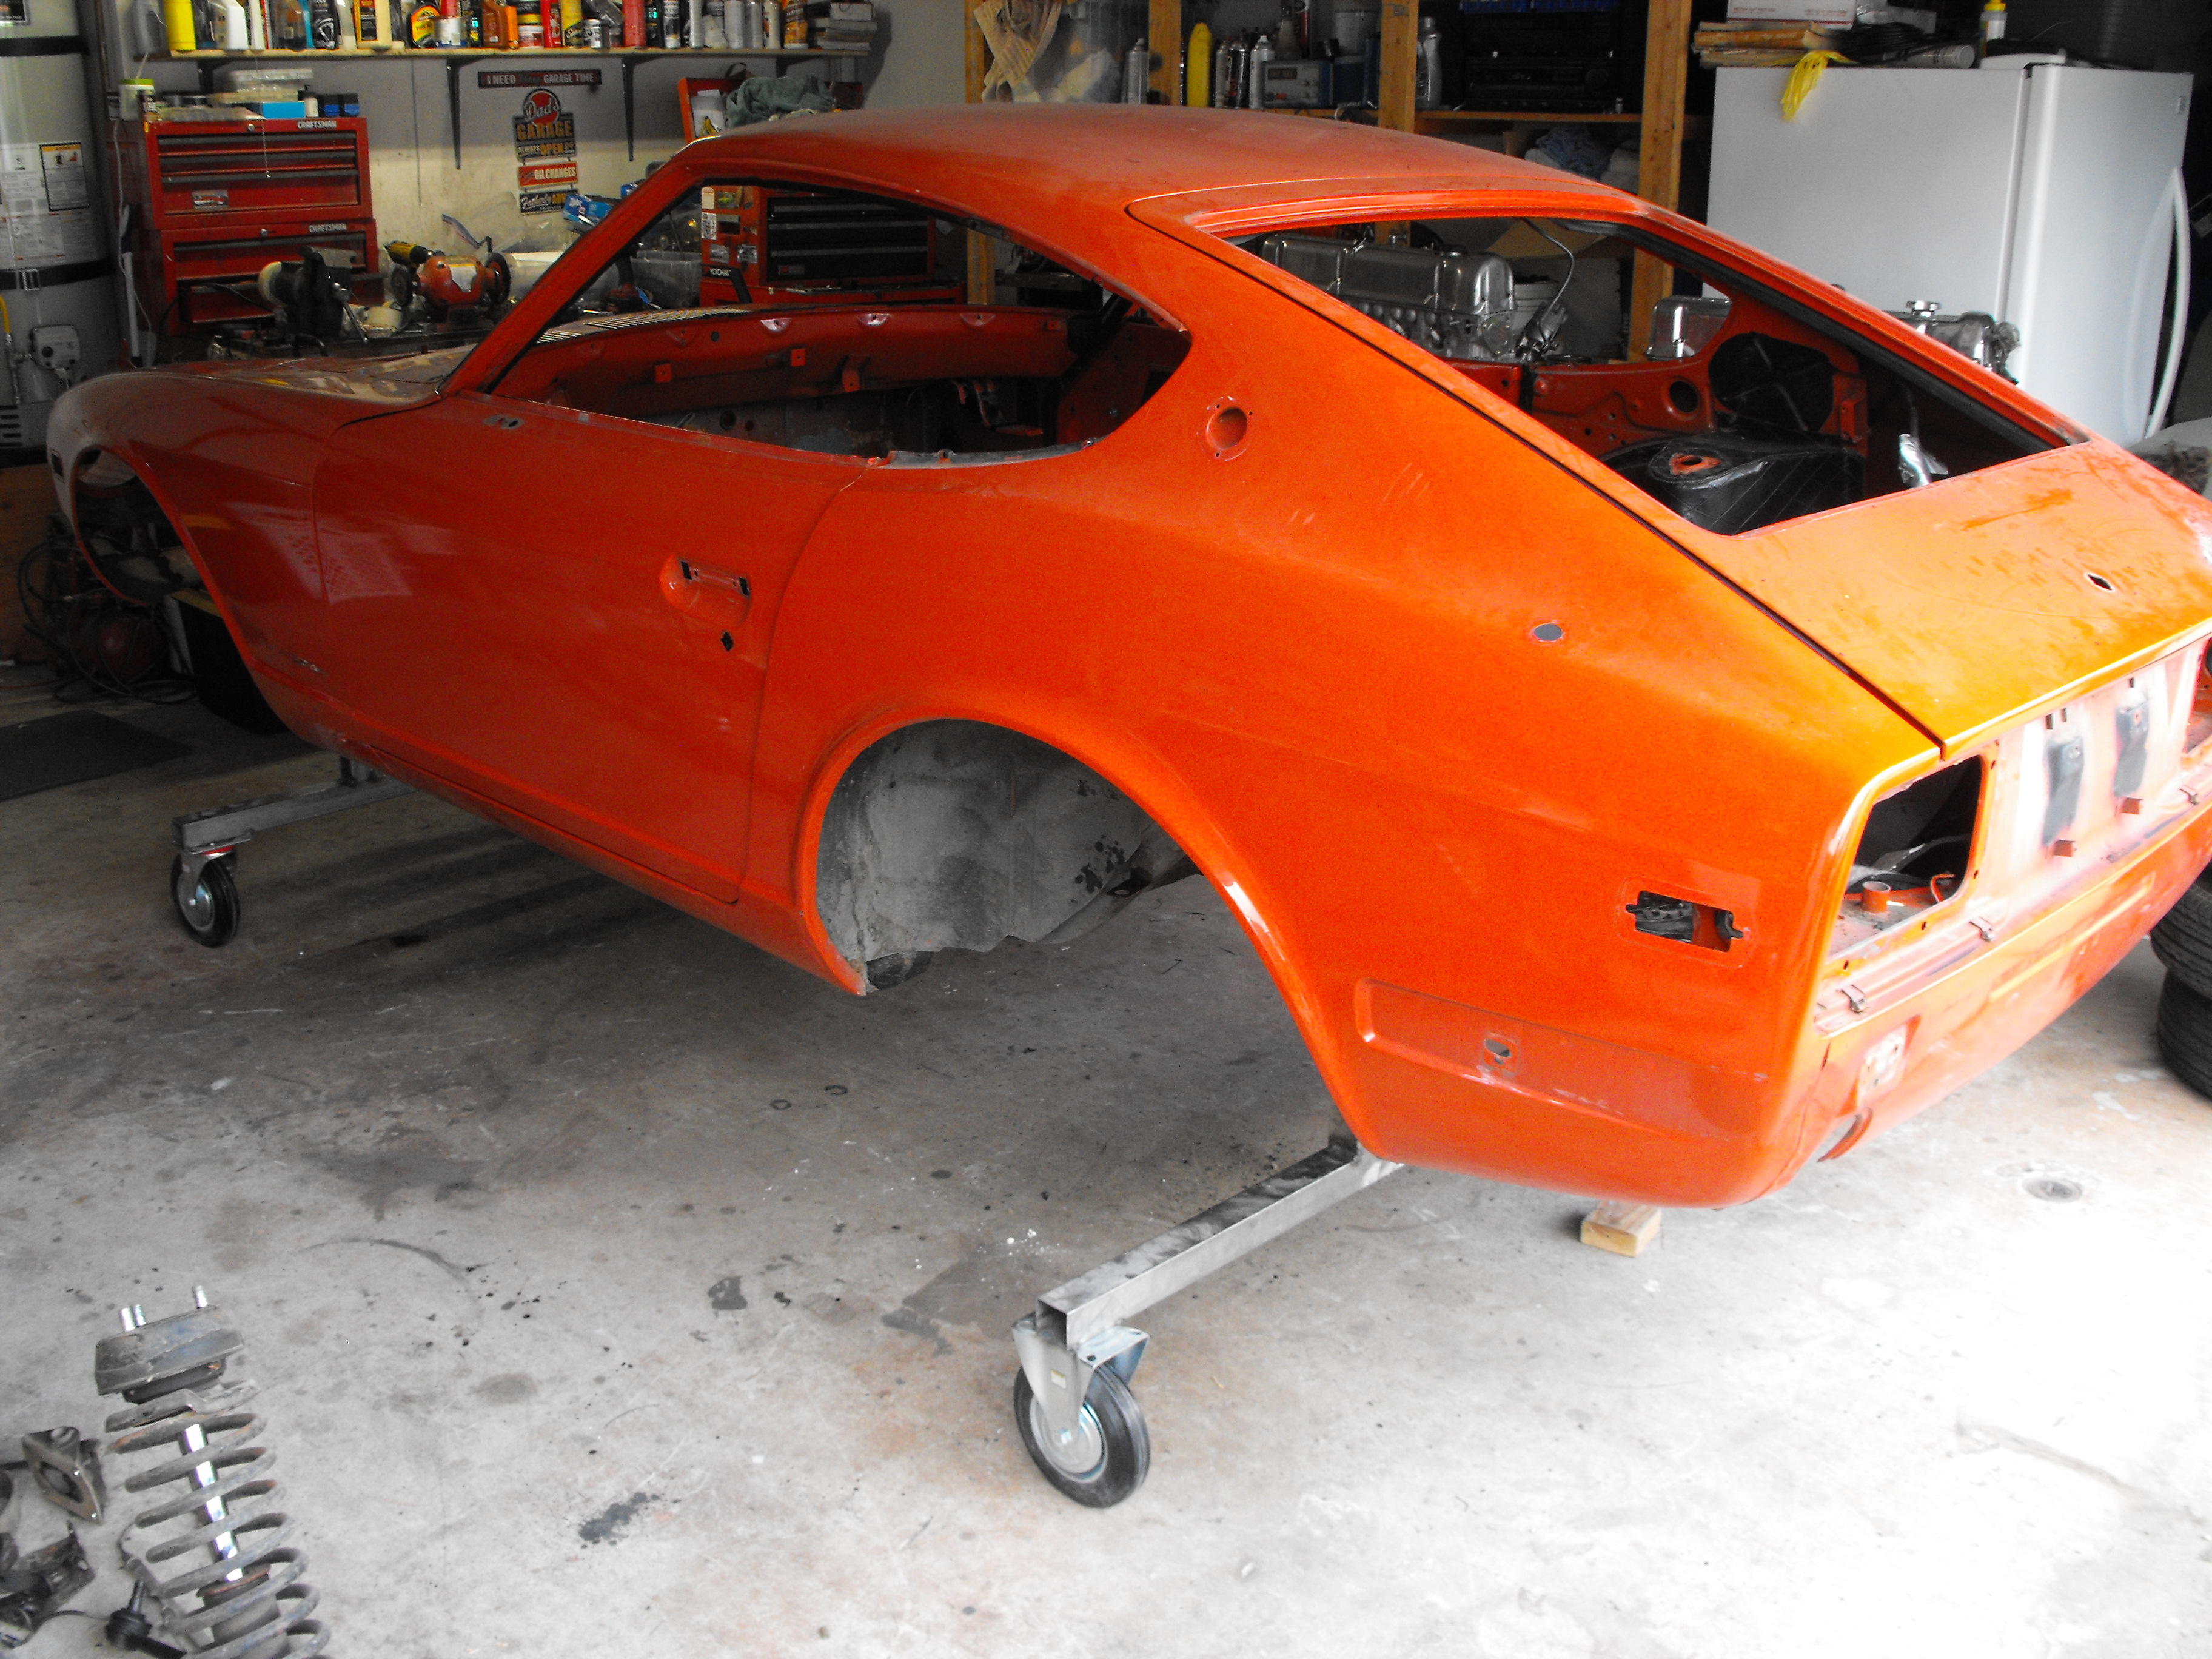
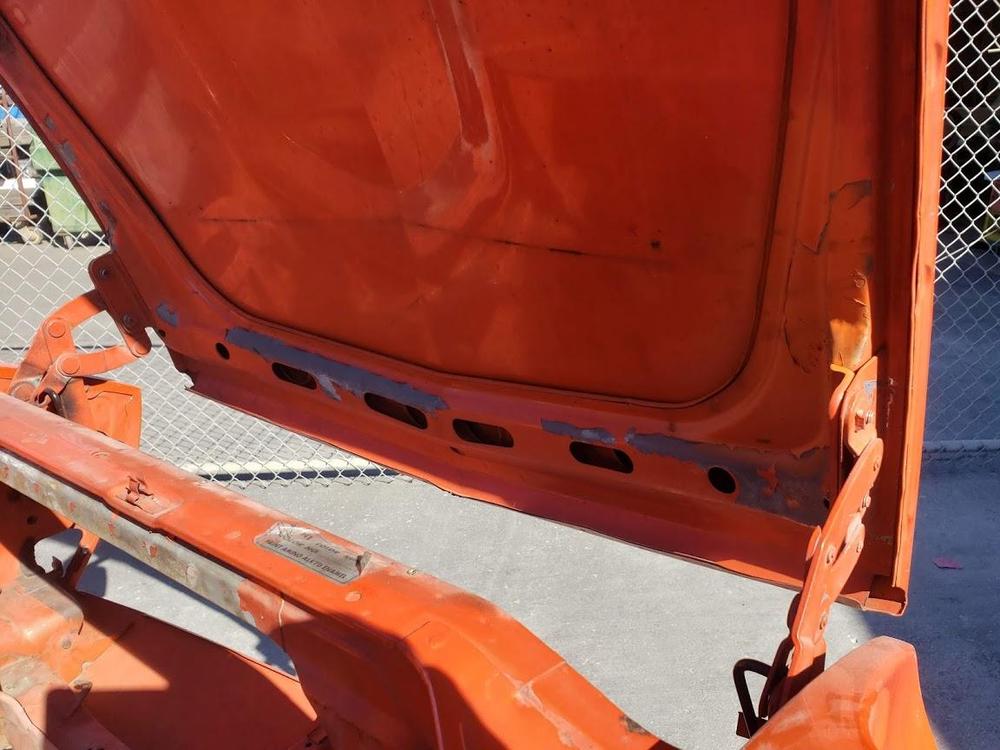
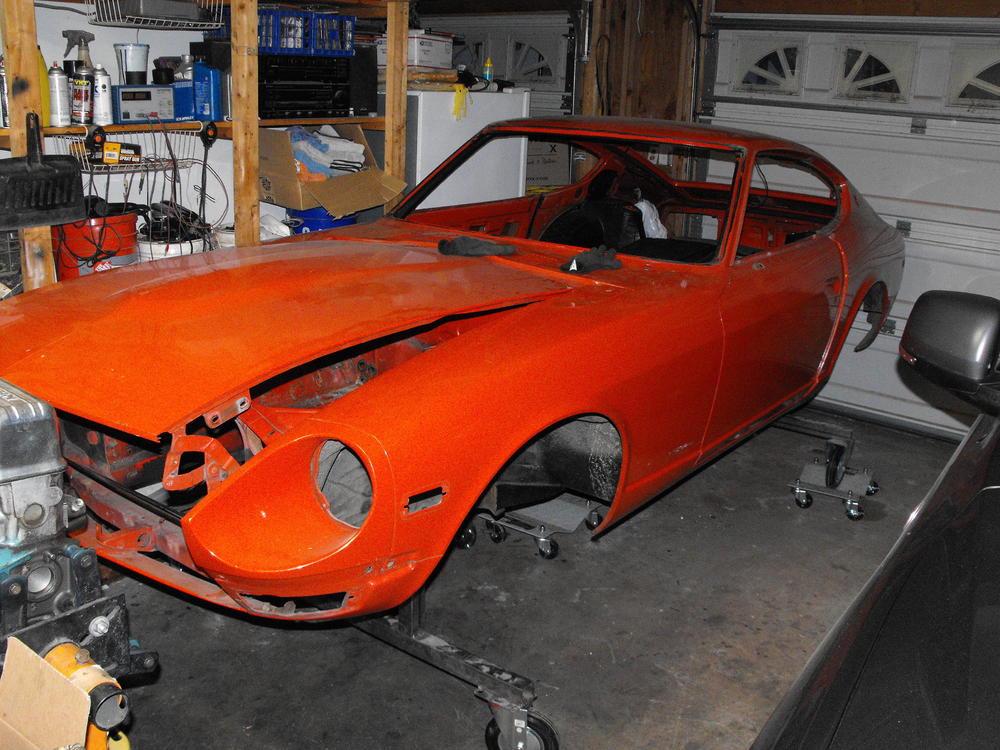
Continued parts removal and now have the car just about completely stripped and ready to ship off to Miguel. I will clean off the remaining weather stripping and do a bit more general clean-up on the body this Tuesday and then have this transported to his shop on Wednesday. Miguel insisted that I install the 'Low Rider' 5 inch rims with solid rubber tires on the body in preparation for paint shop delivery. You can see them in the pictures. I thought the car would look better with some 16 inch Panasports, but he likes these wheels. I did veto the hydraulics, however.....just kidding ? Actually, the stands work out great and it was nice to be able to assemble them on the car at my place. That way I get to keep all of the suspension and fasteners in order. The fuel pump is interesting. It is a different model than the Blue 73 I just did. I should do a bit more research on this. The differential looks like it spent some time at the bottom of the sea. Actually, it is just a lot of dirt.


-
Miguel does all of the body work and paint for the cars that I restore. He specializes in Z cars and his work is pretty amazing. https://www.facebook.com/CustomsByMiguel/
-
@Patcon. Yes, not sure I could help much. i know Miguel would easily be double that budget.. rust looks pretty severe. Would probably need a 'donor, car for sheet metal.
-
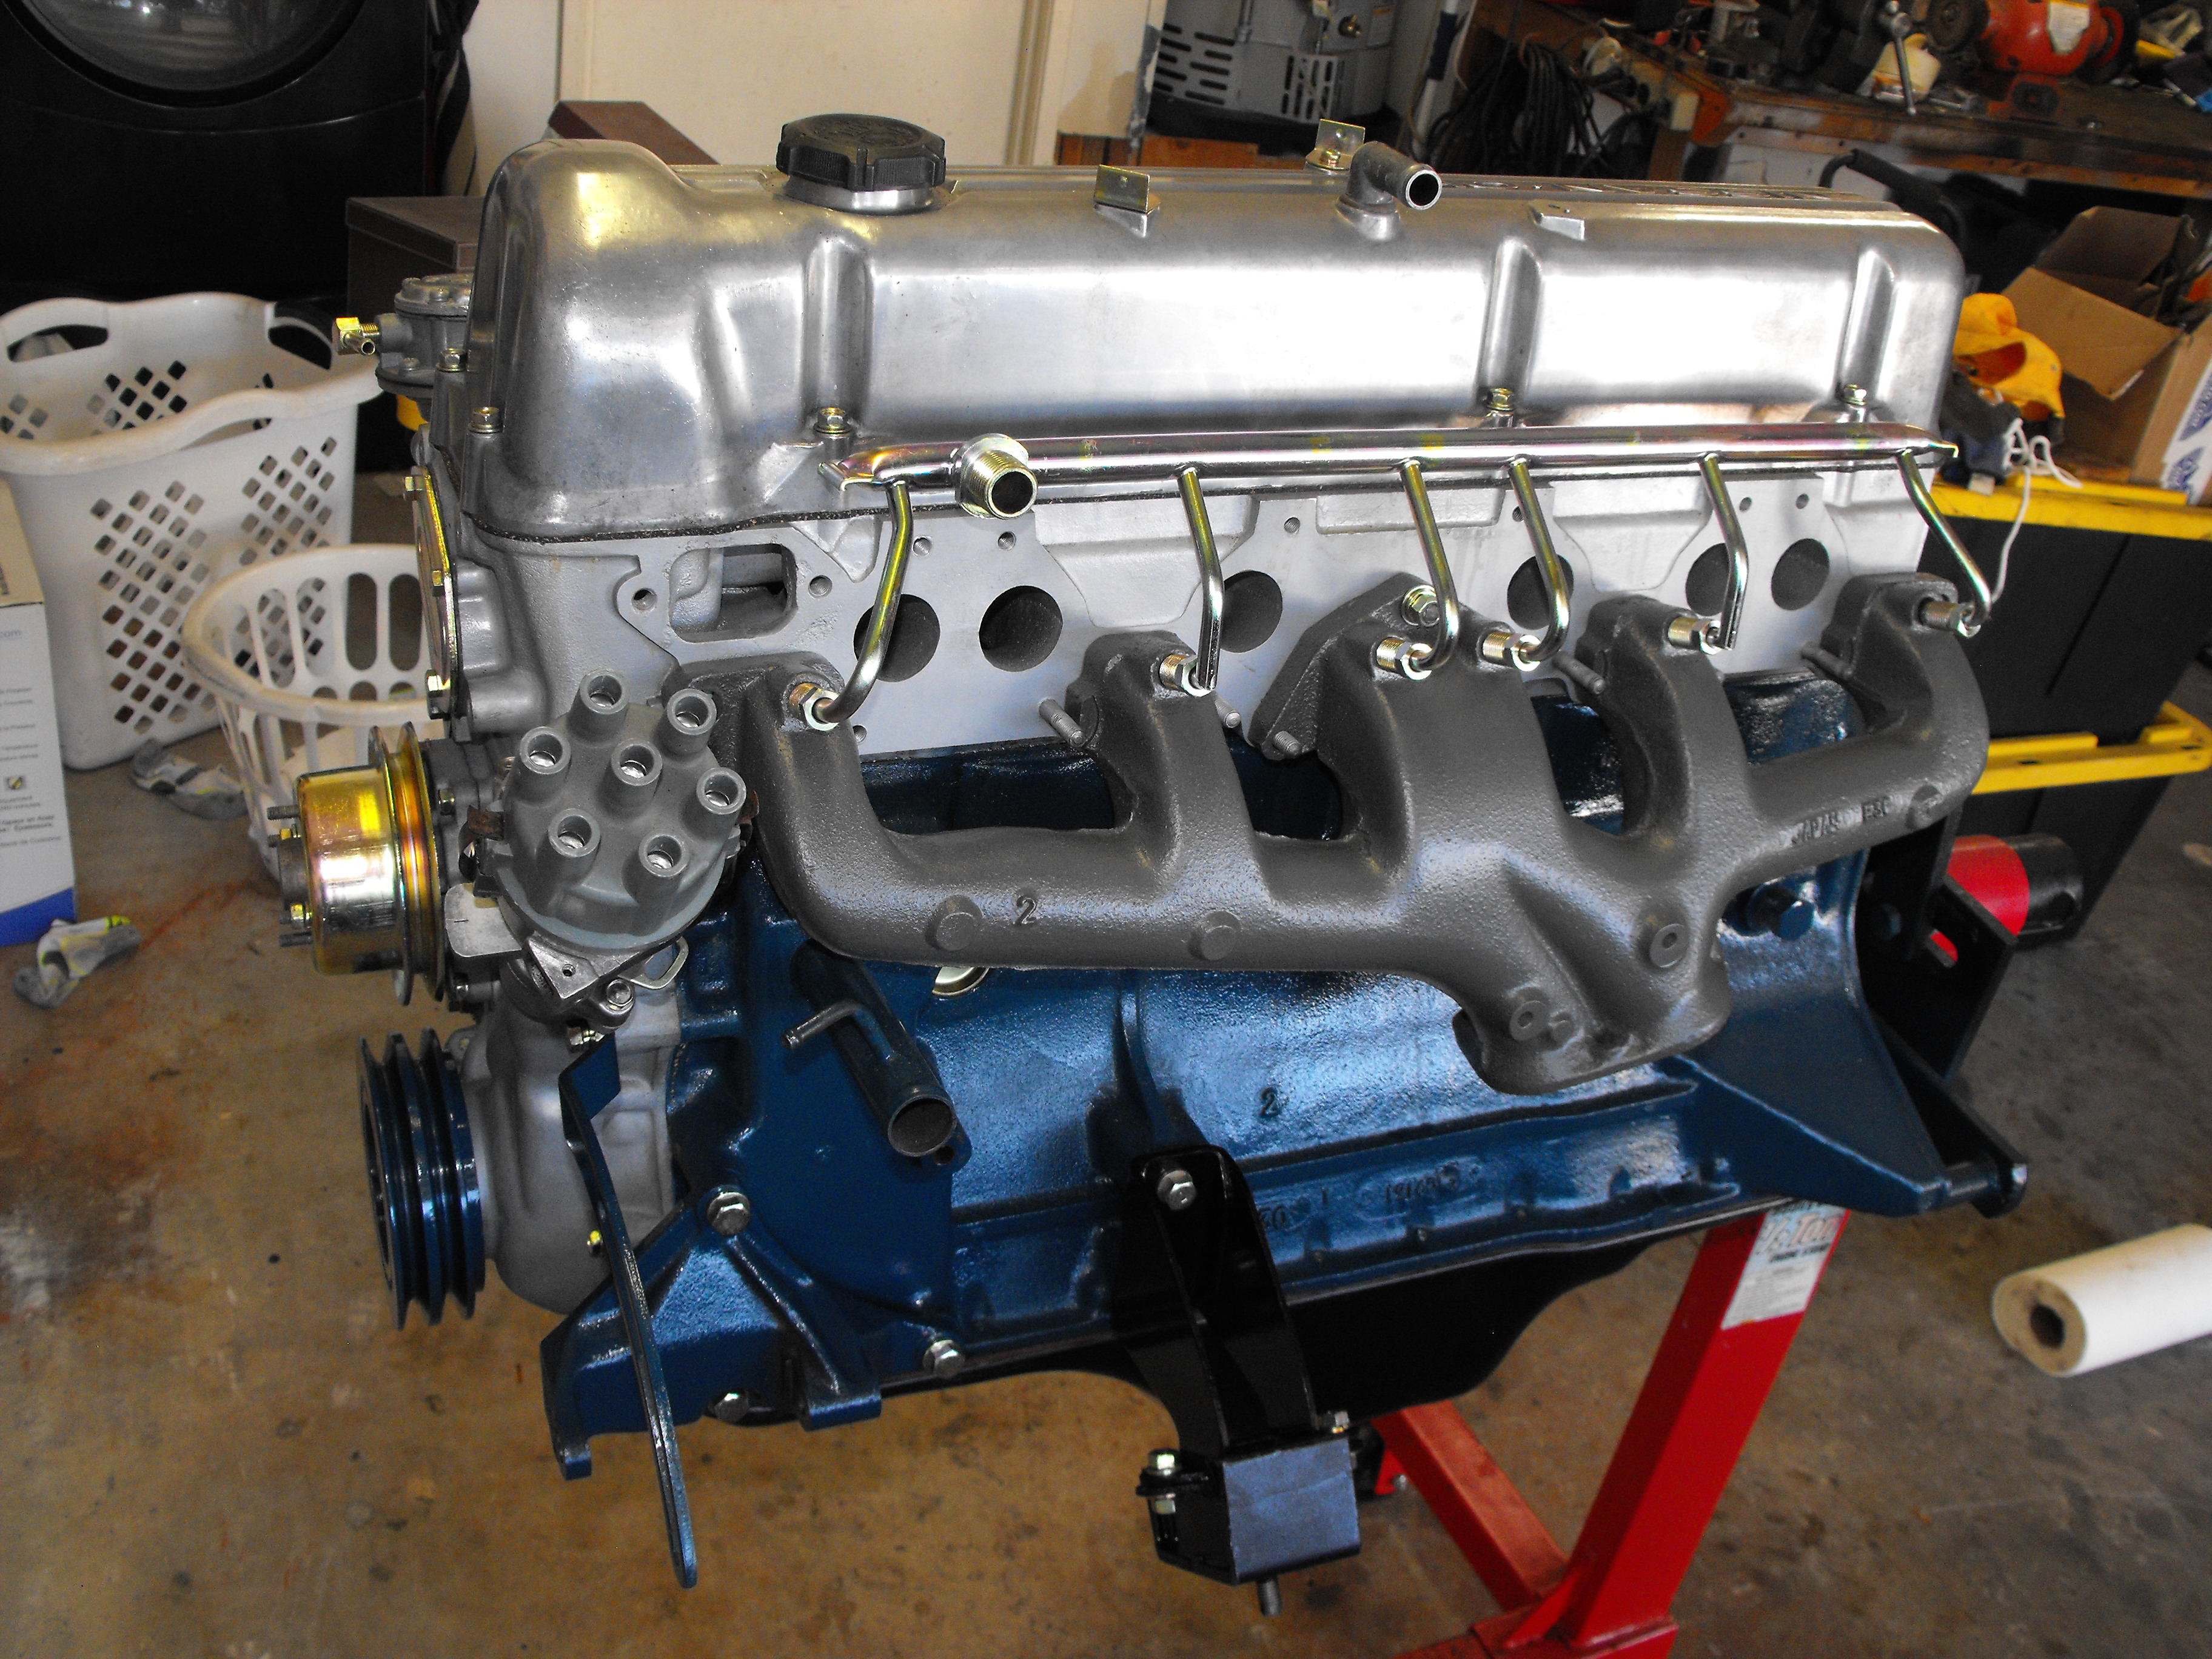
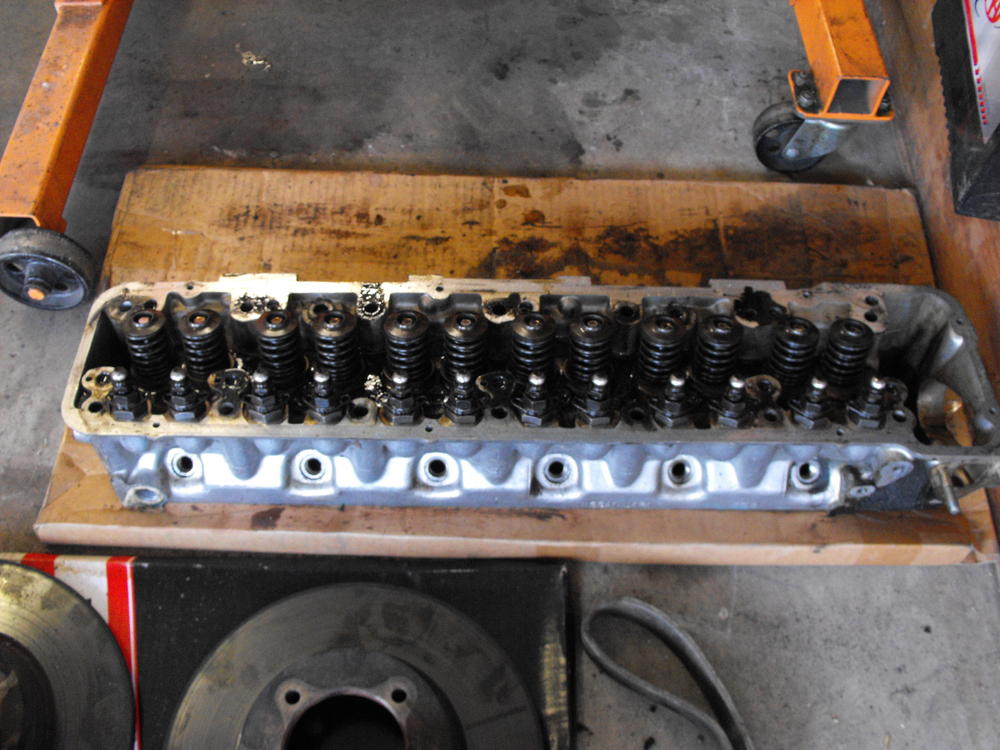
Yes. Typically, I will have the cylinders honed and install new bearings (Rod and Crank) and piston rings. I will also have the valves and new seats done on the head, plus whatever else it may need; surfacing, welding, etc. Will also replace the chain tensioner among other things Sometimes the cylinders need to be bored which would require new pistons, however, based on the low miles, I am betting the machine shop just recommends a hone. The only funky thing on the motor was the front crank pulley is a little loose. Seems like the key that holds it in place is either very worn or not installed. The pulley rotated about 5-10 degrees while installed on the crank. Will address that issue once the body is off to the paint shop.
-
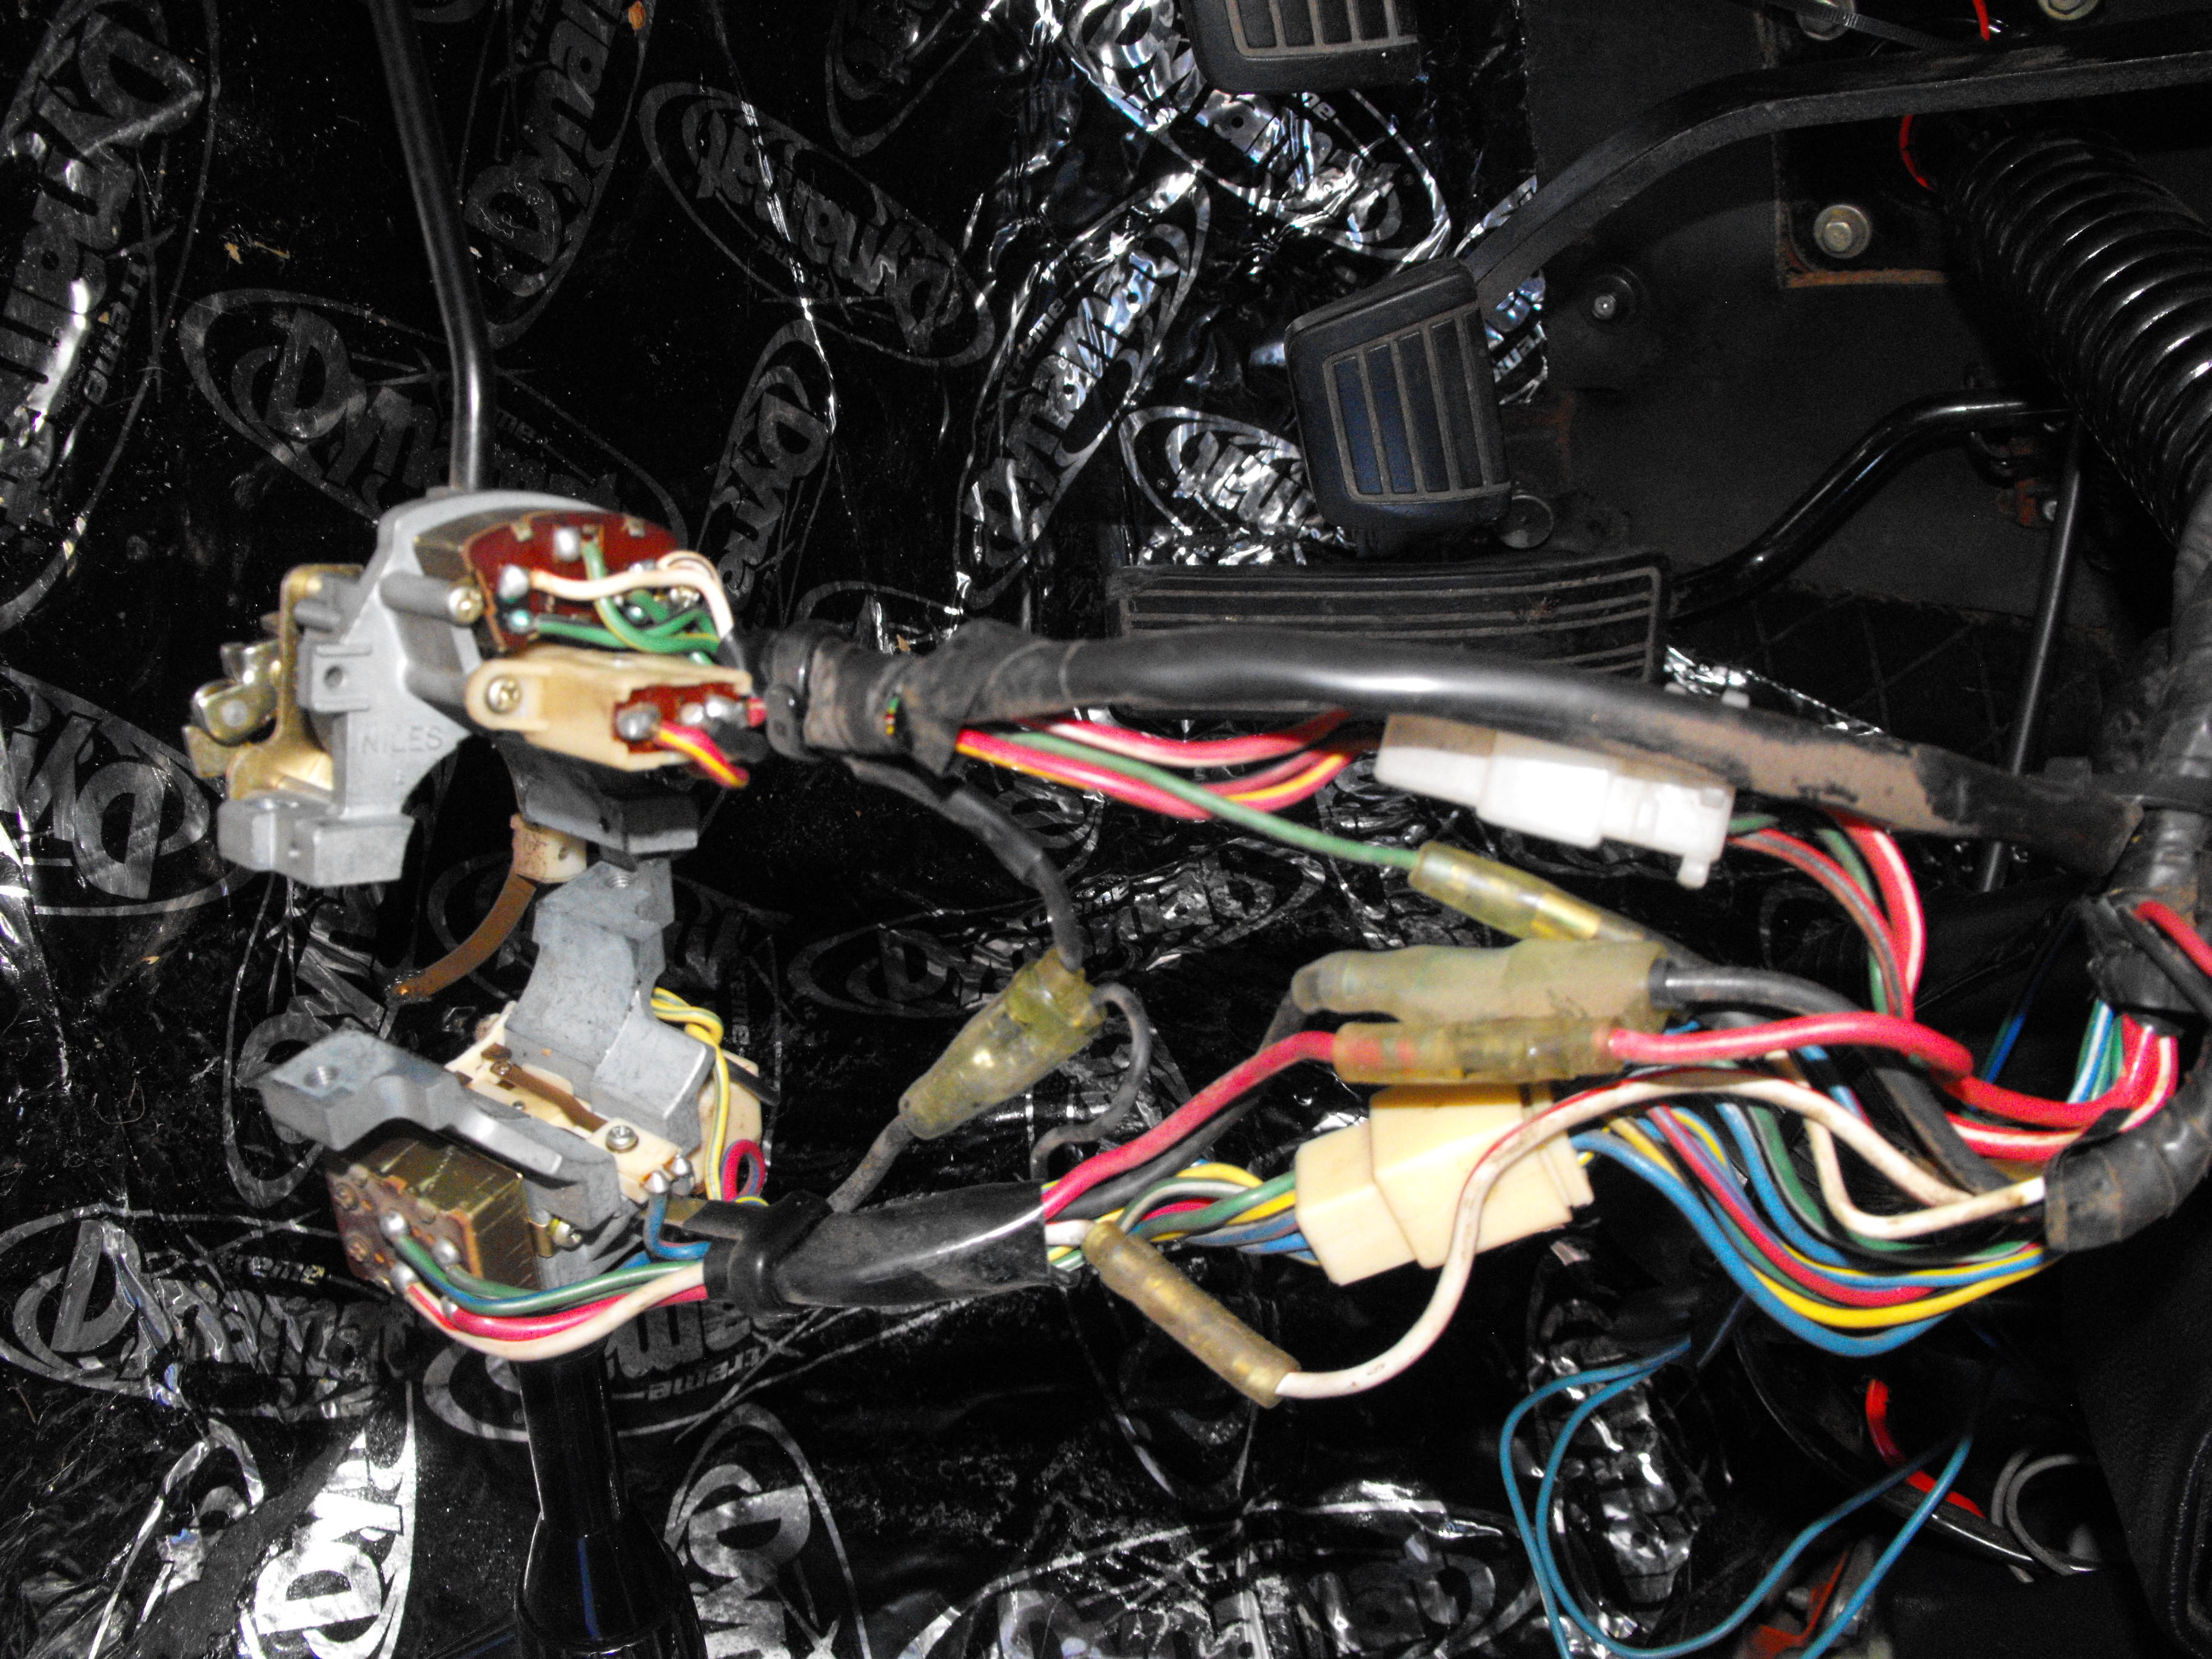
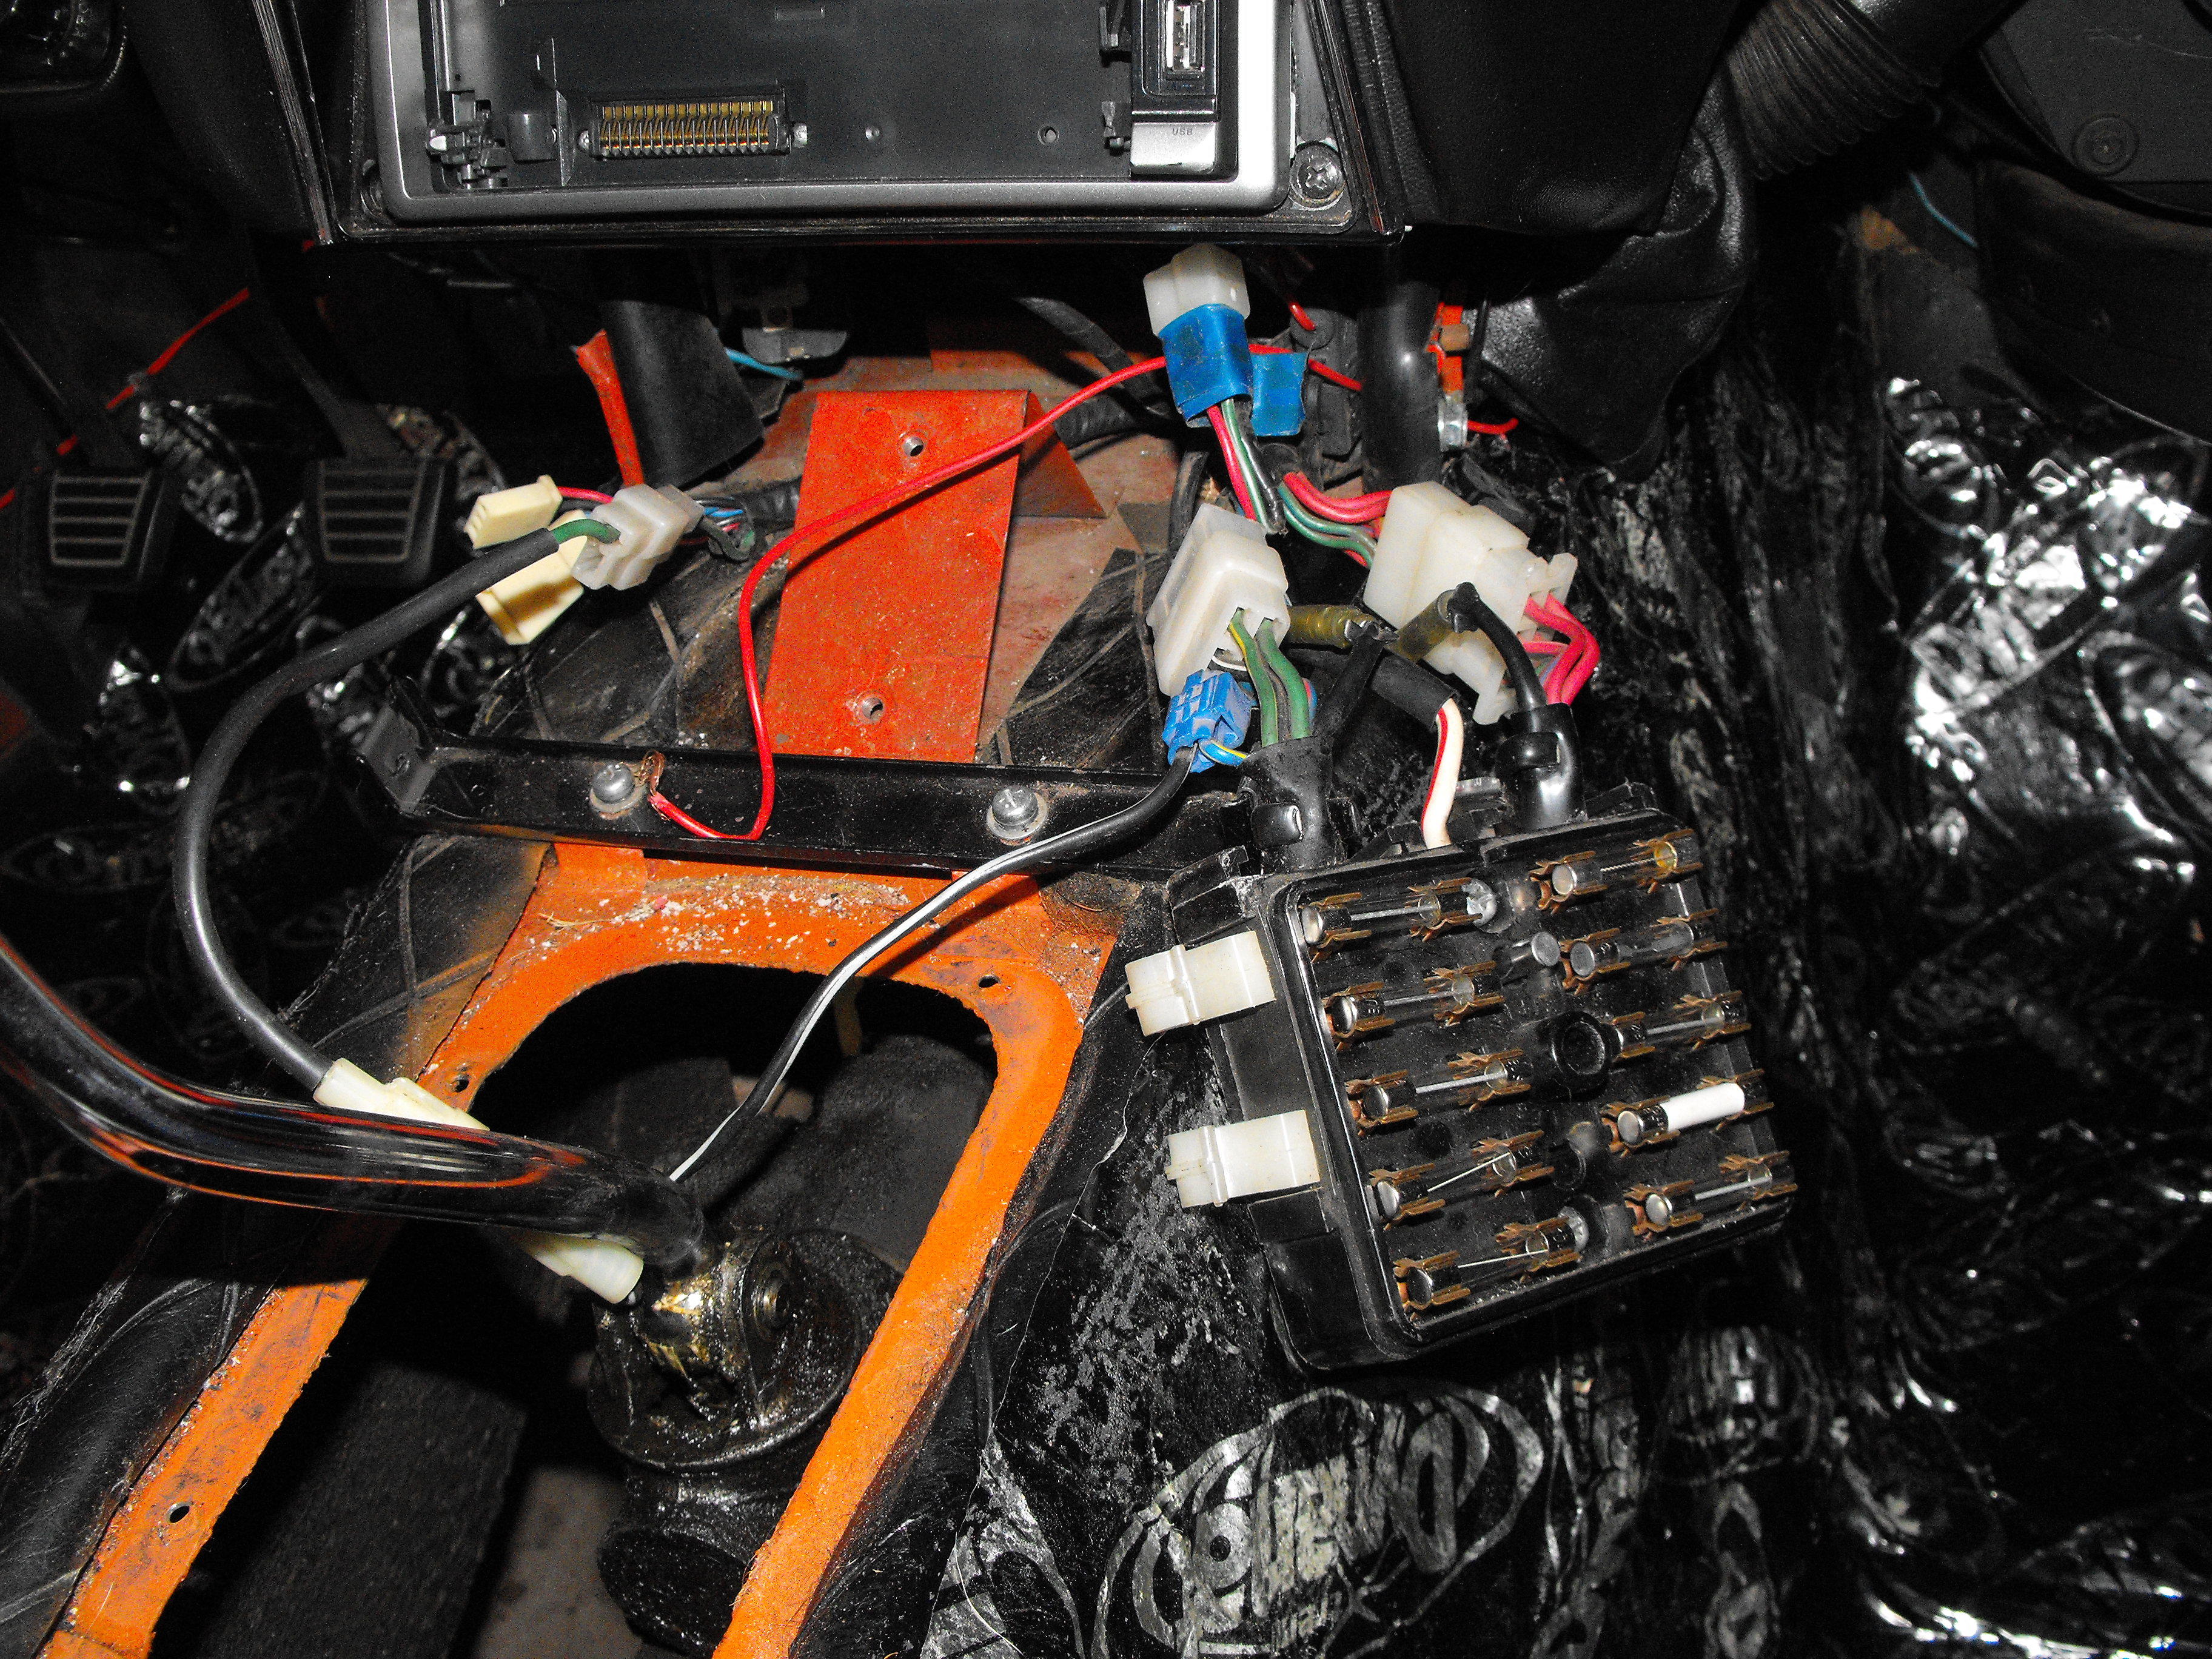
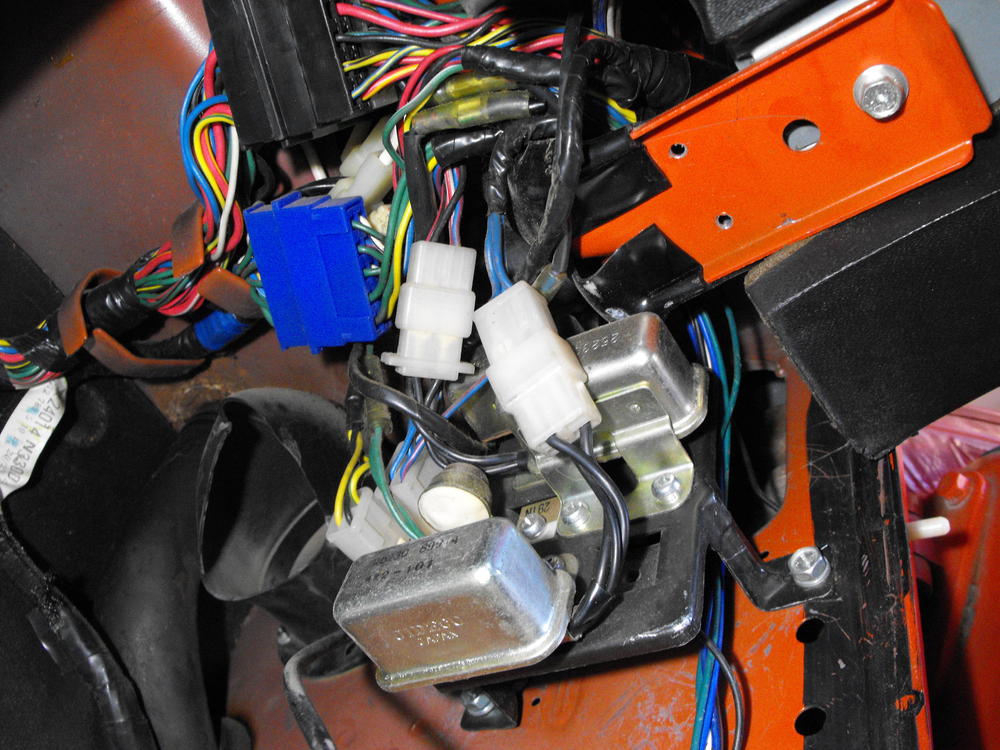
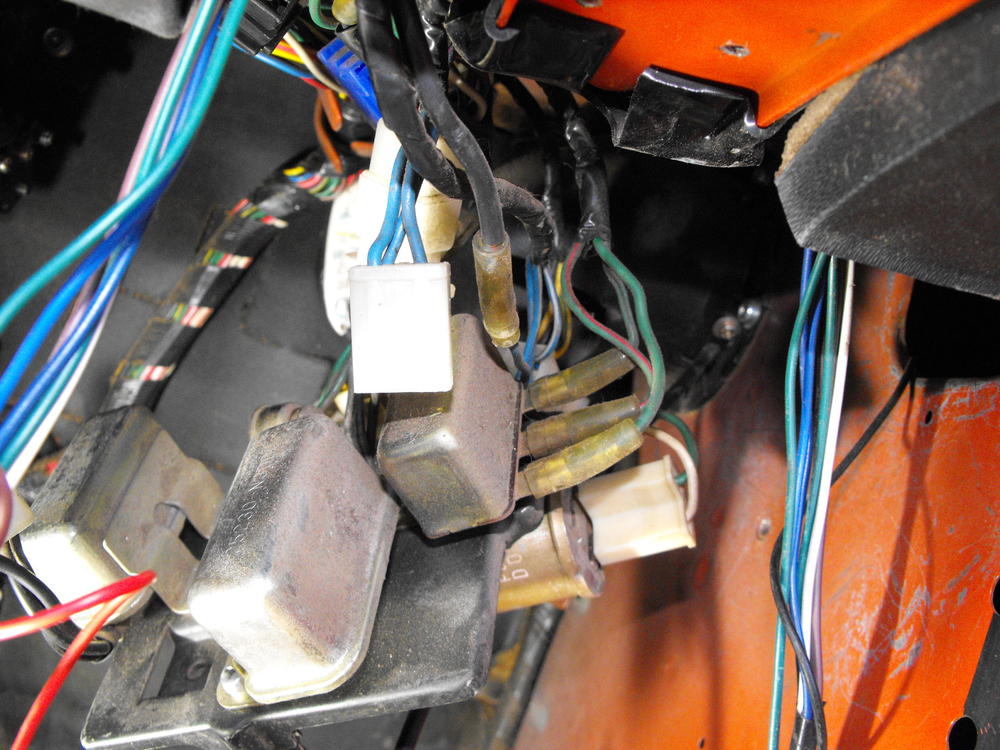
All the electrical wiring, except for the aftermarket stereo and speakers, is original and in very good condition. It is also very clean which makes it nice to work on. I will double check, but pretty sure the wiring for the original radio, antenna and speakers are in tact. The aftermarket stereo was tapped into the ignition wiring for power and seems to have been done well. Wires were nicely secured and routed which is a sign of a good installation.
-
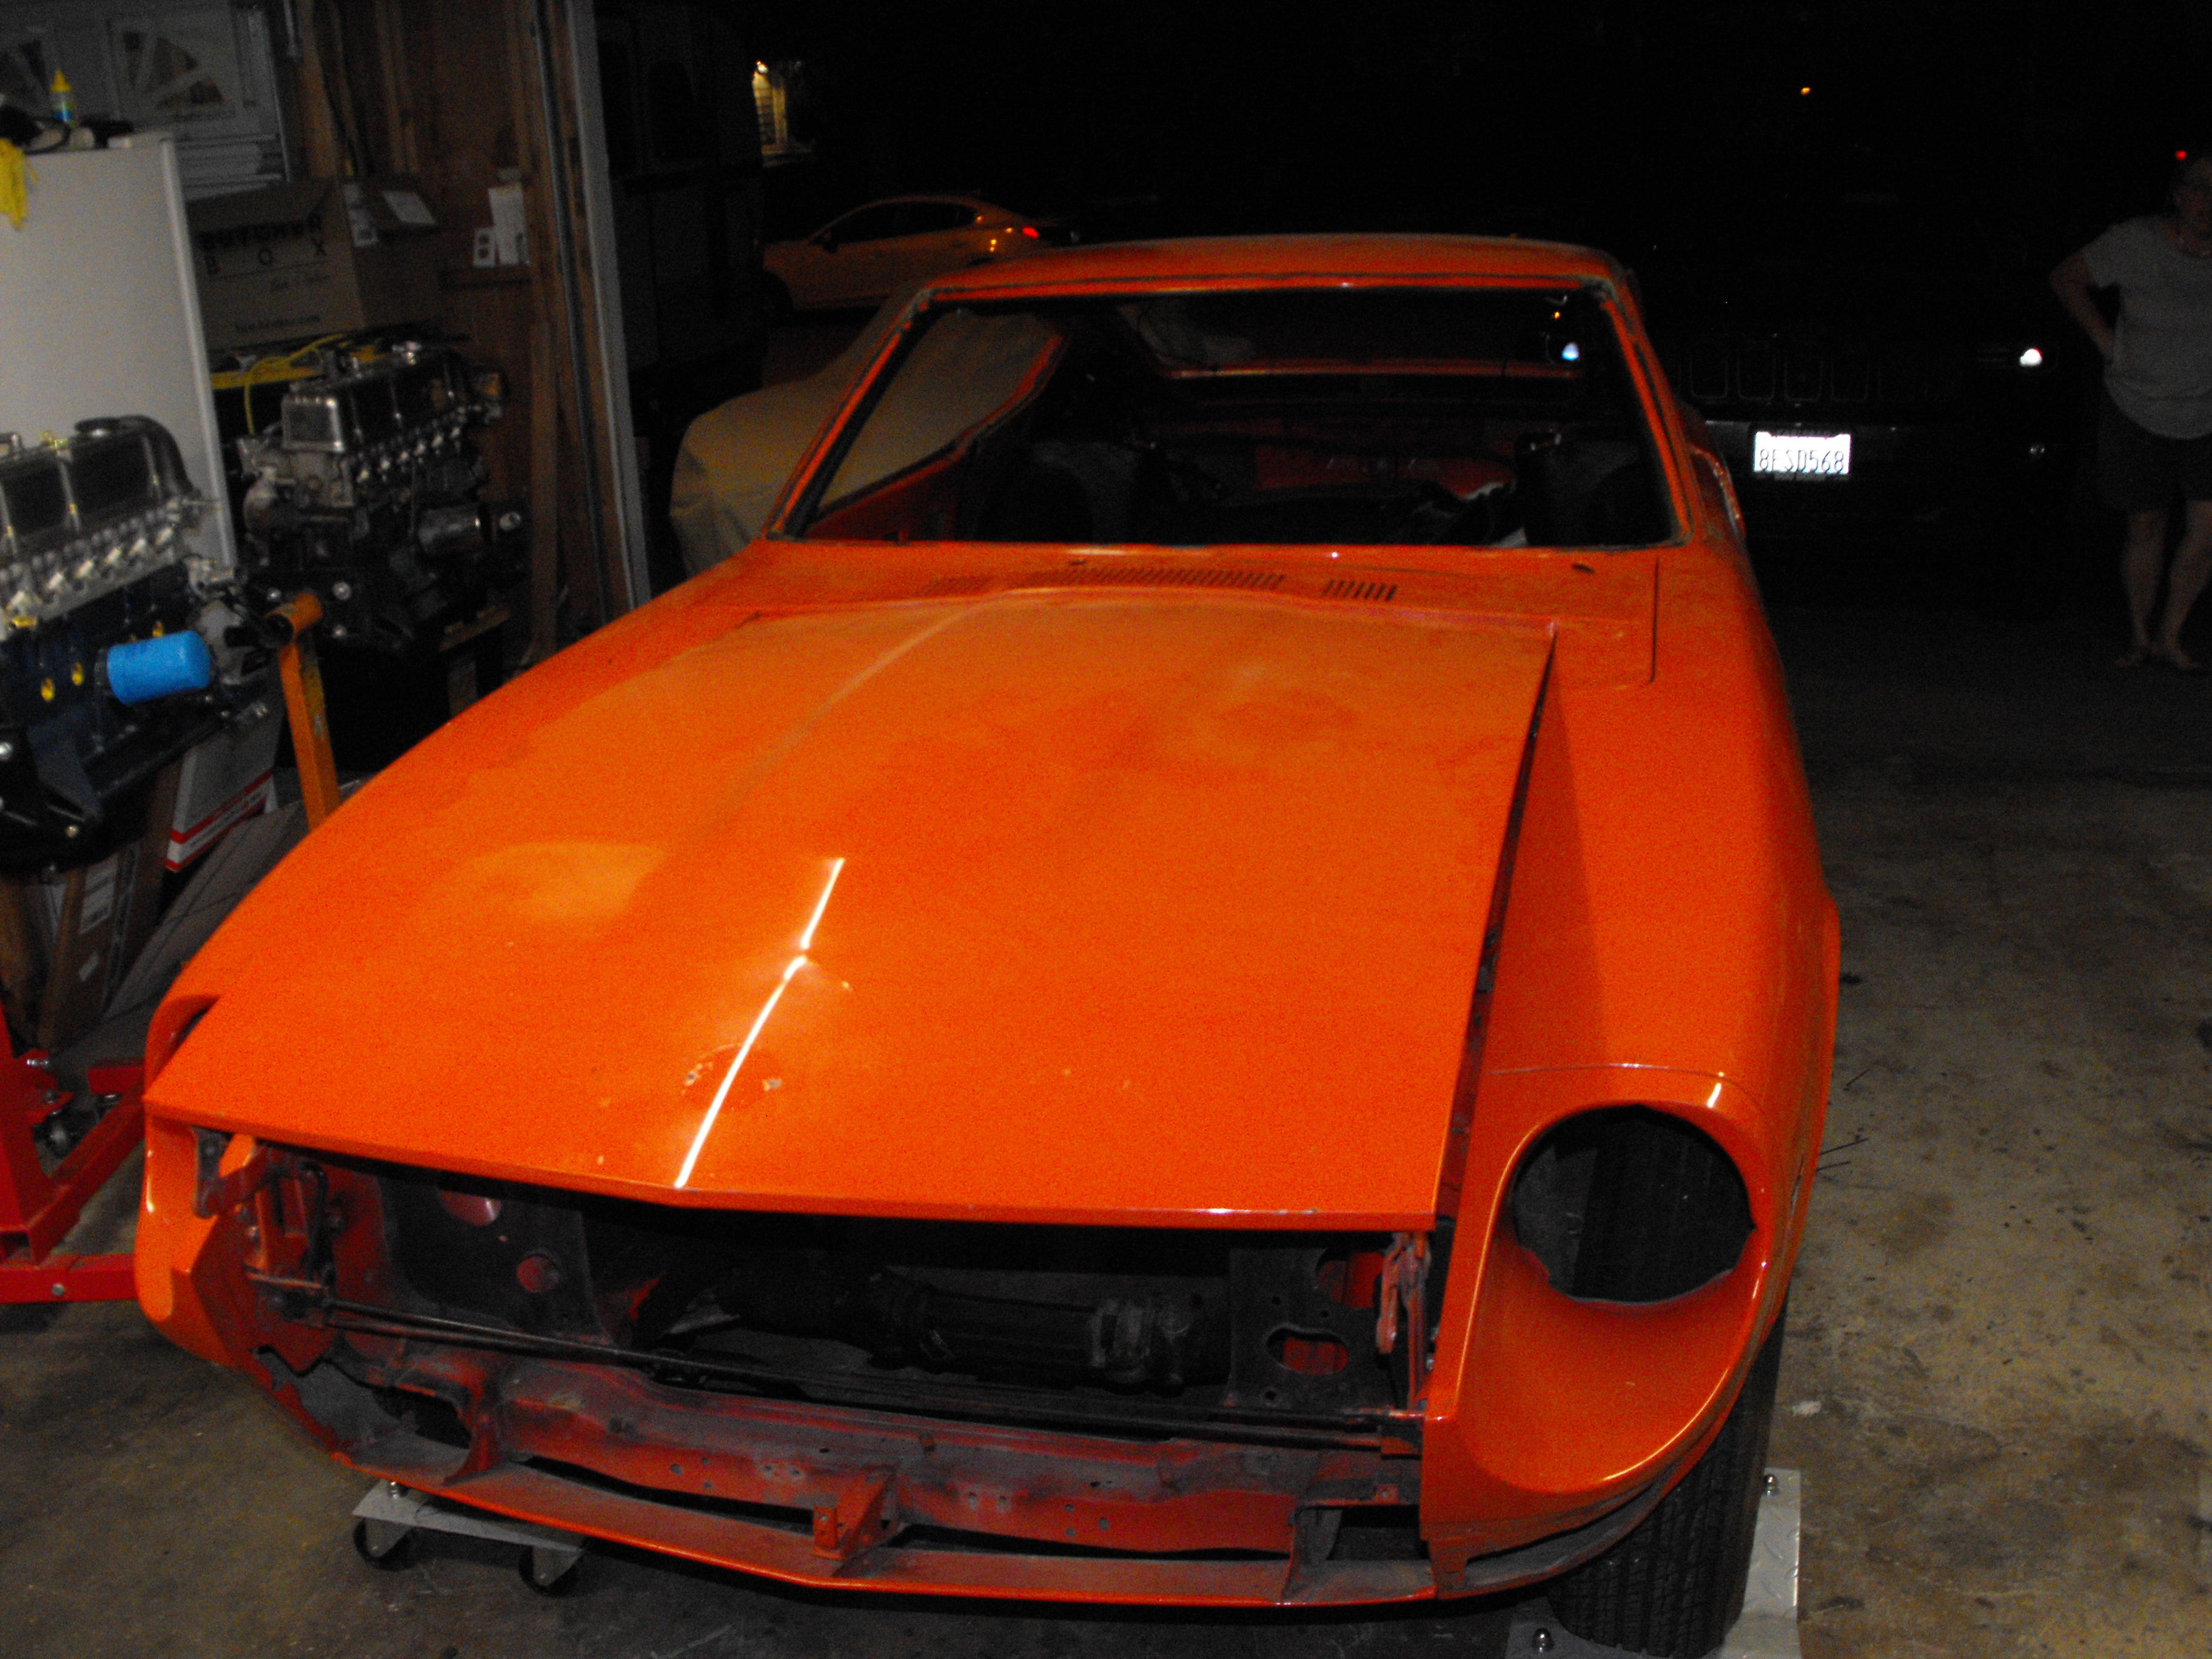
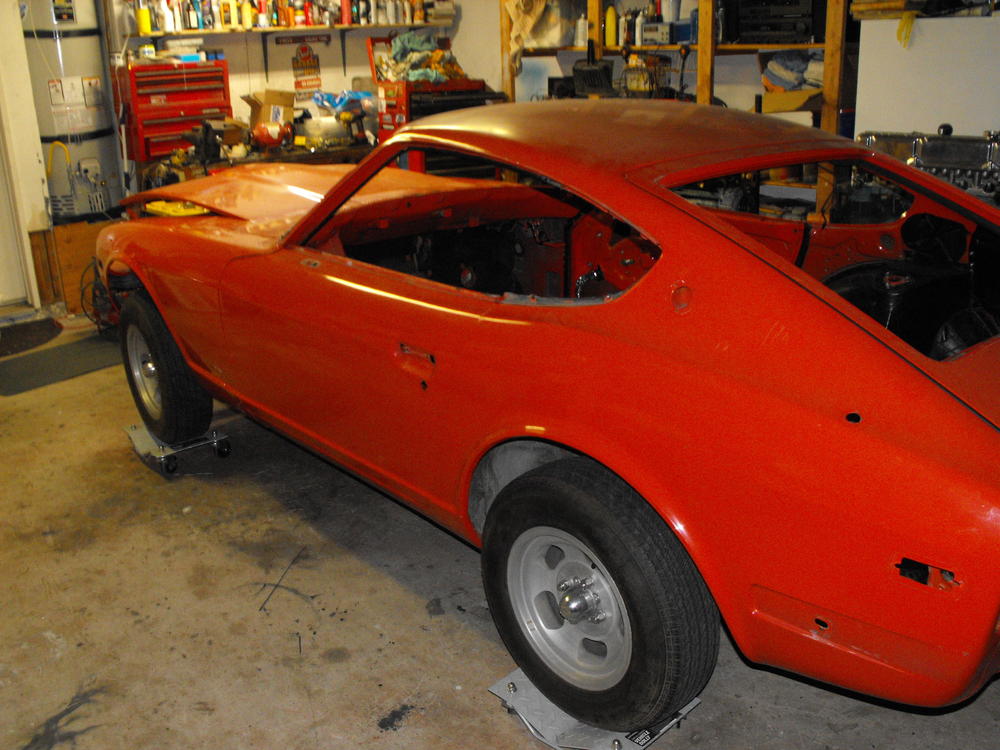
Yes, car is really in decent shape. I would bet the 88K miles on the speedo are the actual miles on the car based on it's condition. Took the glass out this evening along with the door panels and attachments. Miguel gave me the supports to mount the body on. I will remove the suspension in the next couple days and have the car on rollers ready for paint. Should have this to Miguel by the middle of next week.


-
The 48" tanks are at the local plating shop which I typically only use for quick turn around. Personally, I think the plating at my local shop is too dark and not shiny enough. I spoke with Sav-On and they said they could handle parts up to six feet. This works well for the brake and fuel lines because then you only have to fold them in half. This makes for a better bend location as the middle portion that you bend would be in the transmission tunnel and not very visible. Also, it is in a straight section which is easier to manage. Folding in 48 inch lengths is not as good as the bend now is in the engine bay area of the tubing and there are other bends in that location. This makes things a bit more challenging. The cost for the larger tank items is more than the 5 gallon bucket items. These large parts get charged individually so the price is a bit higher. I do however, really like the quality of their work. They do a great job. When i send in the fuel and brake lines, I will cap them with tight fitting caps.
-
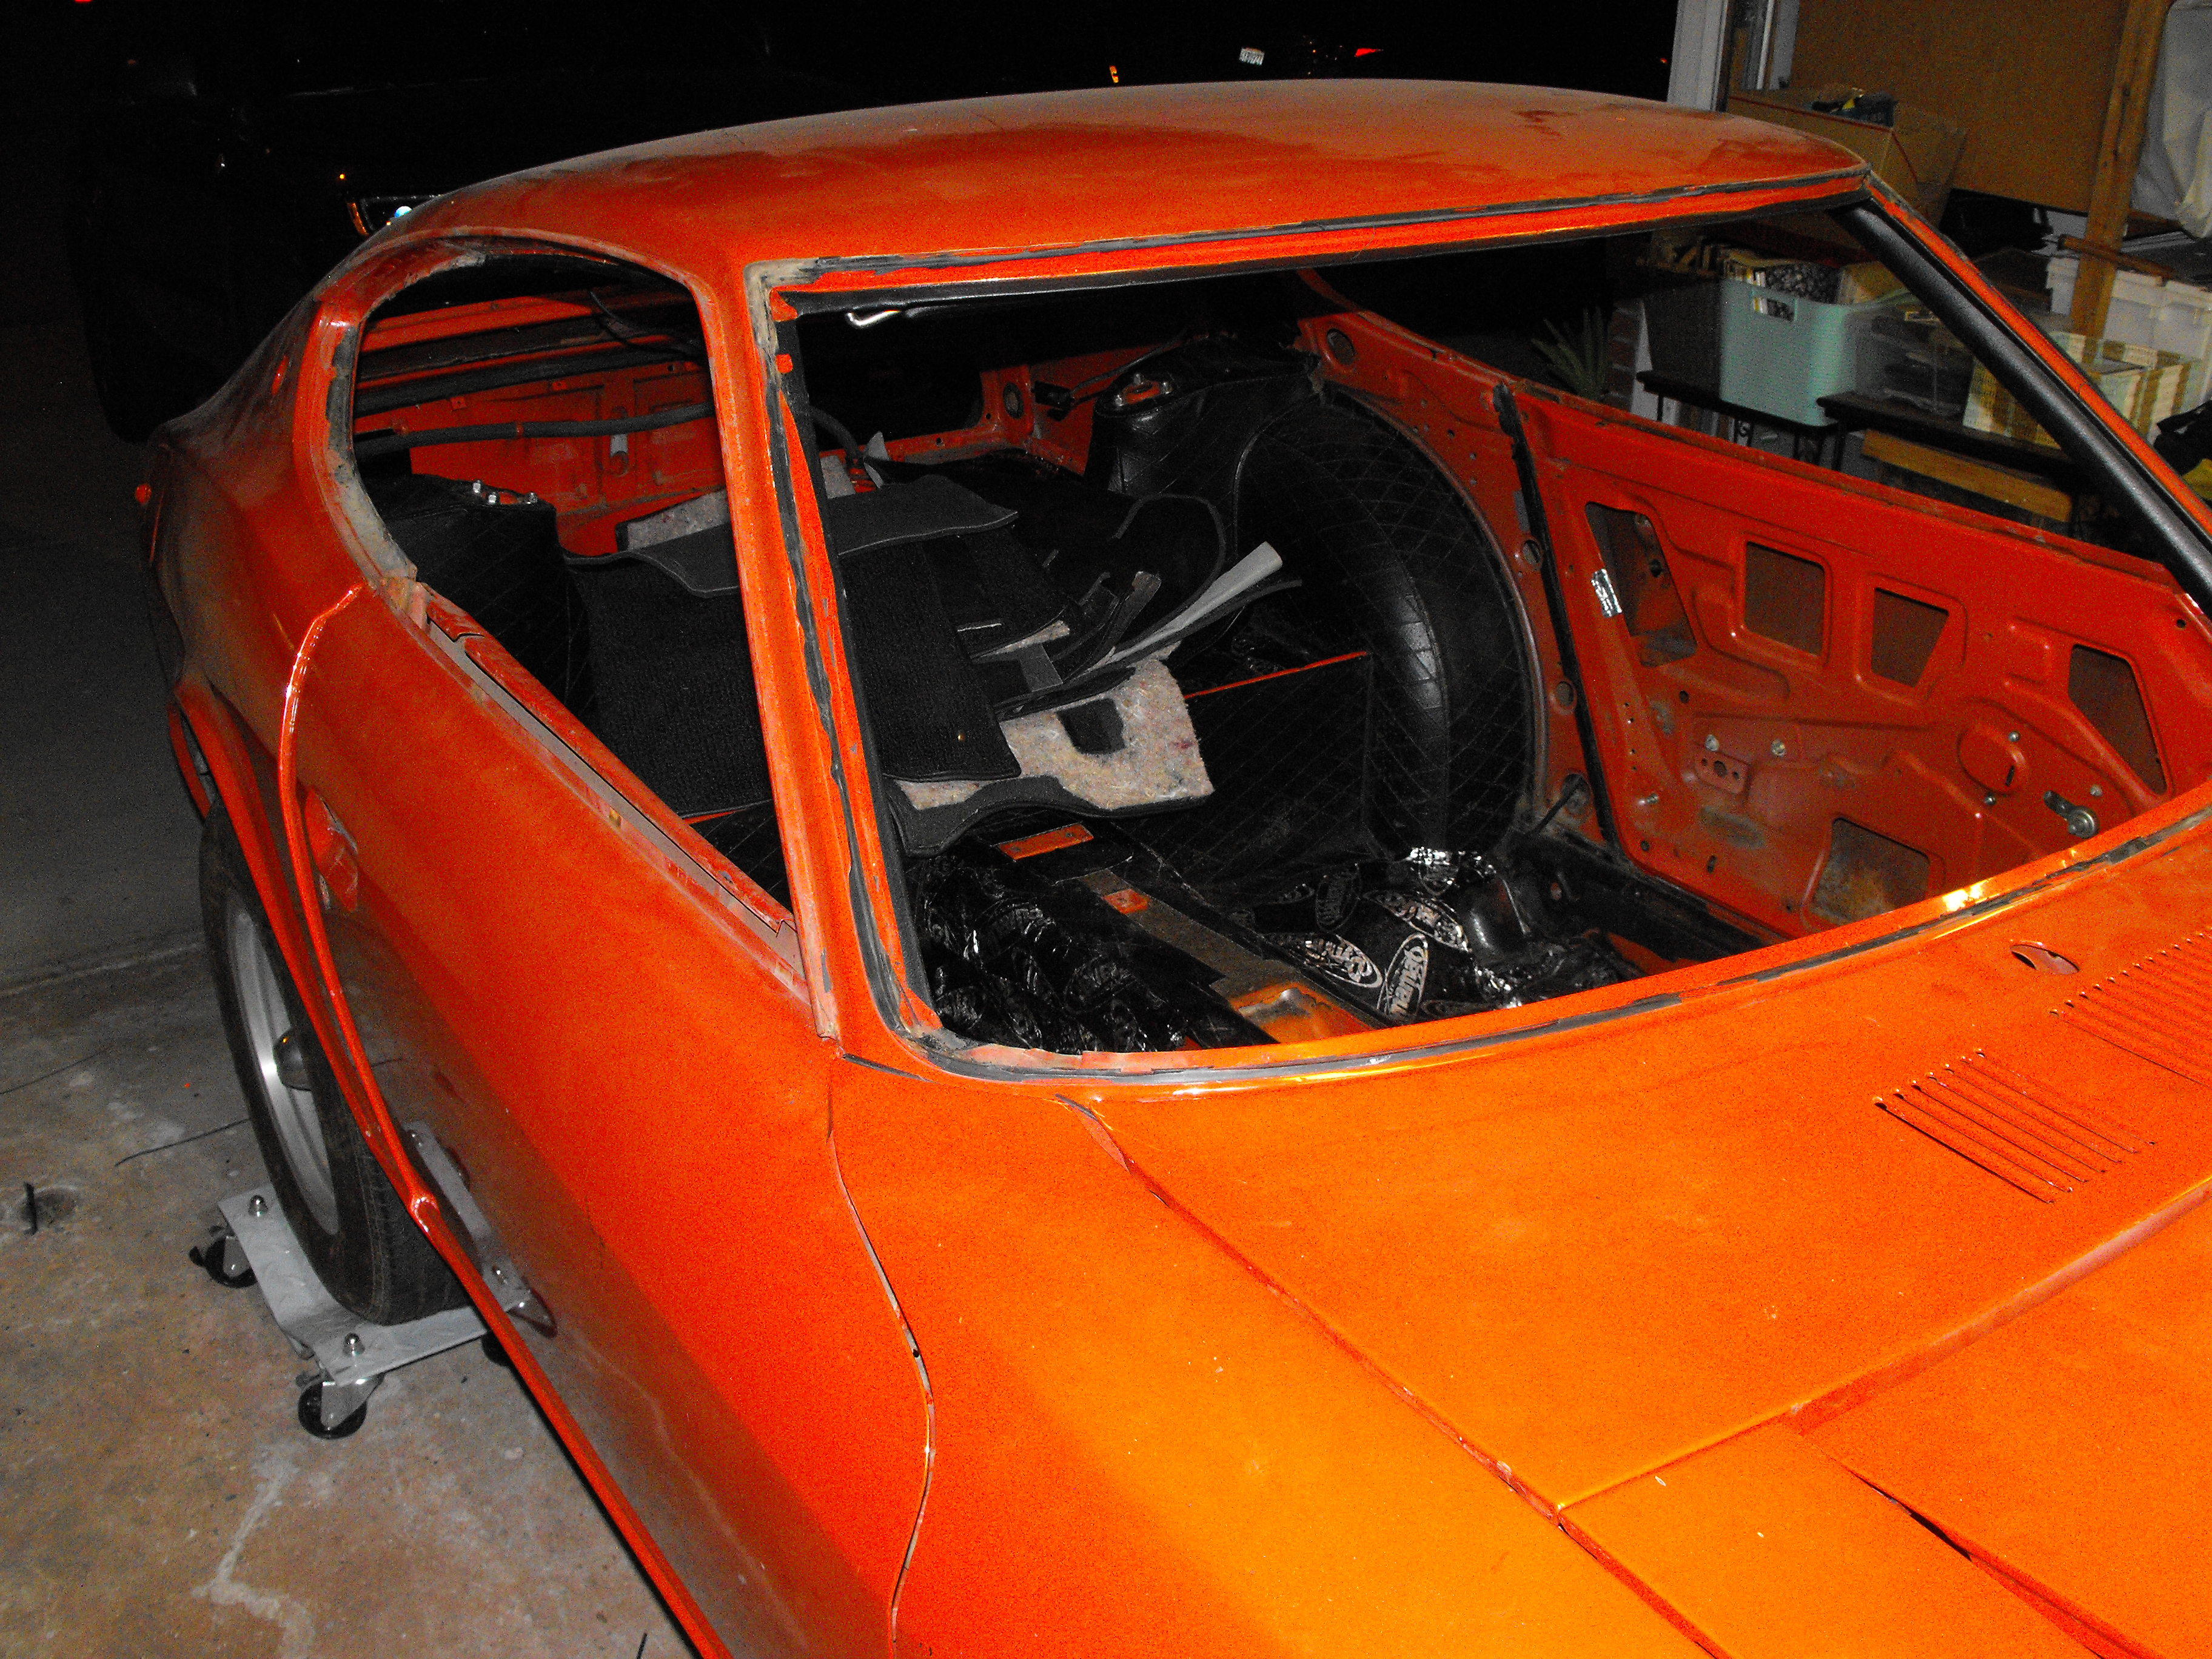
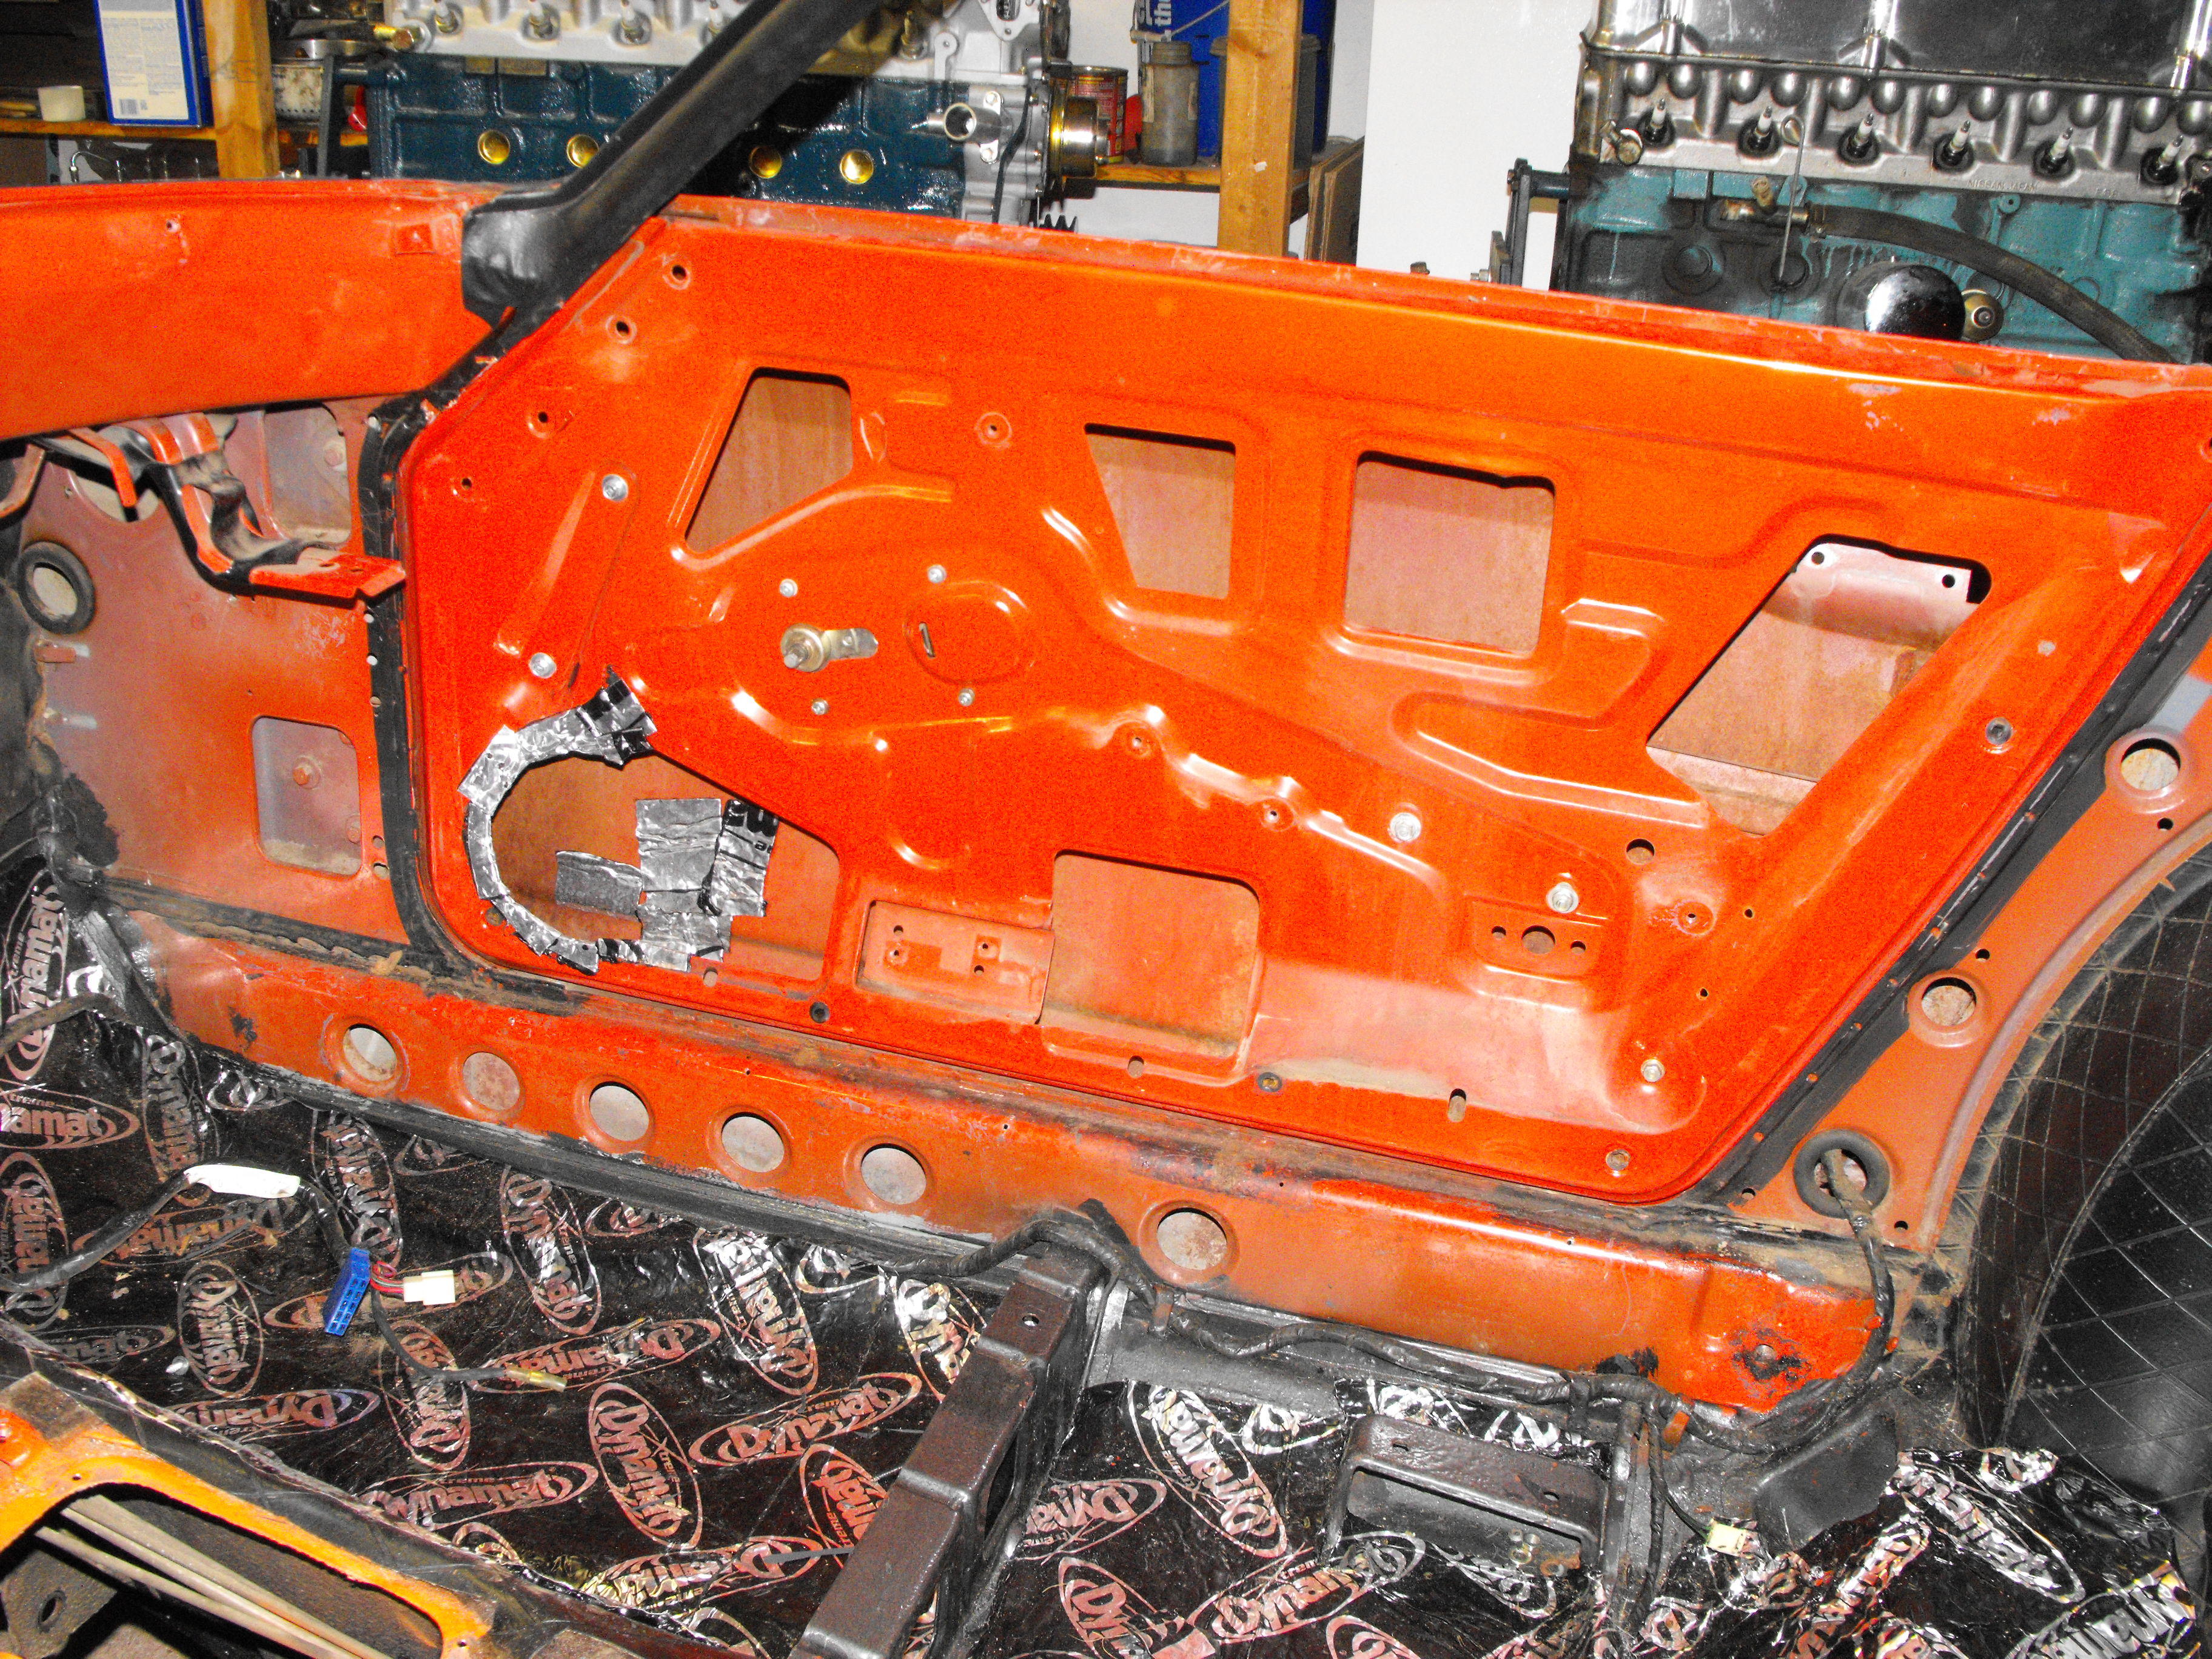
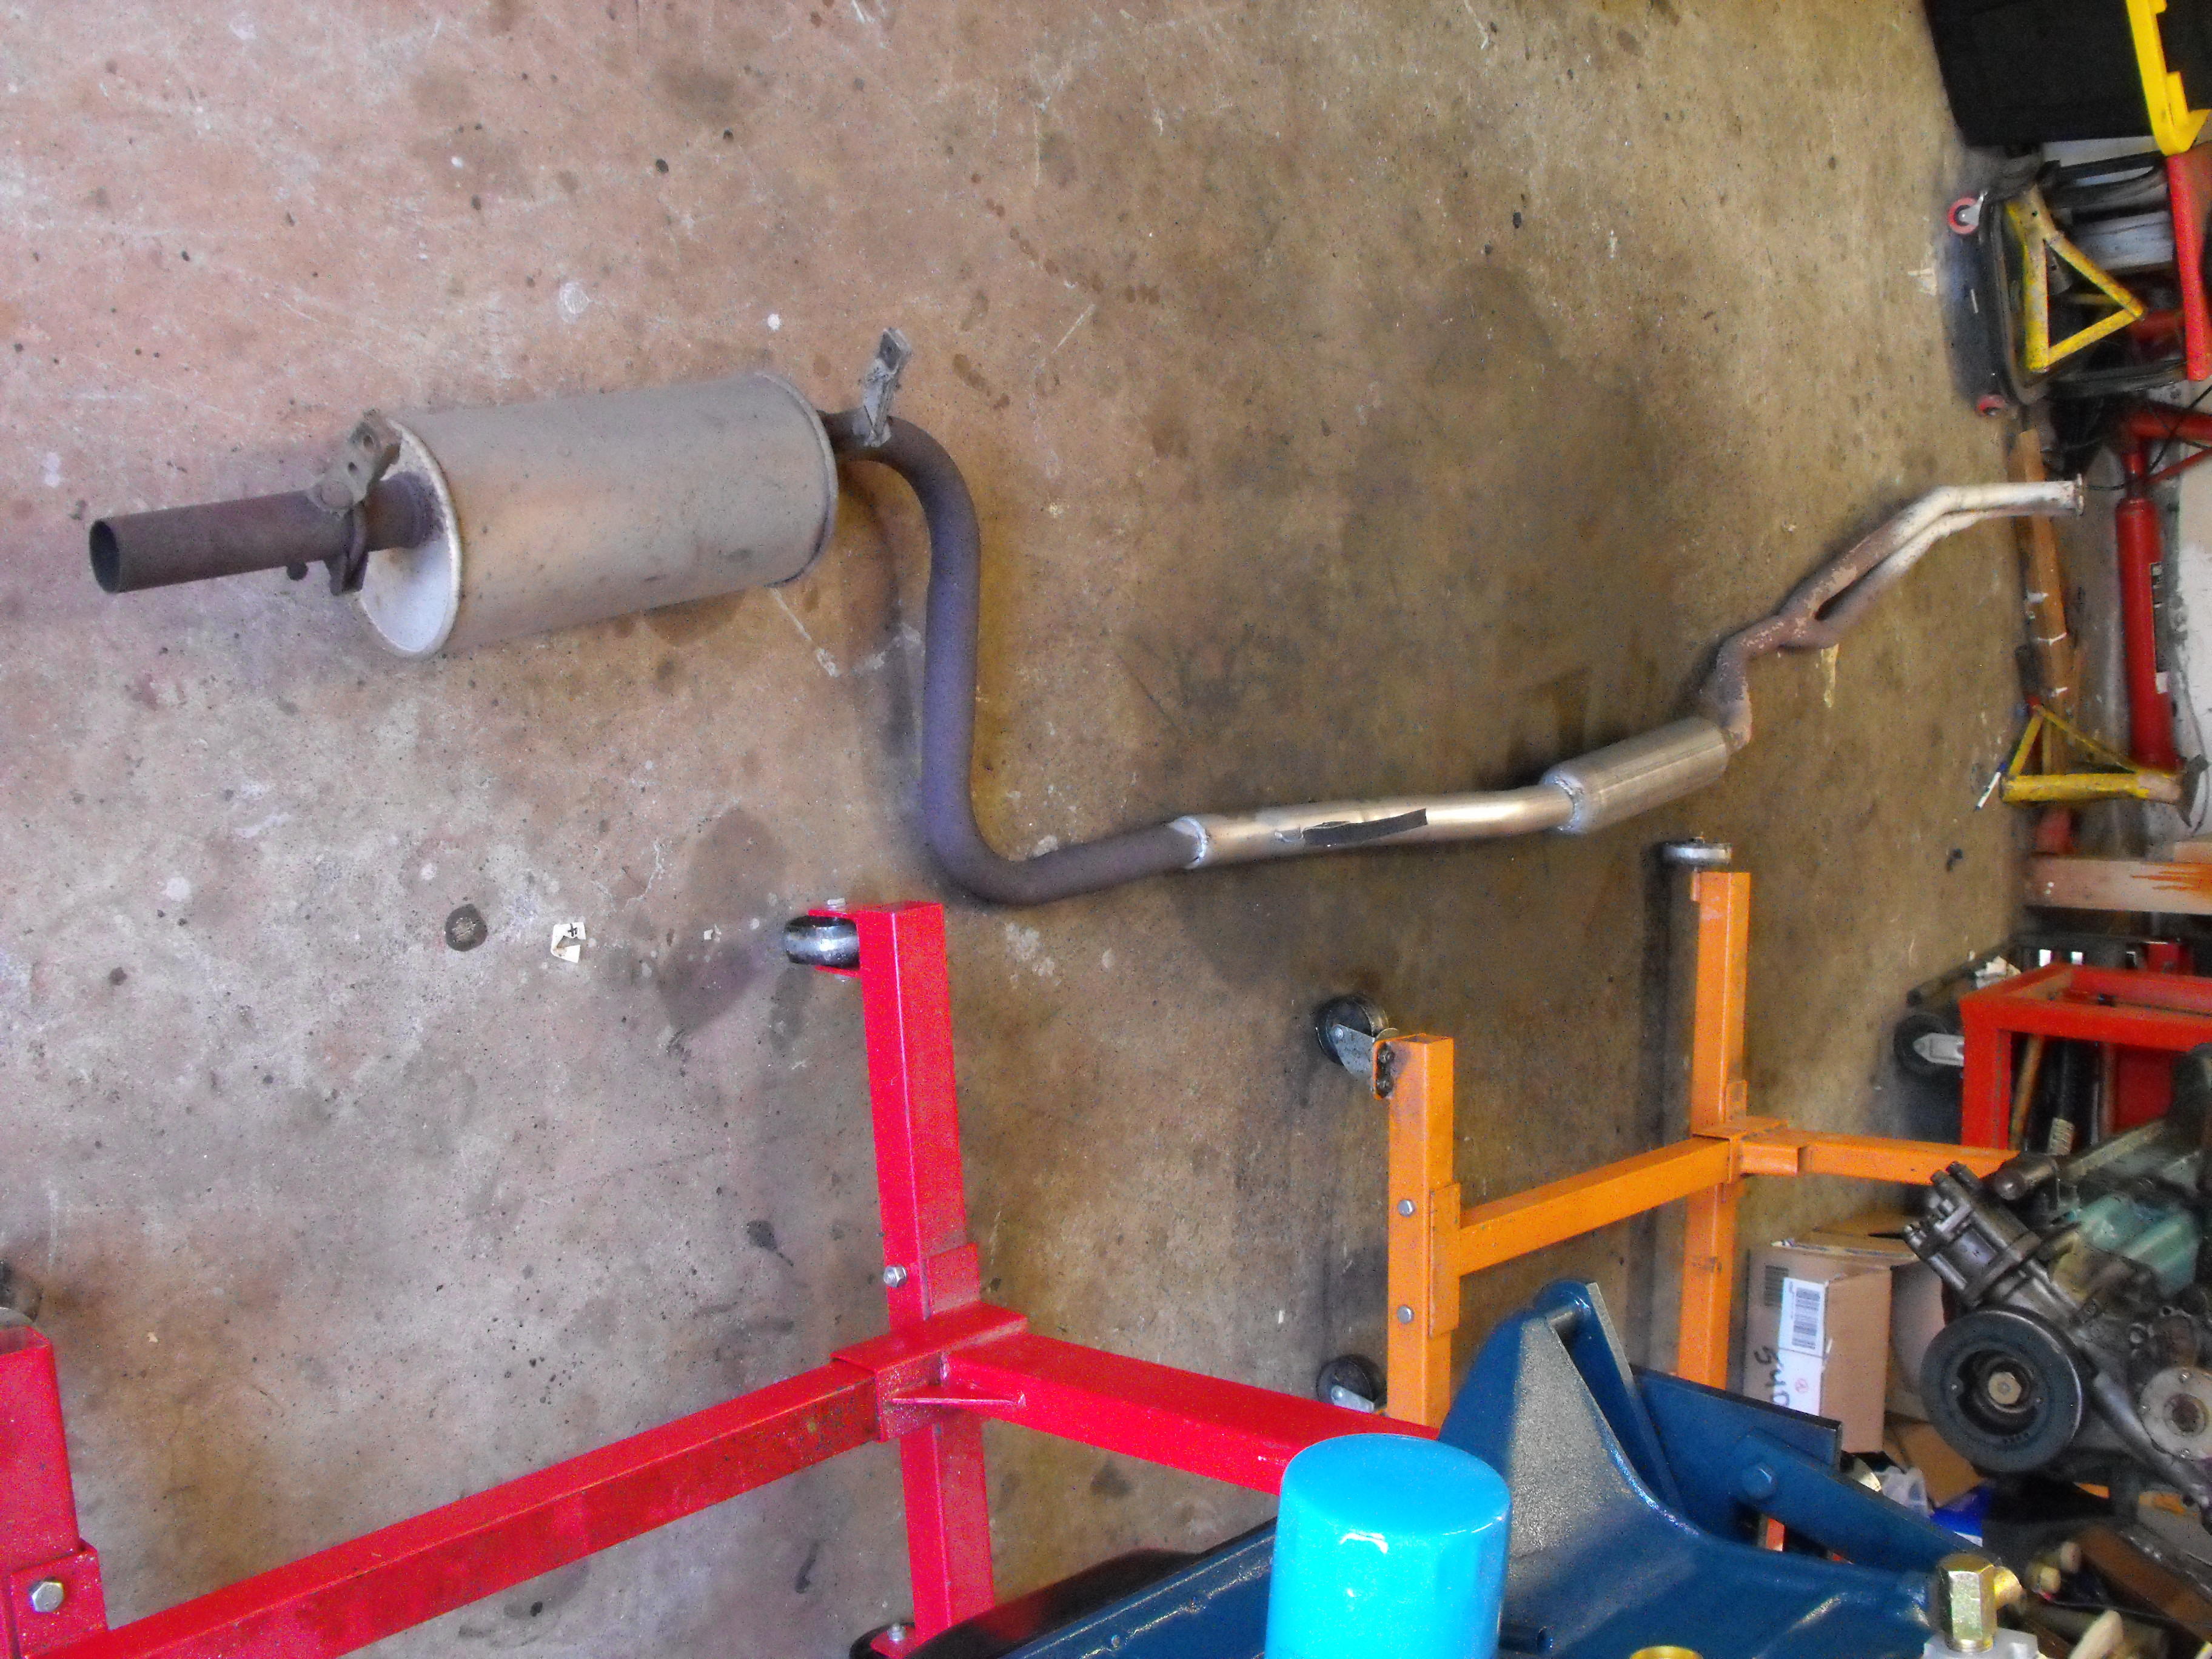
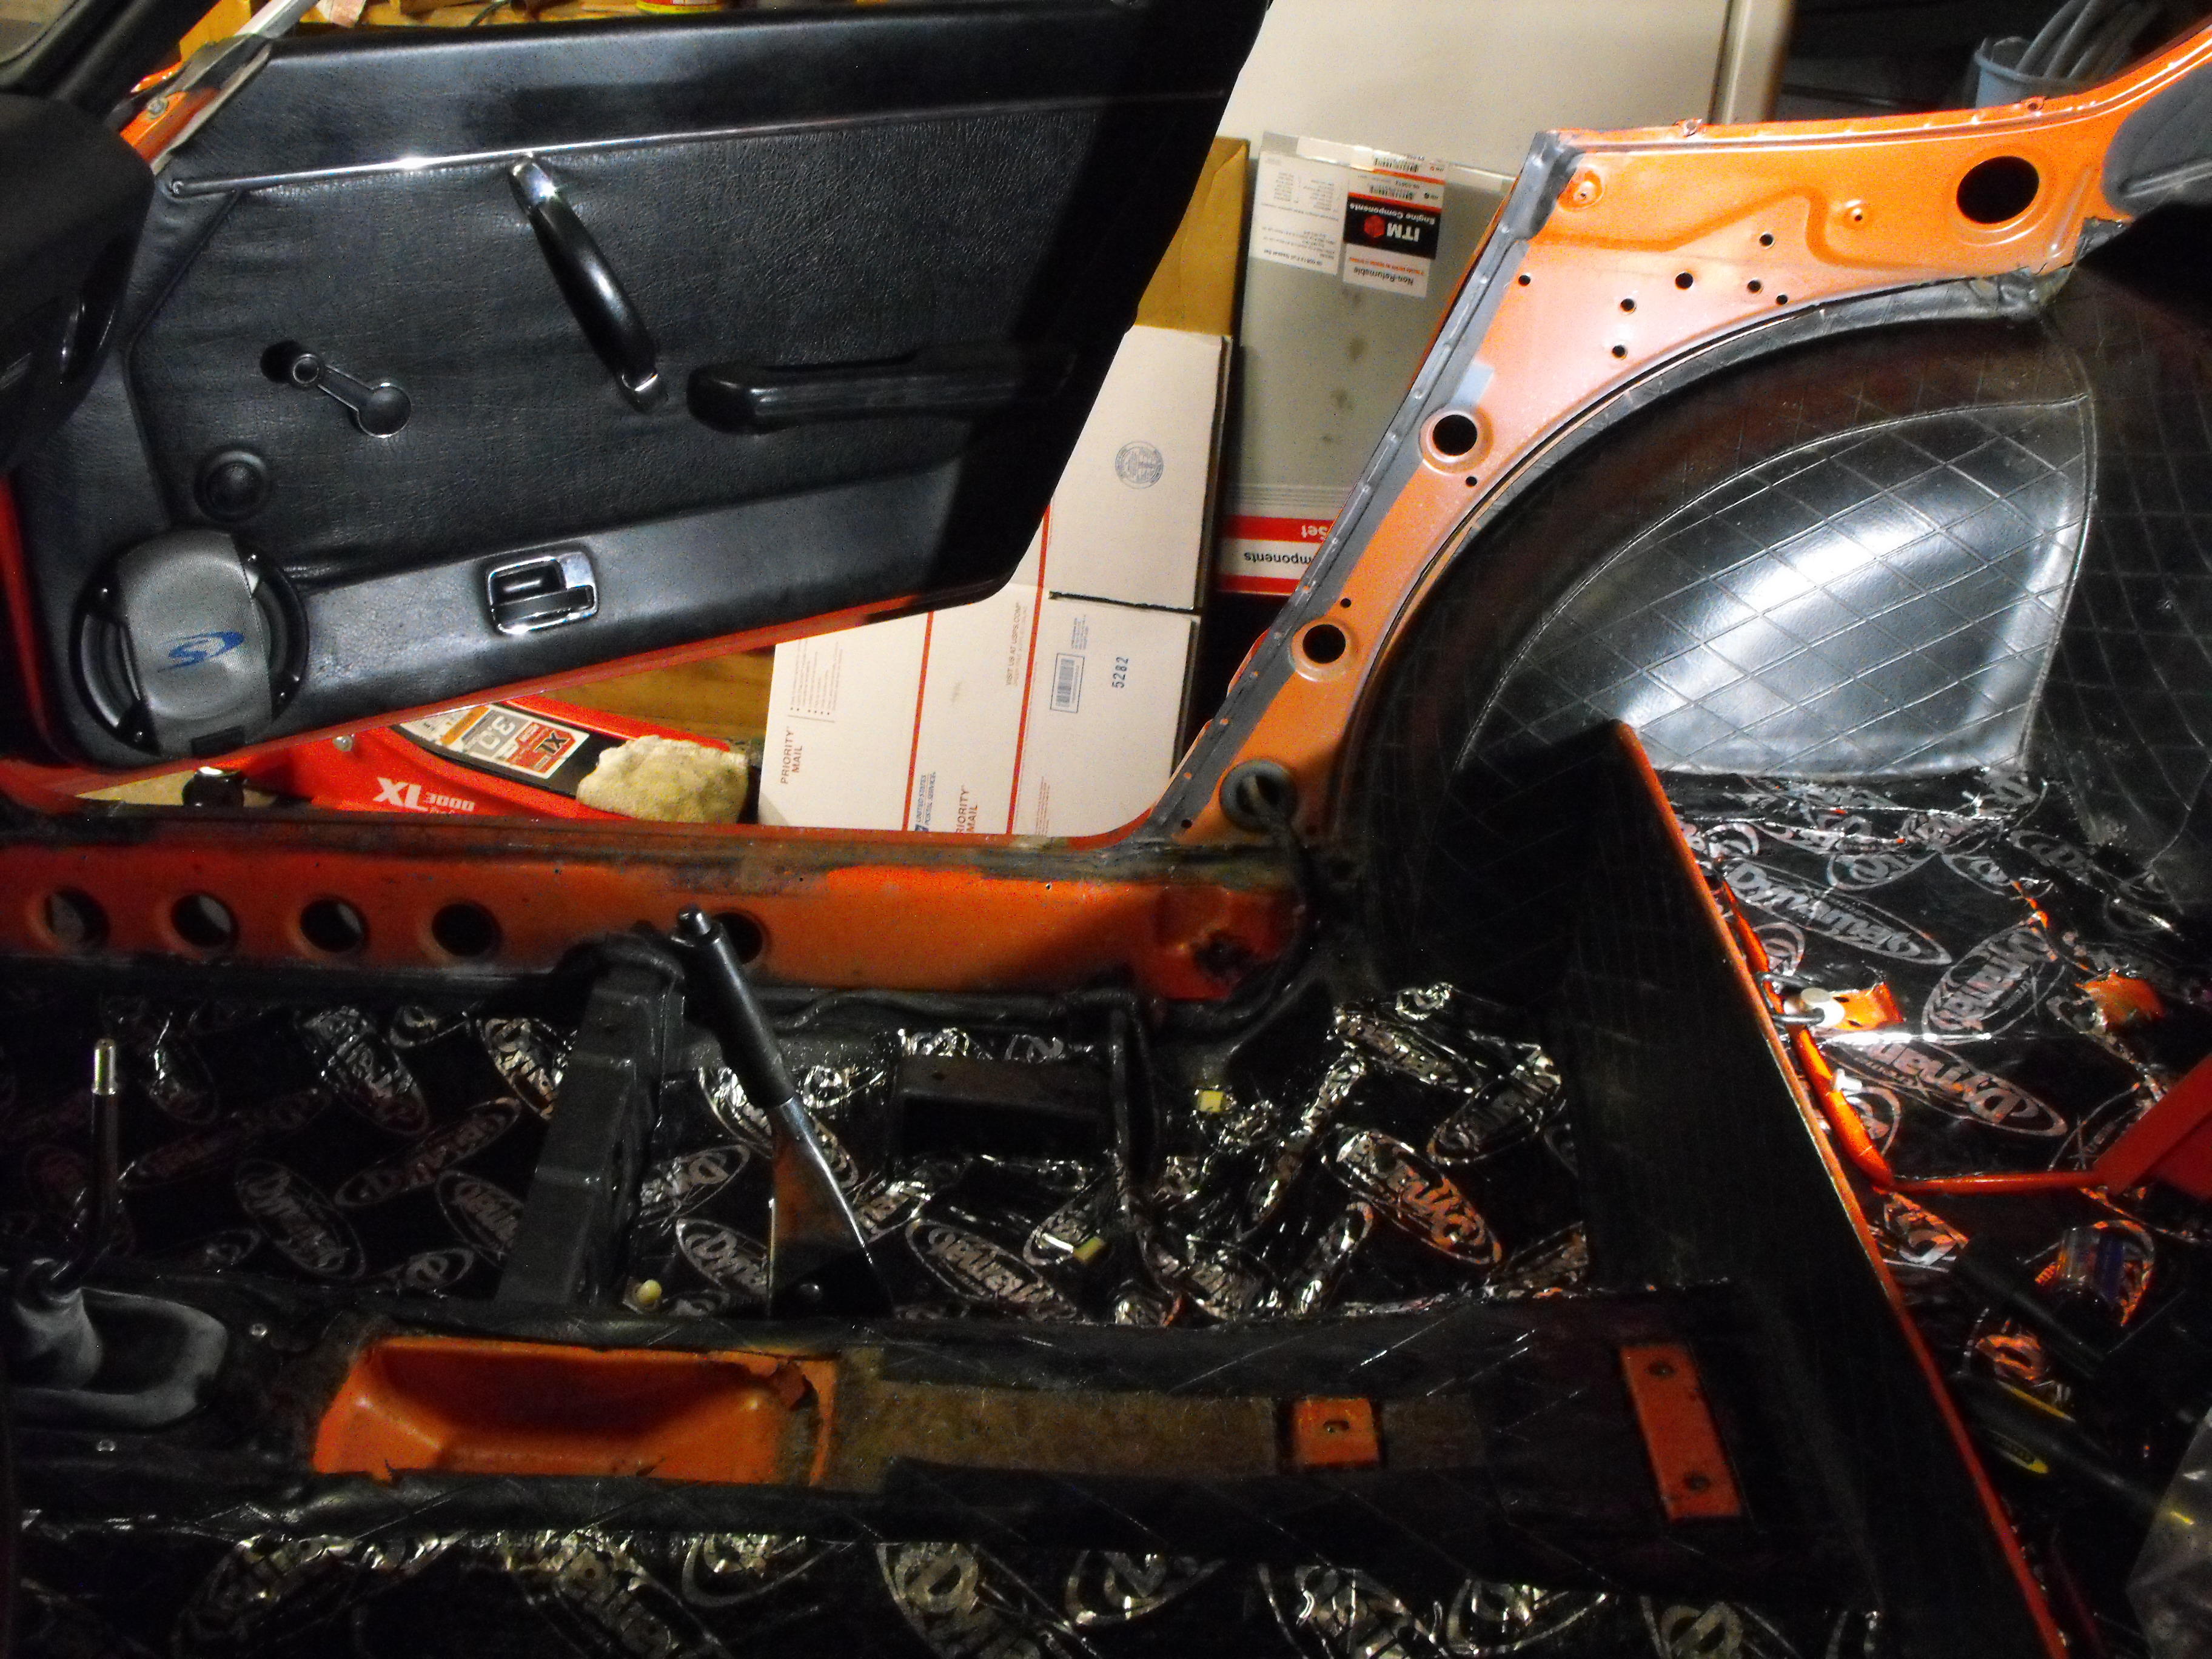
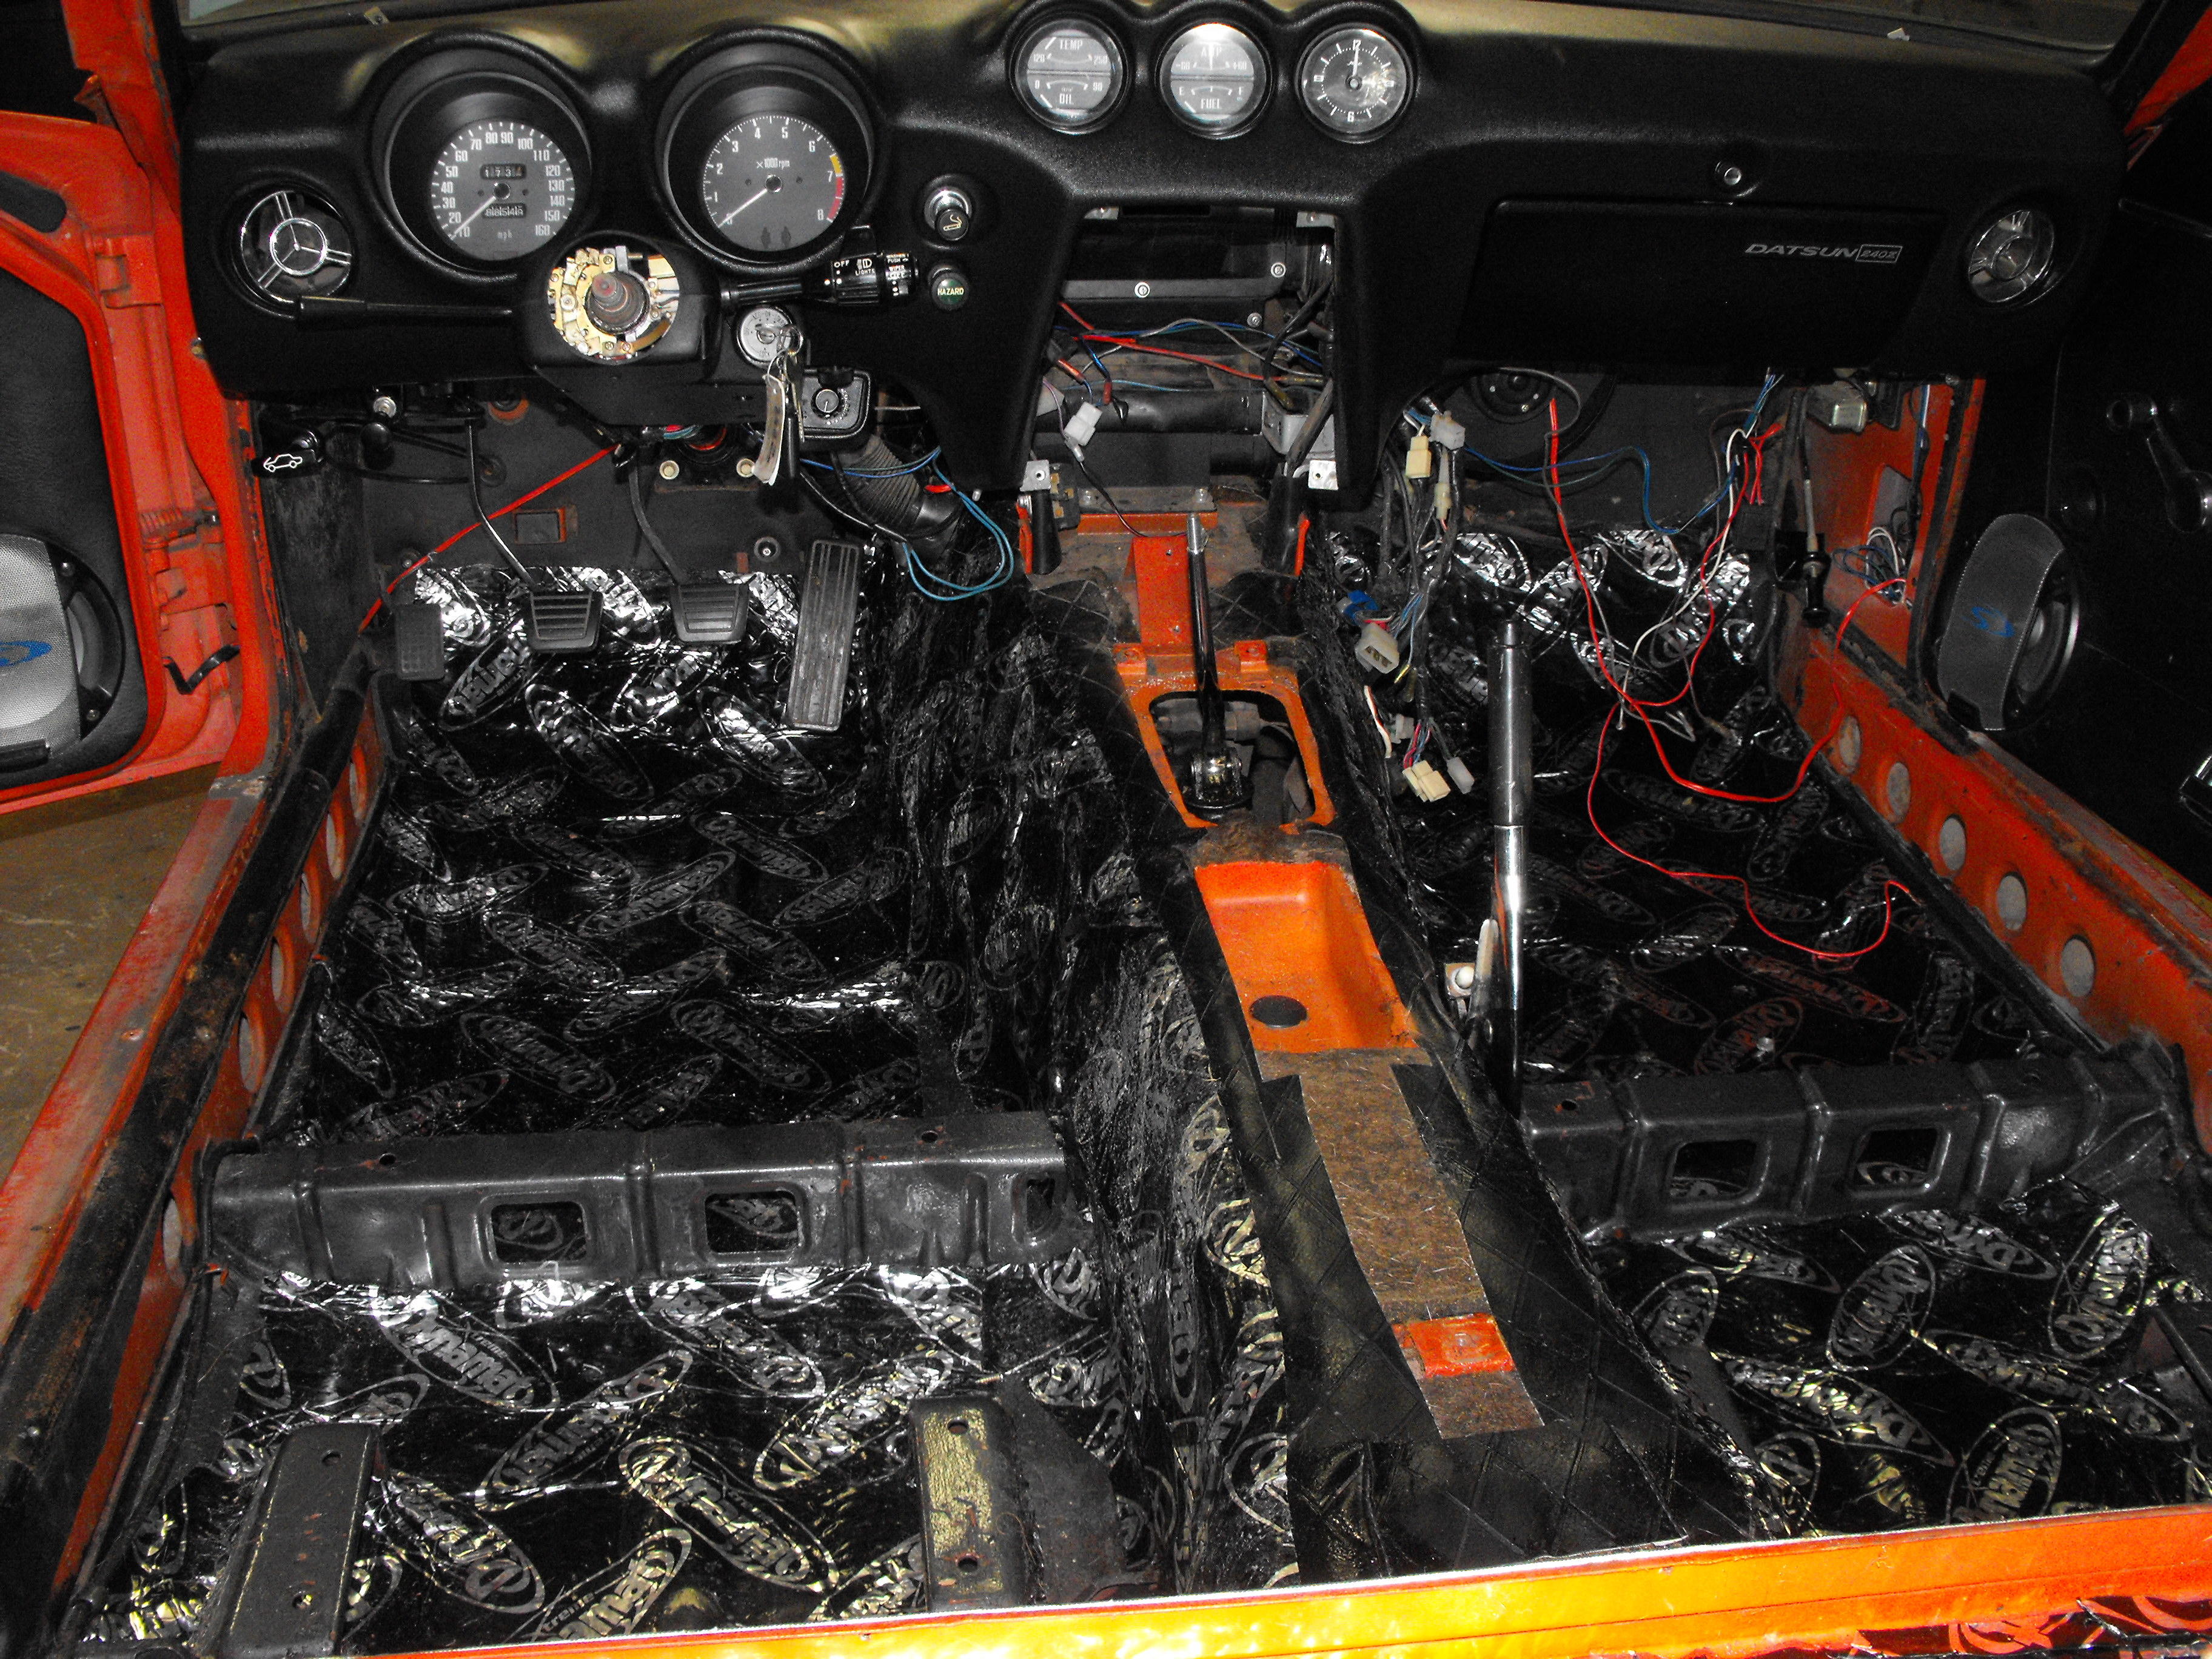
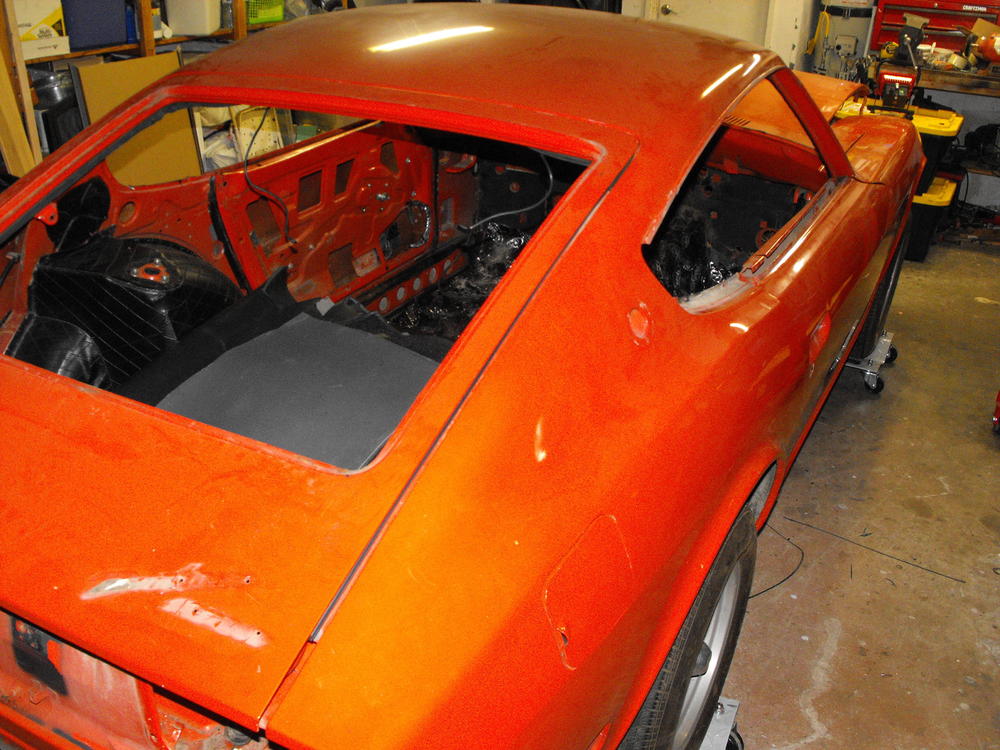
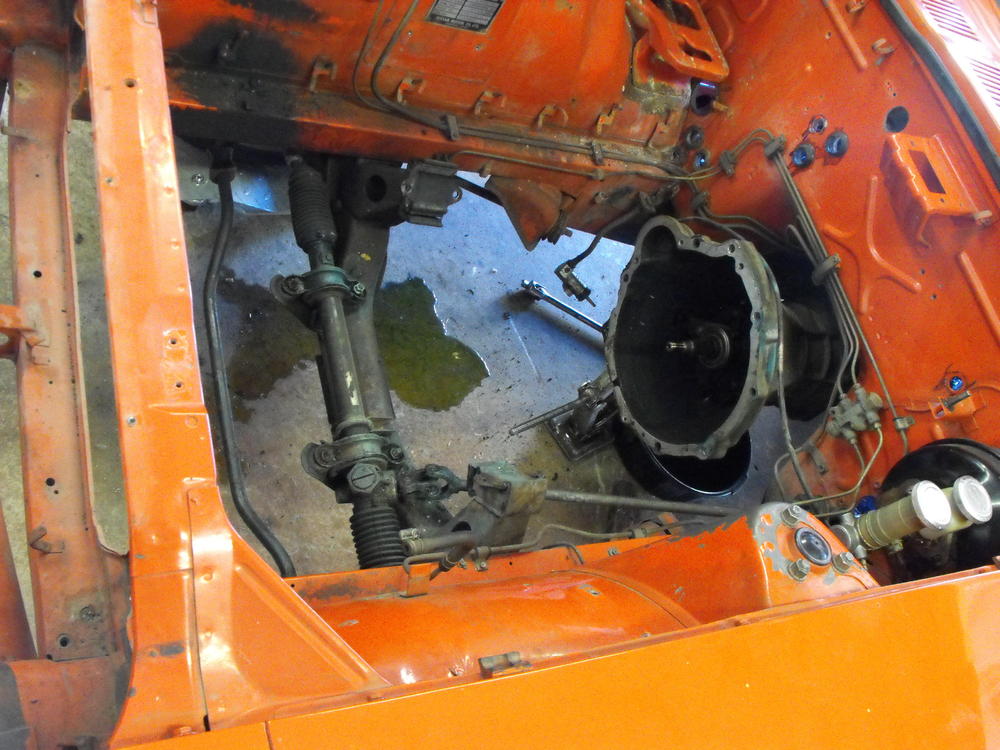
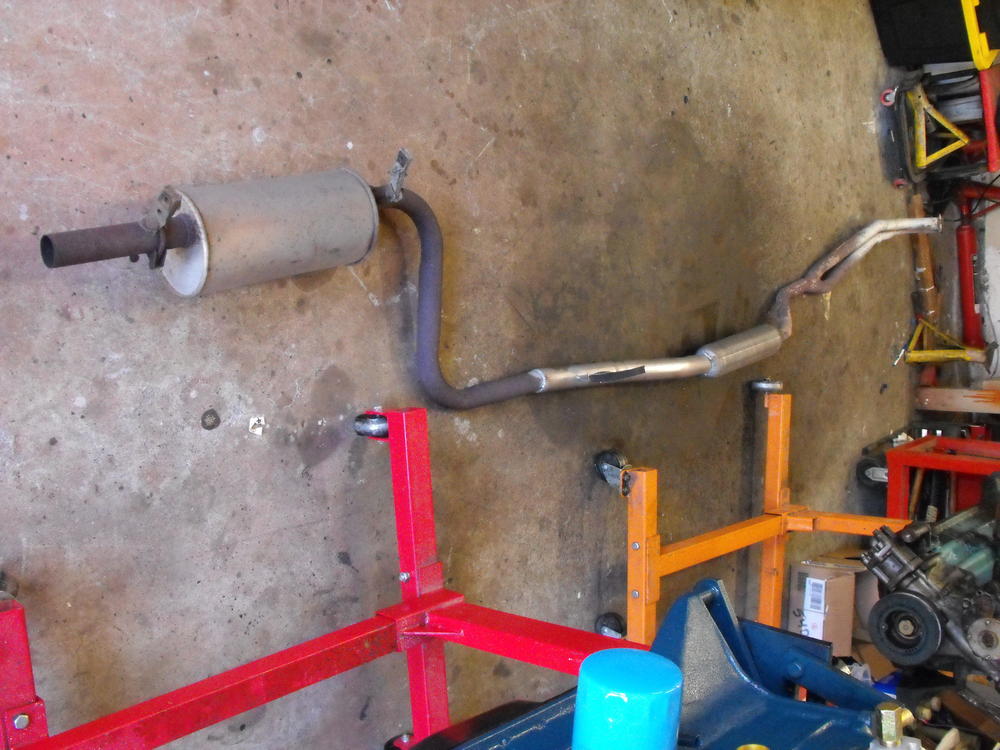
Continued disassembly. Got the Dash out and most of the interior out on Saturday. Got the motor, muffler and transmission out today and started the brake line removal. Took a lot of electrical pics. I removed the interior vent ducts and noticed that a small passenger had set up his home in the driver side vent. Nice spot, much better than under or in the seats. Looks like he was prepping for the cold Pennsylvania winters.


-
@Zaspen That is really a good question as there is more to plating than just sending the parts. 1) Typically rubber does fine and is not effected by the acids. 2) Plastic is a little more hit and miss. Some types seem to not be affected by the acids, others are affected. I notice that the plastic on the end of the carb linkages do not handle the chemicals so well. They come back very clean but seem to loose some of their shape. 3) The bigger problem is 'Cavities'. This is a big problem. The Vac advance would fall into this category. What happens is the liquid that is used in the processing gets into the cavities of these parts and does not get fully rinsed or evaporated from the cavities. Then, during shipping, as the box is manhandled and vibrated, the processing liquid comes out of the cavities and stains the other parts in the box. The cavity parts also corrode very quickly because this liquid is still inside. So now, I send the cavity parts for plating separately from the regular parts. Cavity parts get their own separate shipping bag with instructions to dry longer and ship separately (in bags) from the standard nuts and fasteners. 4) Also, on the last vacuum advance I sent in (without special instructions) it came back with the internals very corroded. So, I ended up using a vacuum advance with light gold paint to somewhat mimic the gold zinc plate.
-
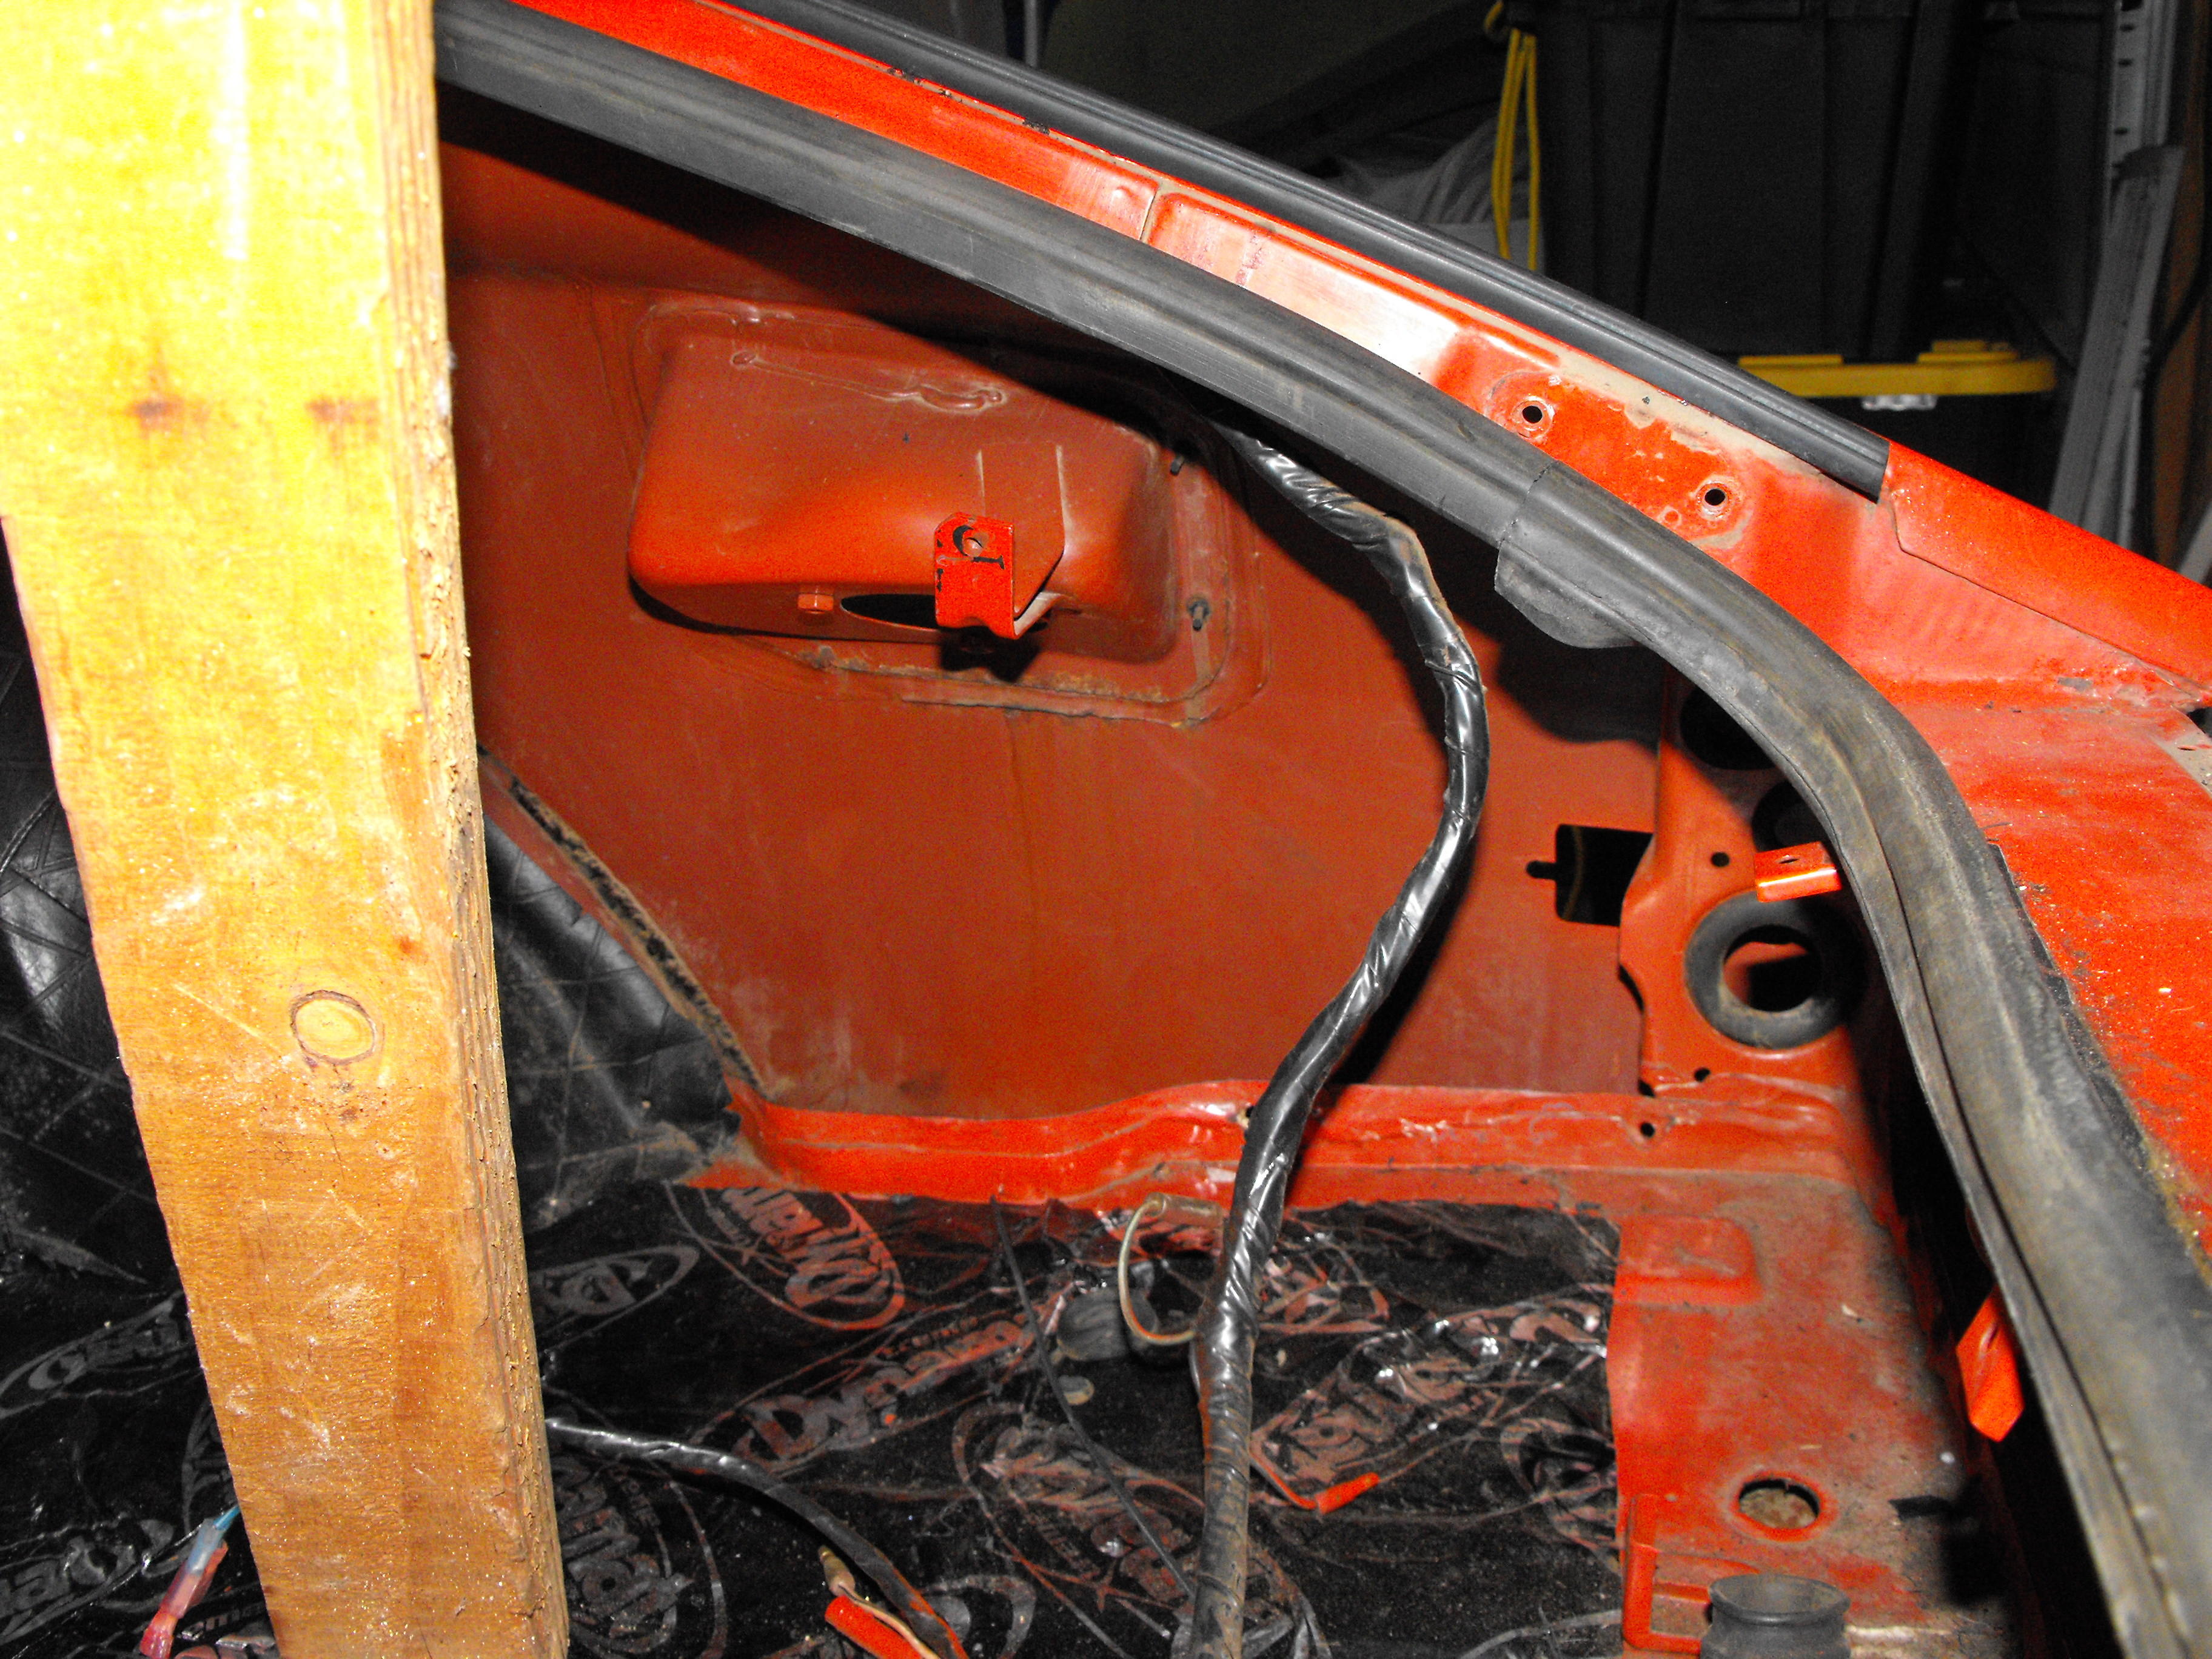
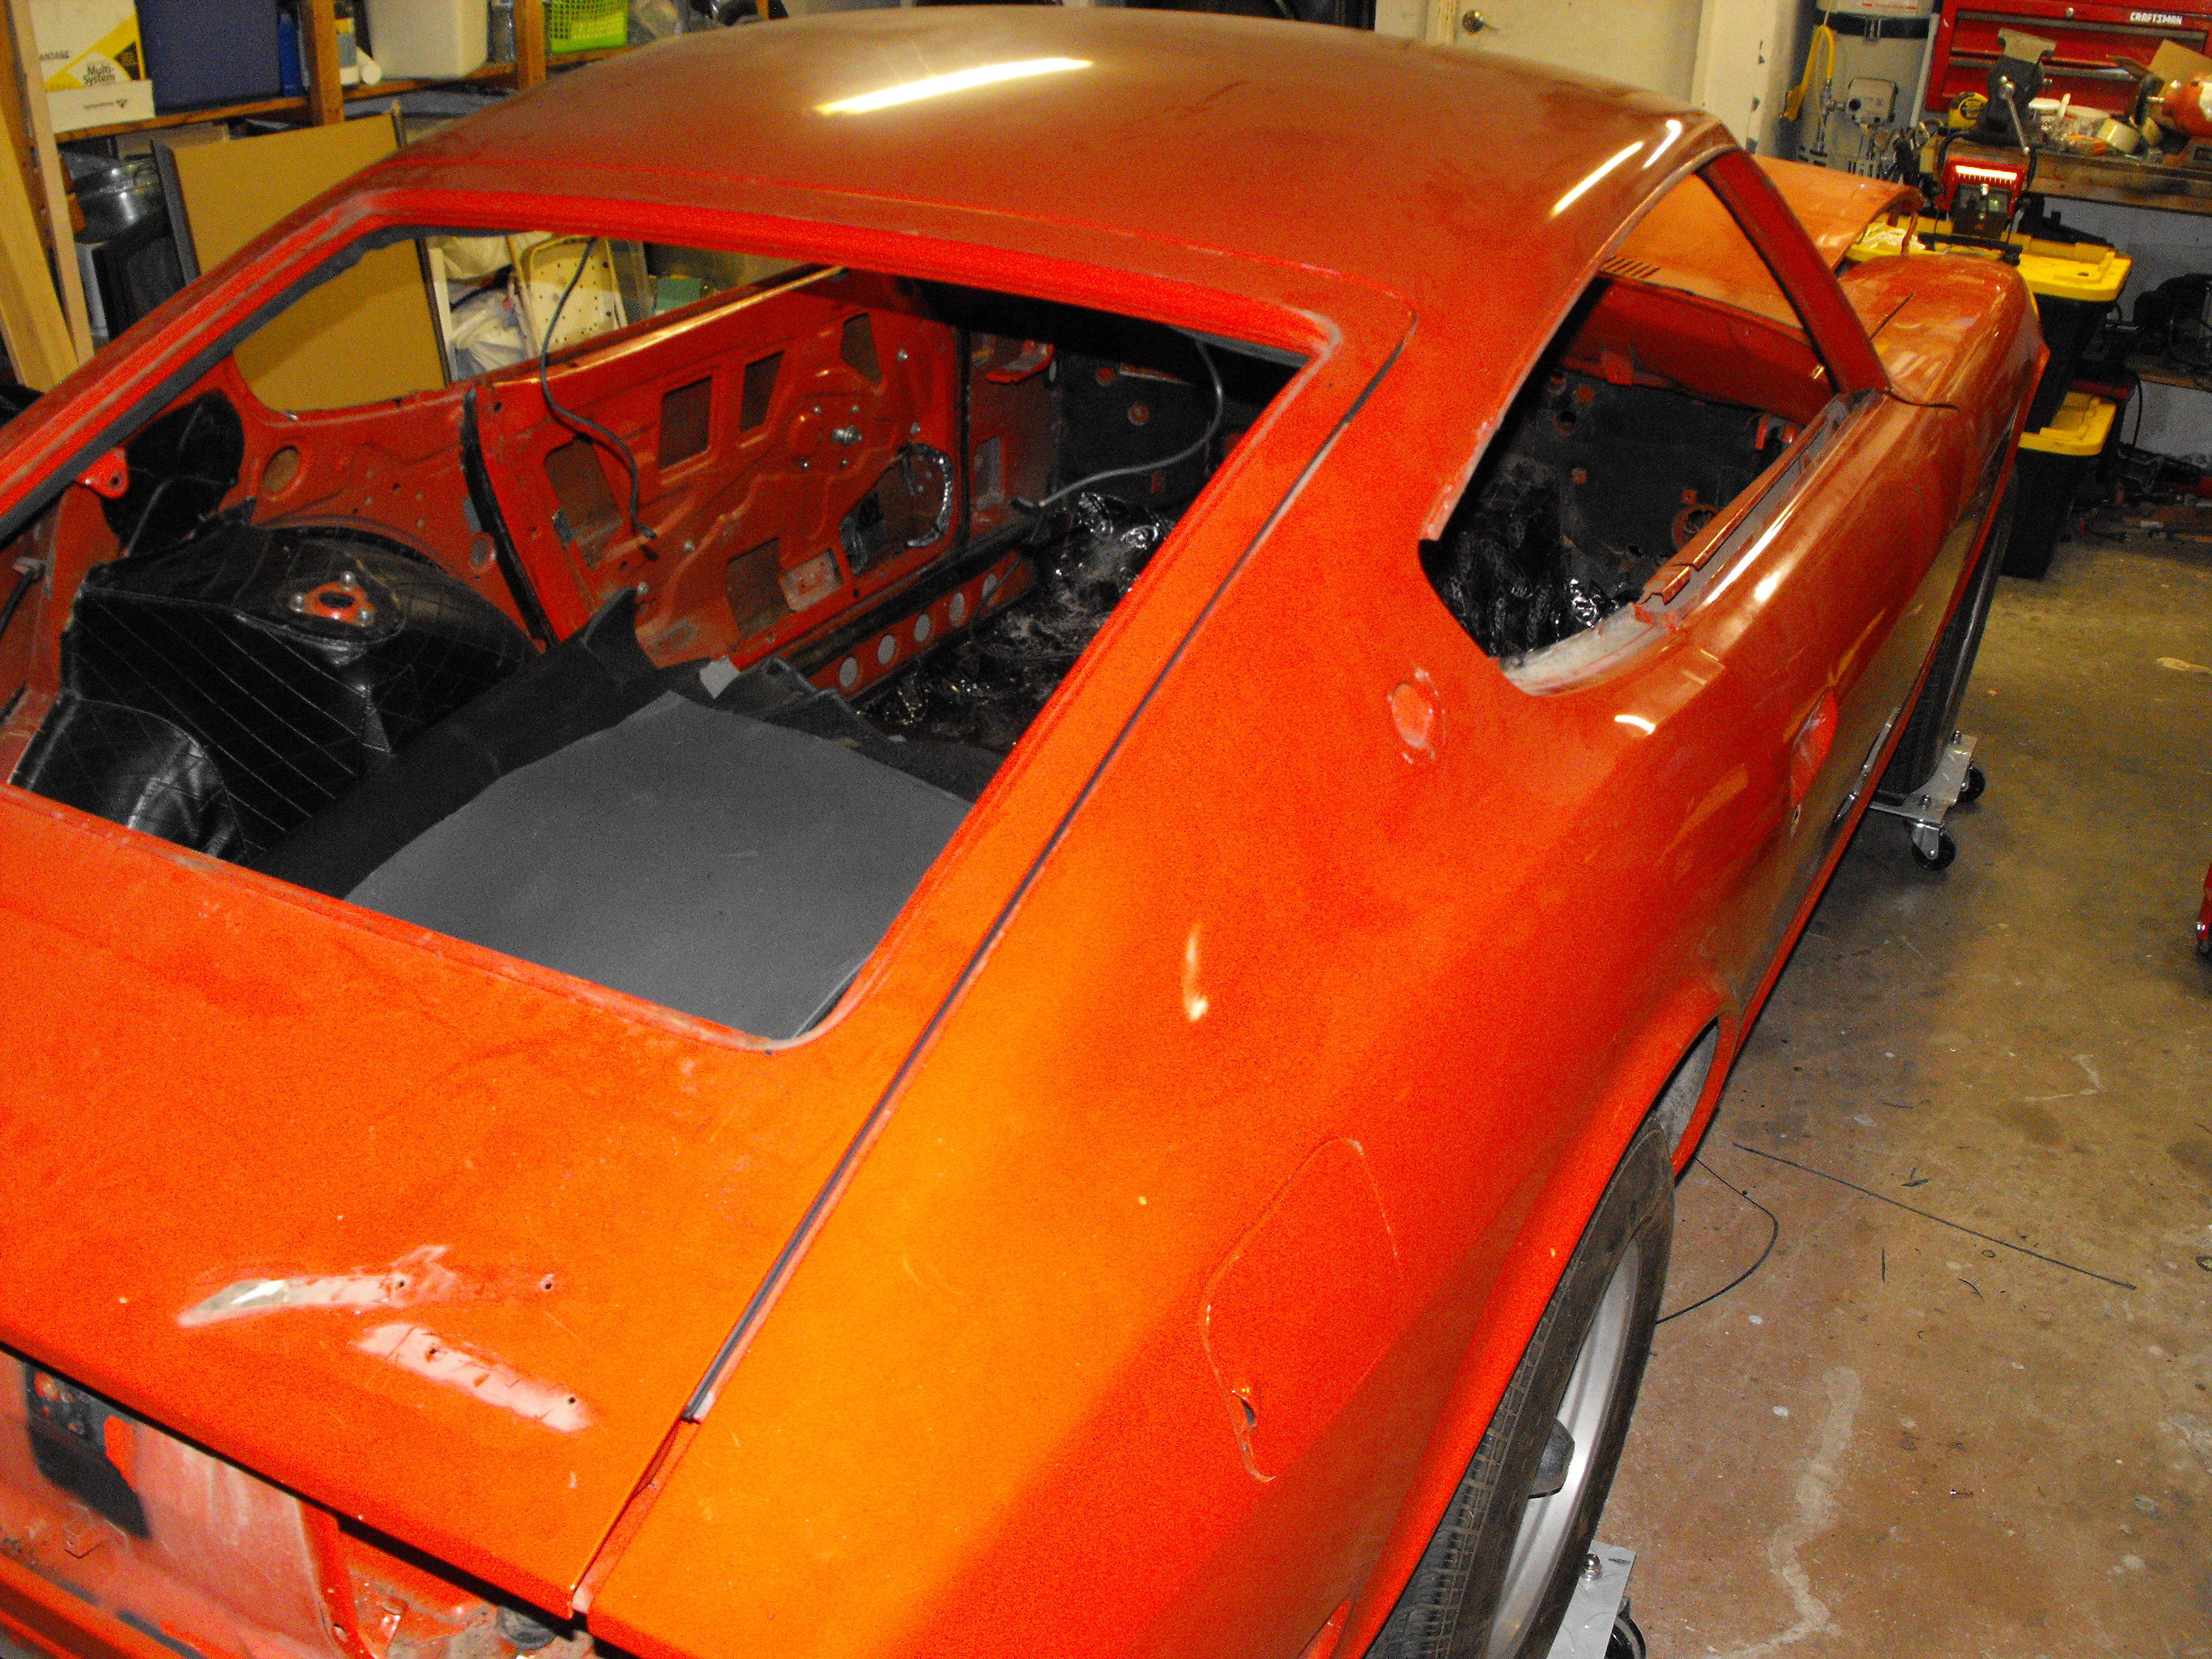
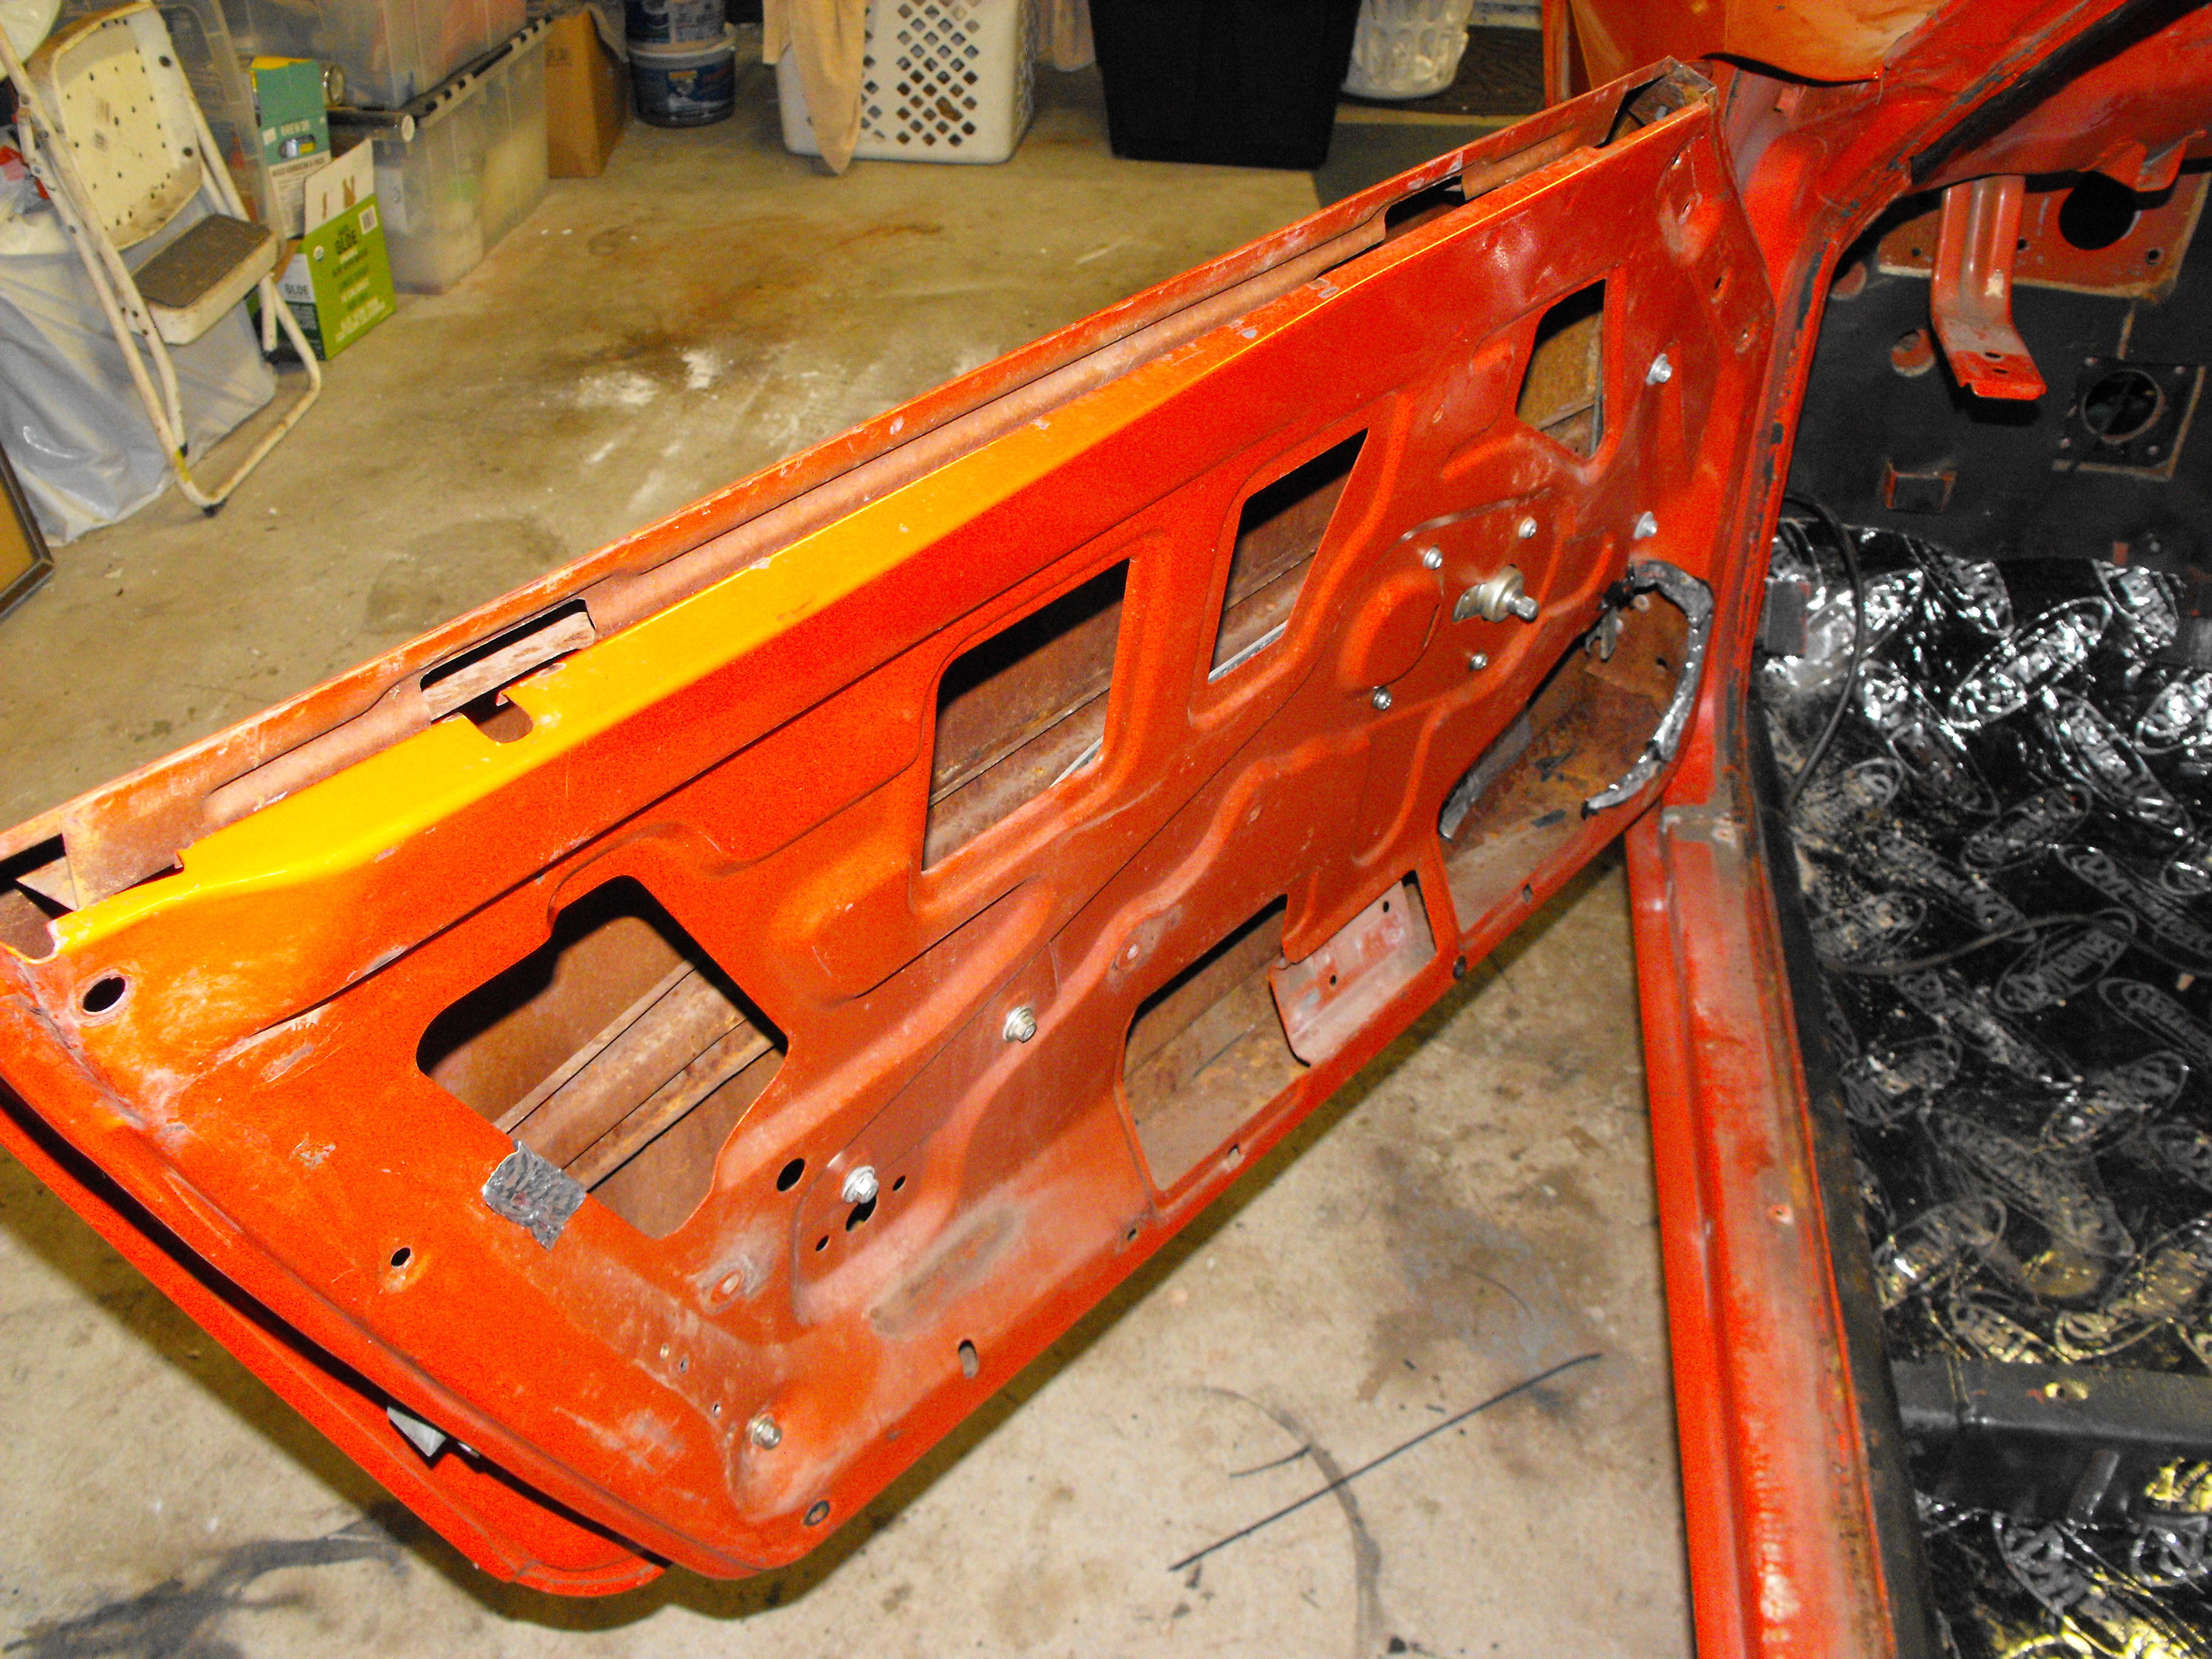
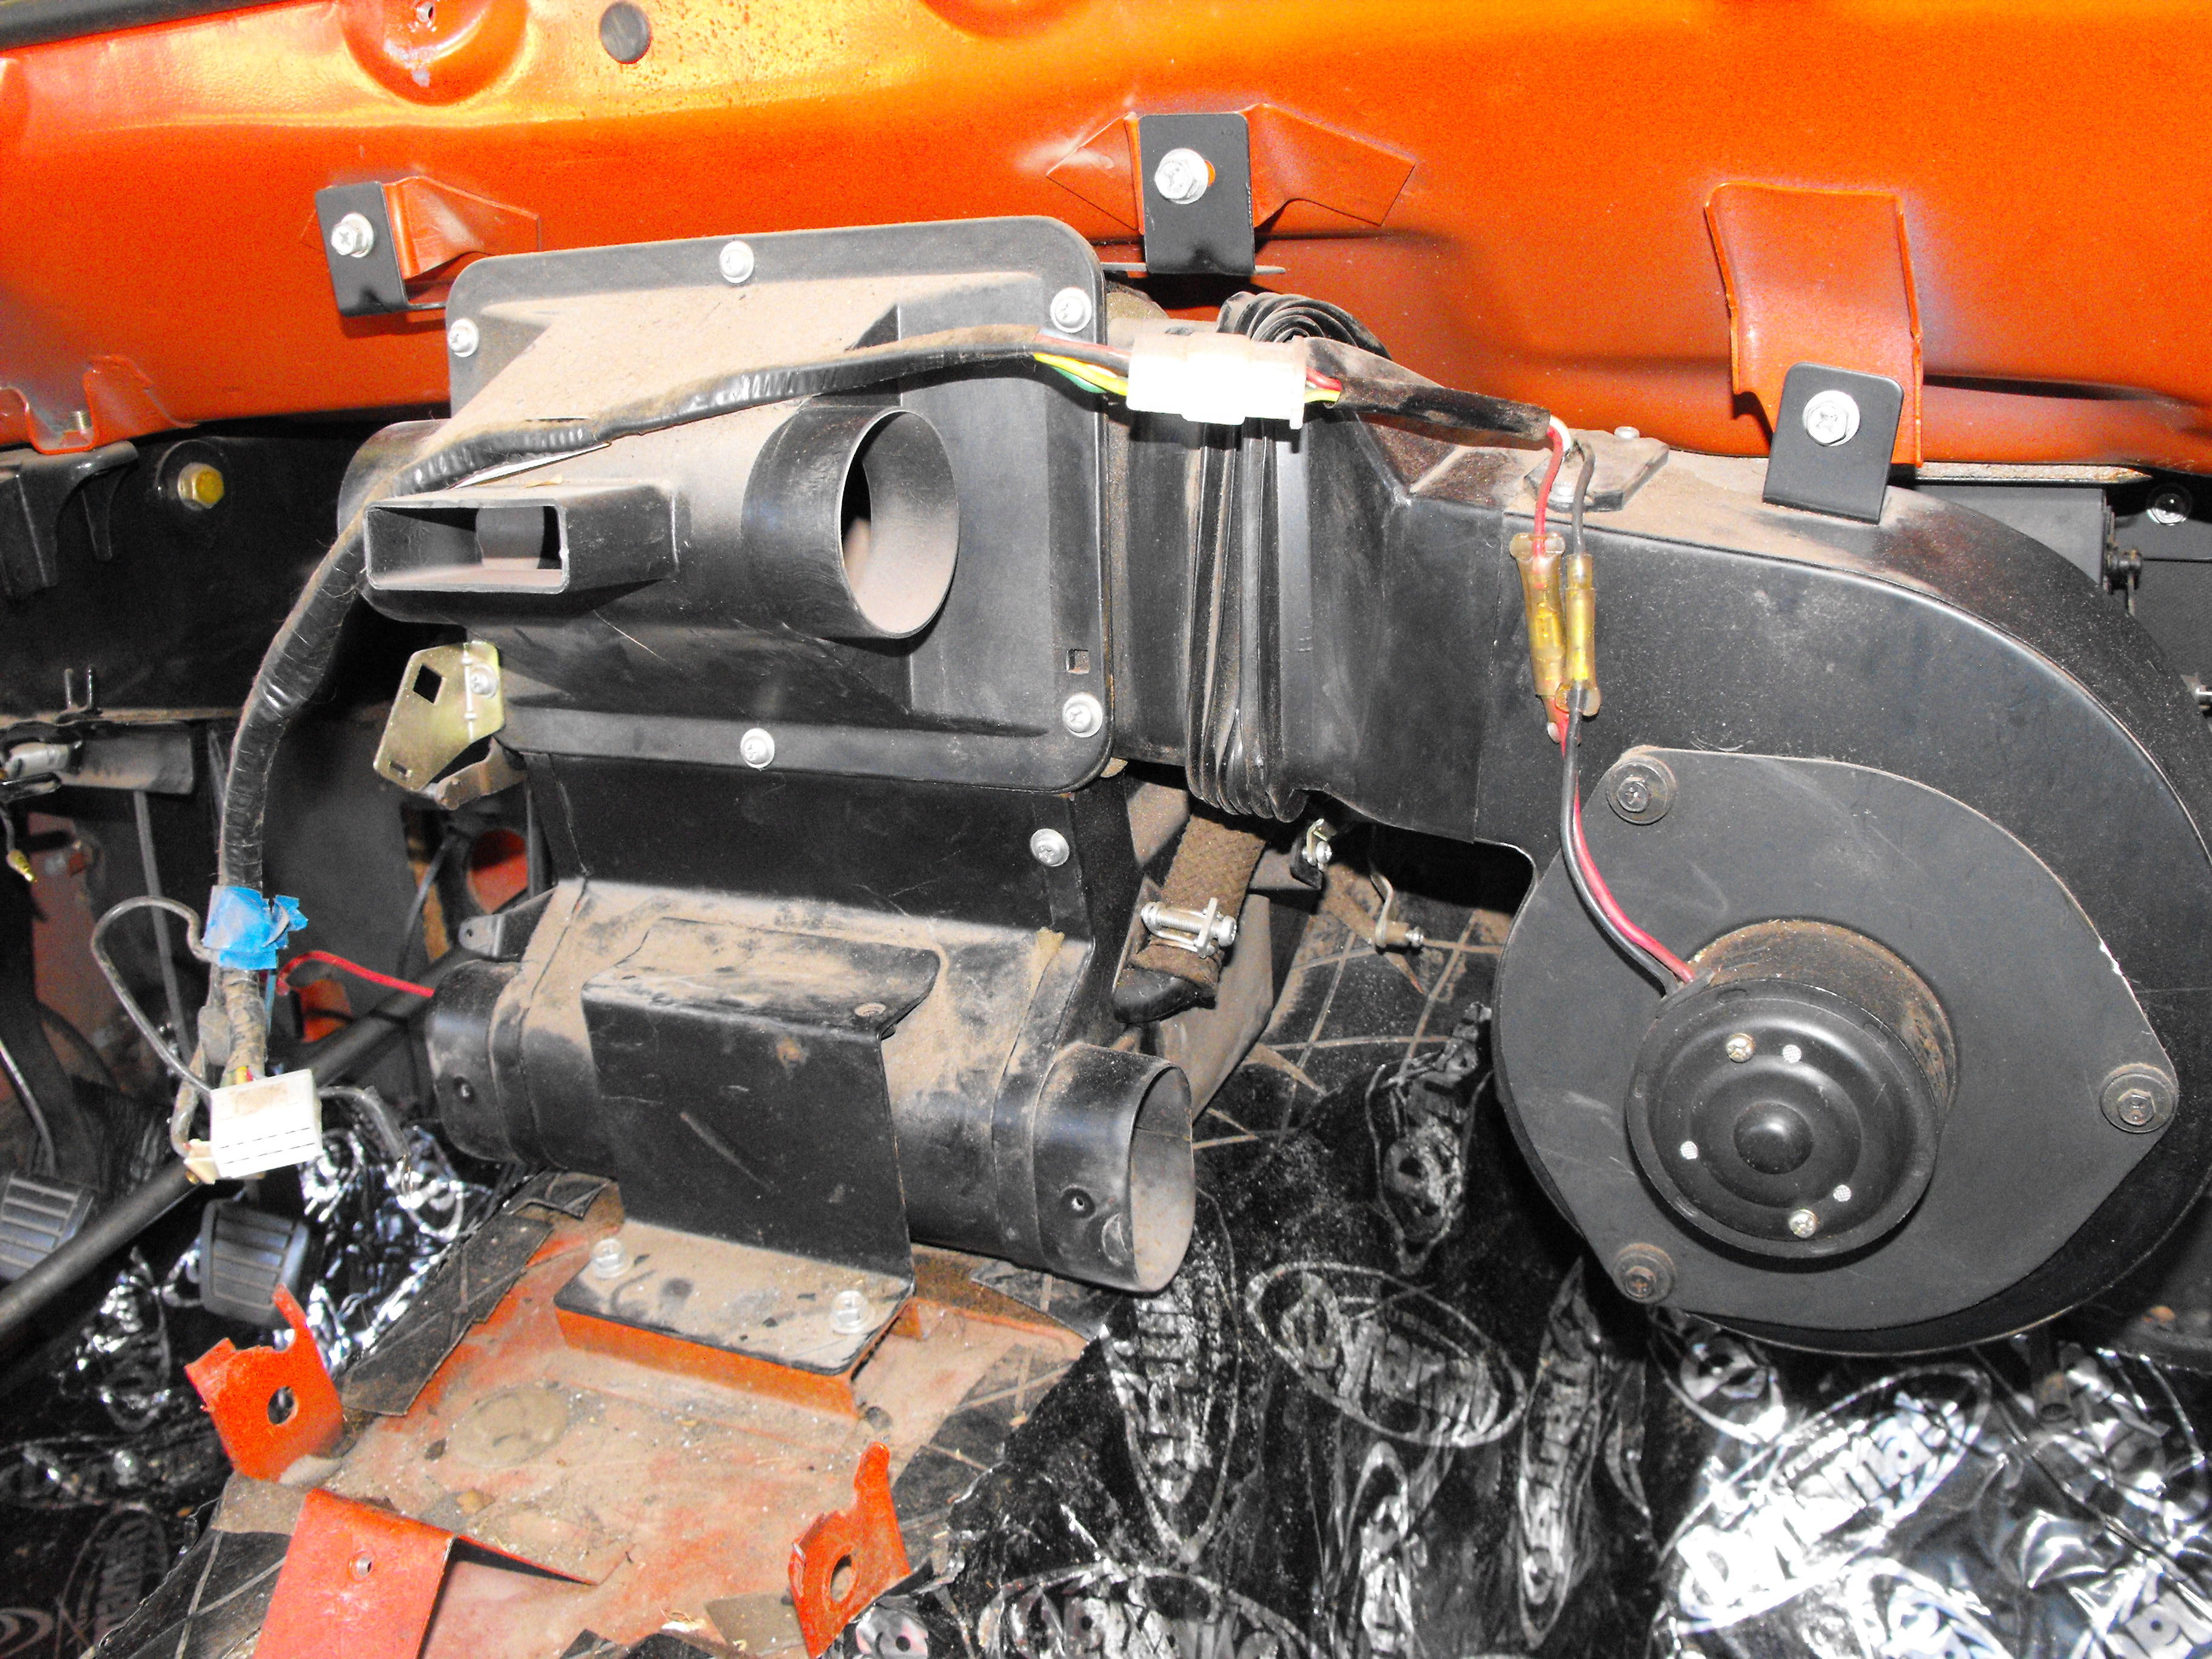
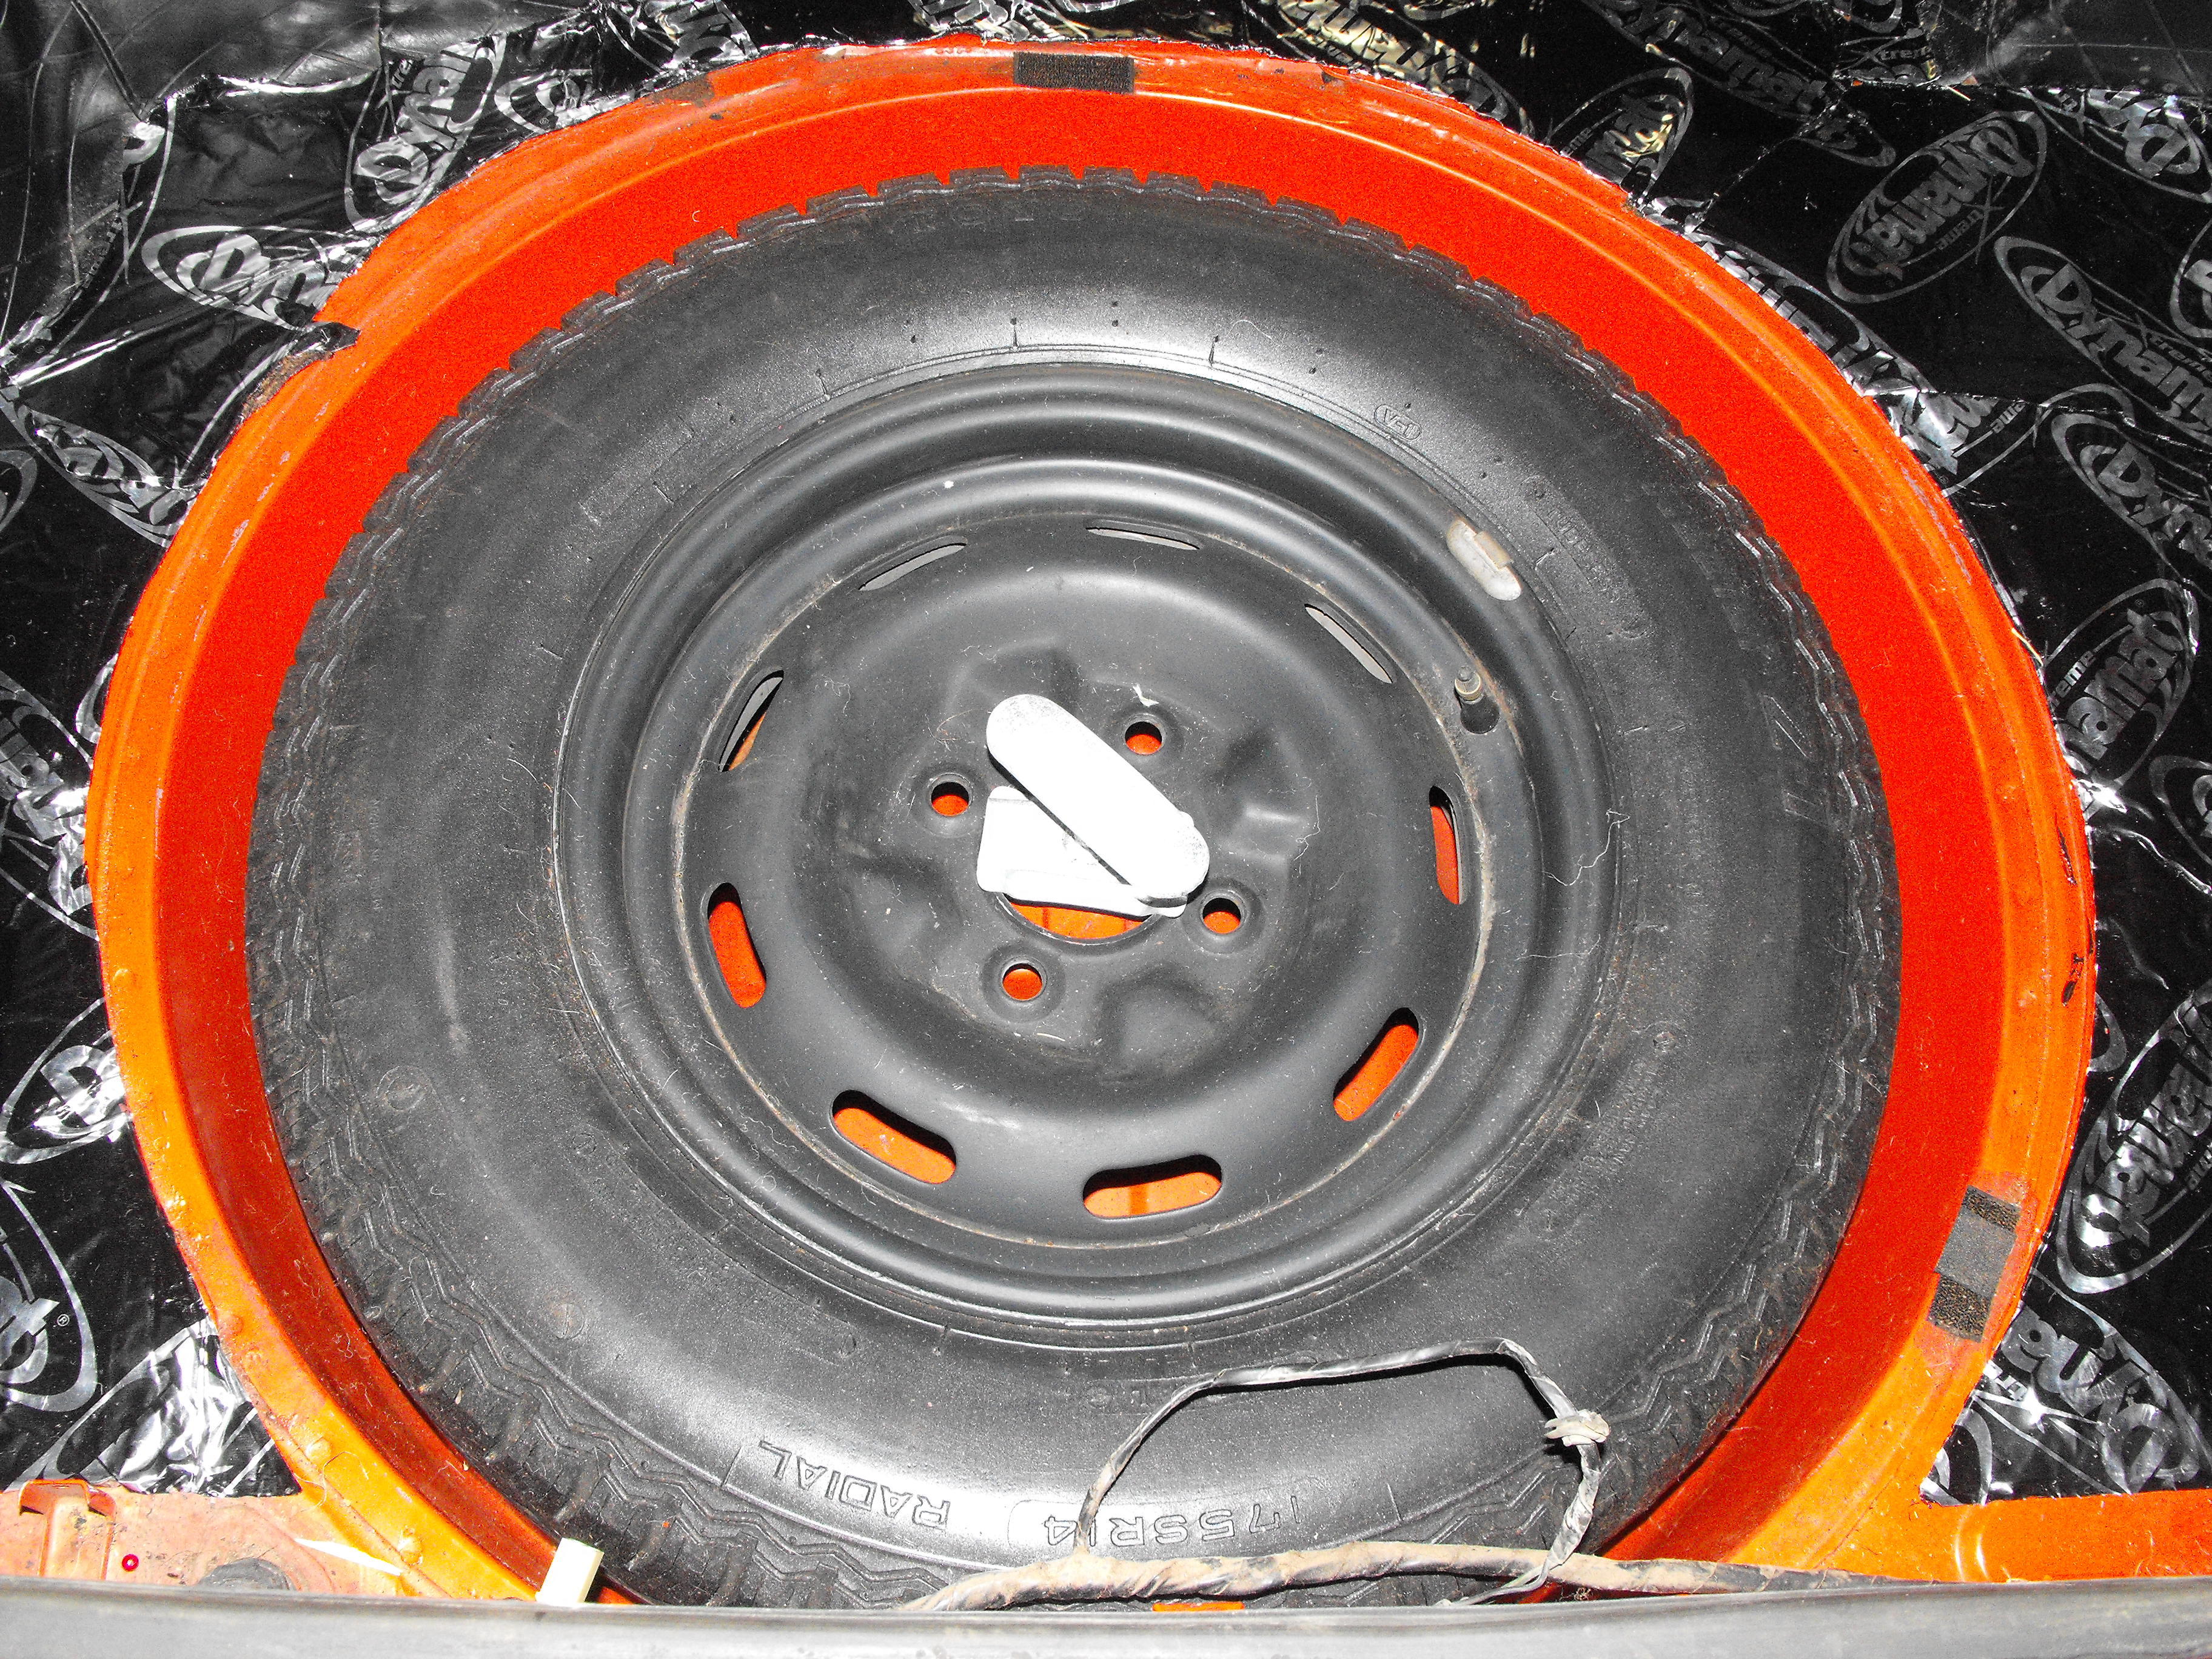
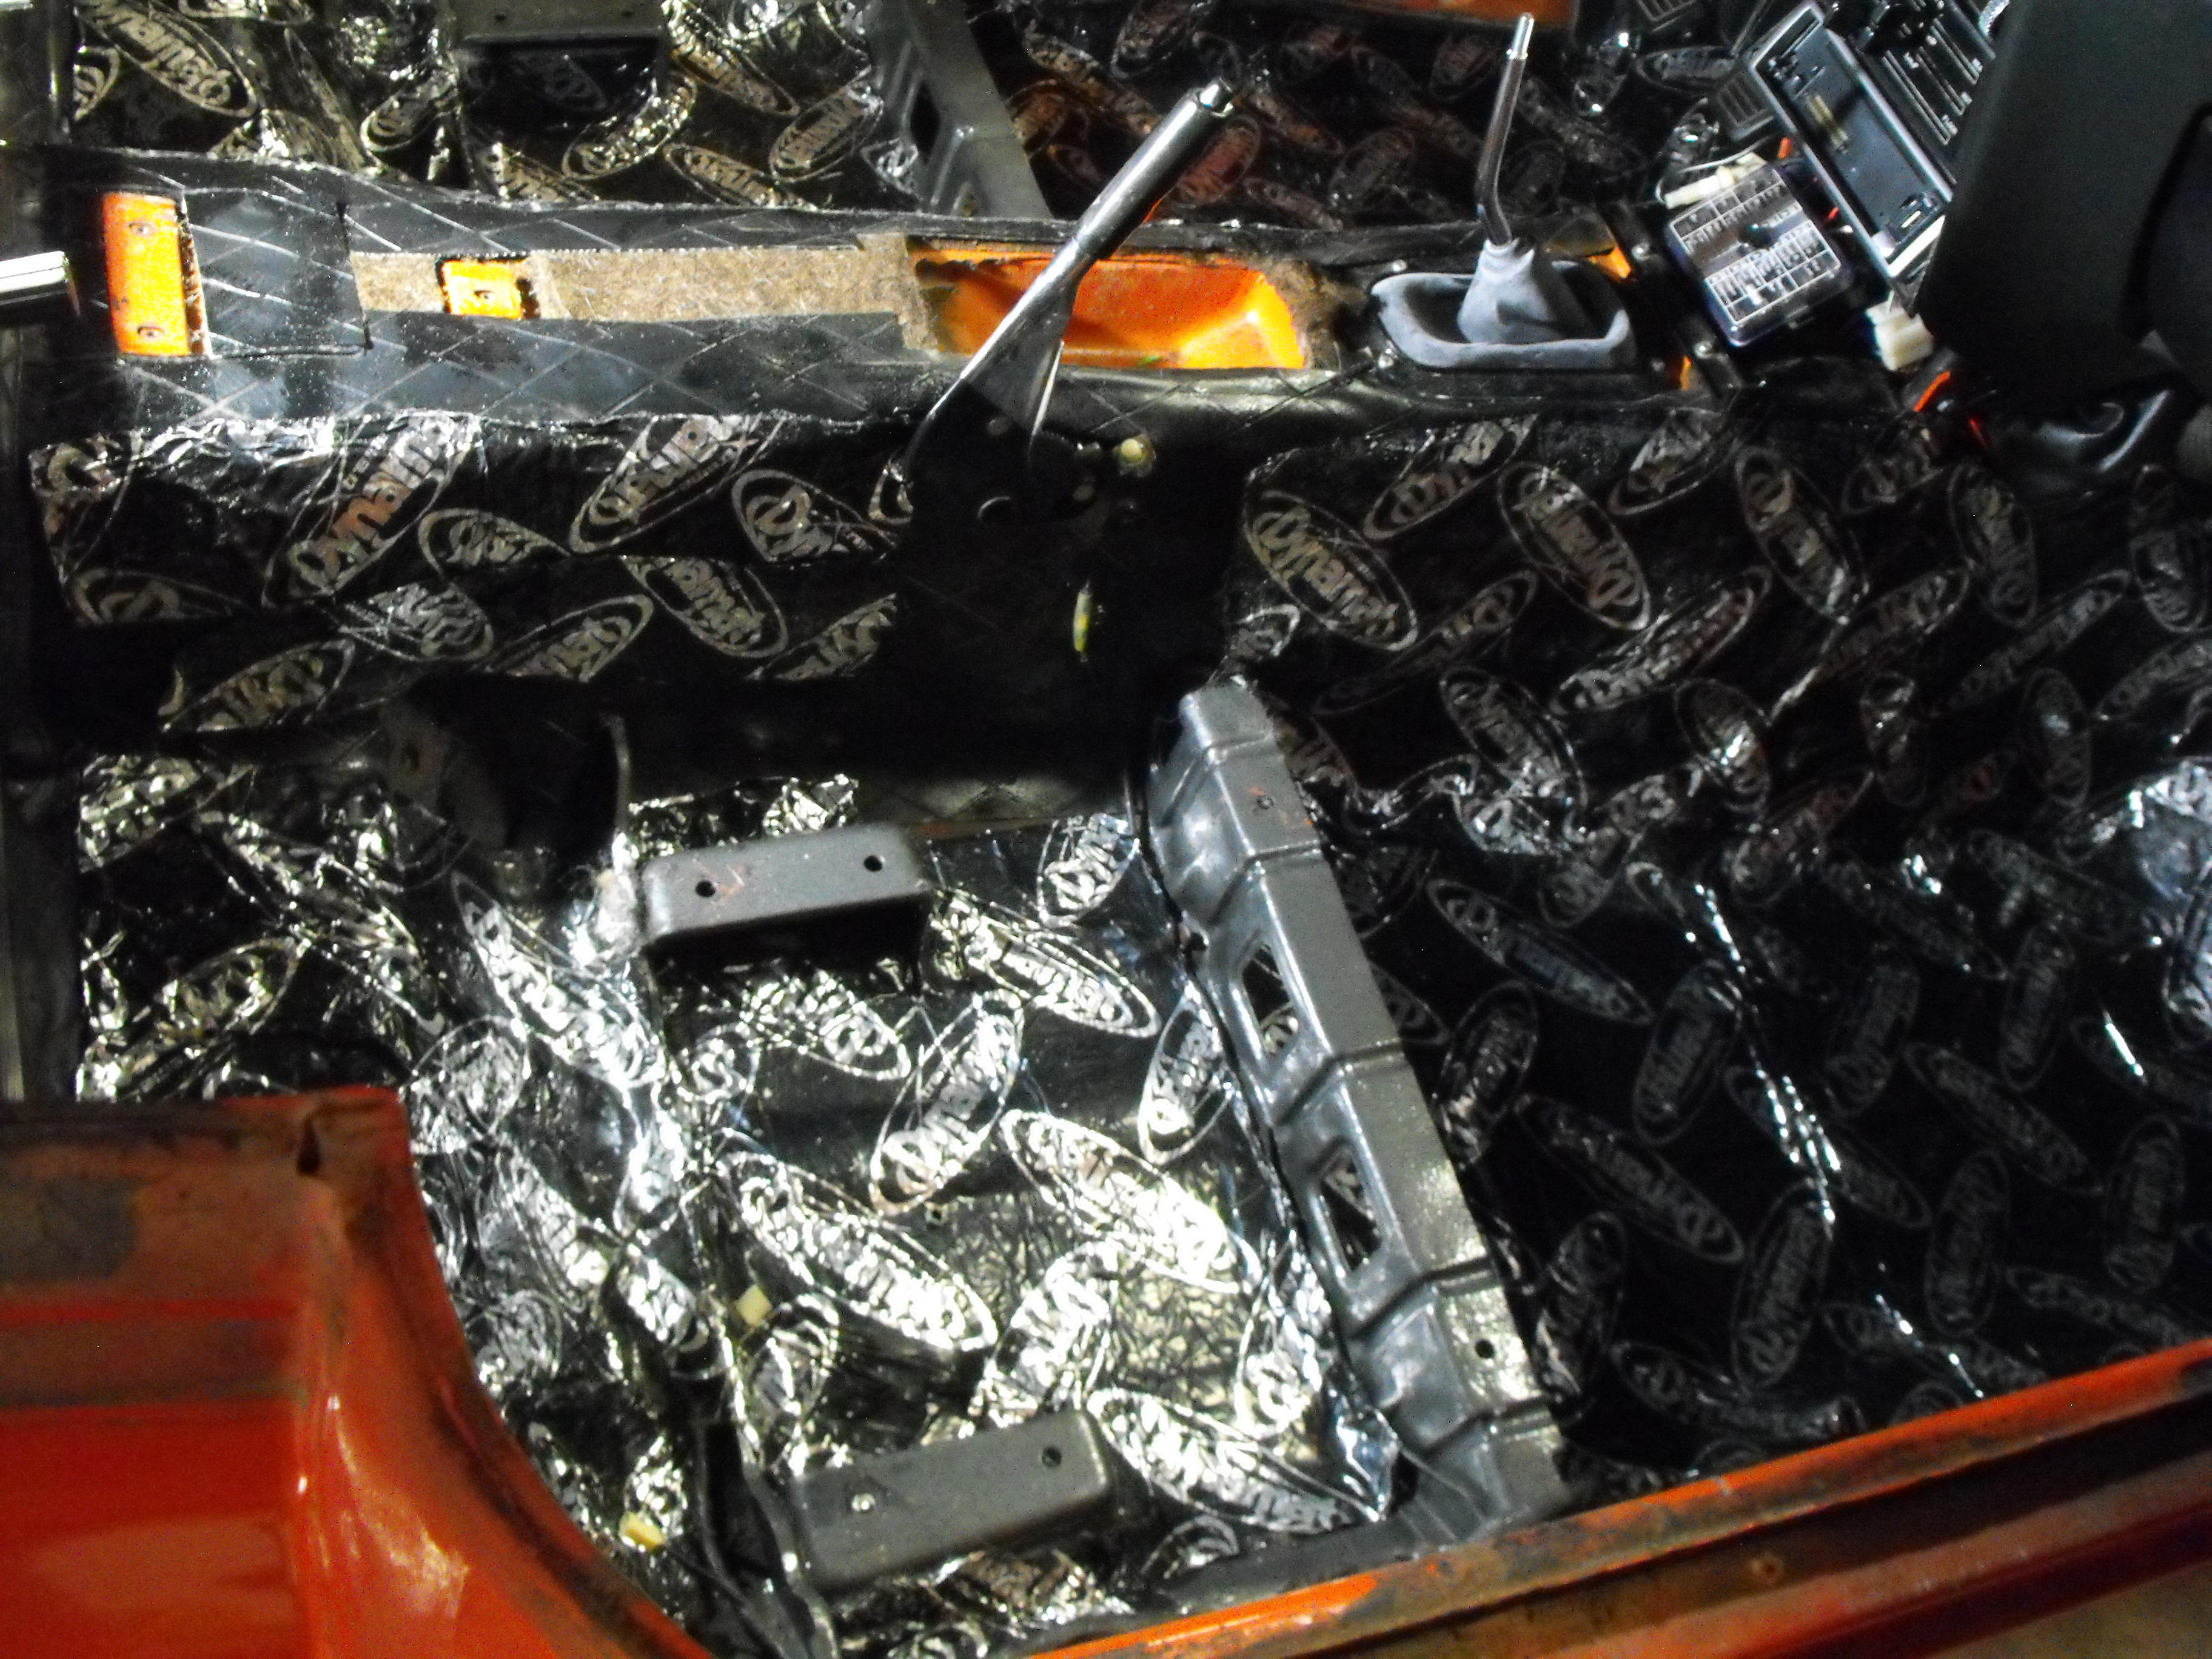
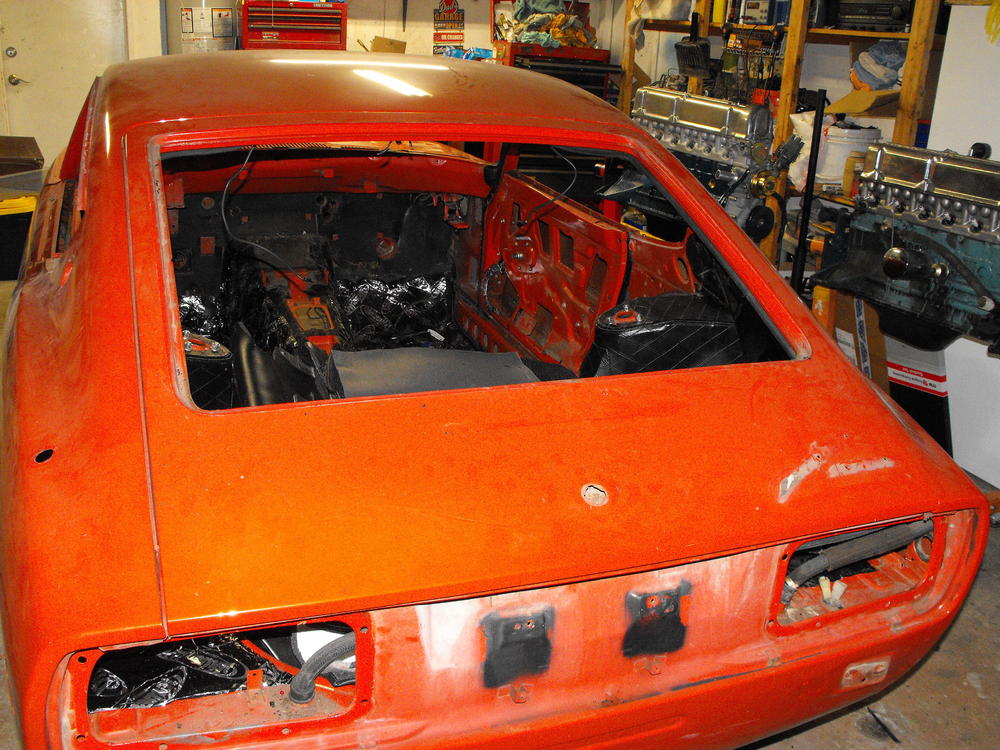
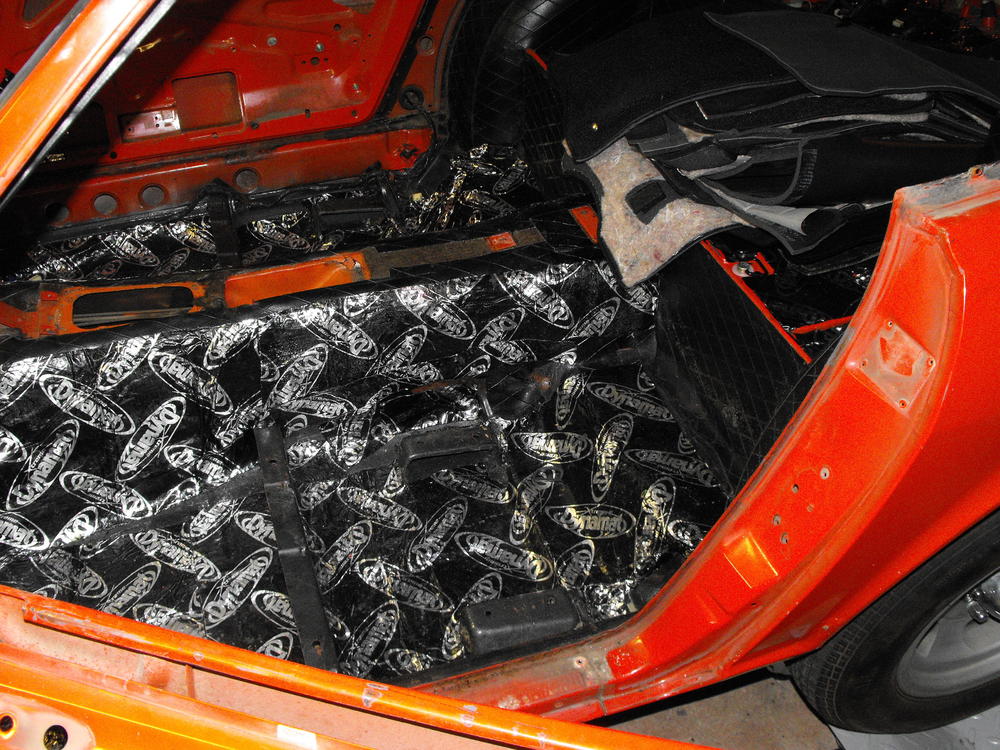
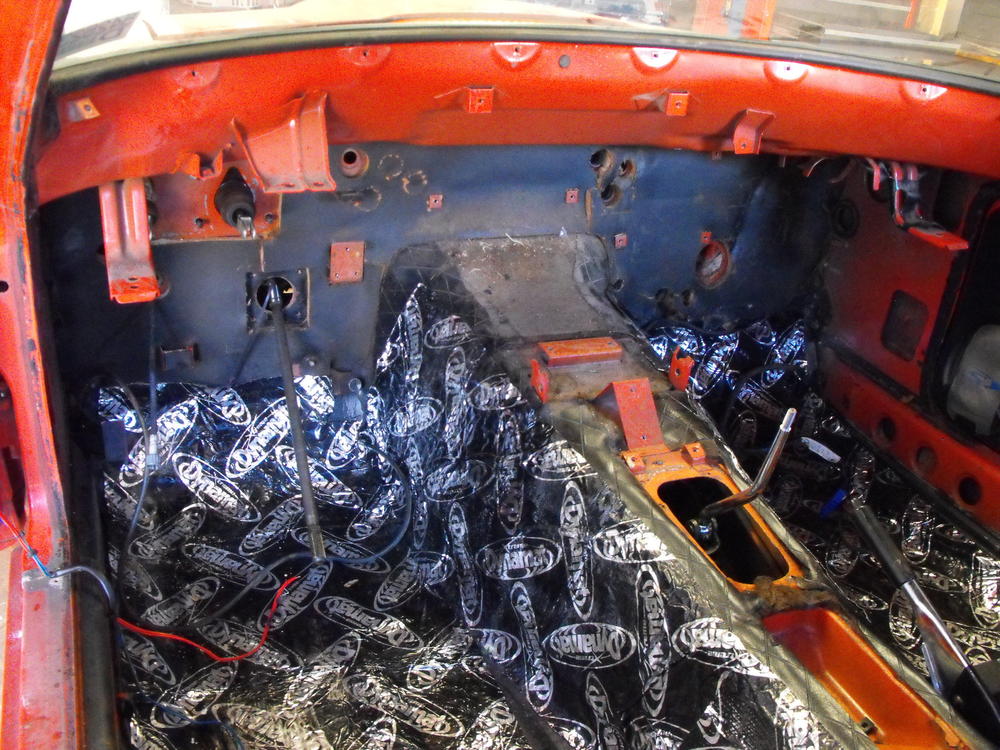
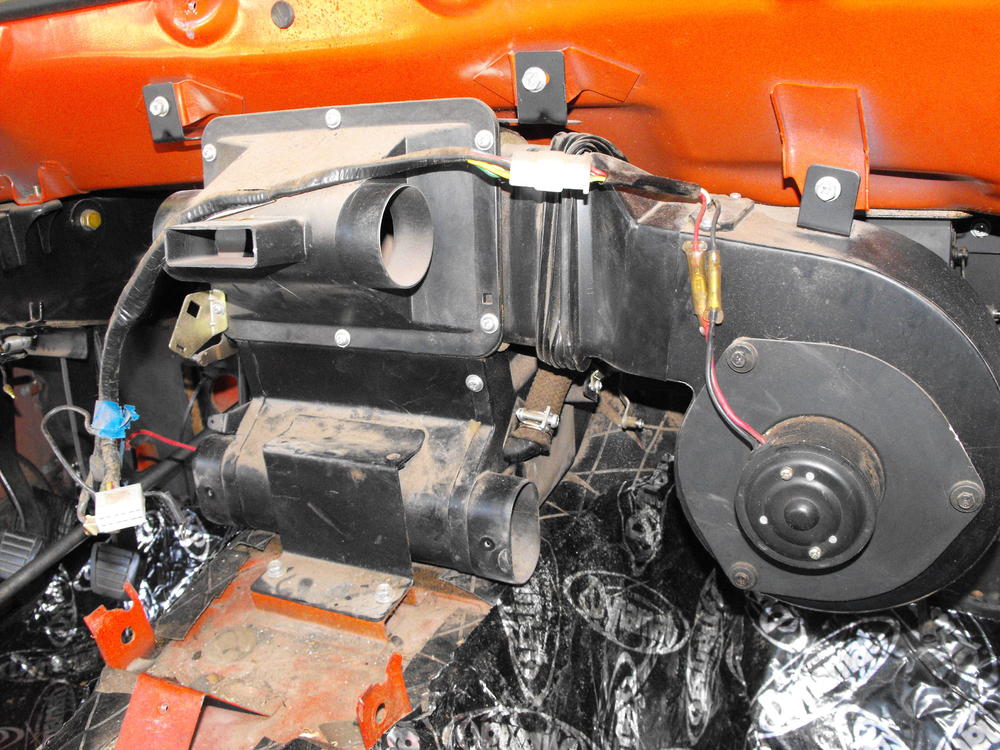
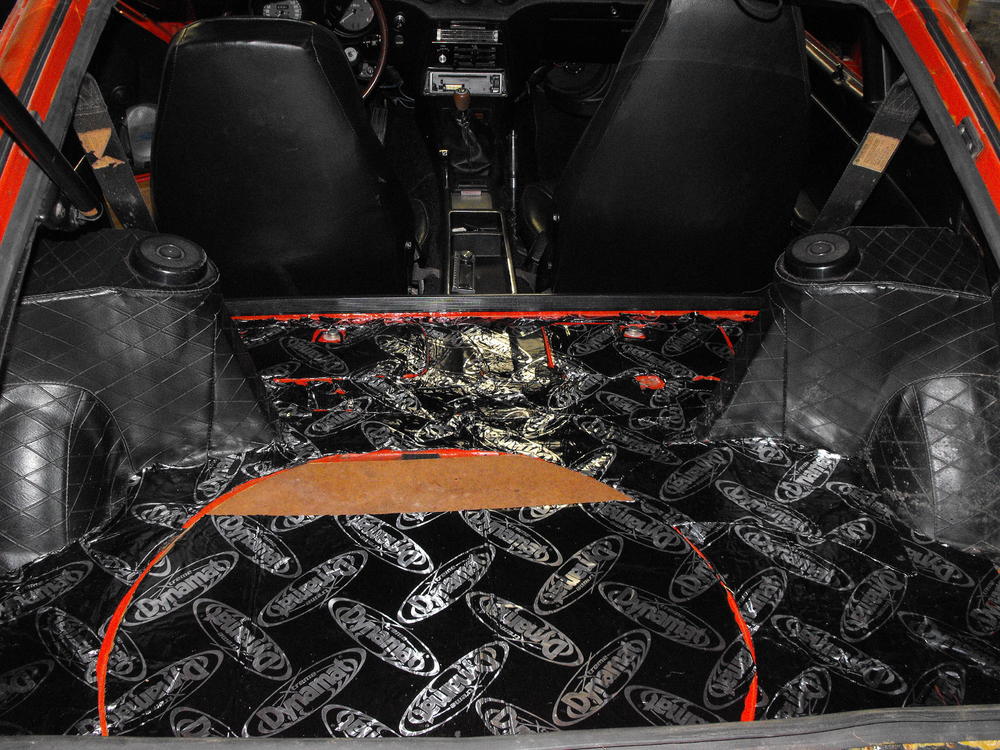
Continued removing parts. Did mostly interior this evening. Looks like Dynamat over the entire floor of the car. I think we will keep most of that except for the Dynamat on the tunnel. That was put over the original diamond vinyl. The spare looks great and original. Not holding pressure, but it looks great and spare tire well looks pretty clean. Removed the AC and Heater panel. Almost ready to pull the dash.


-
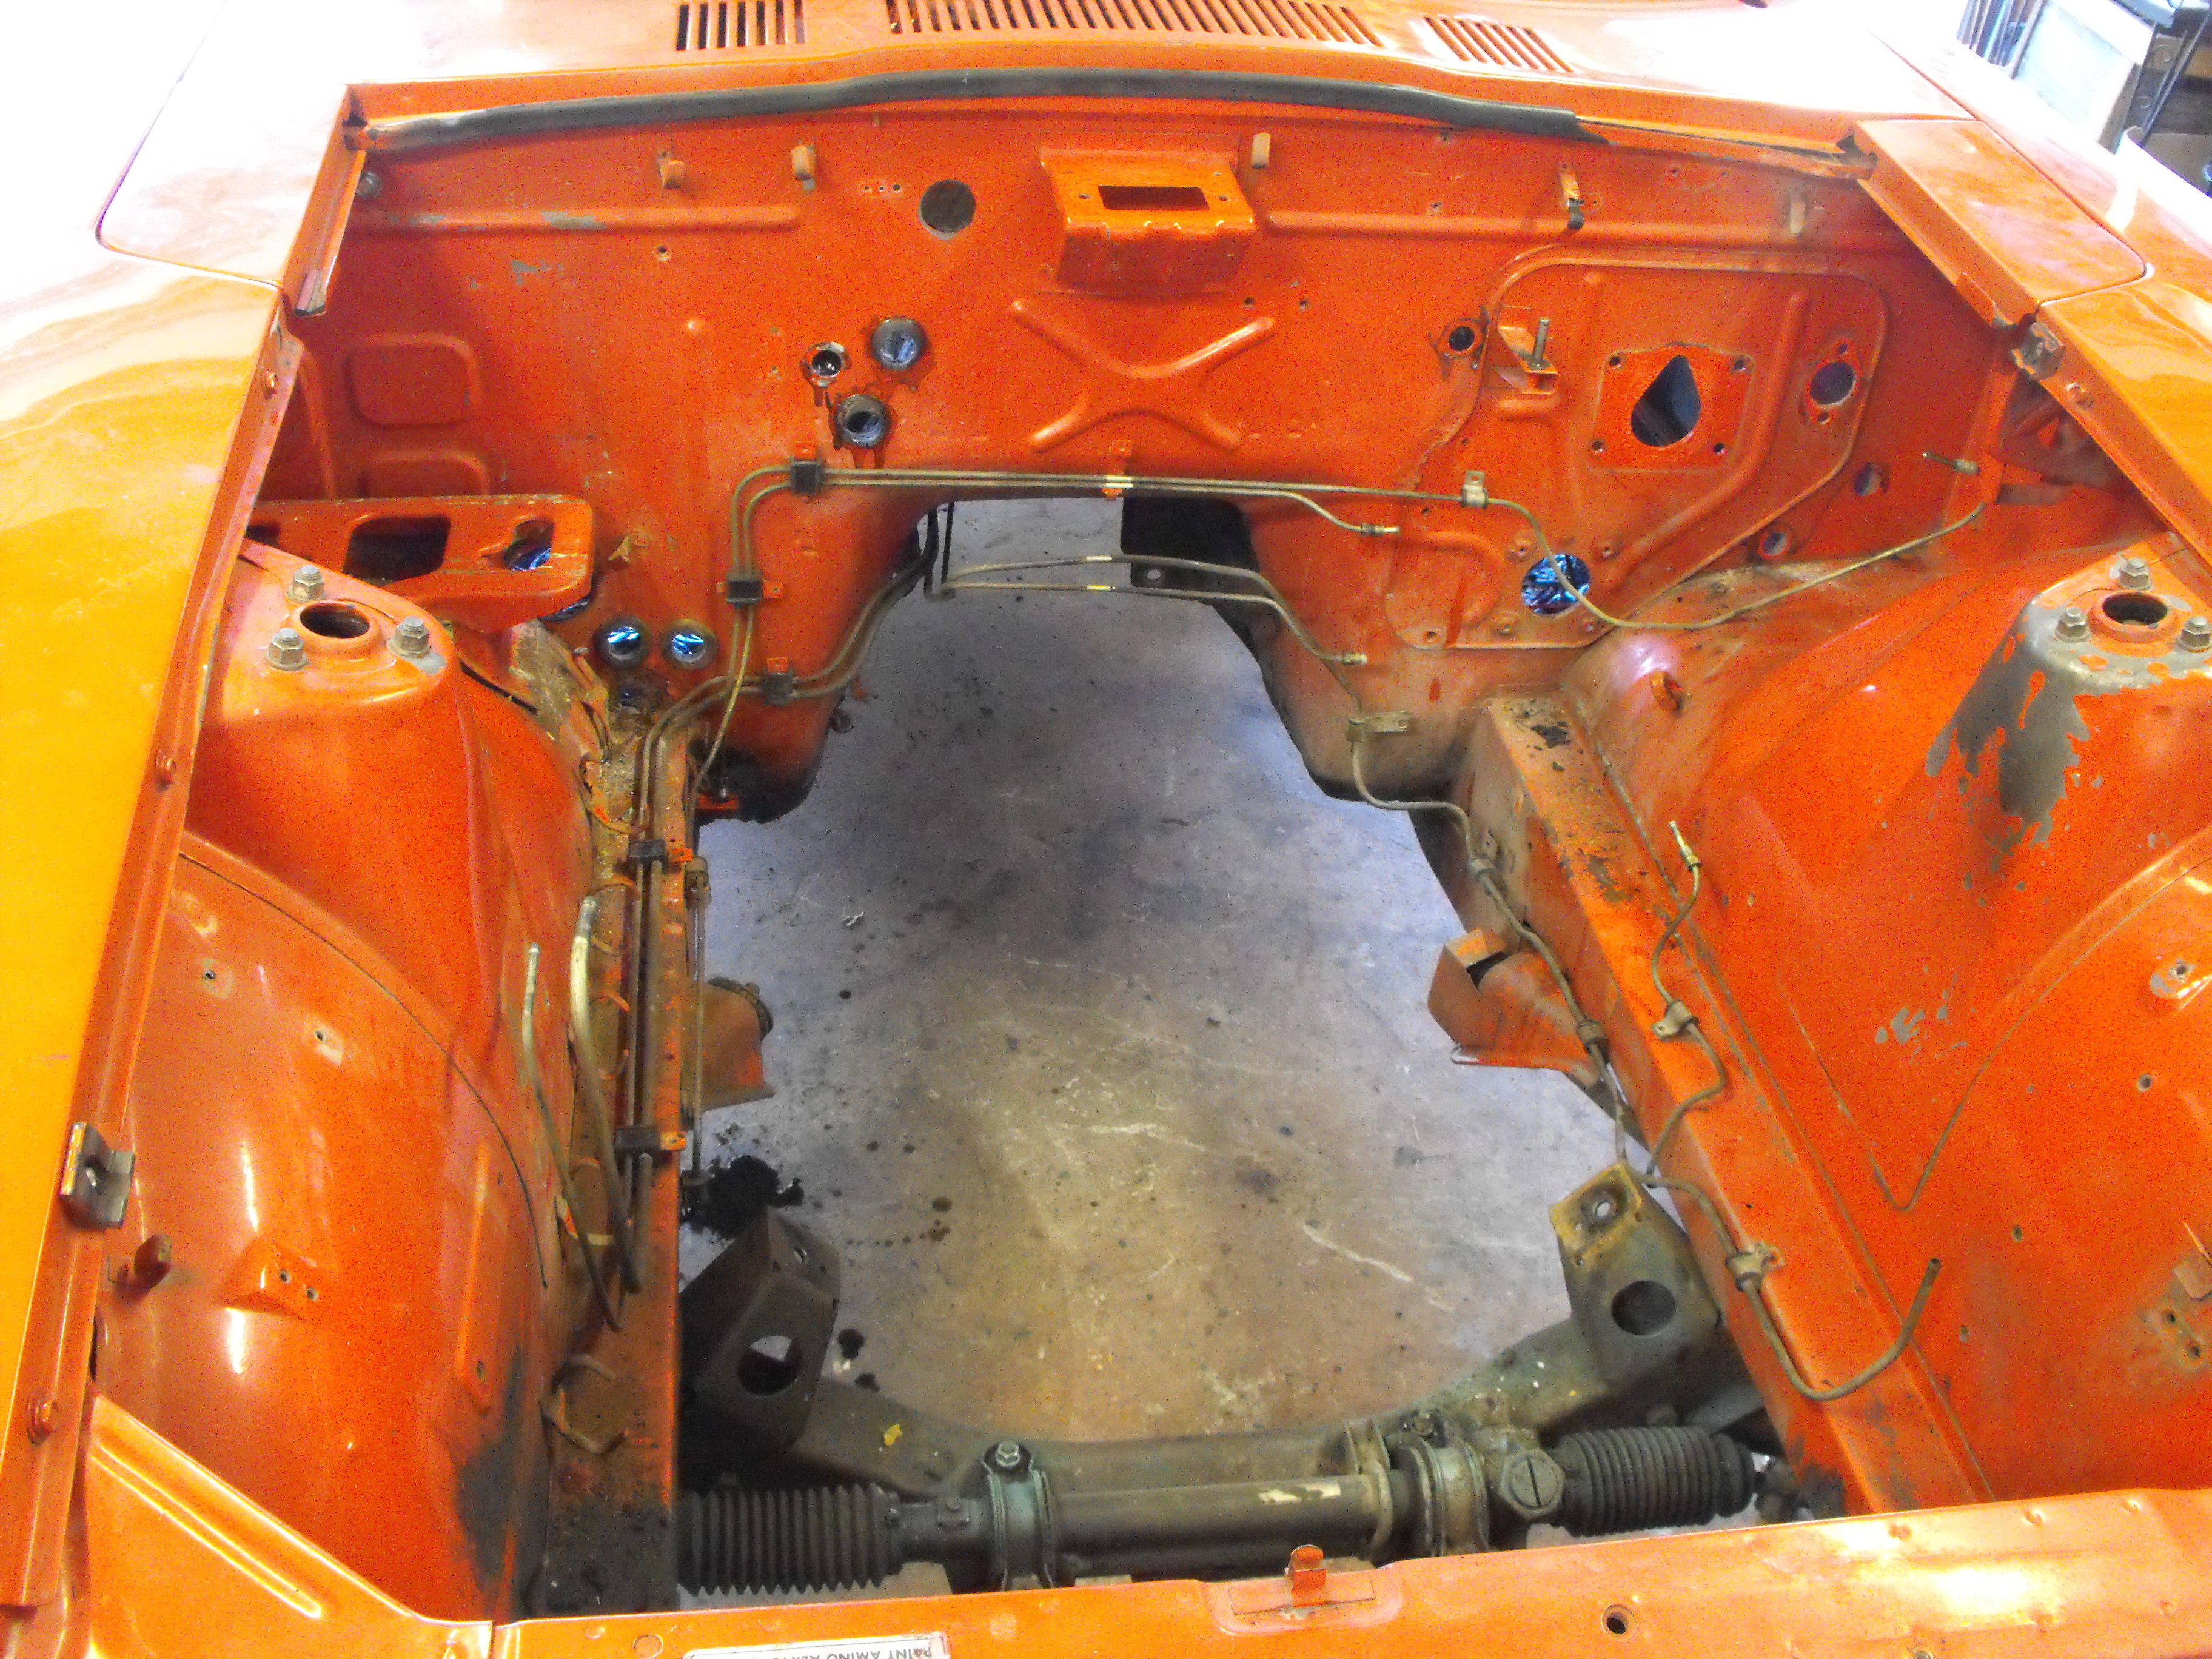
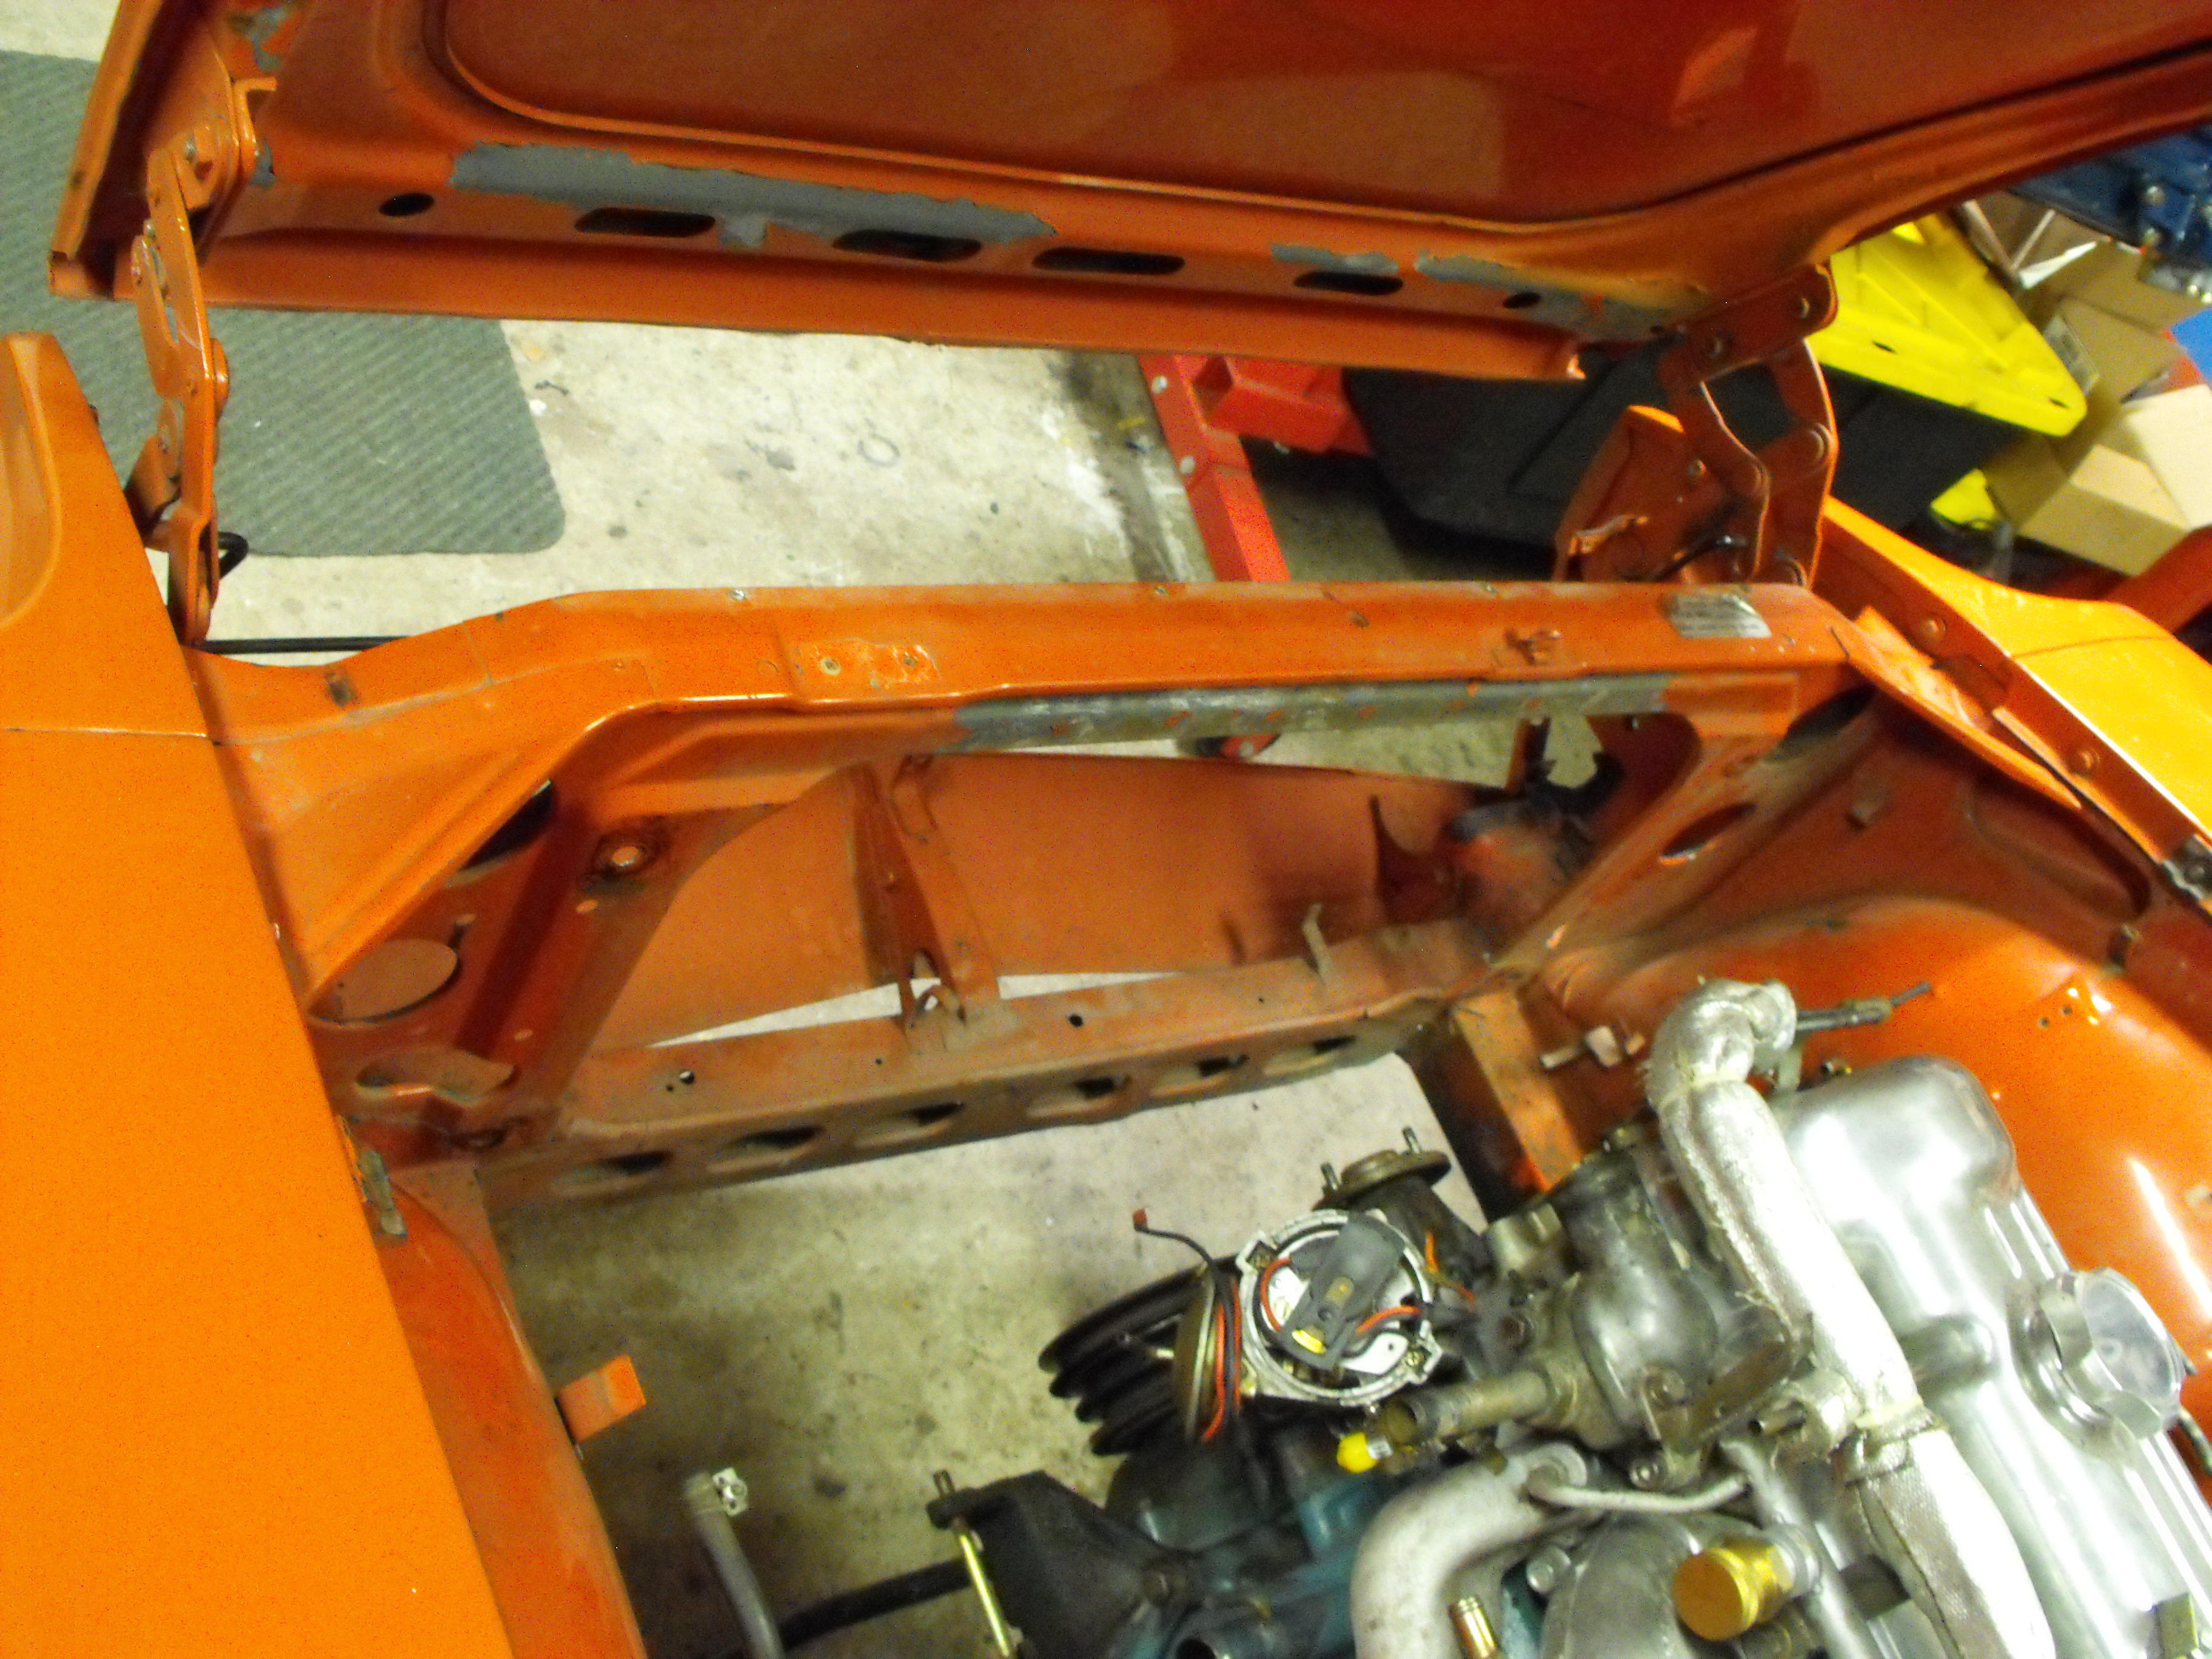
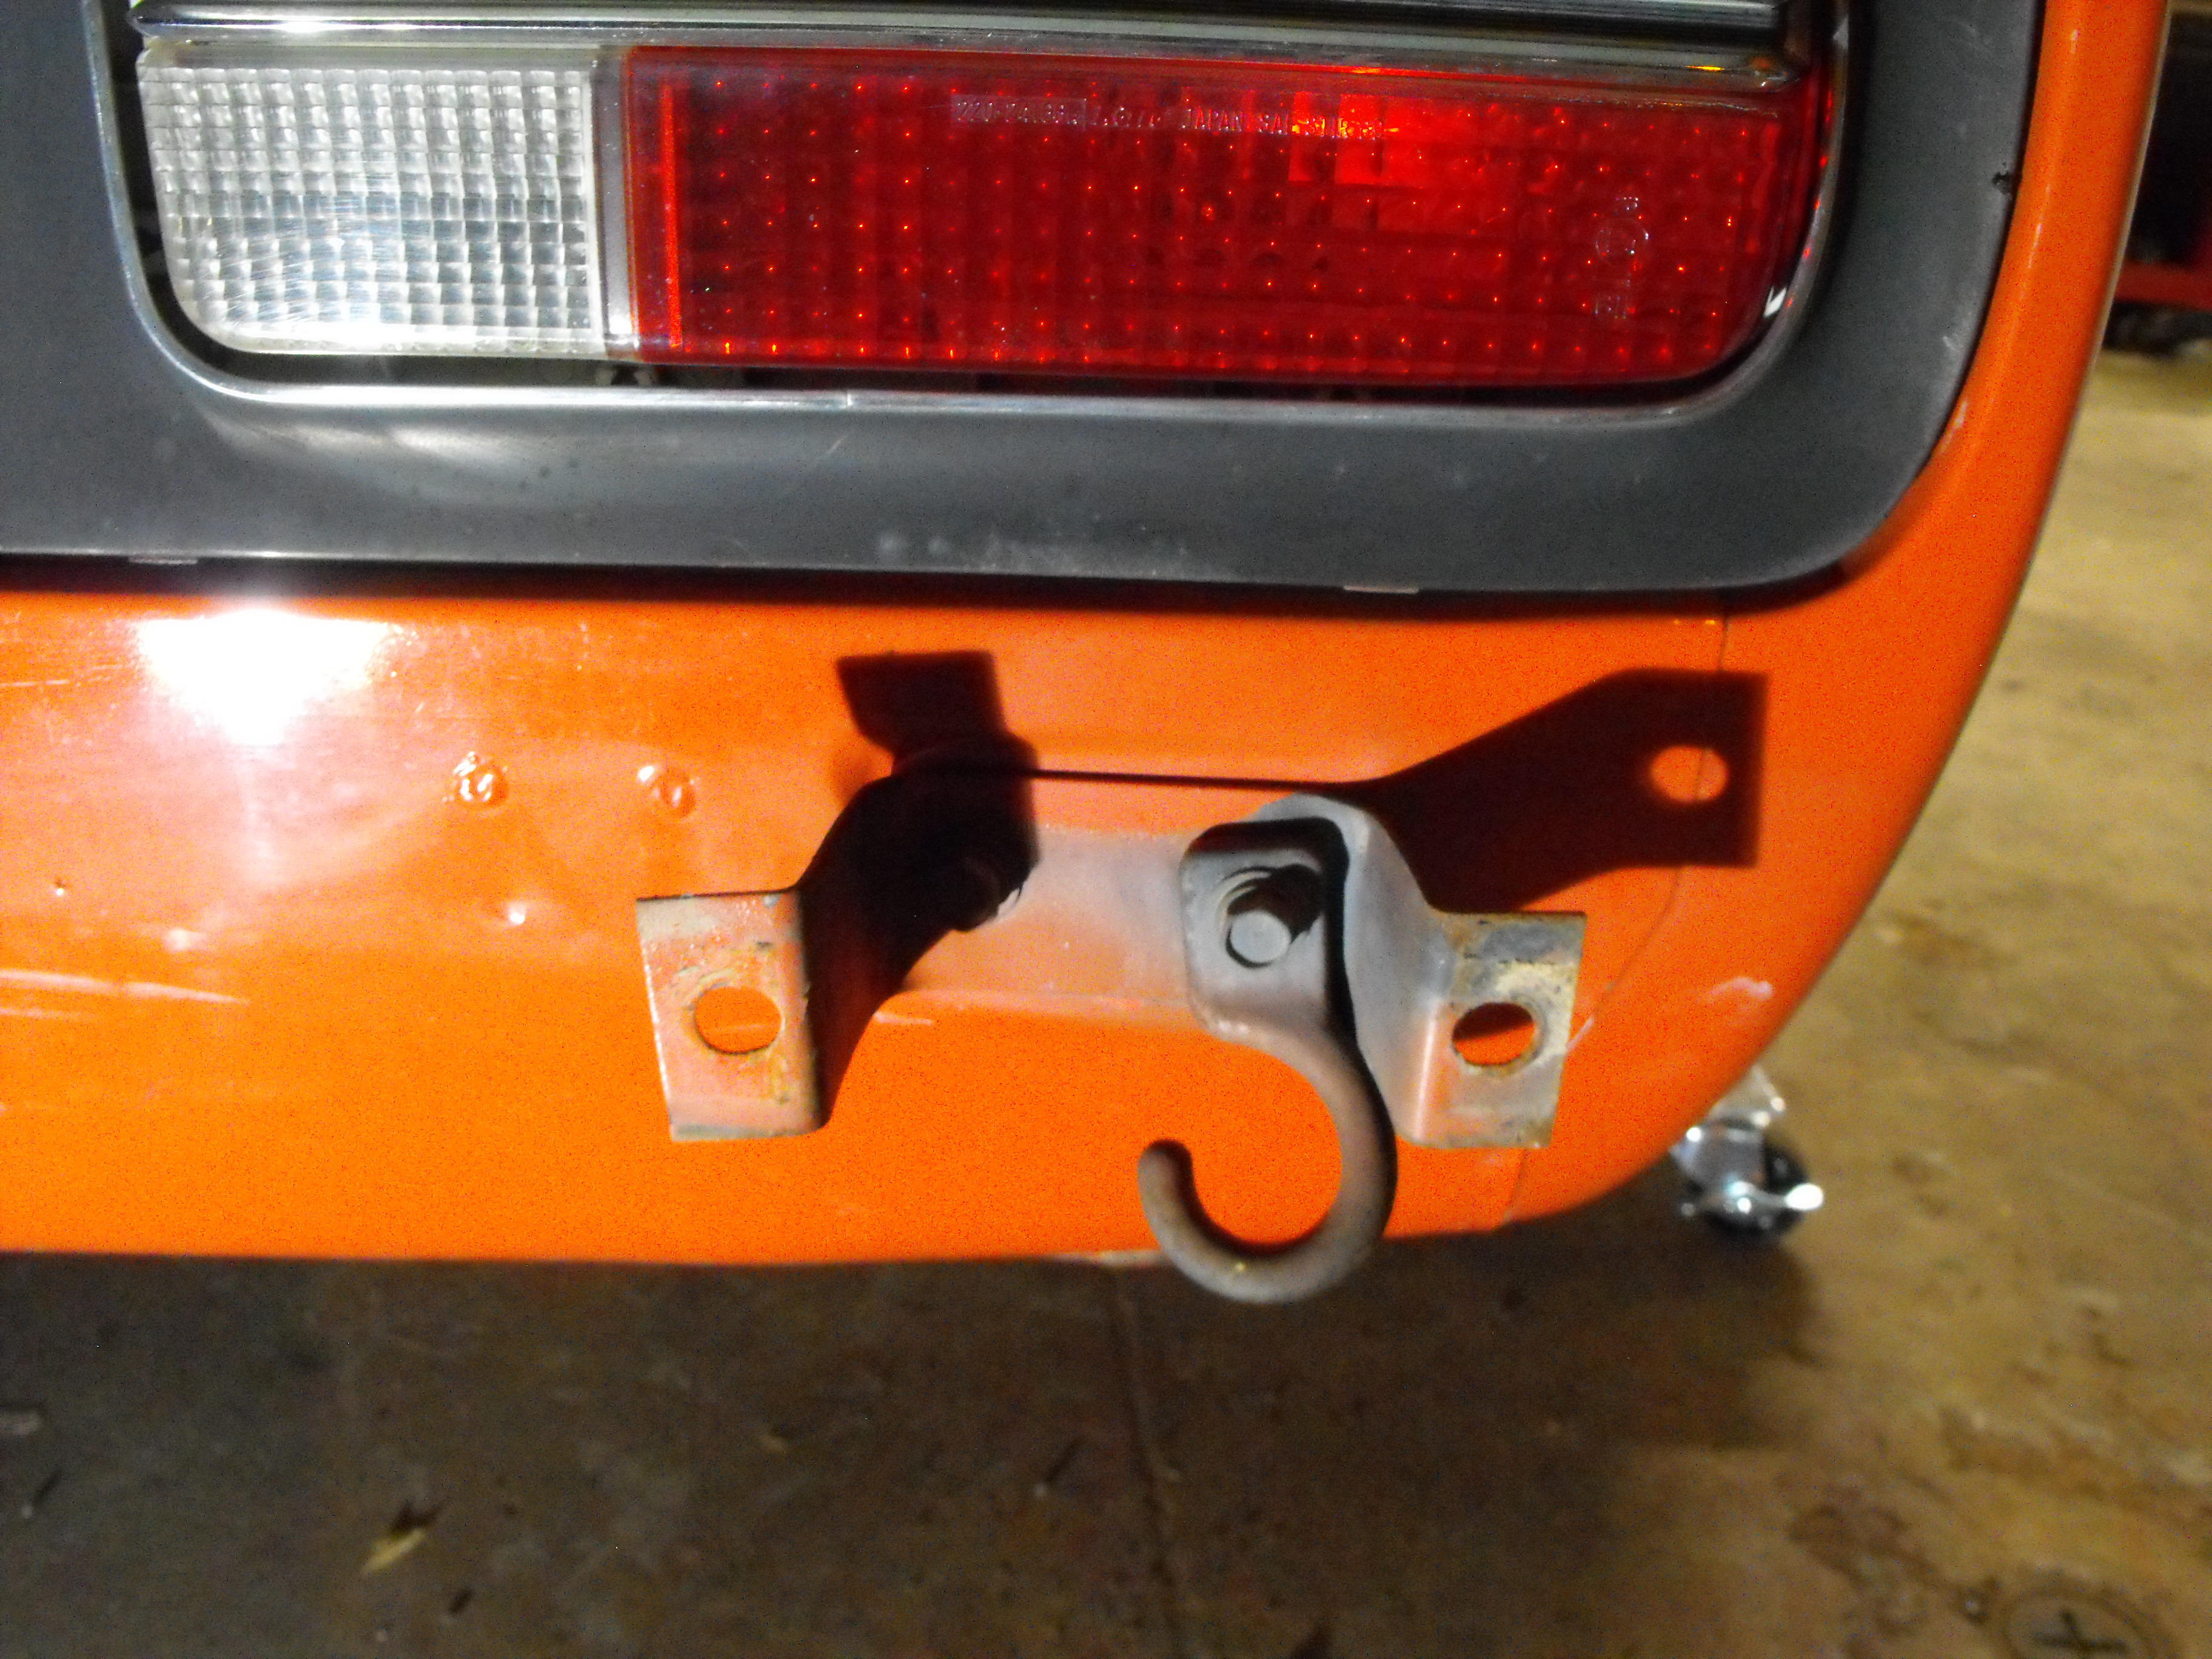
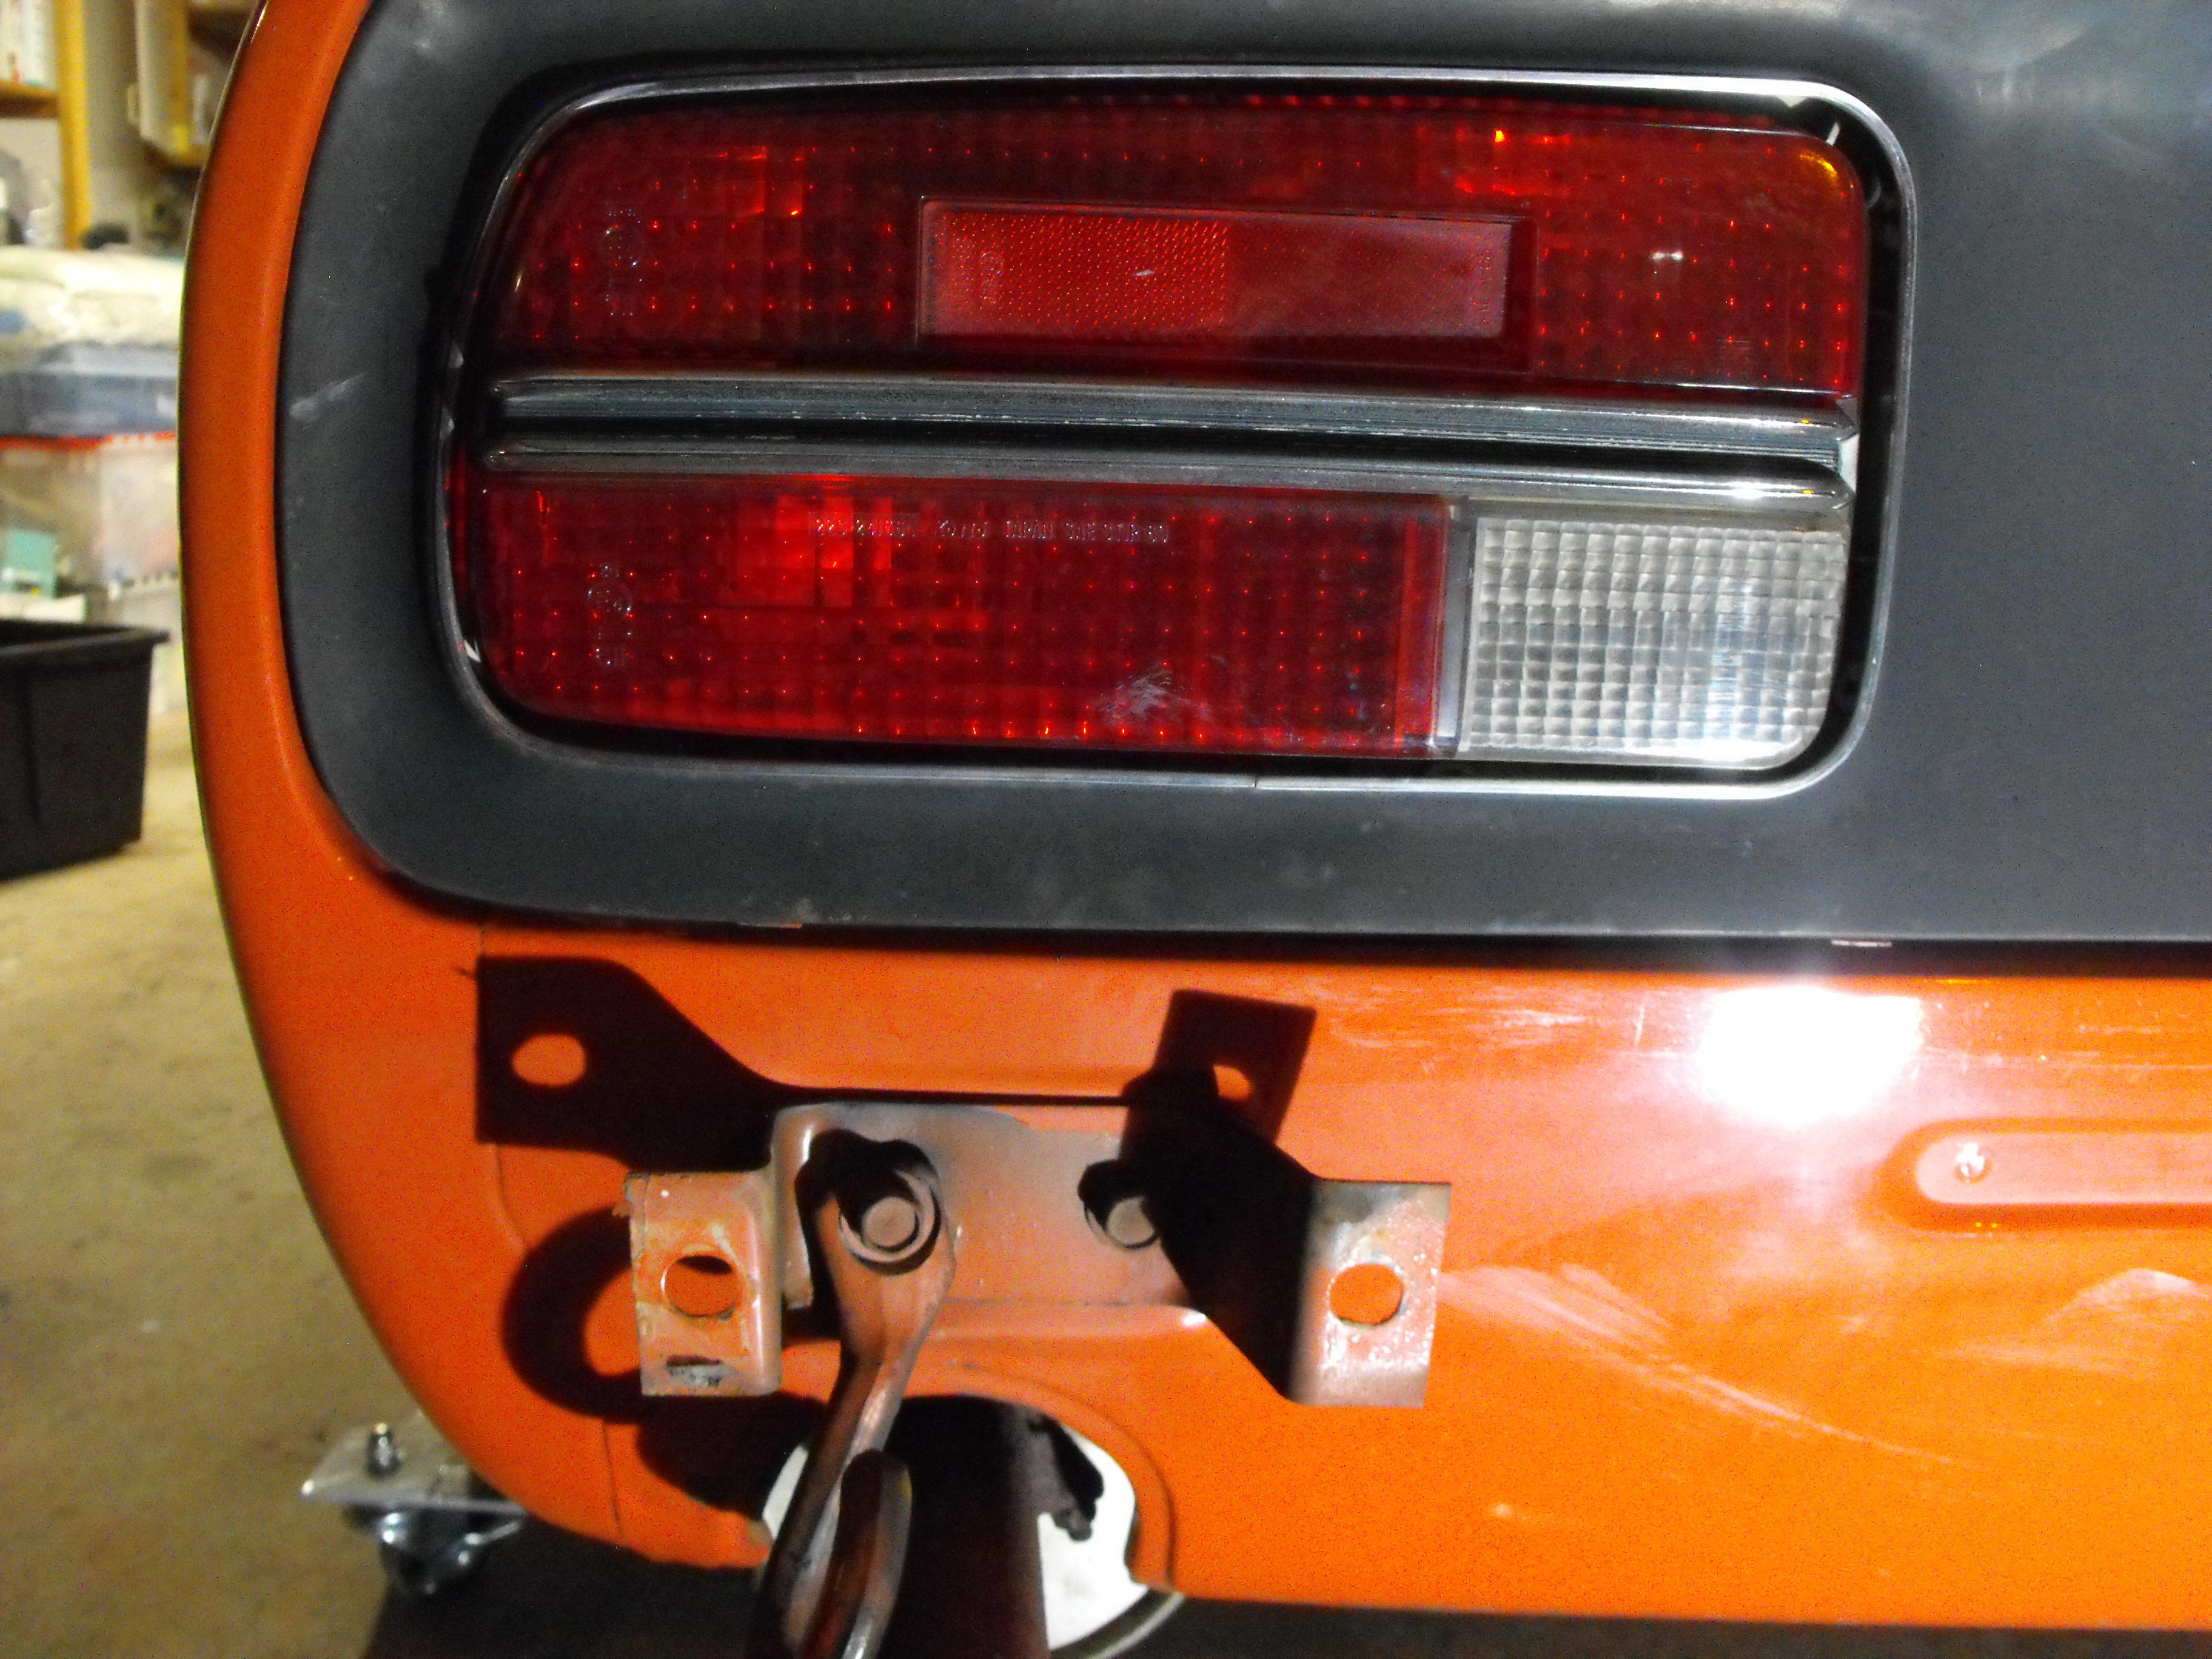
Continued parts removal. Got the bumpers off, grill, rear panels, wiper assembly and all the lights. Also removed a few more parts from engine bay.


-
Good to hear from you! Look forward to your comments and input as the build progresses. Here is a little more background. This car is a very early '73 with a build date on the drivers side plaque of 9/72. The serial number is 122XYZ. The owner of this car contacted me after meeting the new owner of the orange Z that I sold last year. The owner of my orange Z provided the information to her and we were able to discuss the restoration of this car. Funny how things work out, small world. Early on, we were discussing moving back to the original Flat Tops, however, after reviewing the extra parts, there were no Flat tops or original balance tube. Also, a number of the unique '73 tubes were also not present. So the better way to go was to stick with the current SUs. And, since the SUs and balance tube look near brand new, we will stick with these. For the interior, the only changes we will make is to install an original radio and install the diamond vinyl onto the center console. The rest of the vinyl looks like it just needs to be cleaned up. For the seats, there are new, good quality seat covers and foam that we will install so that the seats match. I will be very careful removing the original vinyl from the passenger seat. We will want to save that.
-
I can not say that I have seen silver decals. I checked on my '70Z and even that is still gold in spite of its nearly 50 years of age. I thought maybe the gold could fade to silver, but not what I have seen. Bit of a late response here, sorry about that.
-
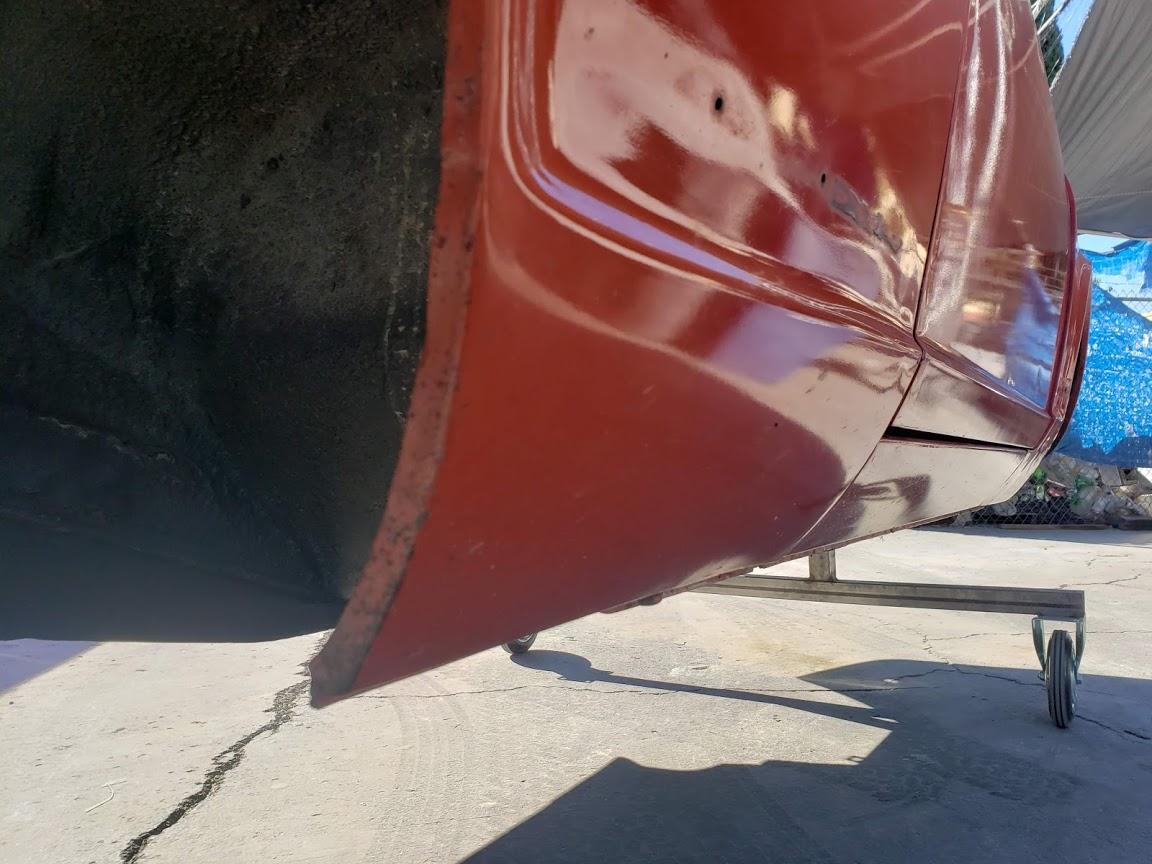
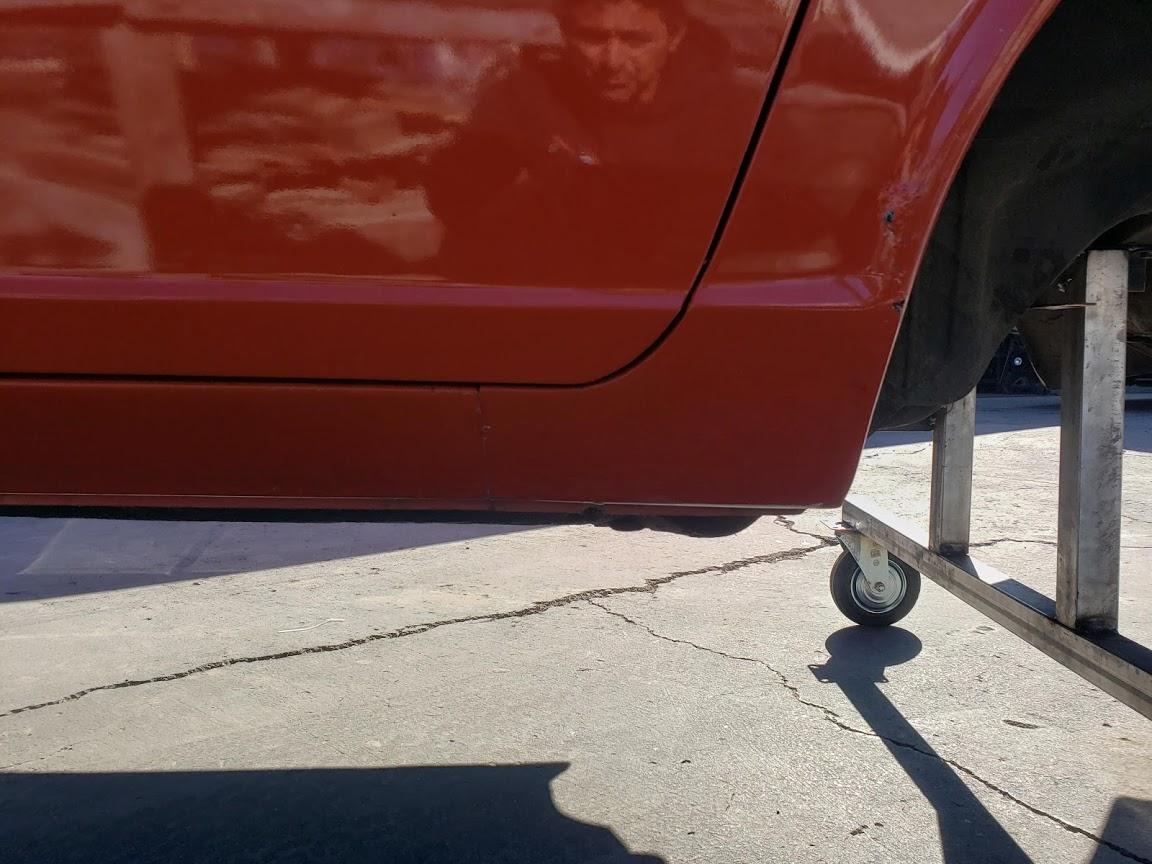
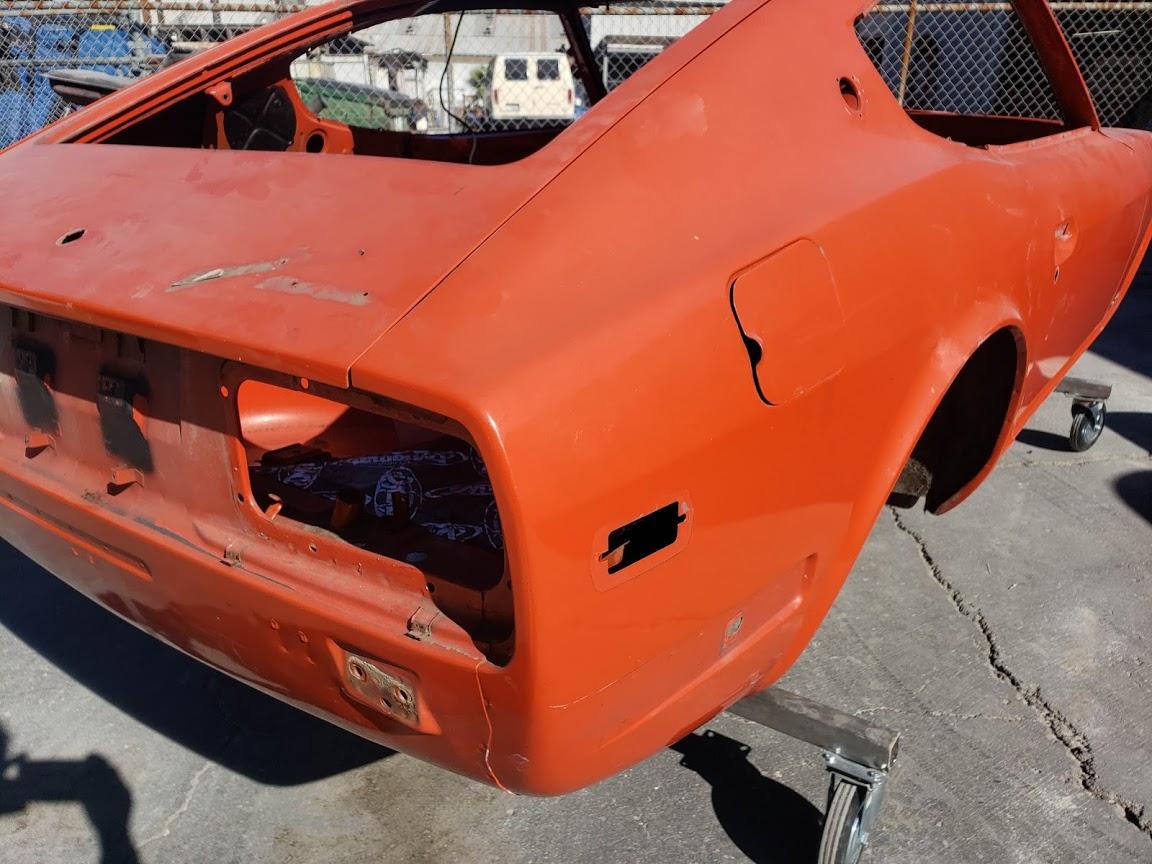
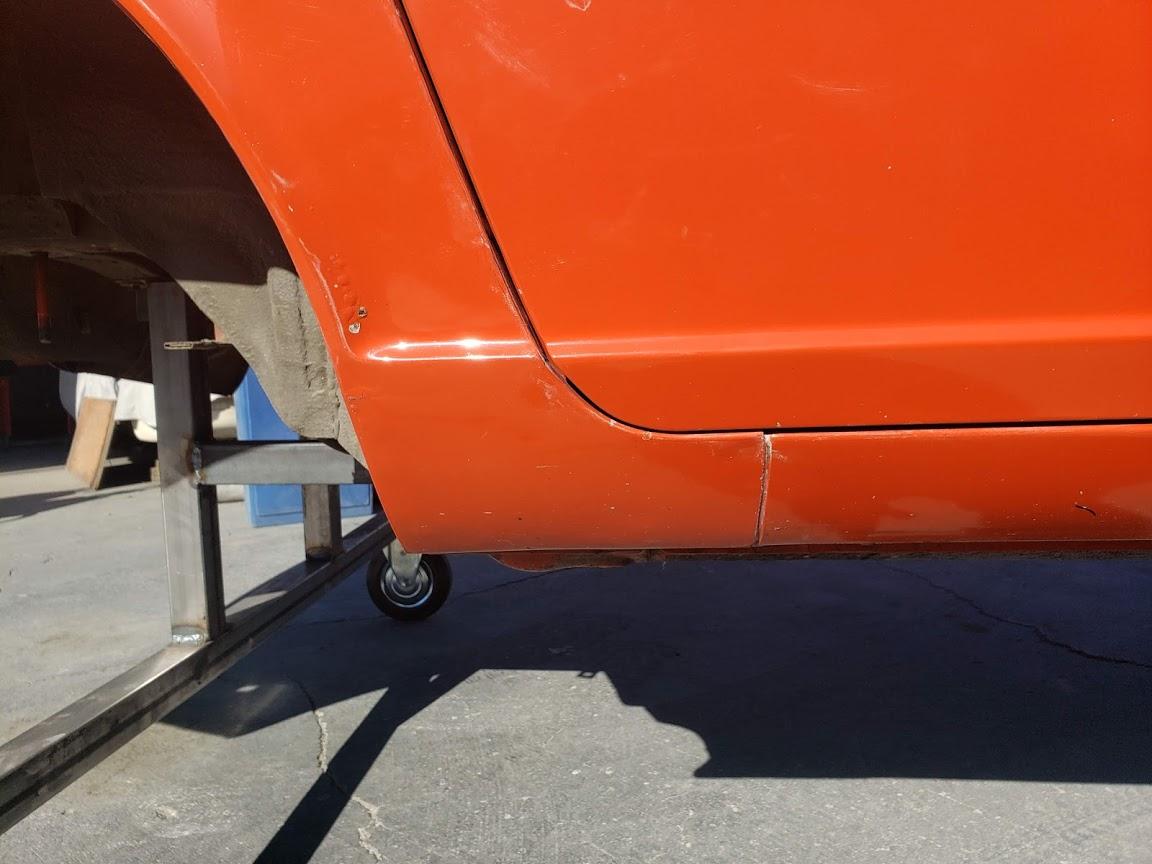
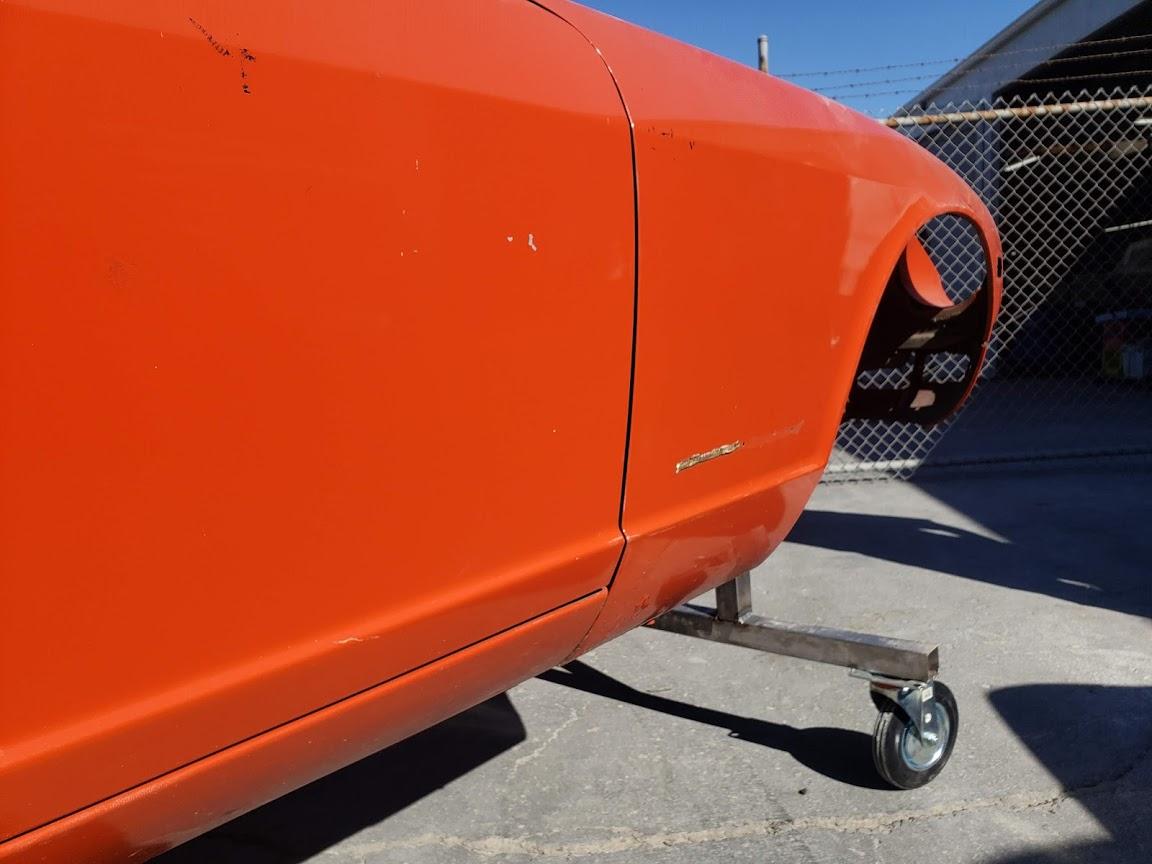
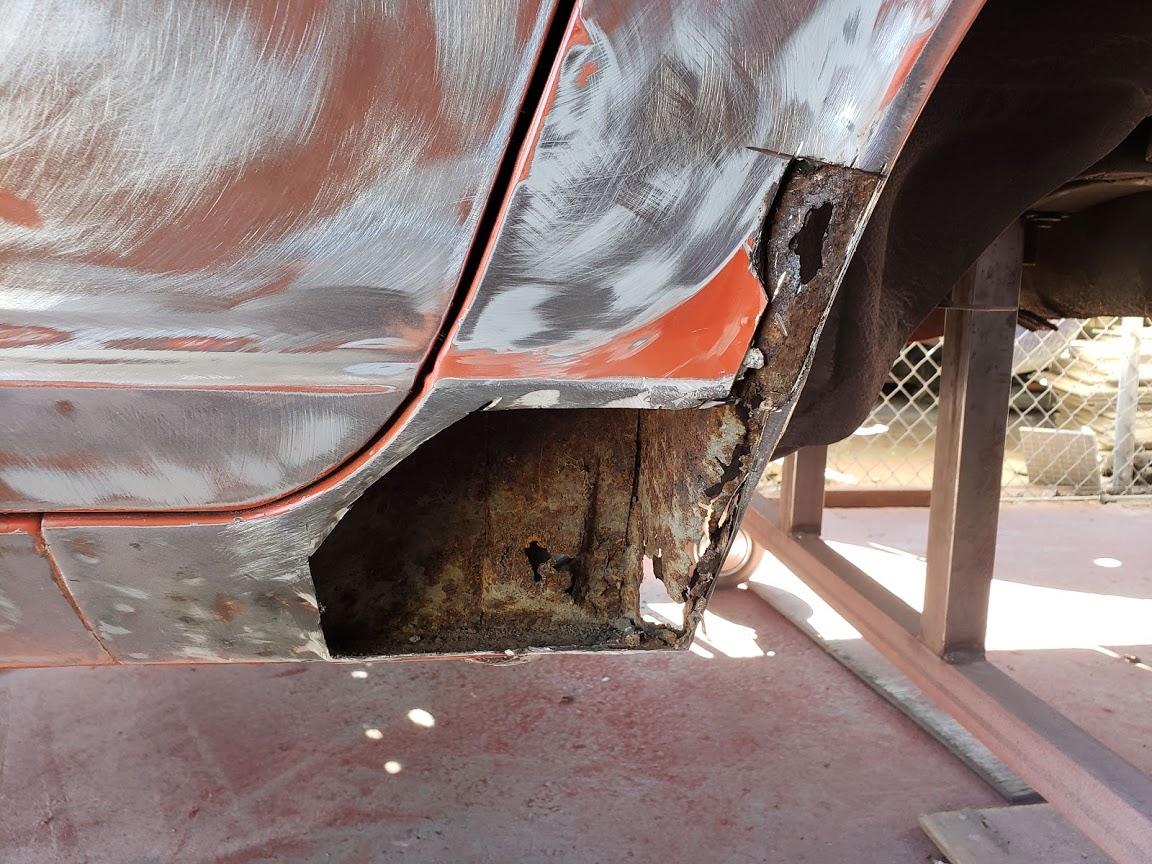
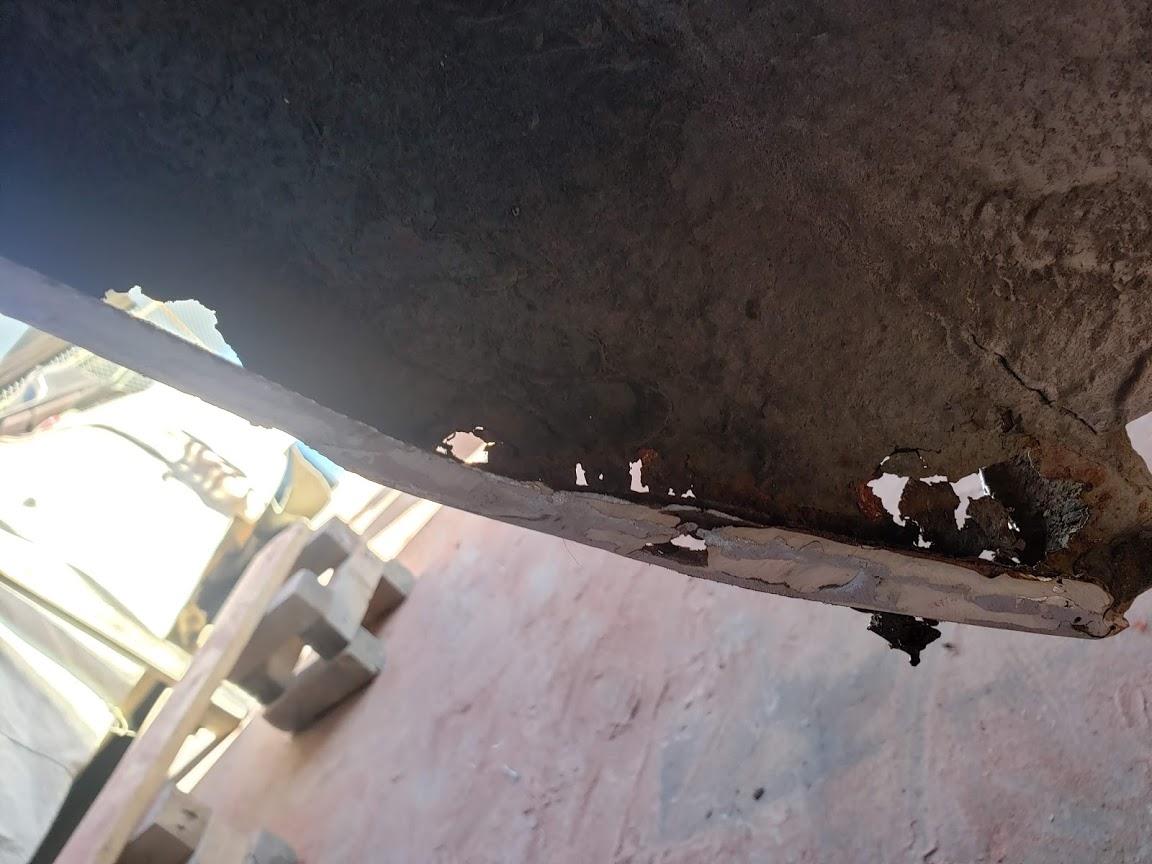
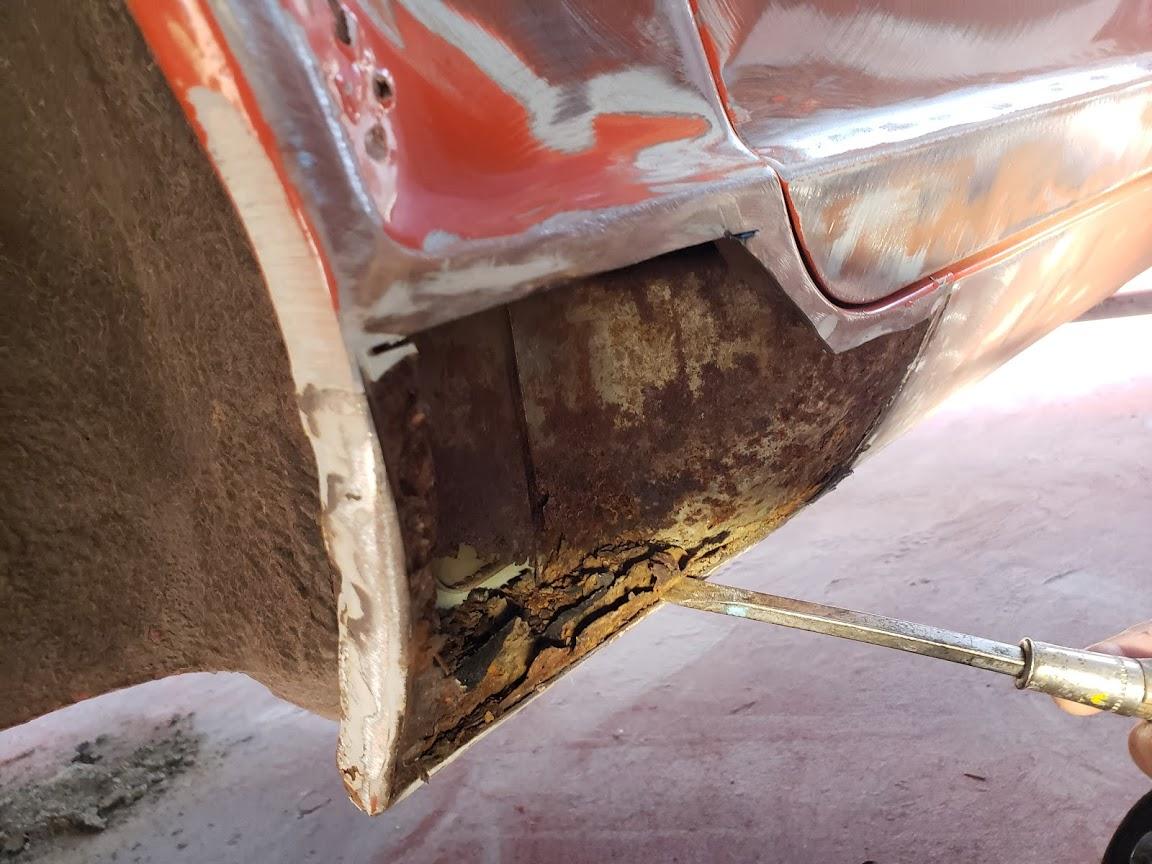
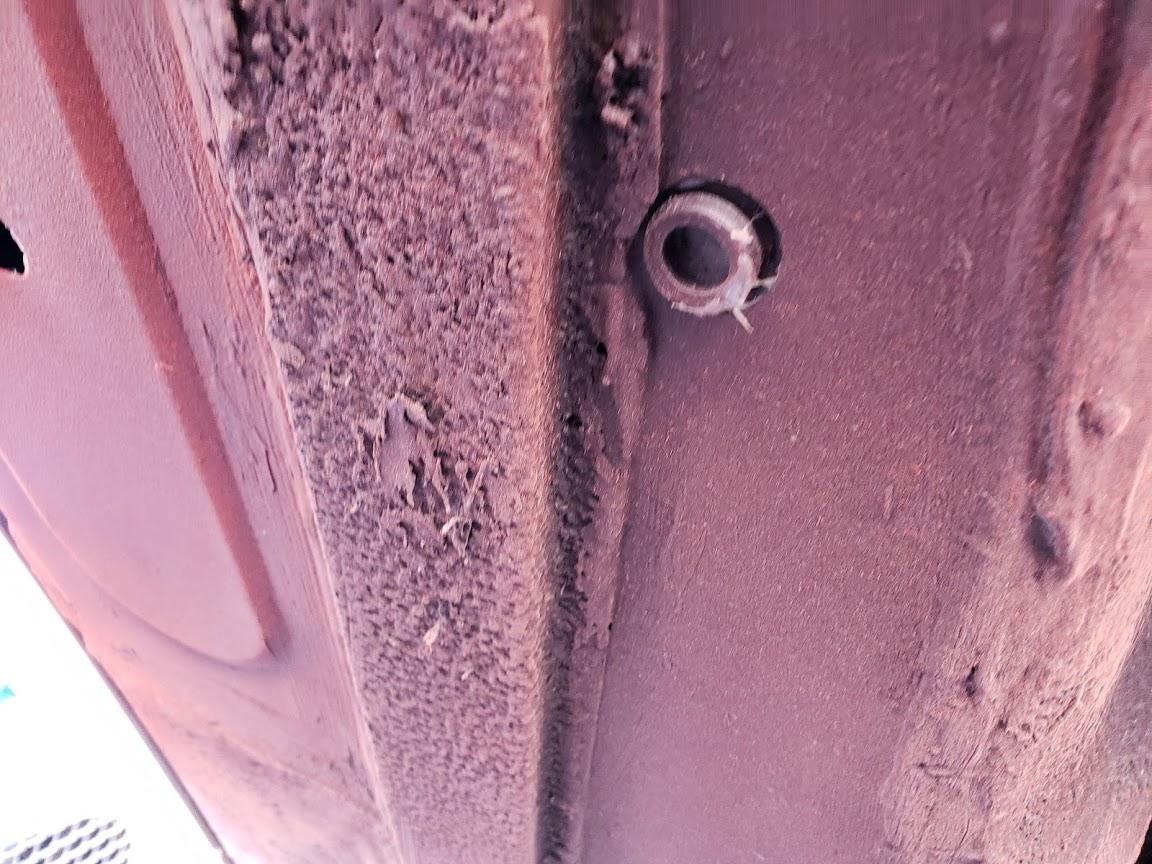
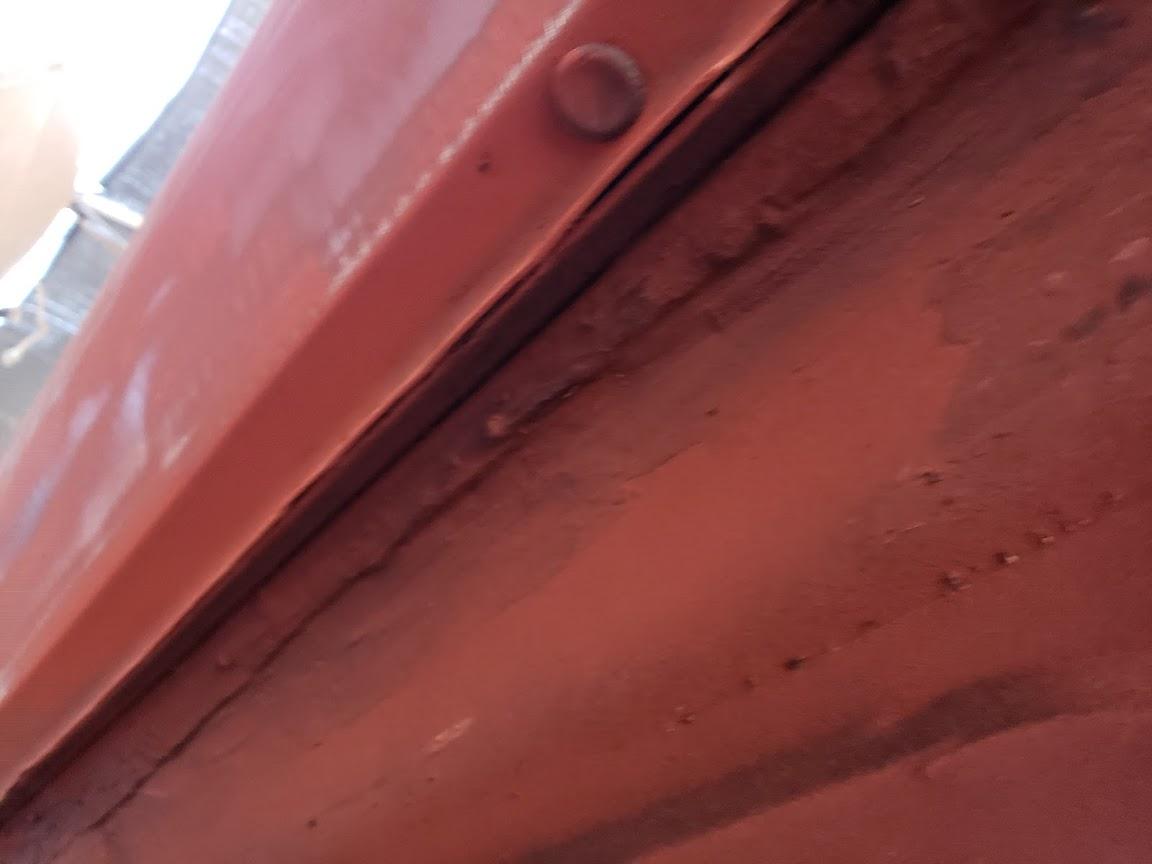
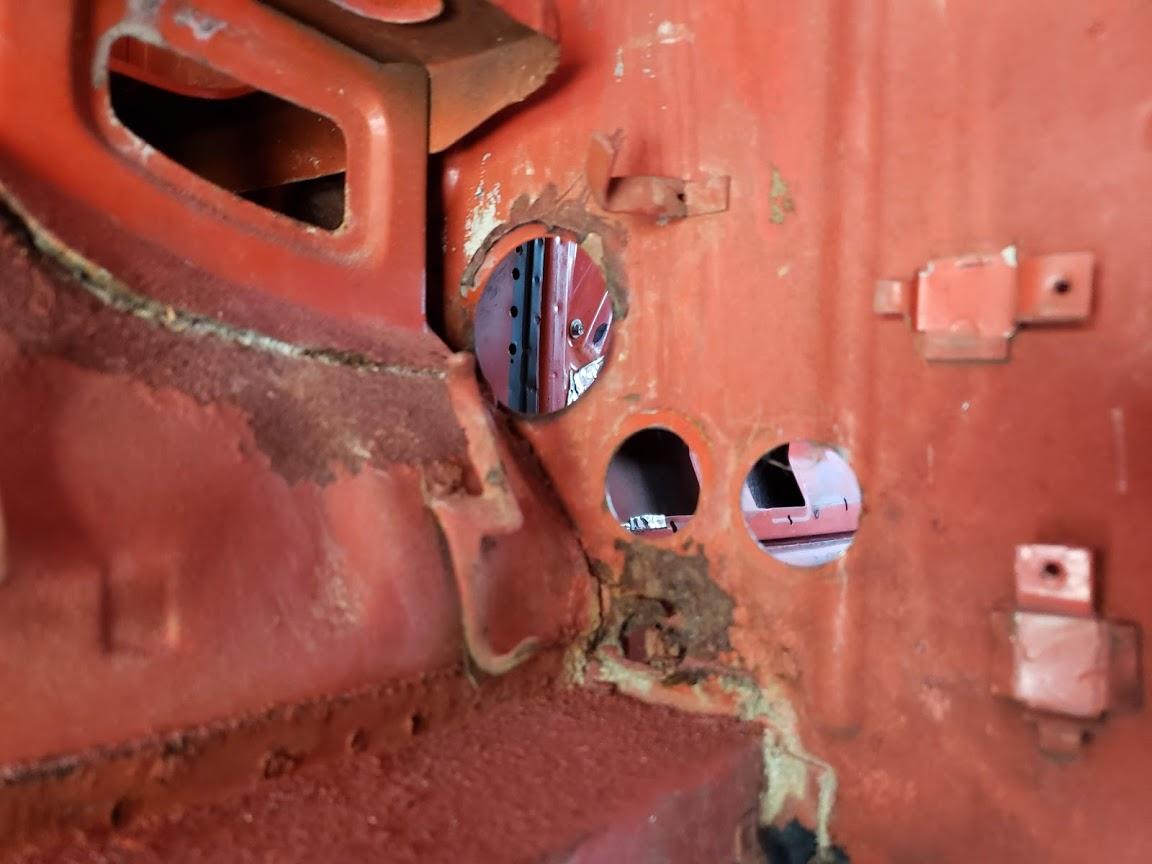
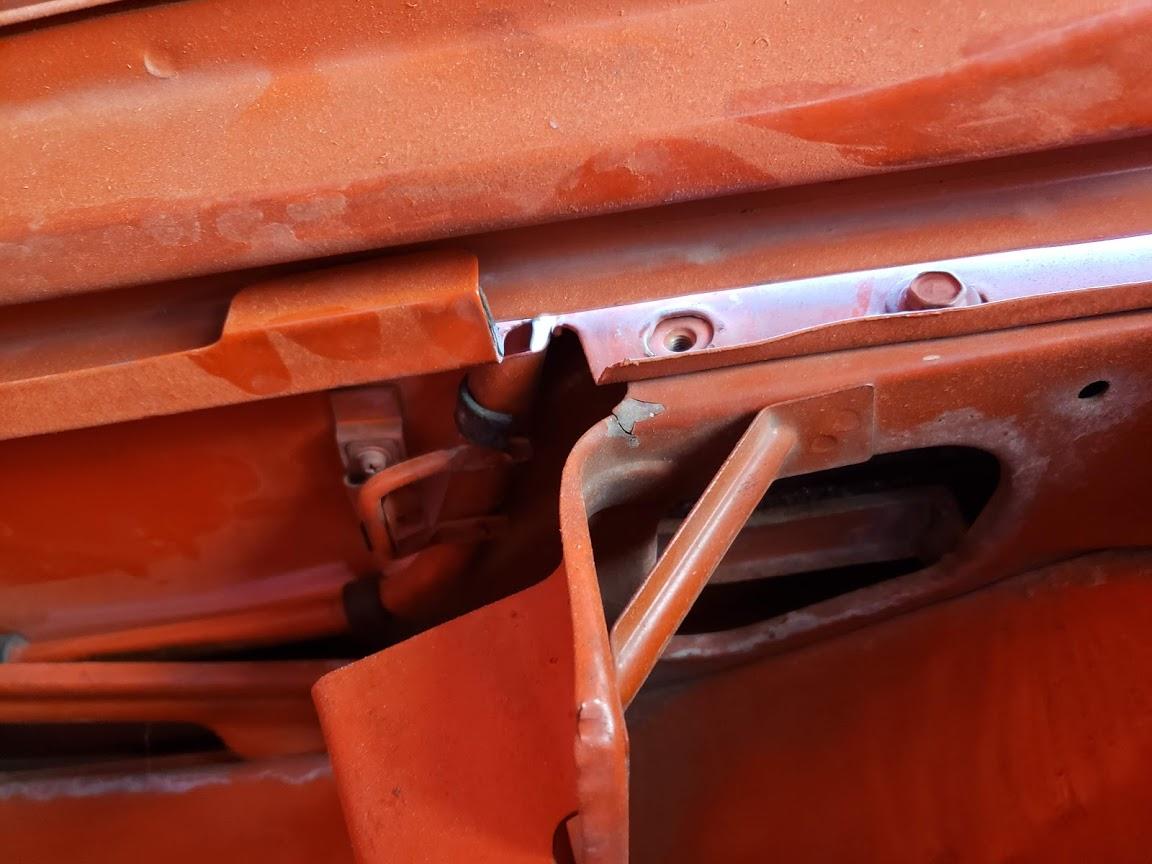
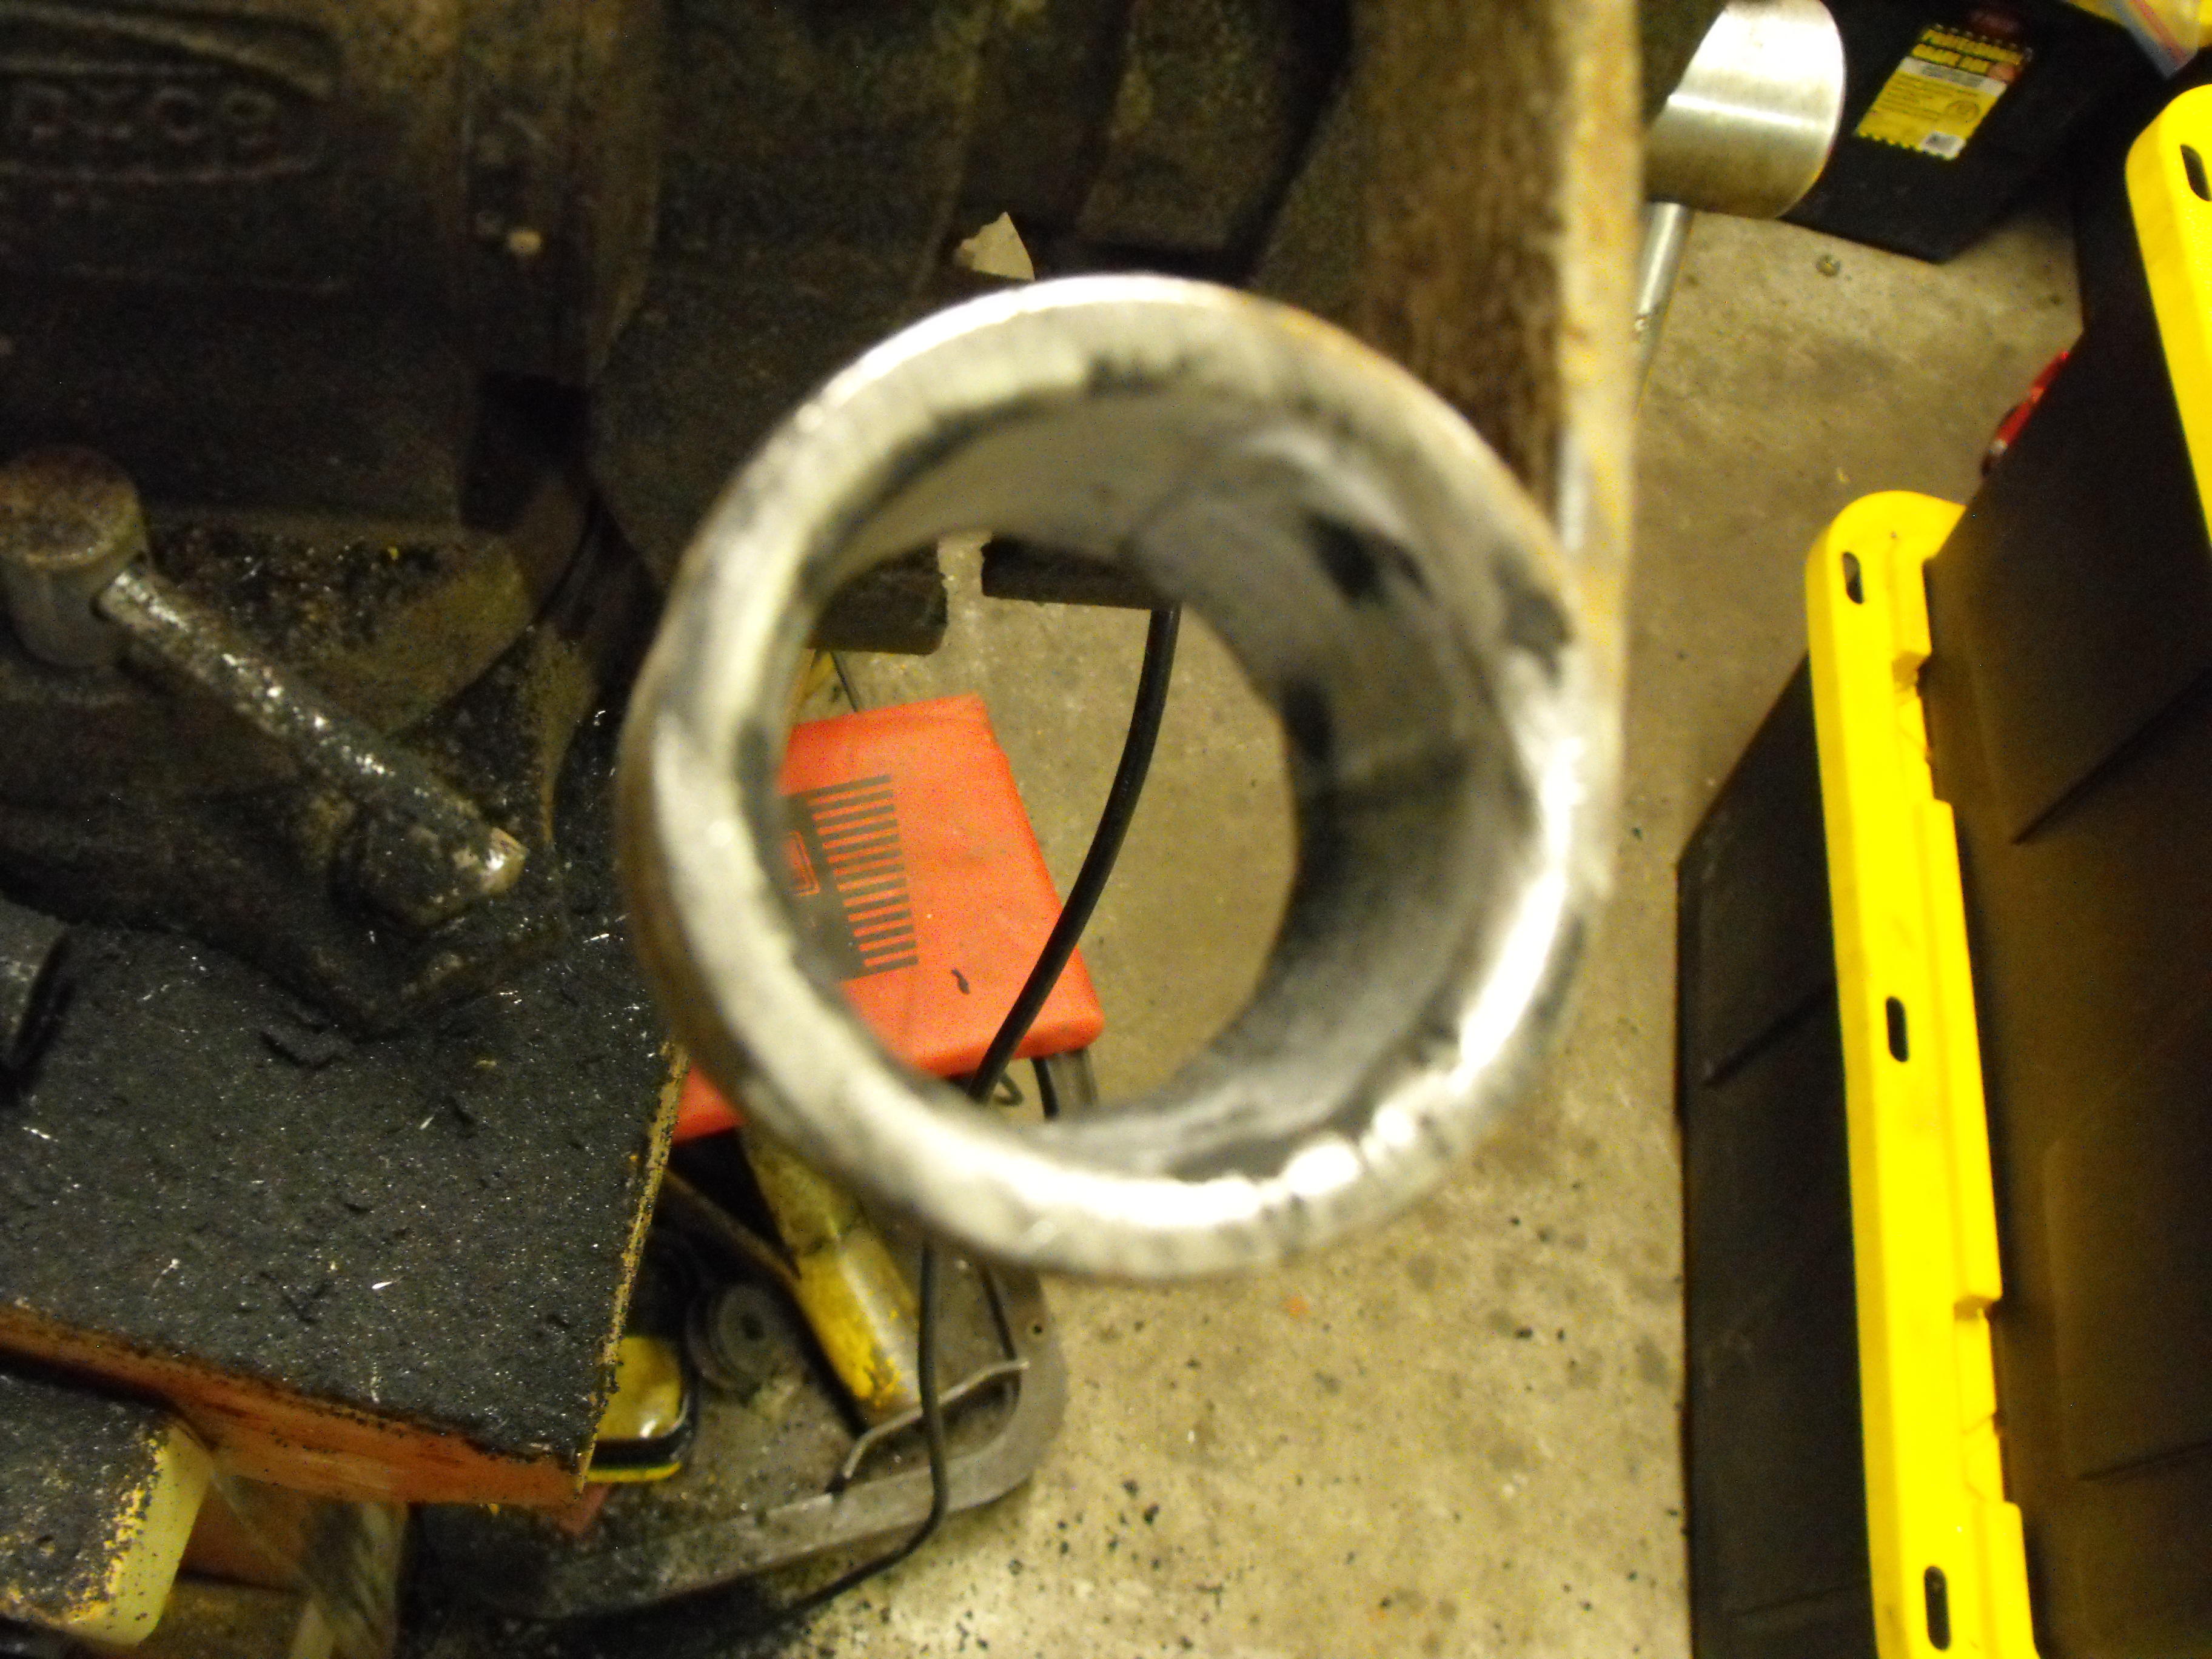
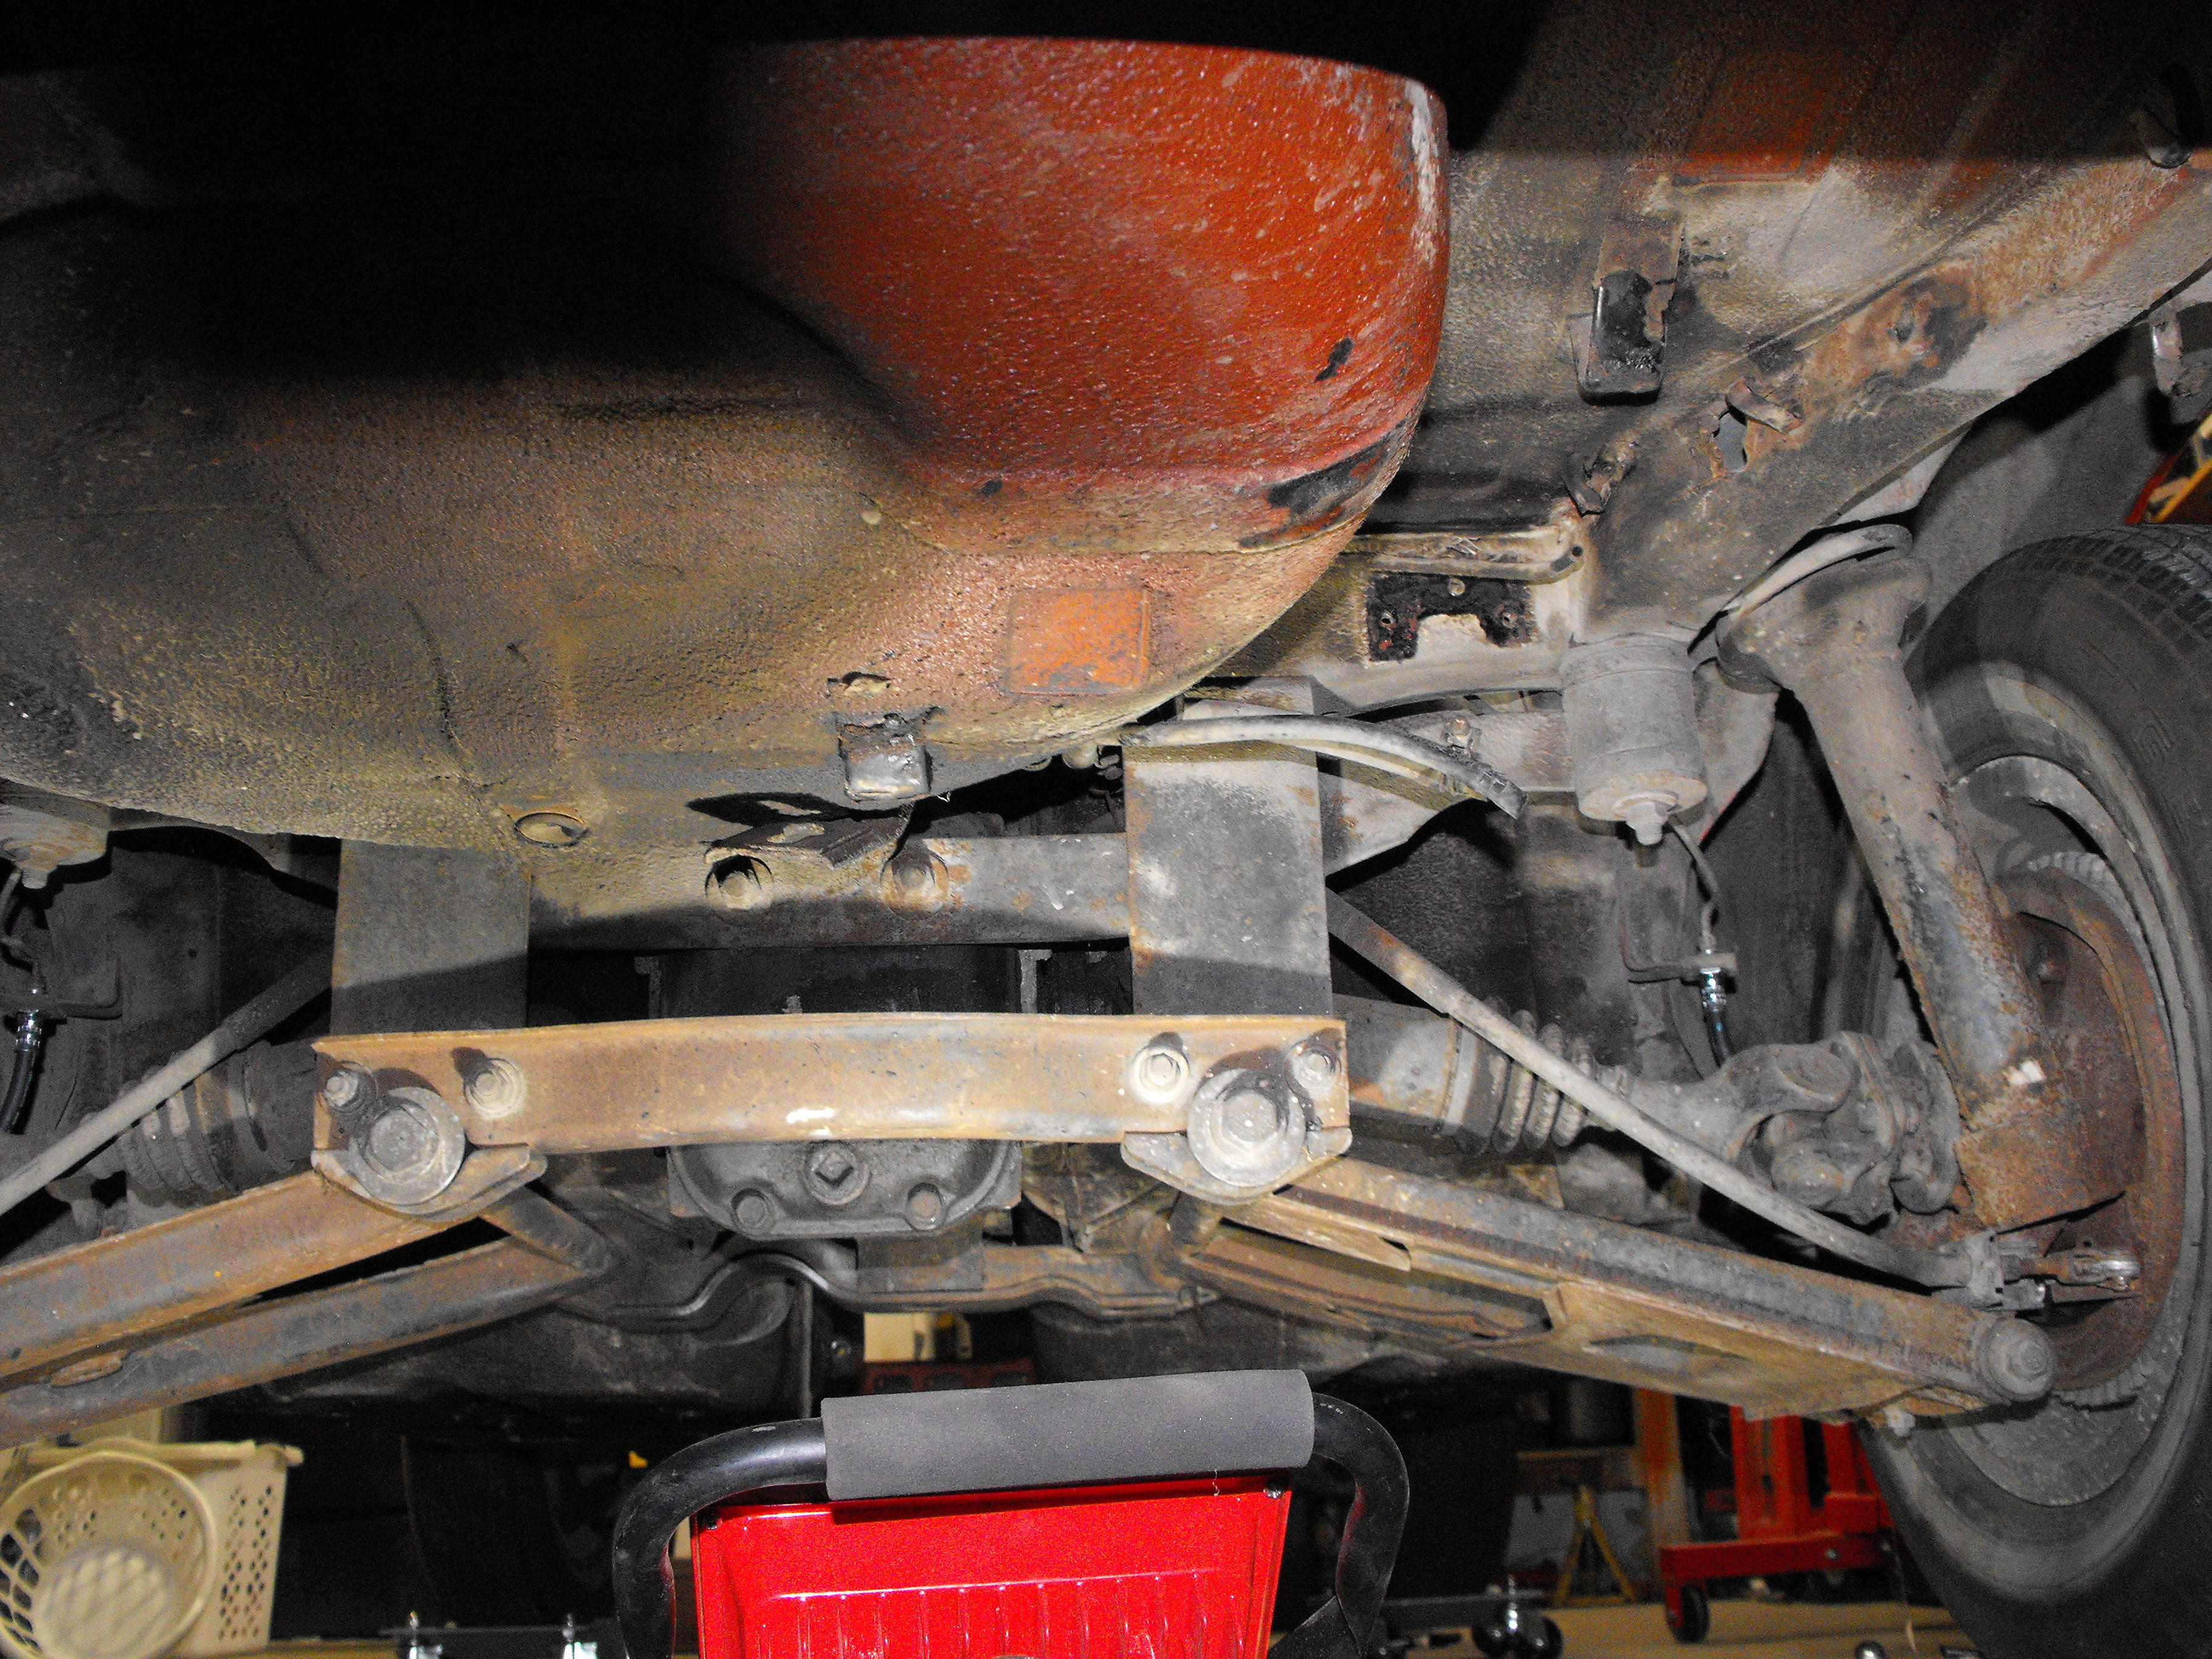
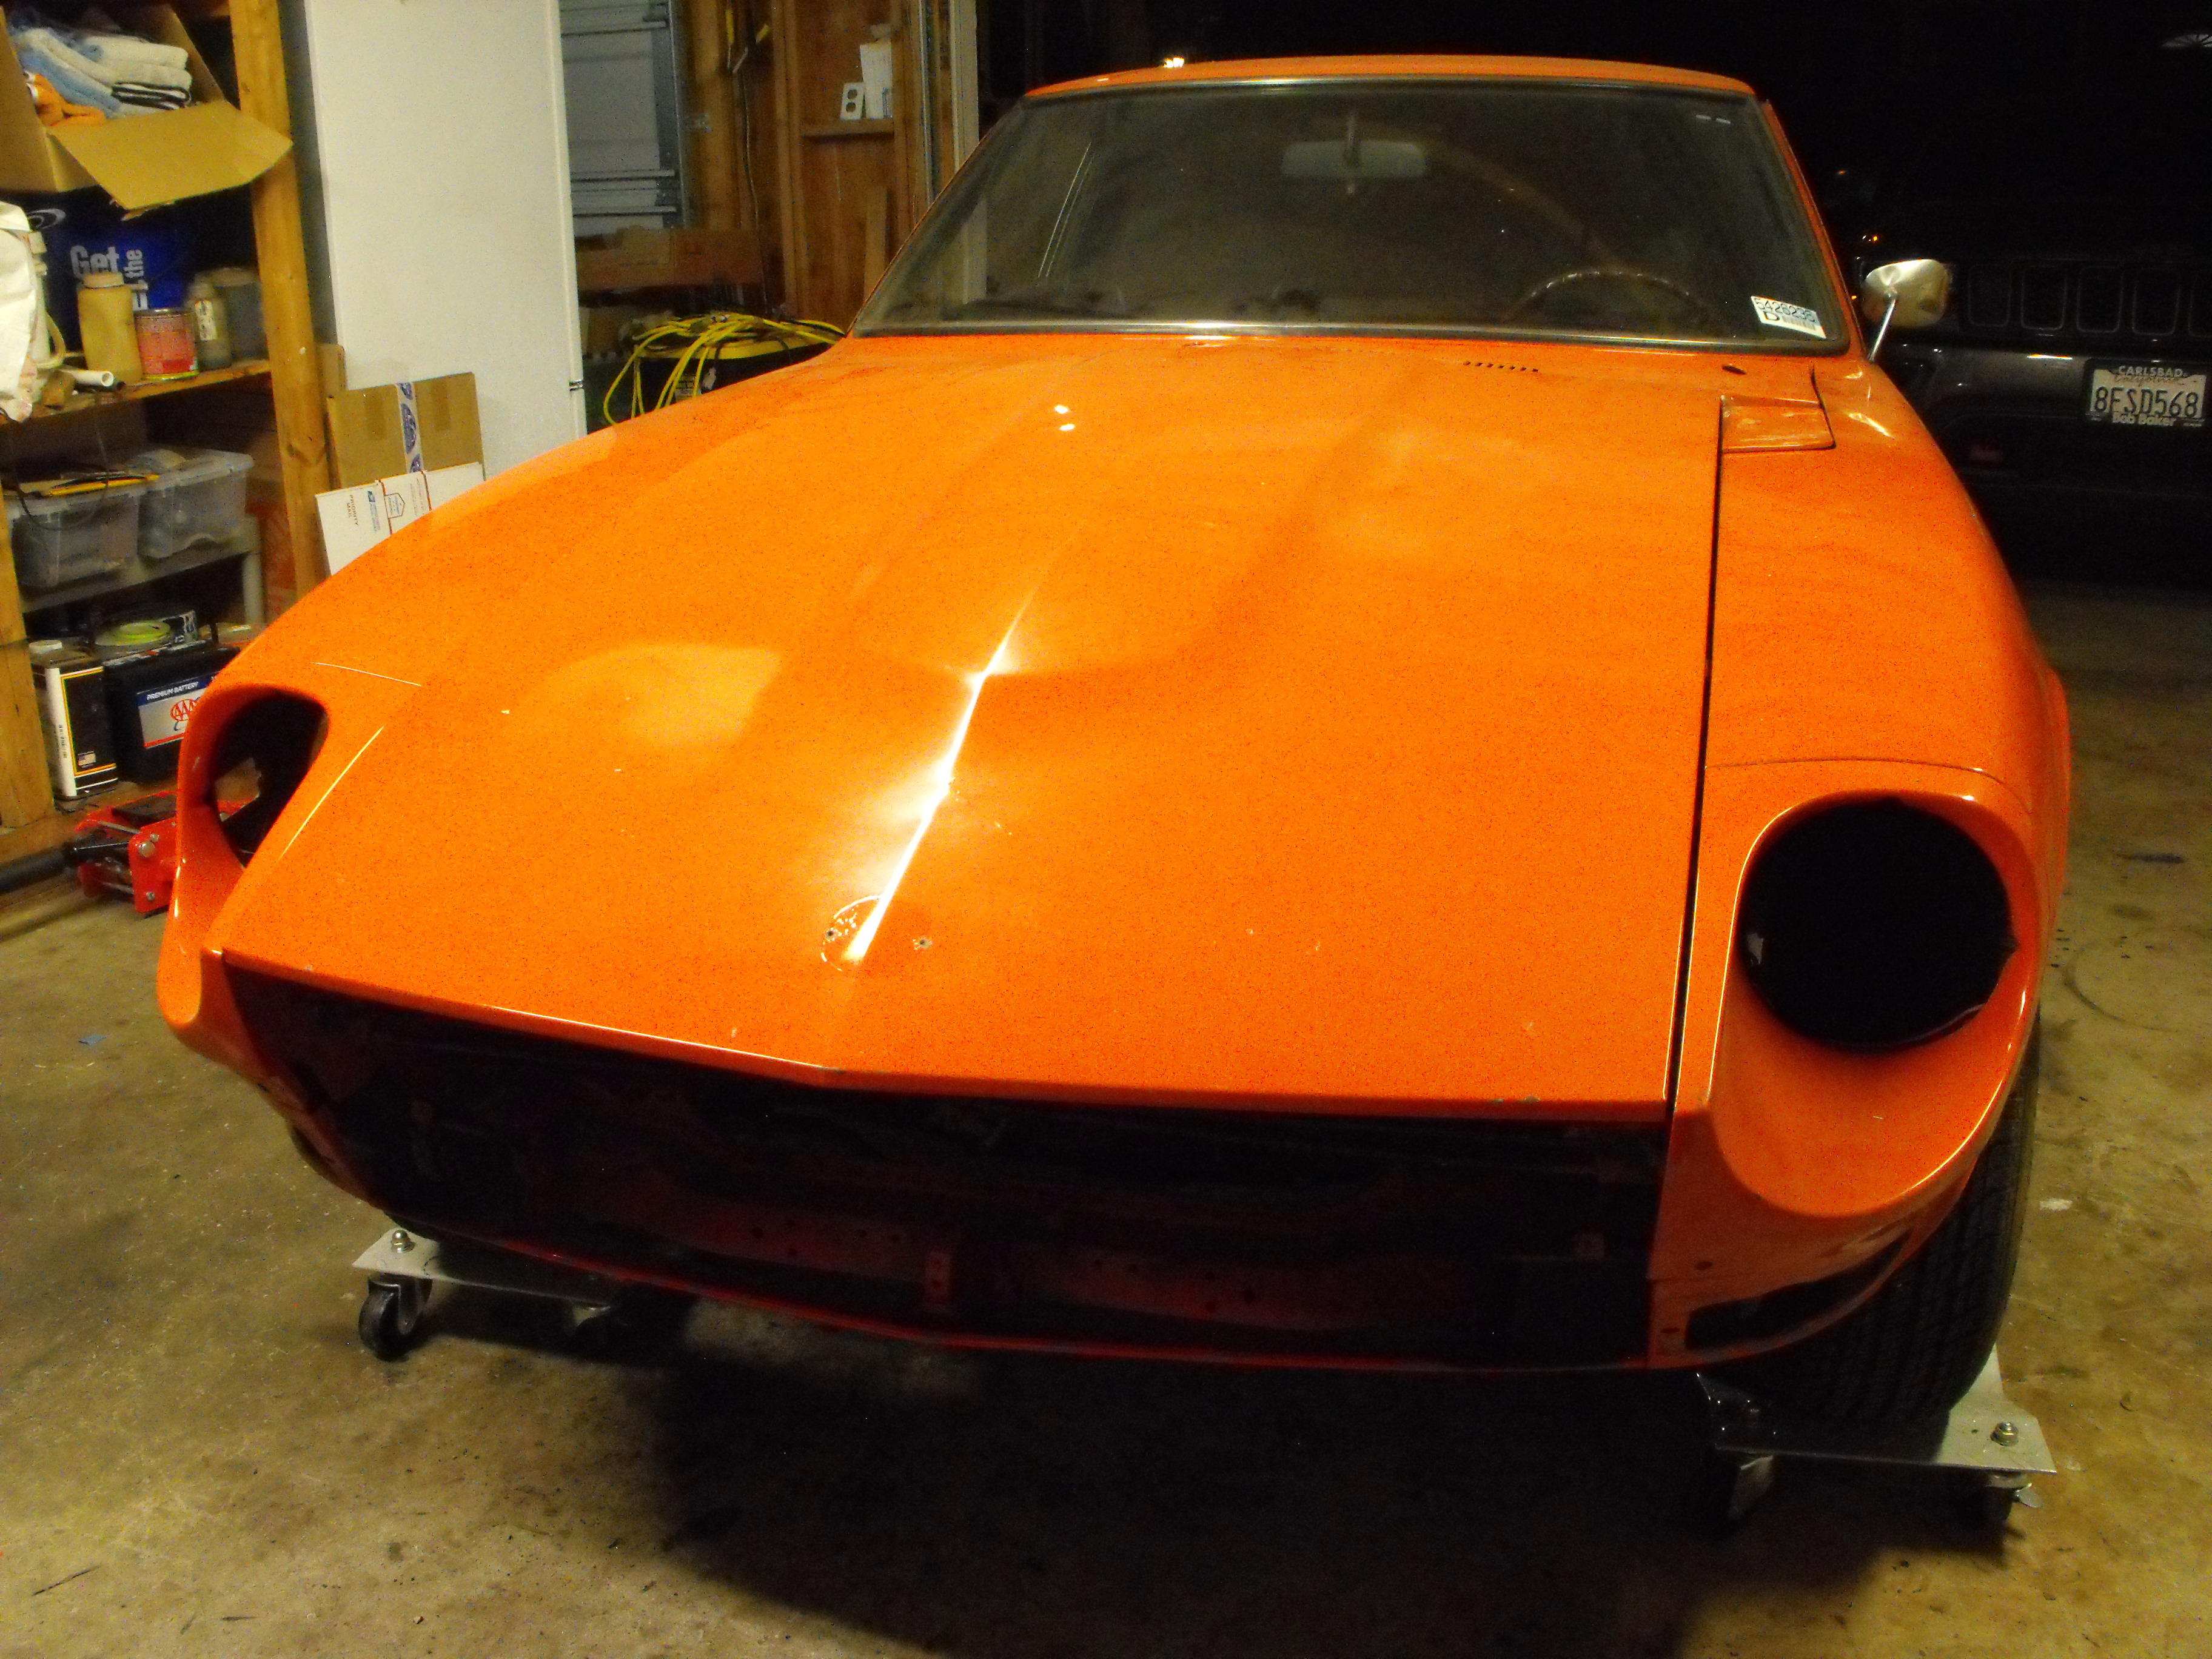
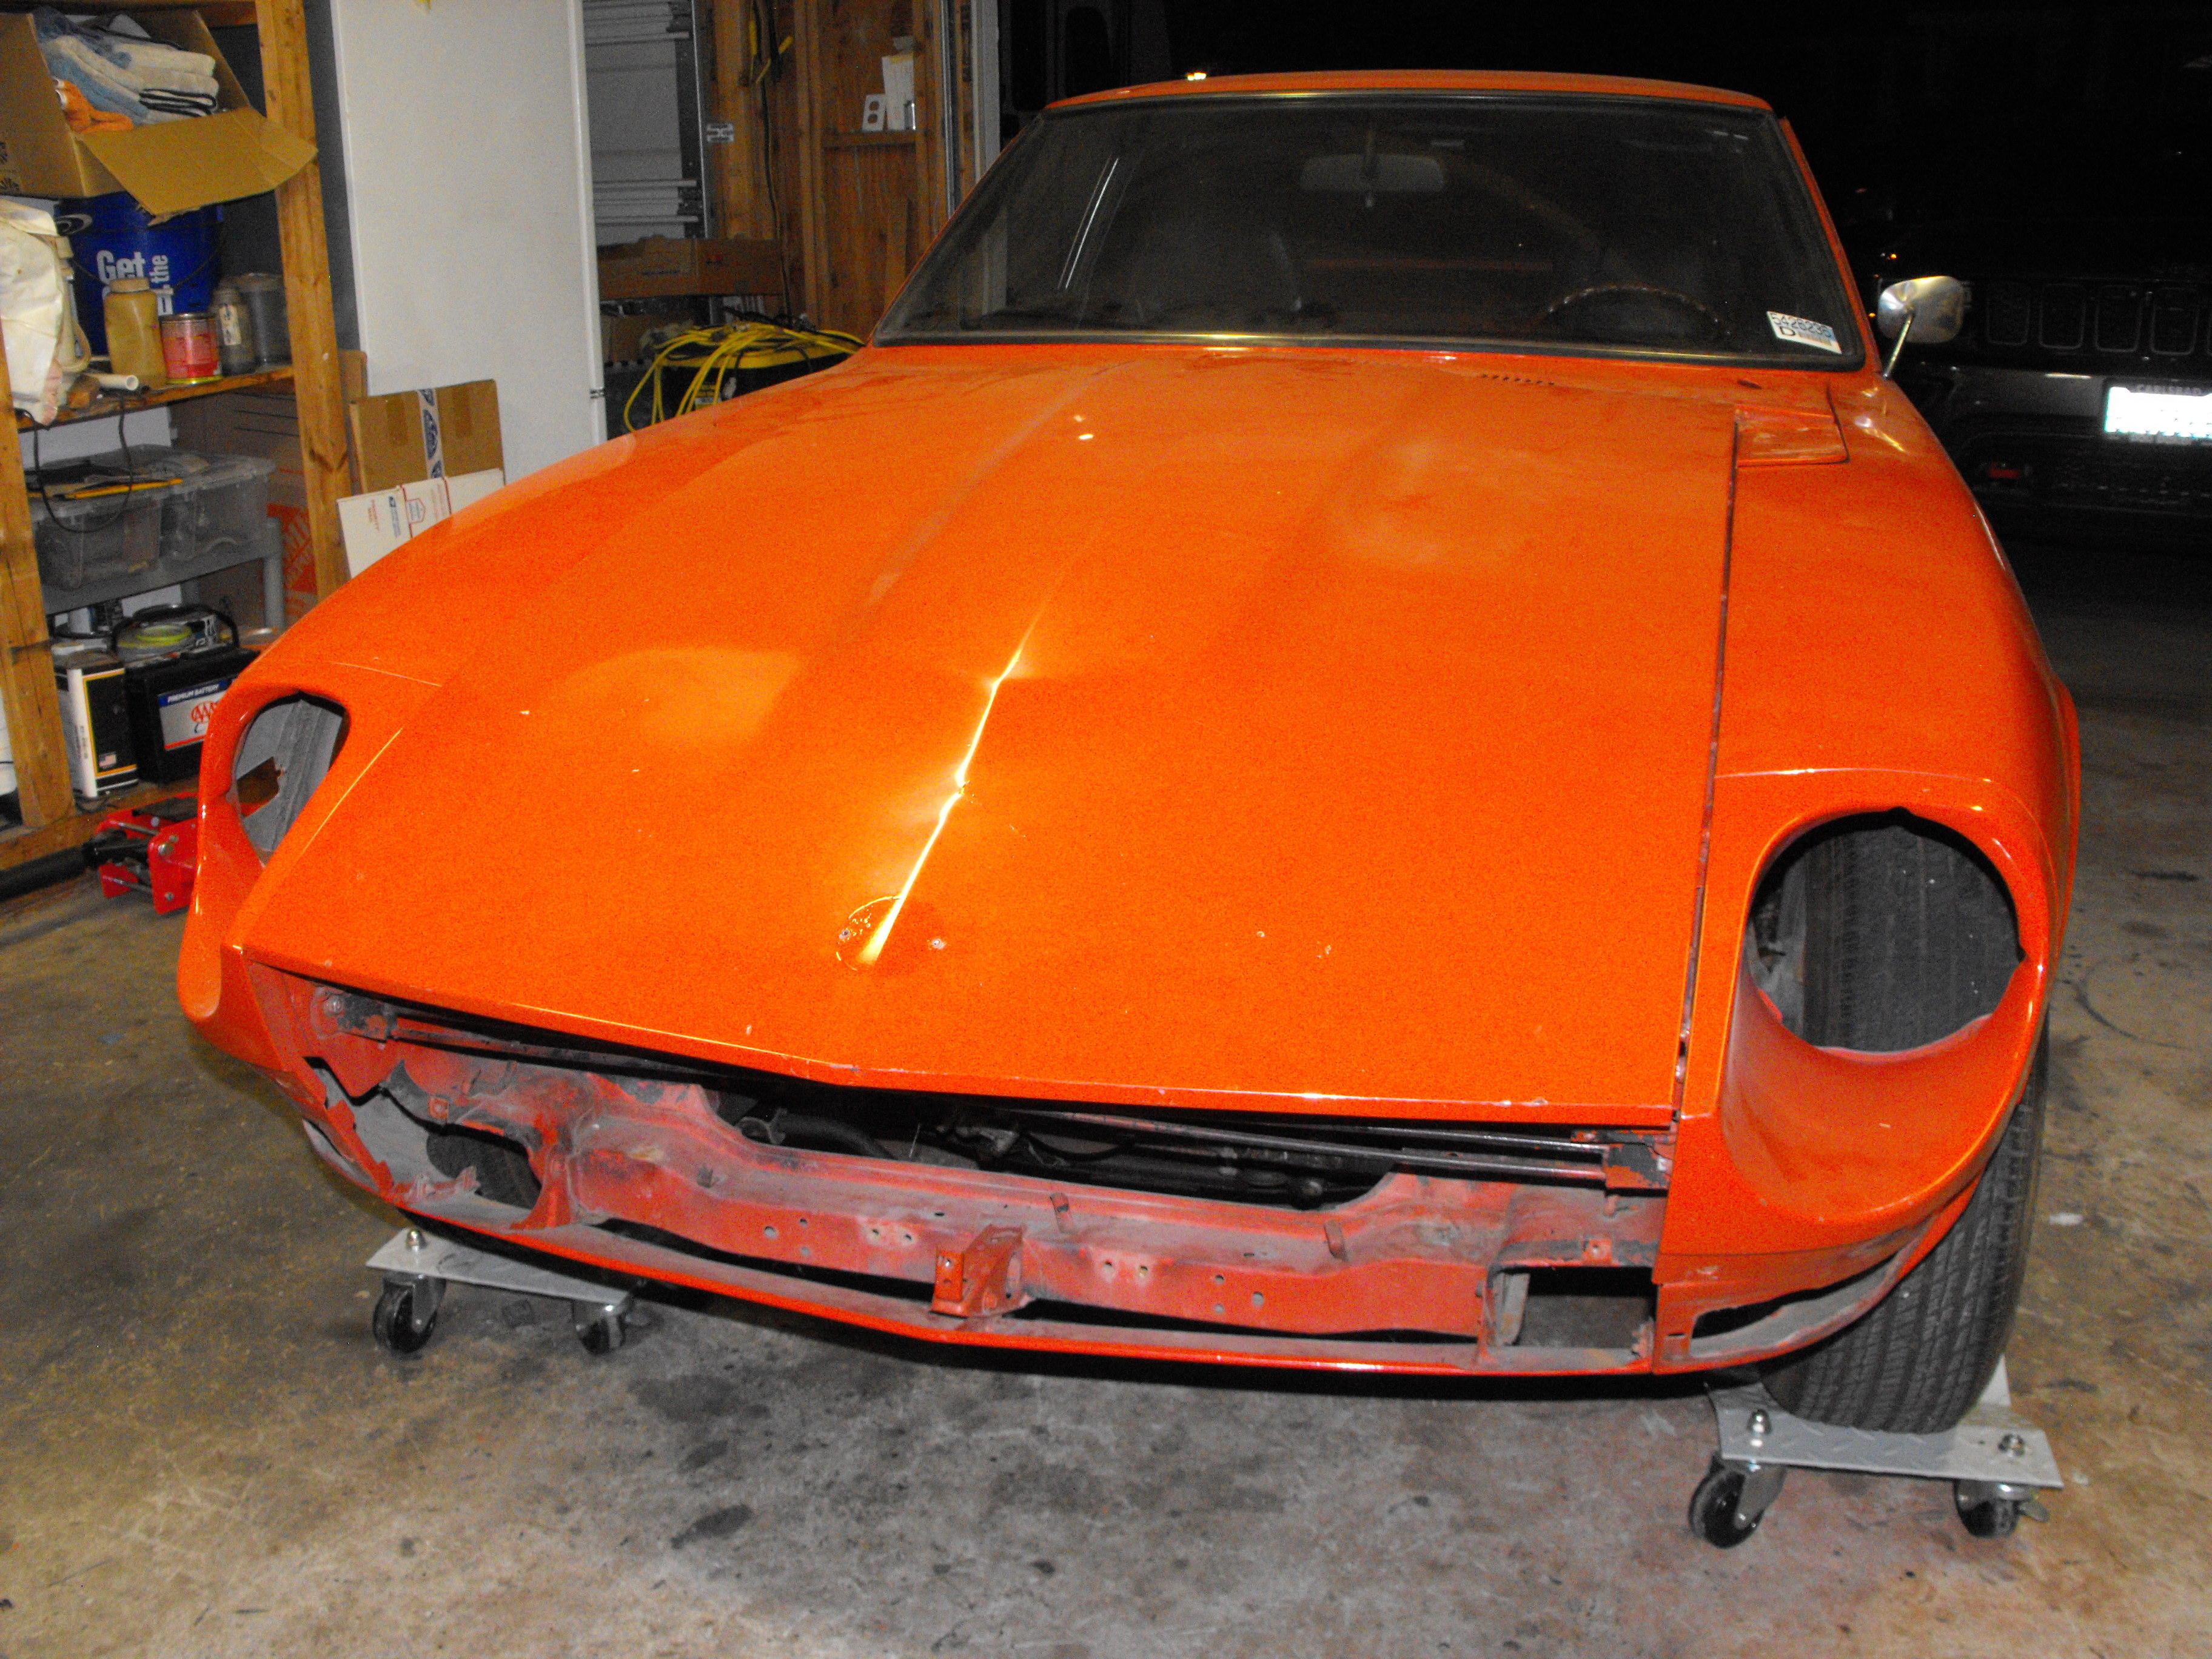
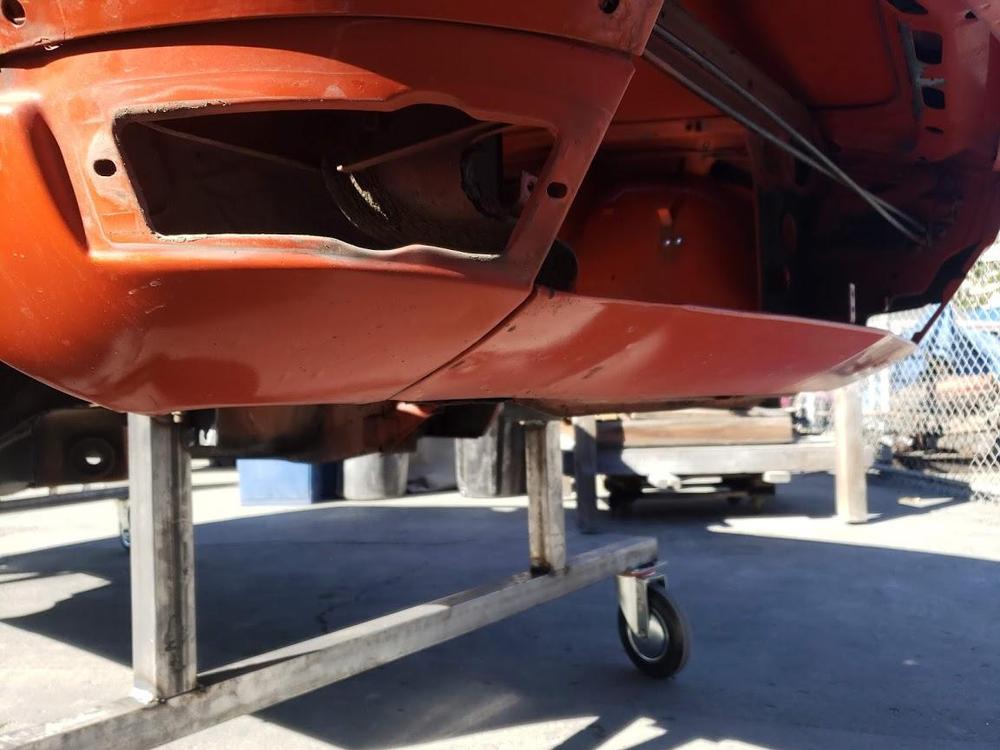
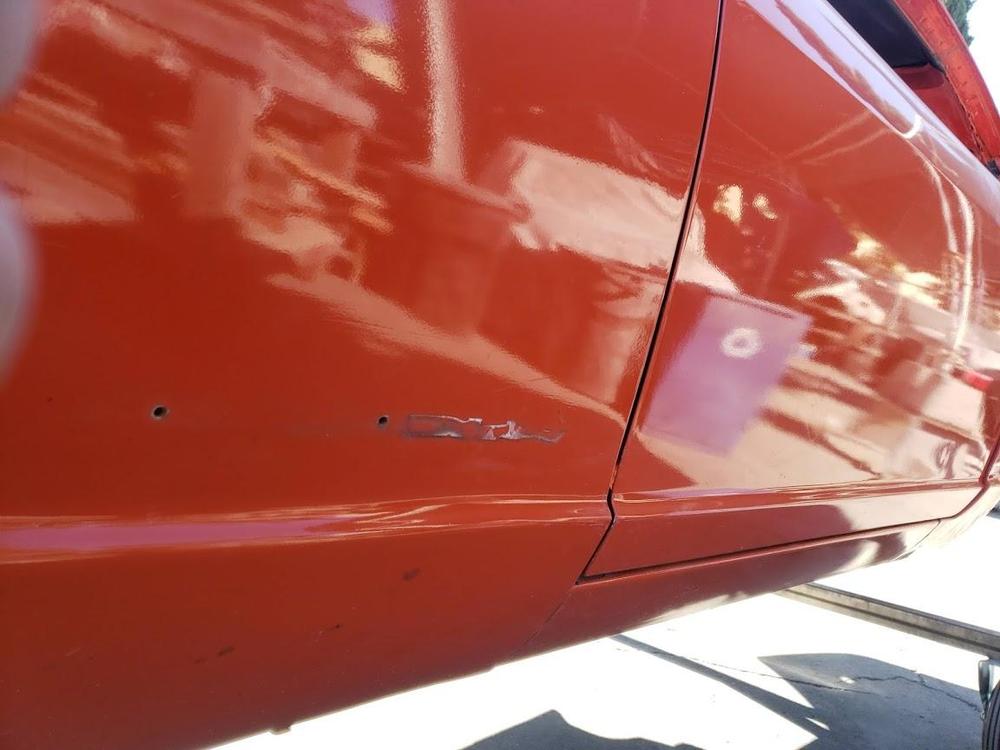
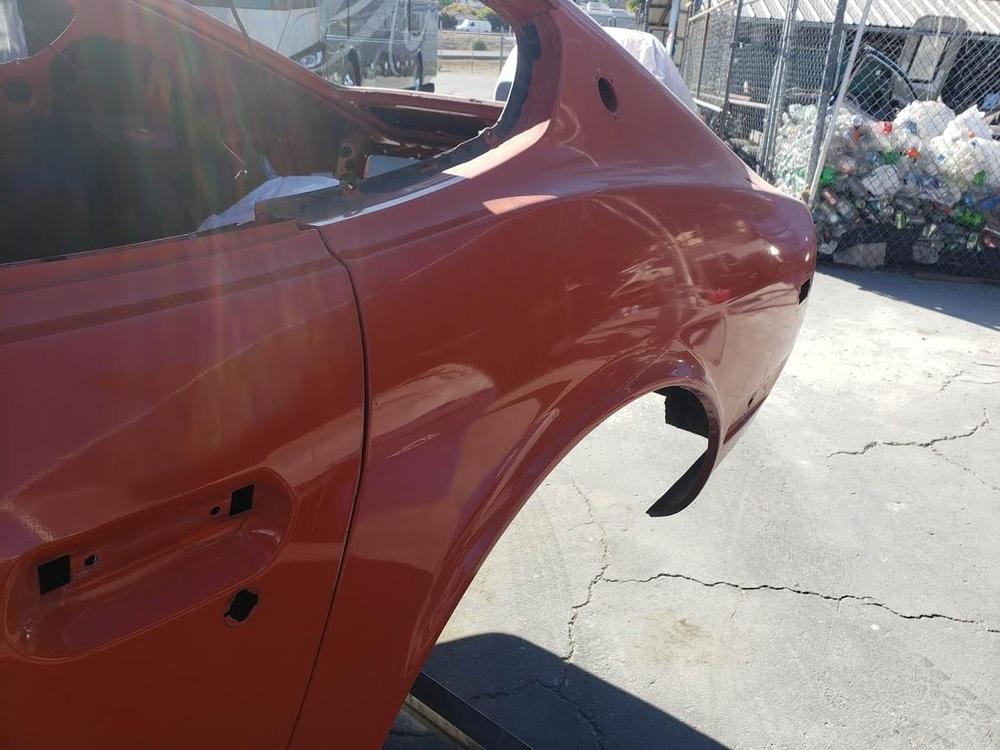
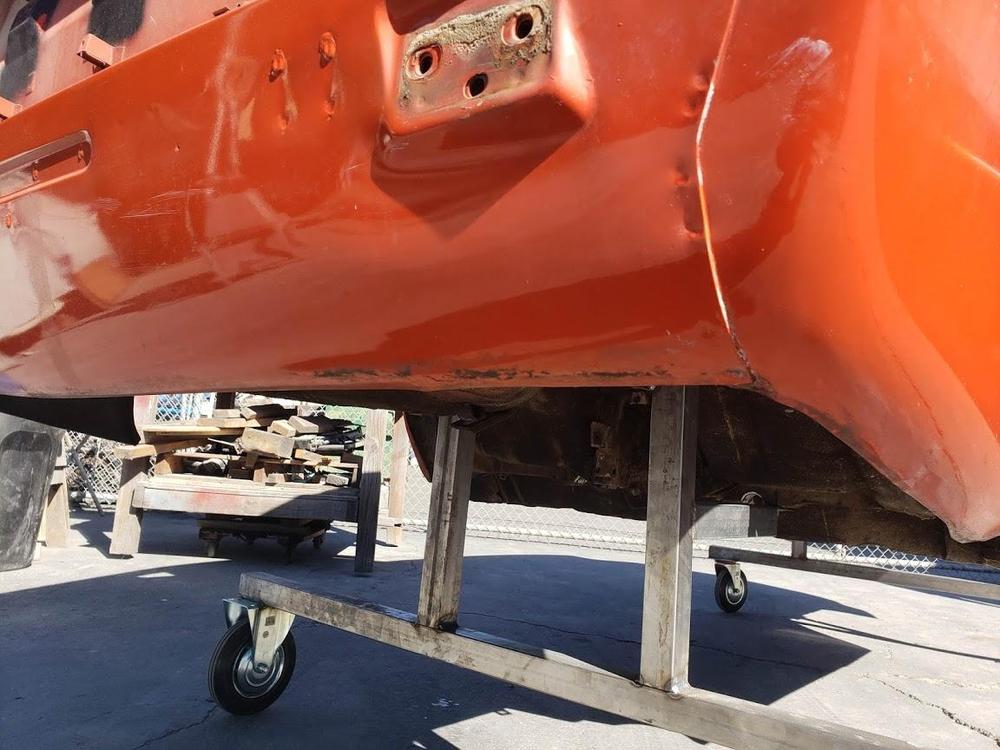
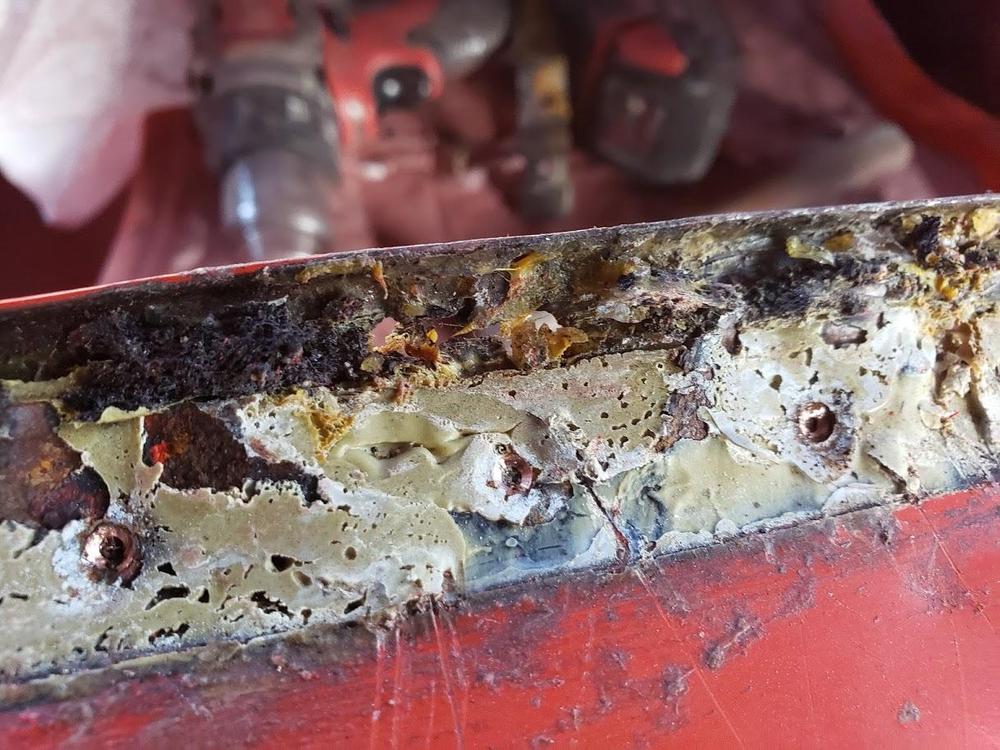
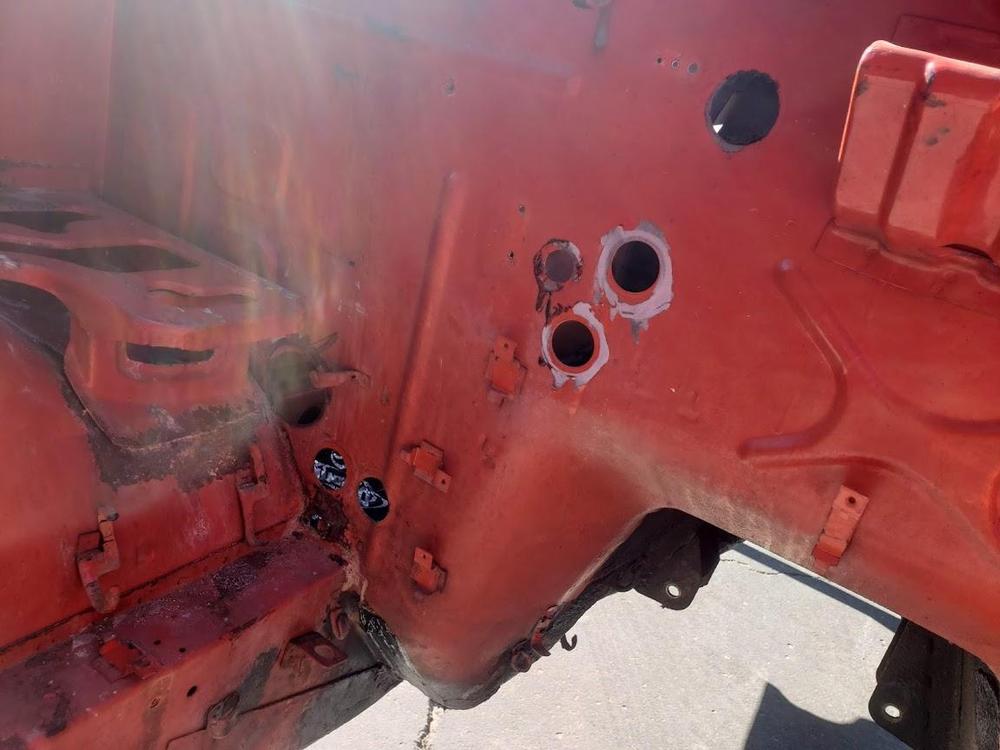
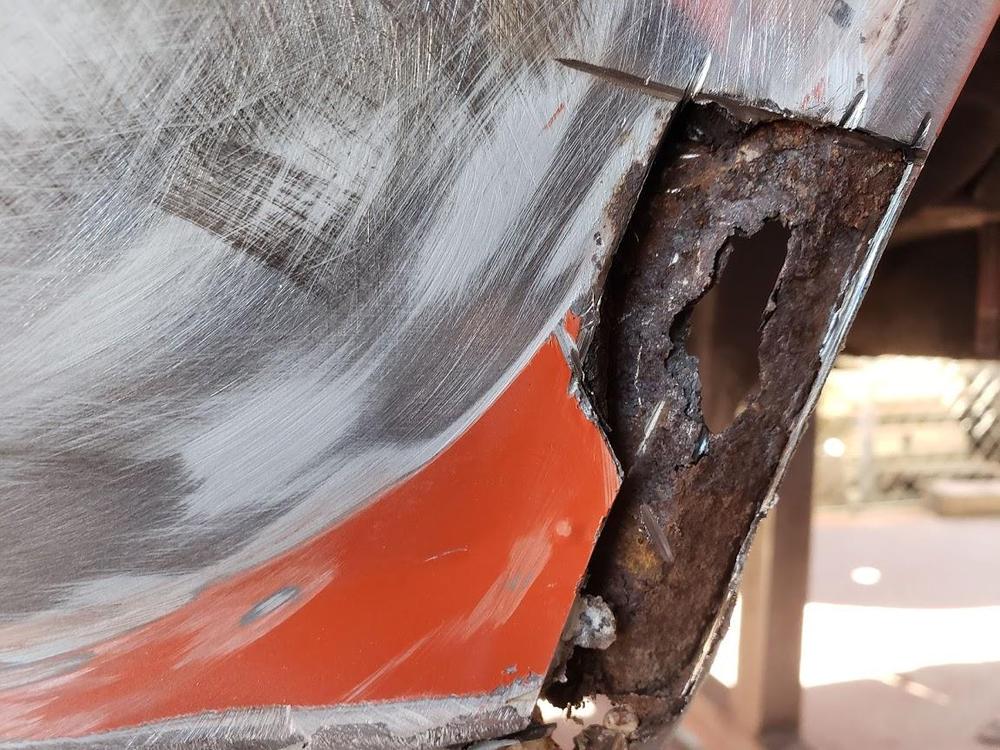
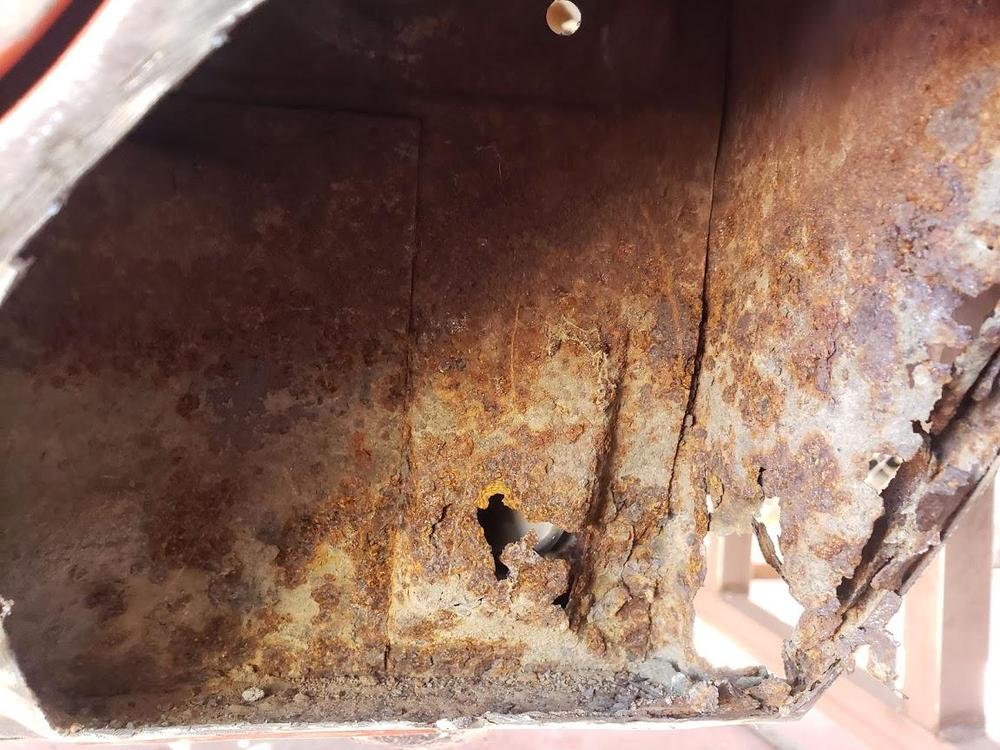
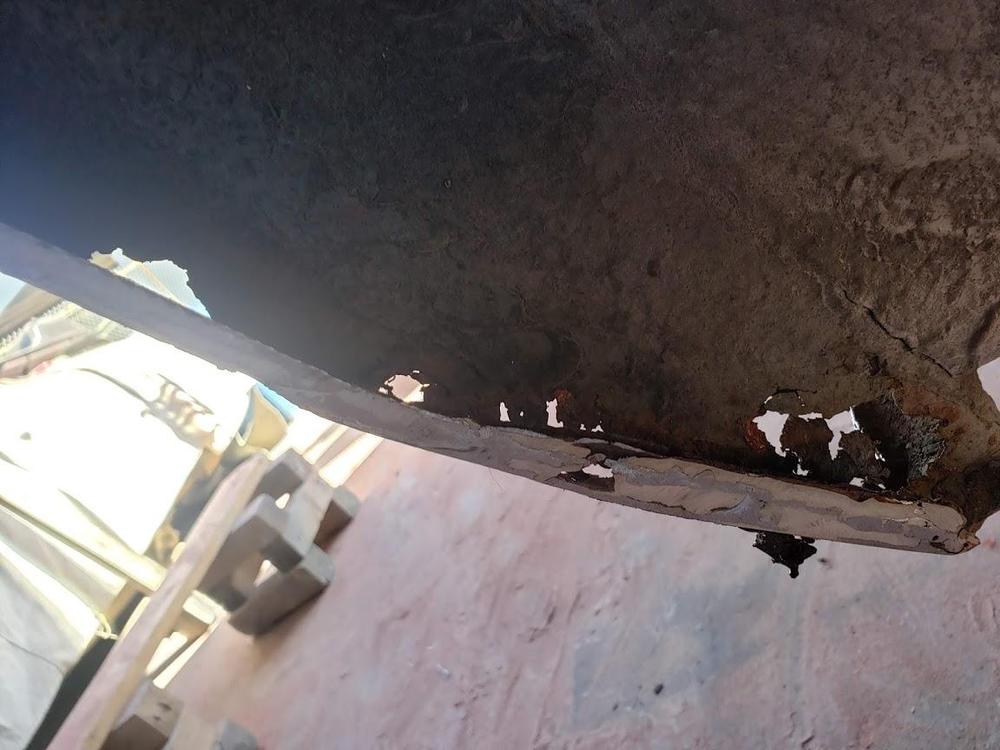
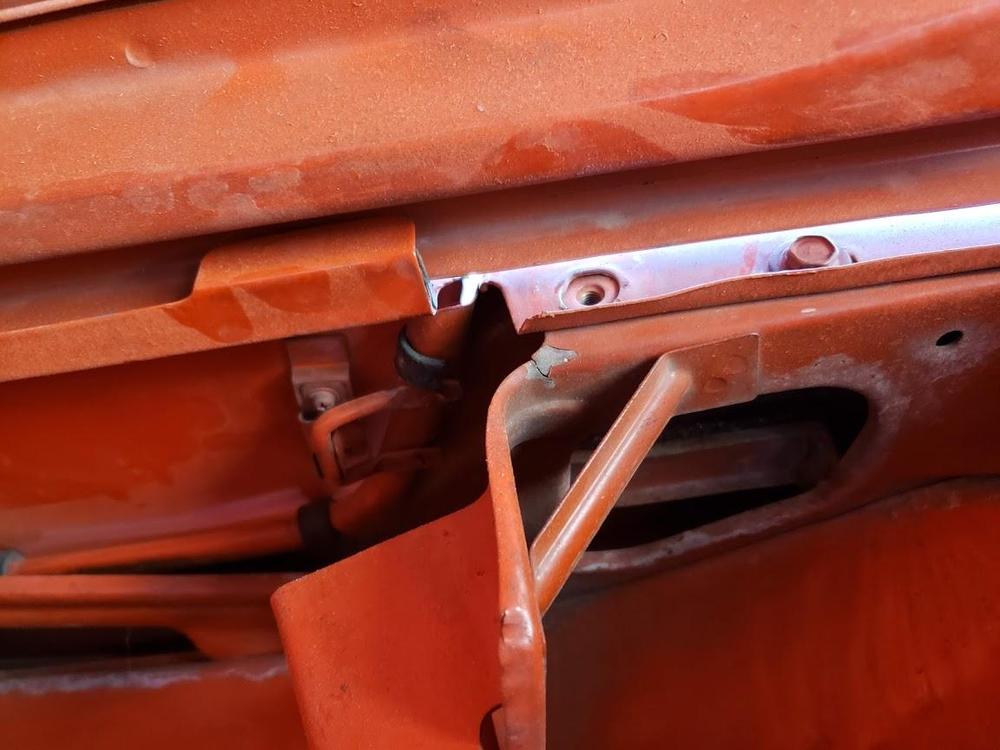
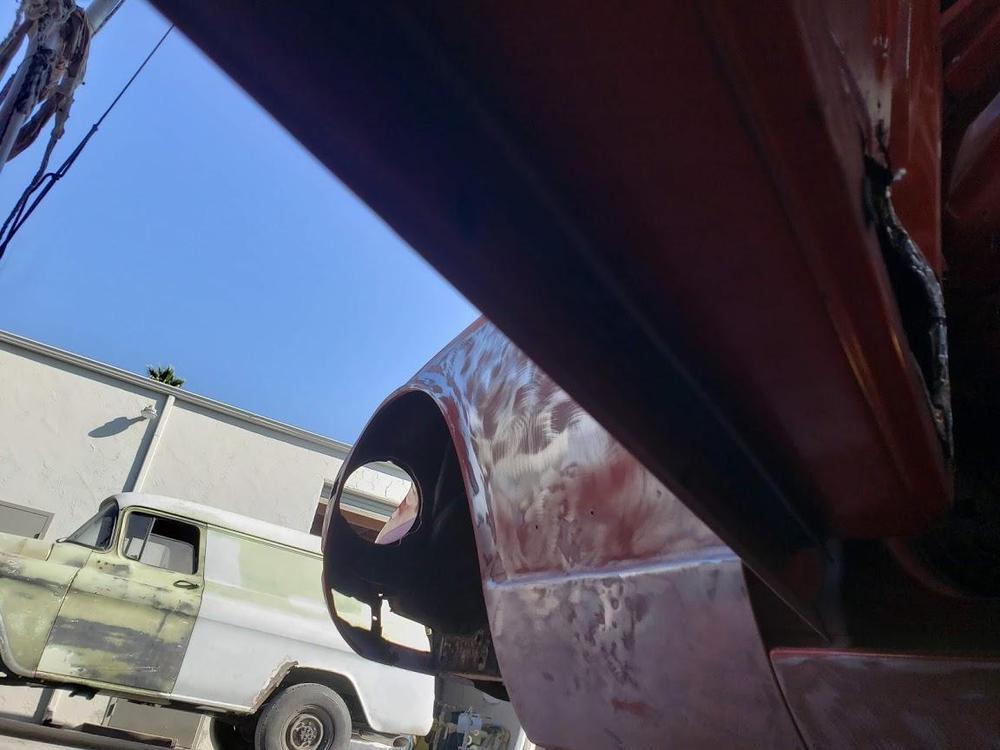
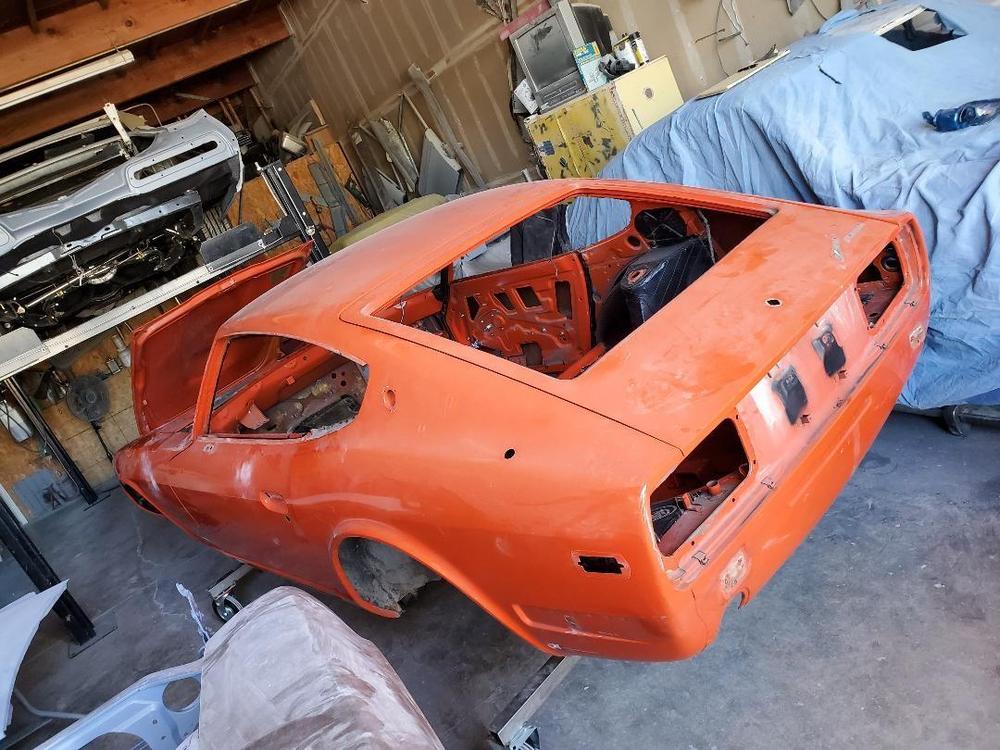
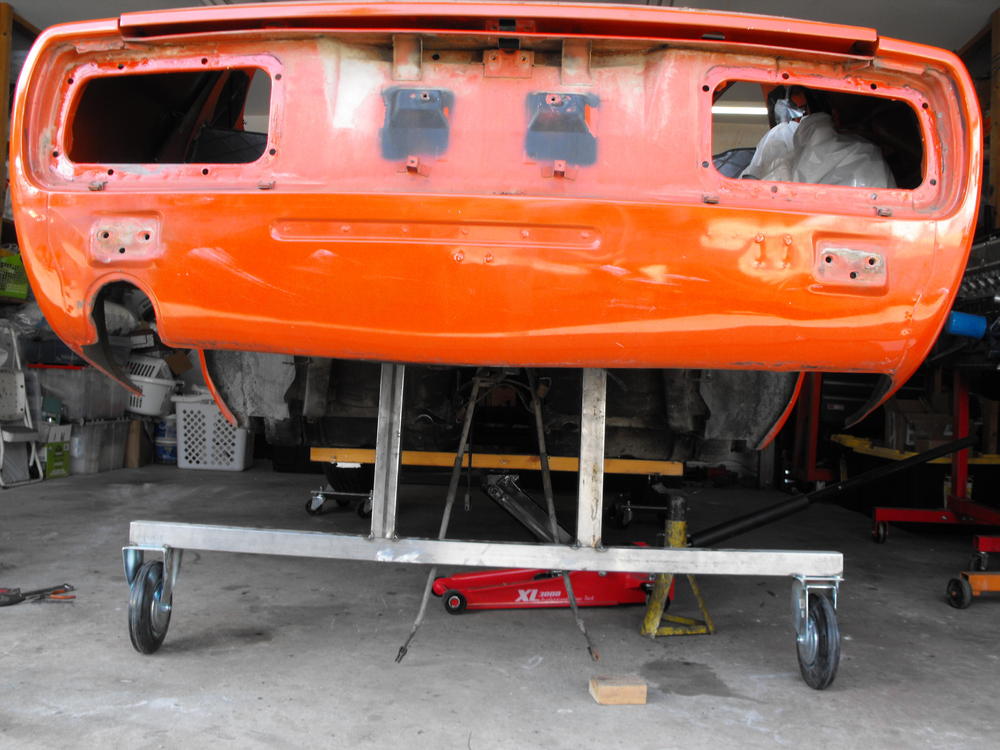
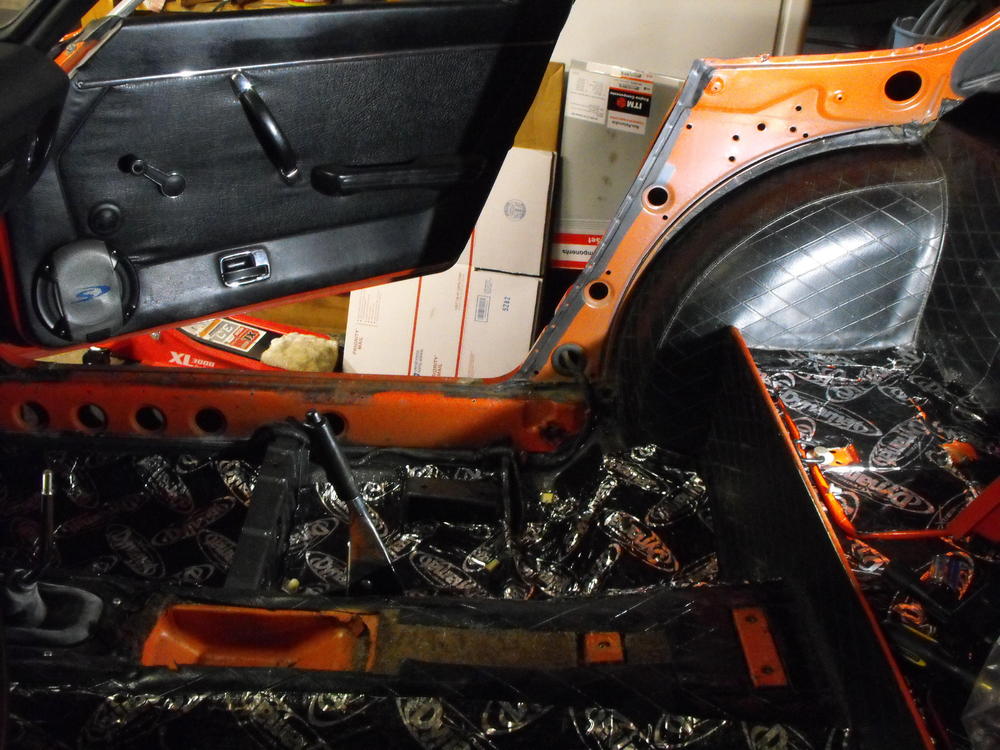
Yes, the underside of the car is one of the best I have seen. Just a few minor depressions in the frame rails which I may just correct with some filler. Otherwise the floor pans are near perfect. There seems to be a number of bondo areas on the car itself and the doglegs are pretty rusted. Probably a result of its time in Pennsylvania. Miguel will cut these areas out and weld in new patch panels.


.jpg.b20677023f34ff8fac1de8255f69b203.jpg)