


motorman7
 Subscriber
-
Joined
-
Last visited
Everything posted by motorman7
-
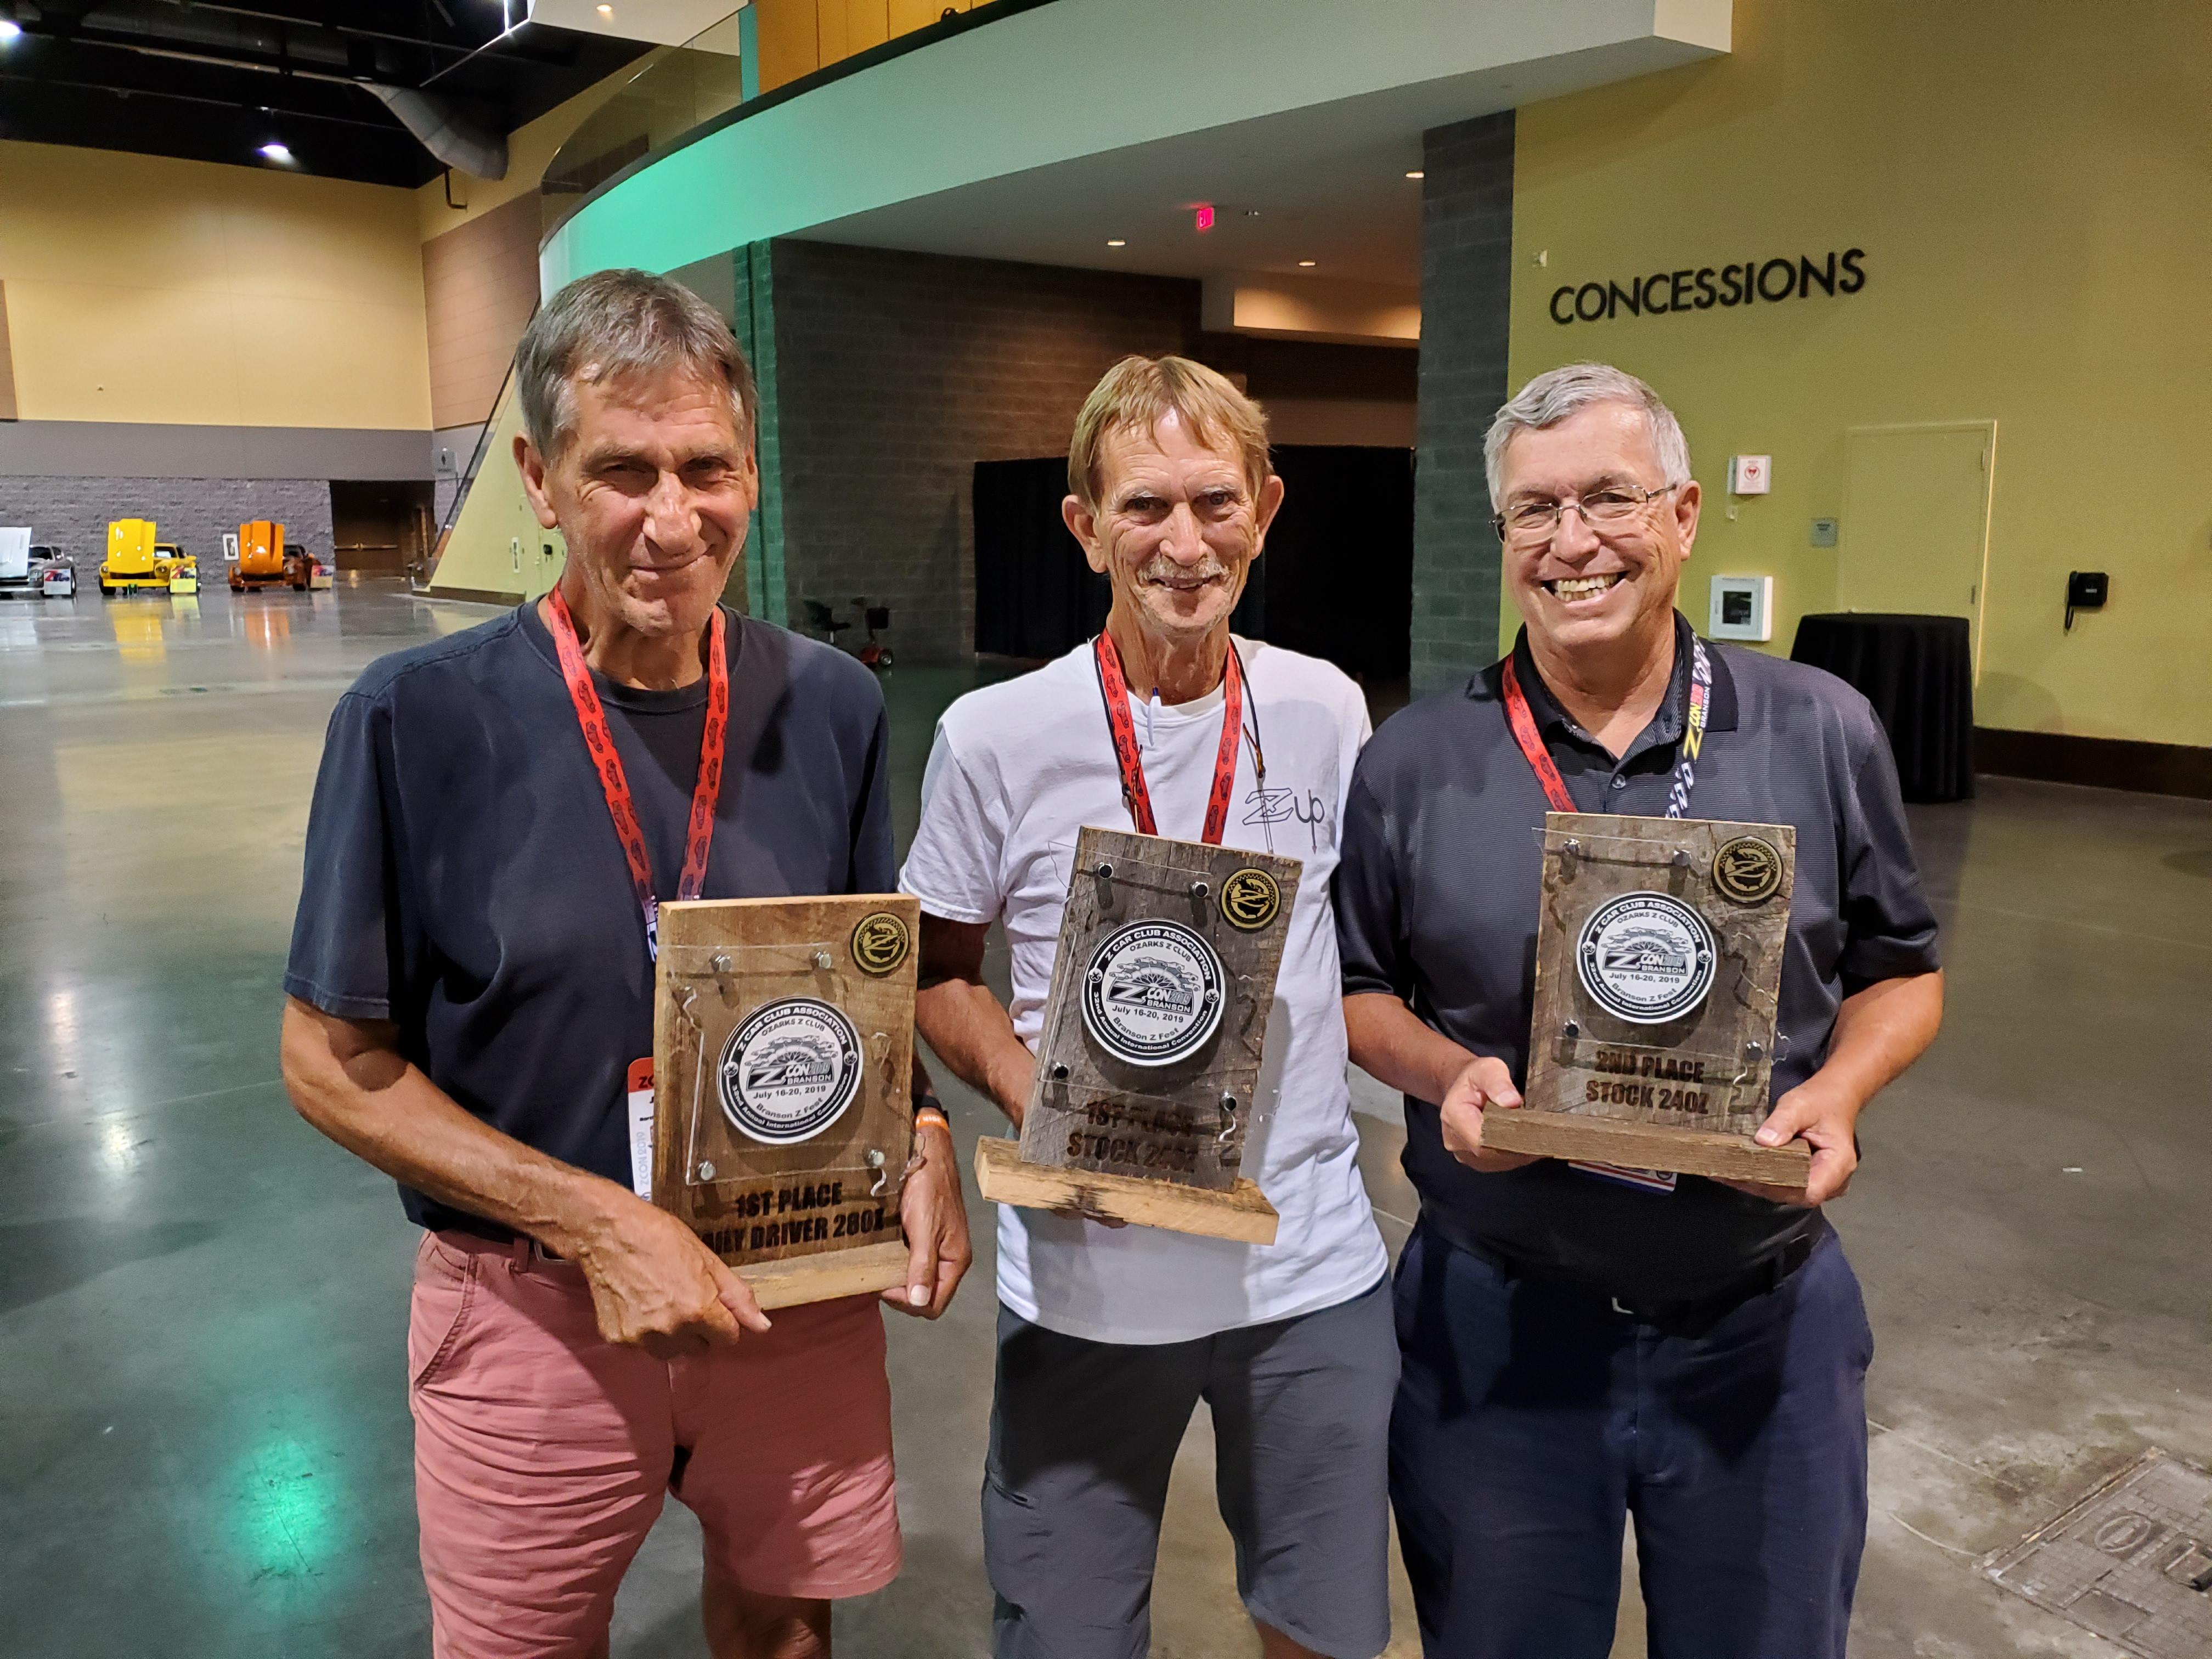
 We will not find out how we did 'pointwise' until we receive the judging sheets in the mail. This typically takes a long time, maybe 3-6 months (just about the time you have forgotten about them). Jim and I both received a second judging which typically means we scored 280 or above in the first round of judging, out of 300. (300 possible: 100 points for each area; interior, exterior and engine). Neither of us were over 290 since we did not receive the Gold Medallion award. There is the possibility of going below 280 after the second judging. That is about all I know for now.
 -
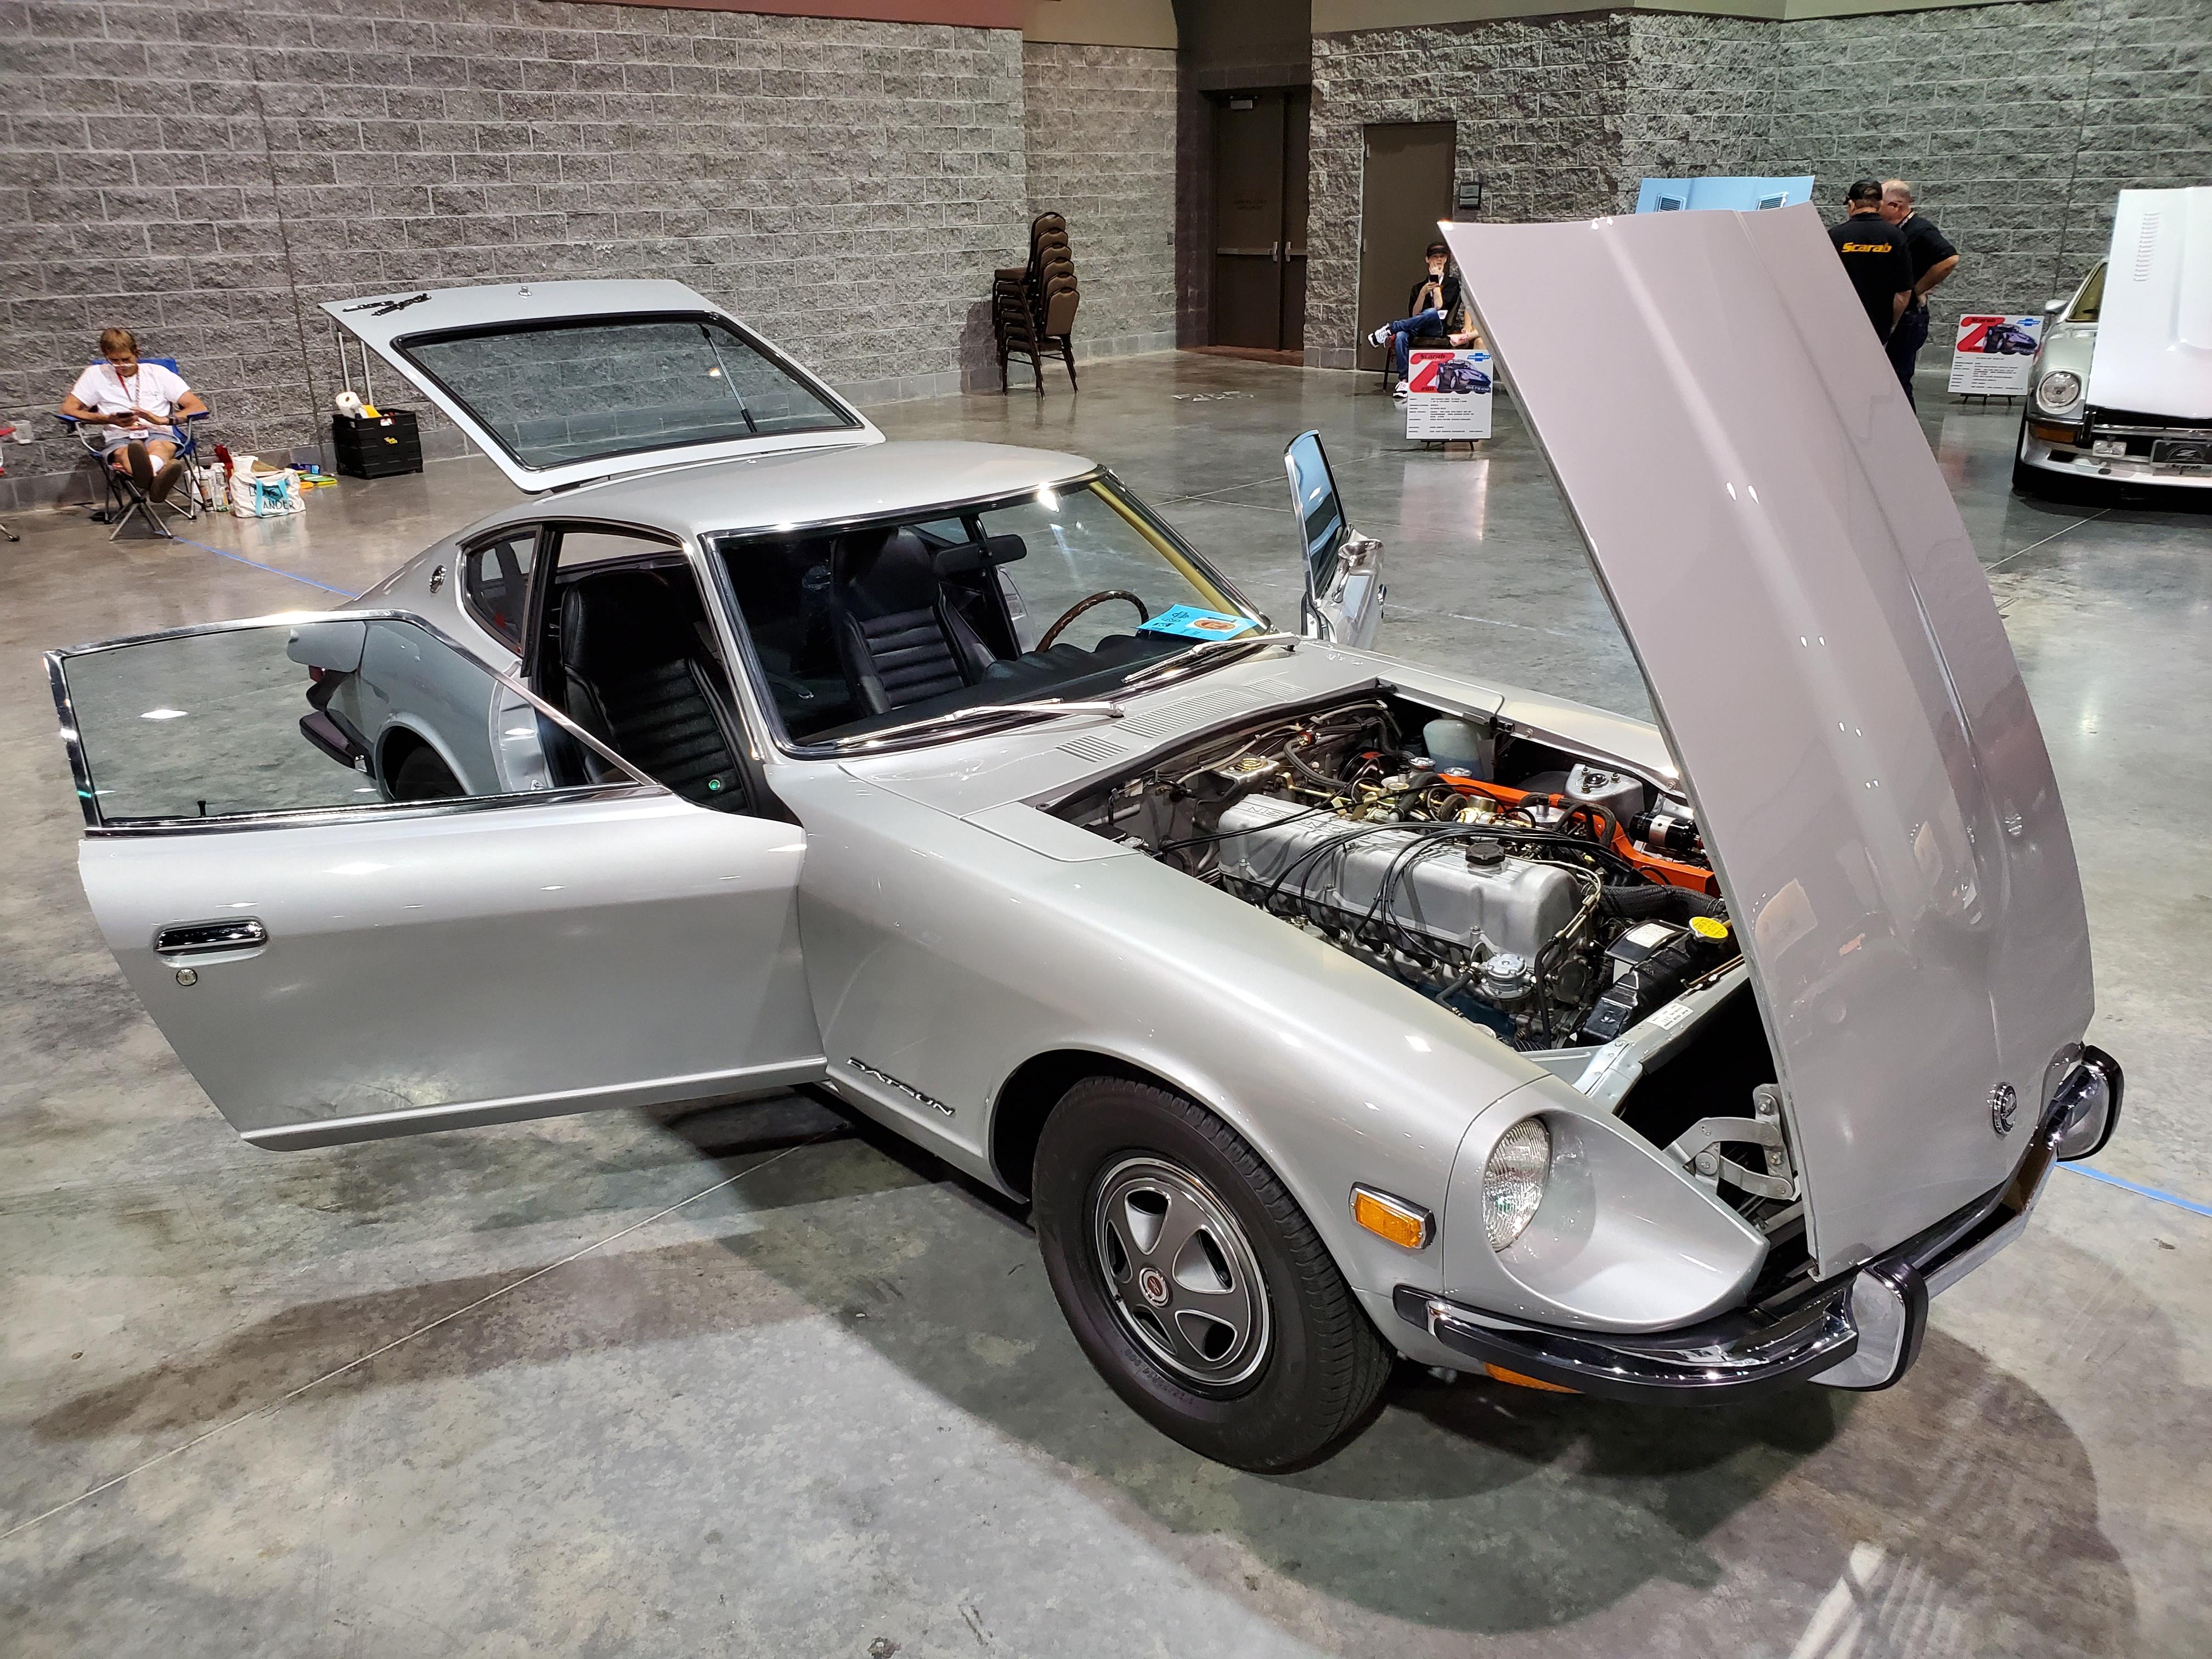
The flat top contingent takes the top two spots placing 1st and 2nd in the stock 240Z category. The outclassed round tops just can't compete.

-
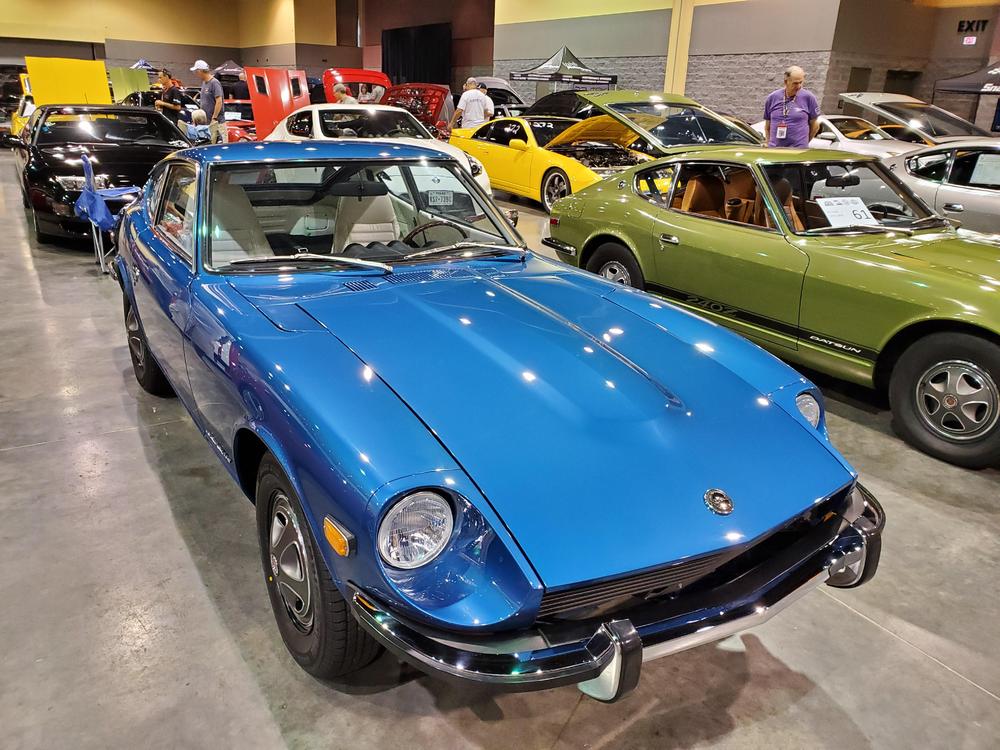
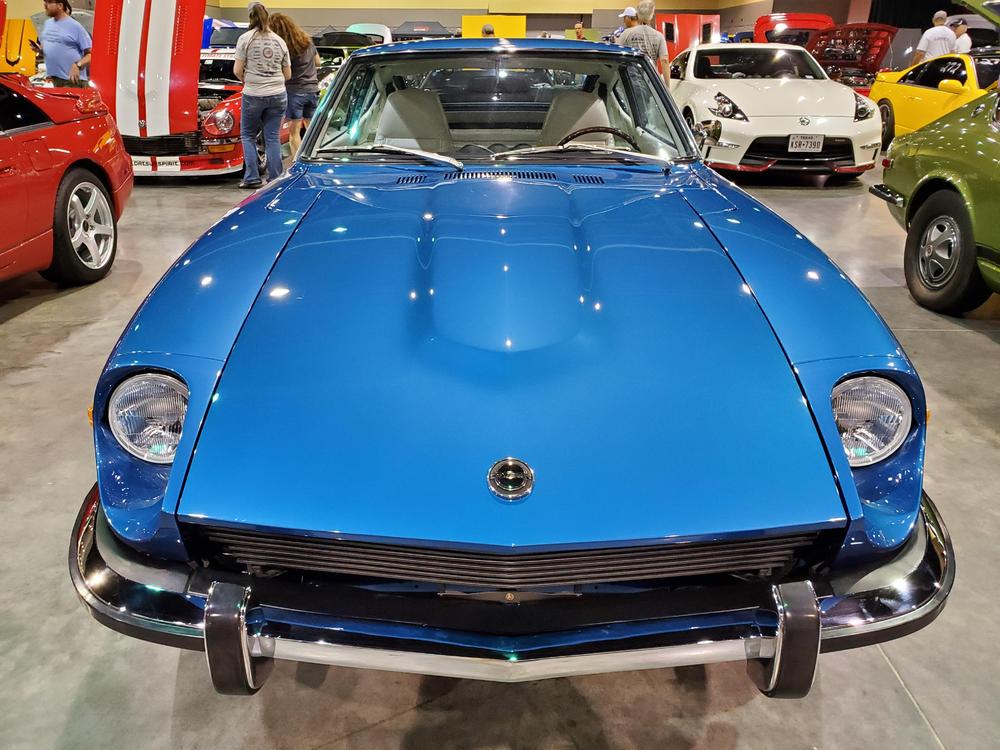
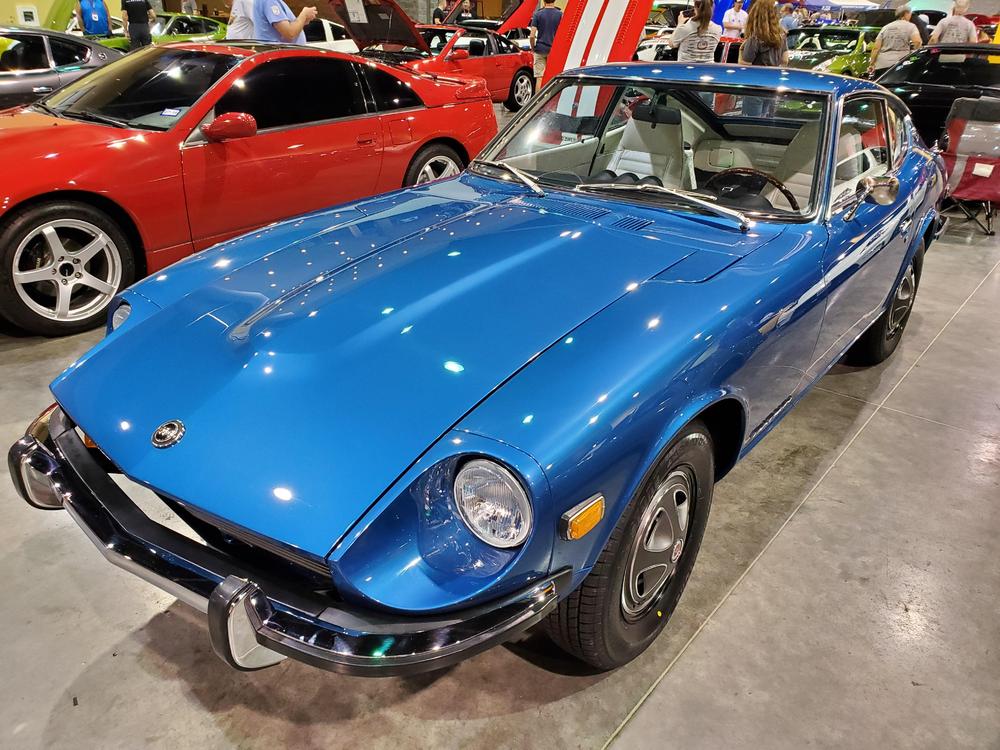
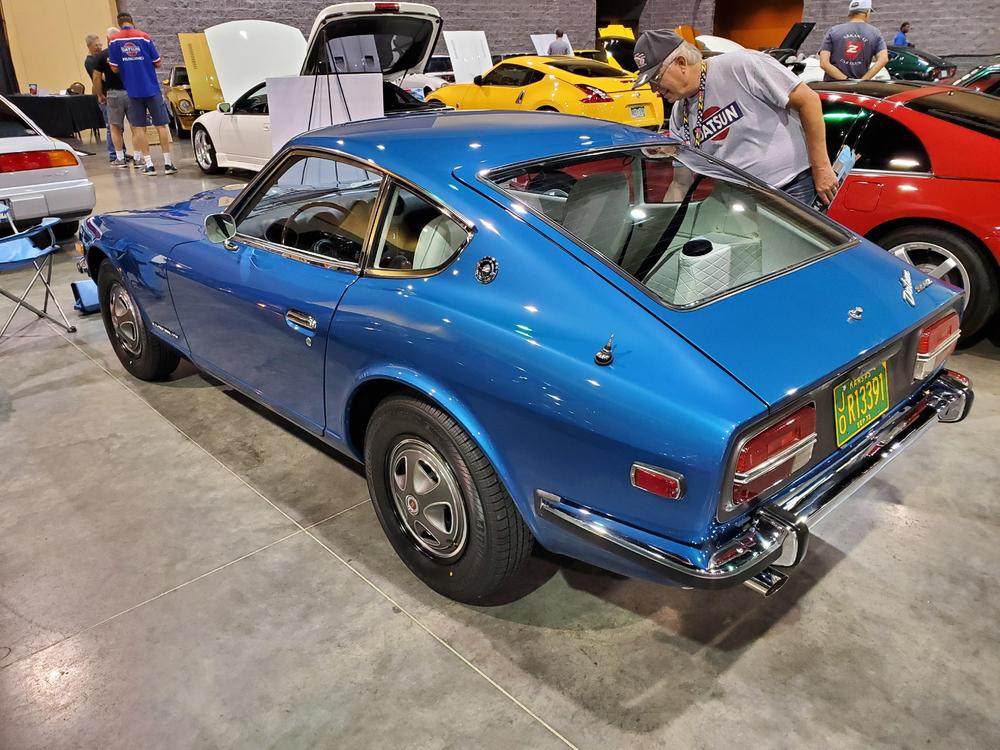
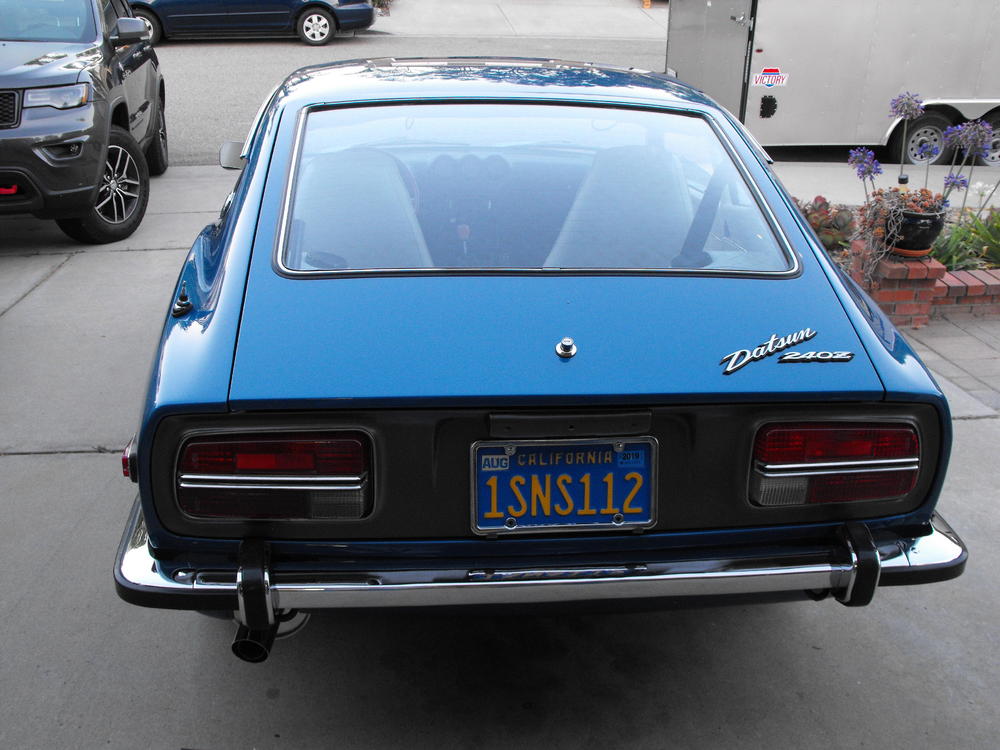
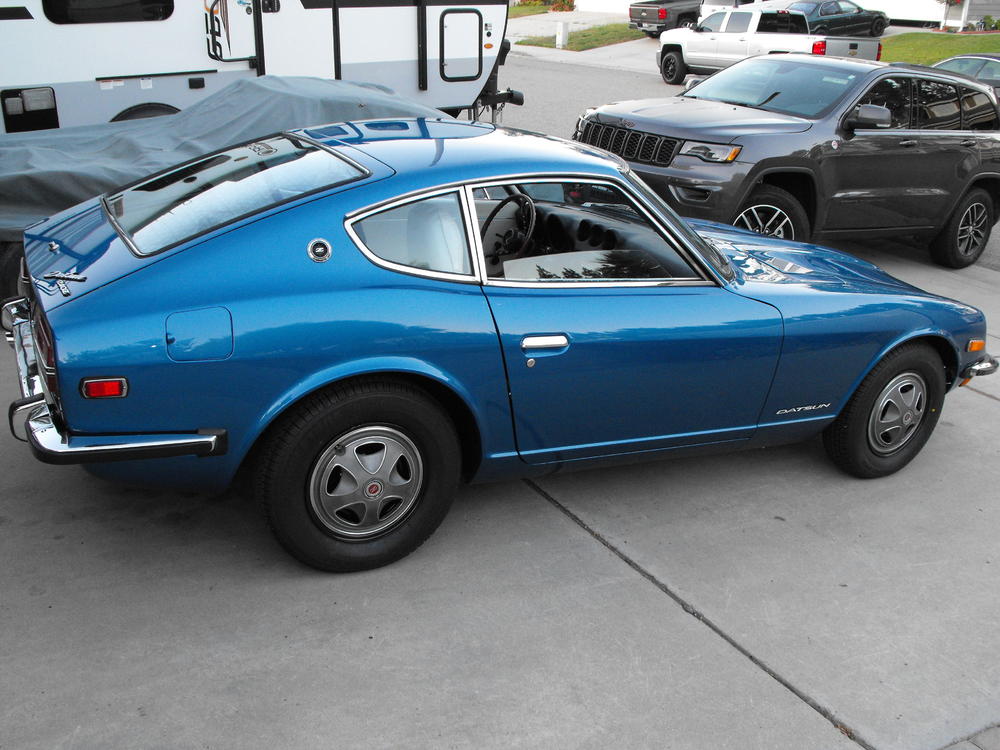
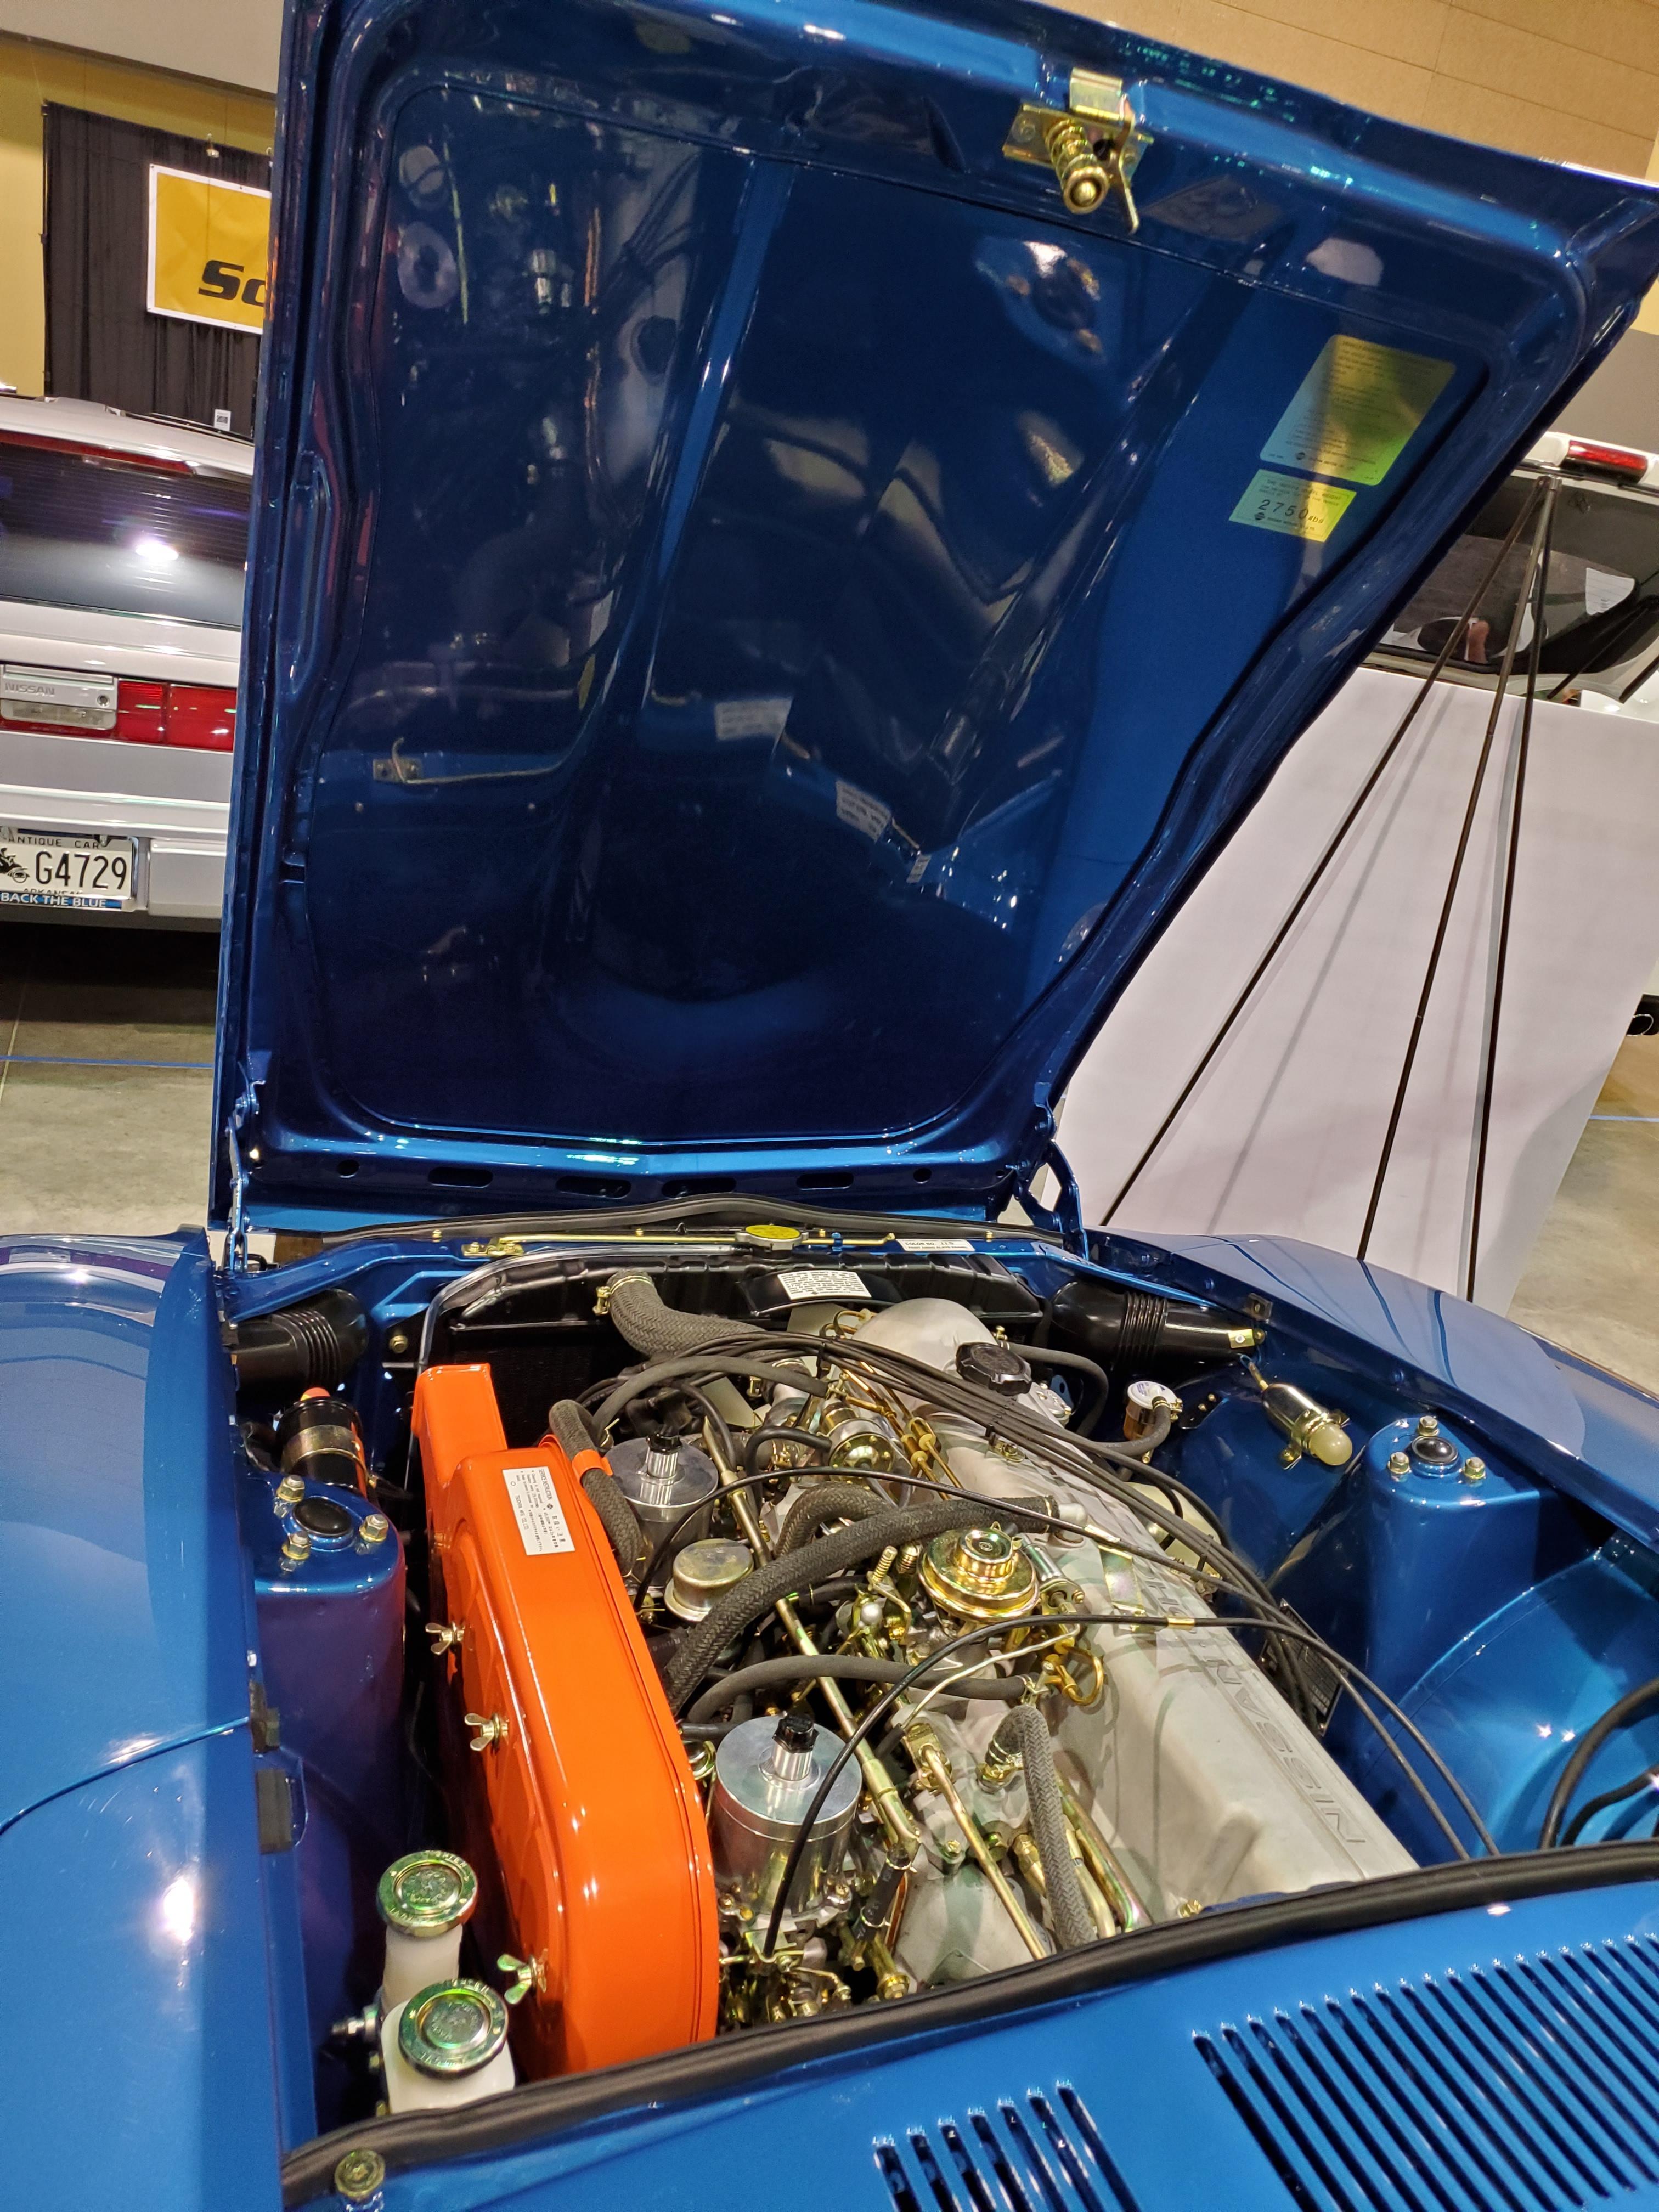
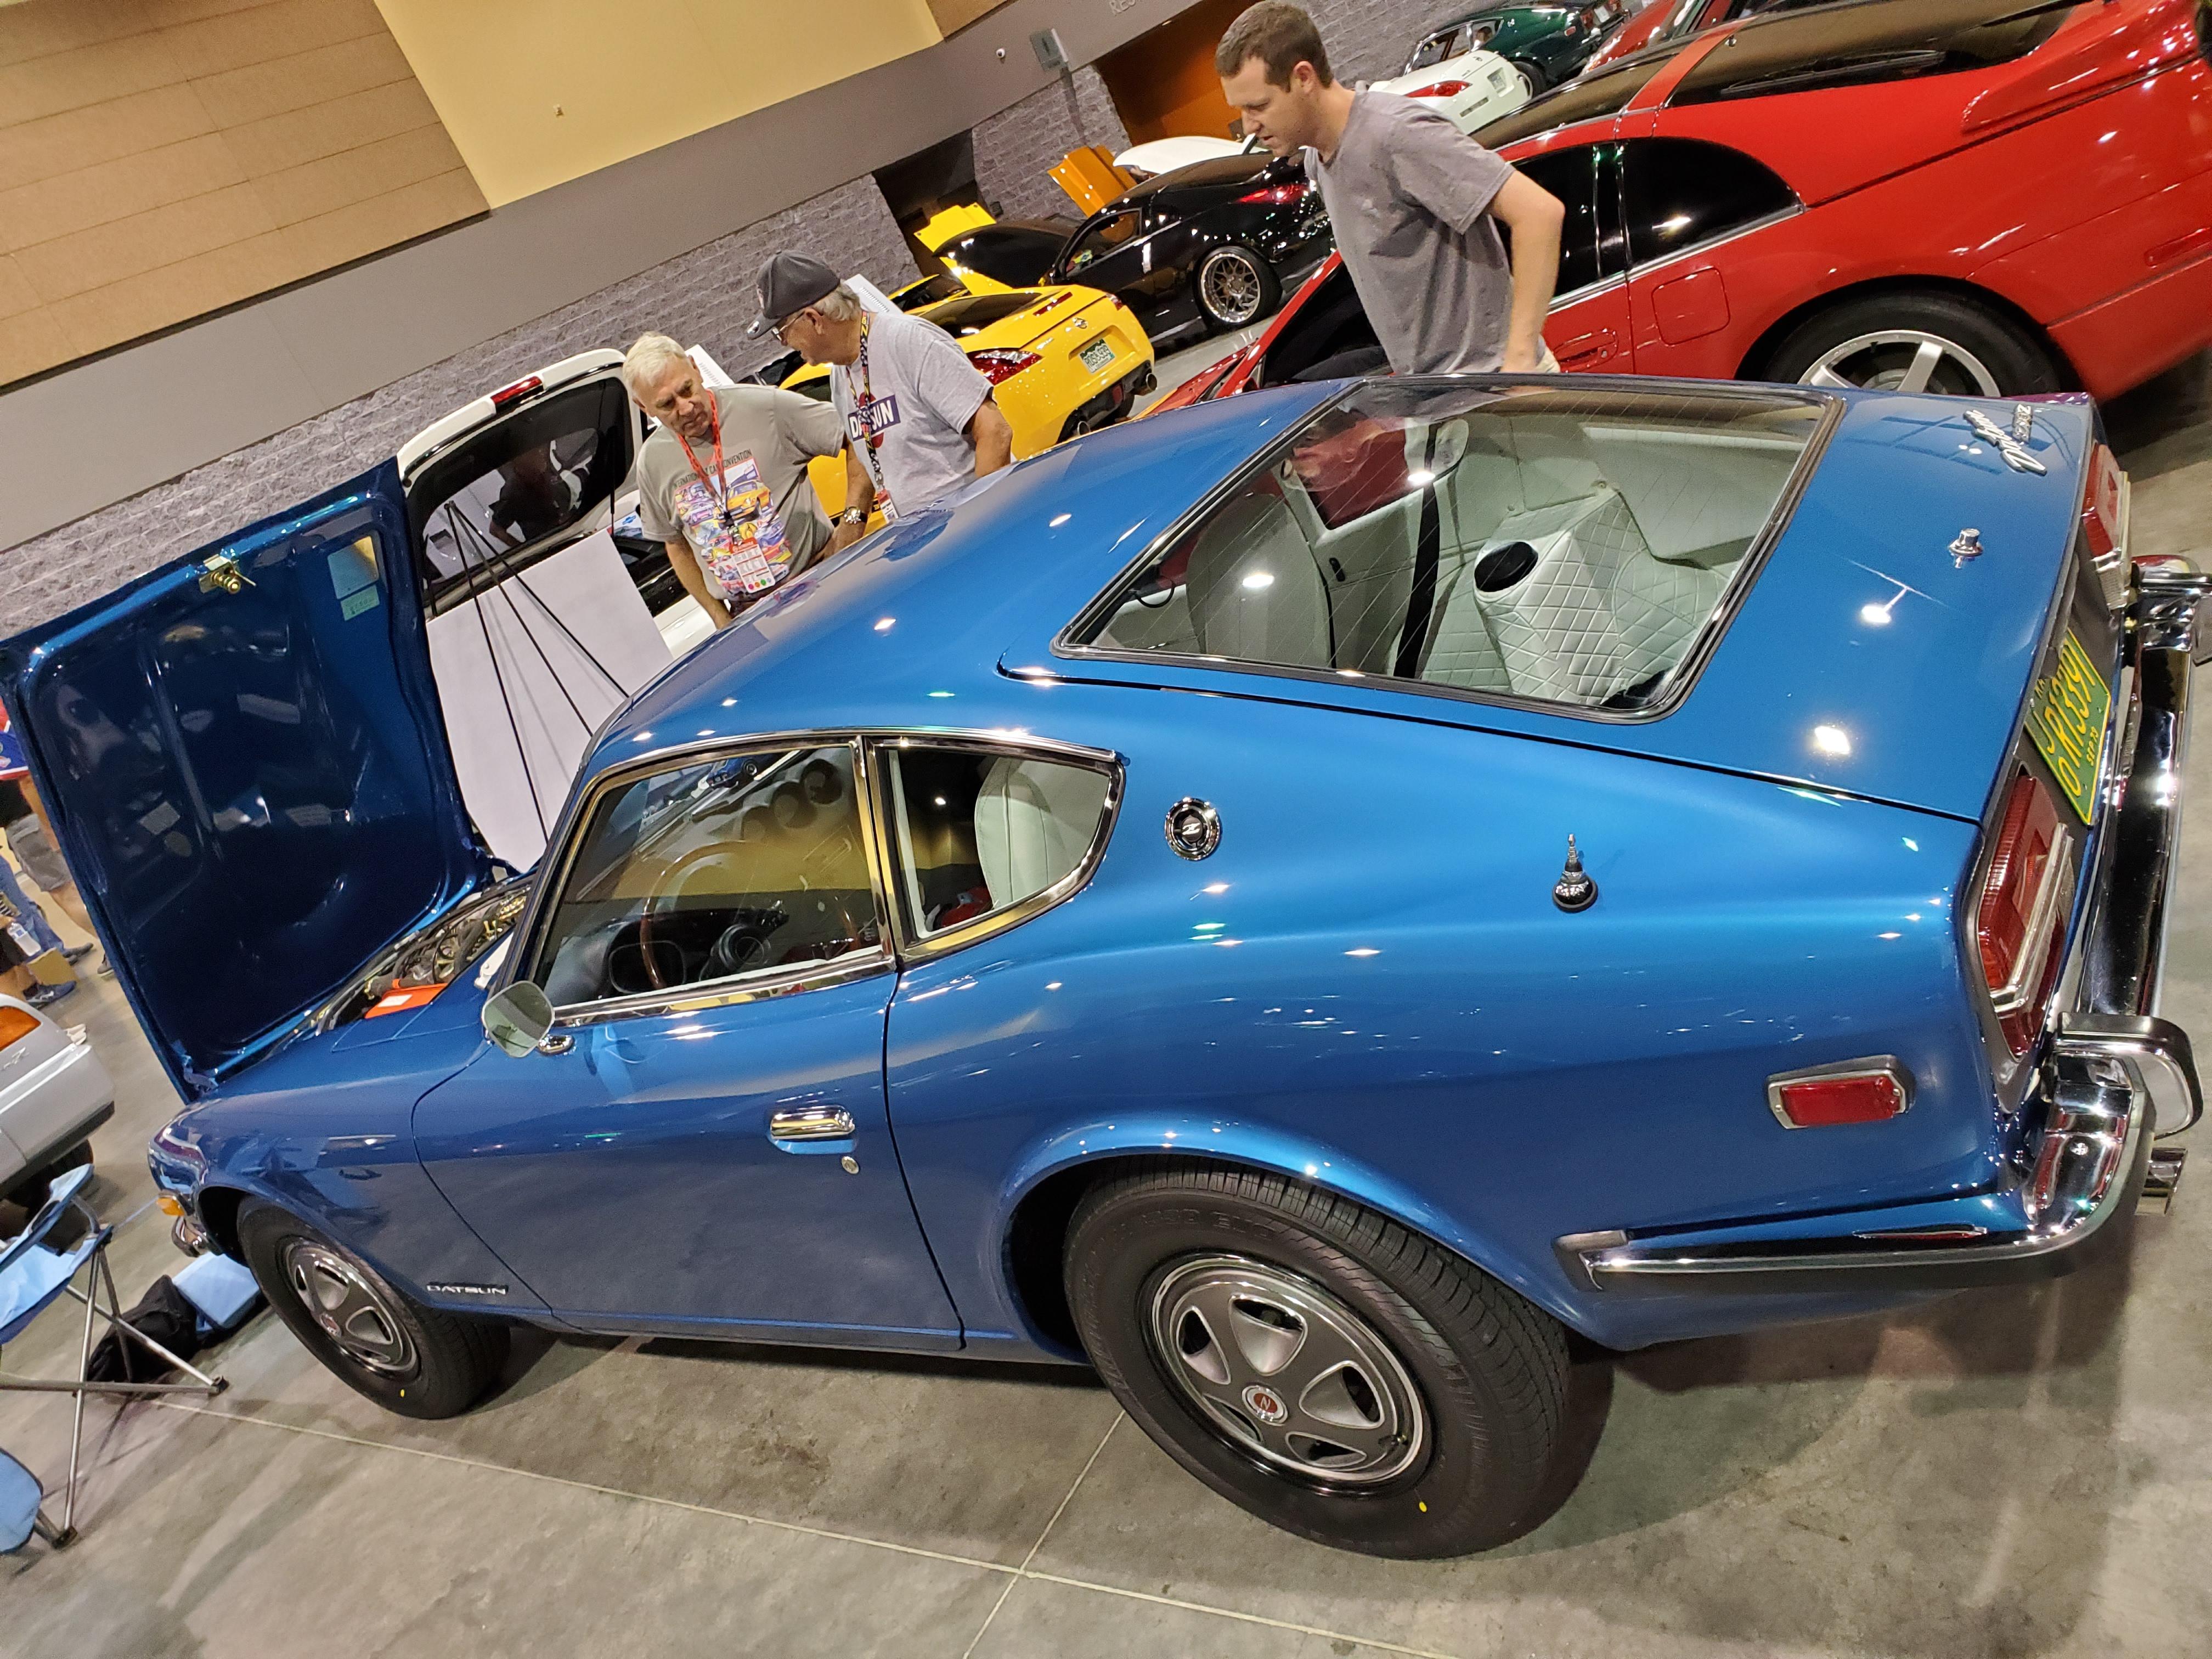
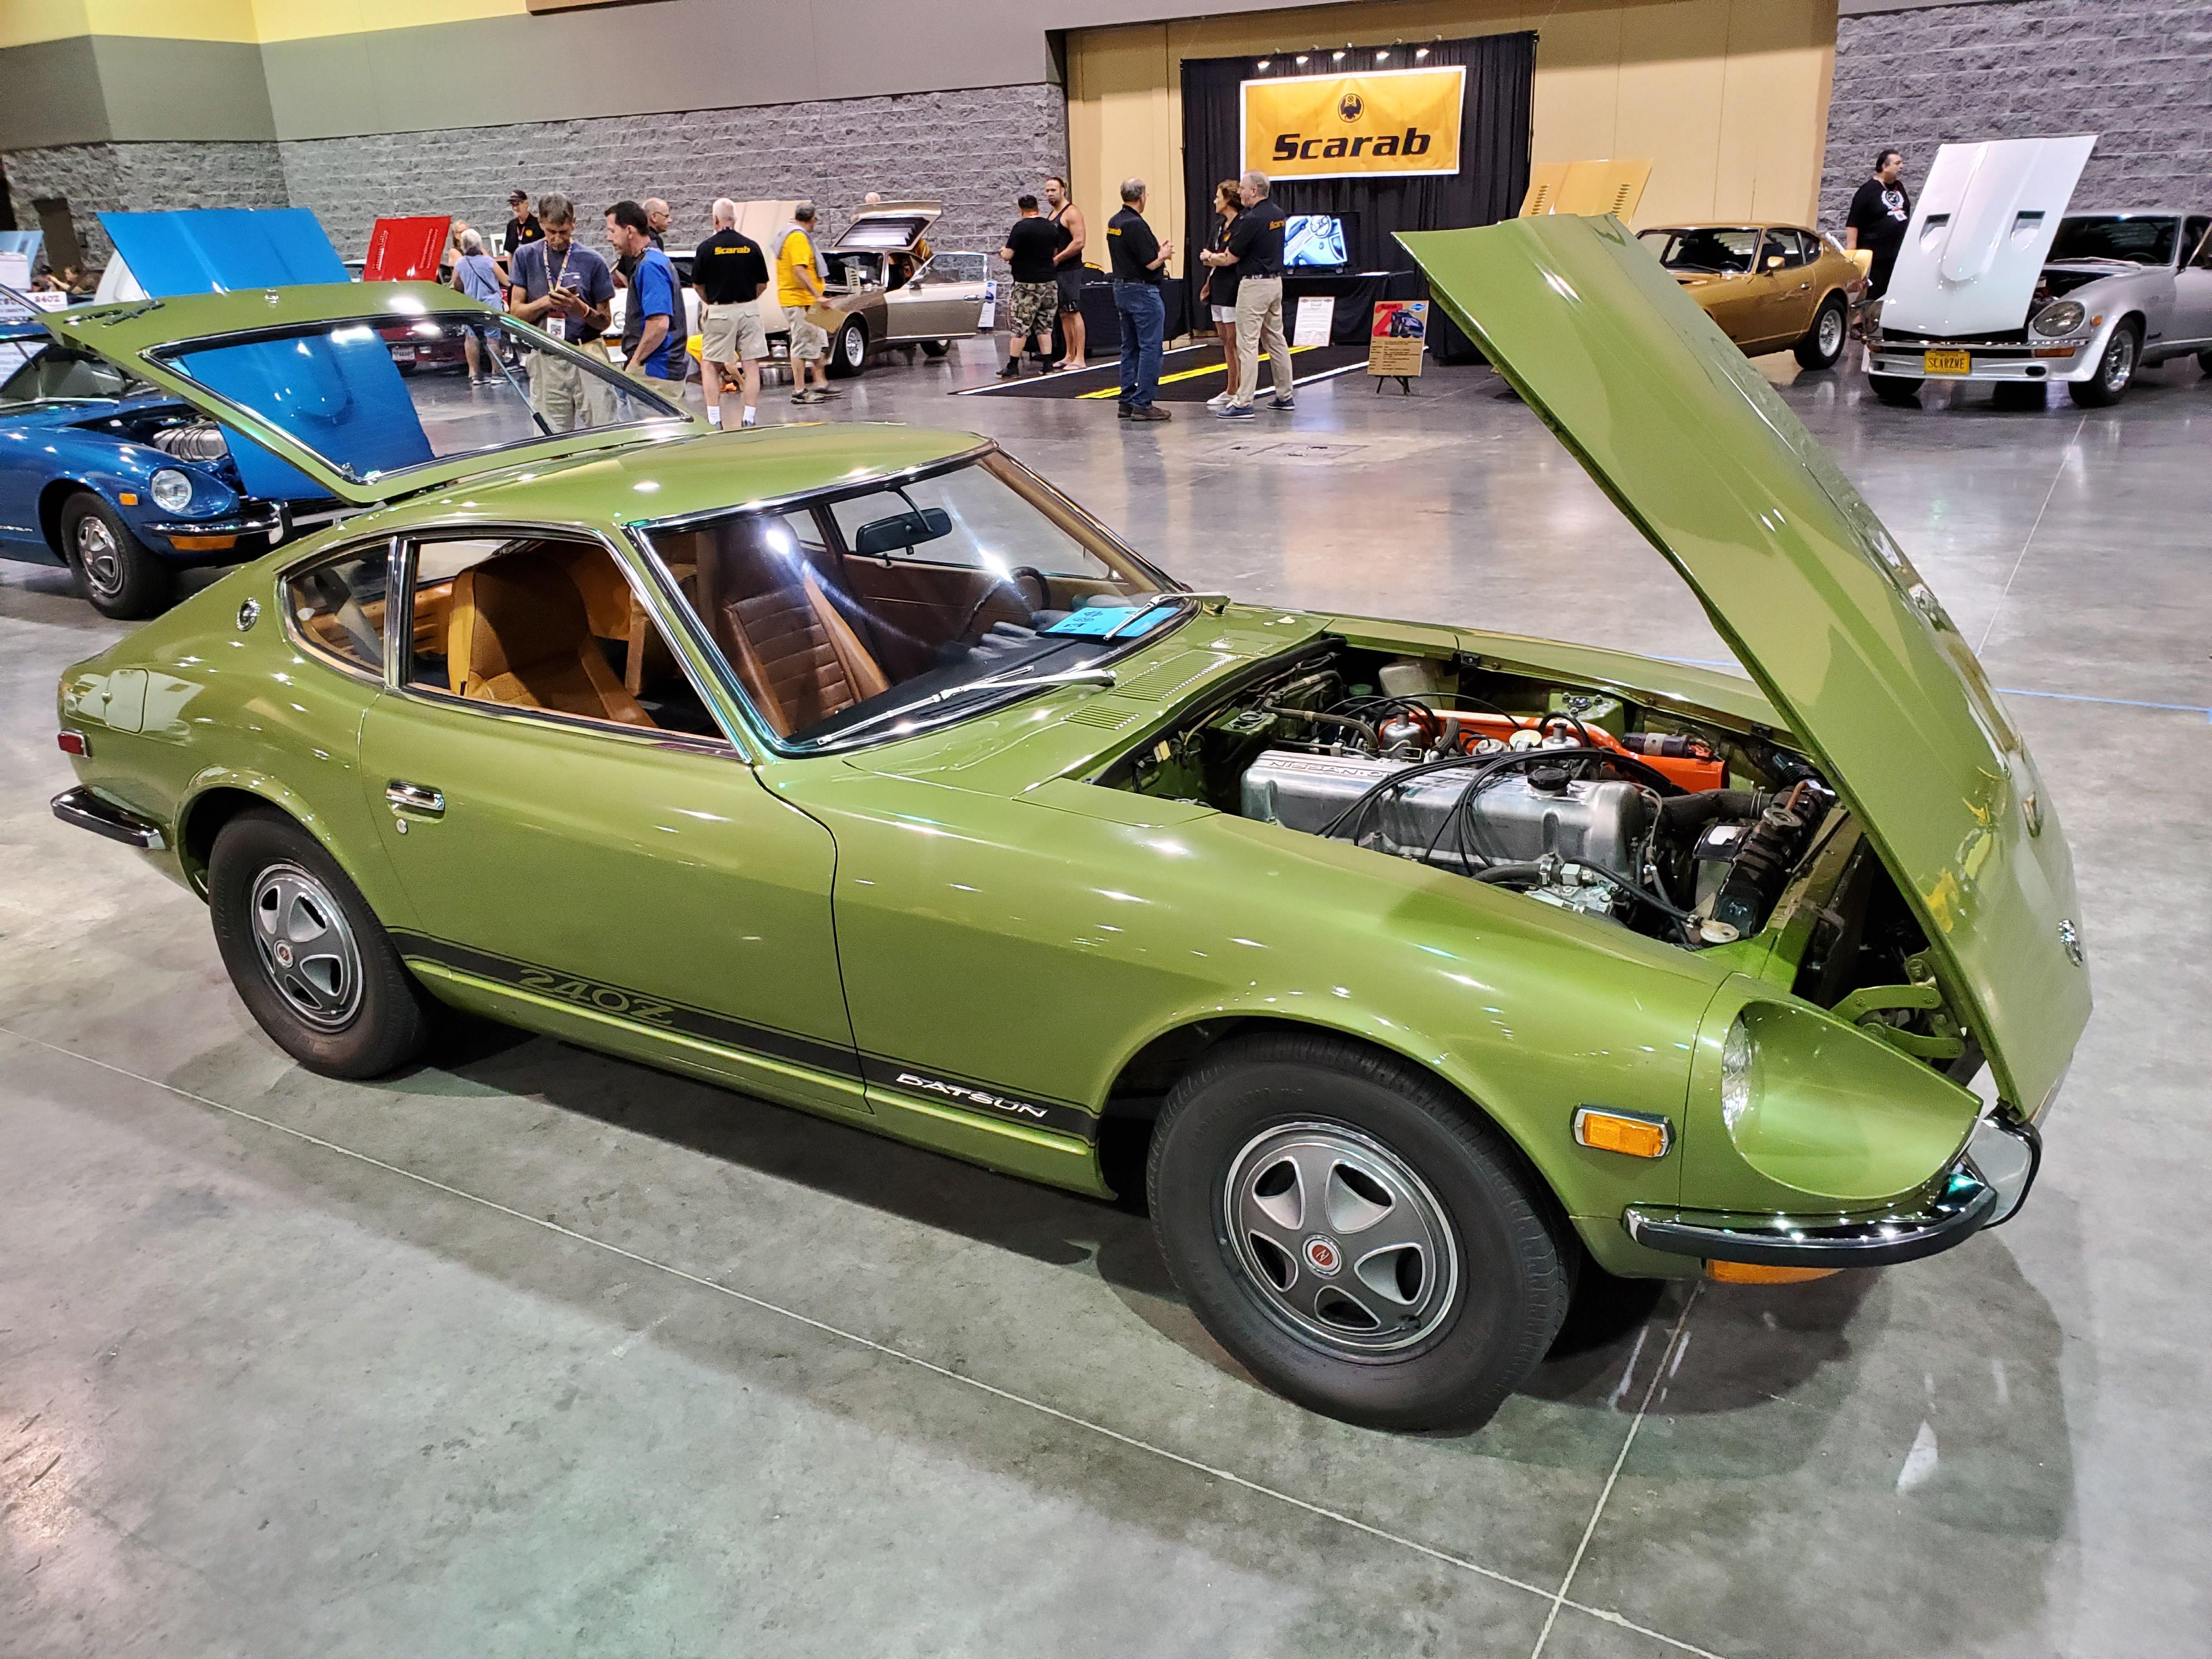
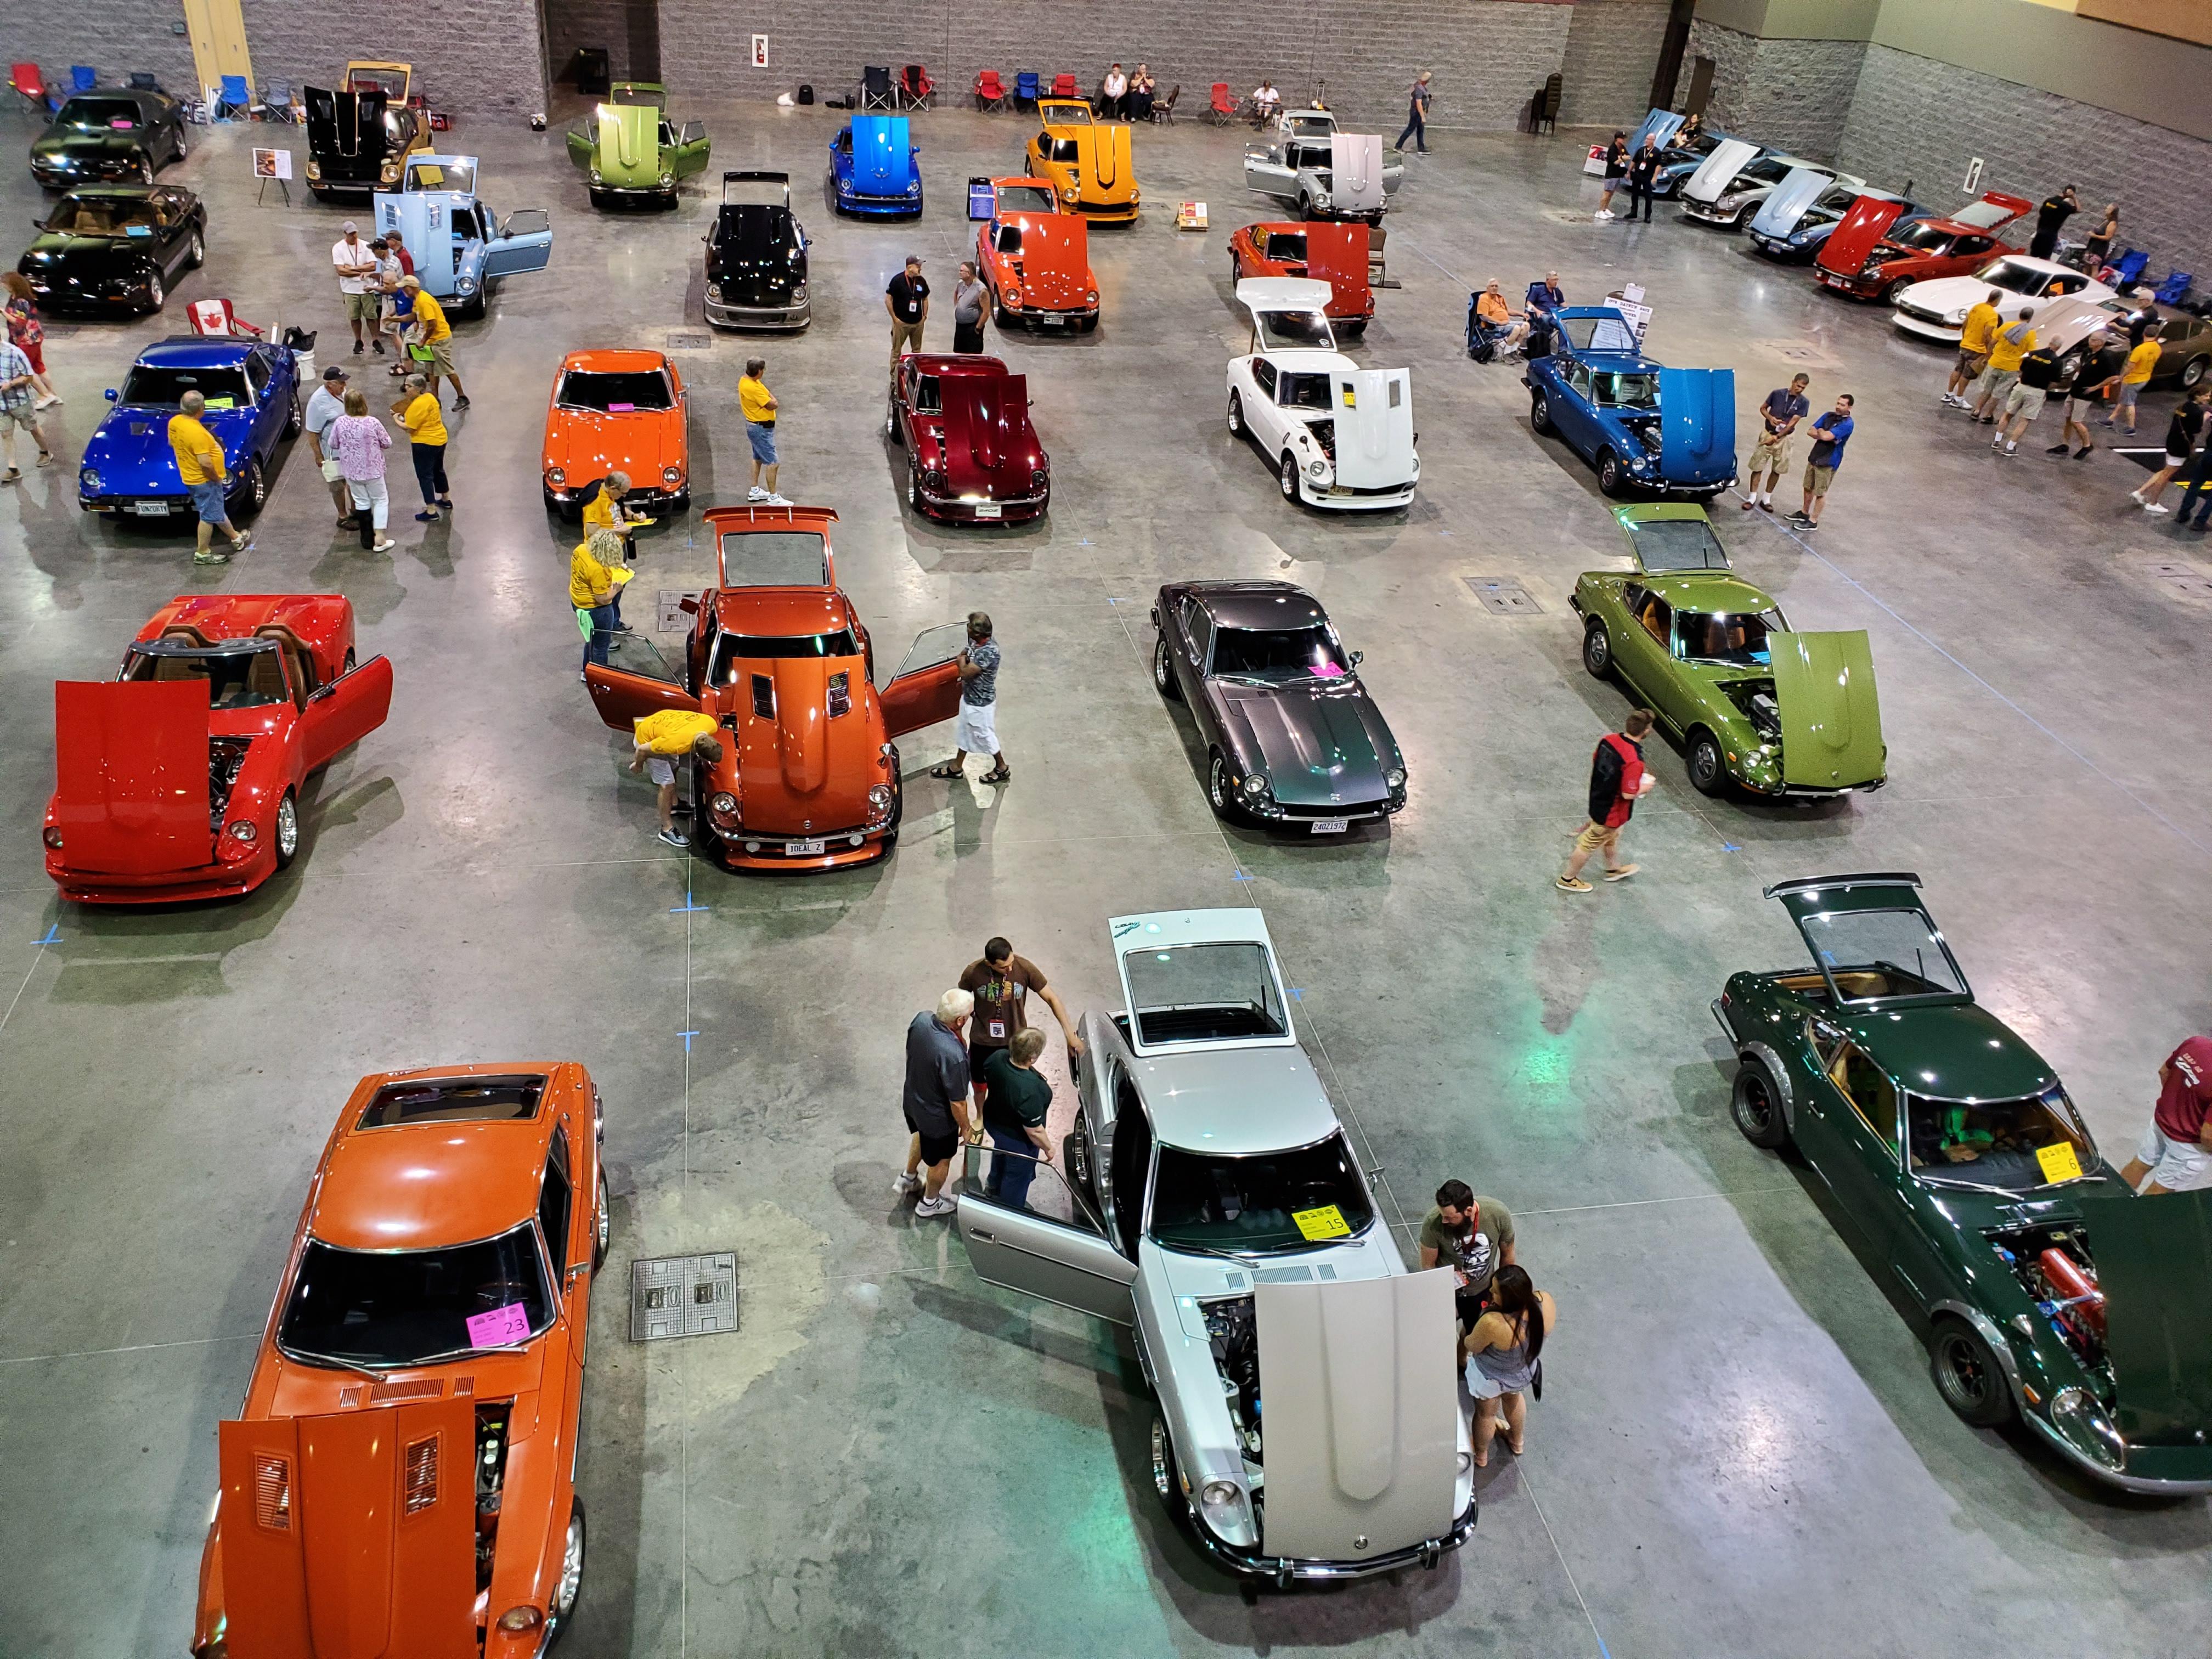
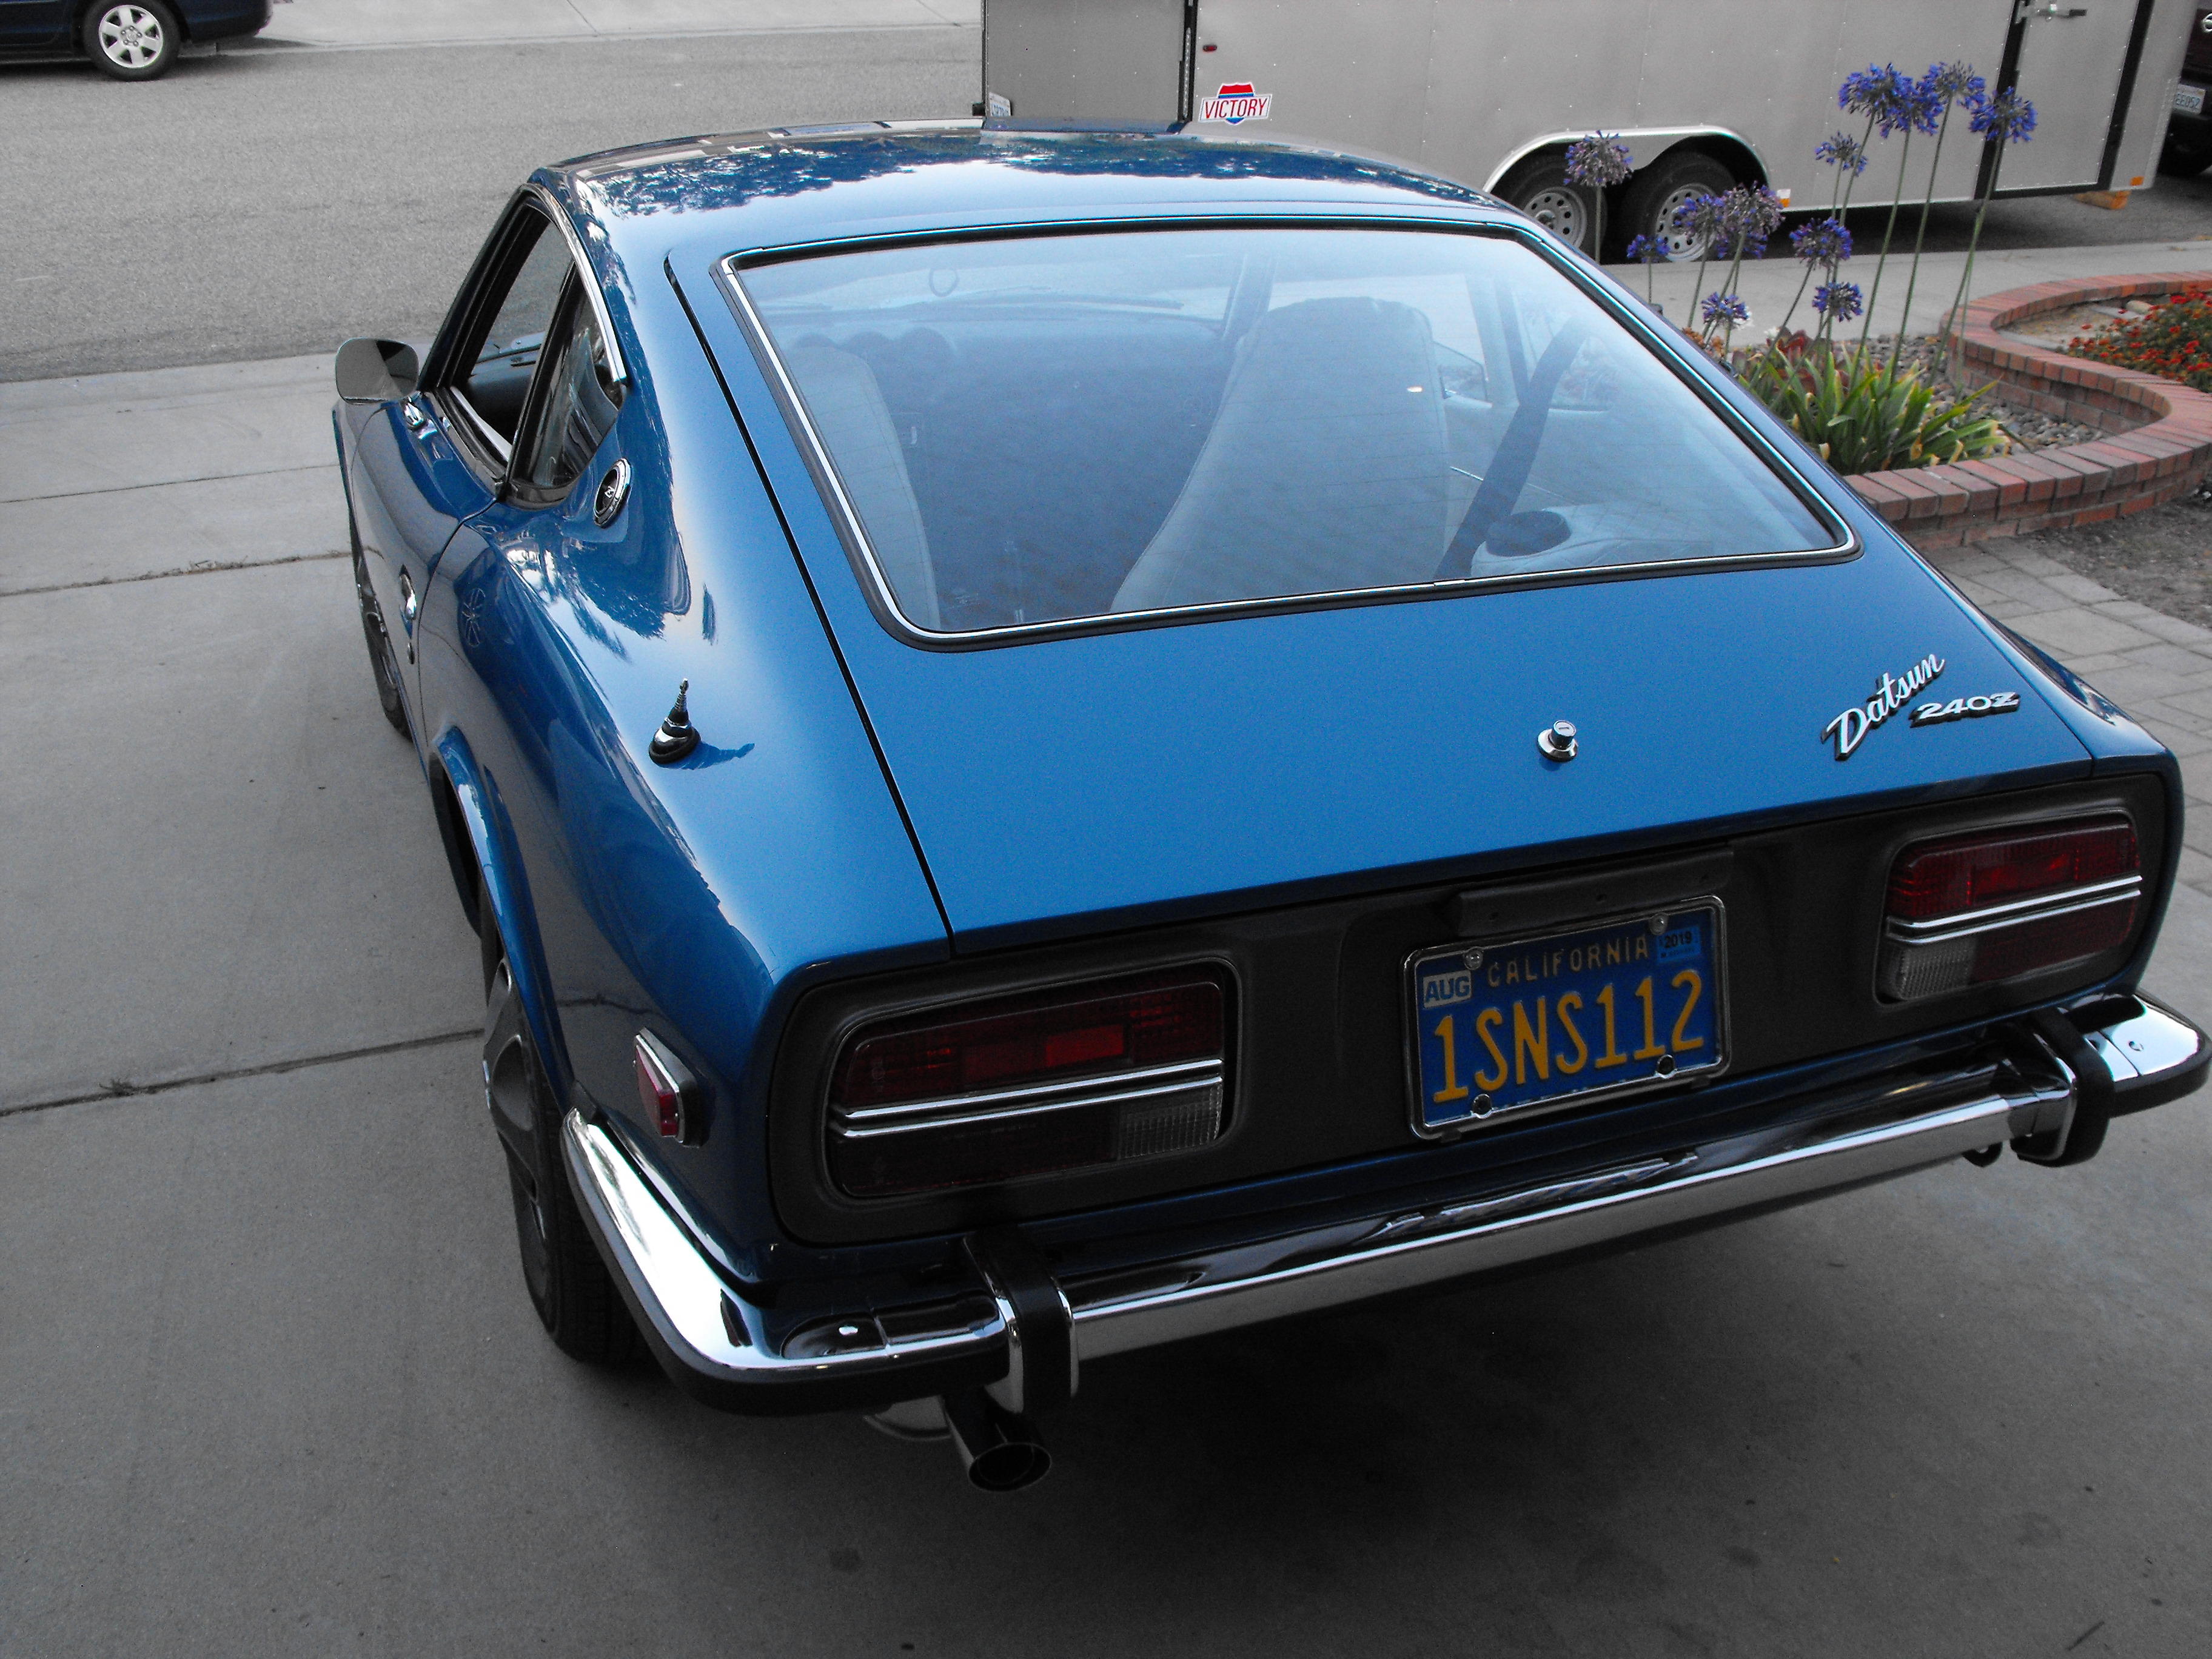
On display at ZCON 2019. Nice lighting.


-
-
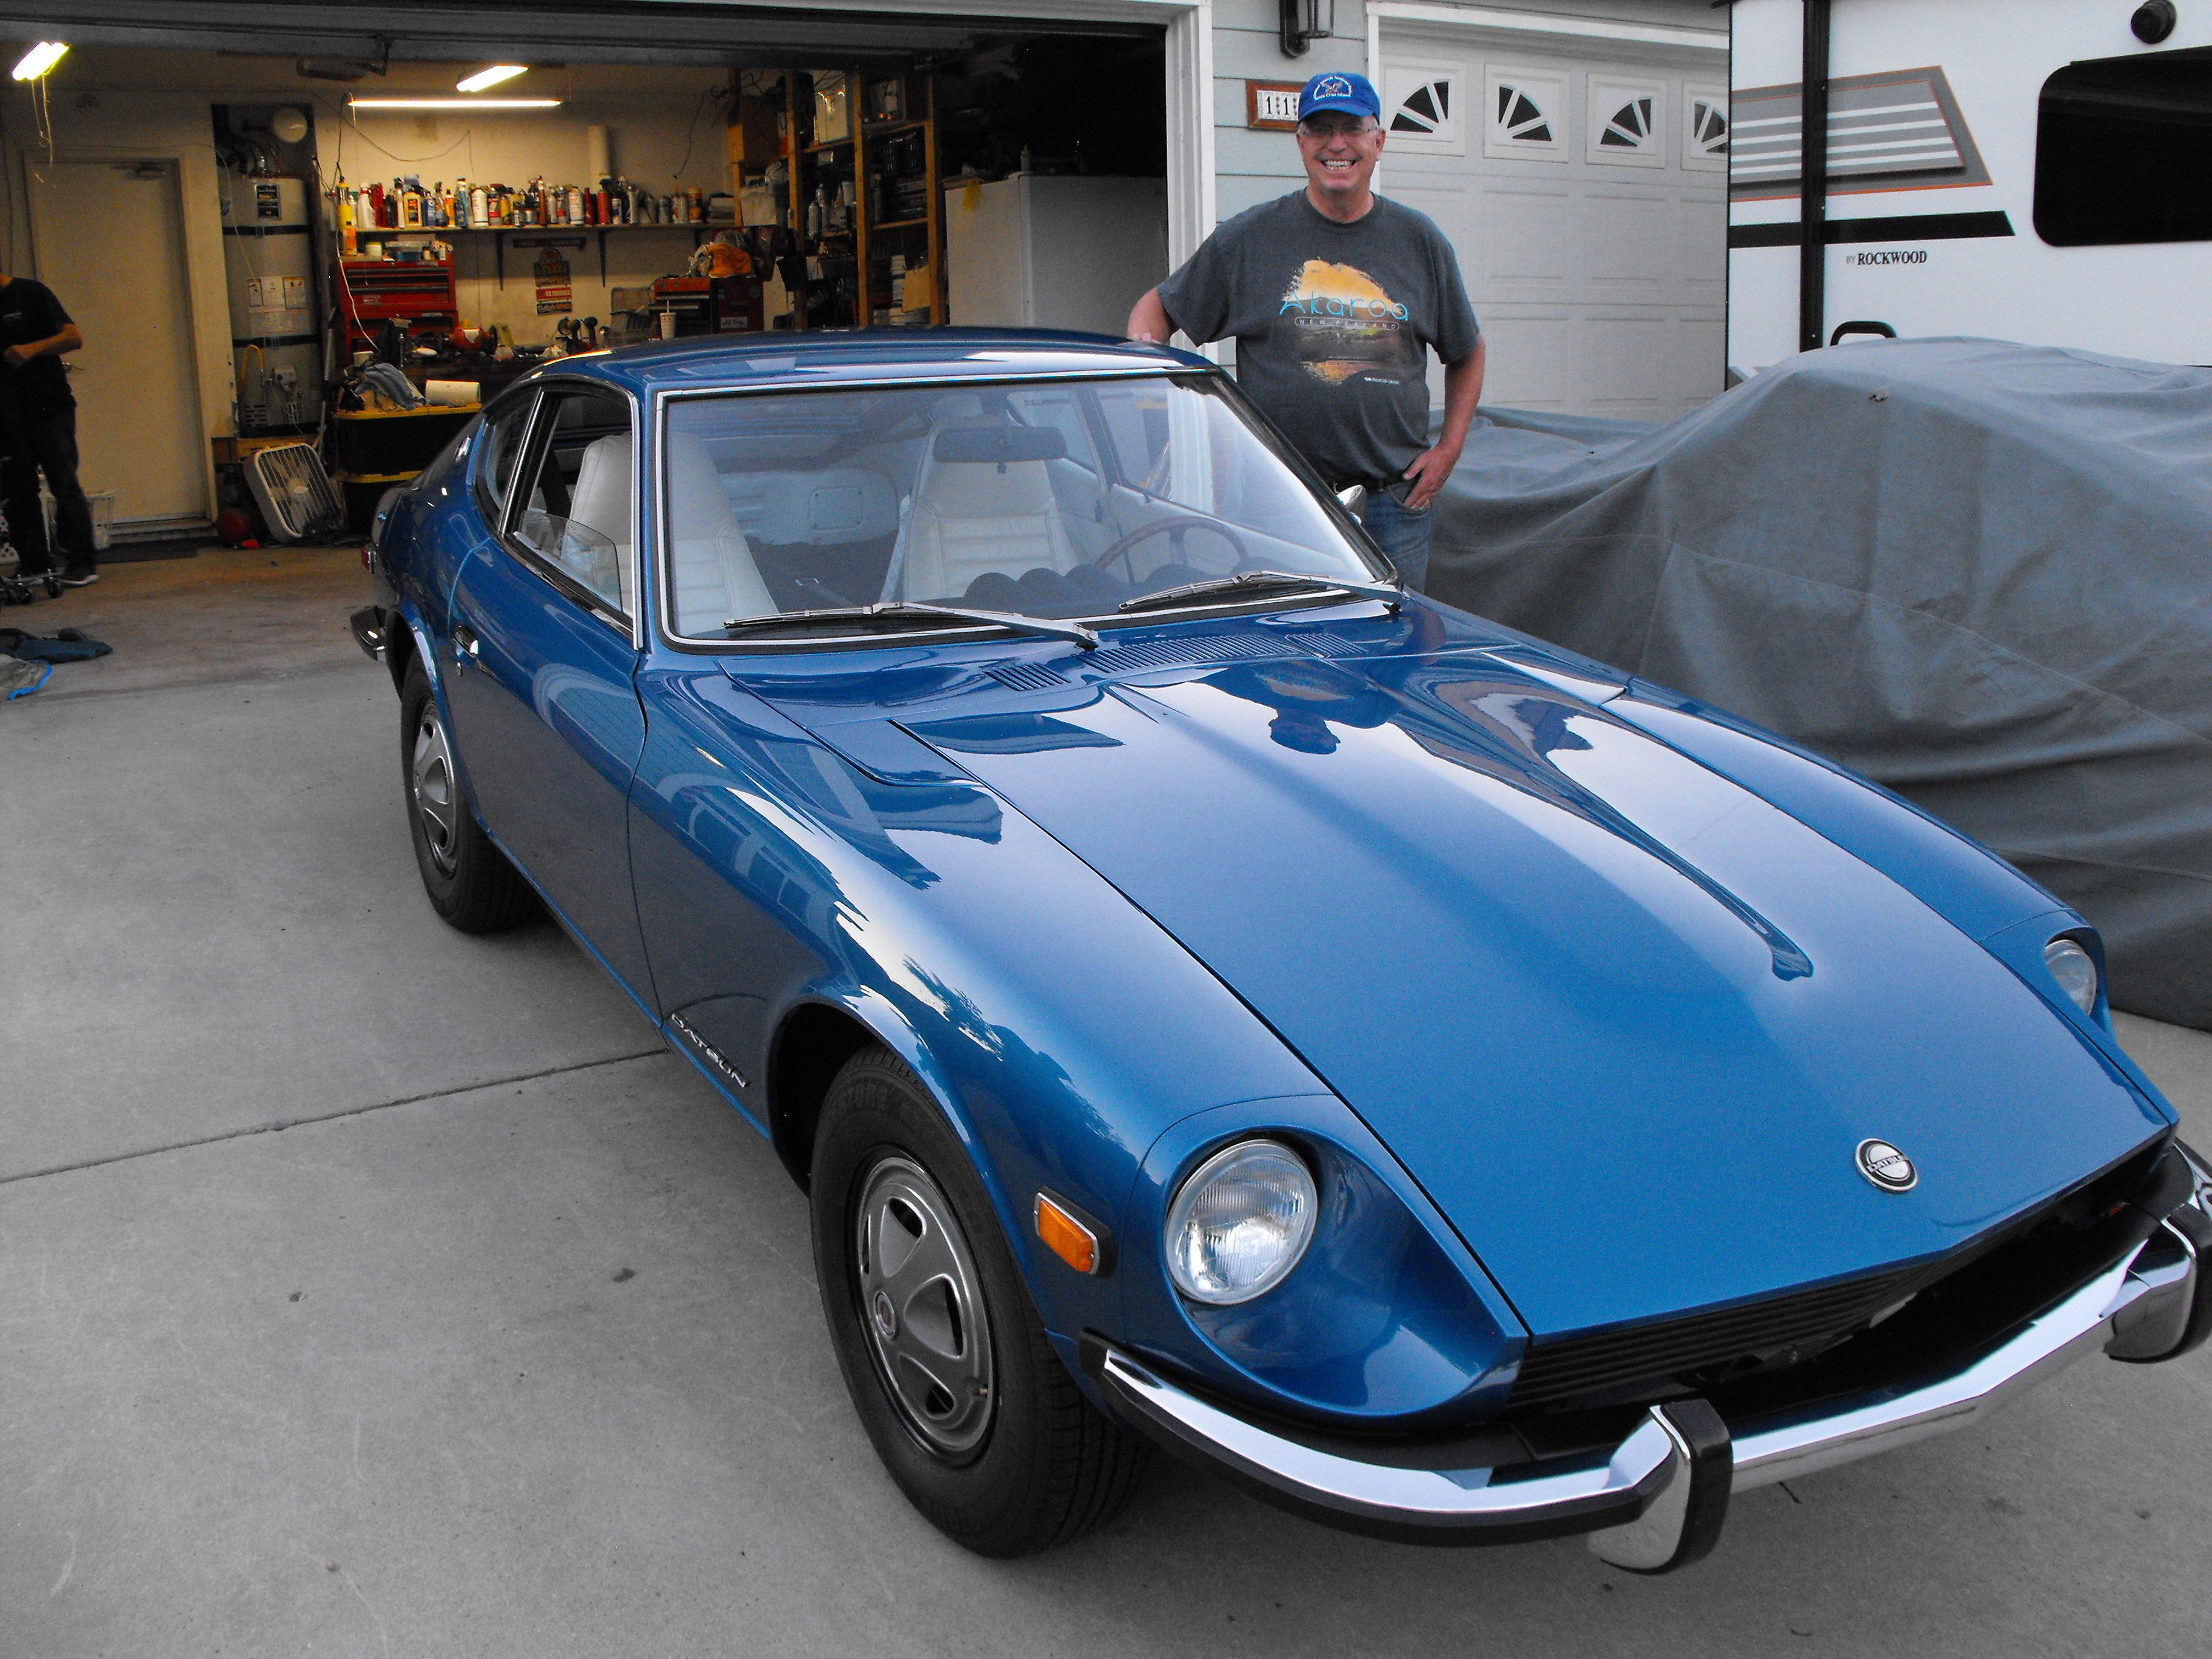
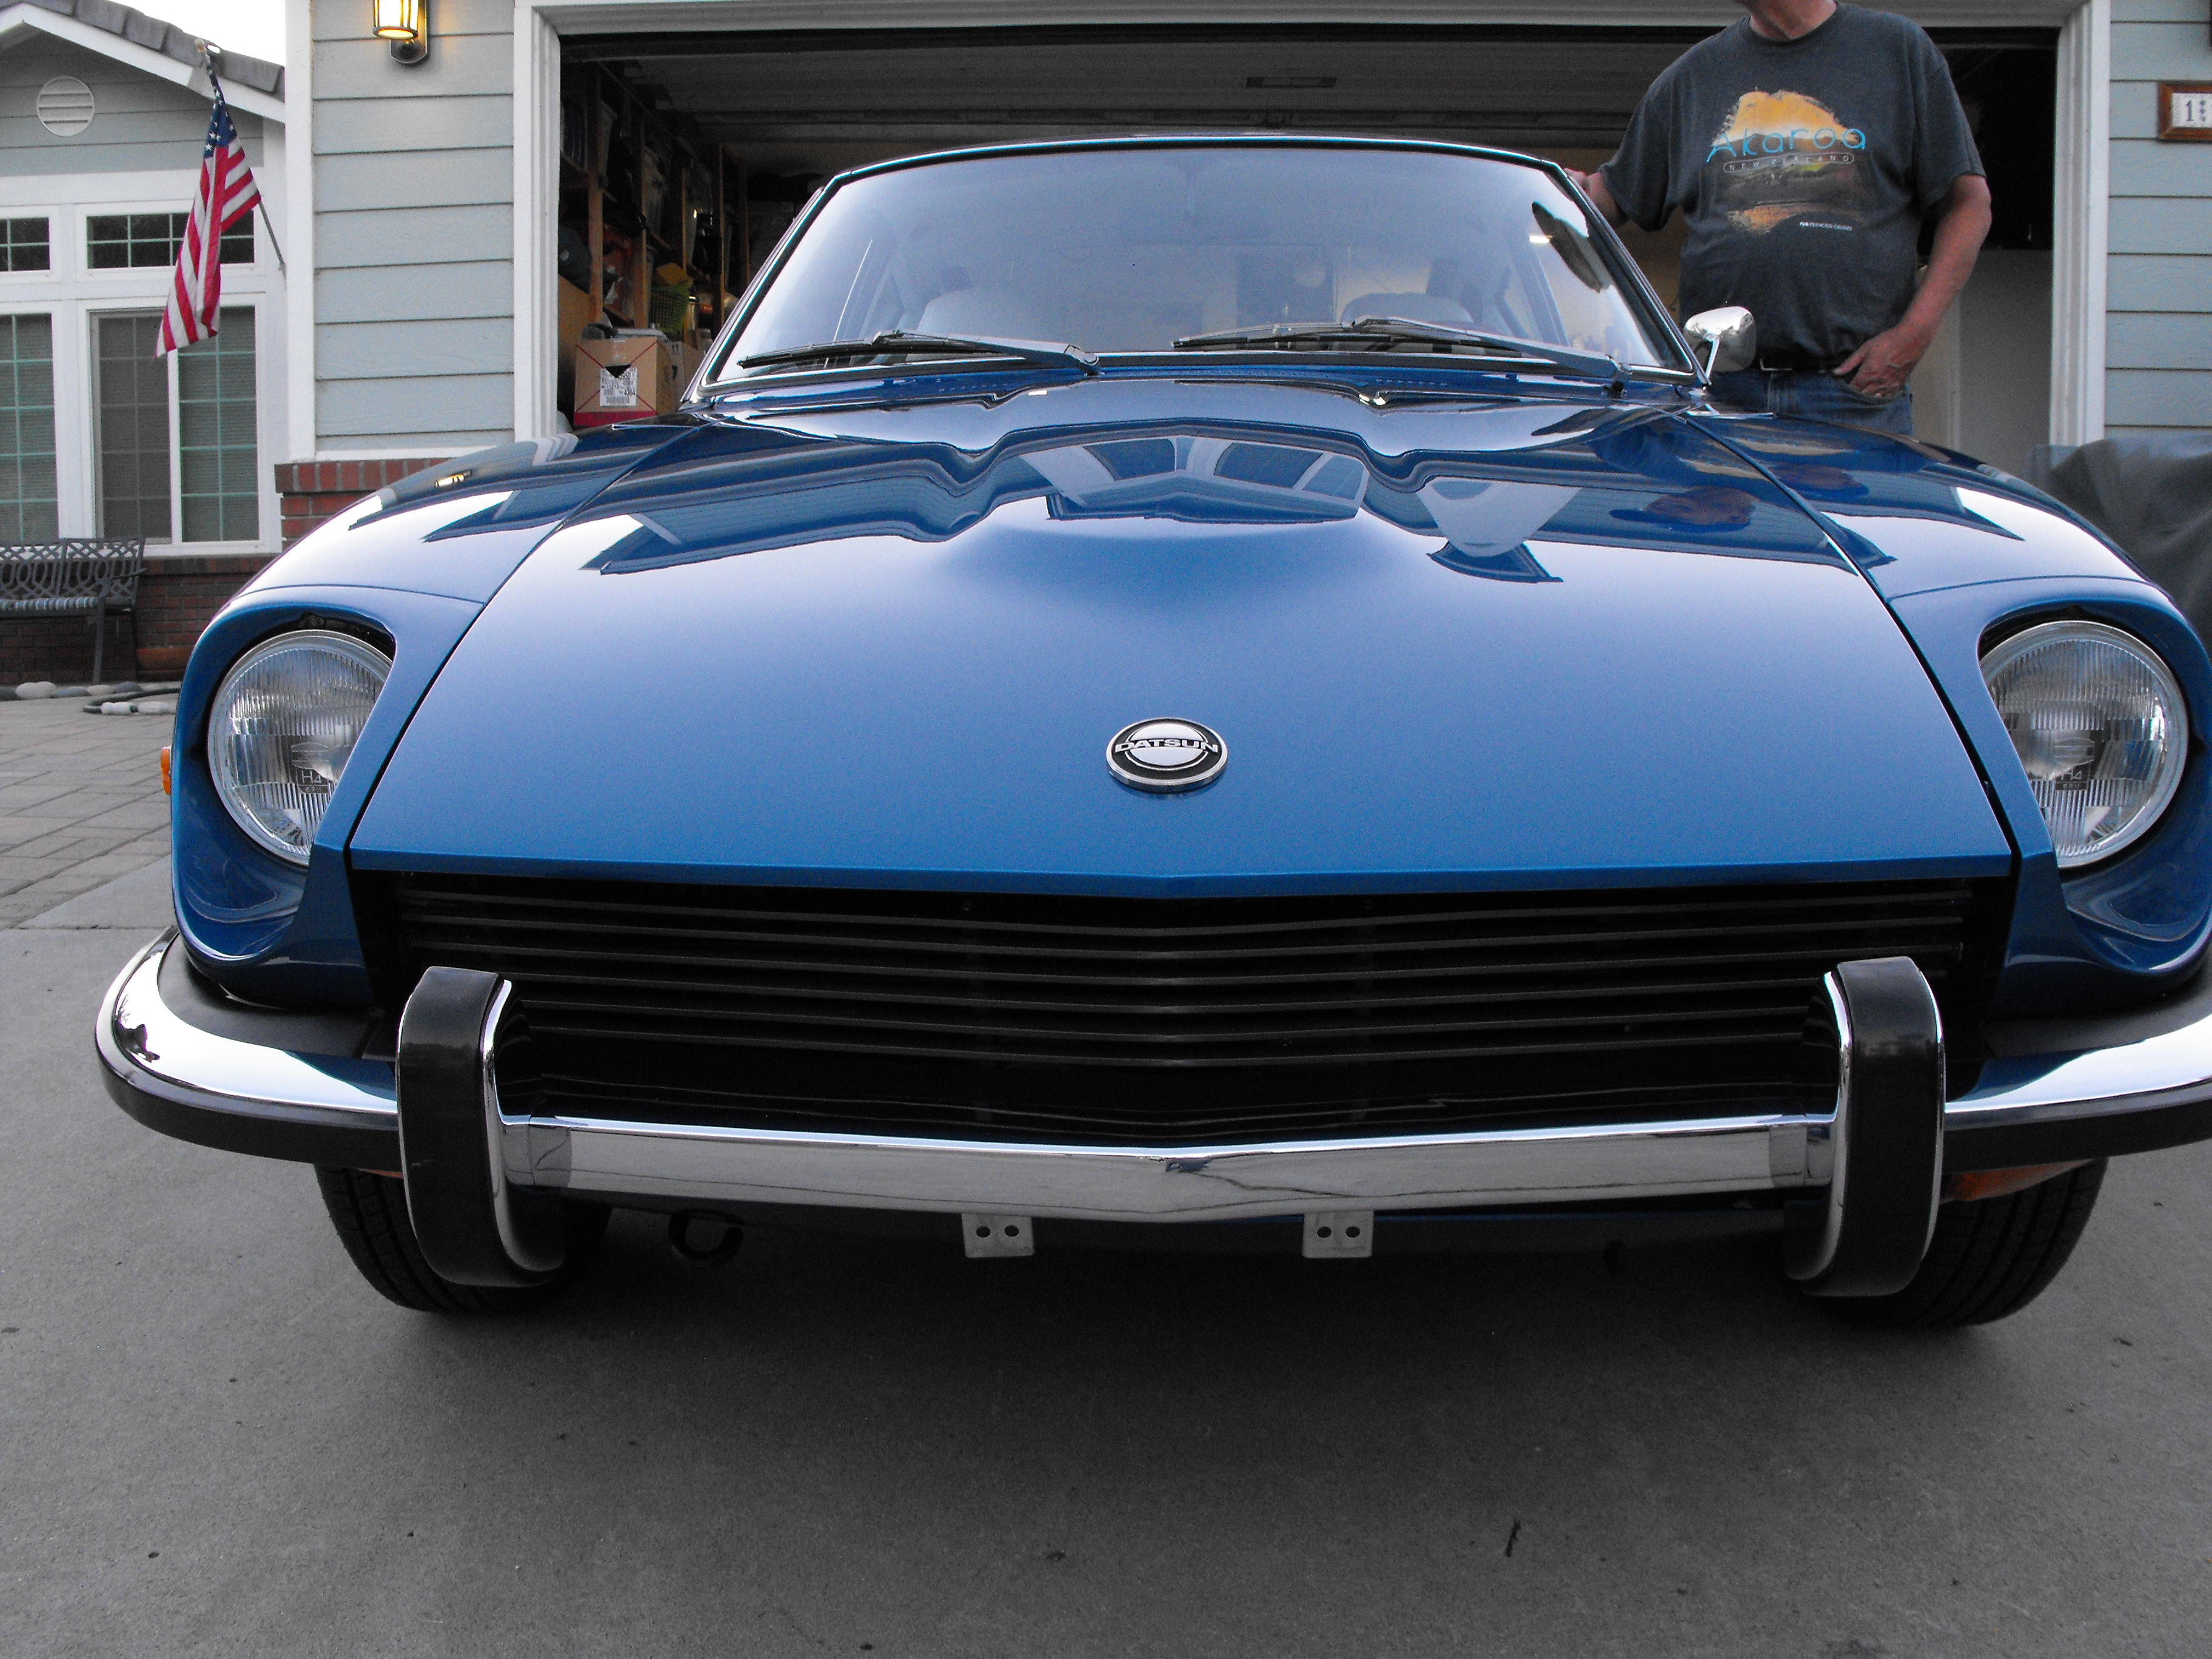
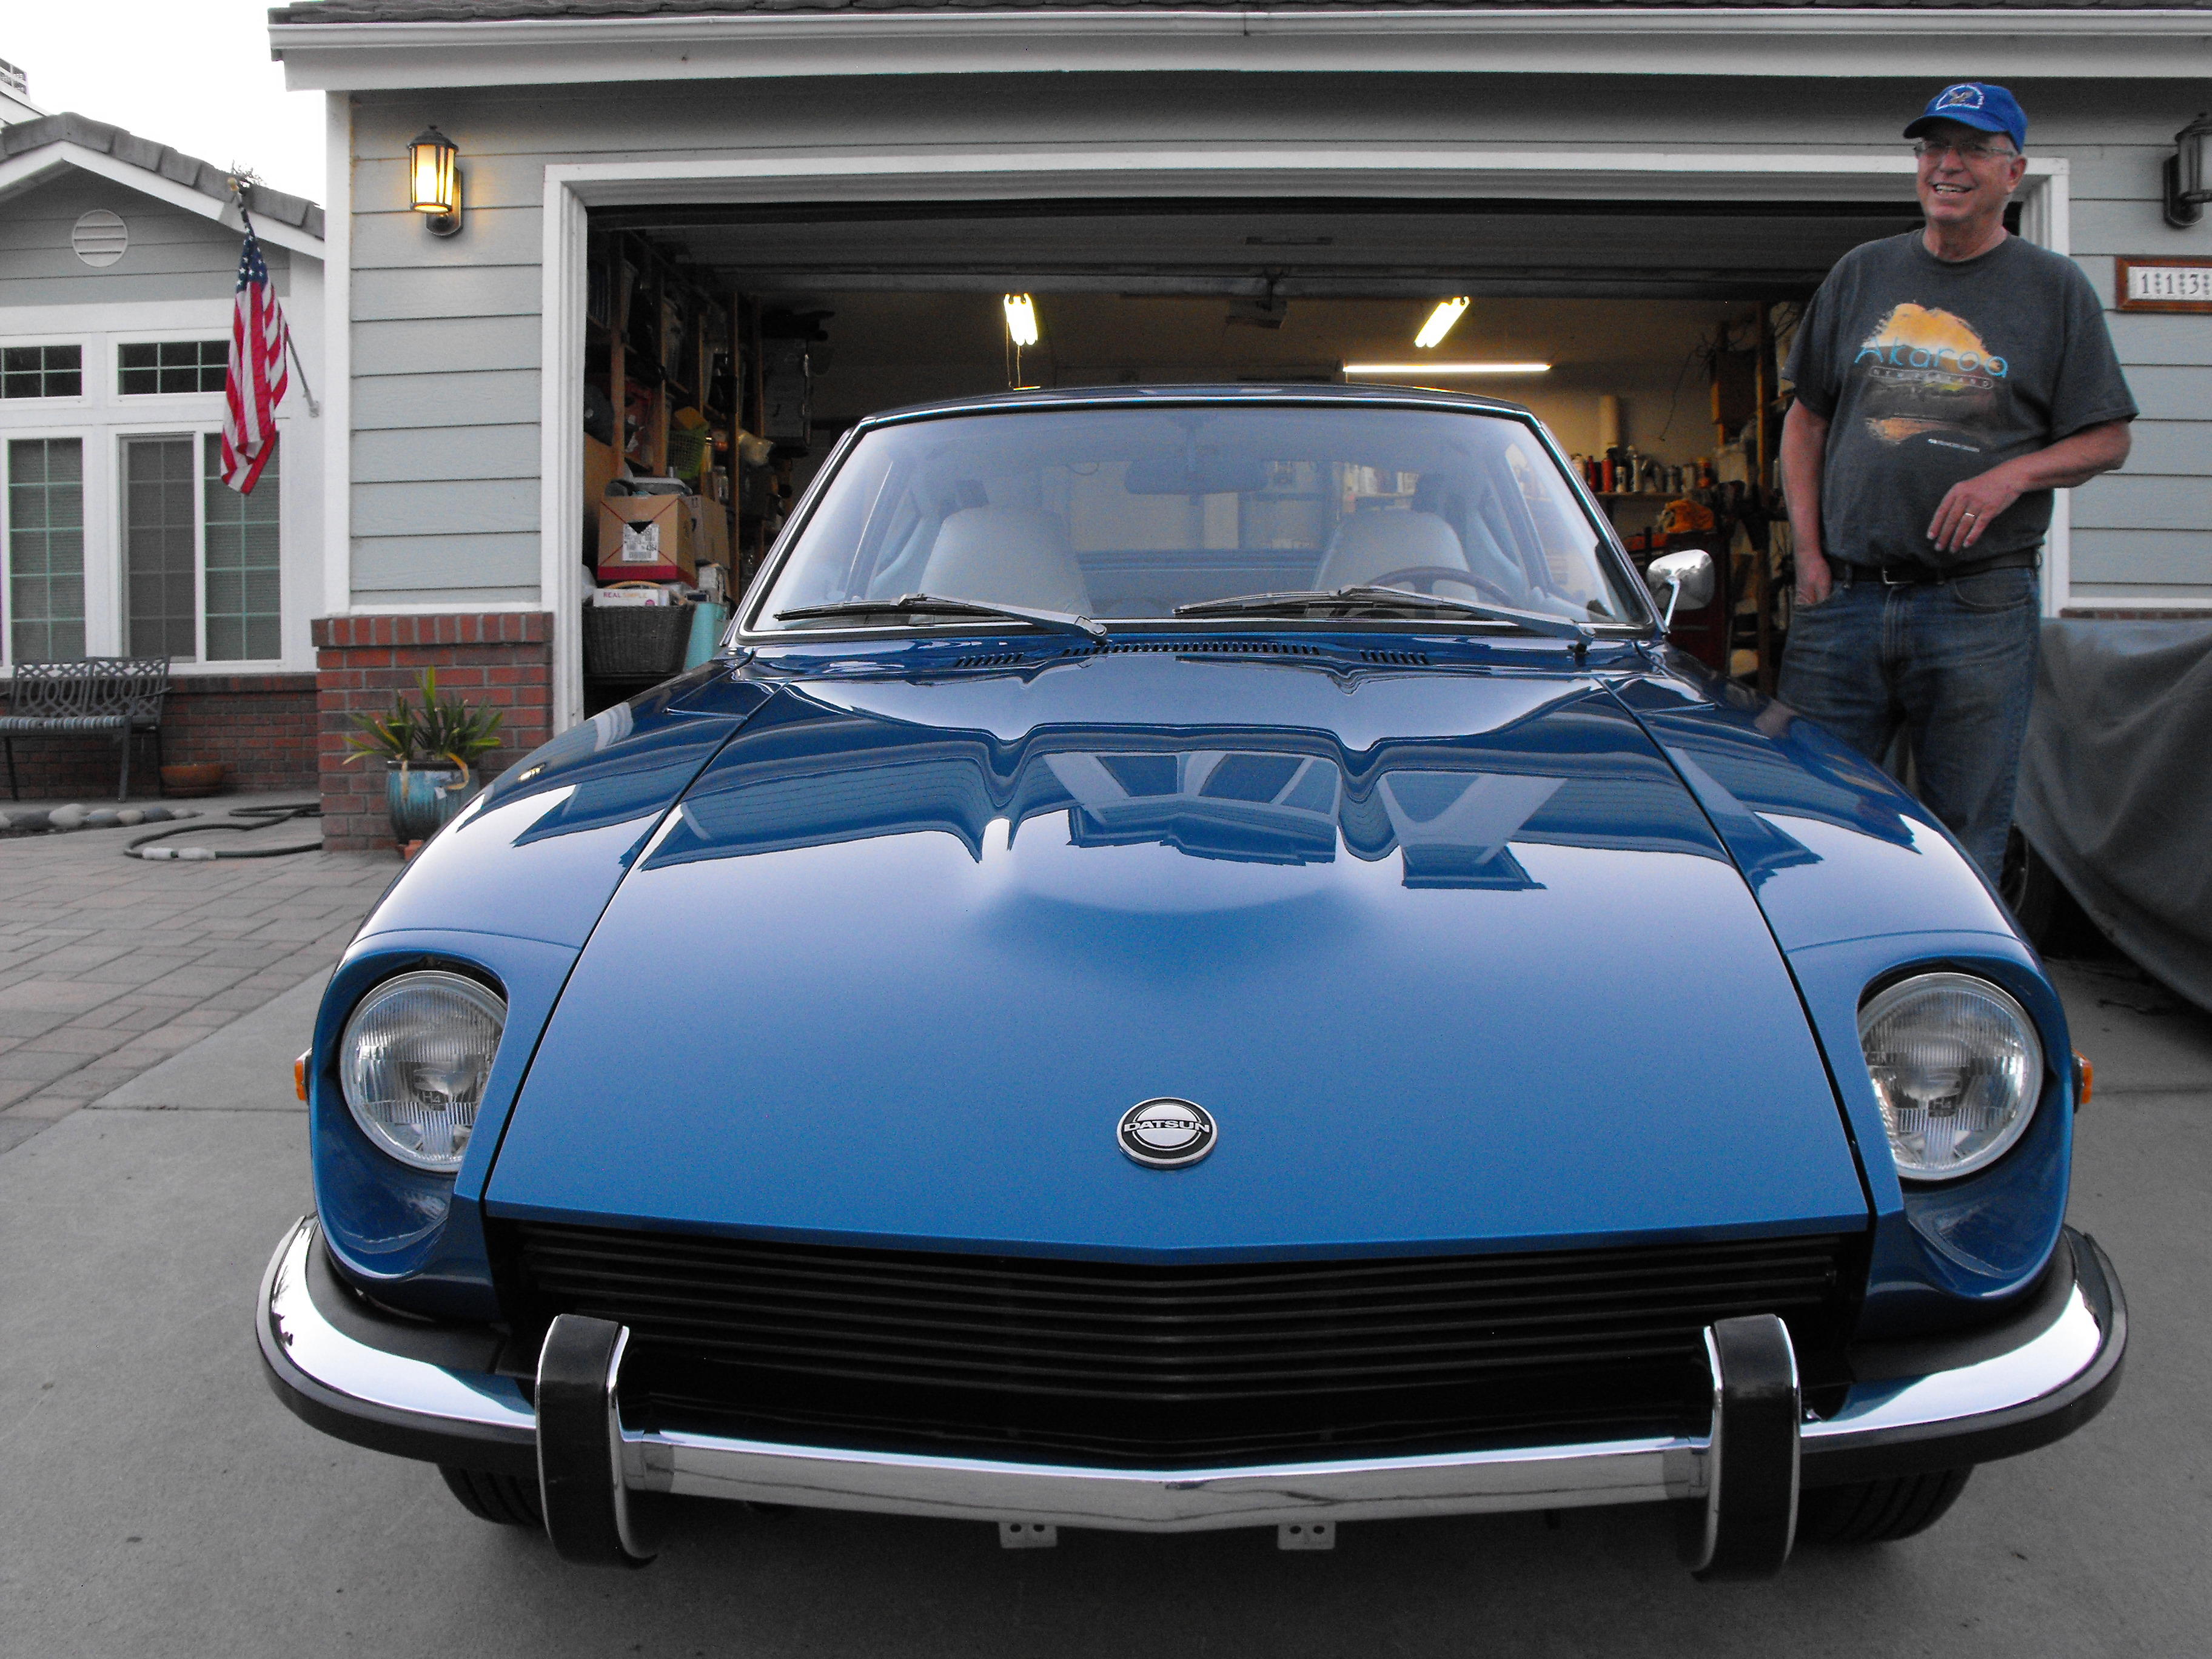
Hi Guy, thanks for the compliments. Will you be out in Branson? The car is not perfect, but it's pretty doggone nice, the colors are awesome. I wish we had another week or two to finish up some small details and do some final tuning, but for the most part she's about 99% complete. We chose in several cases to go with the original parts versus buying new or aftermarket replacements. The windshield would be a good example. It is the original 46 year old glass, complete with small rock chips and wiper scratches. In cases like these, the original part trumps a perfect aftermarket windshield for the build. The small defects are not super obvious in the pics, but I am sure the judges will ding us for such things. That is fine and understandable, it's just very cool to see the original part on the car where it's reasonable. Anyway, I am thrilled that the car will be at the show. I am looking forward to seeing all those awesome Z's!.
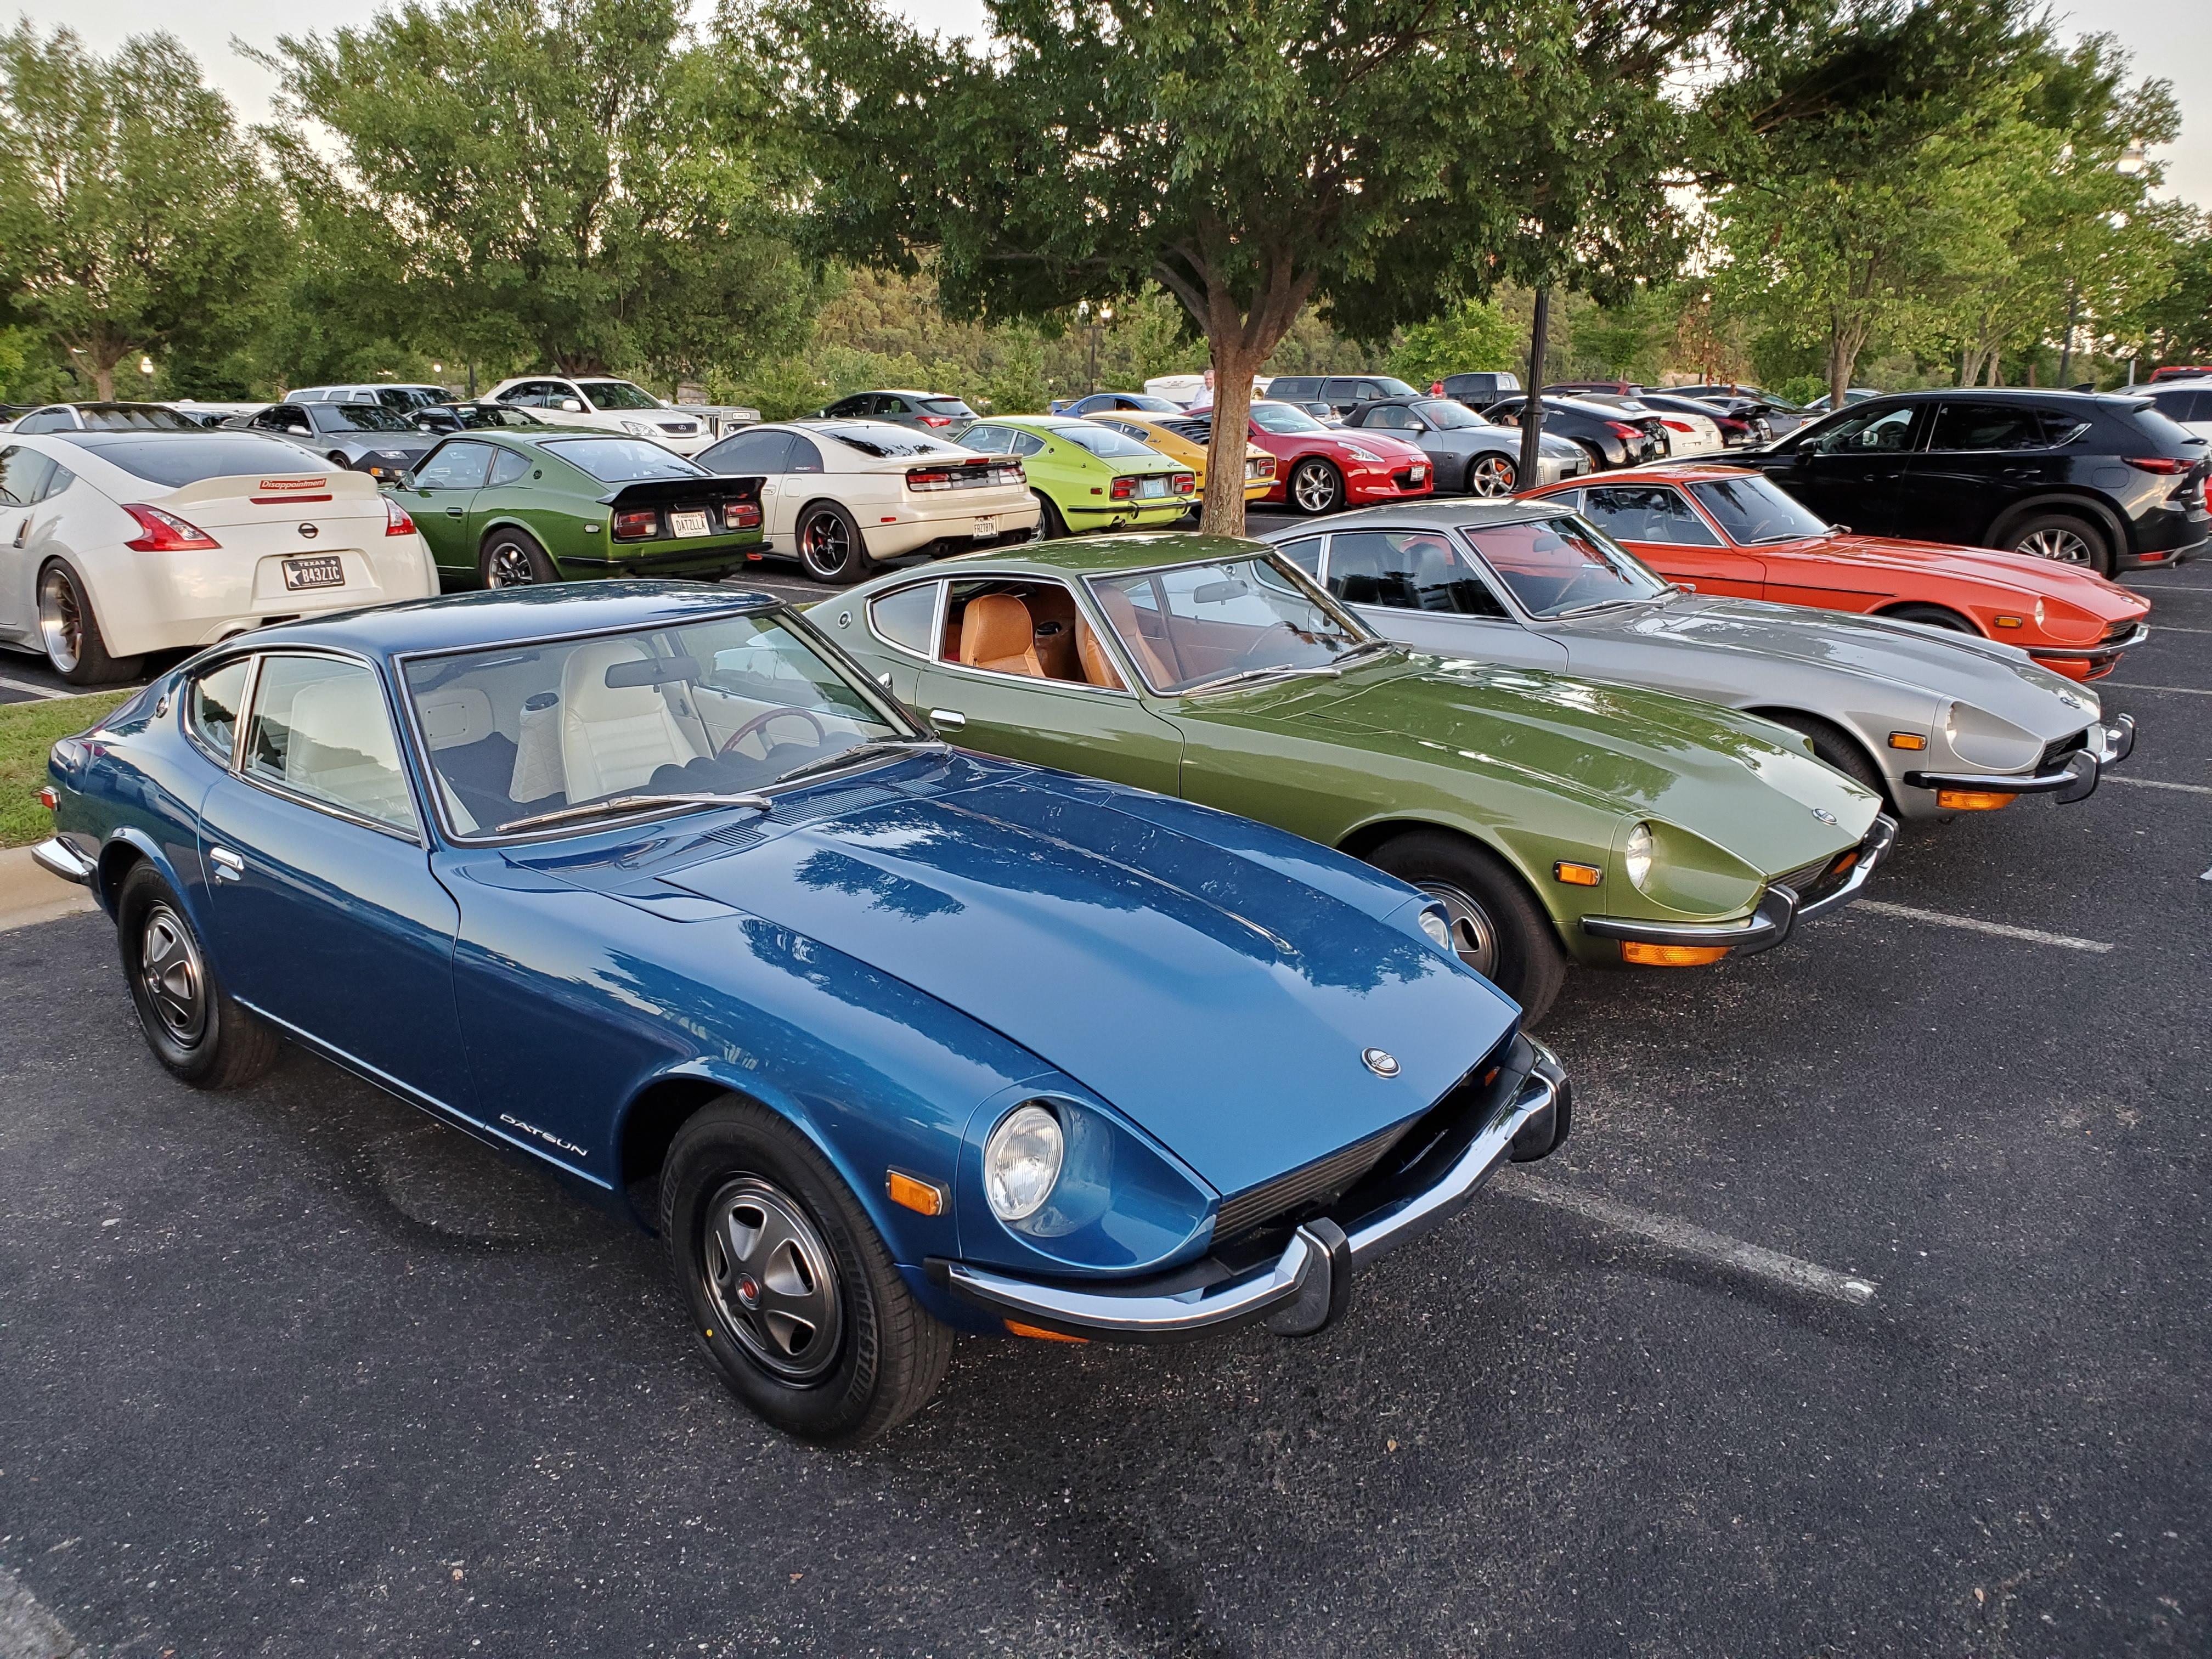
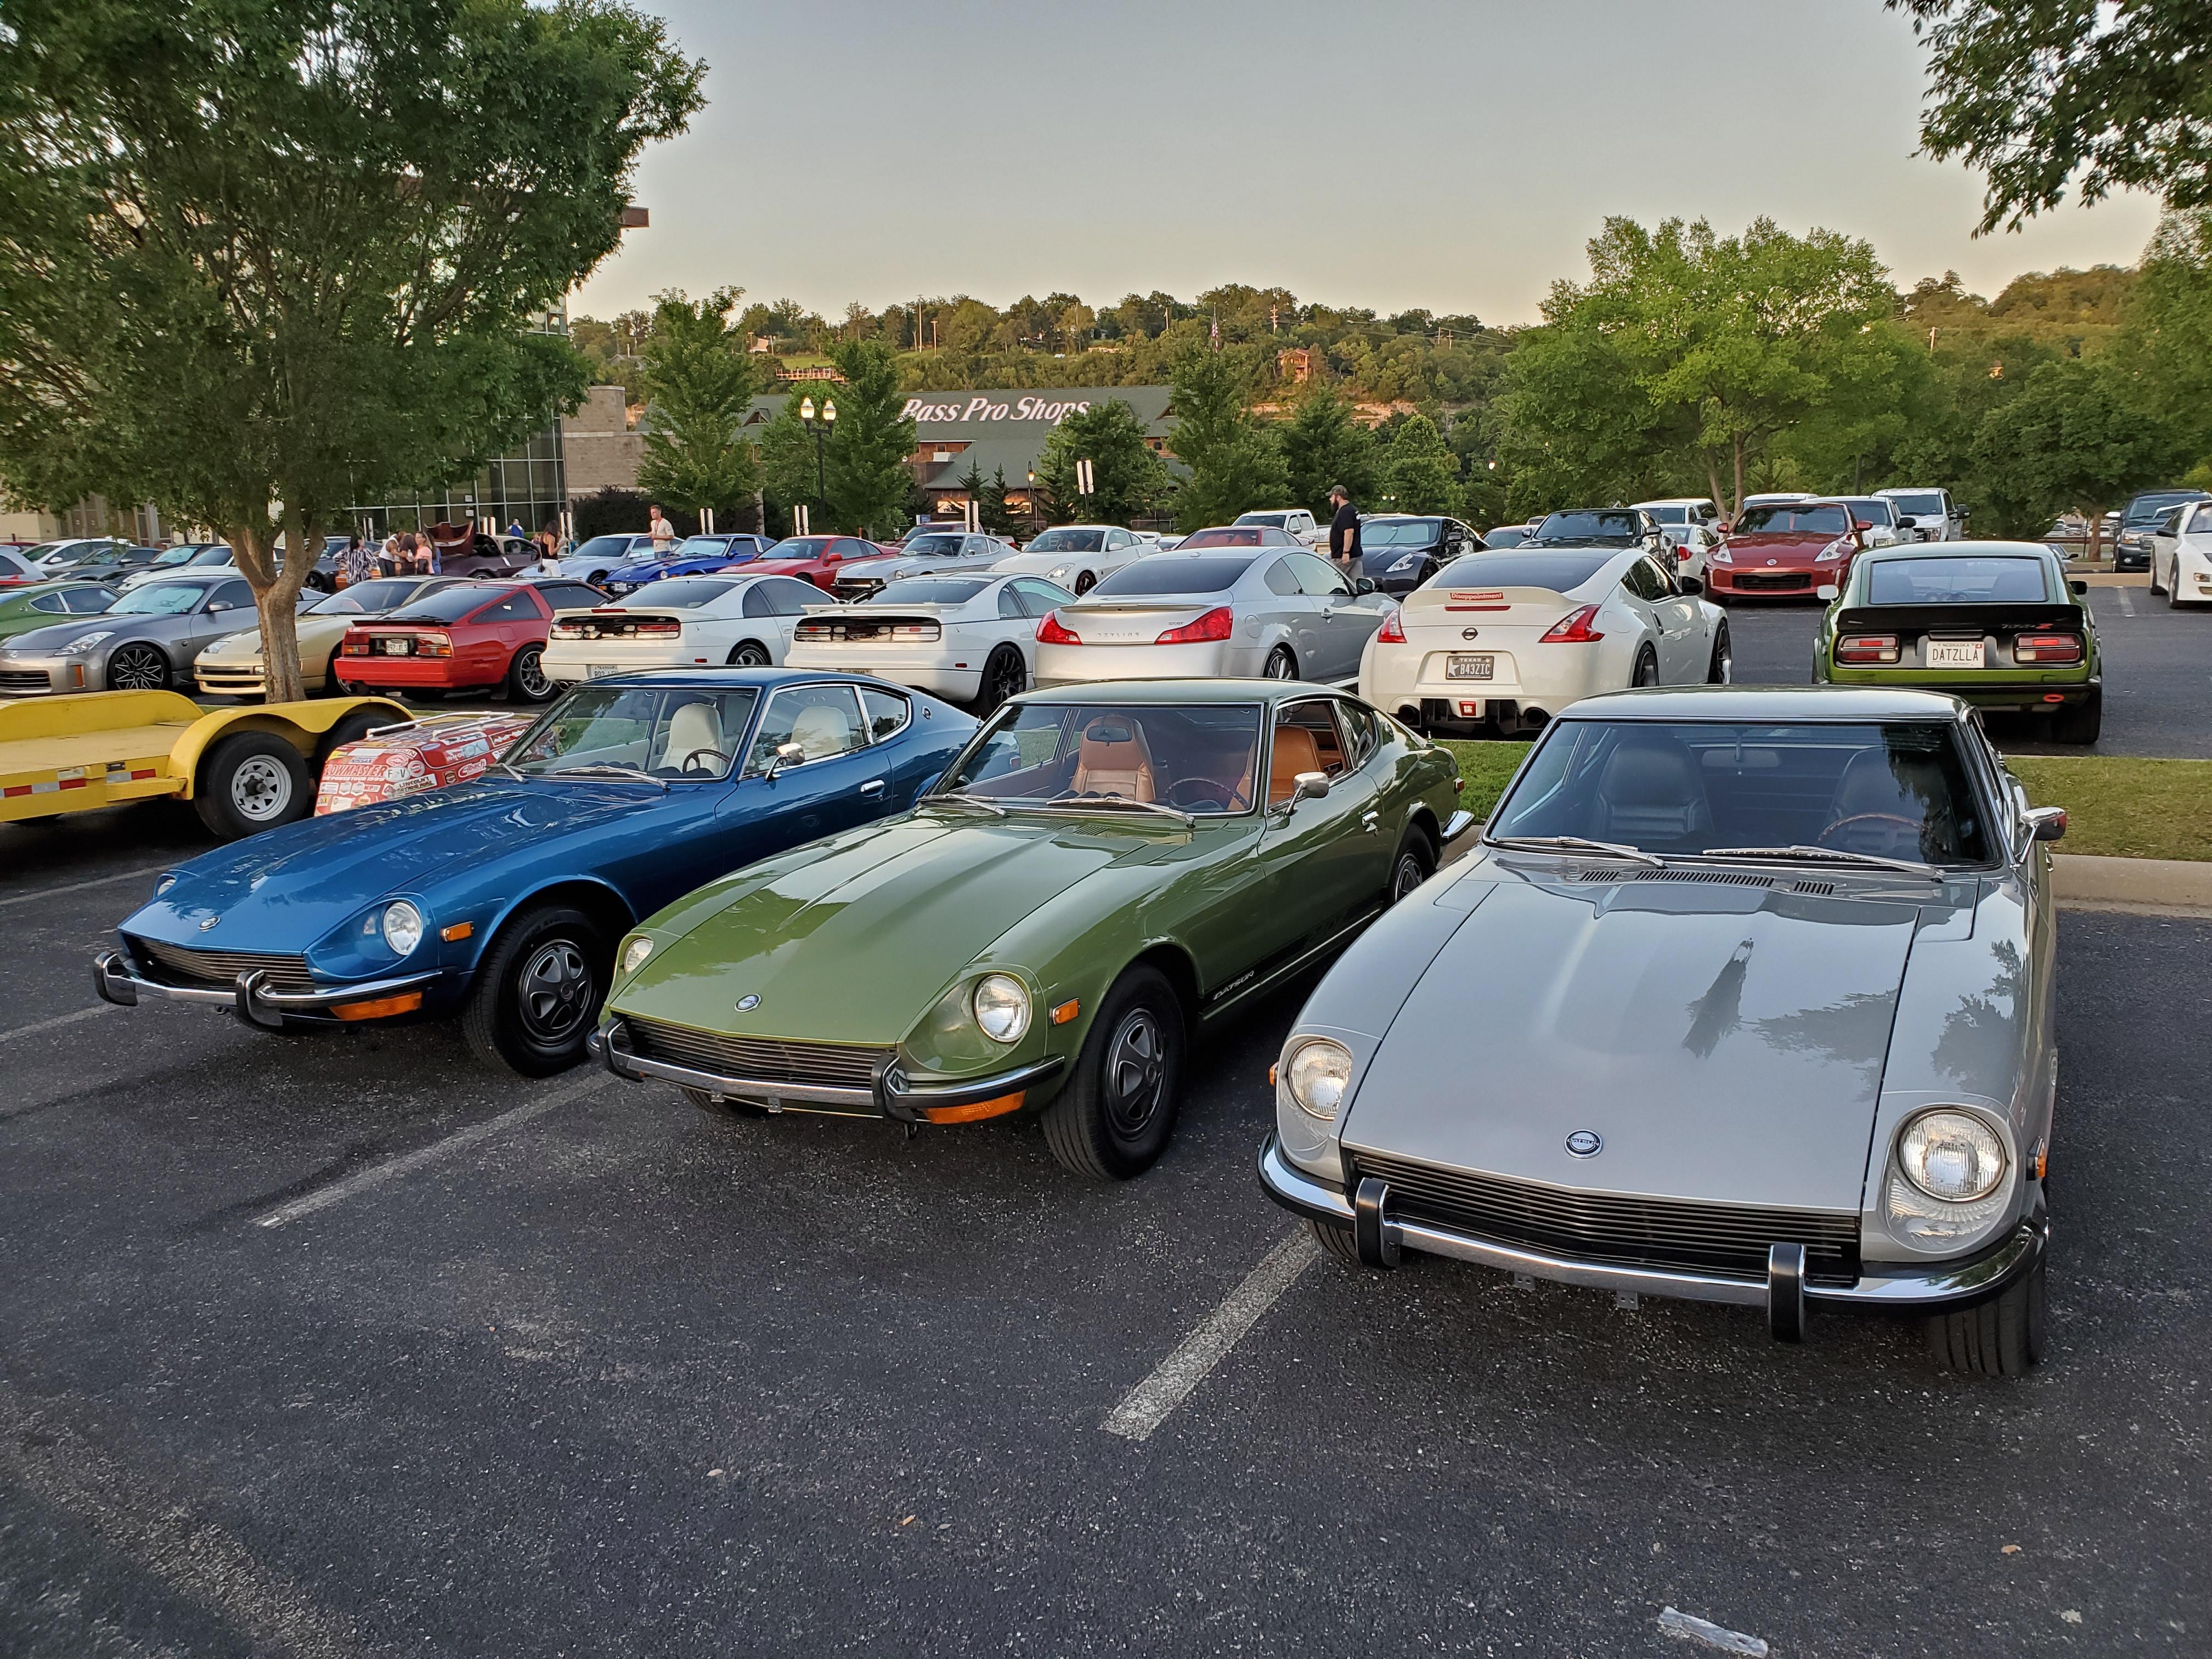
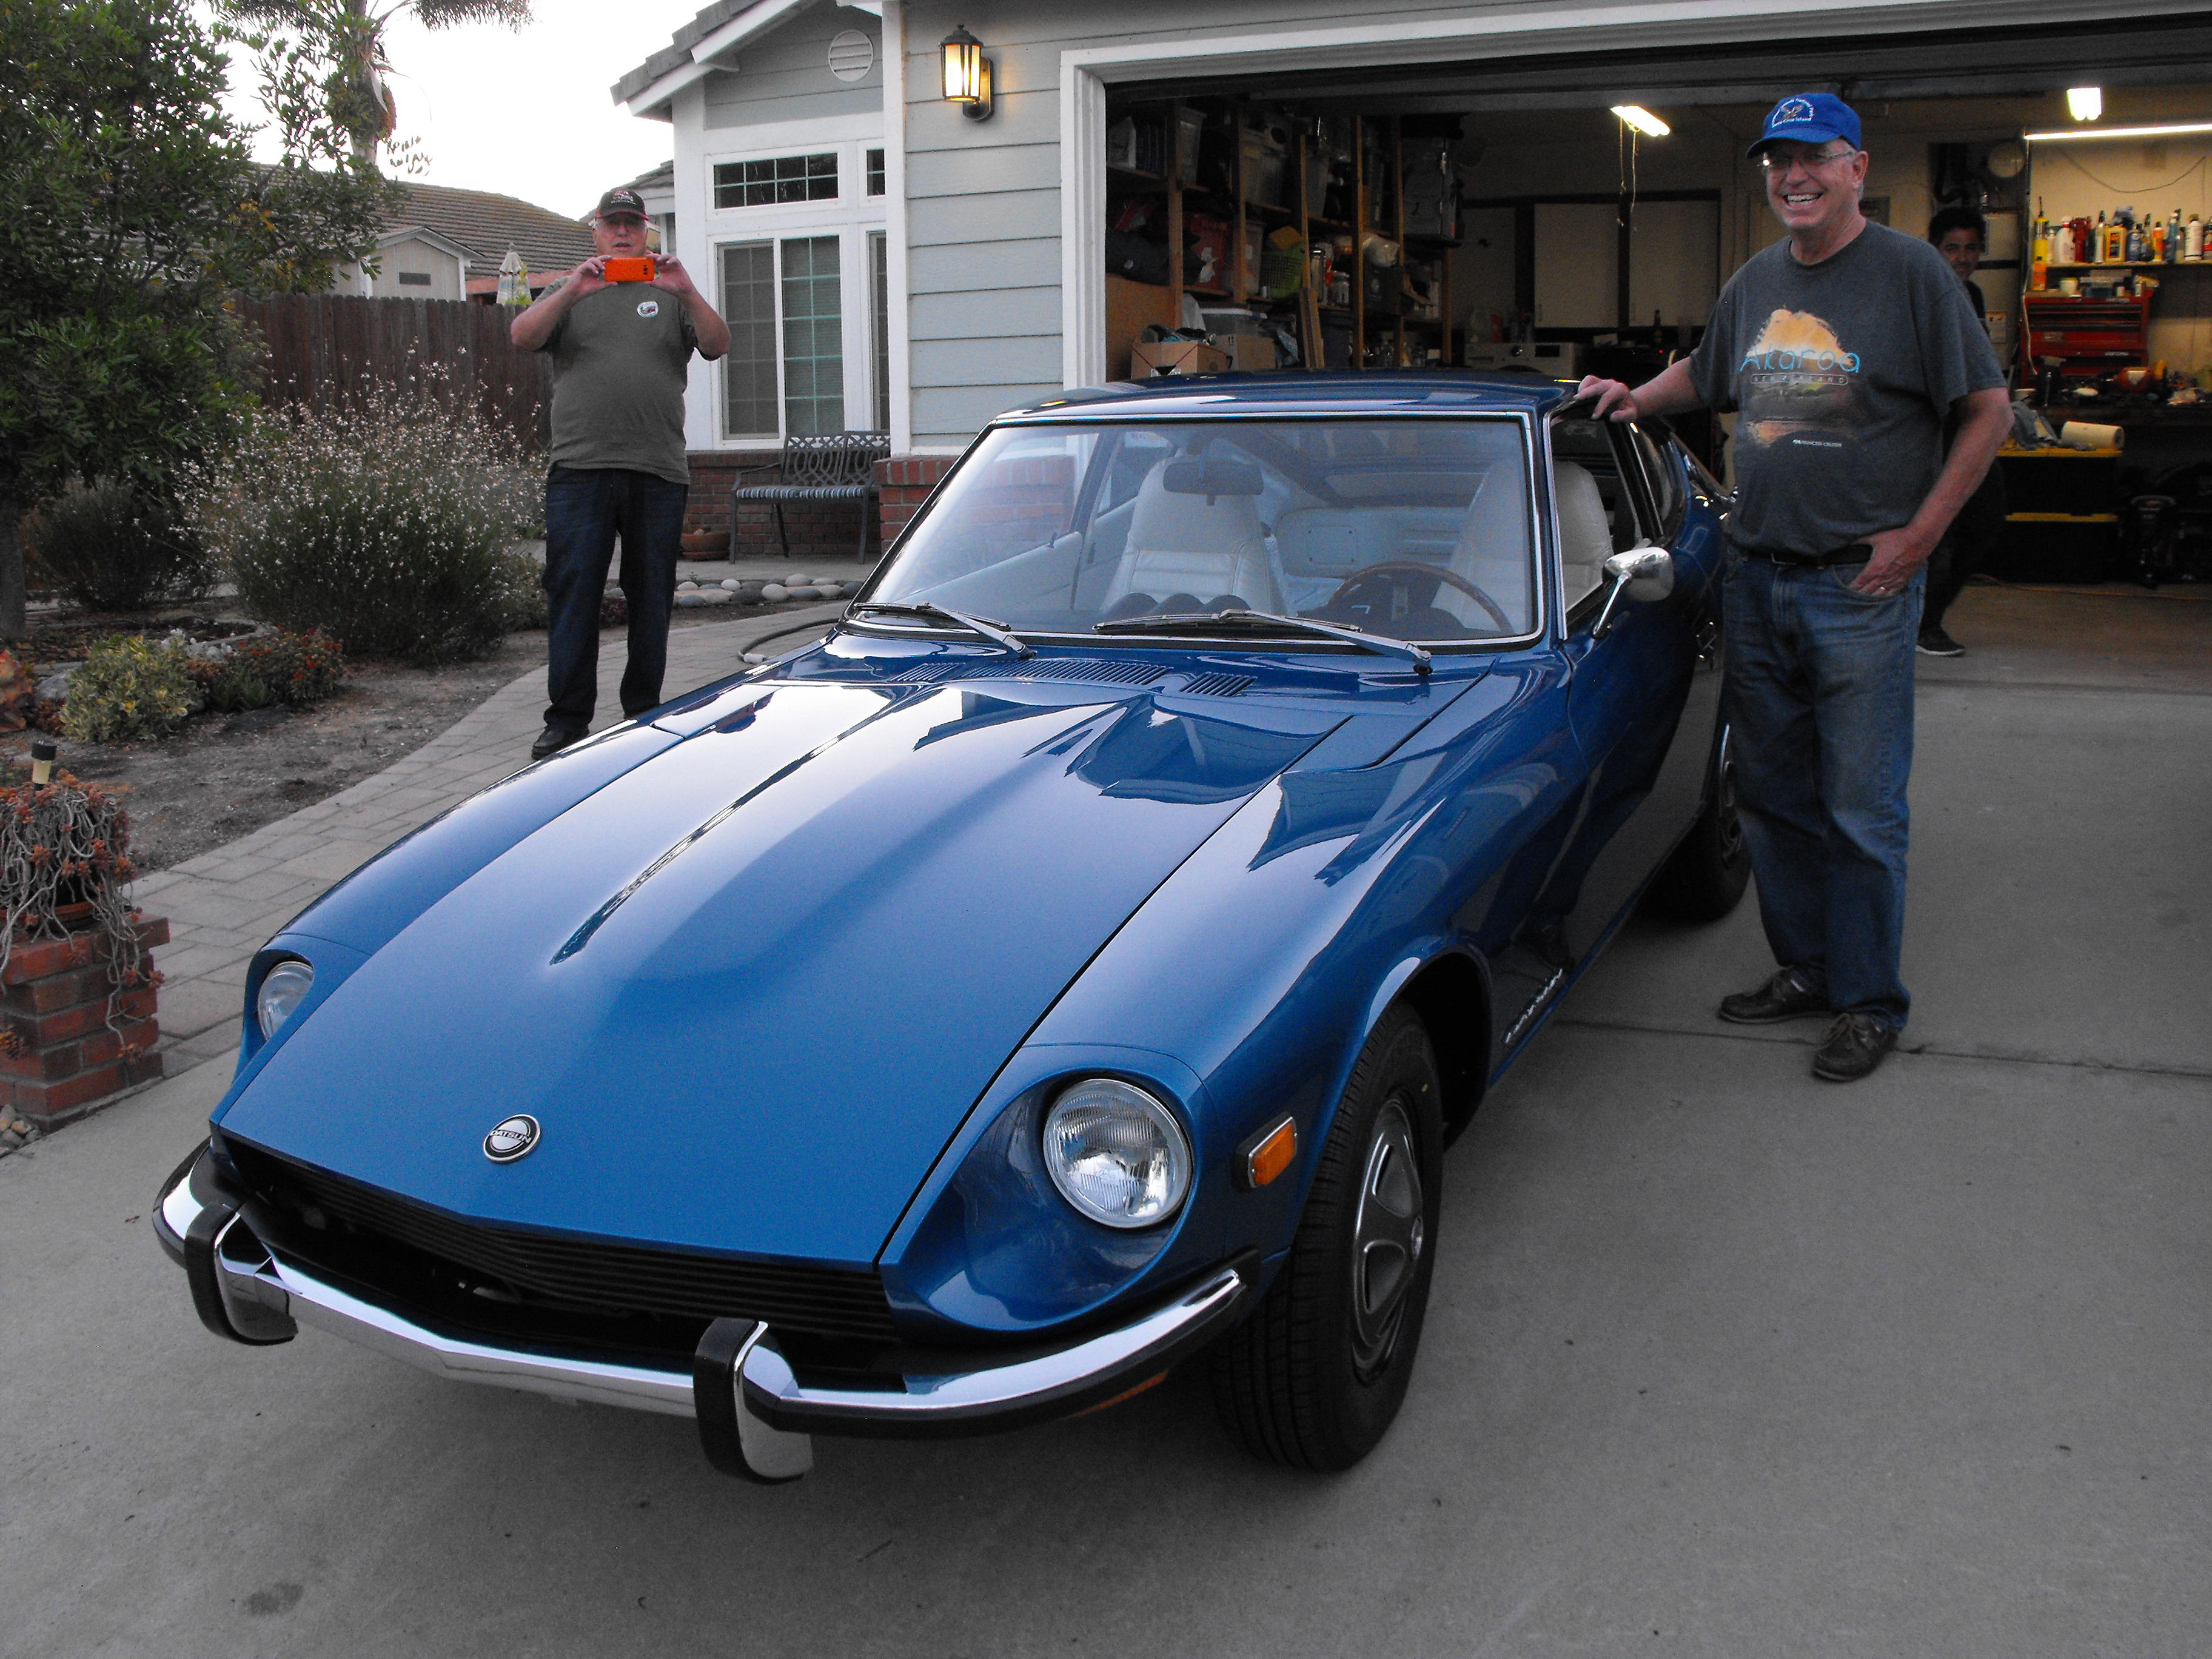
Wife and I arrived in Branson late last night. We are planning on doing some sightseeing and catching some shows before ZCON ramps up. @jayhawk will be visiting family in Kansas before bringing his car down Tuesday AM. Looking forward to a great show and meeting up with old friends. Also, if anyone coming to Branson has a spare one of those plastic things that secures coil wires to radiator , I could use one (for the car that is). Thanks, Rich
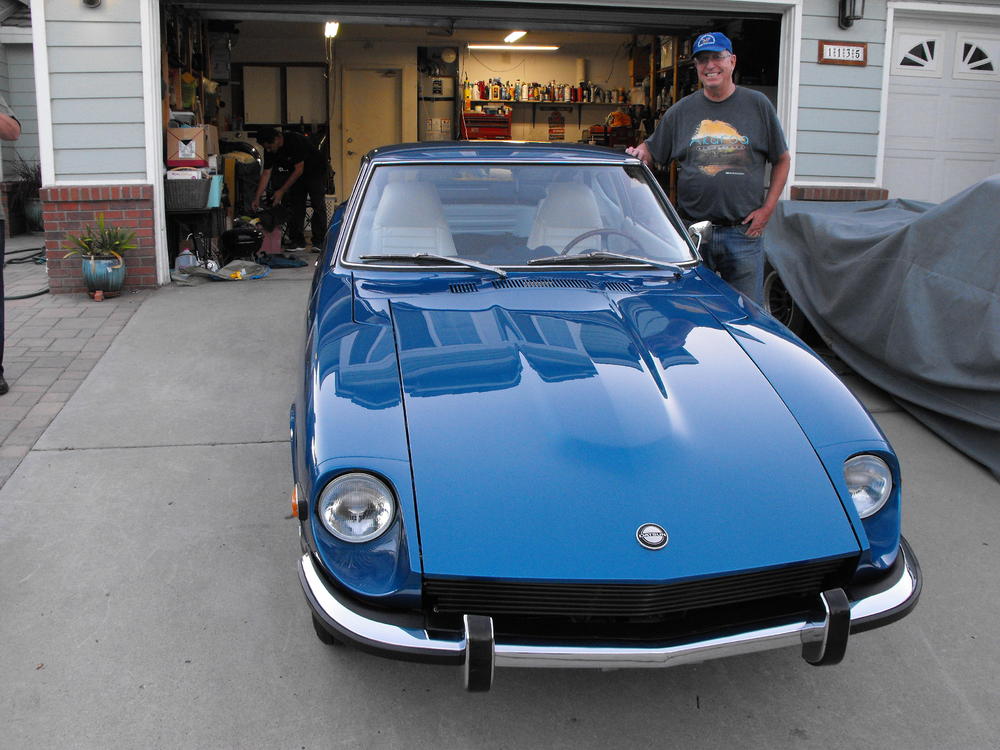
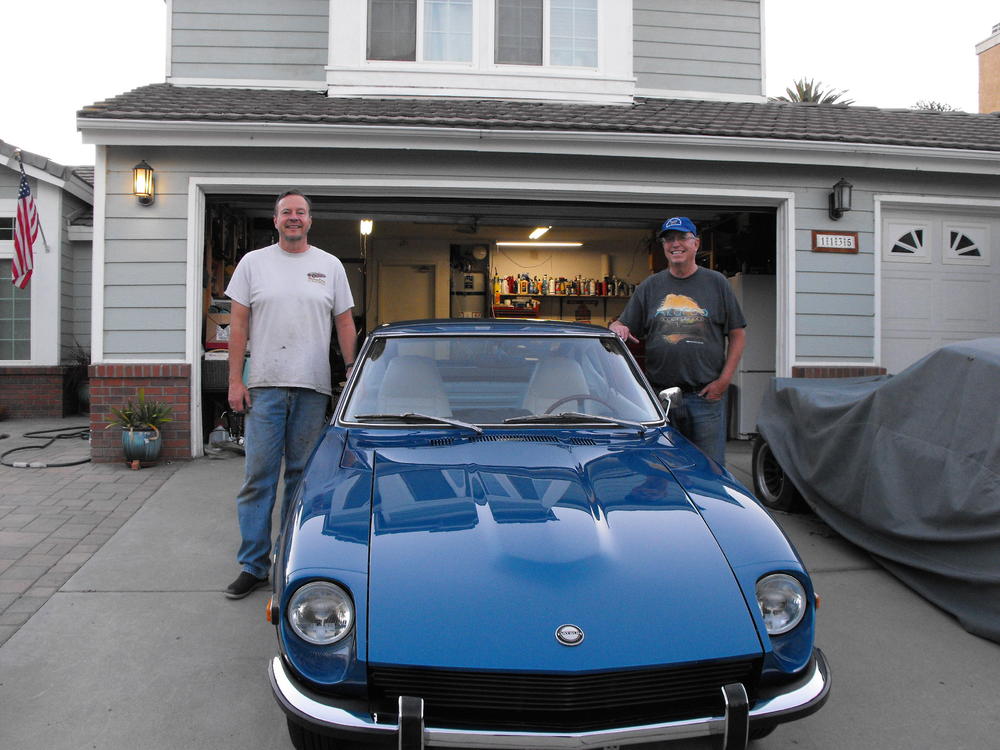
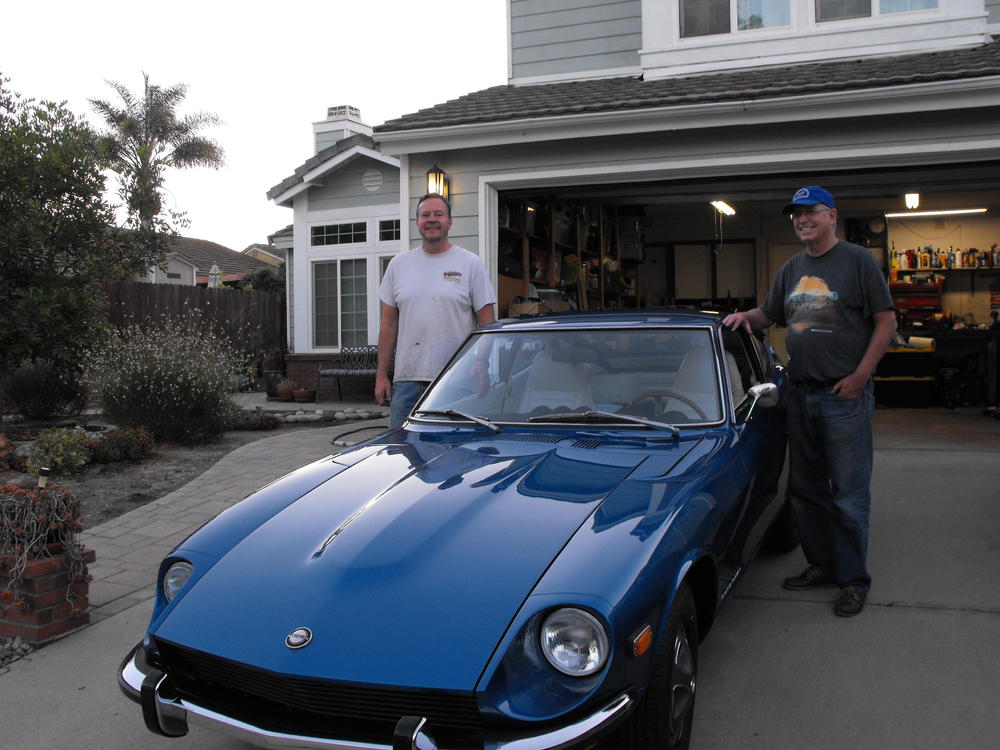
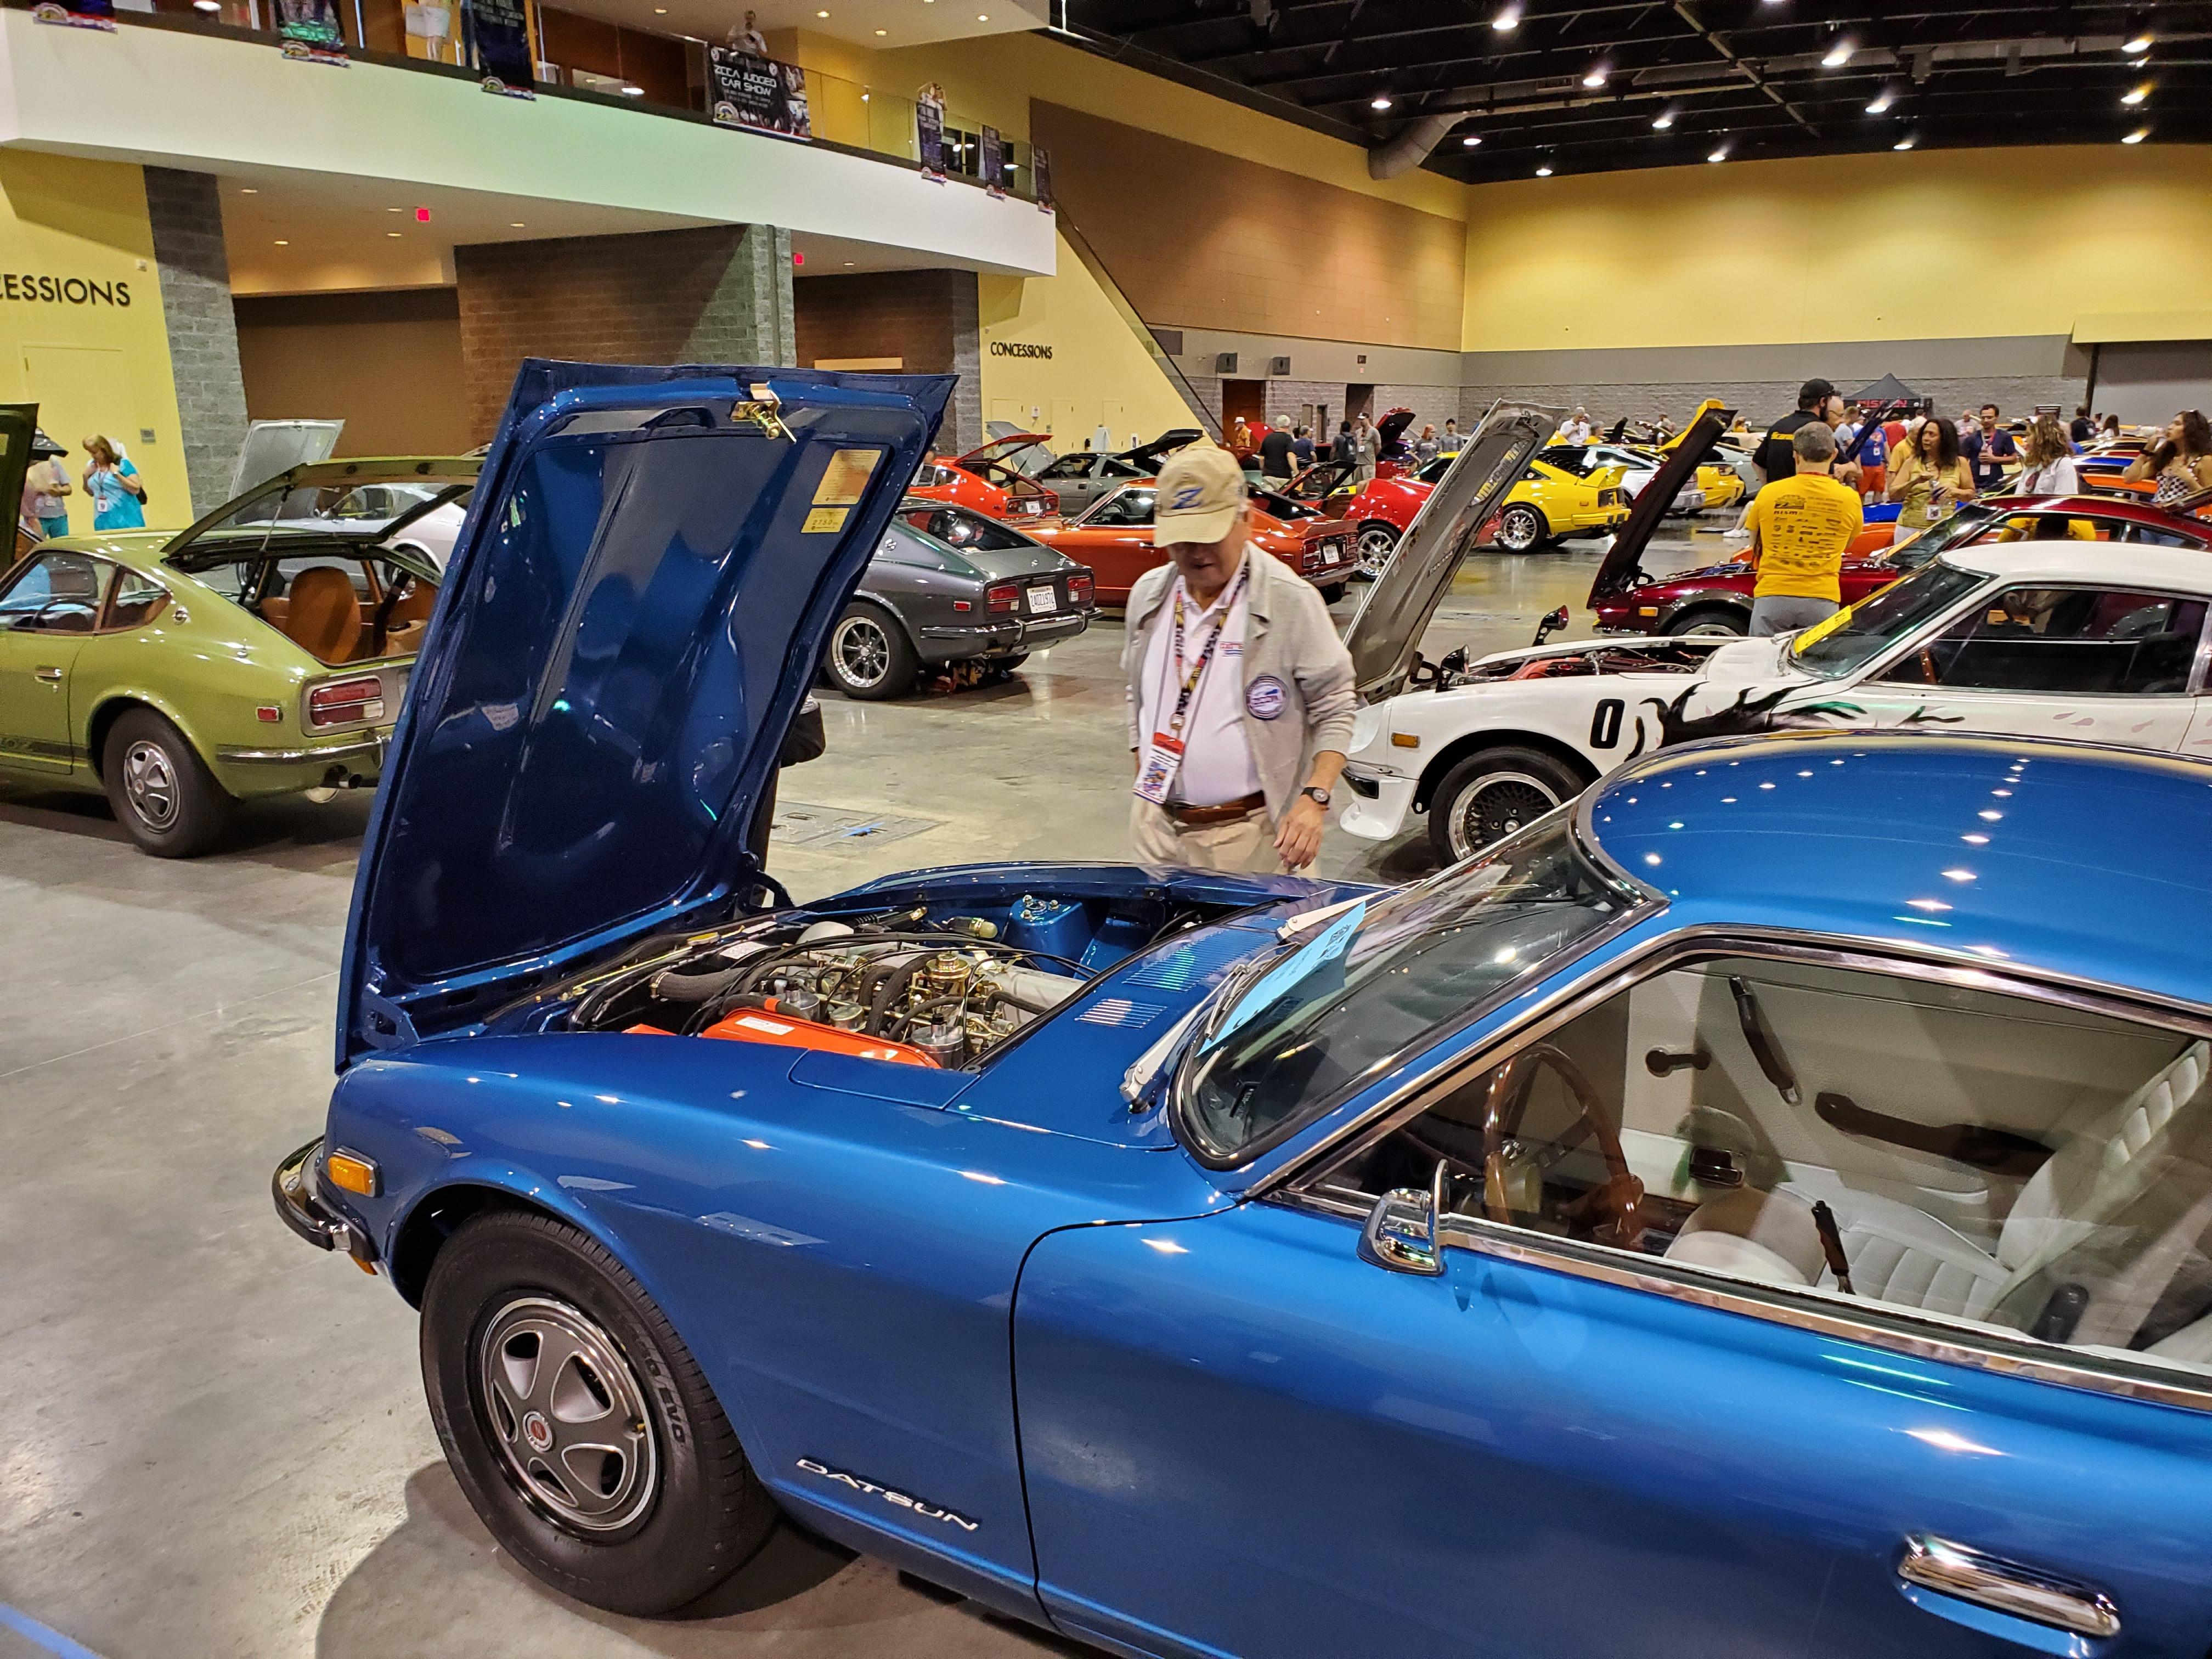
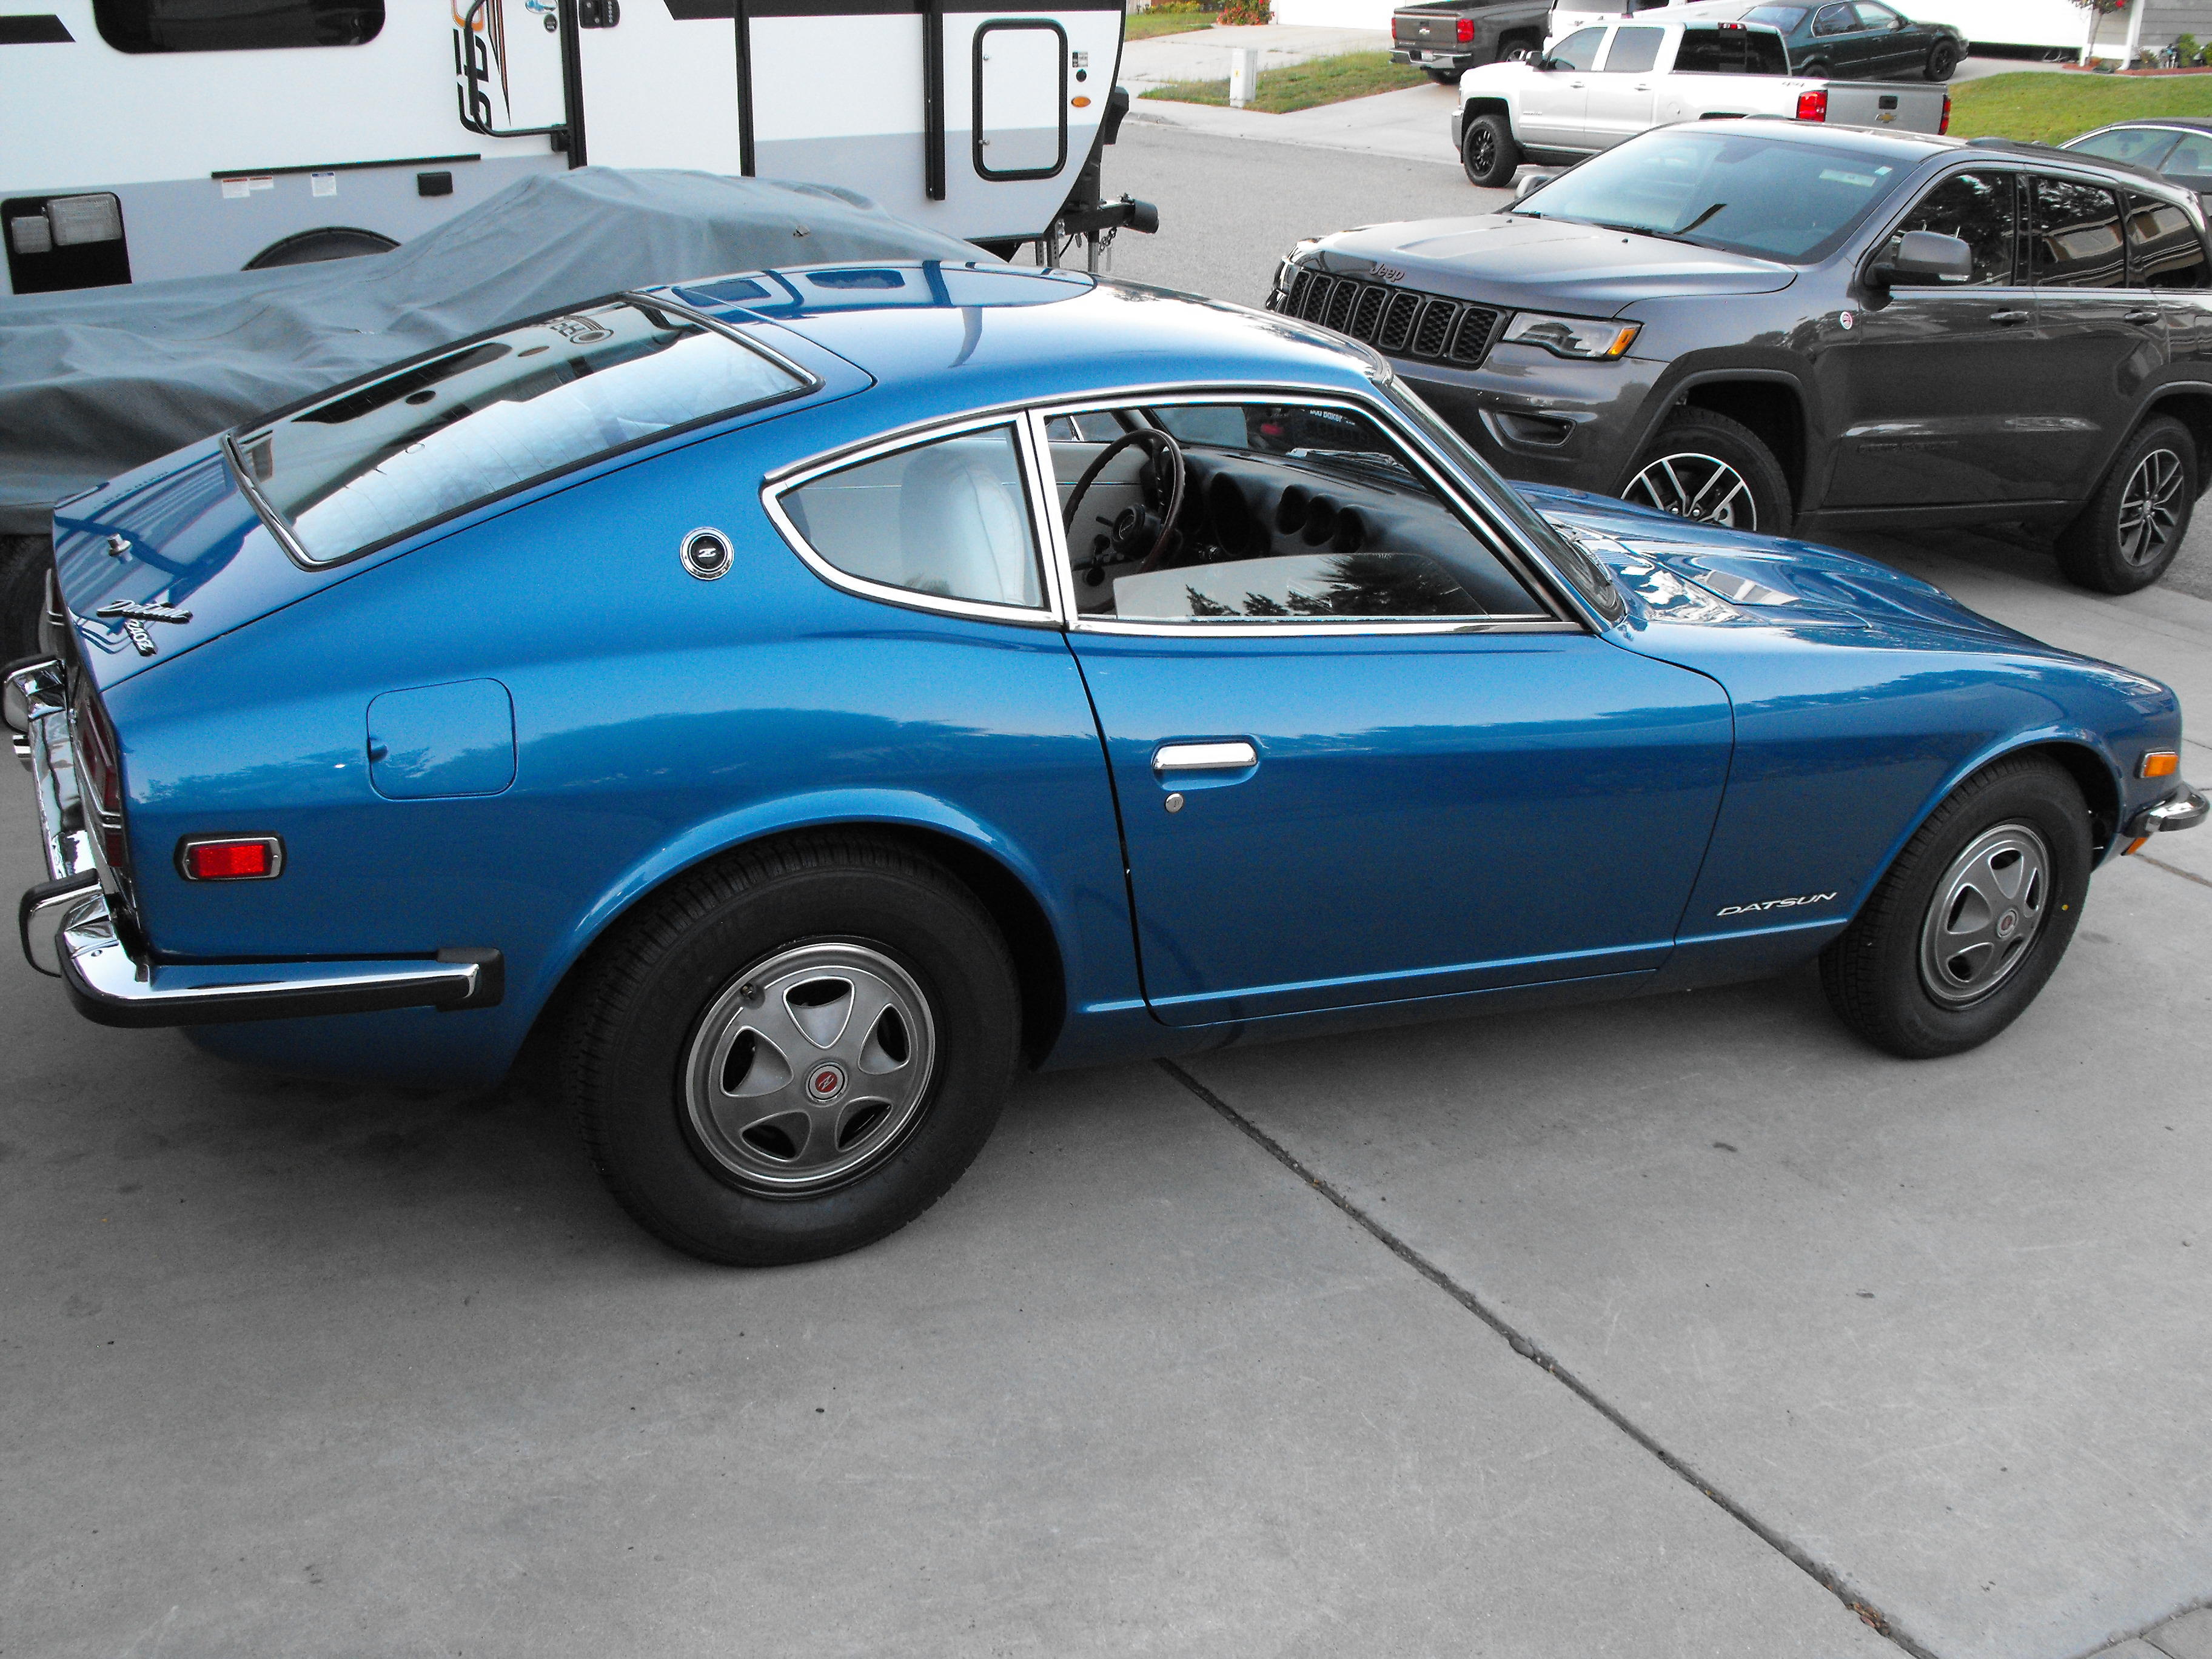
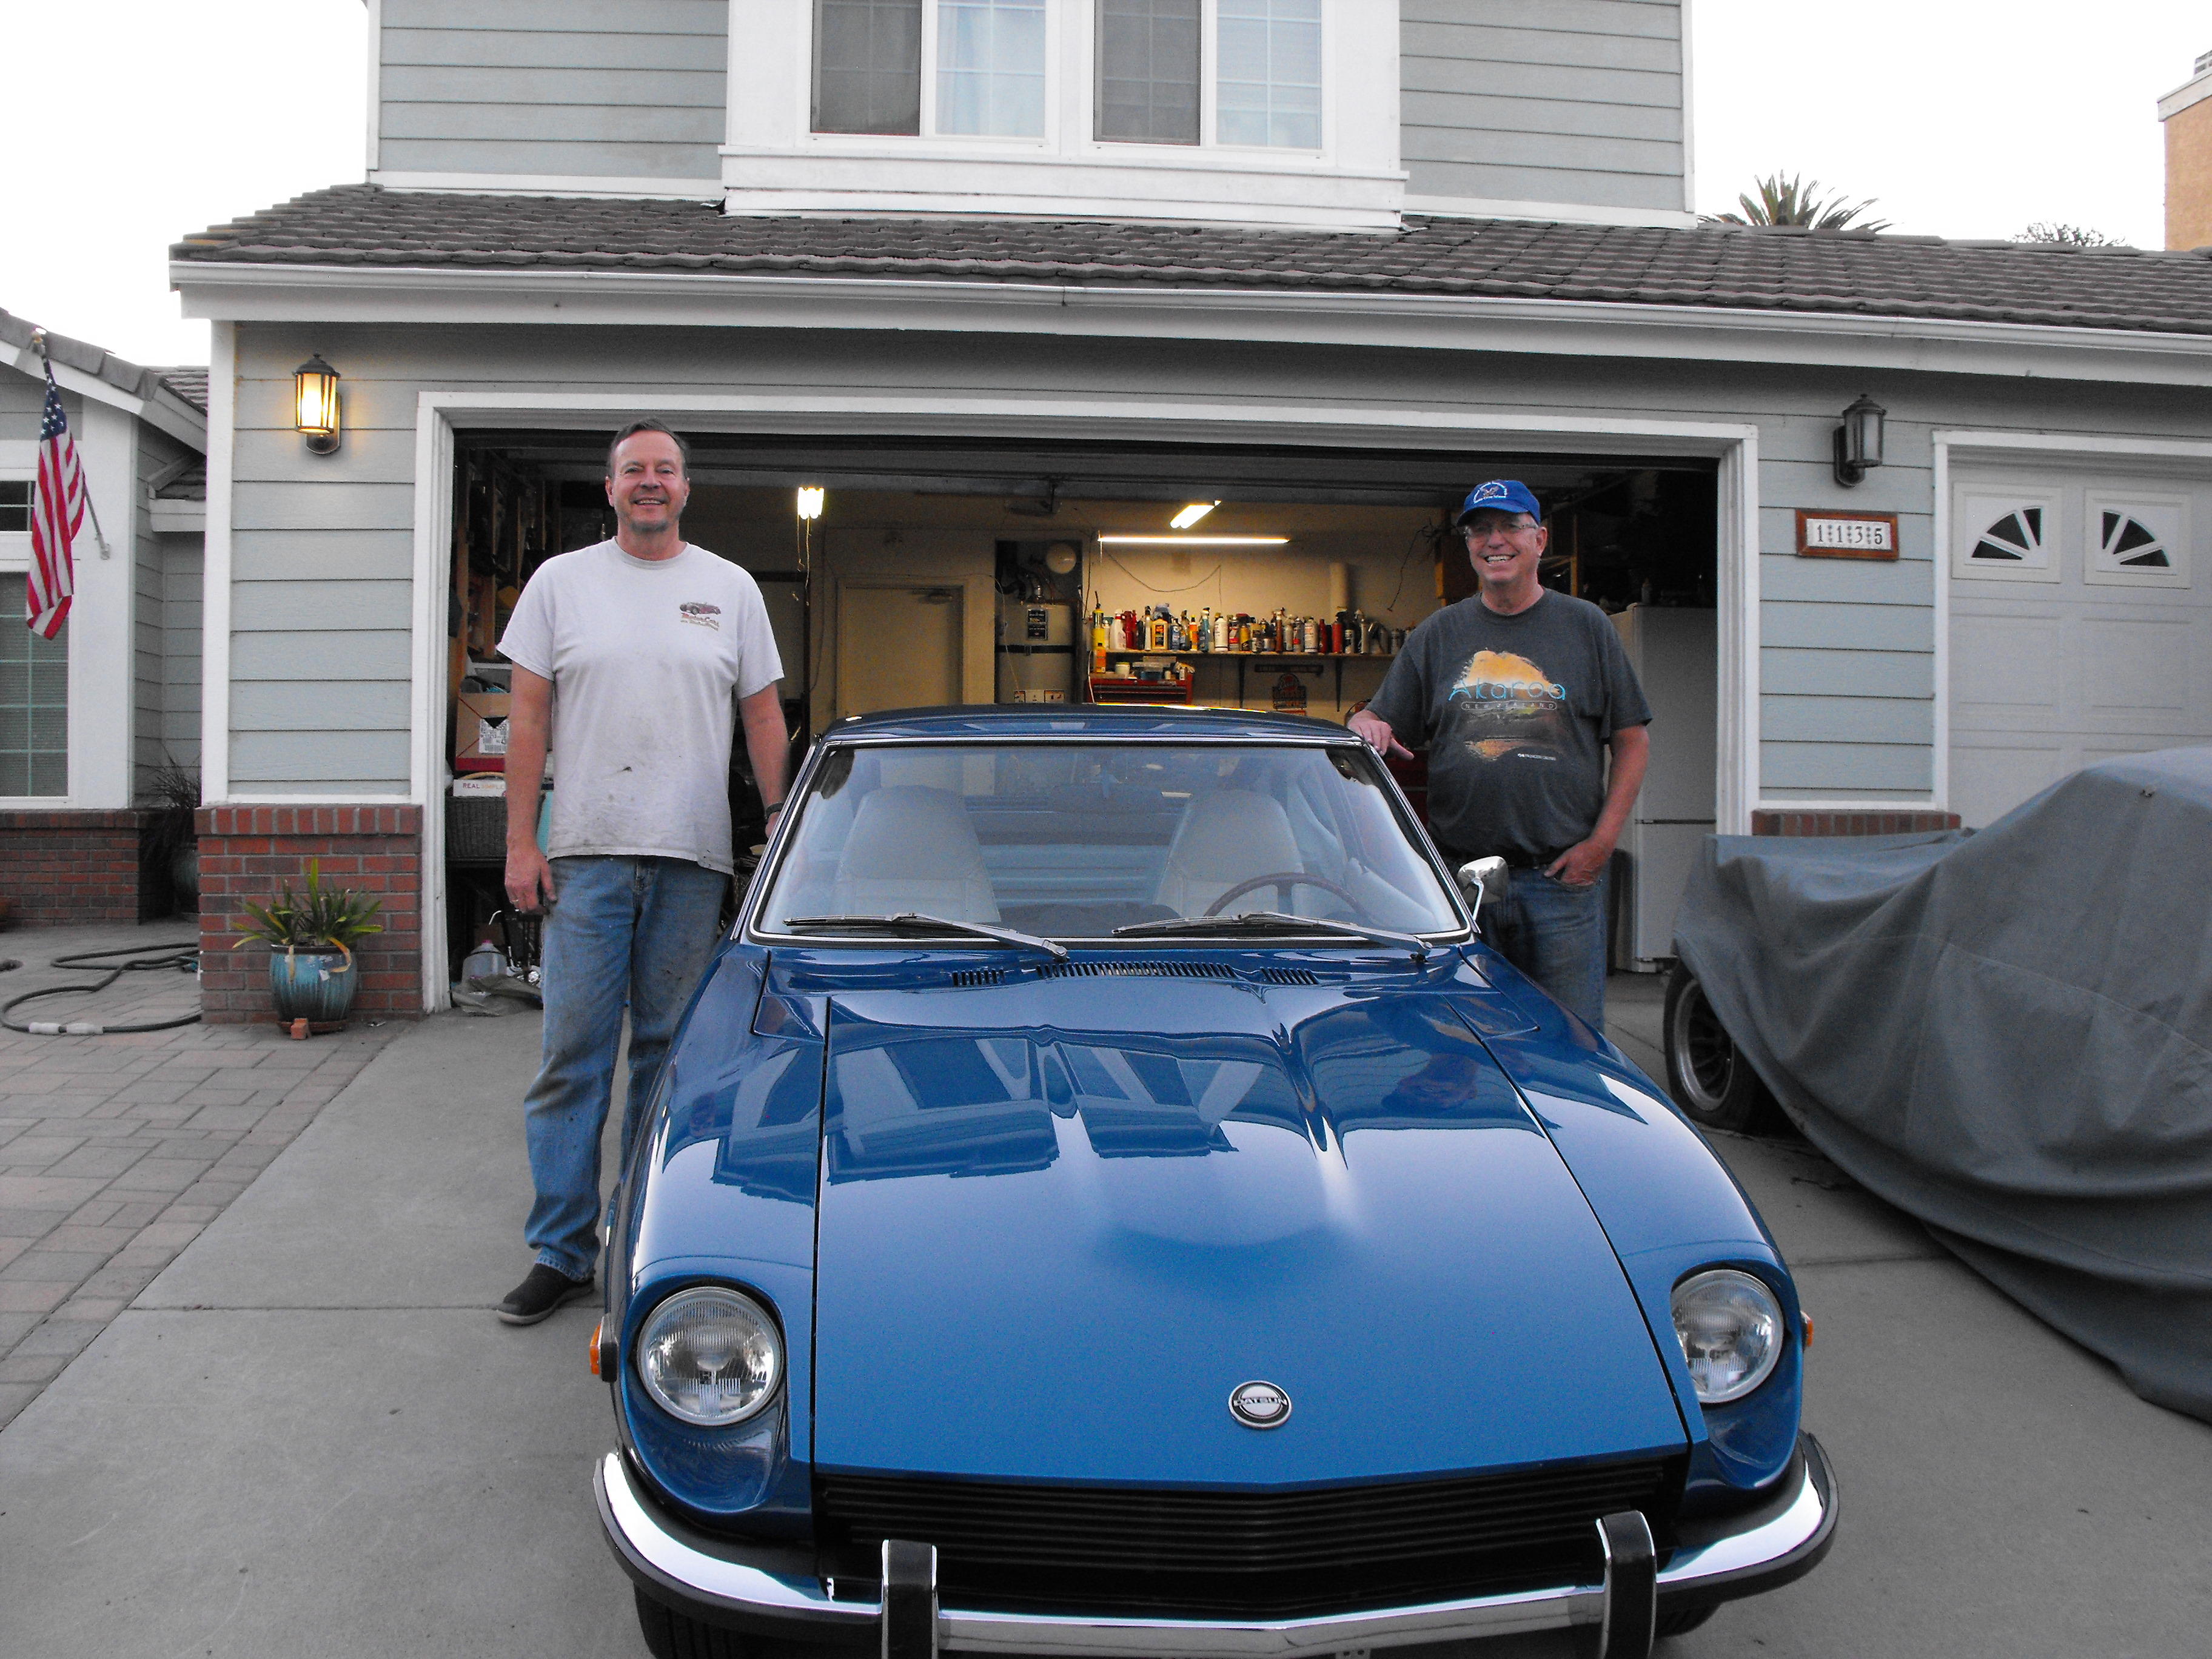
We will be loading the car tomorrow AM and heading for Branson. Here are some final pics of the car. Yes, and a few photos of @jayhawk and @motorman7 in the background. Looking forward to an awesome event. Thanks to everyone for the help, input and support.


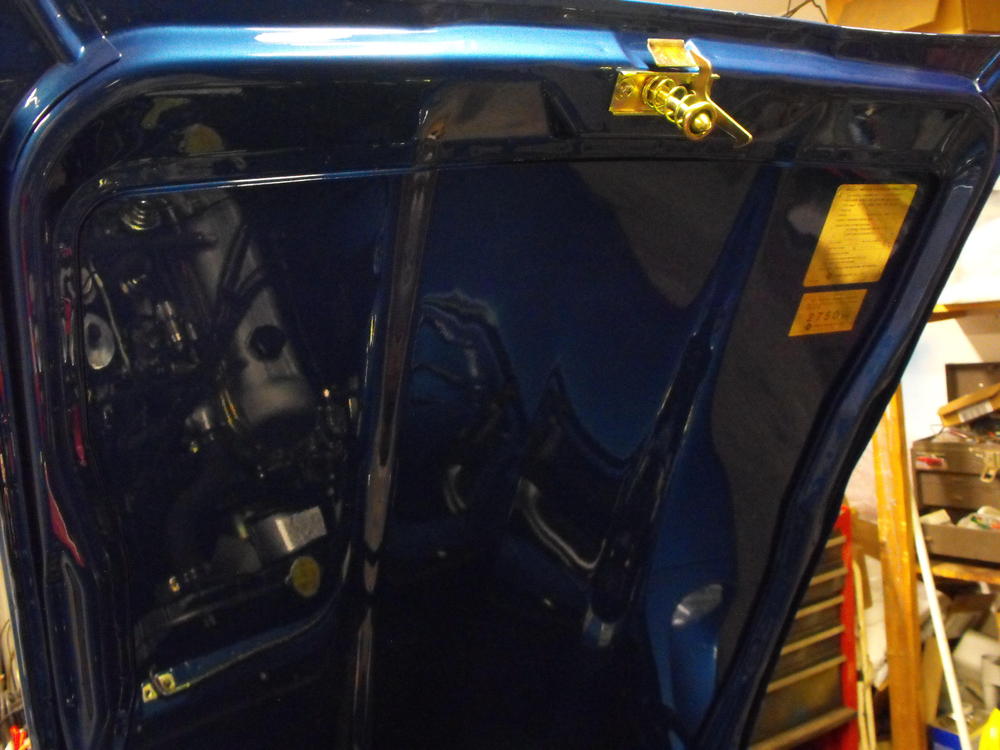
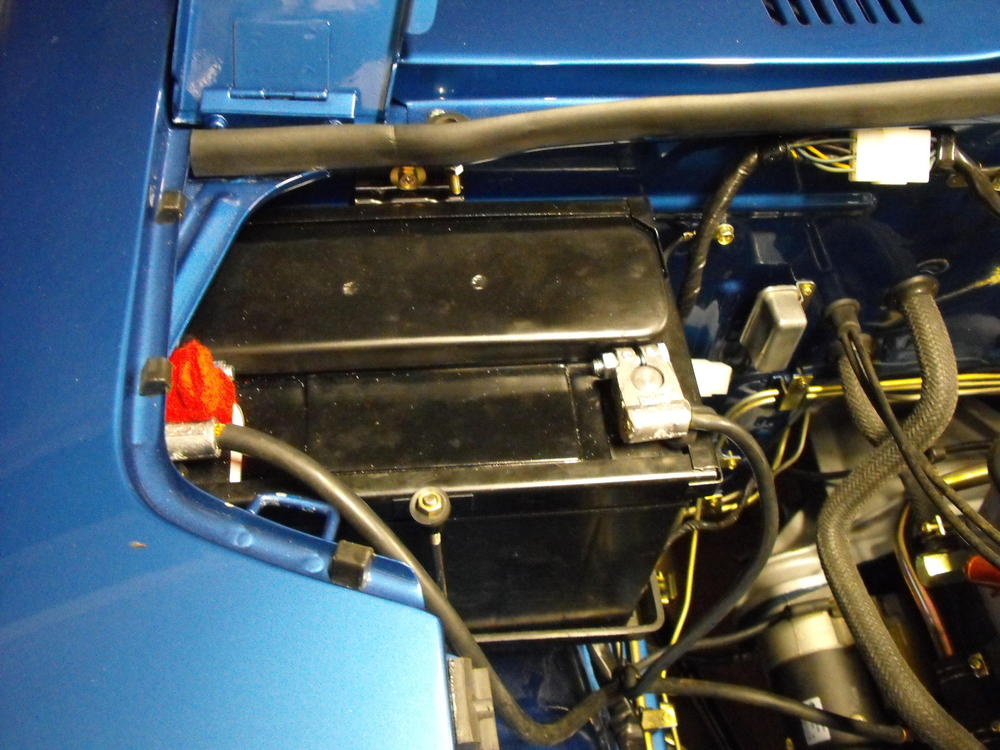
 Thanks @240260280 . That is useful reference material. Still finishing up details. Added decals. Also below is a pic of my fabricated right angle battery cables....no cover though.

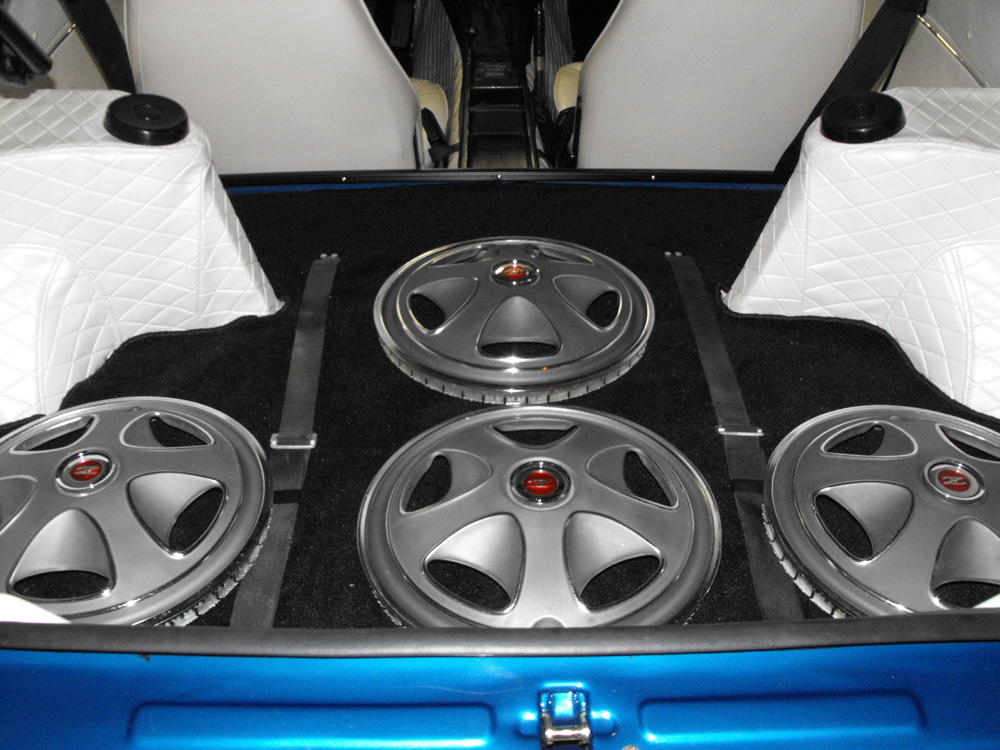
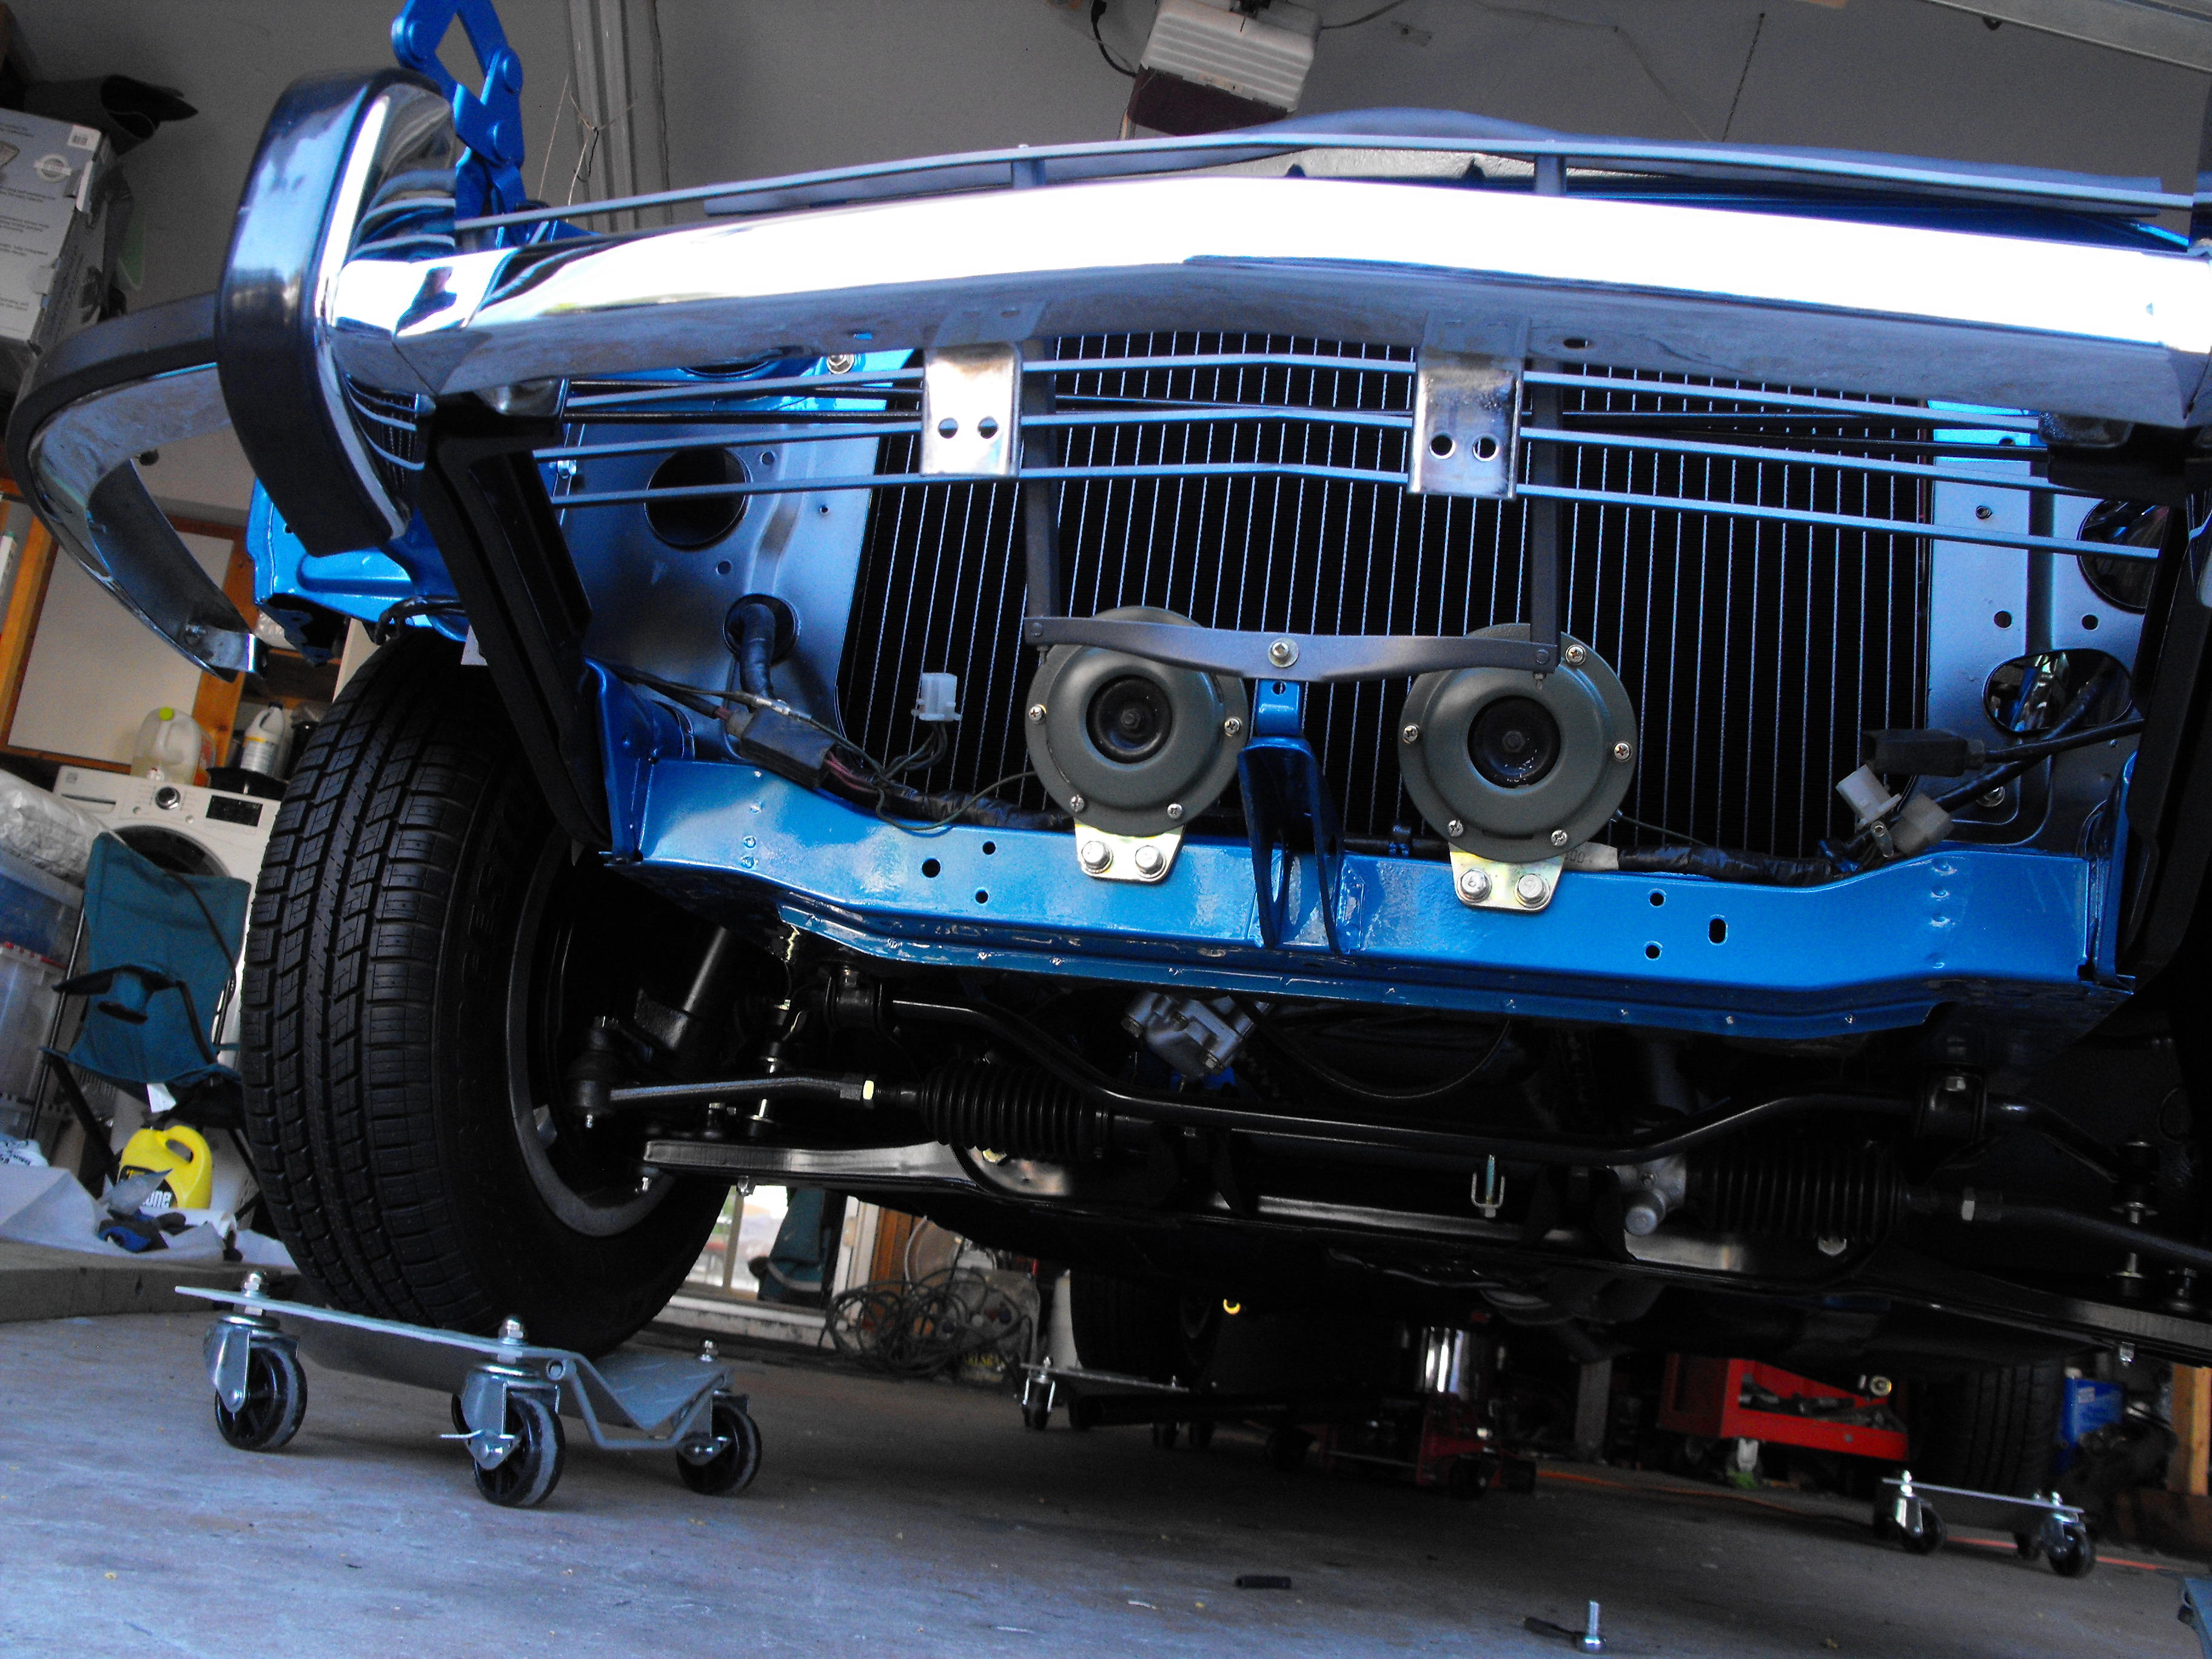
 Put the show tires on and took her for a short spin in the cul-de-sac. Got the center front bumper filler installed along with the alternator and smog support that came in from eBay. Will do the luggage straps tomorrow night. Motorsport parts are coming in on Wednesday. It's coming down to the wire.
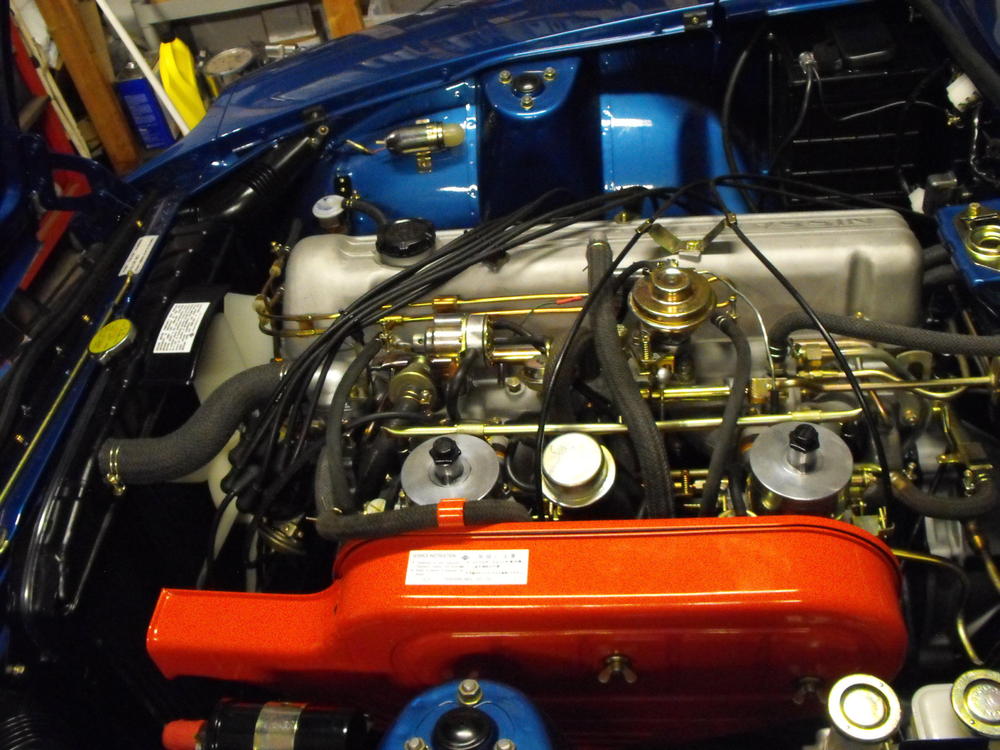
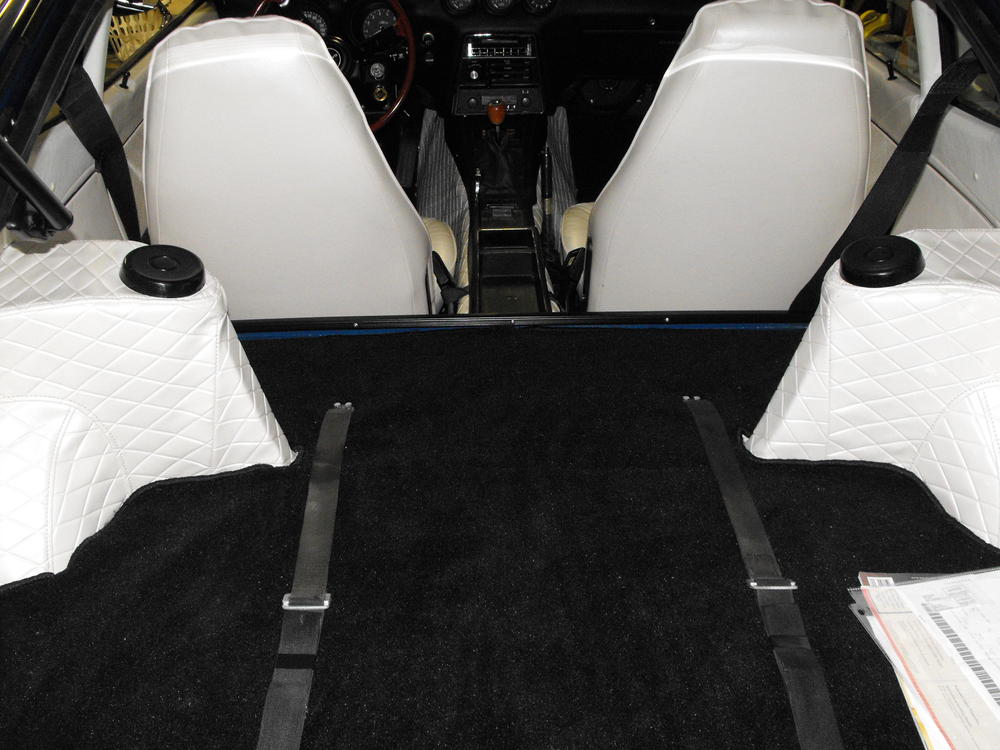
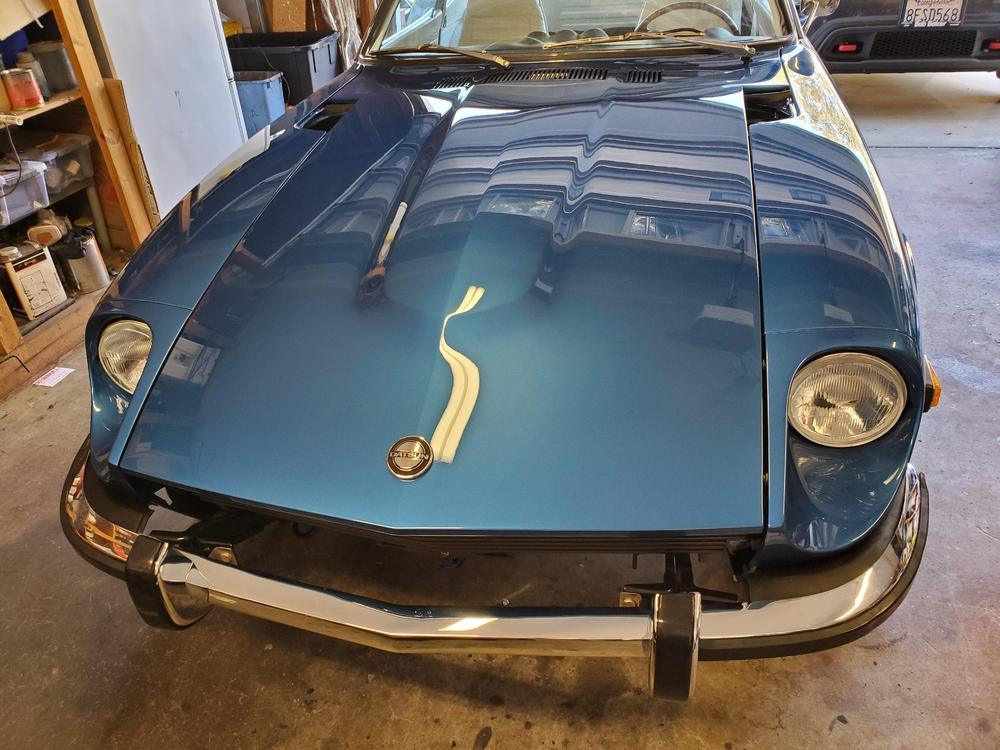
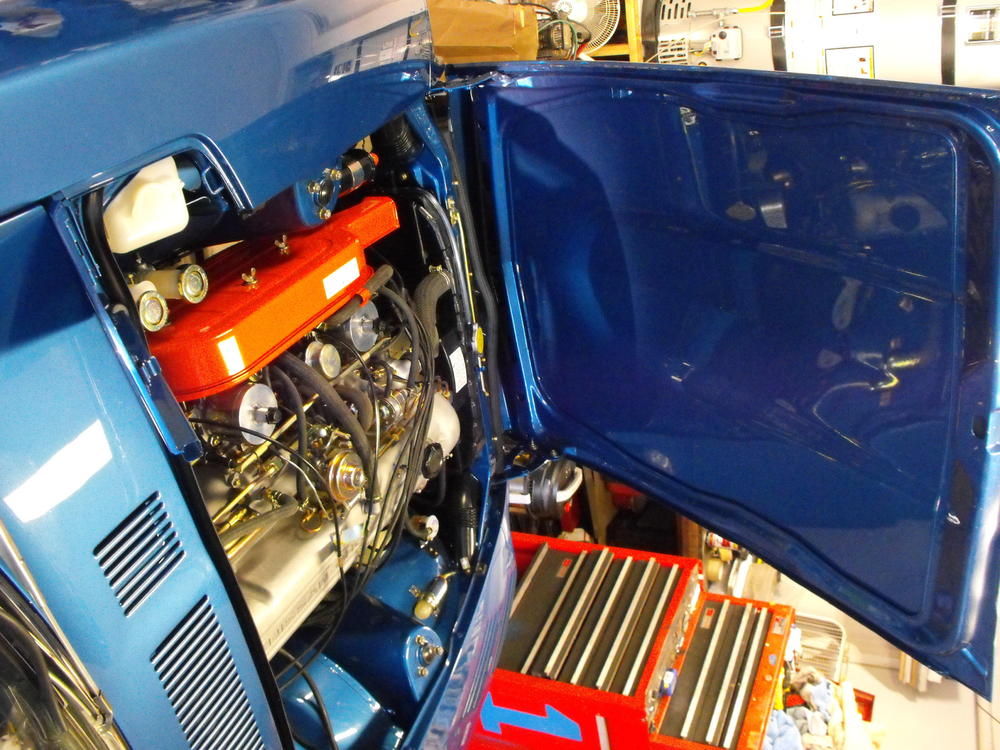
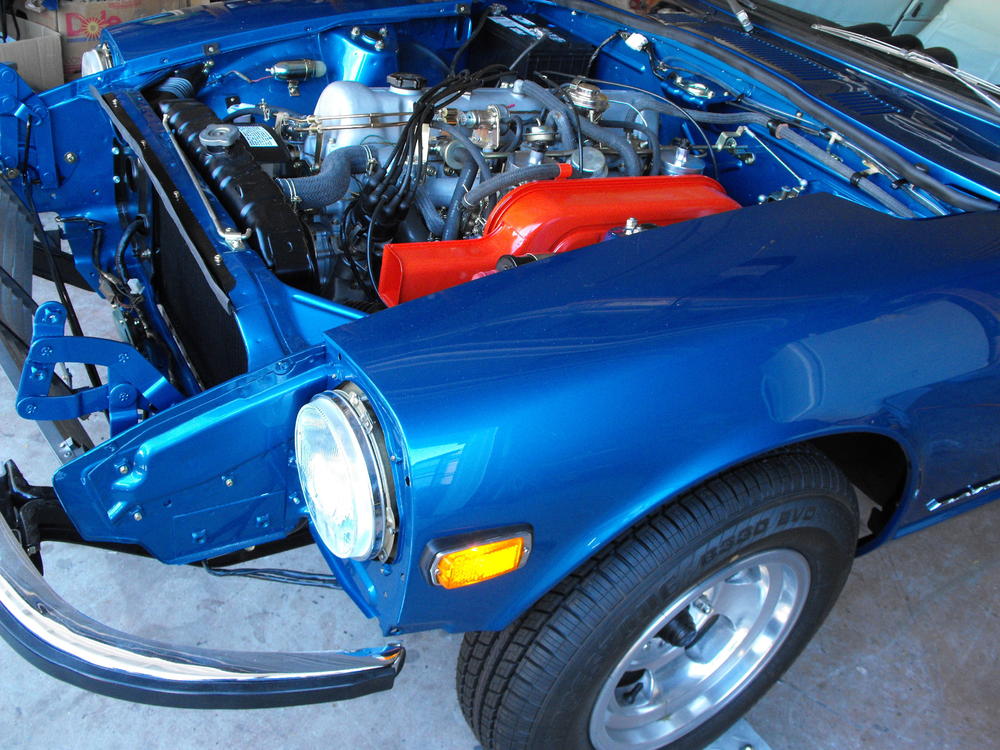
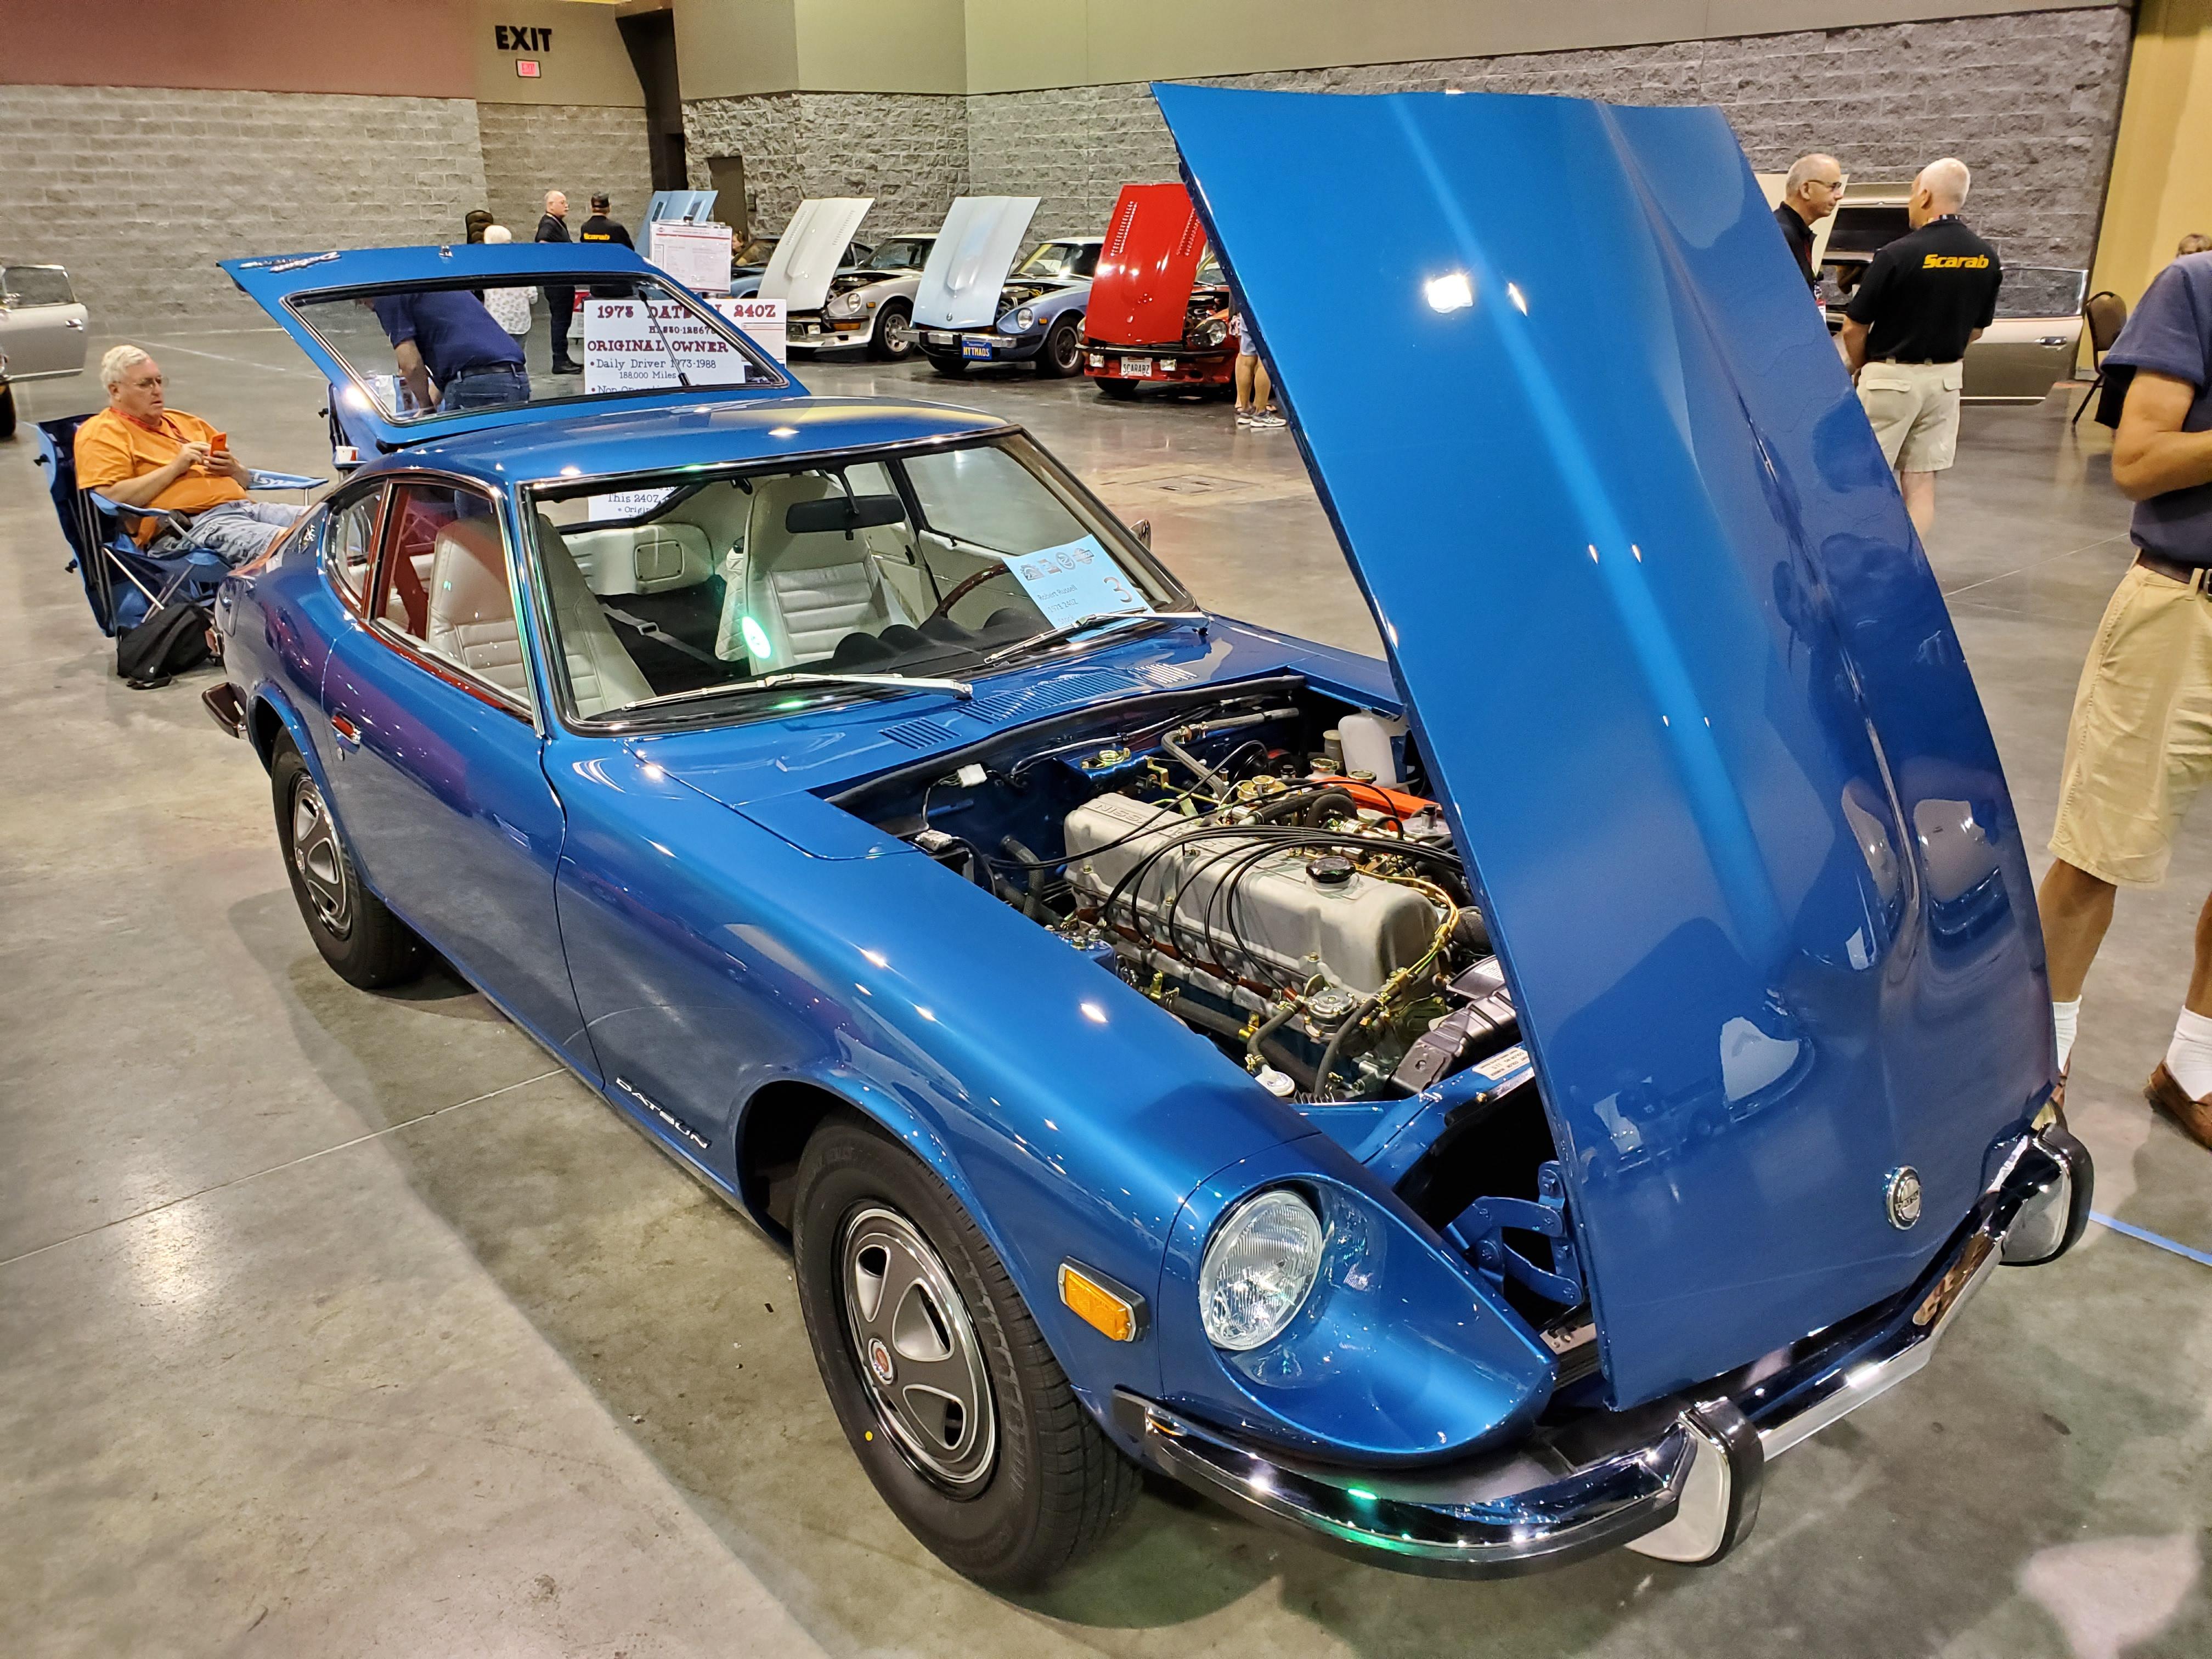
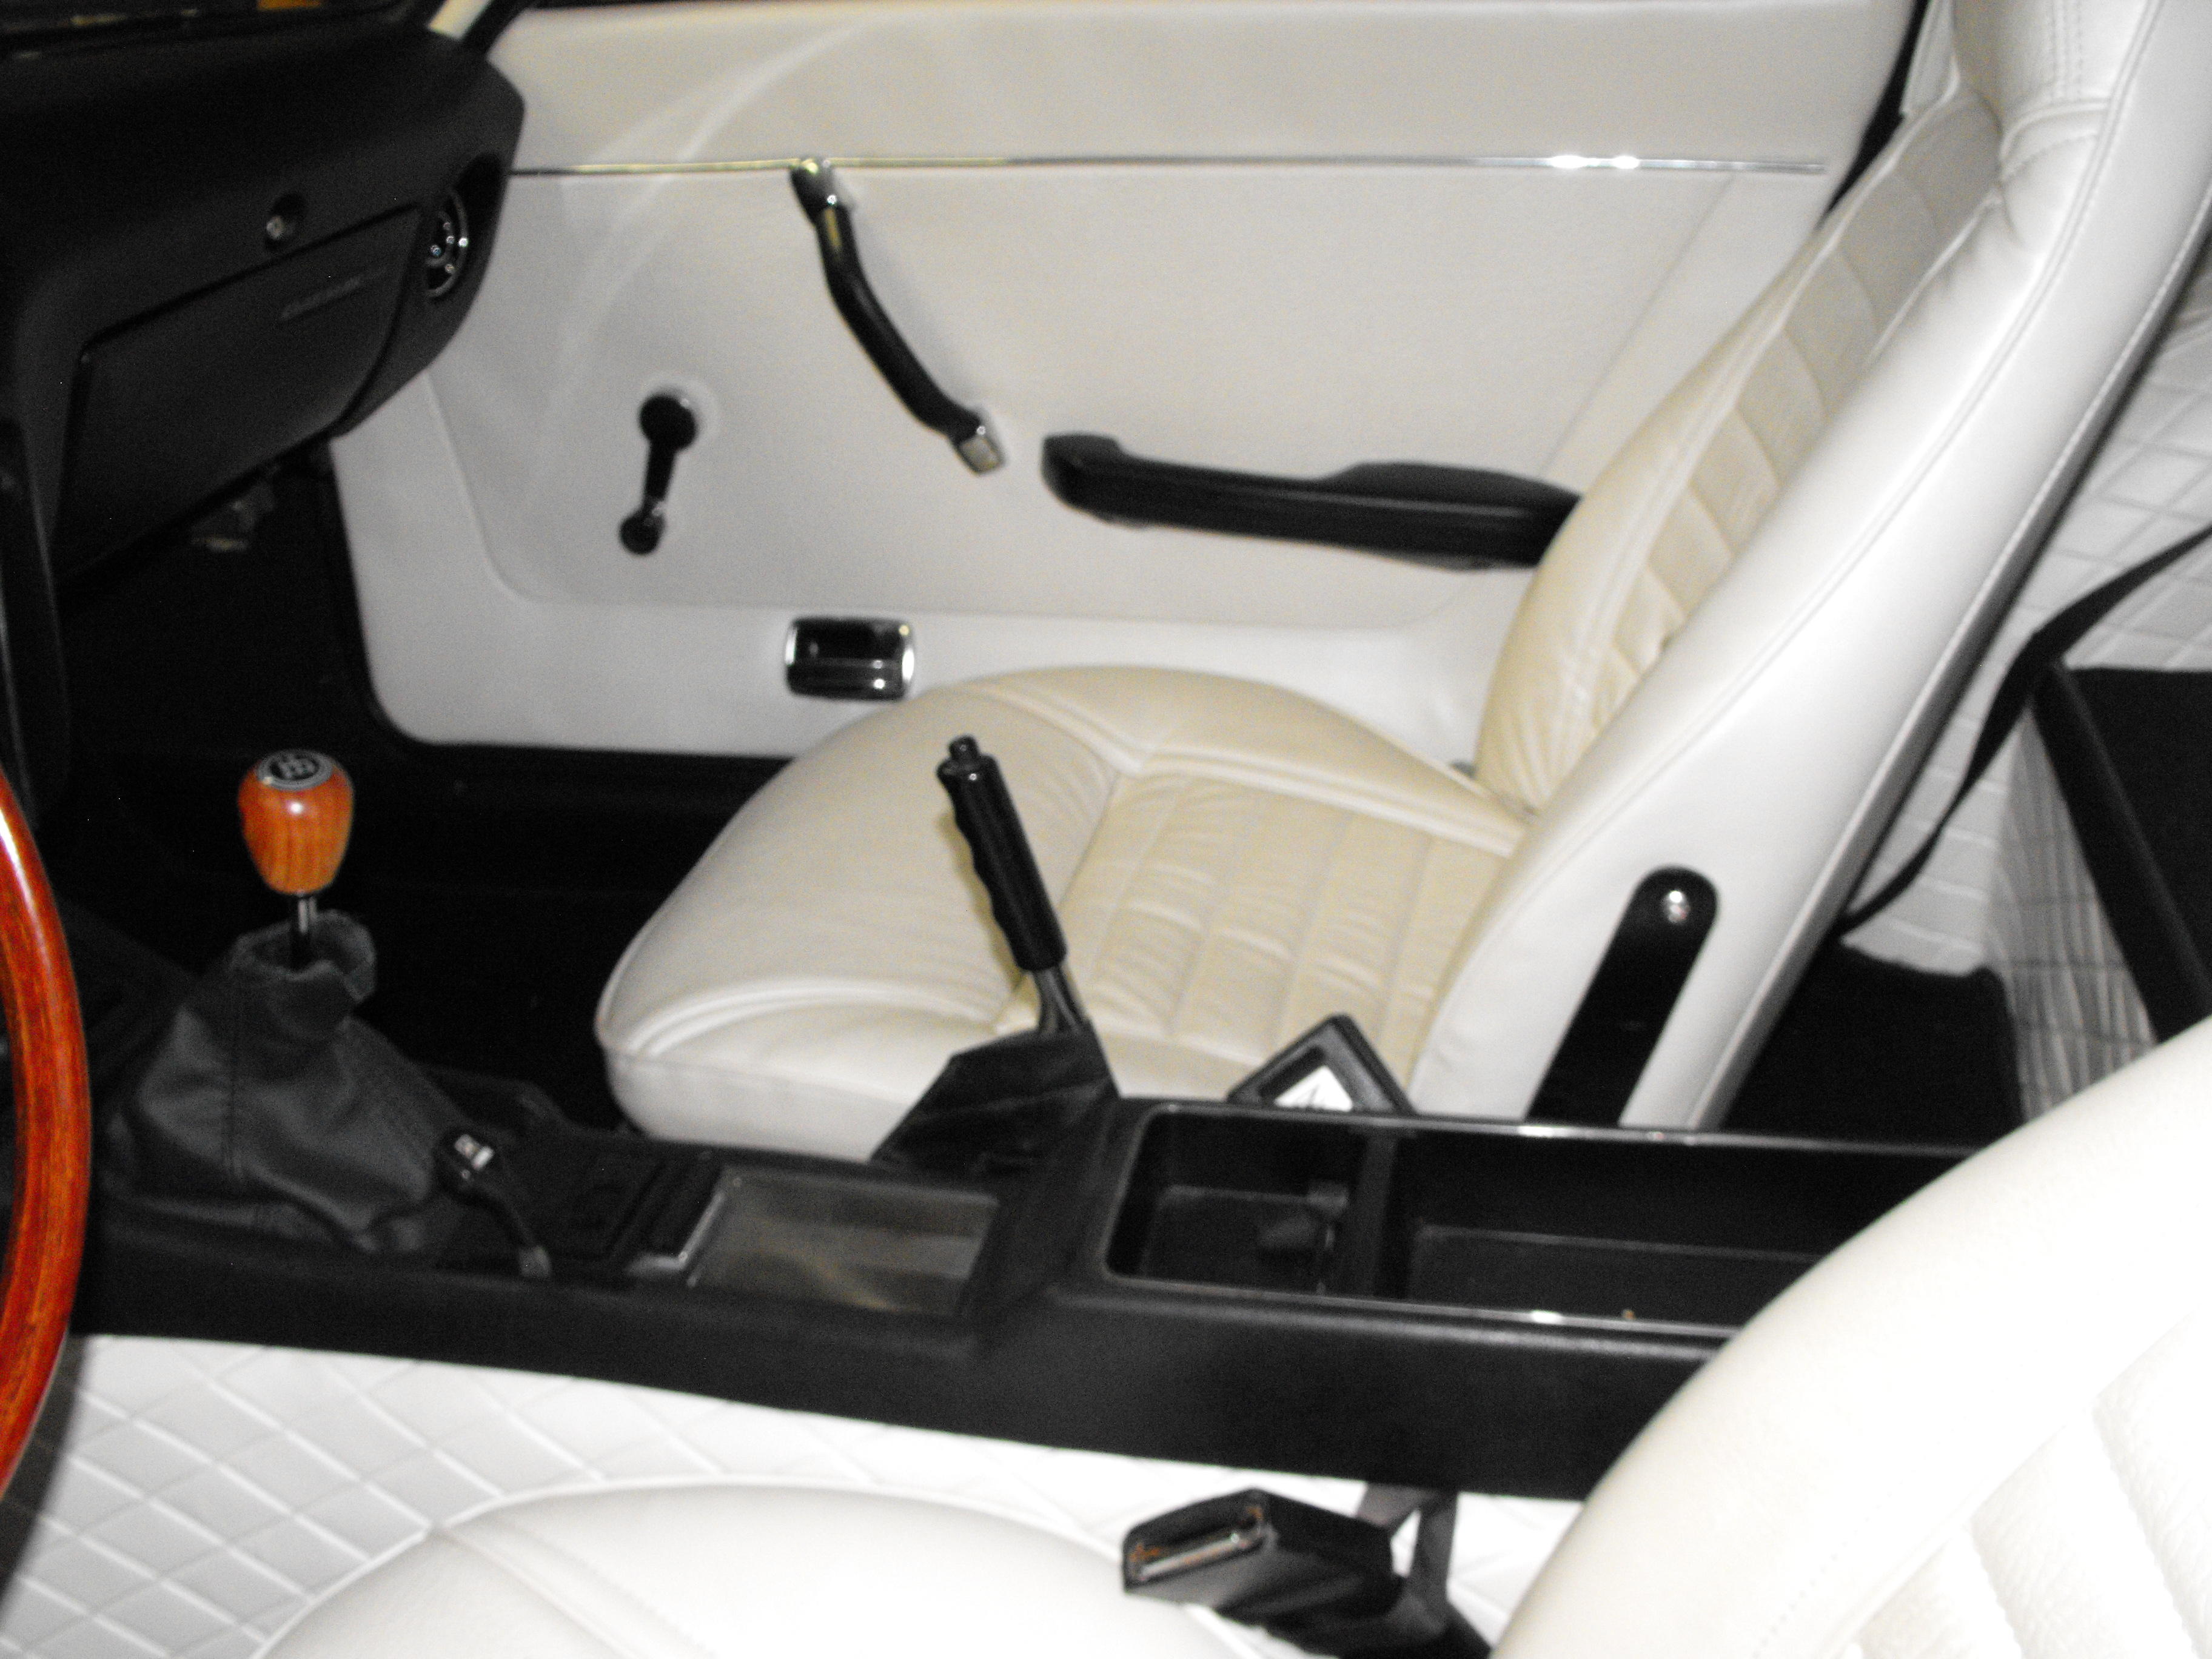
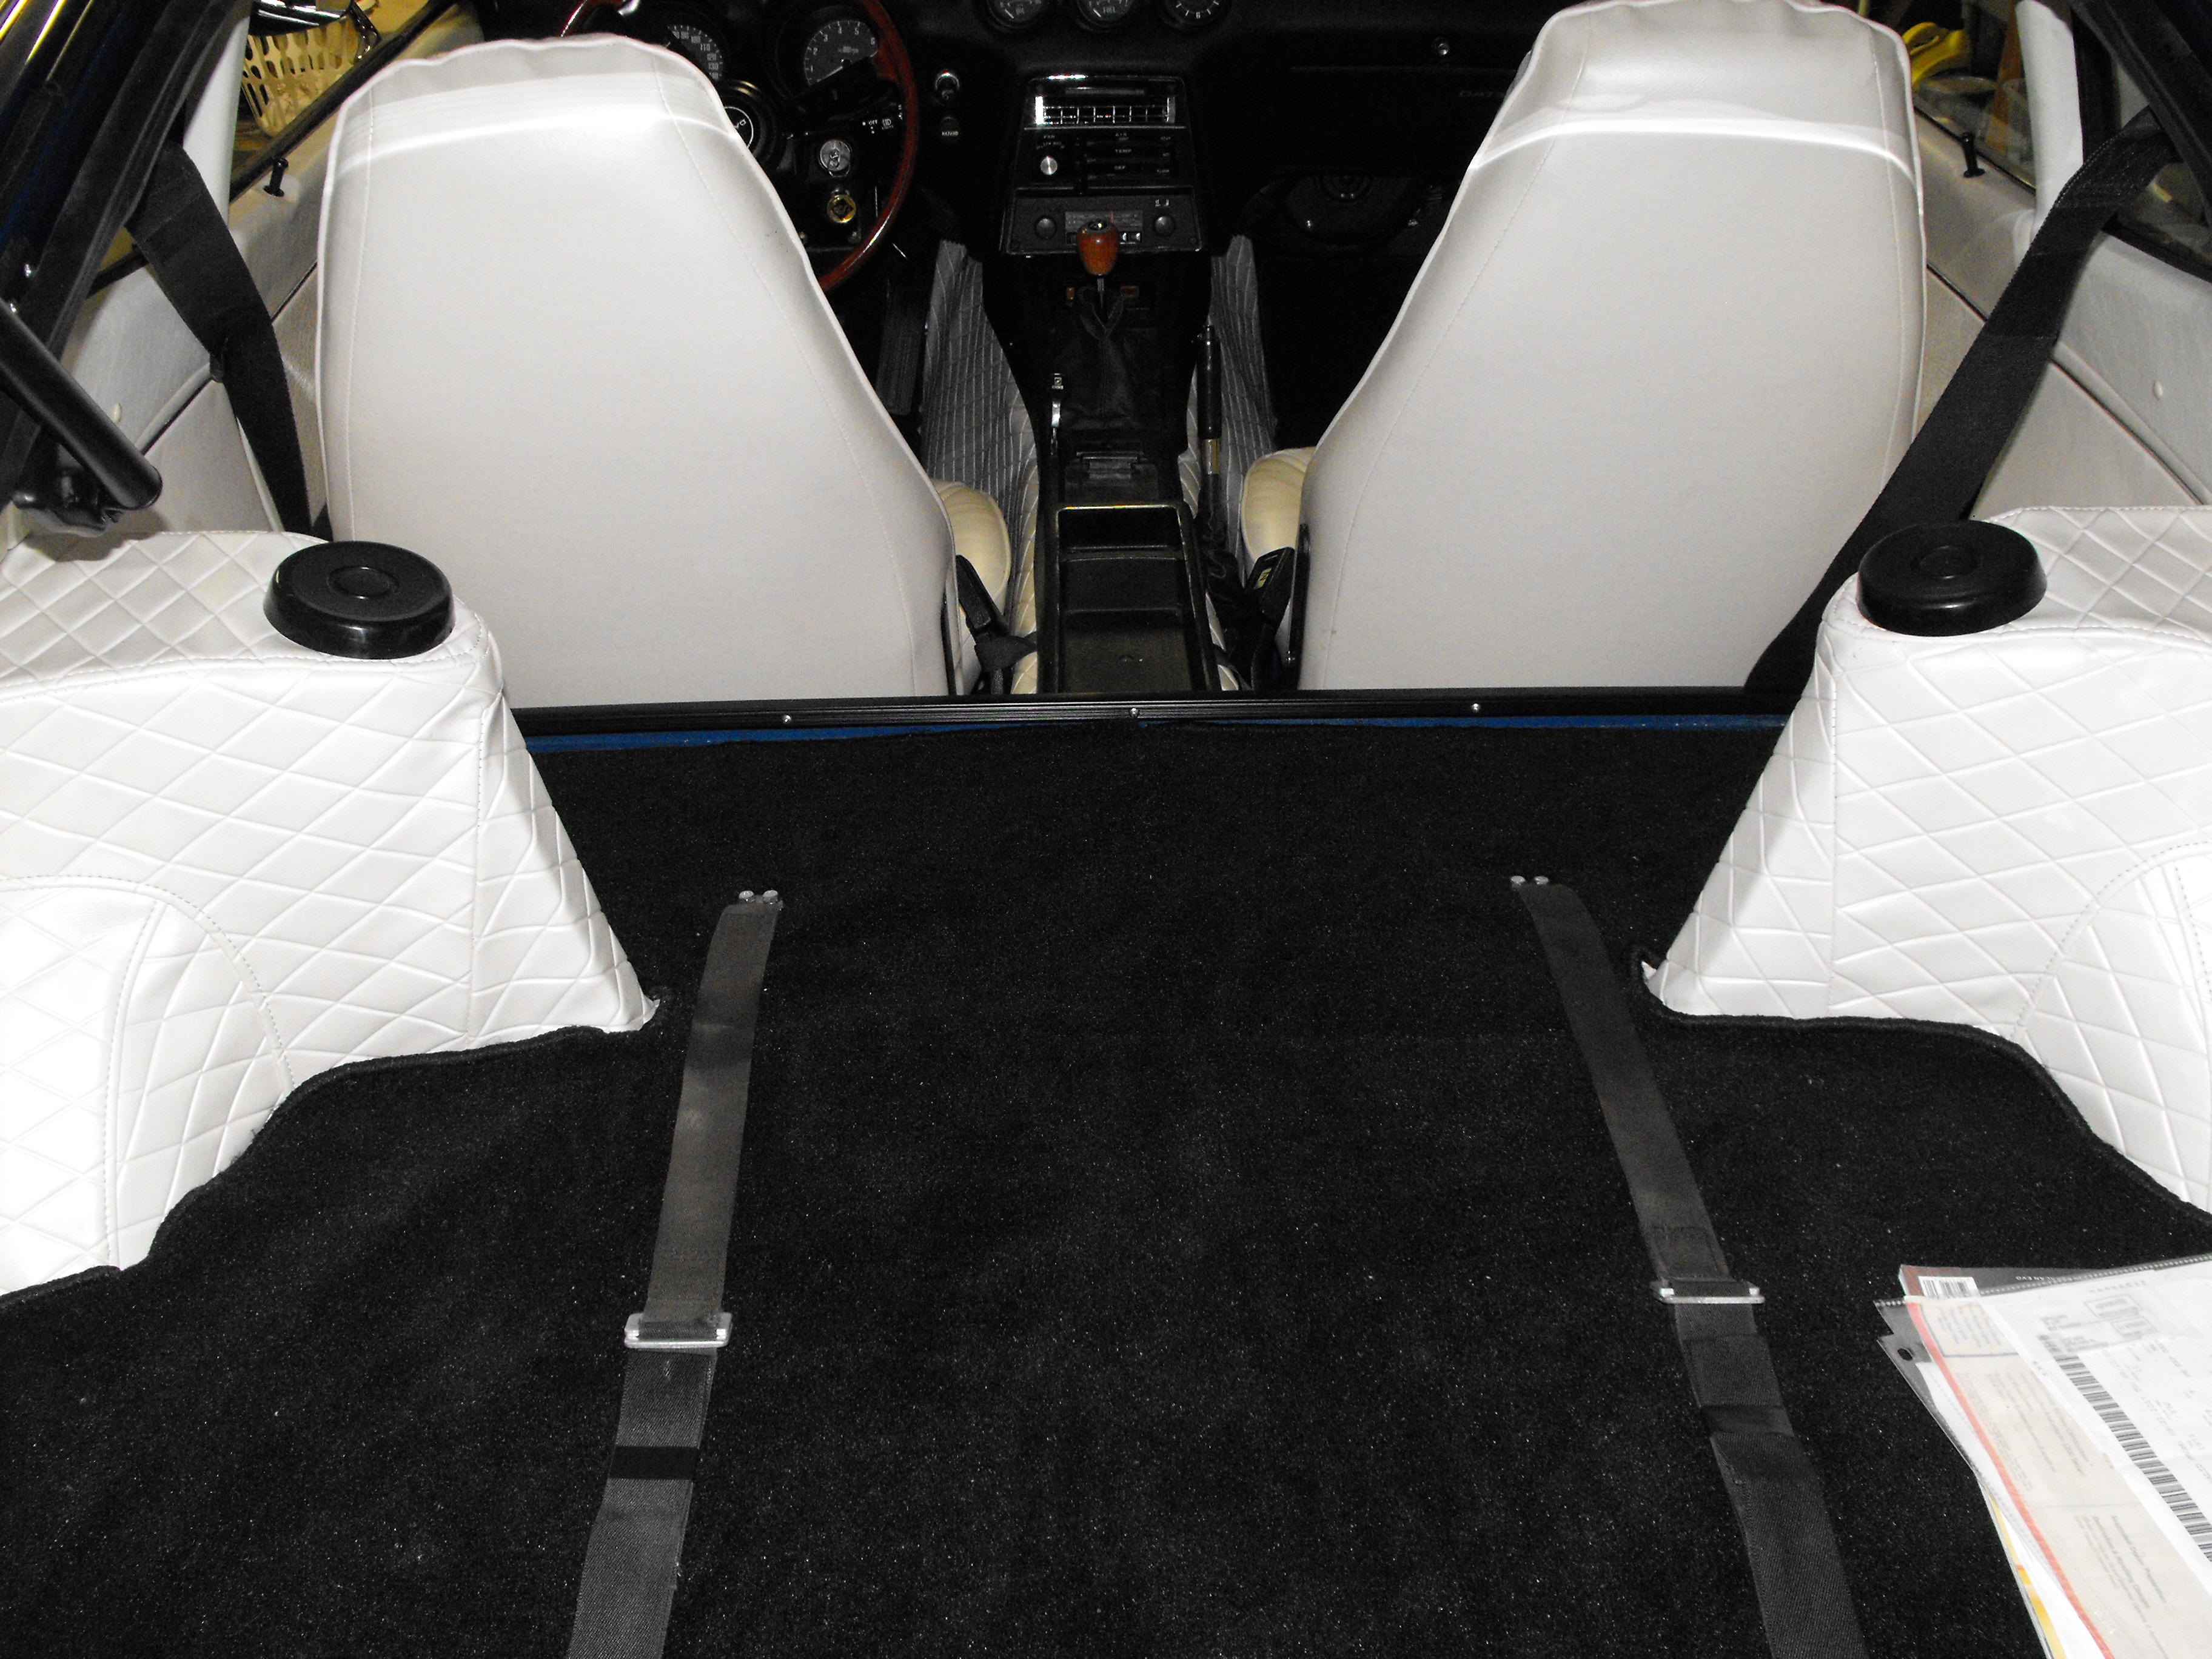
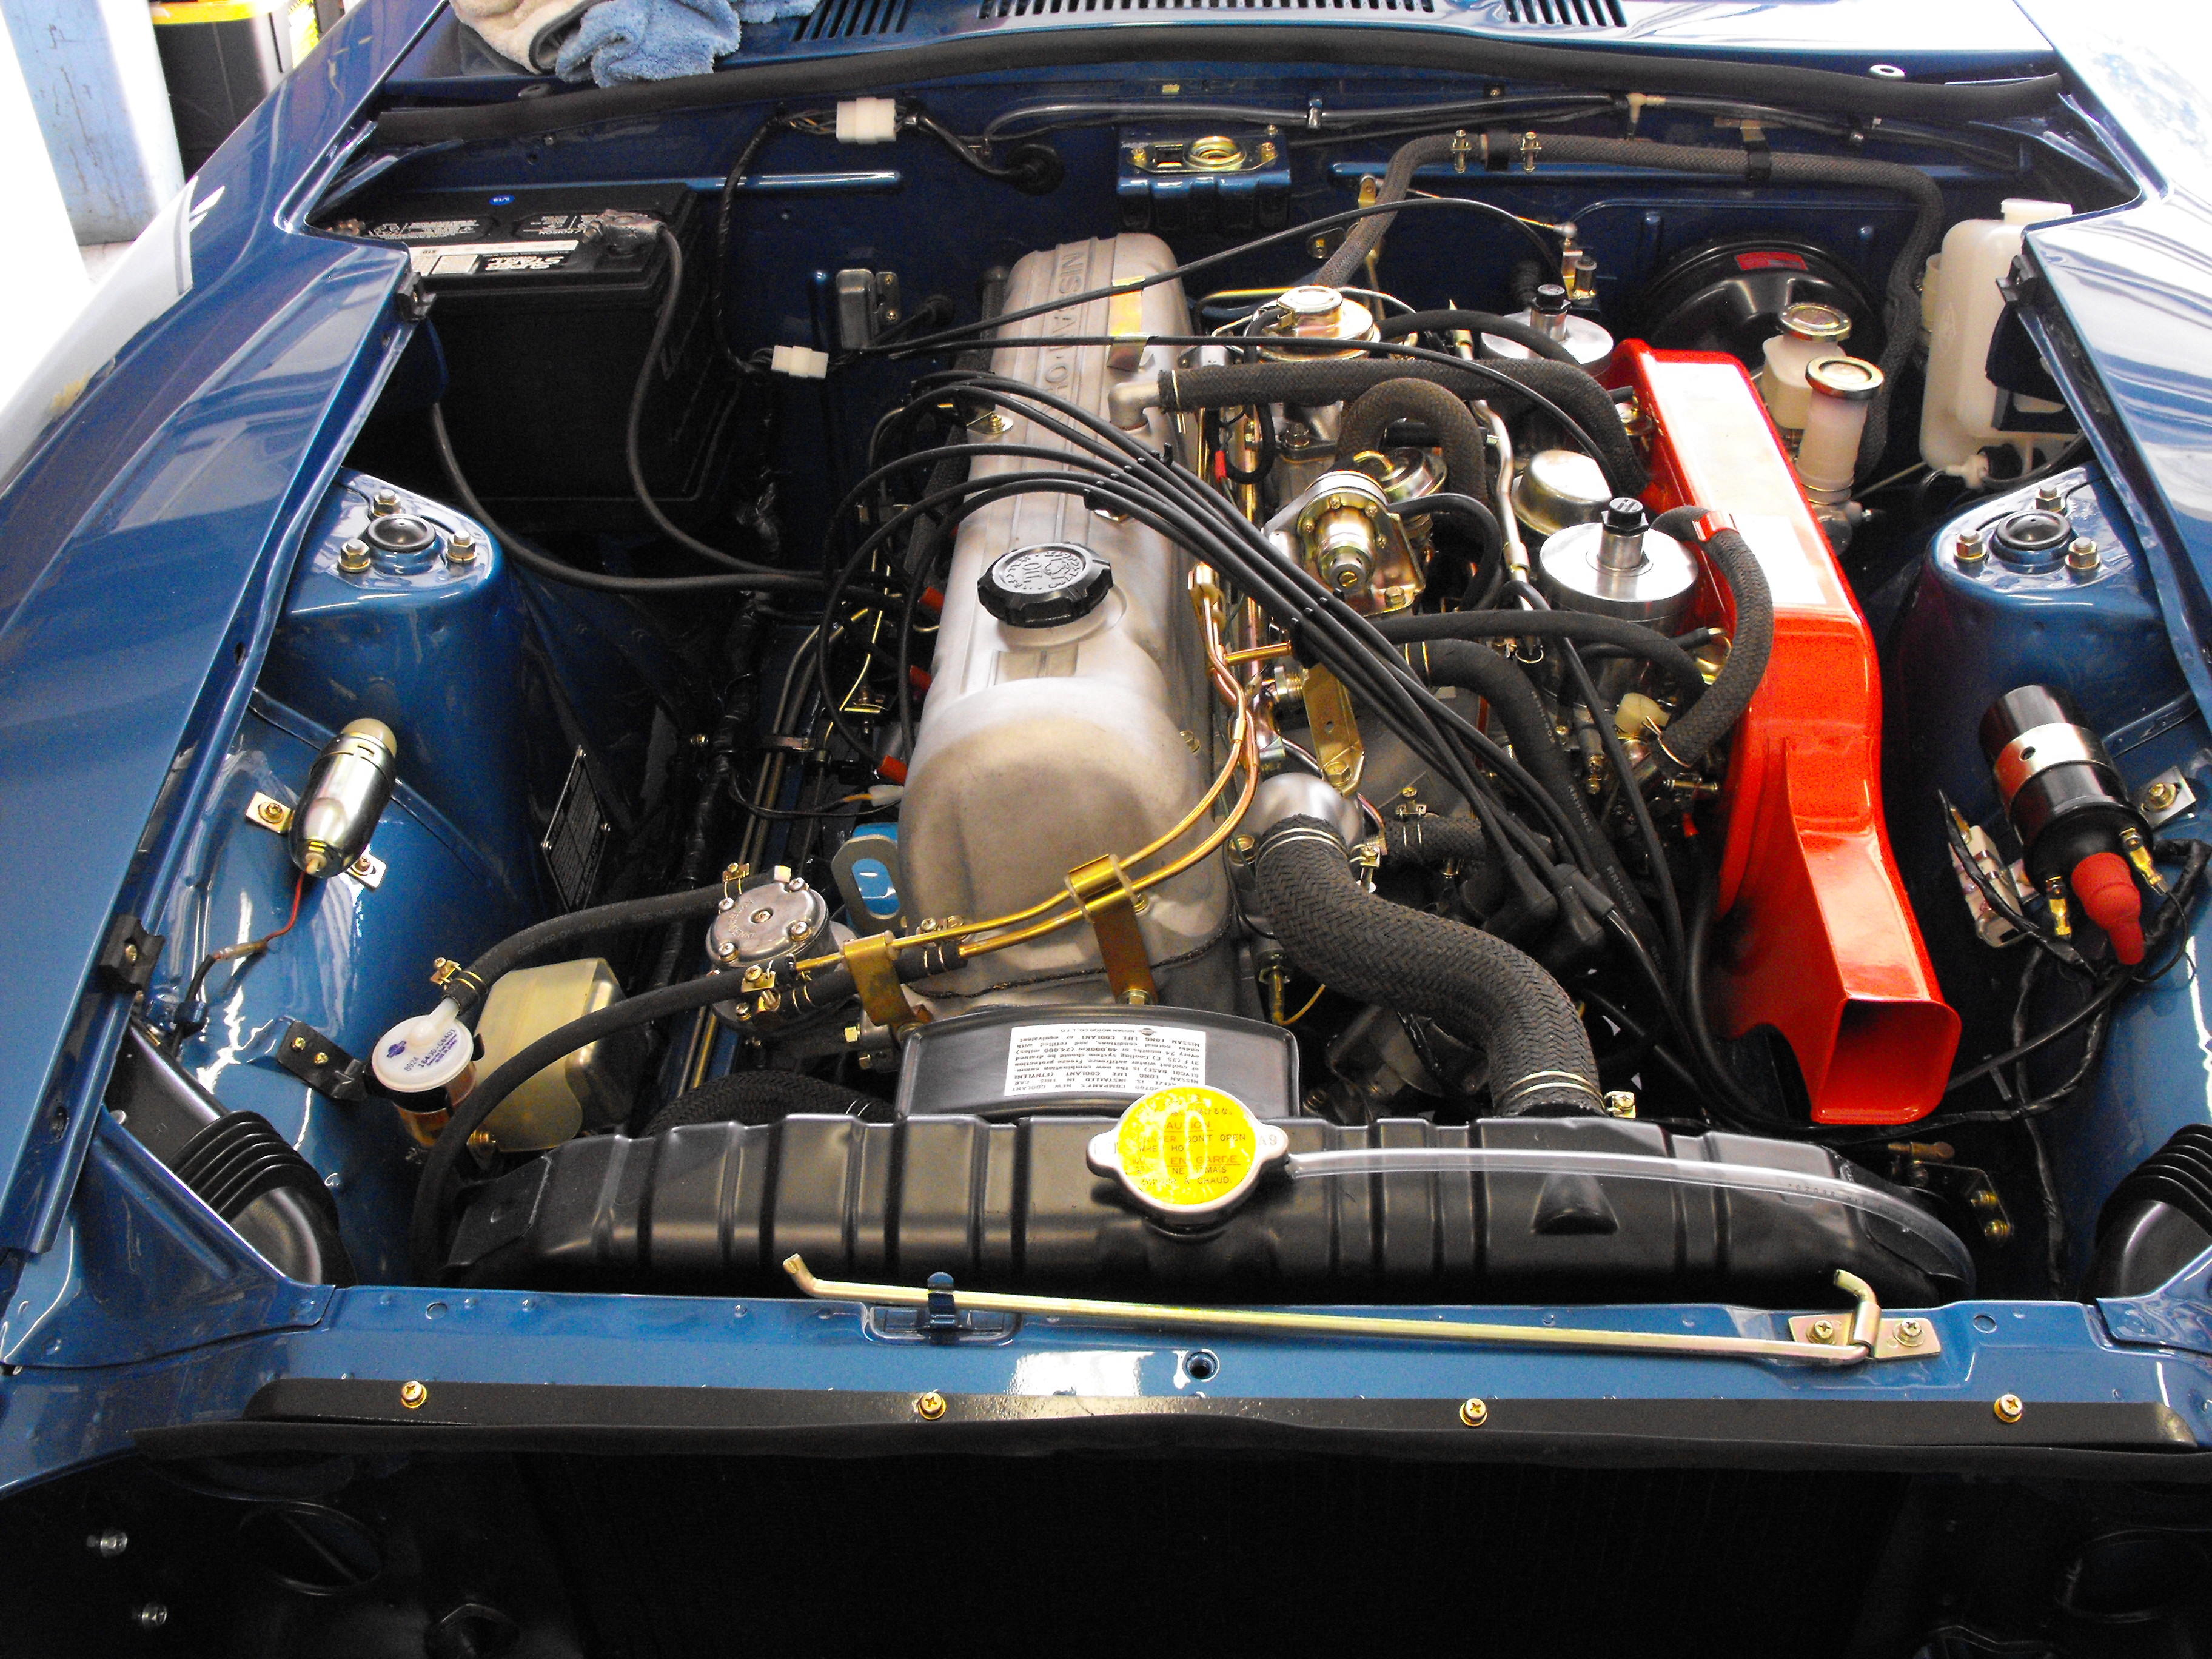
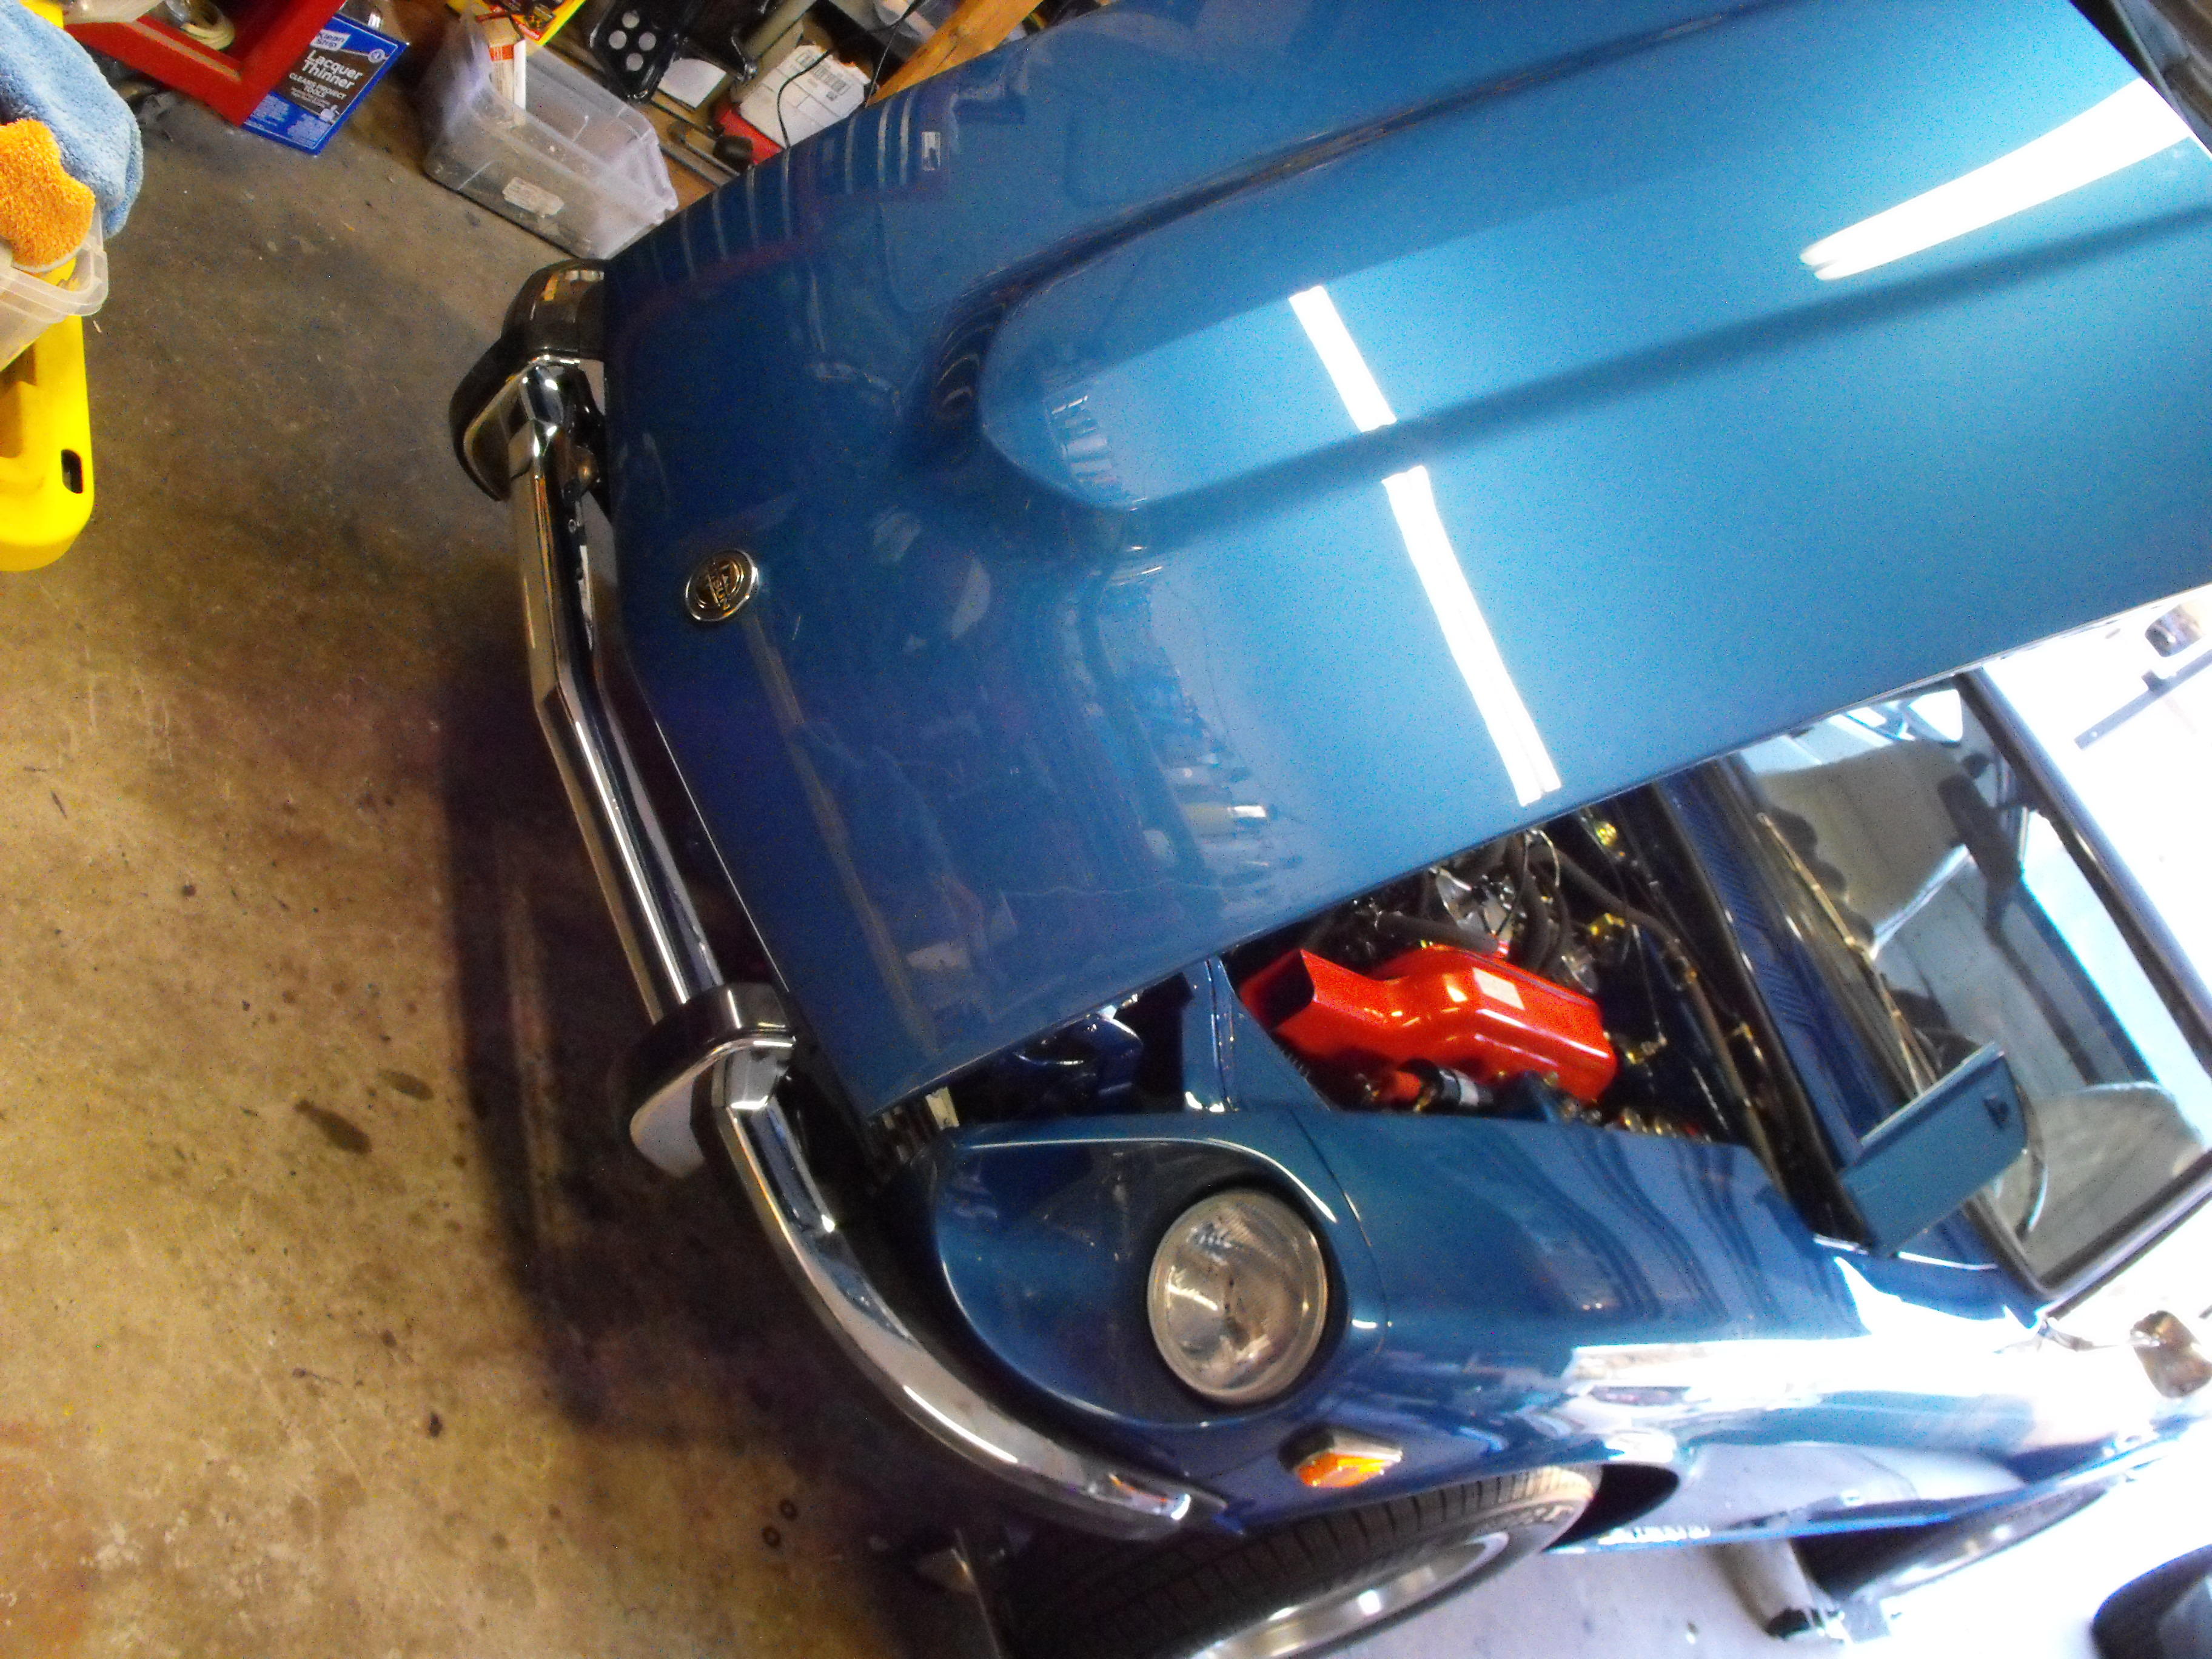
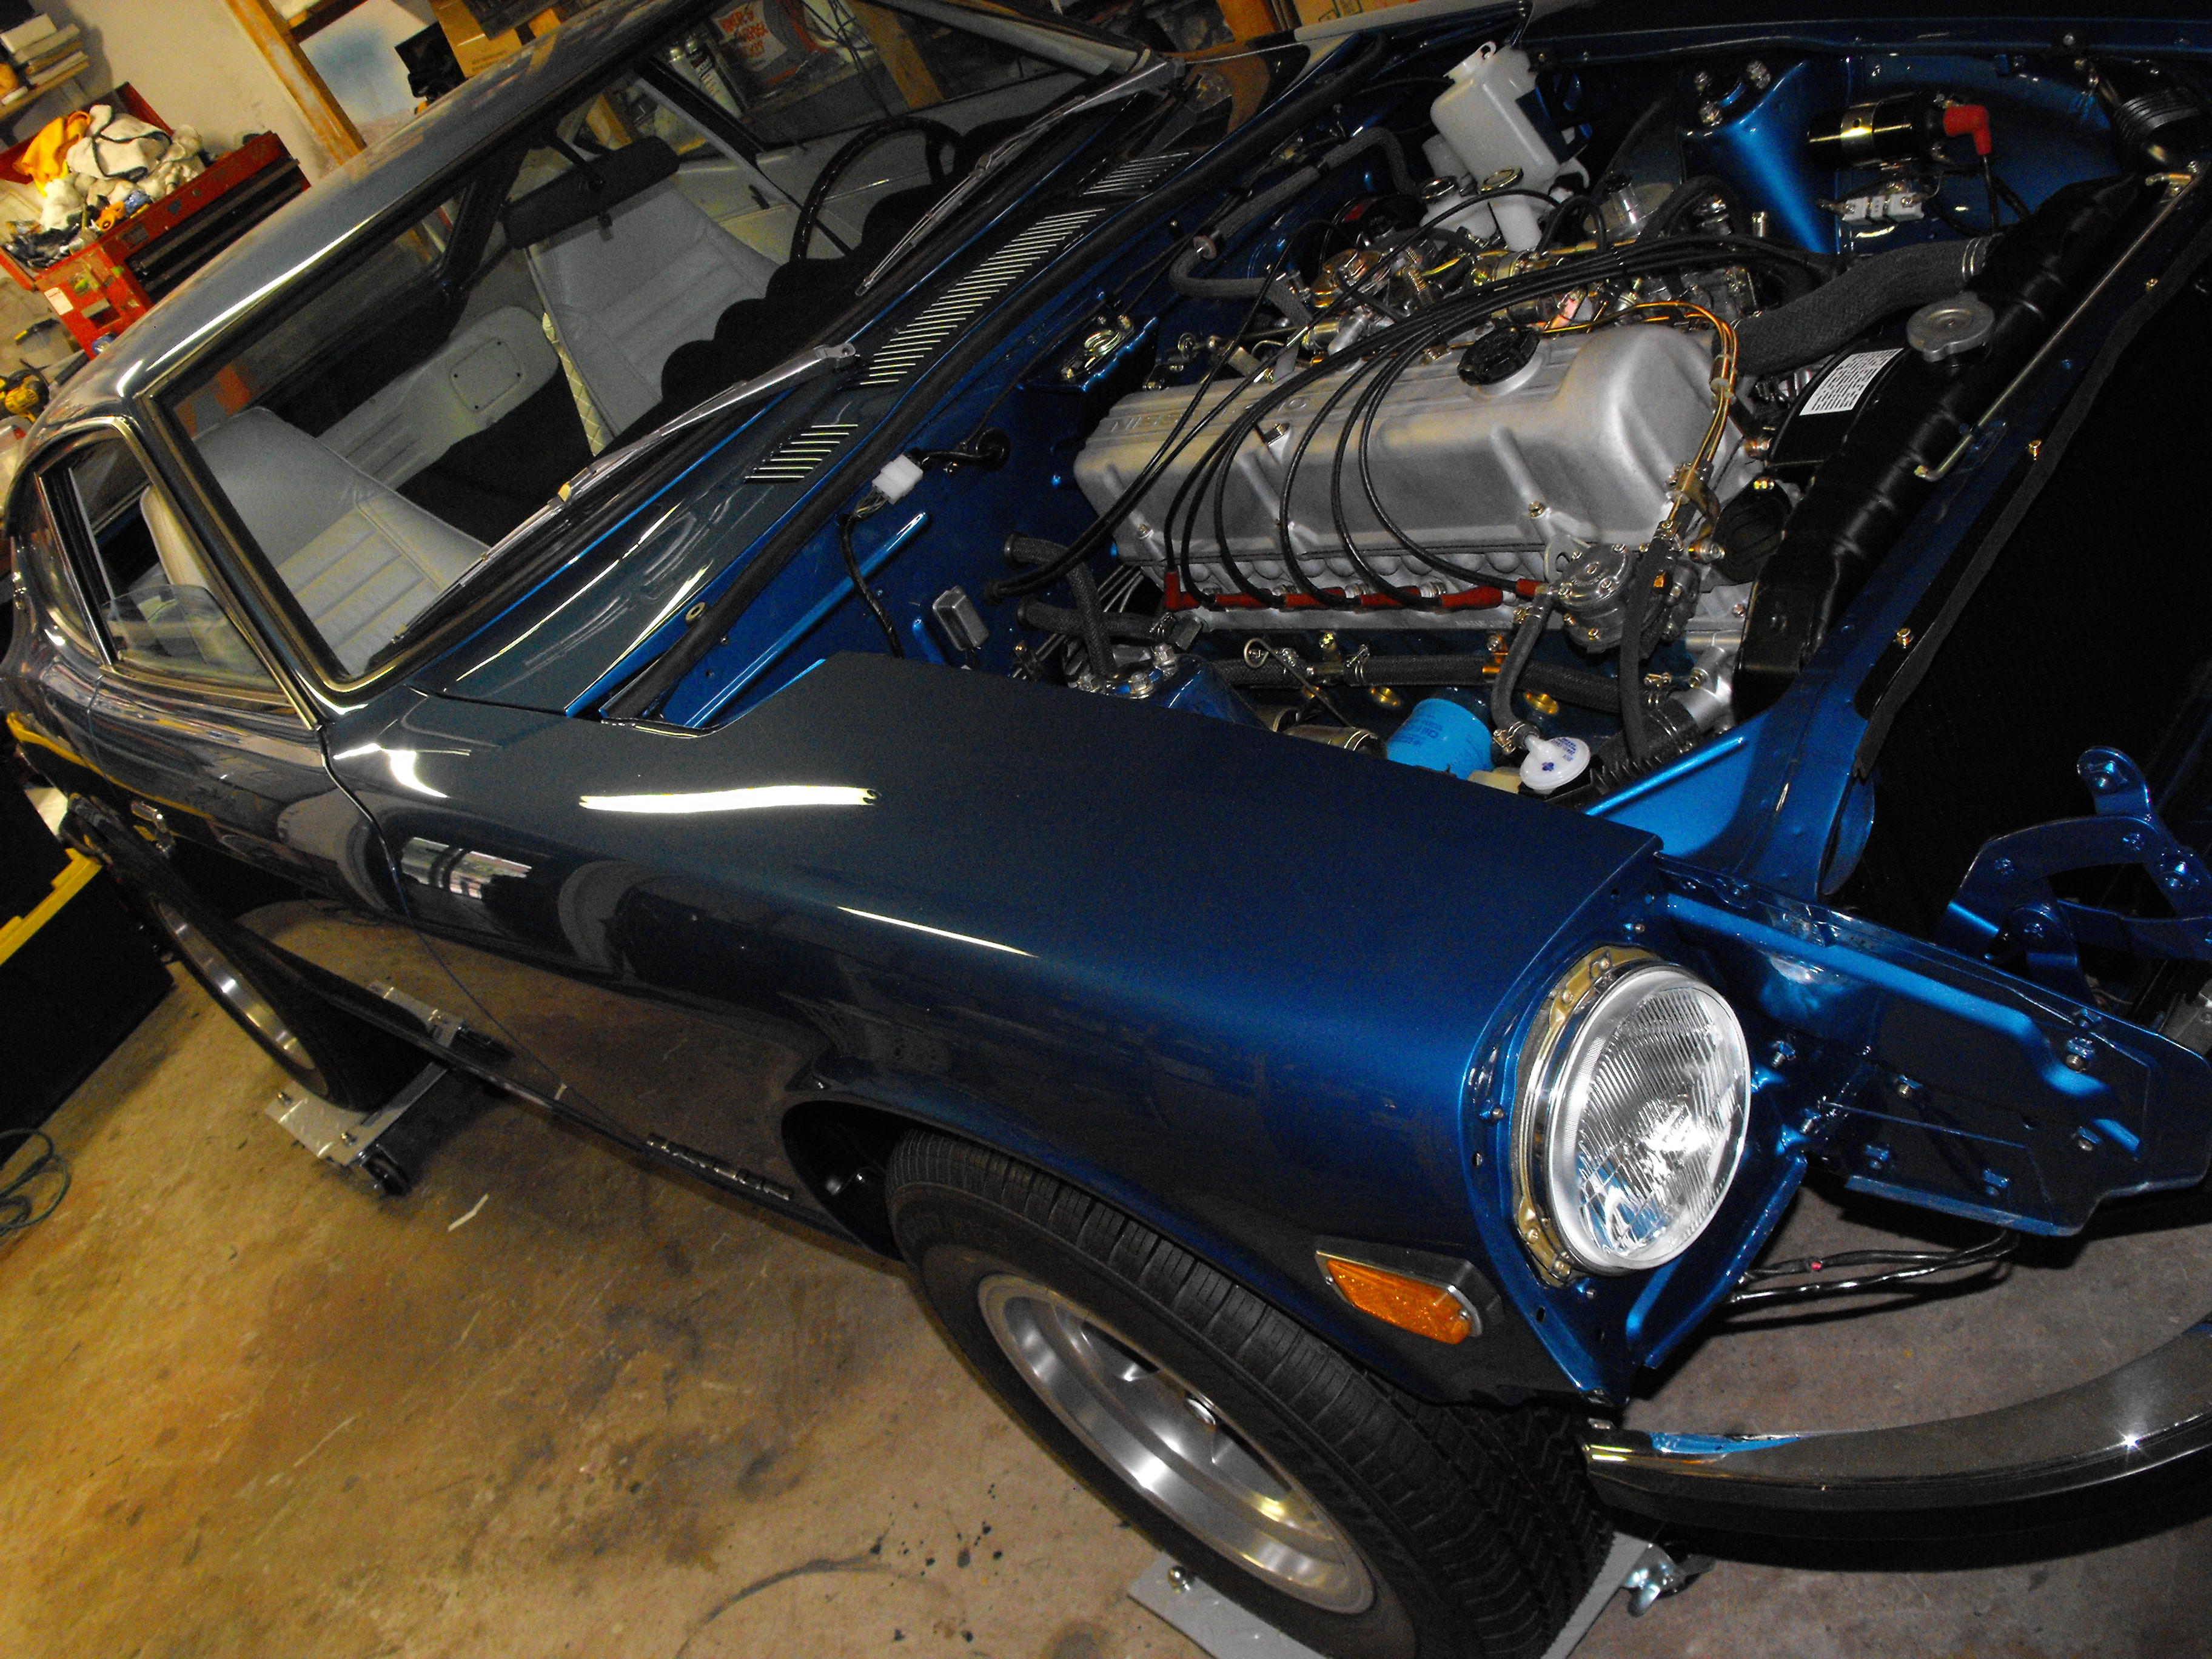
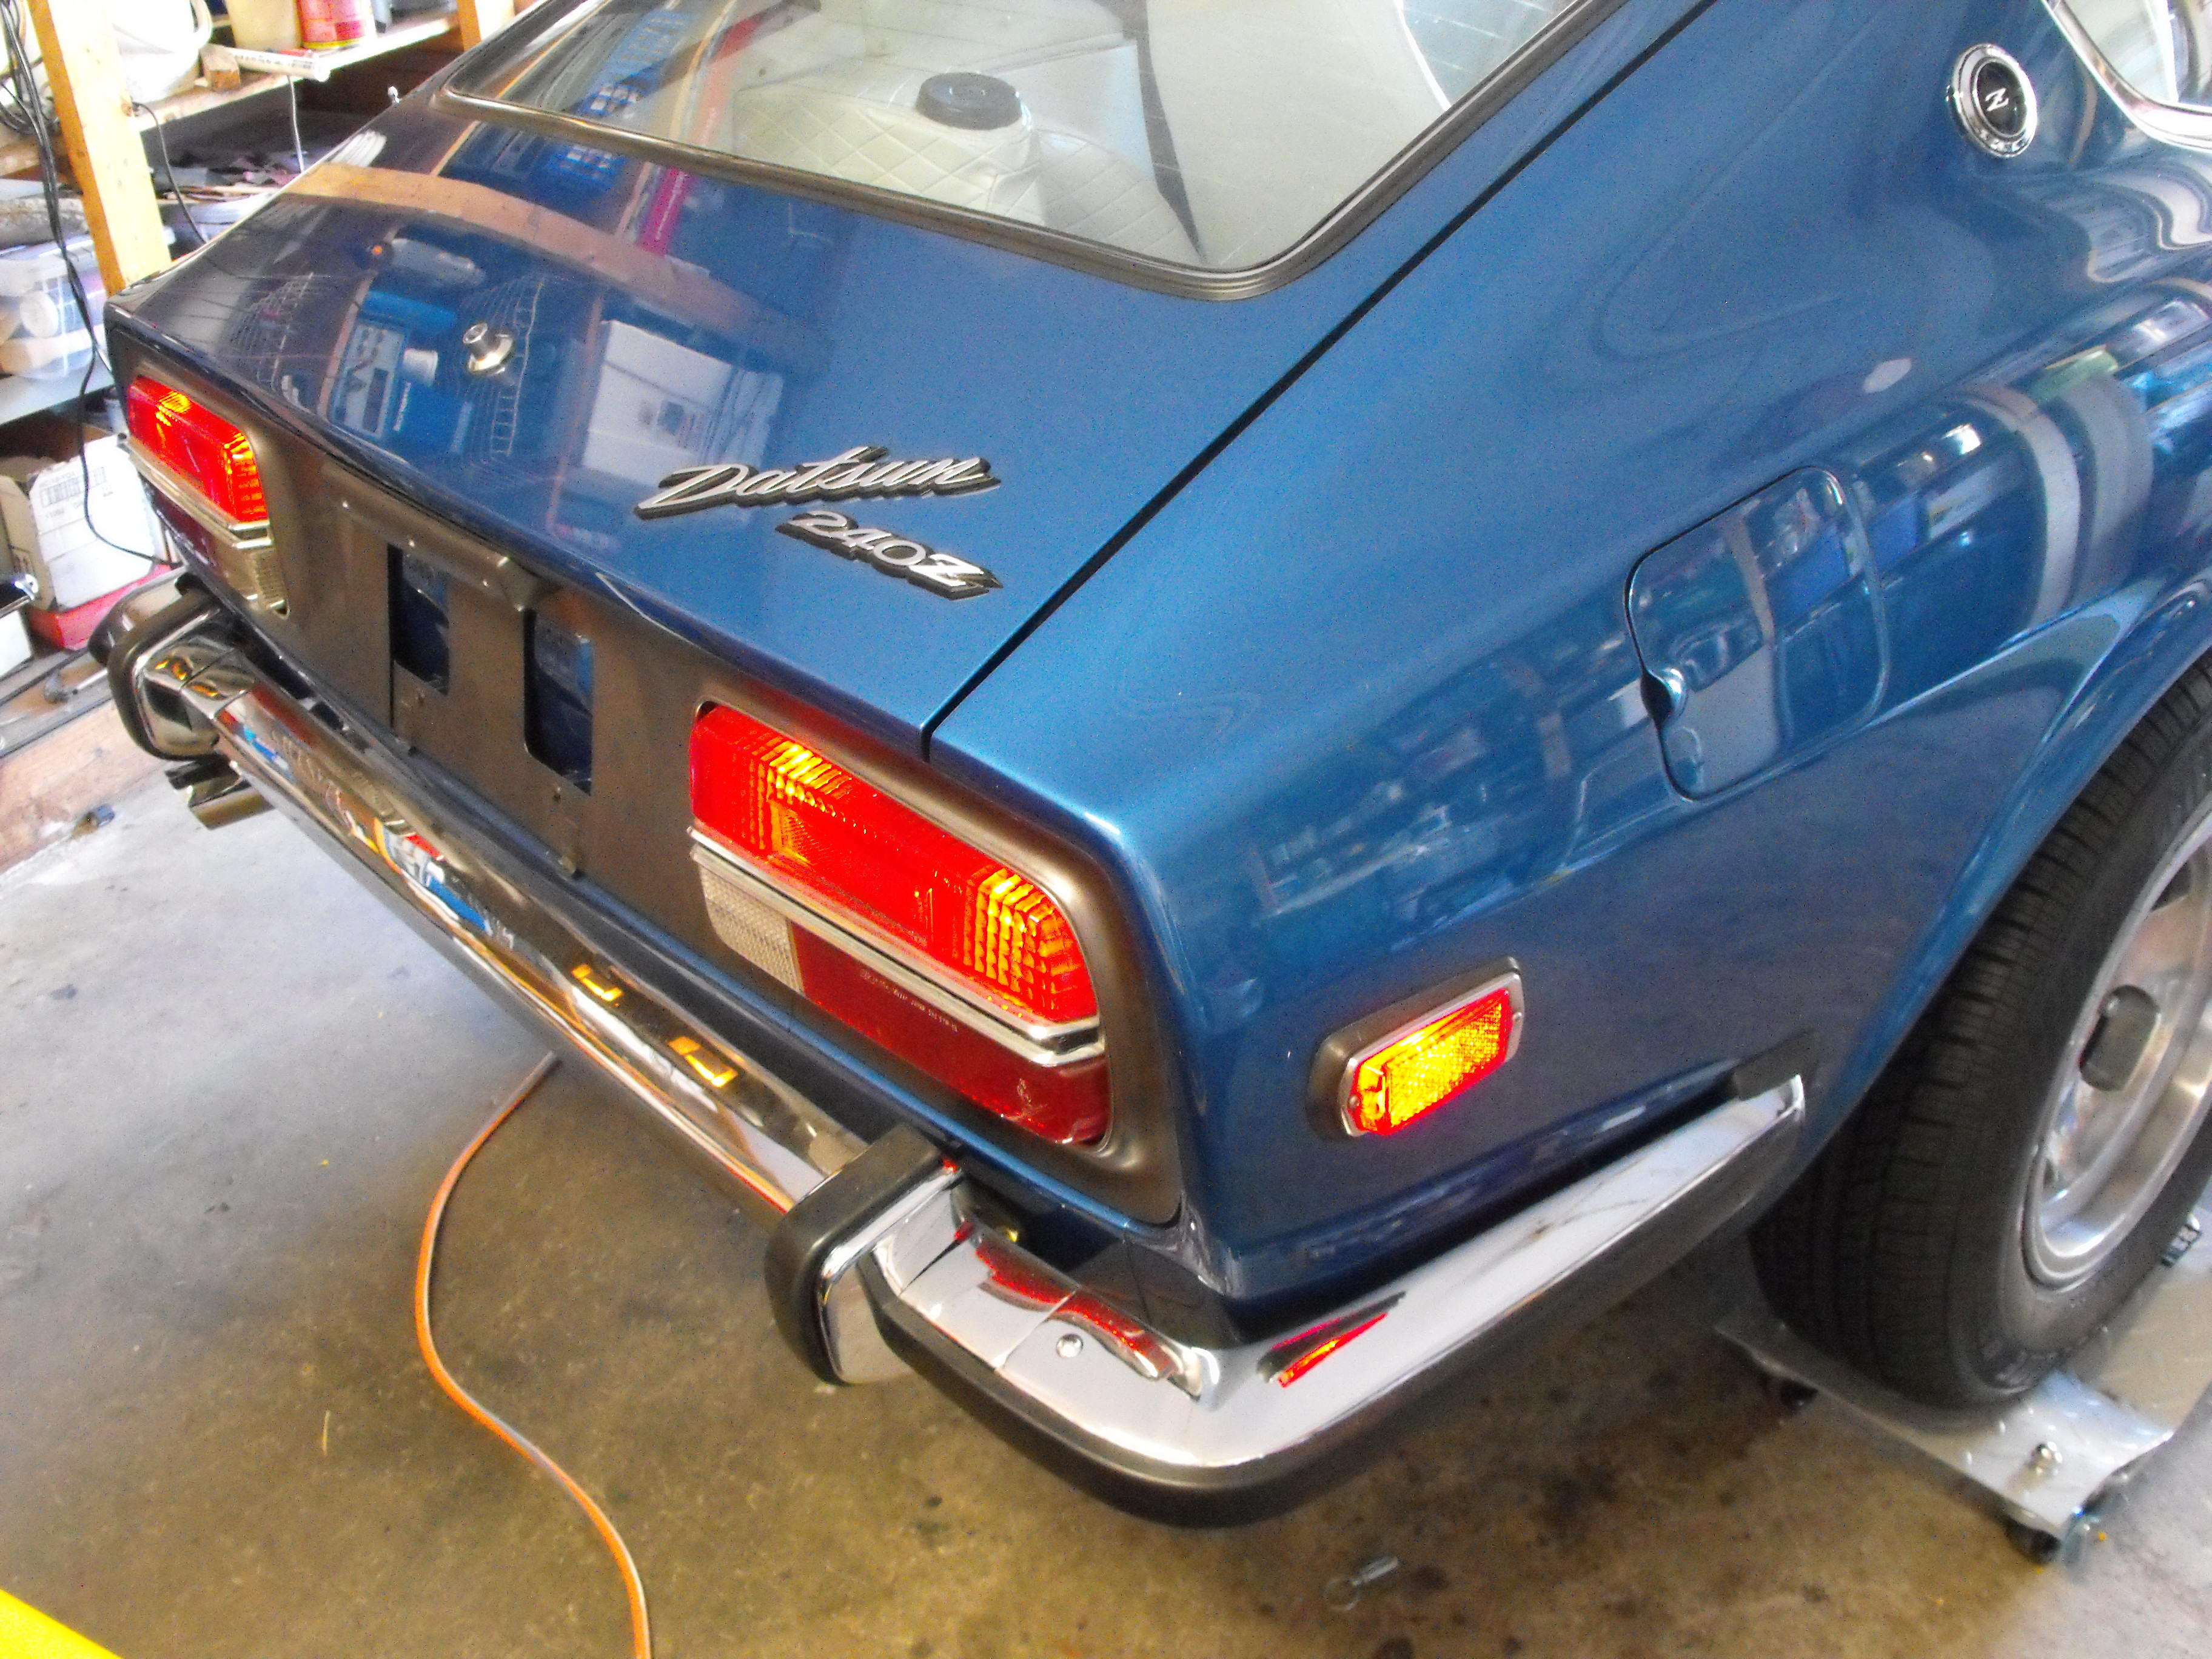
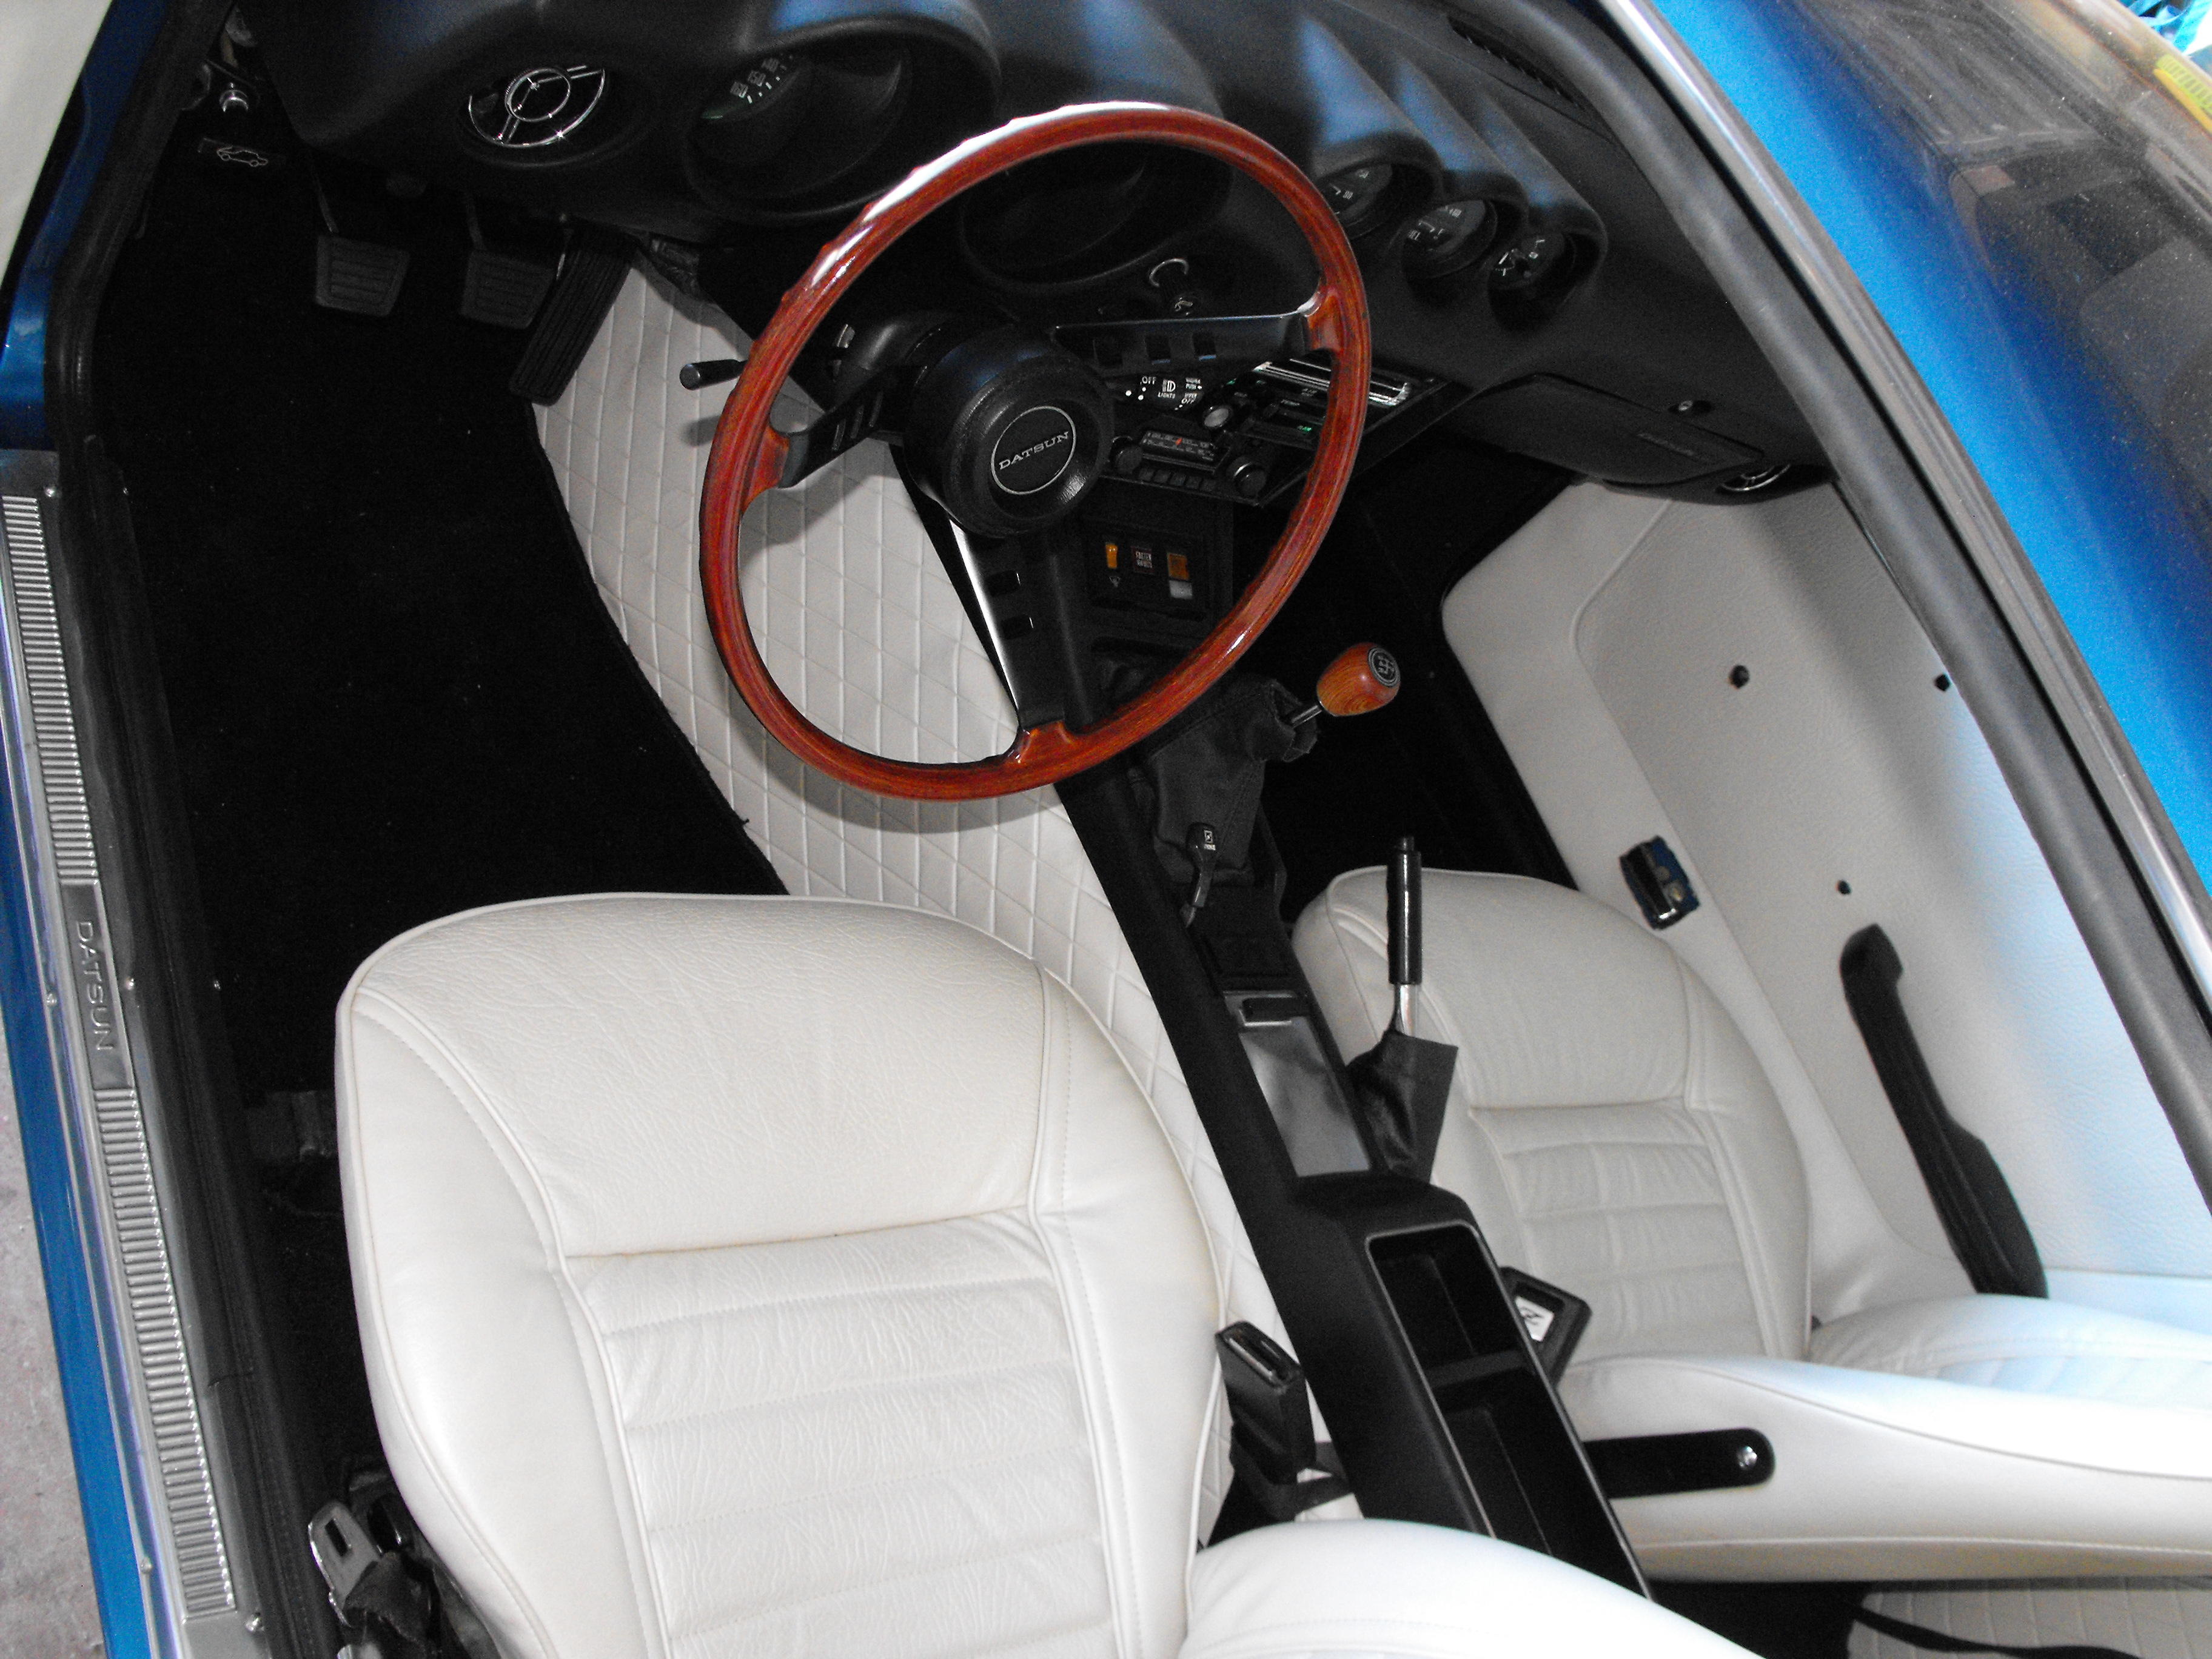
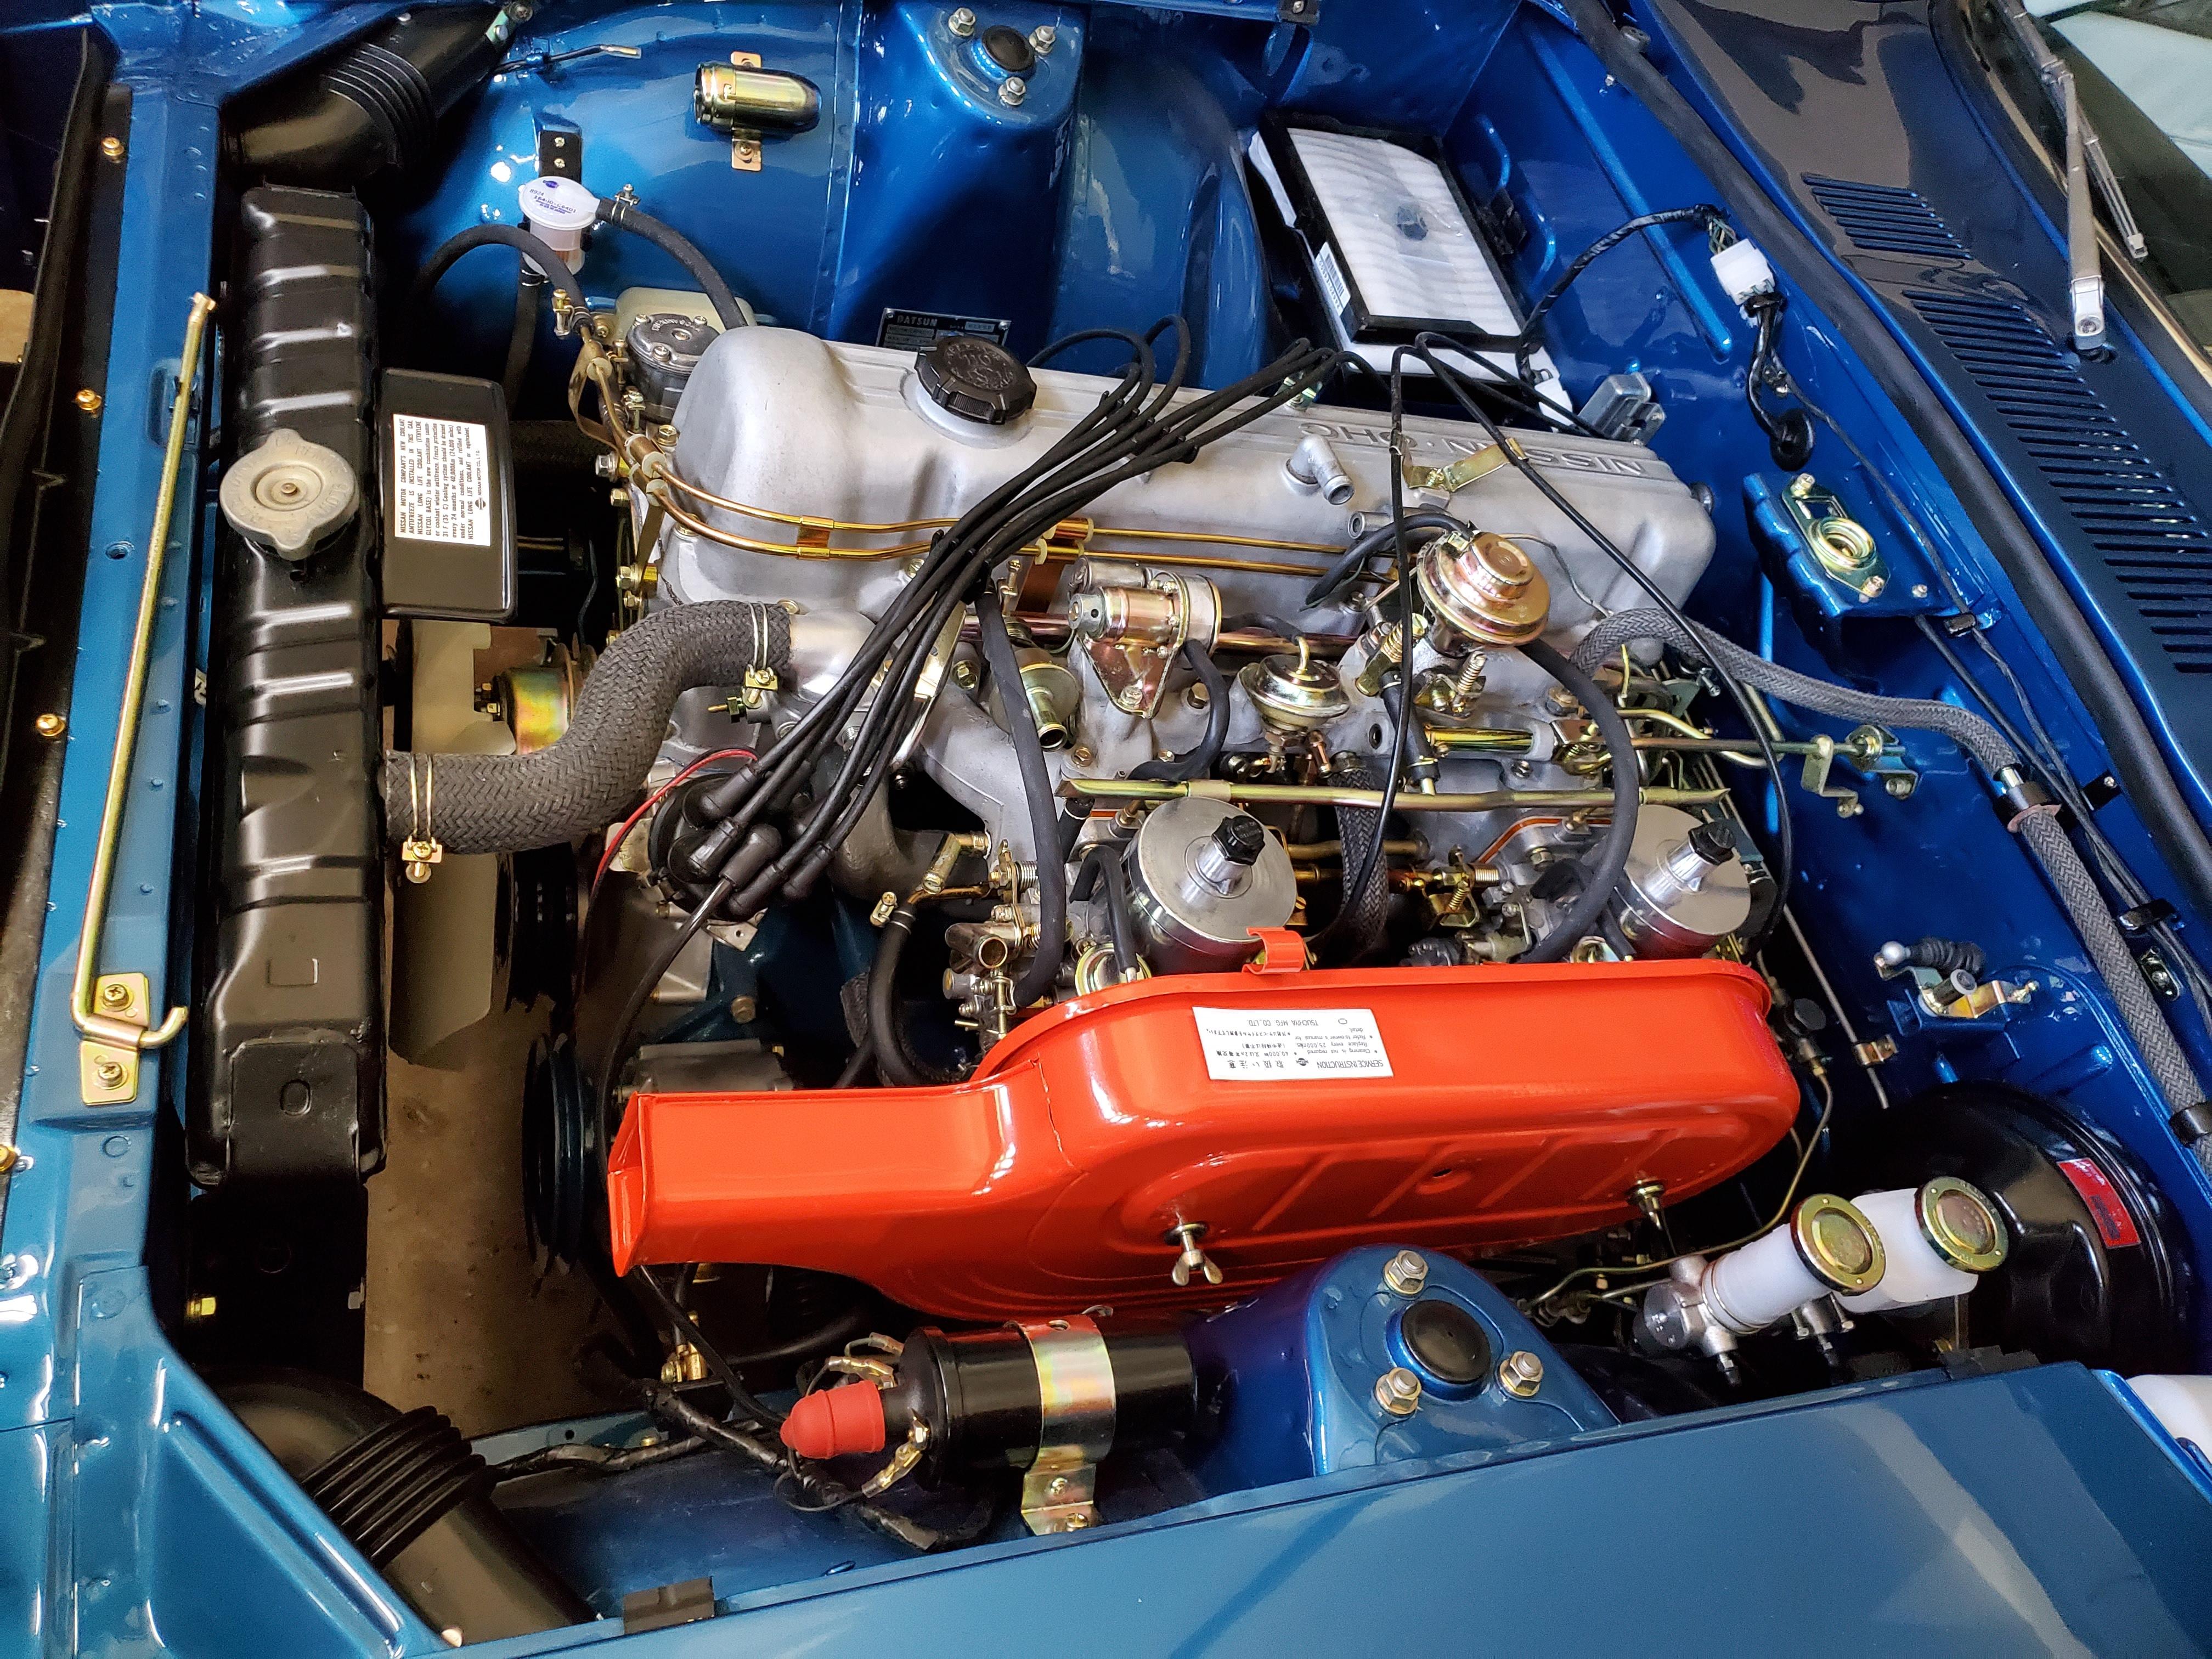
 So here is the Status and some of the issues that I ran into: ENGINE BAY: the engine is running nicely now and all hoses are connected. I still have a few small clamps that need to be added to the vacuum hoses, but for the most part, the motor is done. I have some right angle battery terminals coming in today and will see what I can do to replicate the correct style battery cables (240zrubberparts cables are sold out, have not been able to contact via phone or e-mail). Not sure what I can do to re-crate terminal covers, but do have some on order that will be arriving too late. I am missing the original smog pump arm, but picked up one on ebay that should be in on Tuesday. That is about it for the engine items The only issues I had with the motor operation were a high idle and some RPM cycling oscillations. Even with everything backed off, the idle was sitting at around 1200 RPM. Not sure why that is. I remedied the situation by extending the needles in the two flat top pistons. Idle is now at around 700 RPMs. The RPM cycling was odd and I knew it was a result of one of the vacuum systems. The engine would oscillate from 600 RPM up to 1200 RPM and then back down in a continuous cycle (That would drive anyone crazy). Plugging the hose going the the anti-backfire valve fixed the issue. Looks like I need a new valve and those are pretty pricey. For now, I will leave it plugged. I have run the motor for over 30 minutes and temperature remains steady at a bit below 180F. Clutch and brakes have been bled and peddles feel good. INTERIOR: I have a few parts that were in pretty bad shape (the passenger side pull handle and one roll-up handle), so ordered new ones from Motorsport. All gauges work as well as the clock. The LED lights look nice in the dash but do not appear to be adjustable. I also put LED lights in the overhead interior light and the engine light. I am finishing up the luggage straps and should have them installed in the next day or two. EXTERIOR: Just need to install the center bumper finisher which I painted last night and connect front turn lights. Need new lug nuts for the mags and license plate frame. Will probably pick up from Pep Boys tonight. Also, Miguel wants to do one final polish on Thursday night before we load. Can't imagine the paint looking any better, but he wants to do the final polish on the car. That about completes the list. I will try and take the car out for outdoor pics in the next day or two. We load on Friday.
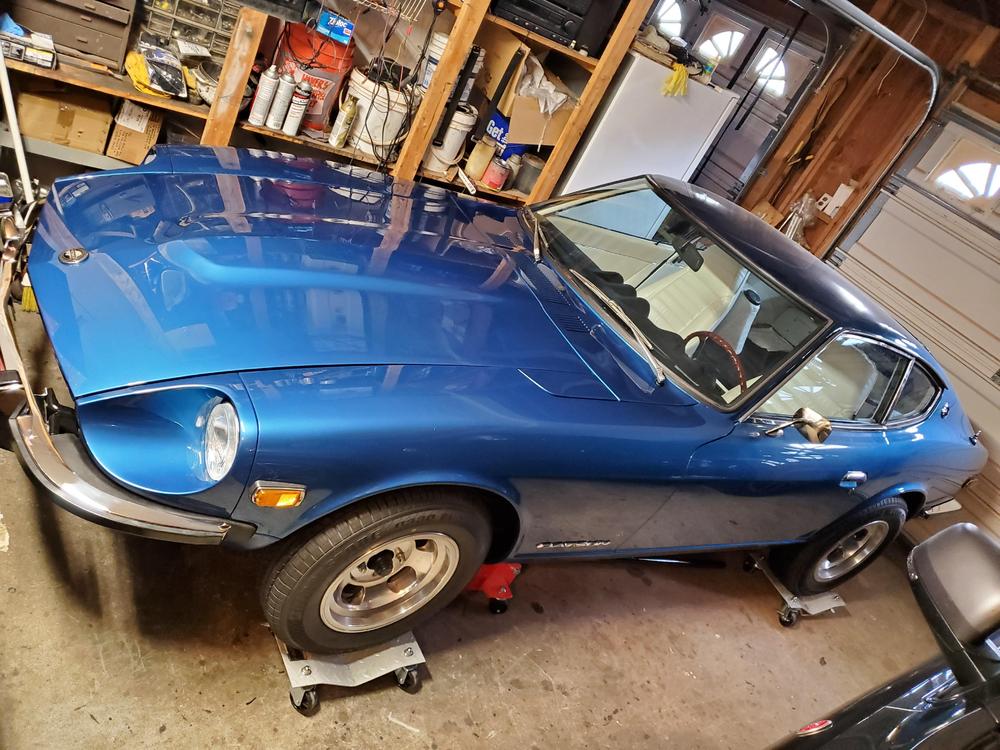
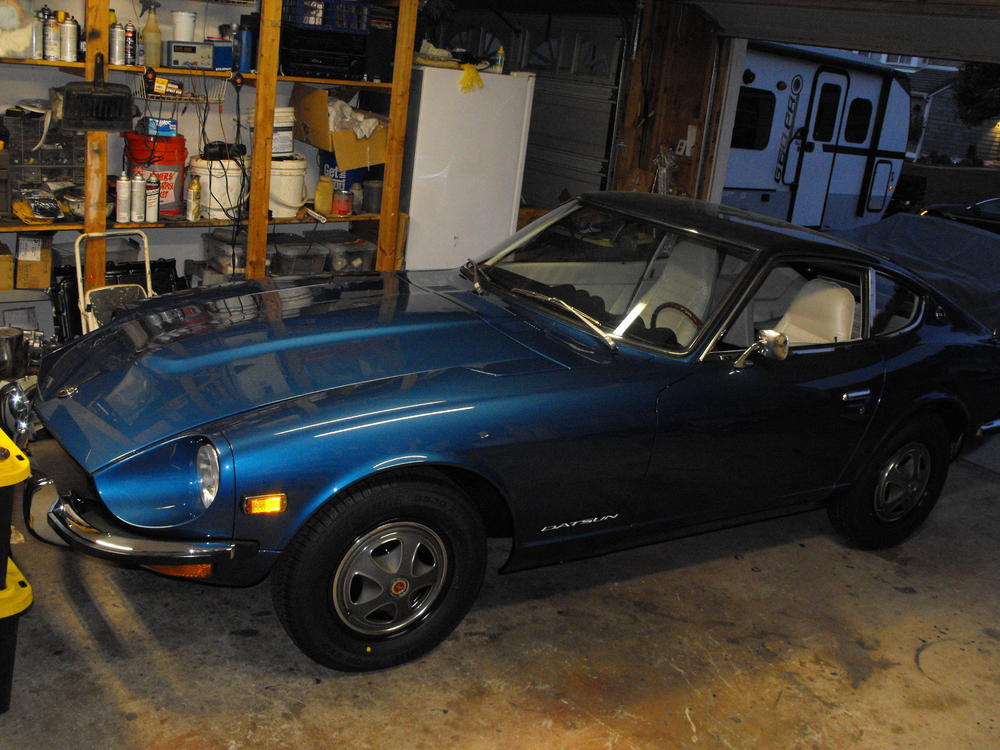
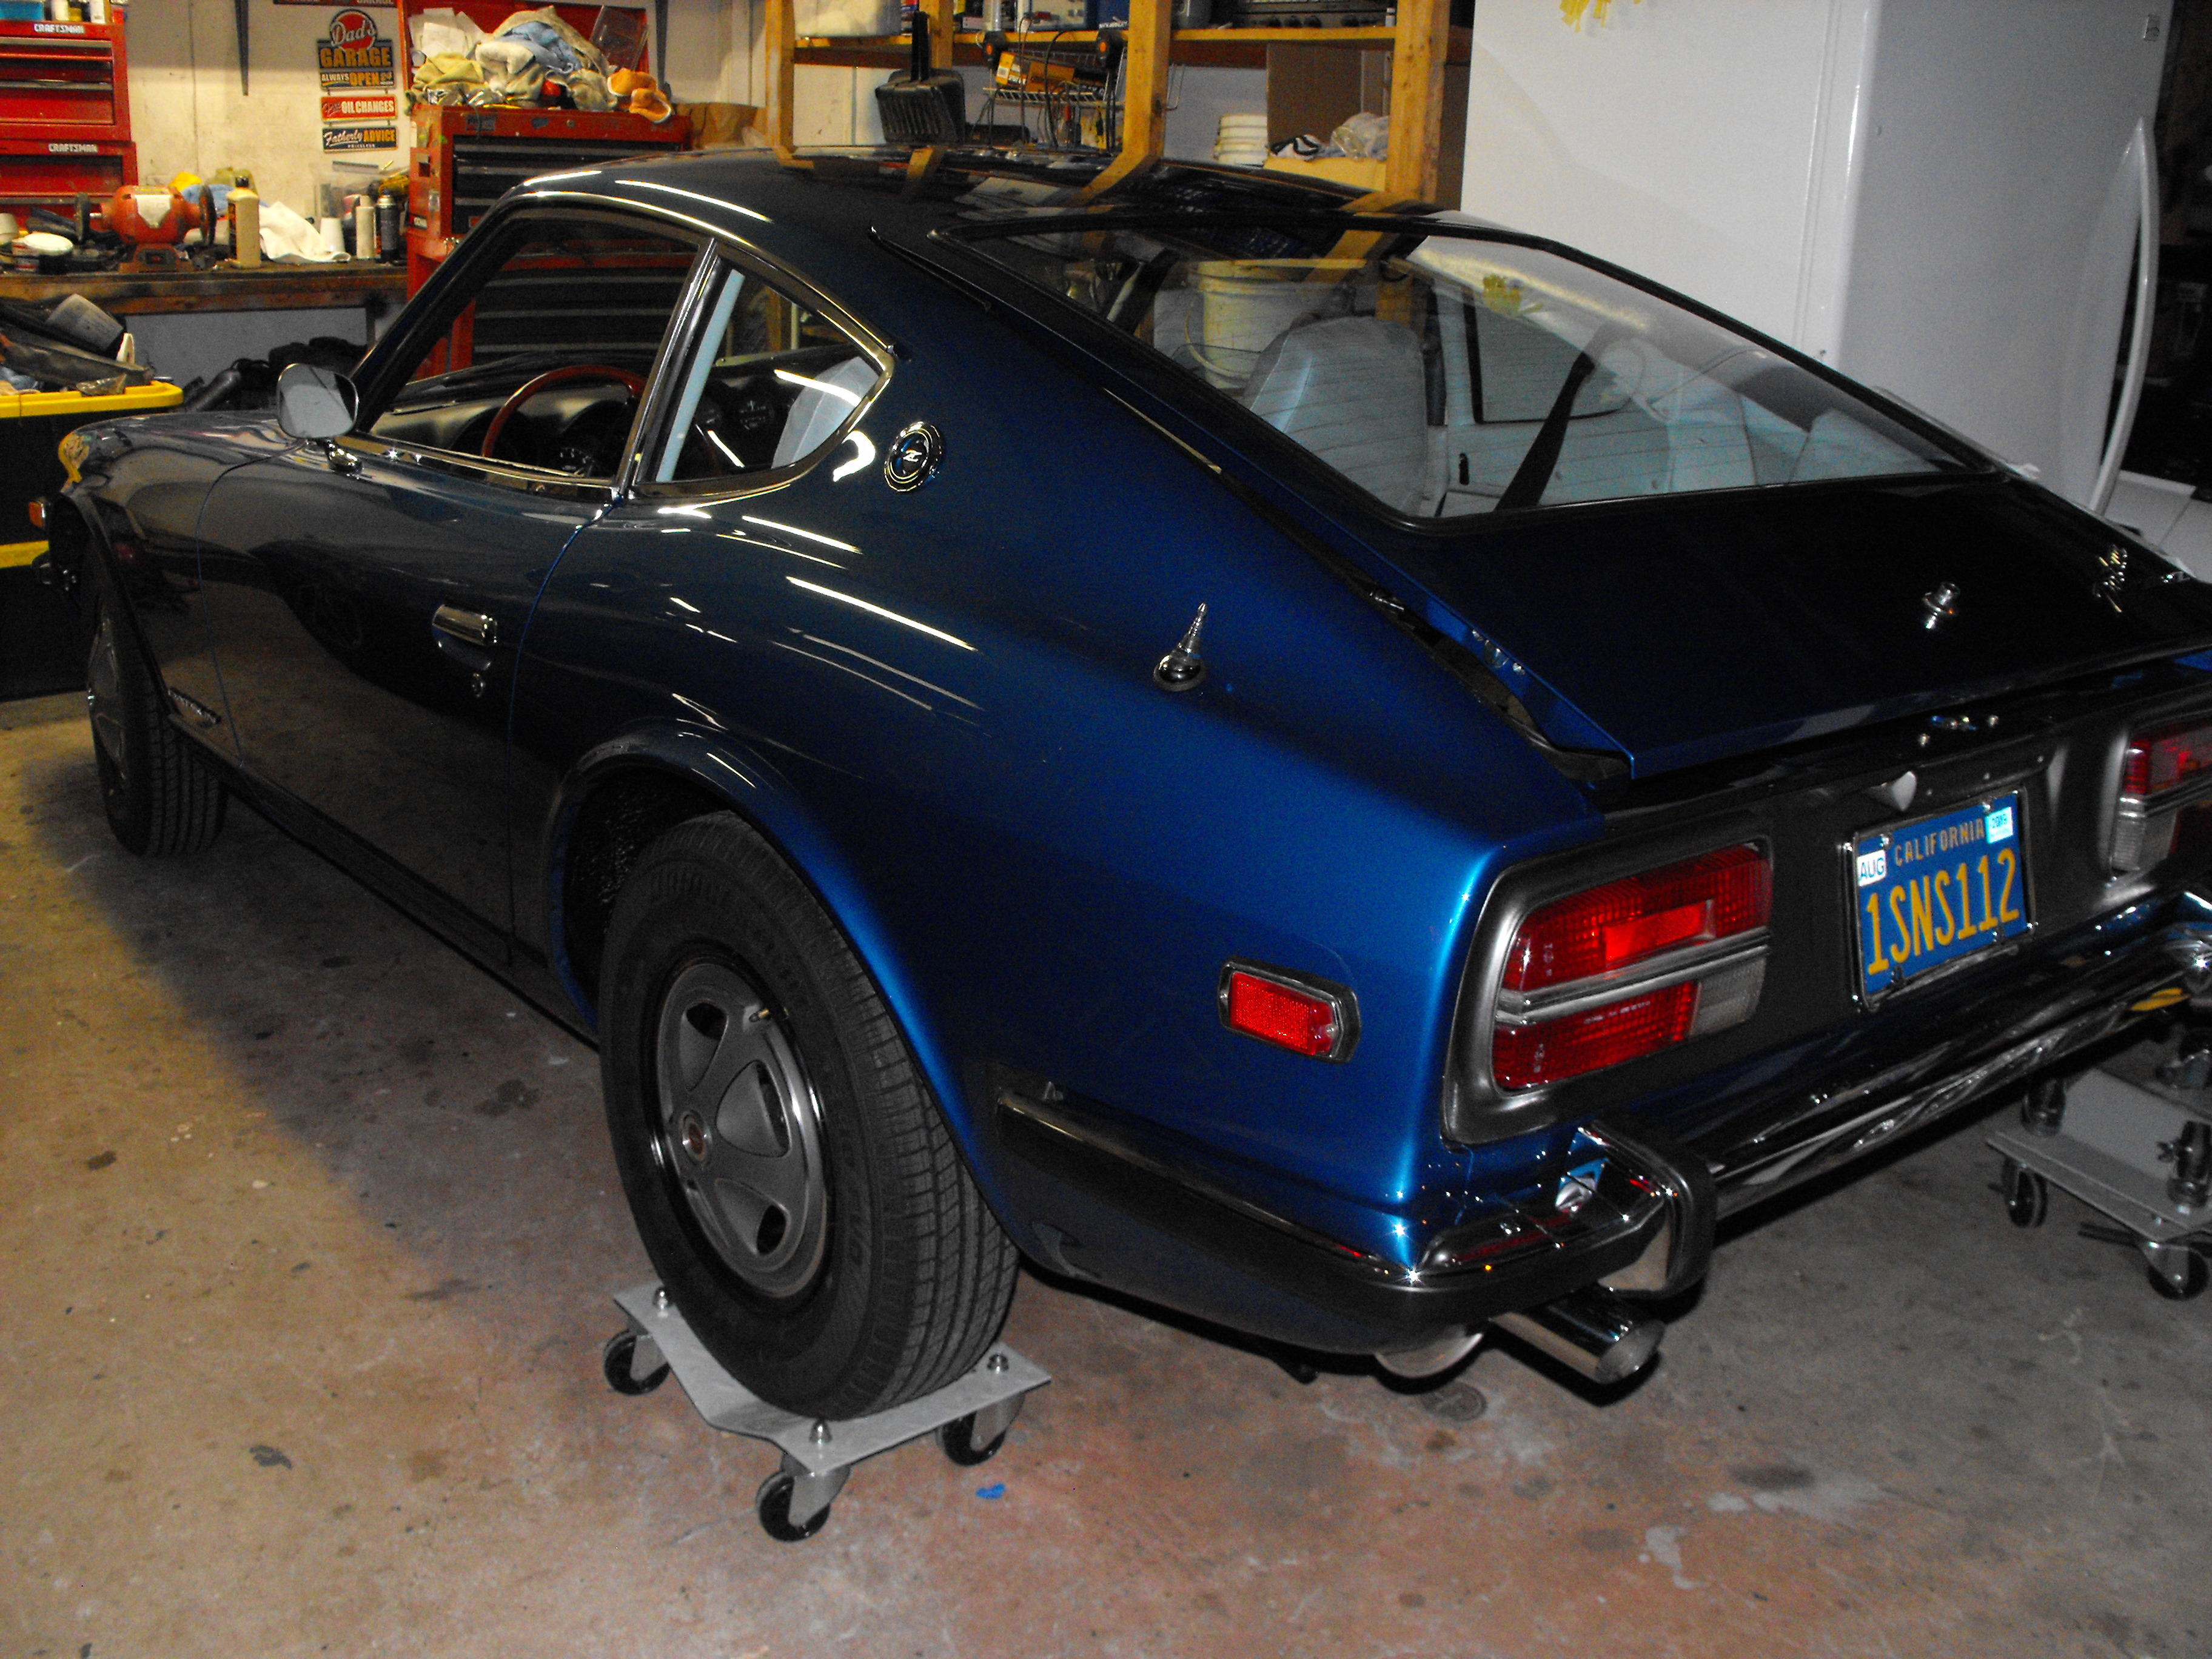
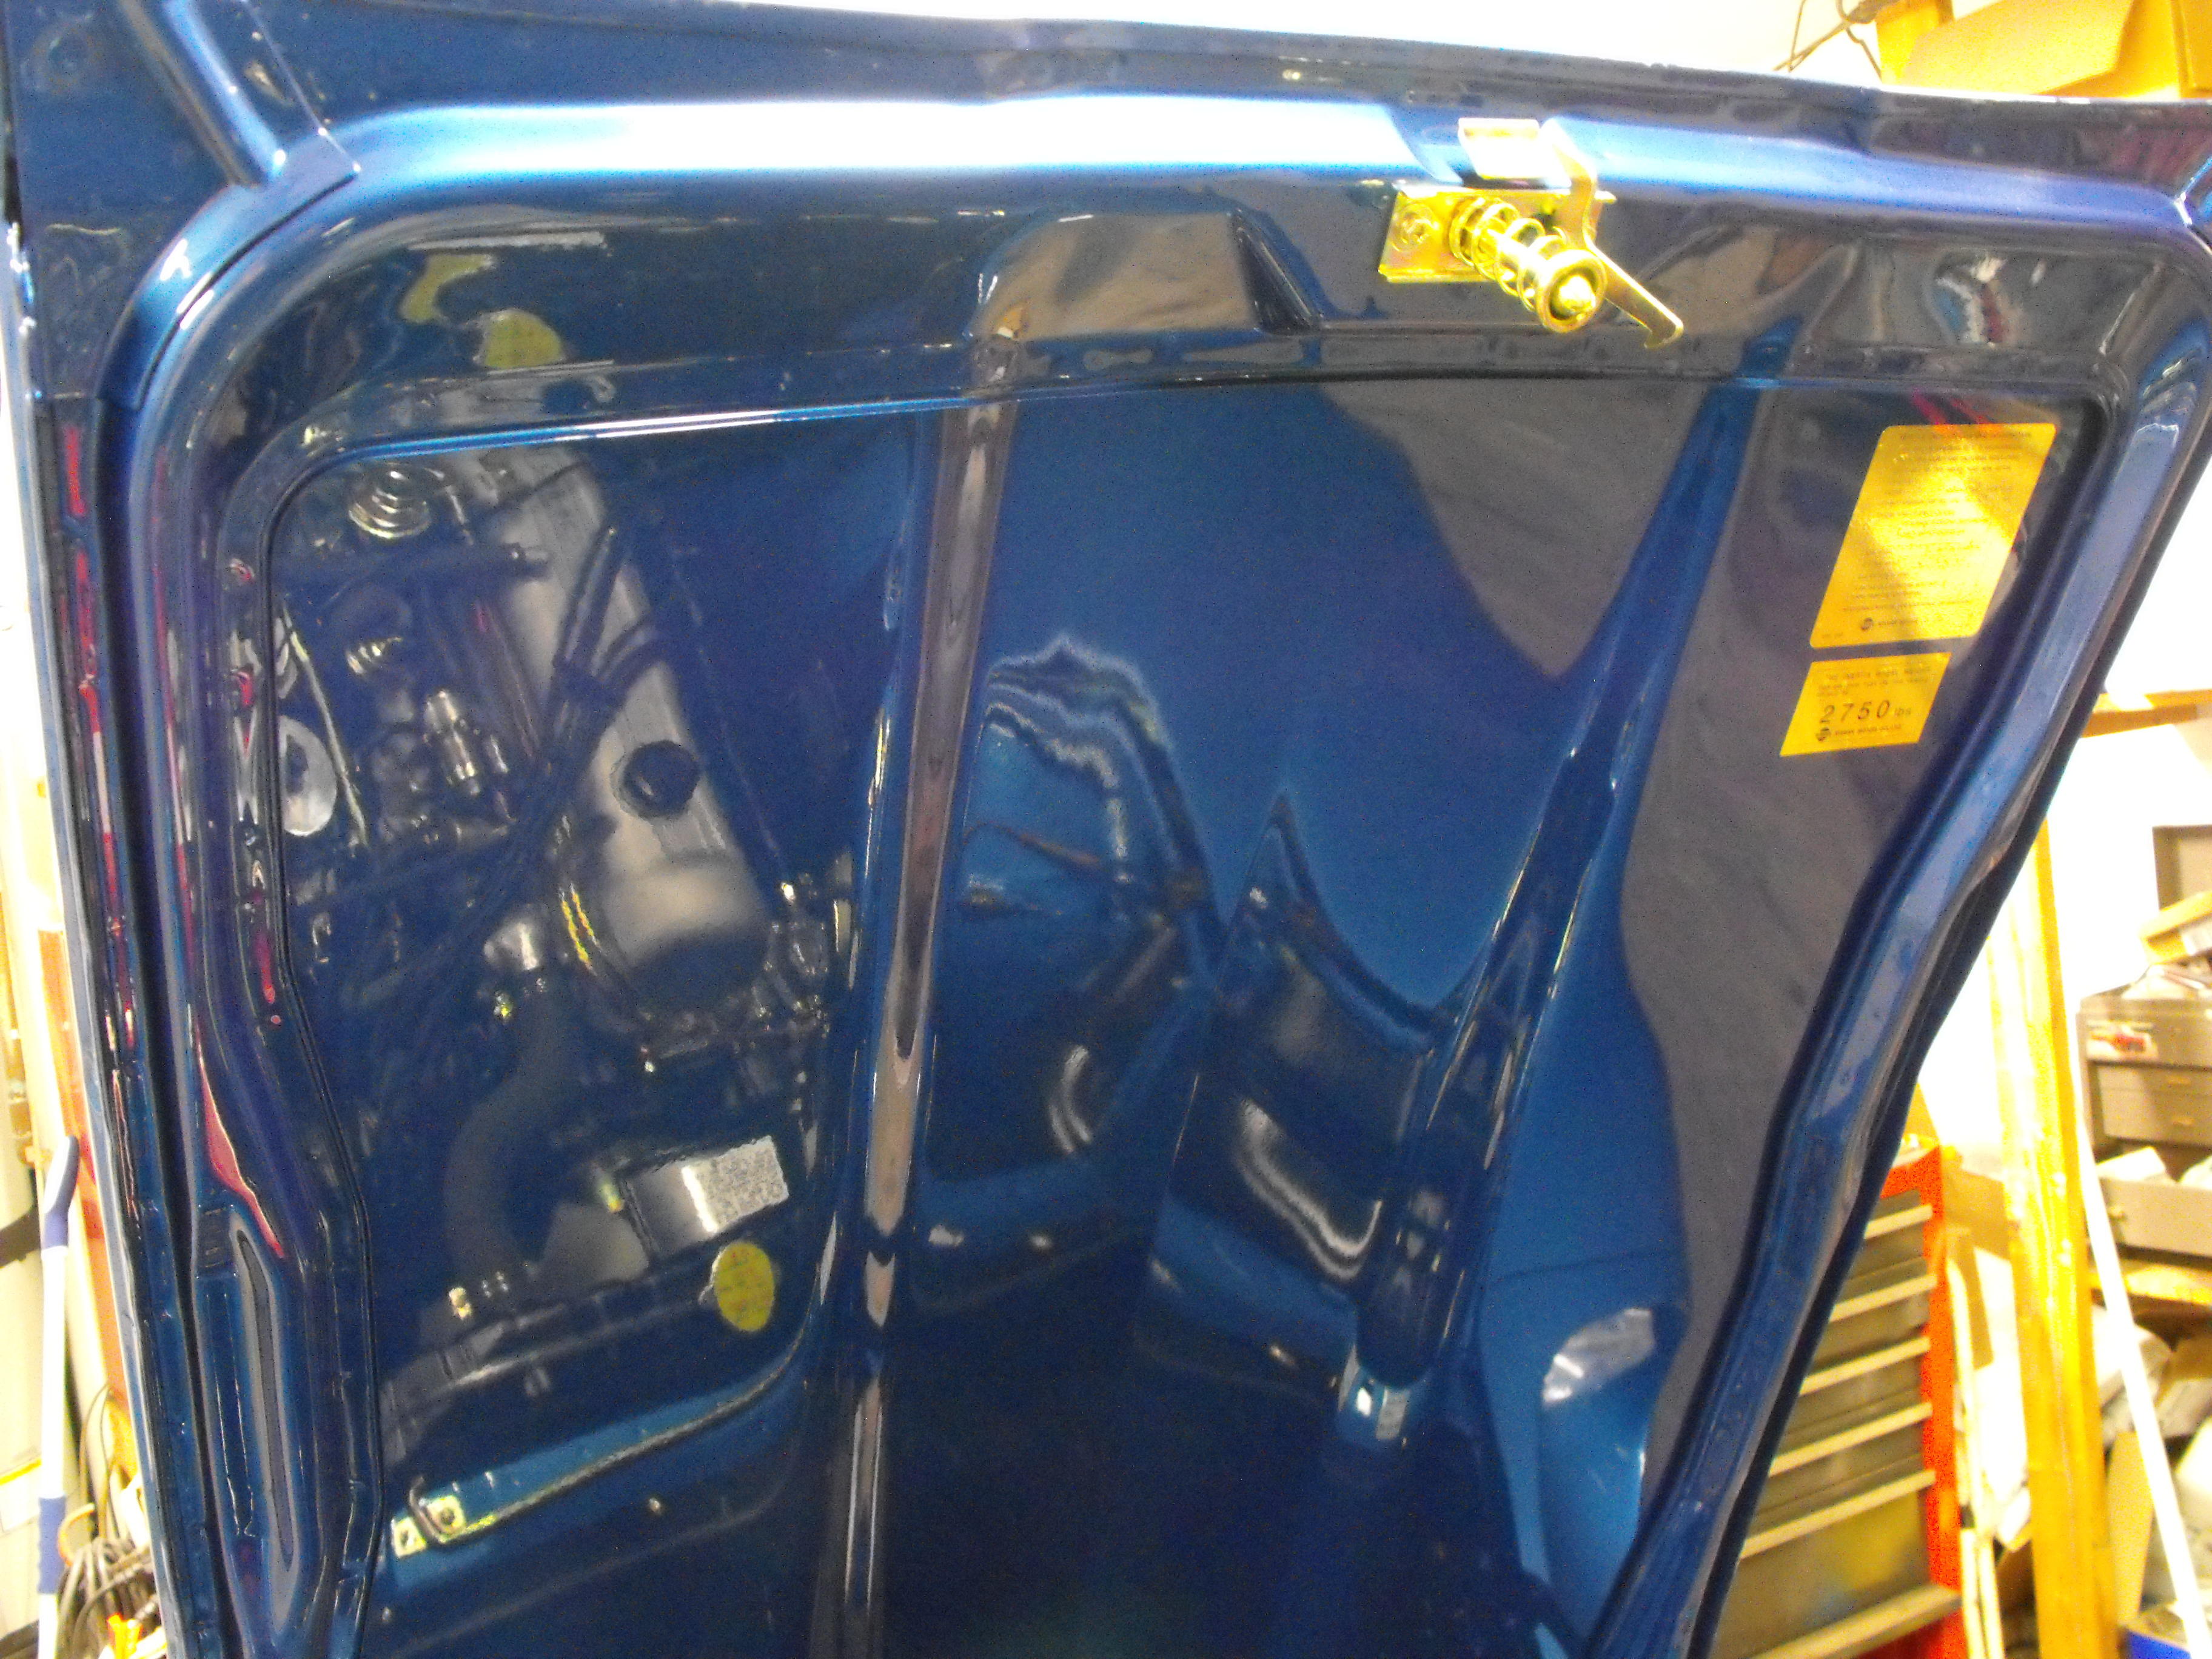
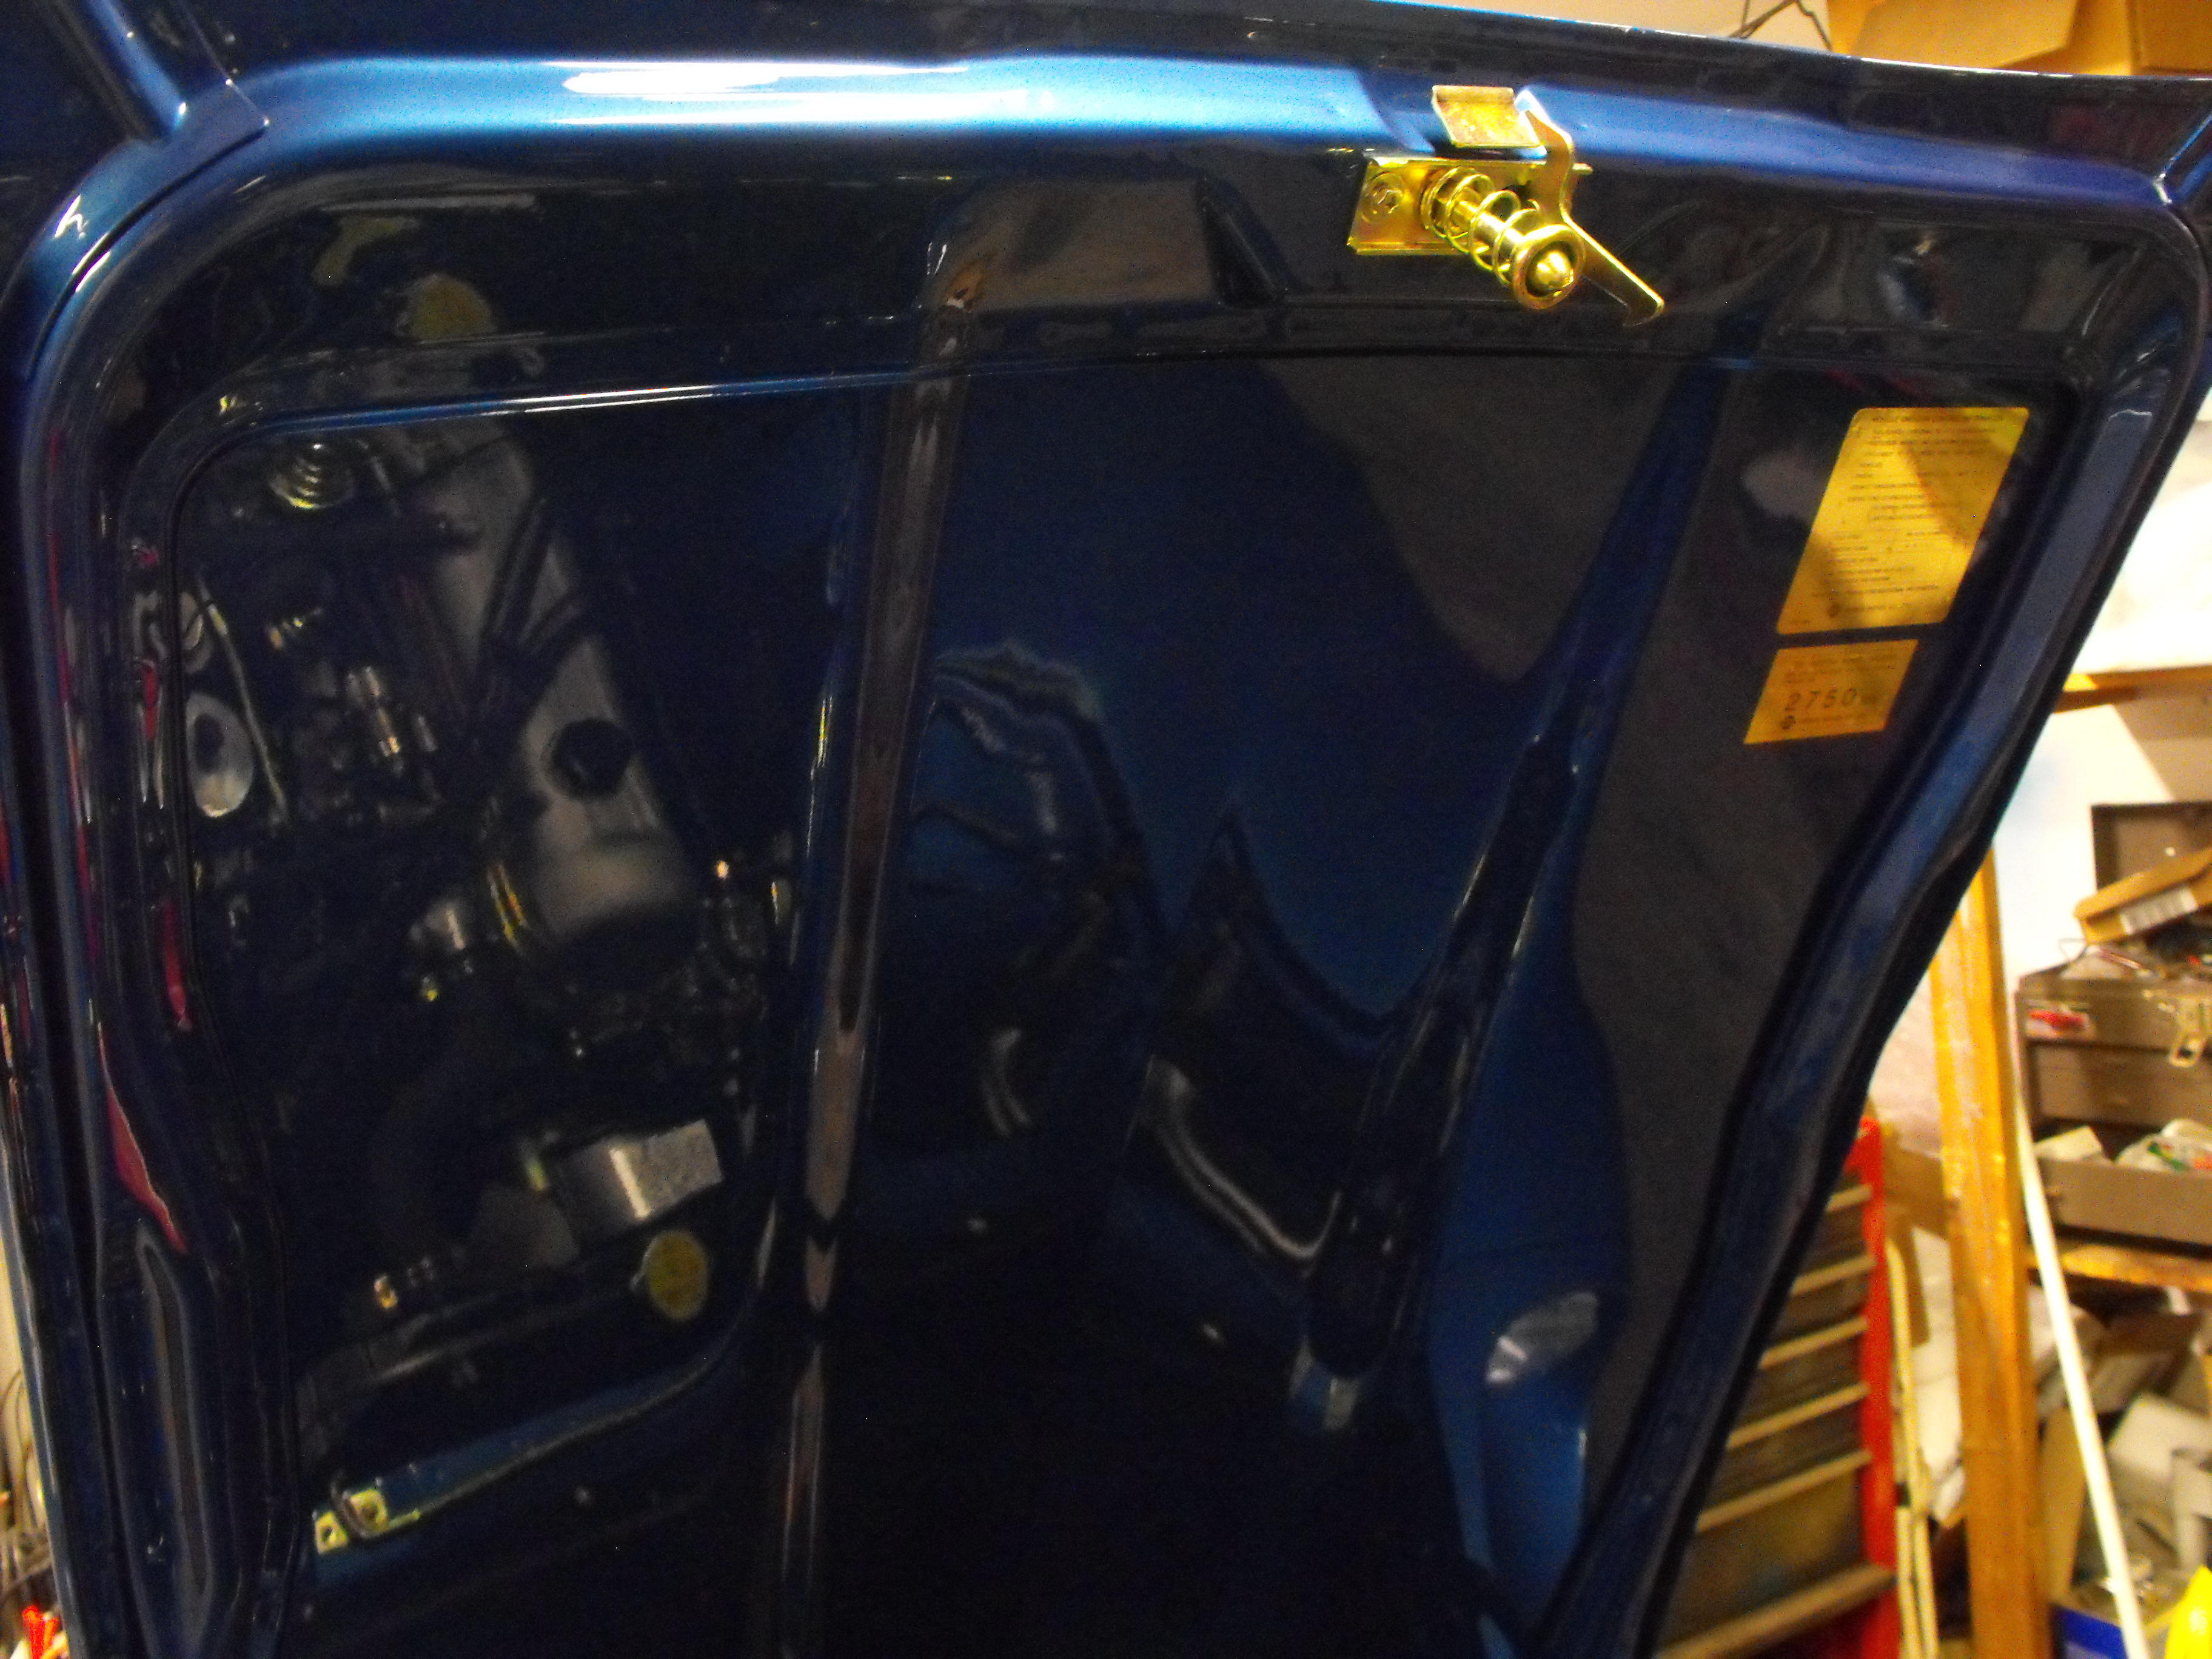
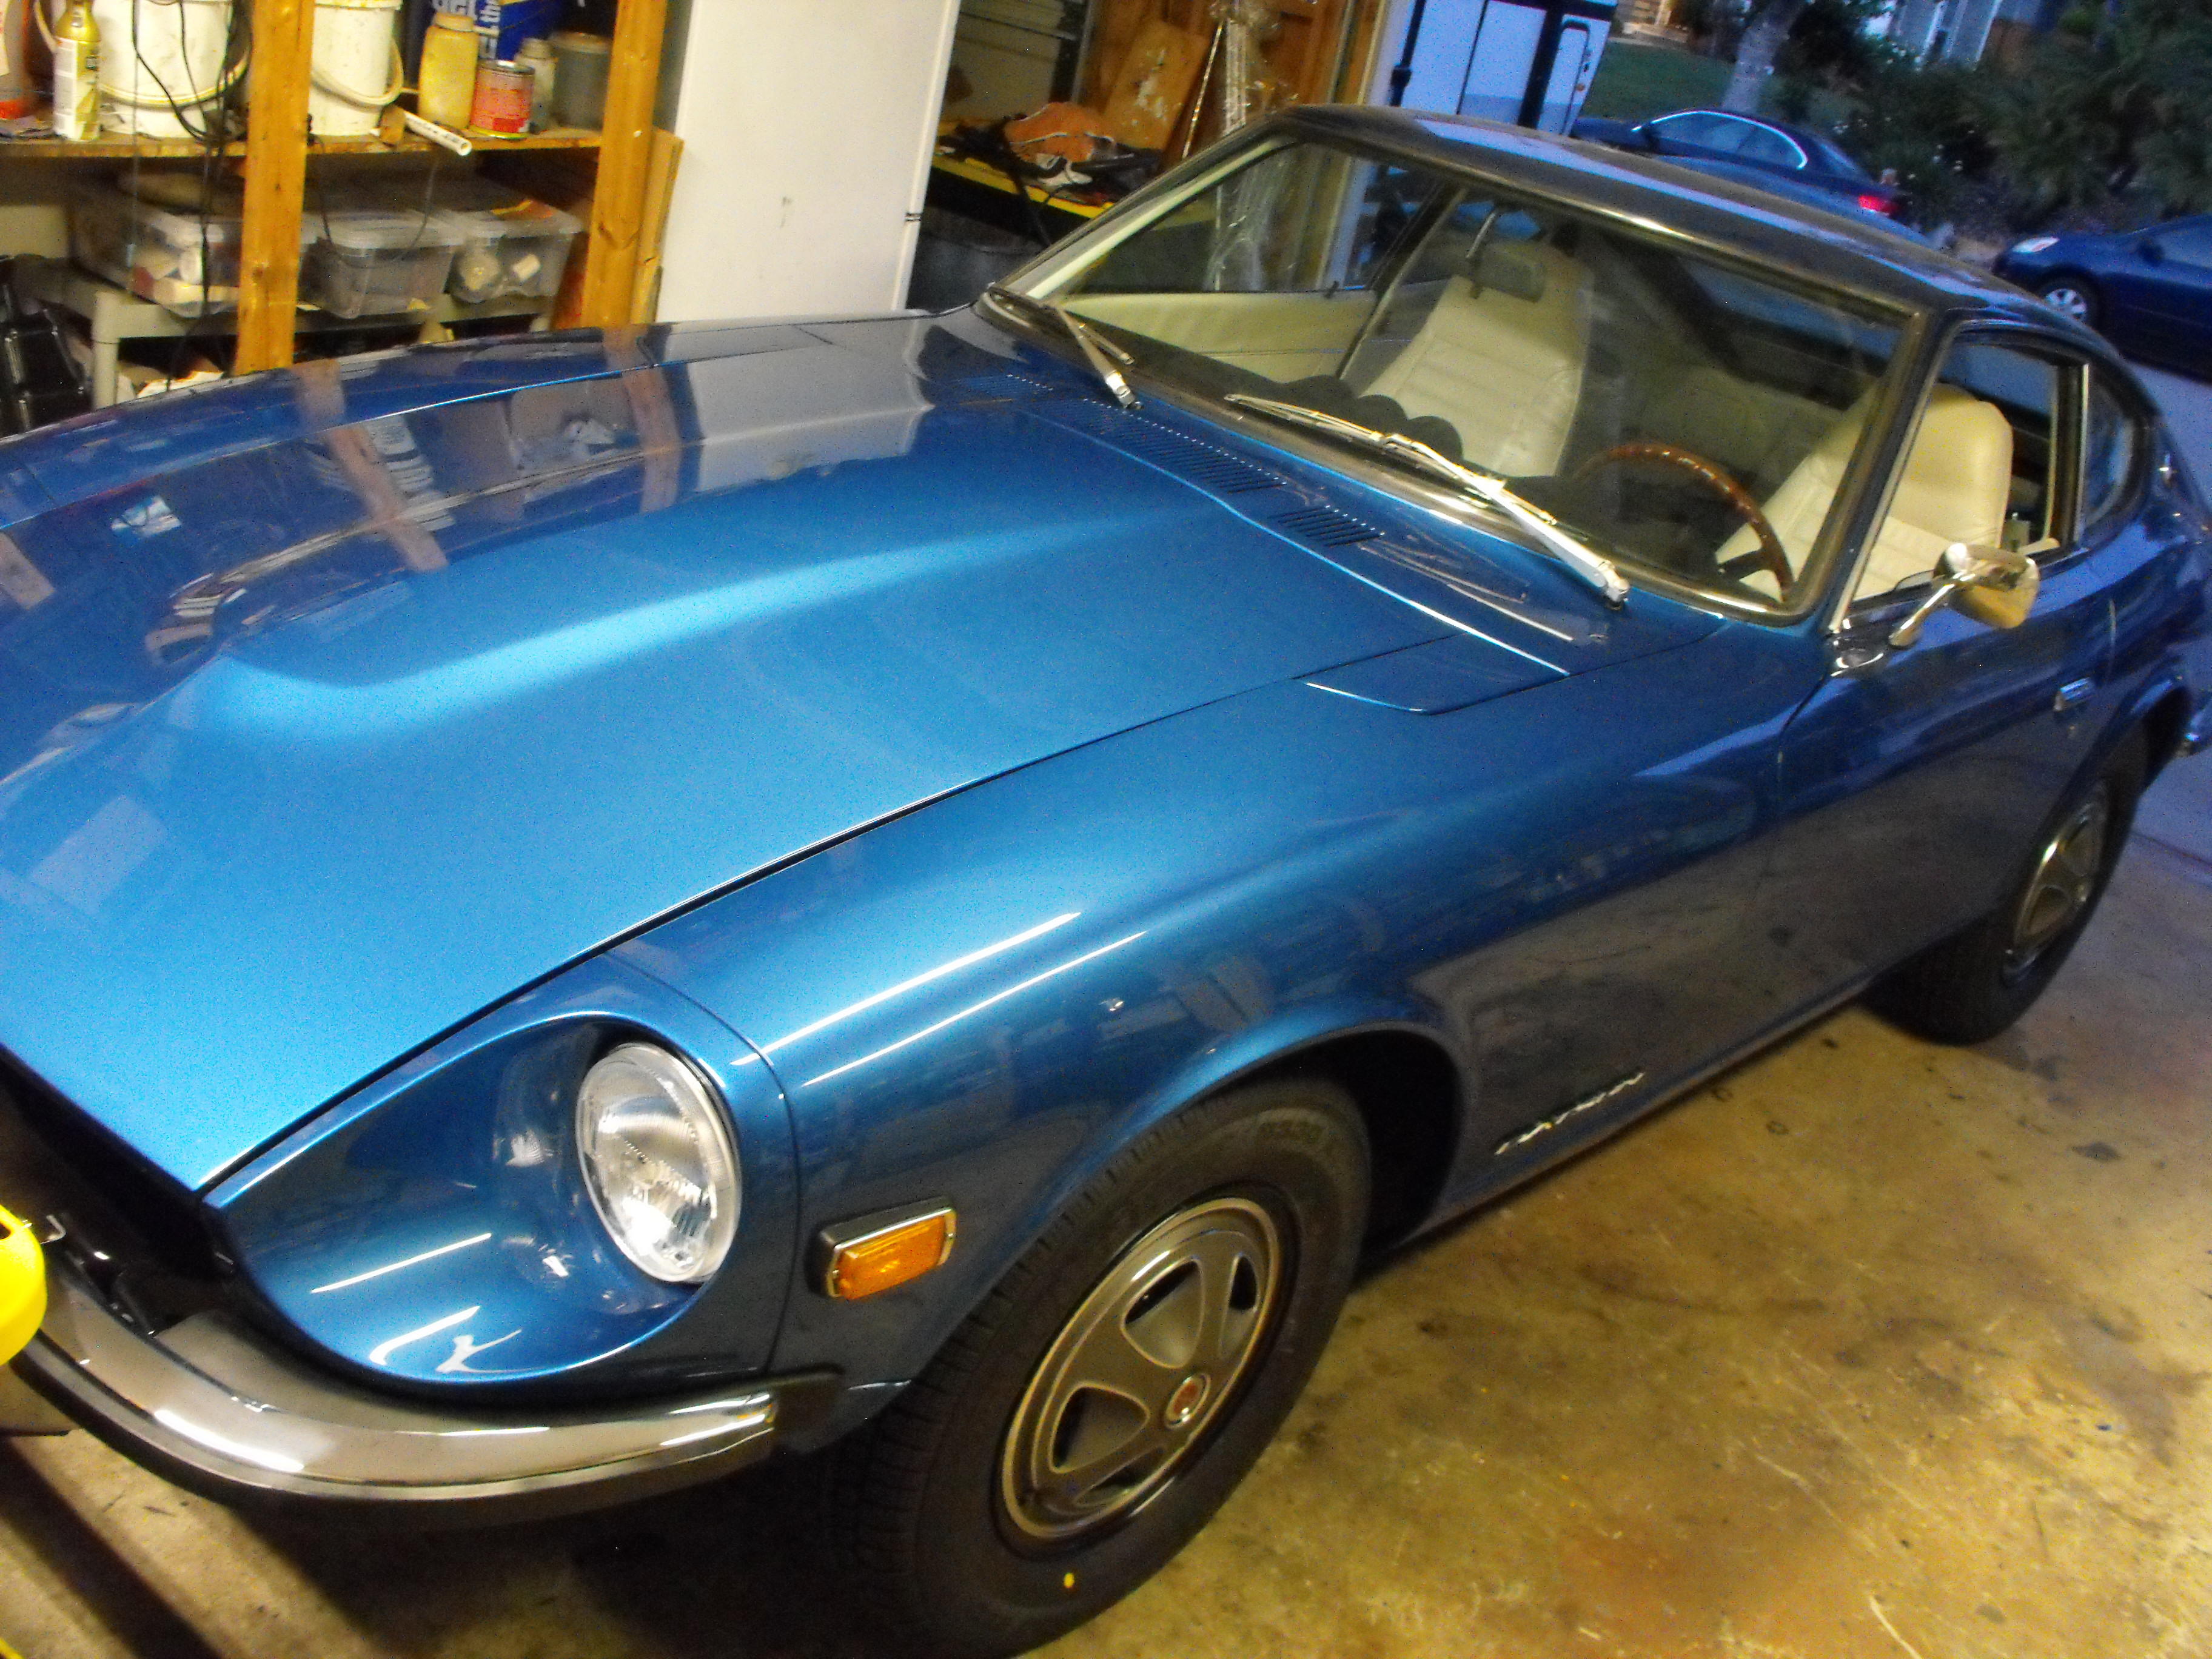
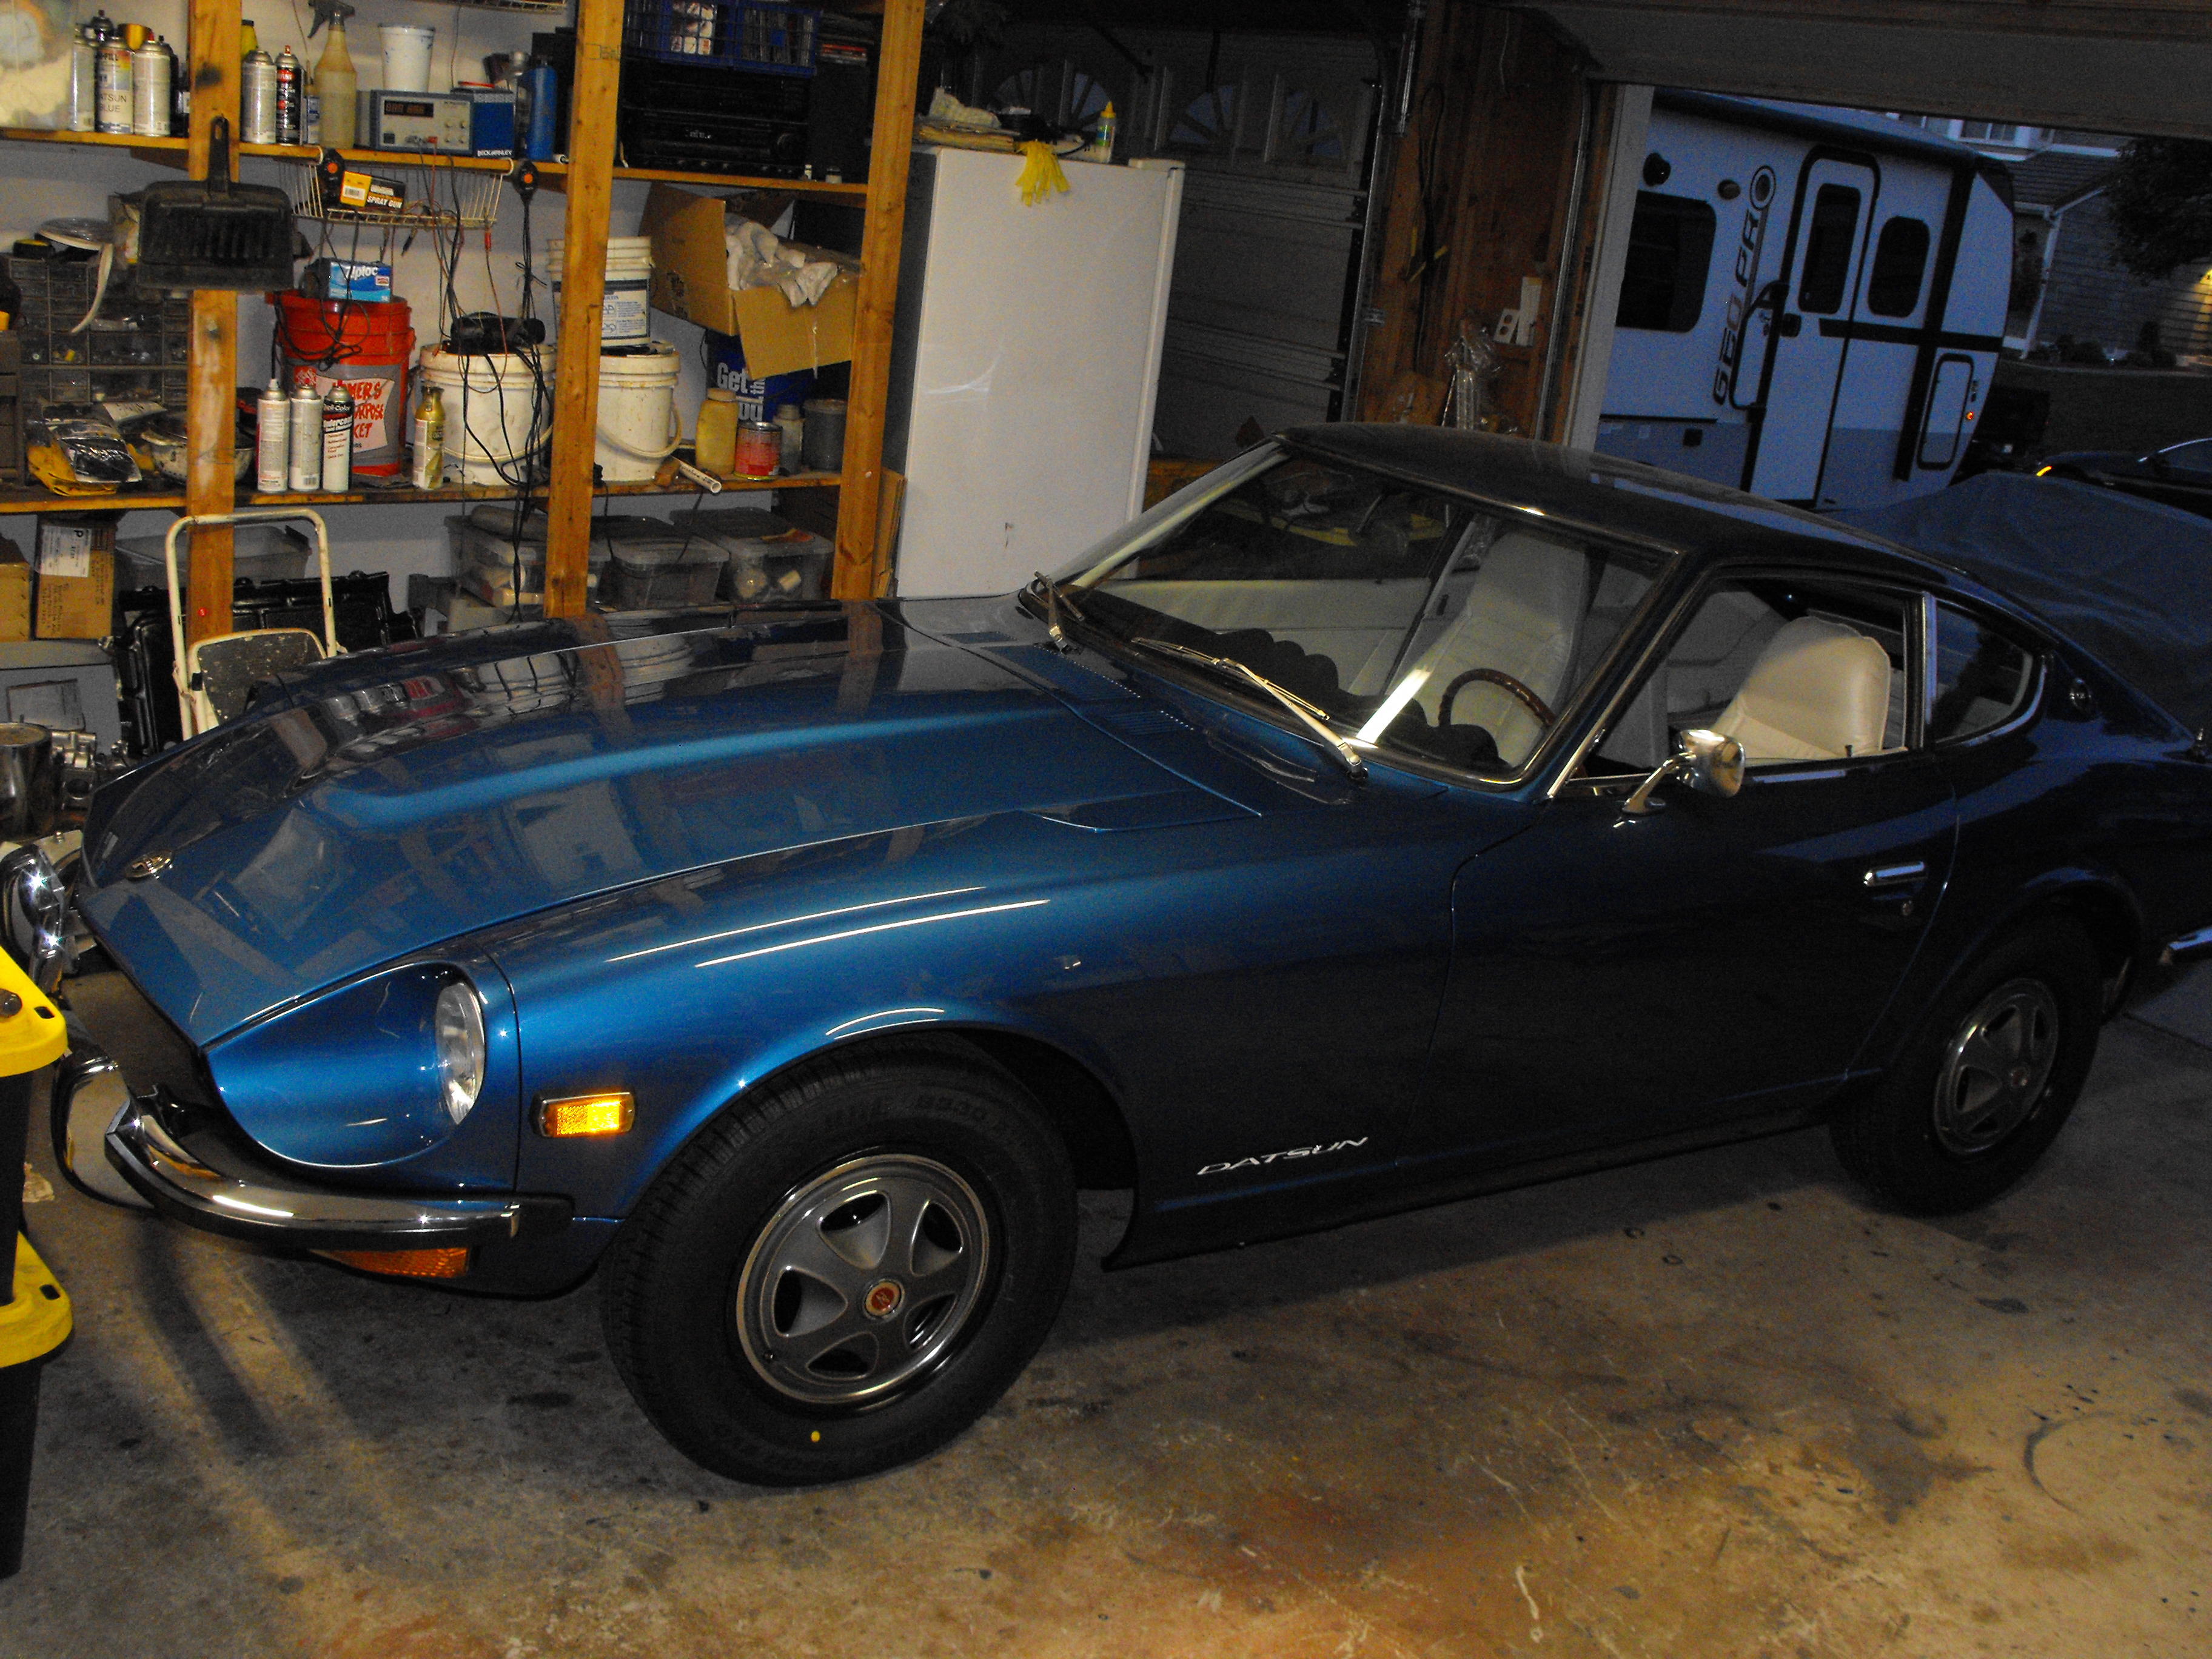
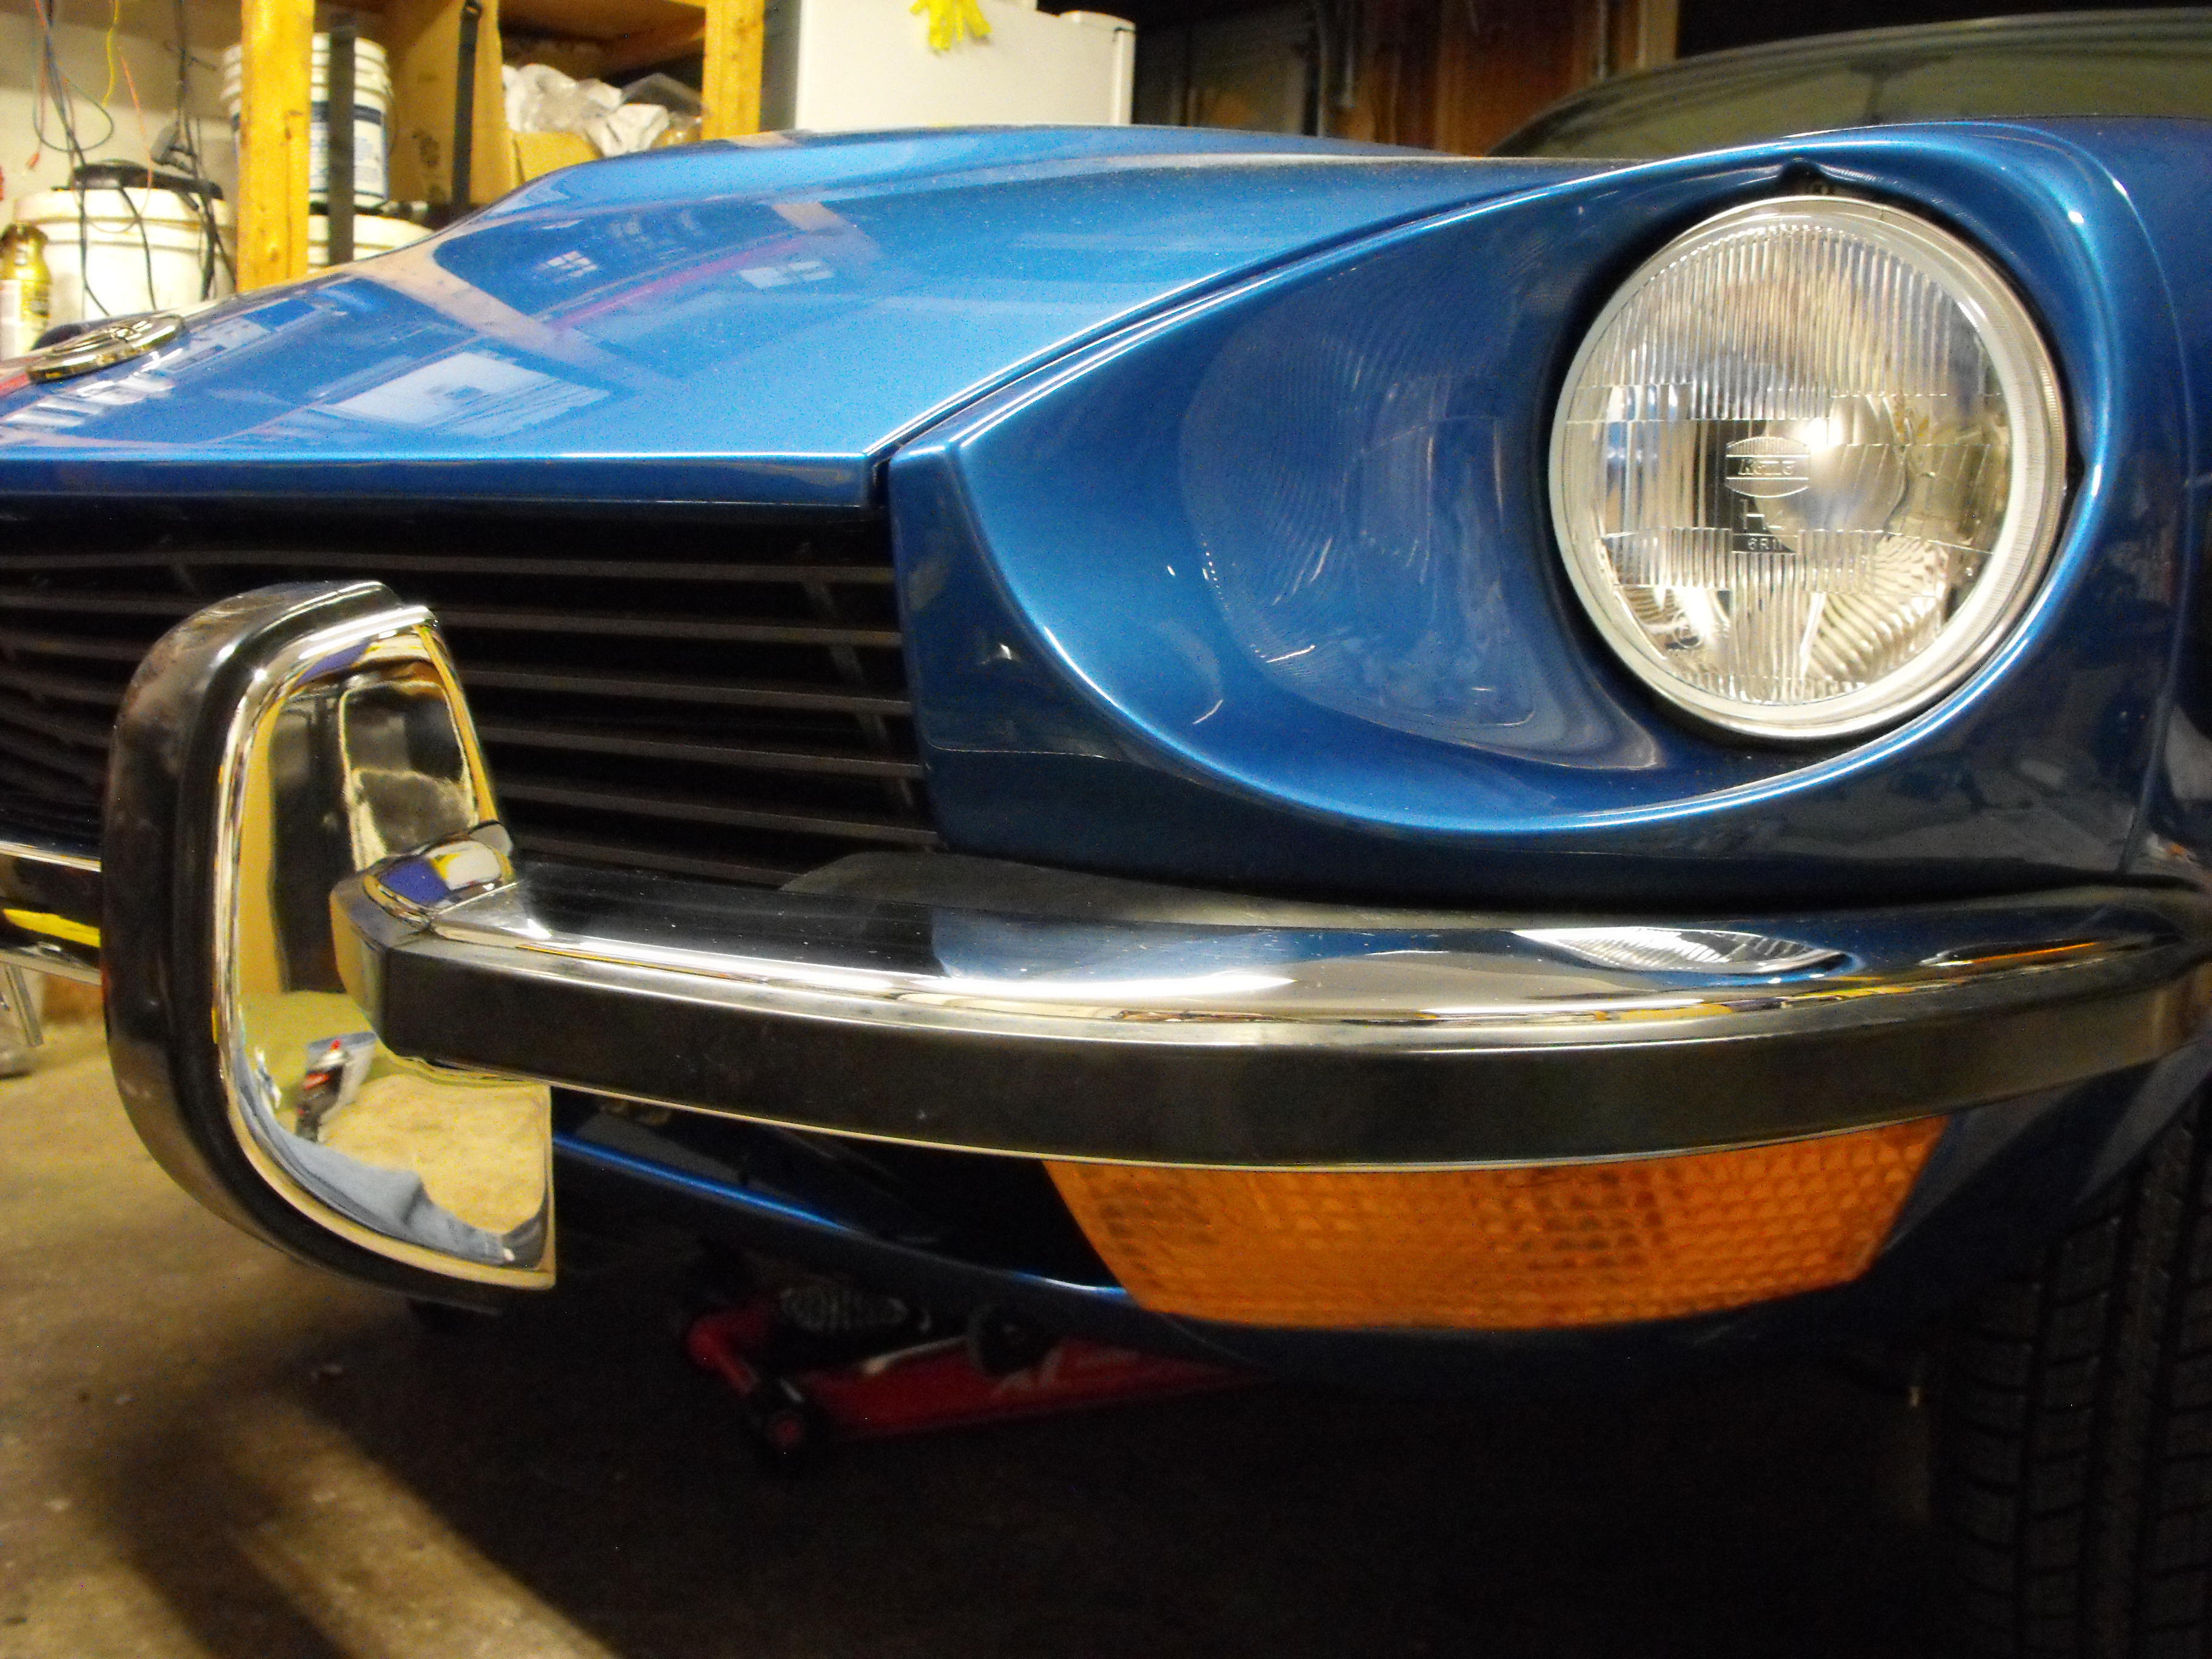
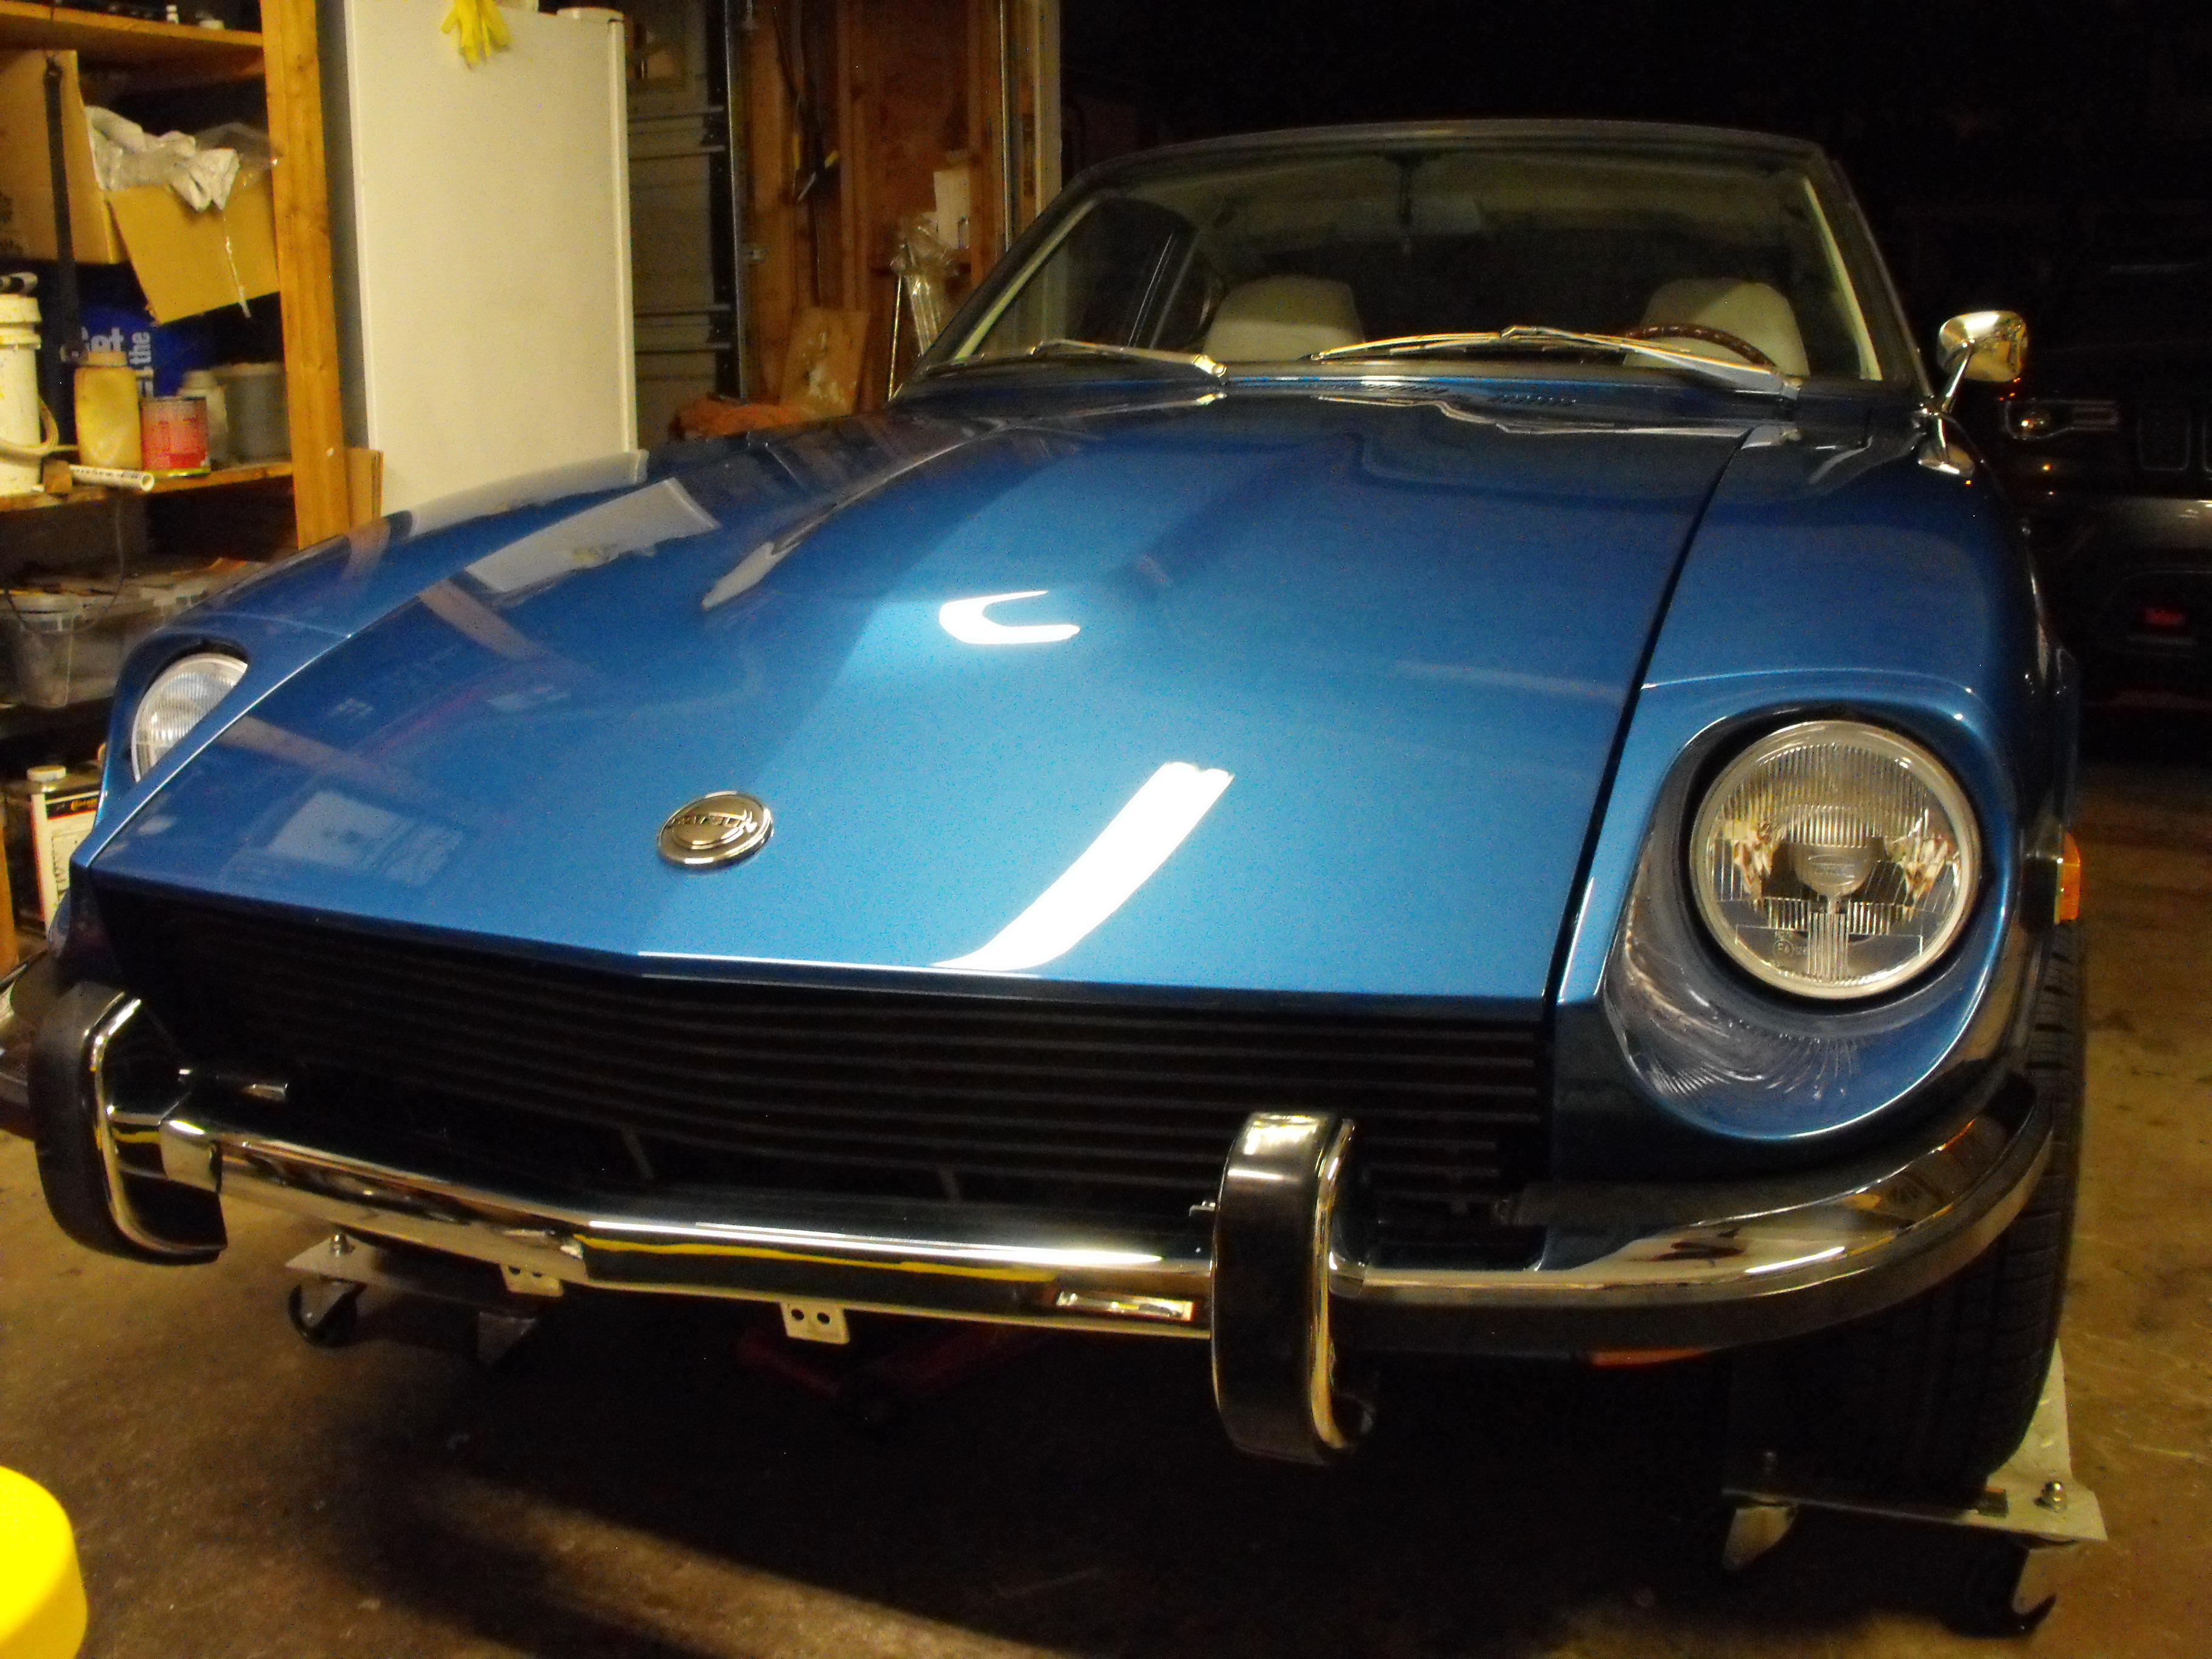
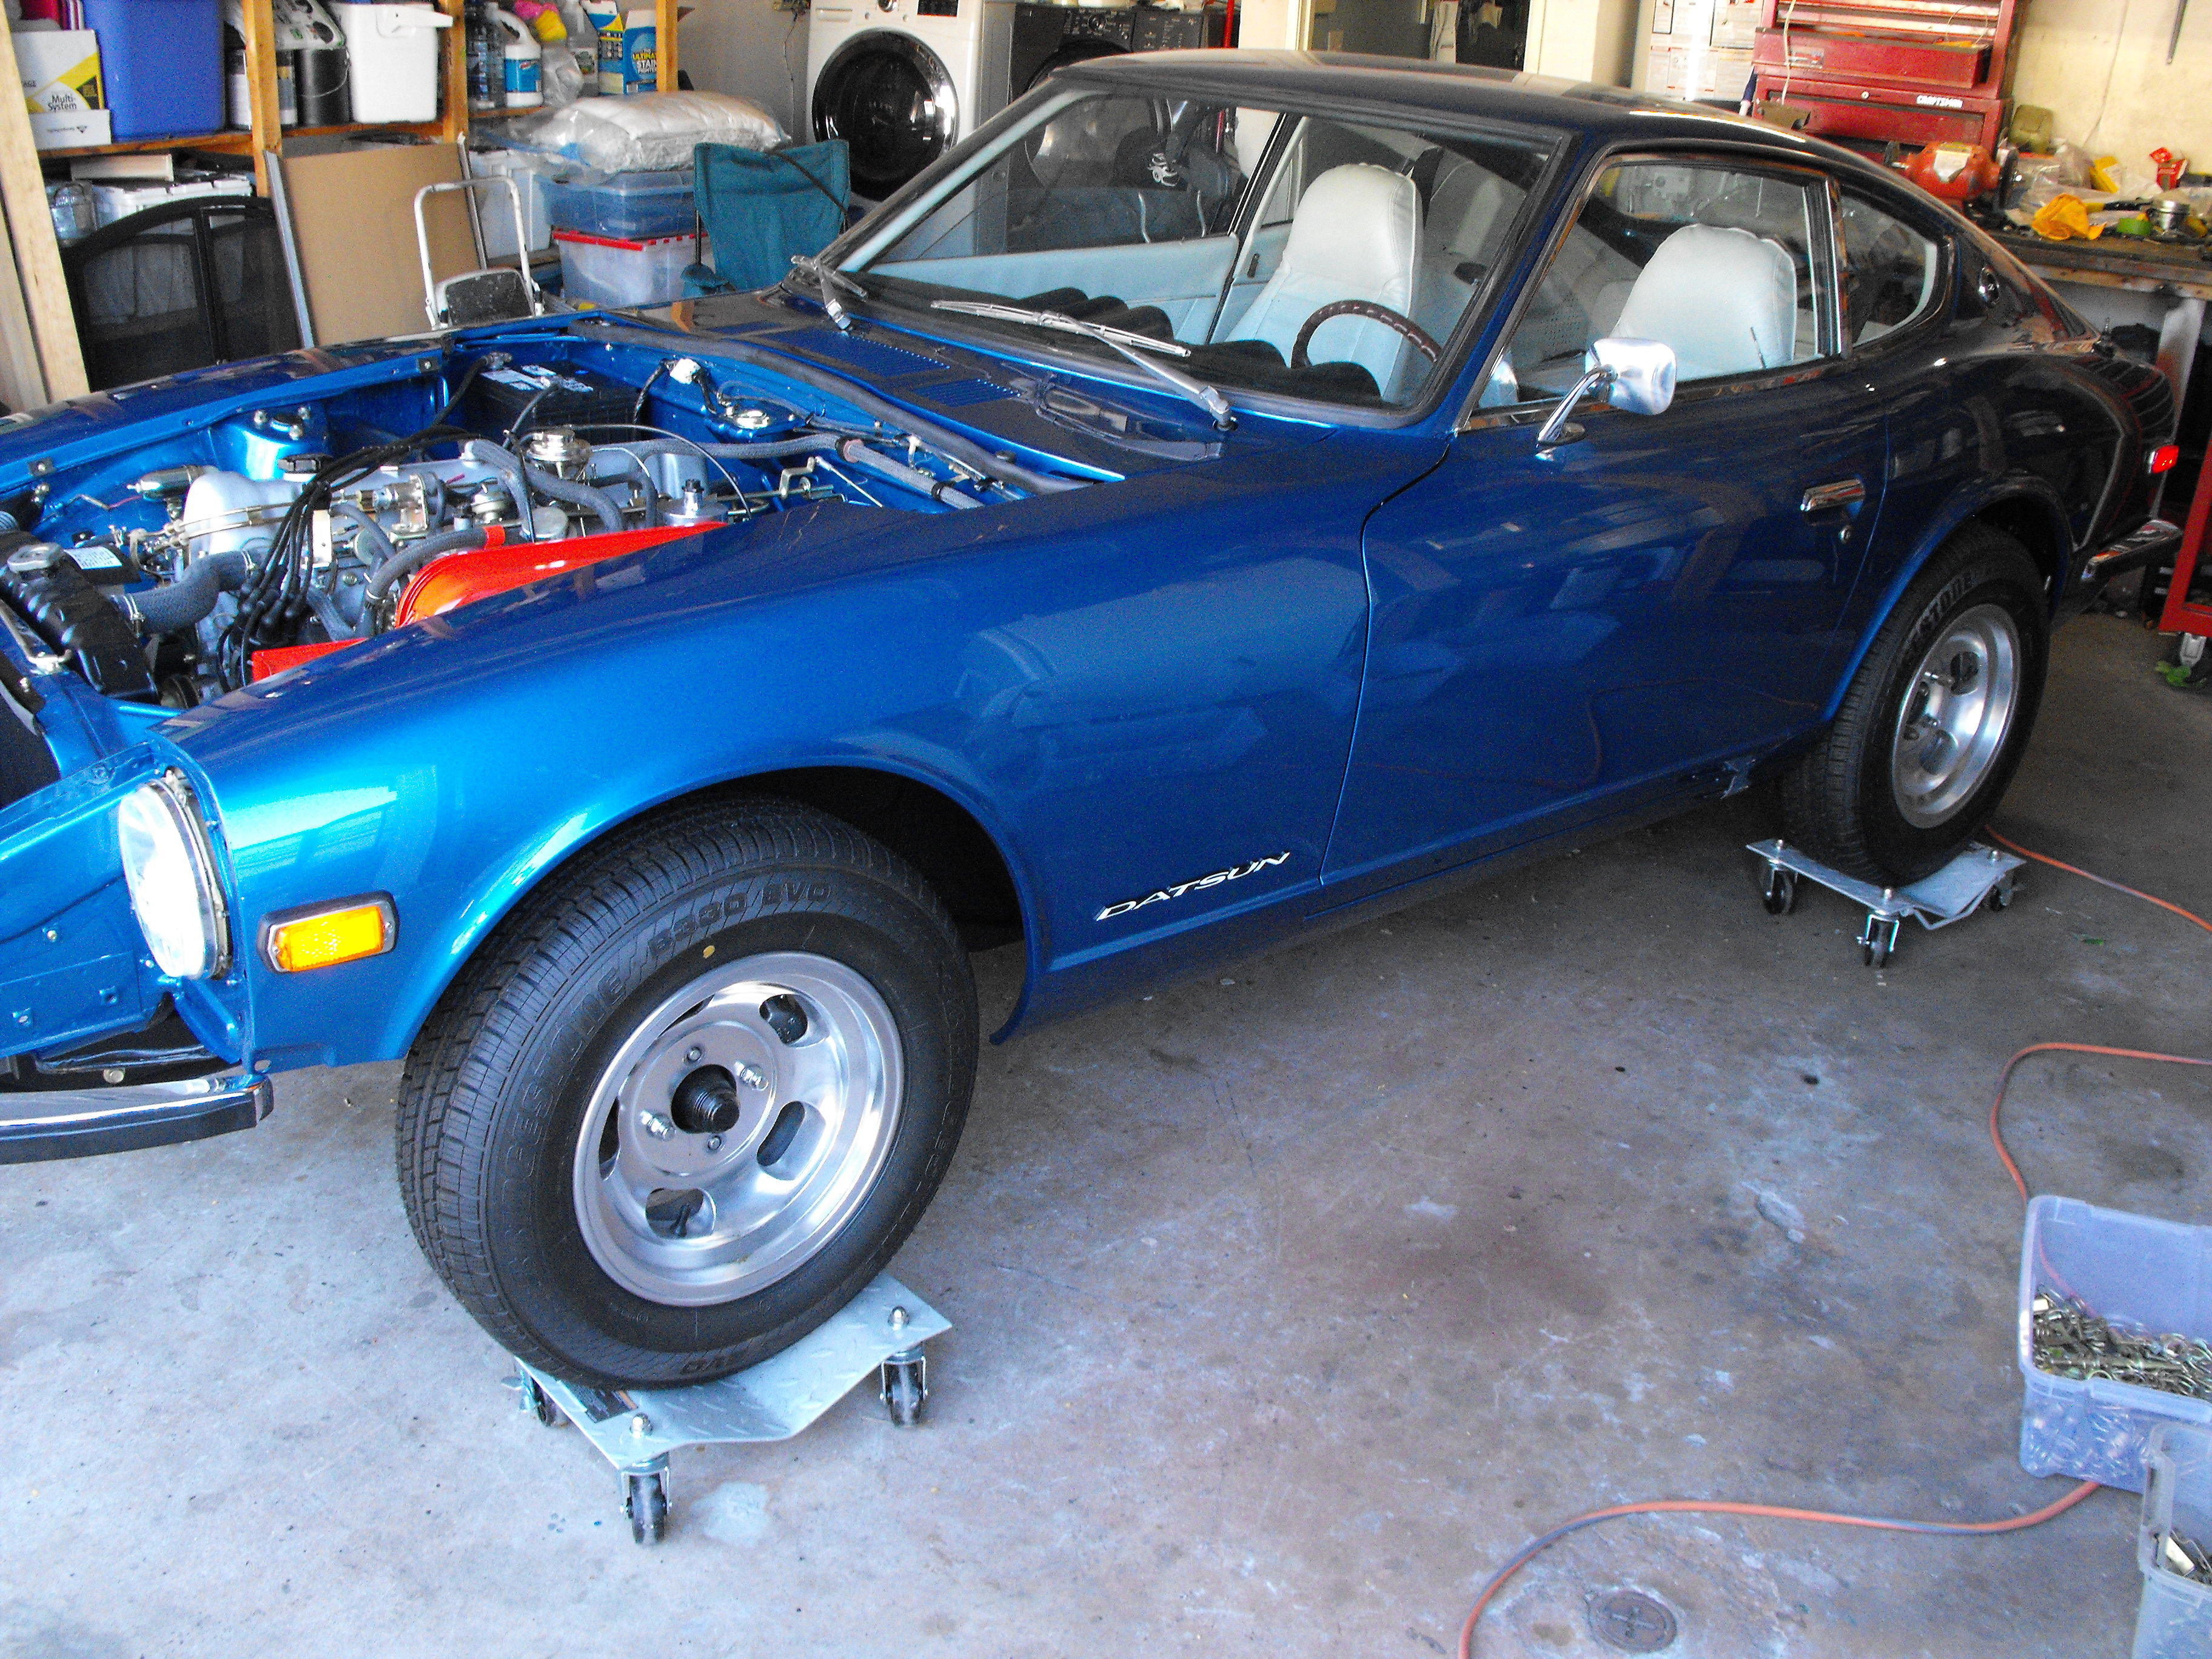
 Very close to finishing here. Got the clutch and brakes bled today. Also installed the final body panels. Just a few more details to finish up and she will be good to go. It's the mad scramble before ZCON in Branson. Right now we are in pretty good shape. Here are the latest pics. The body pics still do not show up well. The paint job is pretty amazing.
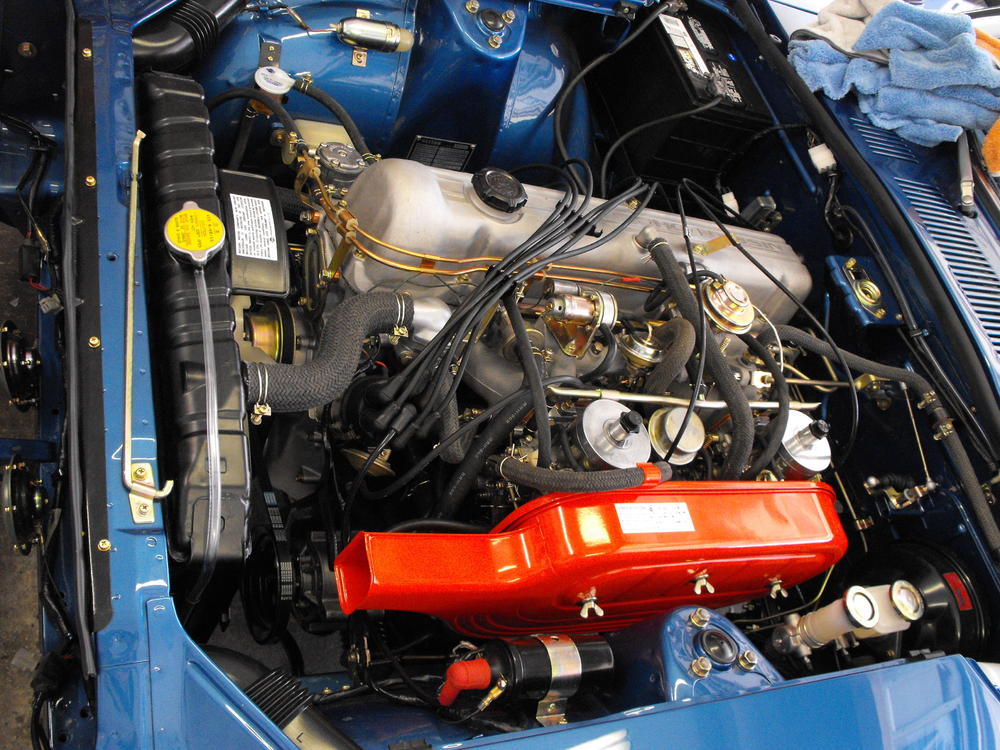


 She's alive! Not sure if this video will download but will give it a try. Looks like I have an exhaust leak at the mainfold/downpipe interface. Otherwise, not bad out of the gate with minimal adjustments so far. Surprisingly , the only leak( so far) was the return fuel line near the gas tank. 20190705_135059.mp4
I did a little write up on this a while back. It is about 2/3 of the way down on the first page of the link below. Personally, I would not use wd40....you want something that evaporates. For what it is worth, Windex is my best friend with all this stuff, especially for putting in the metal strips. It is nice and slippery and then evaporates. Also good for assembling hose onto metal tubes.
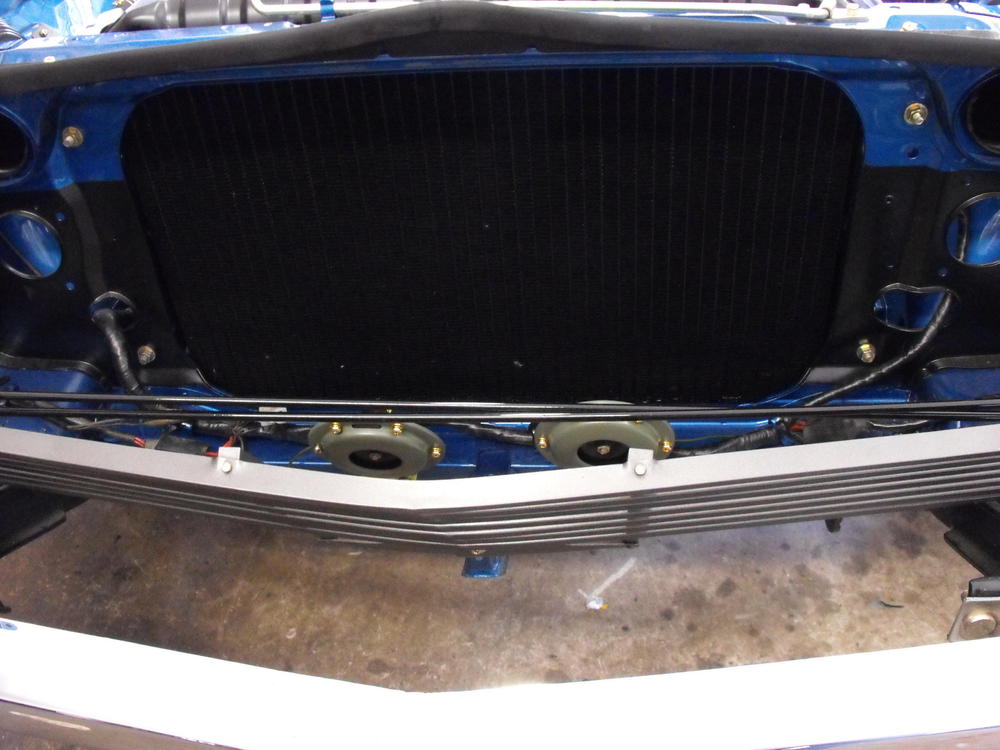
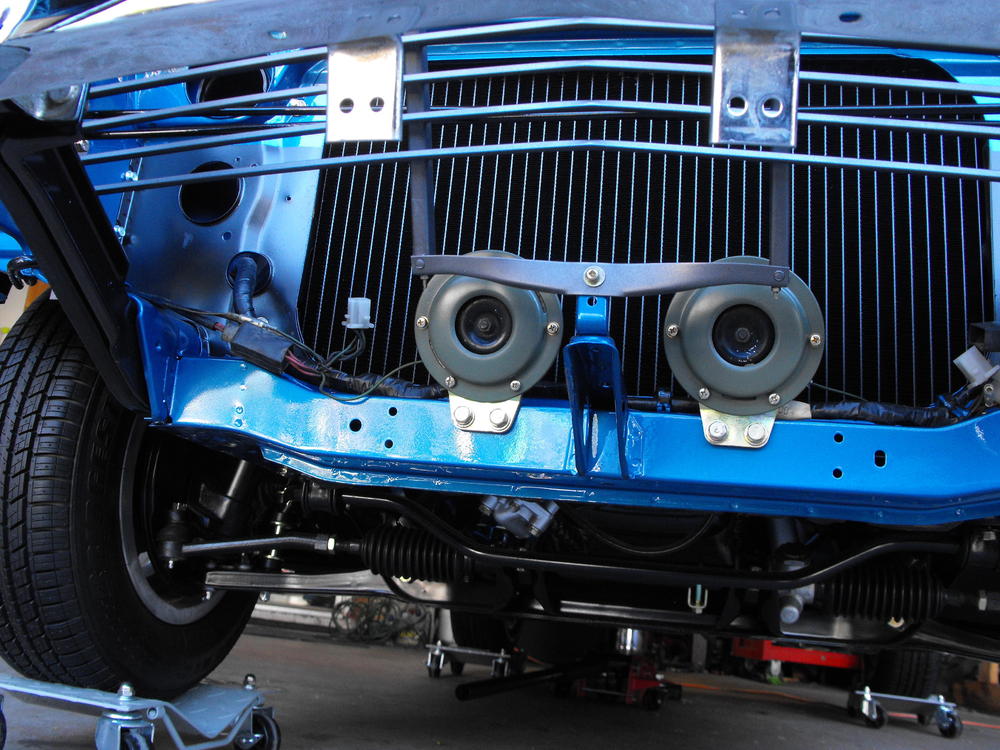
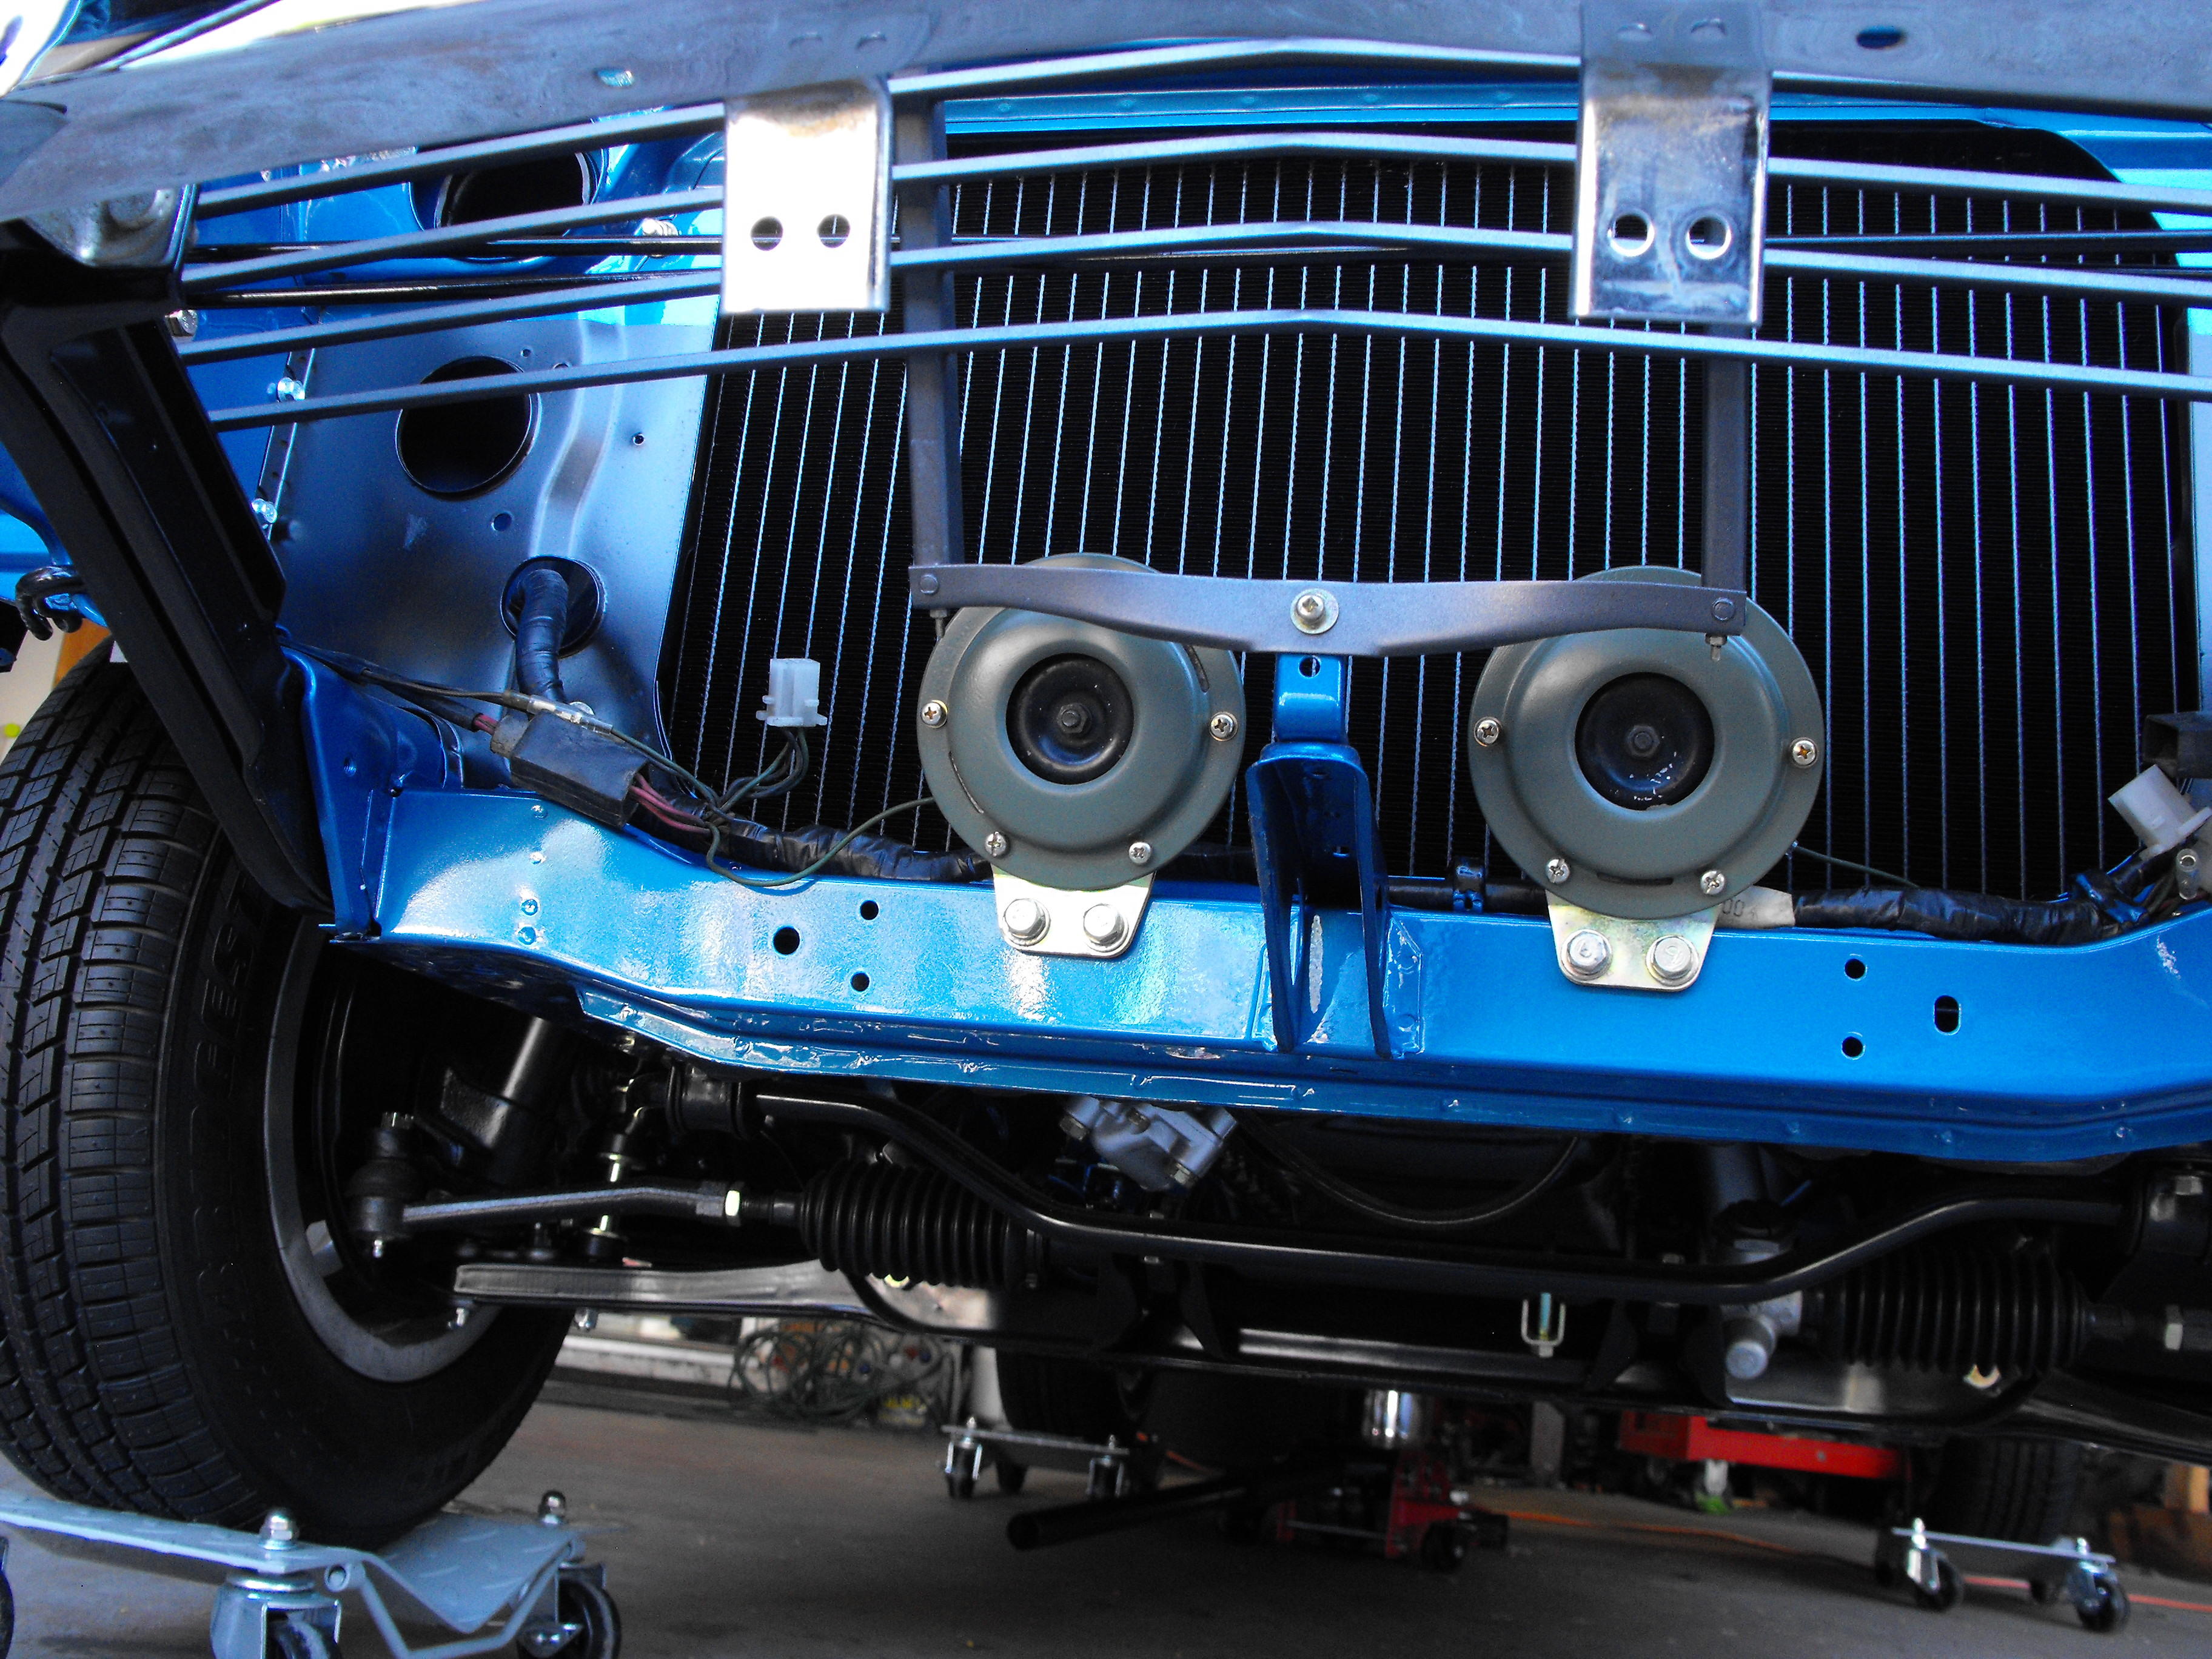
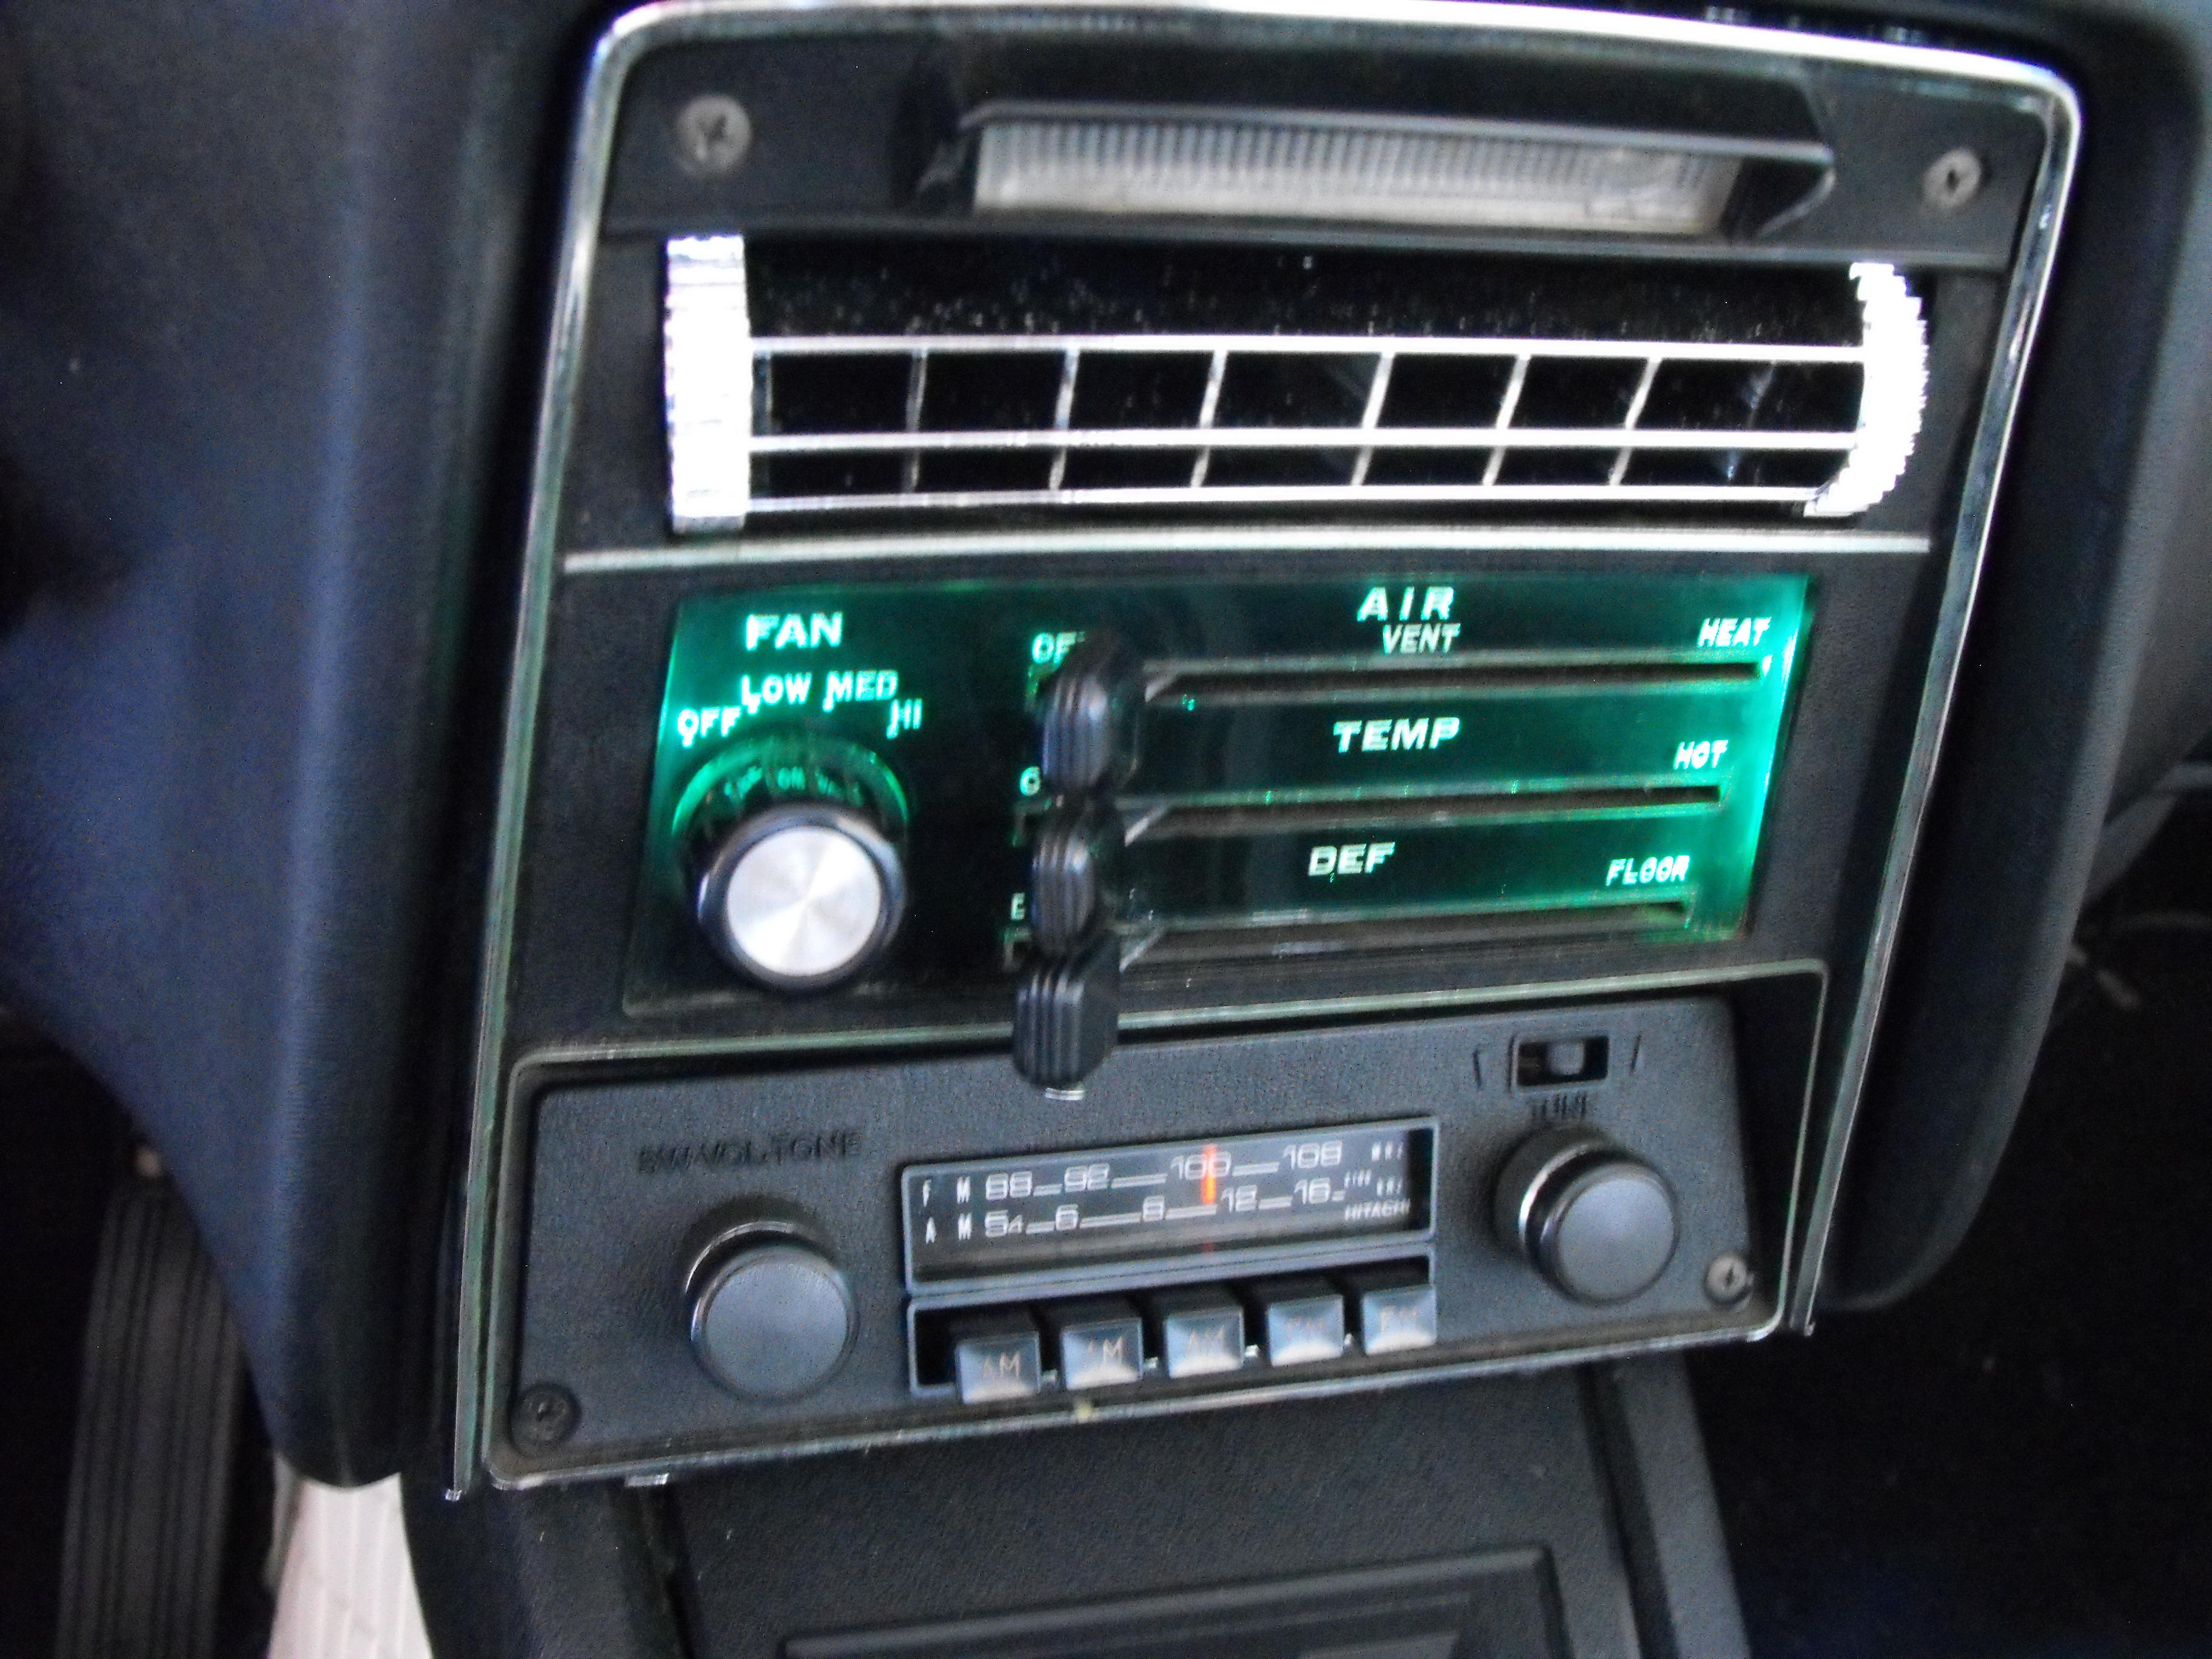
Wife was out of town this weekend so got a ton of stuff done. Also had @jayhawk and his brother stop by and provide support. Got almost all of the engine plumbing in, radio, heater panel along with horns, engine light and a number of other items. Put in the battery and the electrical is in great shape. All of the running lights are working, radio and antenna work well (Andy and I even listened to a bit of AM talk show radio), interior lights and vent control panel lights are working nice. The LEDs work great on the dash, but not sure if they are truly adjustable. Will check this when it is darker. Overall, pretty happy with the progress. Pushing to get this looking nice for the Branson show. Alternator and last of the body parts will be coming in this week. Also put in oil and water. Engine turned over nicely and we have spark. After I double check all the brake line connections and put in fluid, we will put some fuel in her and see how she does. We are getting pretty close. Latest pics are below.
She's alive! Not sure if this video will download but will give it a try. Looks like I have an exhaust leak at the mainfold/downpipe interface. Otherwise, not bad out of the gate with minimal adjustments so far. Surprisingly , the only leak( so far) was the return fuel line near the gas tank. 20190705_135059.mp4
I did a little write up on this a while back. It is about 2/3 of the way down on the first page of the link below. Personally, I would not use wd40....you want something that evaporates. For what it is worth, Windex is my best friend with all this stuff, especially for putting in the metal strips. It is nice and slippery and then evaporates. Also good for assembling hose onto metal tubes.
Wife was out of town this weekend so got a ton of stuff done. Also had @jayhawk and his brother stop by and provide support. Got almost all of the engine plumbing in, radio, heater panel along with horns, engine light and a number of other items. Put in the battery and the electrical is in great shape. All of the running lights are working, radio and antenna work well (Andy and I even listened to a bit of AM talk show radio), interior lights and vent control panel lights are working nice. The LEDs work great on the dash, but not sure if they are truly adjustable. Will check this when it is darker. Overall, pretty happy with the progress. Pushing to get this looking nice for the Branson show. Alternator and last of the body parts will be coming in this week. Also put in oil and water. Engine turned over nicely and we have spark. After I double check all the brake line connections and put in fluid, we will put some fuel in her and see how she does. We are getting pretty close. Latest pics are below.
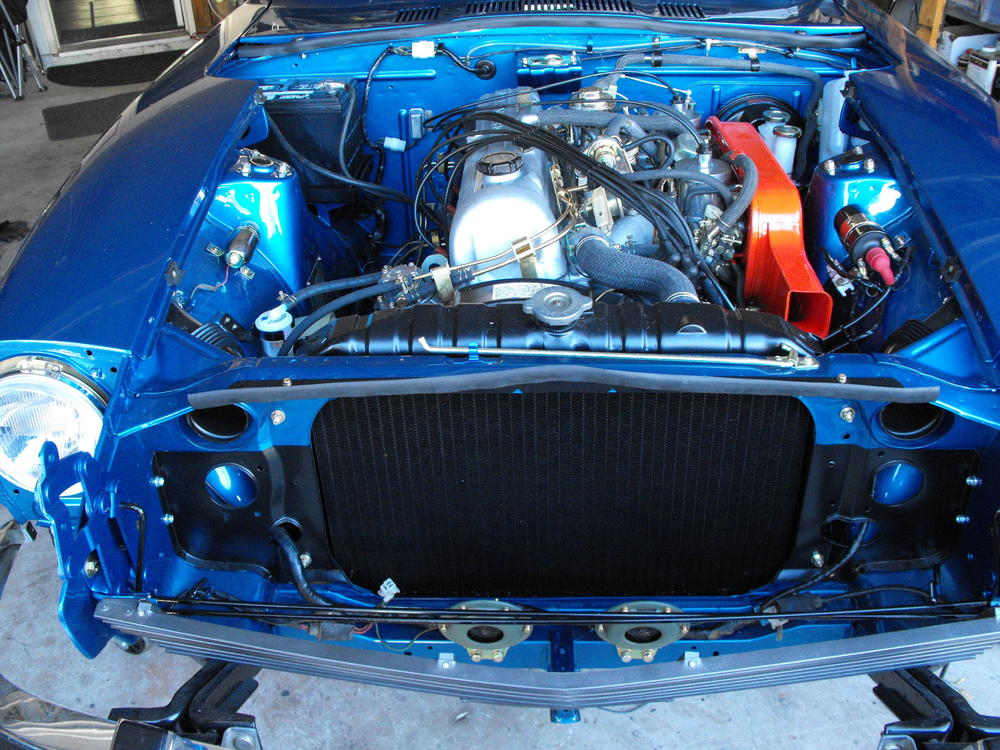

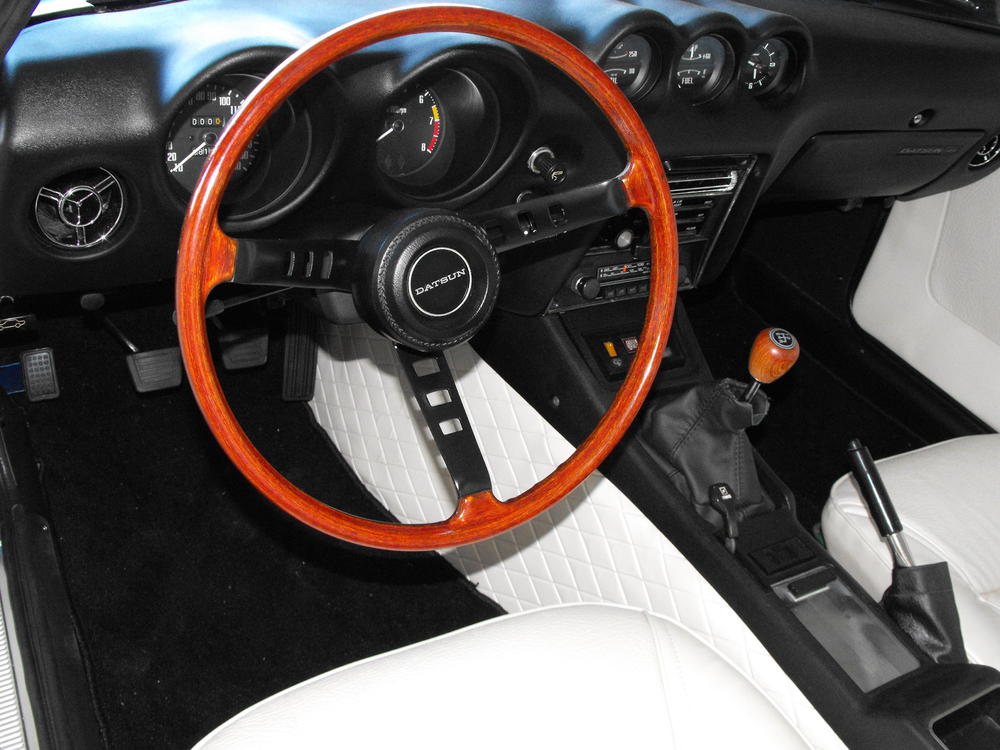


 Got the air cleaner back from Powder coating. Installed loosely just to see how everything looks. Meant to comment on the wires above. I thought that I would need to make a new radio and antenna harness after pulling these two cables off of the dash harness. I lucked out however, as these were the cables that were the original radio leads. Somewhere out there is an original radio with the cables cut off. The new OEM radio just plugged right in making things easy.
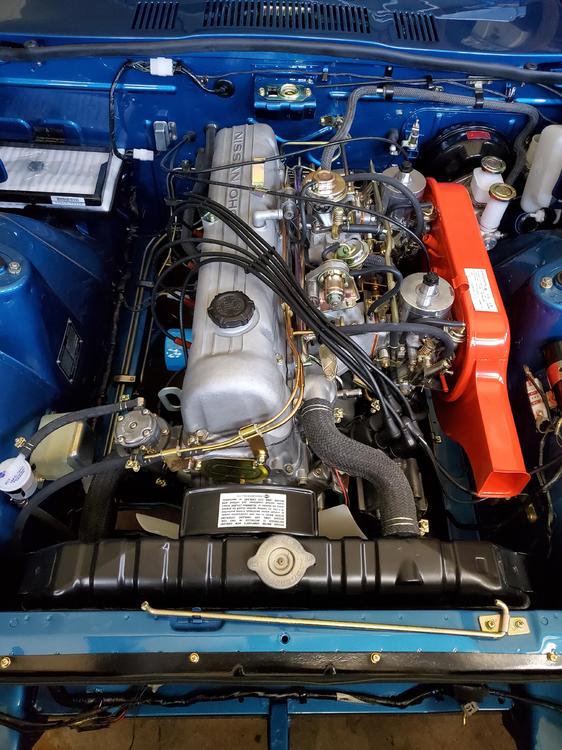
 Interesting...My original comment took about 2 hours before it was posted. The sanitized one posted immediately. Guess i need to be nicer...now I have a double post....oh well.
They took my sanitized version....glad they did.
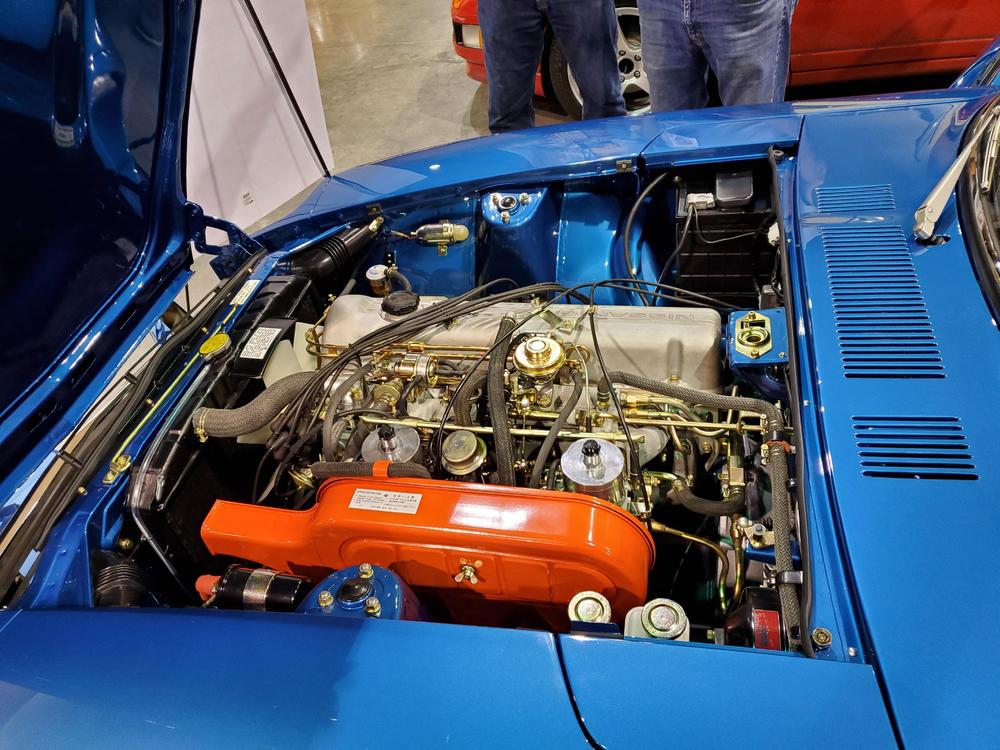
You know I had to chime in here. Still amazes me that people are promoting the technically inferior SUs over the Flat tops, which are stock for this vehicle. I think most do not realize the advances that were incorporated into the flat tops that are not on the SUs. The flat tops feature 1) factory aligned needle and seats 2) a visible glass float bowl level 3) Anti-stall fuel rich mechanism 4) multi-point adjustable fuel mixture screws 5) fuel pump accelerator. I would bet that most who are promoting the SU’s are unfamiliar with these features and have no clue what I am talking about. Personally, this car is about as good as it gets…I even love those hubcaps! OK, no more carb comments from me…I will go back into hiding. I tried to post this comment on the auction site, but looks like they will not allow it....perhaps it is too inflammatory. Maybe I should try to sanitize it and then re-submit.
Interesting...My original comment took about 2 hours before it was posted. The sanitized one posted immediately. Guess i need to be nicer...now I have a double post....oh well.
They took my sanitized version....glad they did.
You know I had to chime in here. Still amazes me that people are promoting the technically inferior SUs over the Flat tops, which are stock for this vehicle. I think most do not realize the advances that were incorporated into the flat tops that are not on the SUs. The flat tops feature 1) factory aligned needle and seats 2) a visible glass float bowl level 3) Anti-stall fuel rich mechanism 4) multi-point adjustable fuel mixture screws 5) fuel pump accelerator. I would bet that most who are promoting the SU’s are unfamiliar with these features and have no clue what I am talking about. Personally, this car is about as good as it gets…I even love those hubcaps! OK, no more carb comments from me…I will go back into hiding. I tried to post this comment on the auction site, but looks like they will not allow it....perhaps it is too inflammatory. Maybe I should try to sanitize it and then re-submit.


Important Information
By using this site, you agree to our Privacy Policy and Guidelines. We have placed cookies on your device to help make this website better. You can adjust your cookie settings, otherwise we'll assume you're okay to continue.