motorman7
 Subscriber
-
Joined
-
Last visited
Everything posted by motorman7
-
 @Captain Obvious thanks for the info on the alternator. I will check that out when I get to that point. Also, new fusible links and harness firewall grommet just arrived today from jdm-car-parts.com. I will attach them in the next week or two here.
 -
Yes, they are on order.😄
-
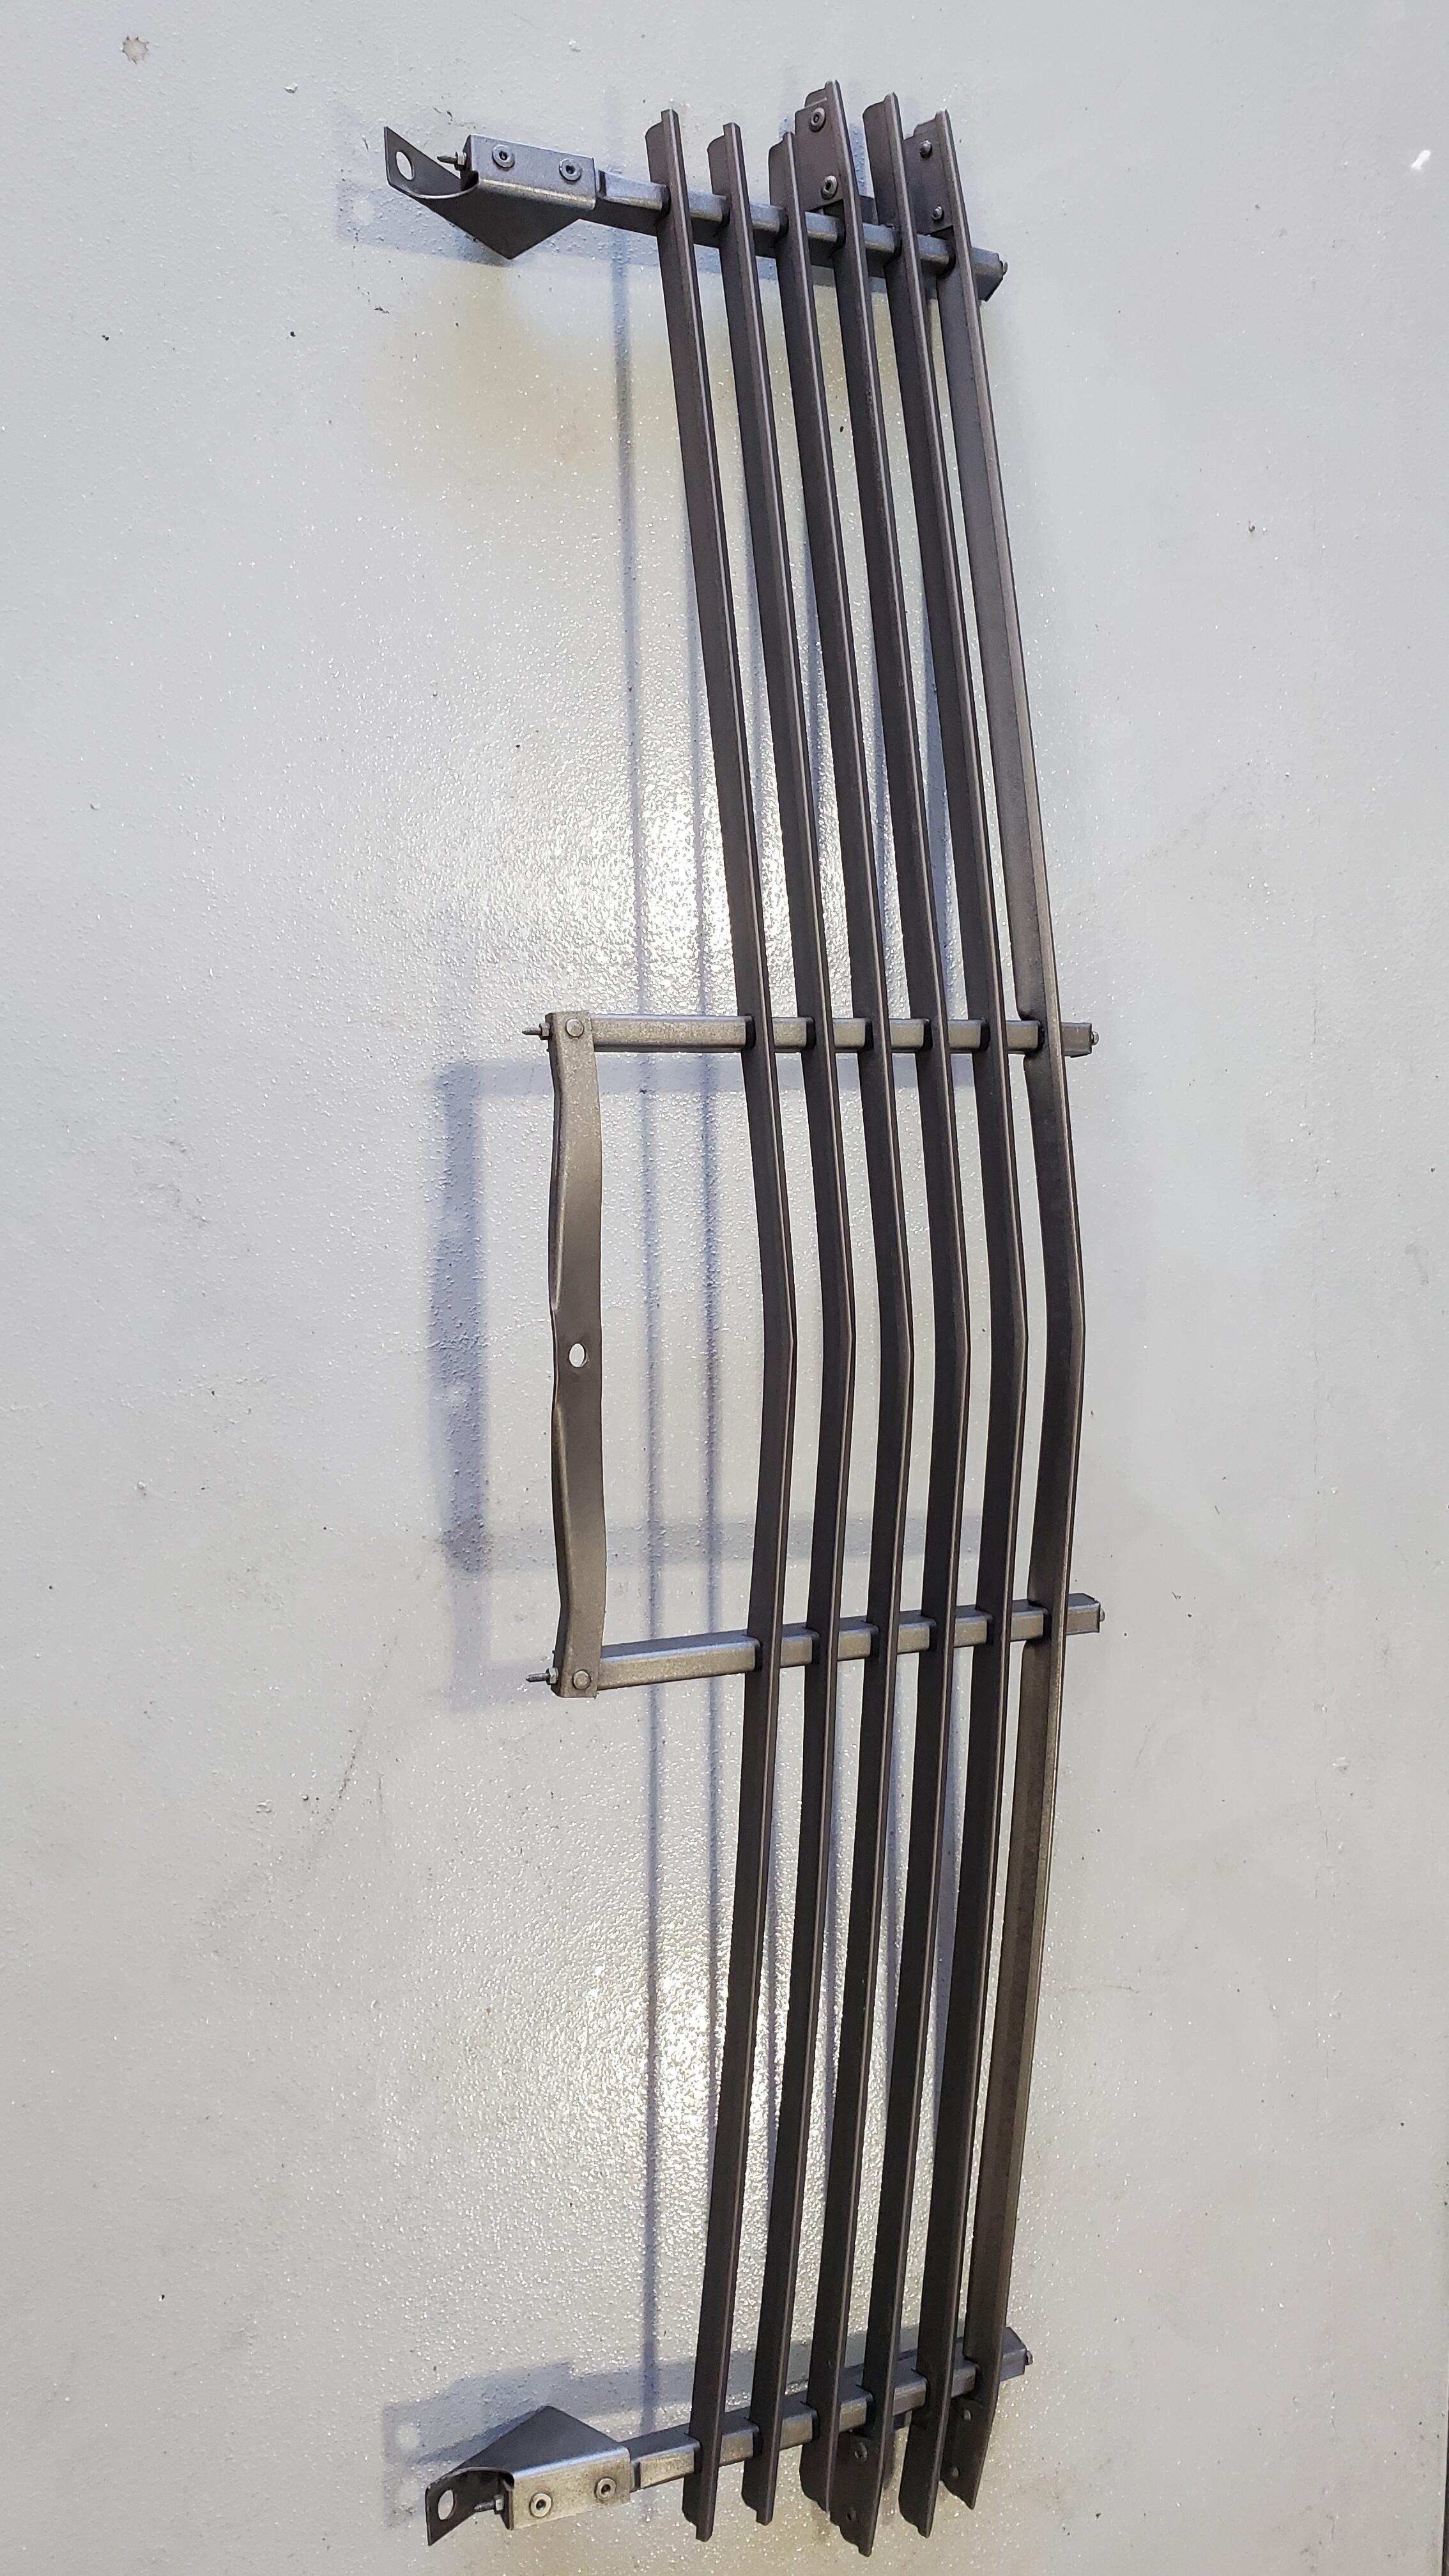
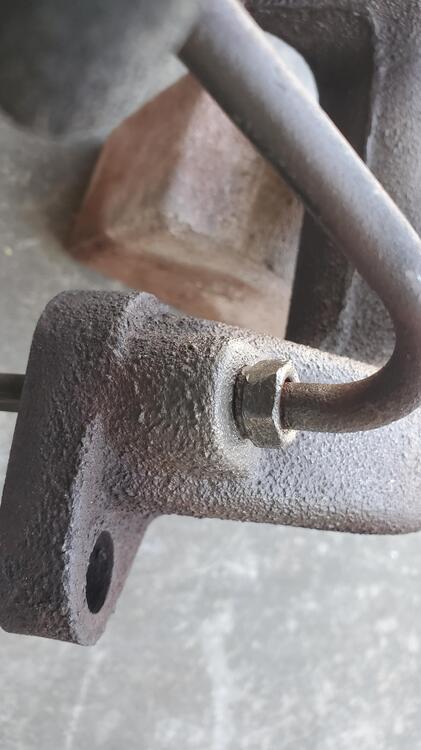
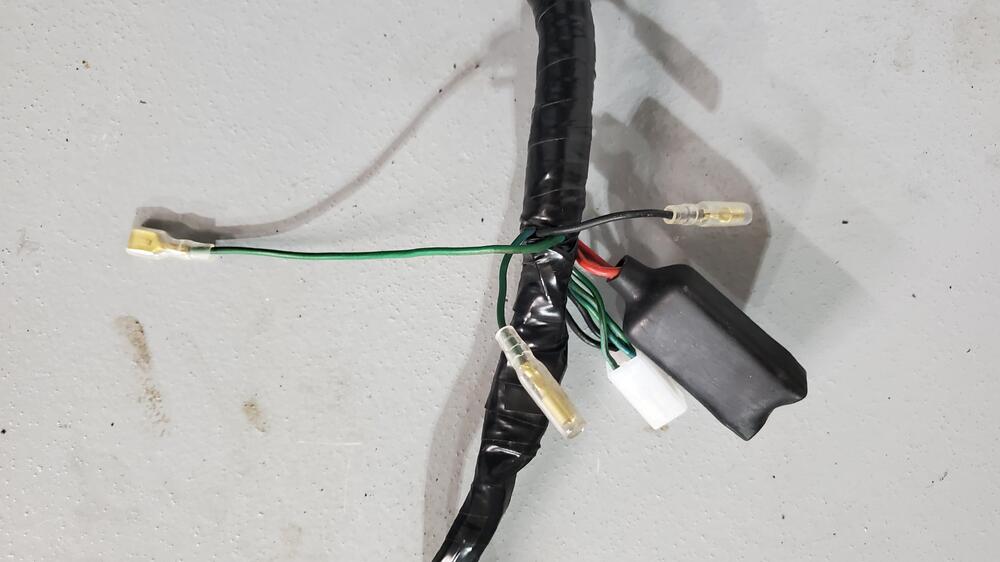
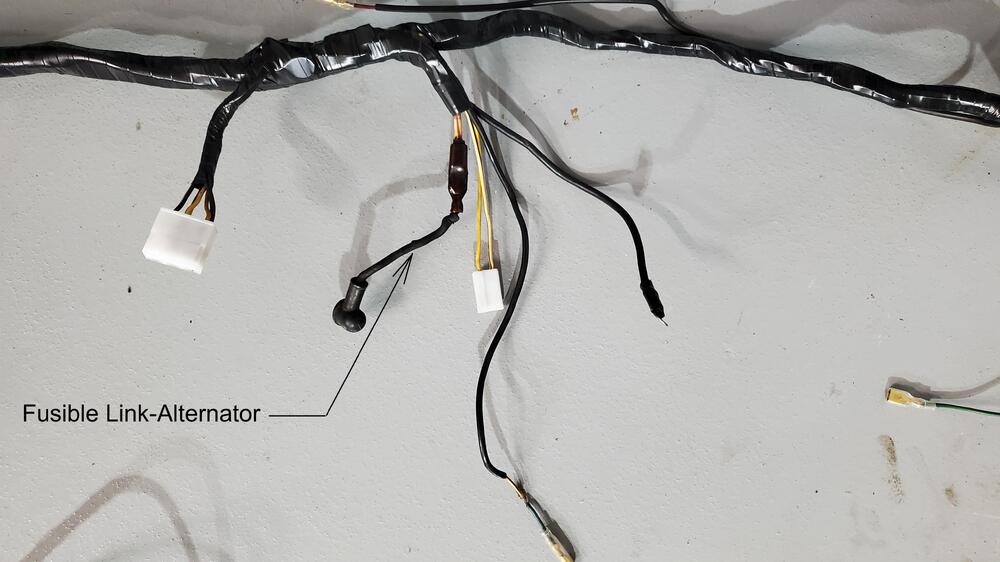
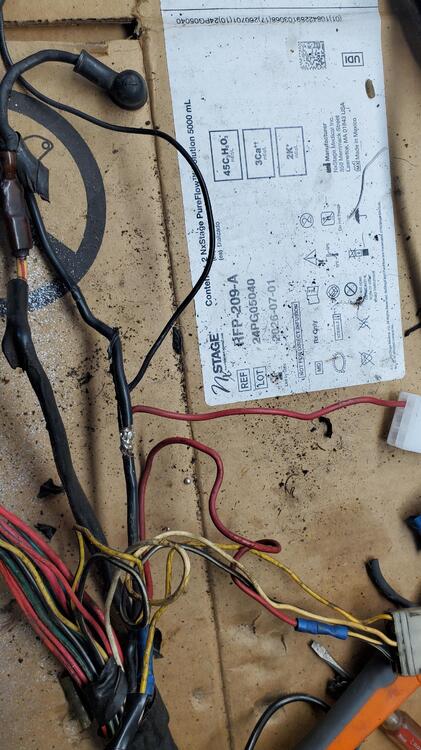
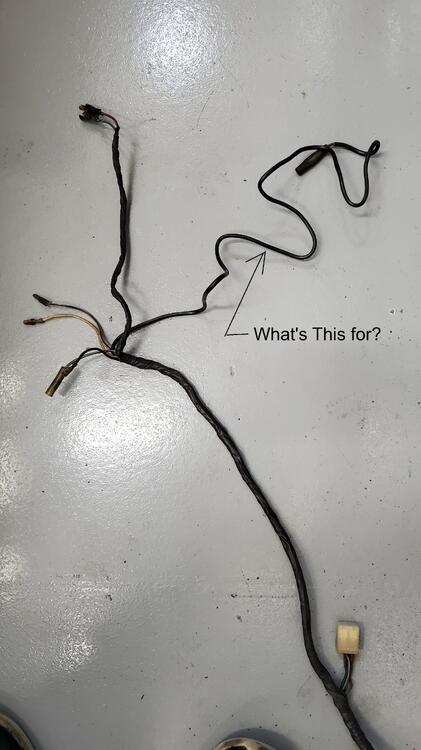
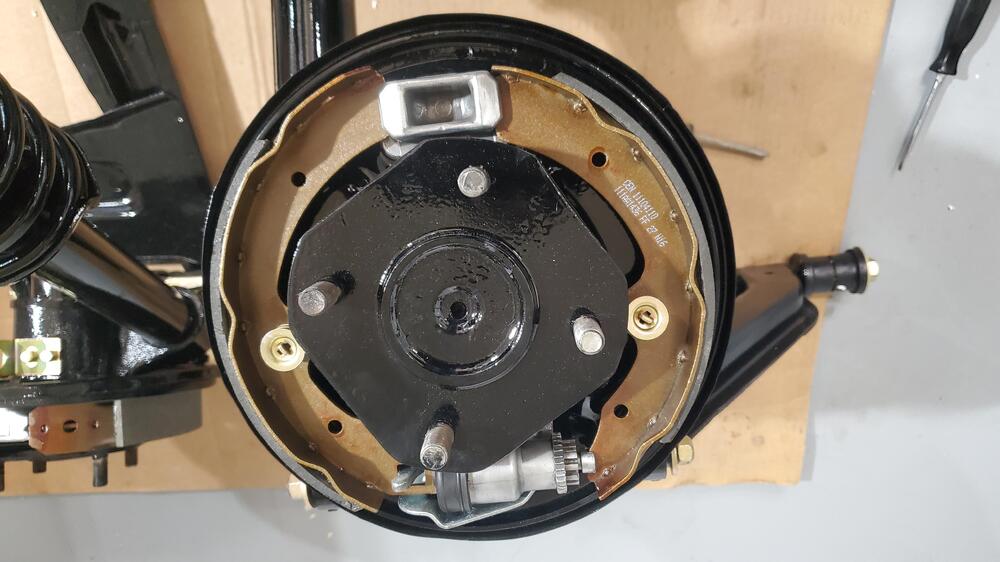
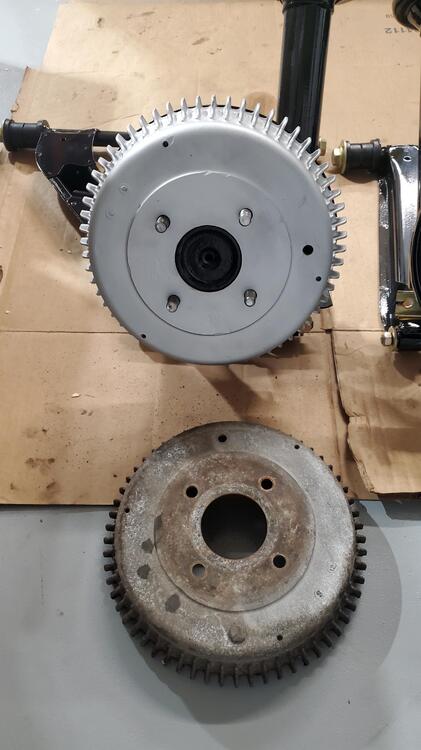
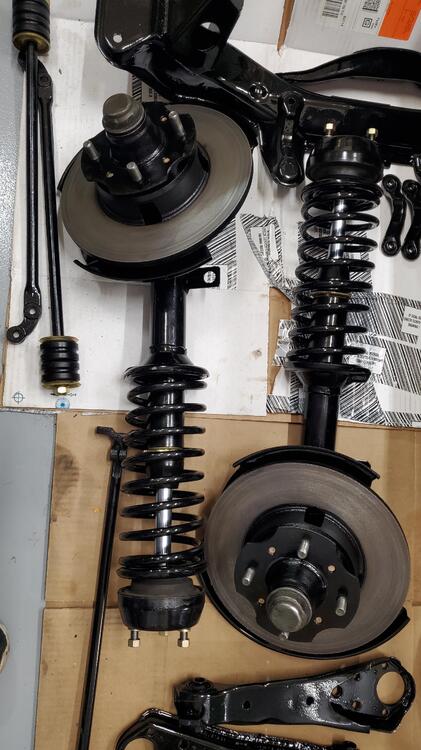
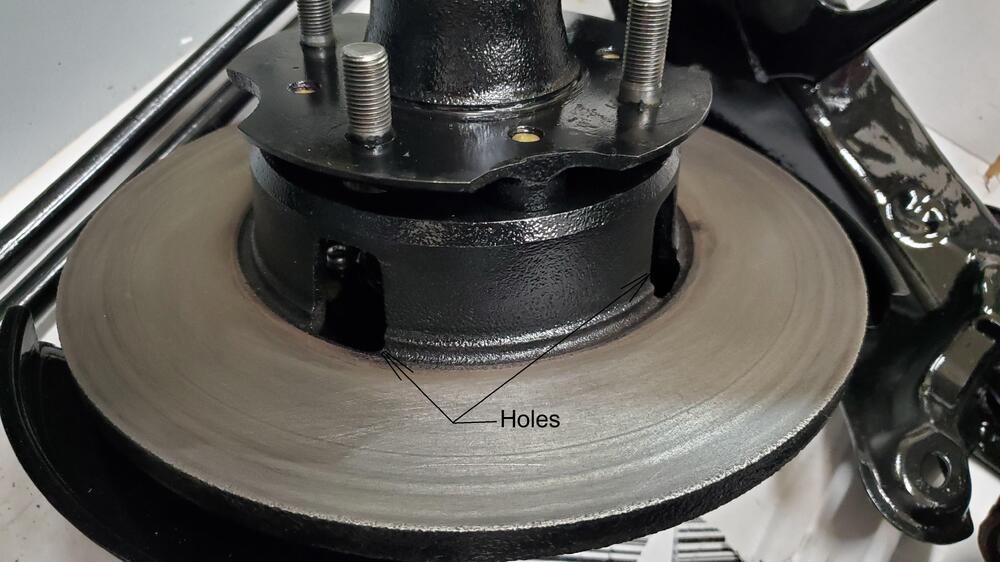
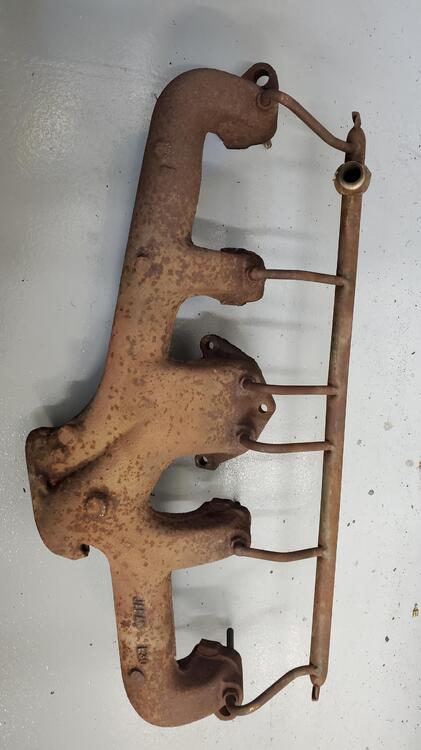
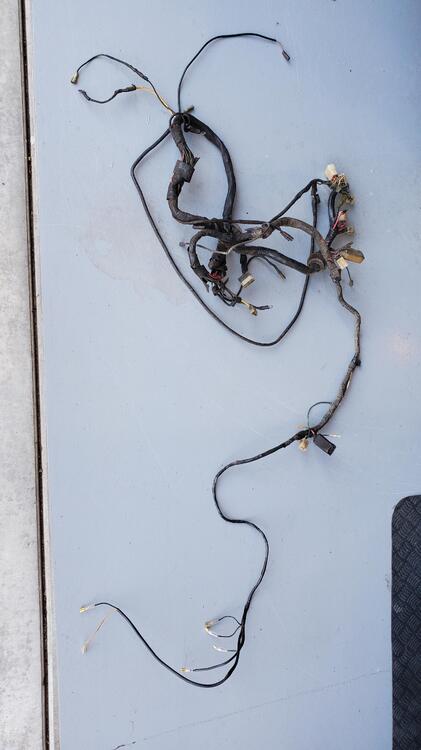
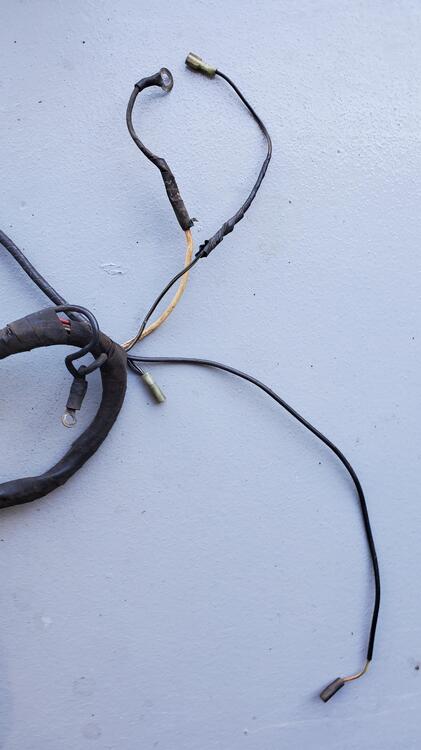
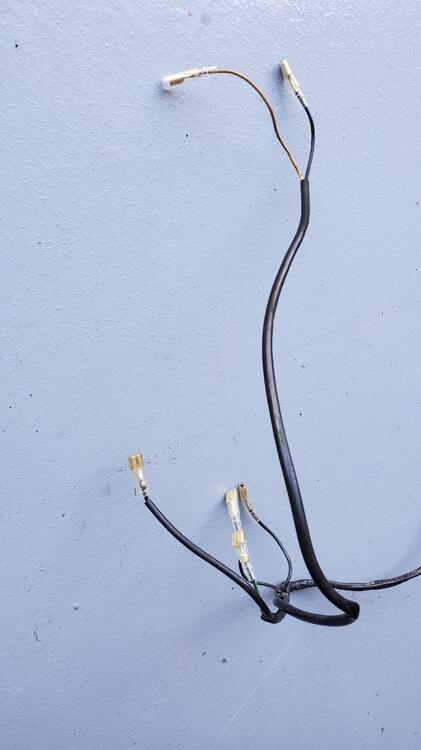
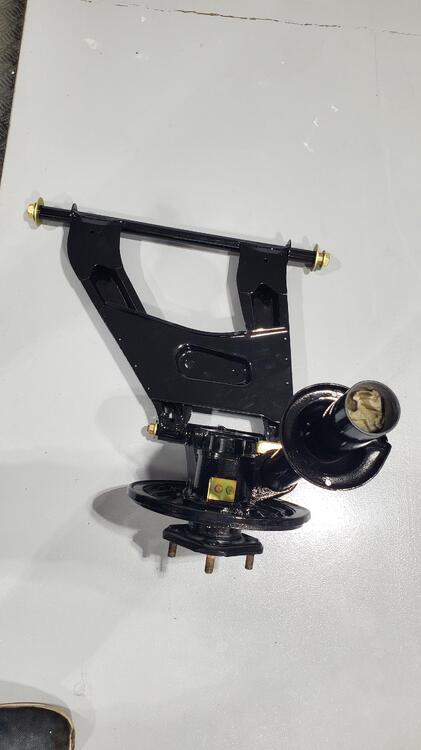
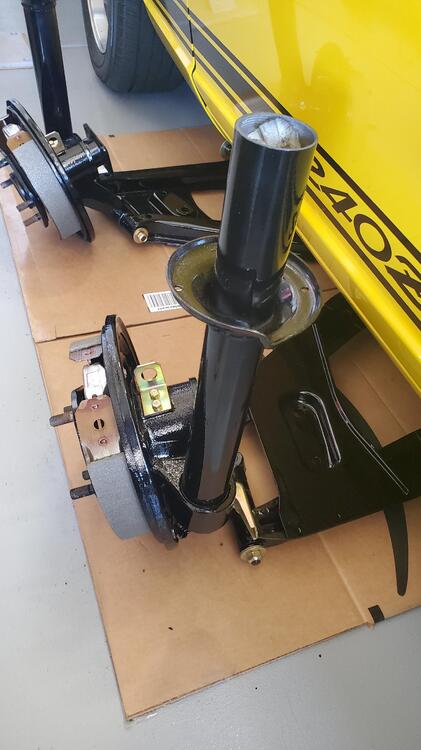
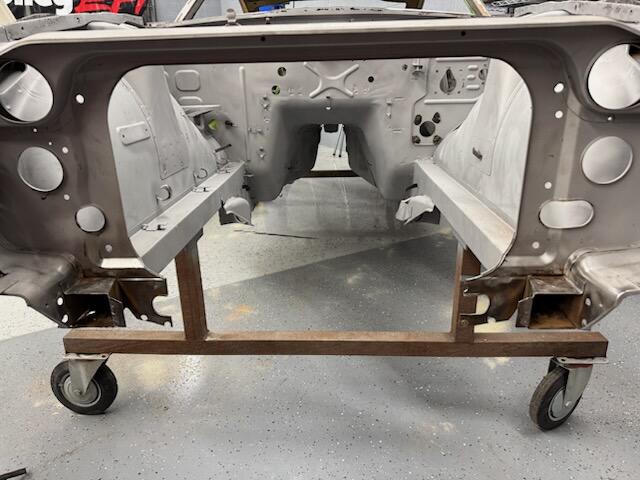
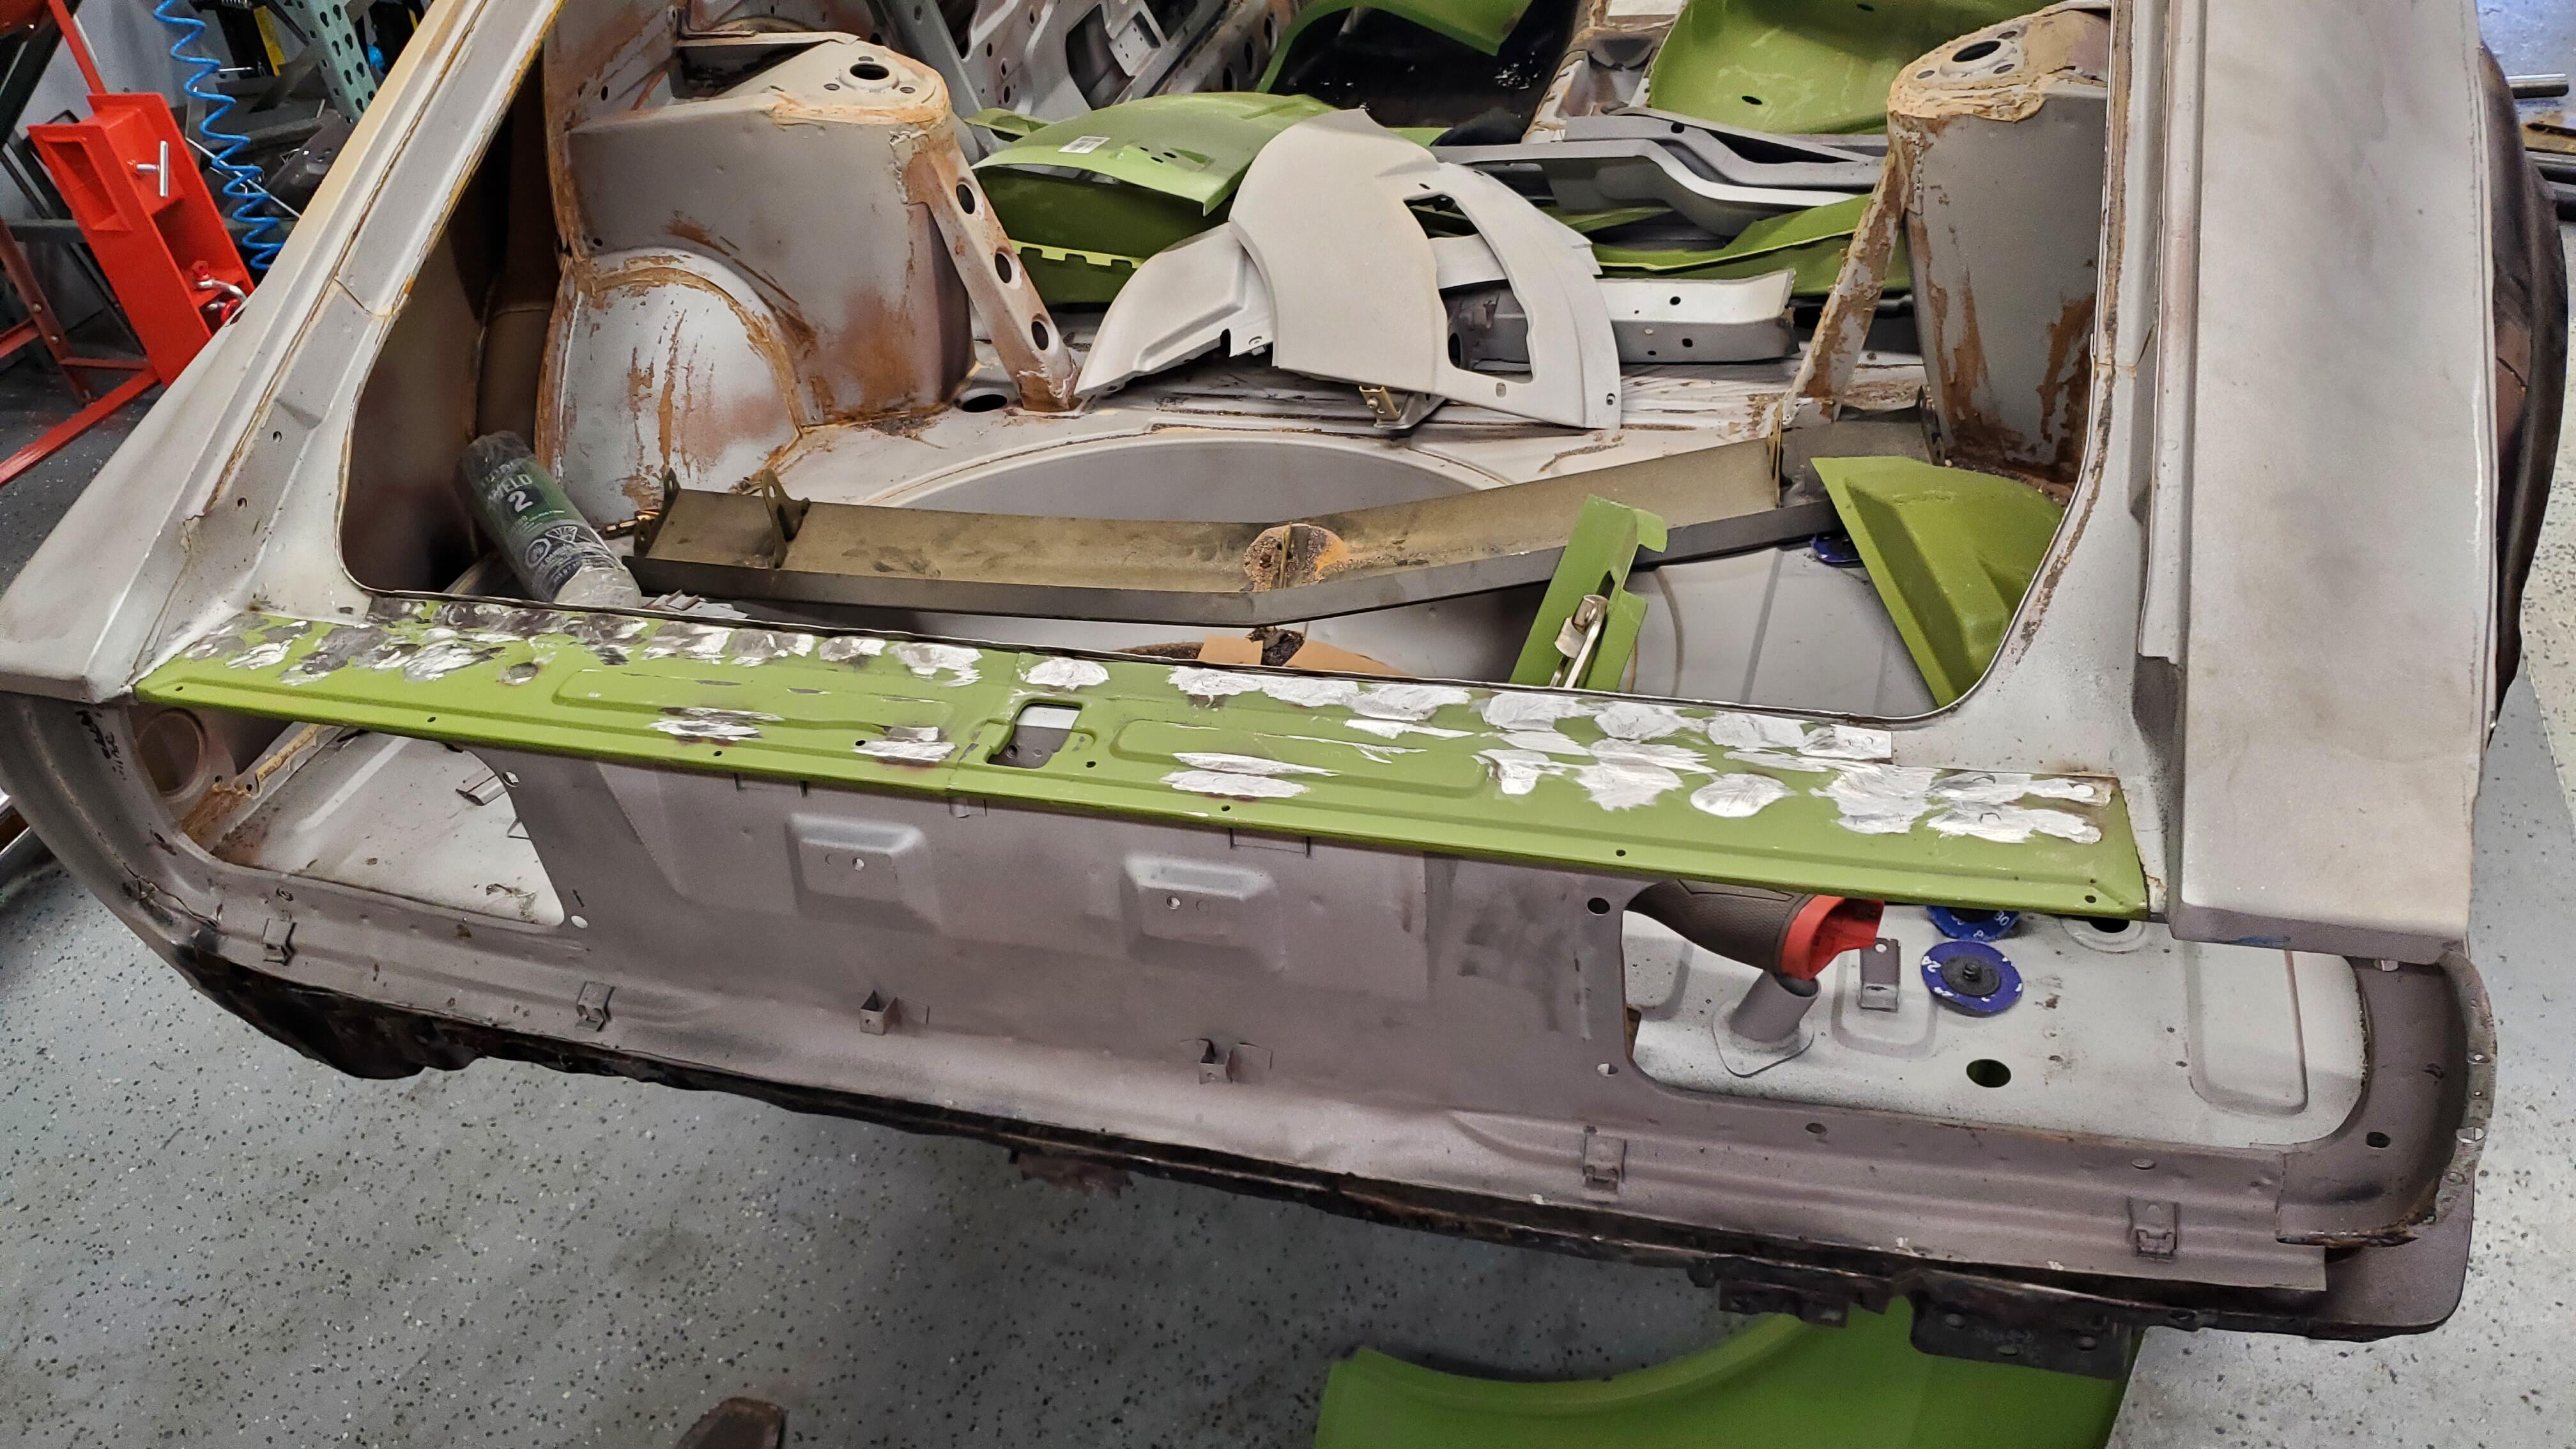
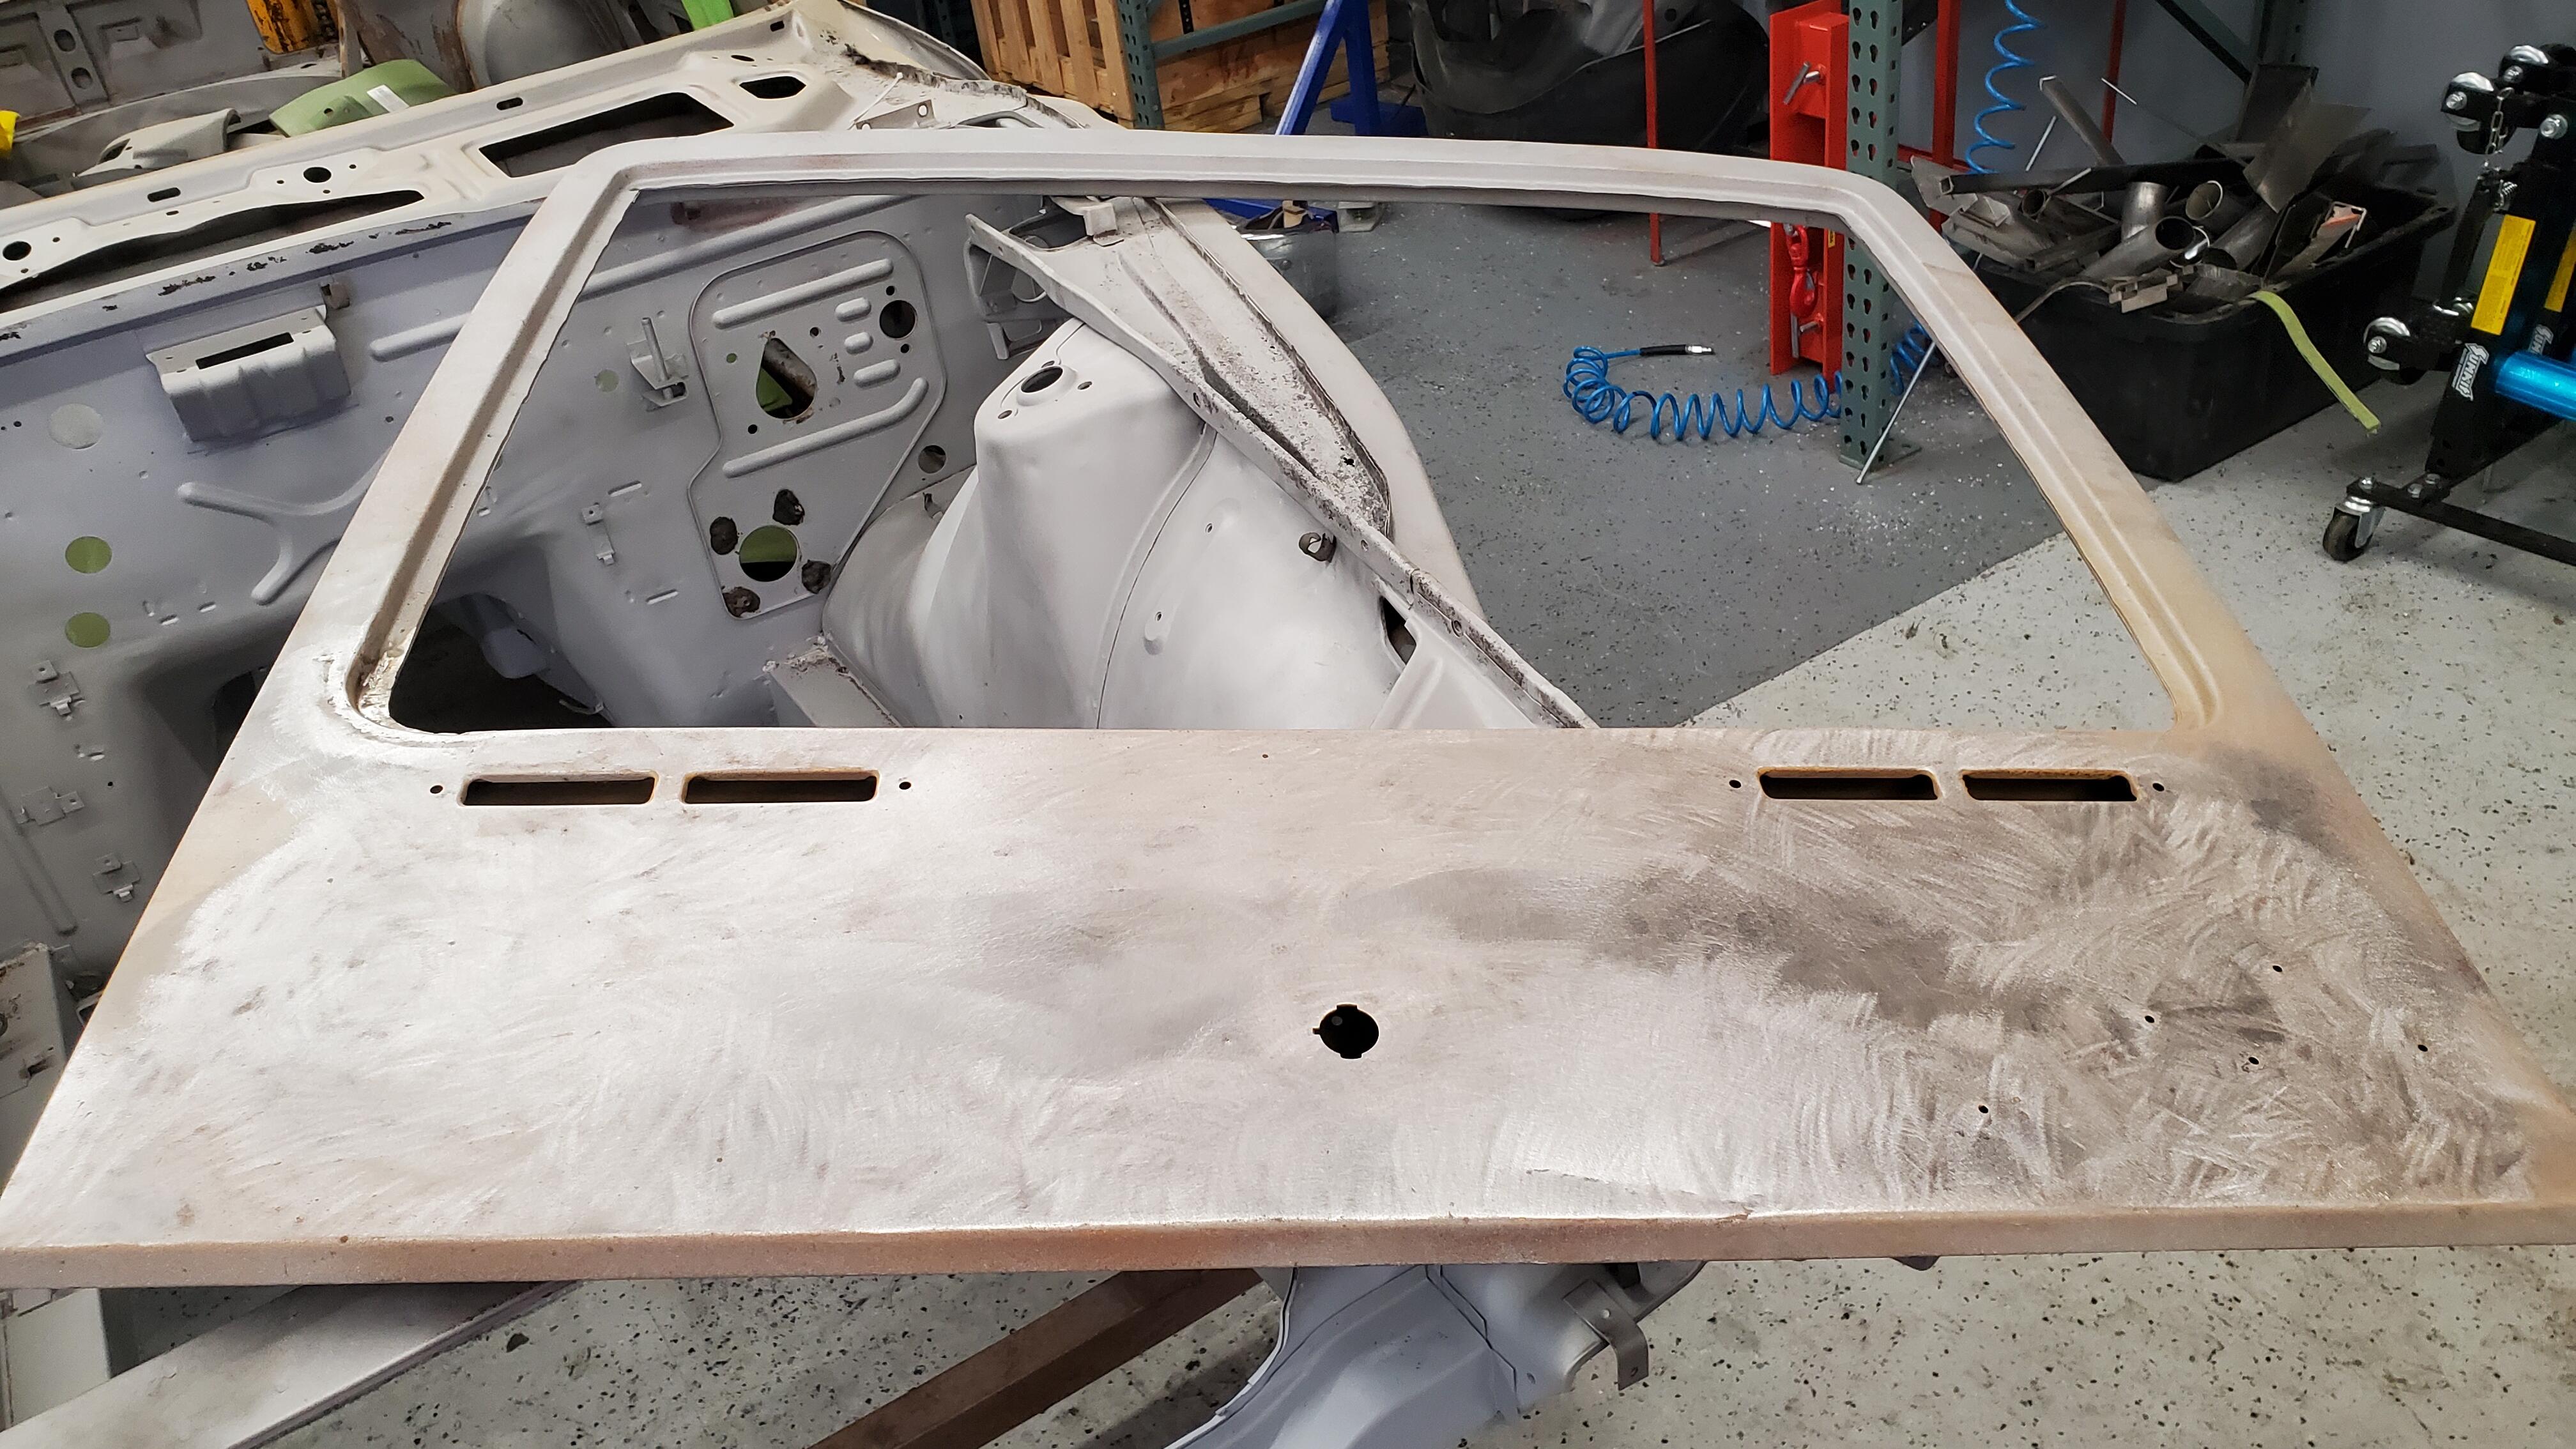
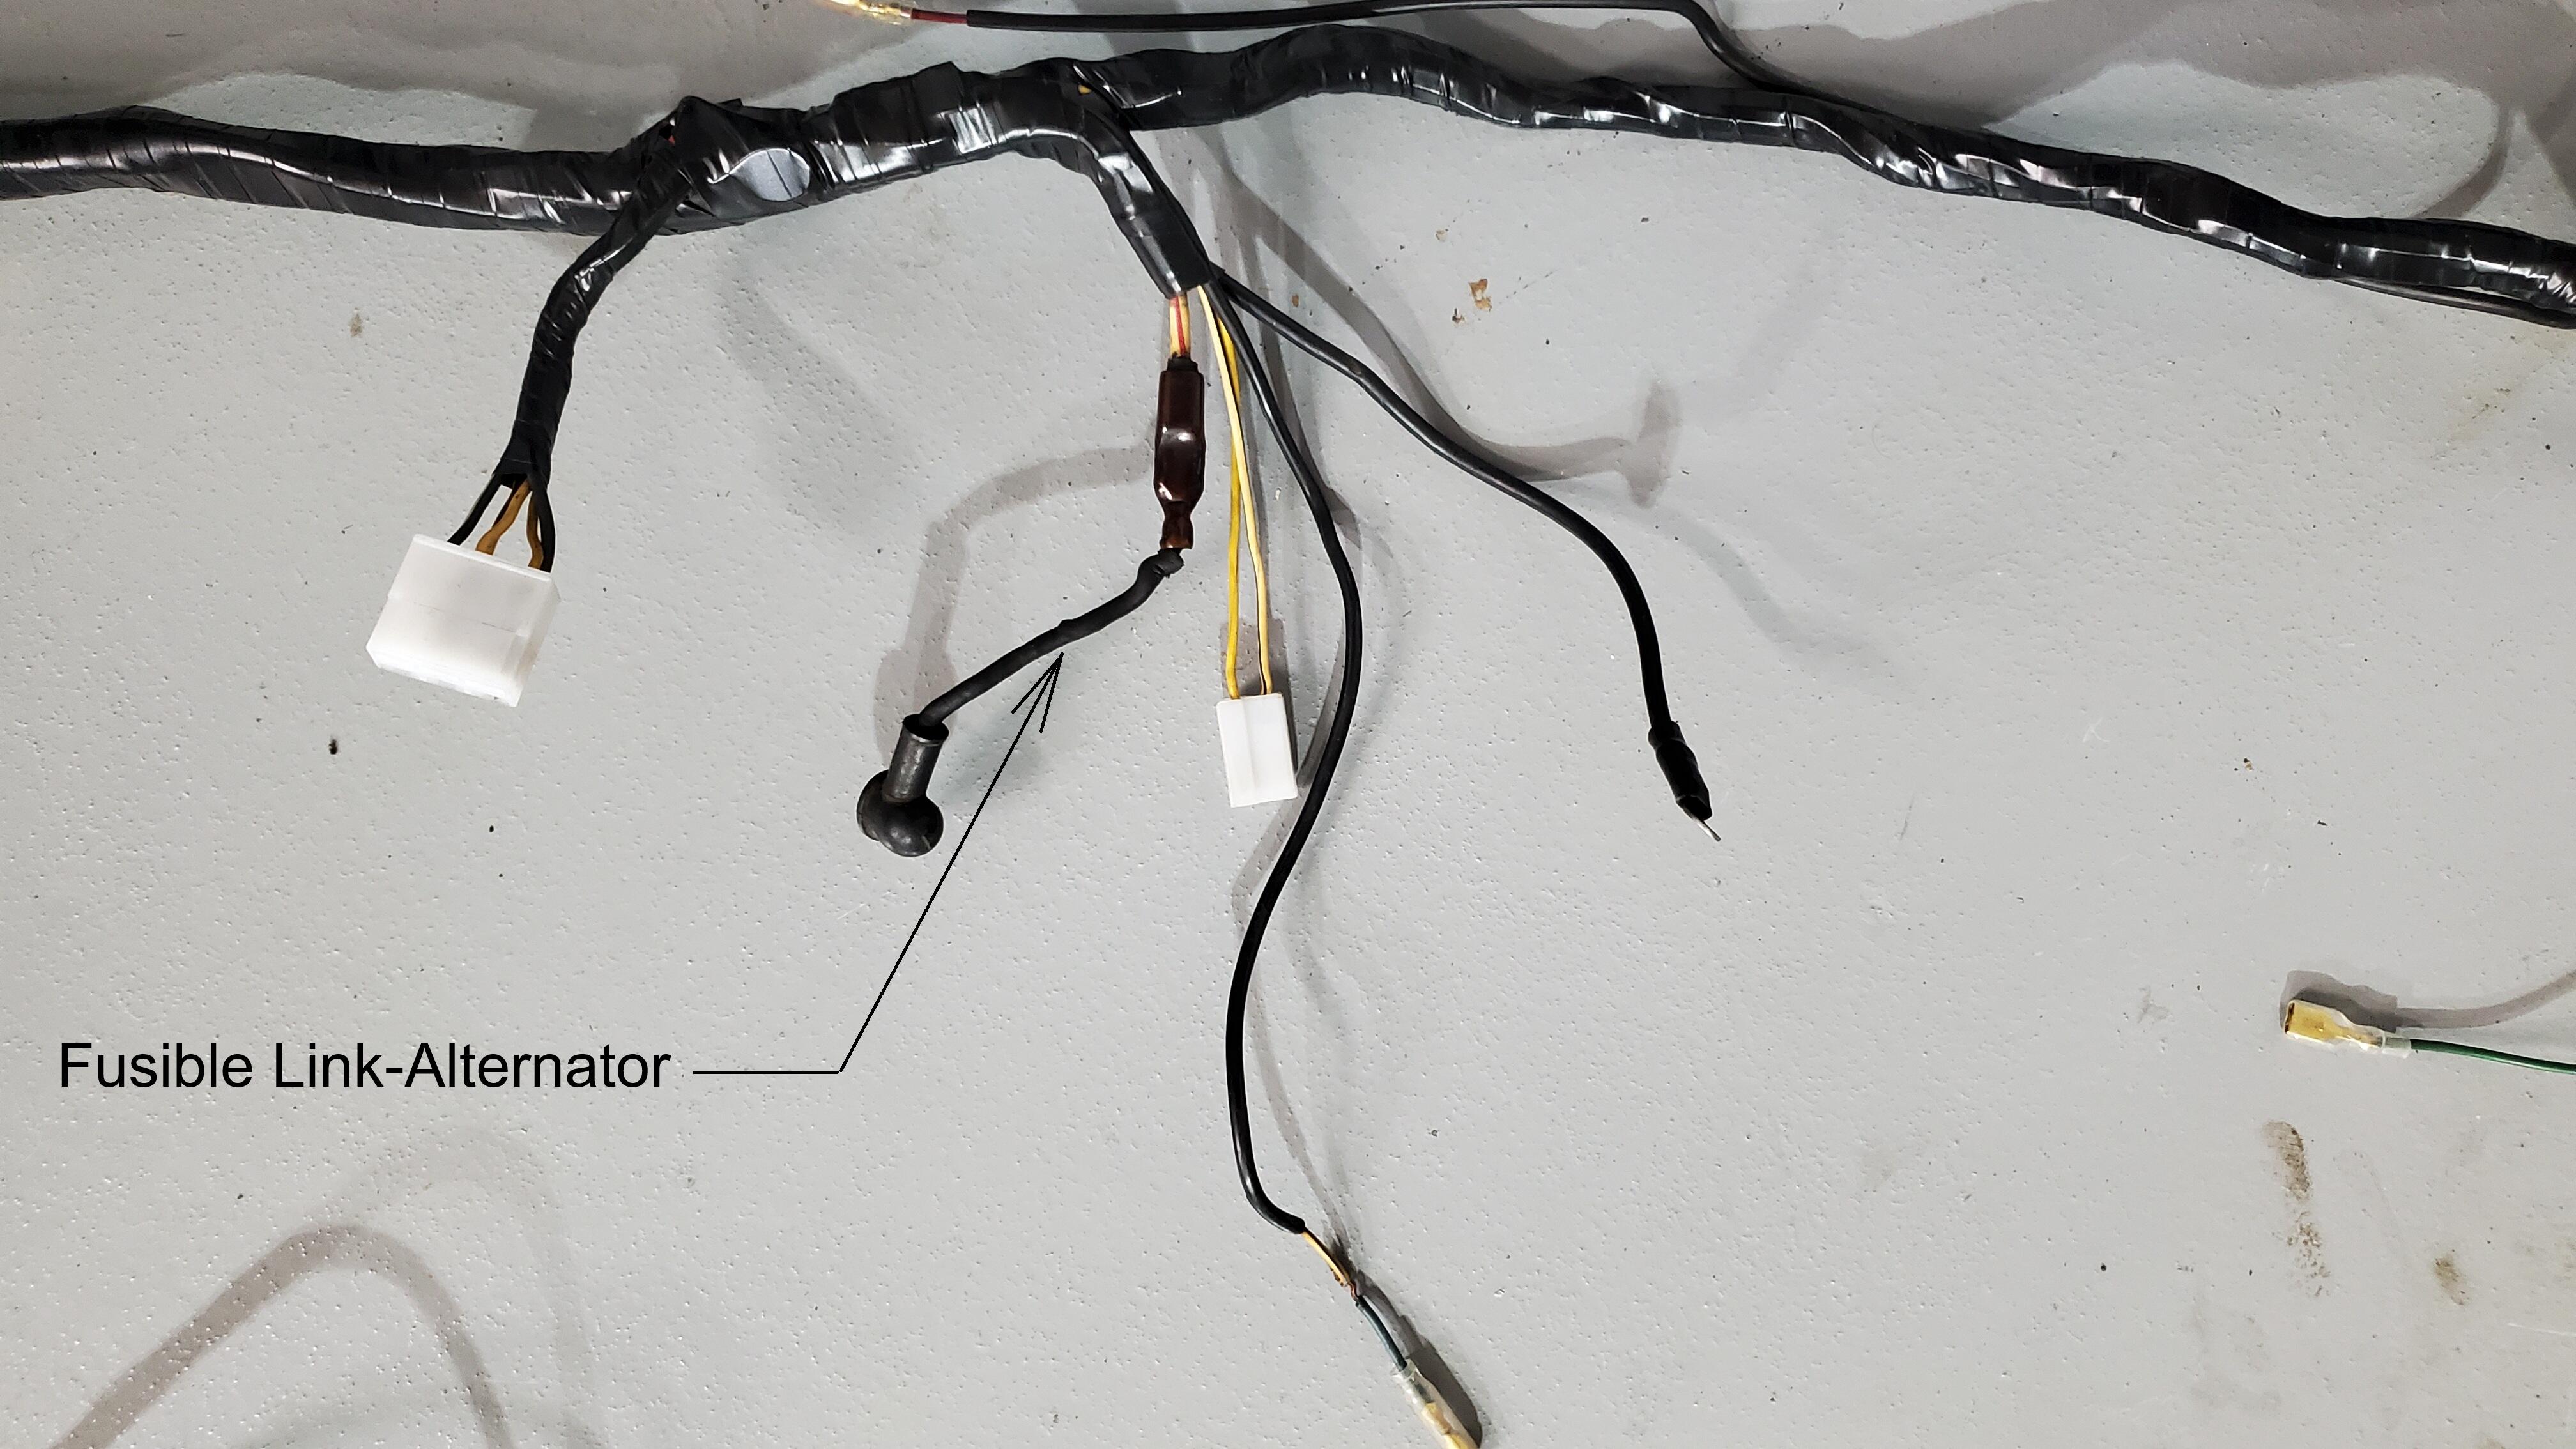
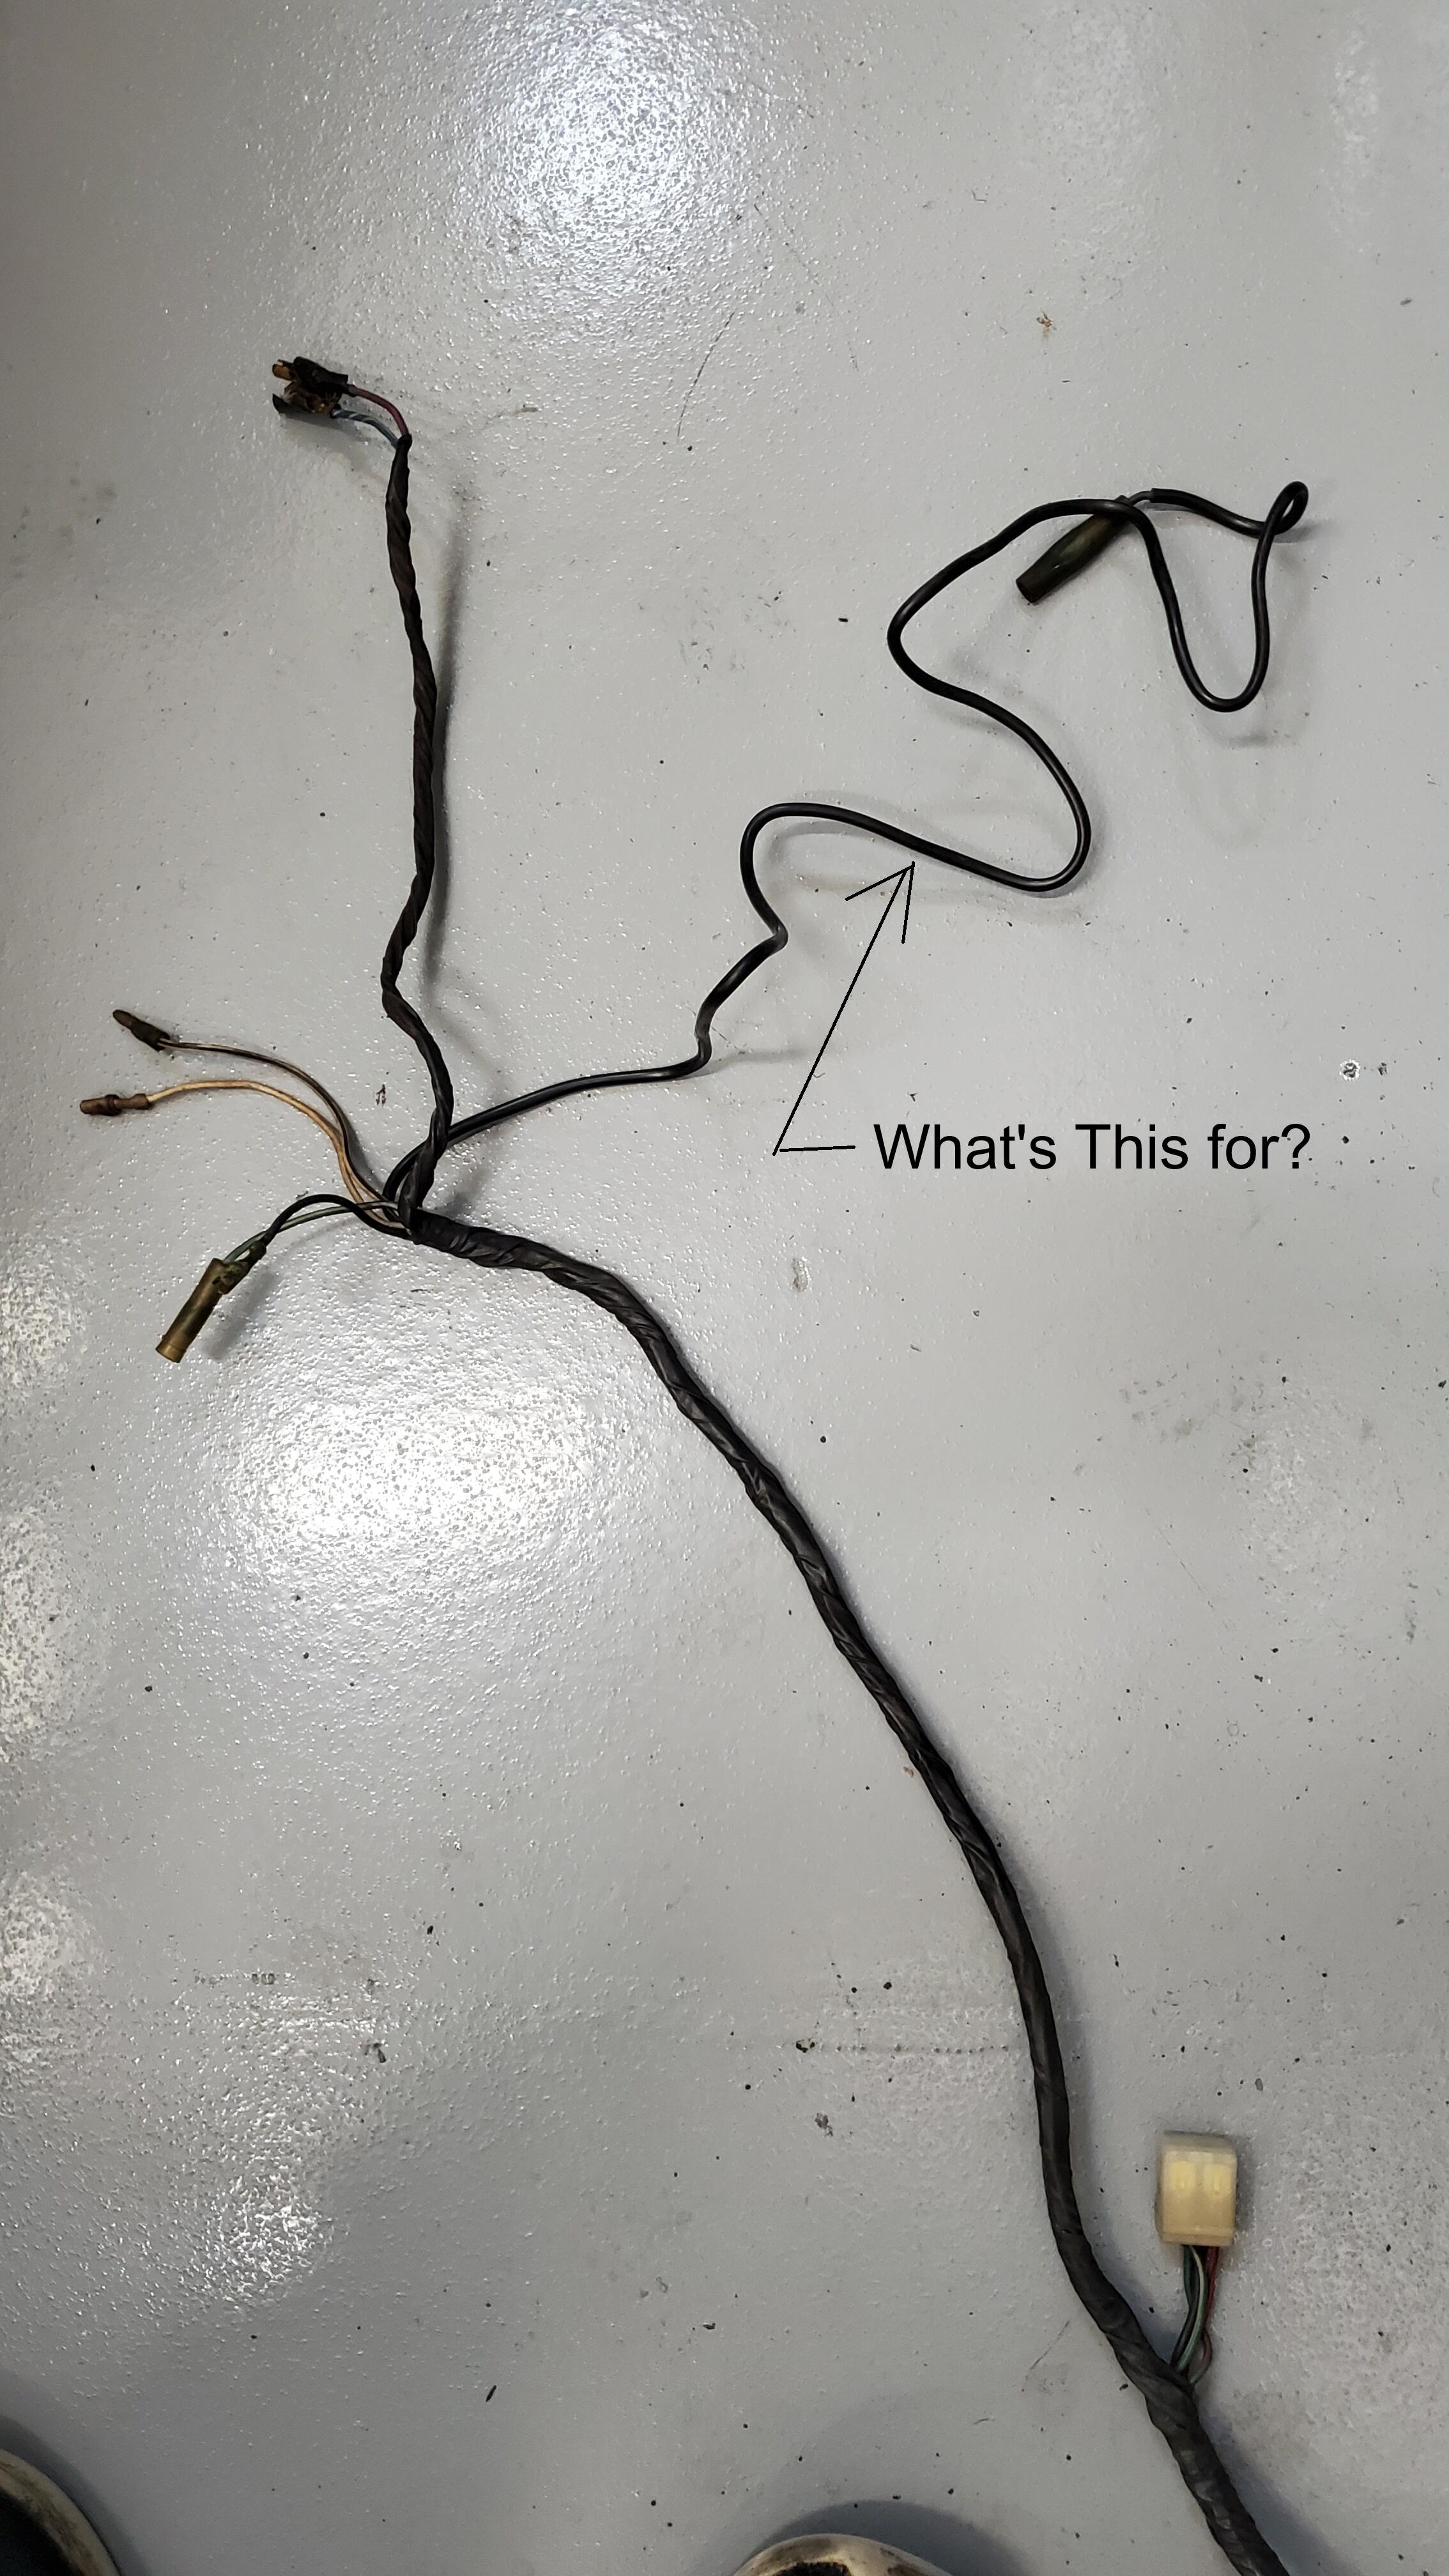
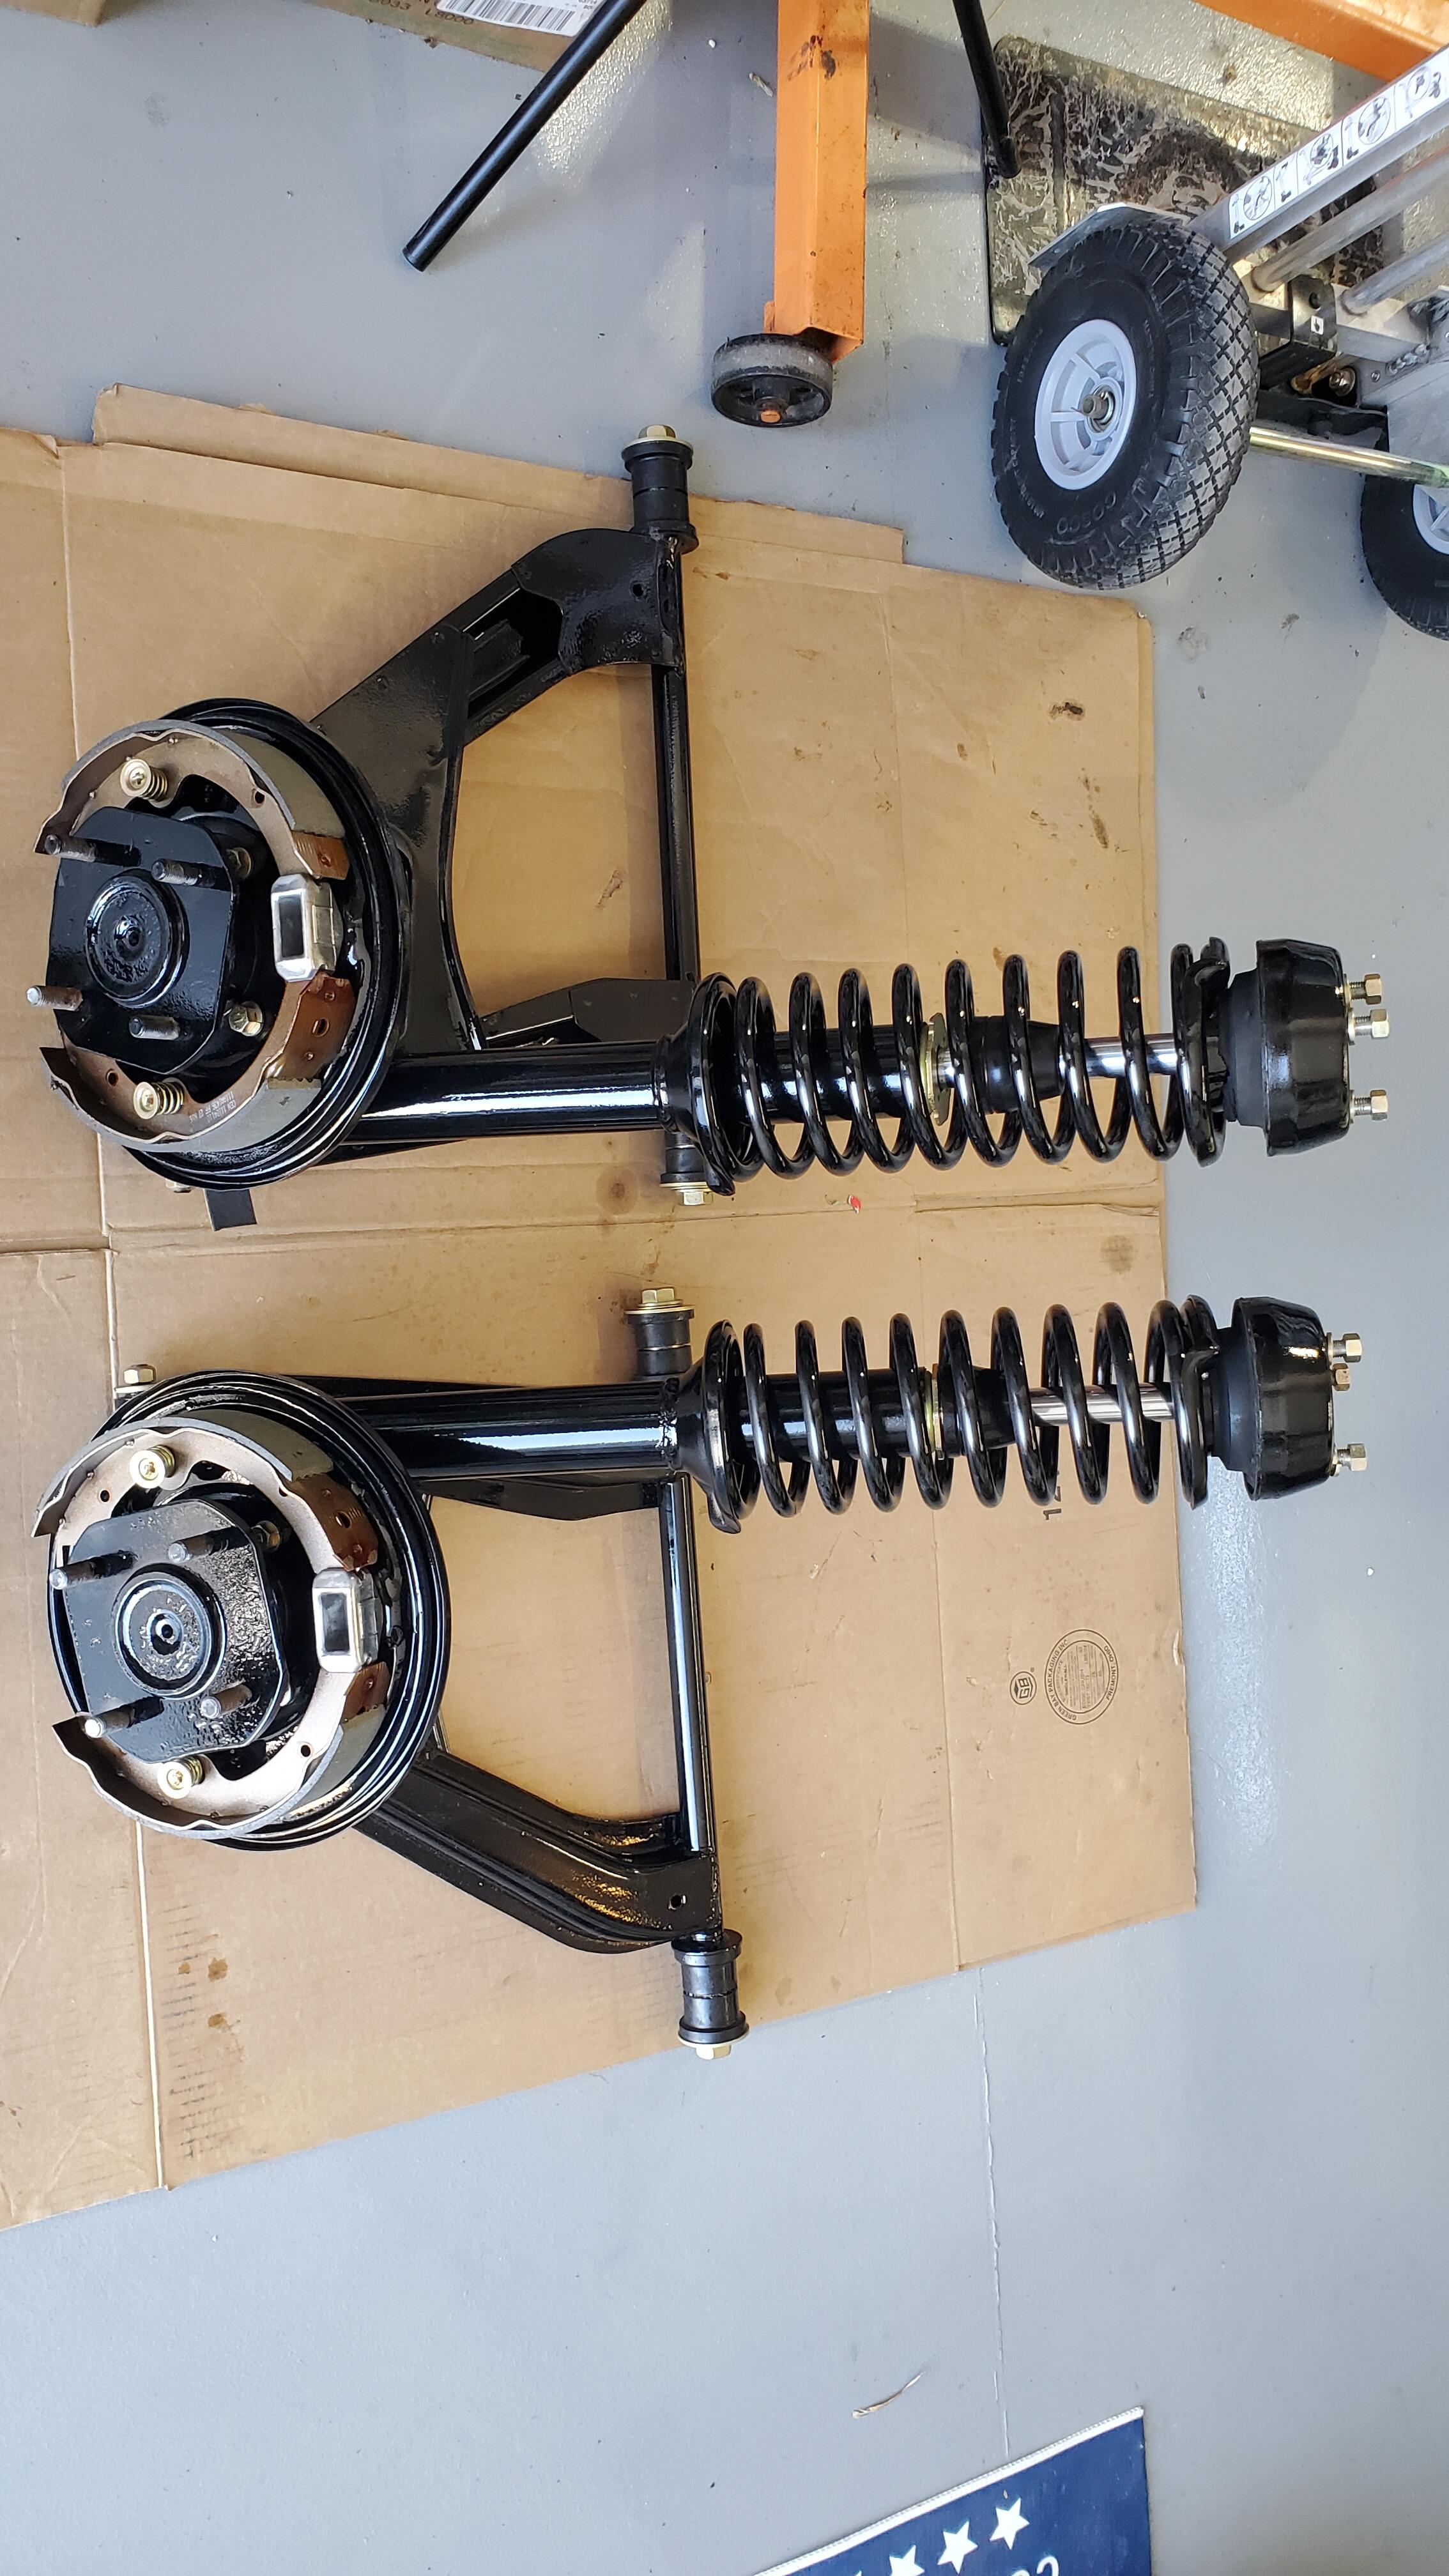
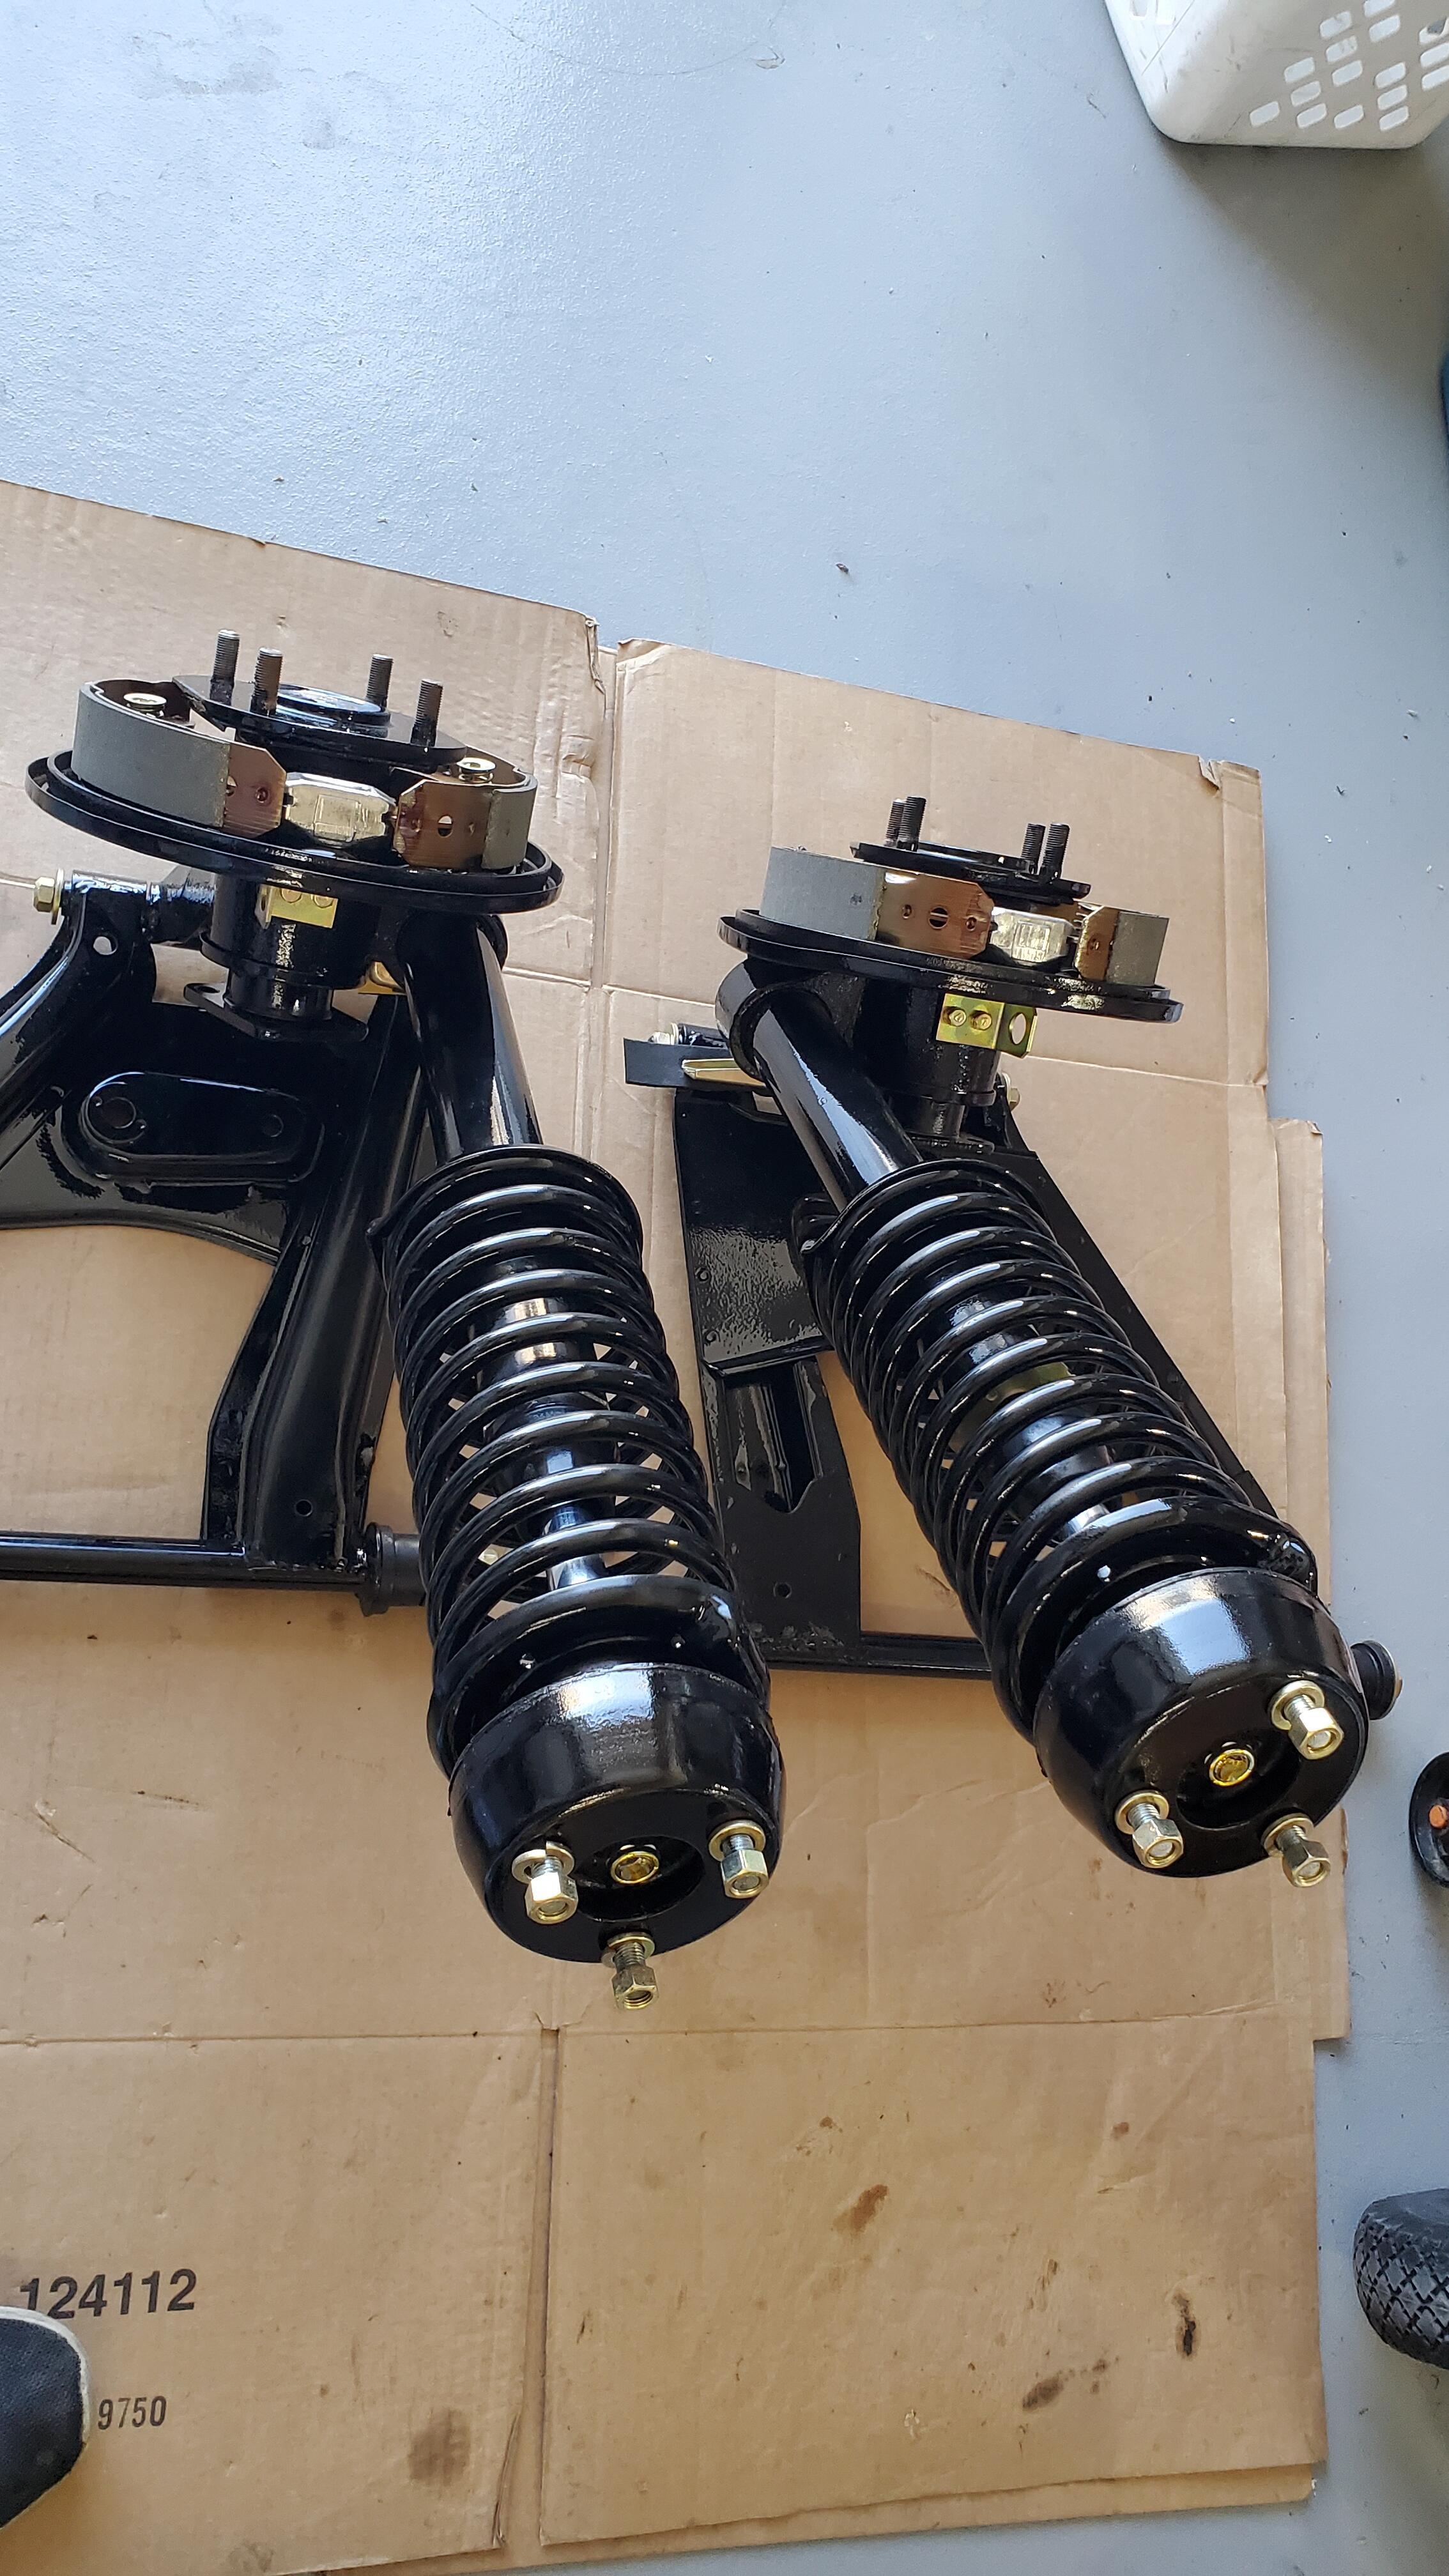
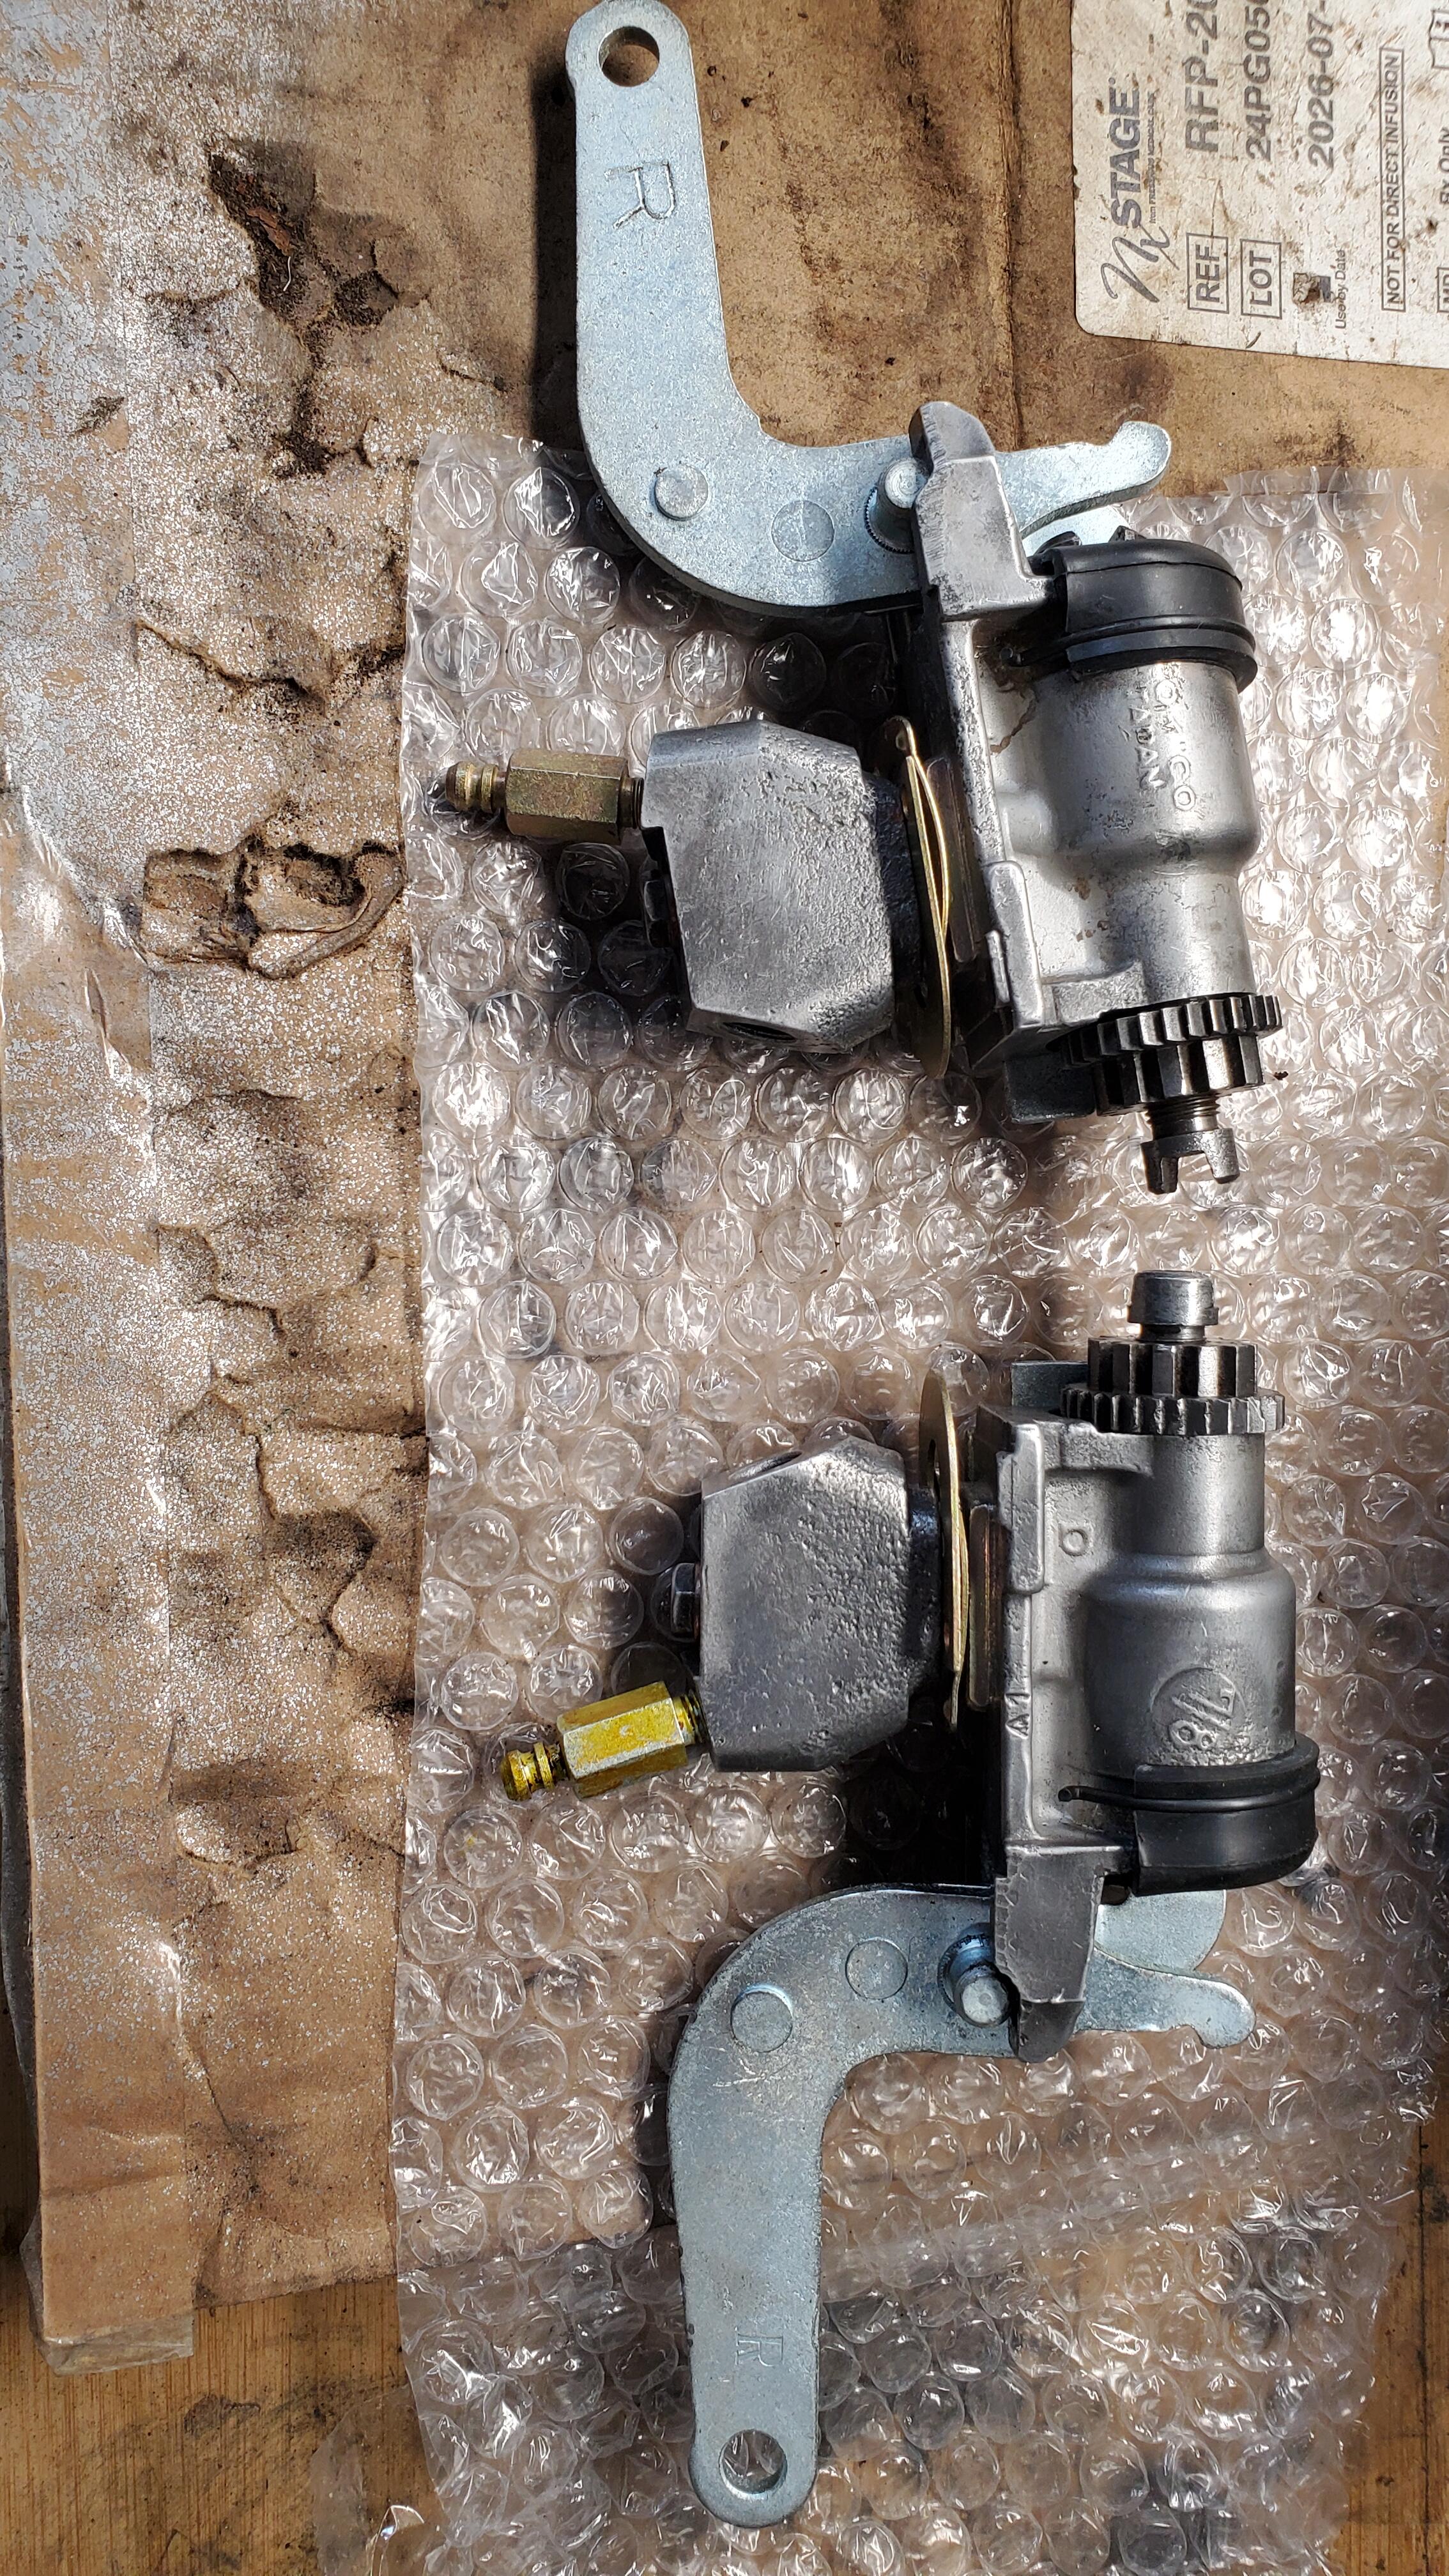
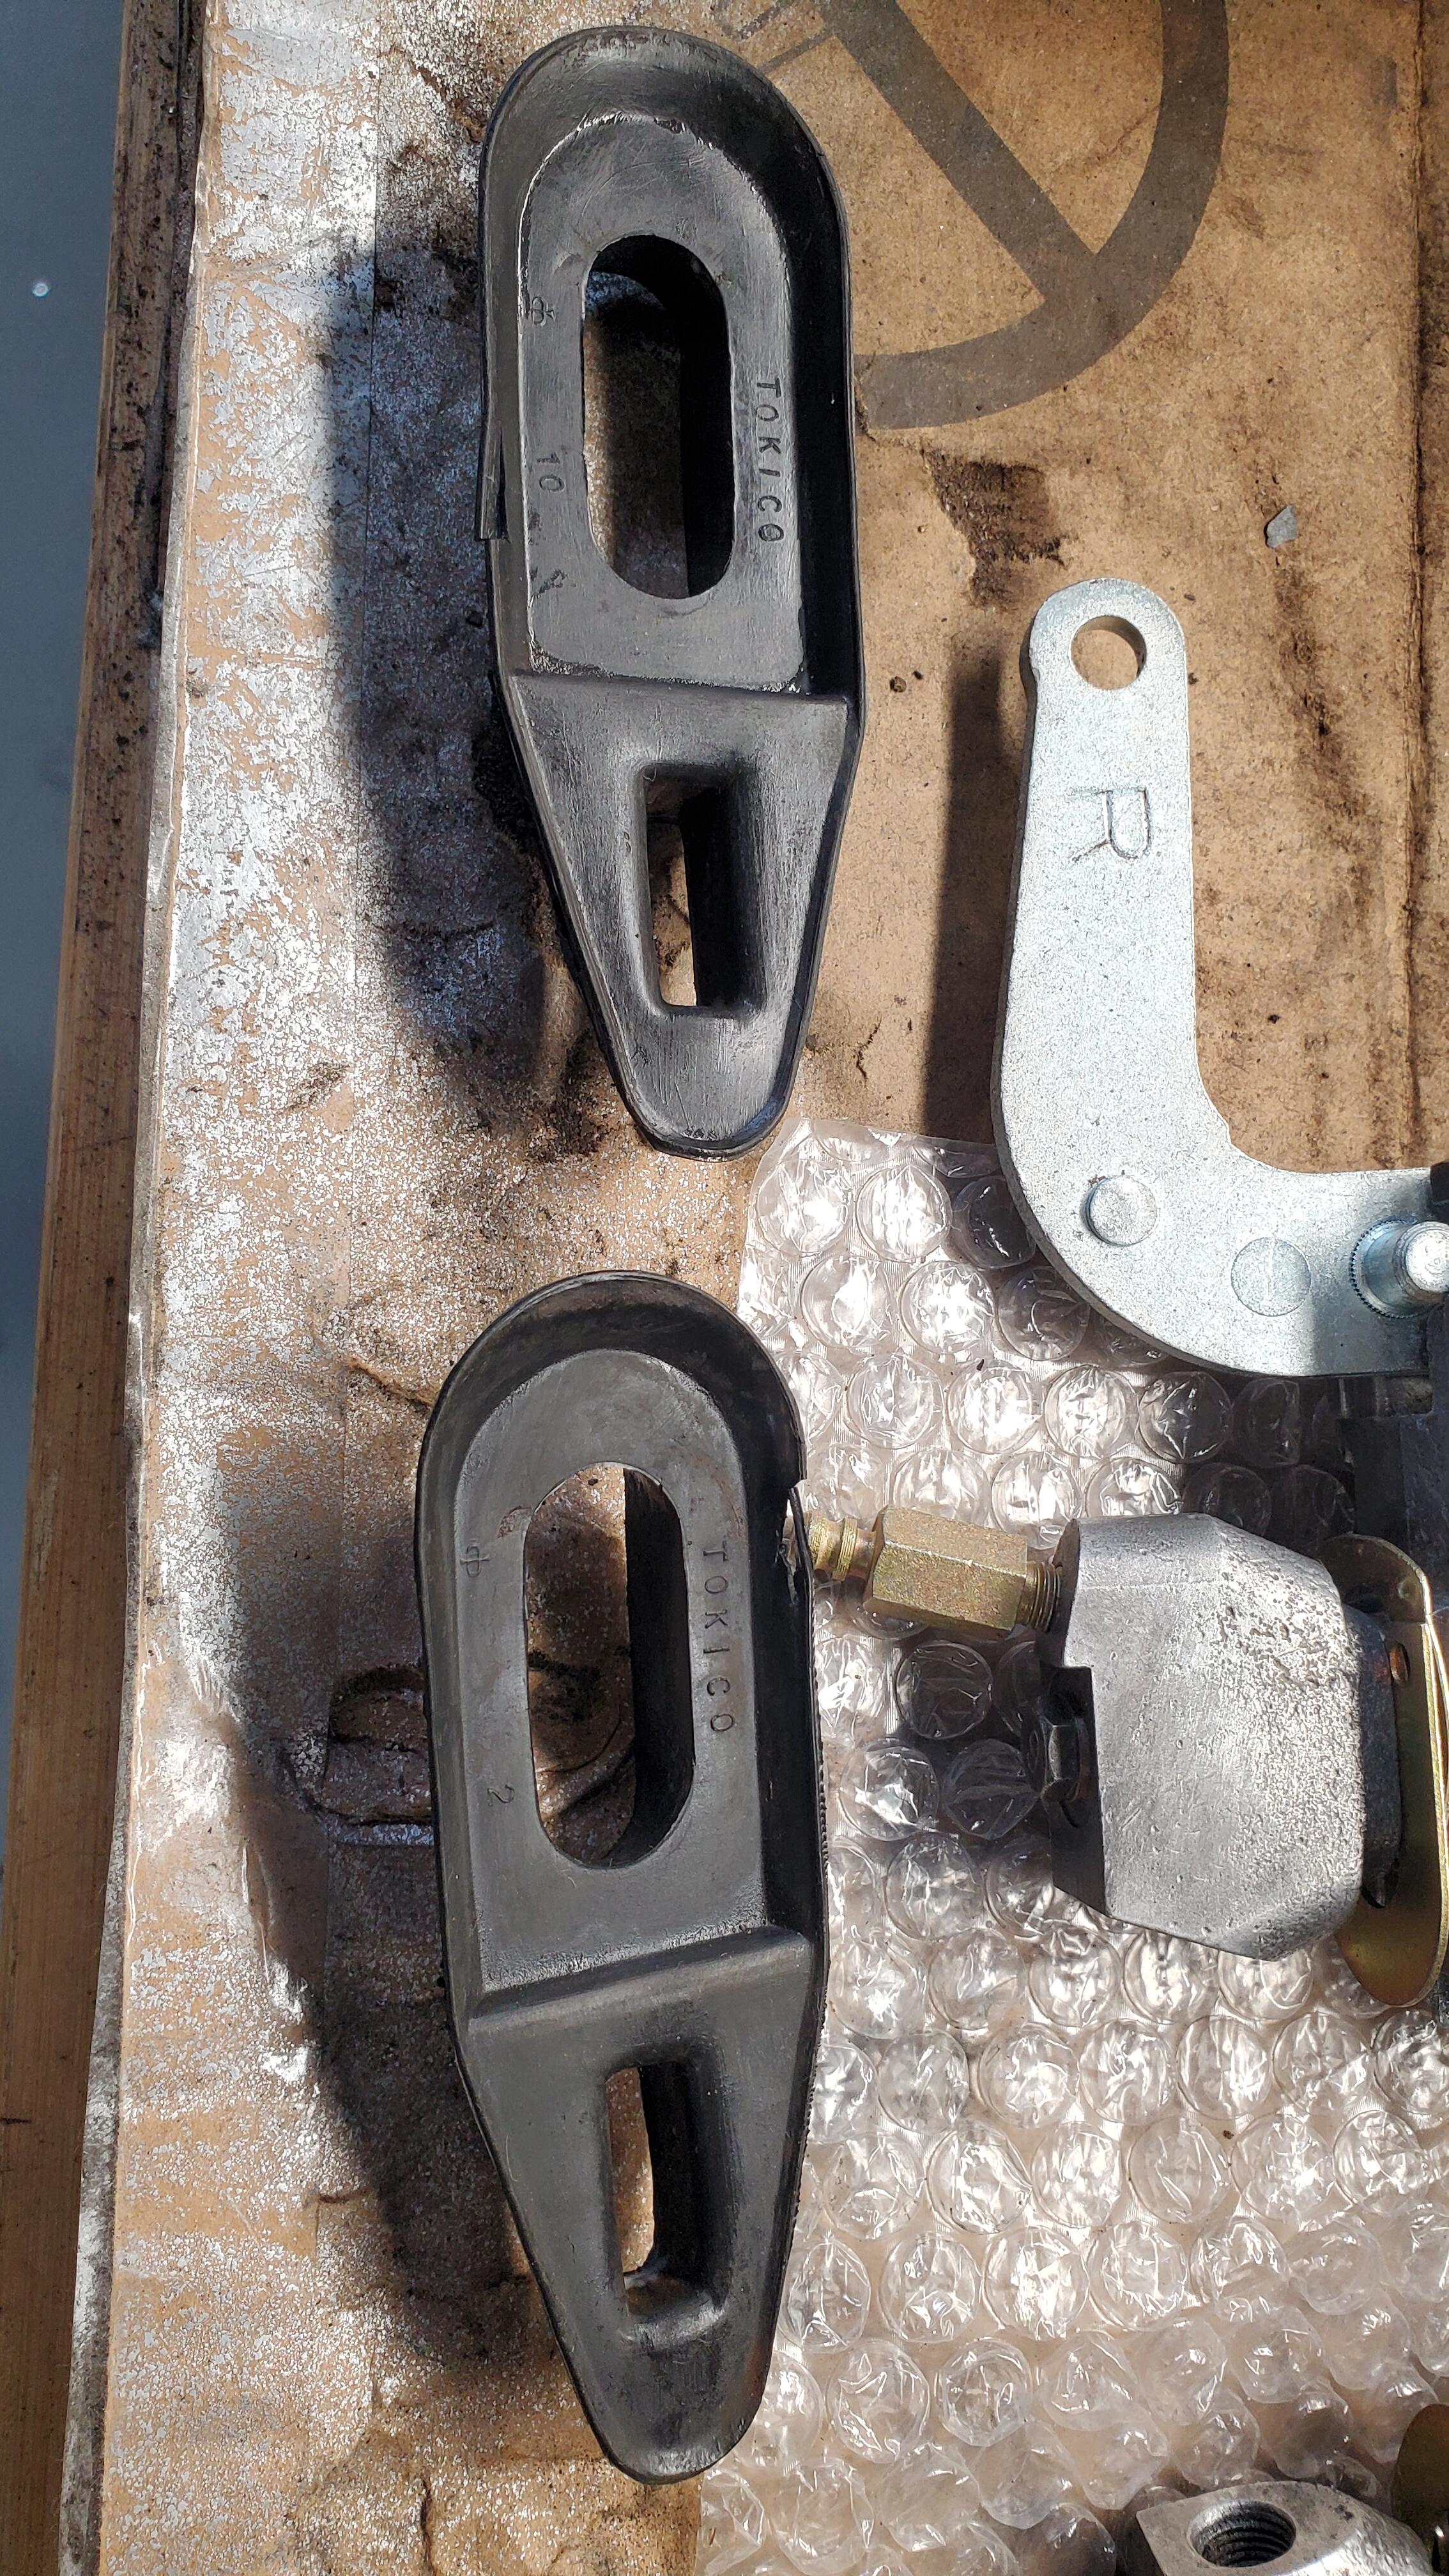
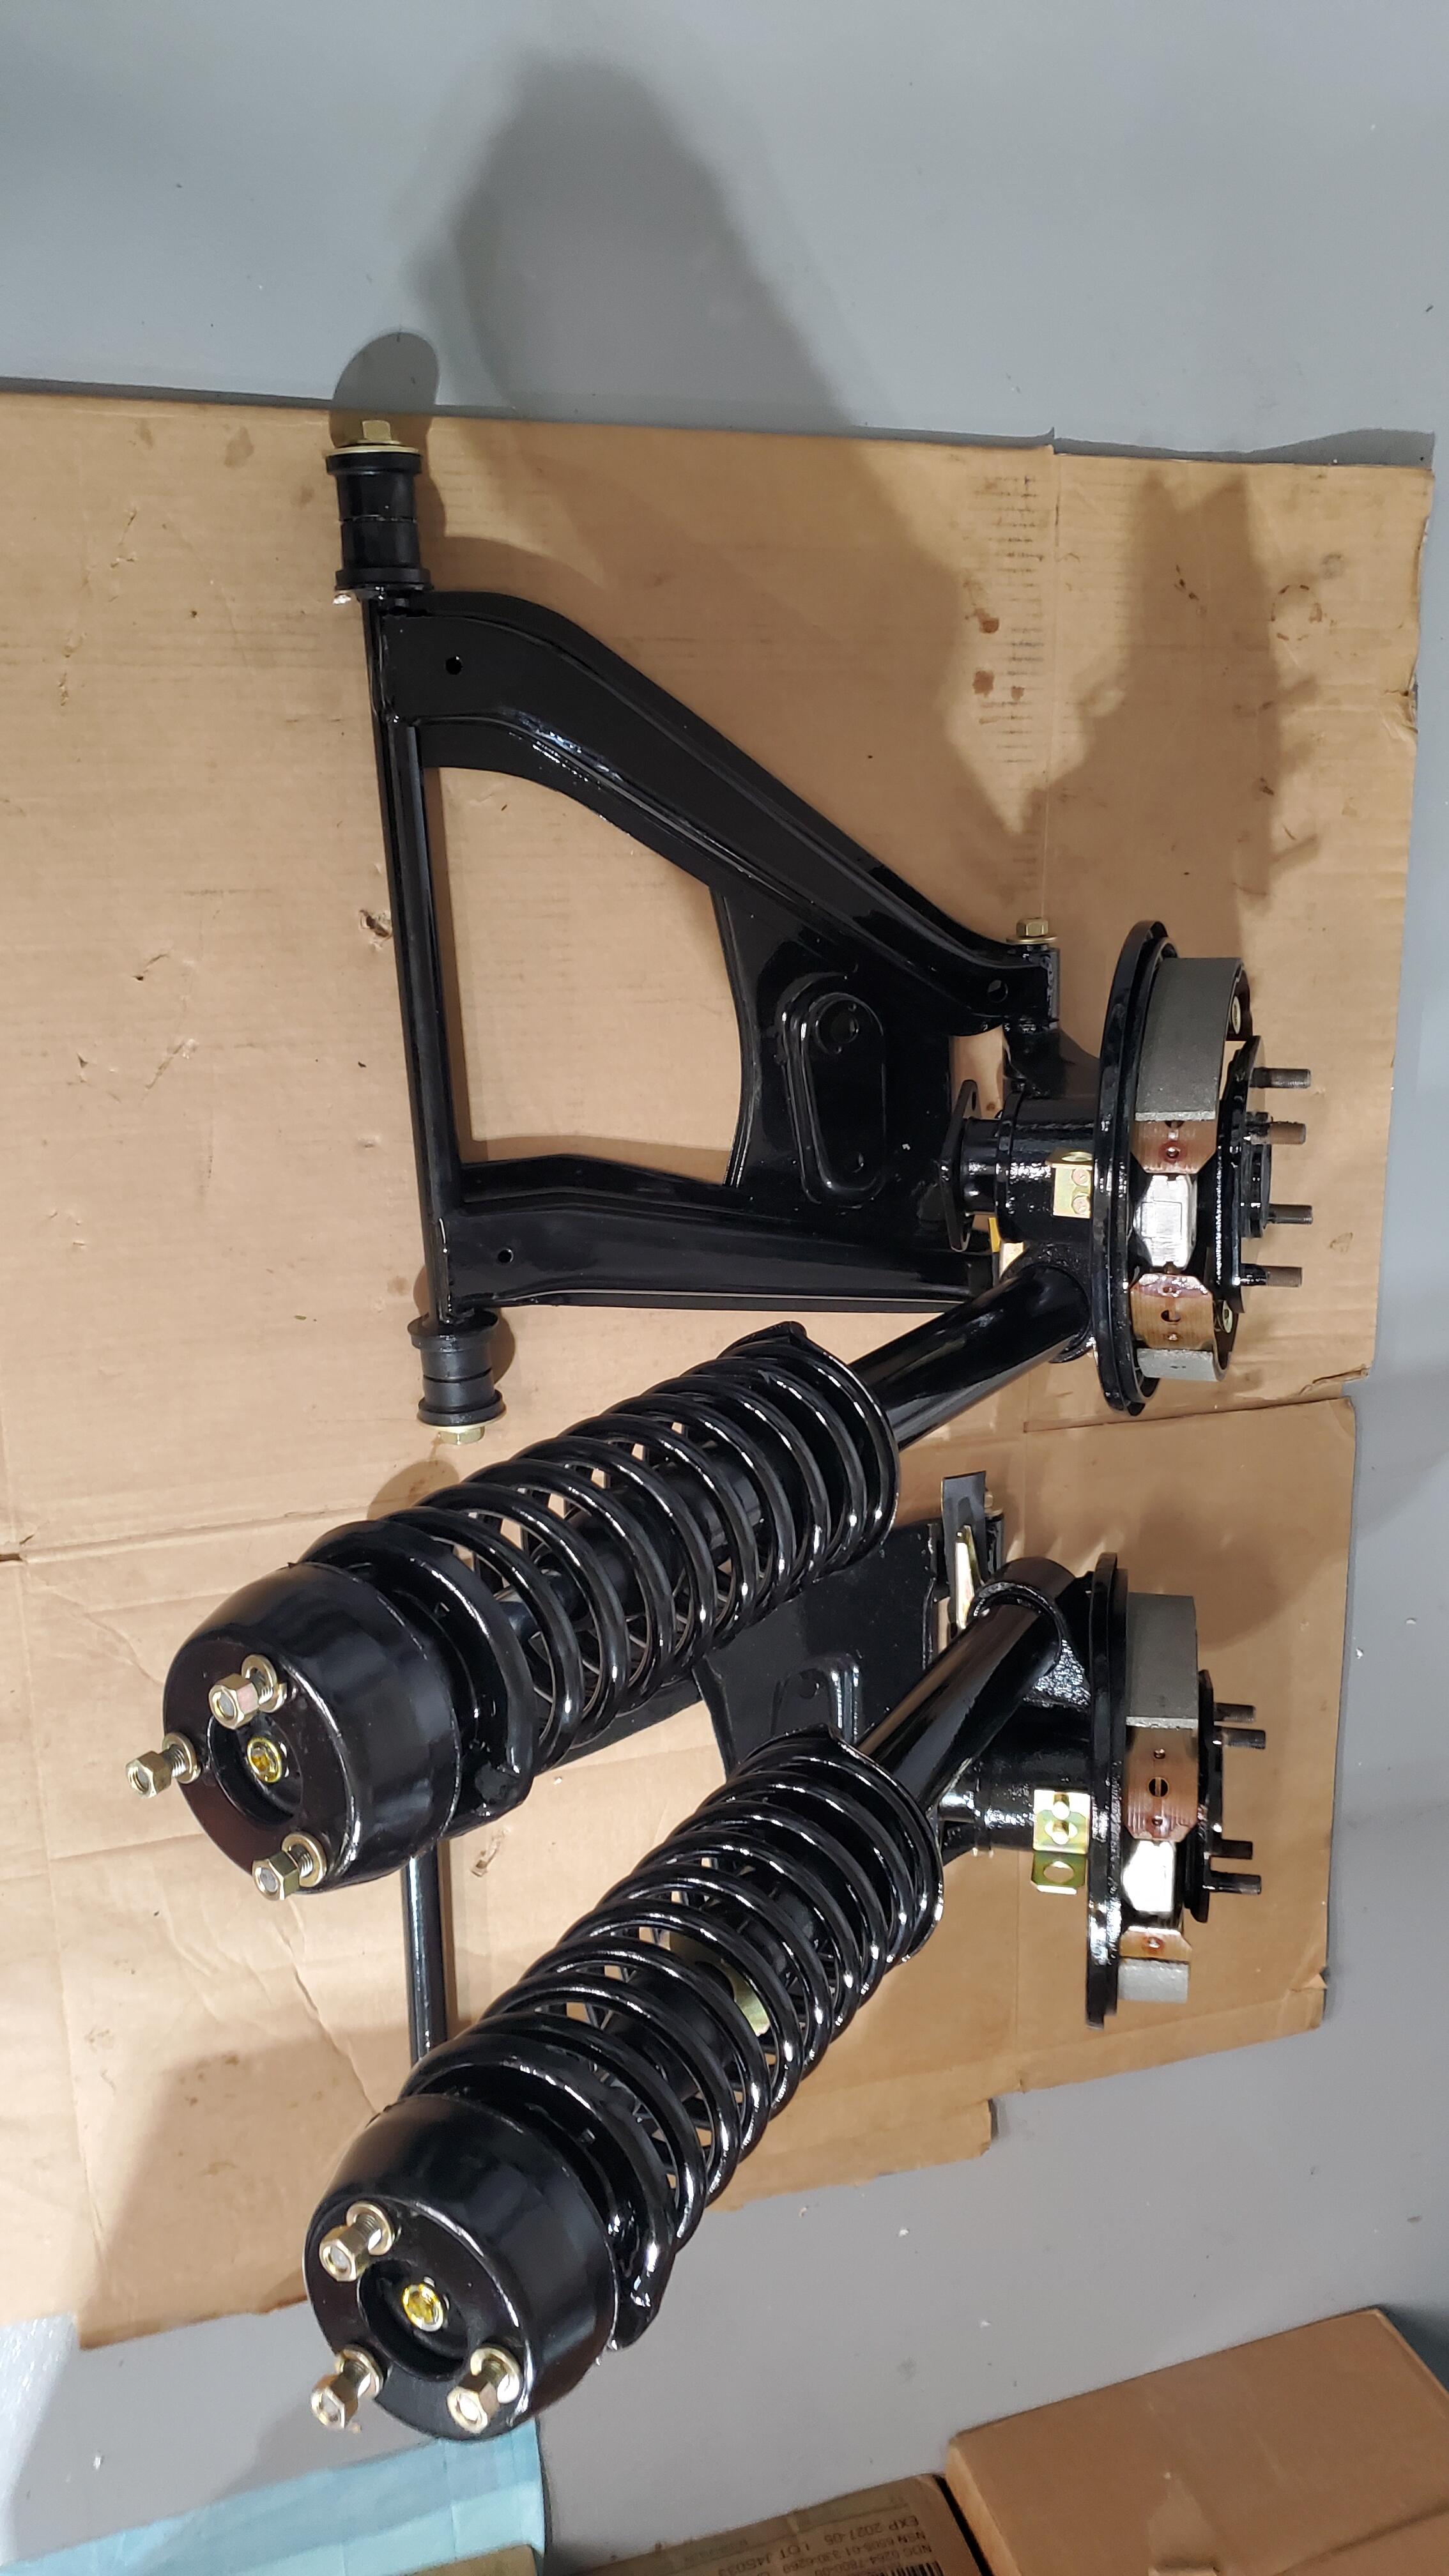
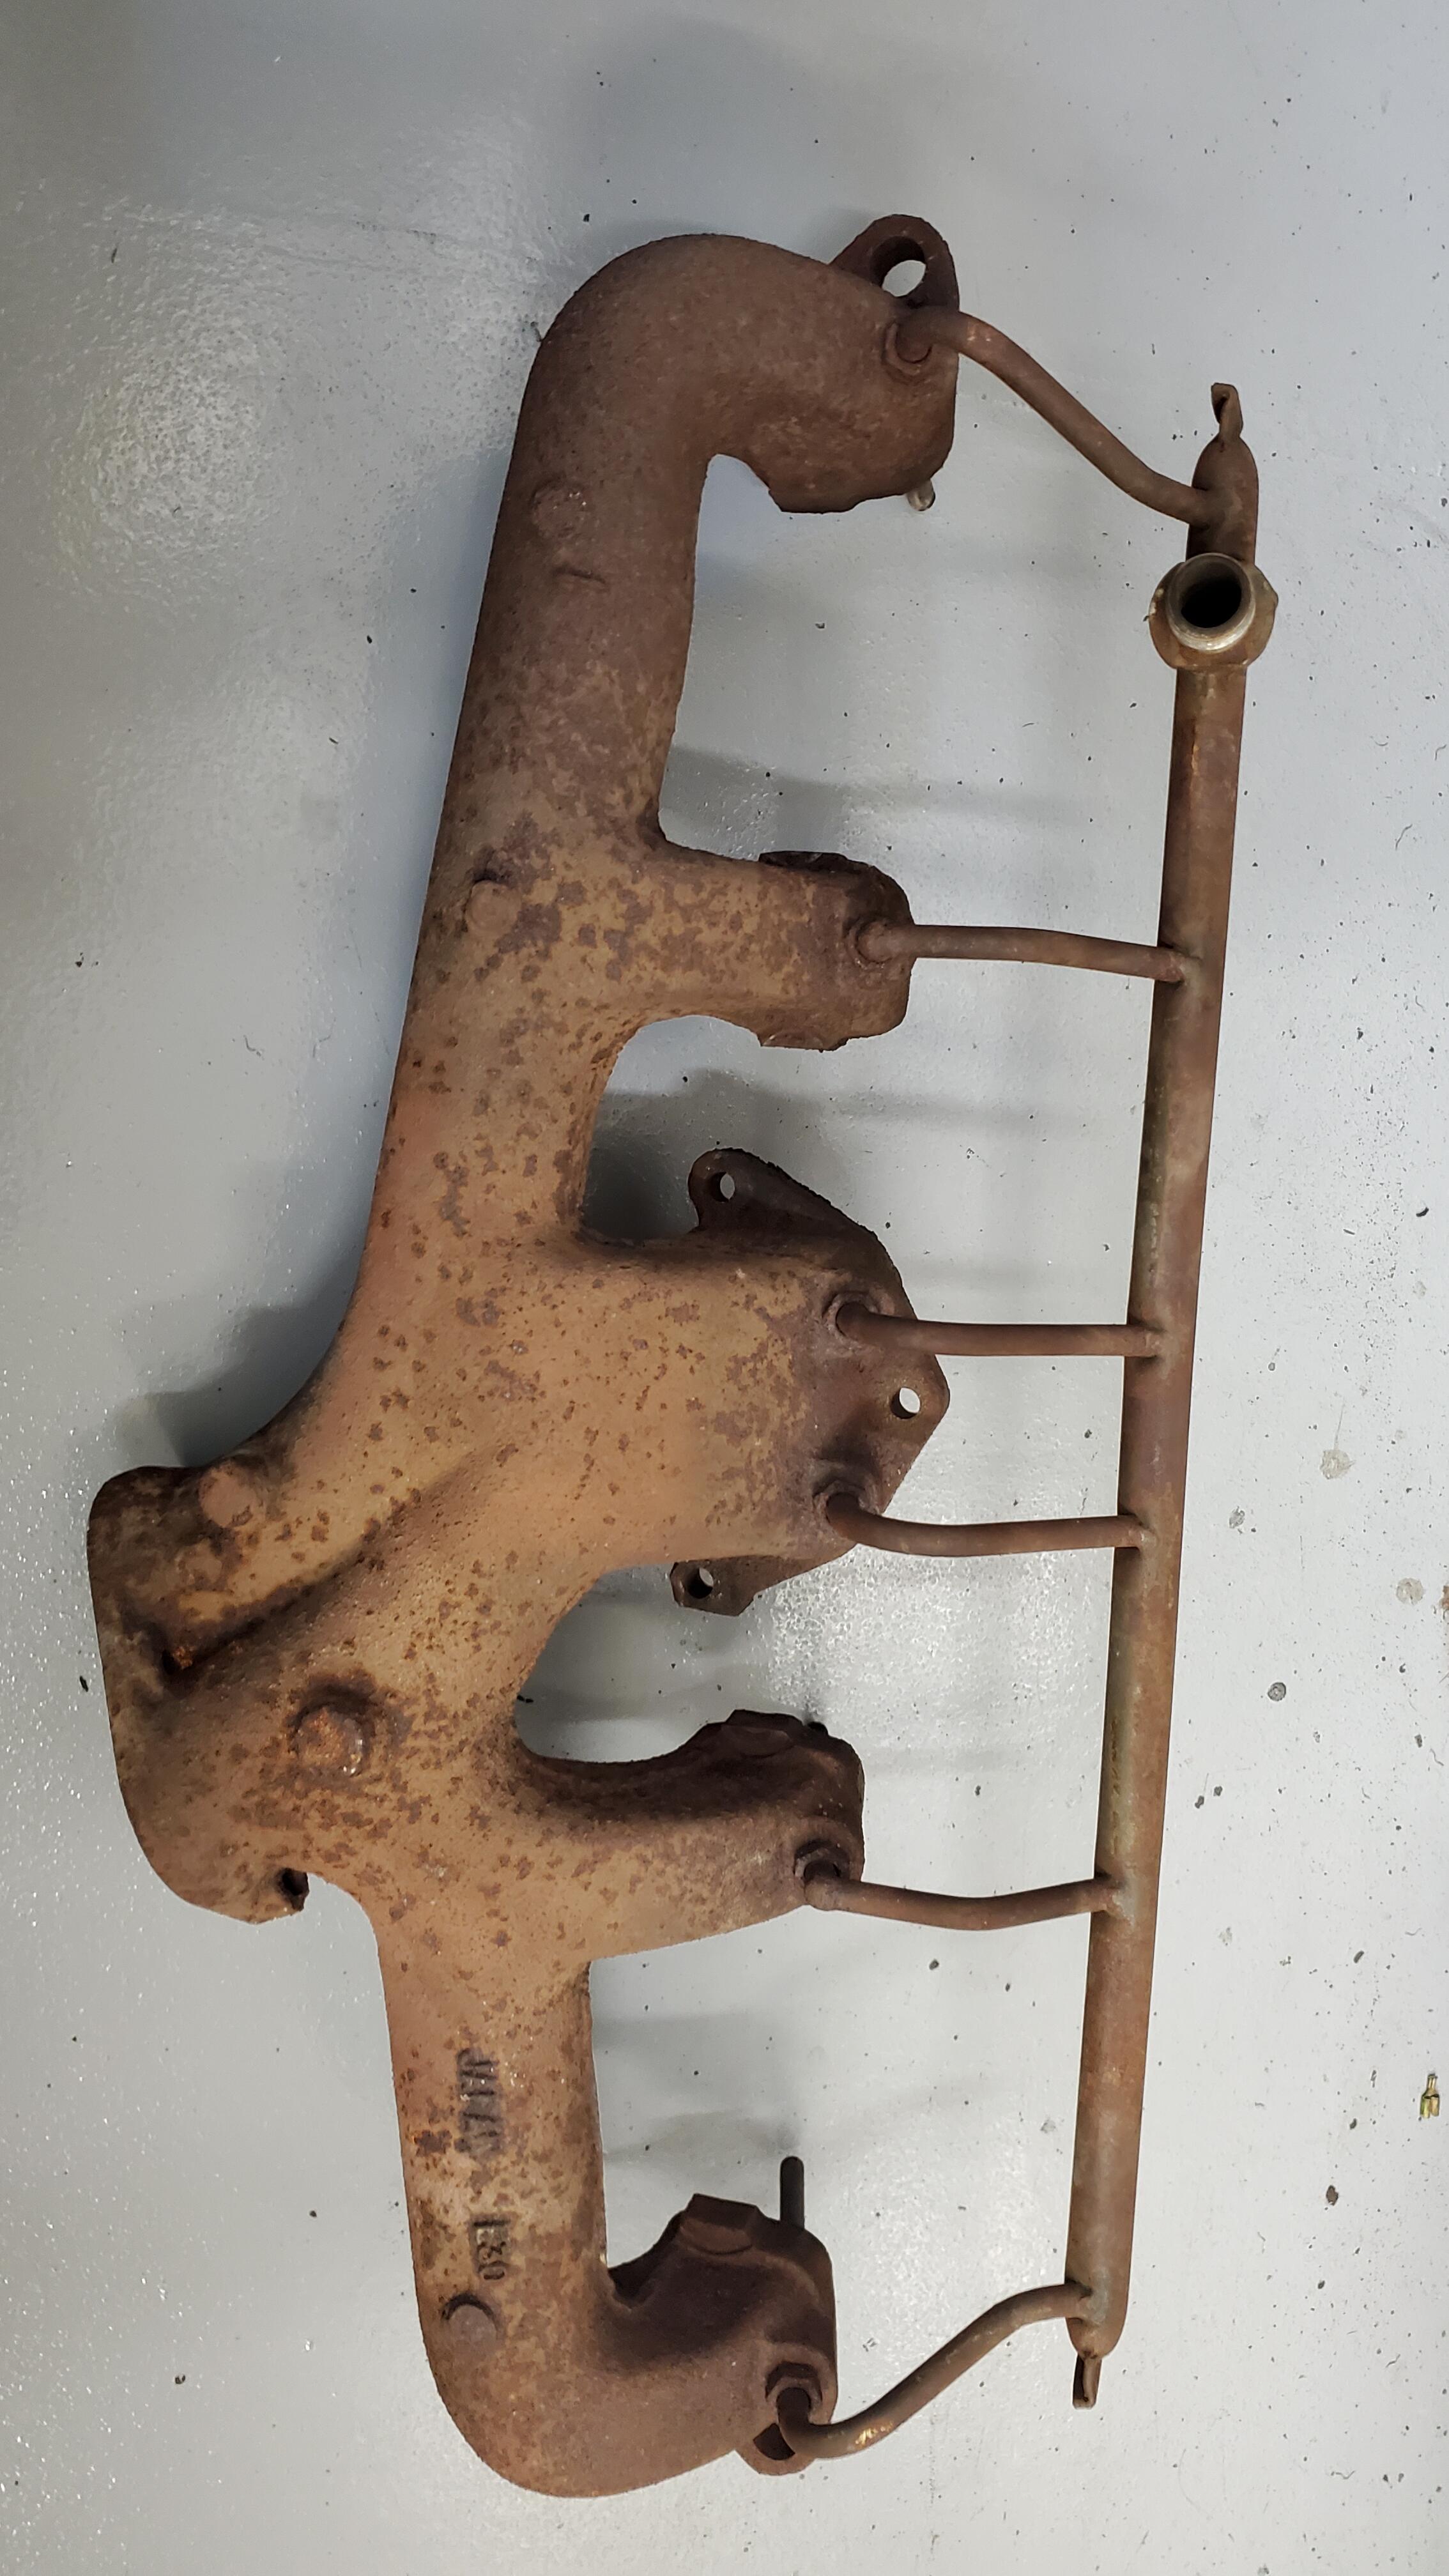
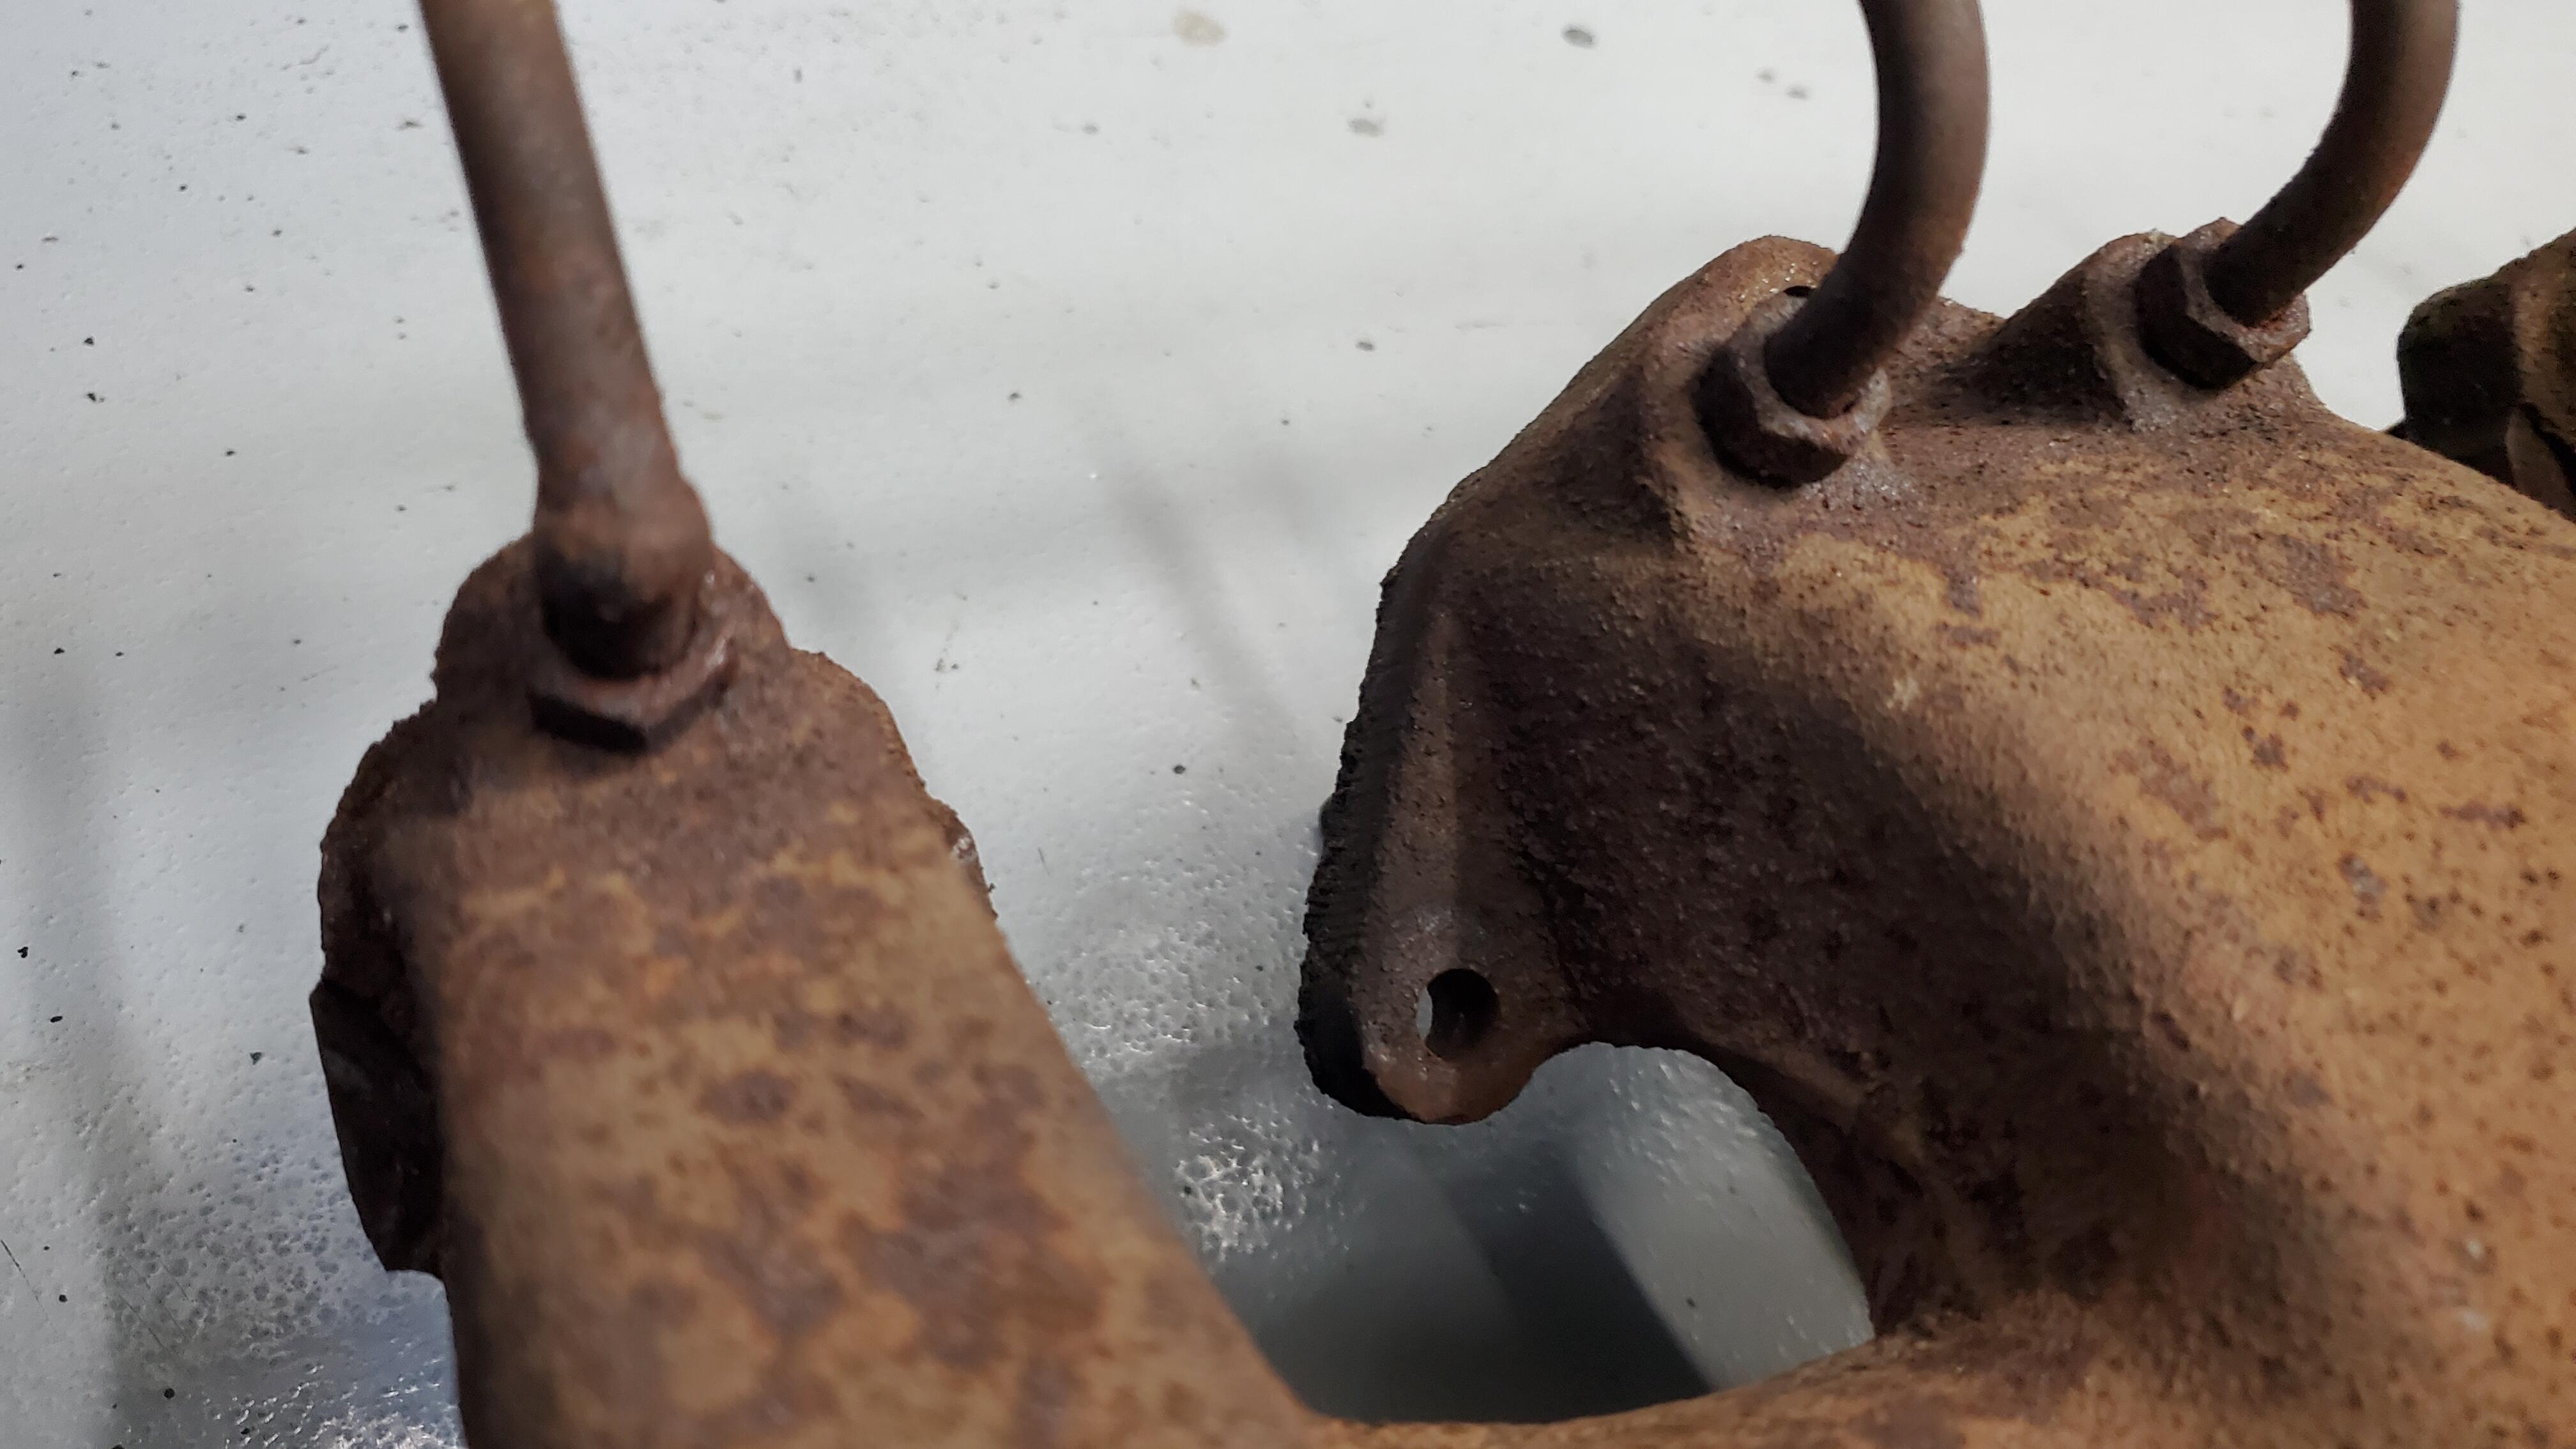
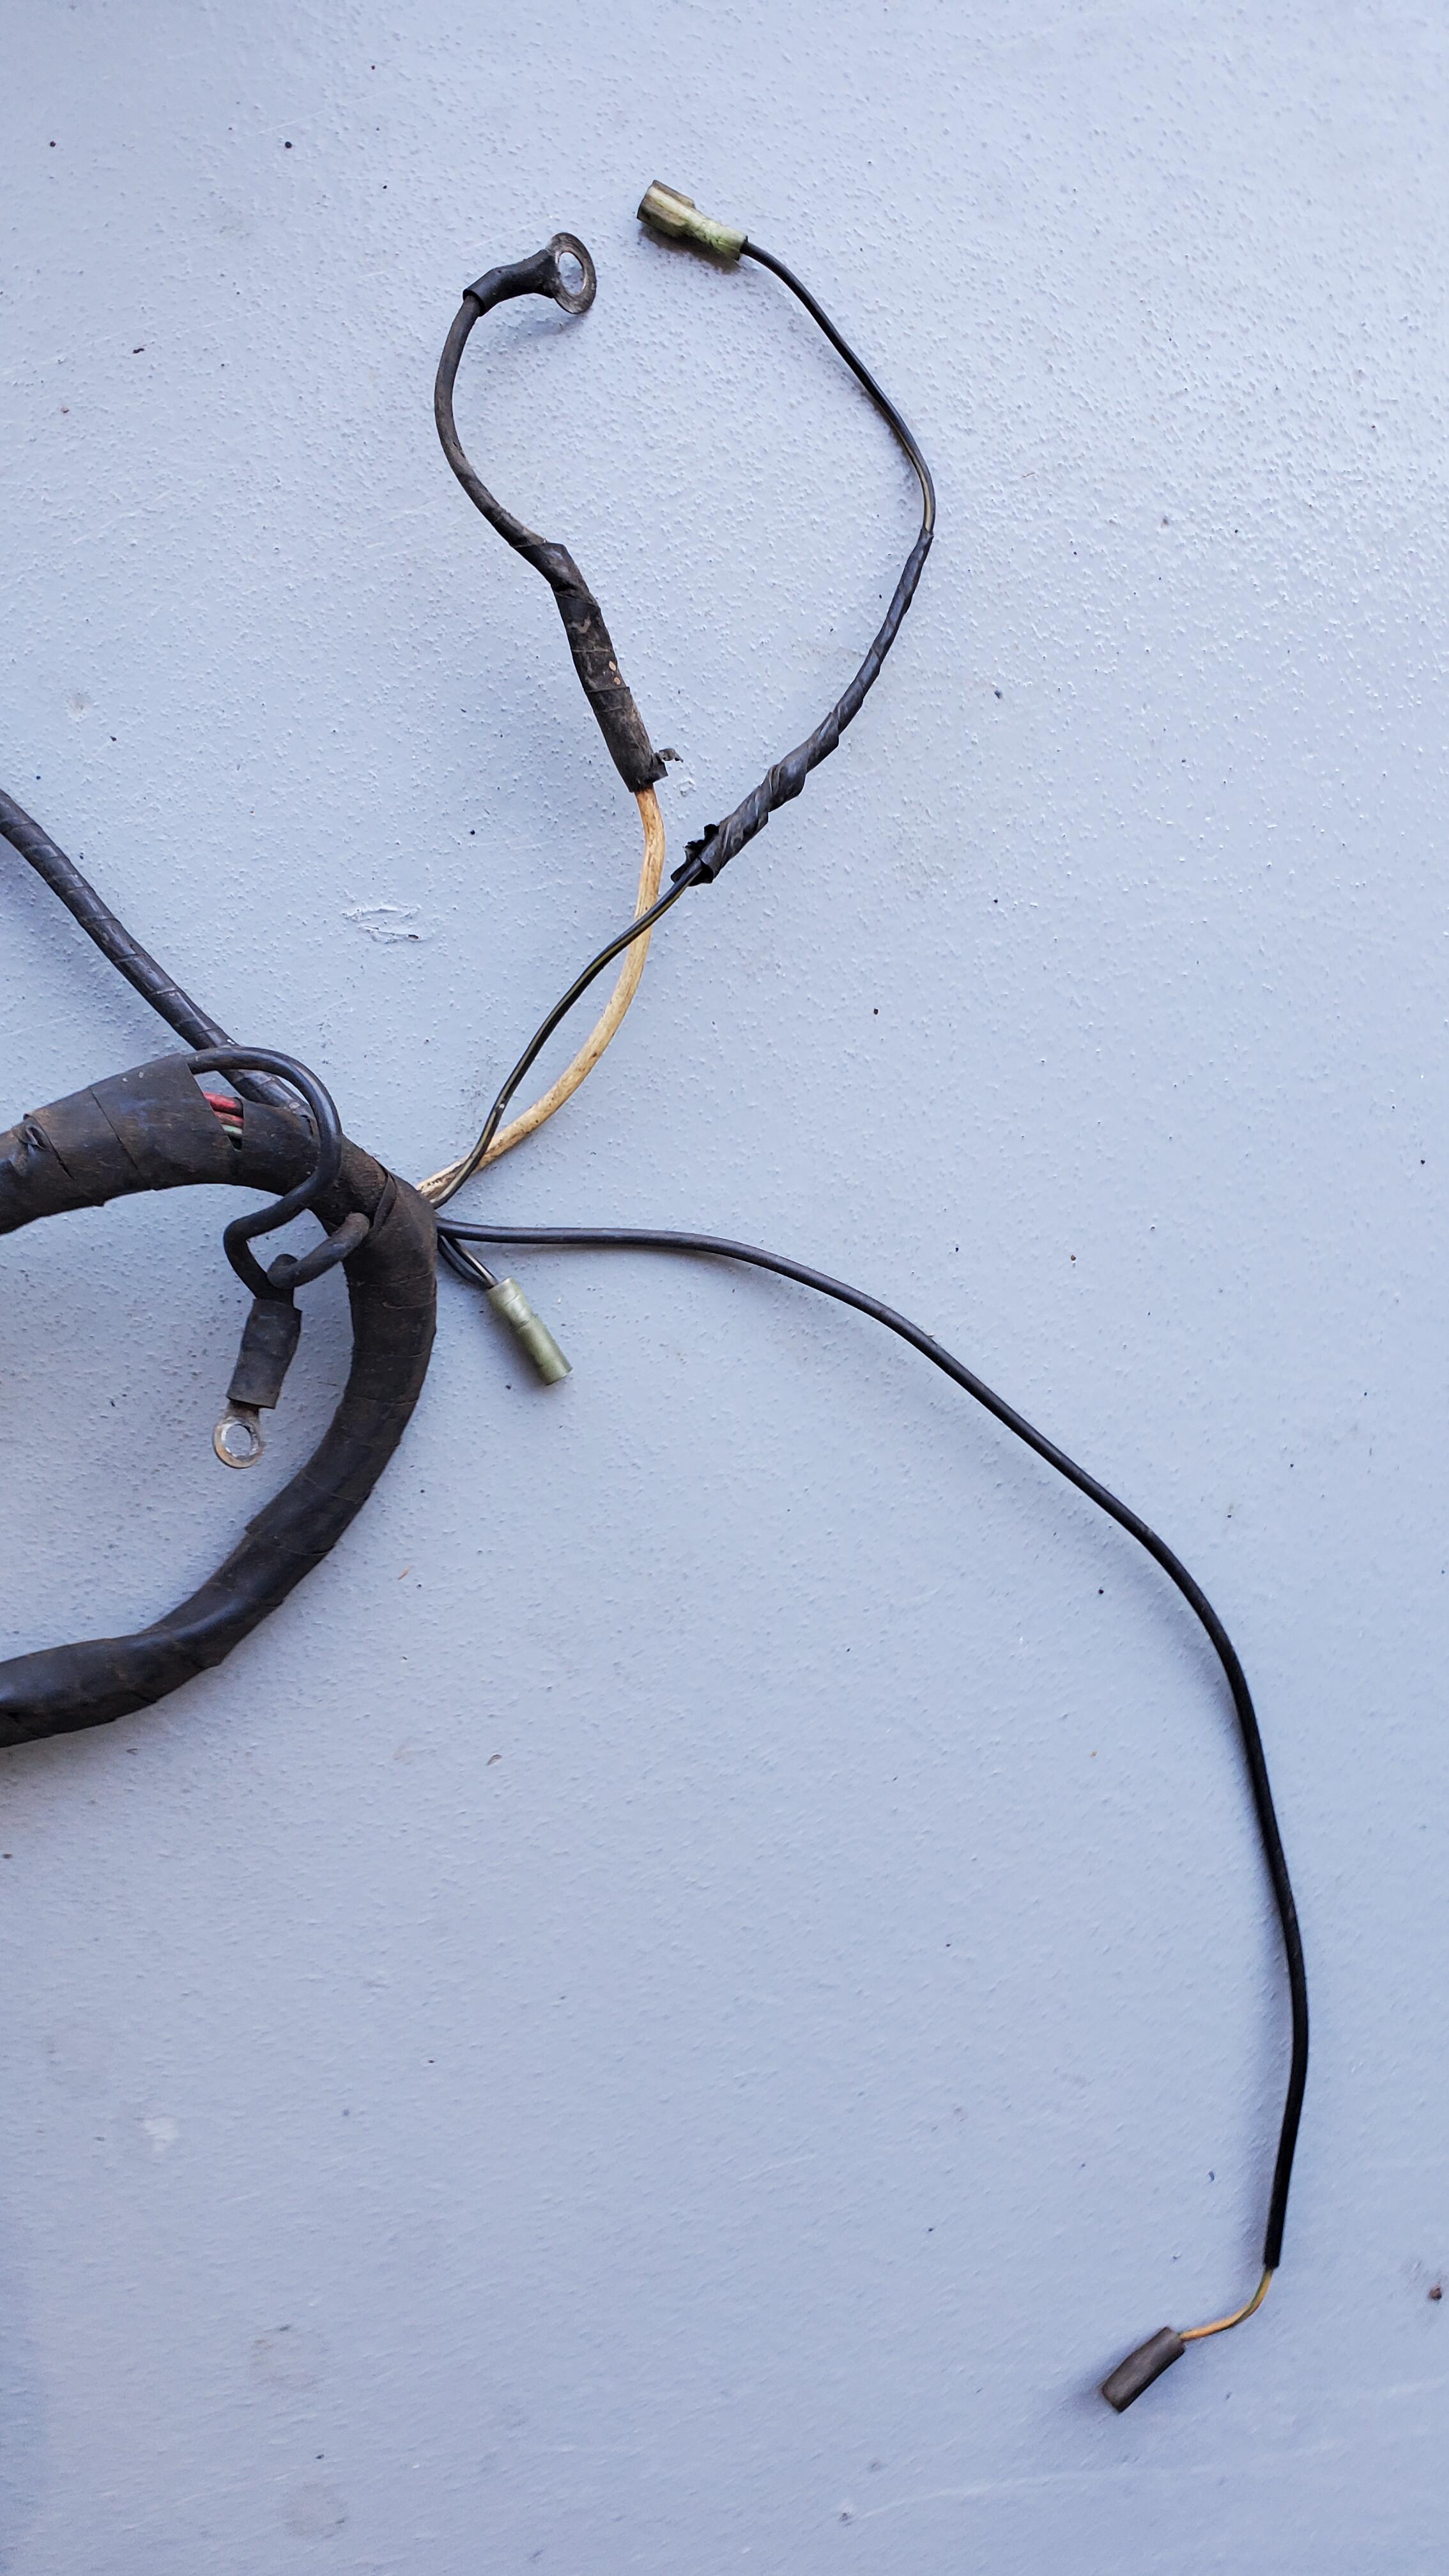
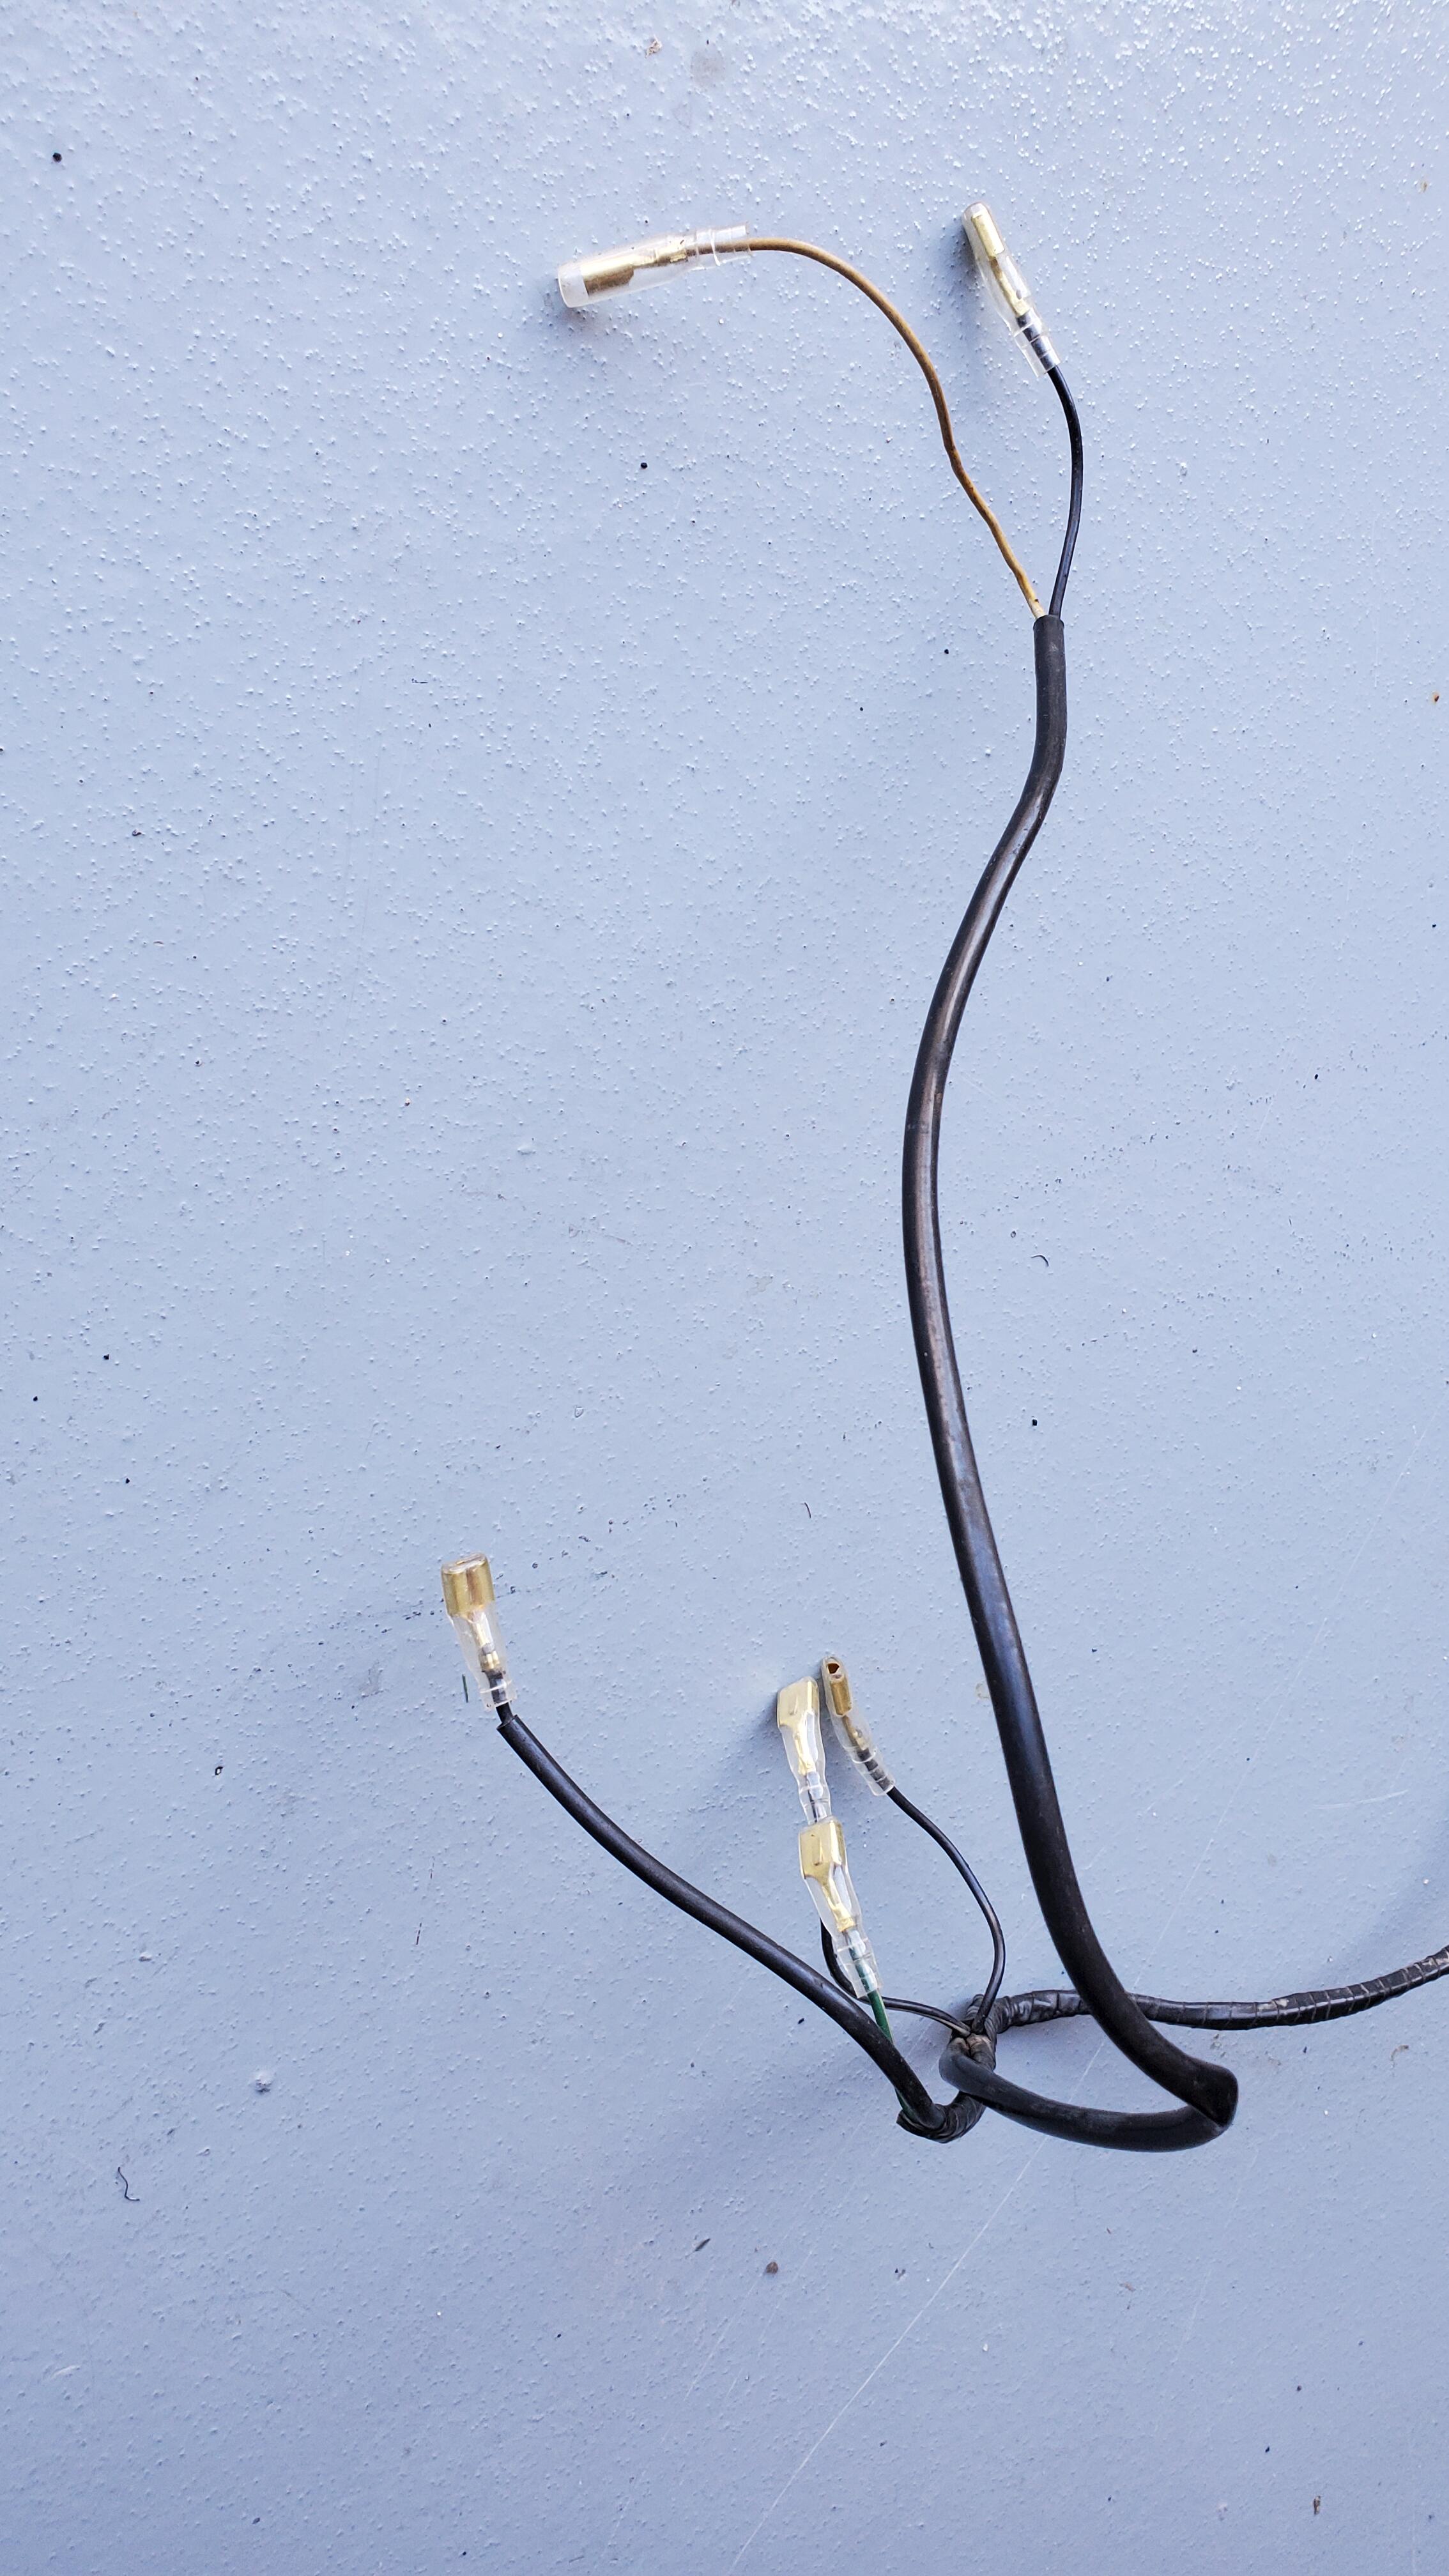
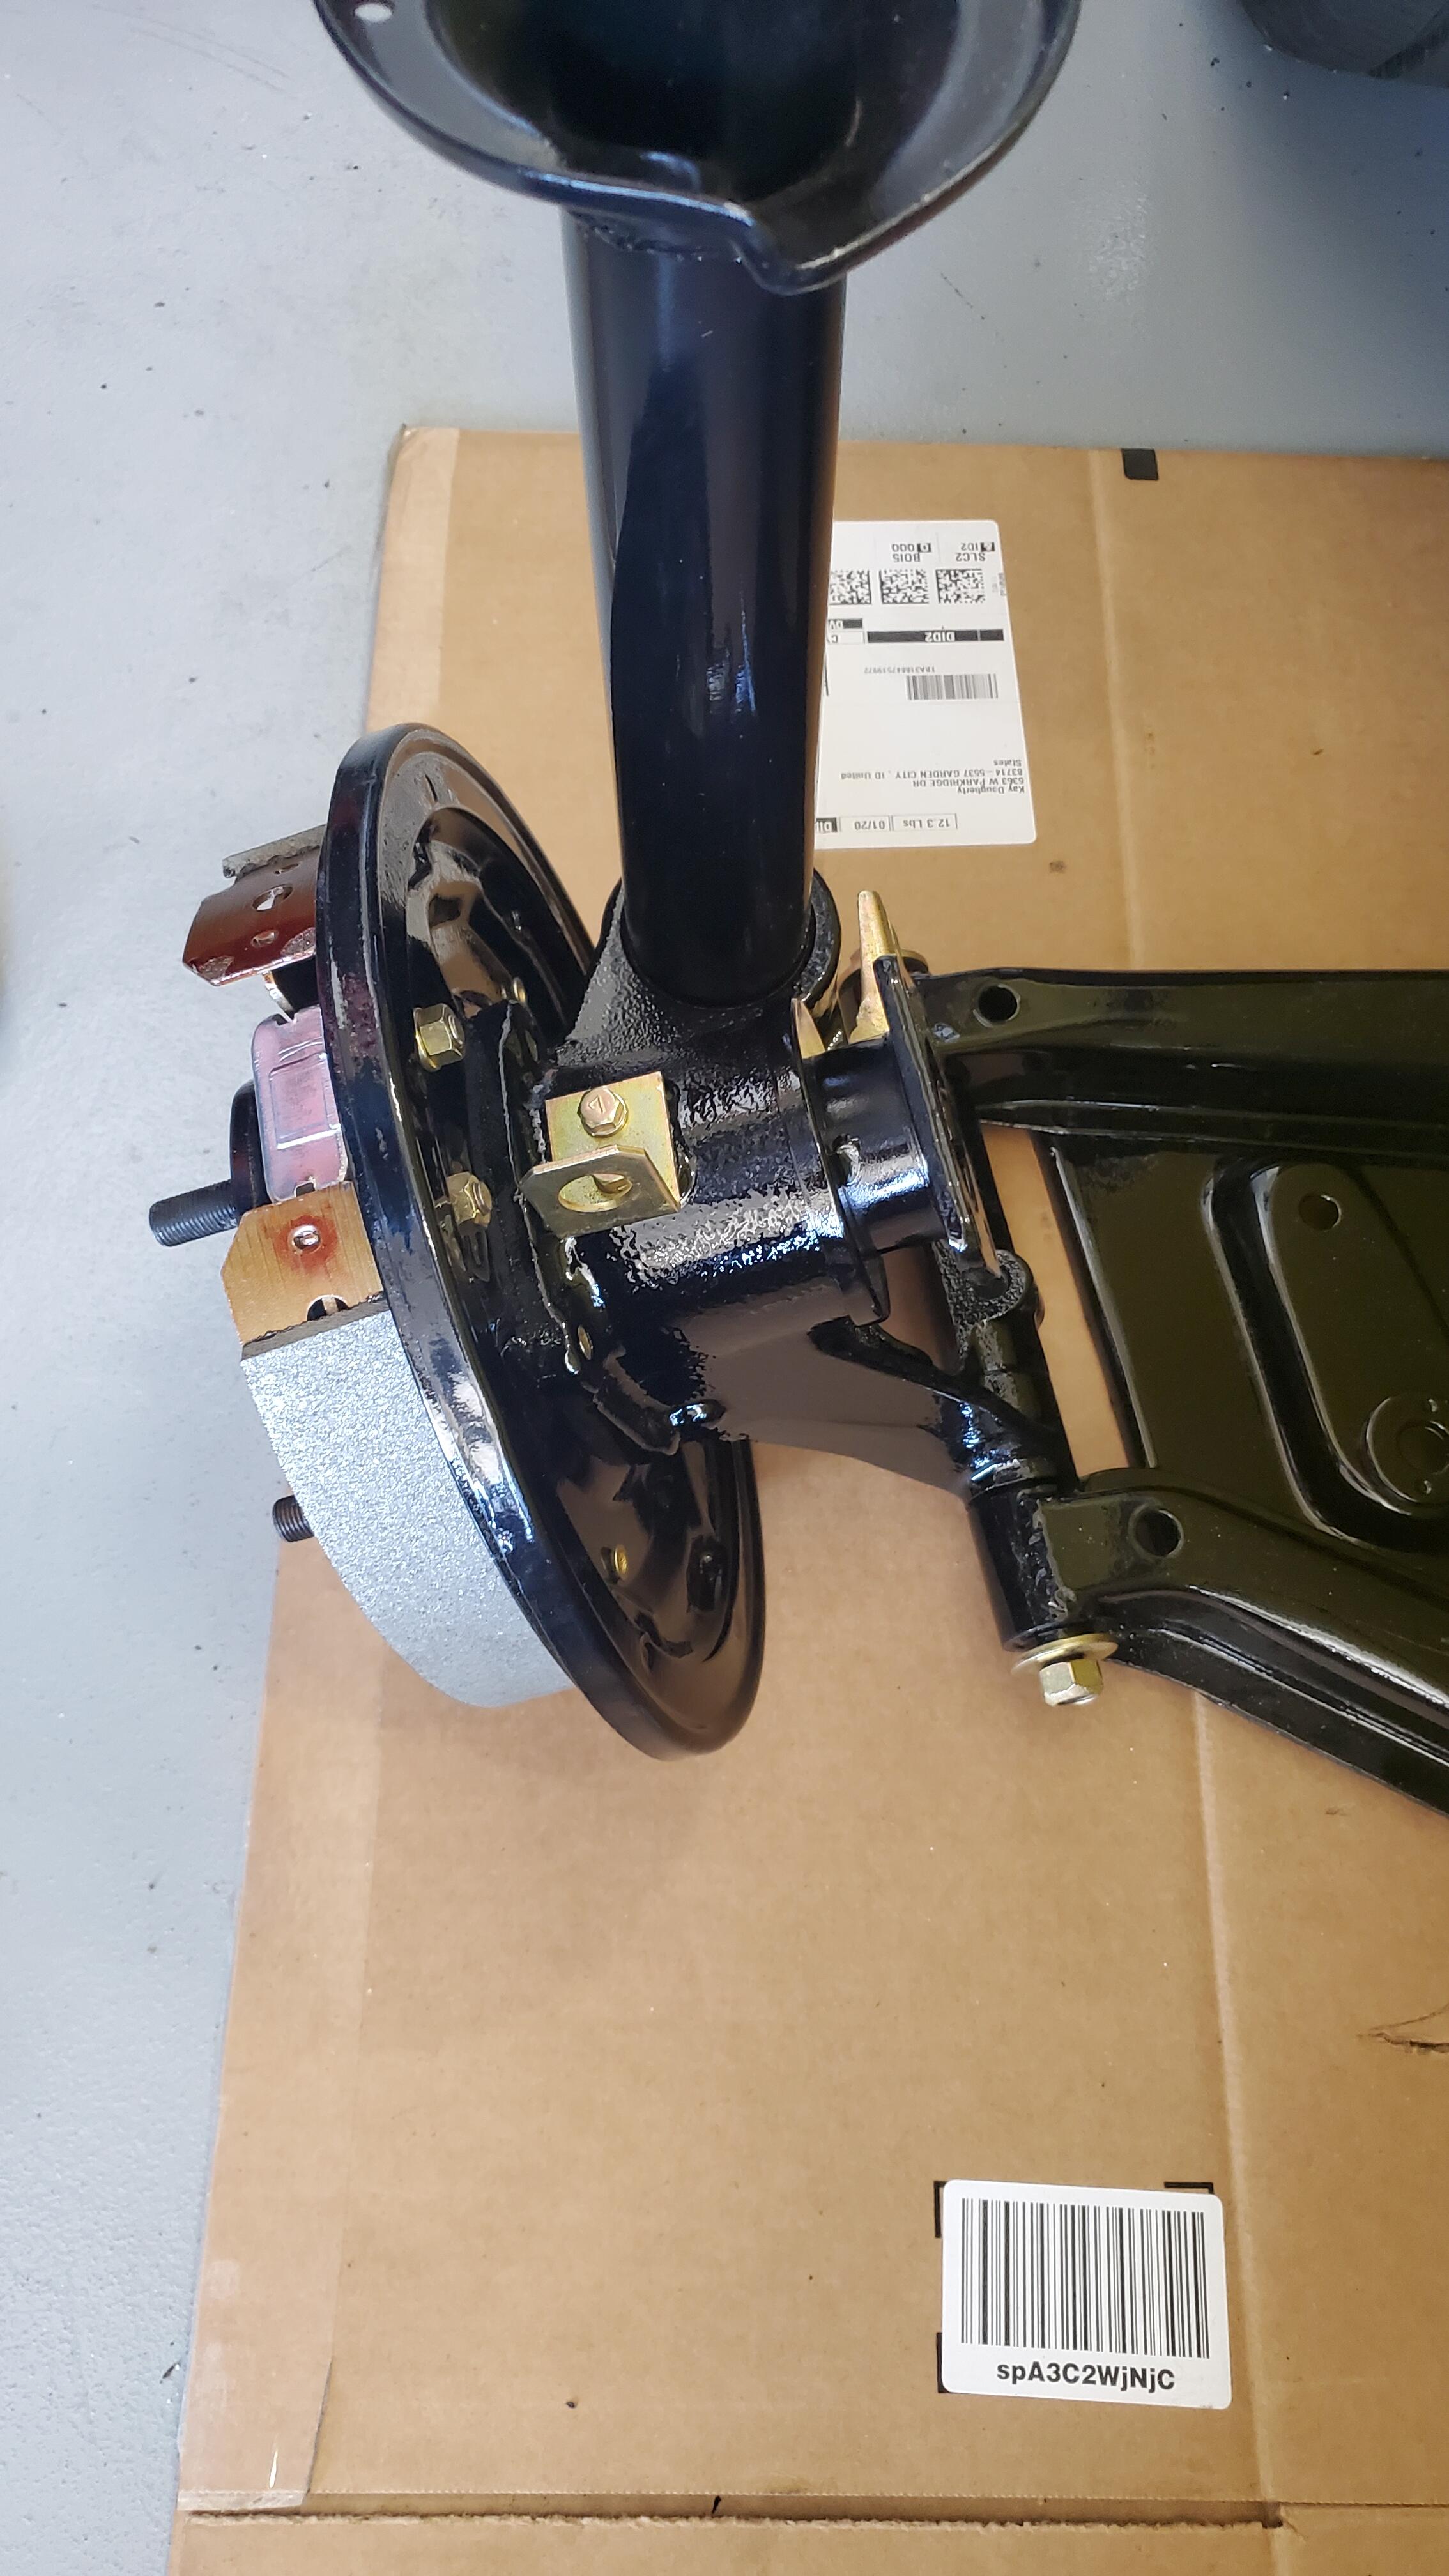
Finally, another update. We last left off with my attempt to remove the Air Galley from the Exhaust Manifold. This is still very much a challenge and I am continuing to work on this. I did get one fitting out, but the others are very stubborn. I continue to soak them in PB Blaster almost everyday, but have not used the Electromagnetic heater for the last couple weeks. The fumes are pretty bad from the heating process so I have backed off on that, even while doing that outdoors. Will probably go back to the heating process in a week or so and see if I can make some progress. There really is no rush on this, so I will hit it at a more convenient time. The body work is moving along, slowly as always. Pictures below show the latest updates from the body shop. I am almost finished with the engine electrical harness and have finished the rear harness. The engine electrical harness had a couple of interesting items. First is a Fusible link that goes to the Alternator. I have not seen that before, but apparently it is a thing on the very early cars. Also, on the alternator charge/regulator cable, it look like there was some outside work done. There was a red wire connected to the main black ground wire. That's a little scary. I checked my Z charge cable wiring and noticed my wire was black, so I am guessing that whoever did the work didn't have the correct gauge black wire, so they used red instead. Anyway, I replaced the red wire with the correct color black wire just to get everything back to normal. Pics are below. On the rear harness there is a wire at the end of the harness near where the speaker and antenna control wires are. Haven't seen that before. Not sure what it would operate. See pic below. I got the shocks and springs installed on the struts. Also cleaned and lubed the front strut bearings prior to re-assembly. I re-furbed the rear brake cylinders and assembled those onto their respective backing plates. Also noticed the both emergency brake arms had an 'R' on them, odd. Cleaned up the drums also. I cleaned and installed the front discs and noticed slots/holes in the rim of the disc. First time I have seen that. Again, probably unique to the early cars. 20250404_153515.mp4


-
I'll pass. You are mistaken on items 1 and 2 so you already have discredited yourself. If you care to belabor the point, you can refer to the earlier pictures here which show you are incorrect. If you doubt the authernticity of this motor, I can show you my personal vehicle which has been in the family for 55 years and is well documented showing the same thing.
-
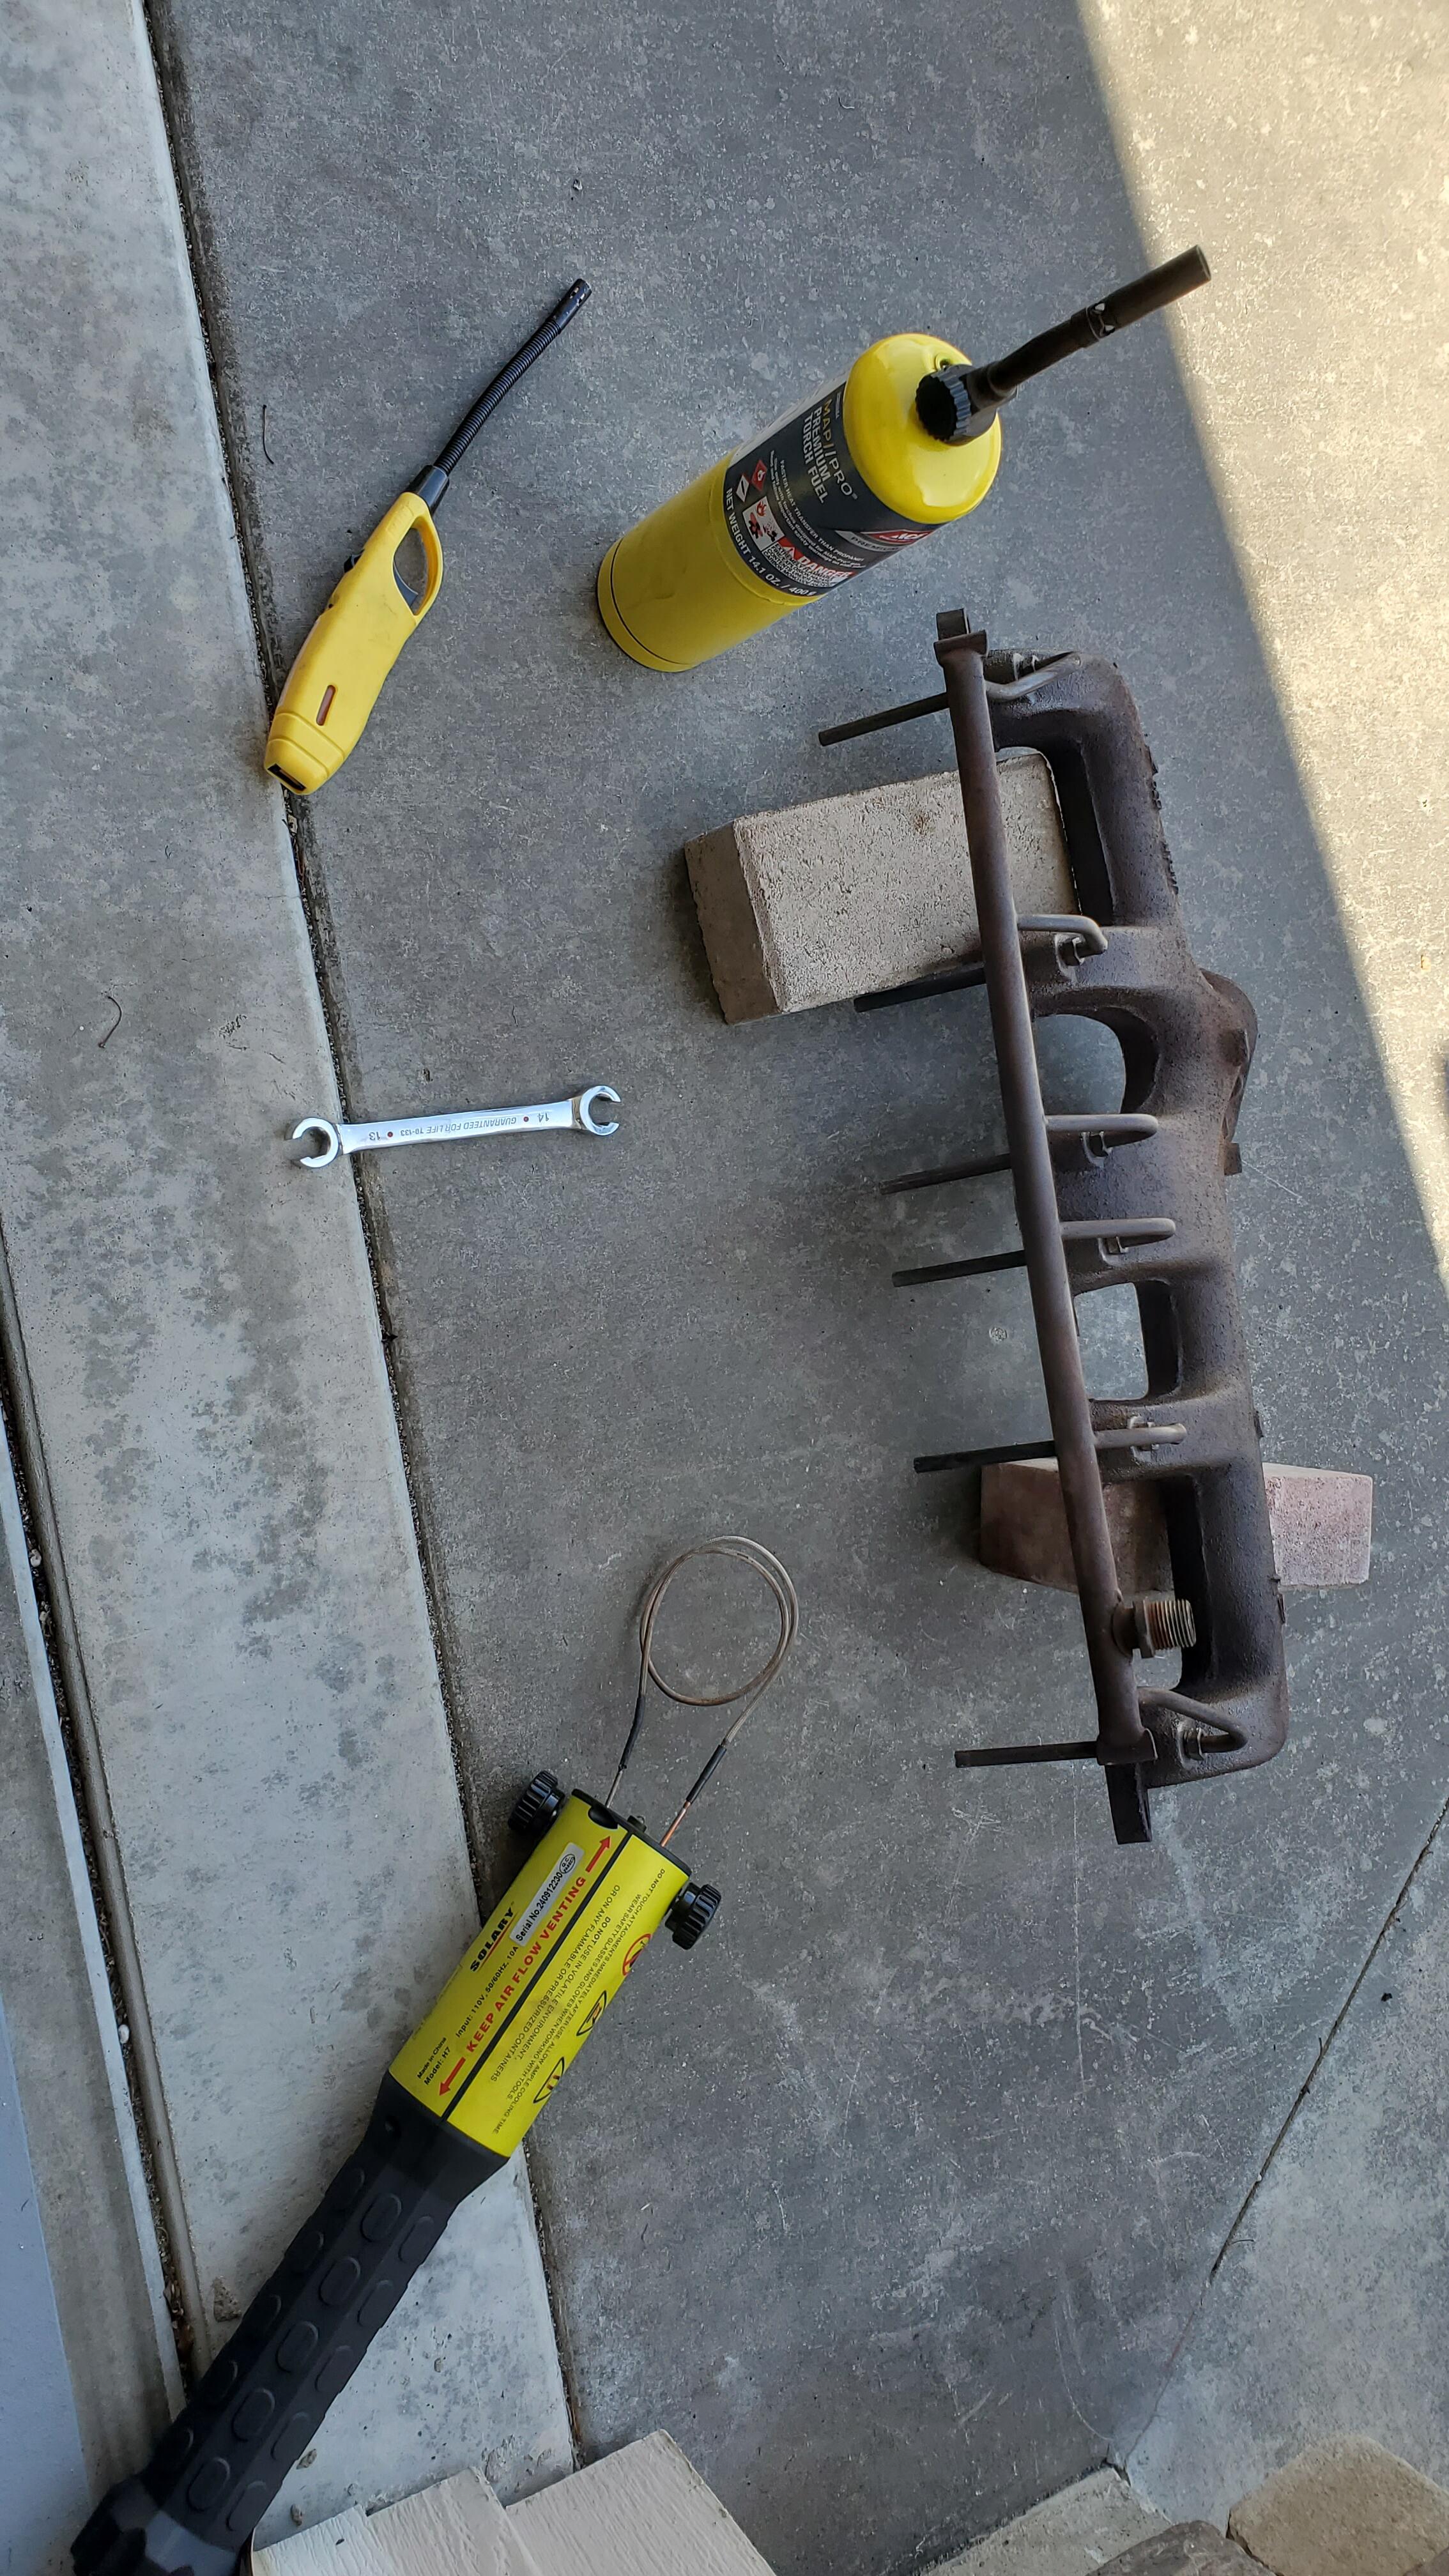
I tried my MAPP Torch and it was not even close to getting the exhaust manifold red, so I think I will pop for the Induction Heater.
-
That seems like the best approach, but they are a little pricey. I saw that you used one on the intake manifold tube fitting and was intrigued. I've used a torch and ice cubes in the past, but it was not very effective on the manifold because of its size I think.
-
The exhaust manifold will be a bit of a project. I don't beleive that the air galley will be salvagable as the attach fittings are pretty rusted onto the manifold. I will soak these in rust penetrant for a couple more days, but most likely I will need to cut off the air galley, remove the fittings and re-tap the holes.

-
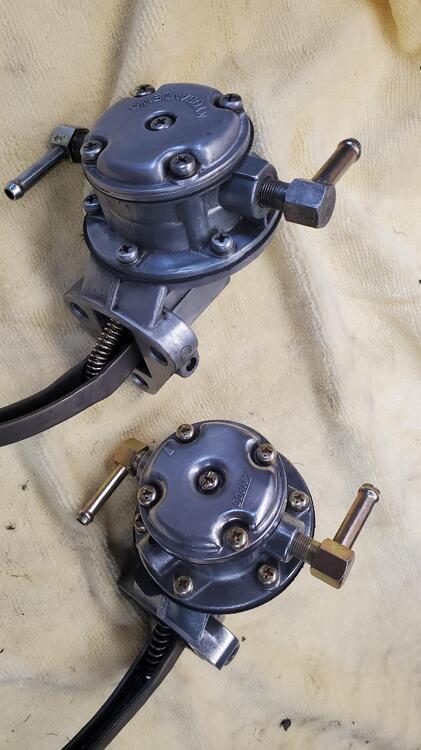
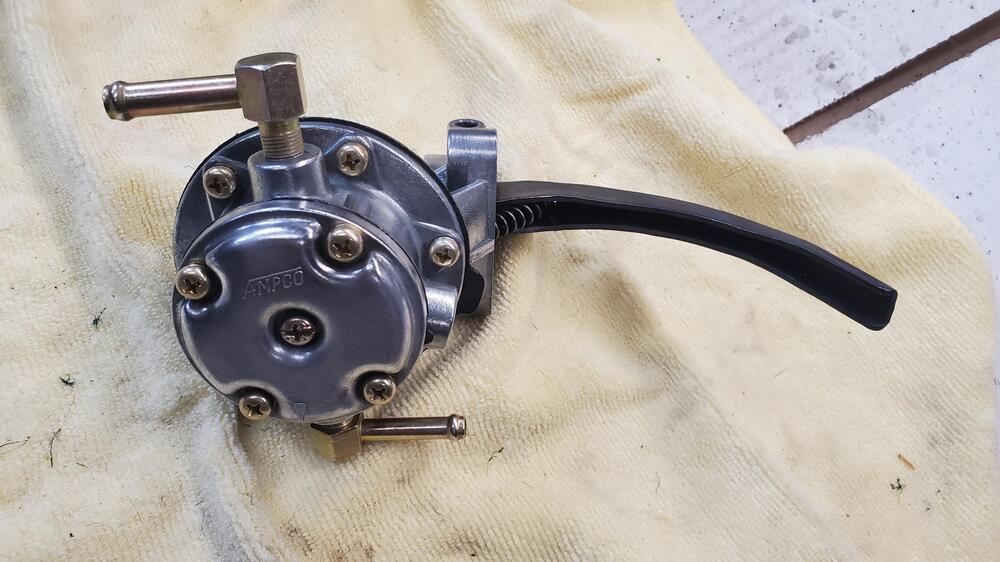
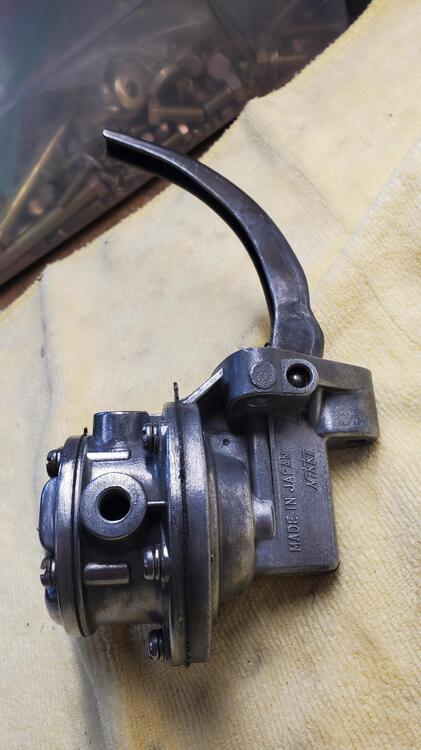
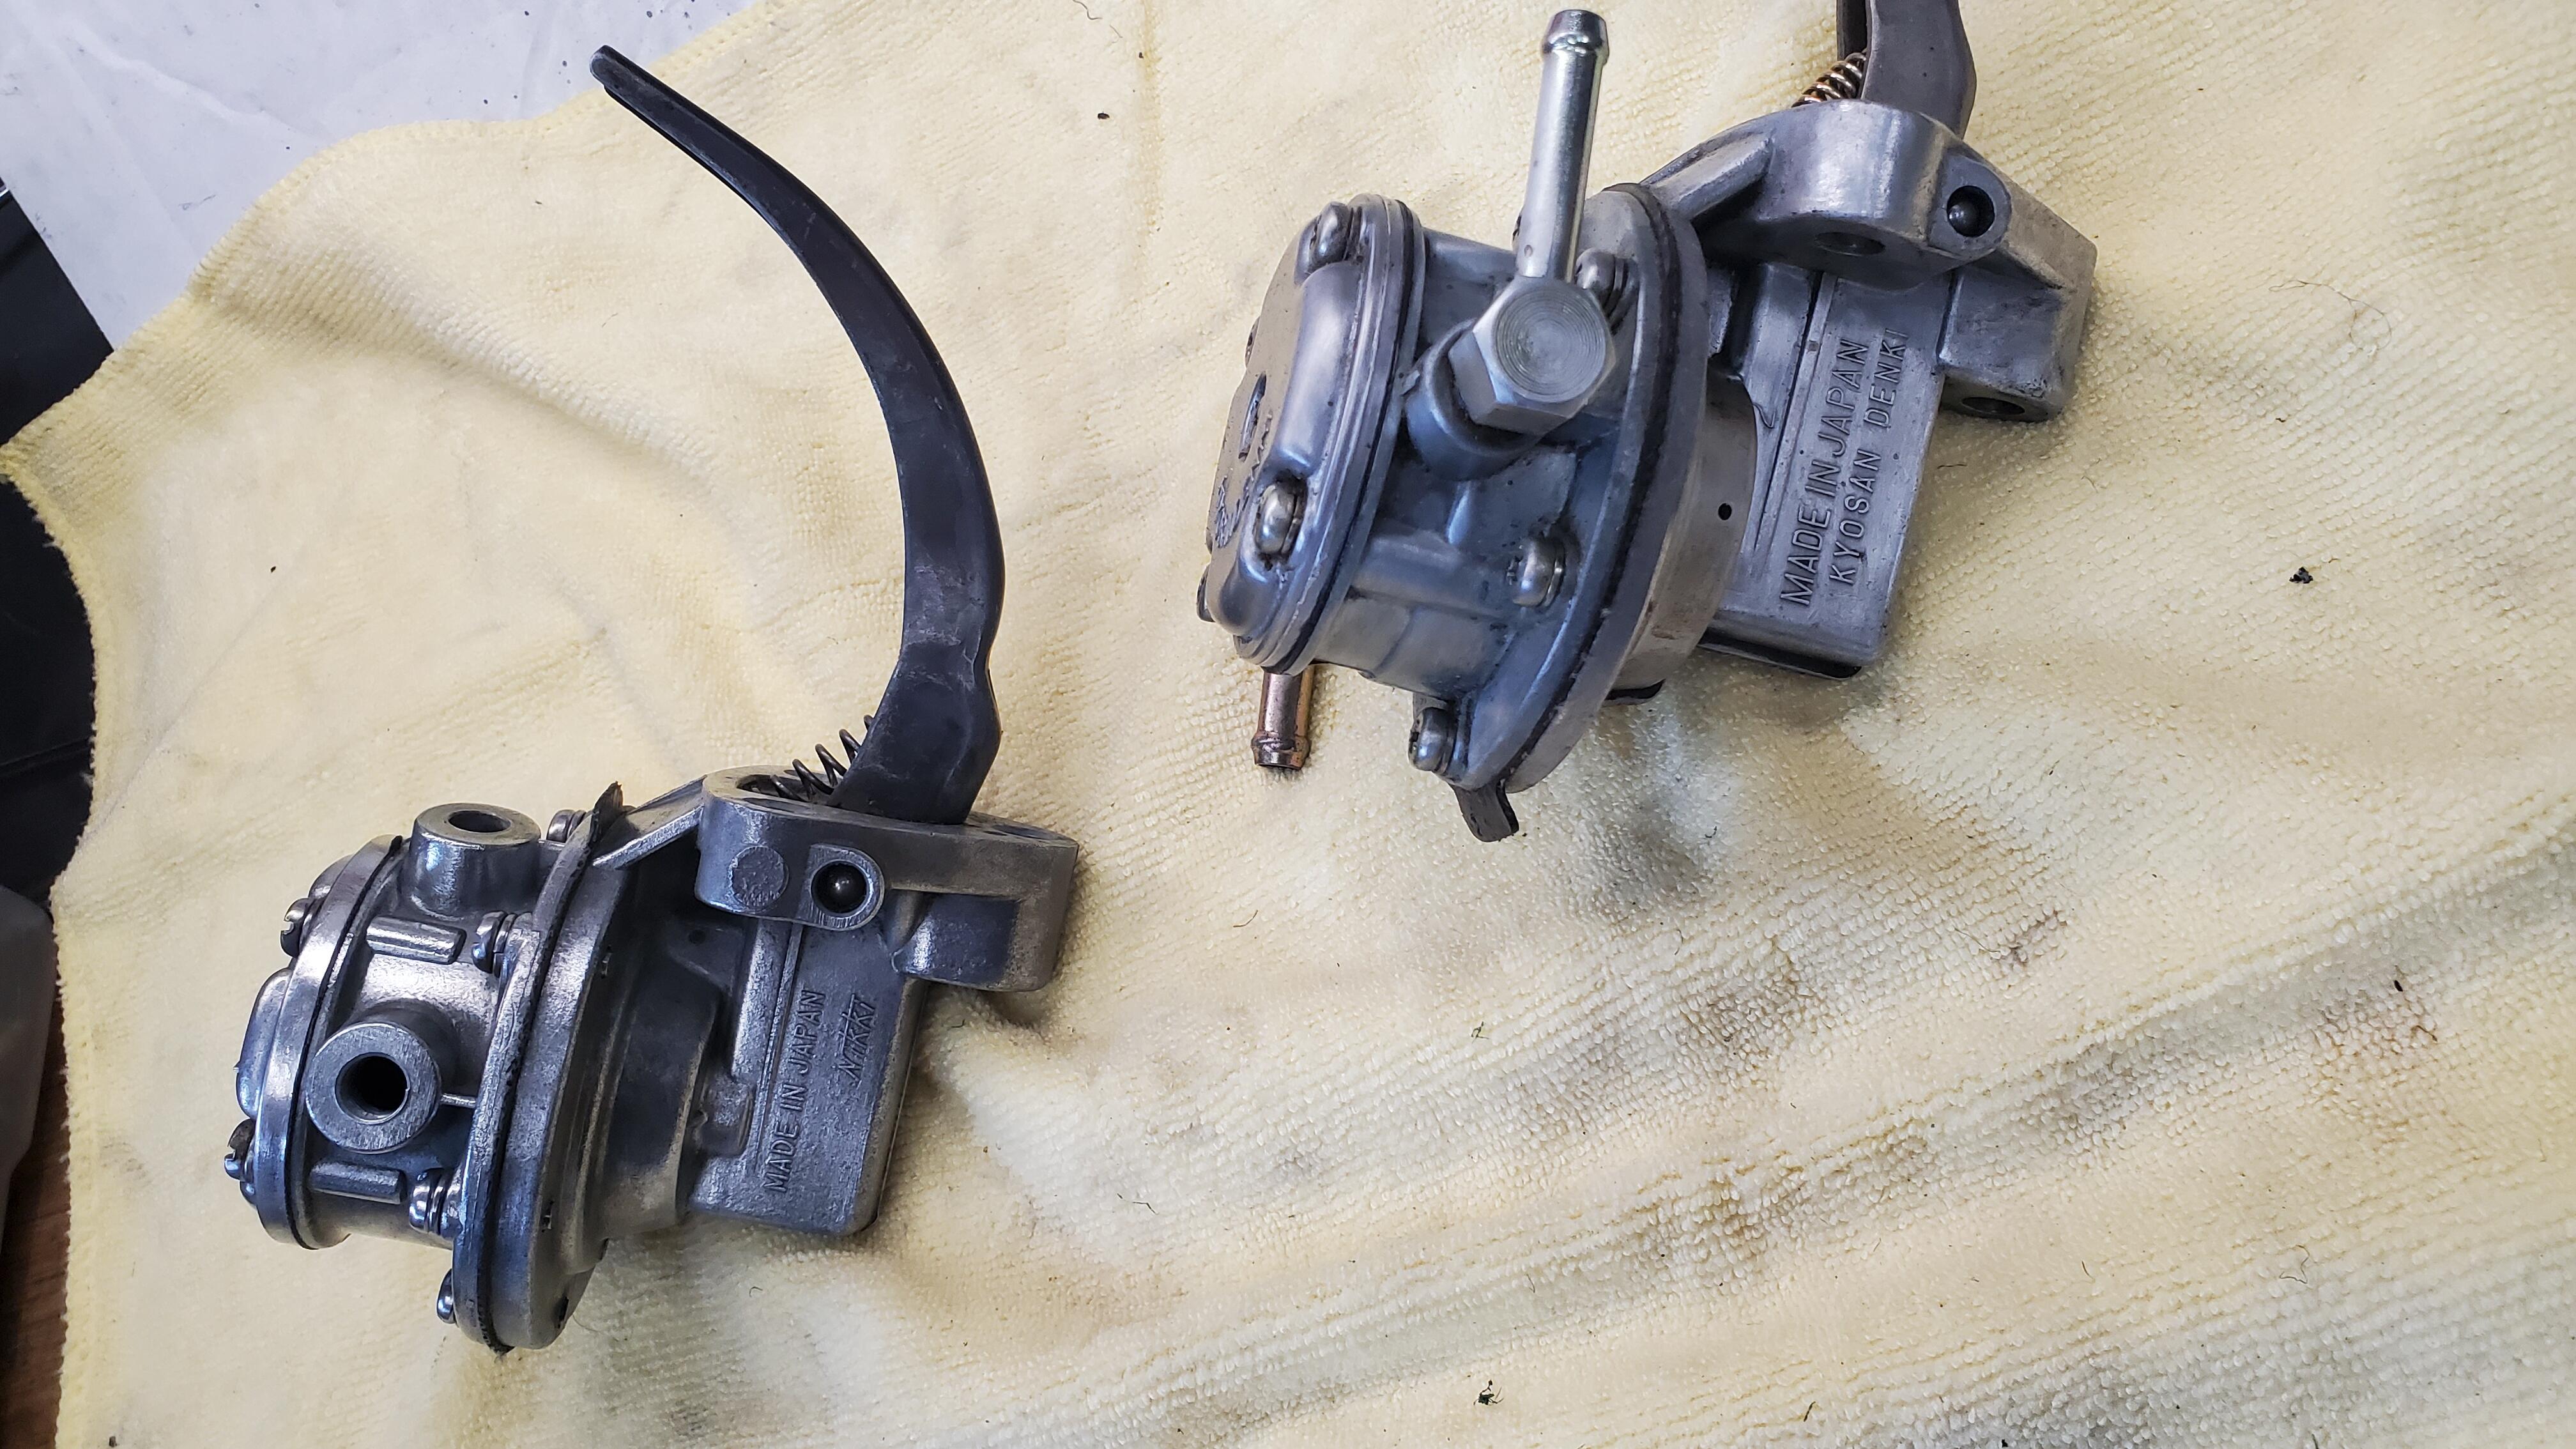
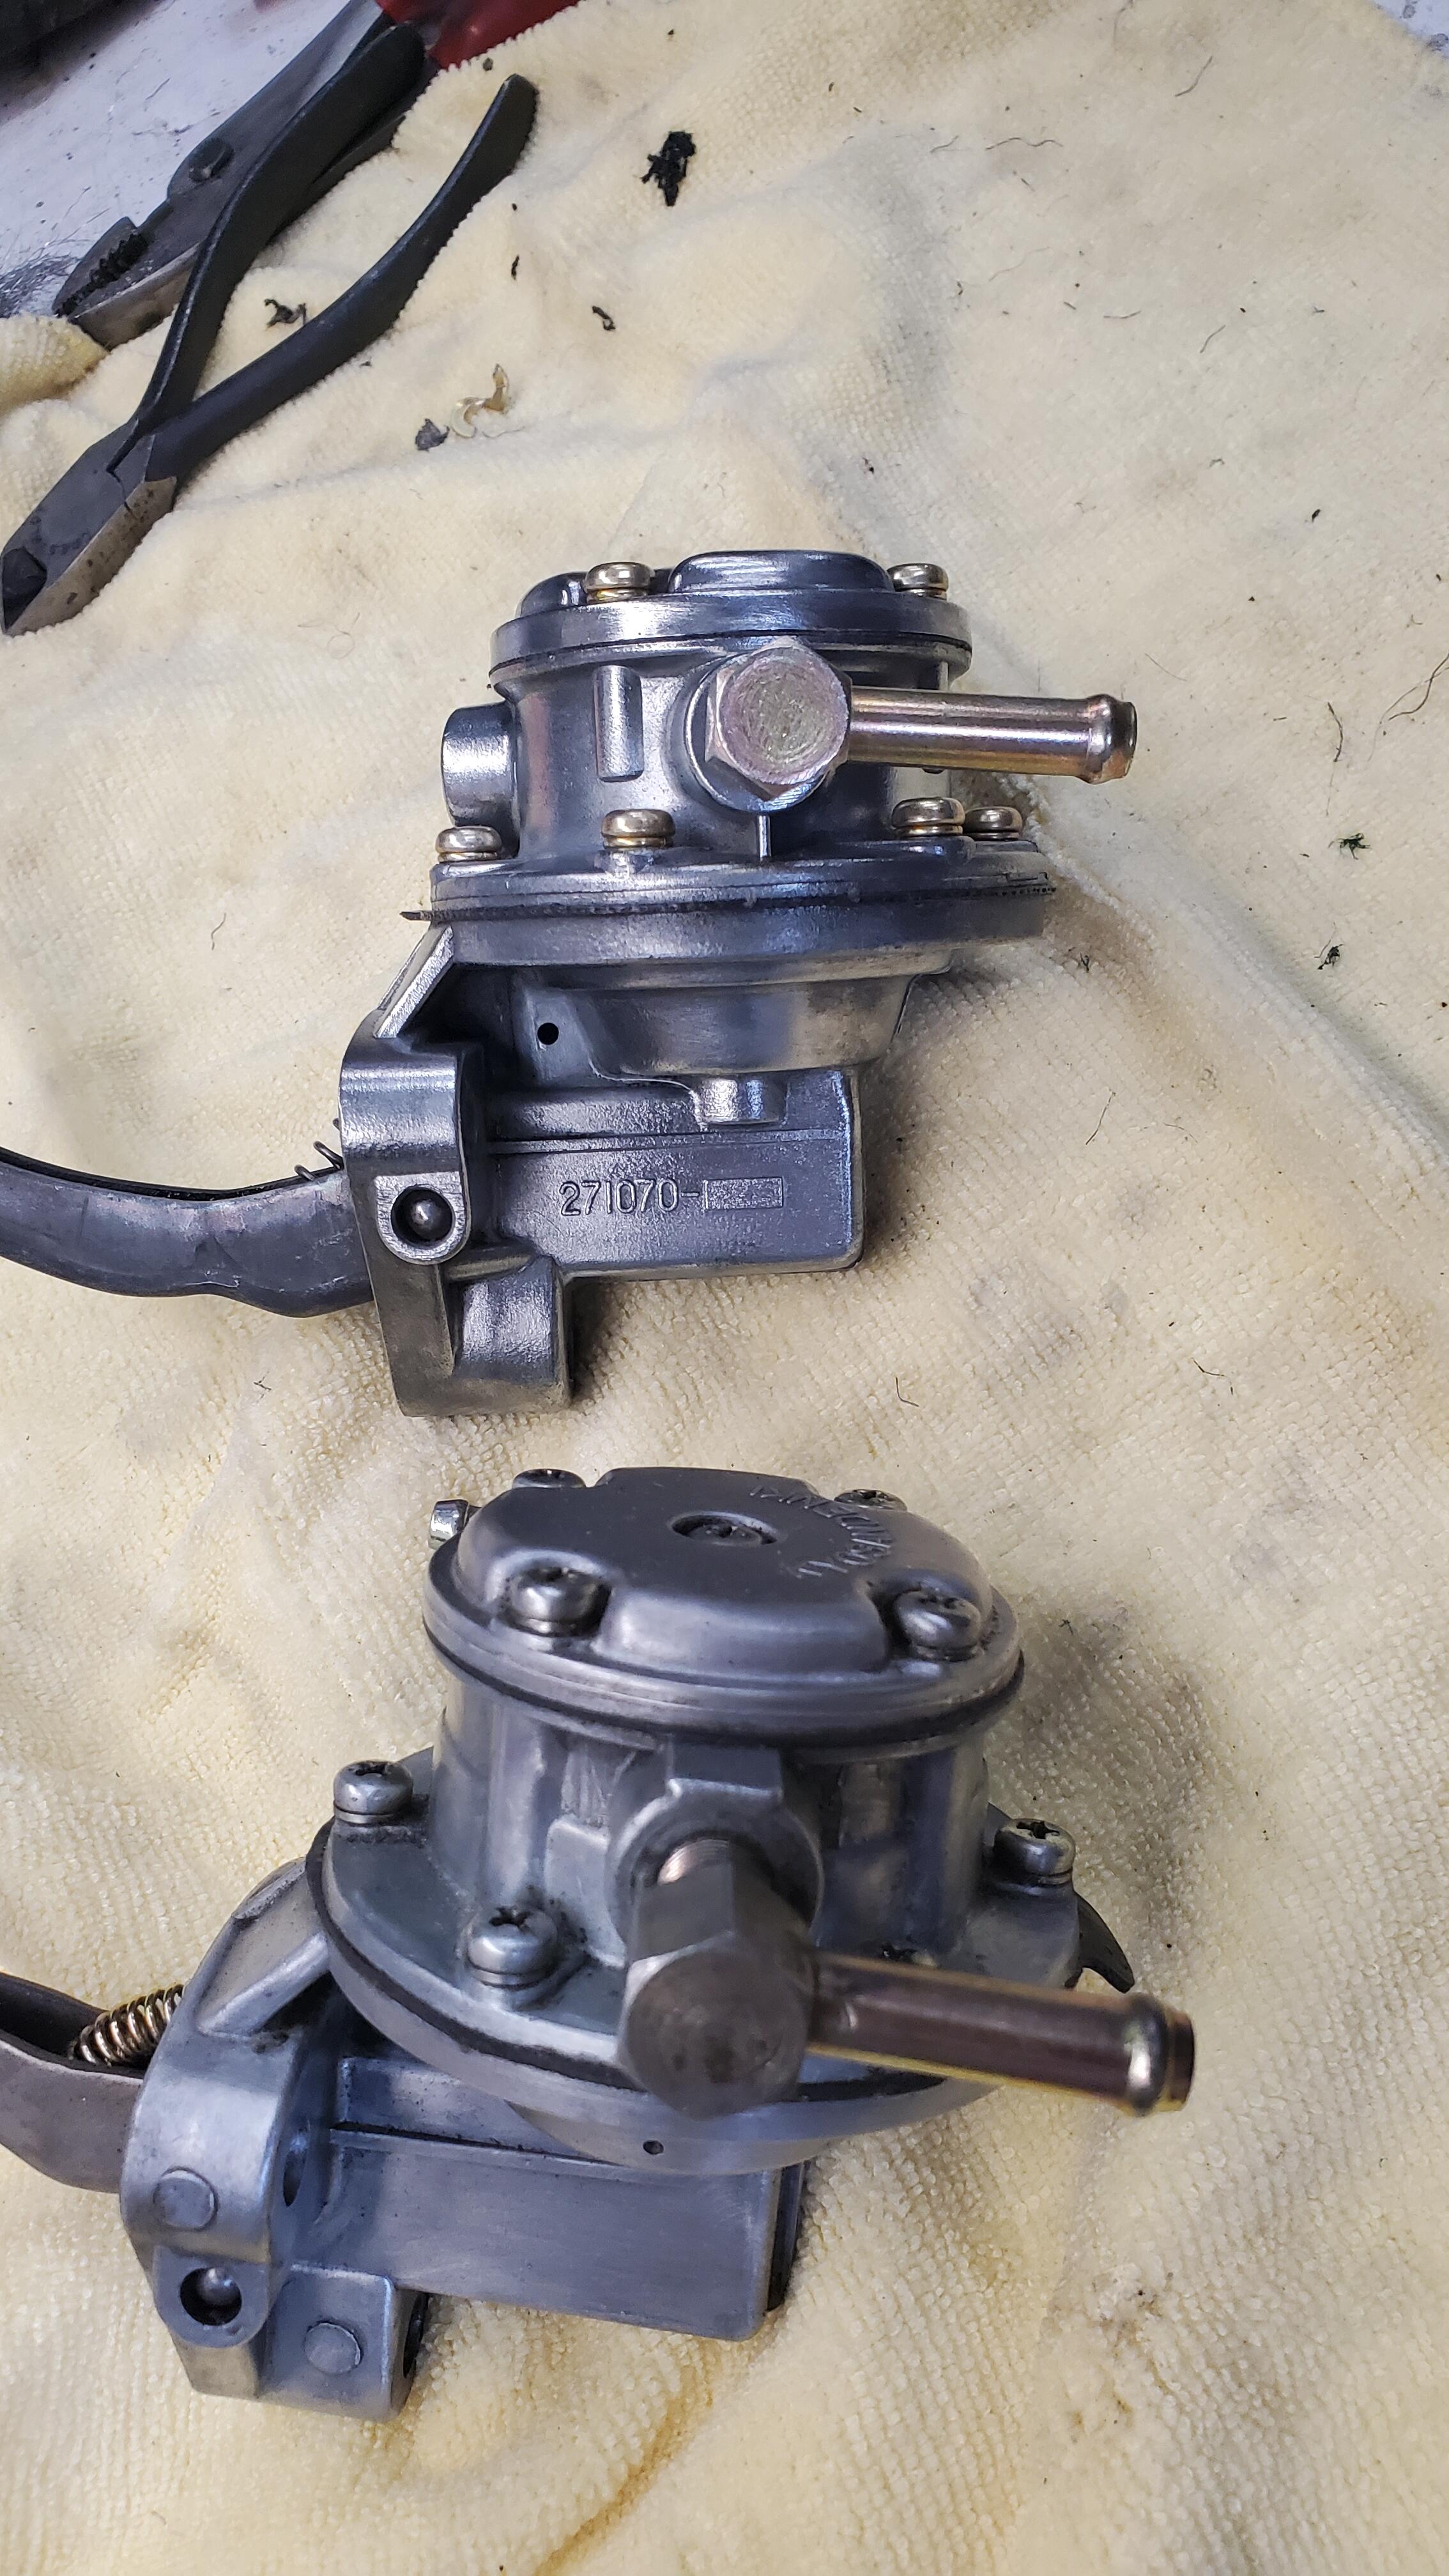
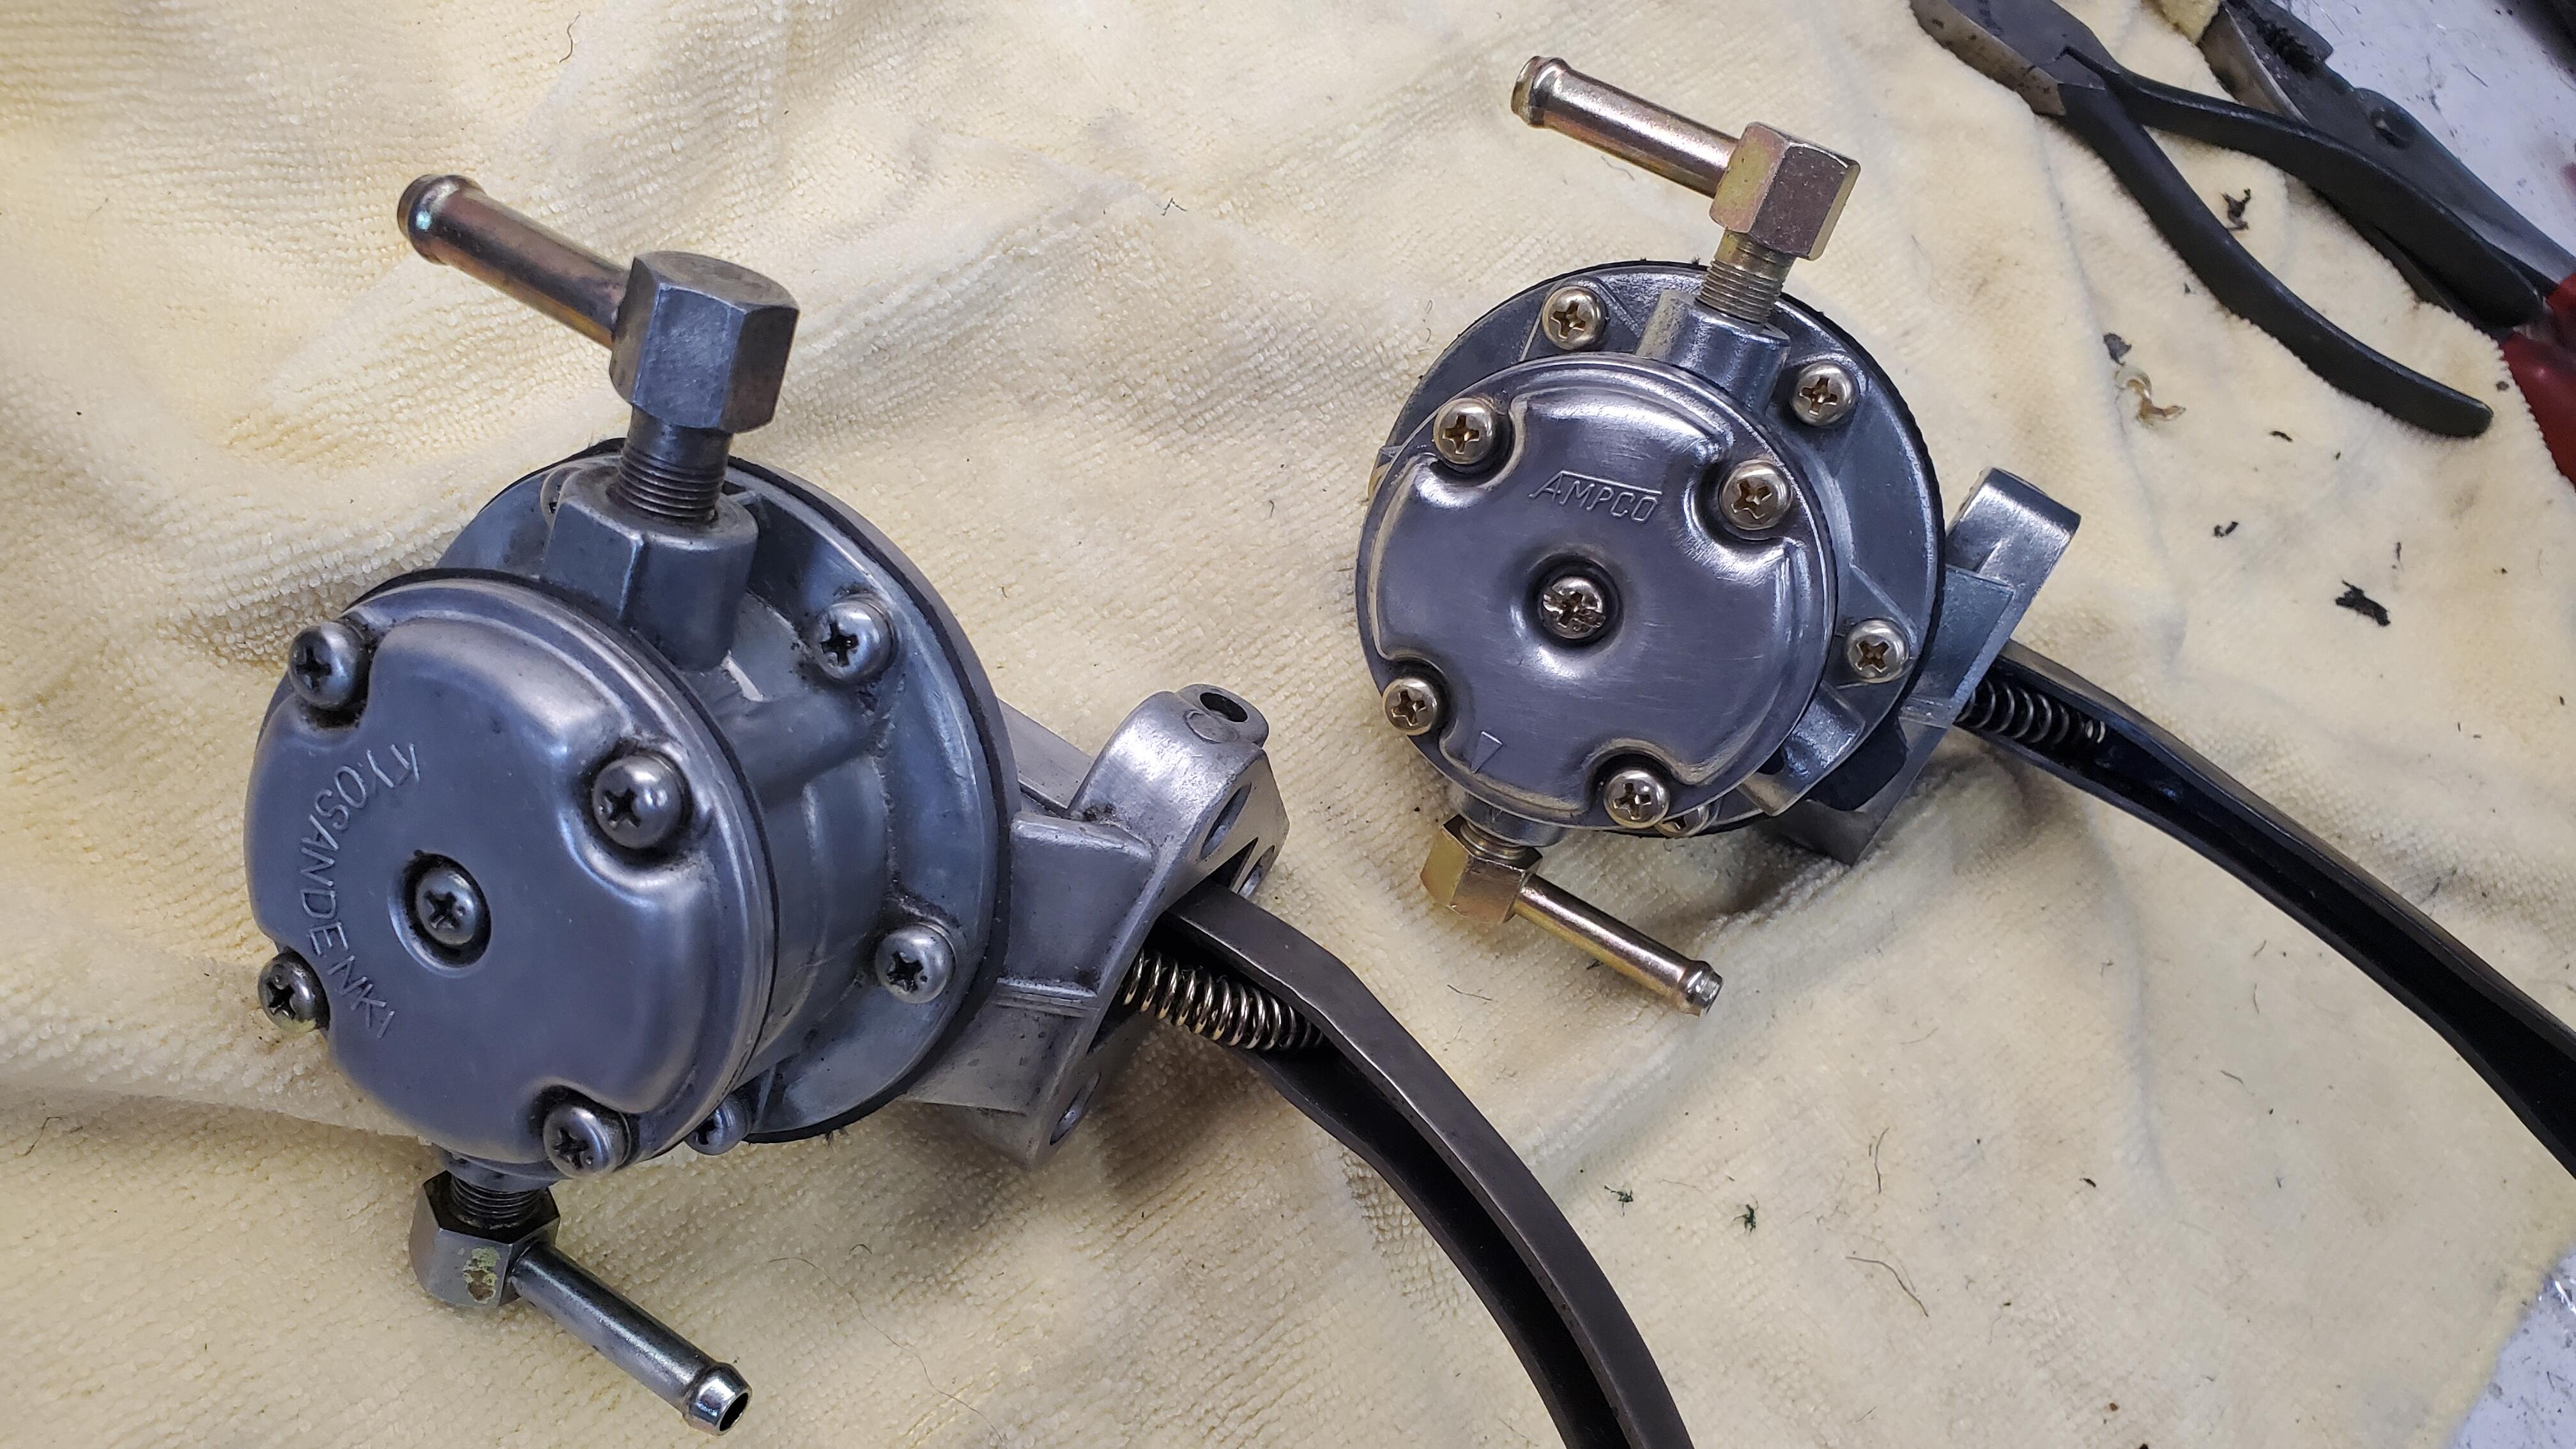
I have two fuel pumps, the one that came with the car and one sent by the owner. The one that came with the car looks like it had the cap replaced for some reason. The base looks like the original Nikki, but the cover is an Ampco. I cleaned up the original and will go with that. If anyone has a Nikki top cover, please contact me. Thanks


-
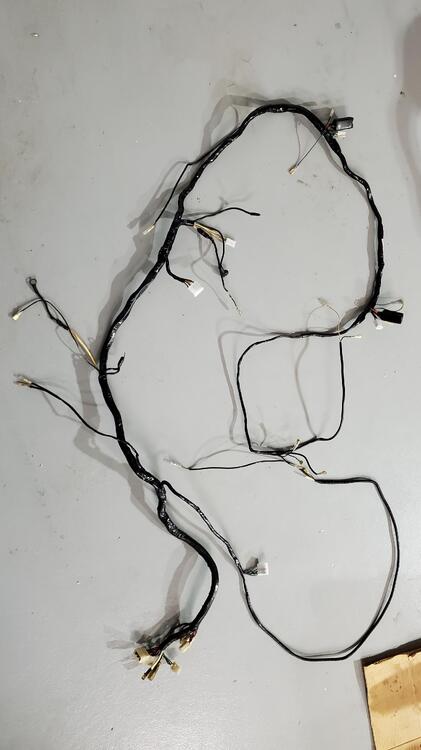
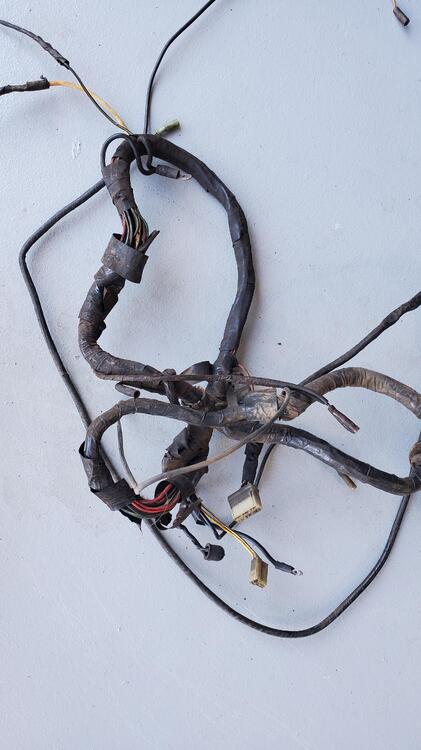
Currently I am working on cleaning up the electrical harnesses. New Connector blocks and terminals from Vintage Connections came in last week. Harness pics are below. The last one is the cleaned up section. Also looks like the ID tags are in good shape and salvagable.
-
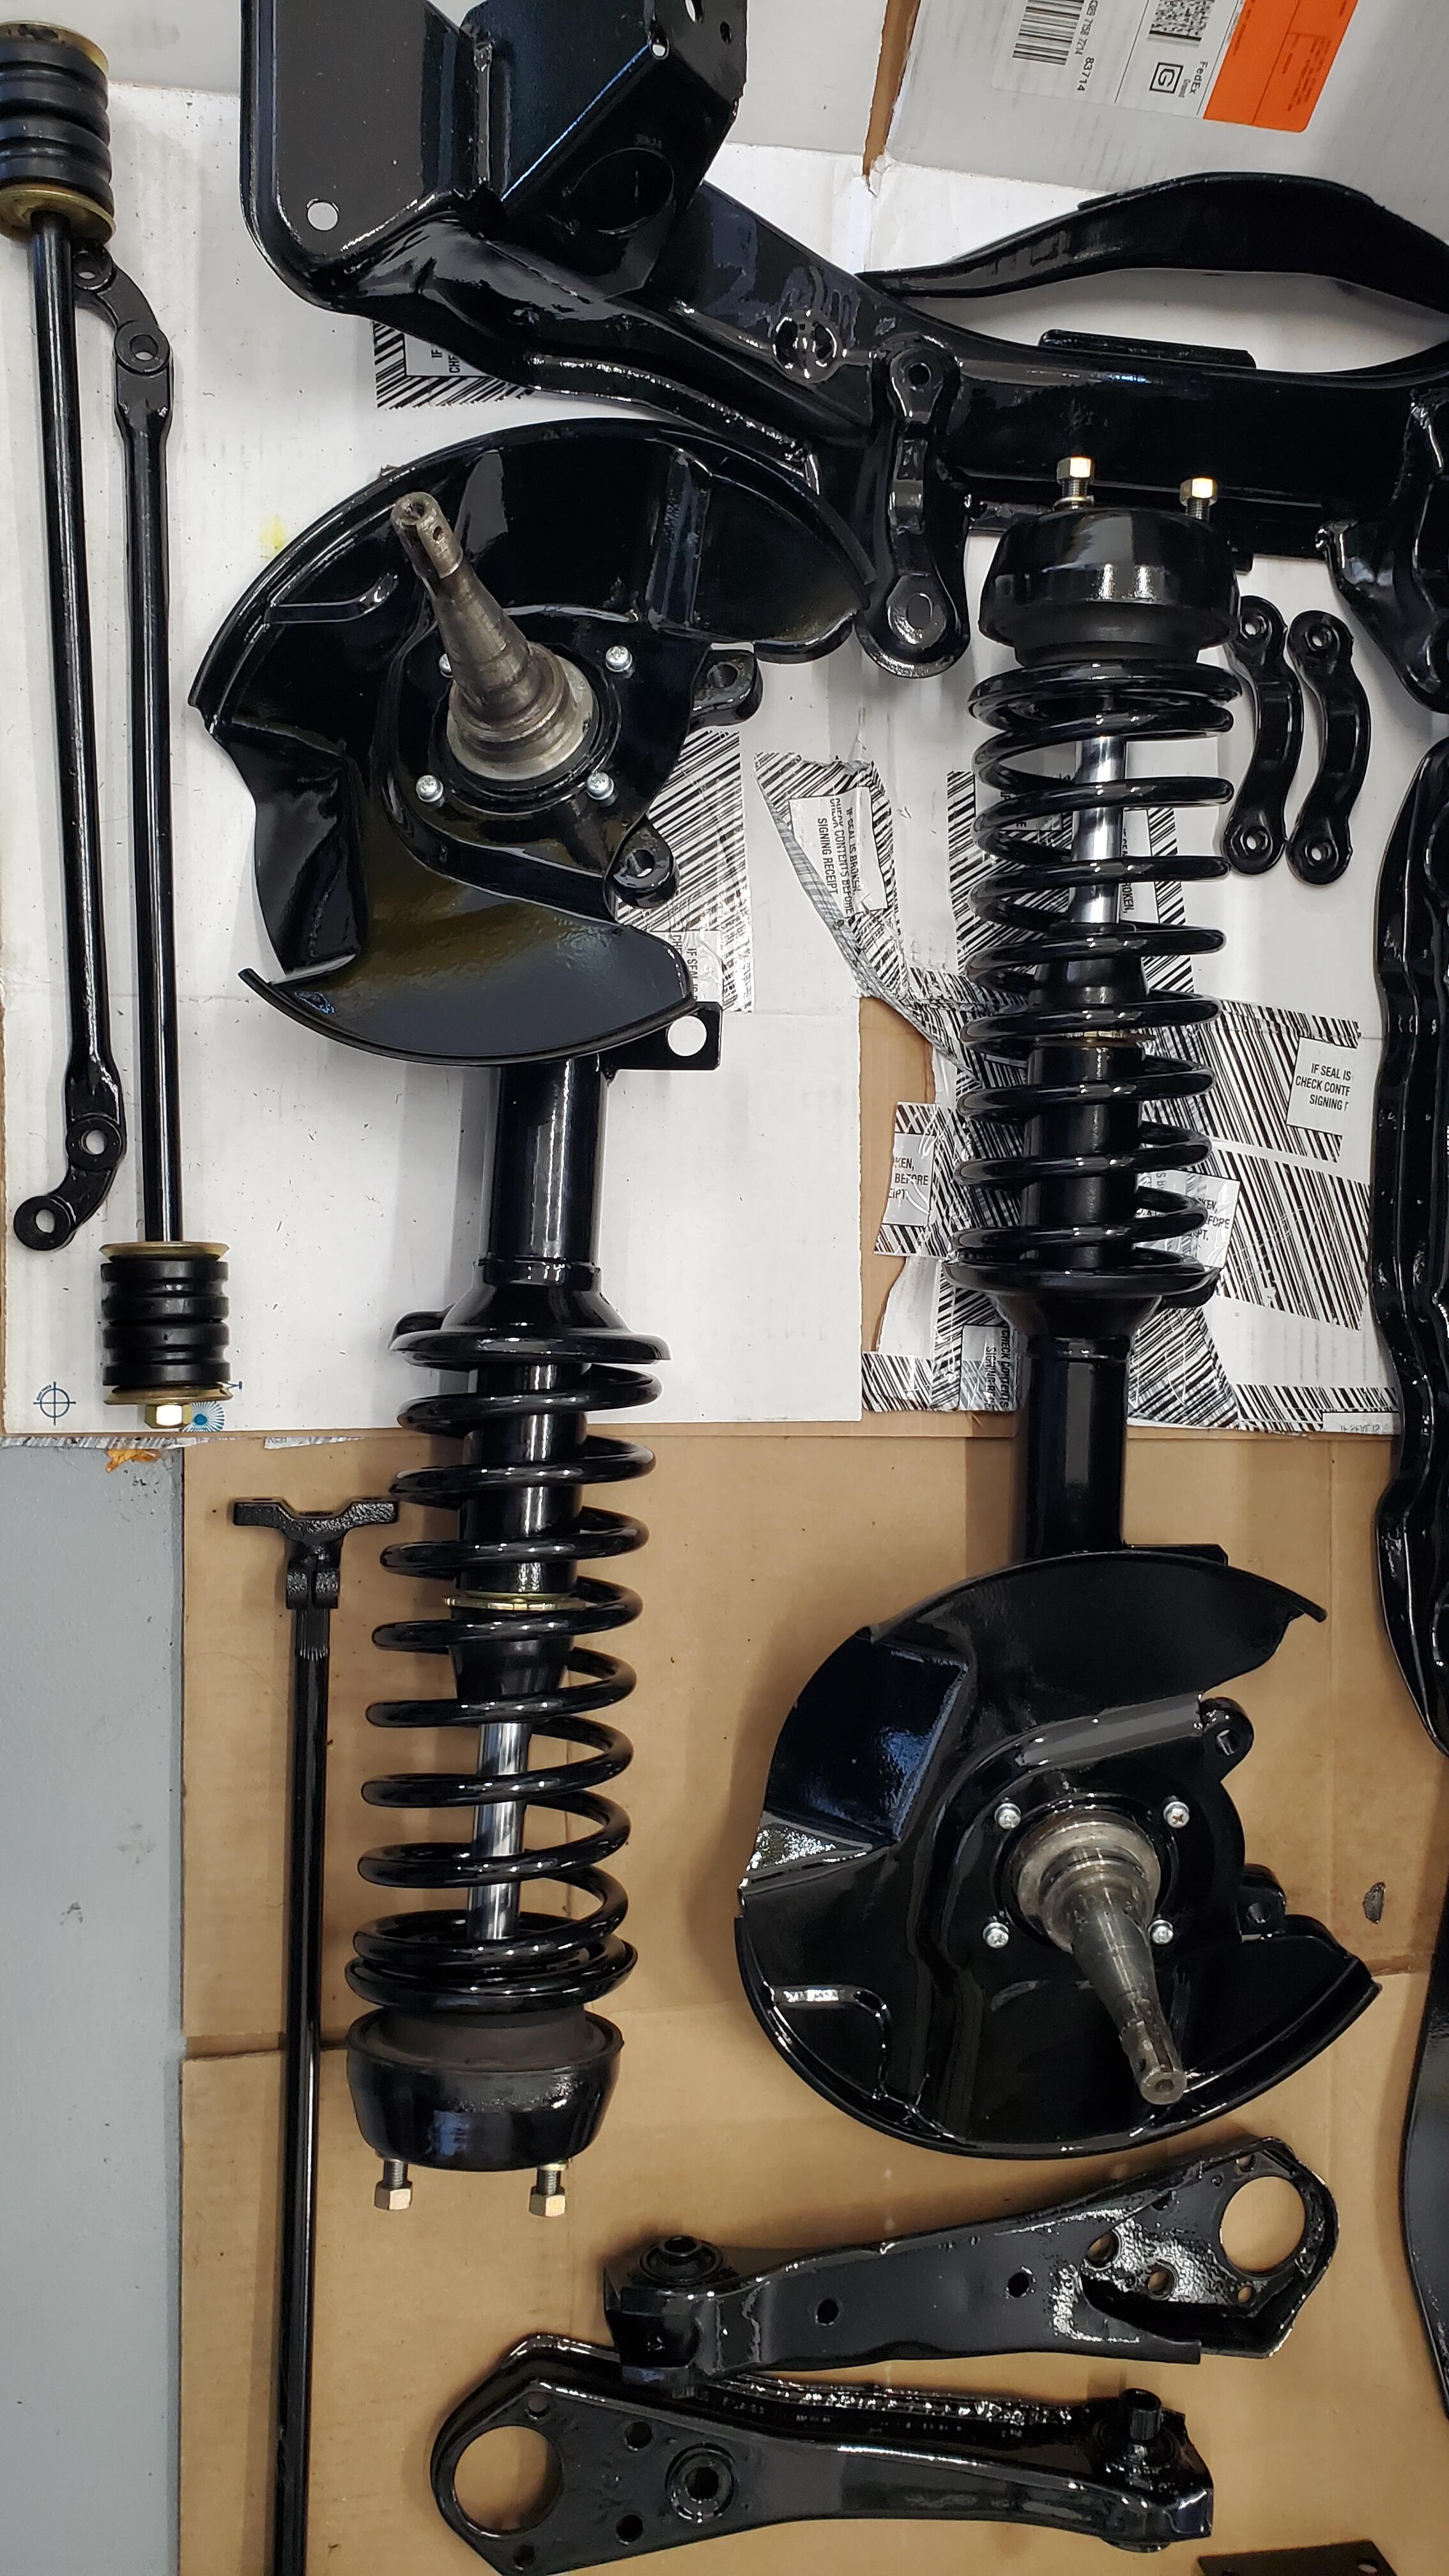
I have been pre-assembling some of the suspension parts. Looking forward to actually puttling these on the body. The owner sent me two radios to check for operation. One produces sound but the seek is slow, so I will clean that one up. The other operated nicely, but couldn't find a station. Both had the same antenna set-up, so not sure what's up with that one. 20250222_125123.mp4


-
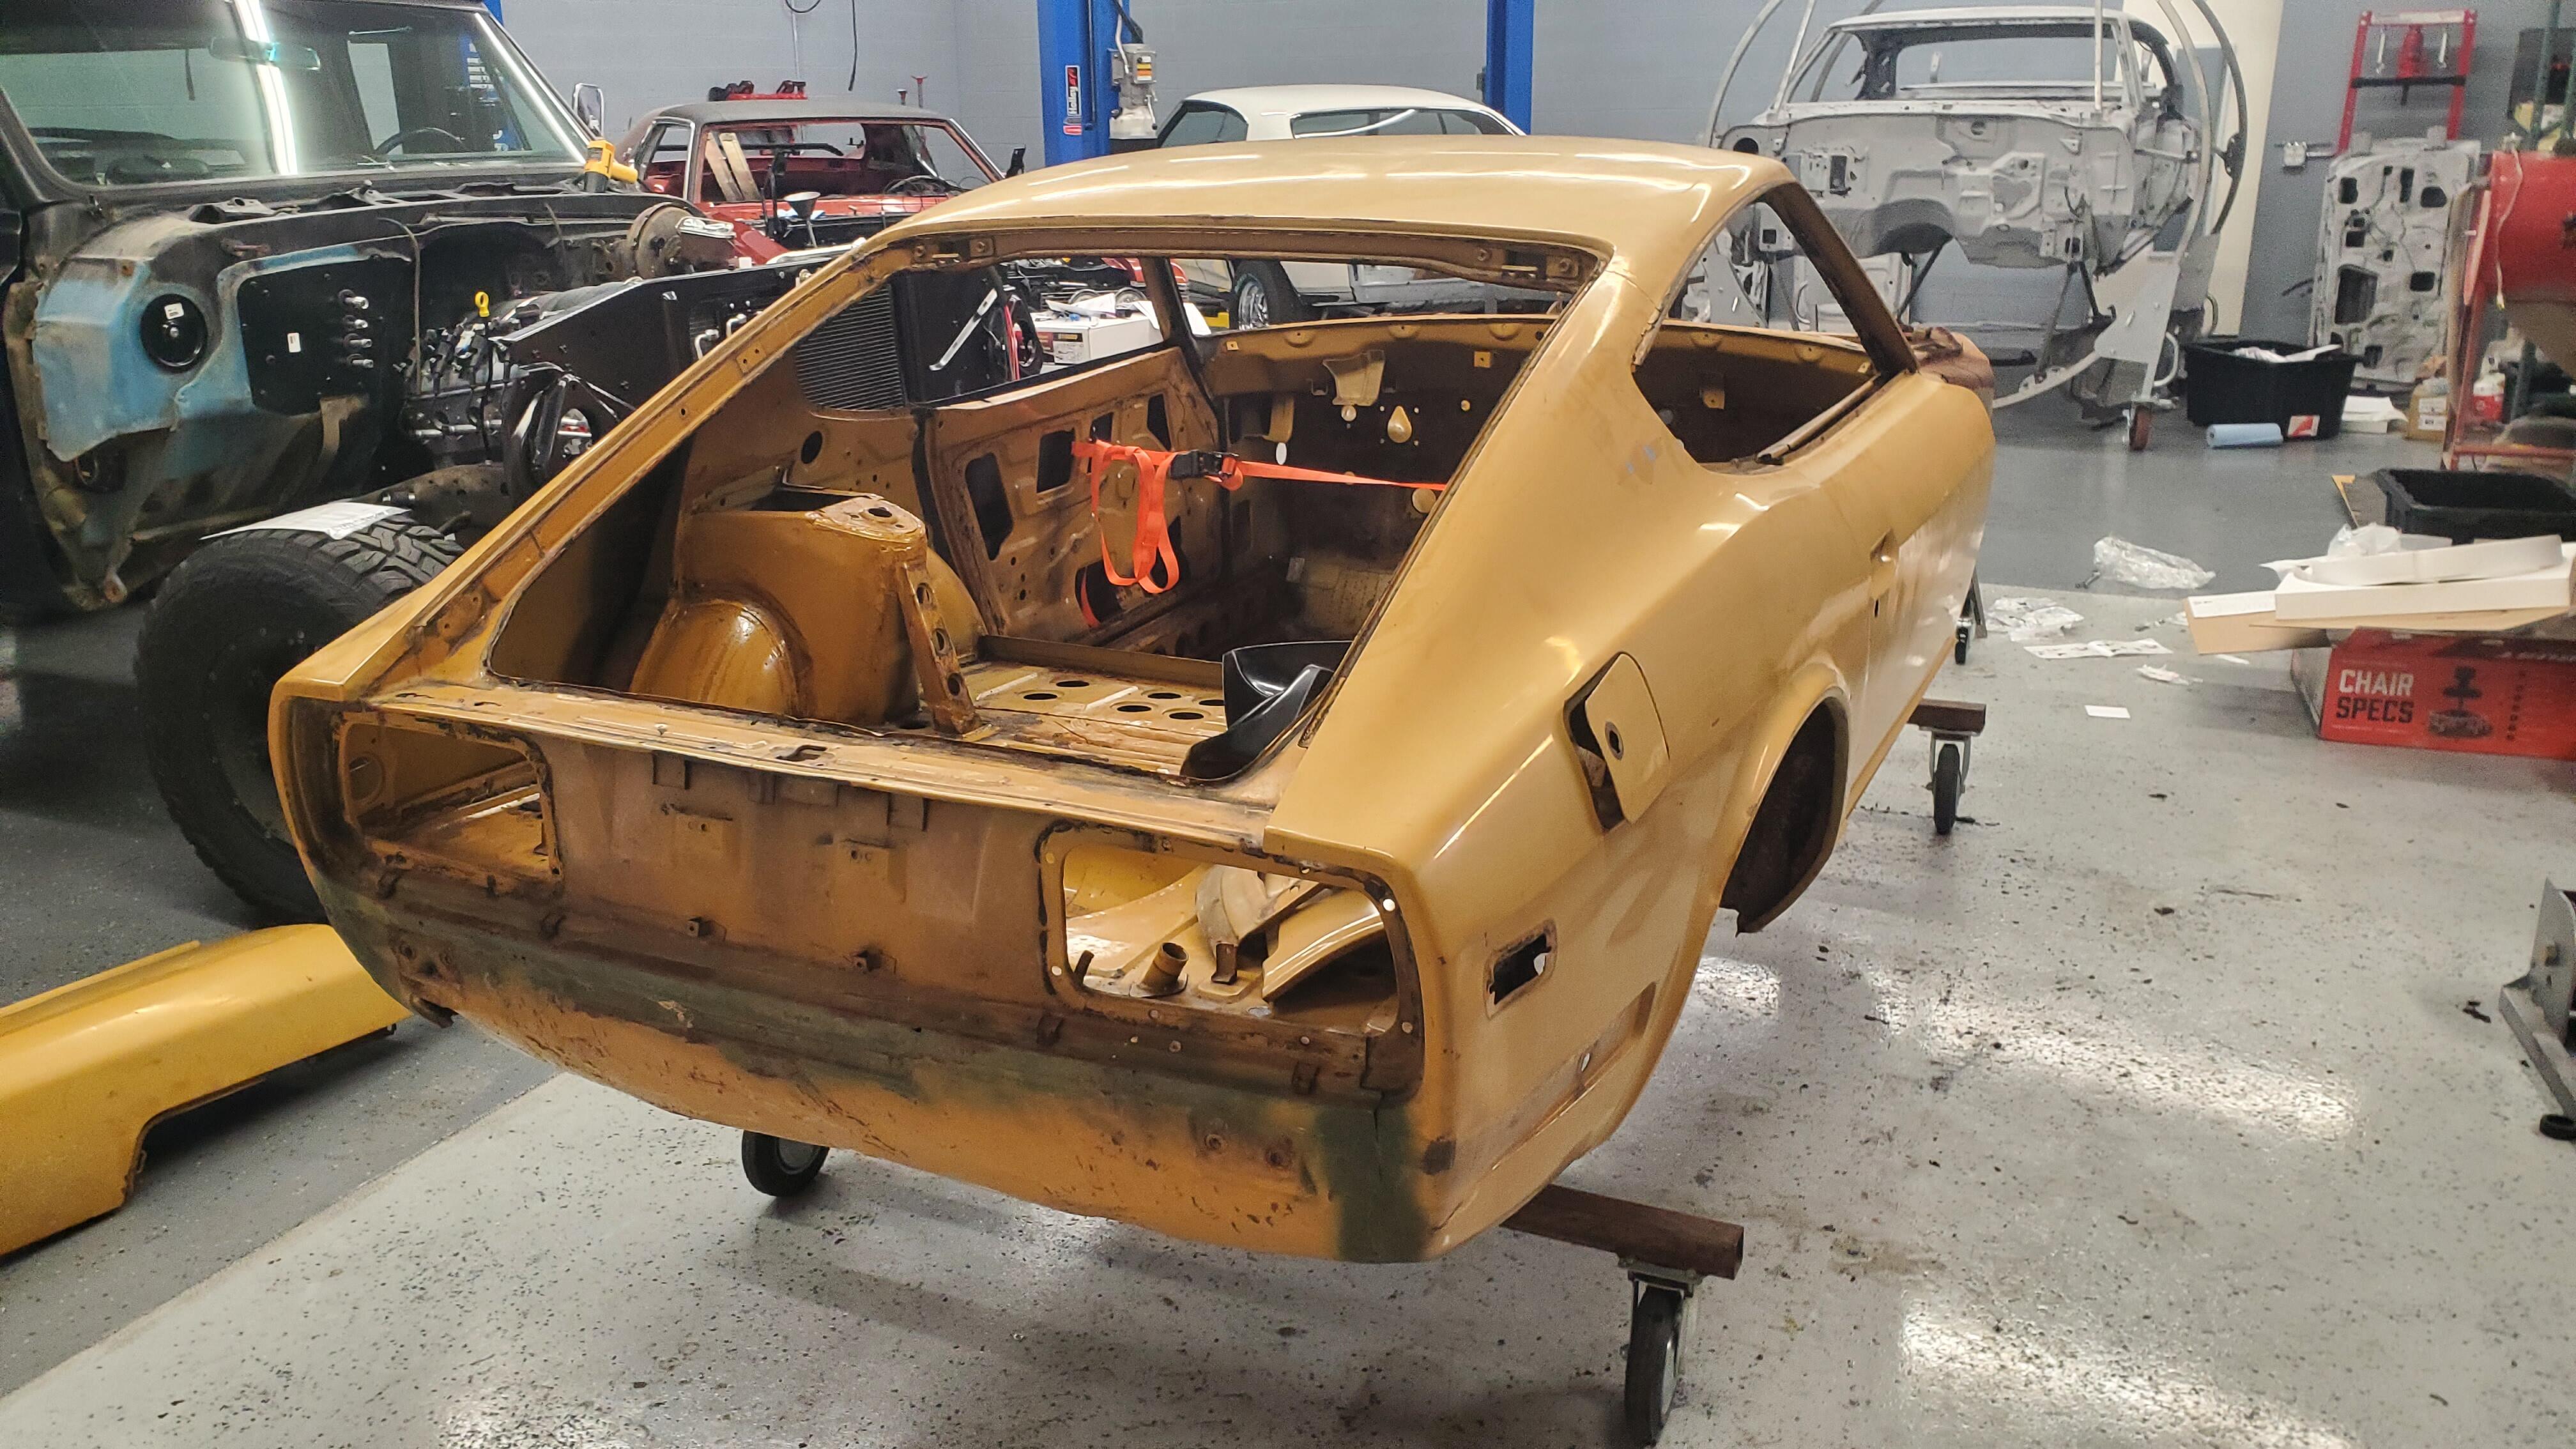
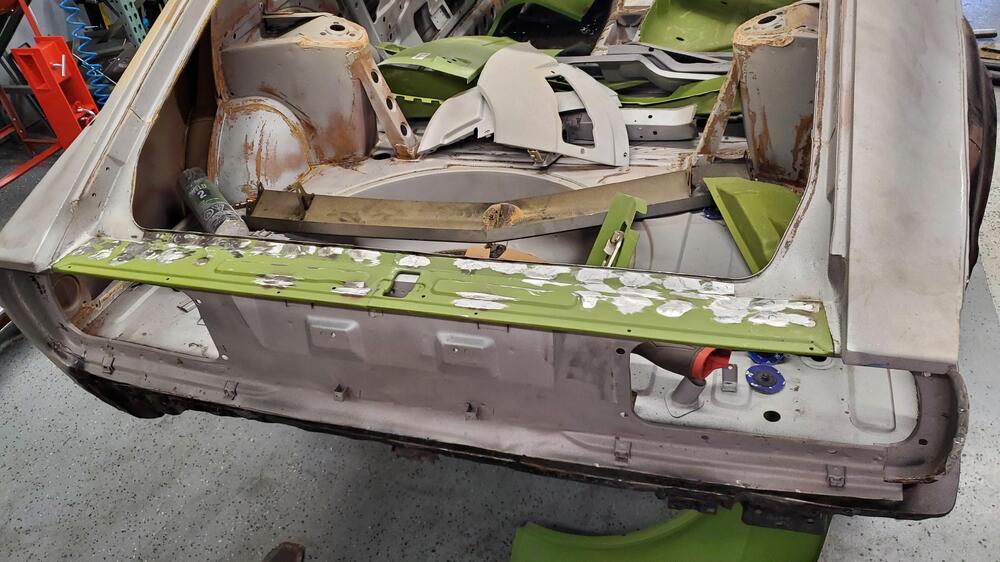
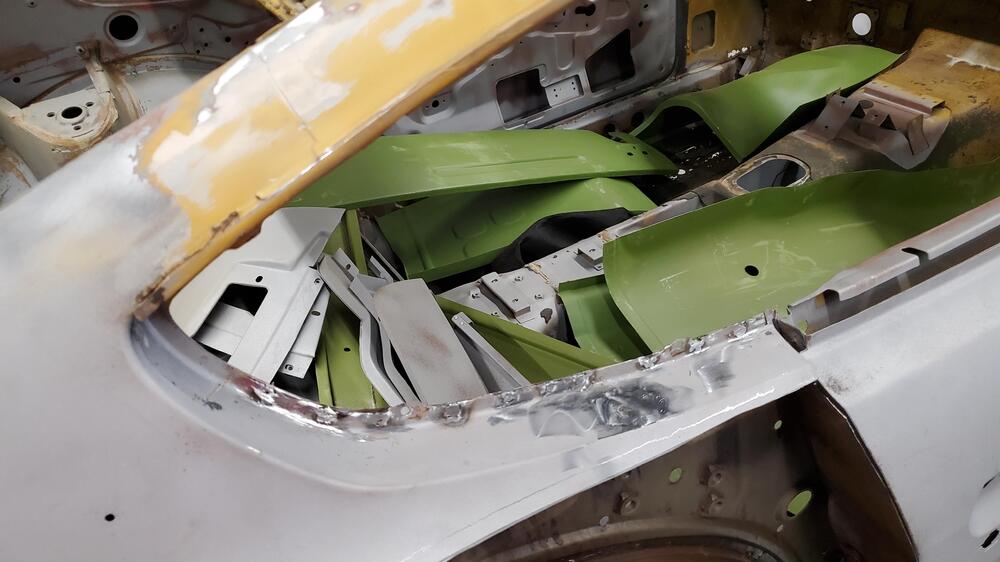
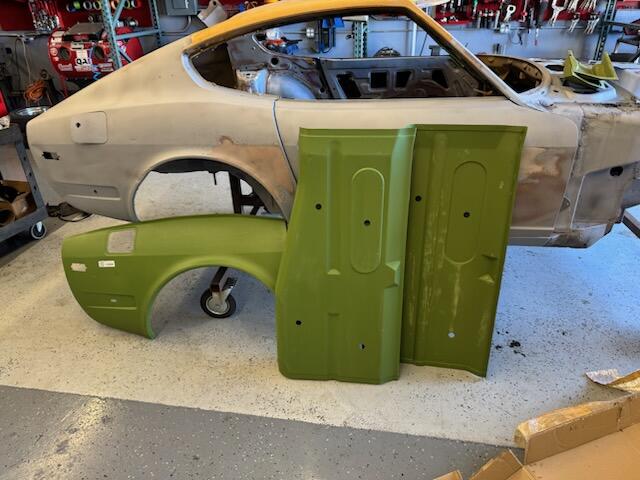
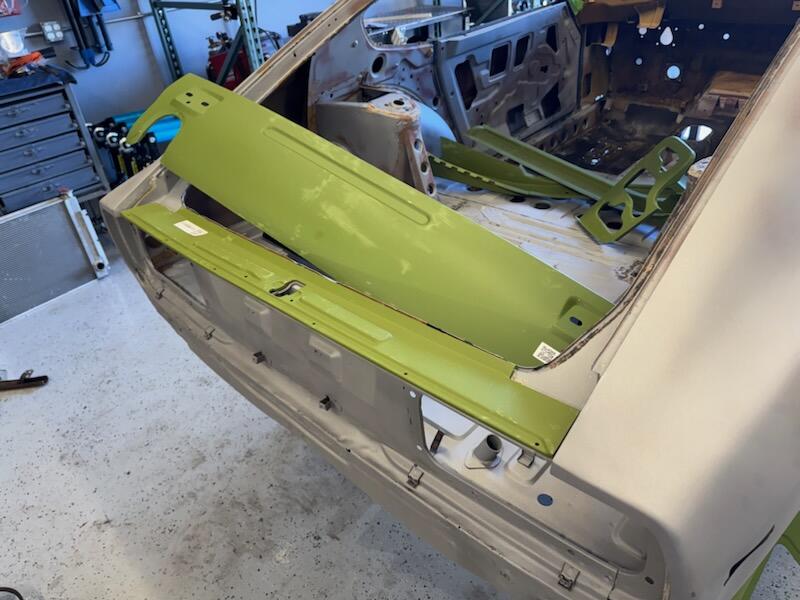
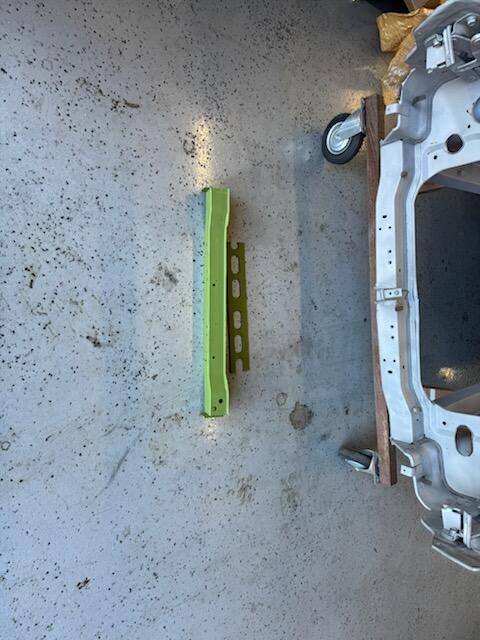
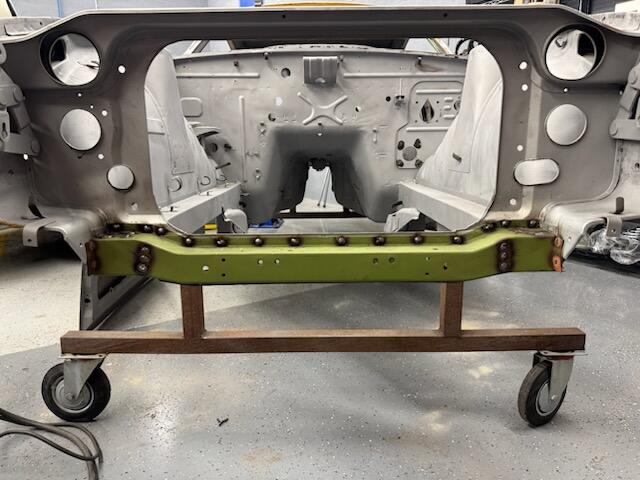
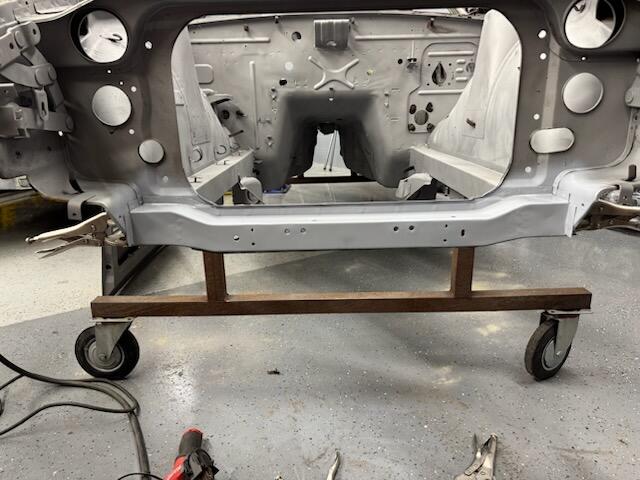
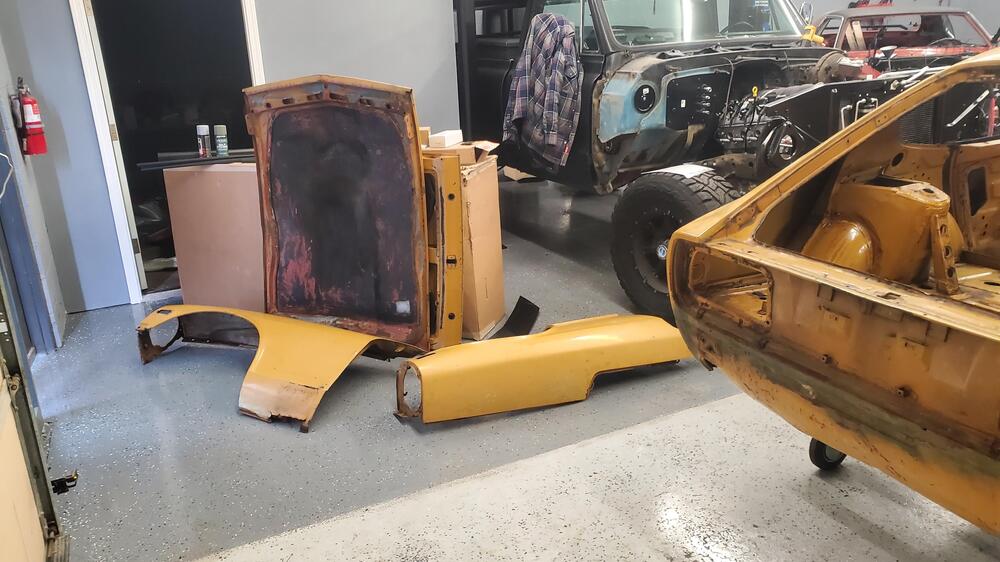
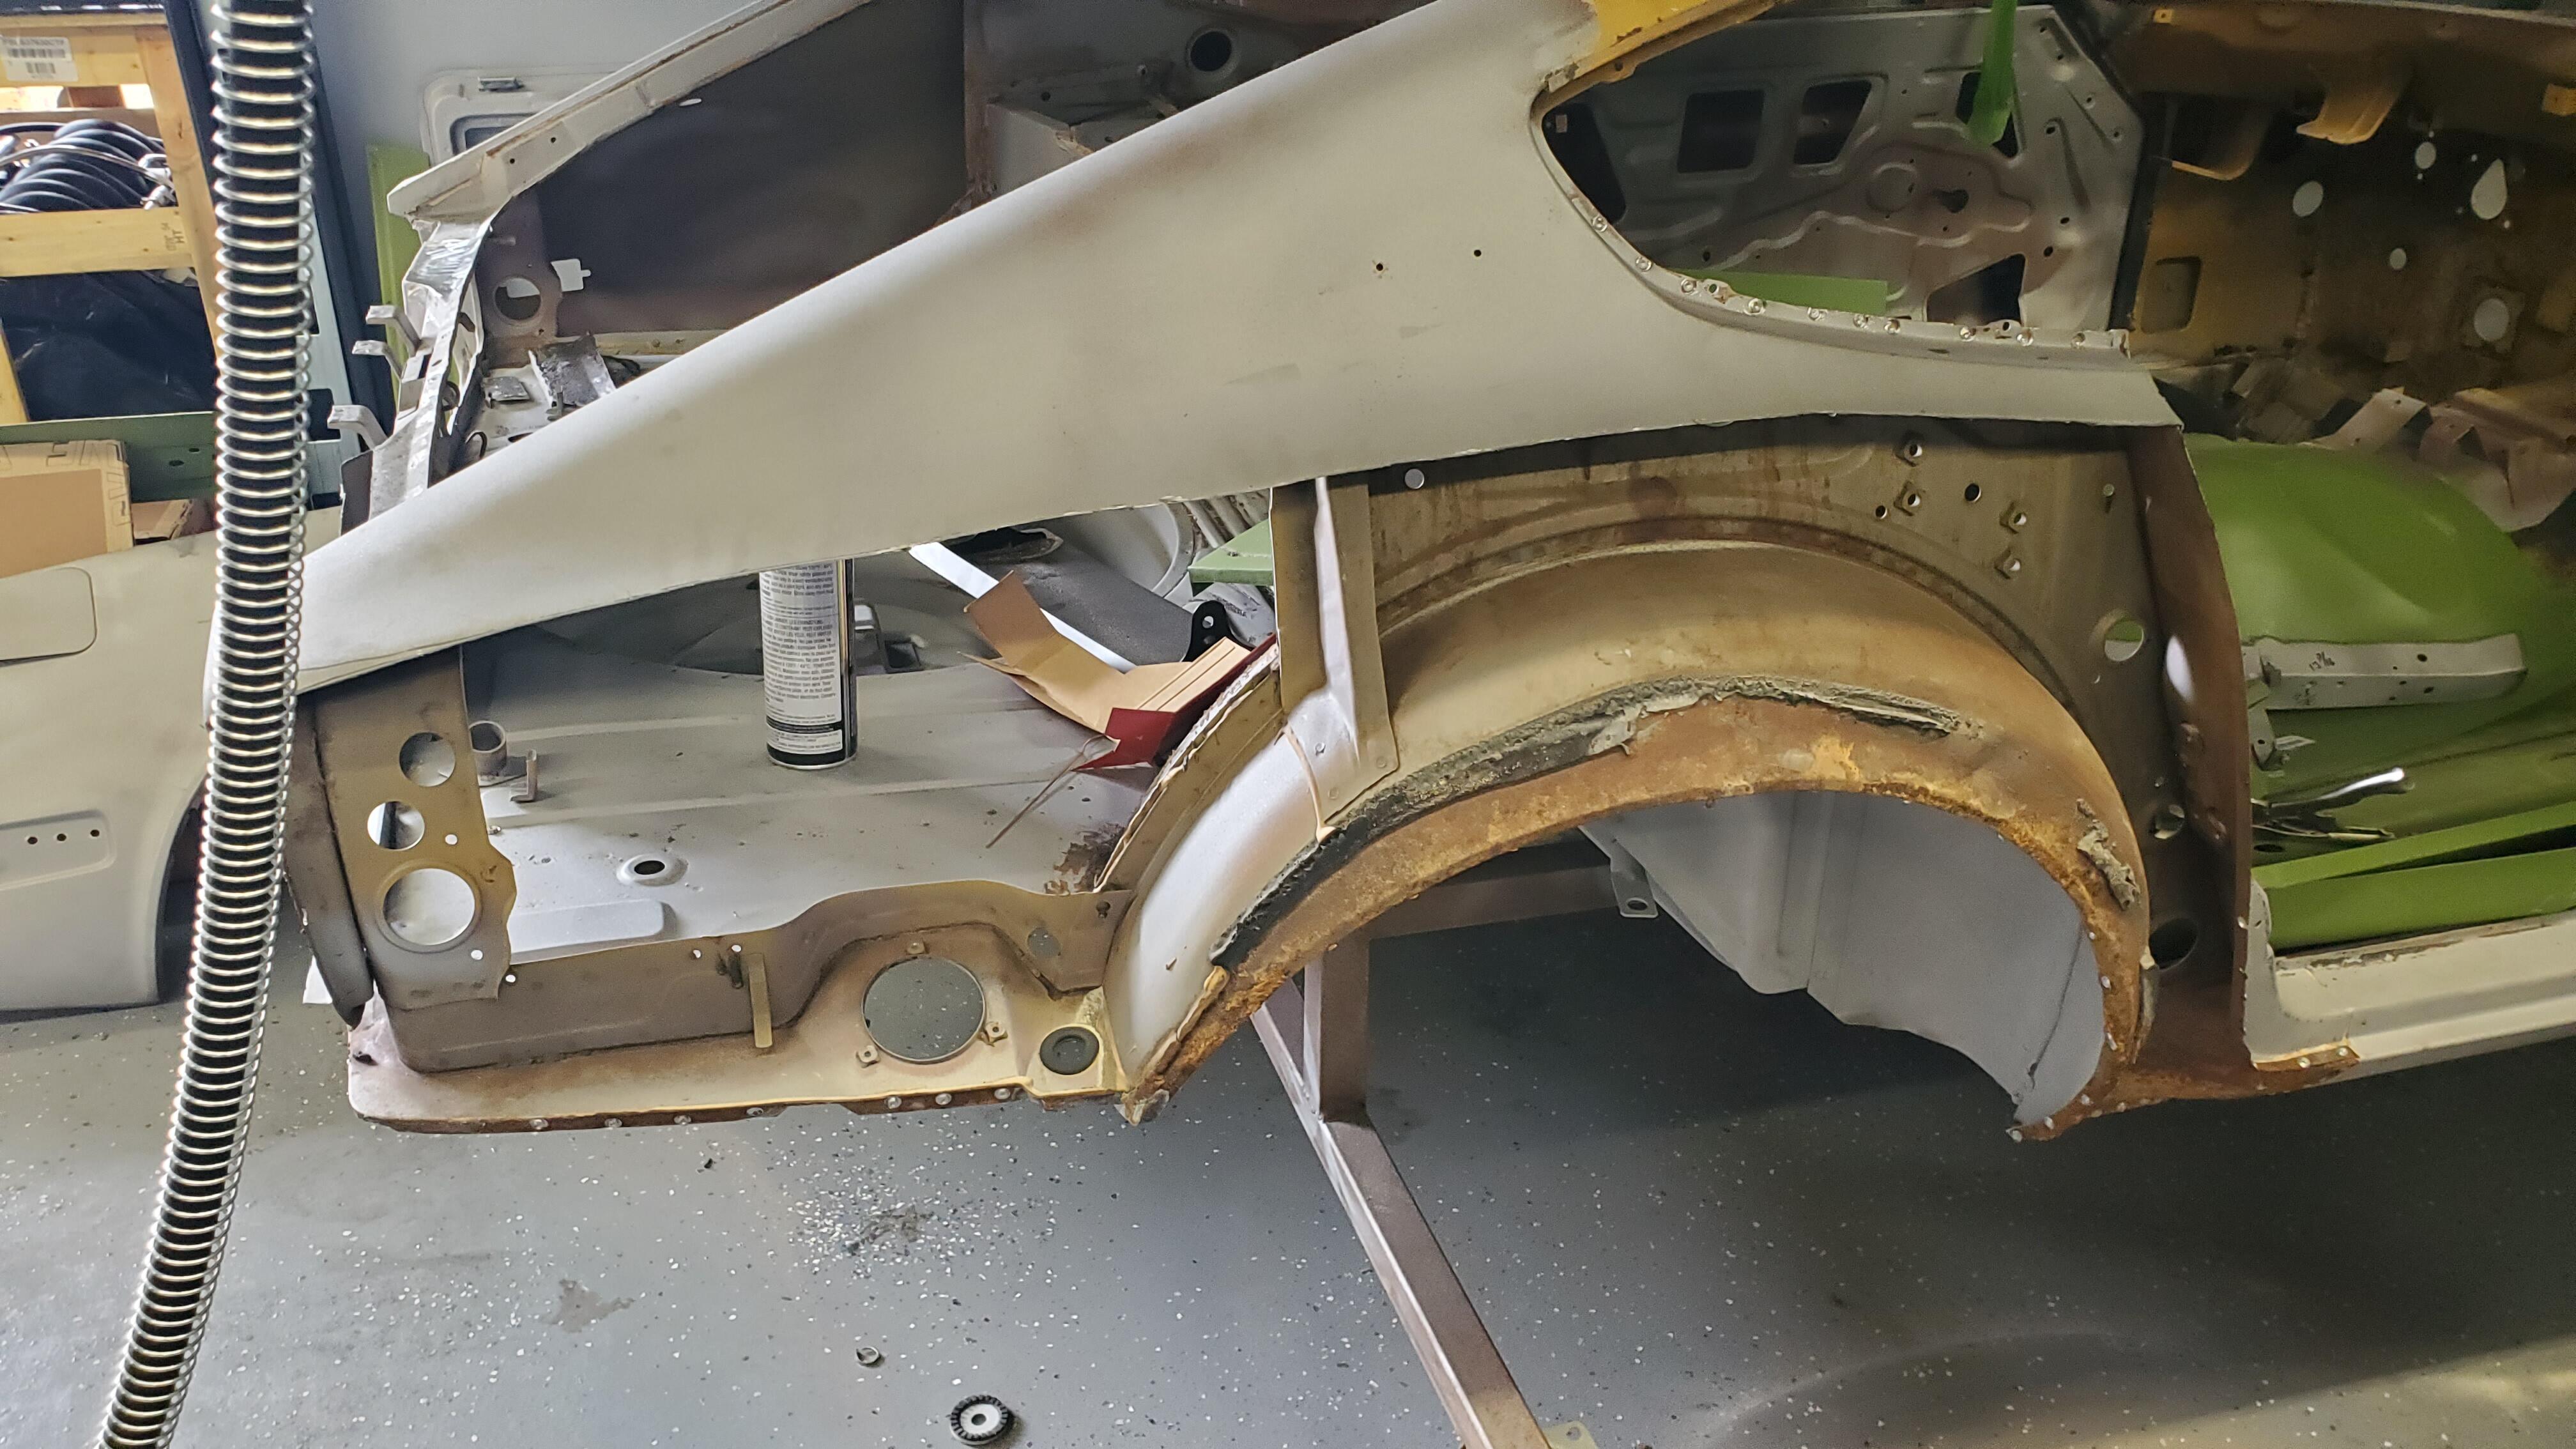
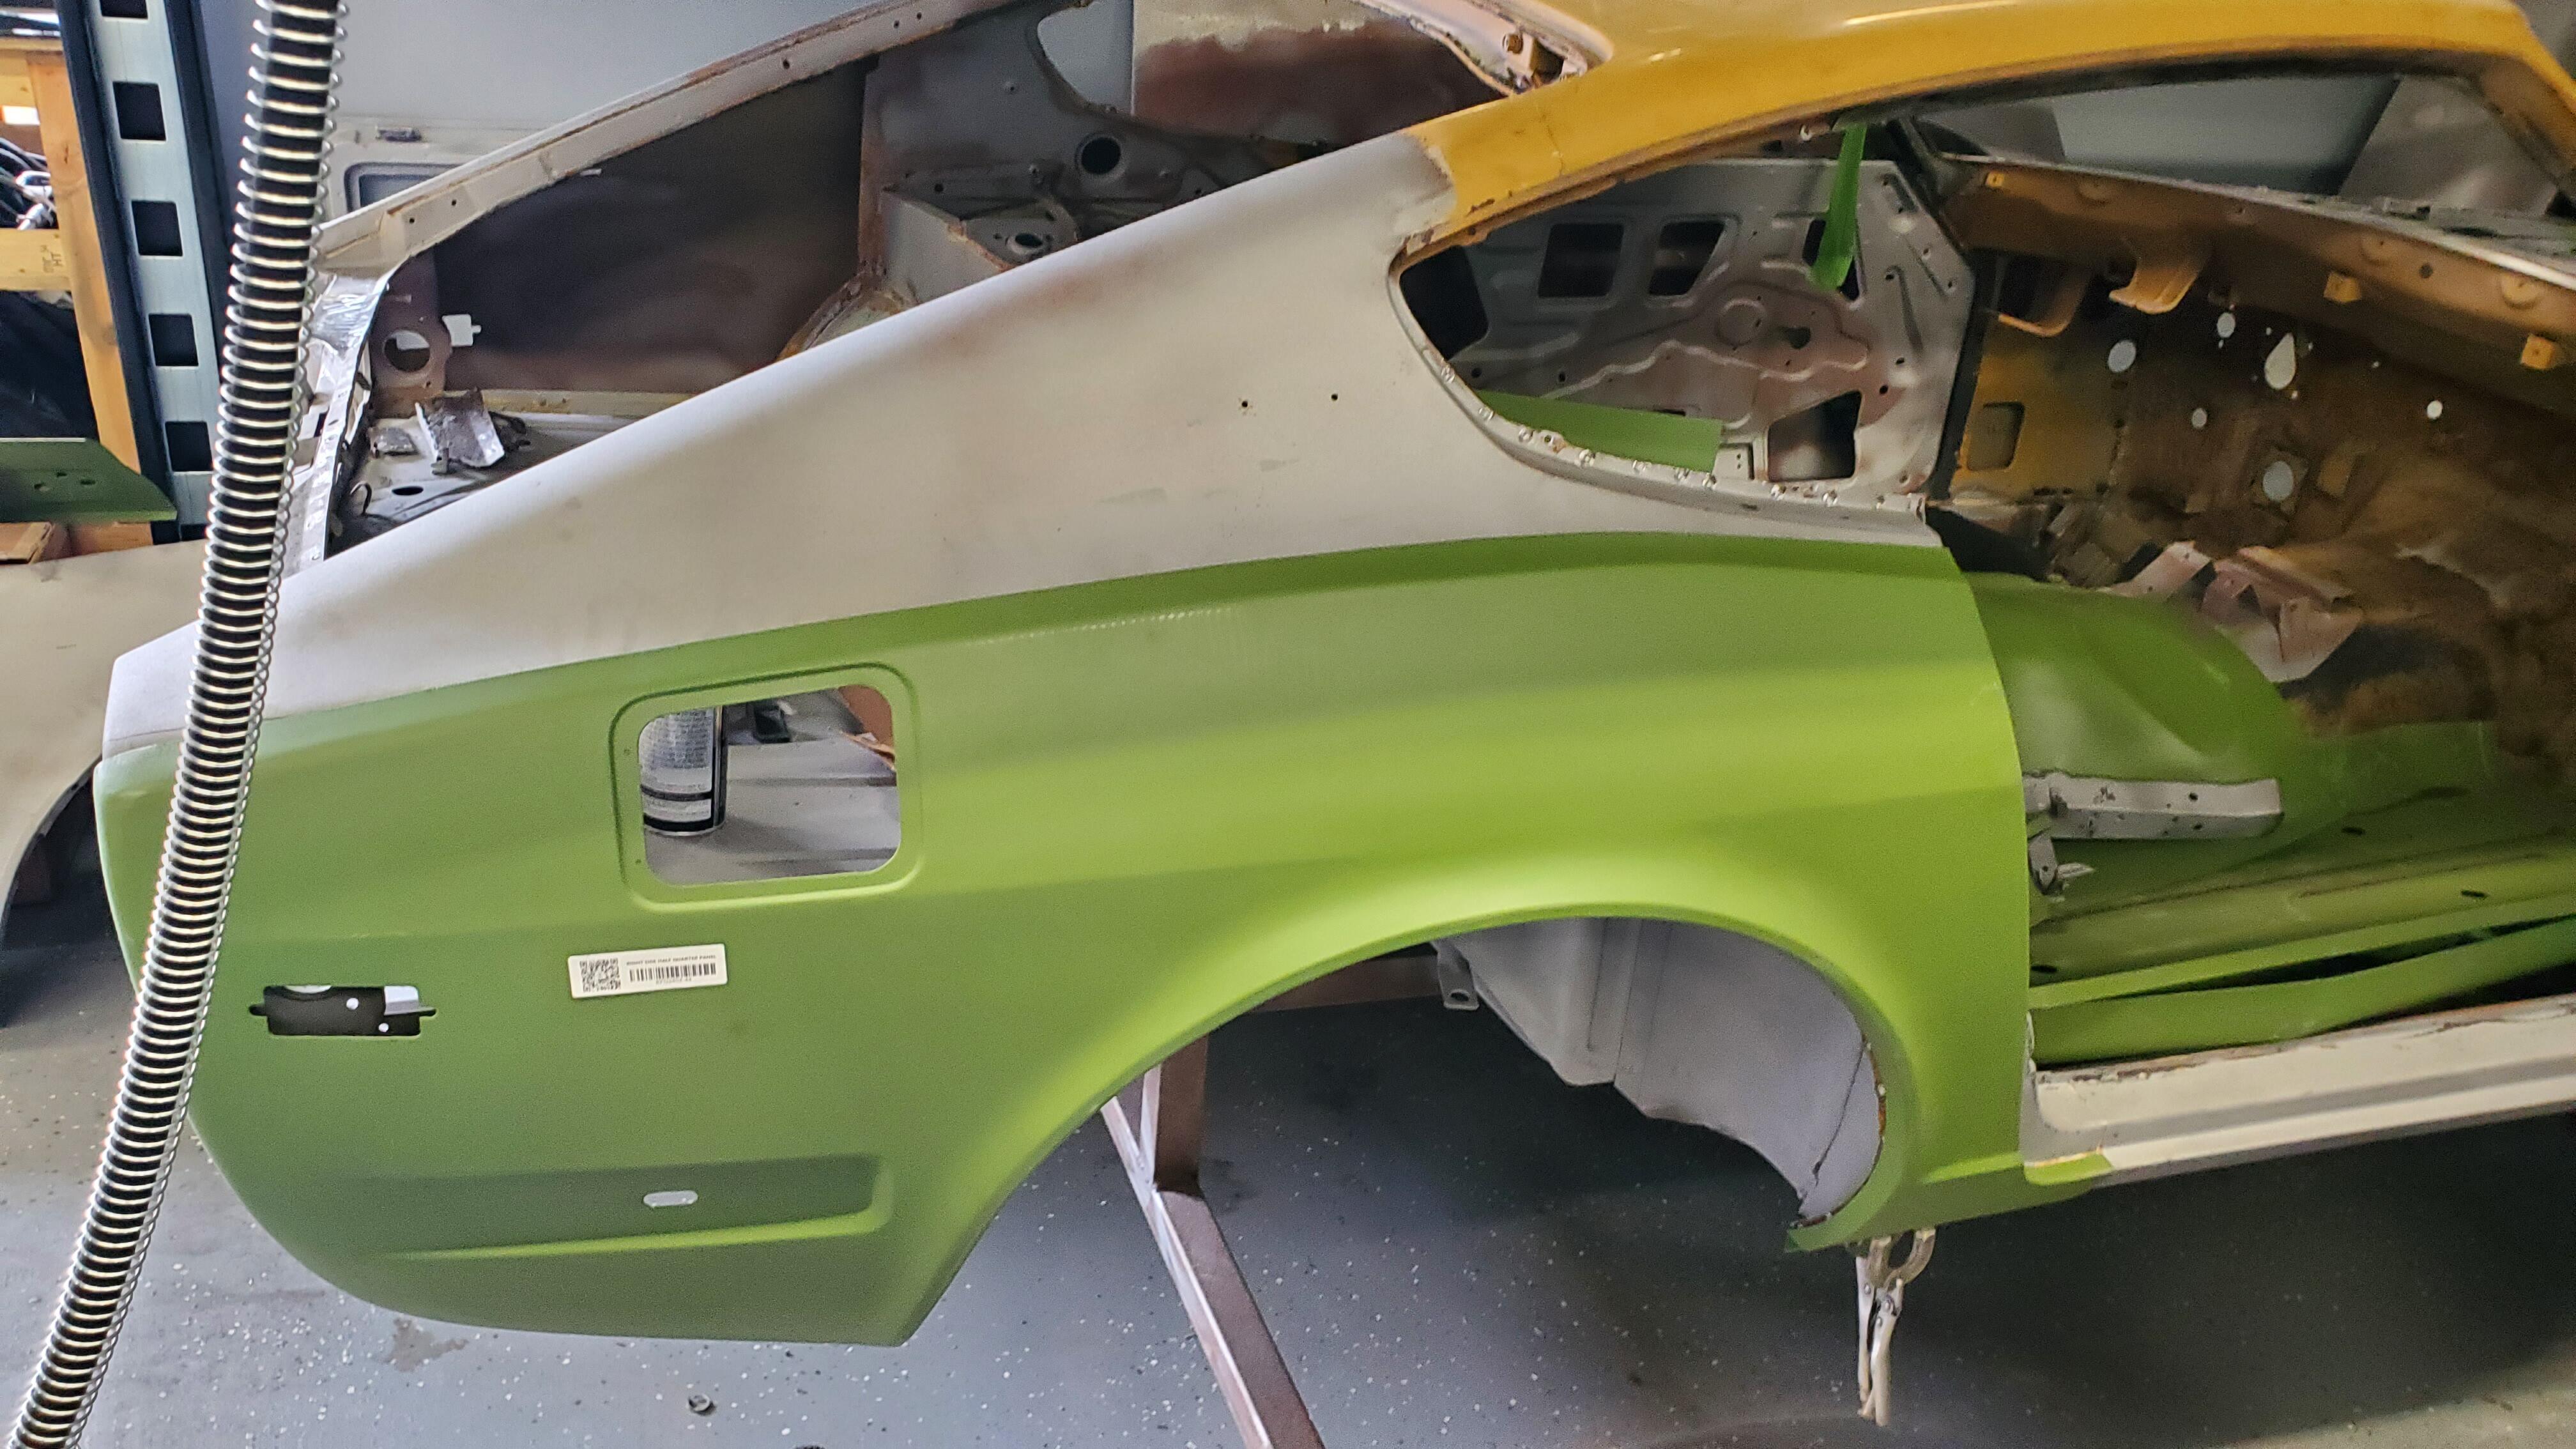
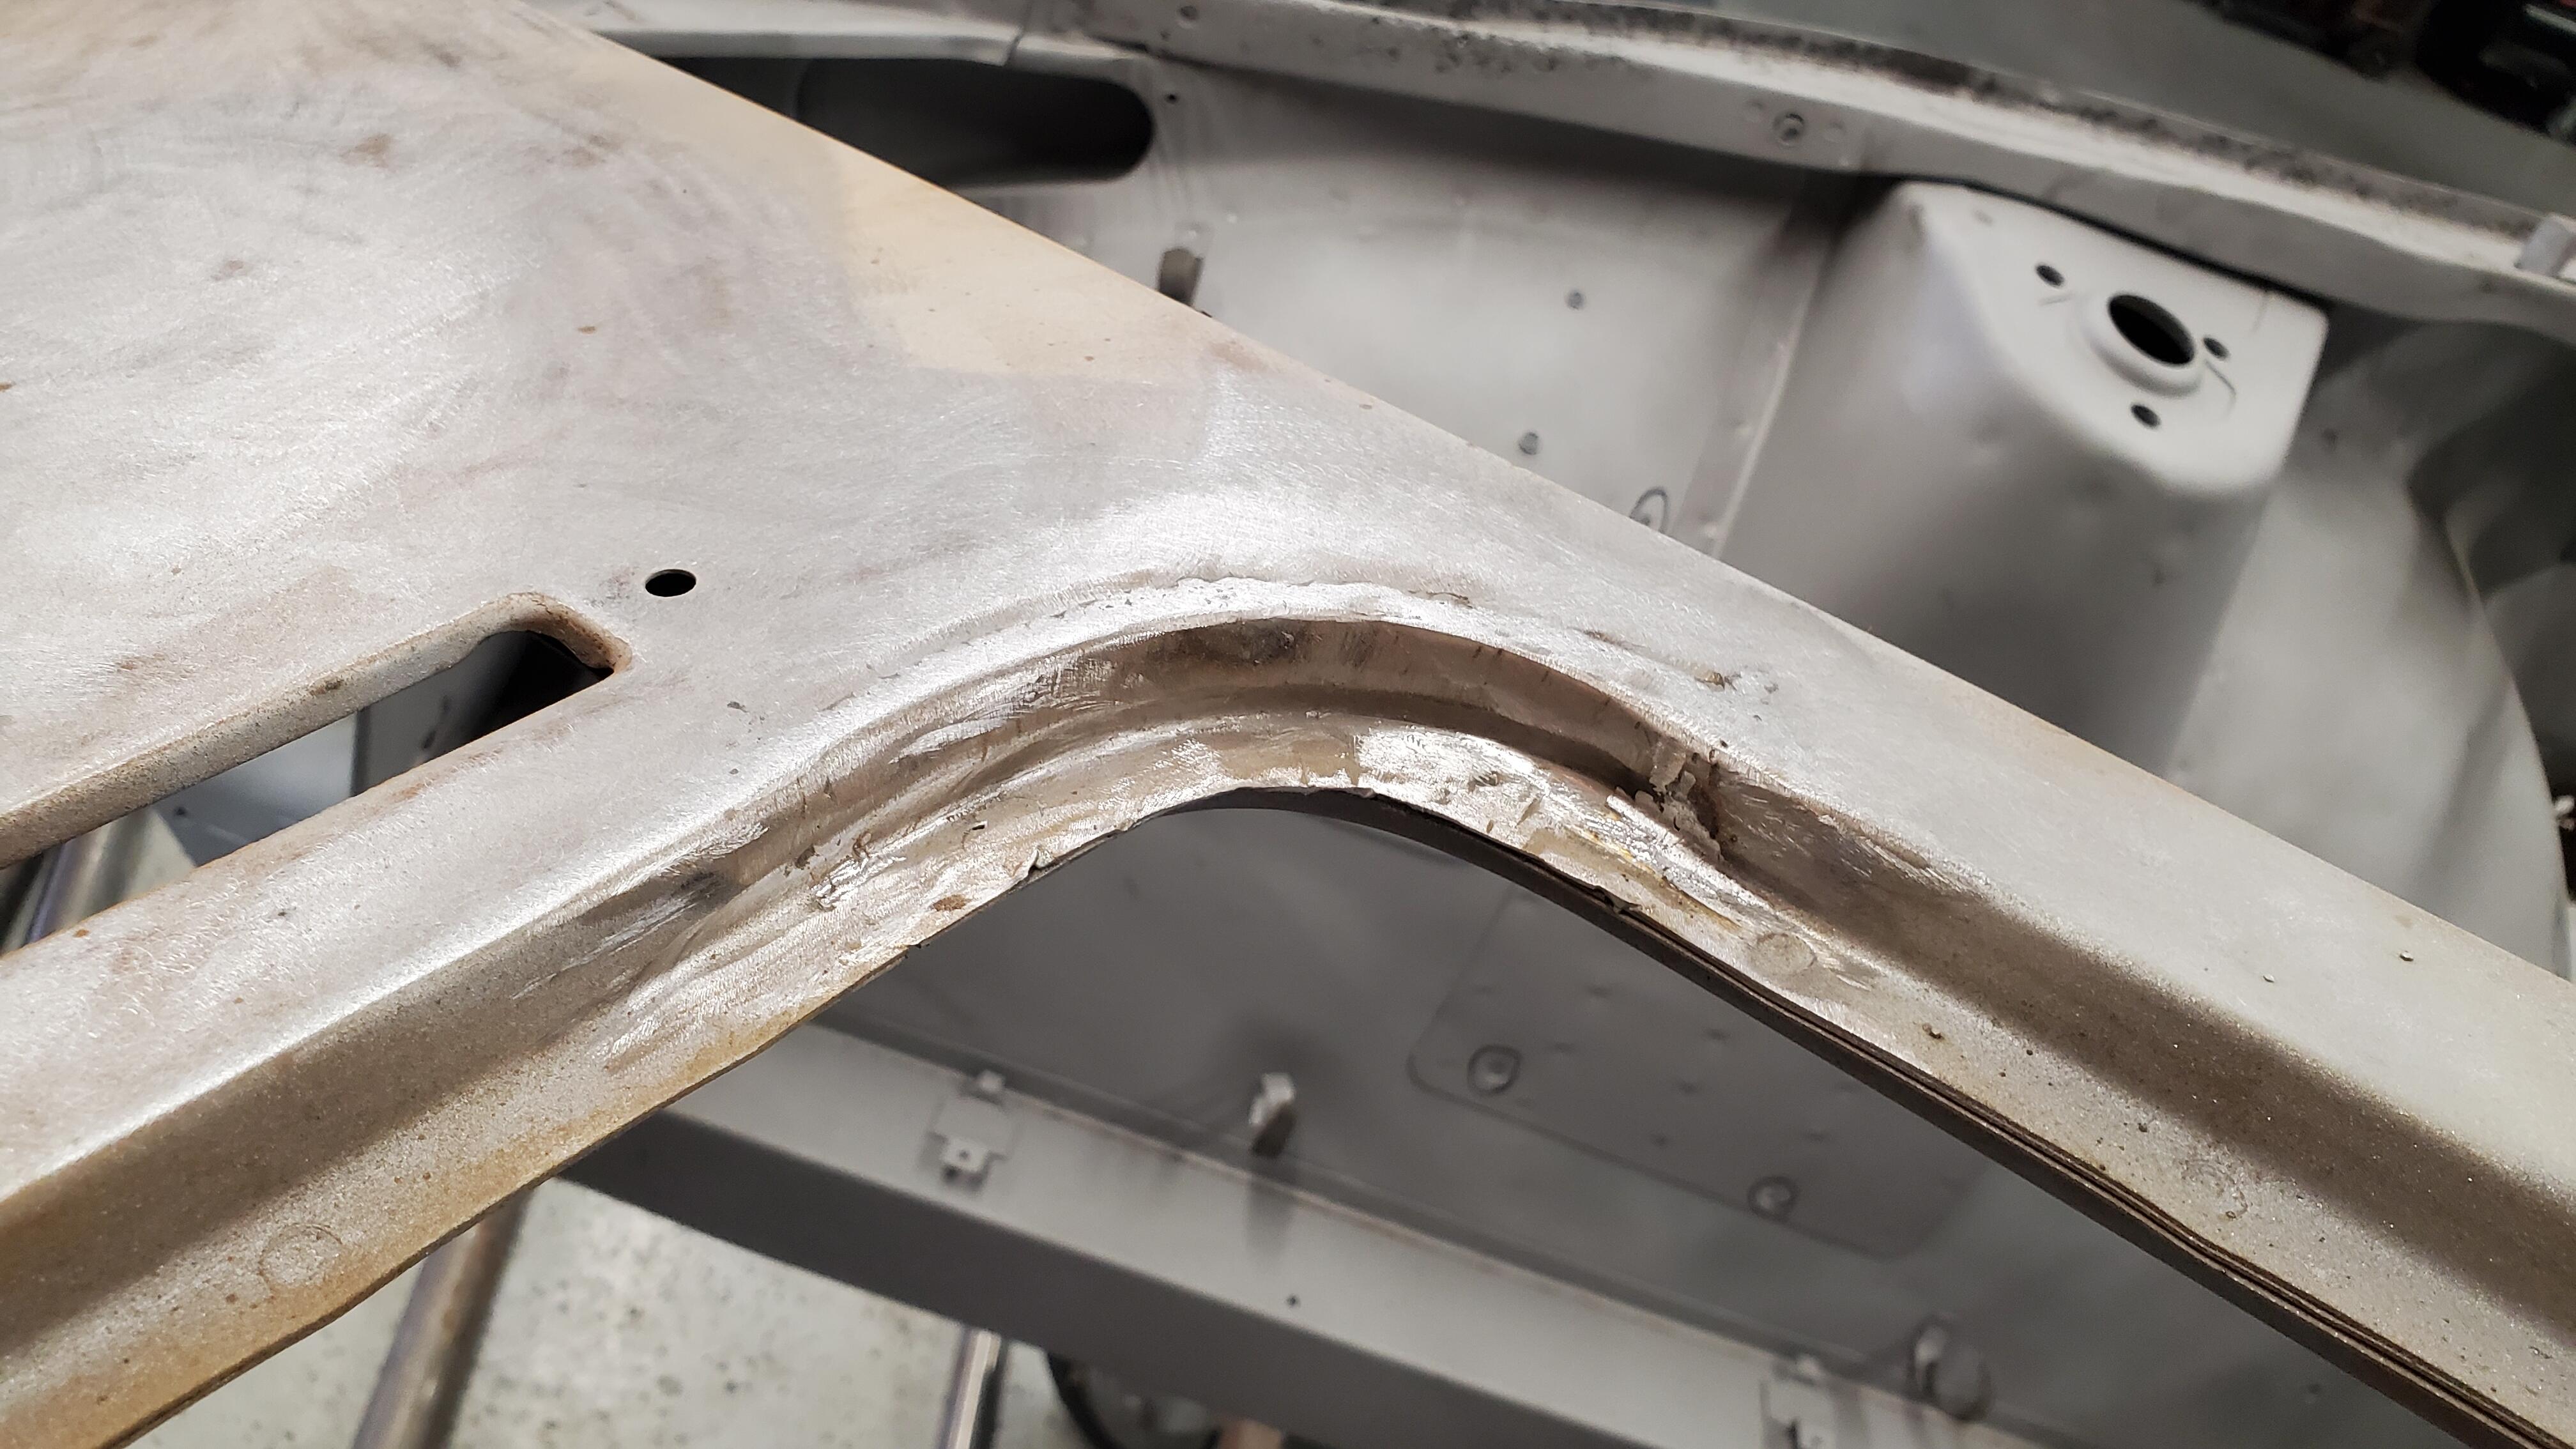
The body is now at the weld shop and the replacement panels from KF Vintage have arrived. The welder, Larry, said the panels were very good quality and nice thickness. Panels are now being installed. Pics are below. Work is being done by L&L Restomods. https://www.llrestomods.com/

-
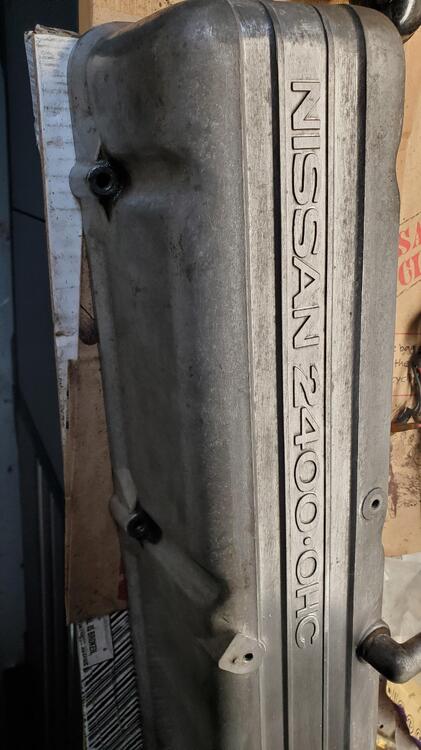
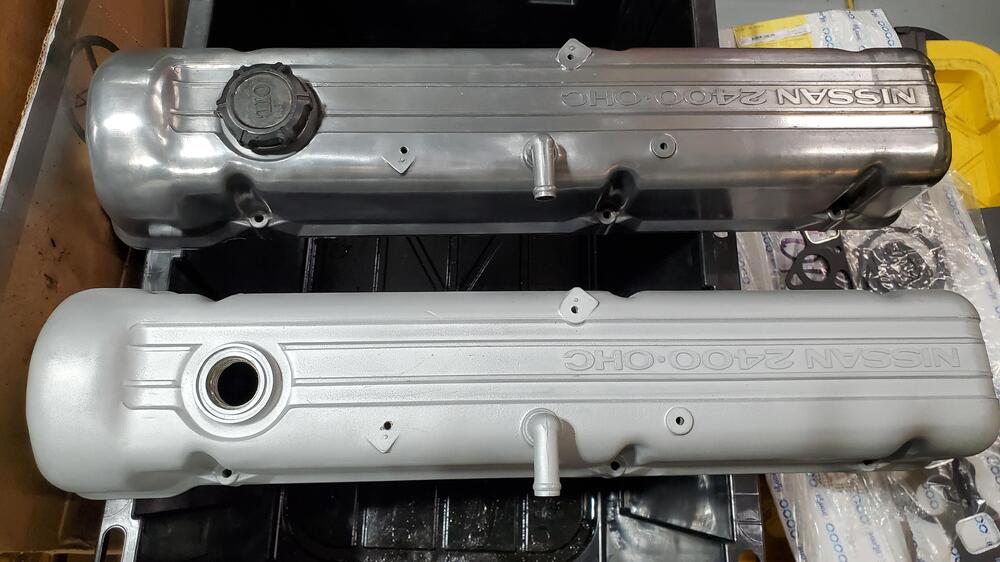
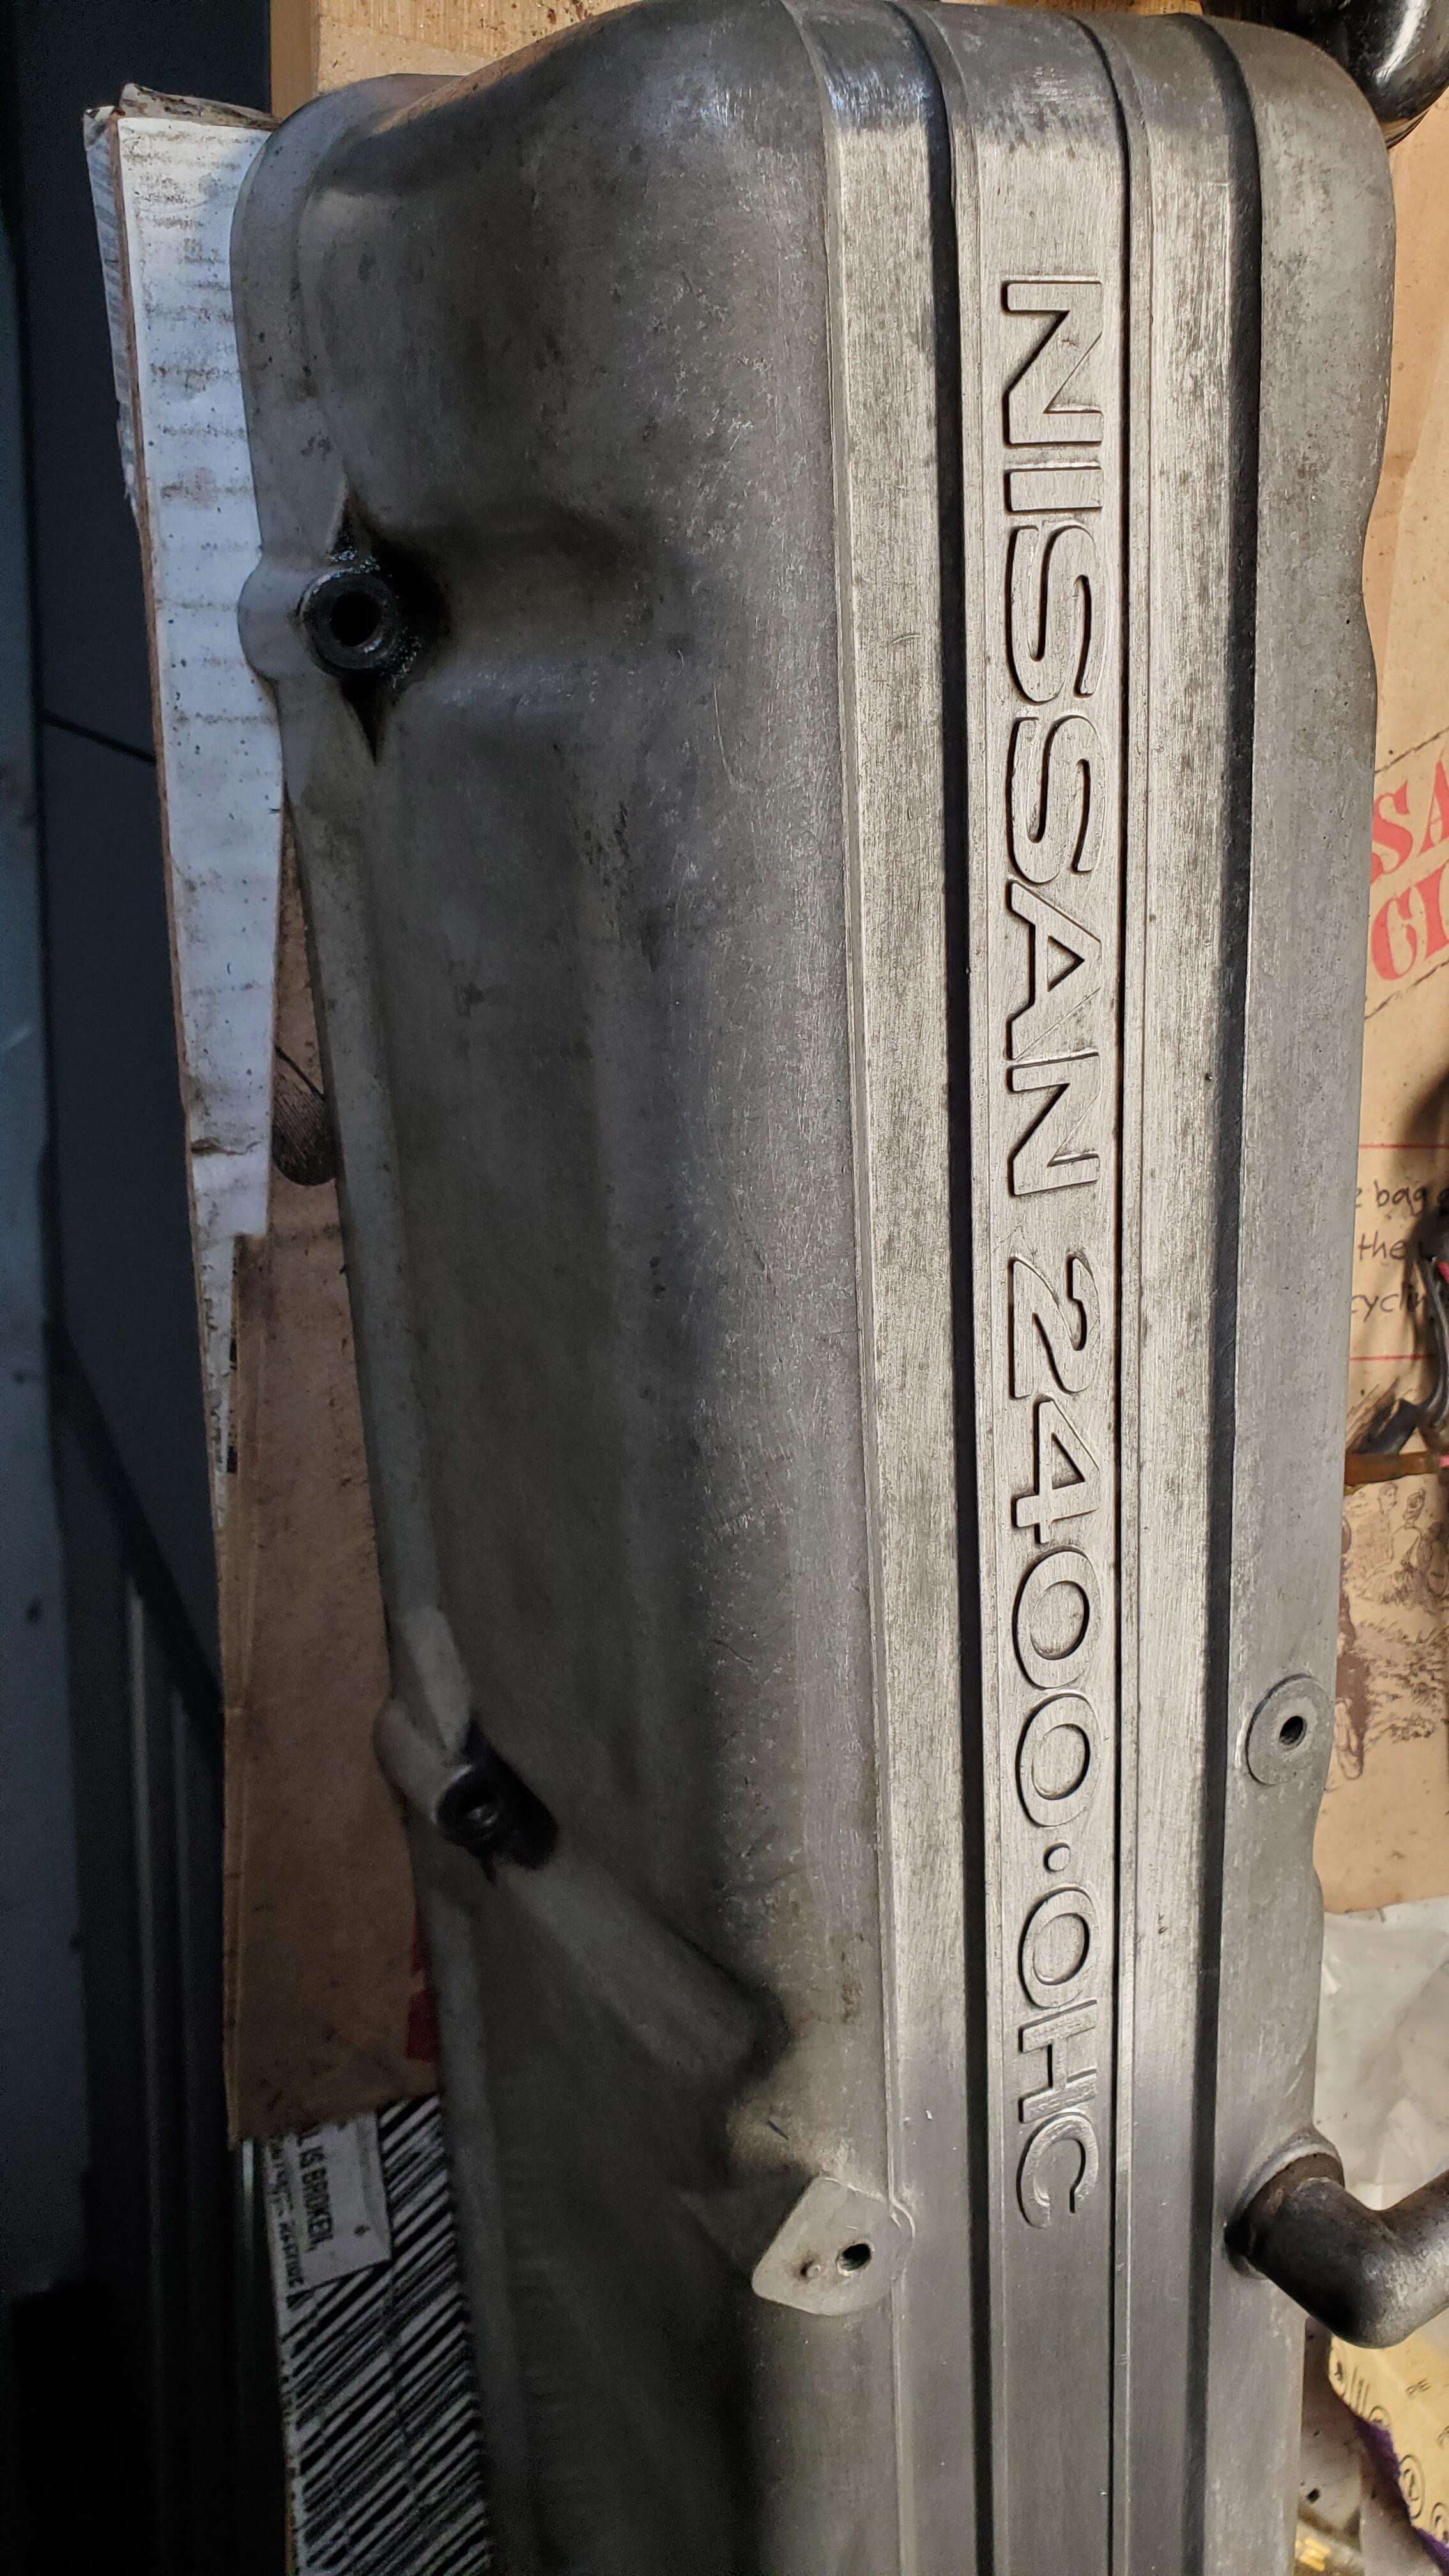
I have two 2400 valve covers, one from the original motor and one that the owner sent. I was not happy with the painted valve cover, although it looks pretty, as it would get dinged by the ZCON judges as not the original finish. Also, it's not the original finish. So, I just decided to clean up the original valve cover. I am much happier with that. Looks much better. Pics below
-
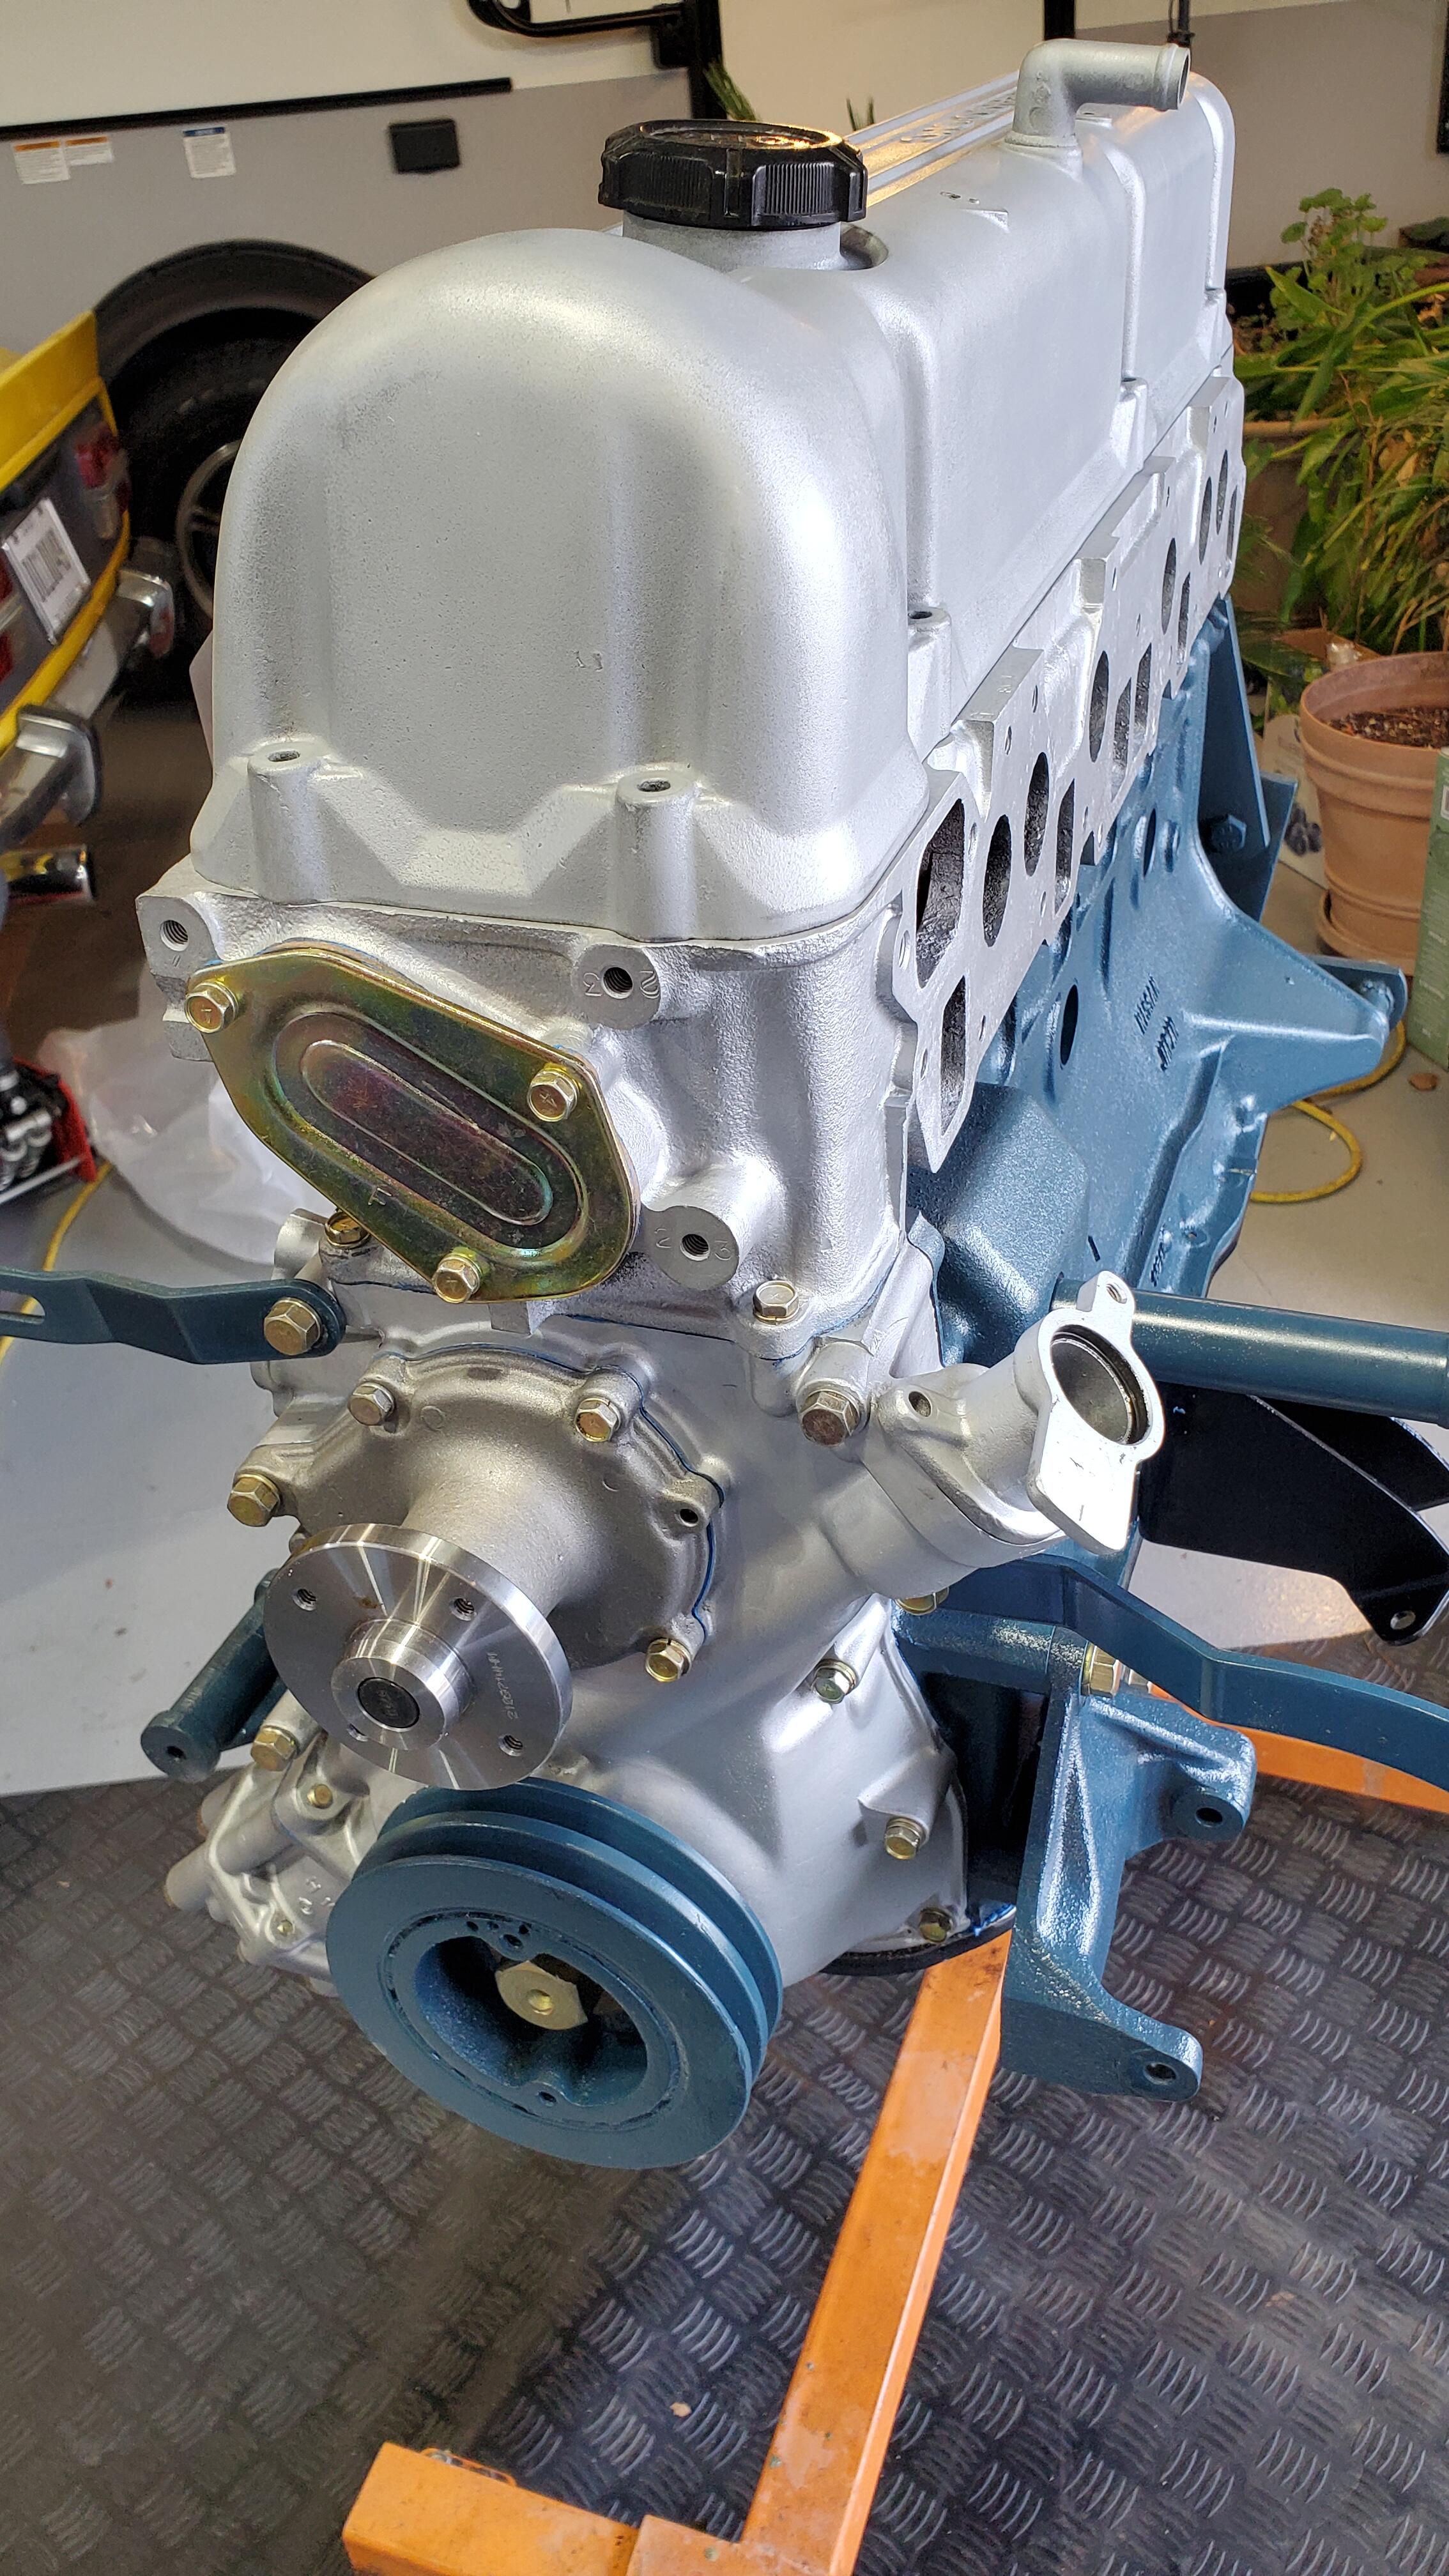
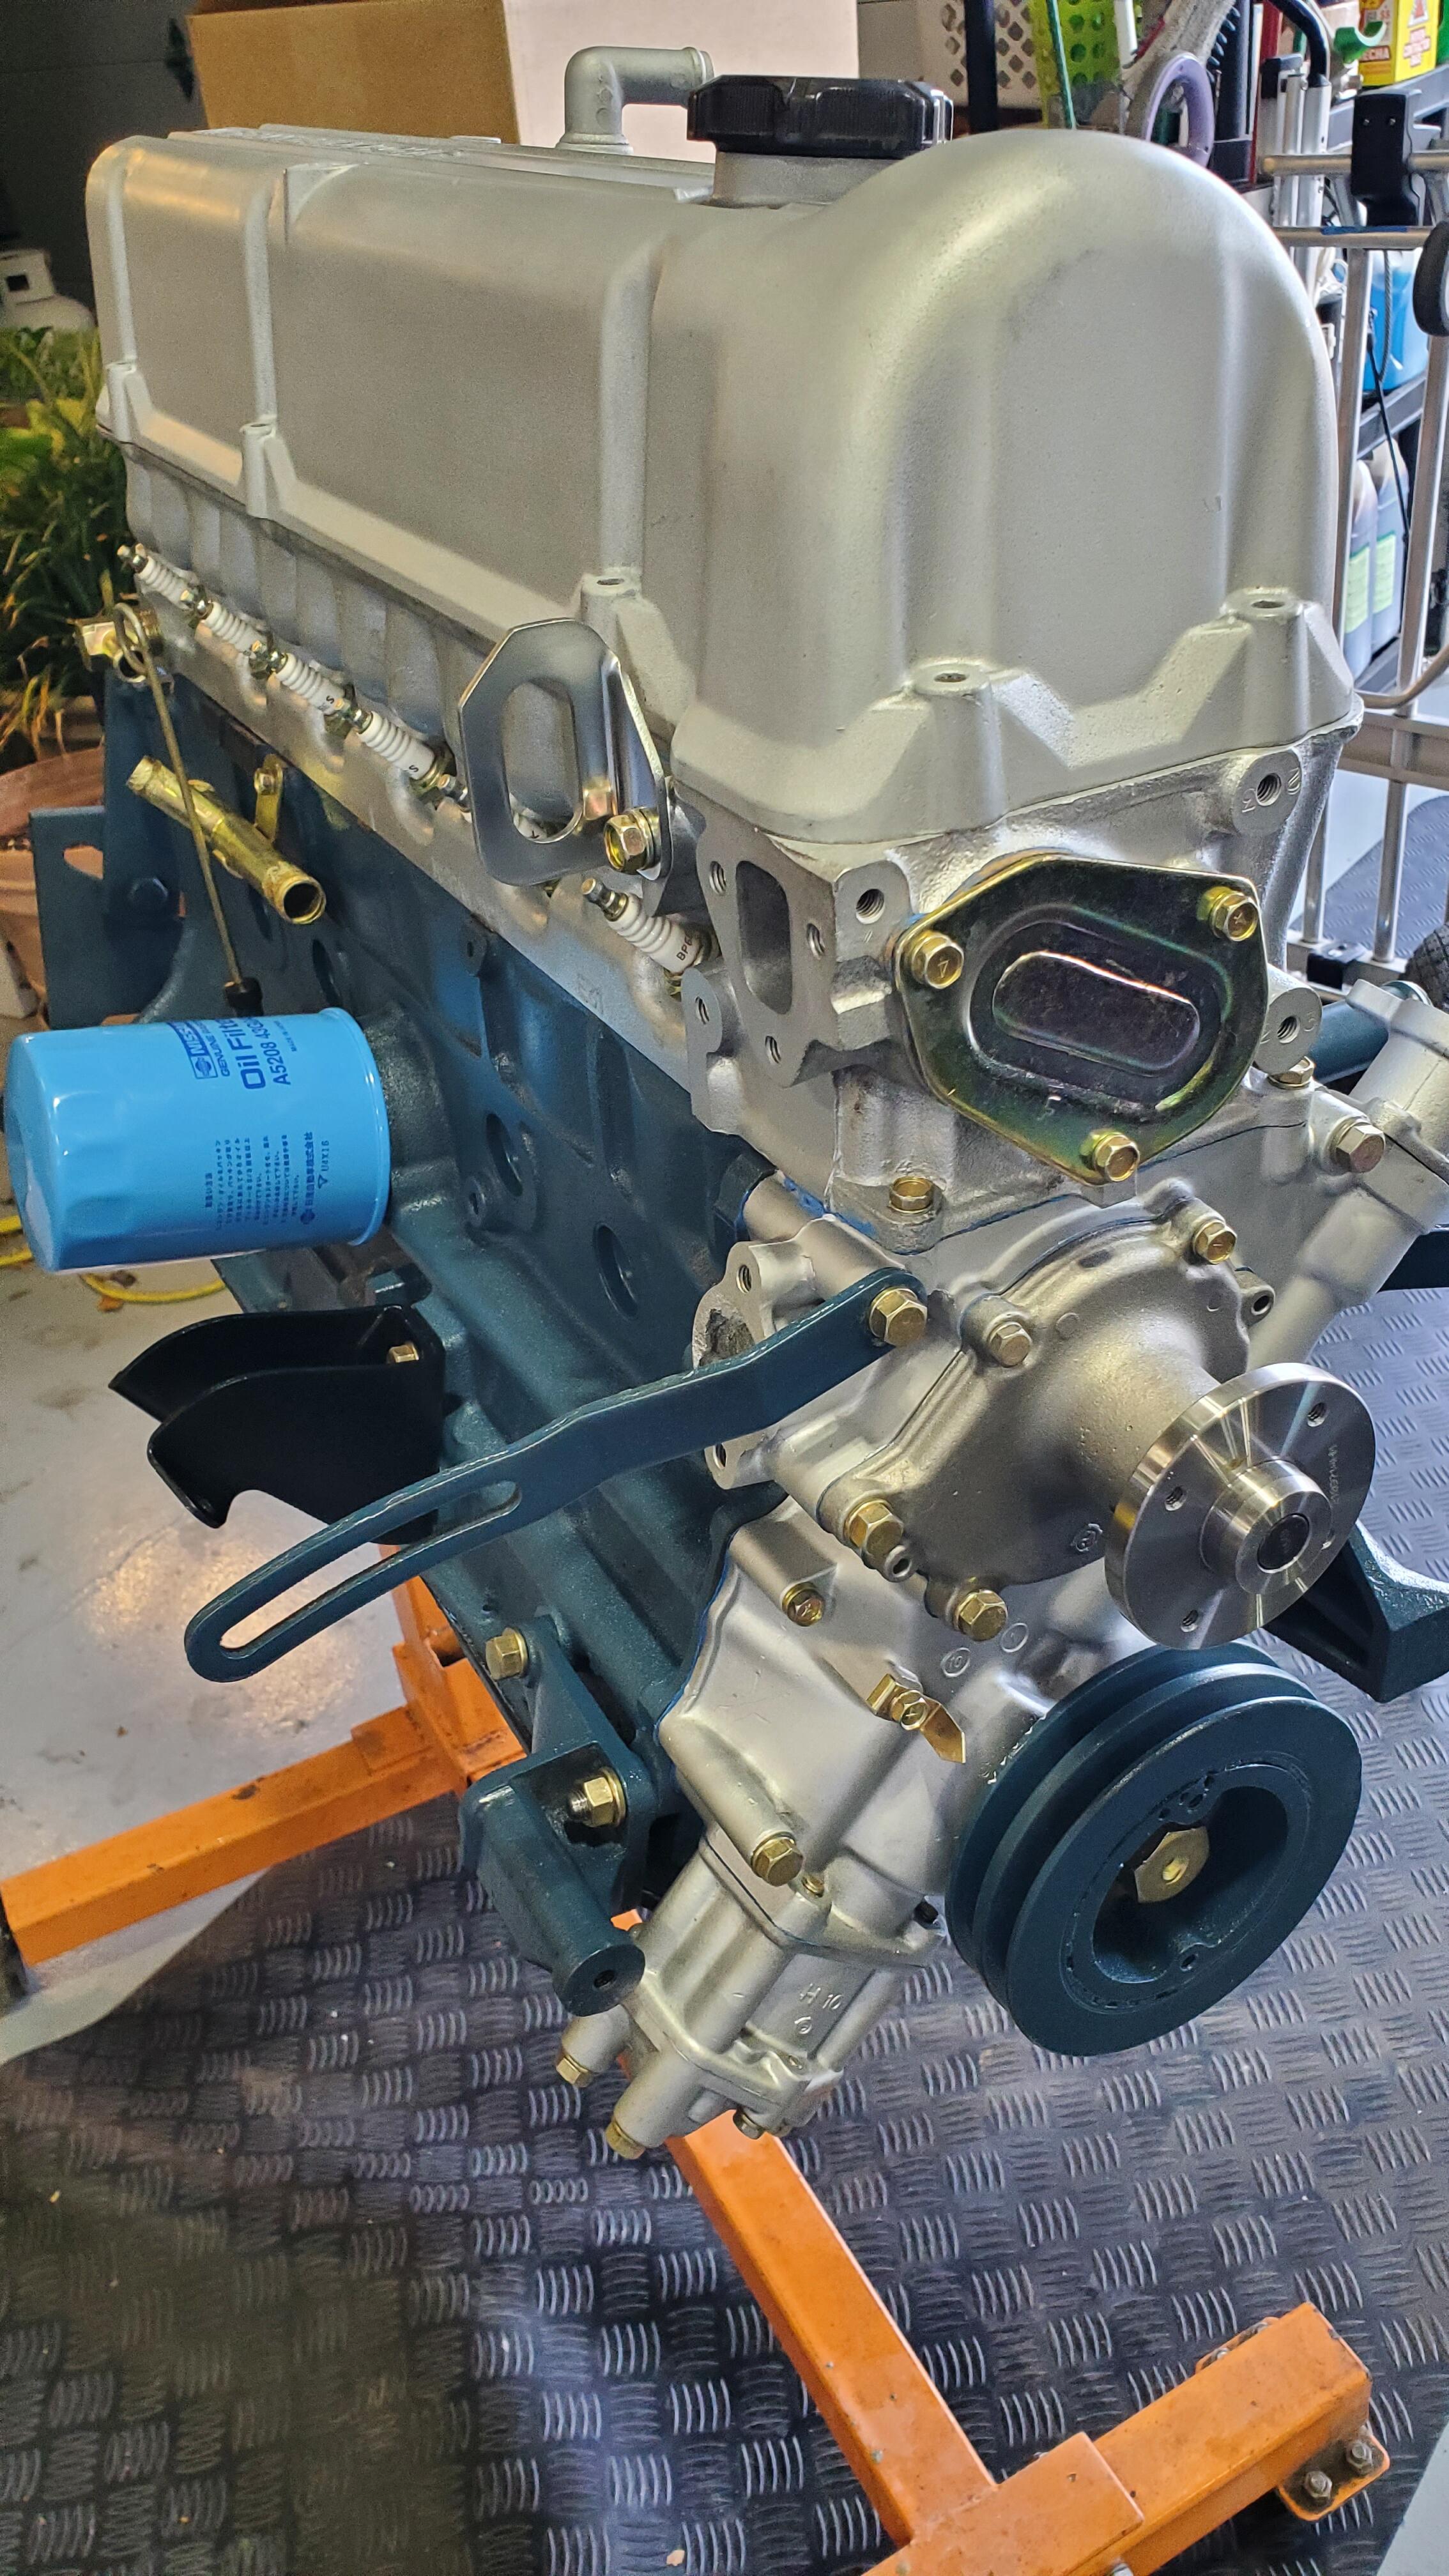
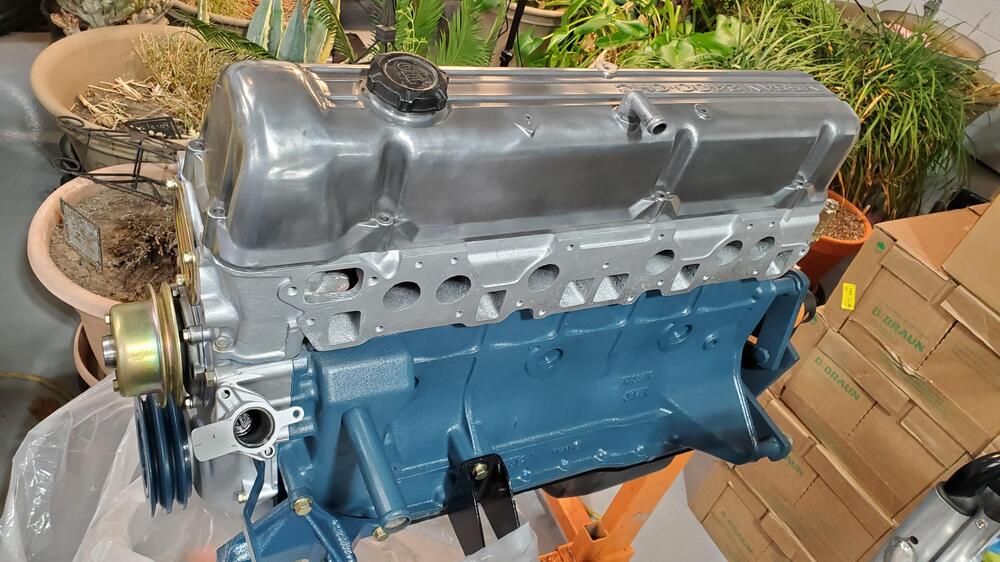
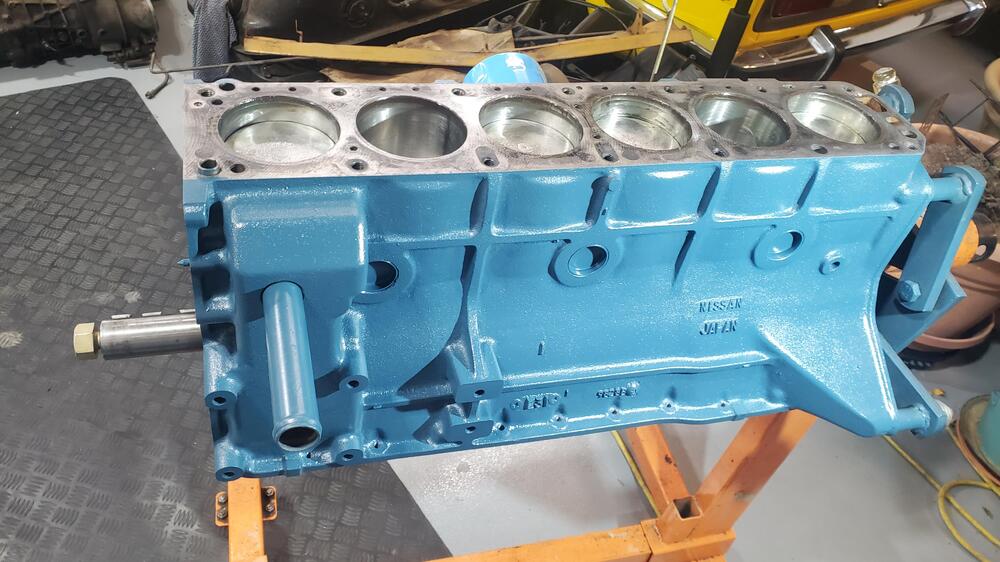
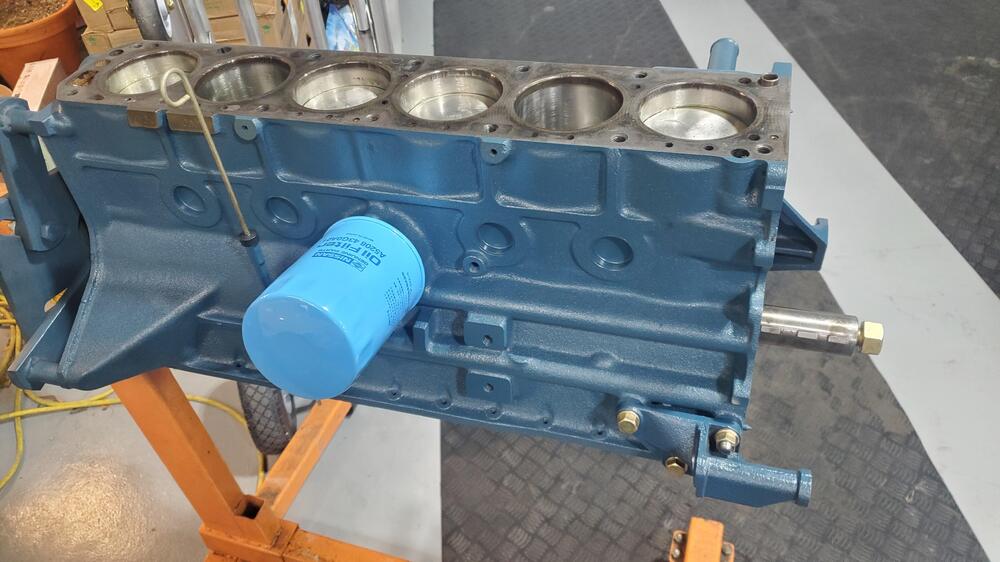
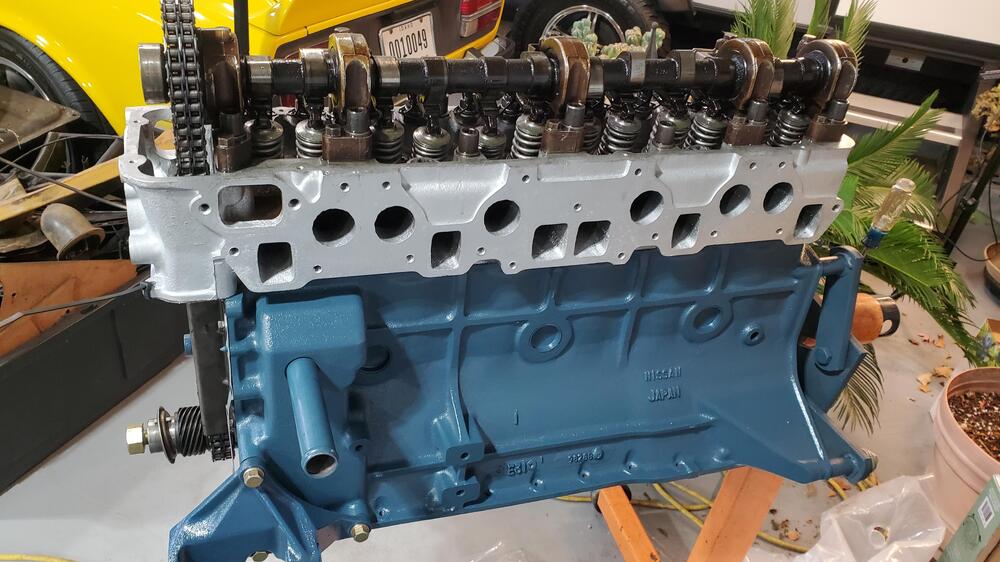
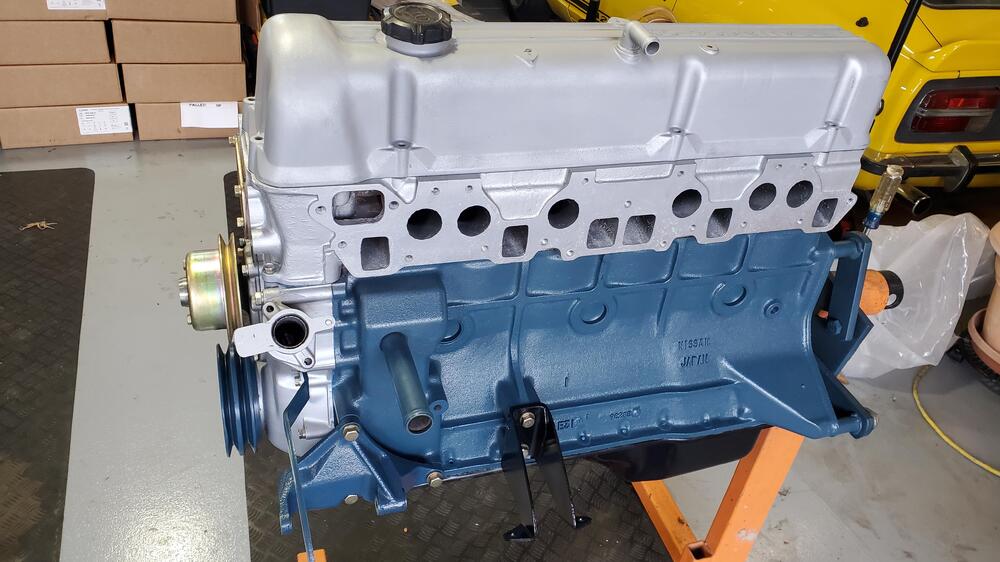
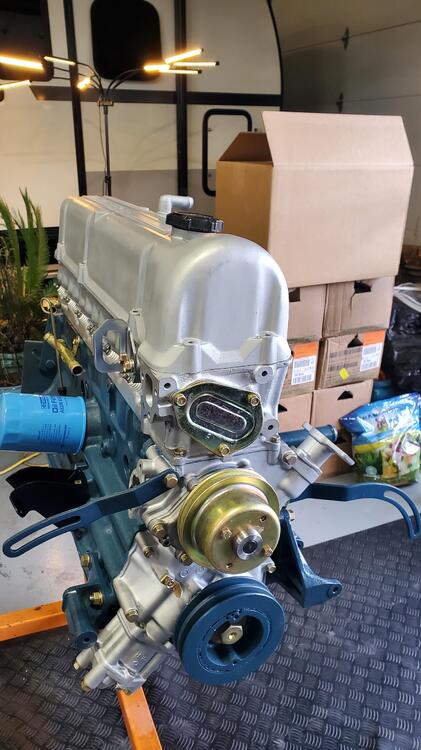
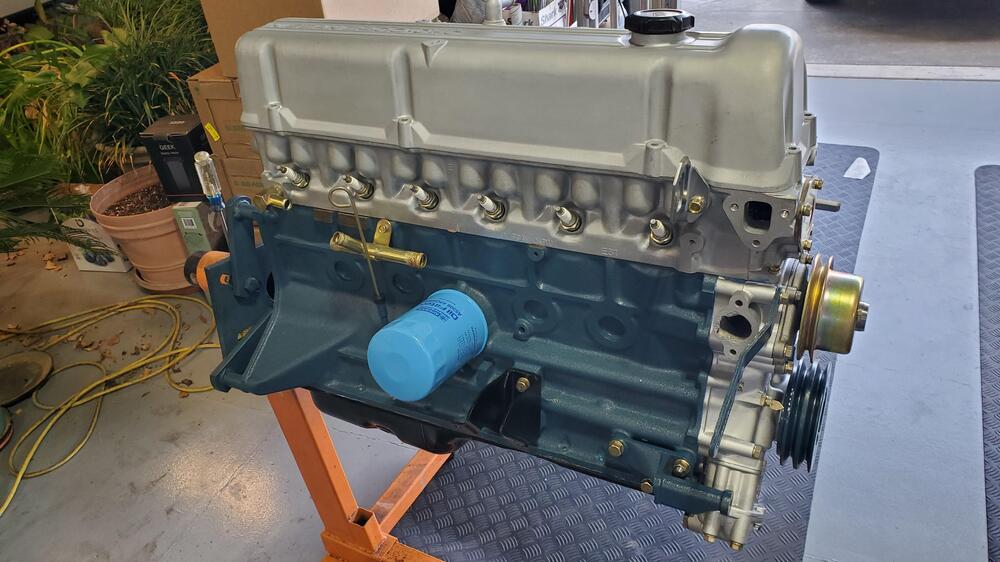
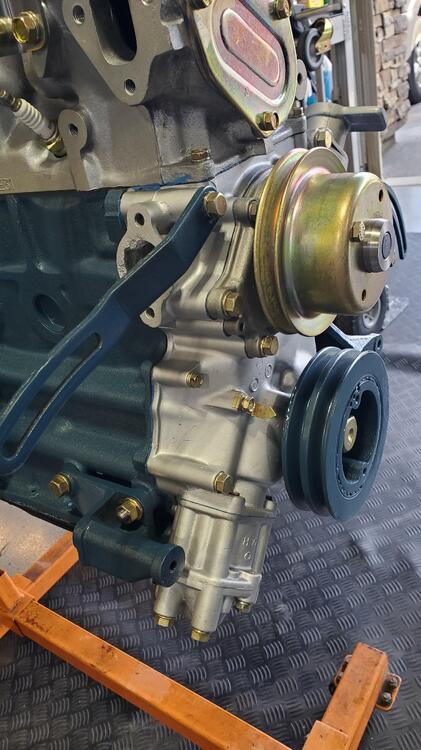
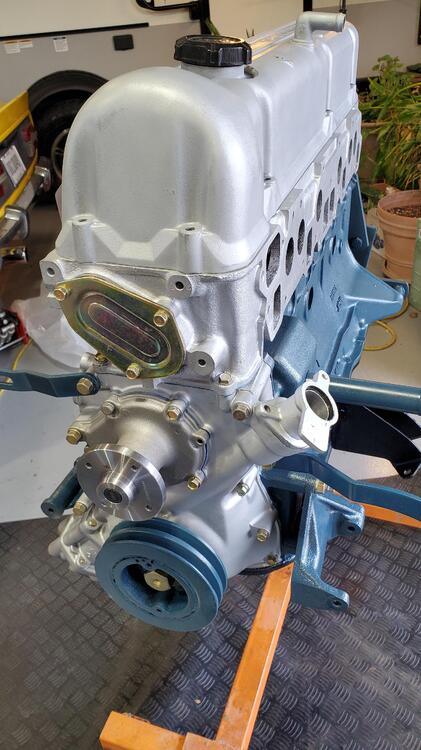
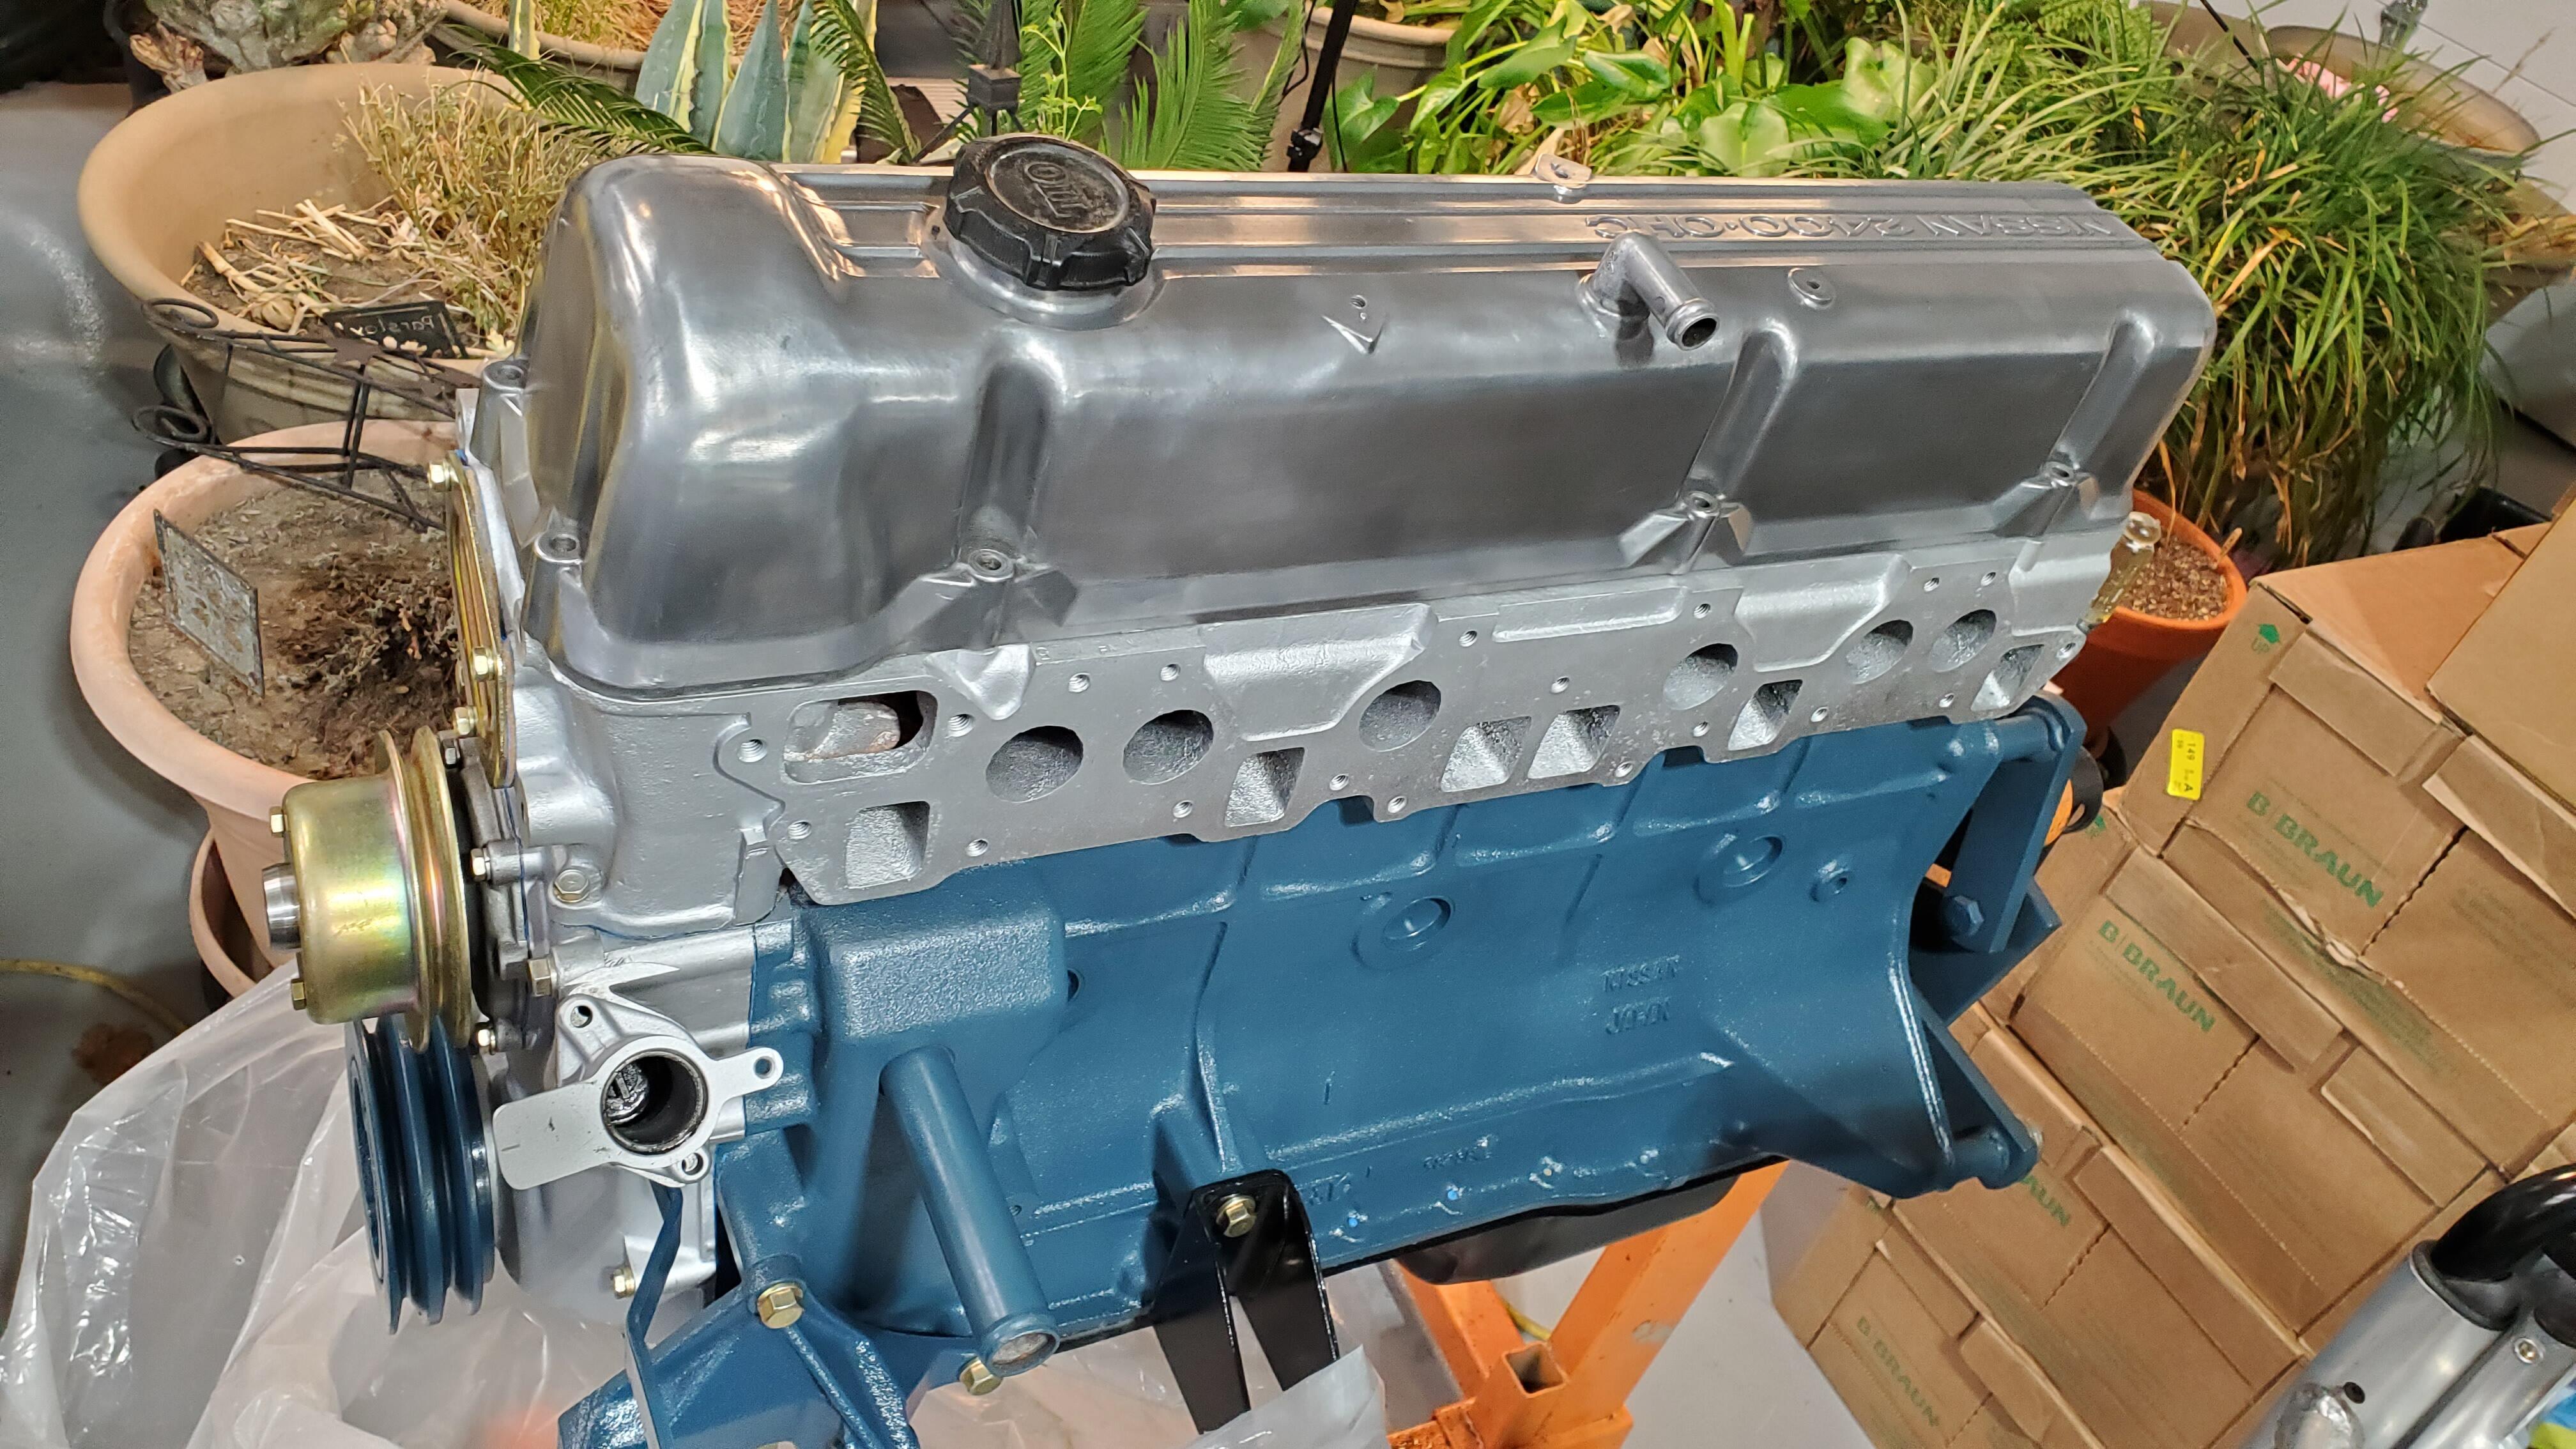
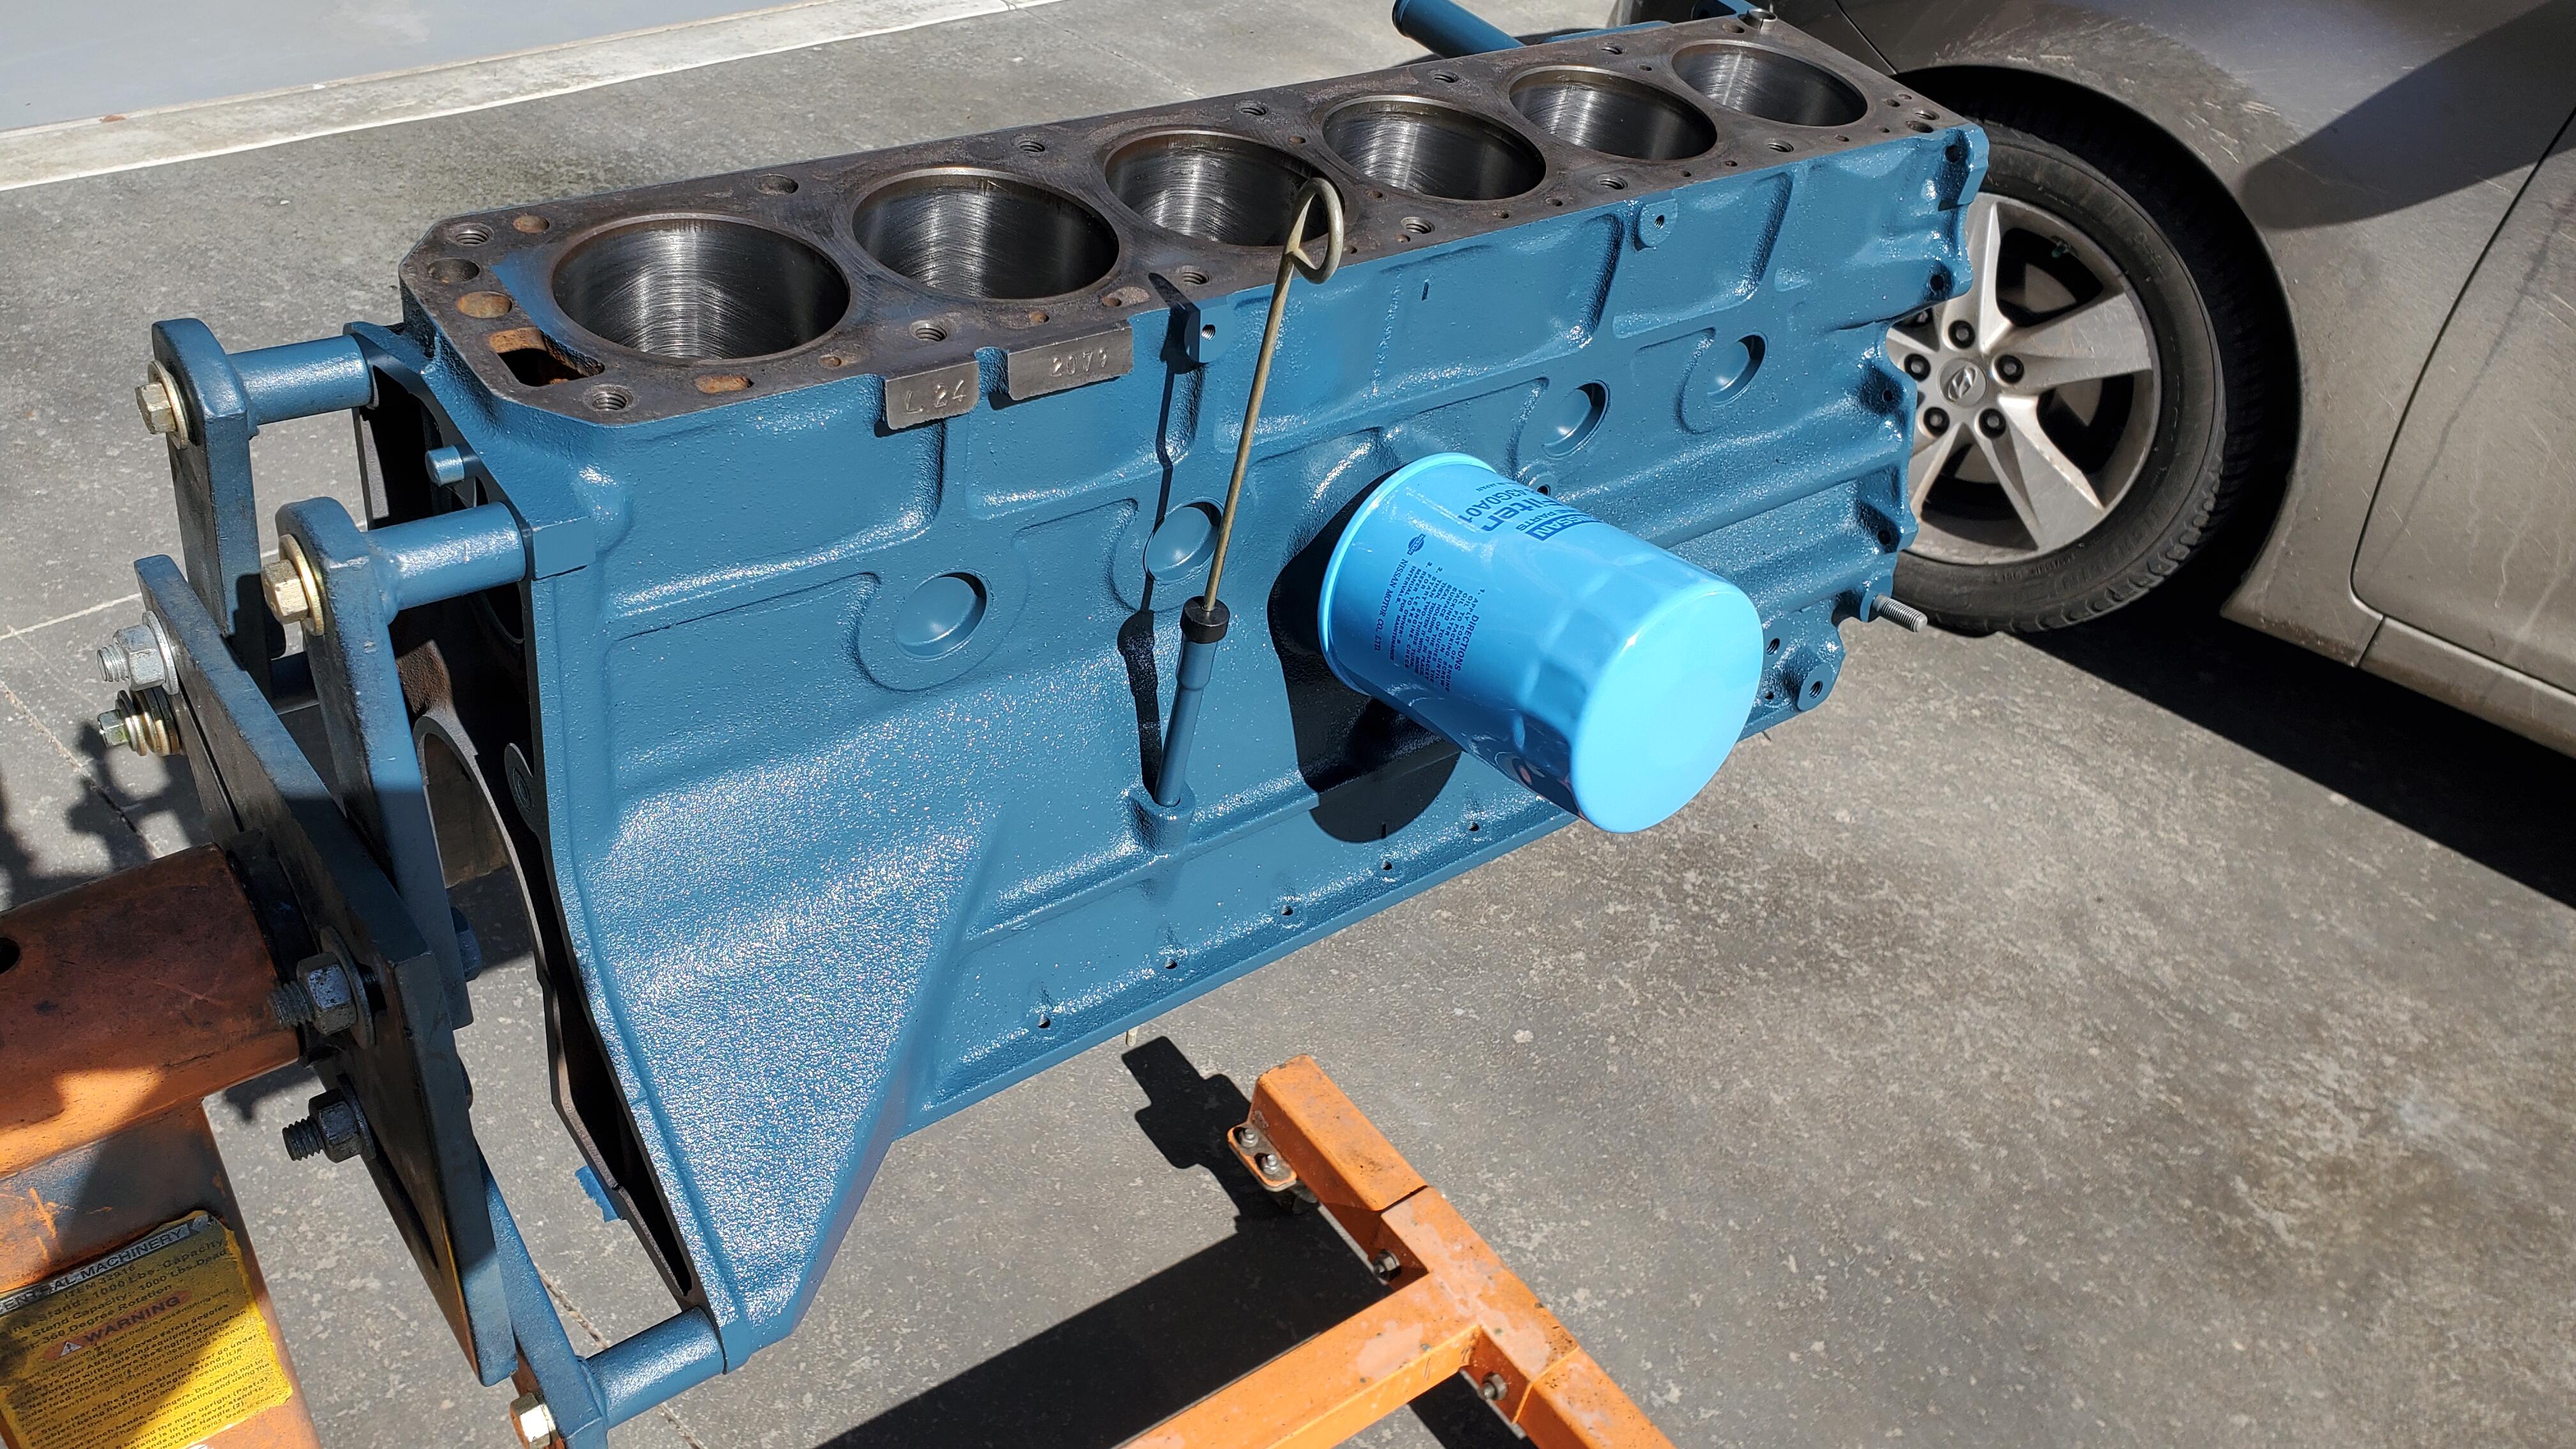
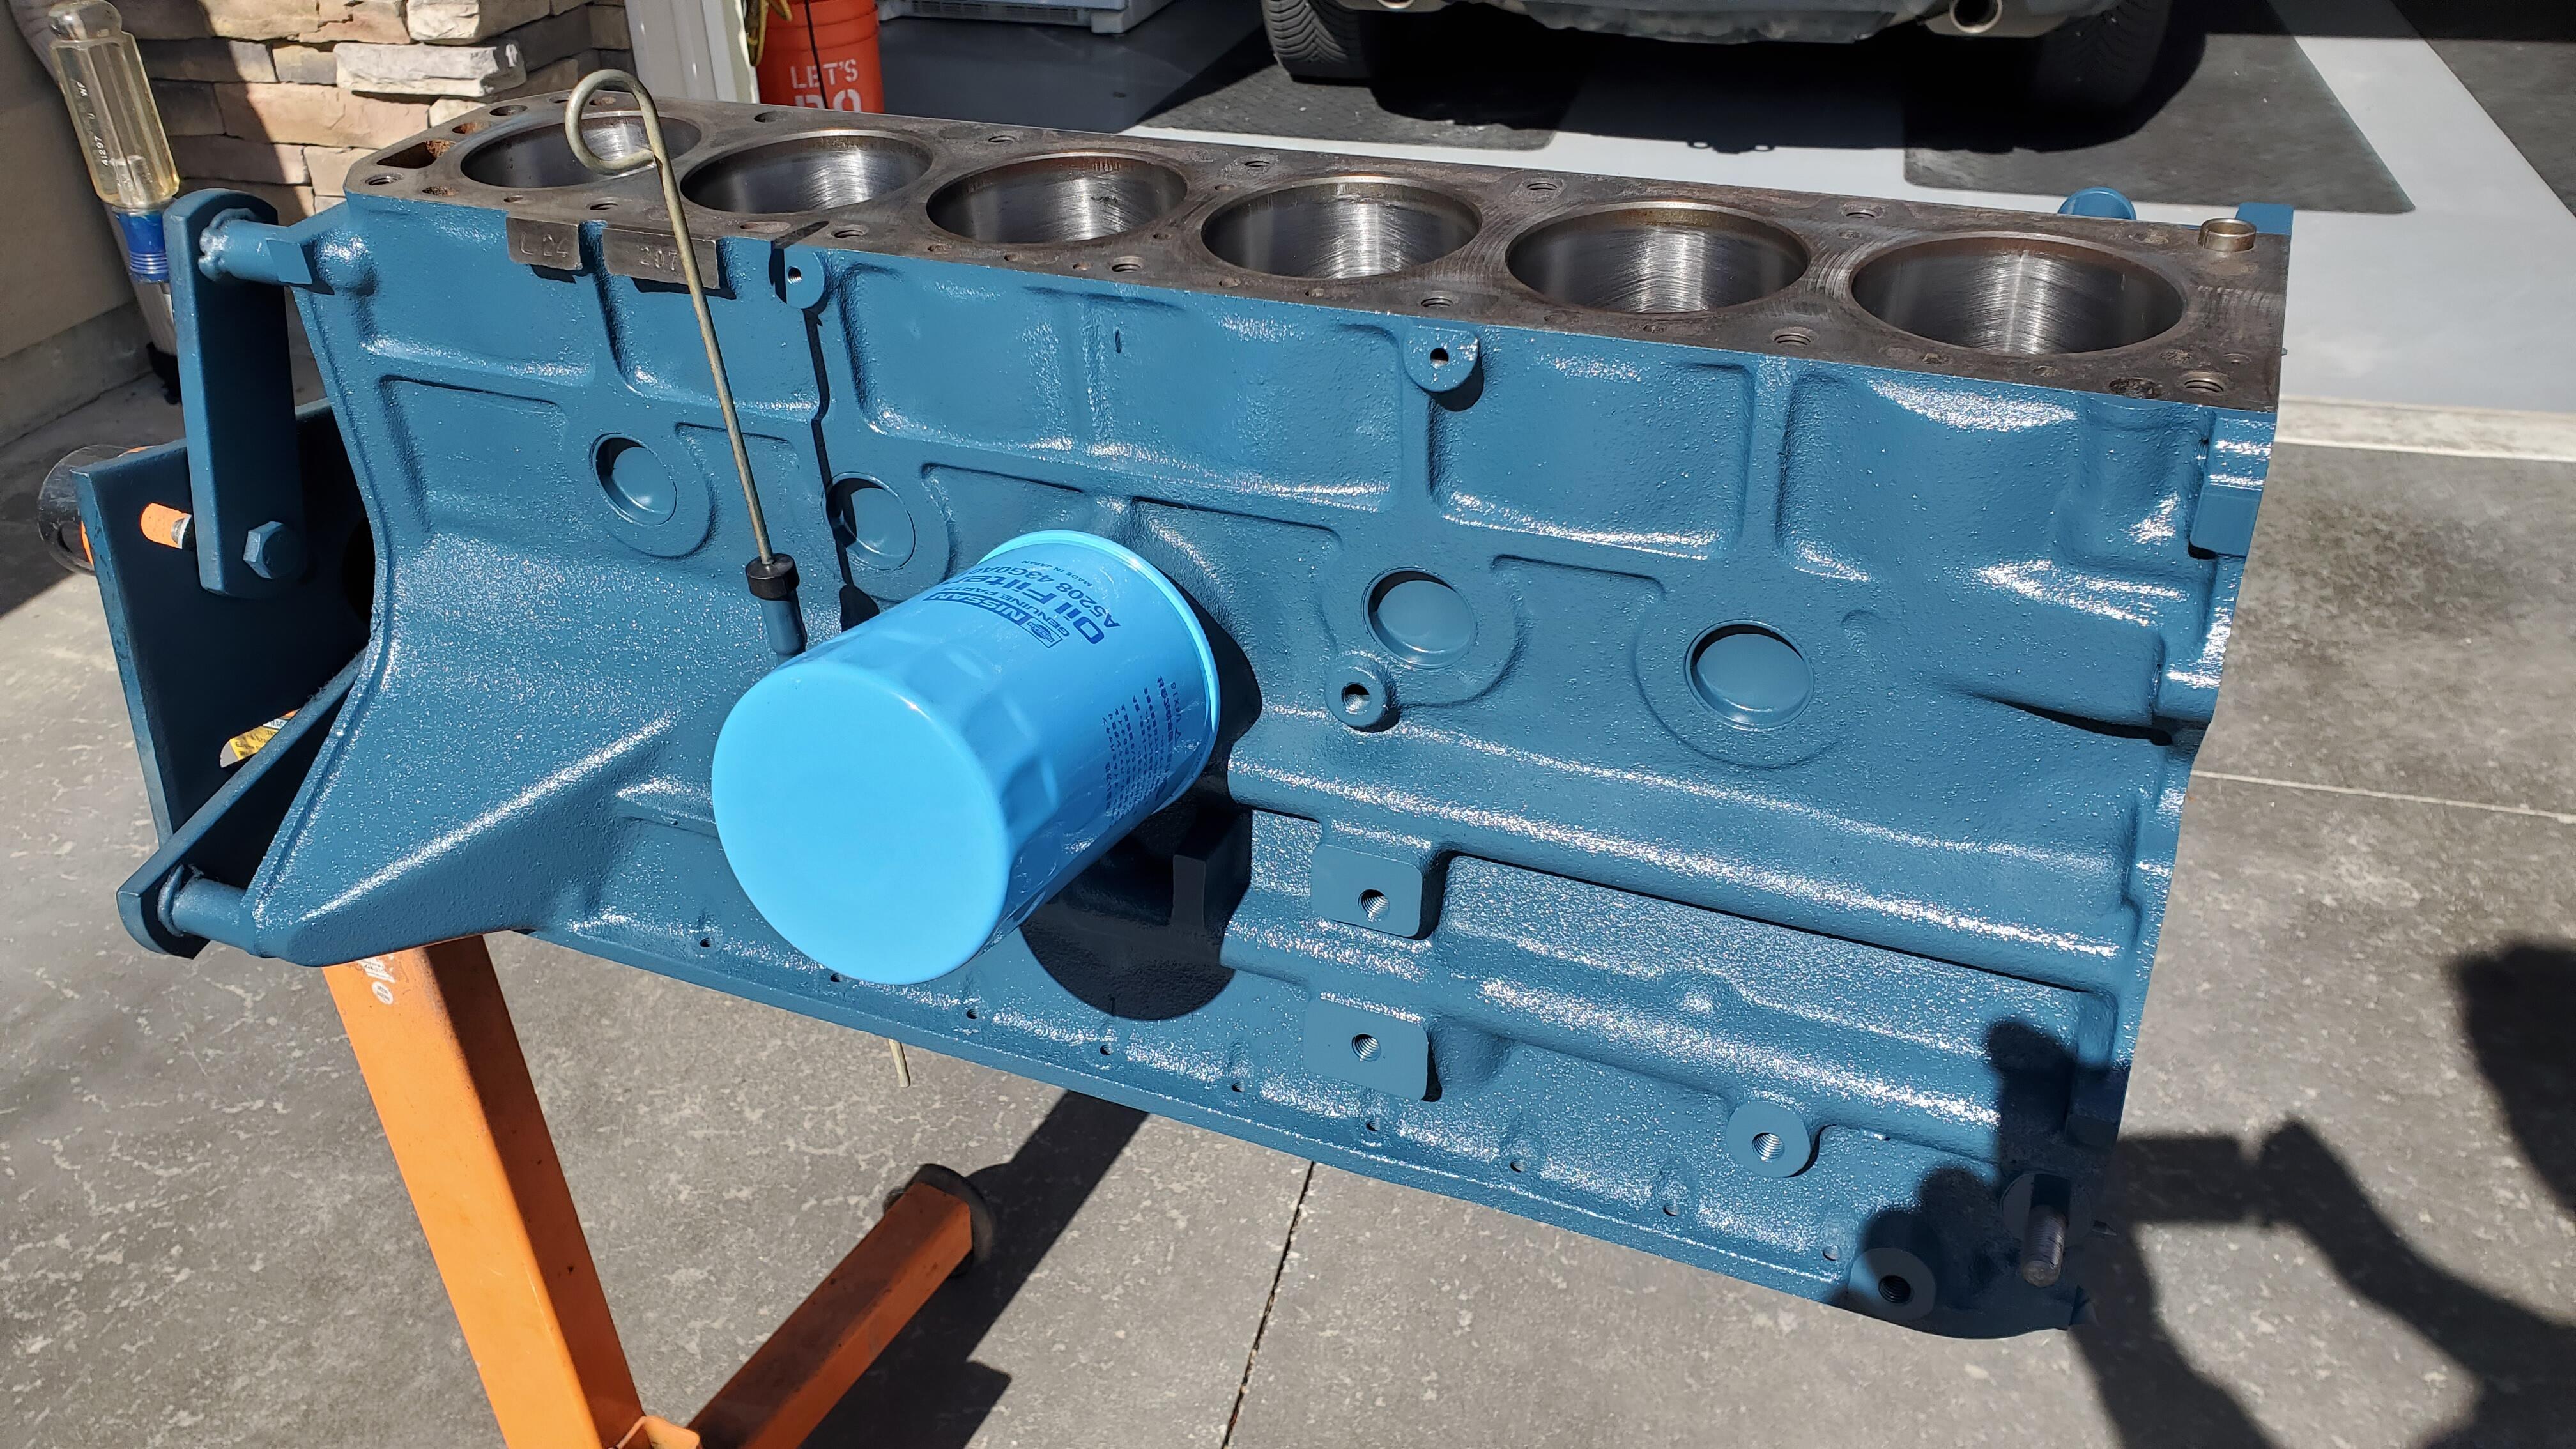
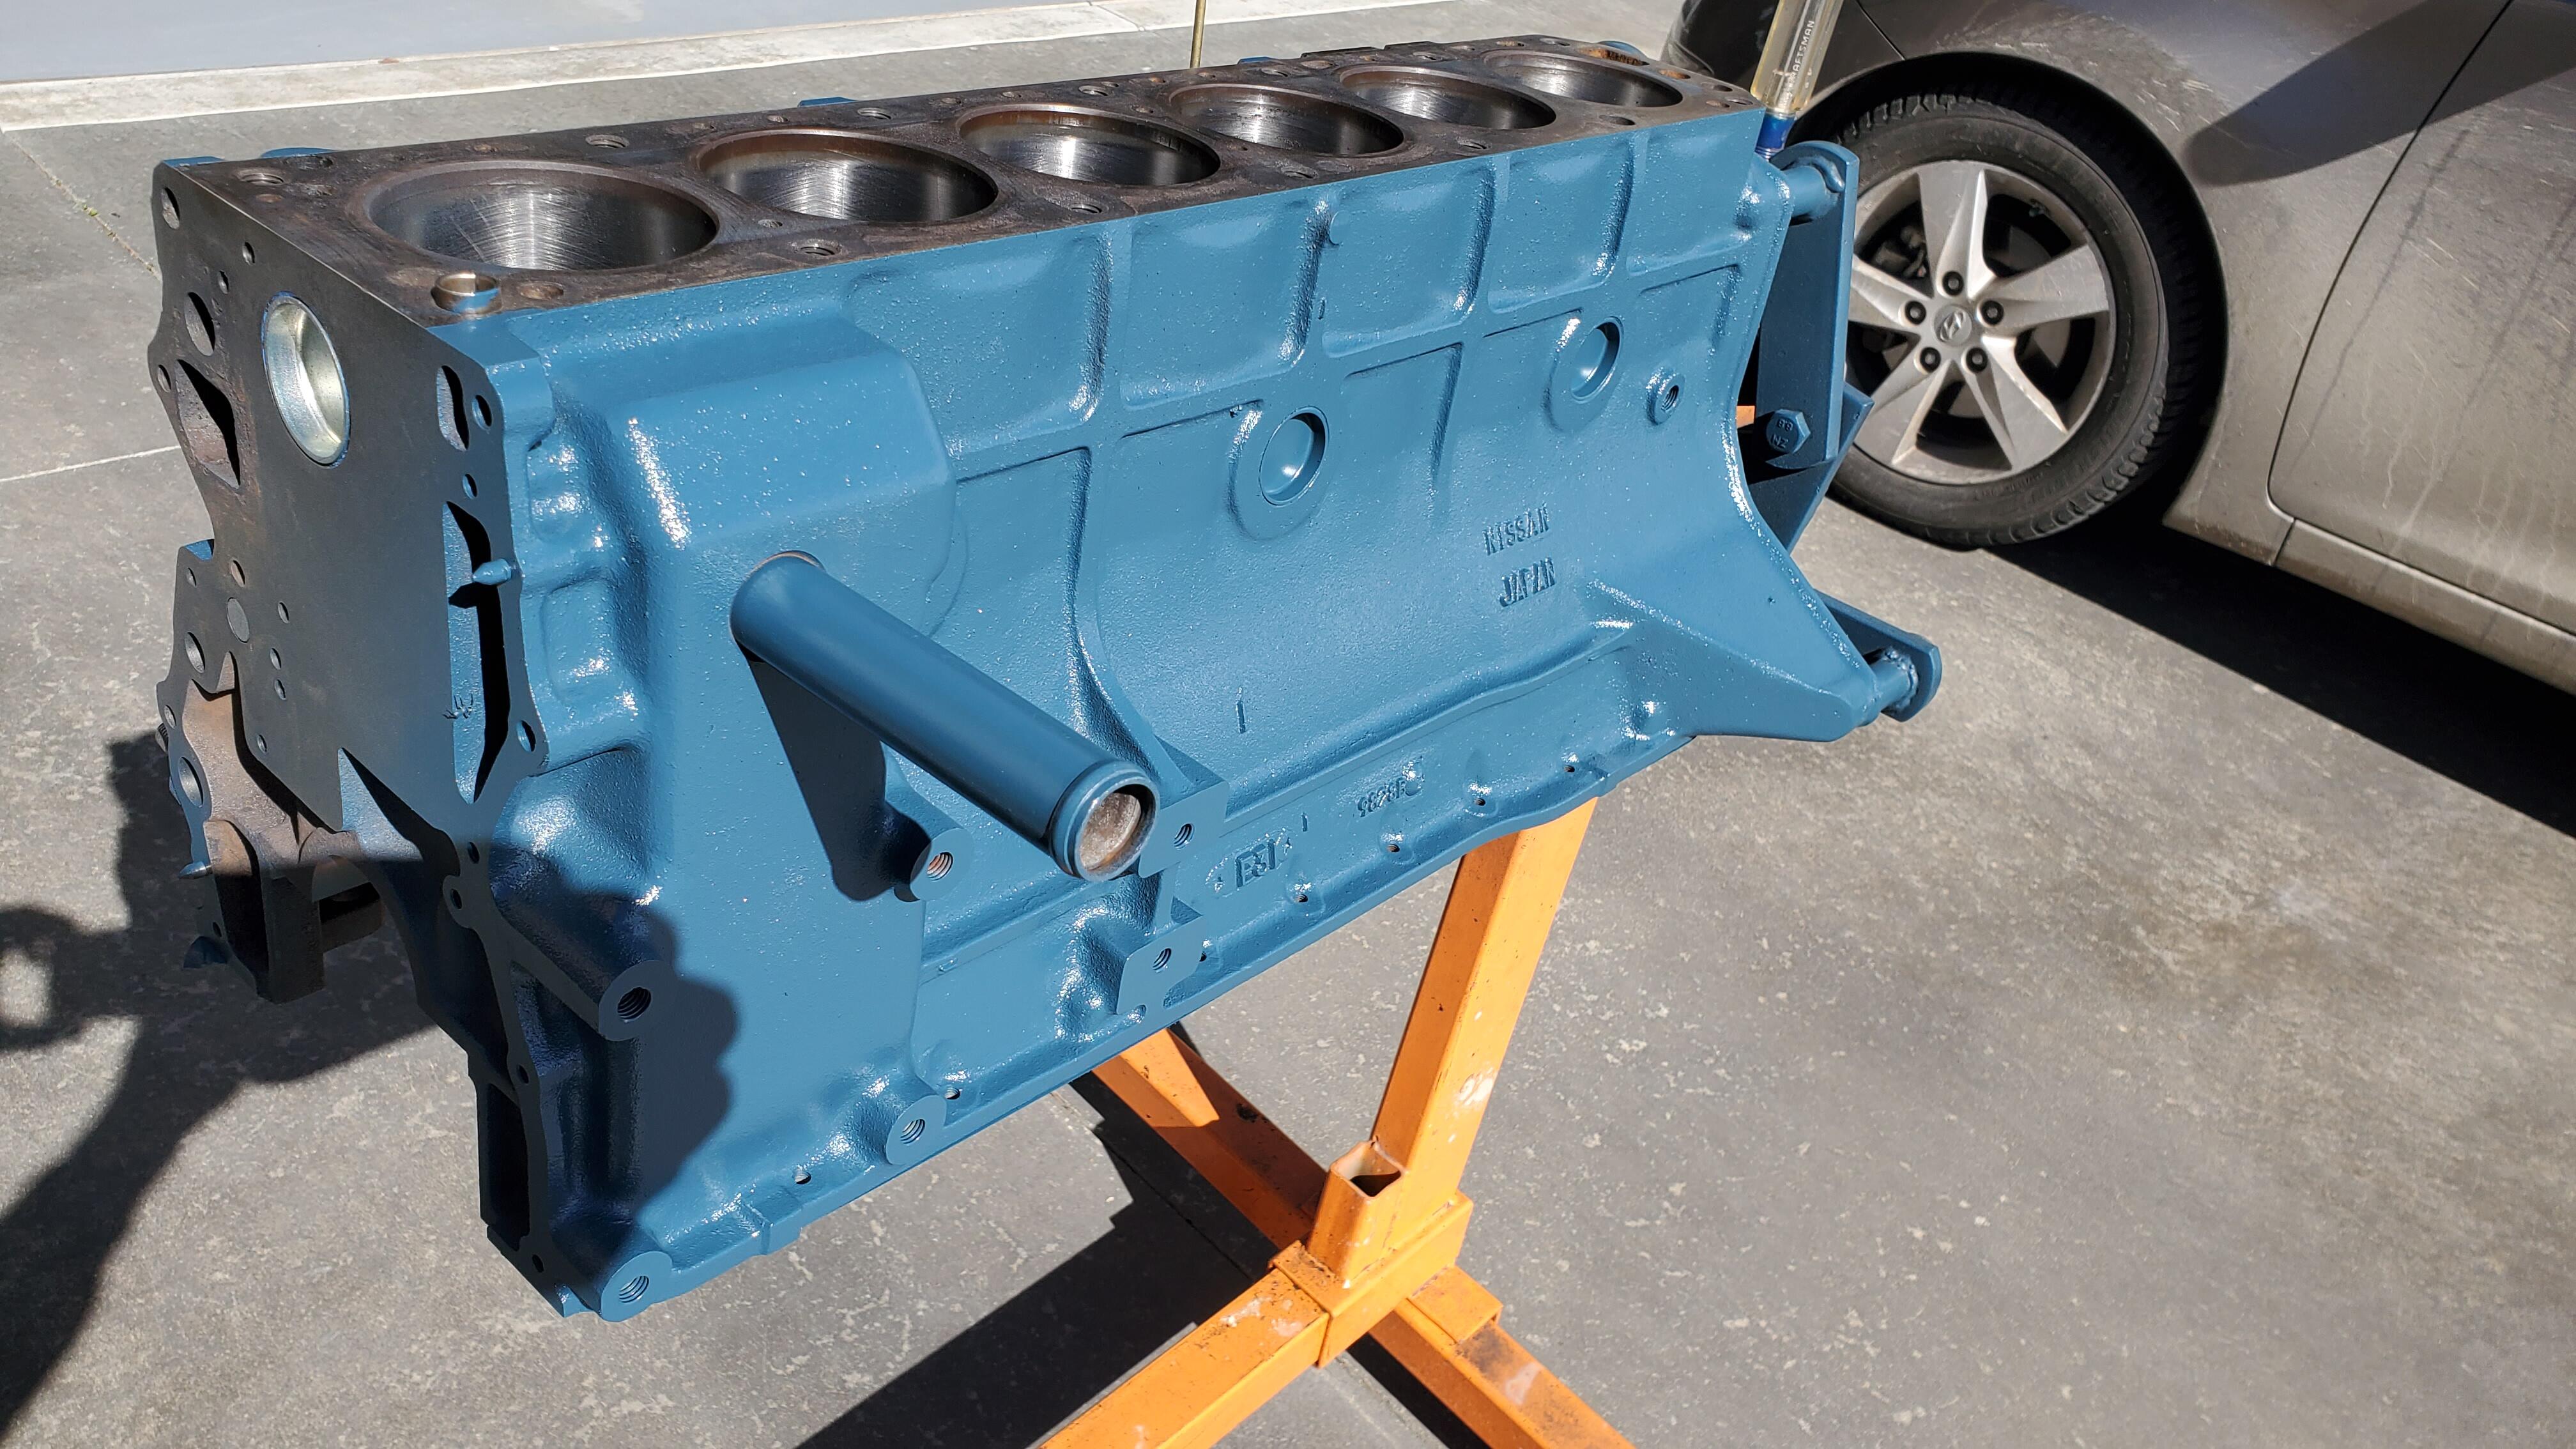
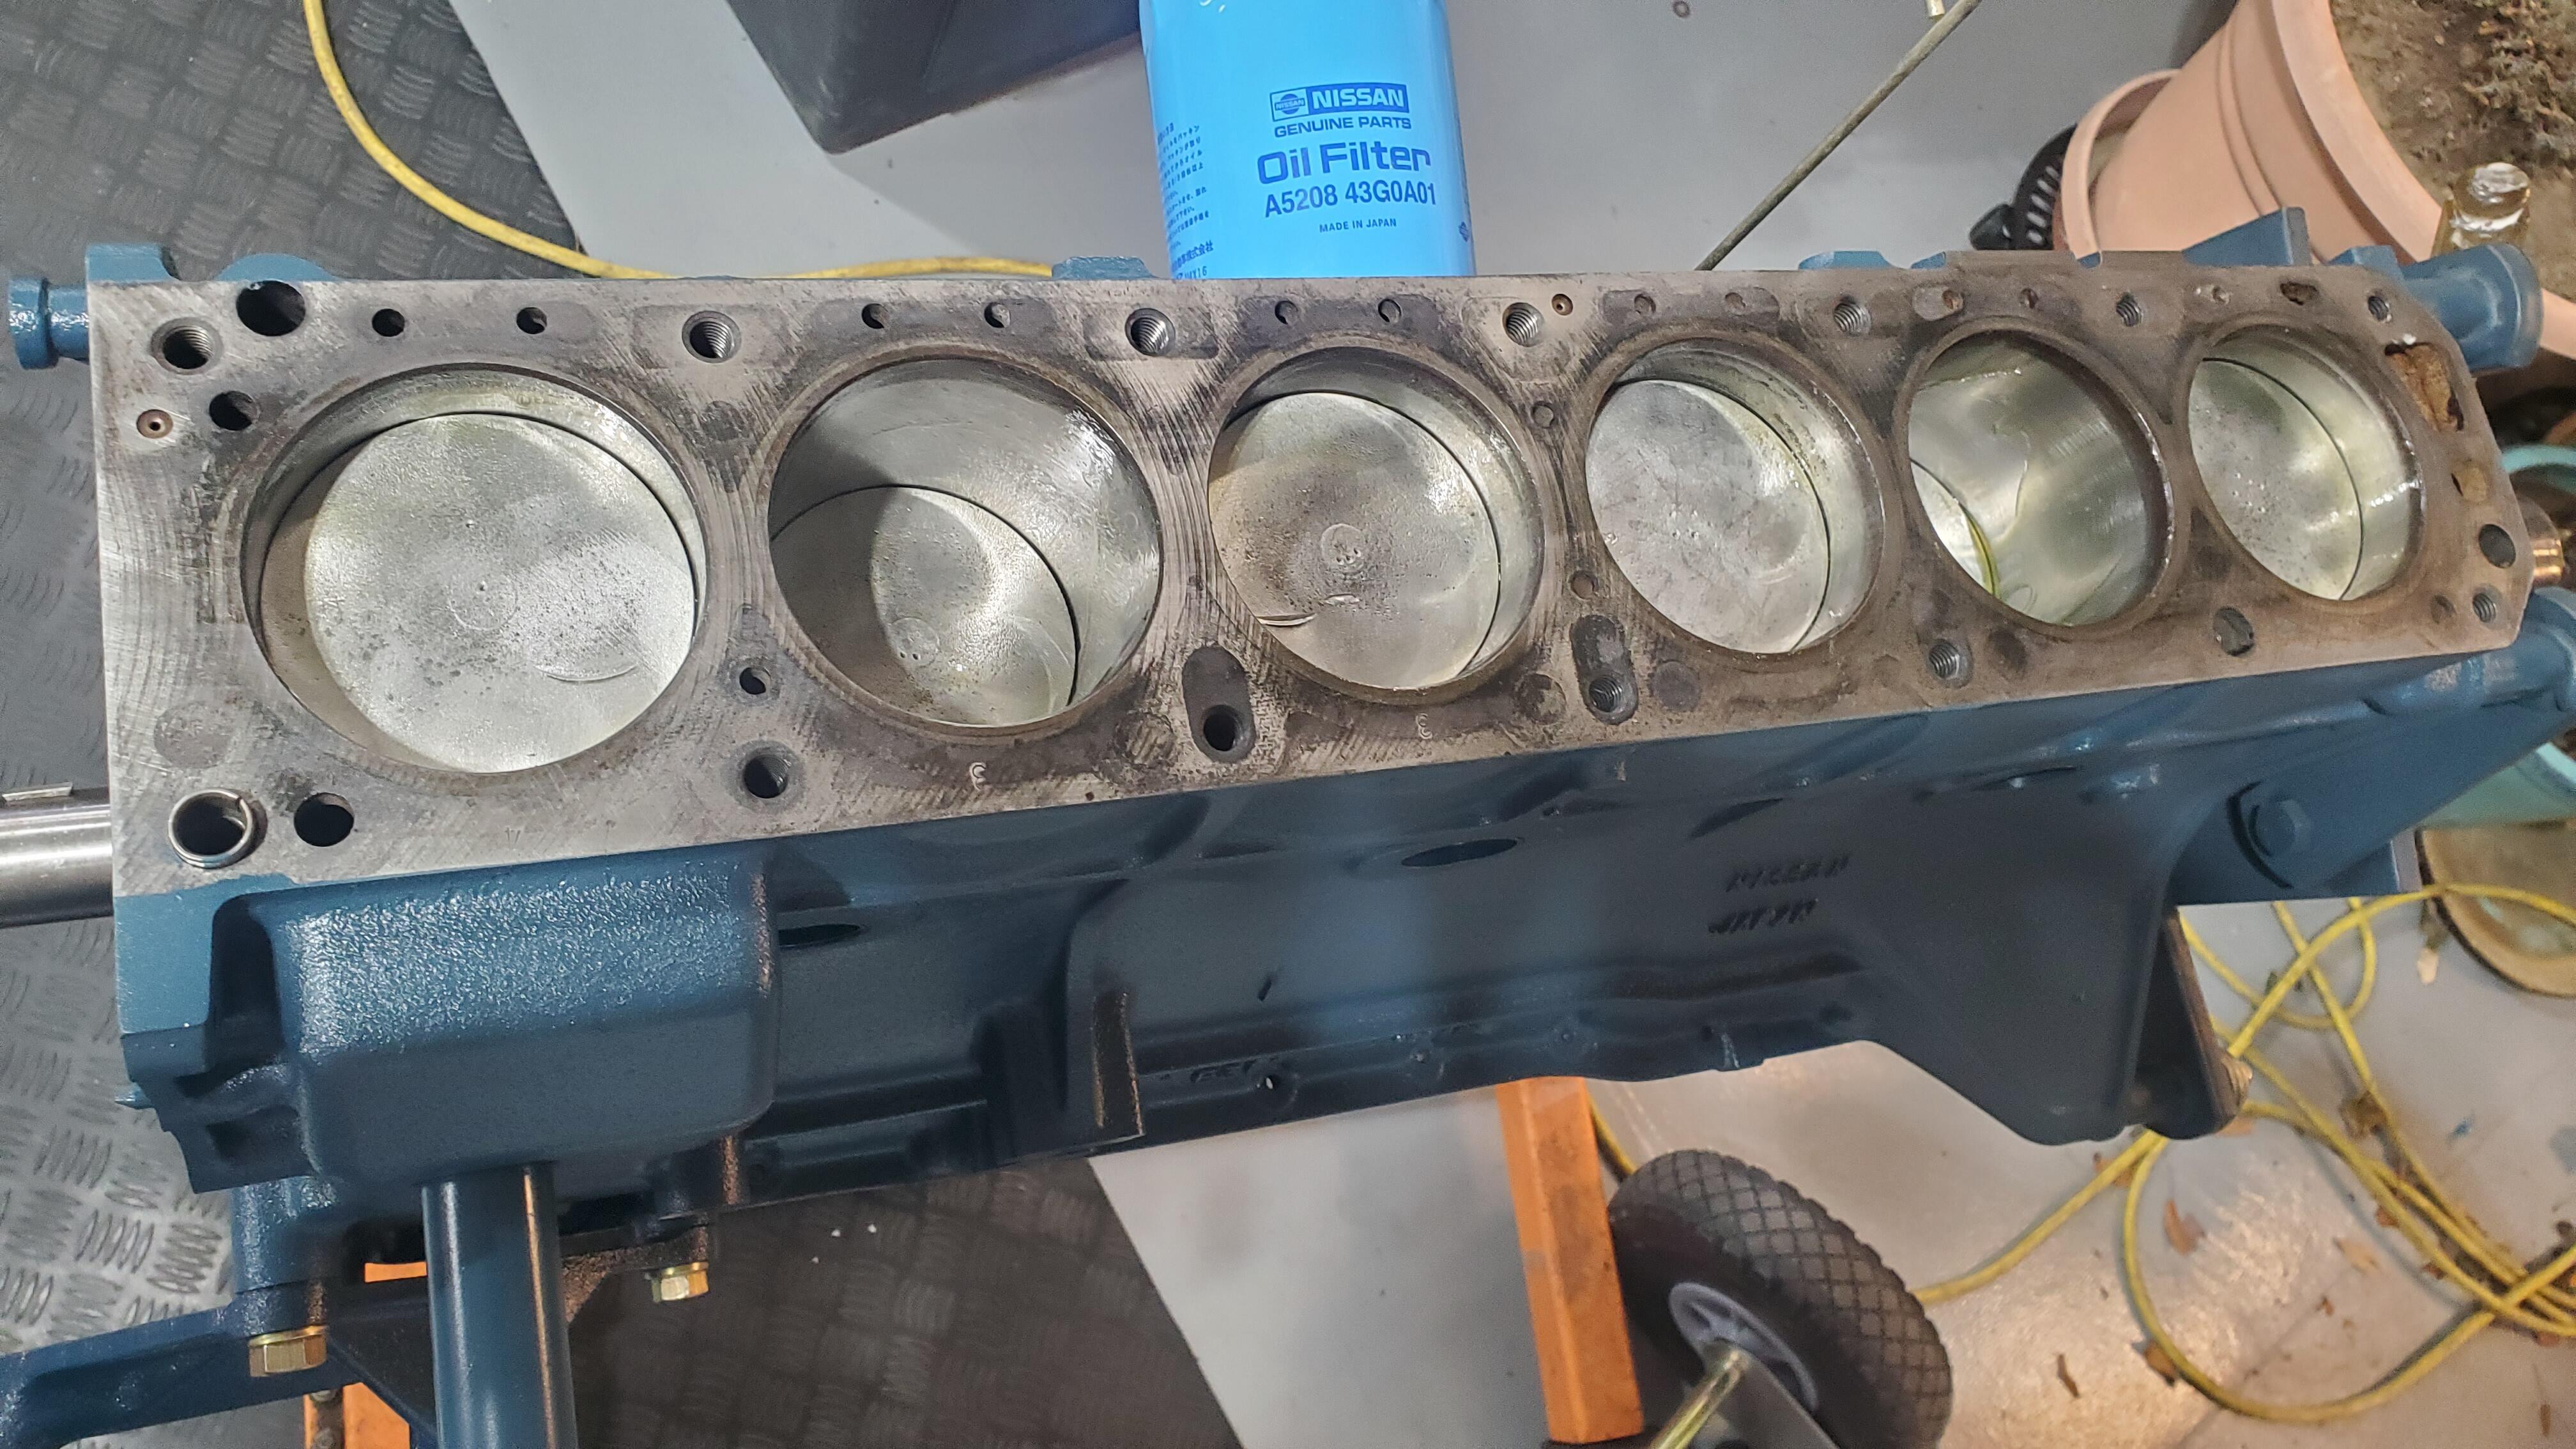
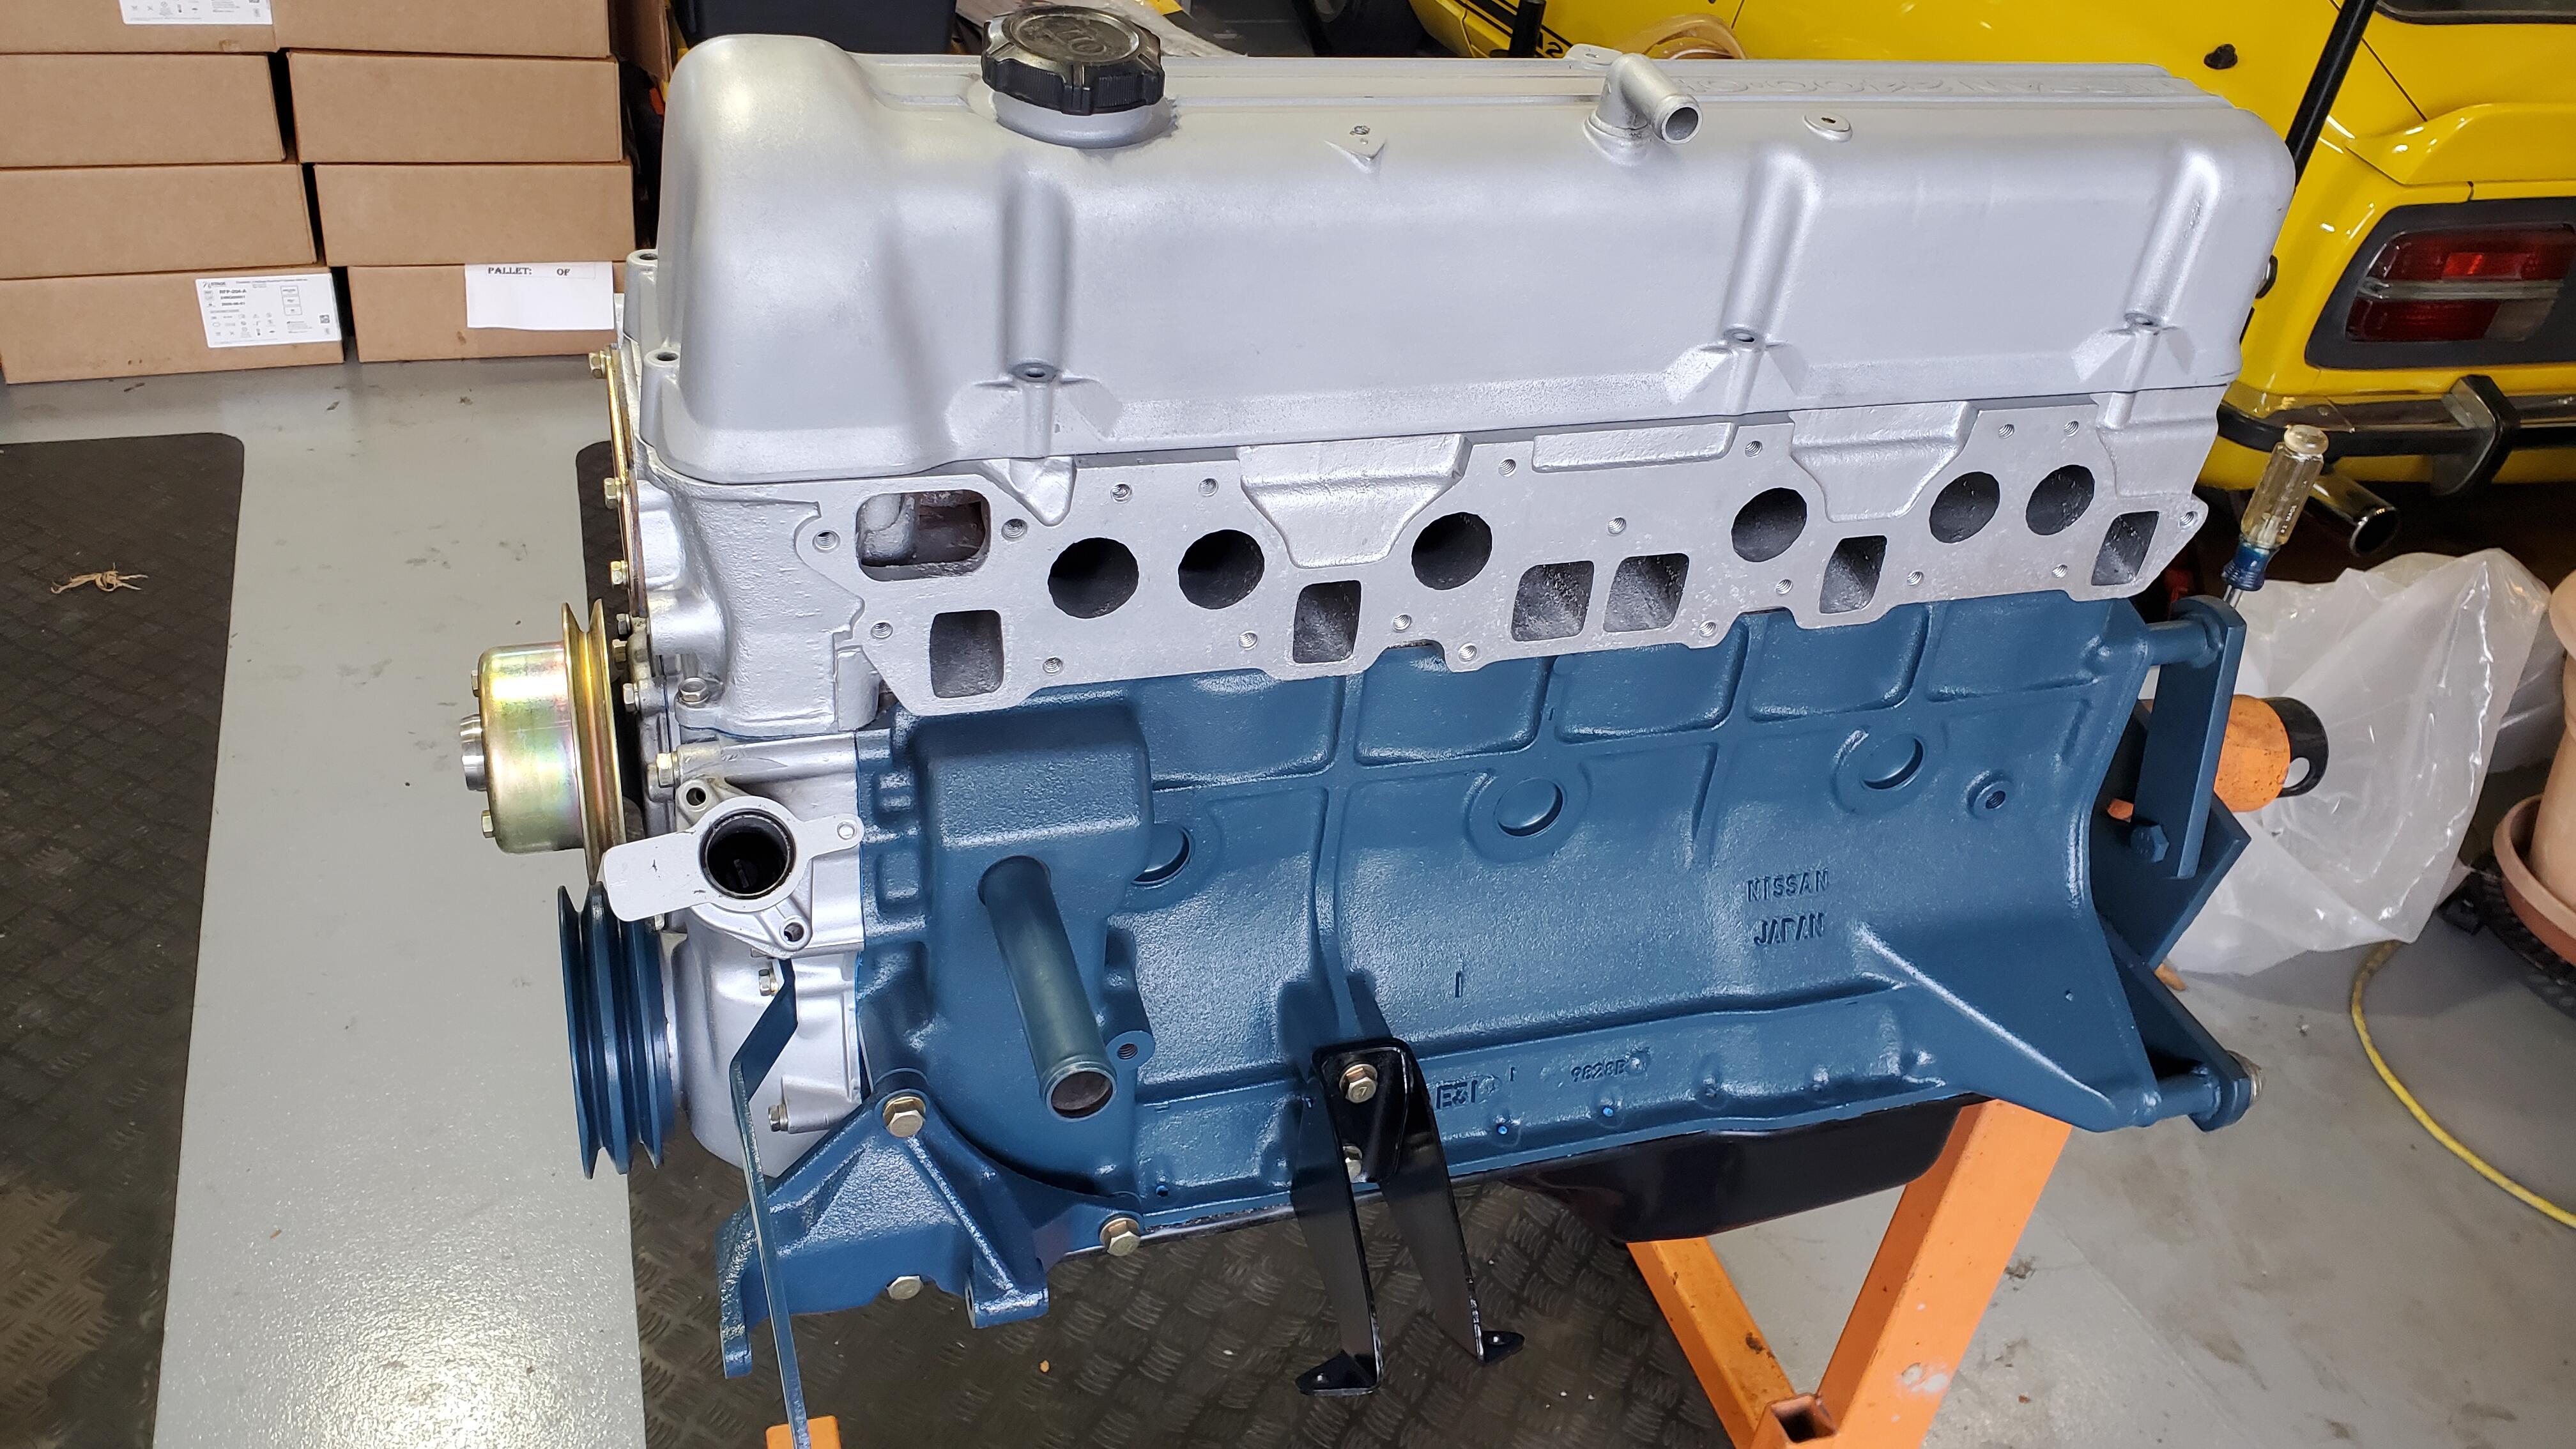
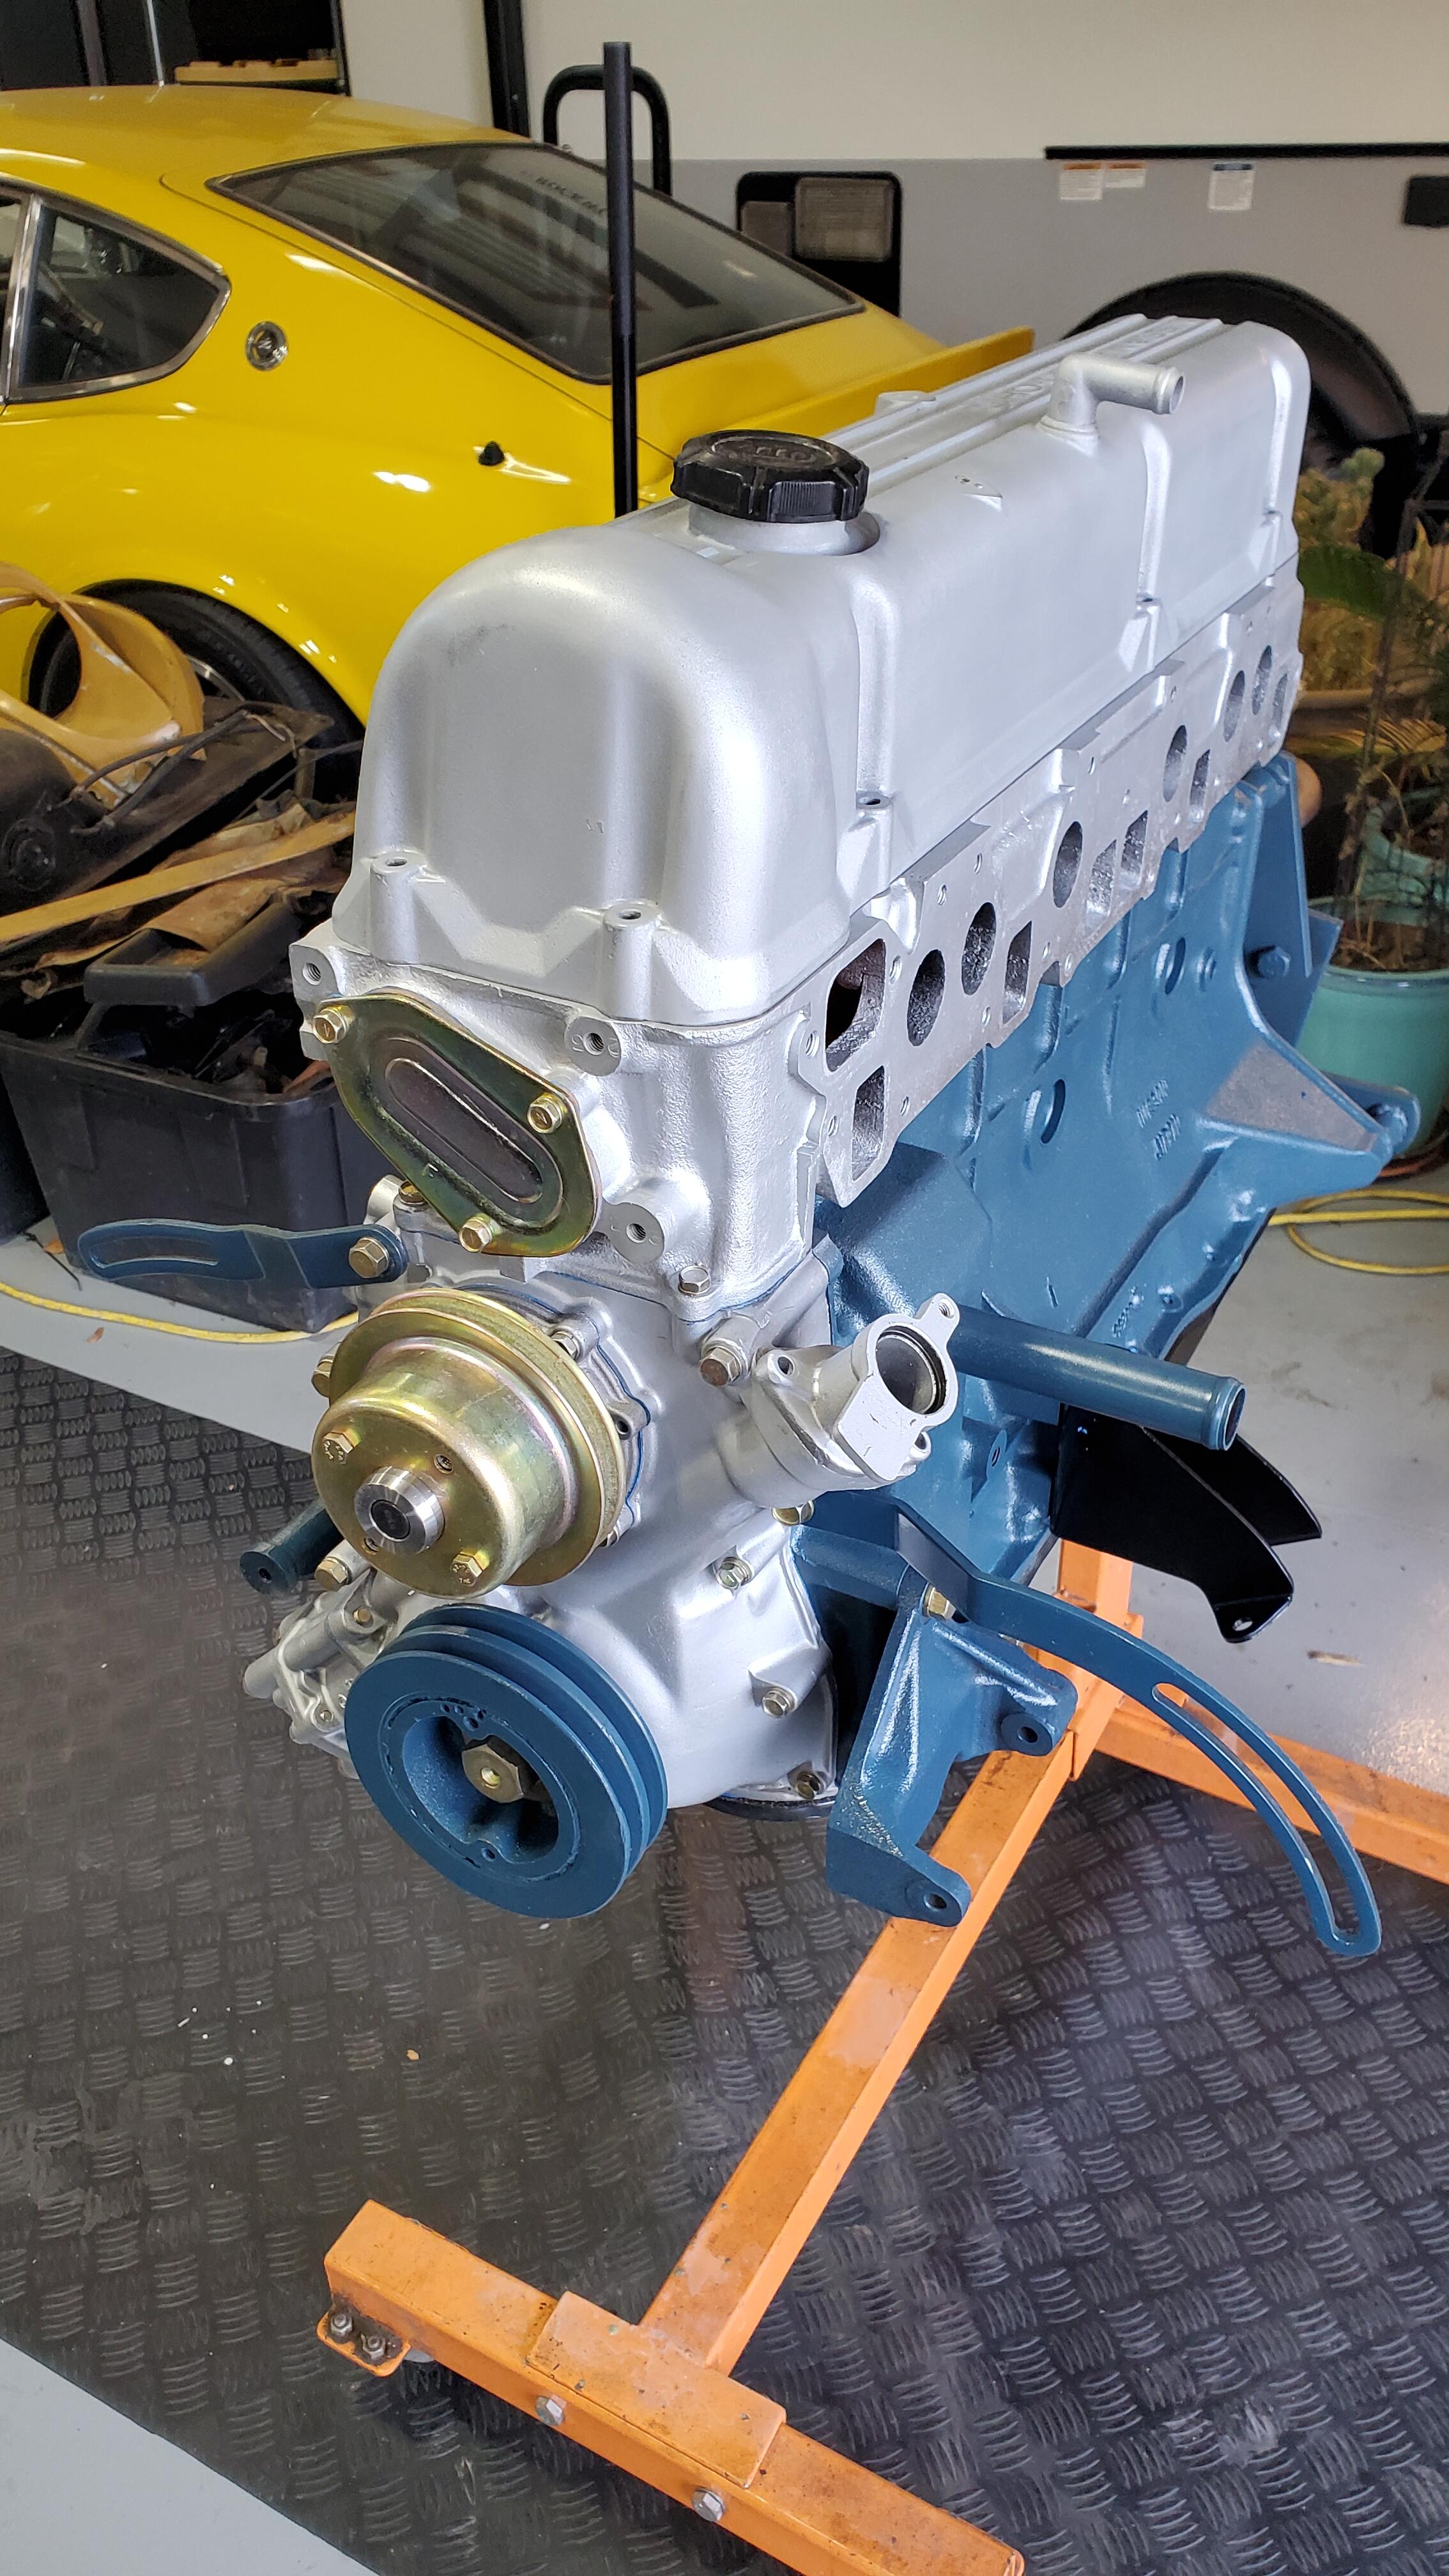
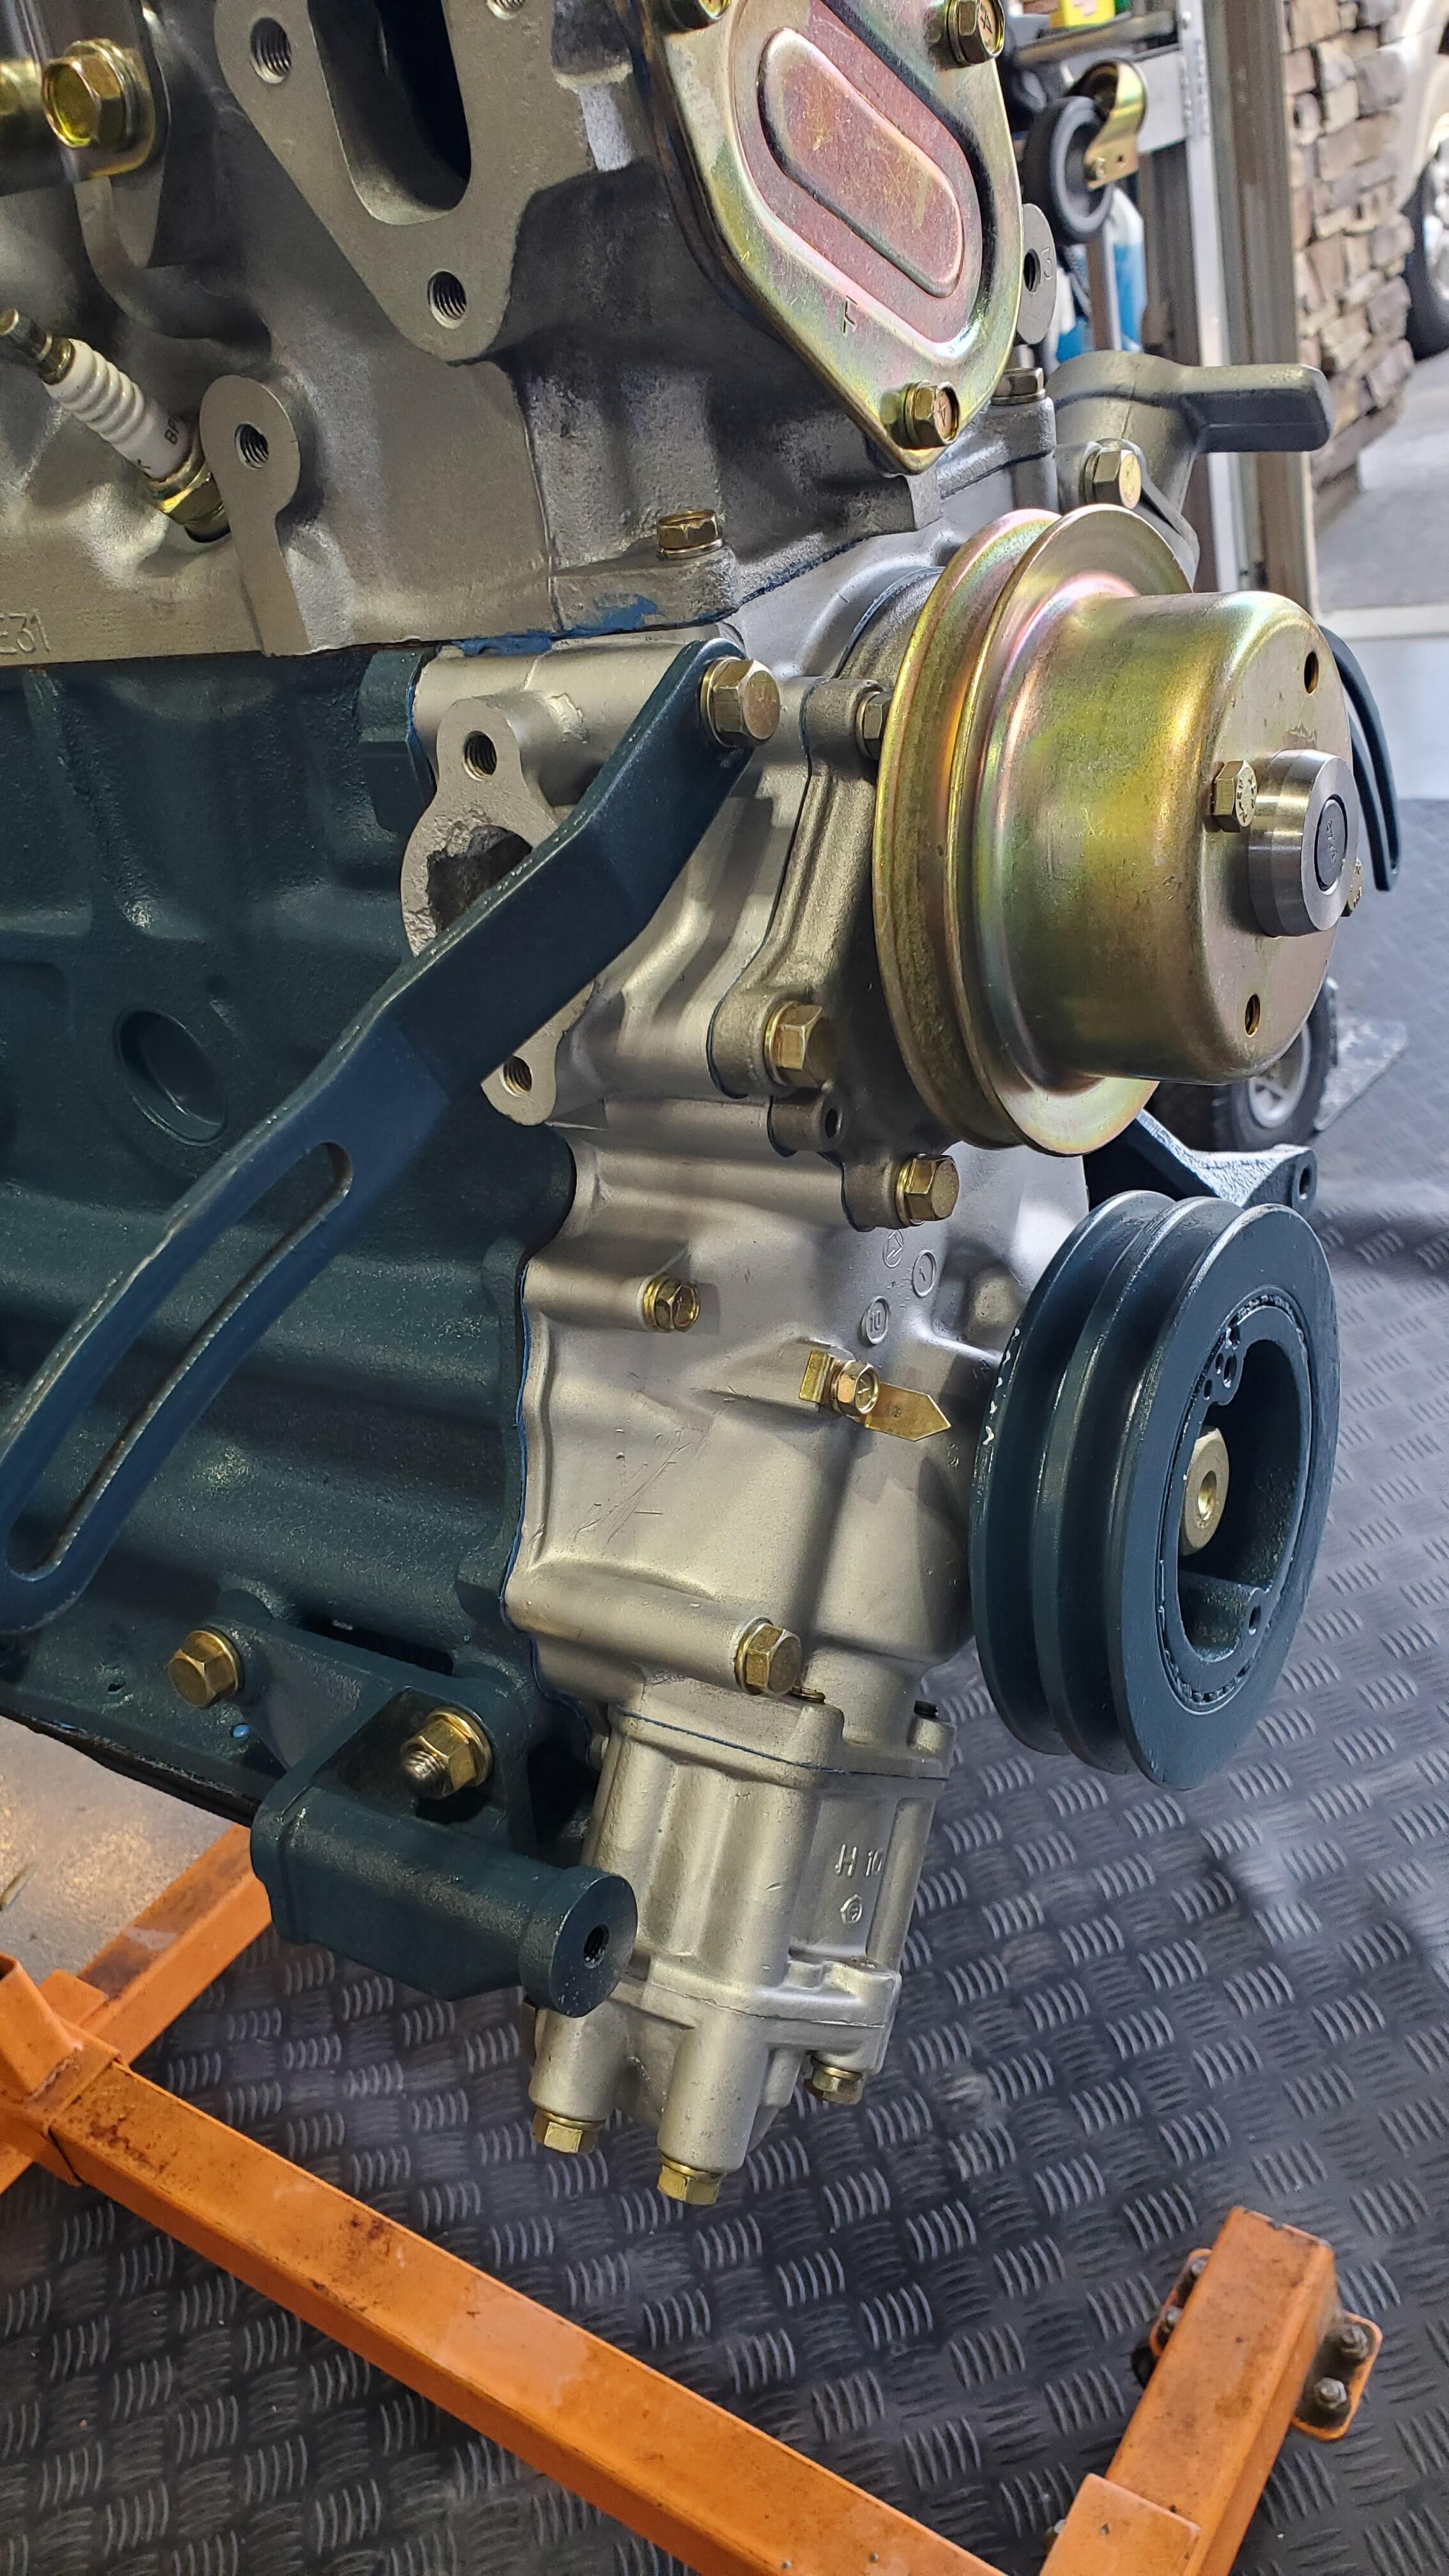
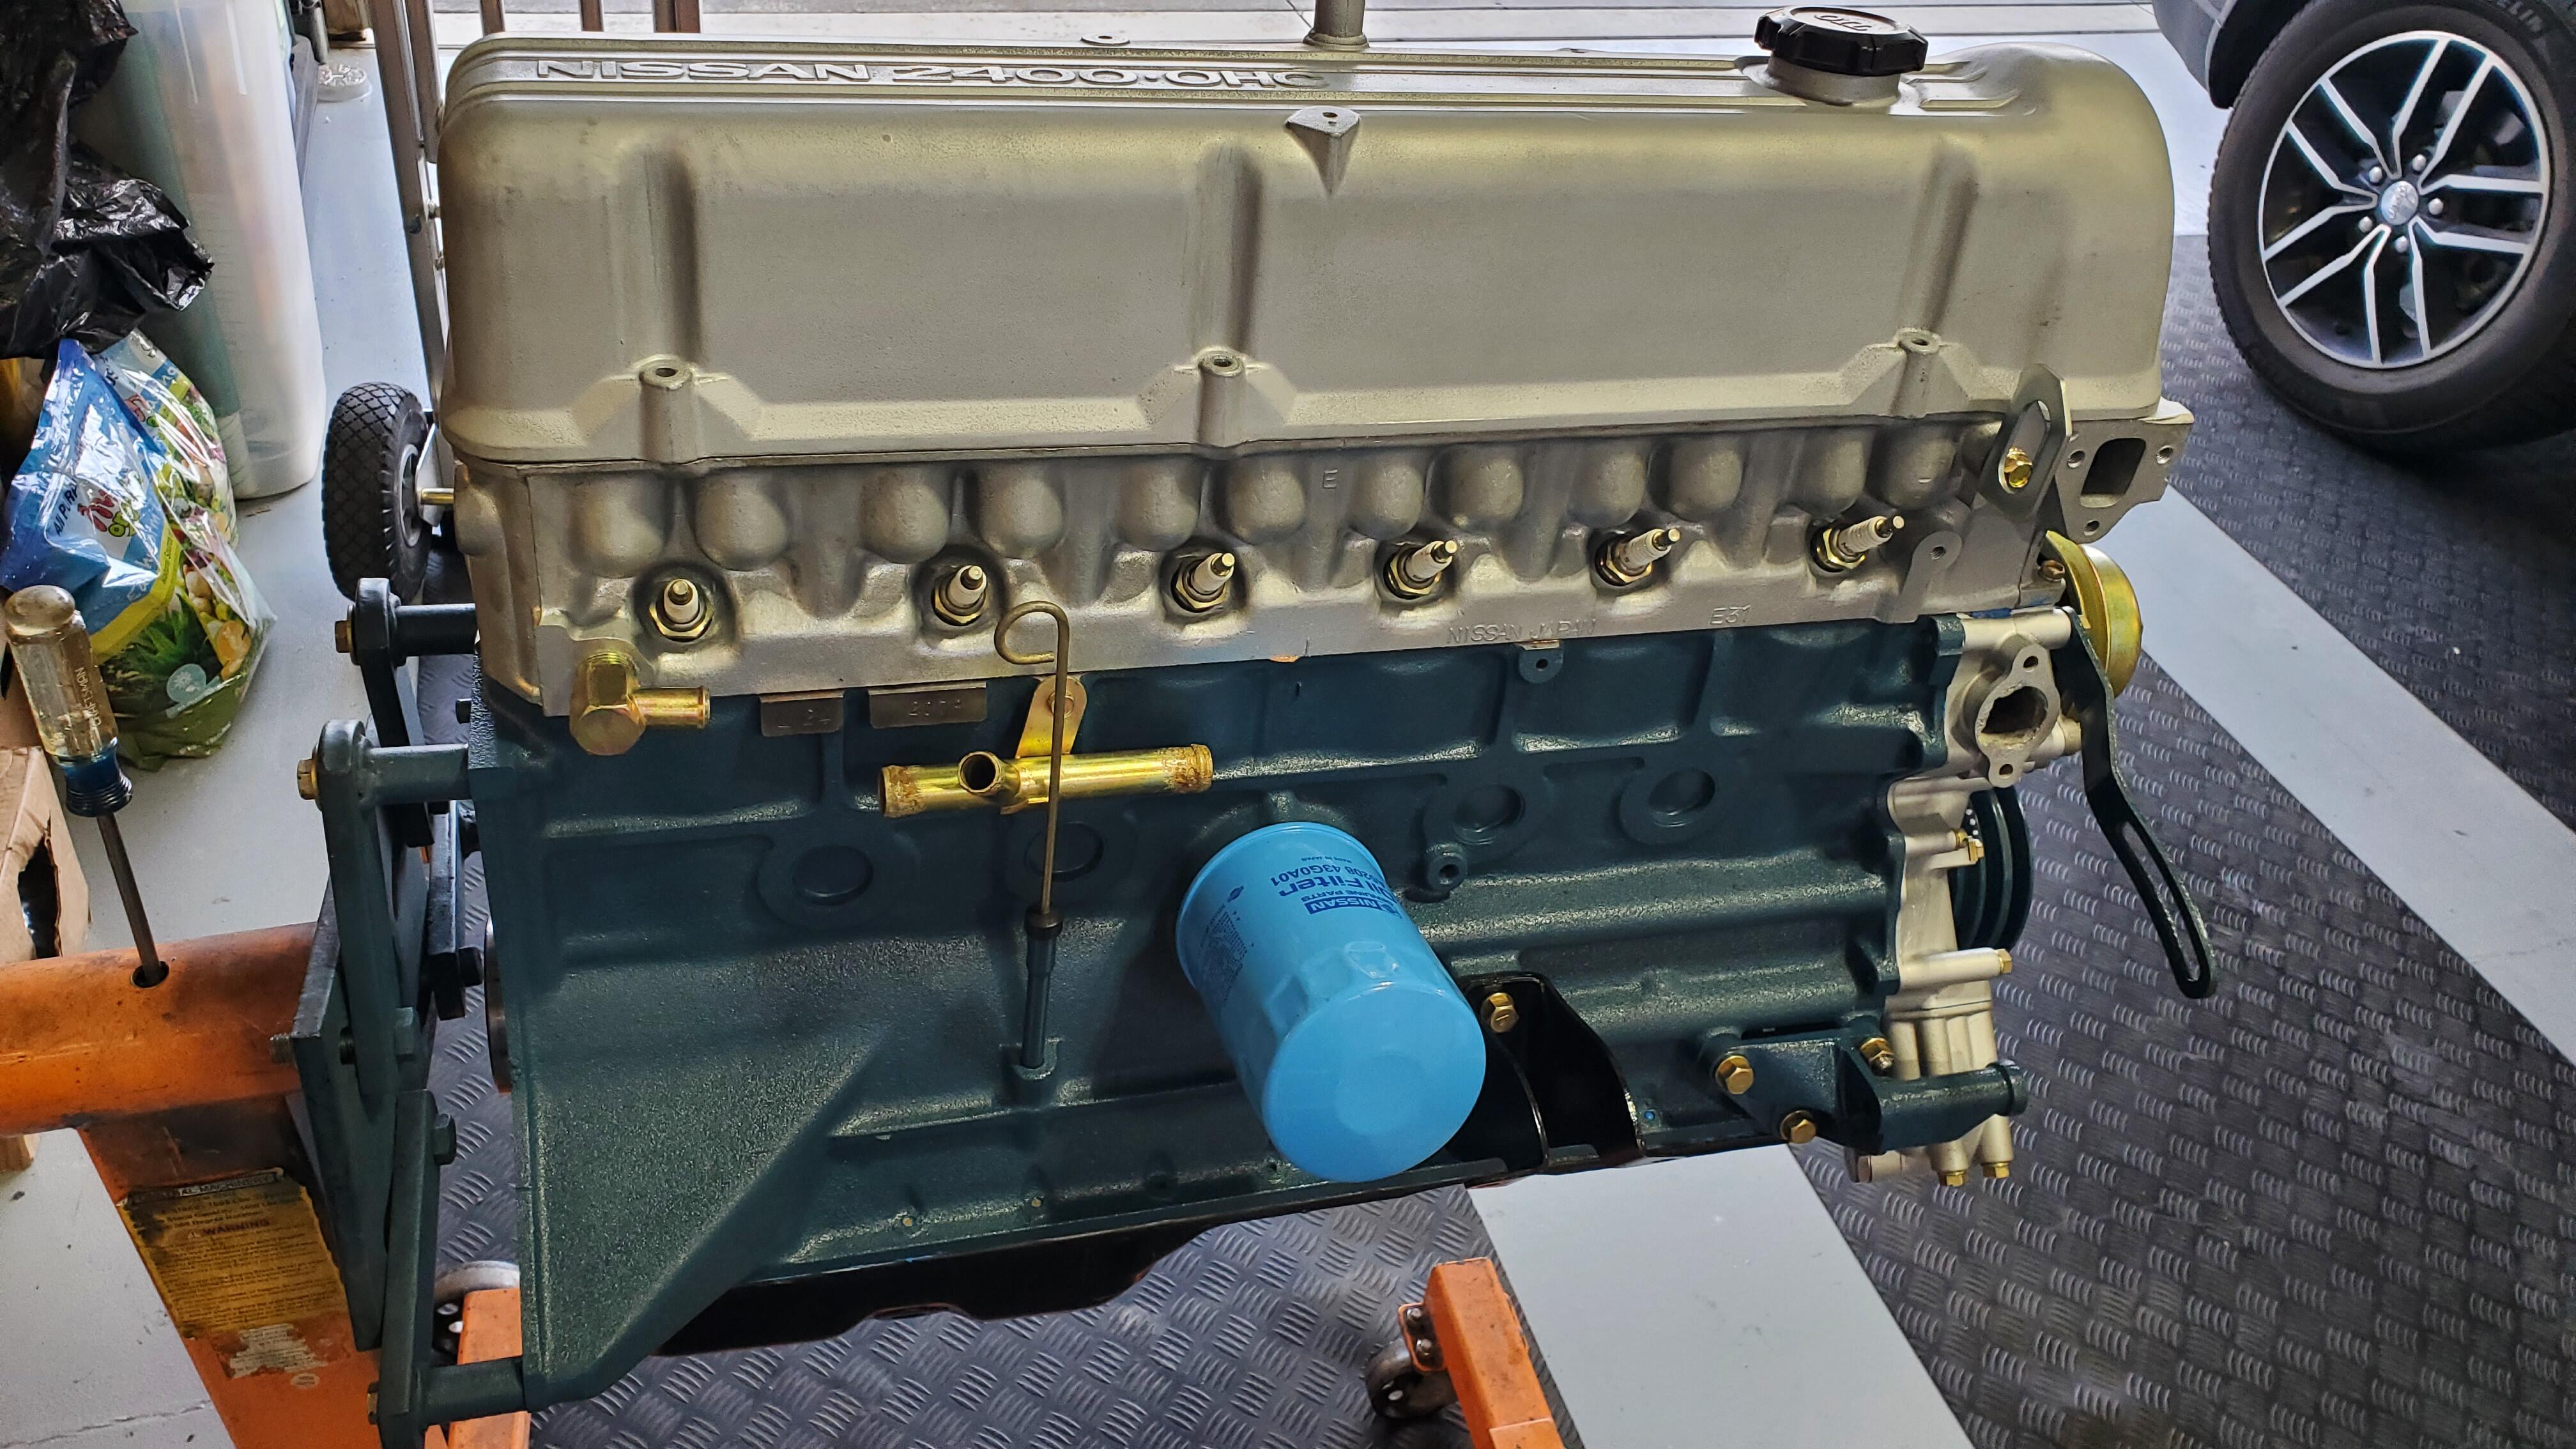
I have been delinquent in posting updates, but finally have a little time so here goes. I will break this up into several posts so the pictures won't be overwhelming. It took almost 5 weeks to get the engine parts from Motorsports, but once they arrrived it gave me all the hardware I needed to finish the engine. The shipment was delayed for the stock piston rings. The motor went together pretty smoothly with no hiccups. The only item that was odd, and I'm guessing it's an early car item, is that the timing chain did not have the two timing links, 42 links apart. There was just one bright link and it actually had a clip feature on it so that it could be easily removed. Can't say I have seen that before. I did not take a pic of it, but may show that in the future. Pics of the engine are below.


.thumb.jpg.b3c7428299b515219475ffbb6afa6142.jpg)

-
Now I need to find a Nikki top cap.
-
That is perfect, Thanks!
-
I know this is an old thread, but can anyone get me a side view of an Ampco pump? I am curious to see if it says Ampco on the side housing.
-
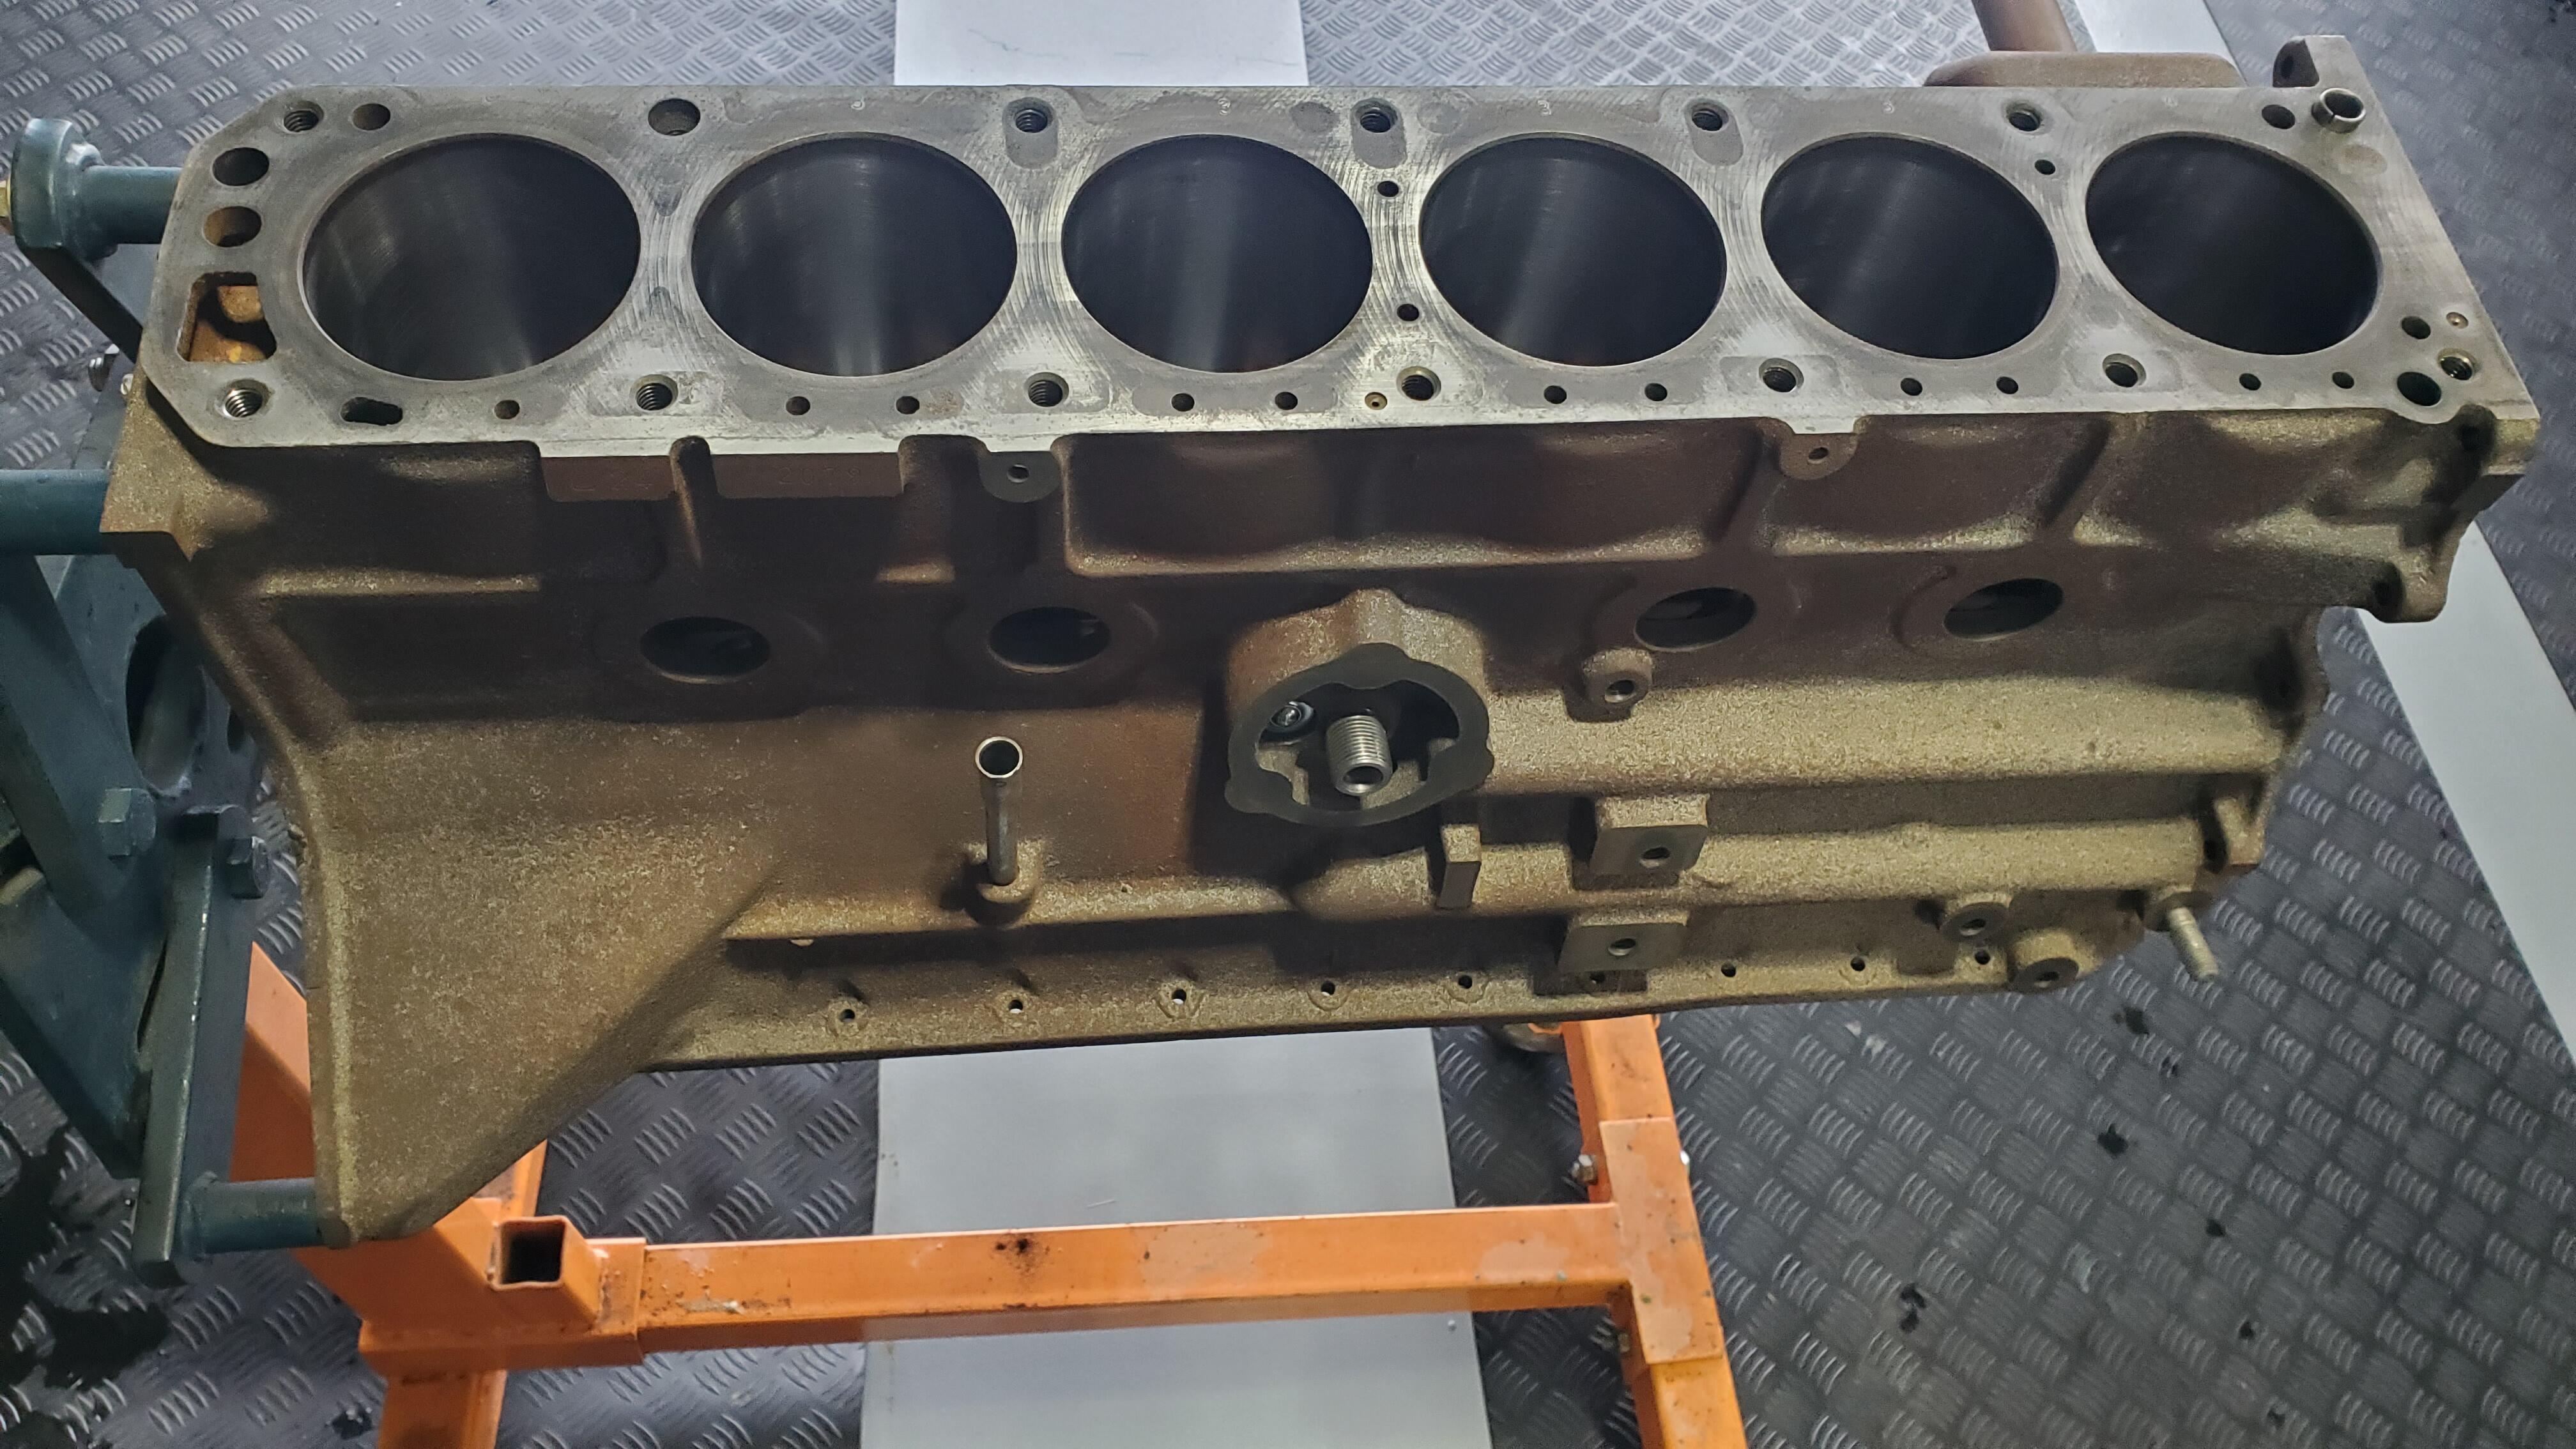
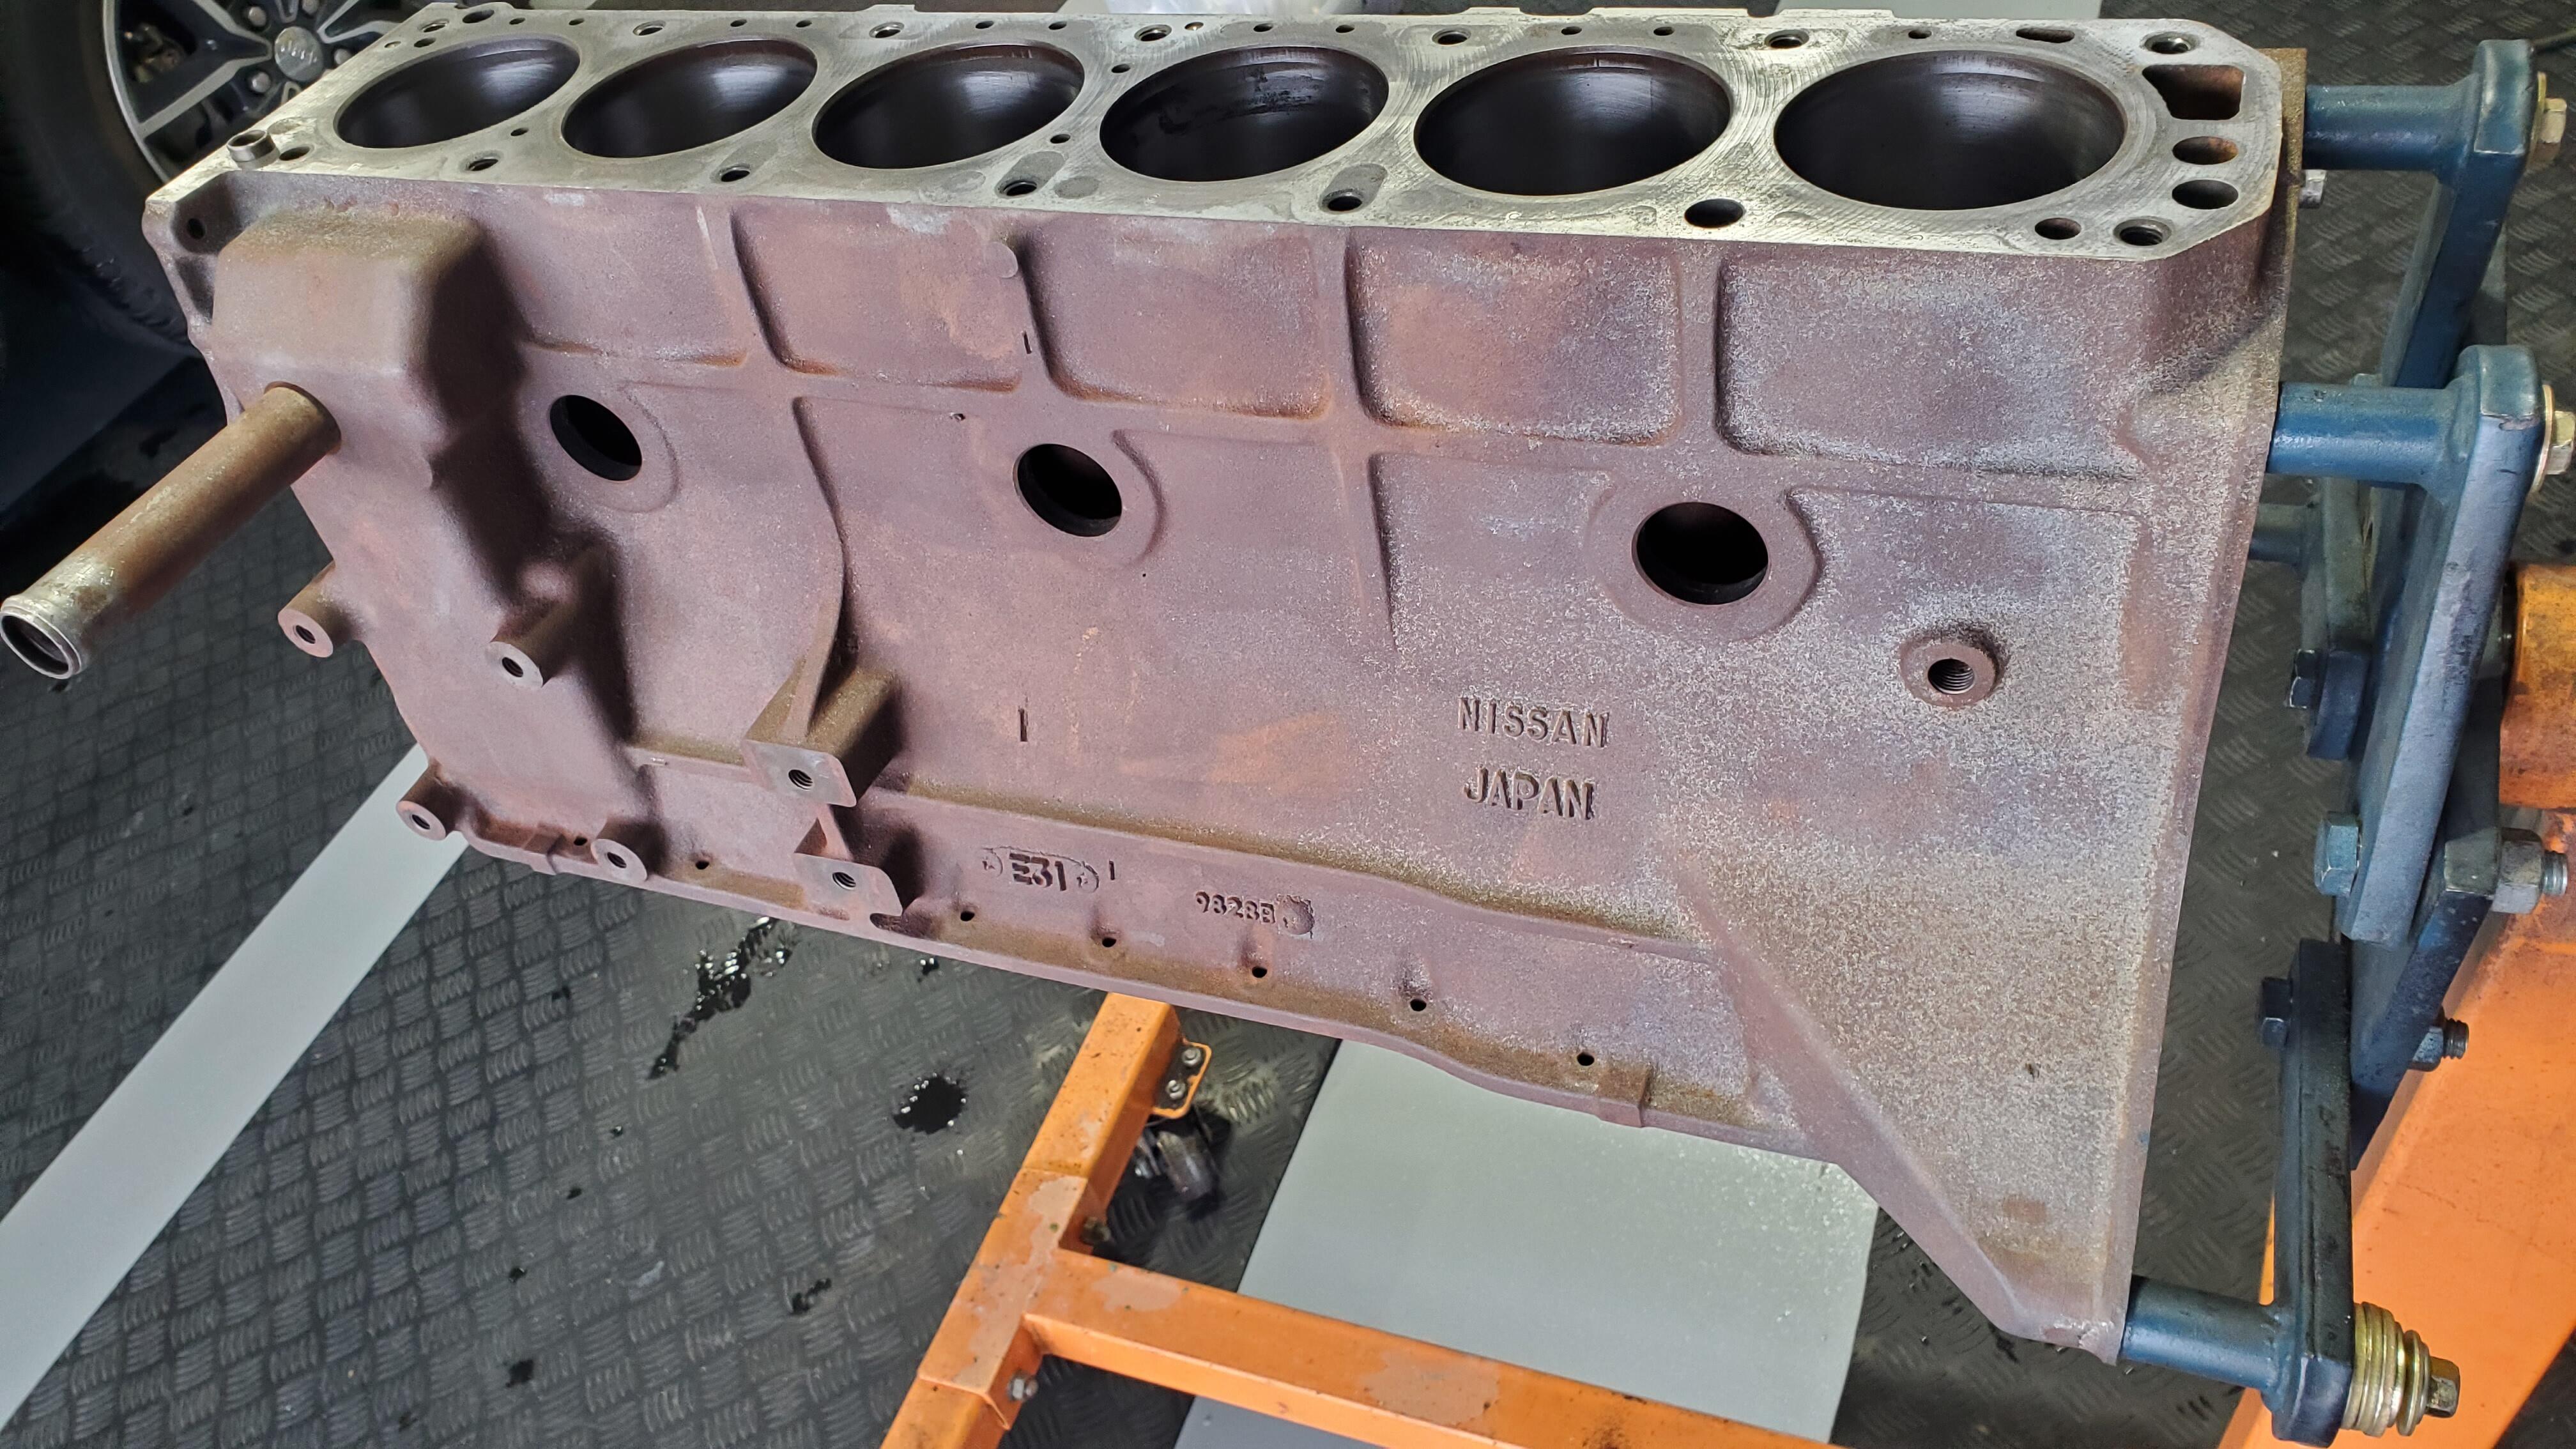
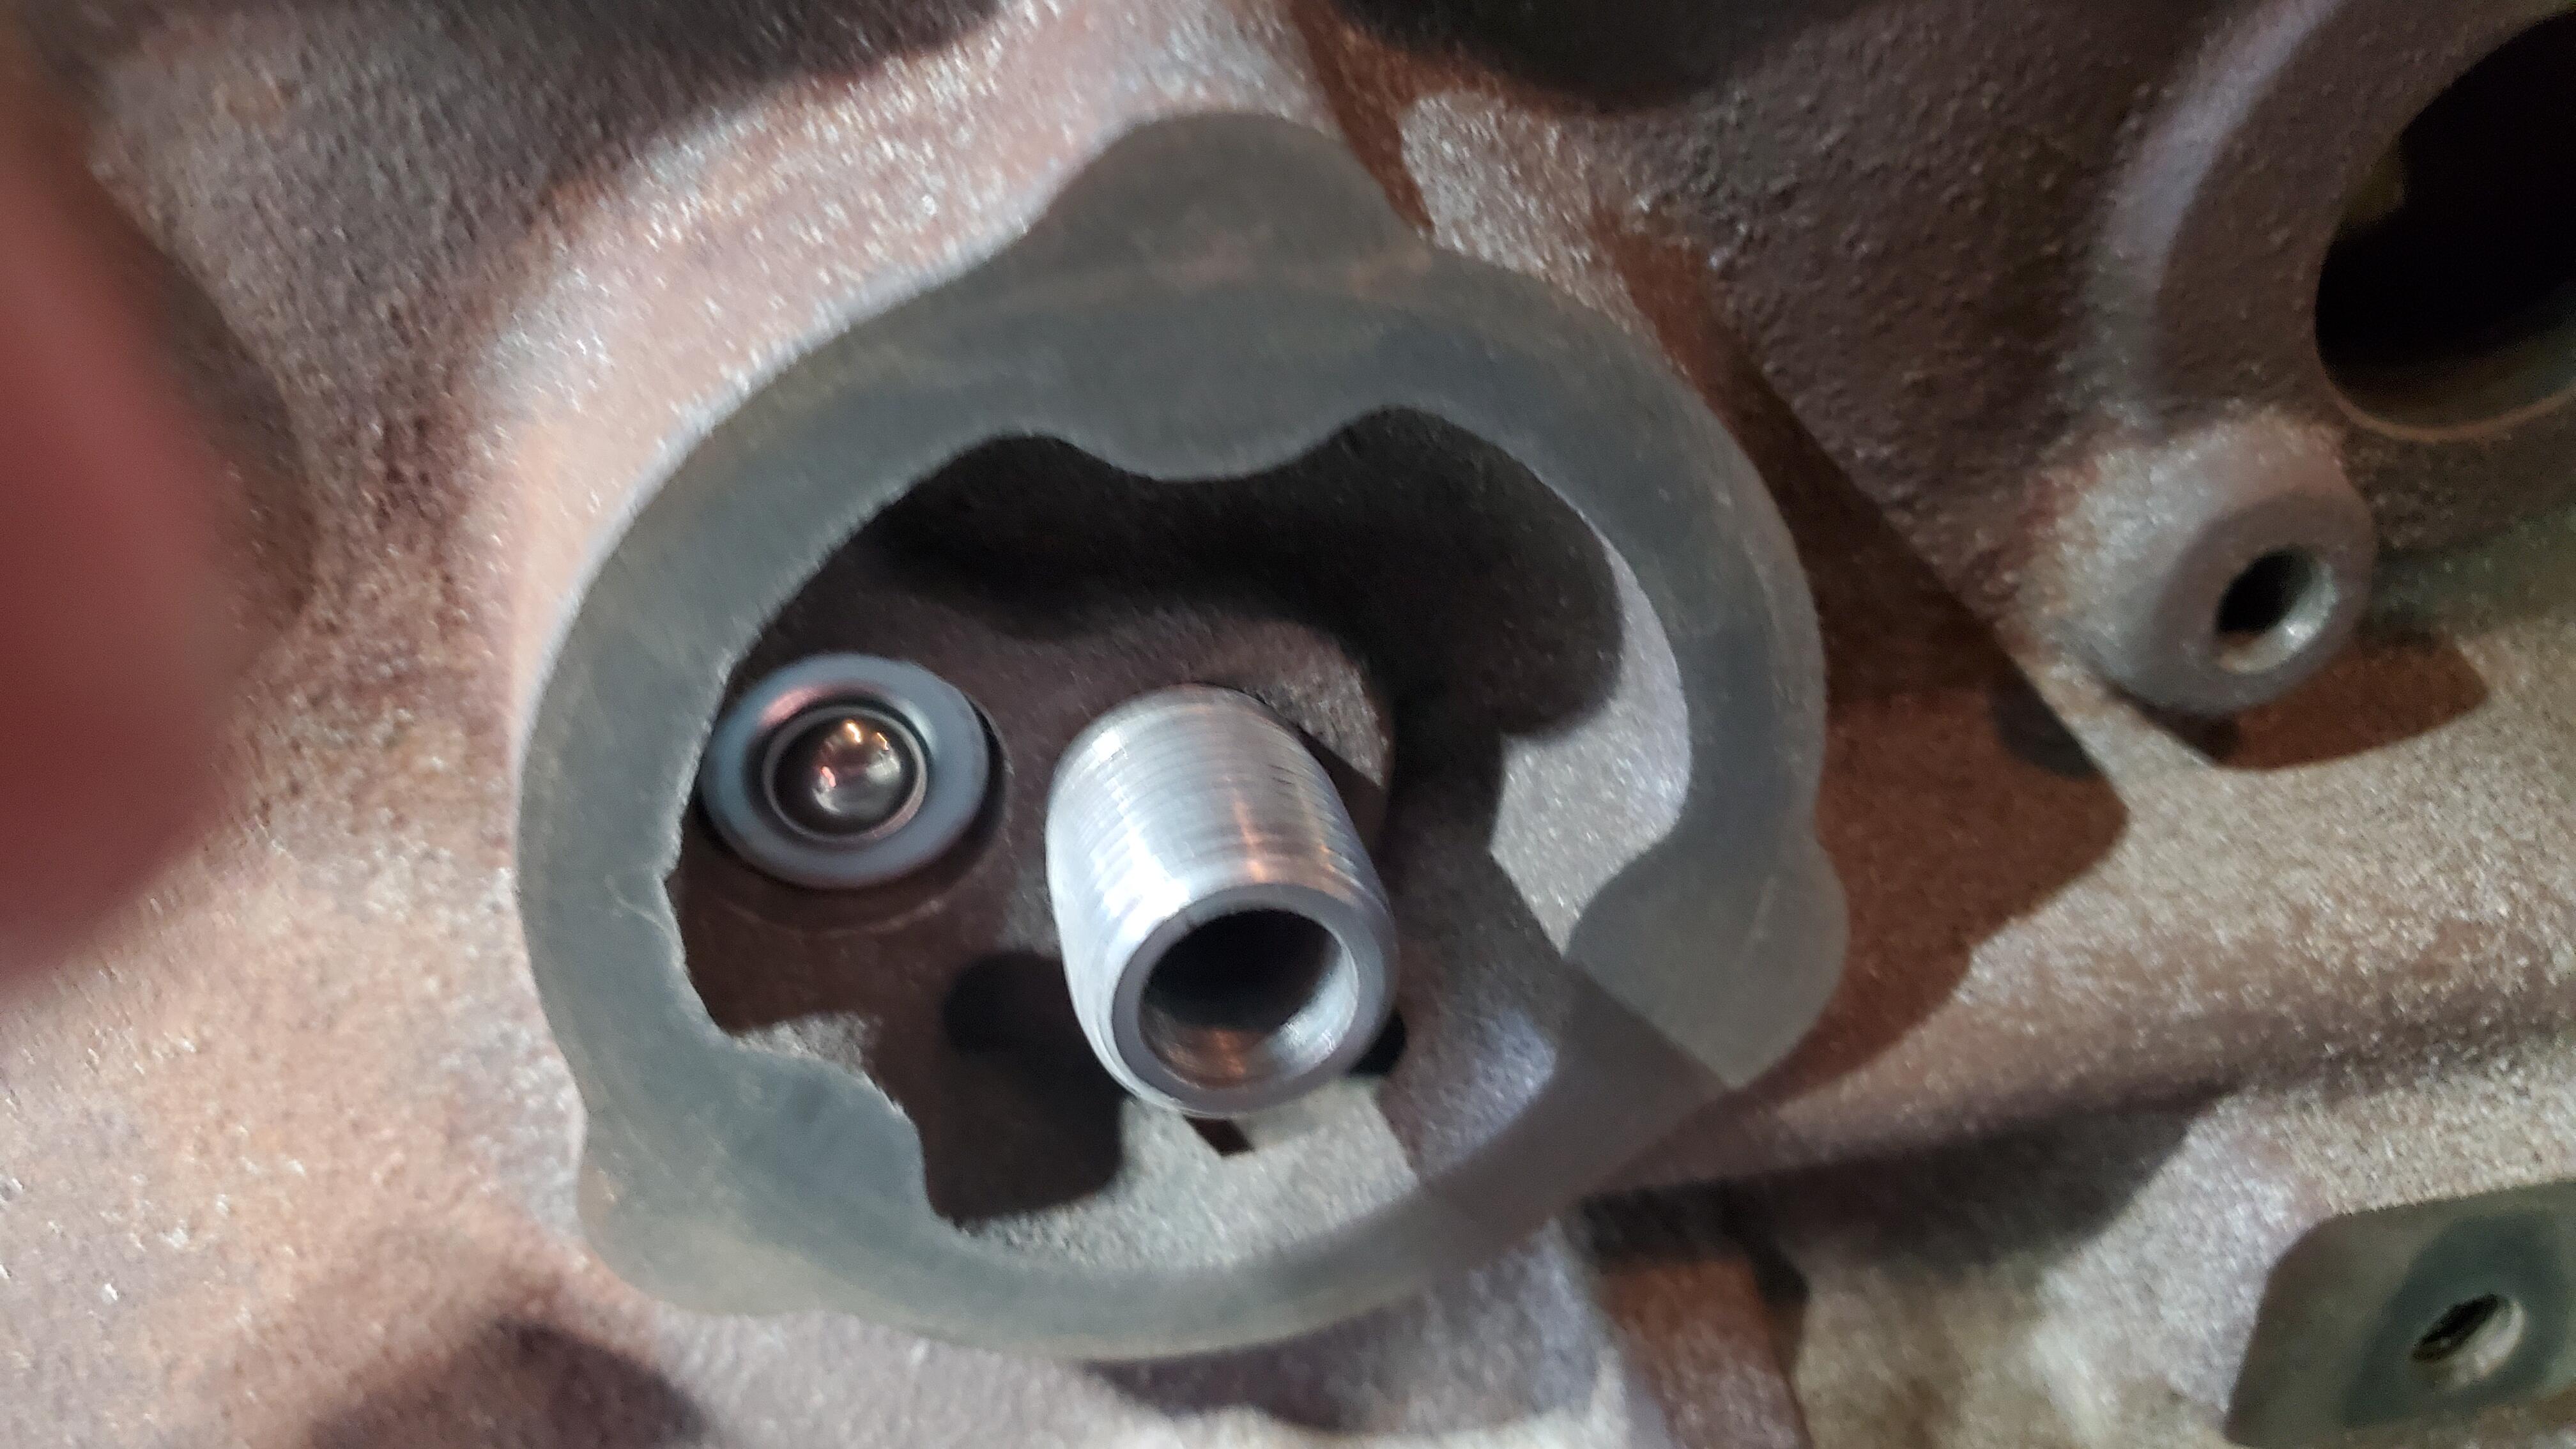
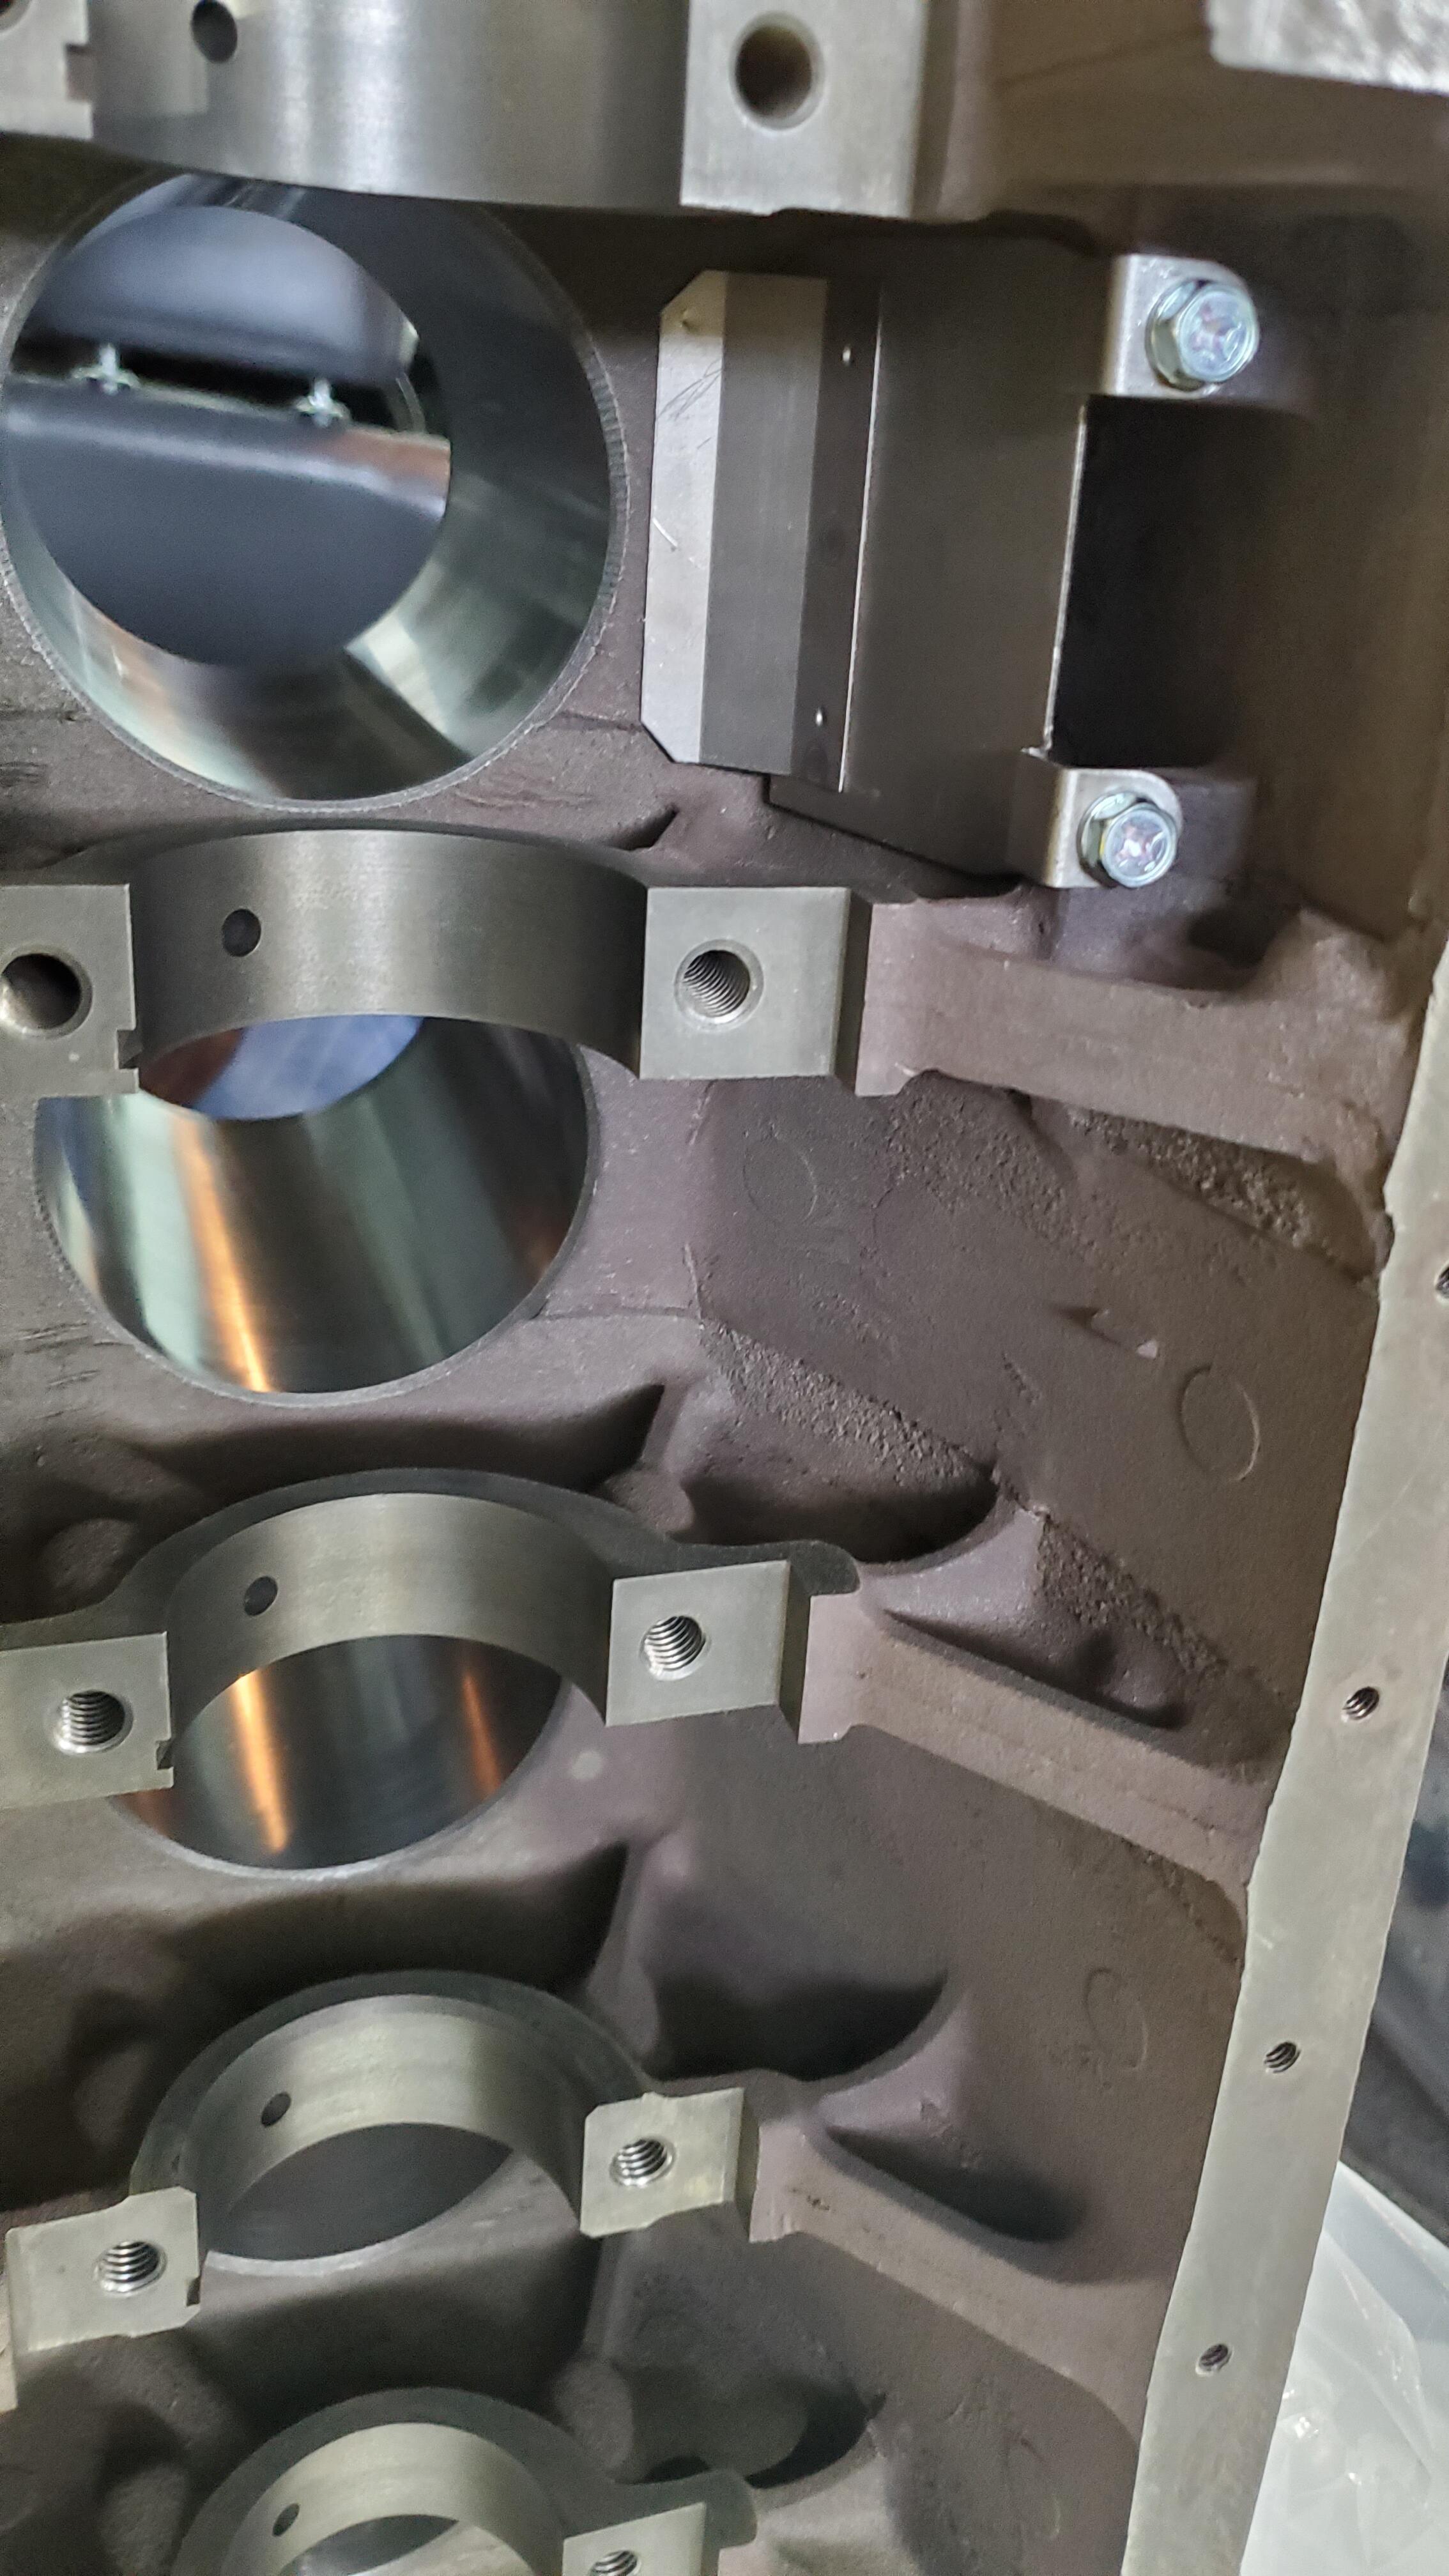
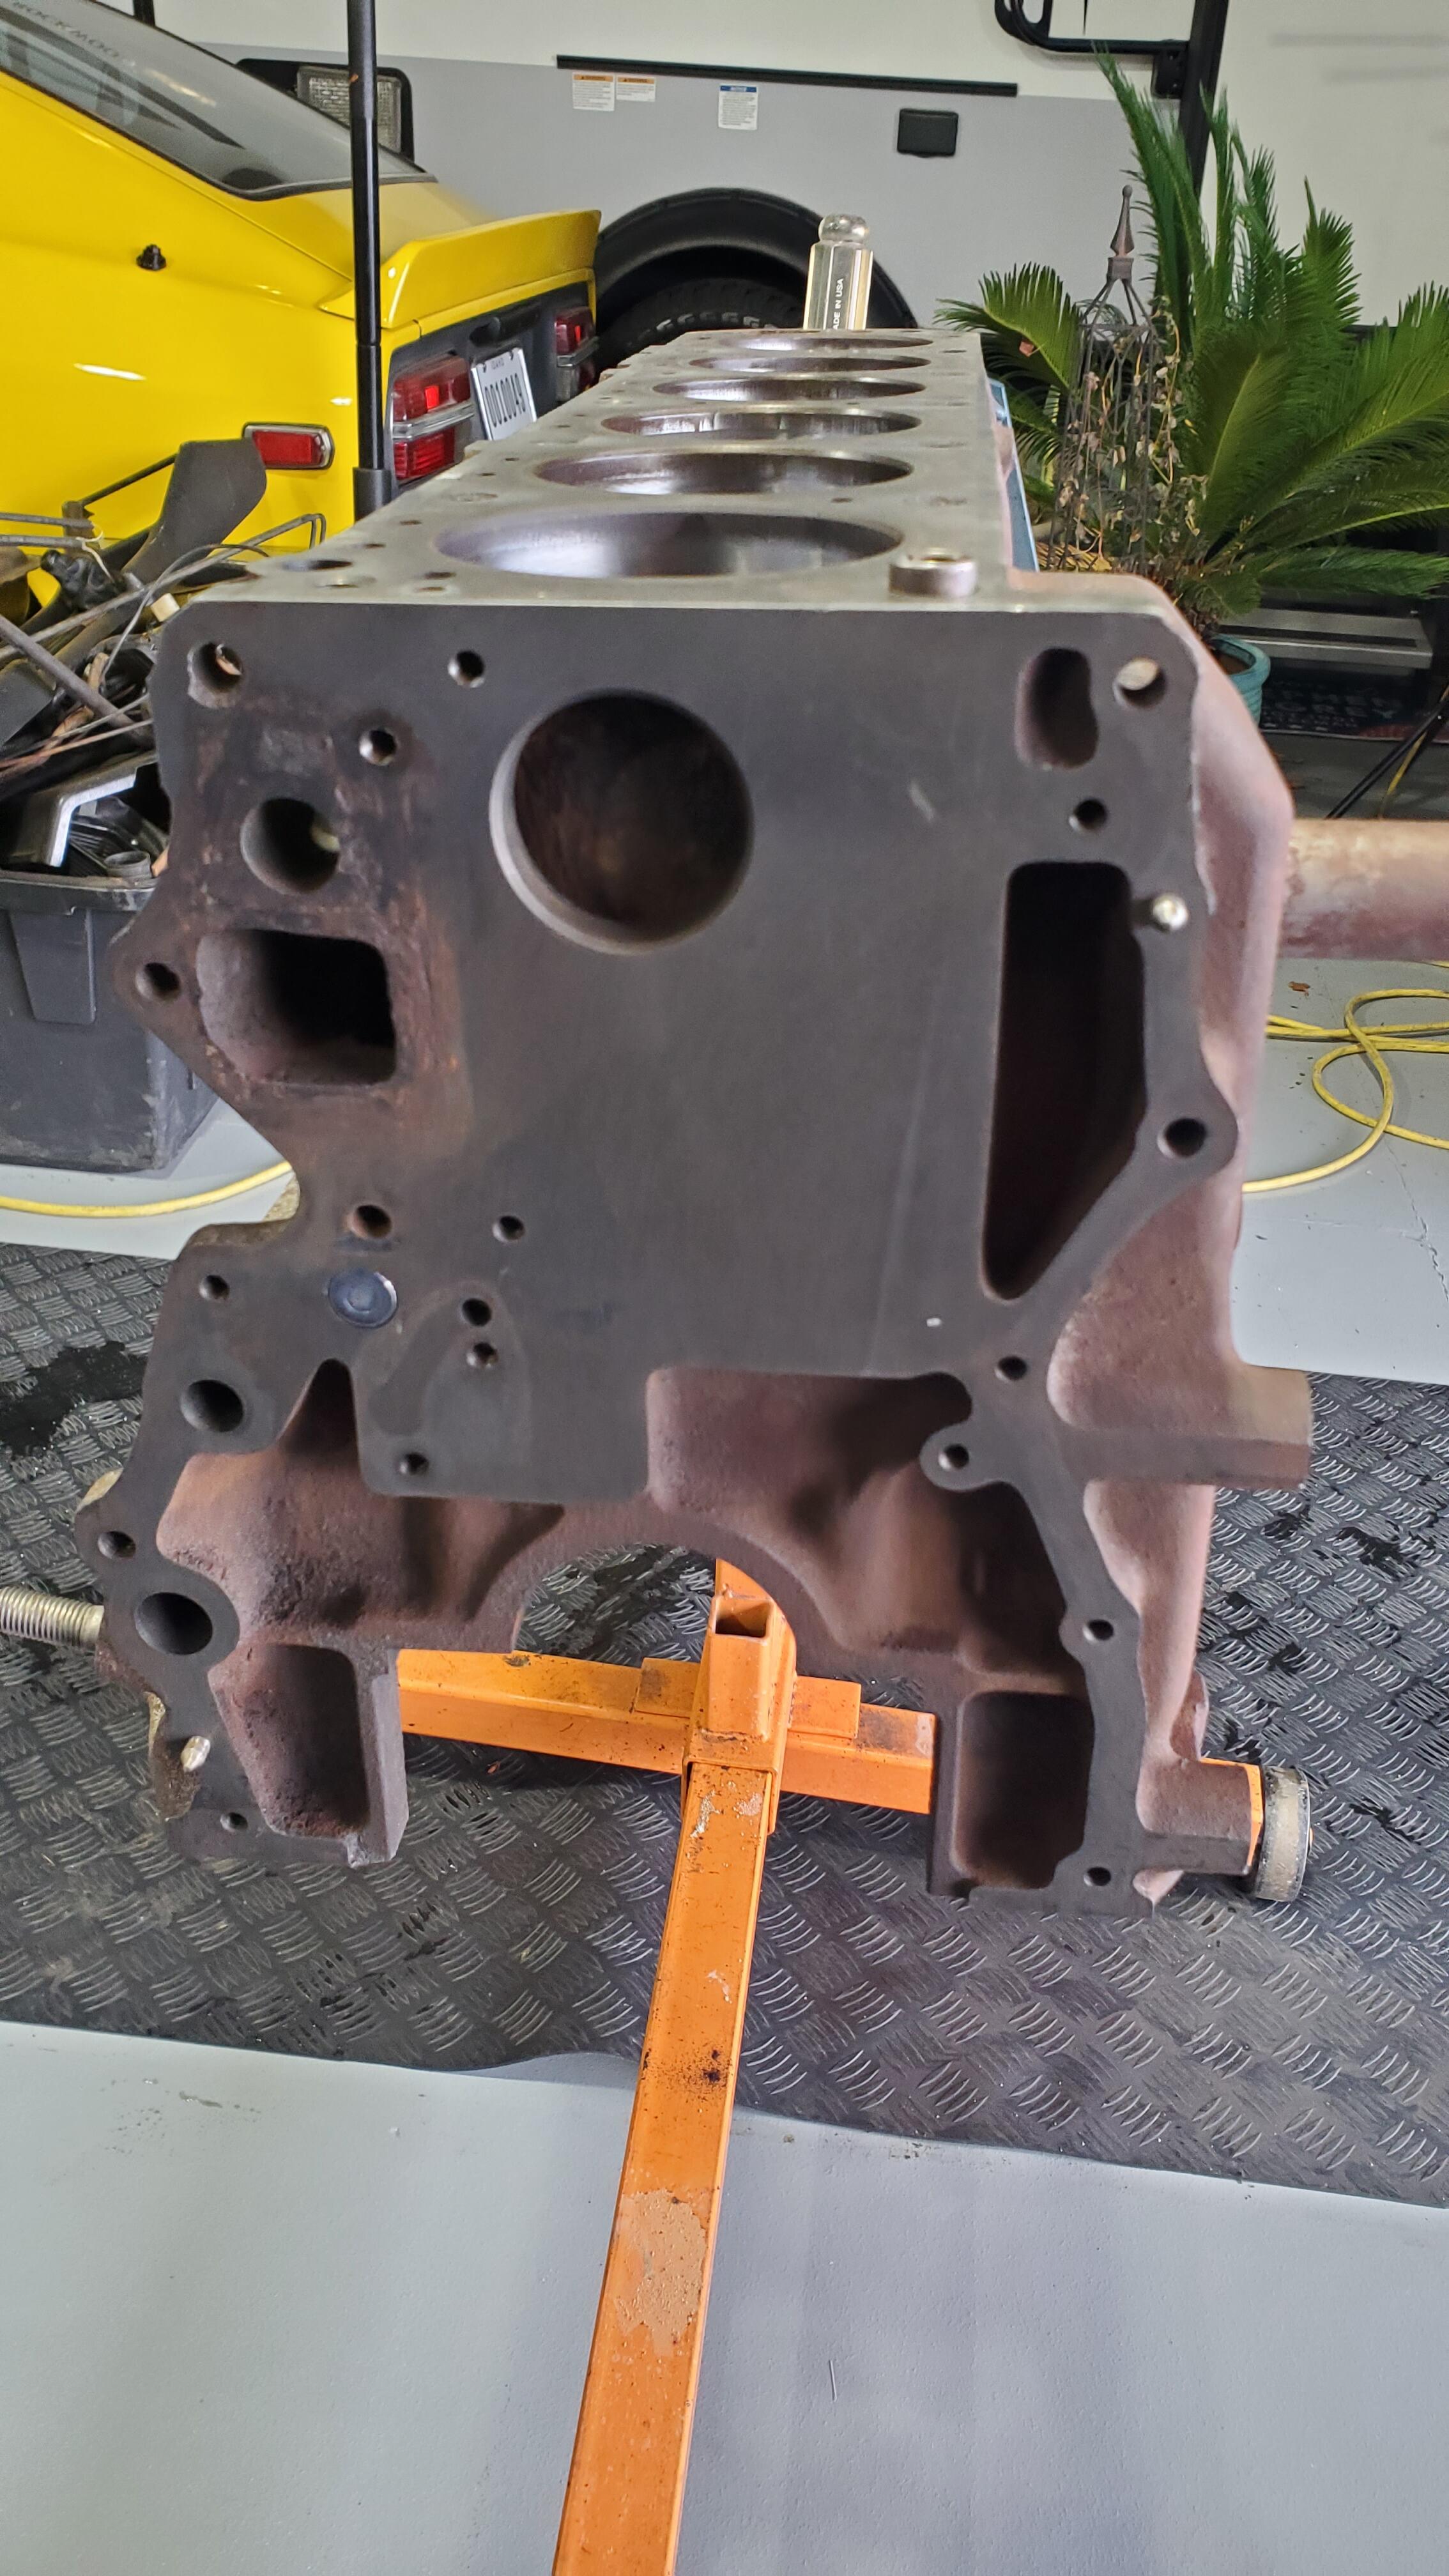
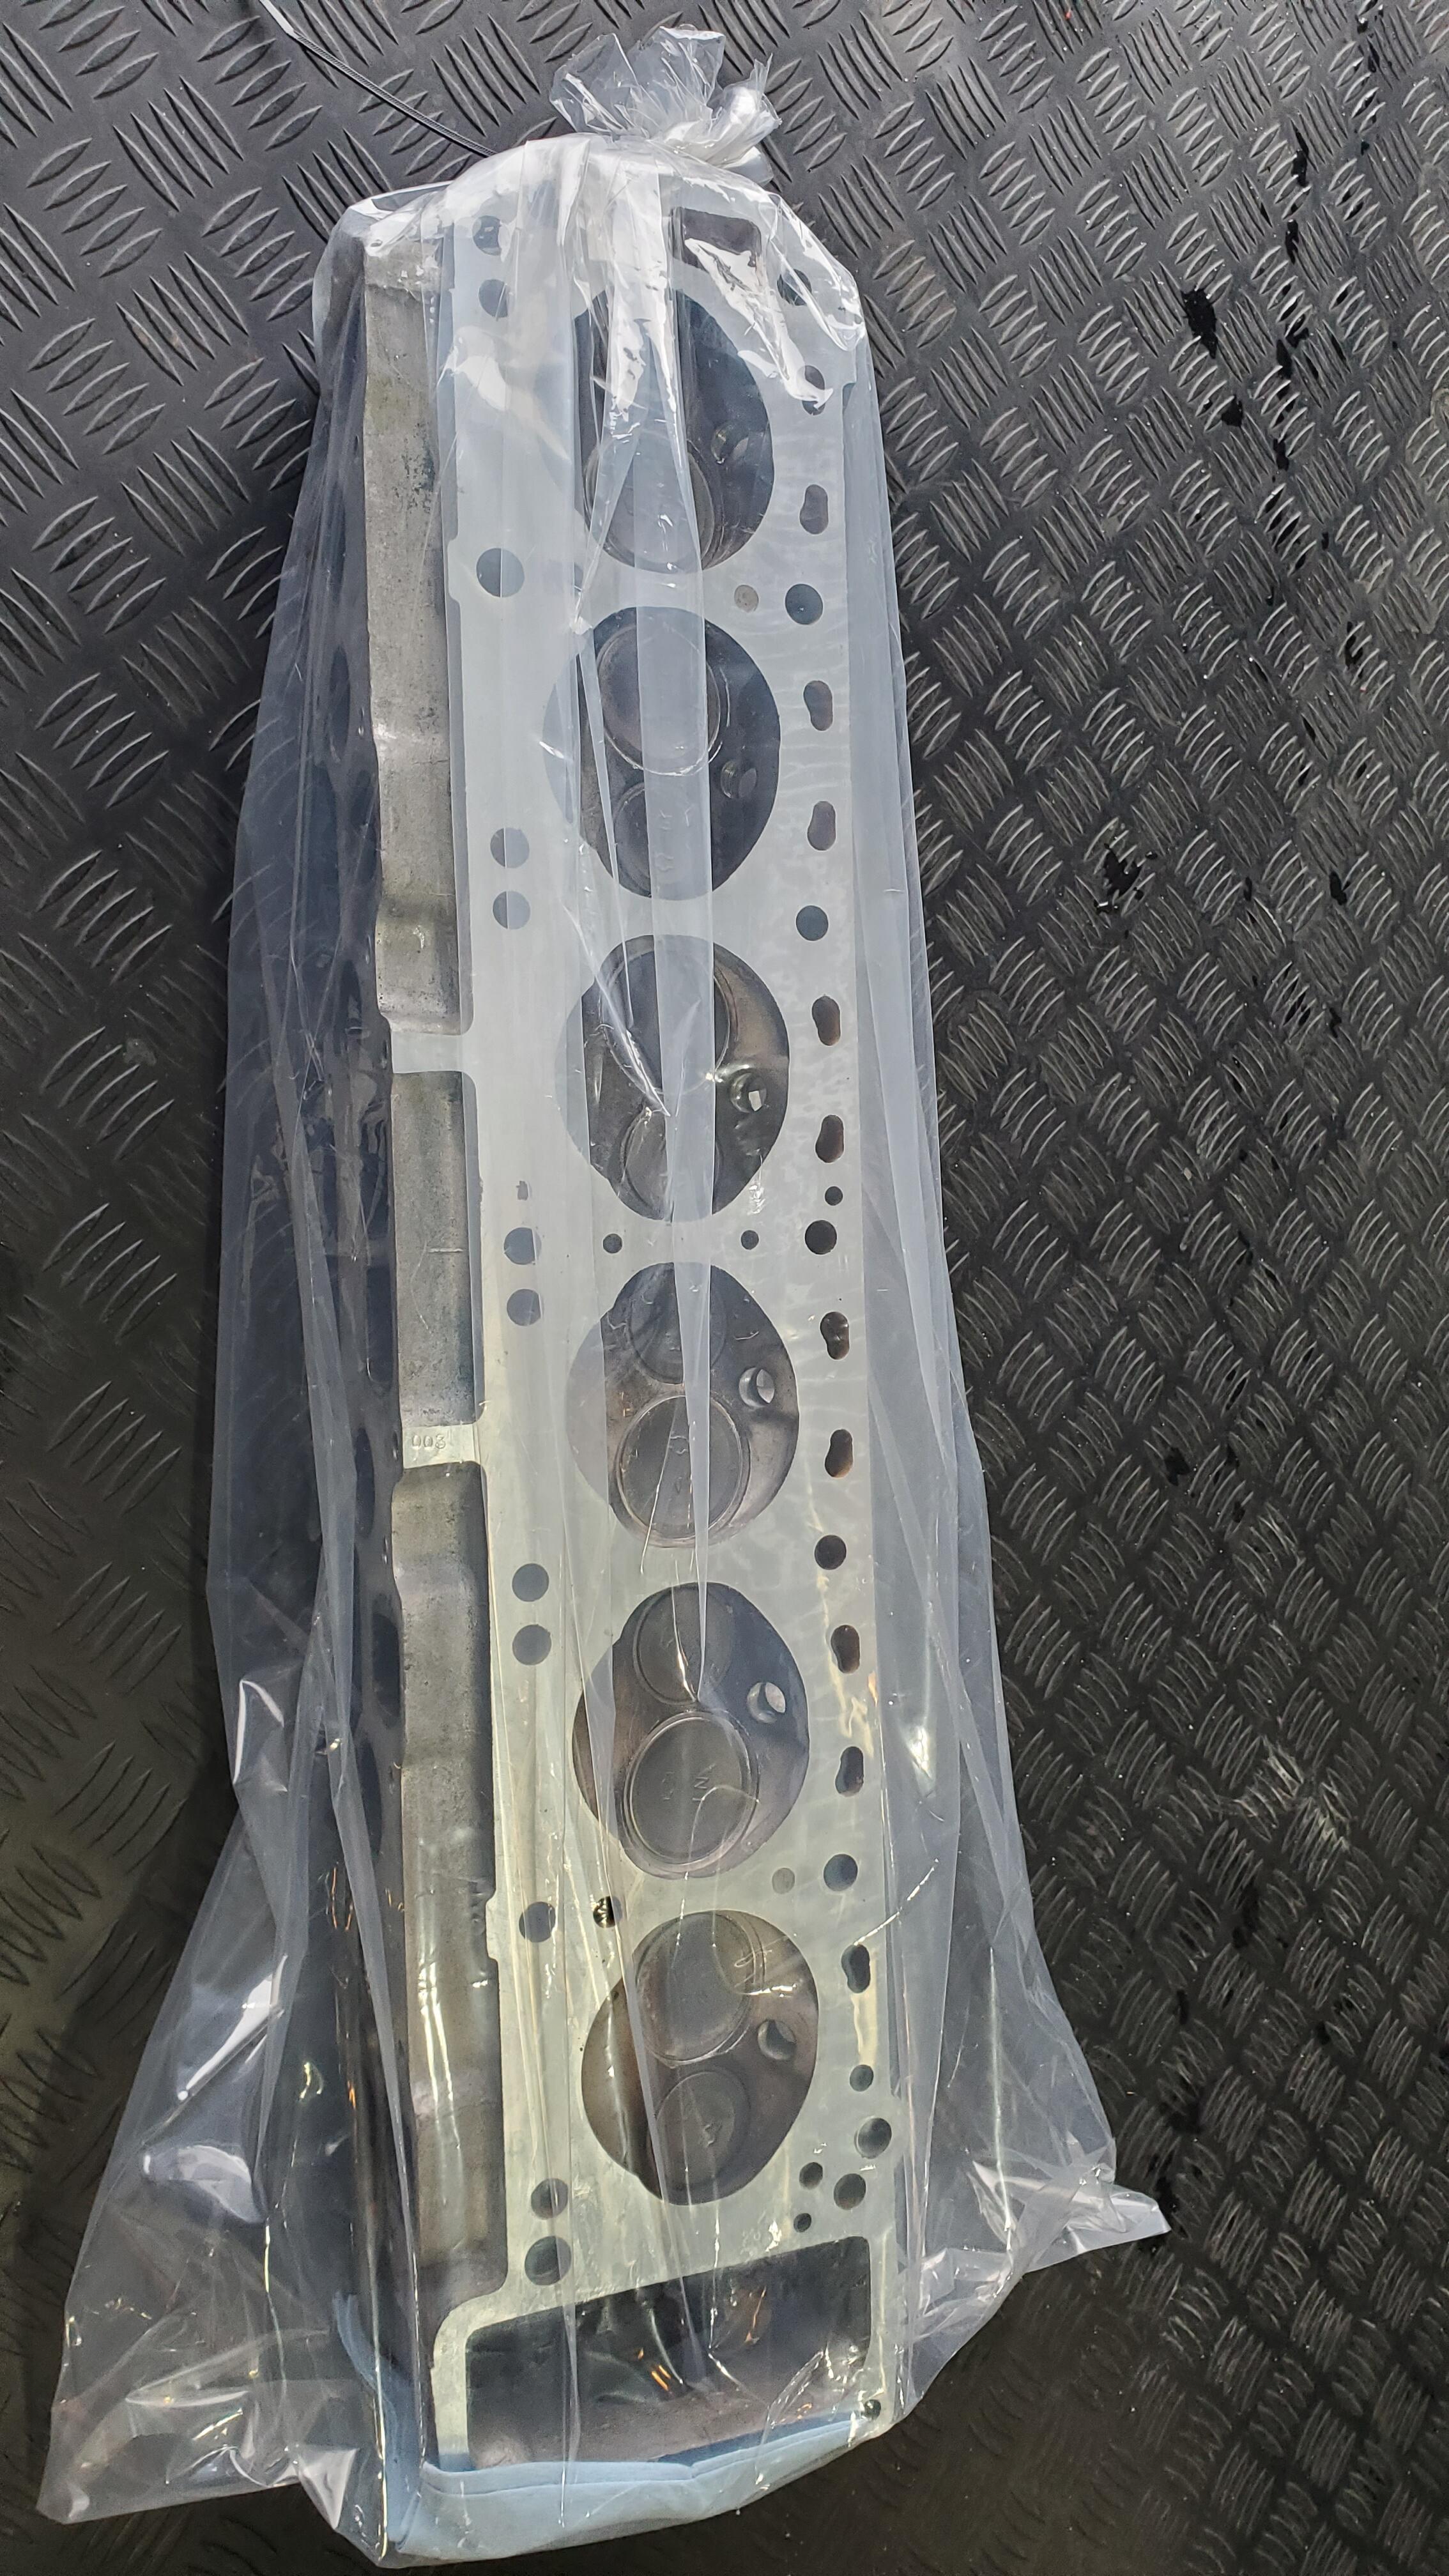
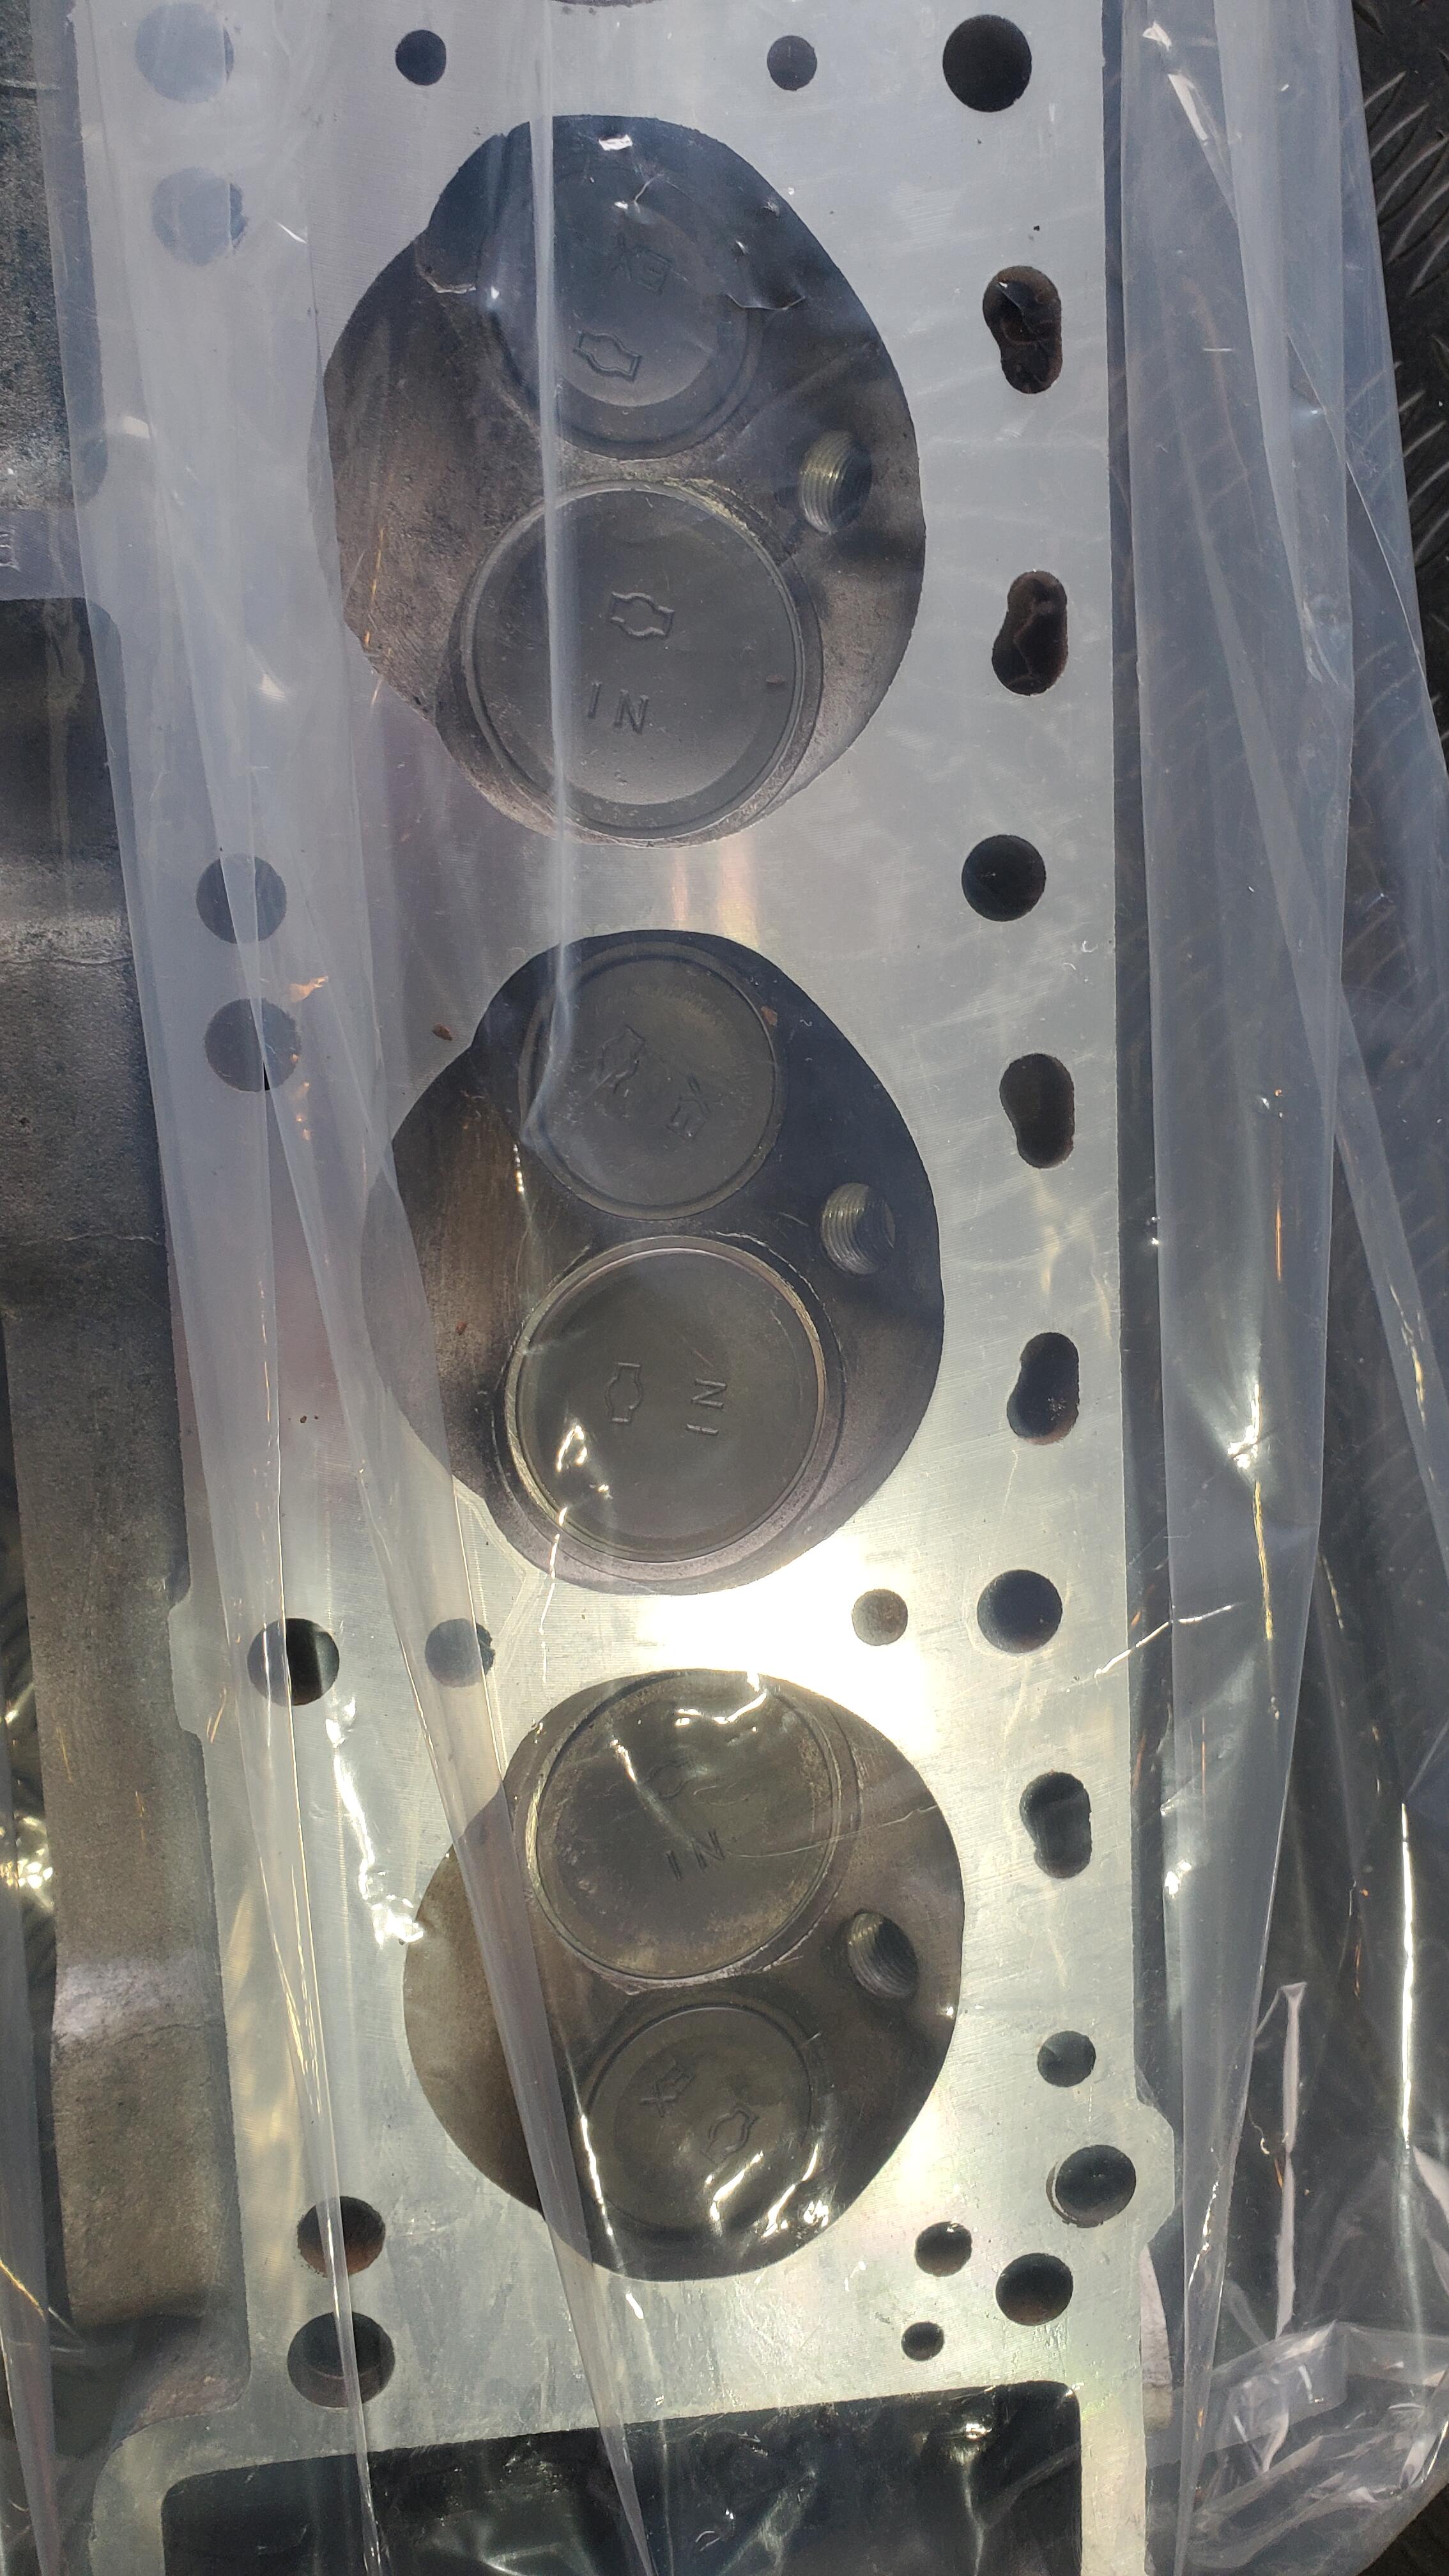
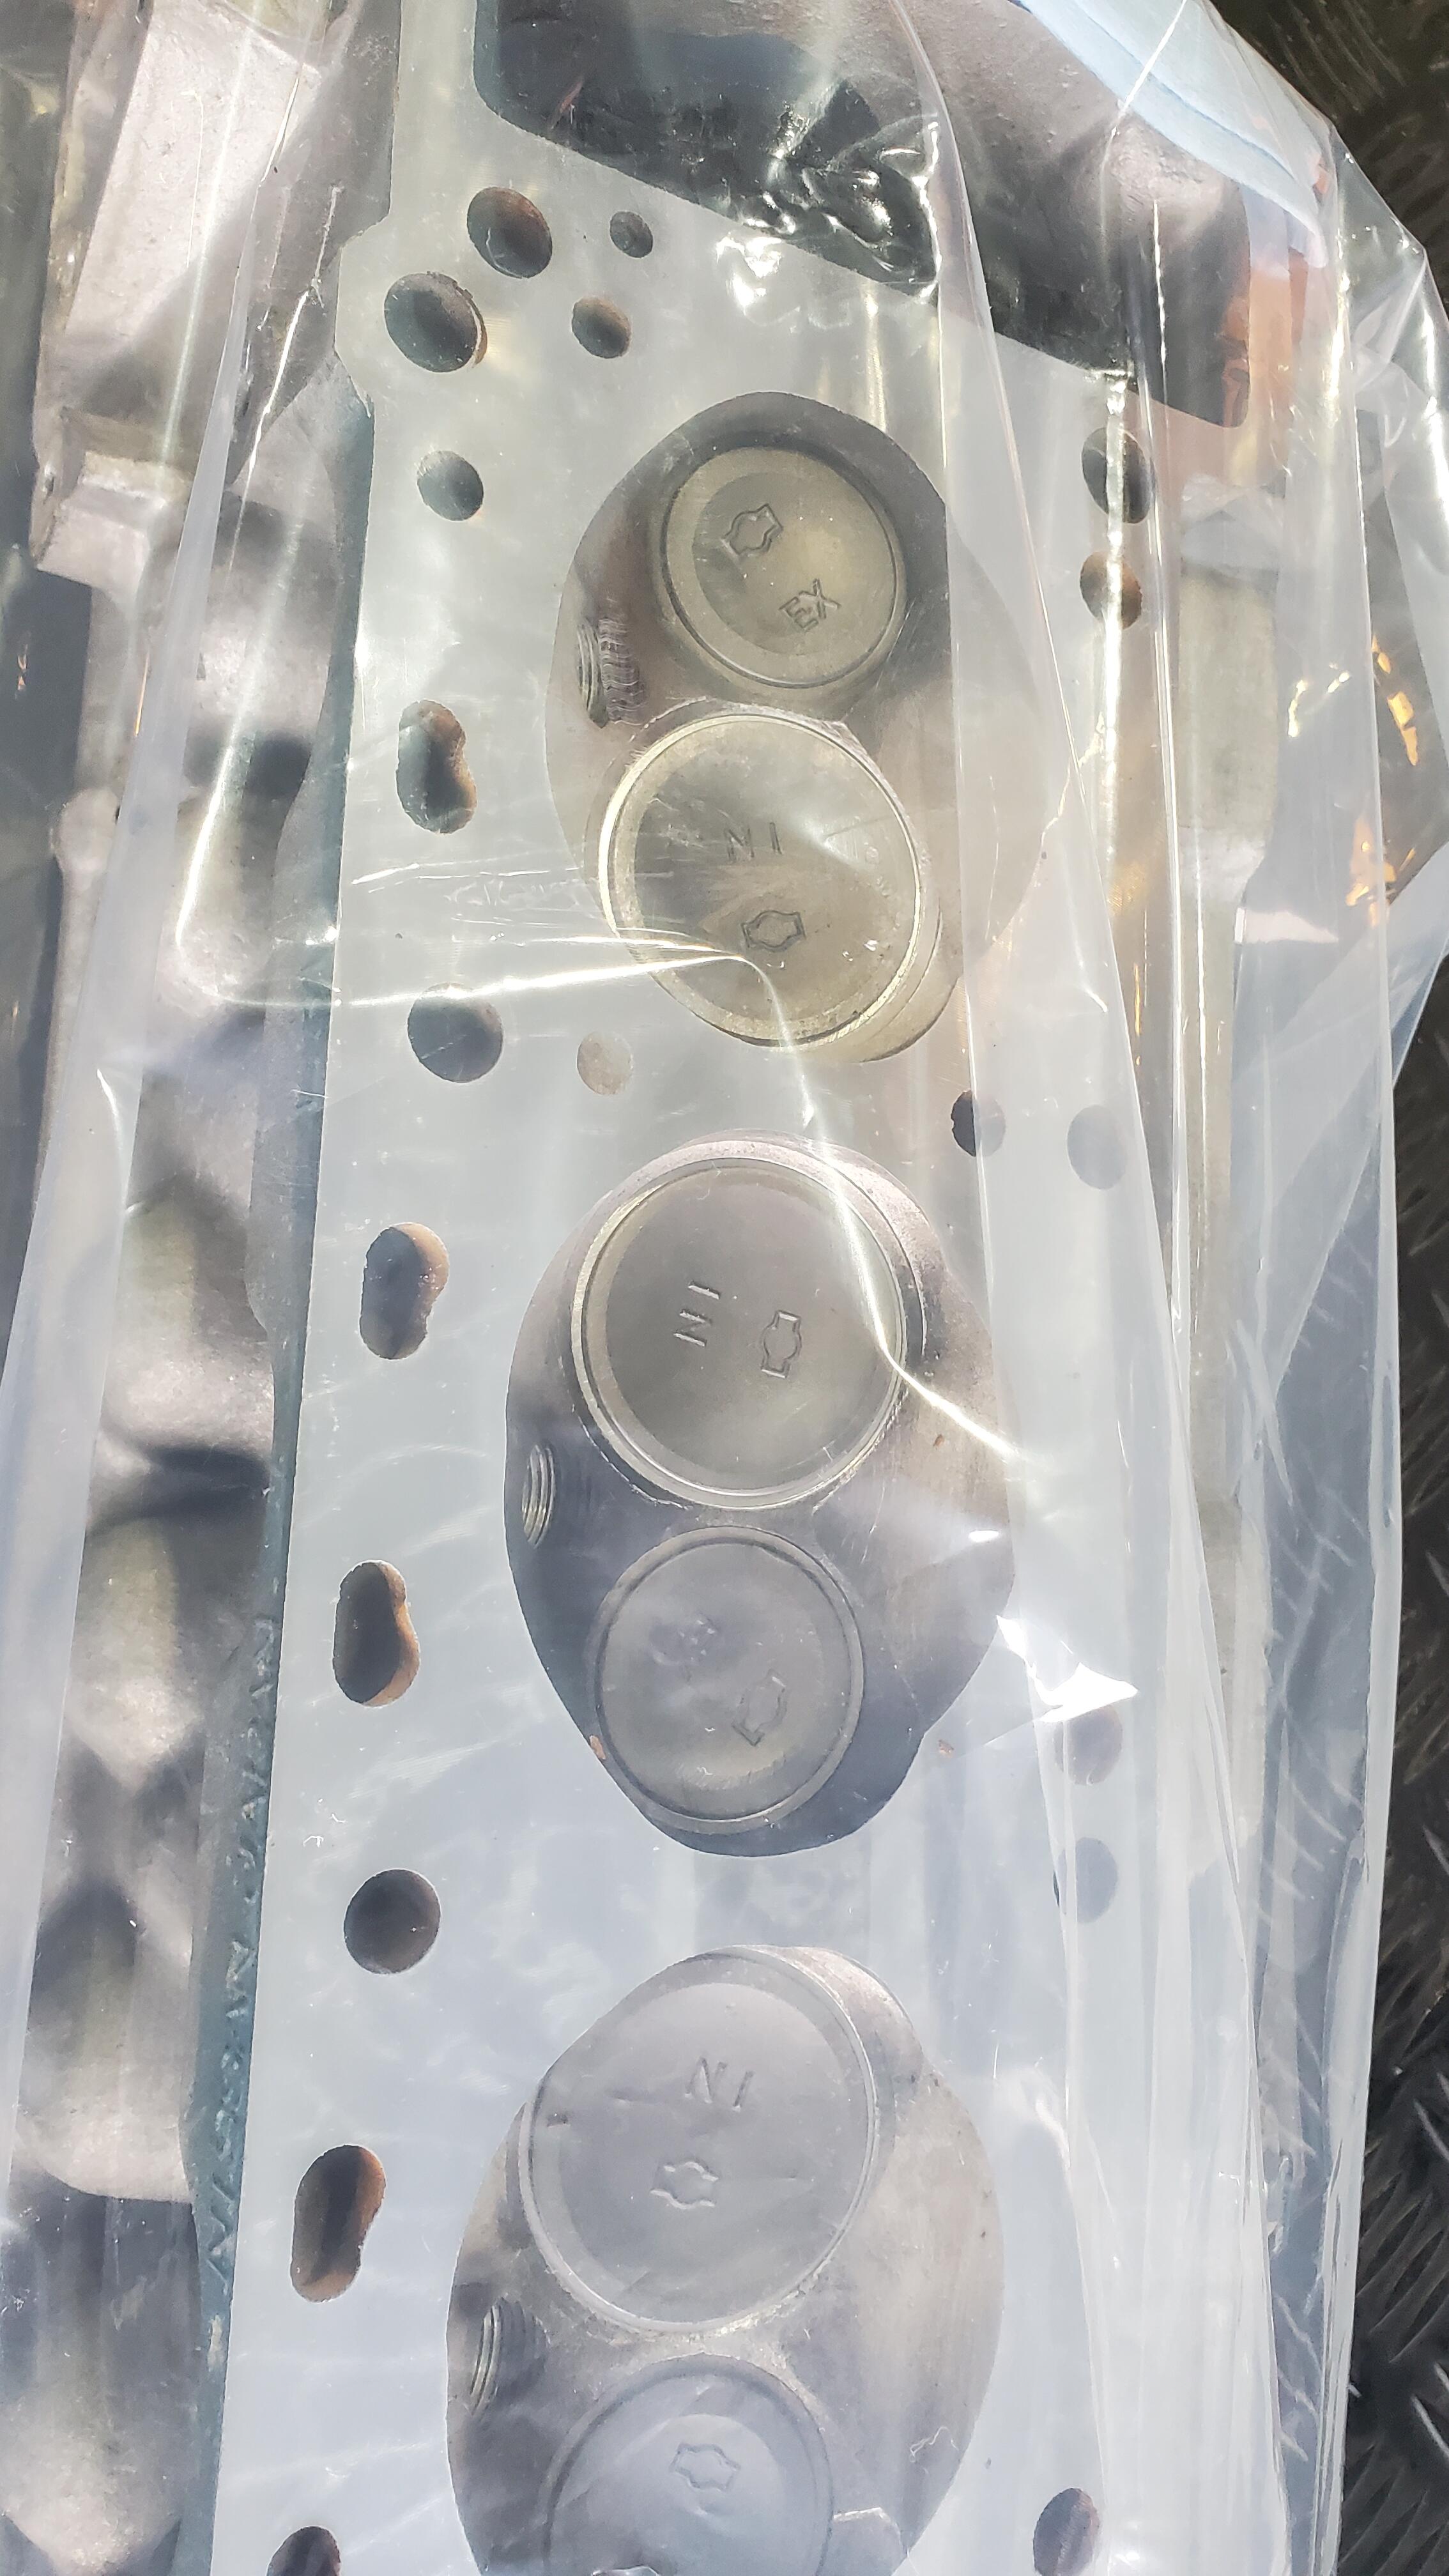
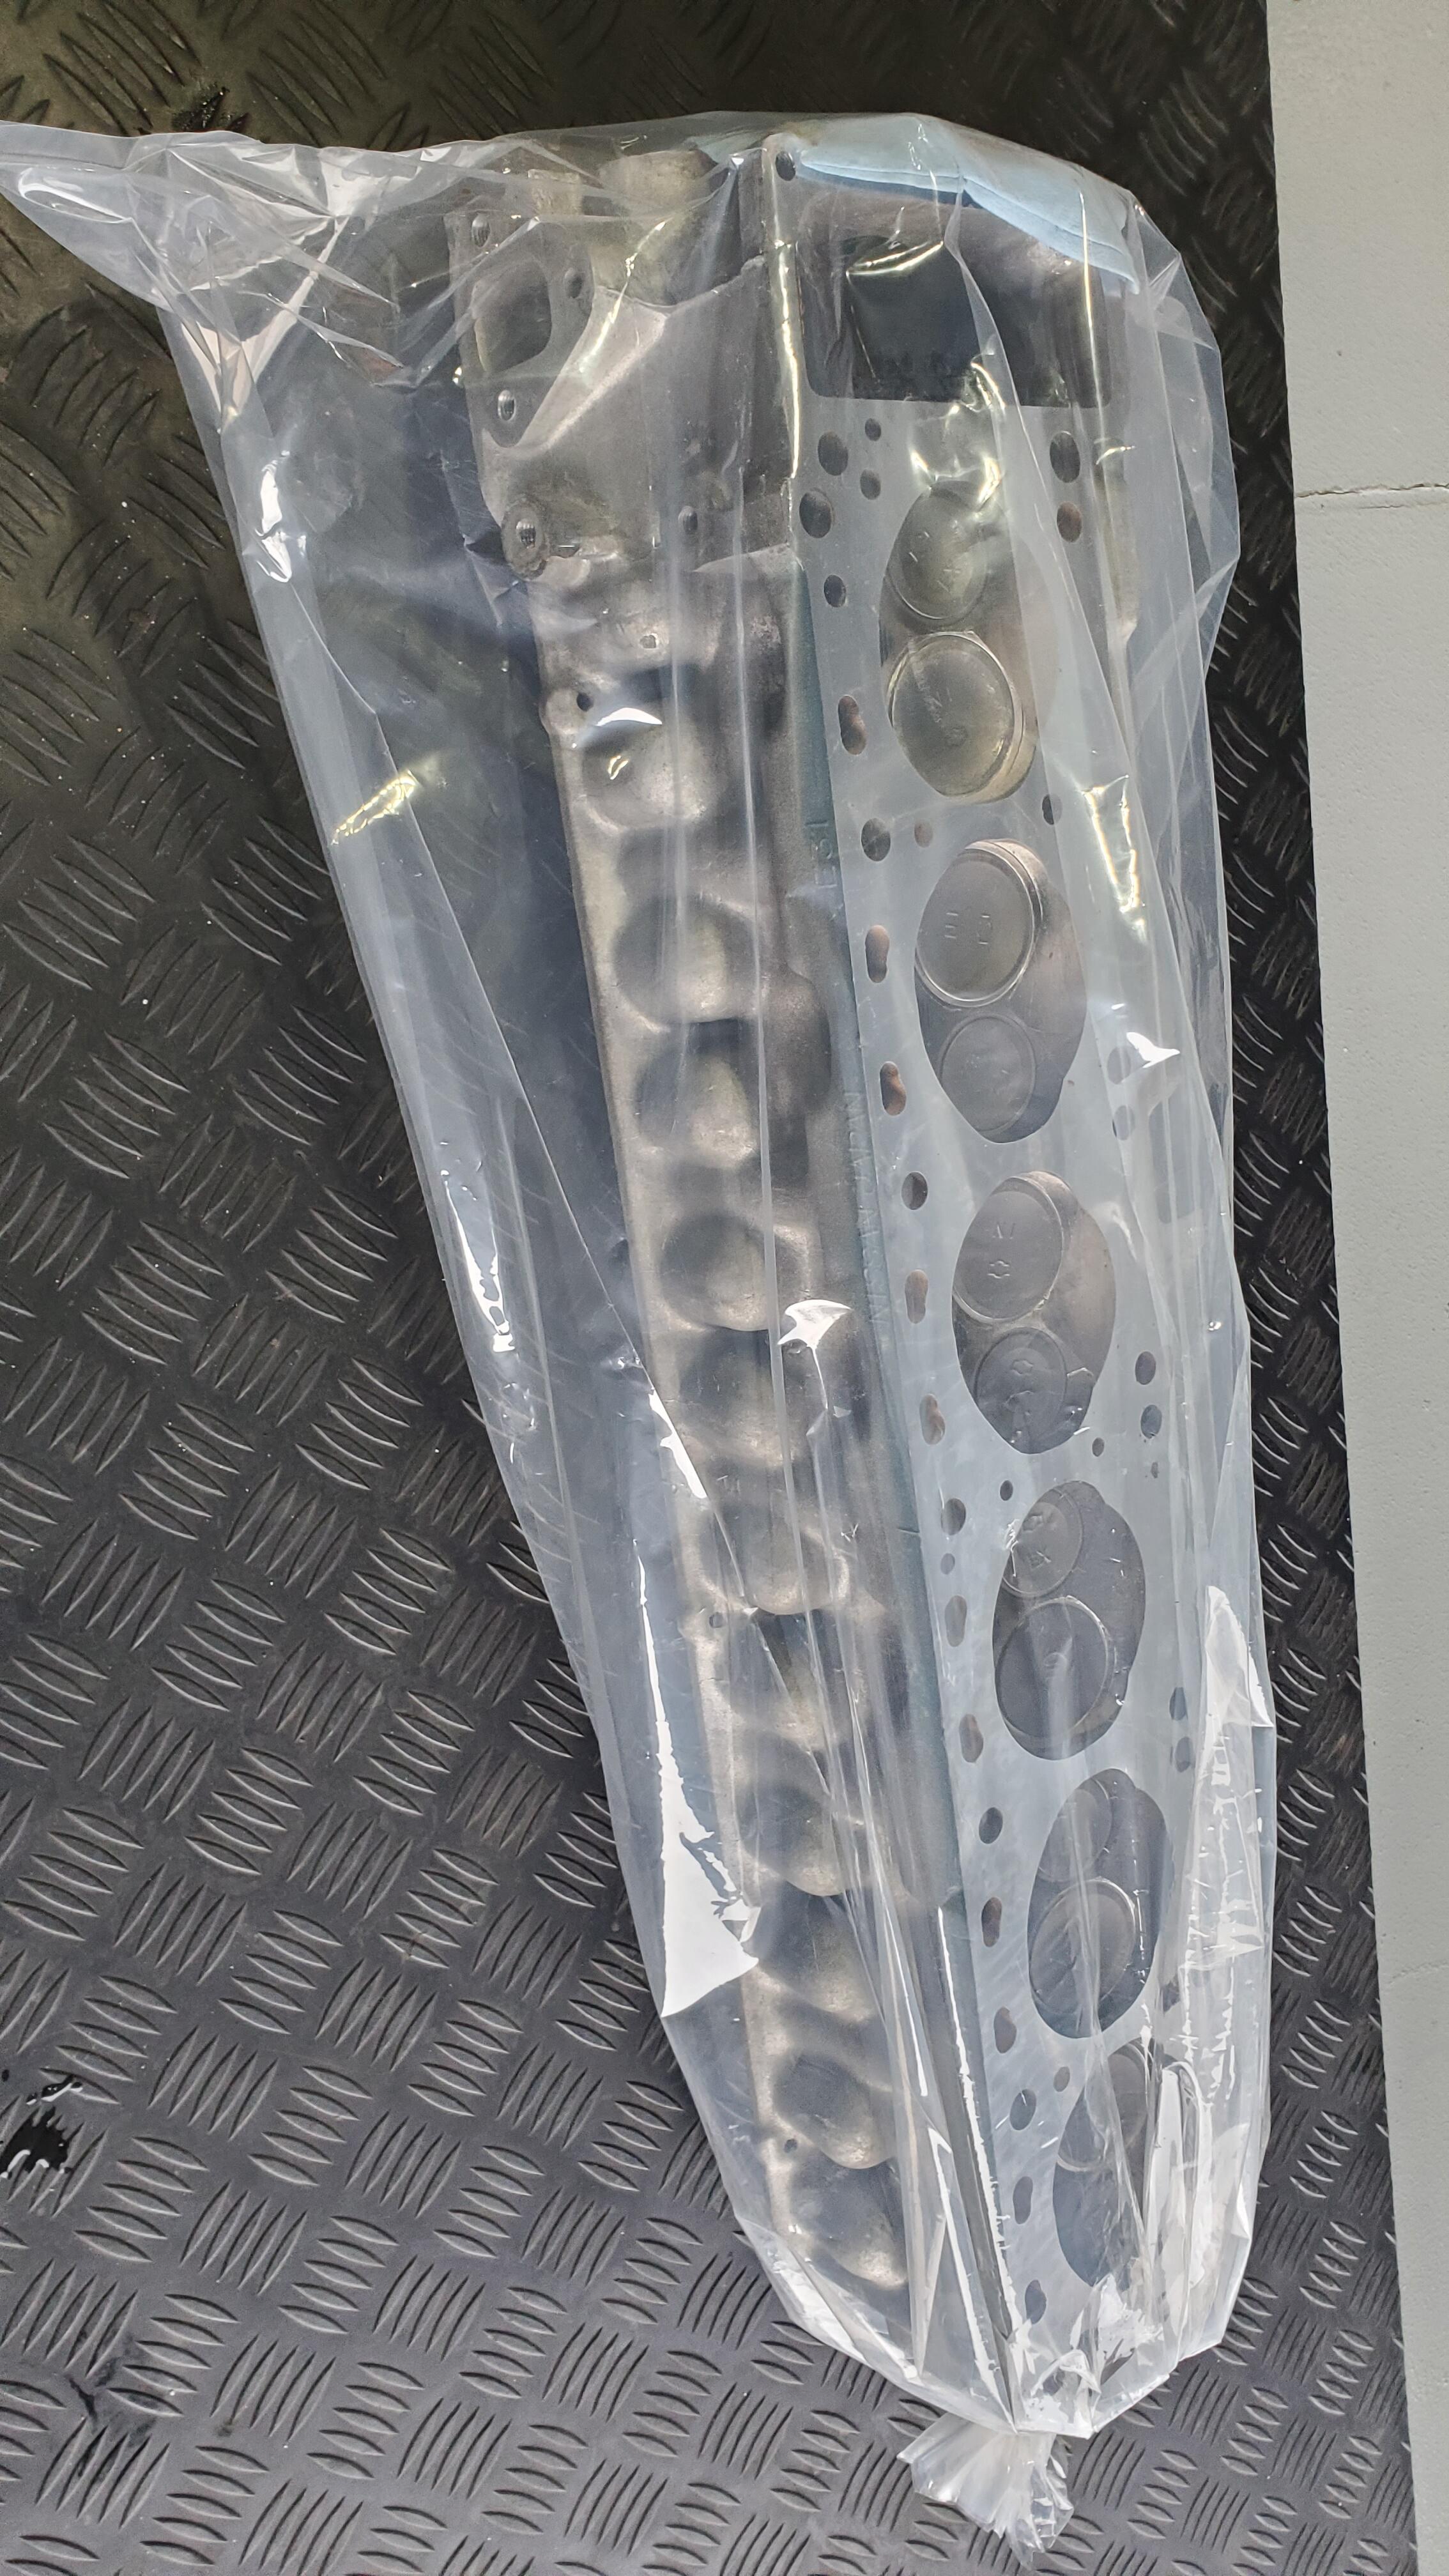
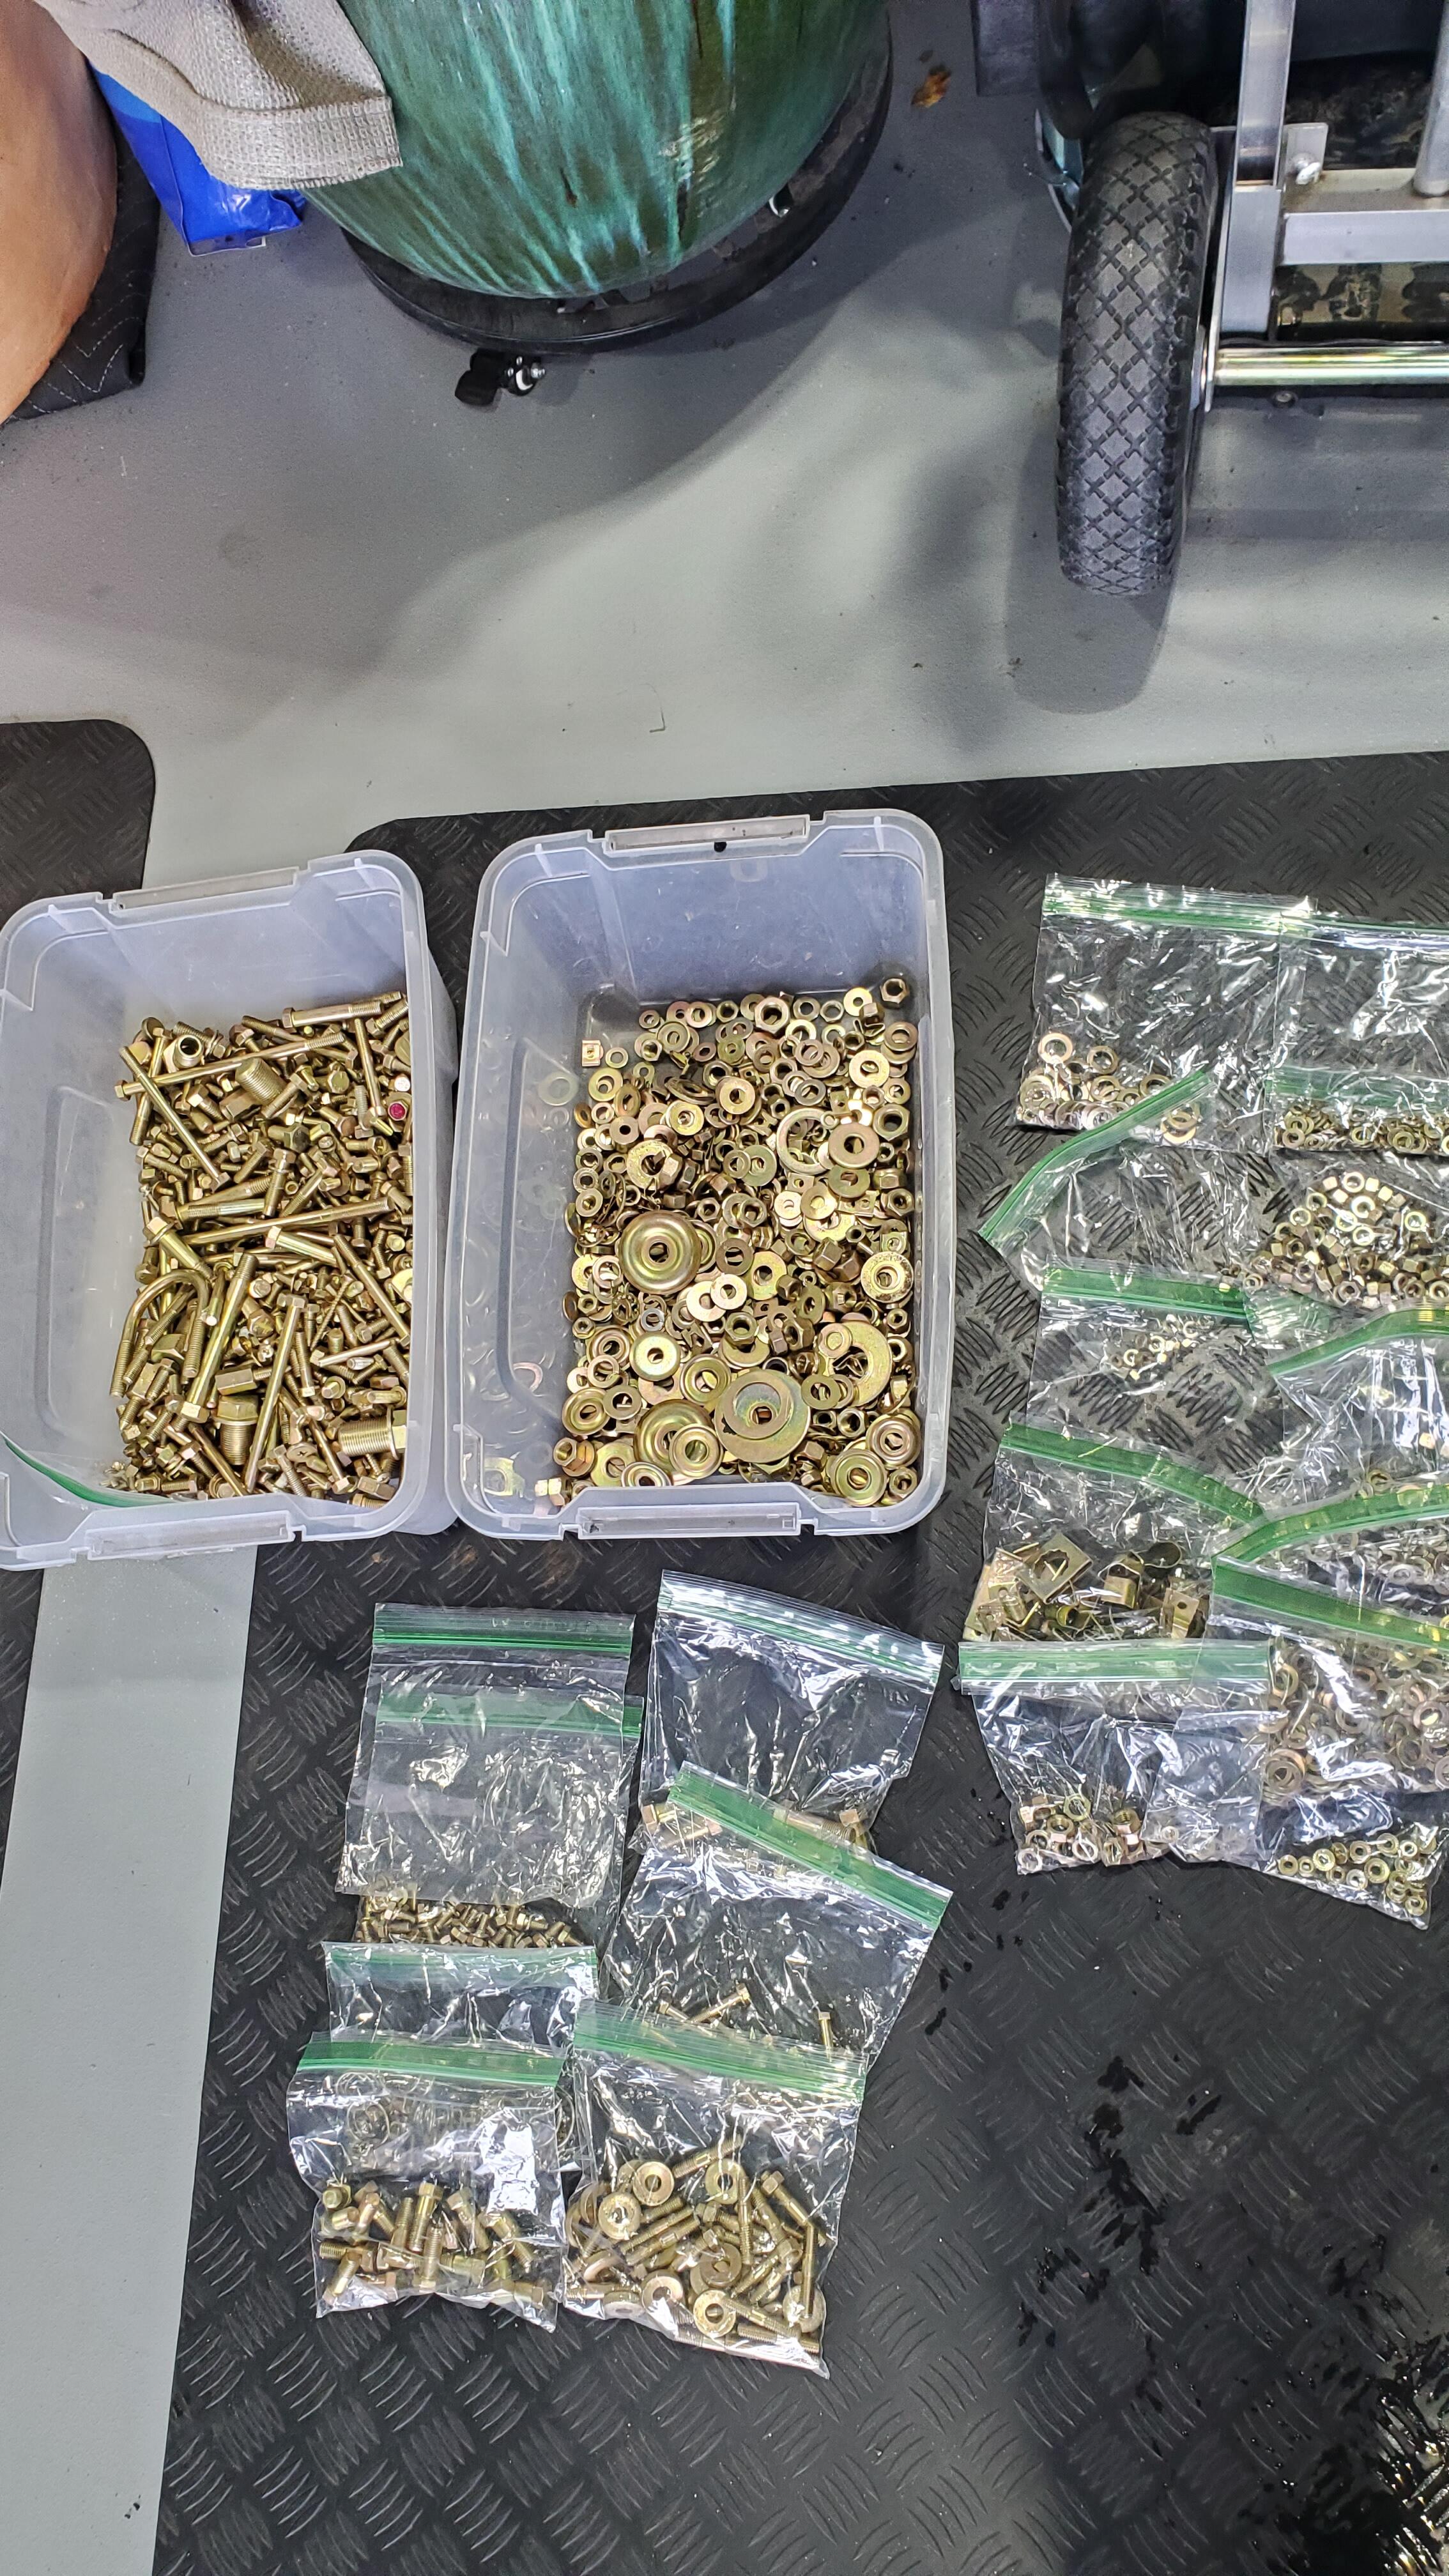
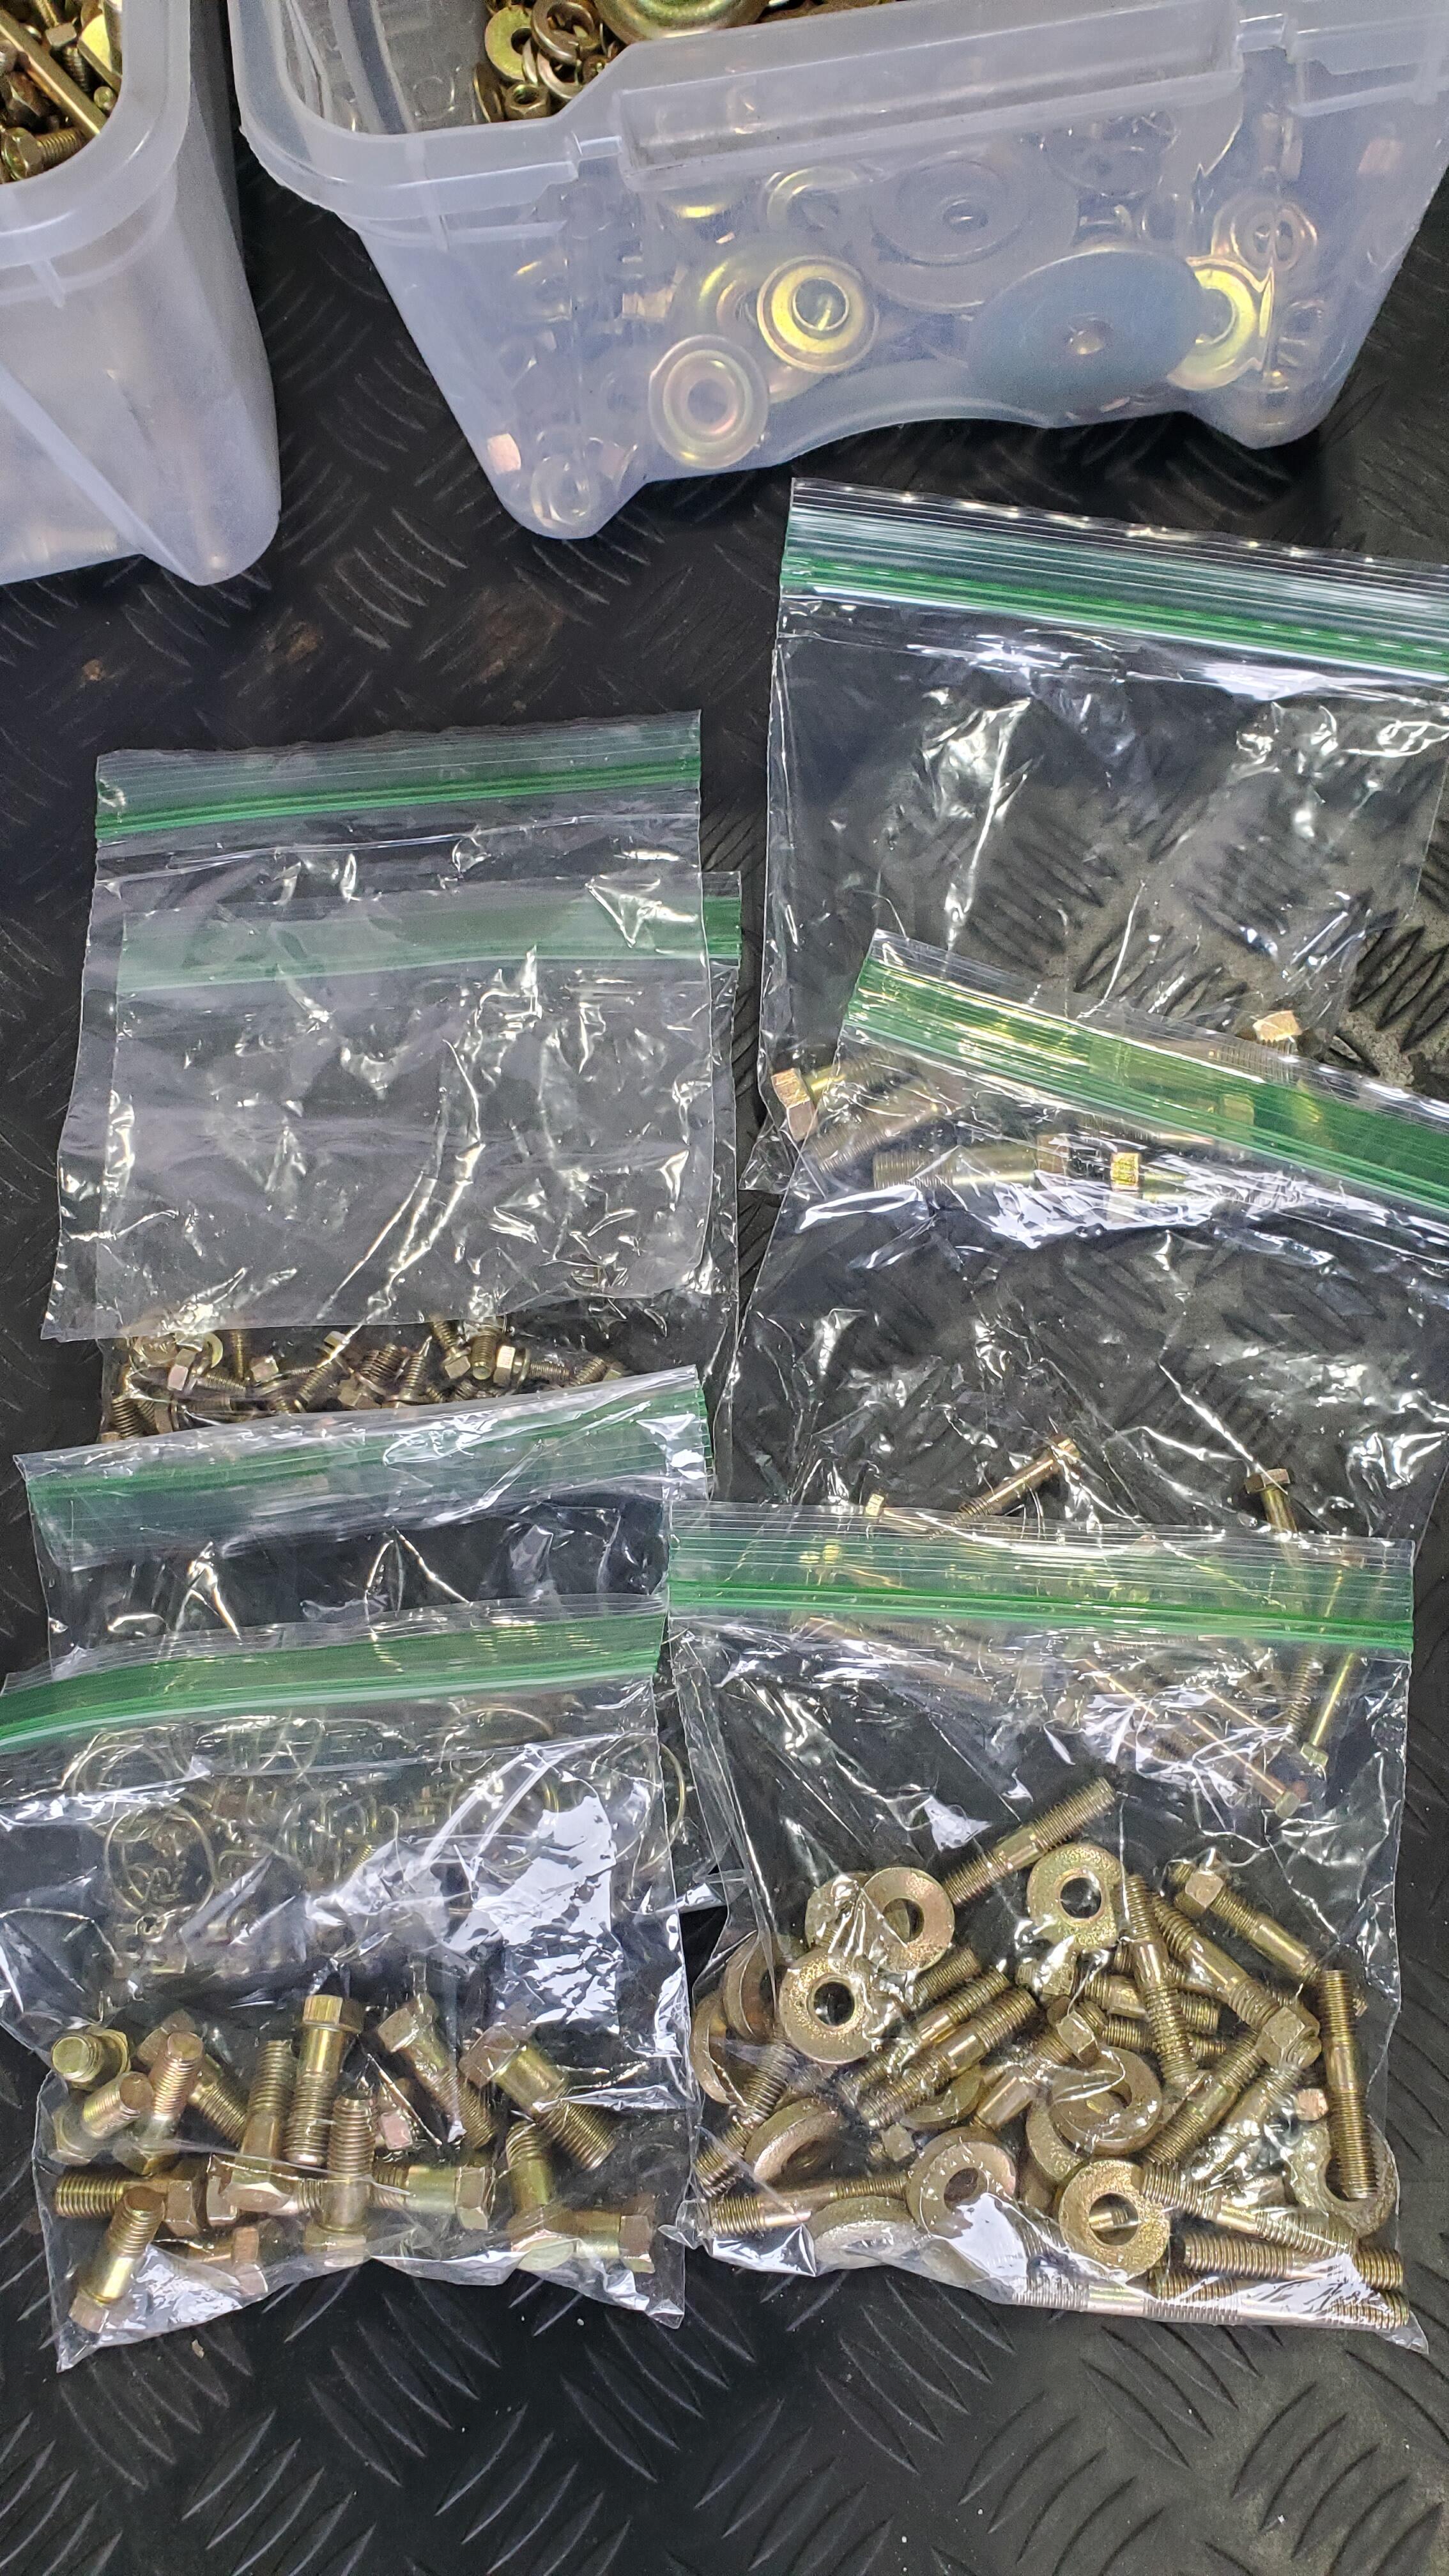
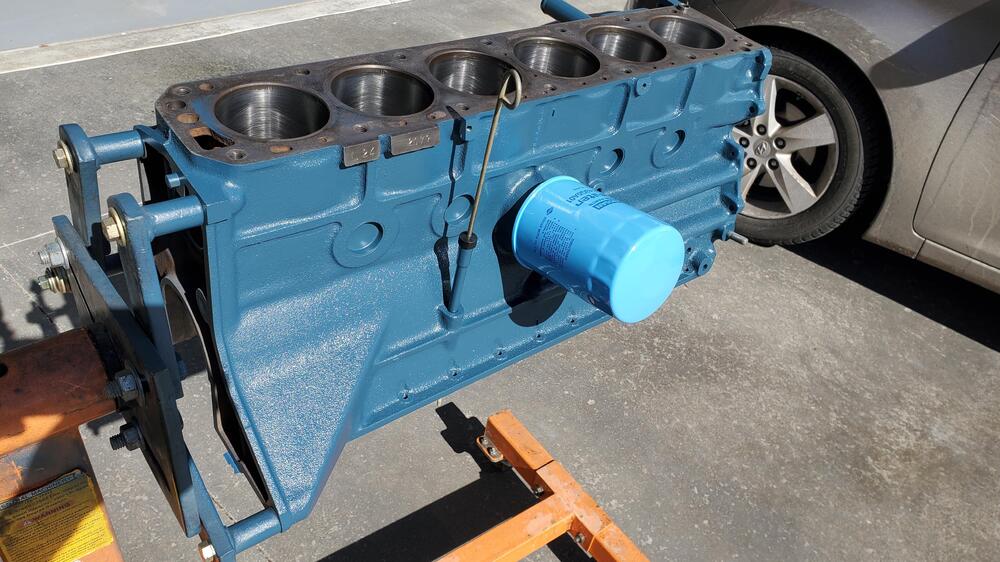
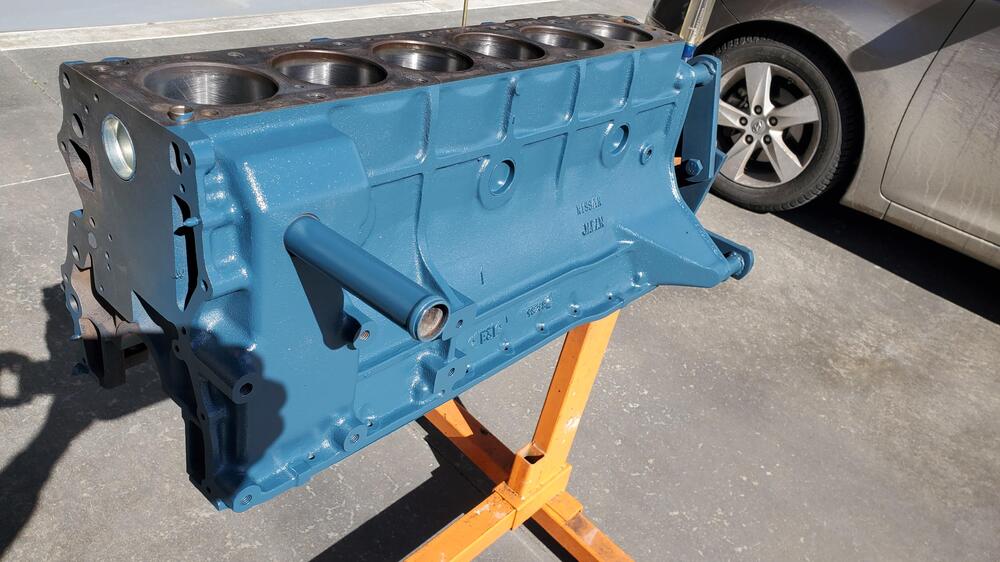
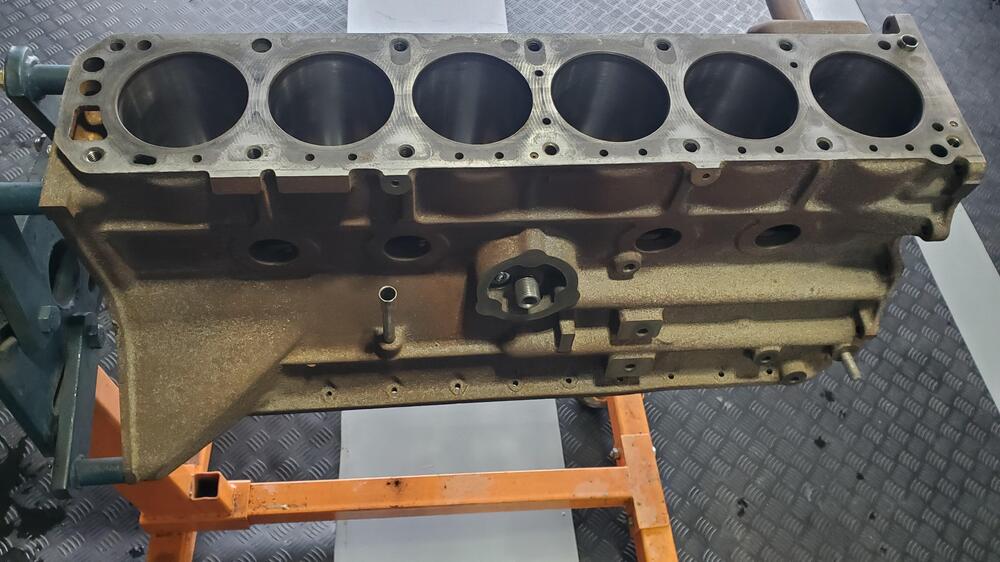
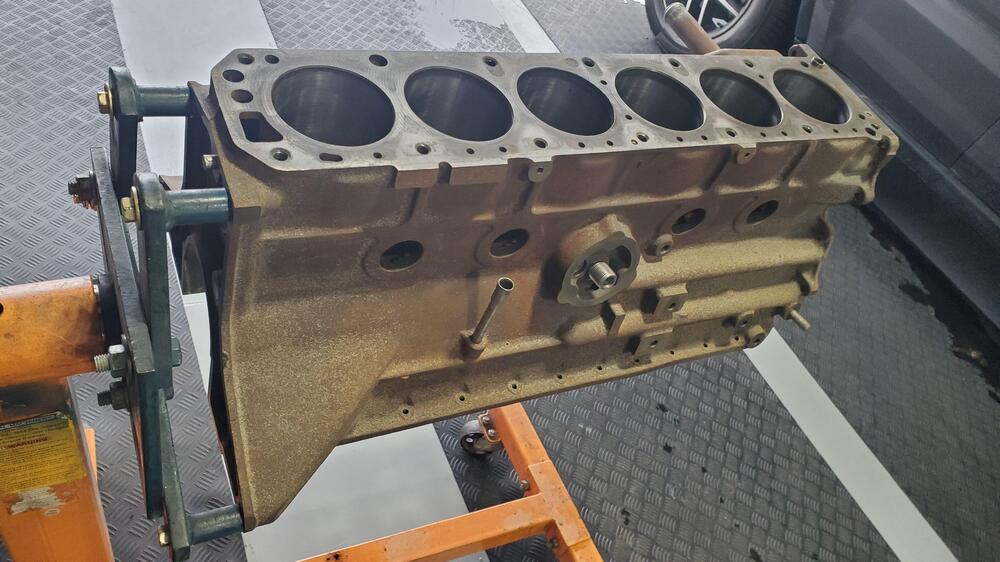
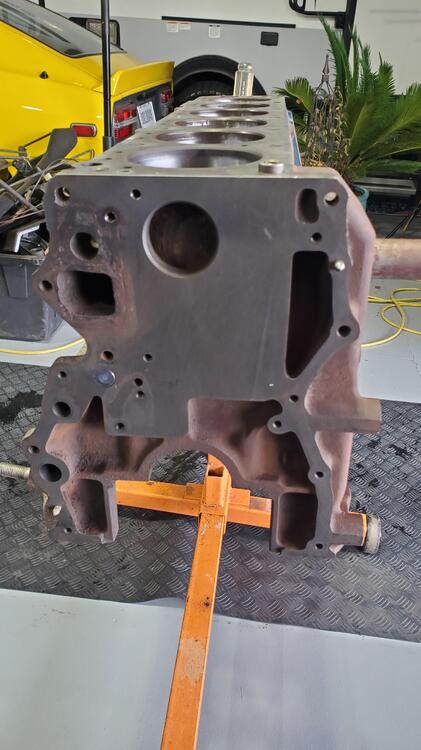
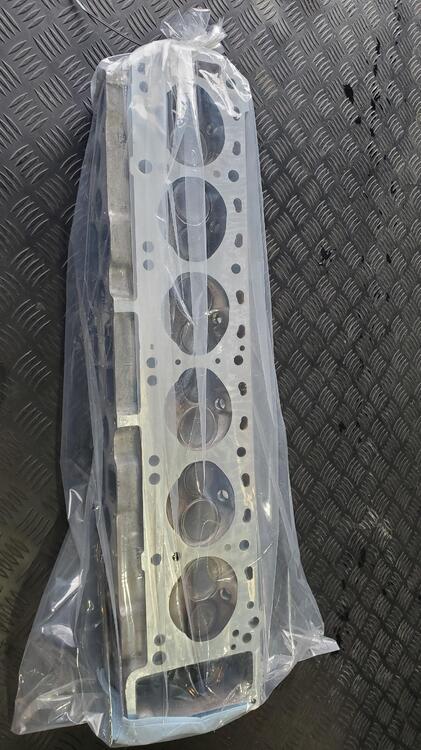
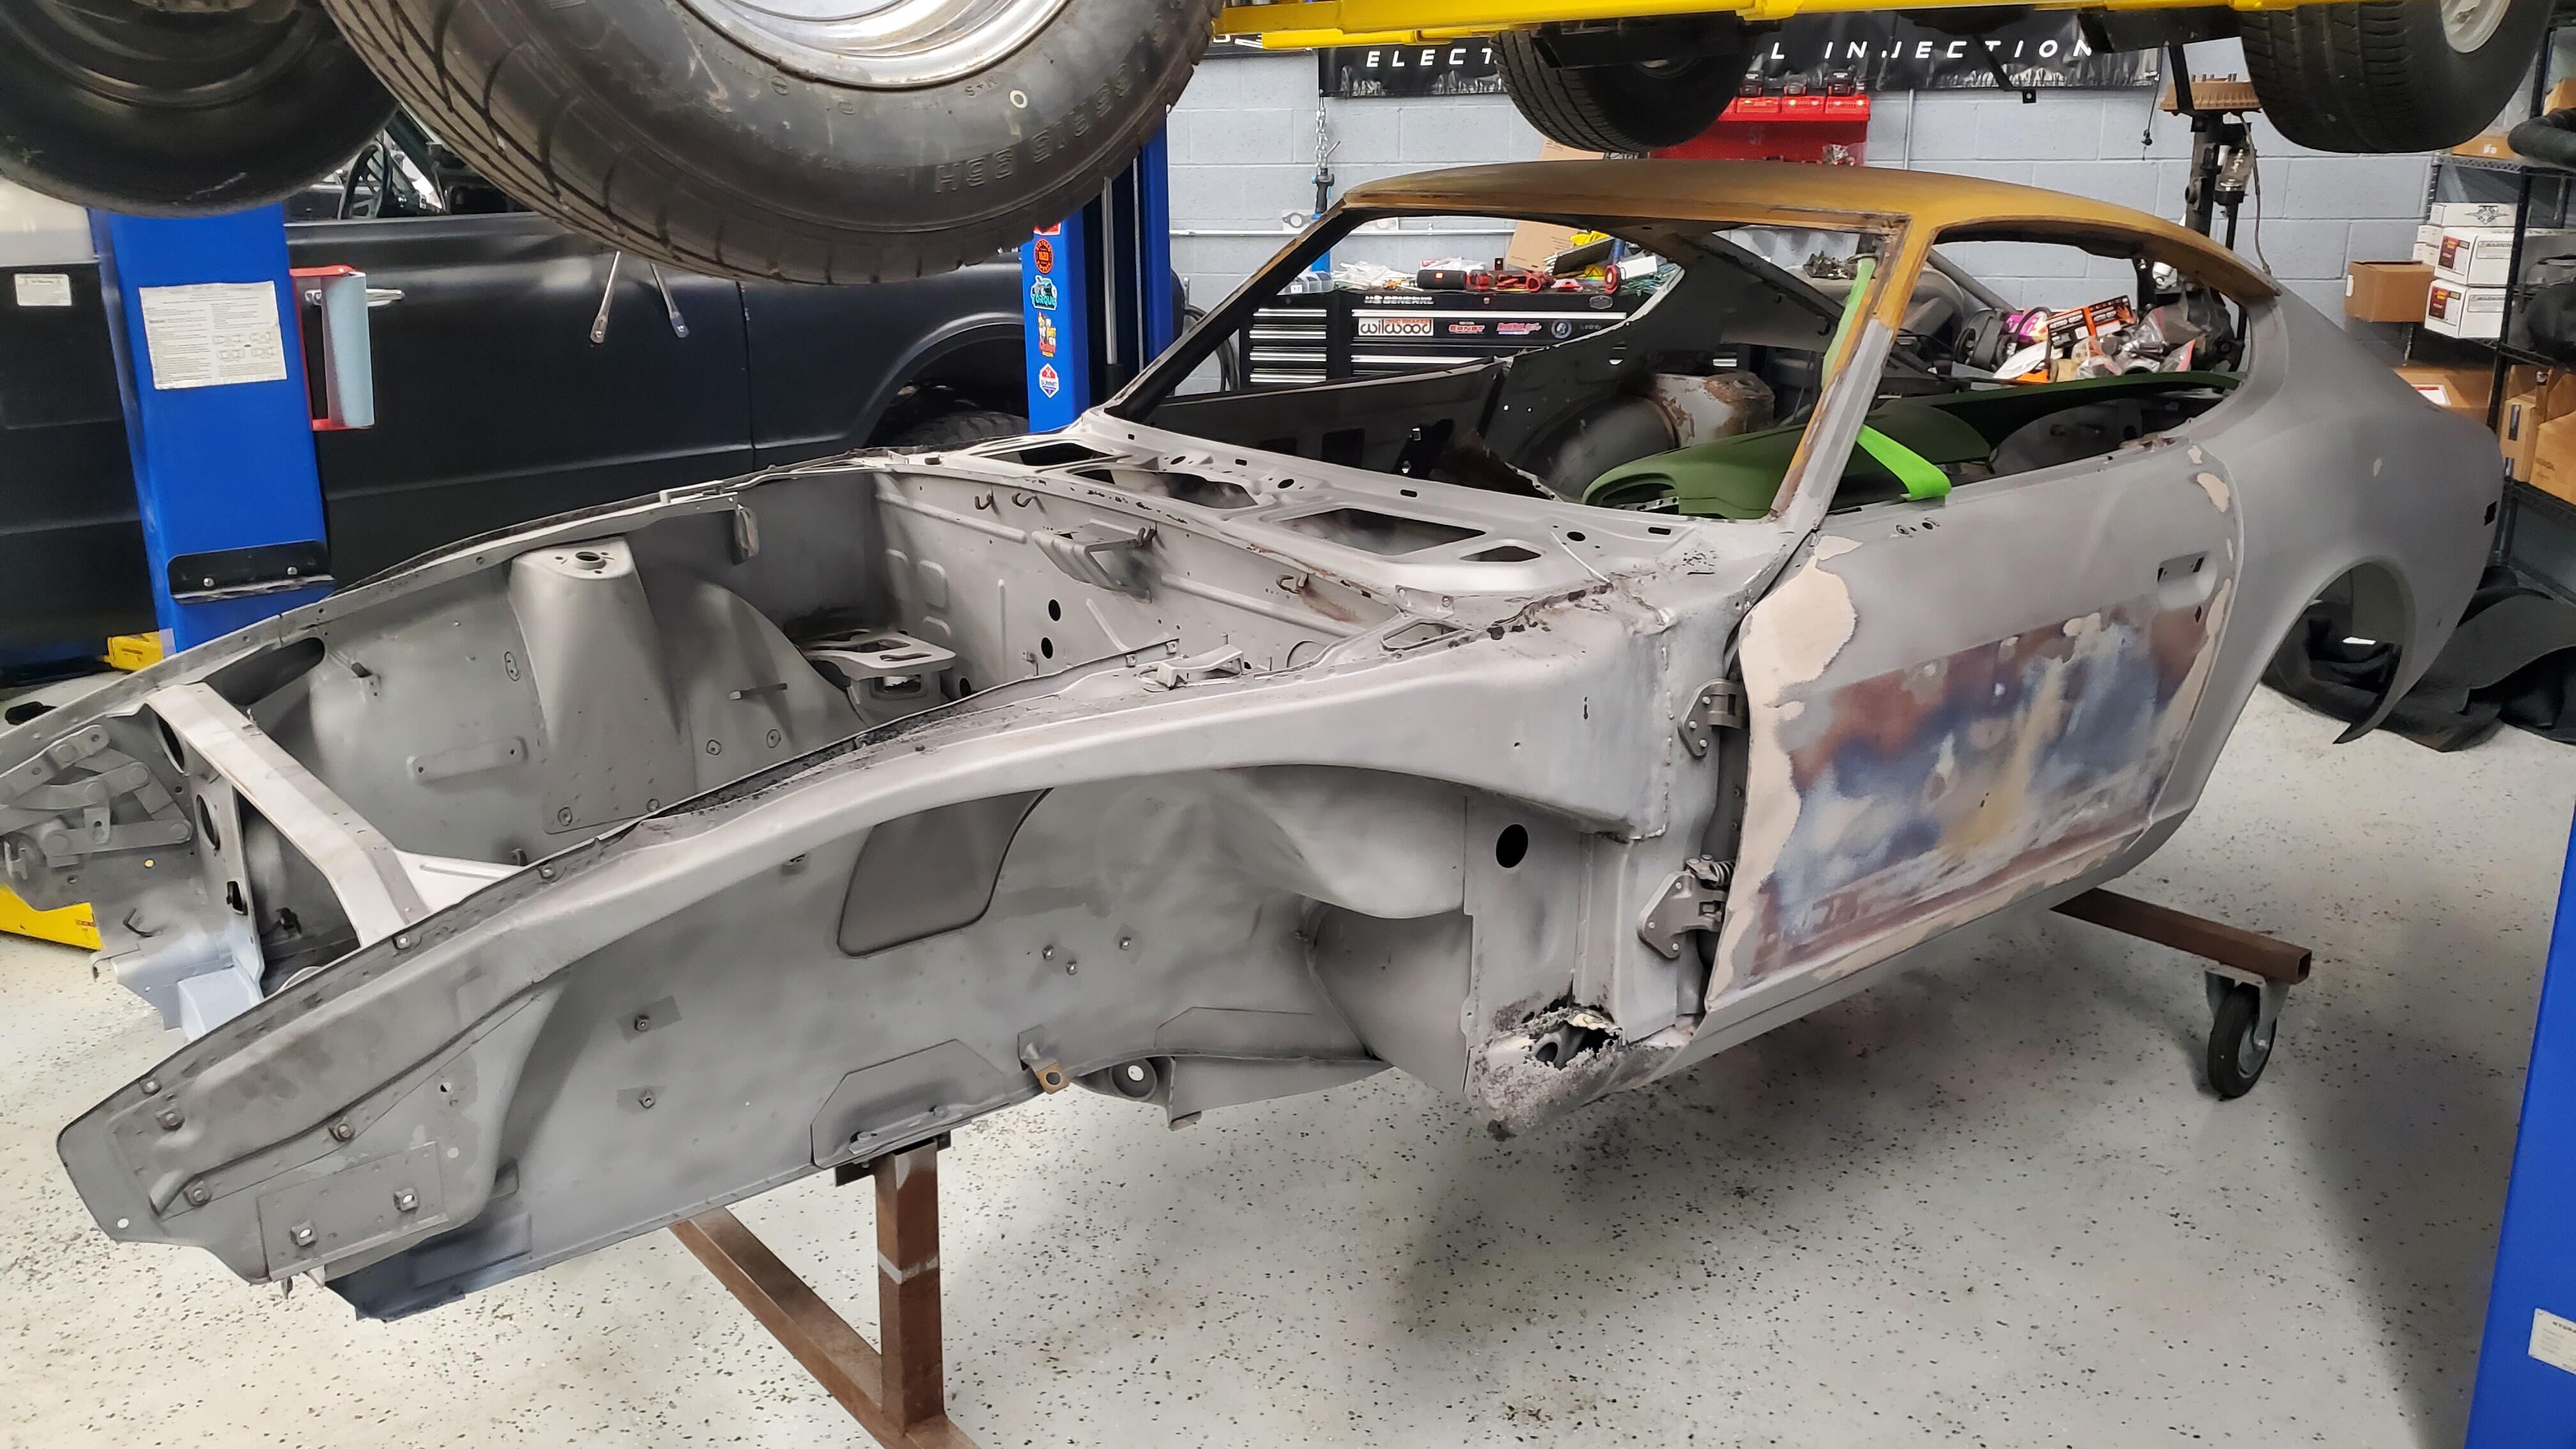
The body shop finally had room availabe so we brought the car and all the panels down to the shop. The plan is to media blast next week and then determine what panels will need to be replaced. Got the Block and Head back from the machine shop today. Both look great and nicely done. The block only needed a hone which is good, so we can stick with the original stock pistons and just get new rings. Bearings will be replaced with new stock rod and crank bearings. Oil galleys were cleaned and oil filter check valve and filter screen replaced. The head had just one bad valve and all of the intake valve seats were replaced with the modern 'bronze' seats. Valve guides were replaced. The exhaust valve seats had been replaced during previous machine work. I spent a little time sorting some of the plated hardware putting some of the more common parts in bags. This will help things to move along a bit quicker during assembly time. Pics are below


-
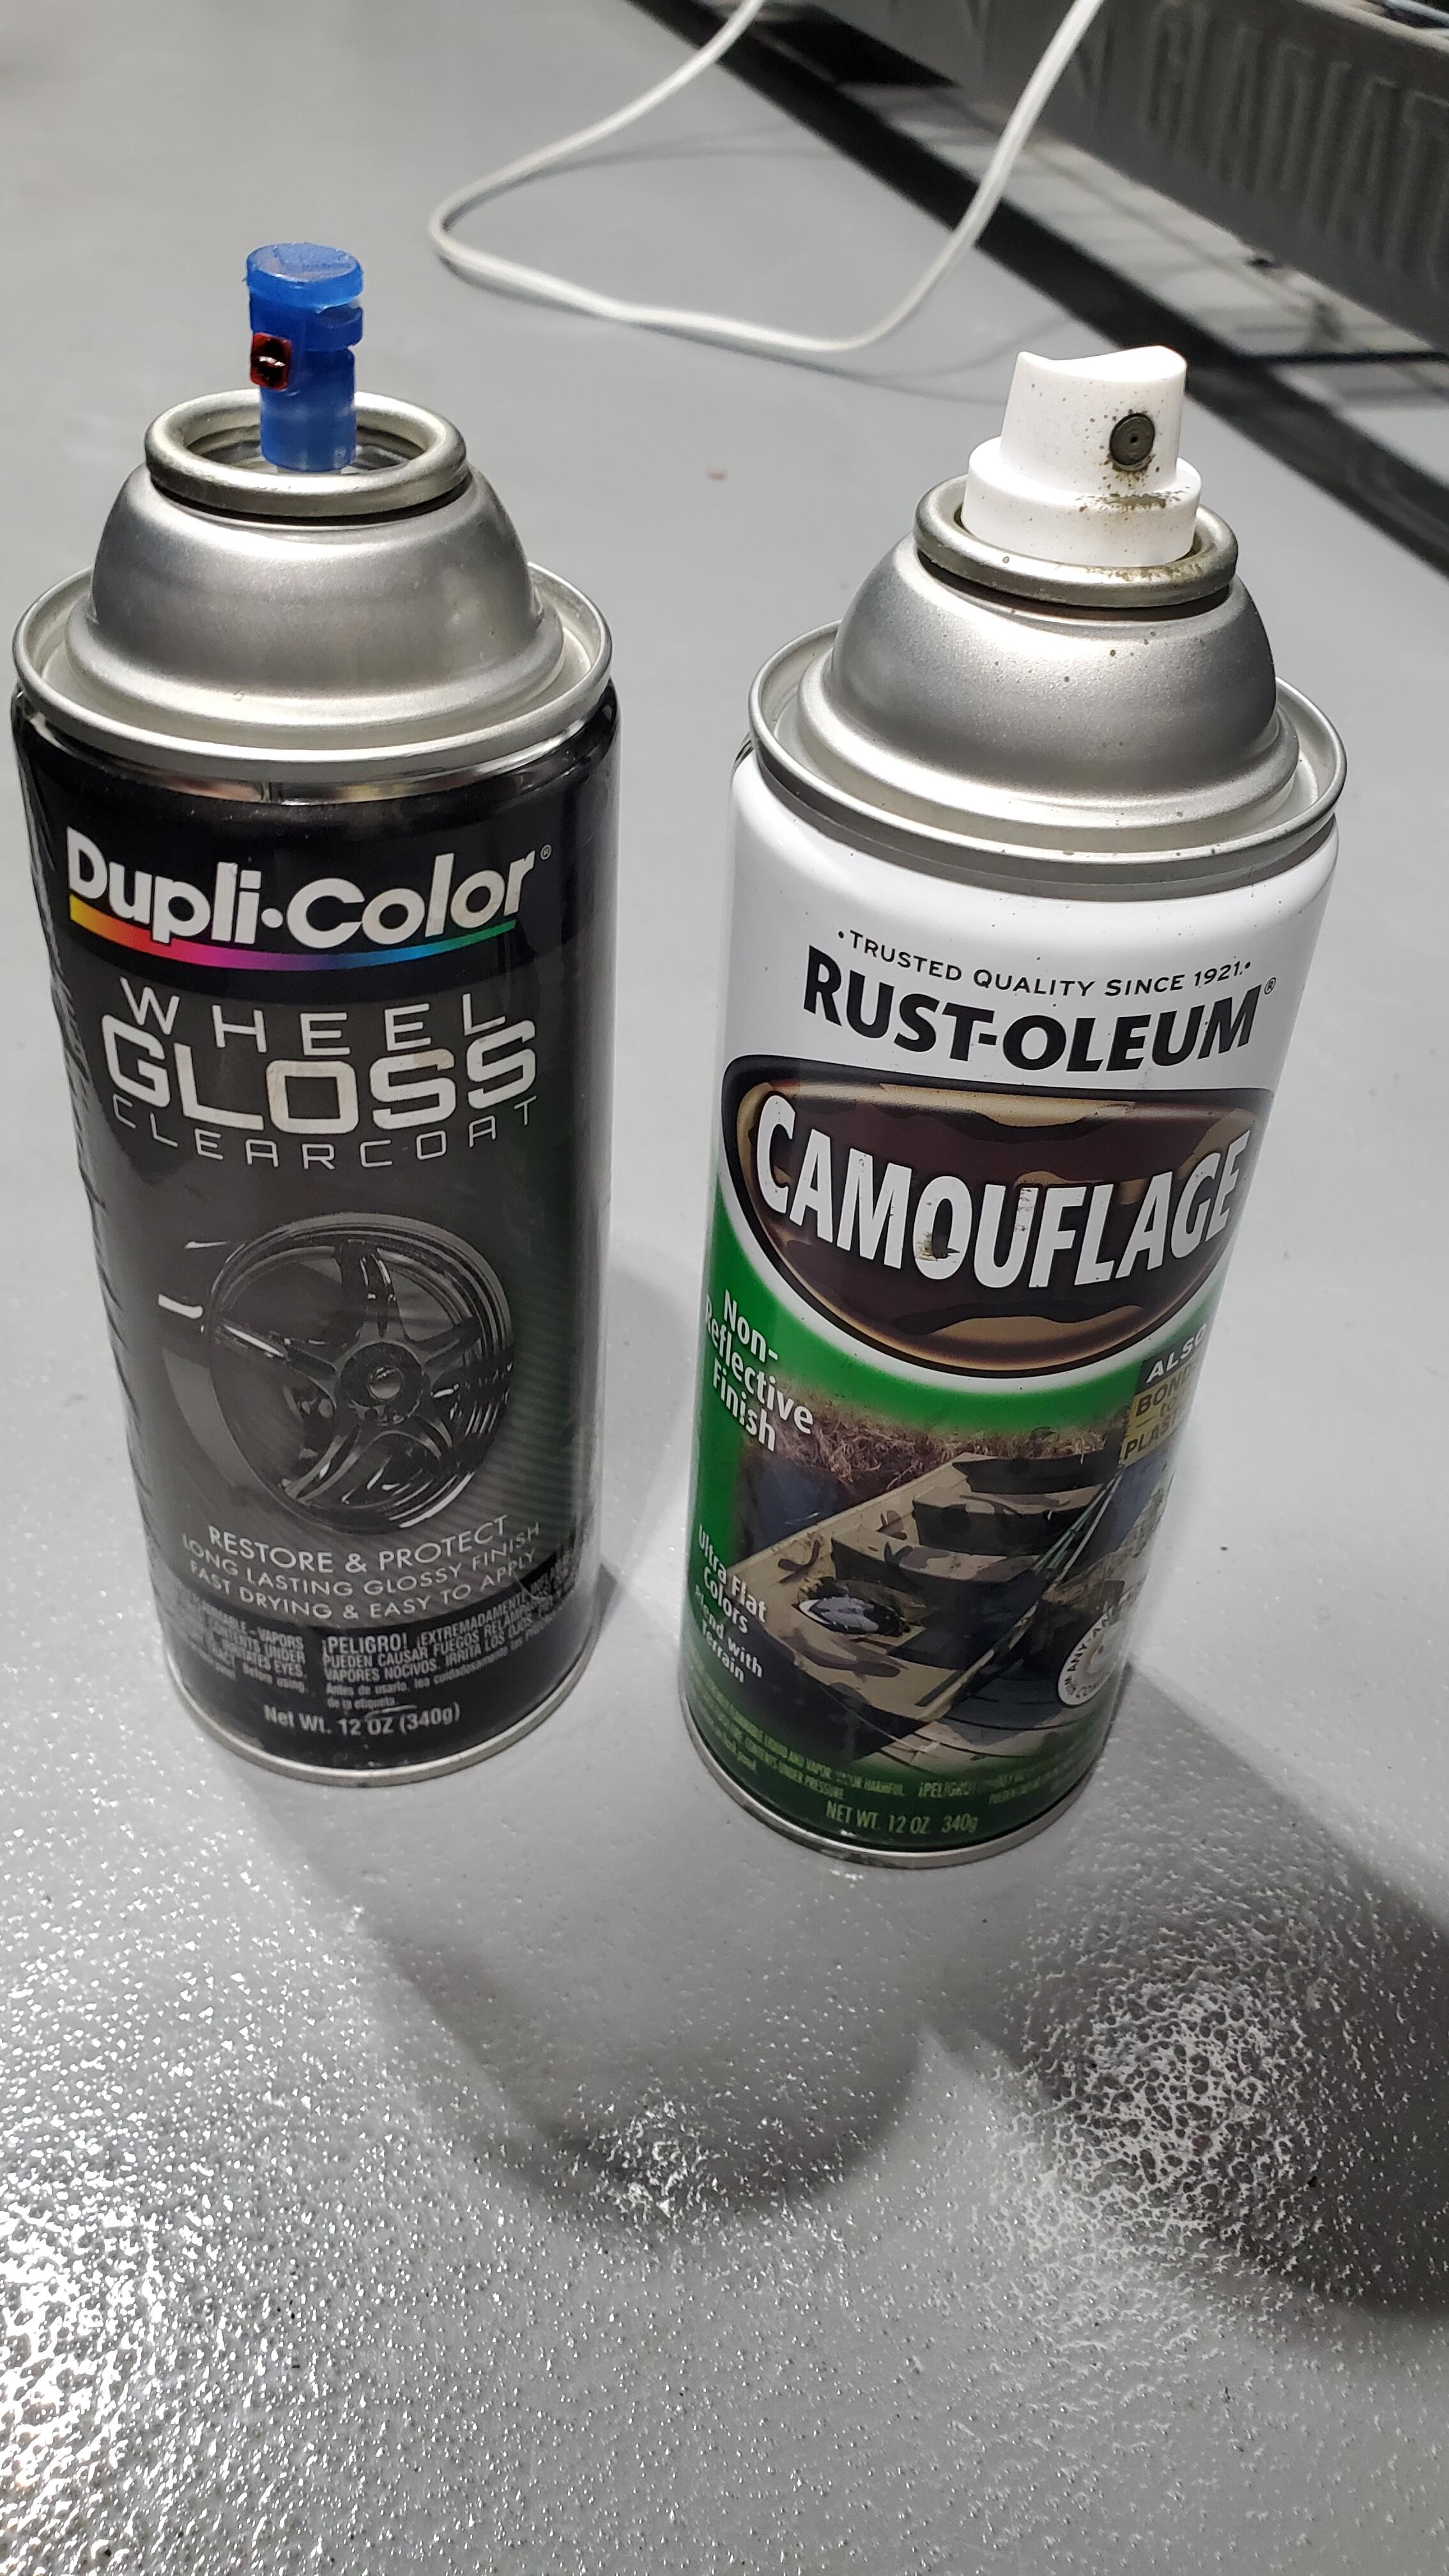
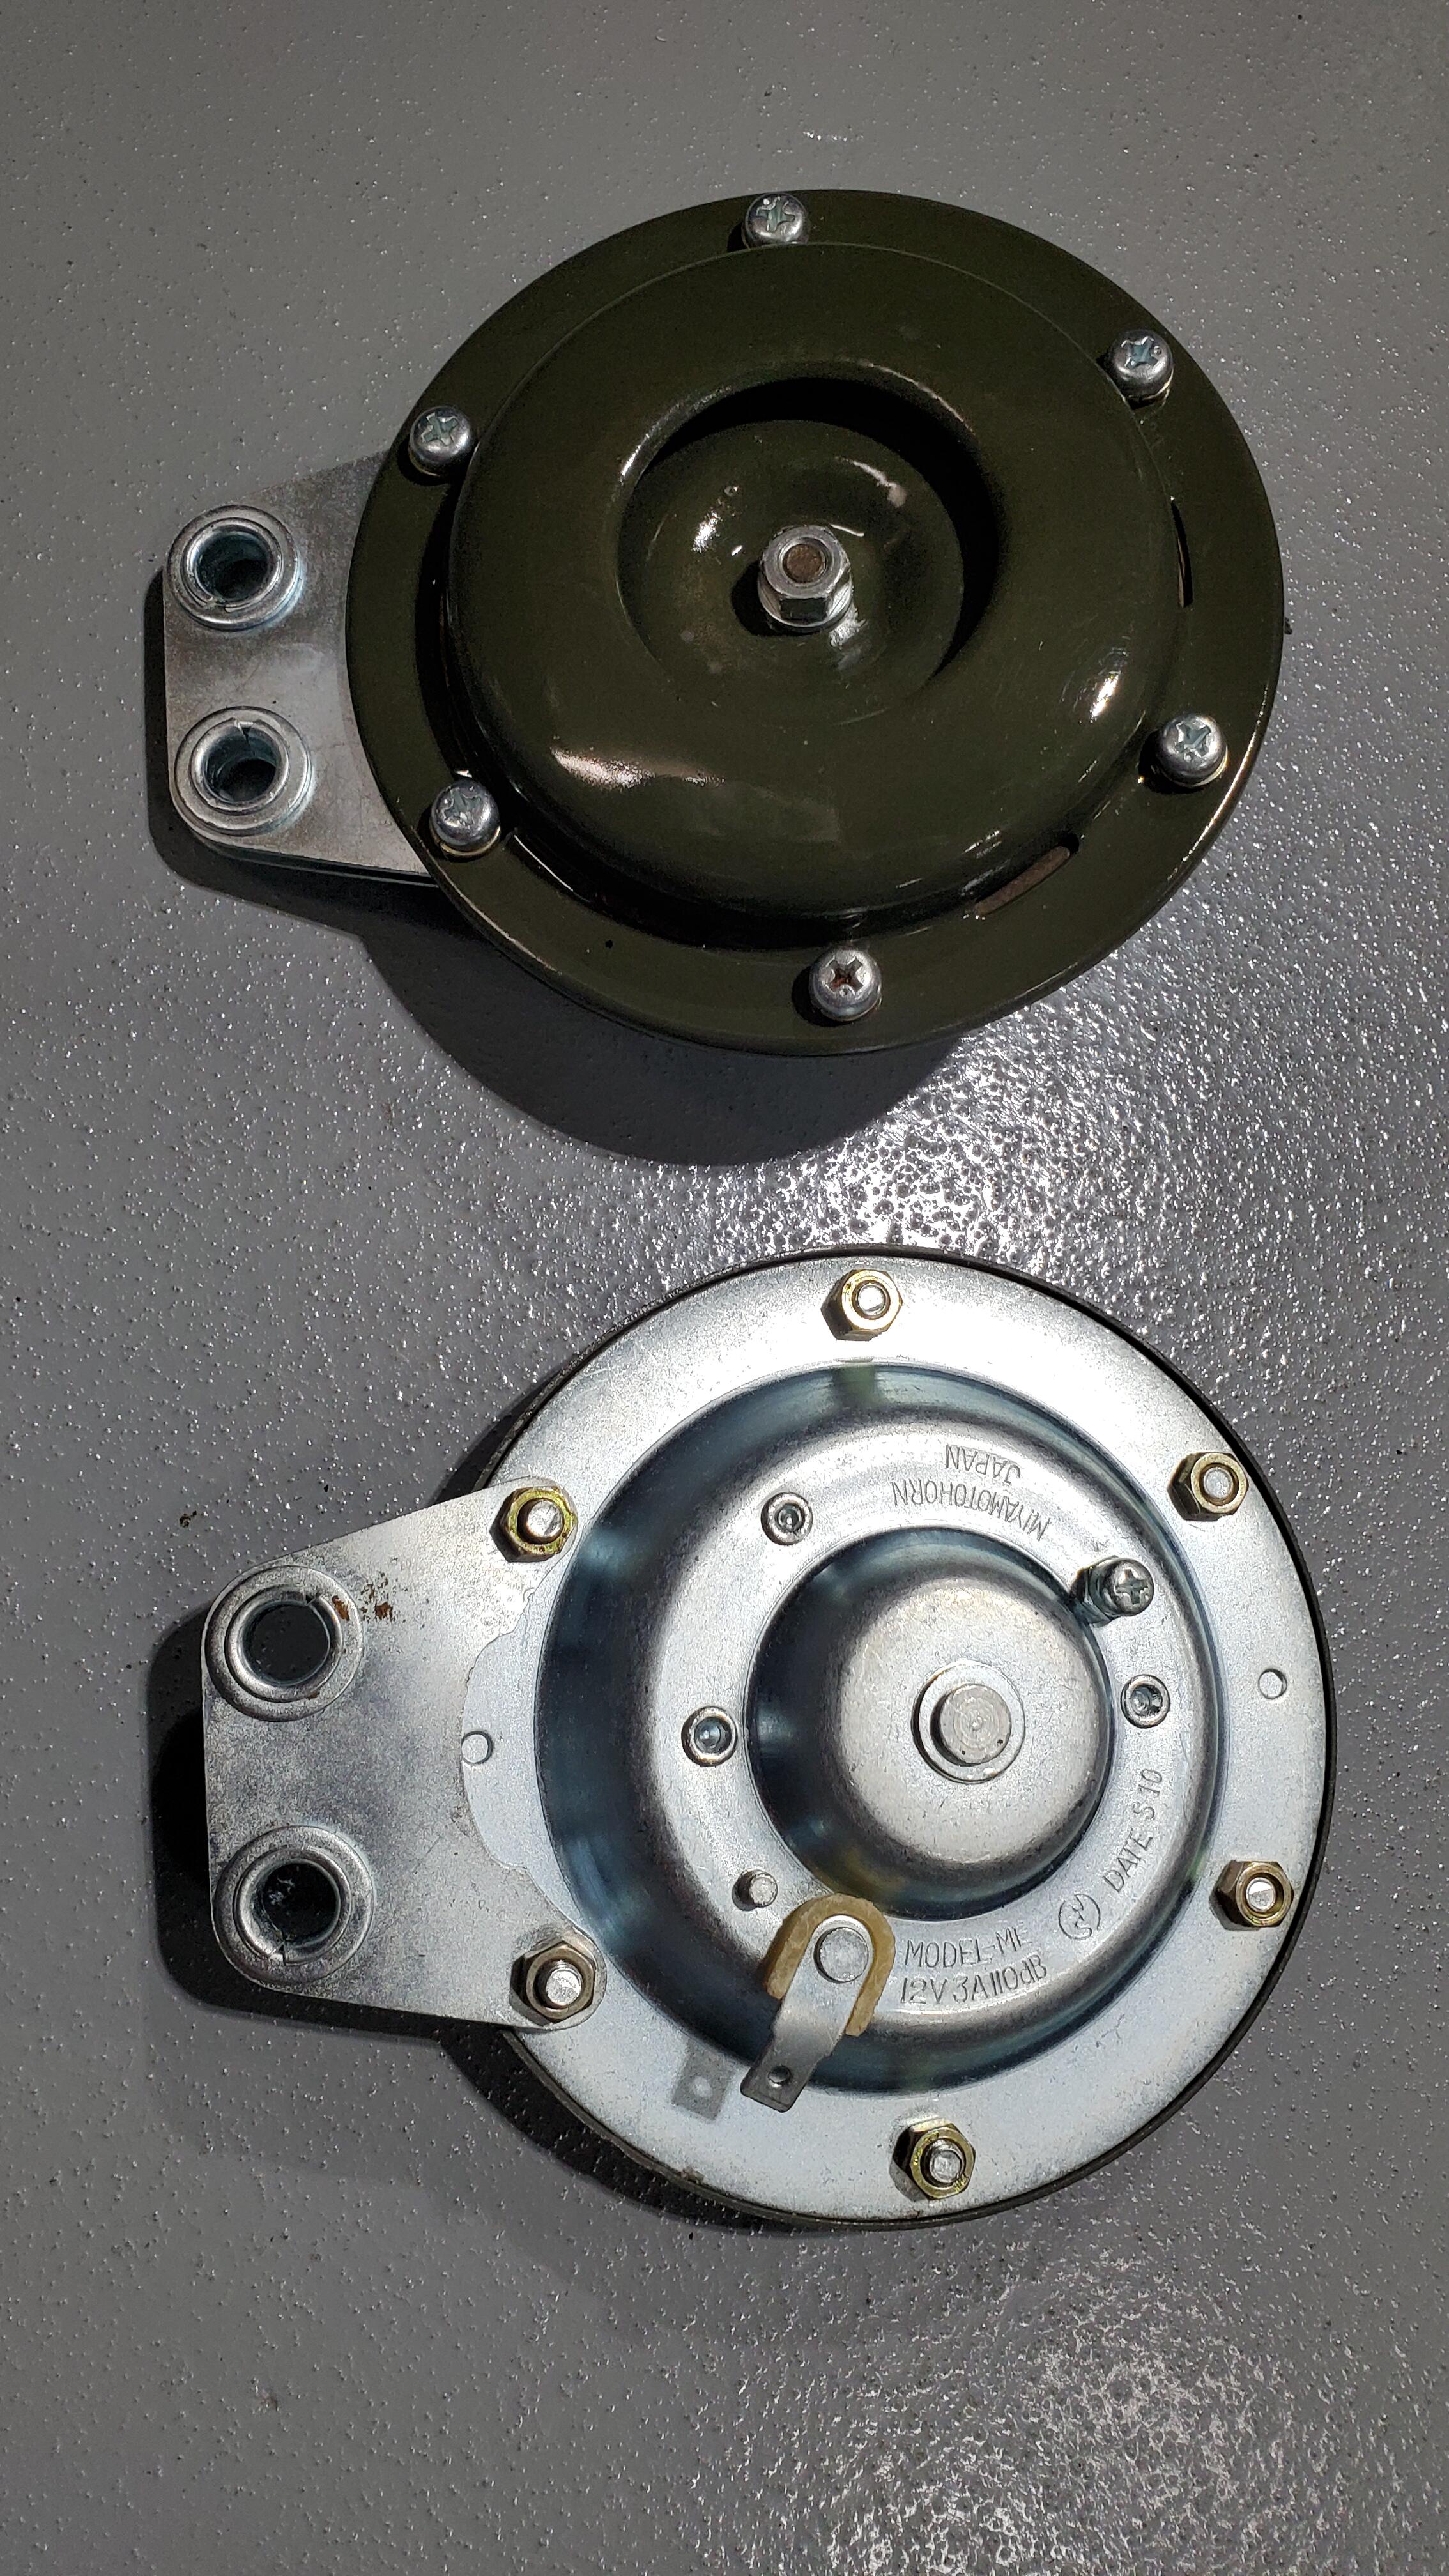
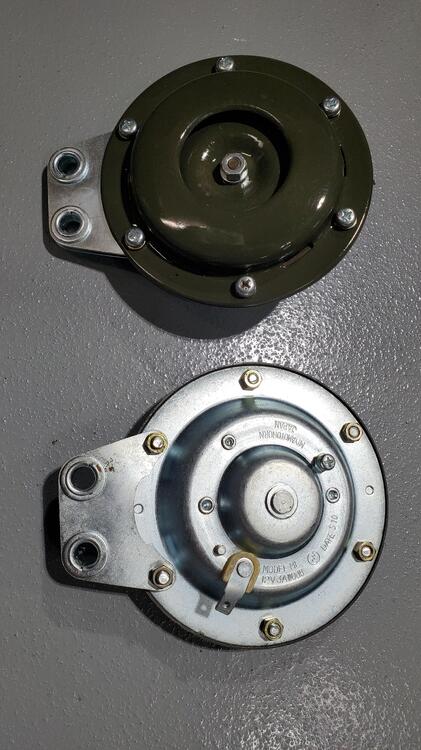
This is what I used. I initially used an Olive green but it was too light, so I went to Ace hardware and got a darker green. I used the center part of the horn as the 'master' as it was in the best condition. The Camouflage paint is flat, so I added the gloss clear. A thin semi-gloss may be a little bit better replication. I think the green is maybe a bit on the glossy side, but they do look pretty doggone close to the original.


-
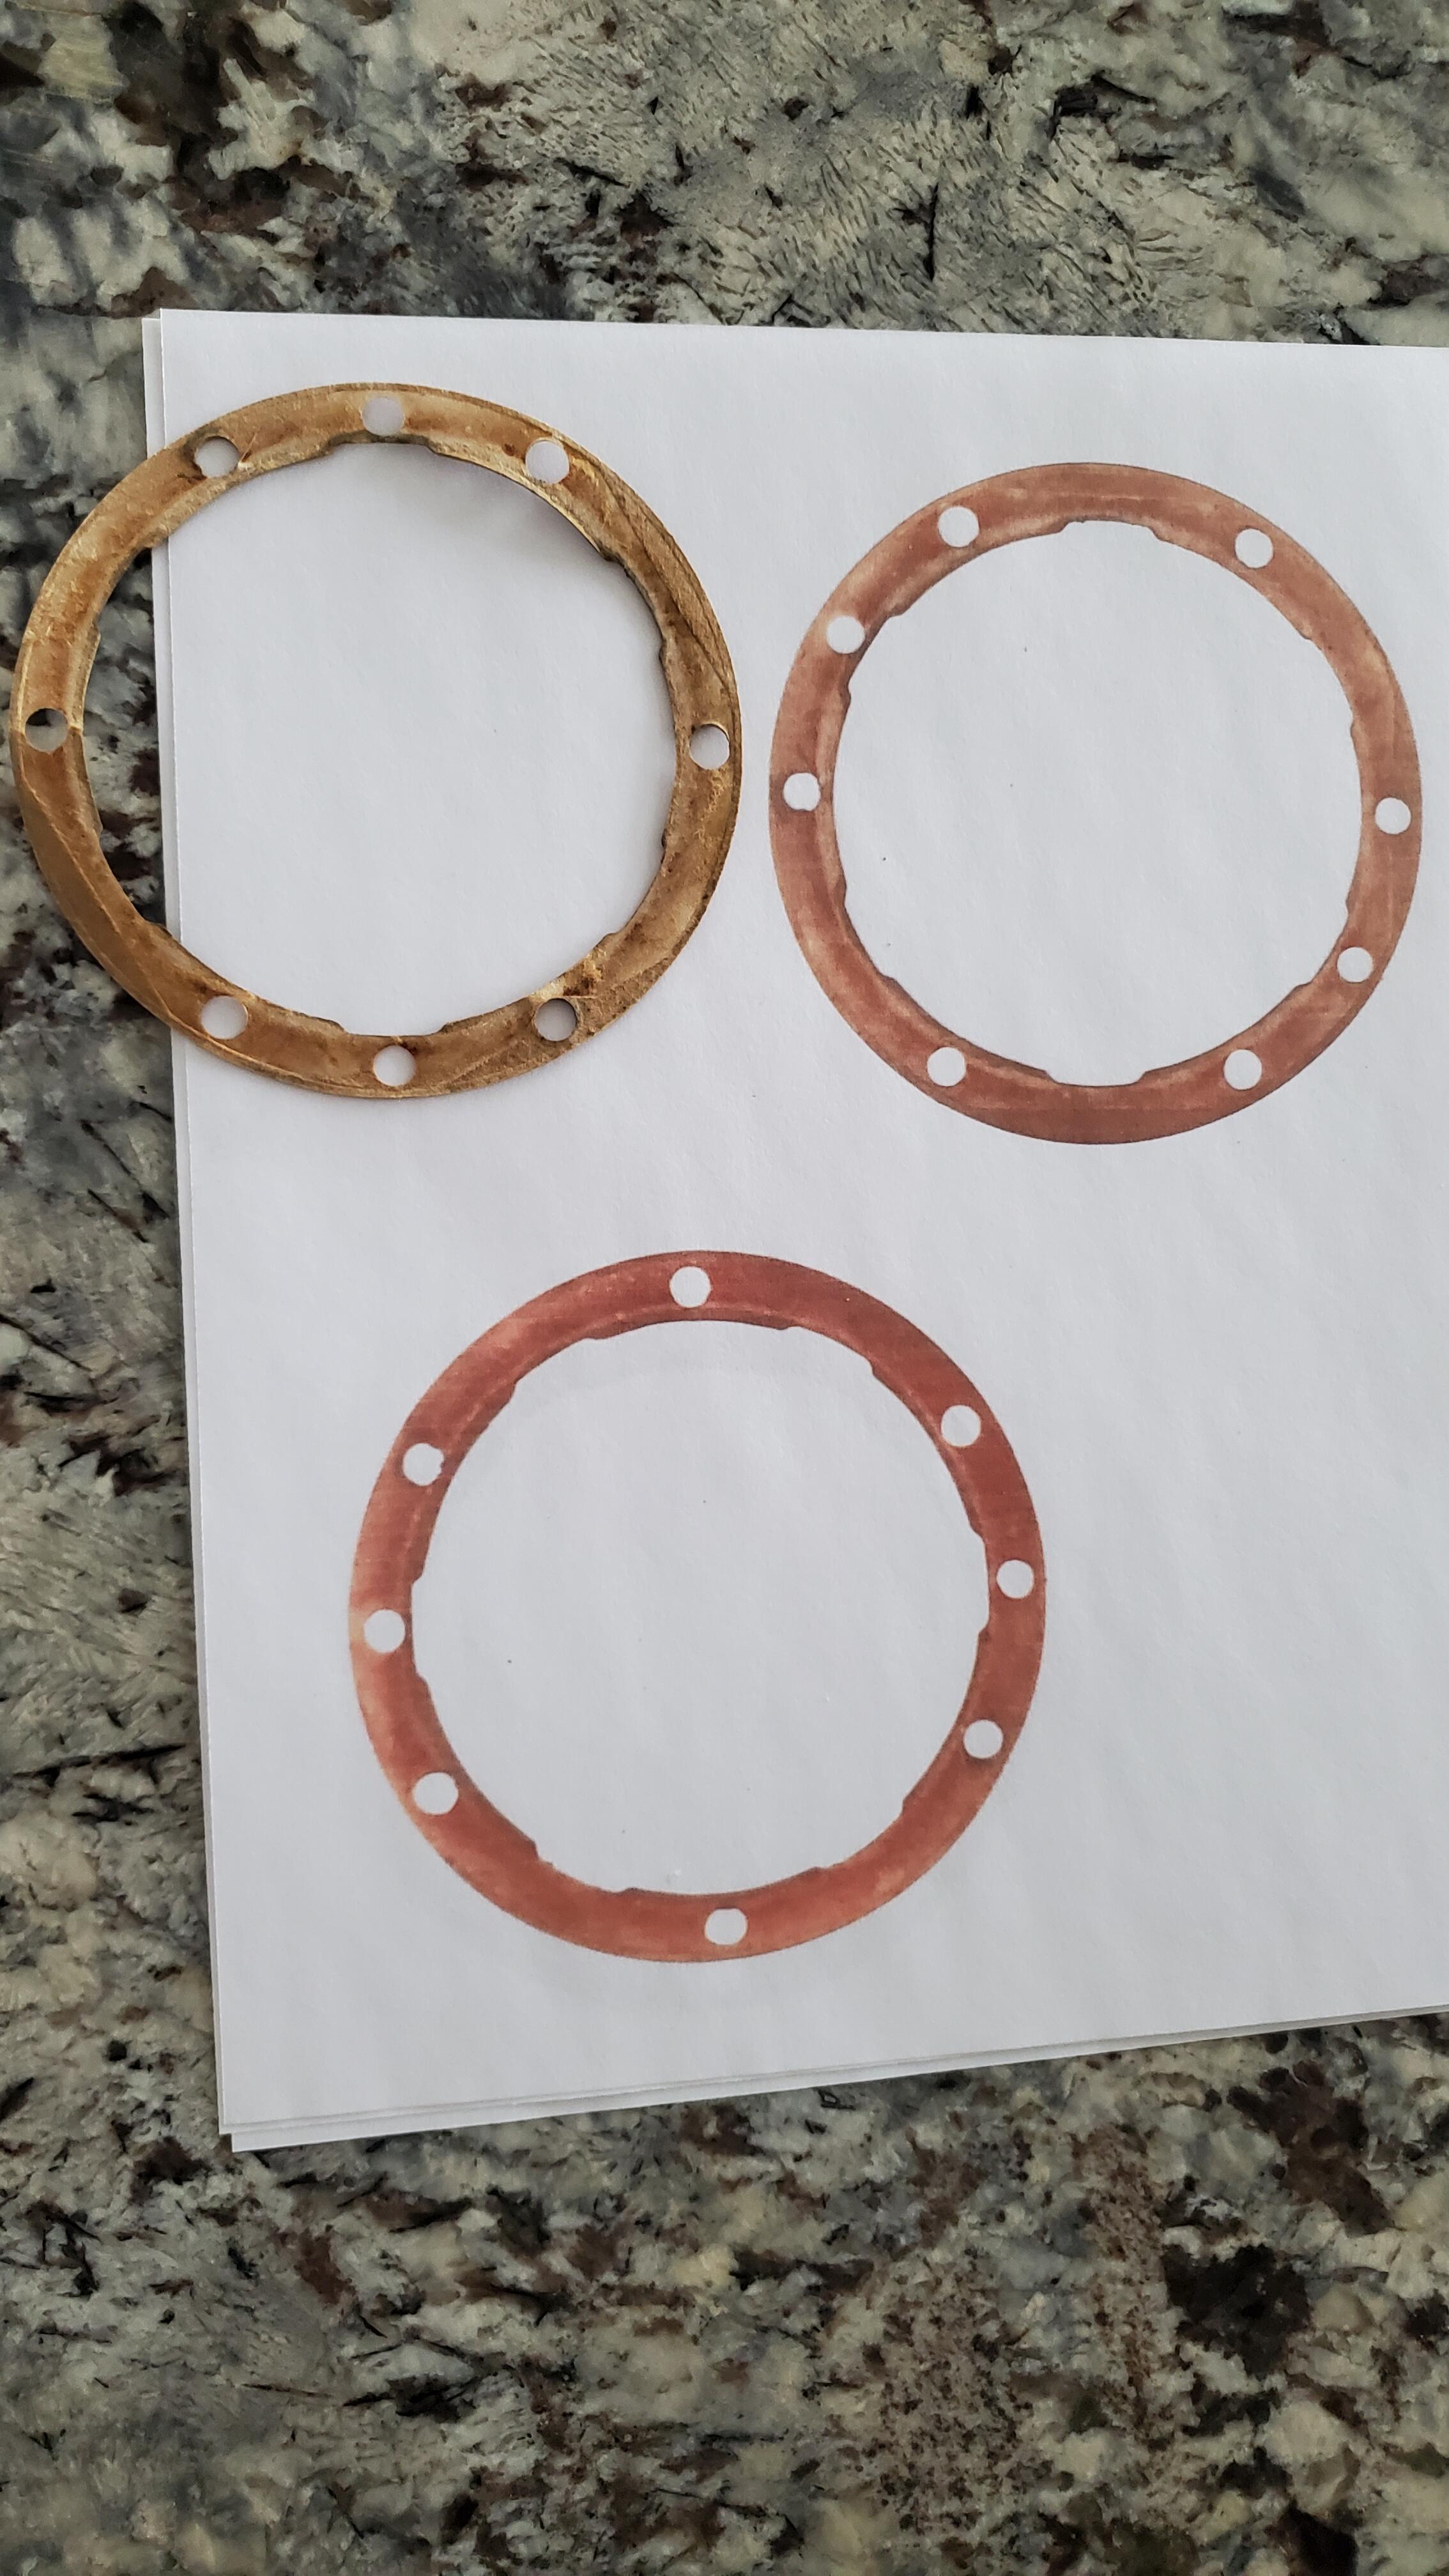
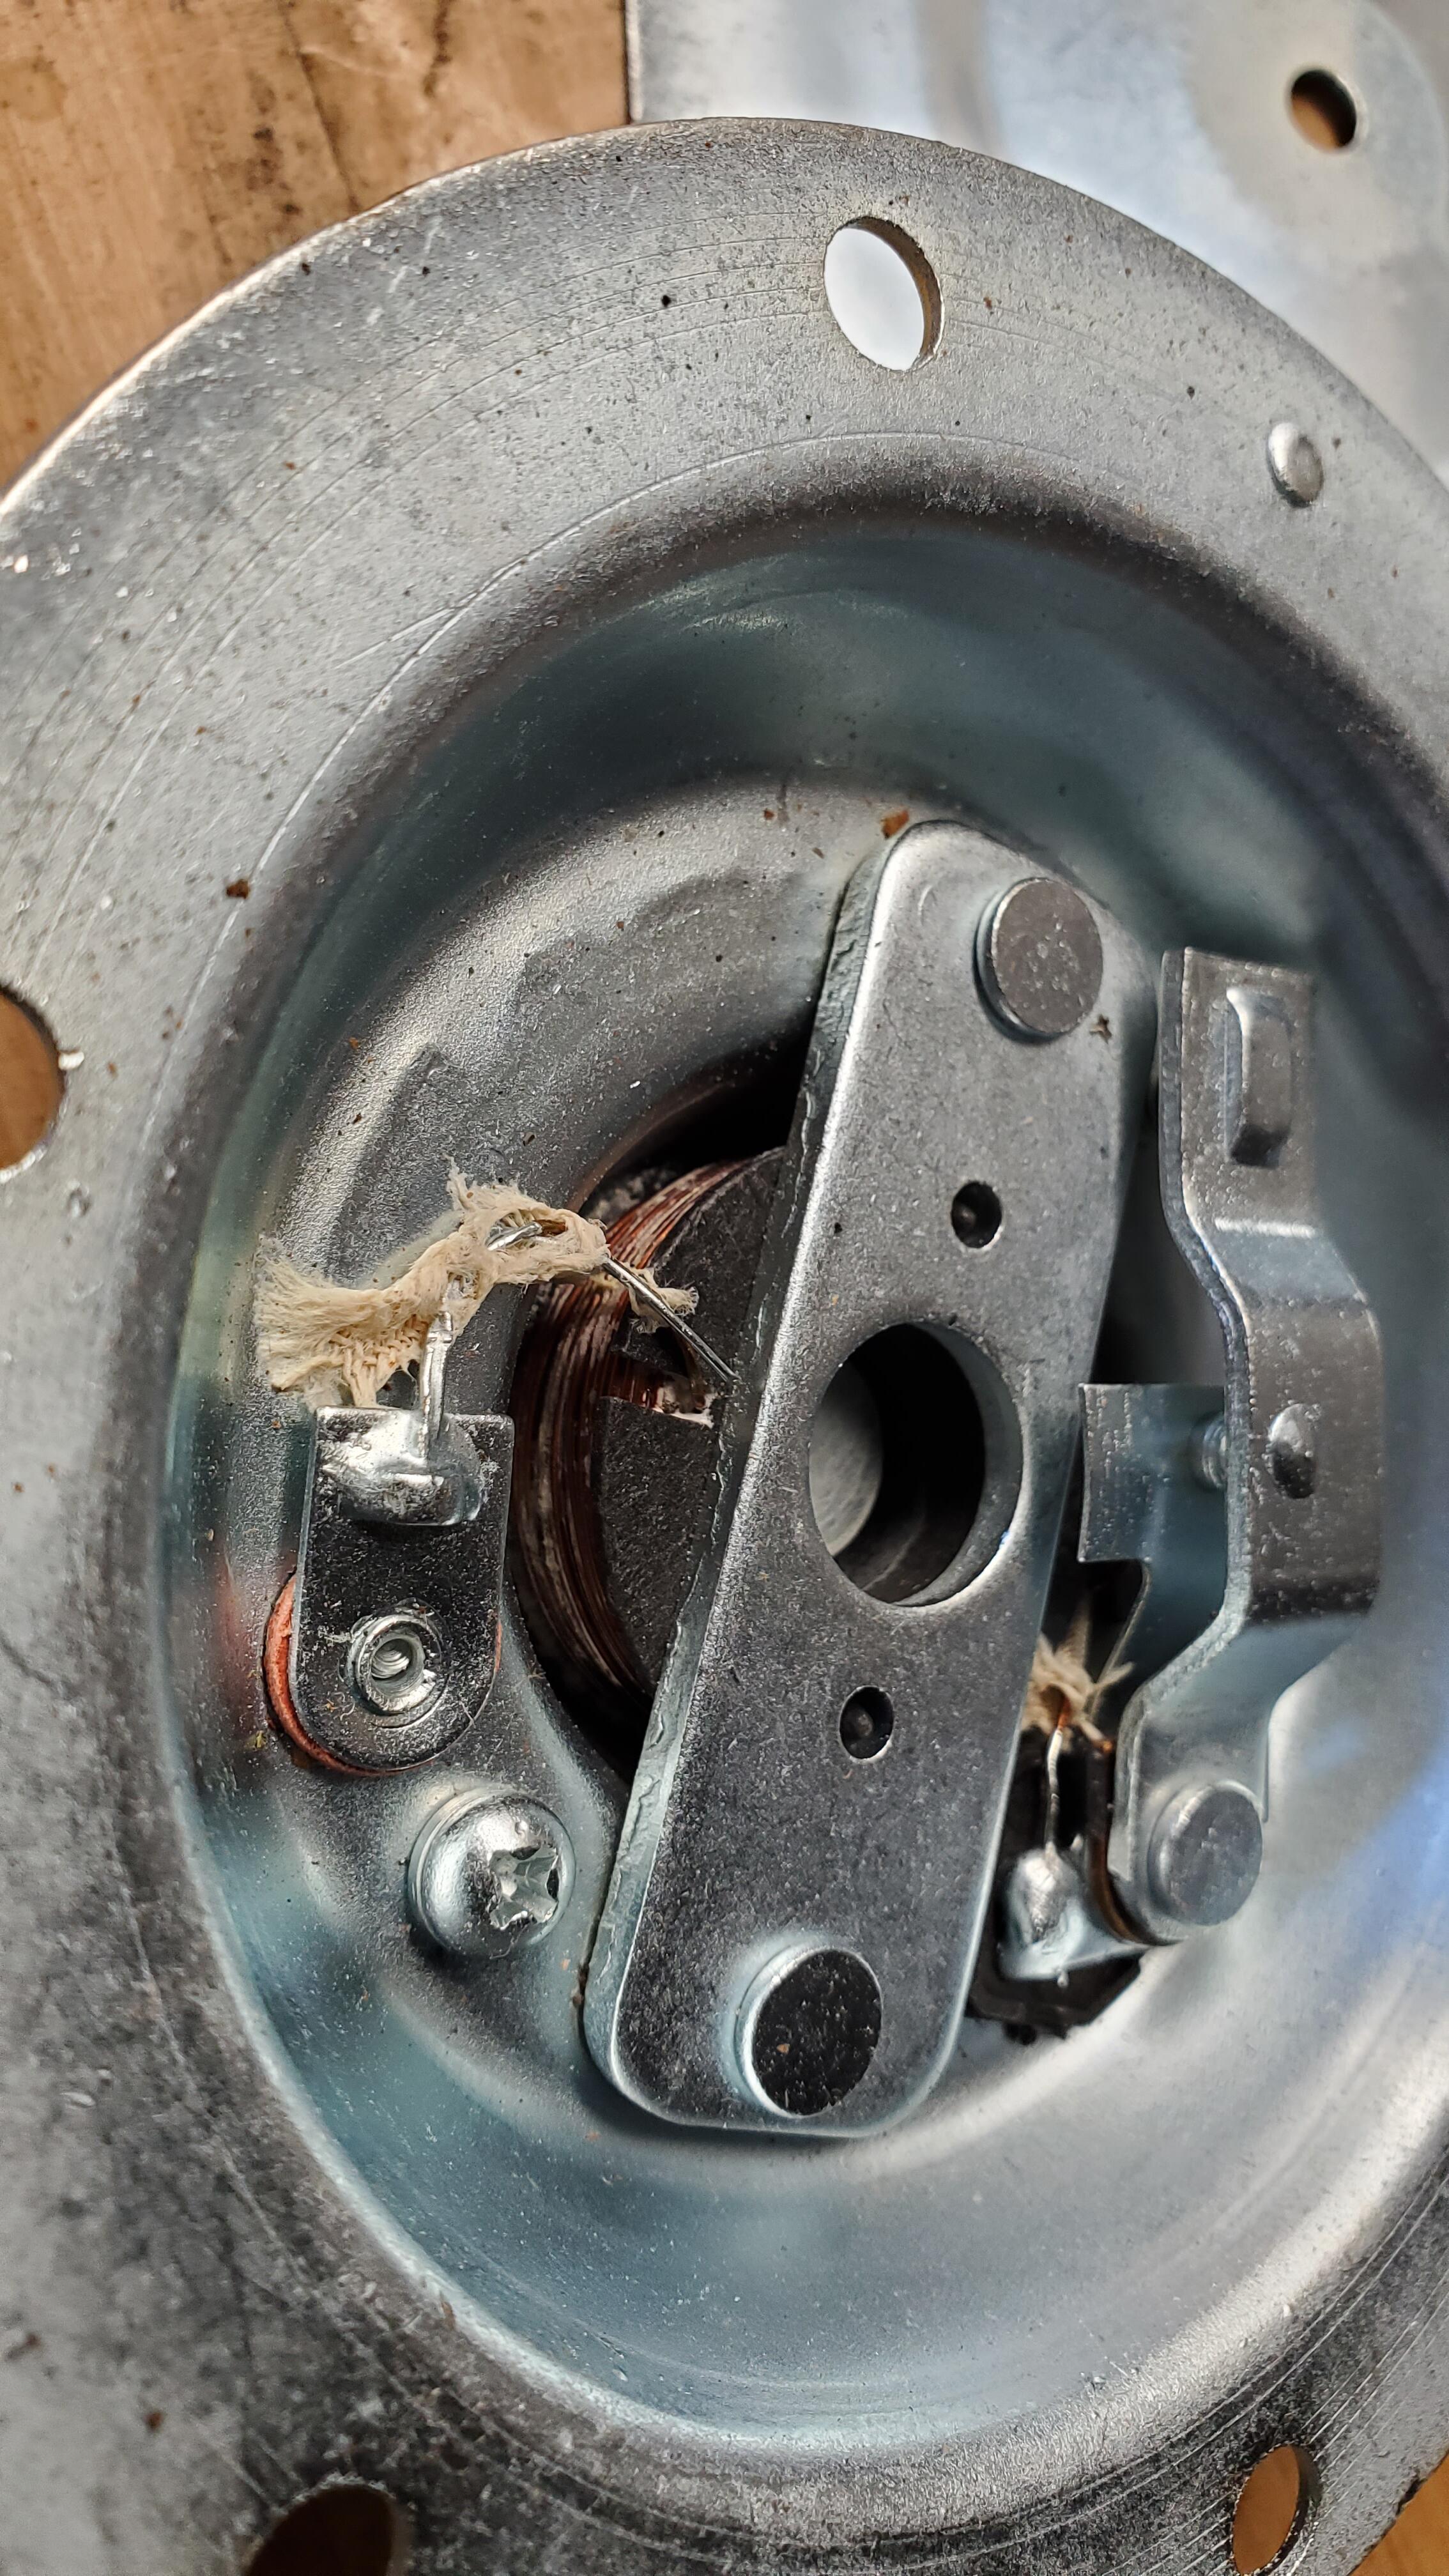
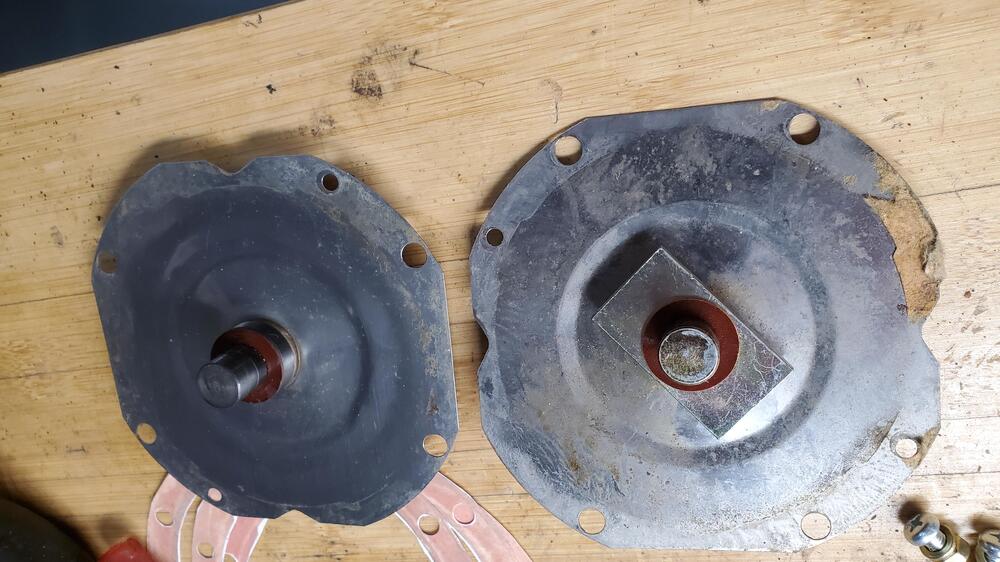
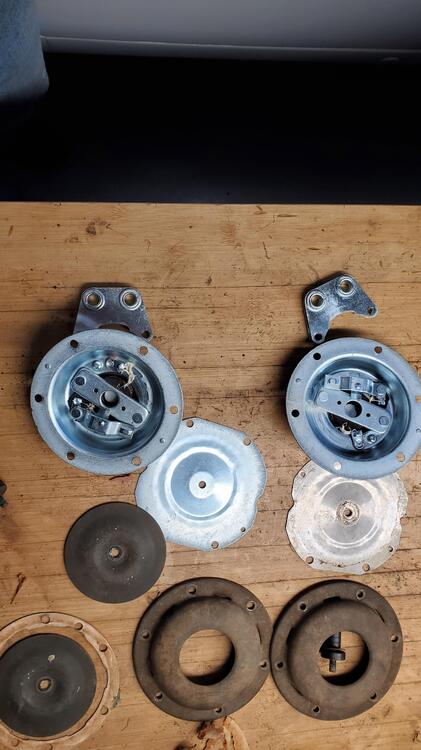
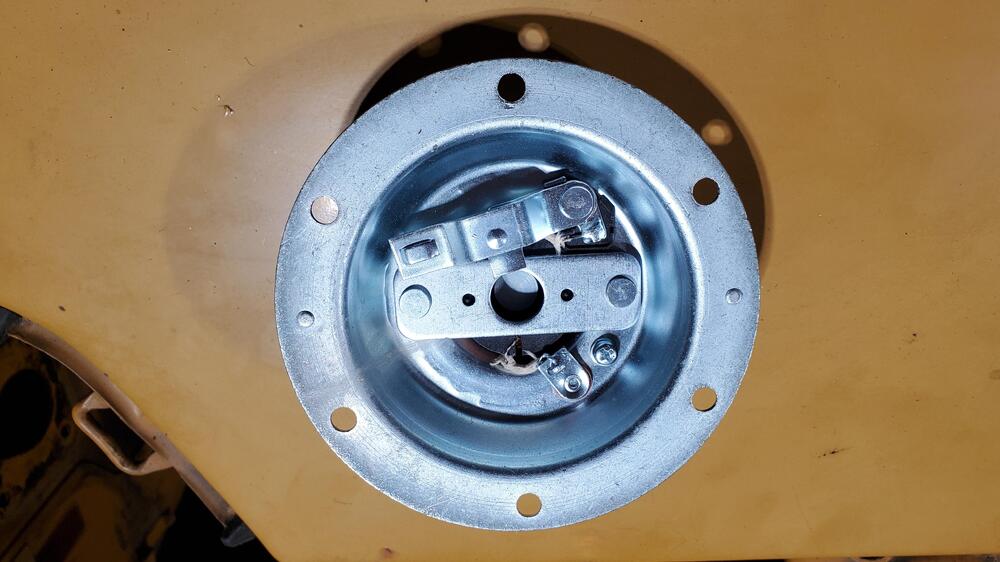
Since we were on the subject of horns, I just went ahead and rebuilt them. Pictures are below. I added a view of the horn coil. You can see that the copper is not plated. (Also, aluminum or any material other than steel will not plate) Also, I noticed the inside of the horn has a round metal part versus the later rectangular part. Maybe that is unique to the early car horns? I am pretty happy with the color of the horn front cover in its match of the original. I used a dark forest green camouflage paint with a clear coat for the color. I was only able to salvage one gasket from the original horns out of four, so I scanned the gasket and made 3 more.


-
No problem at all. I have rebuilt several sets of horns with this plating. No issues.
-
This is the inside. I put the rest of the parts in a zip lock bag

-
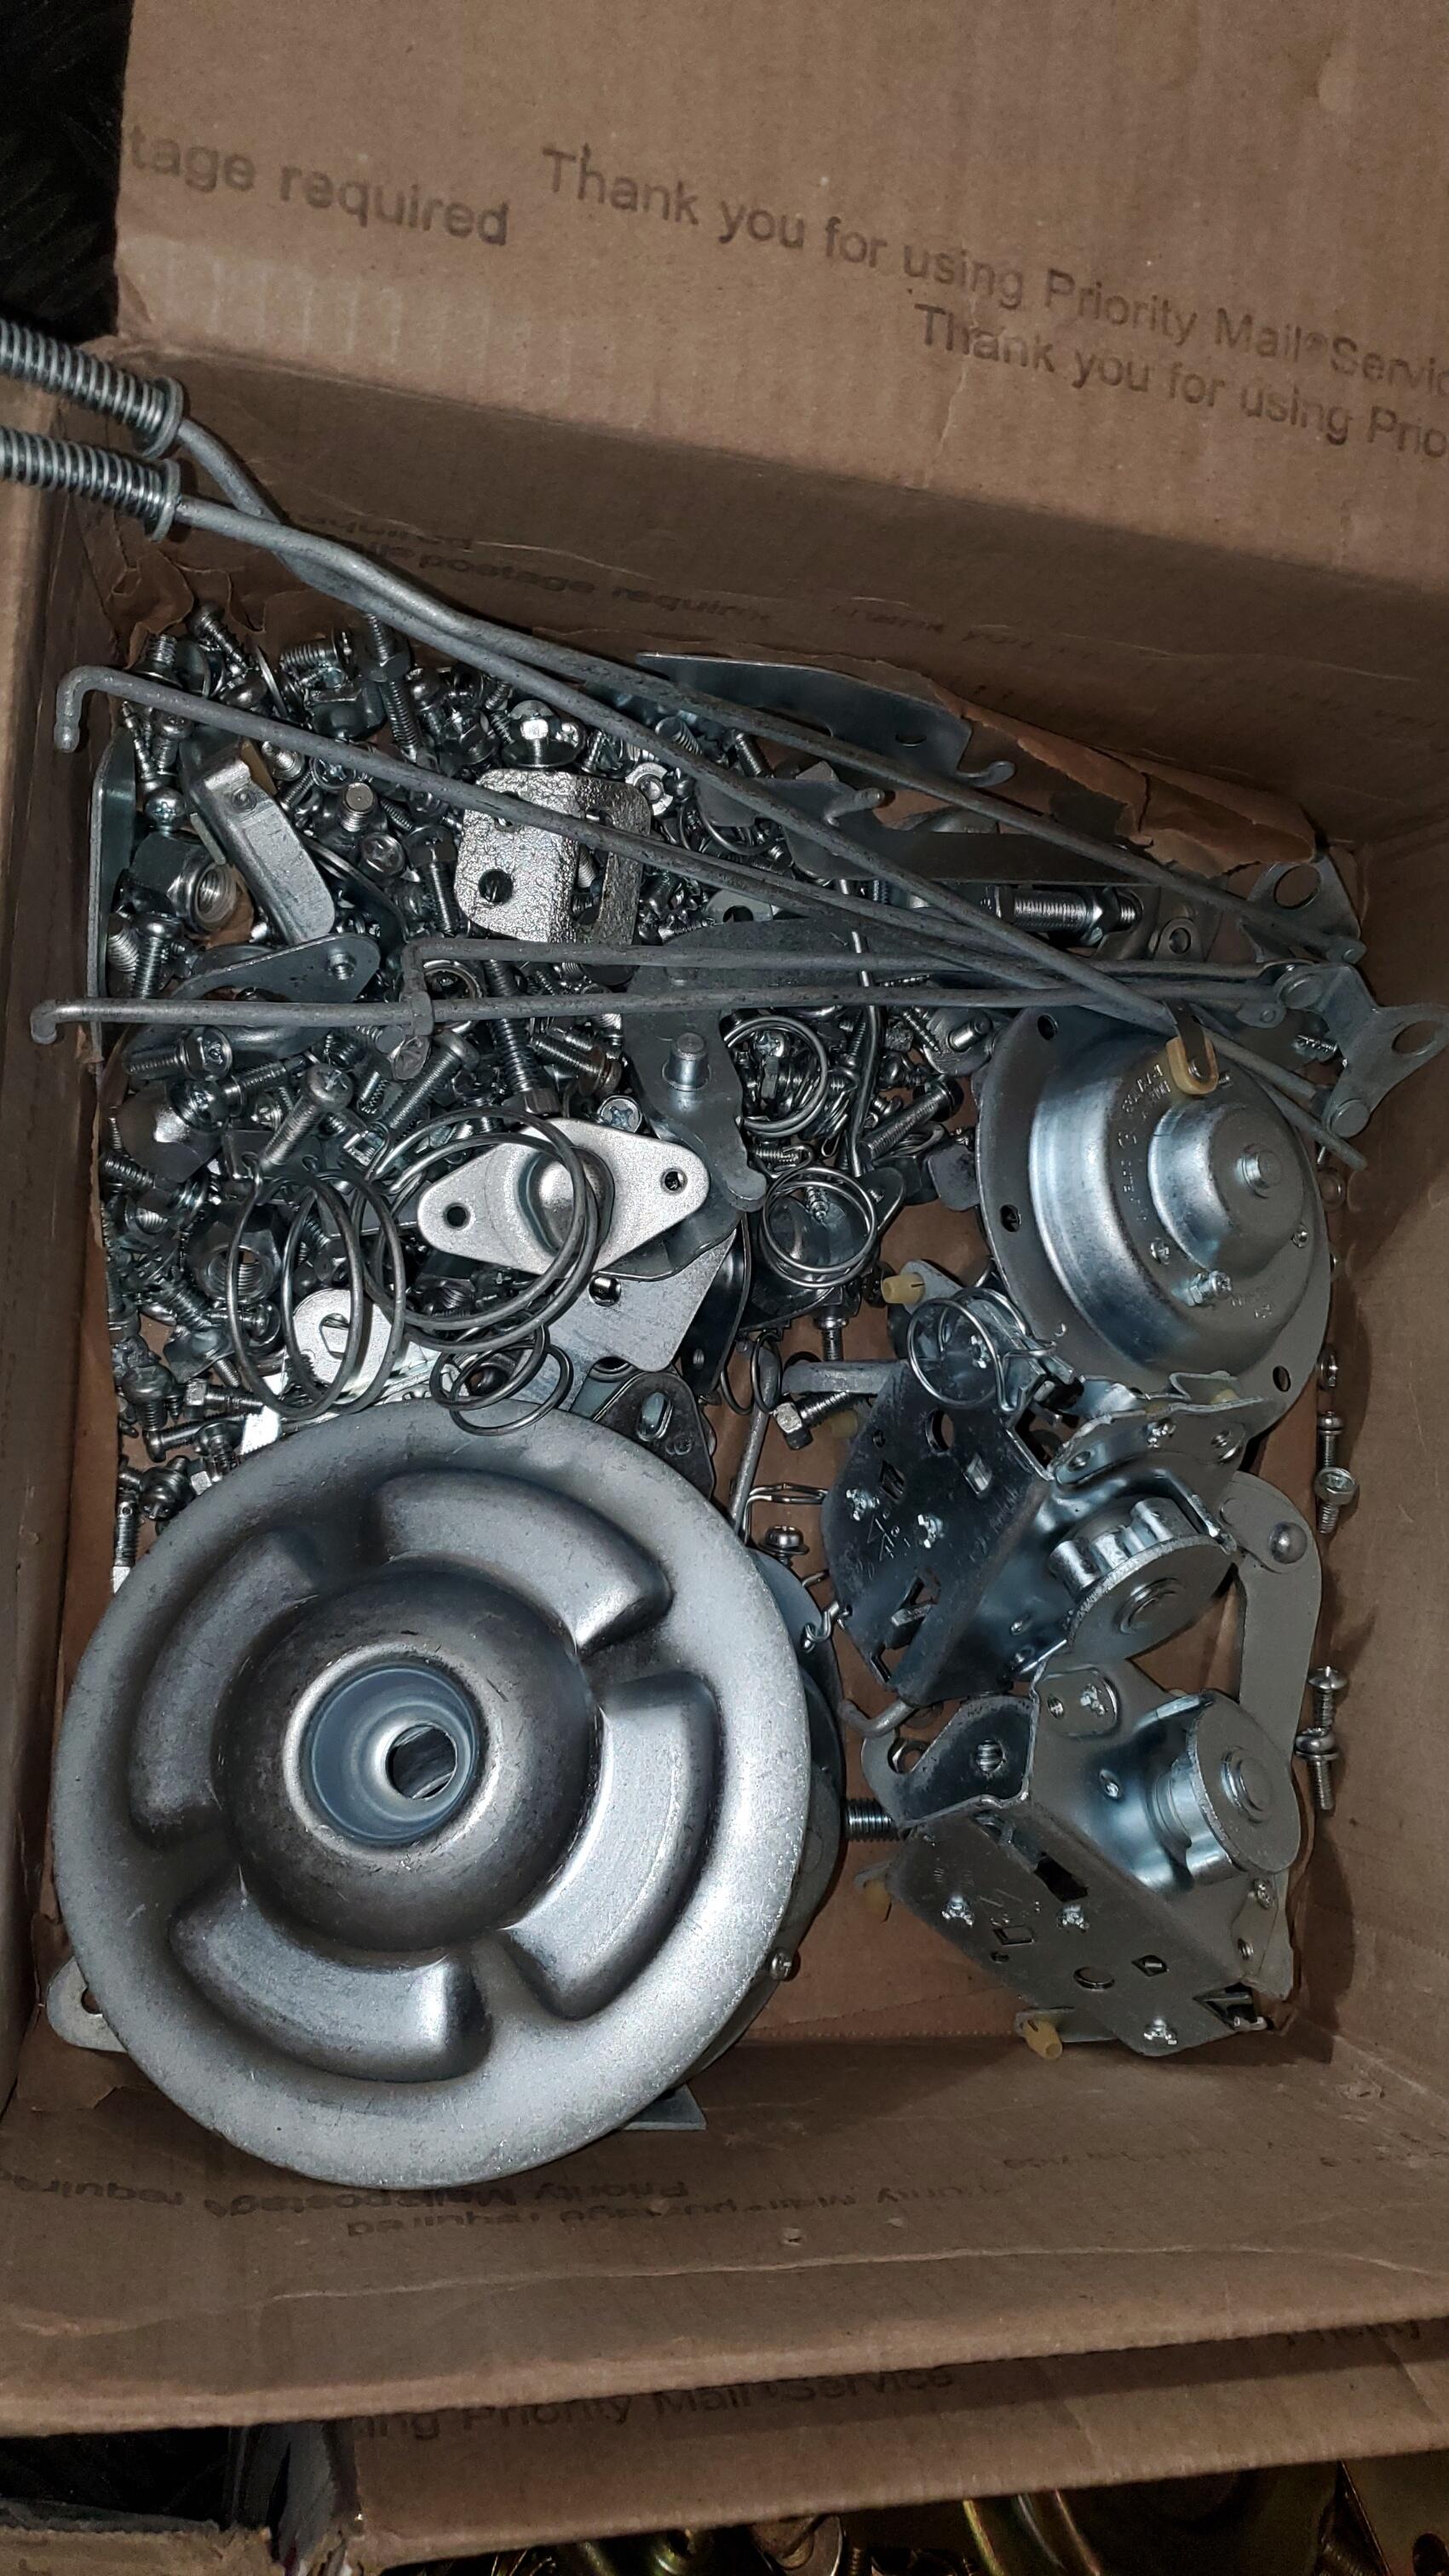
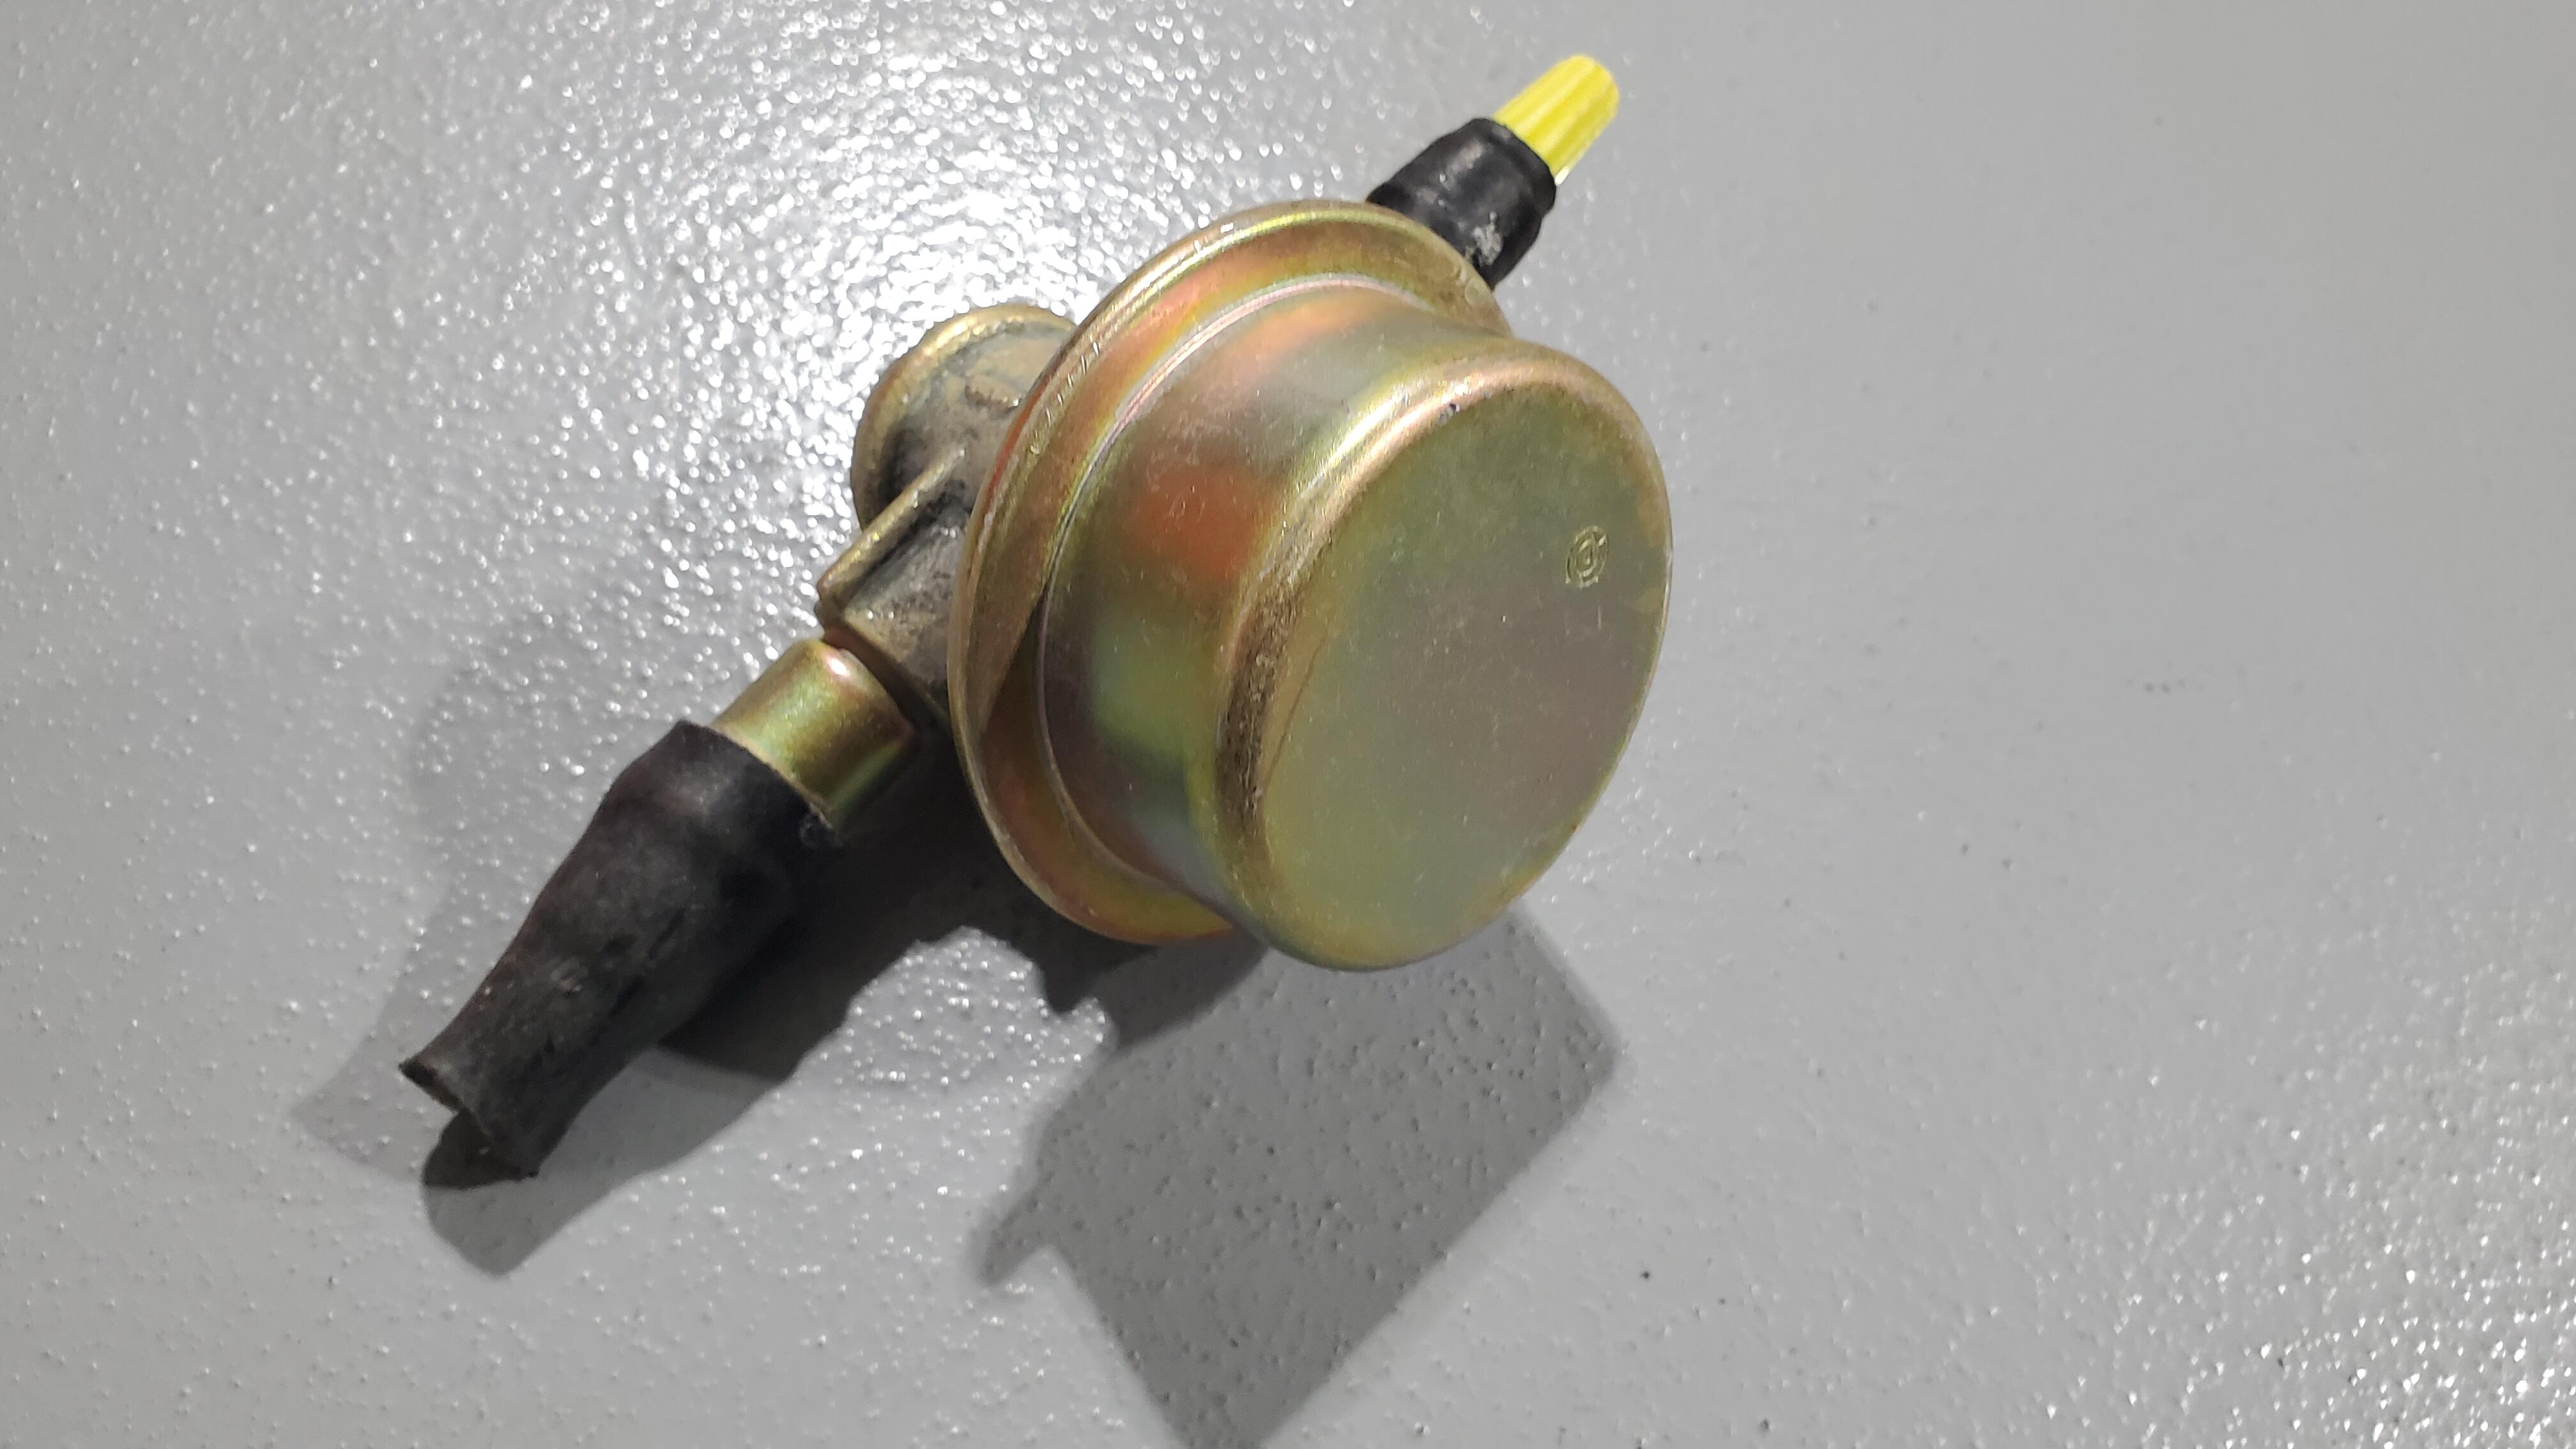
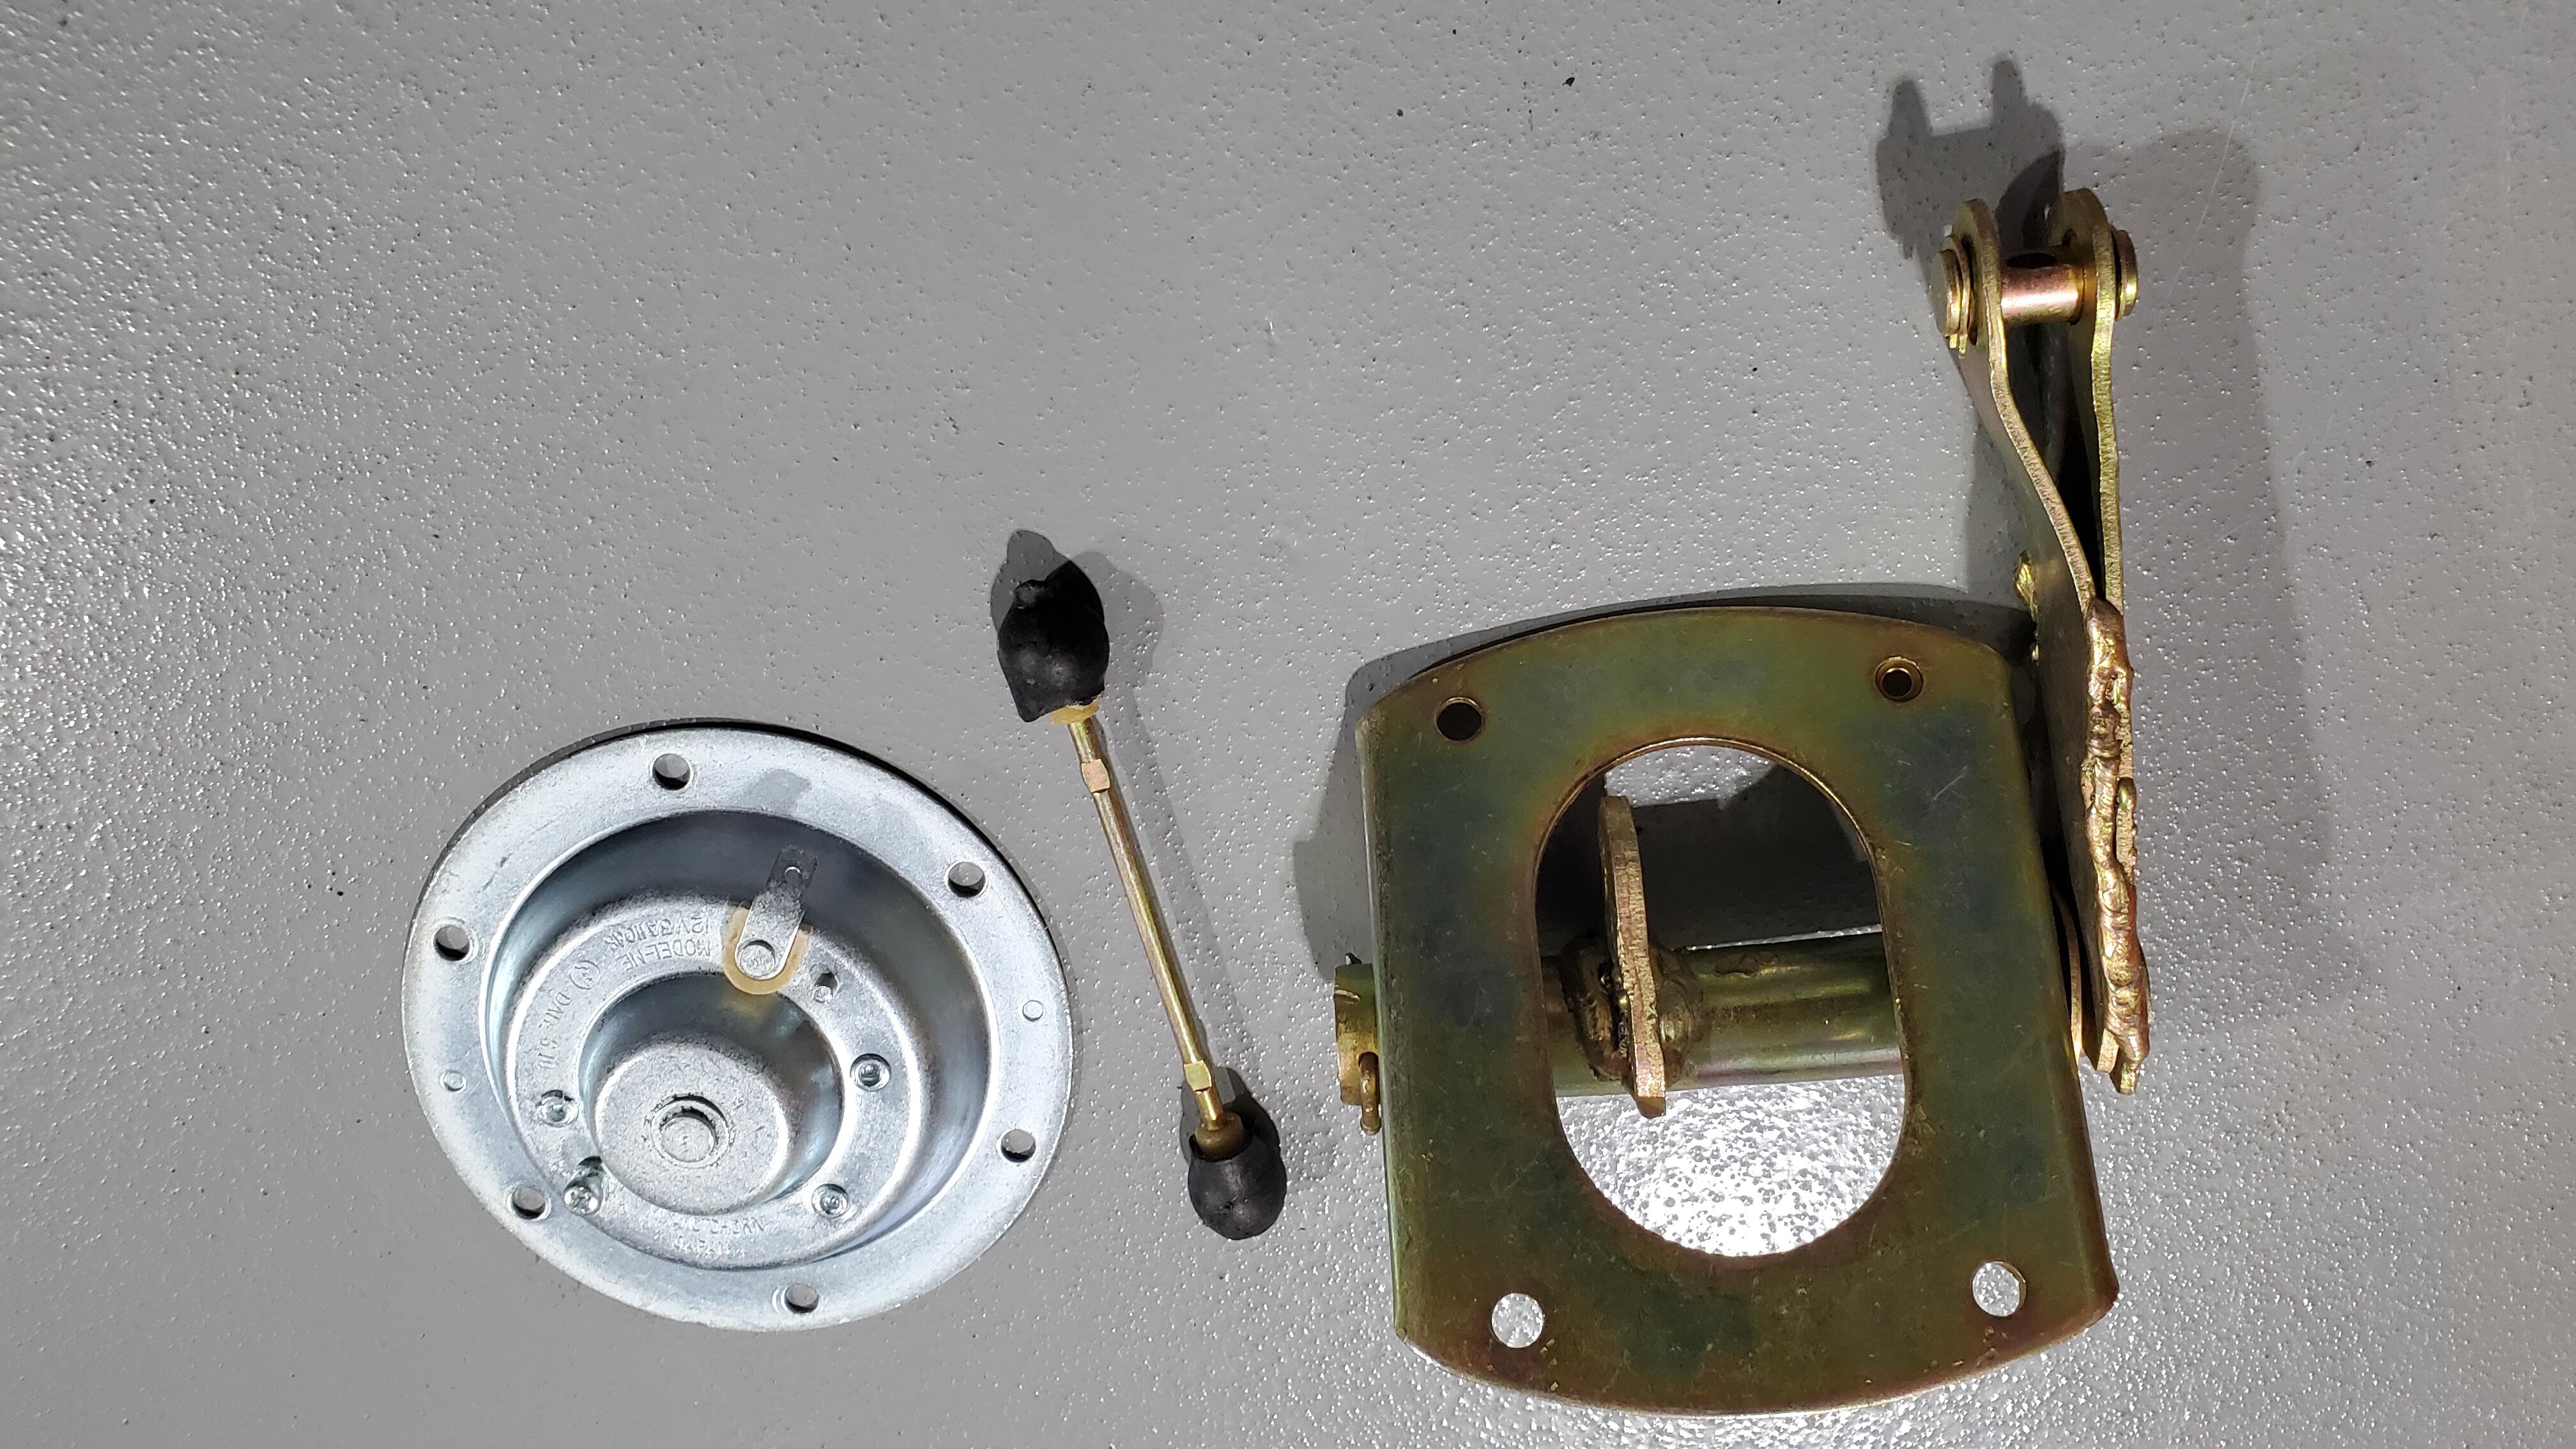
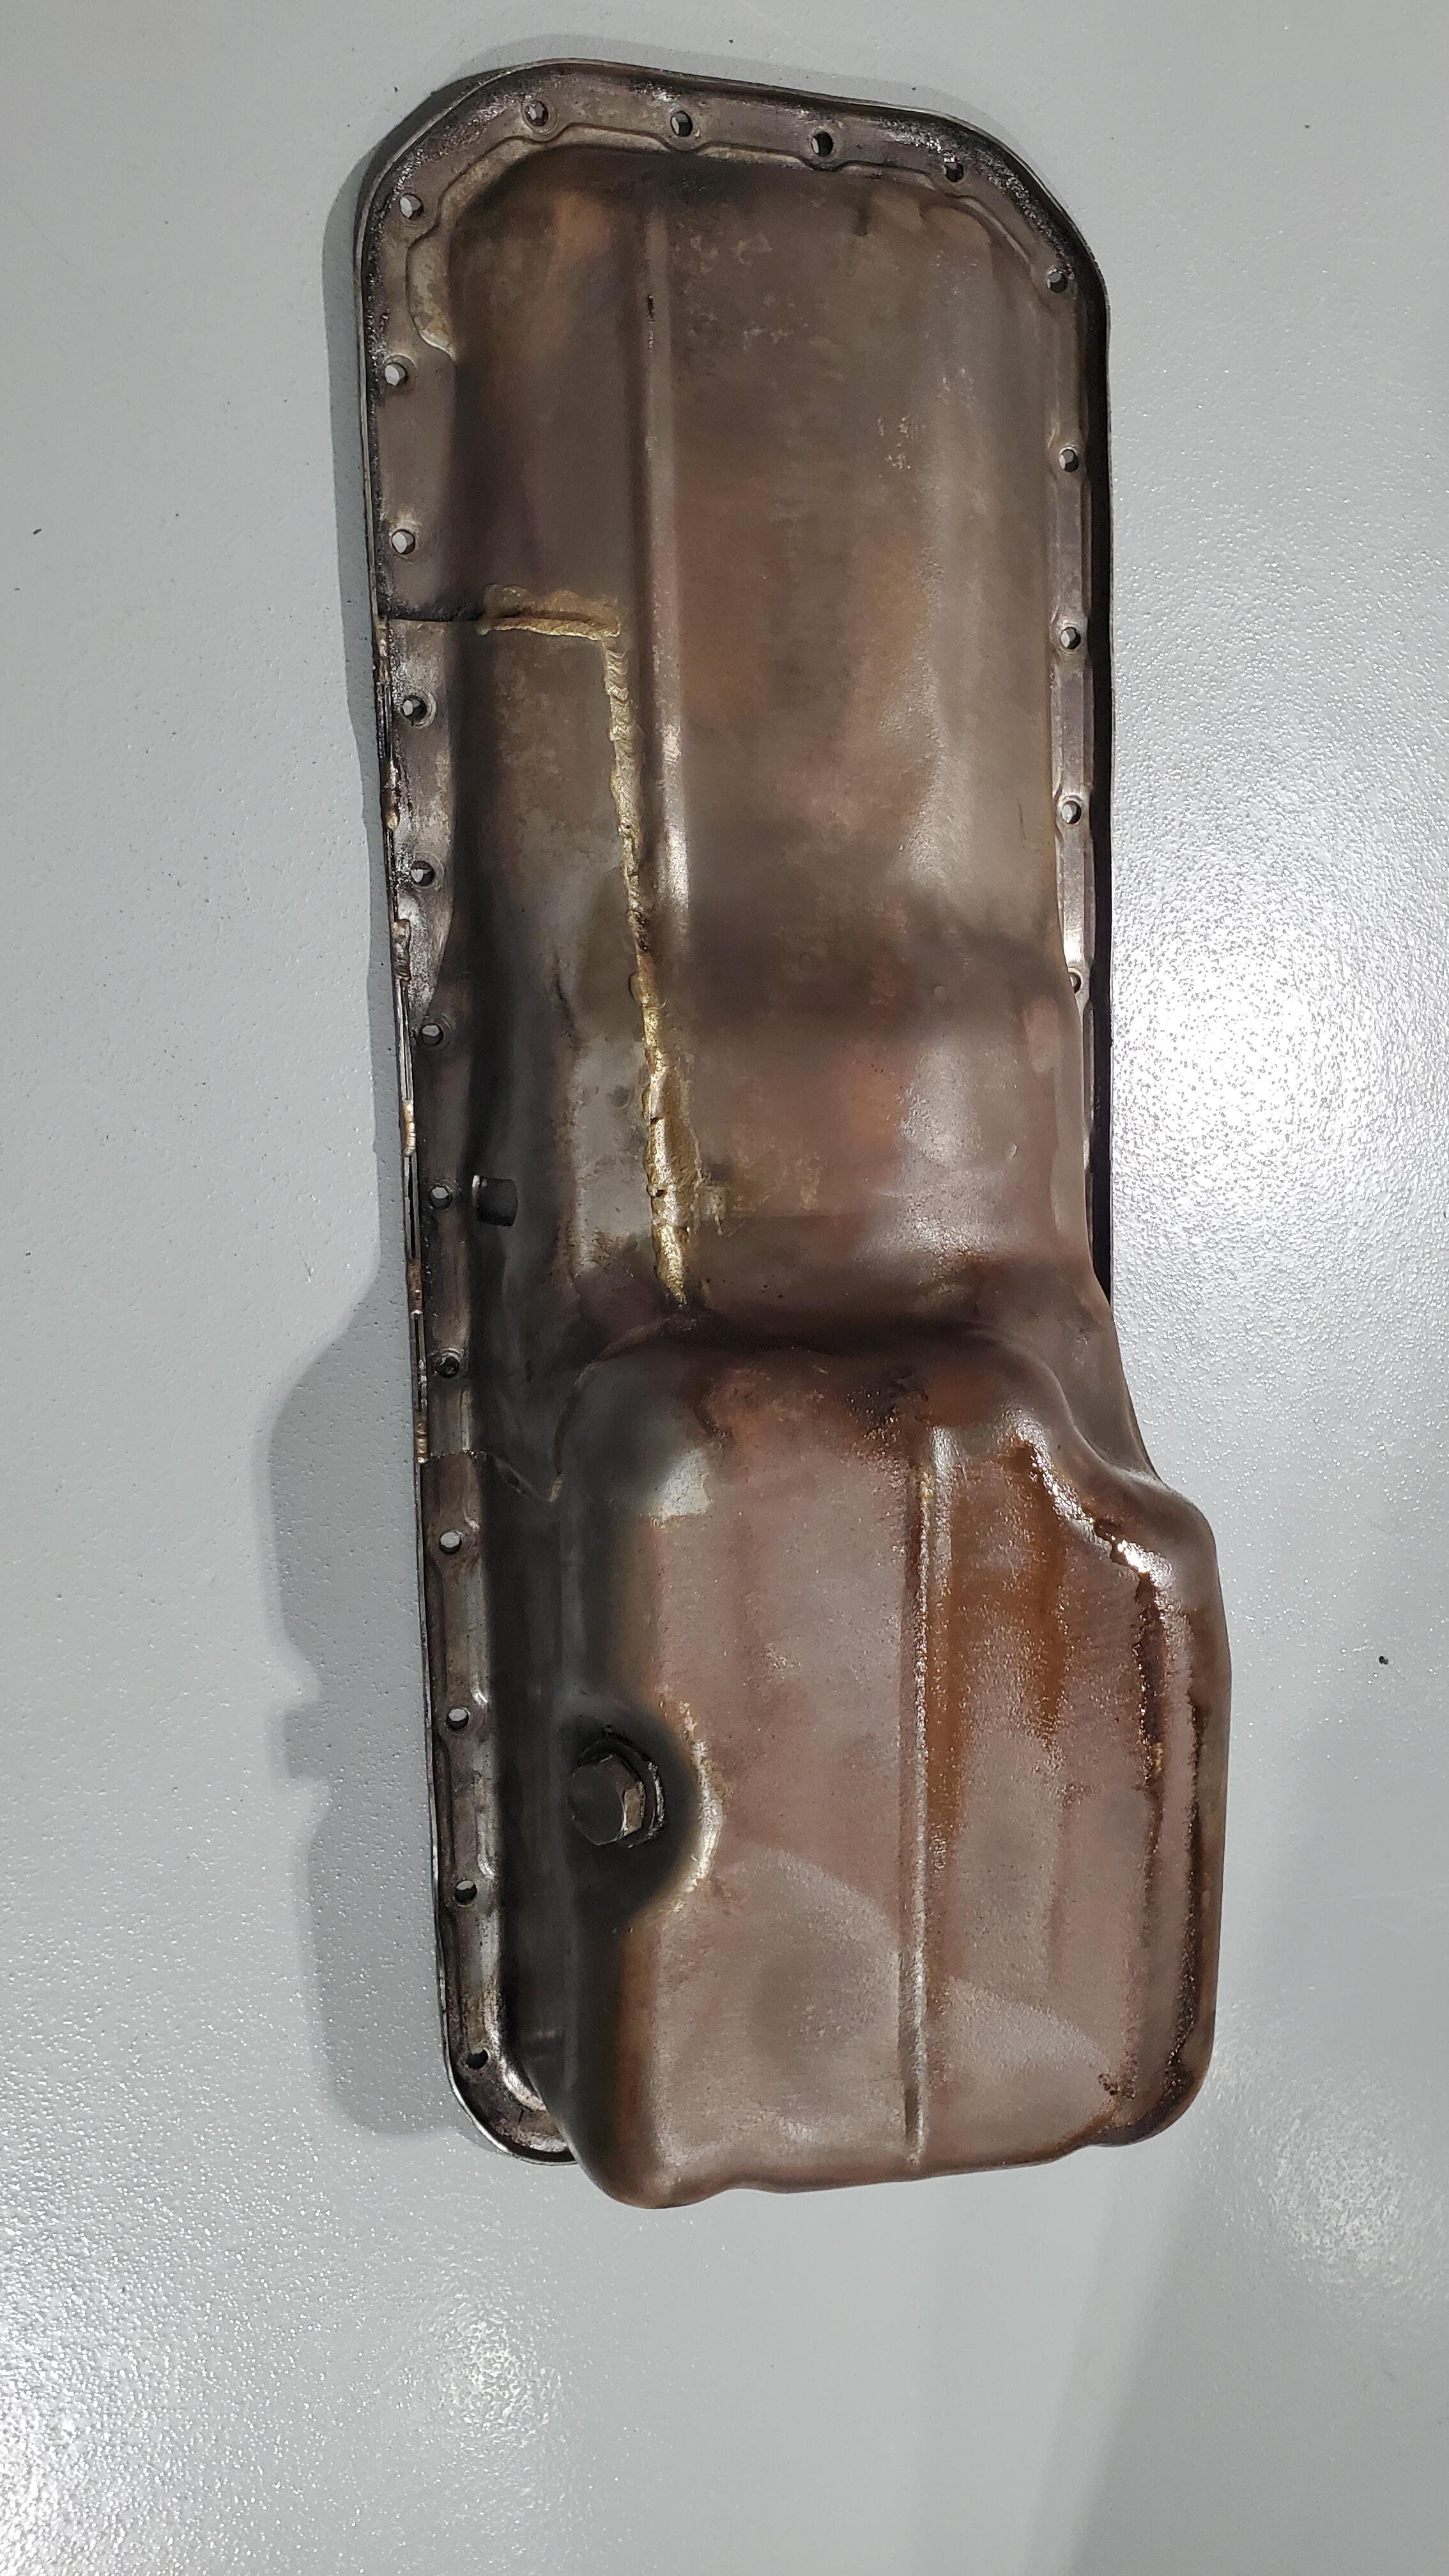
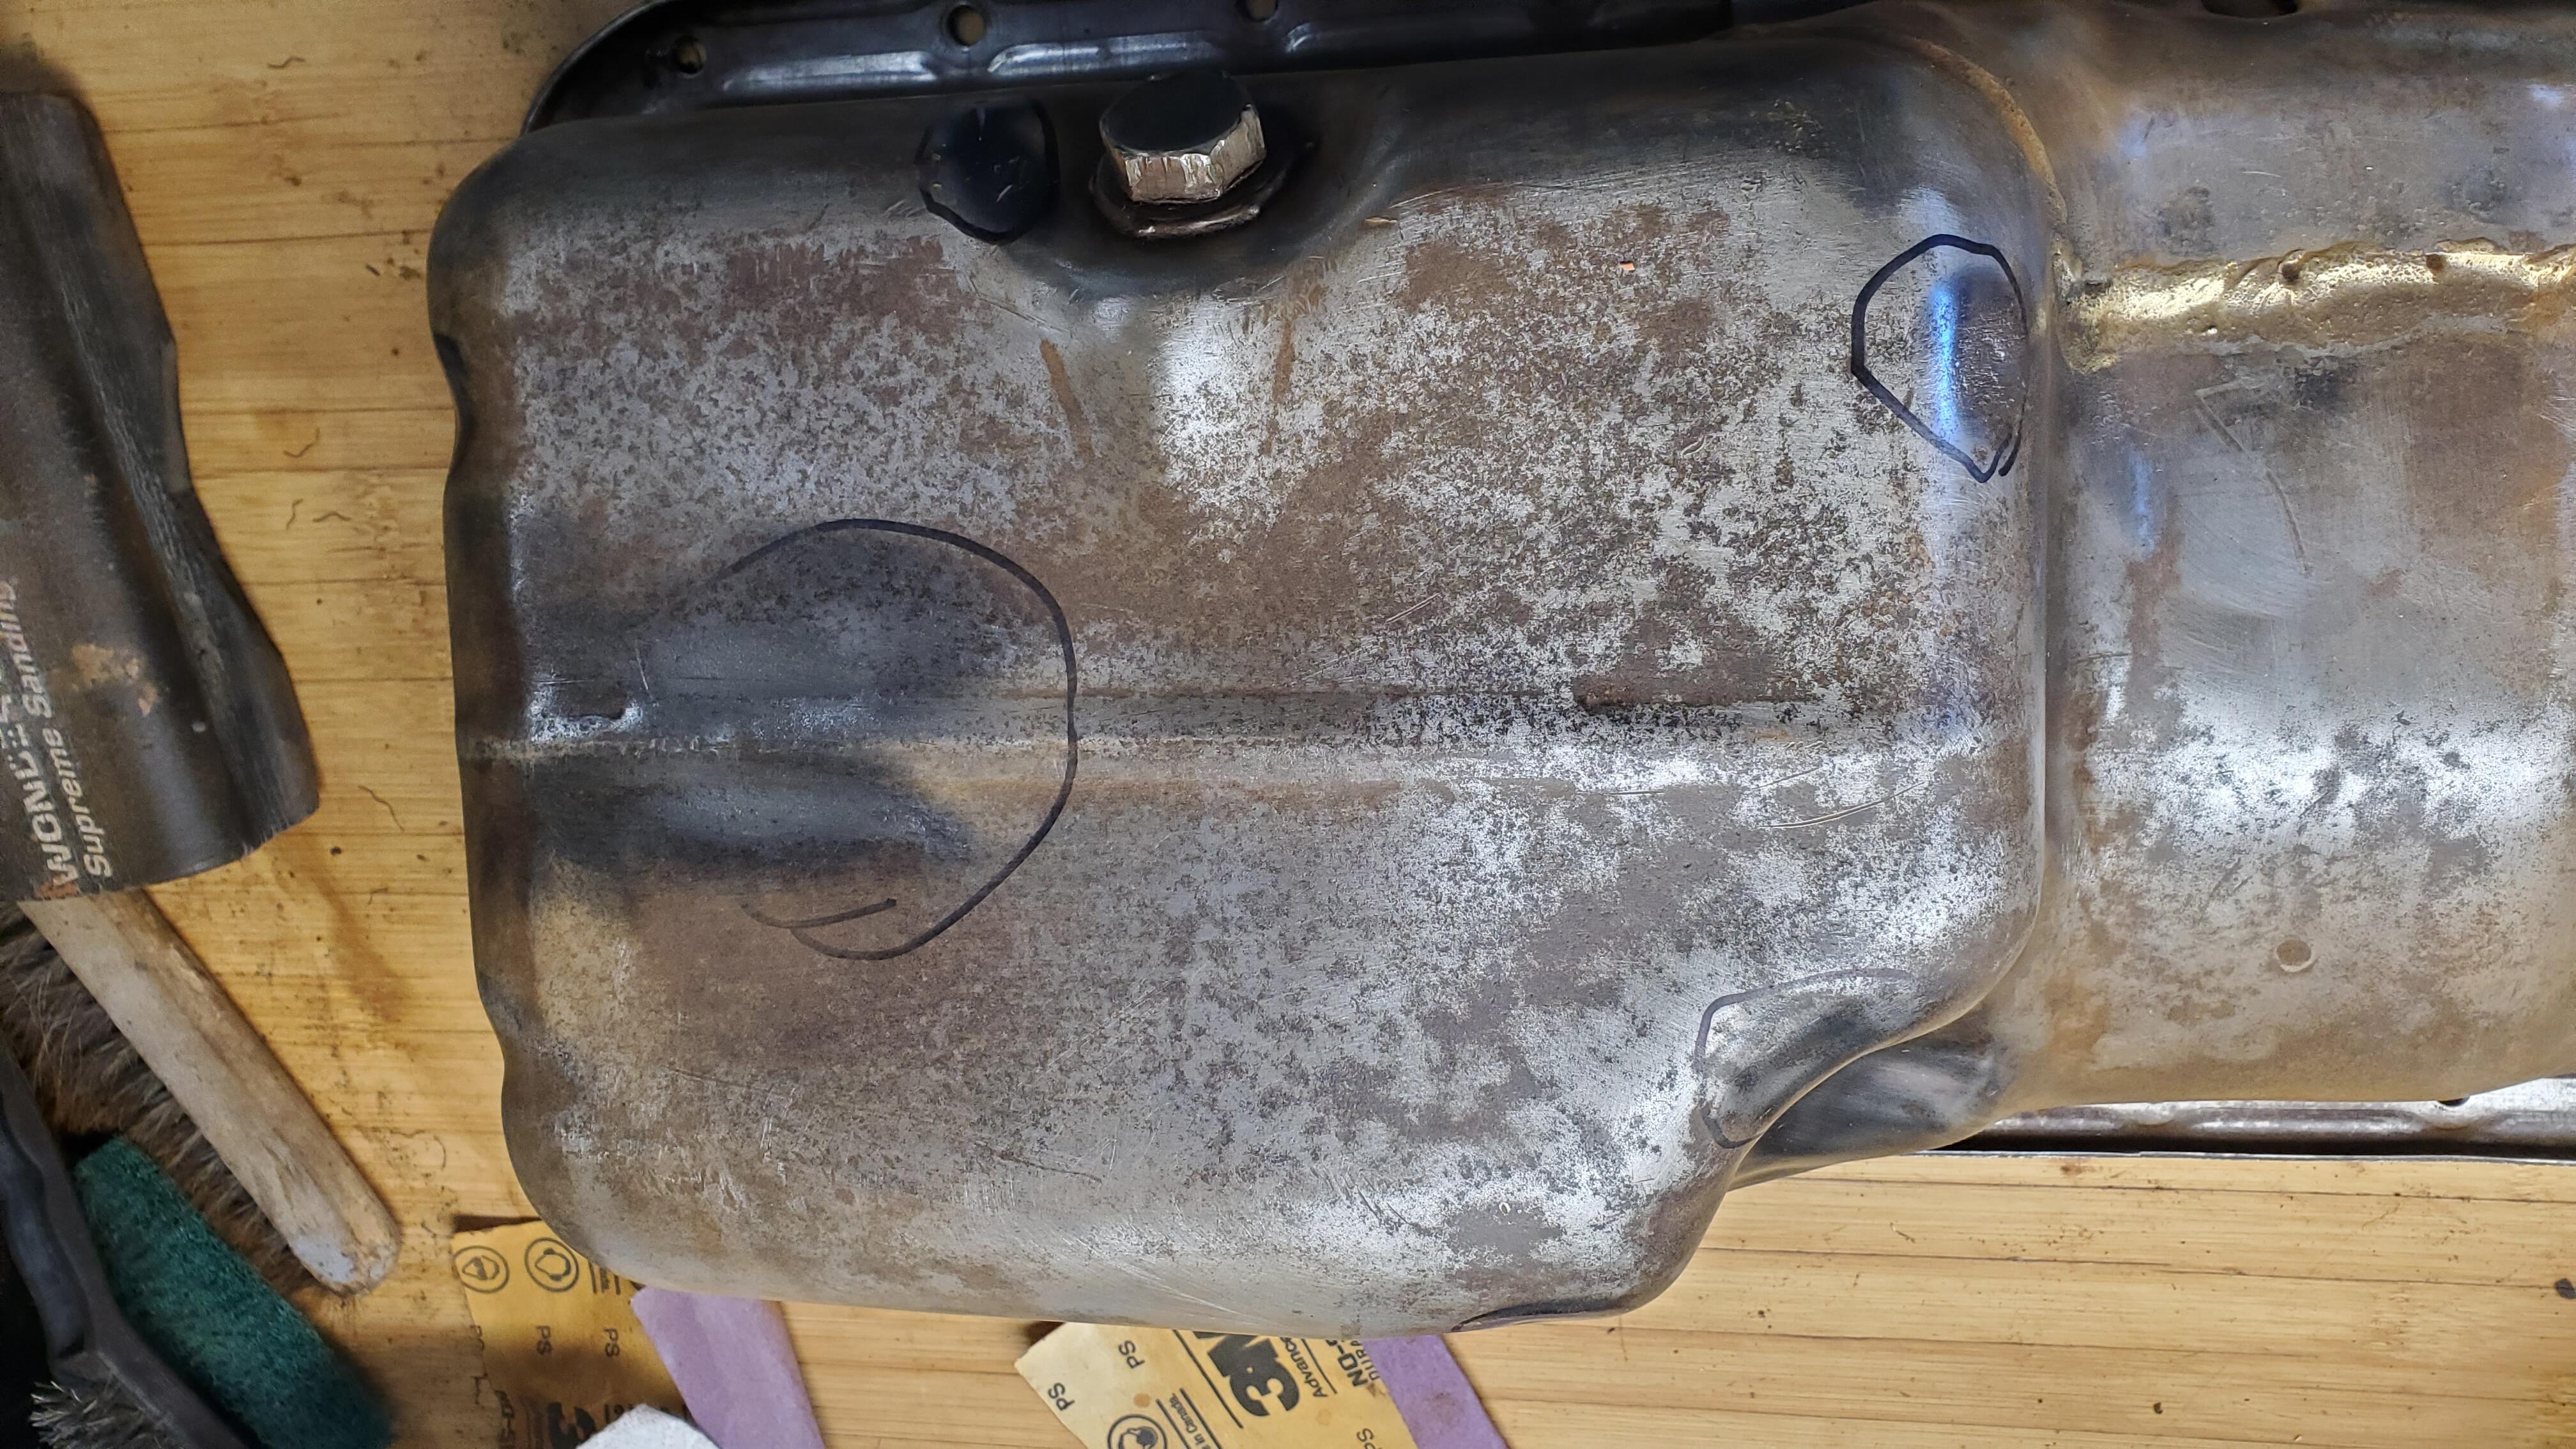
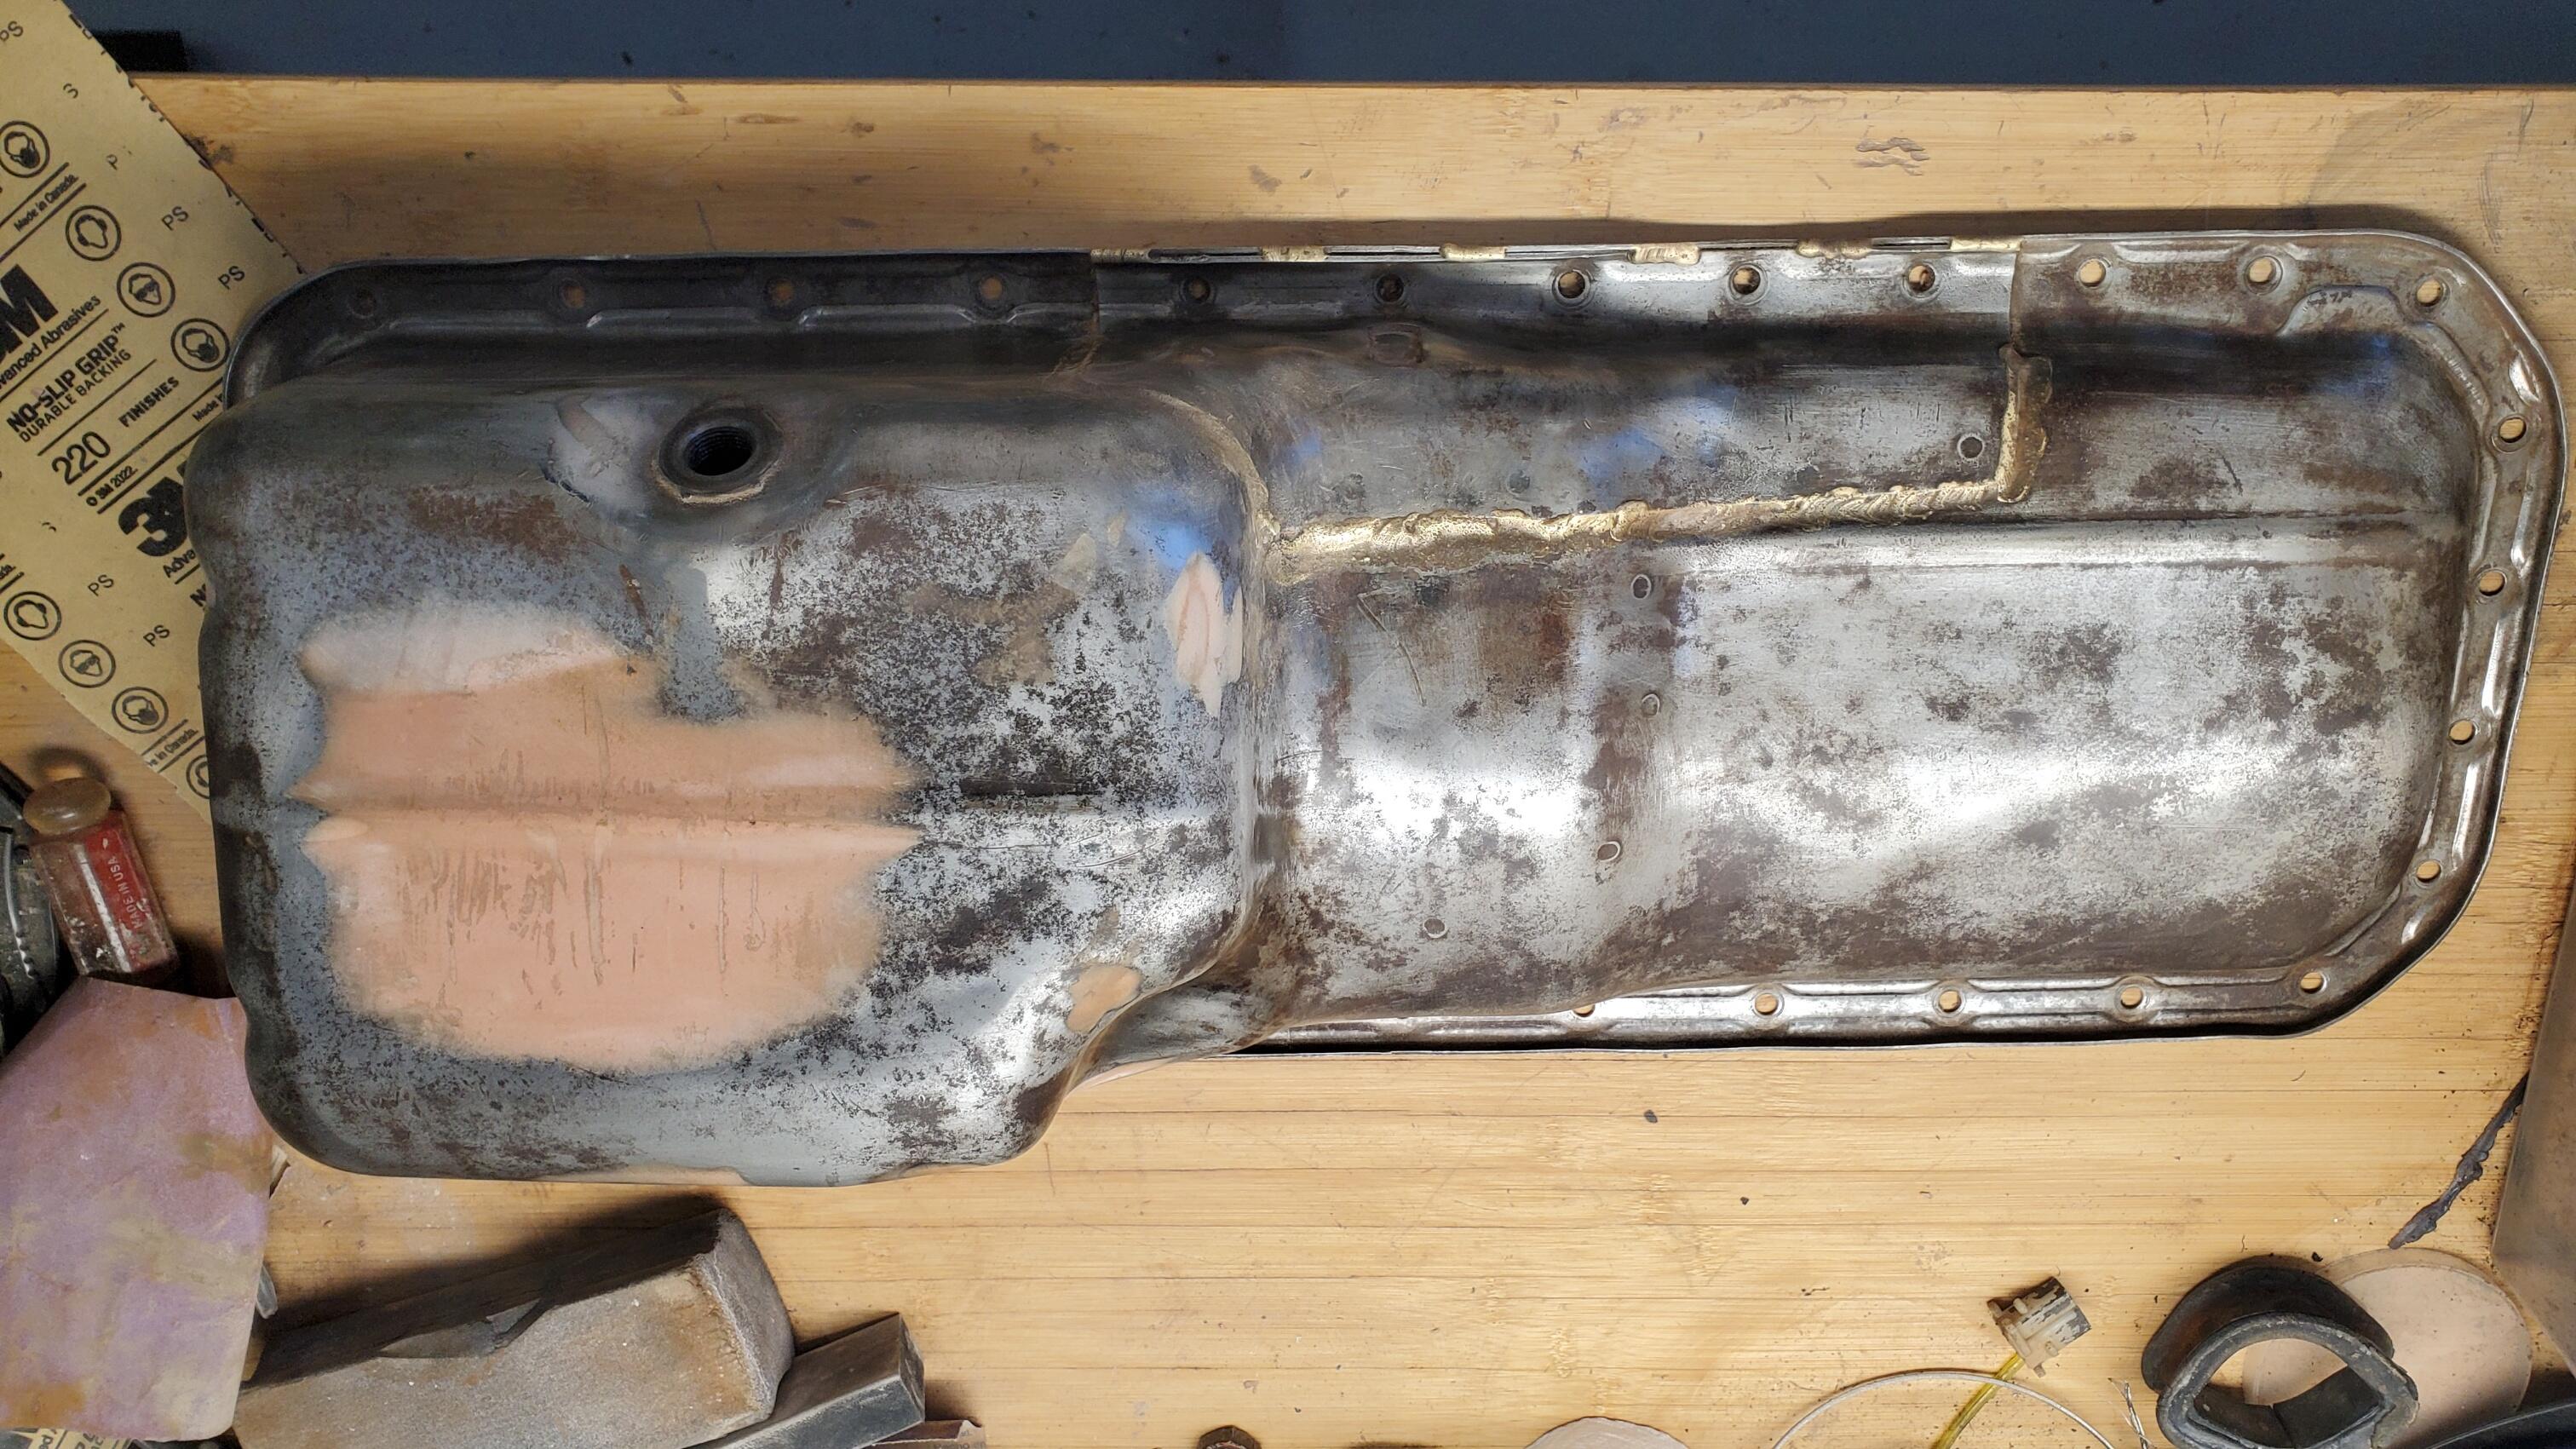
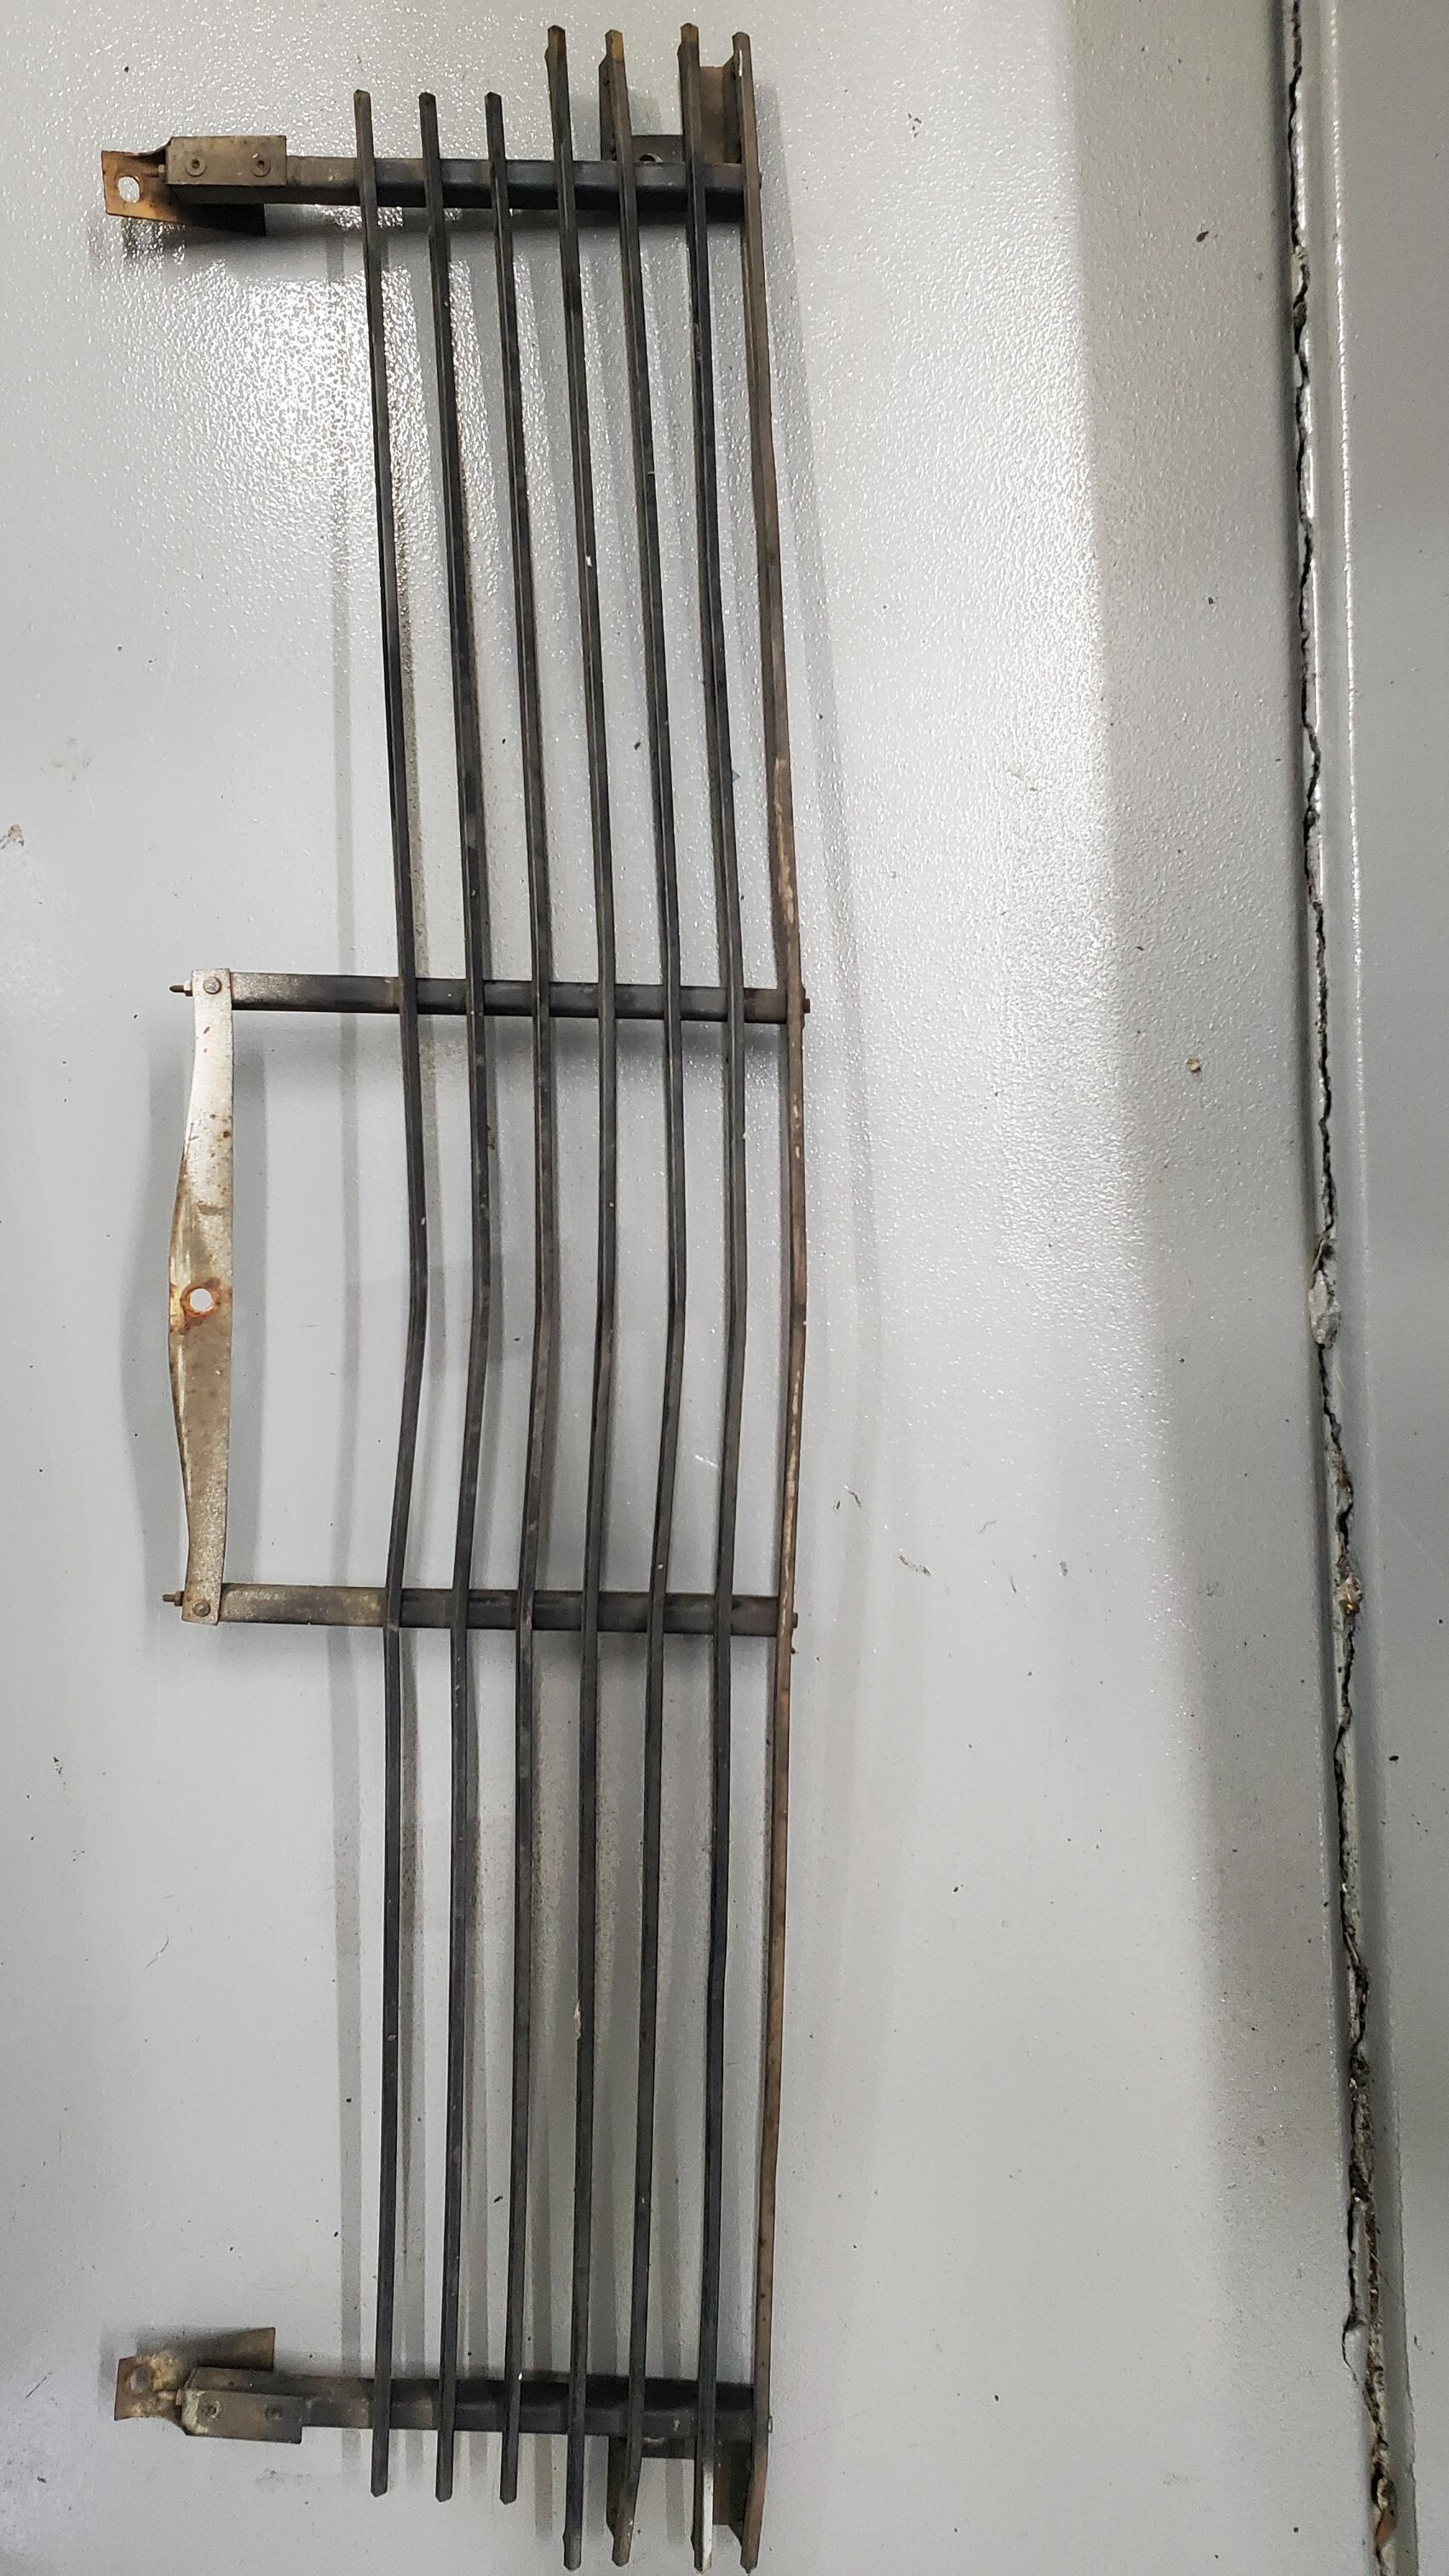
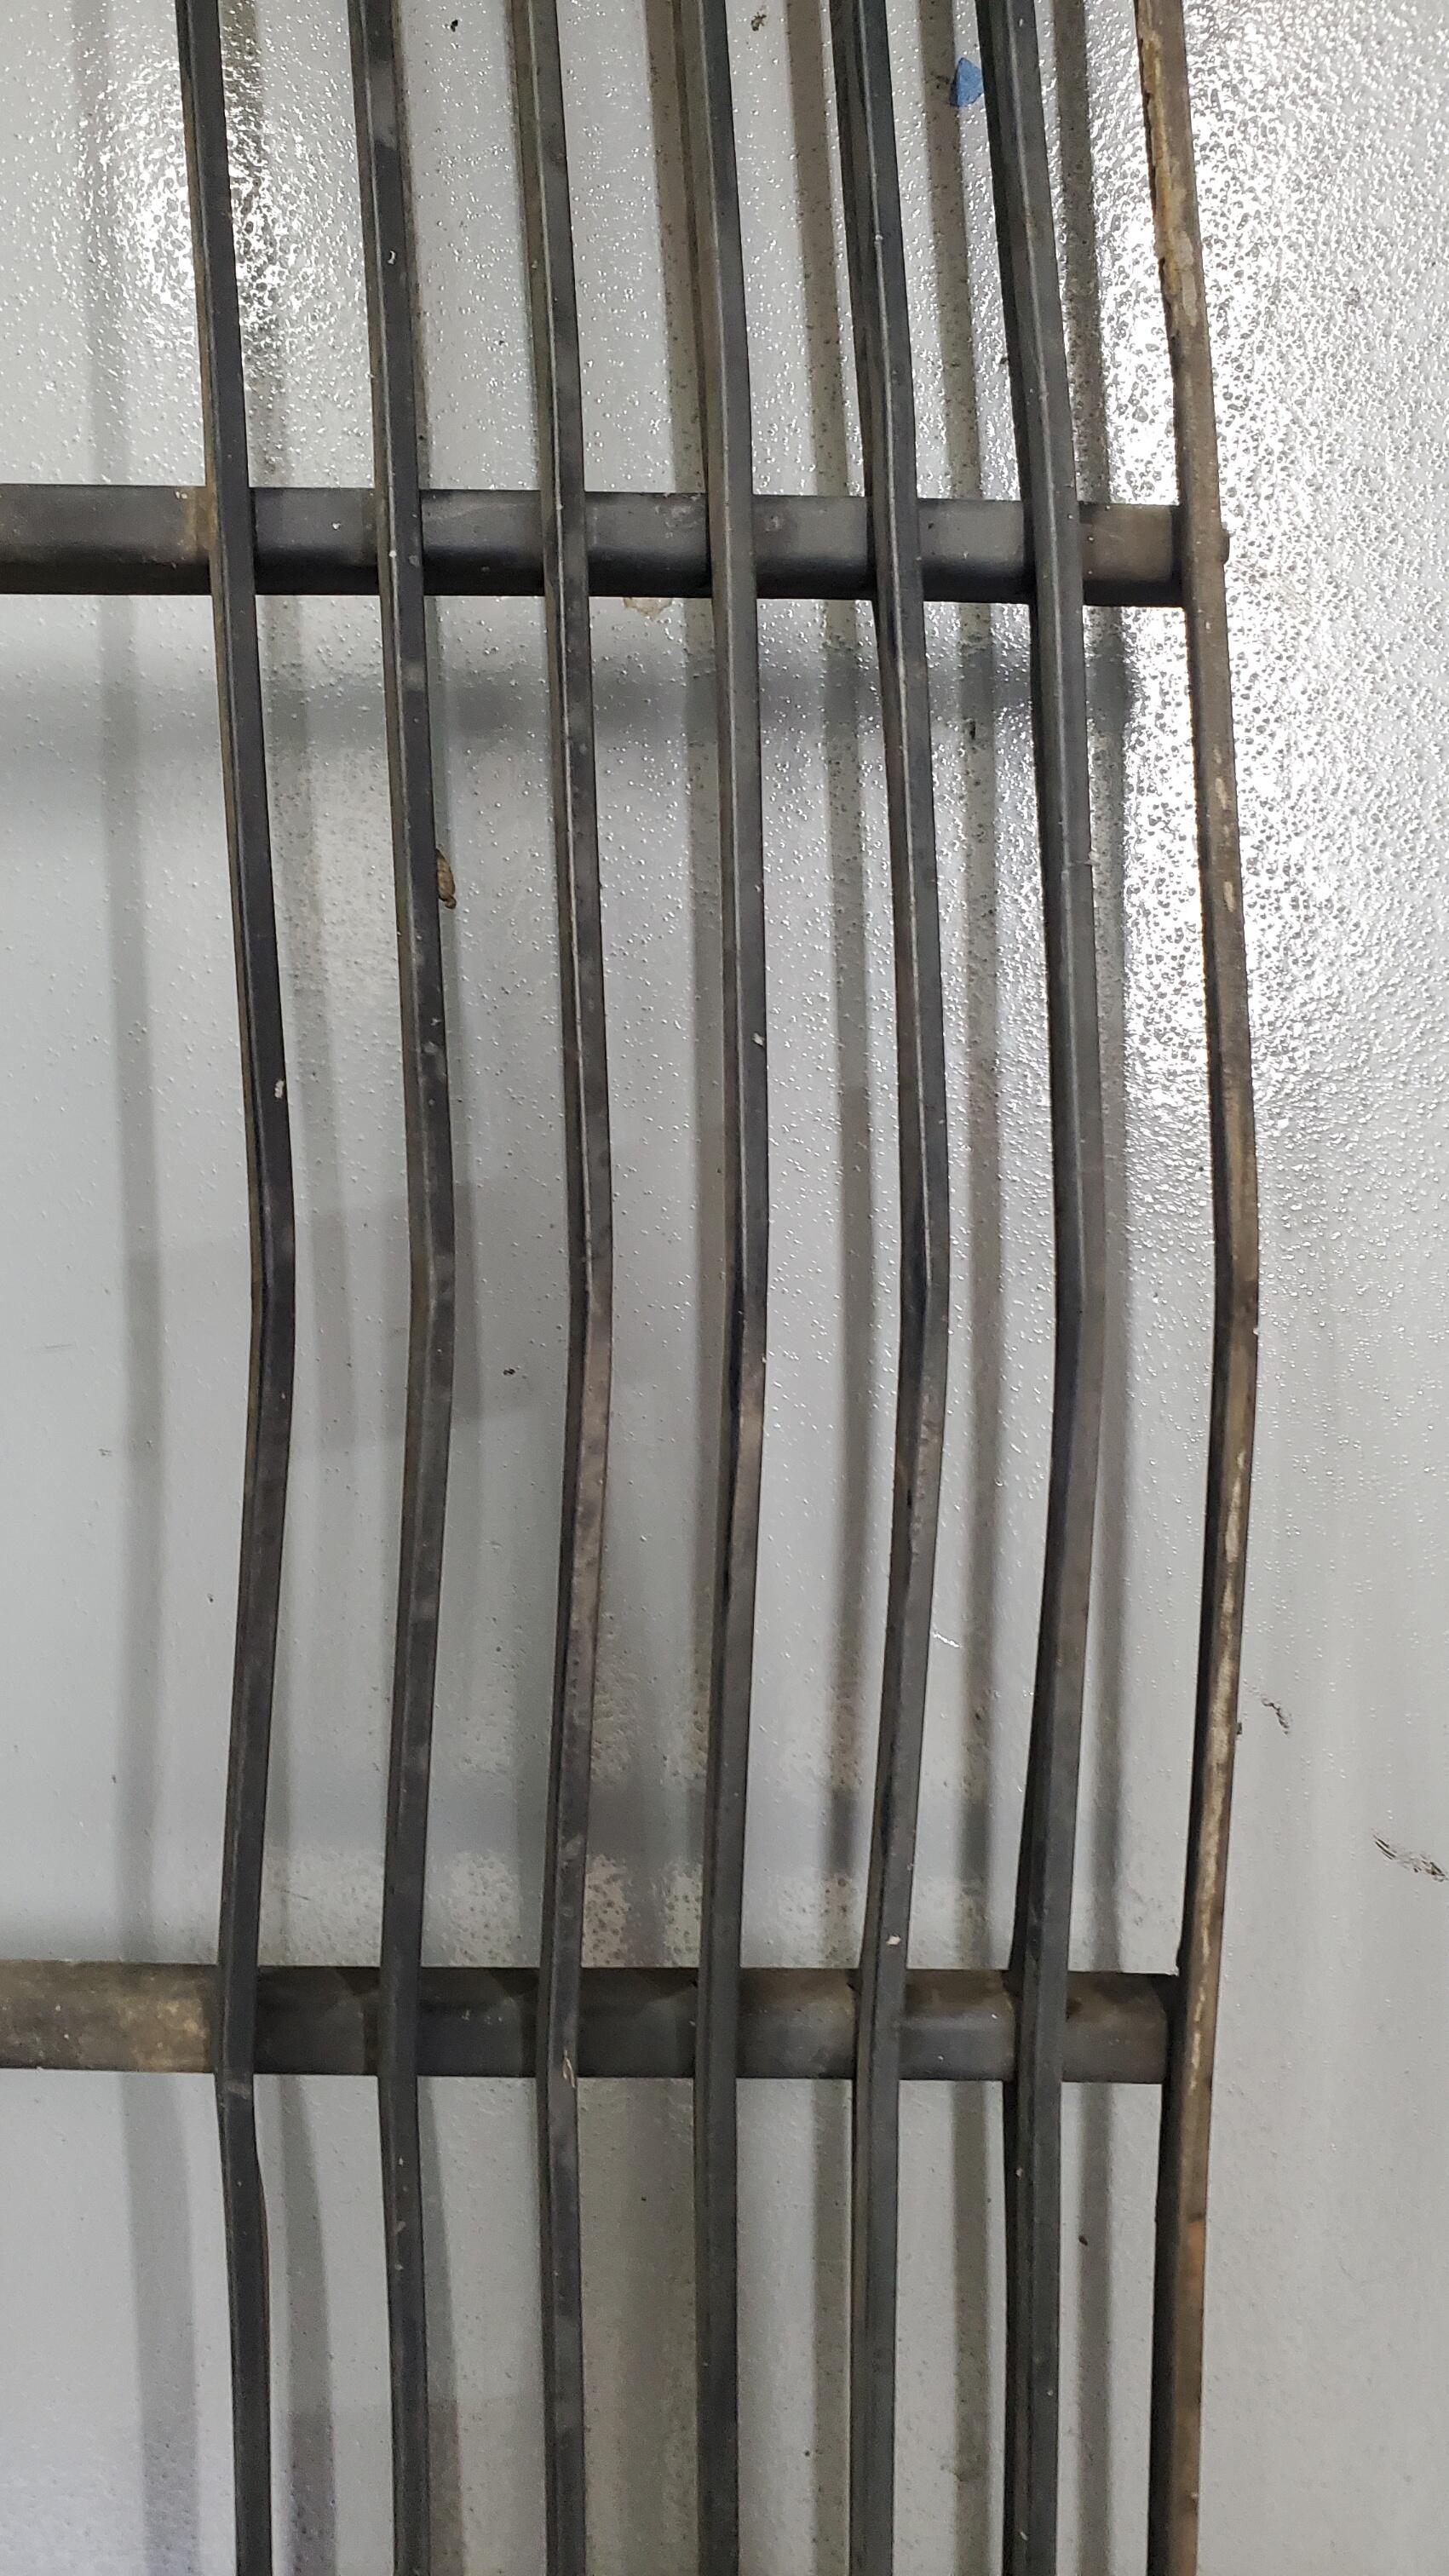
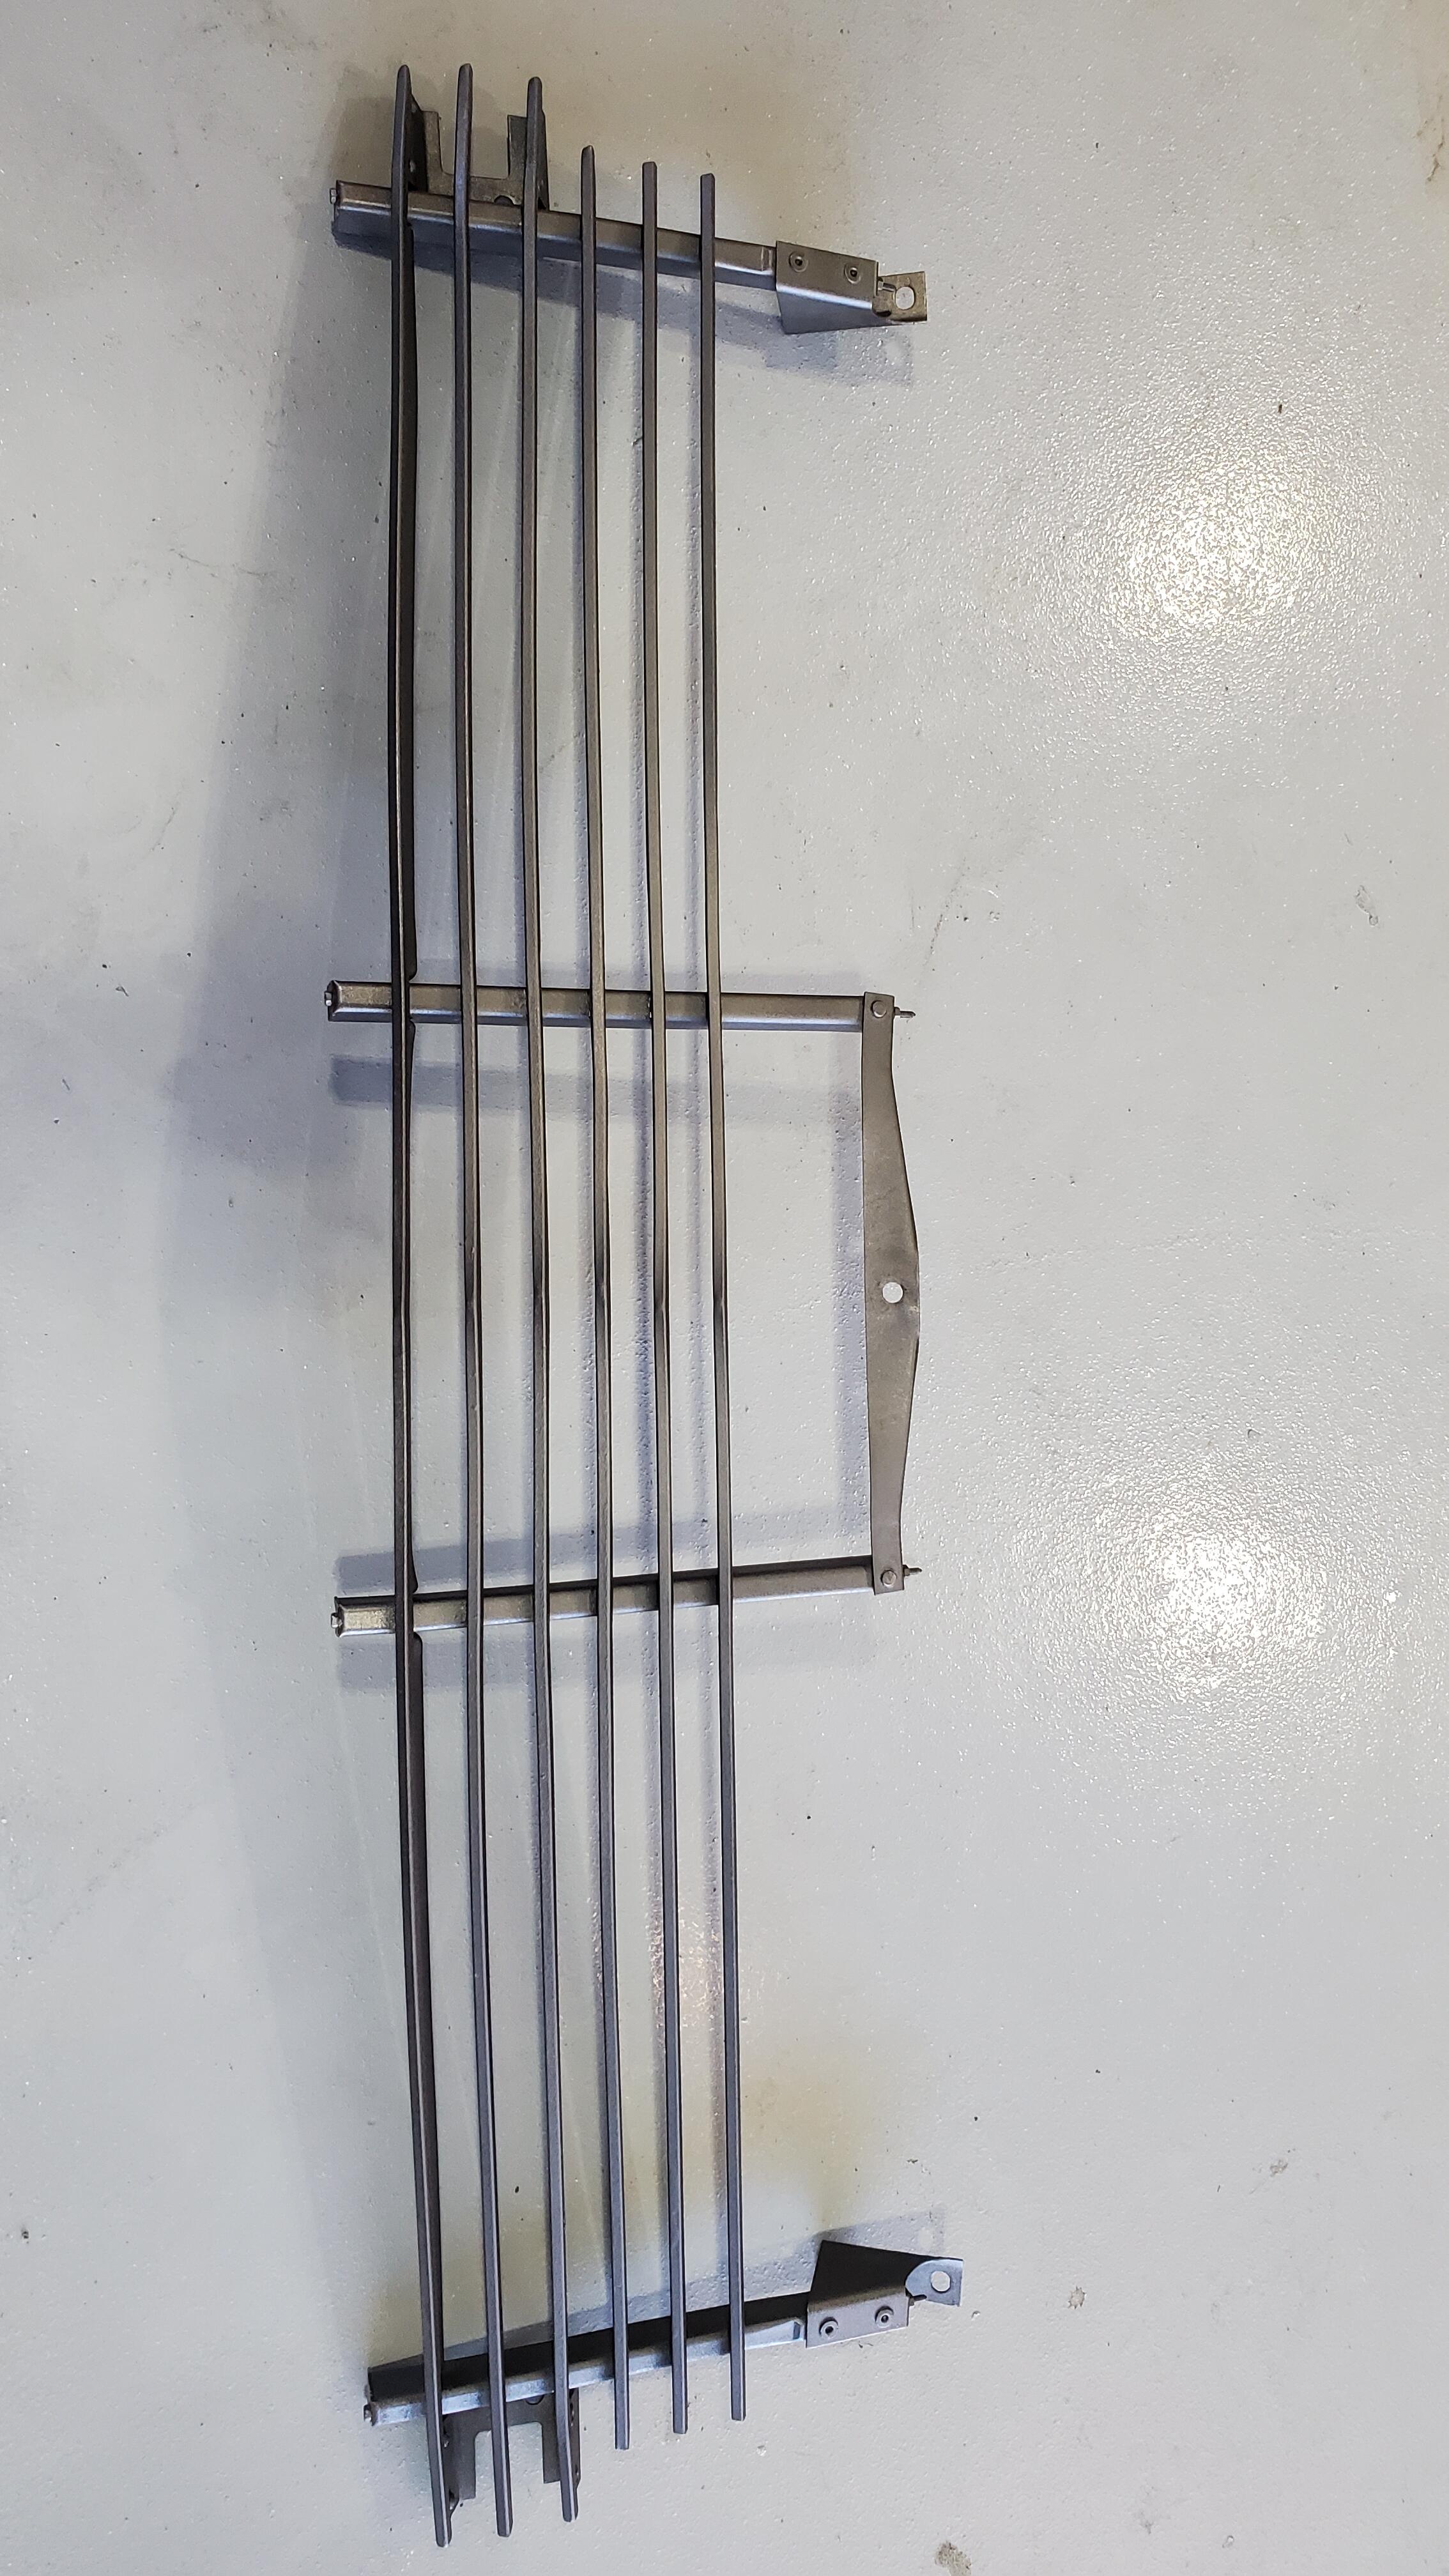
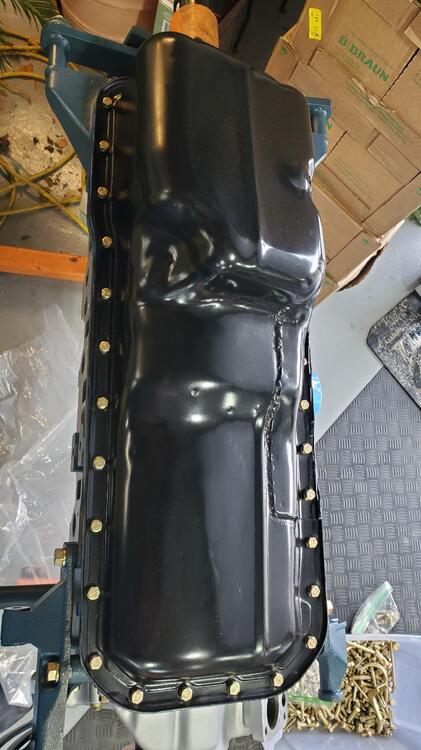
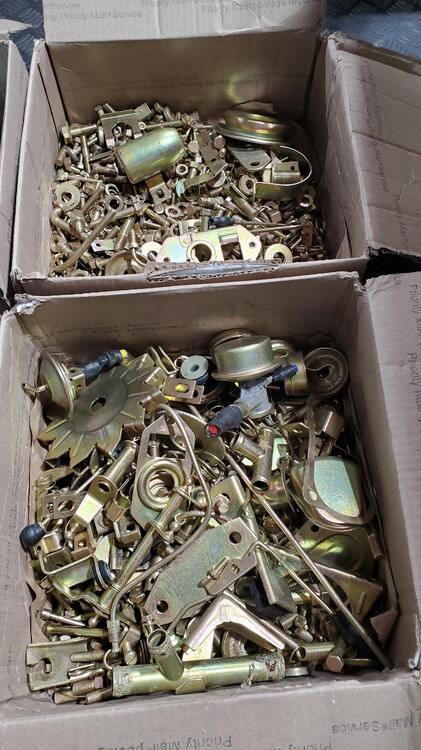
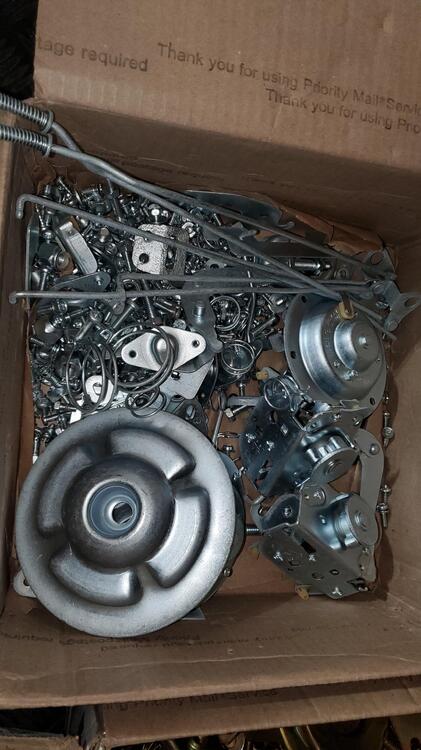
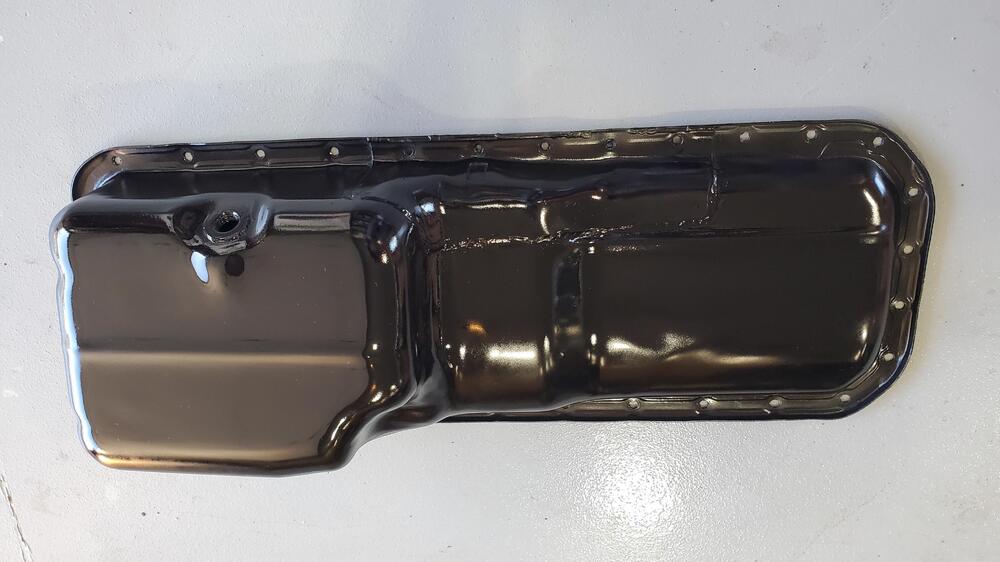
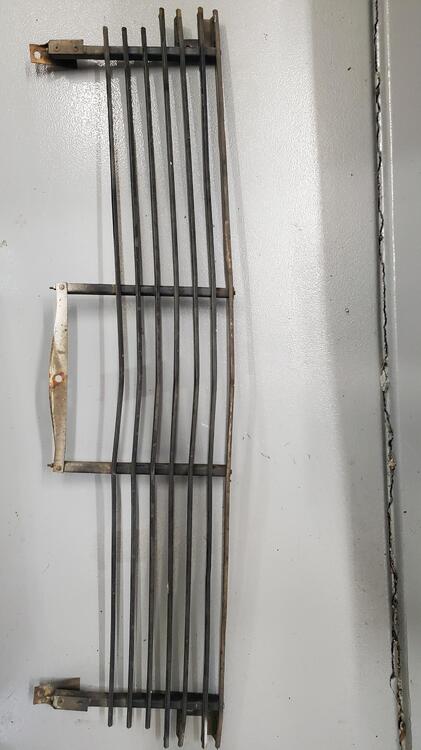
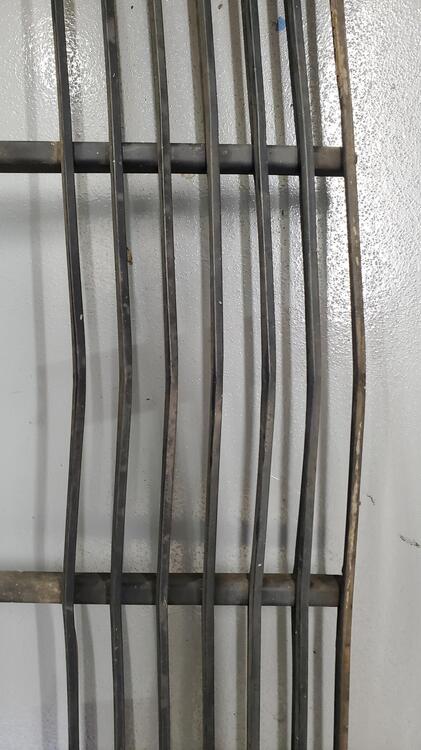
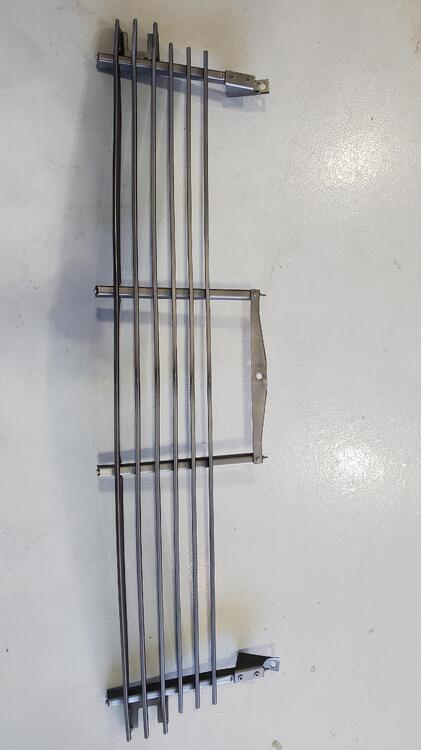
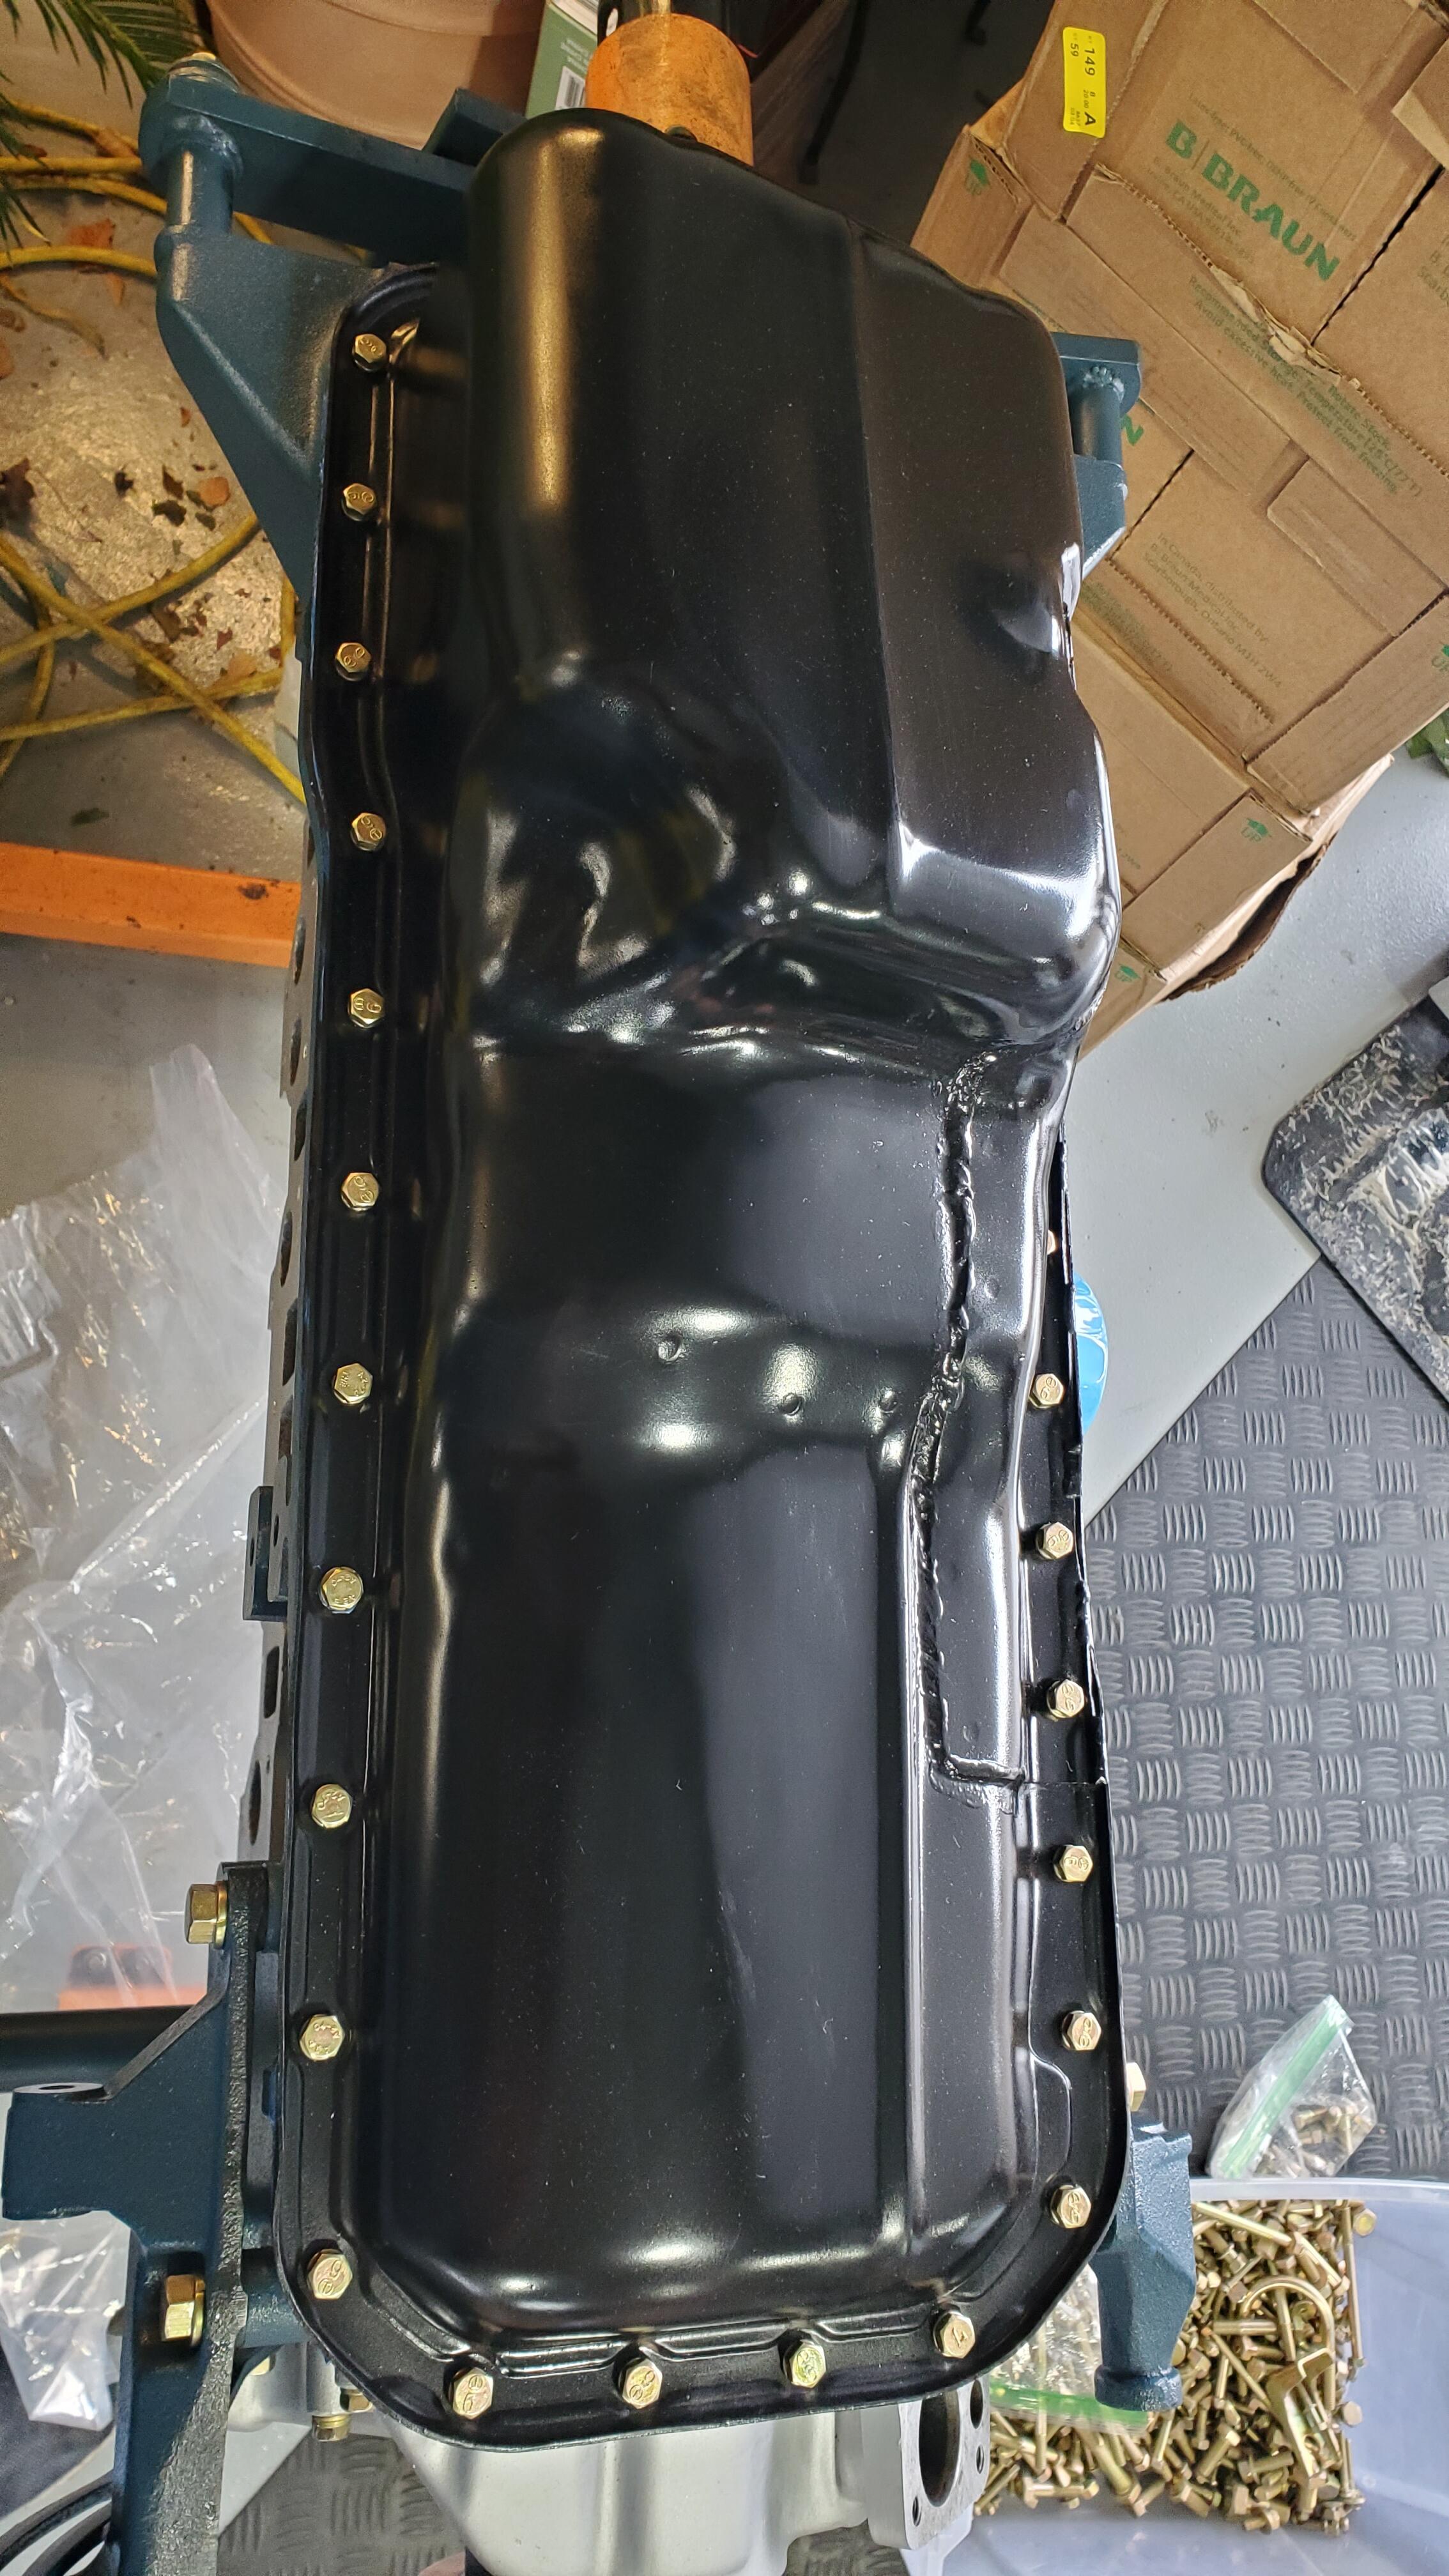
The Zinc parts came back from plating and look great. Pictures are below. Also shown are a couple examples of the shrink sleeve used to protect the plastic carb linkage ends and sealing of the cavities of the anti-backfire valve. The oil pan had a few dings in it so I used a little bondo to smooth those out prior to paint. Front grill was a little tweaked, to I disassembled that, straightened the pieces, then re-assembled and painted.


-
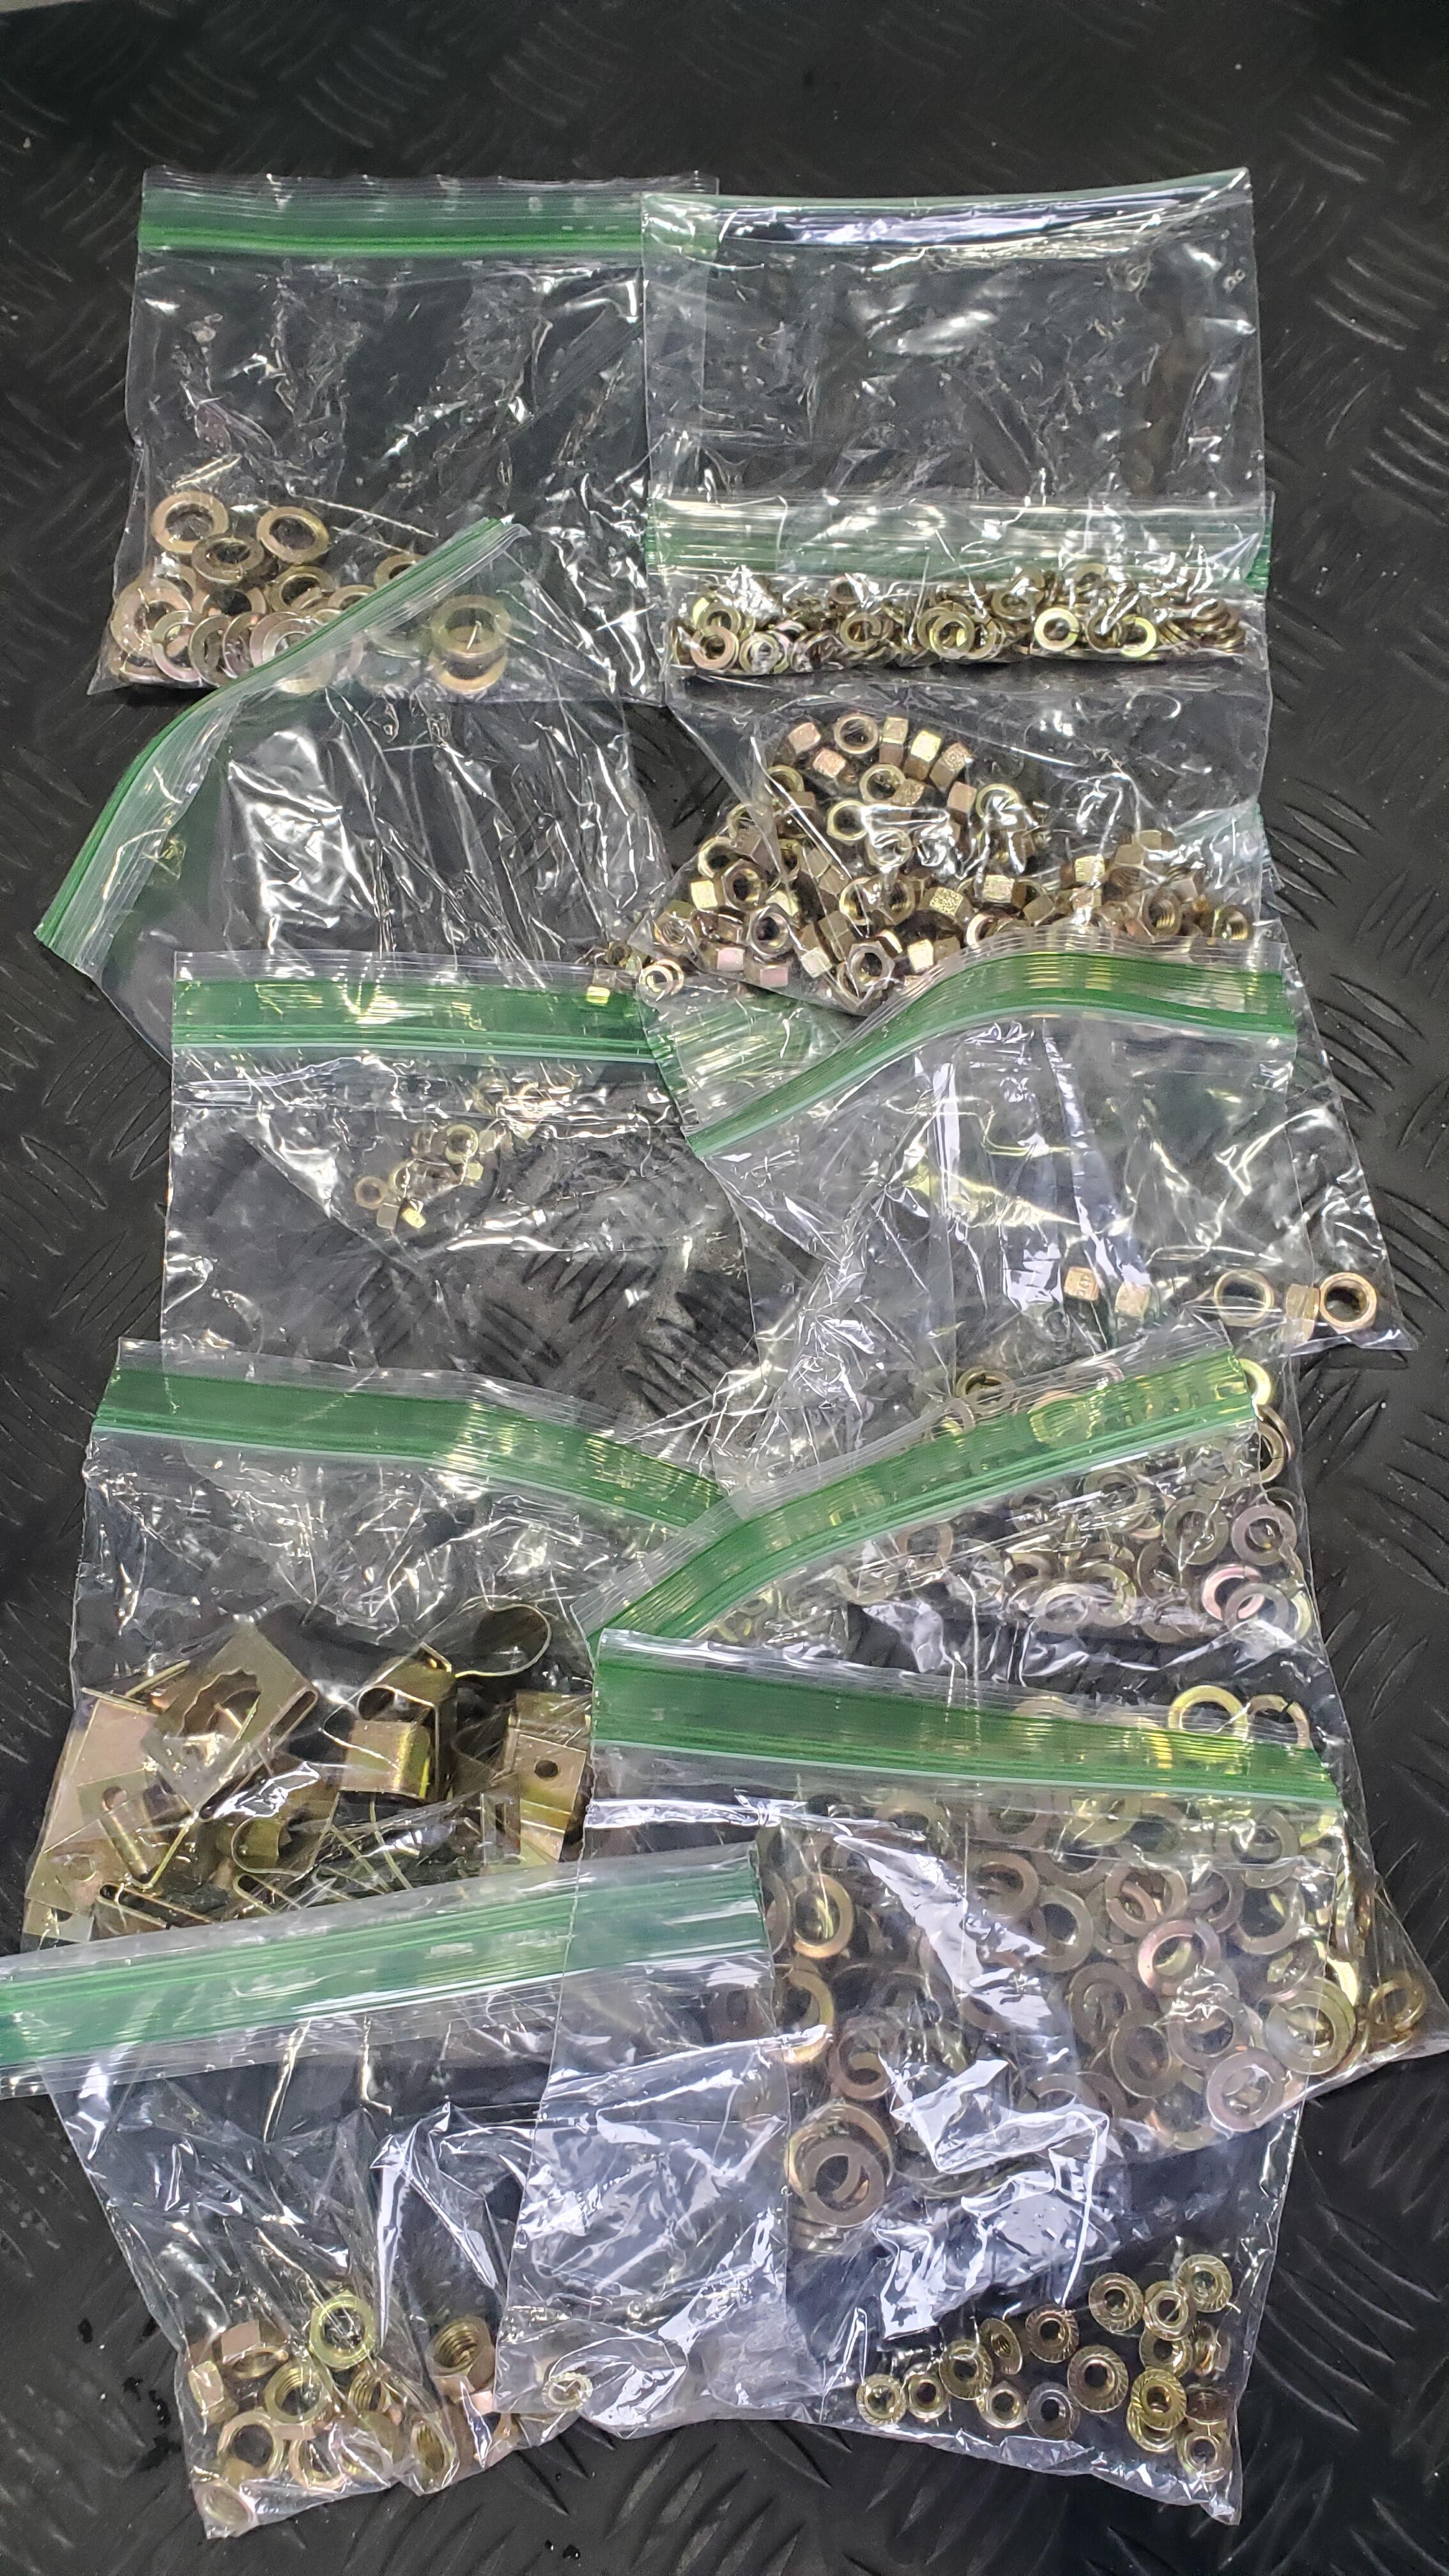
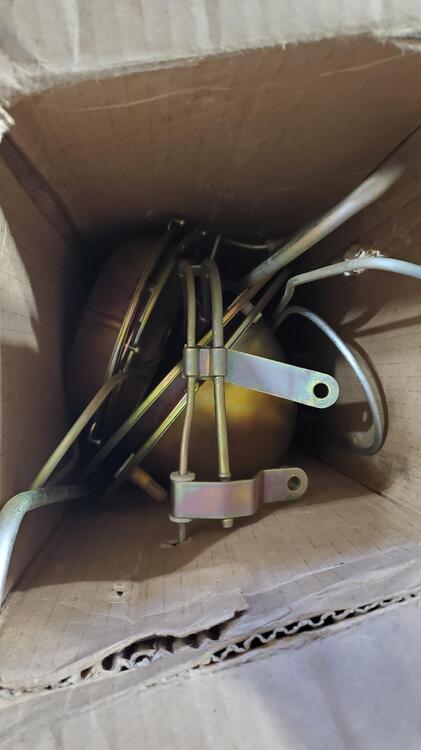
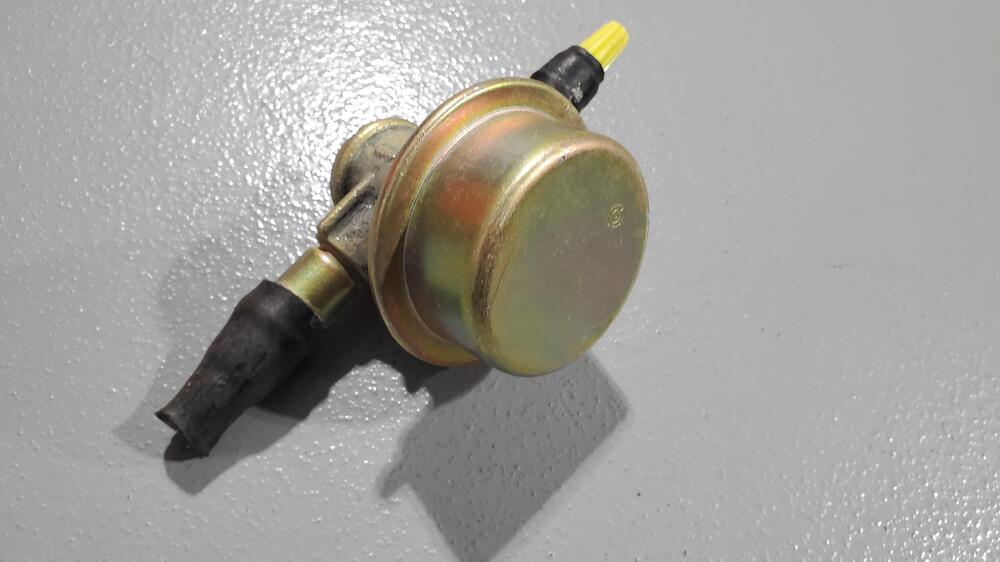
No, I just put everything in a zip lock bag as I know the boxes will get beat up in shipping. Also, I do not overpack the bags, but everything fits comfortably, bags are cheap. I also add a little packing material around the bags. Can't say that I have had any parts lost. Even the small lock washers do fine and are returned nicely plated. Only issue I ever had was a few leaky parts that dripped onto the batch and stained some of the plating on return shipping. (Smog check valve and distributor vacuum chamber are examples of parts that need to be plugged)
-
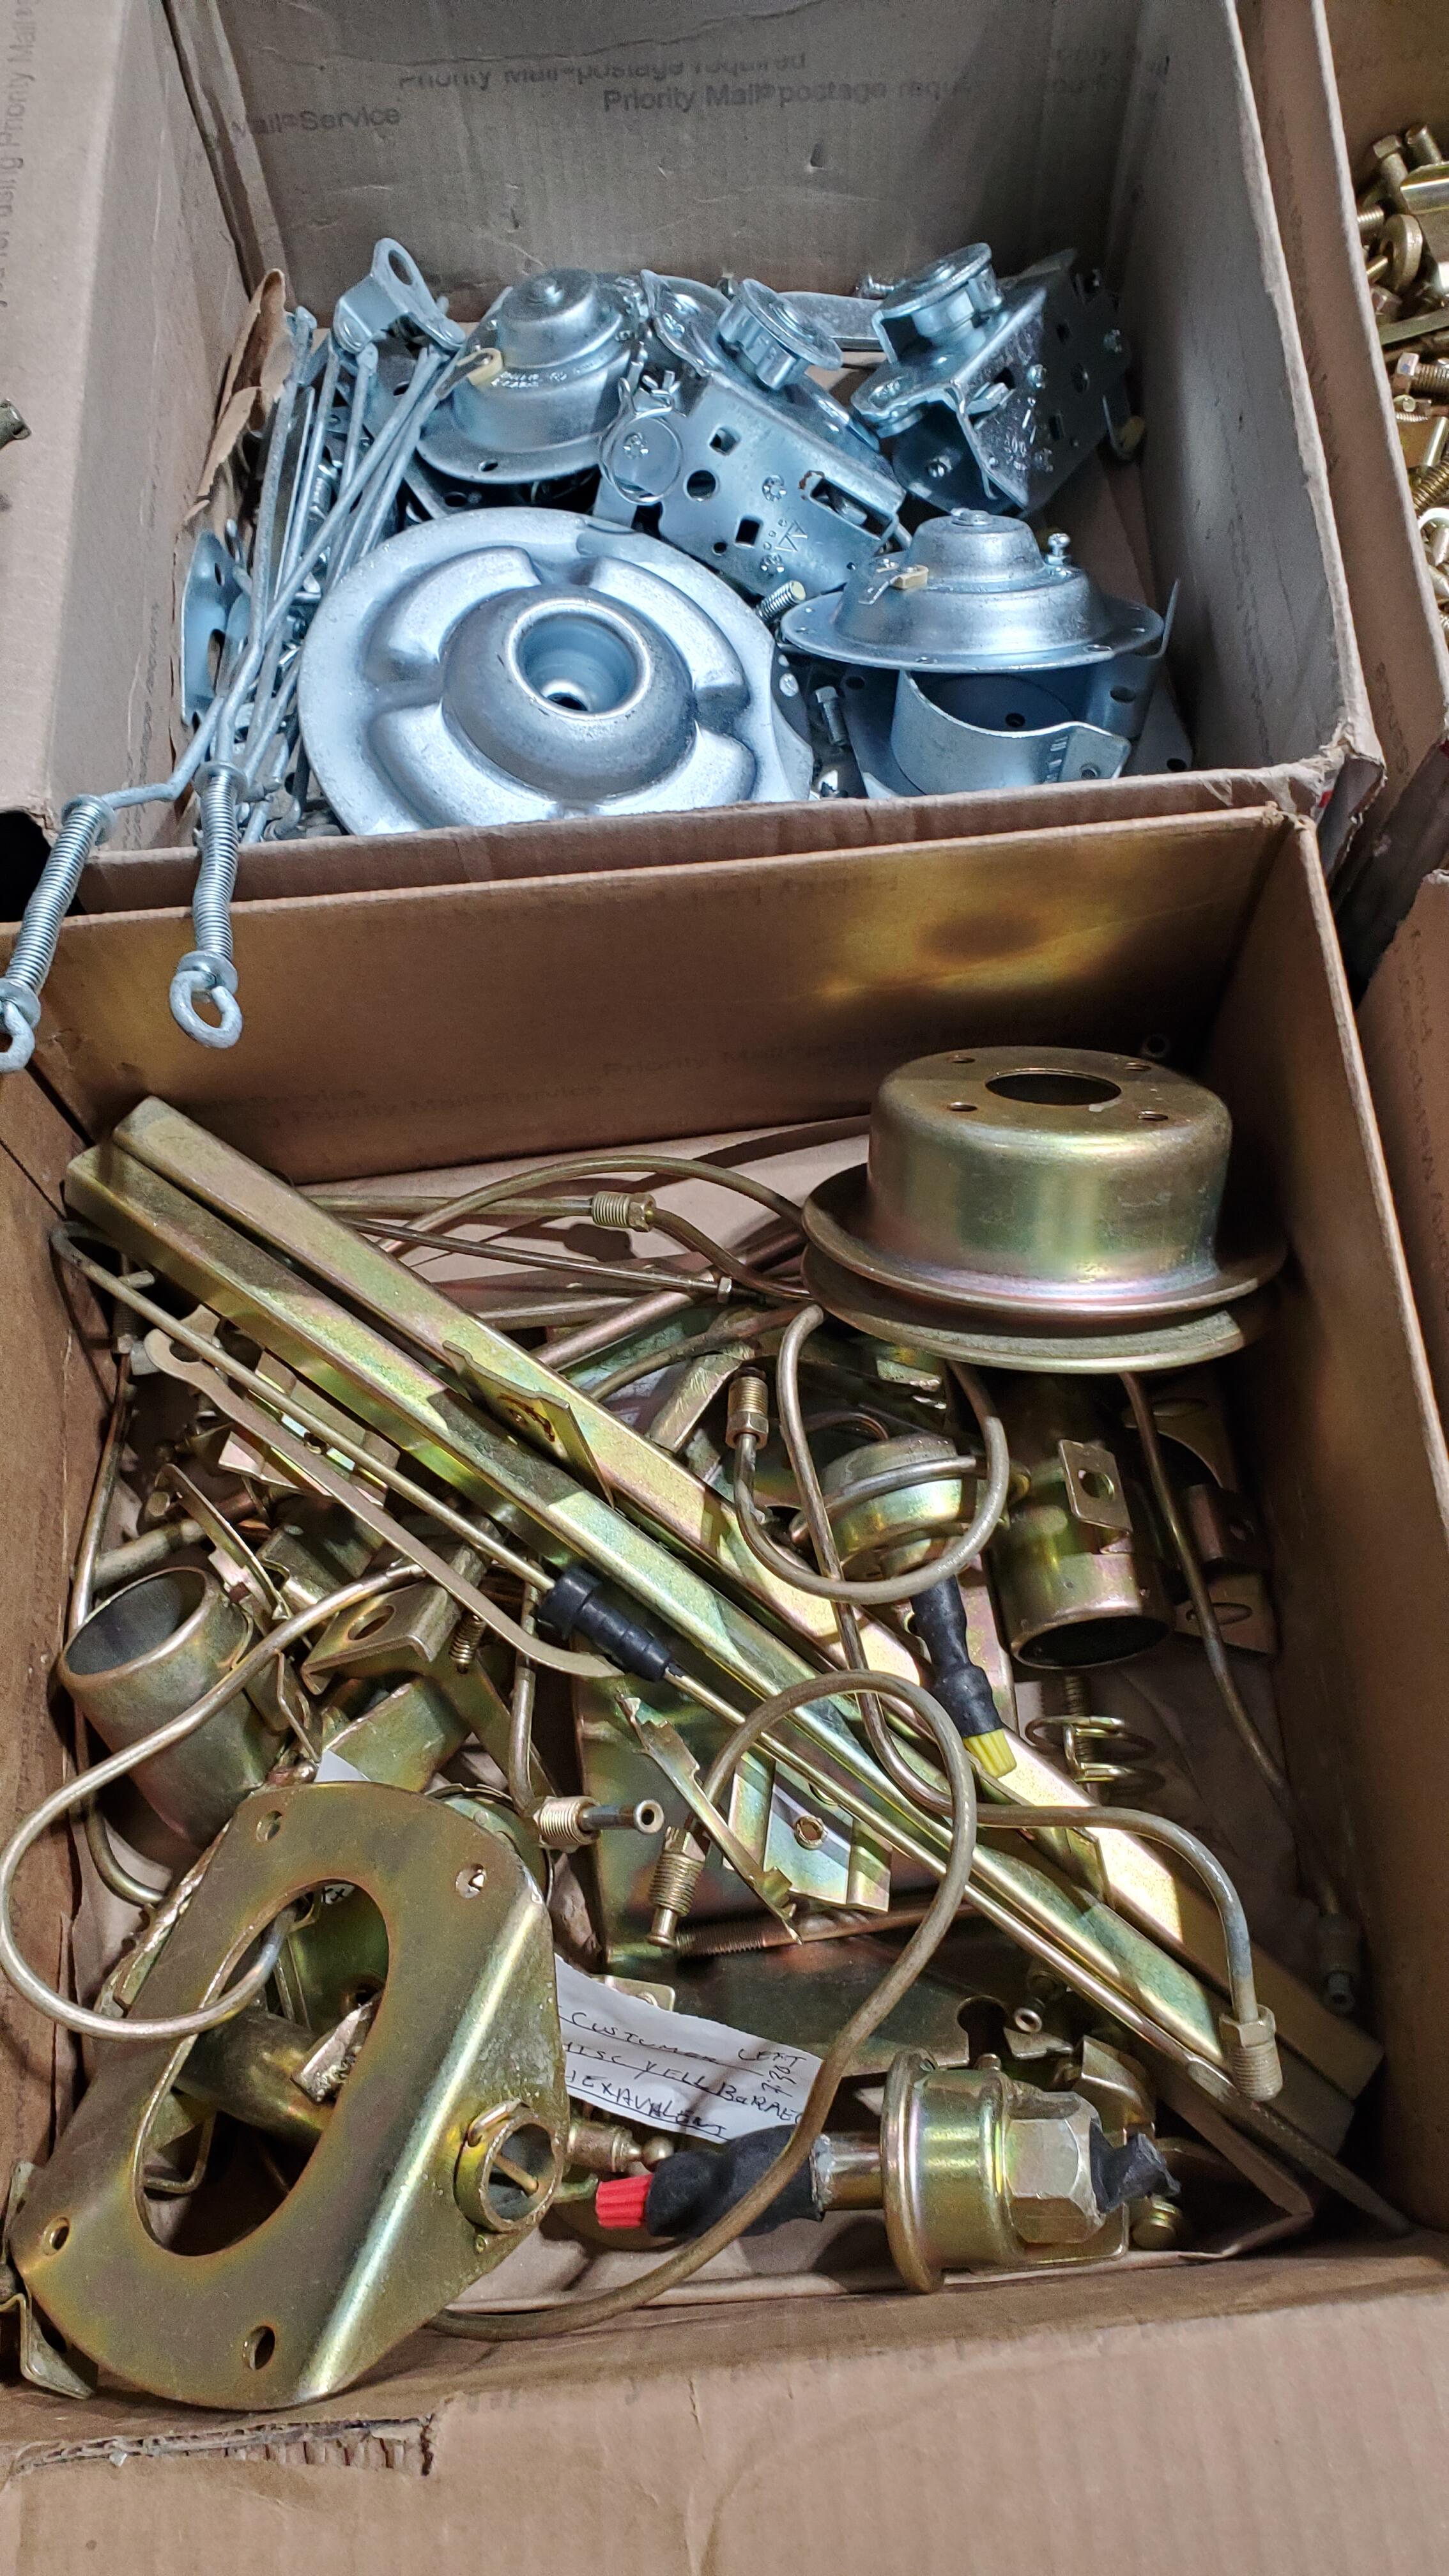
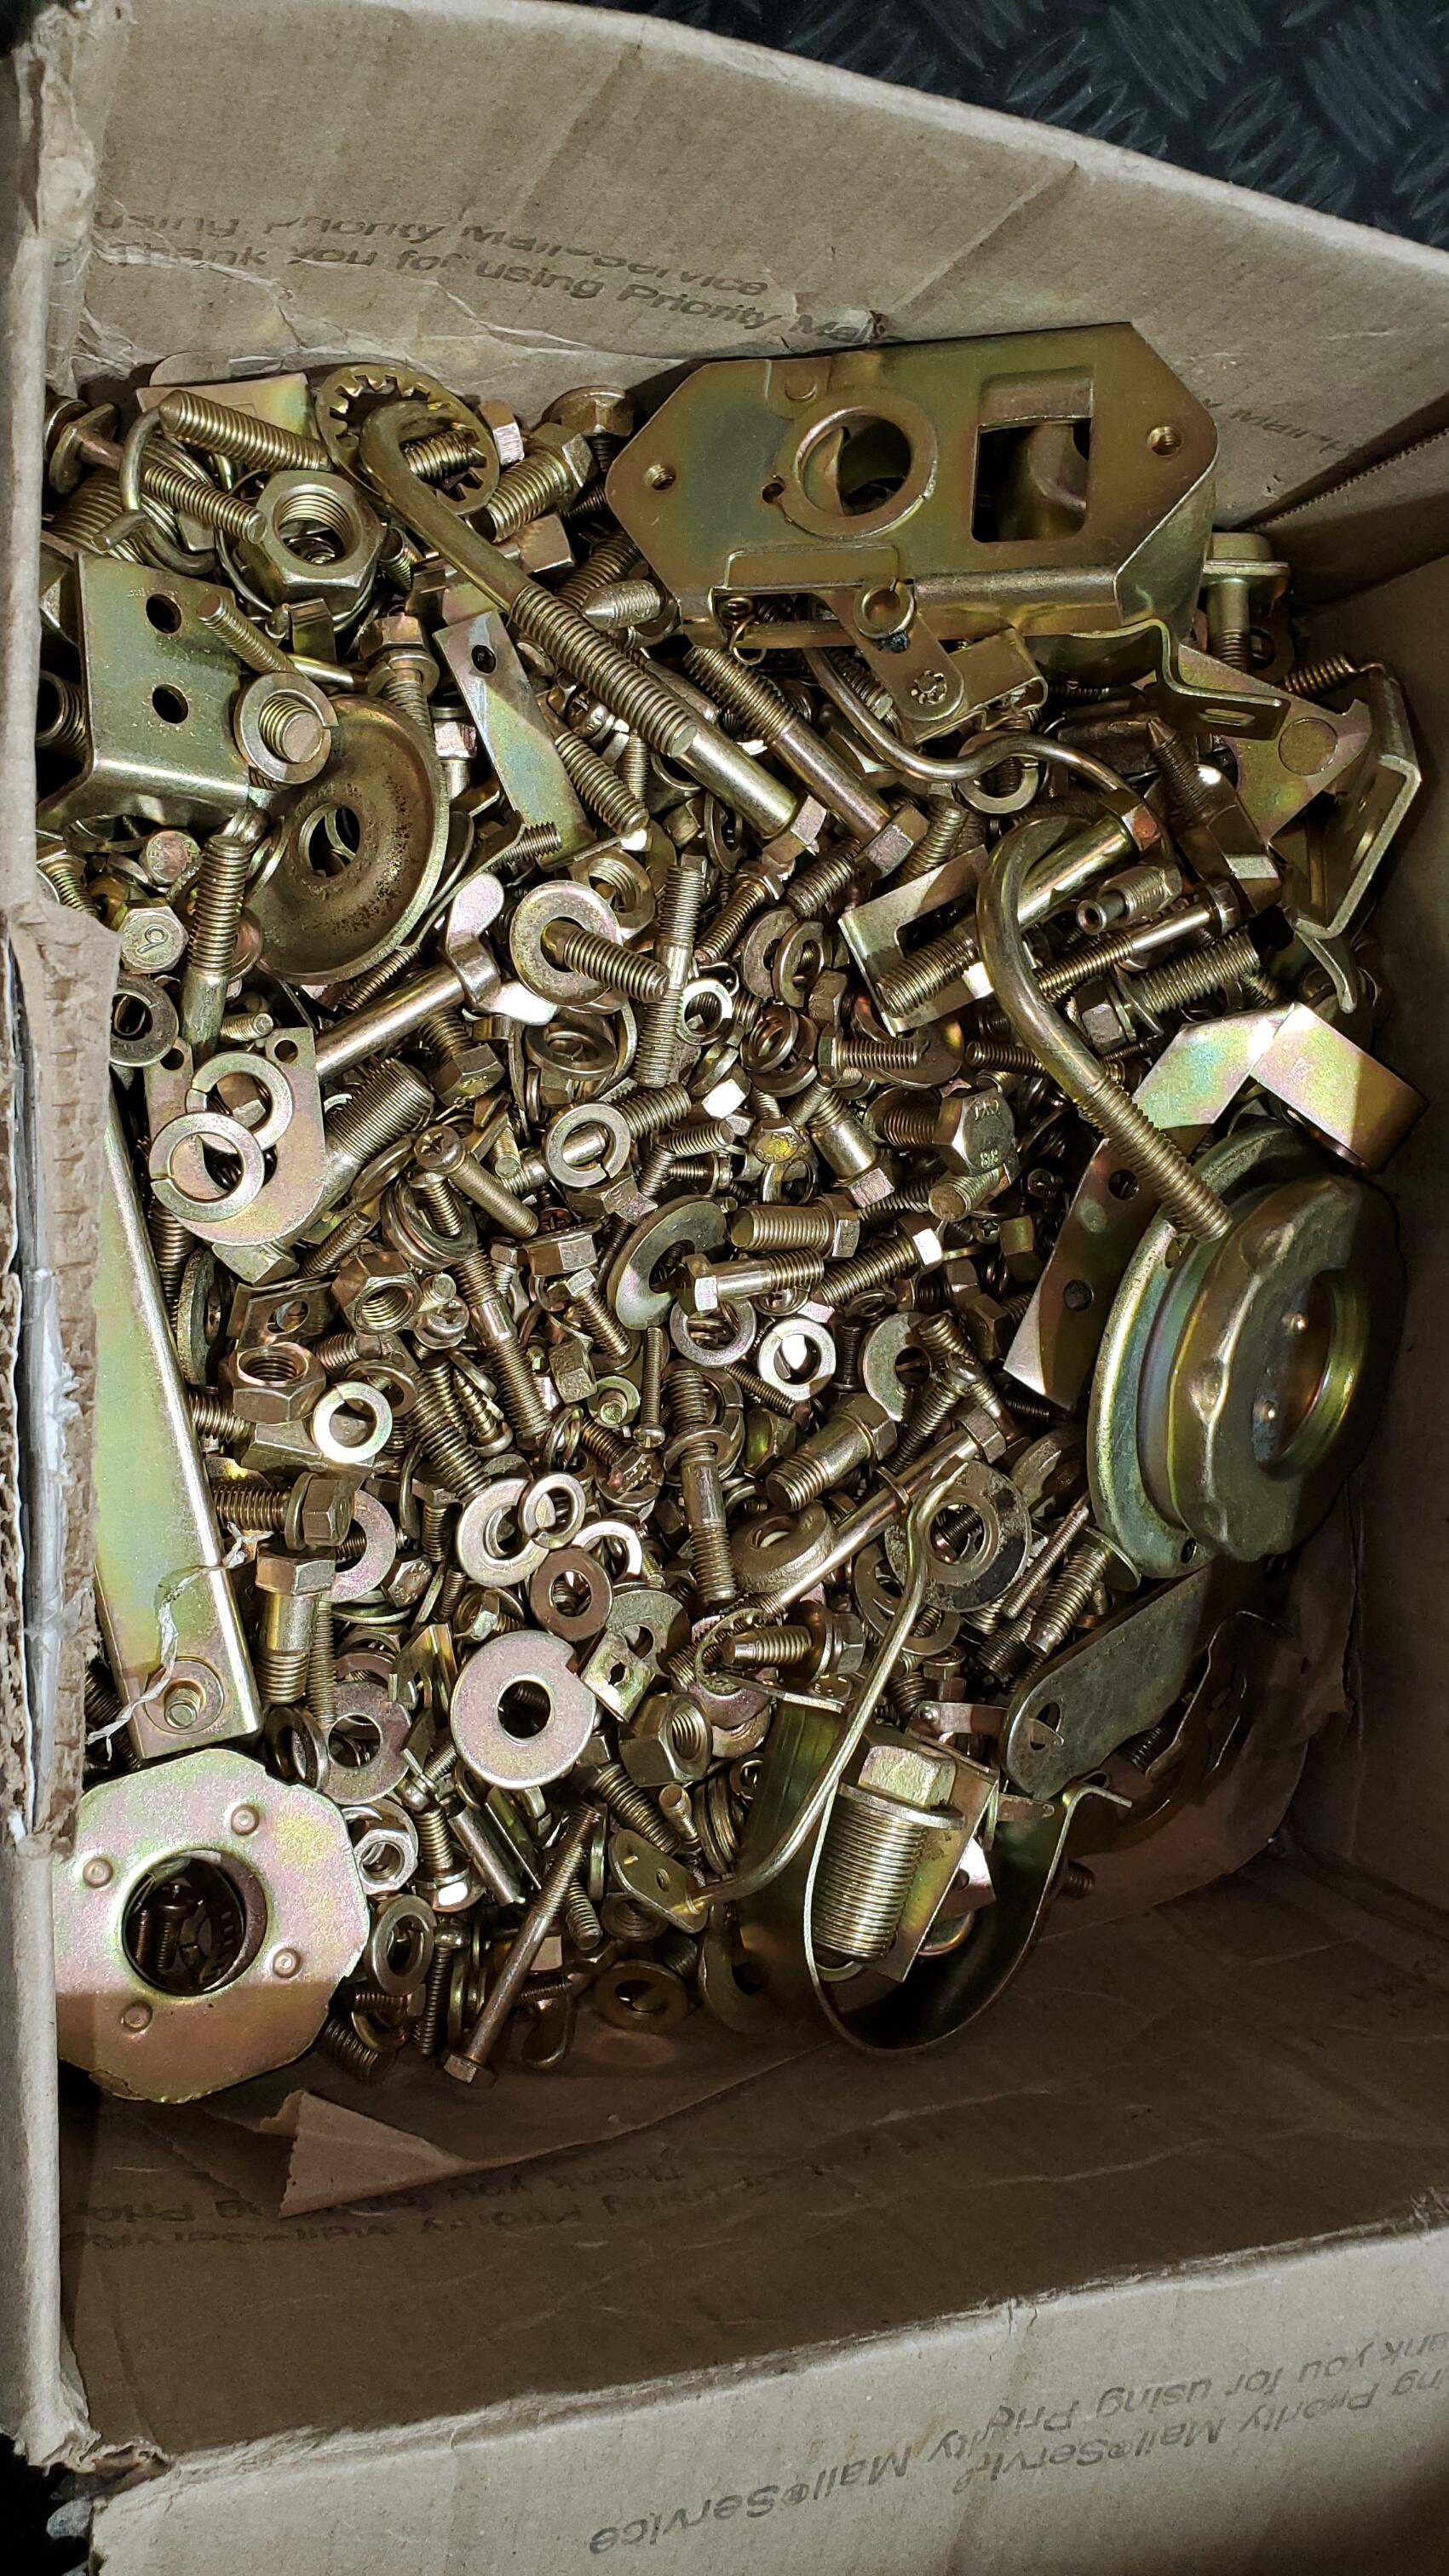
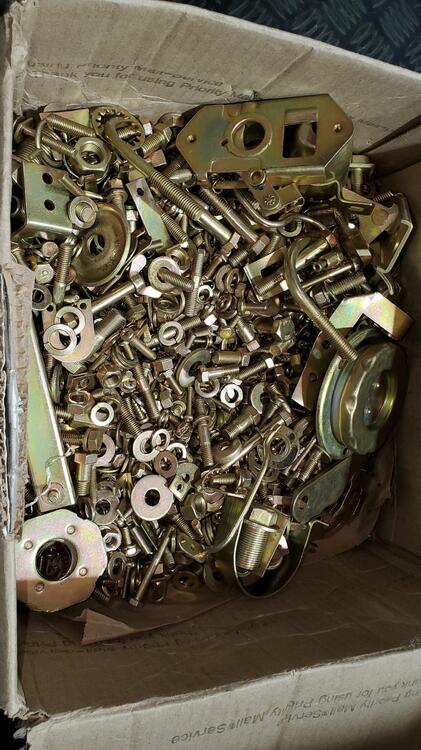
The fuel and brake lines were also sent to Sav-On plating. They were put in the large-long box in the earlier pictures. They will be rack plated. So there will be three plating batches run at the plating shop: one batch of barrel silver/clear zinc, one batch of barrel gold/yellow zinc, and one batch of rack plating gold/yellow zinc for the larger parts. Cost is roughly $250 per batch. The smaller parts are processed in the 'barrel', and Sav-On does a good job of cleaning these. I believe they are tumbled together for cleaning, so plastic portions of parts need protection. (I used shrink sleeve on the carb linkages). Not sure what they do to clean the larger parts and tubing, so I clean these up better using solvents and light sand or steel wool. Also, any parts with cavities need to be plugged or they will retain processing solvent and leak on your parts during return shipping. (Learned by experience).
-
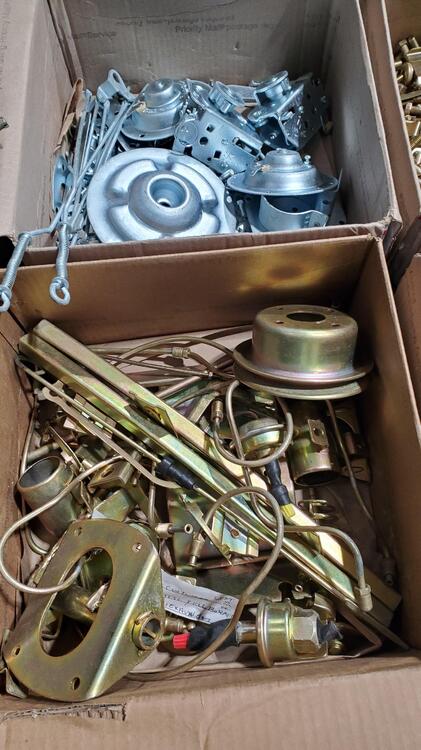
Yes, that is basically what I did, every single nut and bolt. That's why it ends up being so many boxes. The only exception is the carbs and fuel pump. Owner has a pretty set of rebuilt carbs and fuel pump. Horns were disassembled and fasteners sent to plater.


.jpg.d7d6f976f0e040bd60b20d64dd040414.jpg)