motorman7
 Subscriber
-
Joined
-
Last visited
-
Currently
Viewing Topic: SN 00042 Restoration; The Older Twin
Everything posted by motorman7
-
 You could clean it up so it would be ready to drop in at a moments notice. Plus, they are beautiful works of art and would nicely compliment any garage.
-
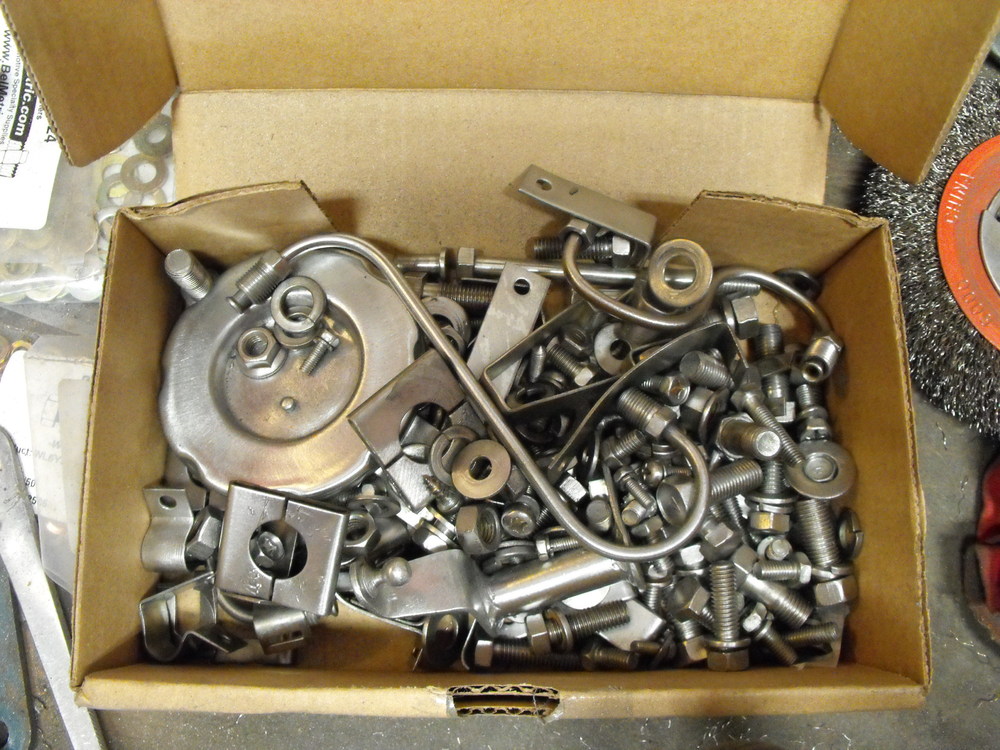
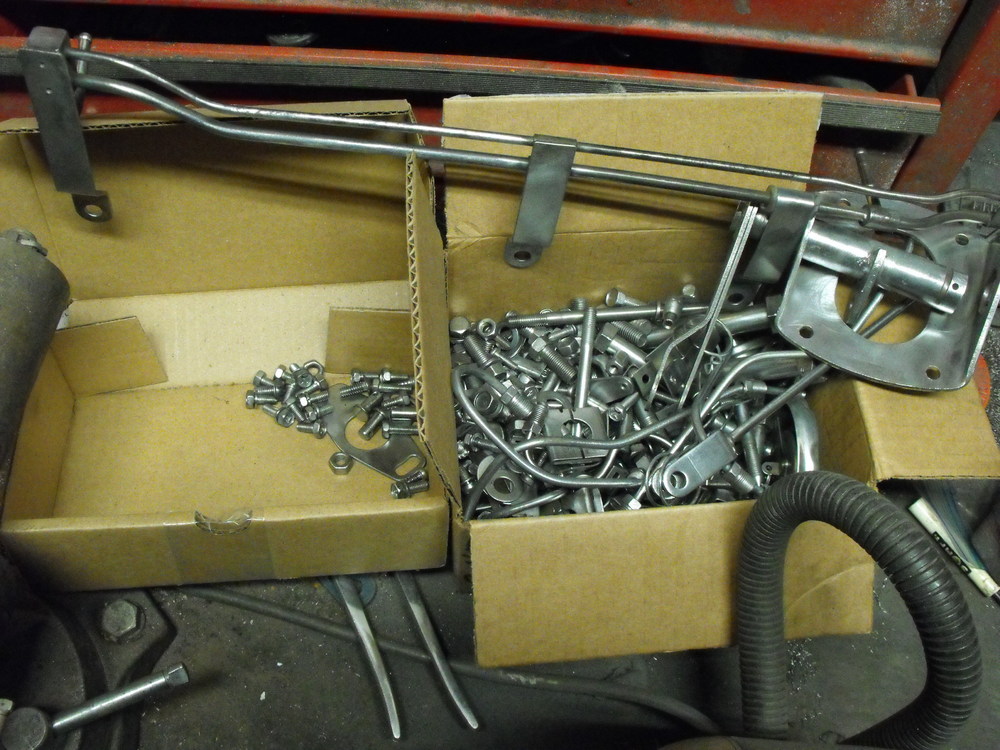
The dog days of restoration. Hours at the wheel prepping parts for plating. It will be all worth while when we start putting this all back together. Separating yellow zinc from clear zinc. A few motor additions. Attention to the small details are what makes it all come together nicely.
-
Just a few small updates from the paint shop. Got the Exhaust manifold off to be ceramic coated, Air cleaner is being powder coated at the same place. Been adding a few pars to the motor. Will try and get the rest of the plated items wire wheeled this weekend.

-
I love that quote! One of my favorites. Just a quick note on 'Just Dashes': Current cost is $1750 plus tax and shipping. Shipping is way expensive, so since you are fairly local, just better to drop it off there. Also, the lead time is 3 months, so you will not get your dash back right away. Good luck!
-
Fixing the existing cracks in a dash is pretty much just a temporary fix. Age and condition of the plastic on the dash can not be reversed, and eventually new cracks will form. In some cases your new fix will exacerbate the problem as the patch may shrink, producing more cracks. I followed one of the dash repair threads on this forum using the 'bumper rubber' material as the patch material on my 1970 roadster. The dash looked awesome for about 6 months, then the cracks started to appear. The cracks were in the old plastic that was not replaced and eventually they became overwhelming. I ended up just putting a dash cap over it.
-
I would say it is a bit more than 30 minutes, closer to an hour or two based on your skill level. For me, the most difficult part of the dash removal is removing the heater panel and it's associated cables, the radio, and the wires that go to the fuse box. It is probably easiest to remove the fuse box along with the dash harness instead of unscrewing the two wires that attach to the bottom of the box. The rest of the removal is easy by comparison in my opinion. Also, you will want to take a lot of pics of the smaller individual wire connections. There are several that change color and this can be a bit tricky when re-installing. The larger connections are basic. Also, I would recommend 'Just Dashes' over purchasing an uncracked or NOS dash. There is no telling the condition of an old dash and how old the plastic is and what it has been exposed to. Just my thoughts.
-
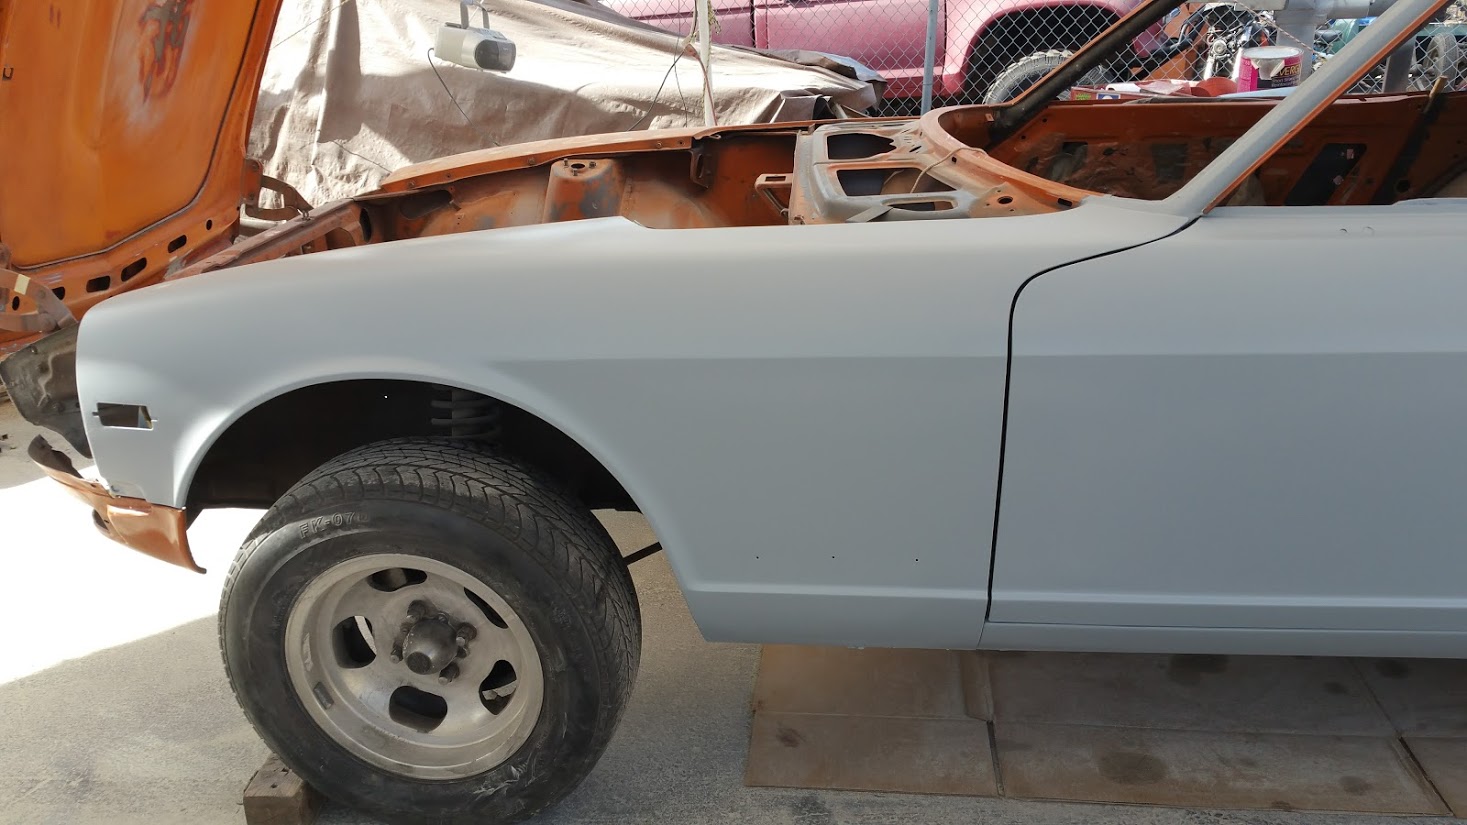
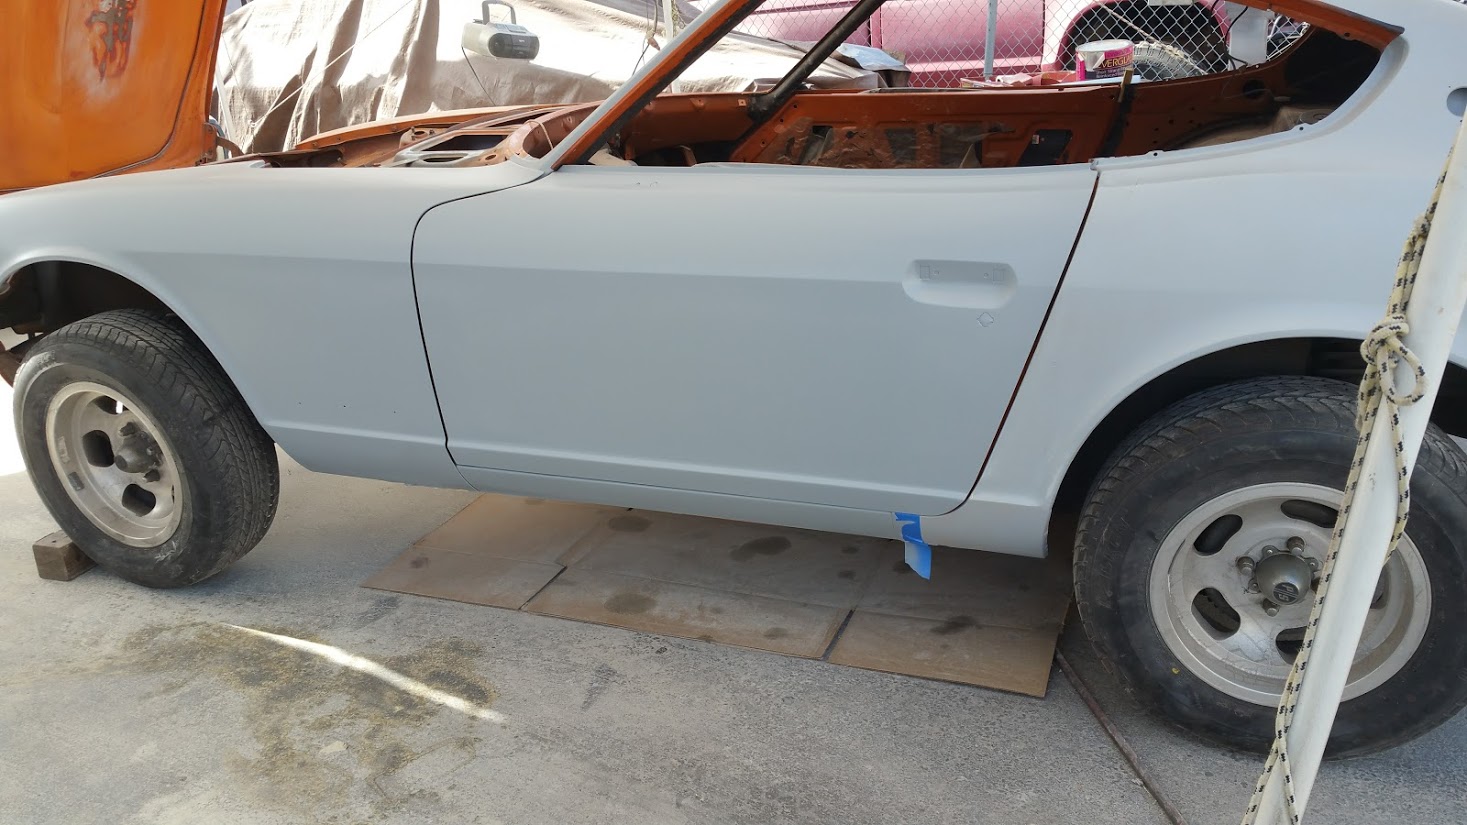
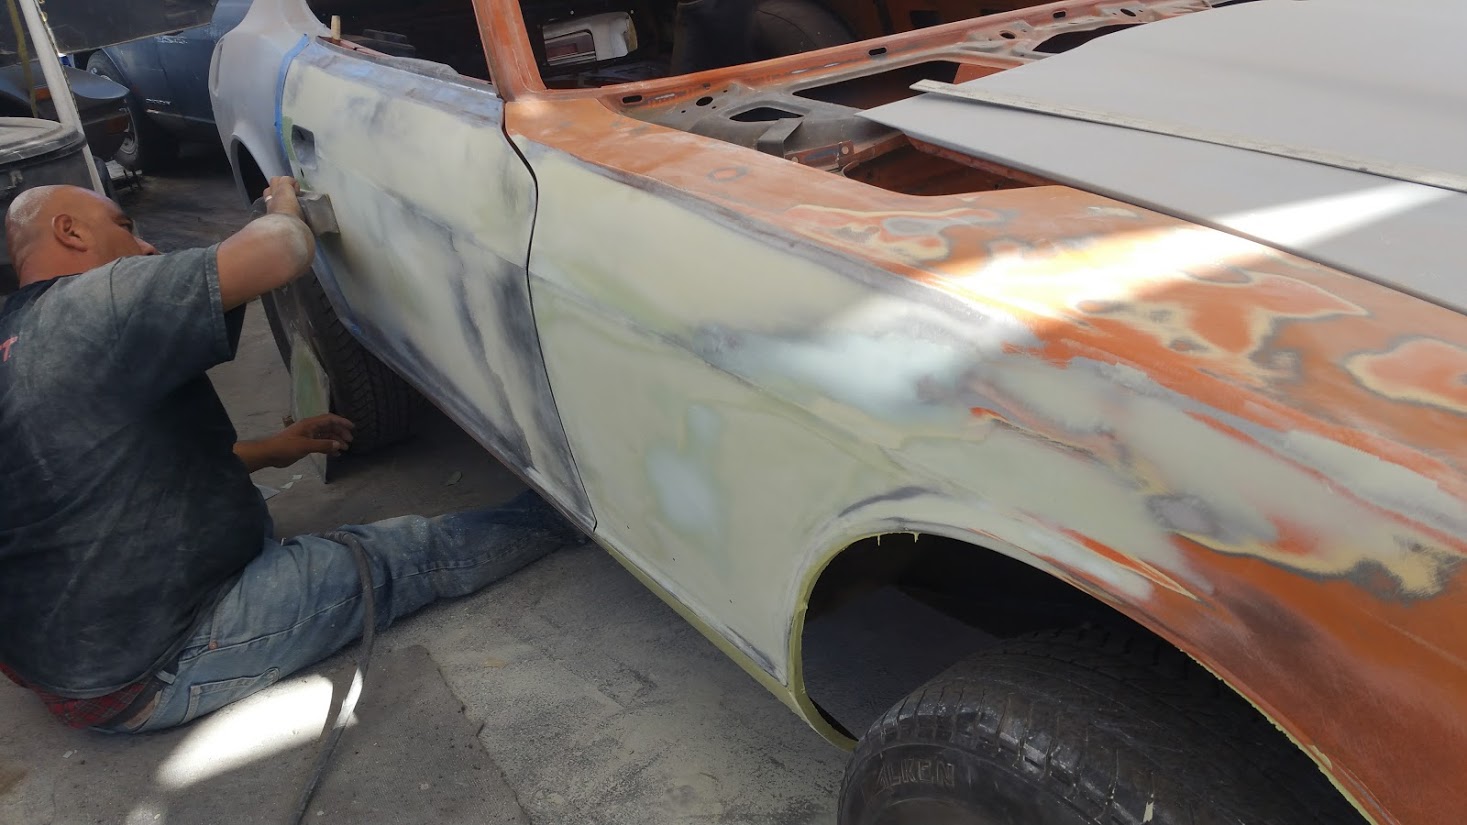
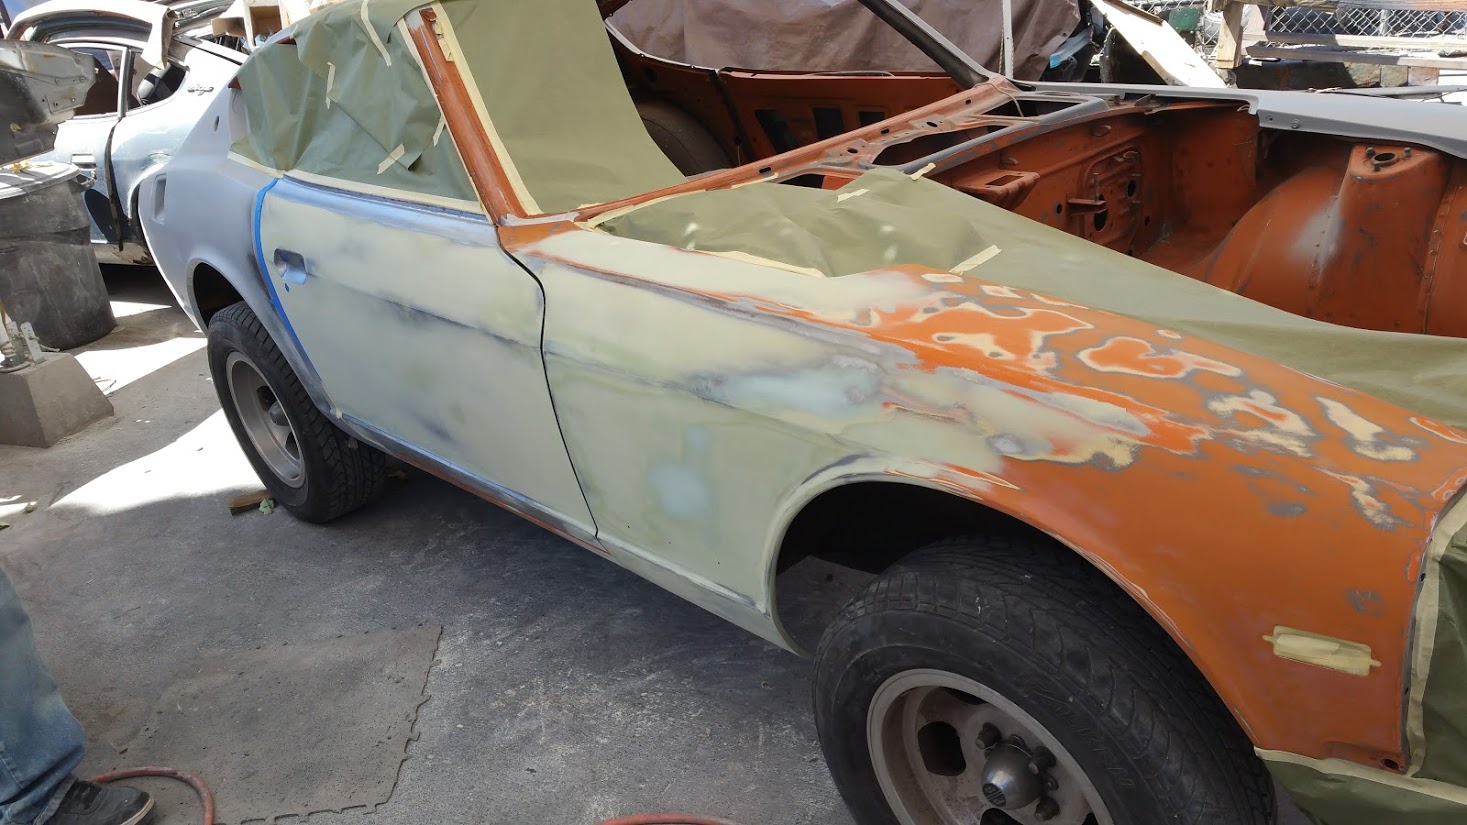
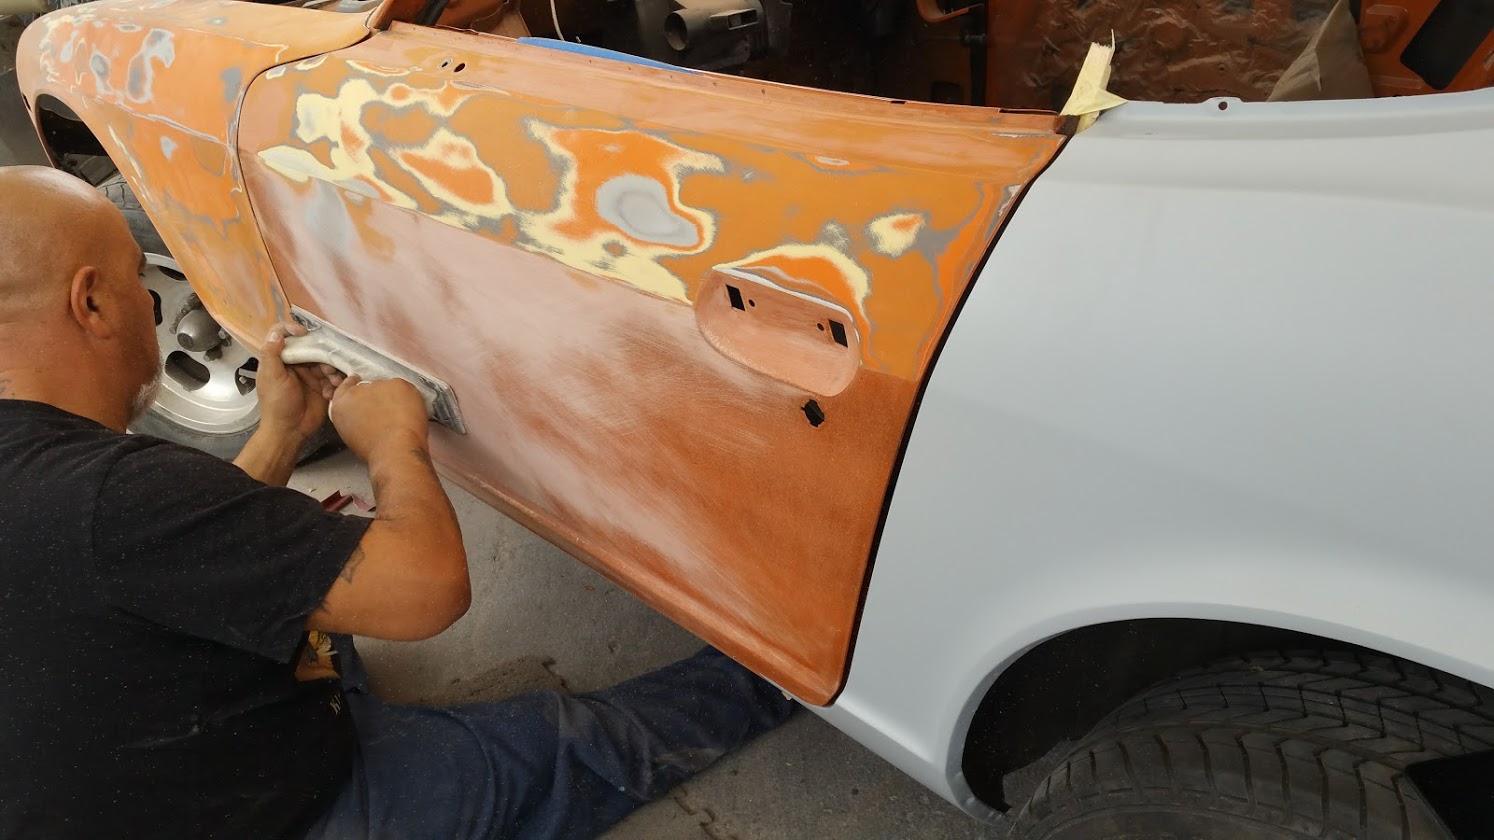
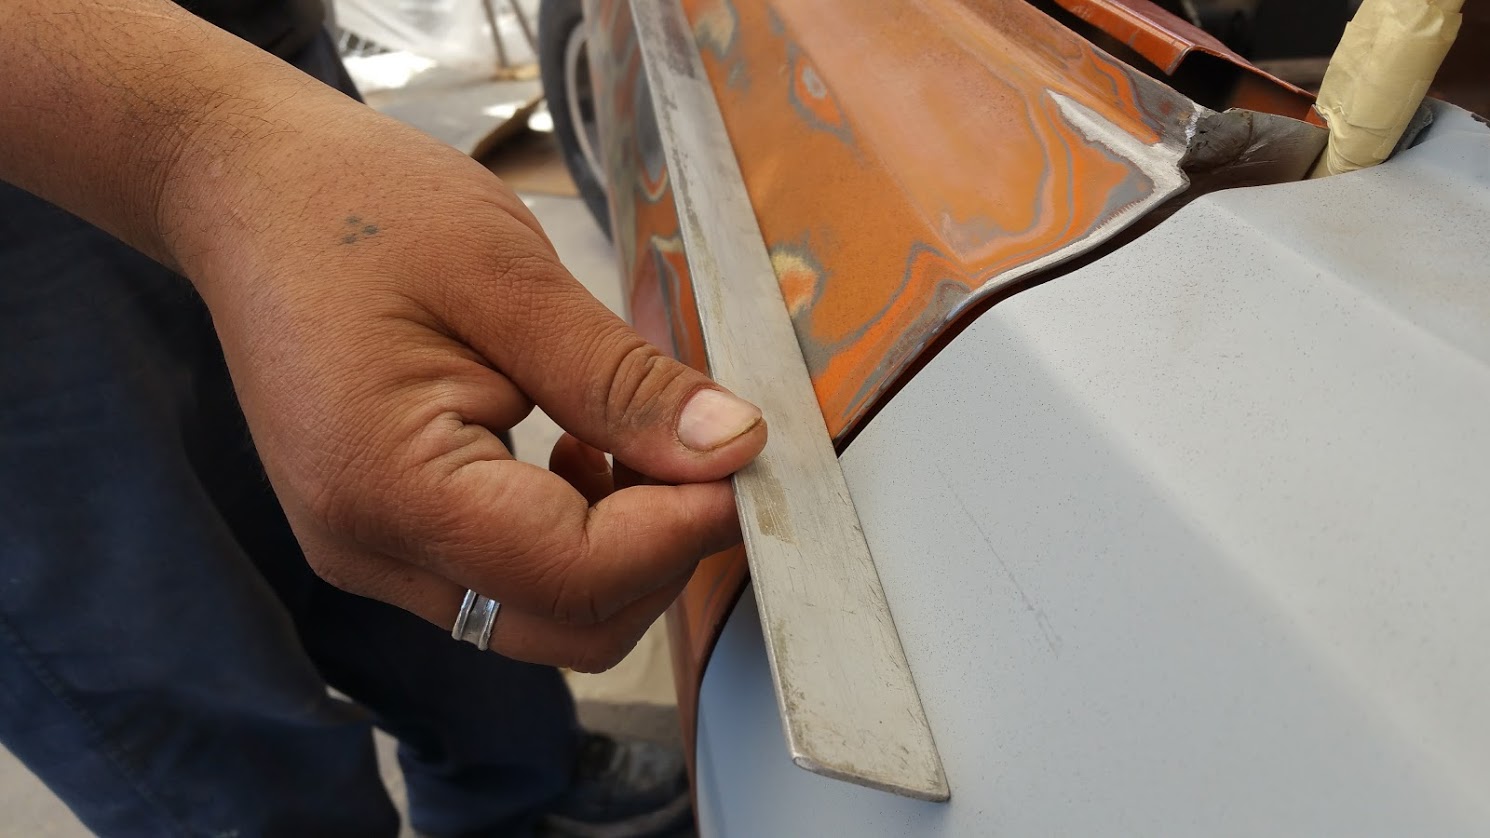
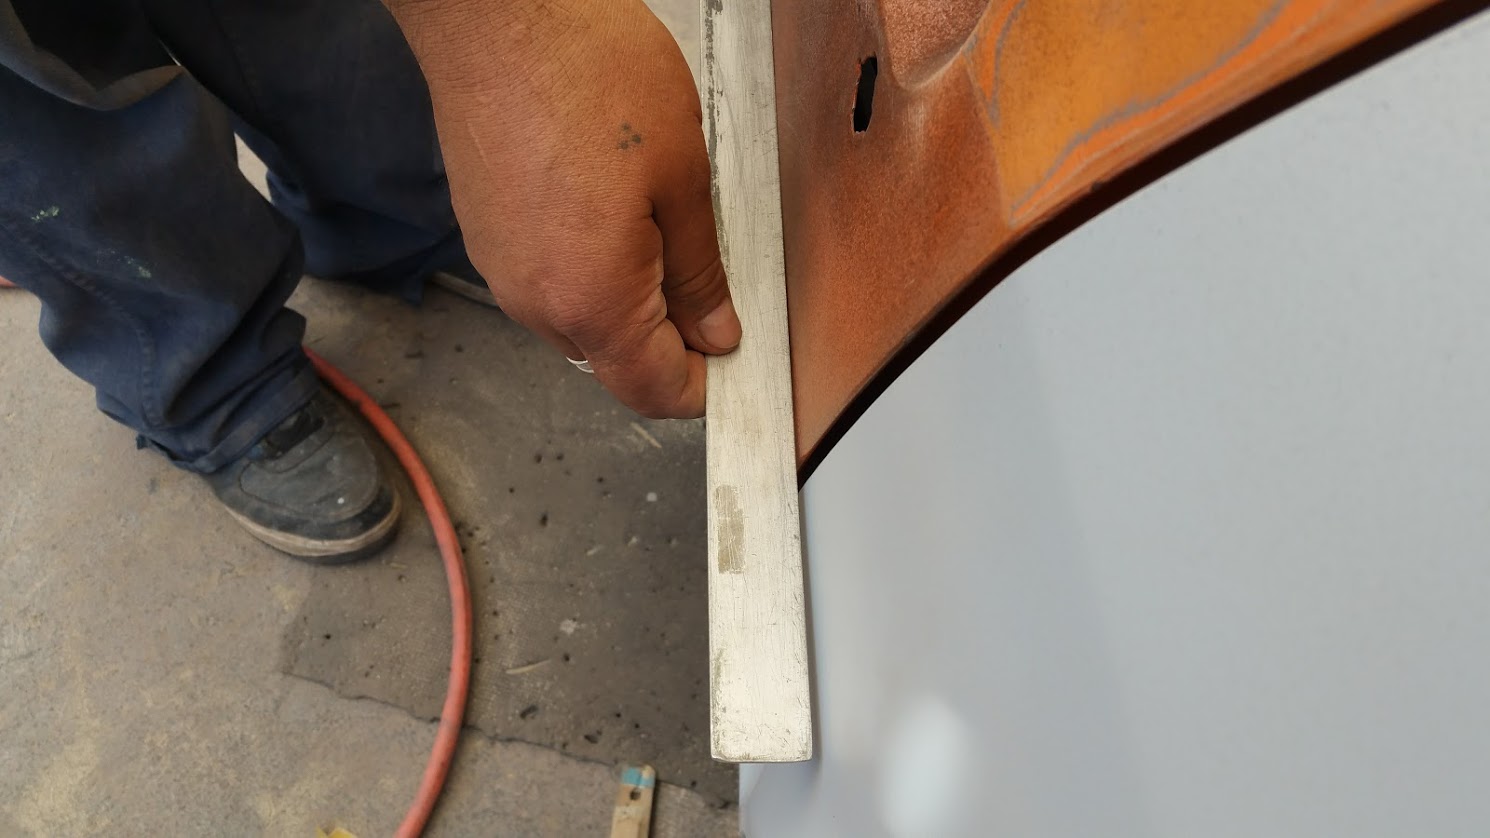
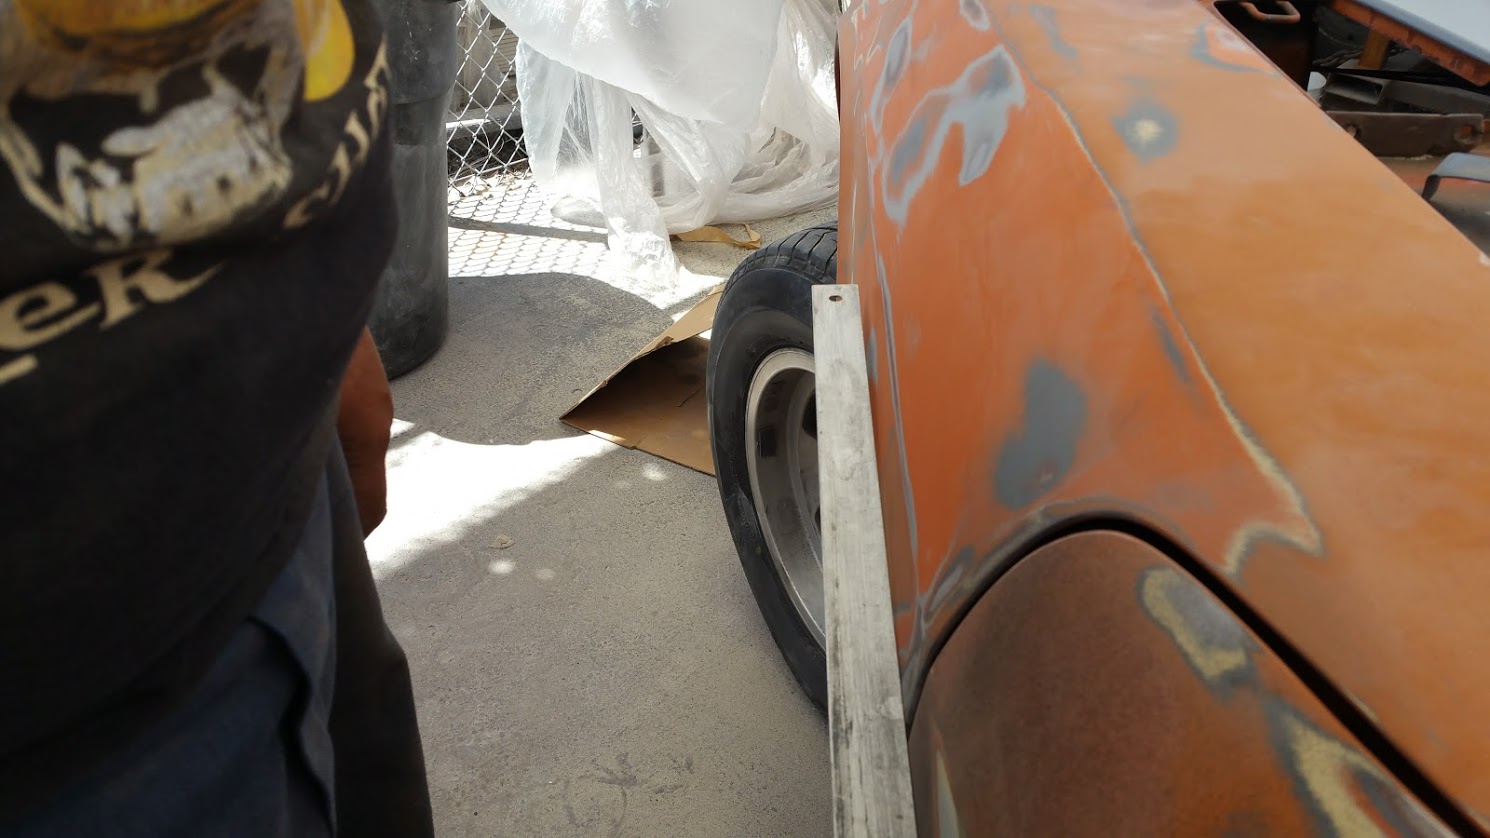
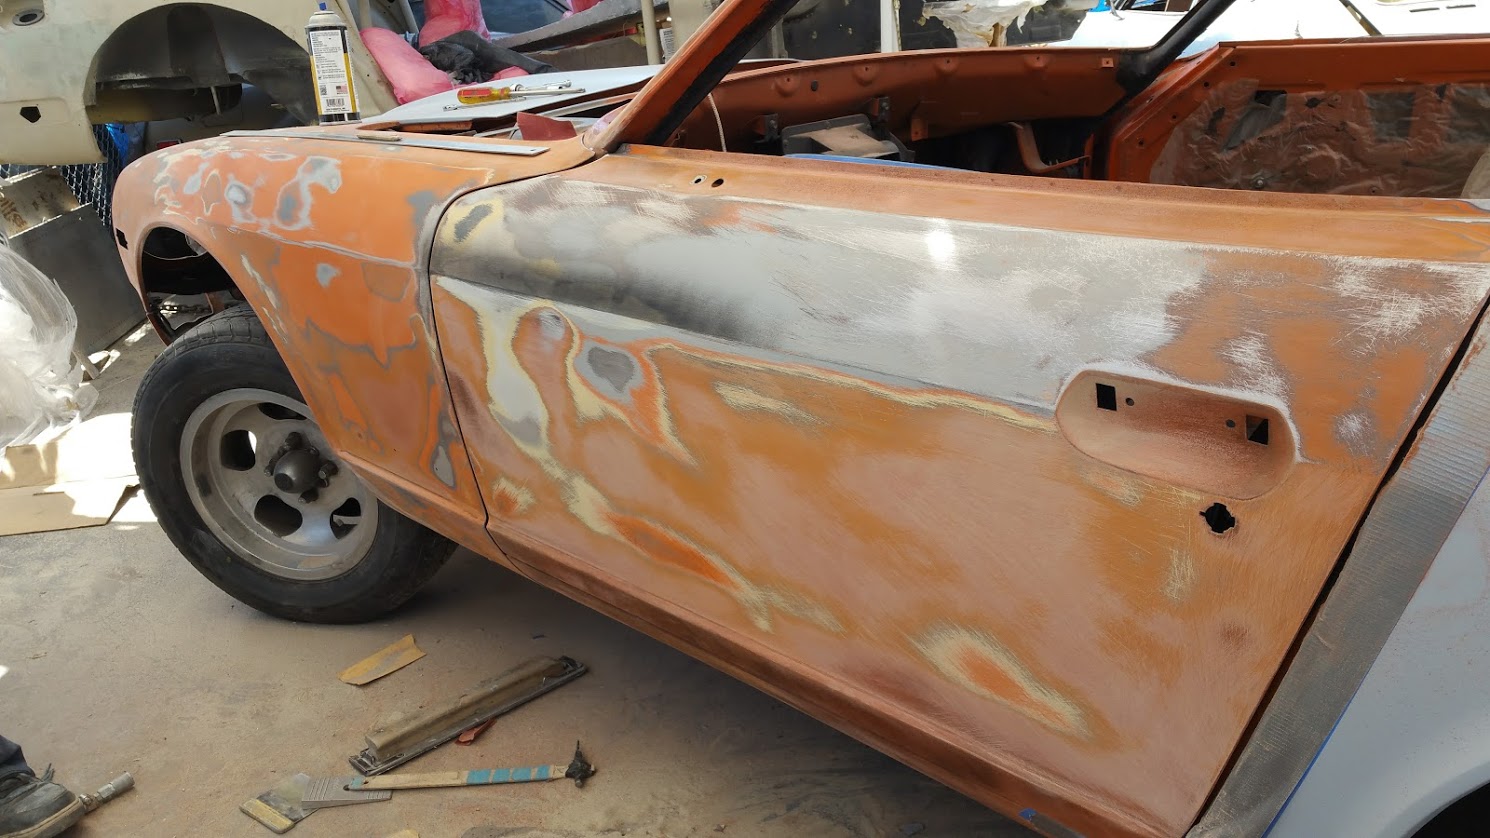
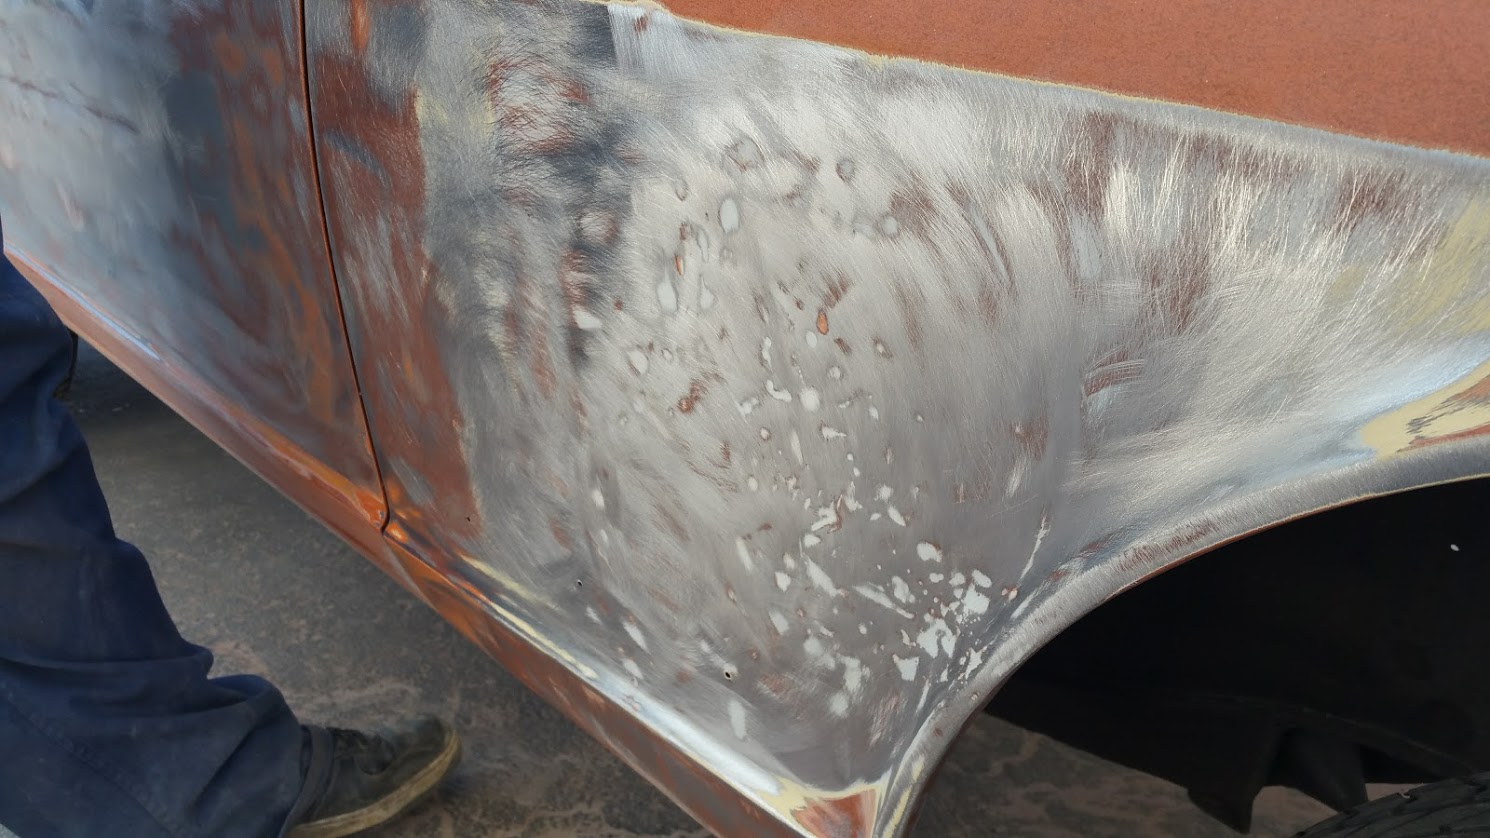
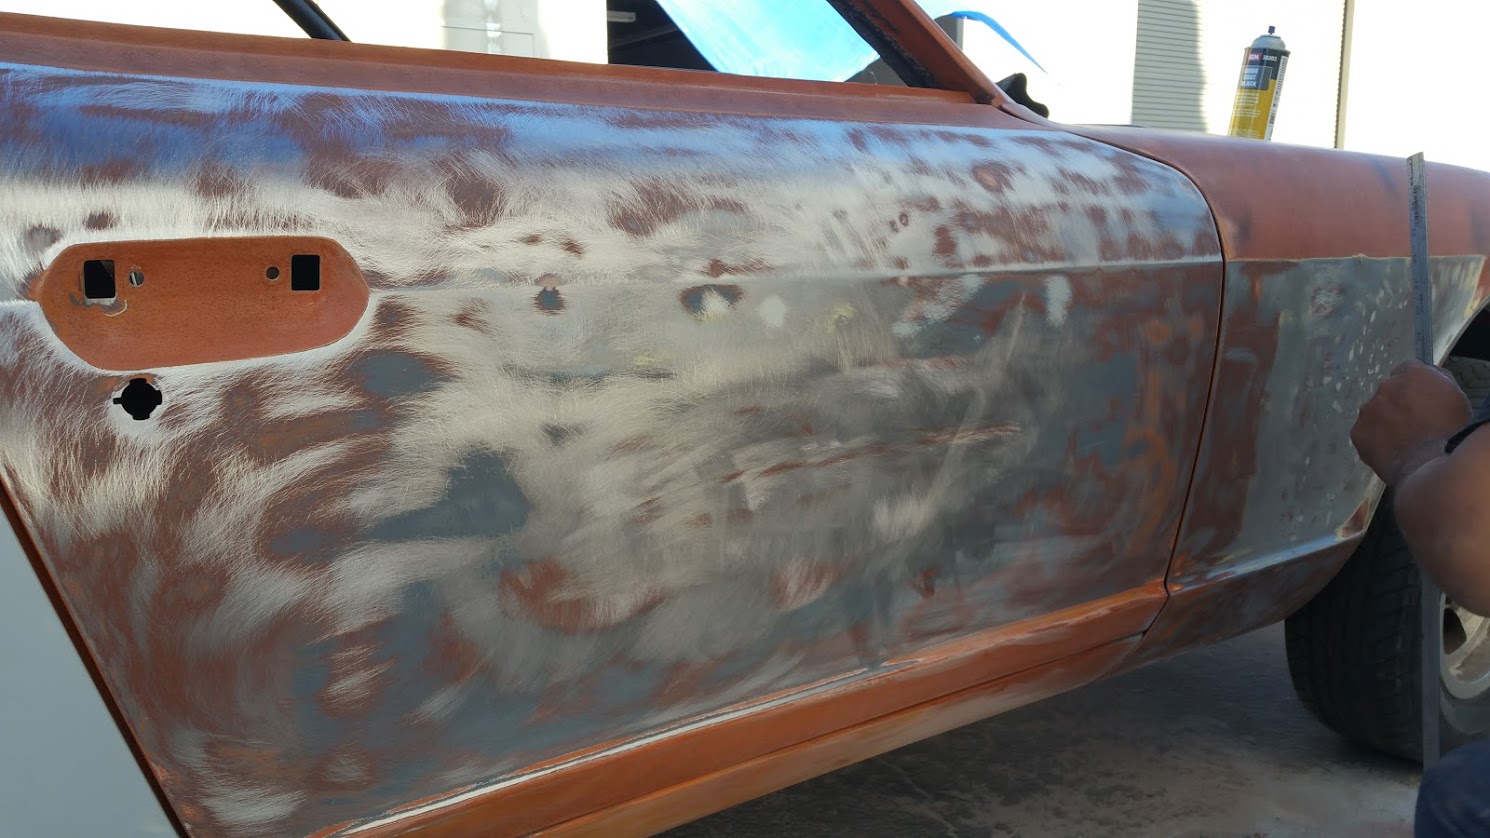
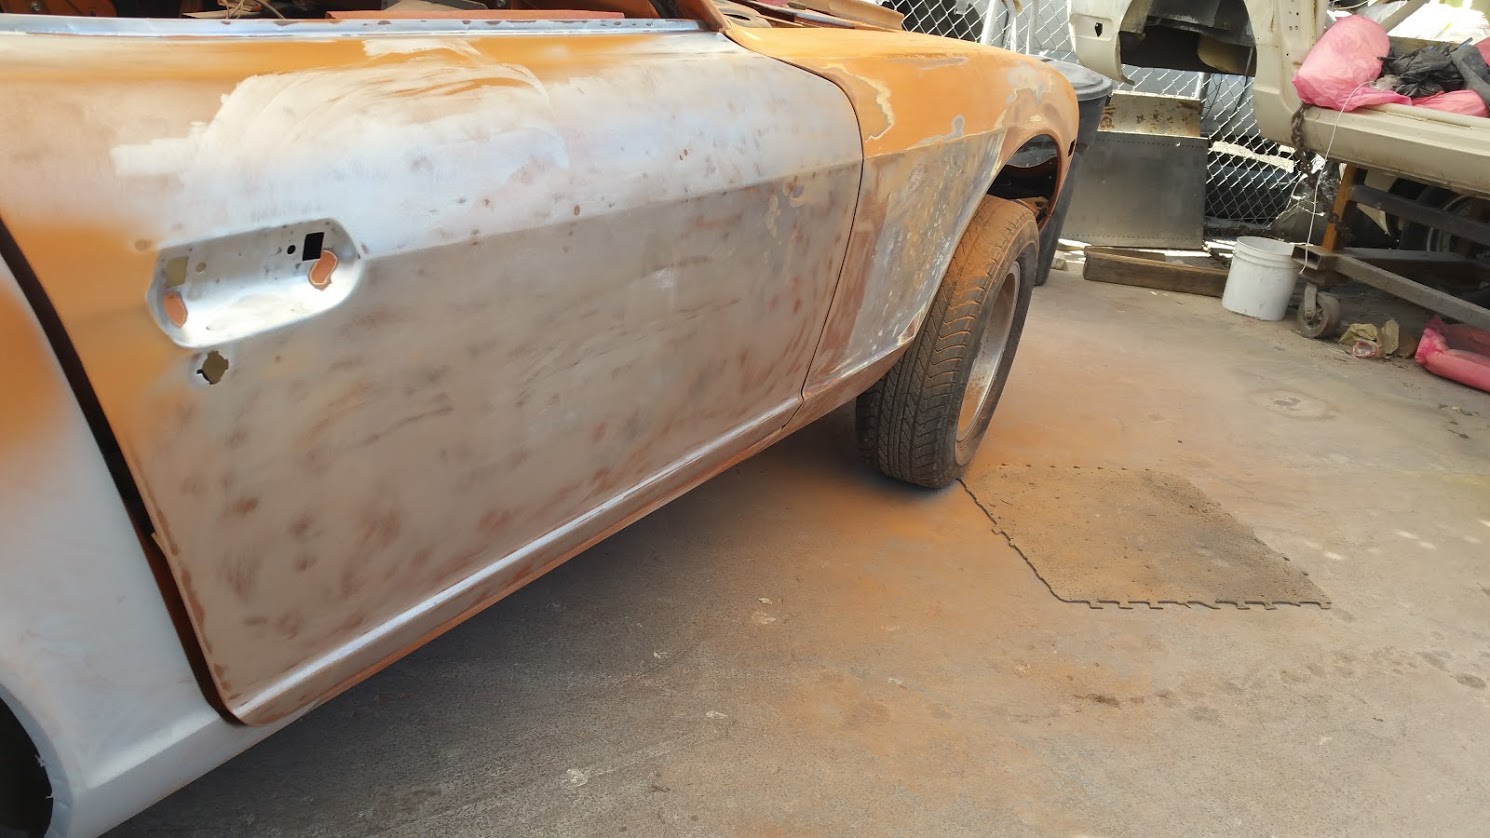
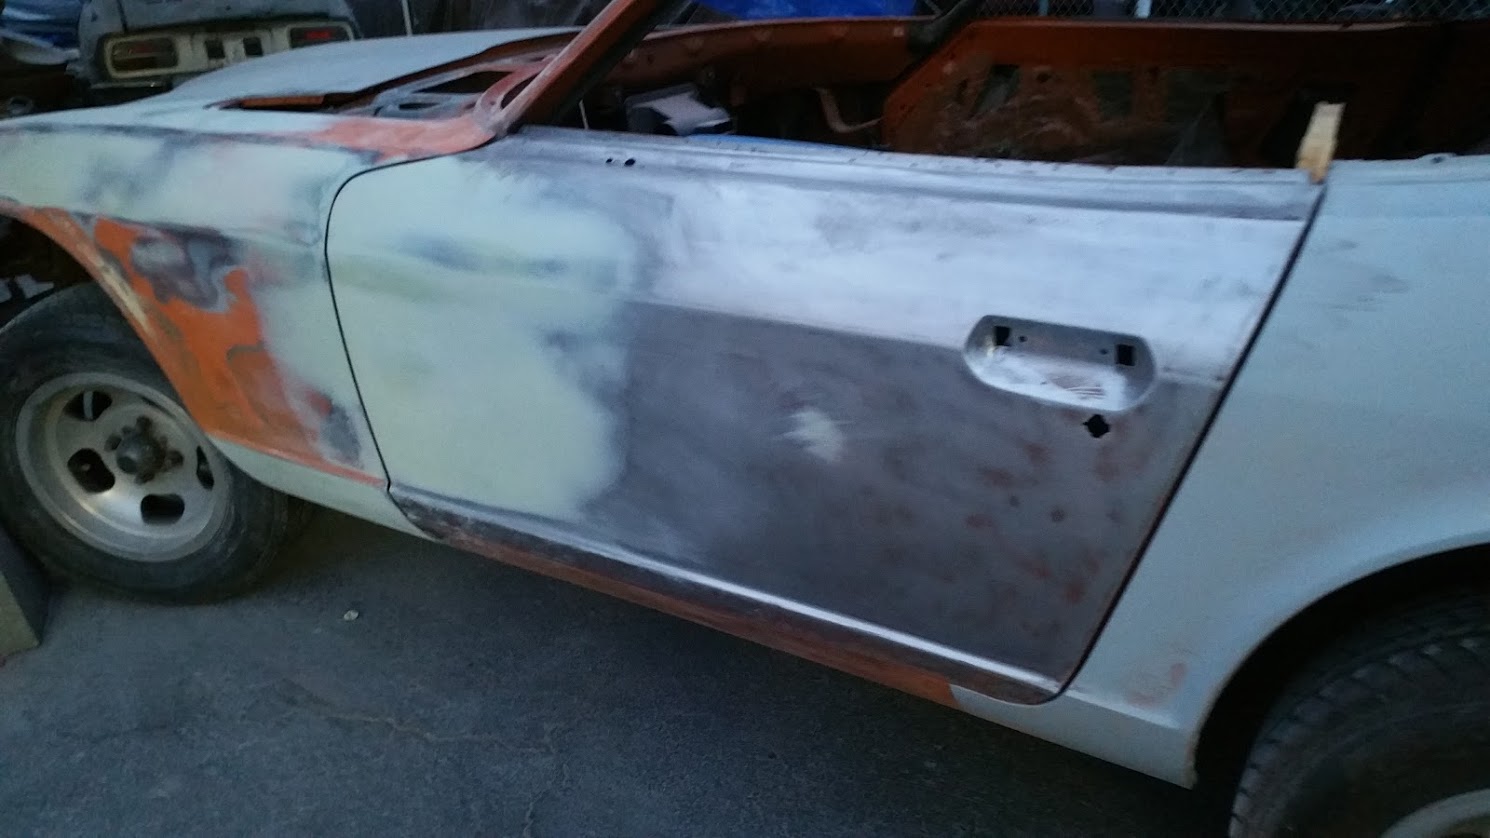
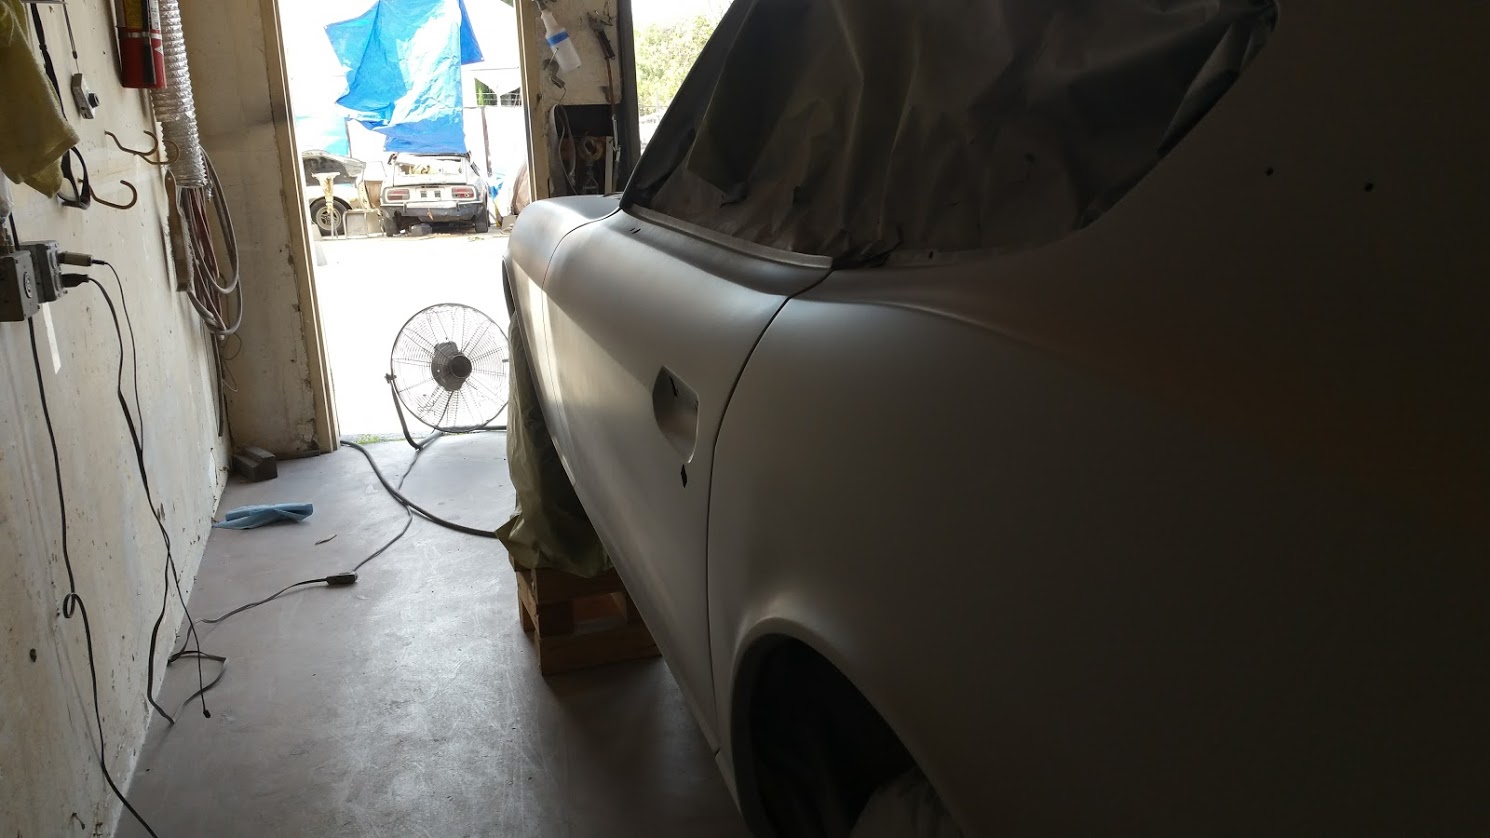
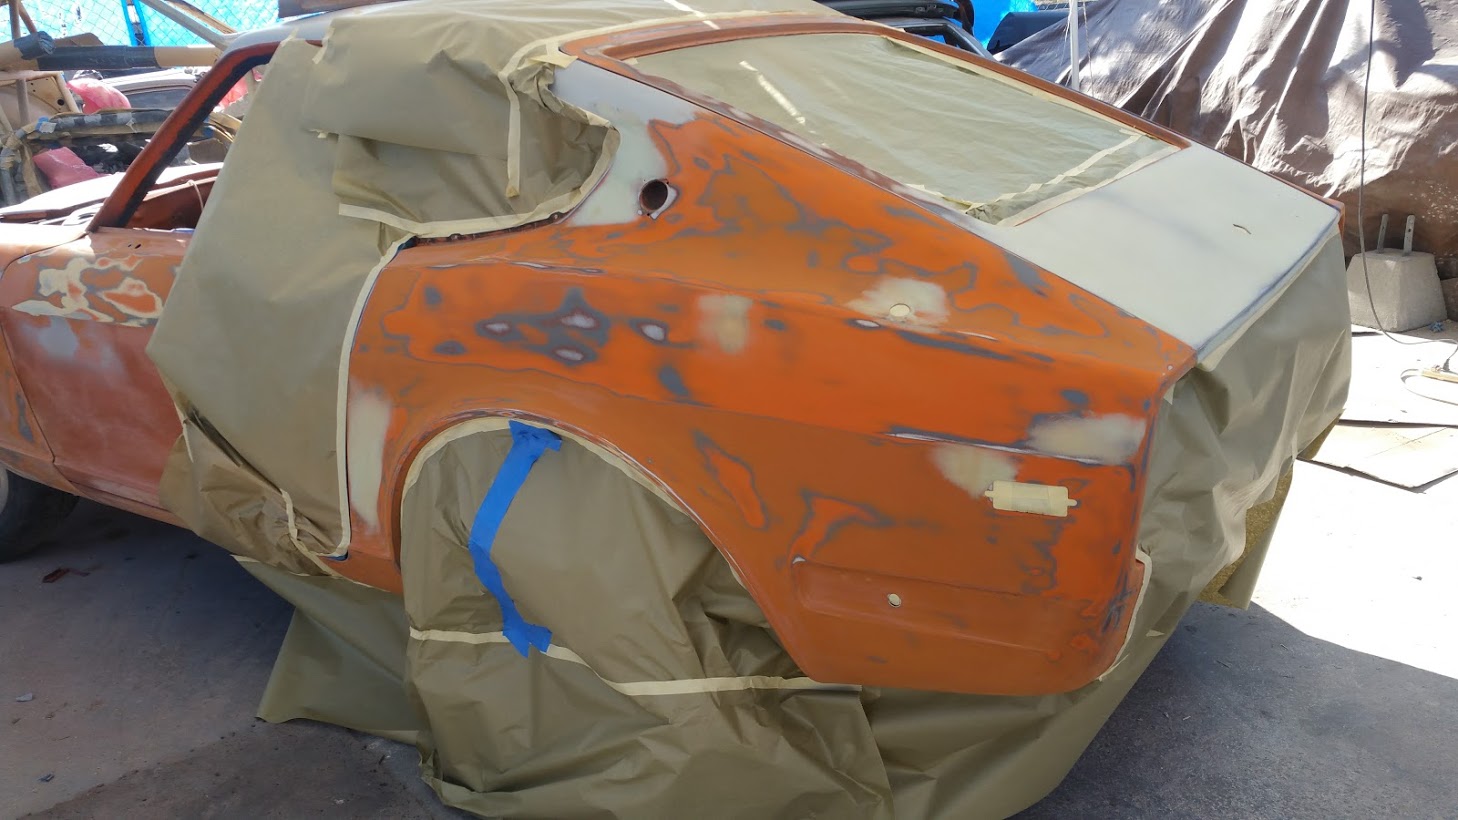
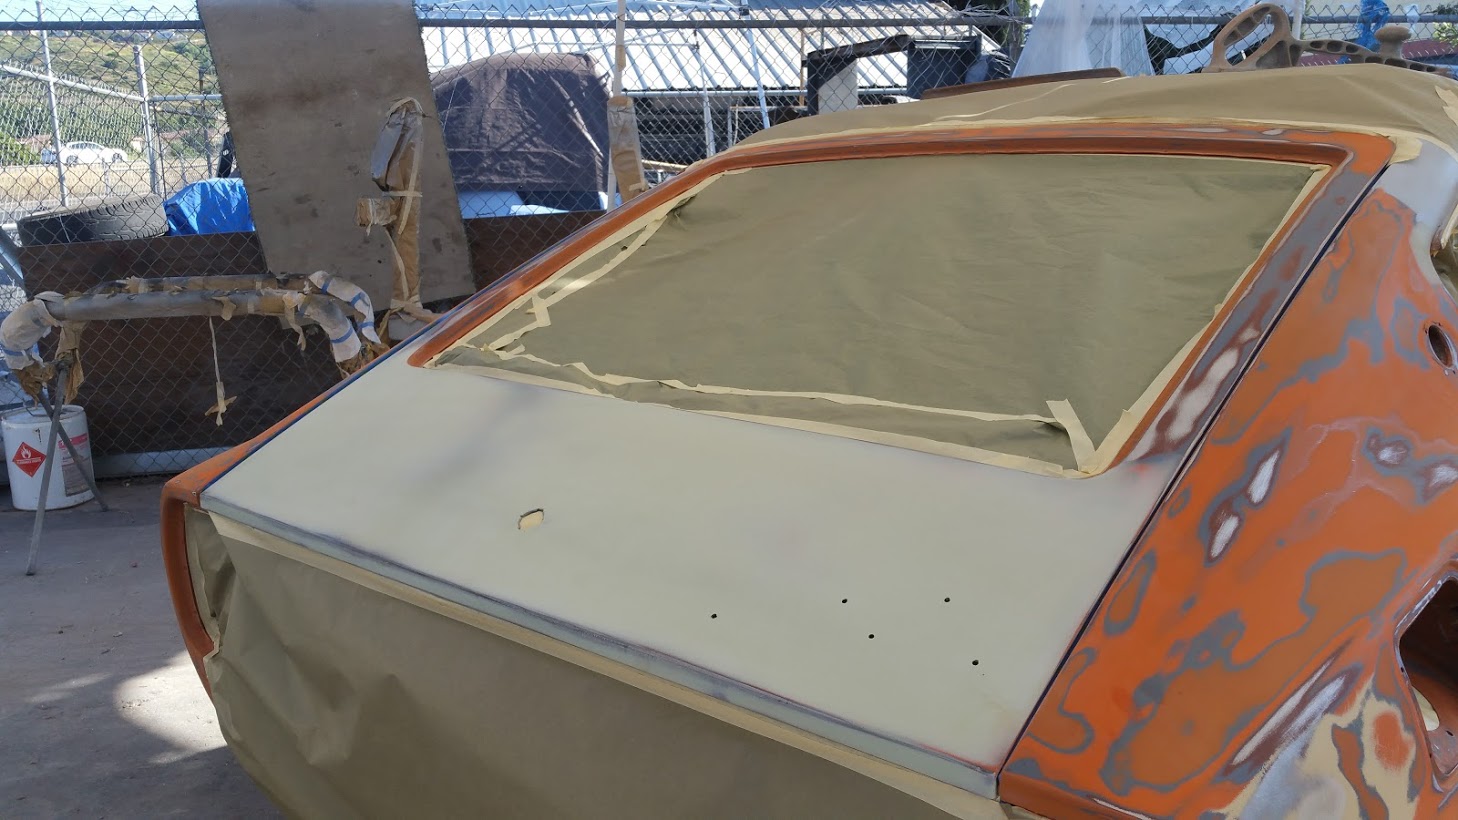
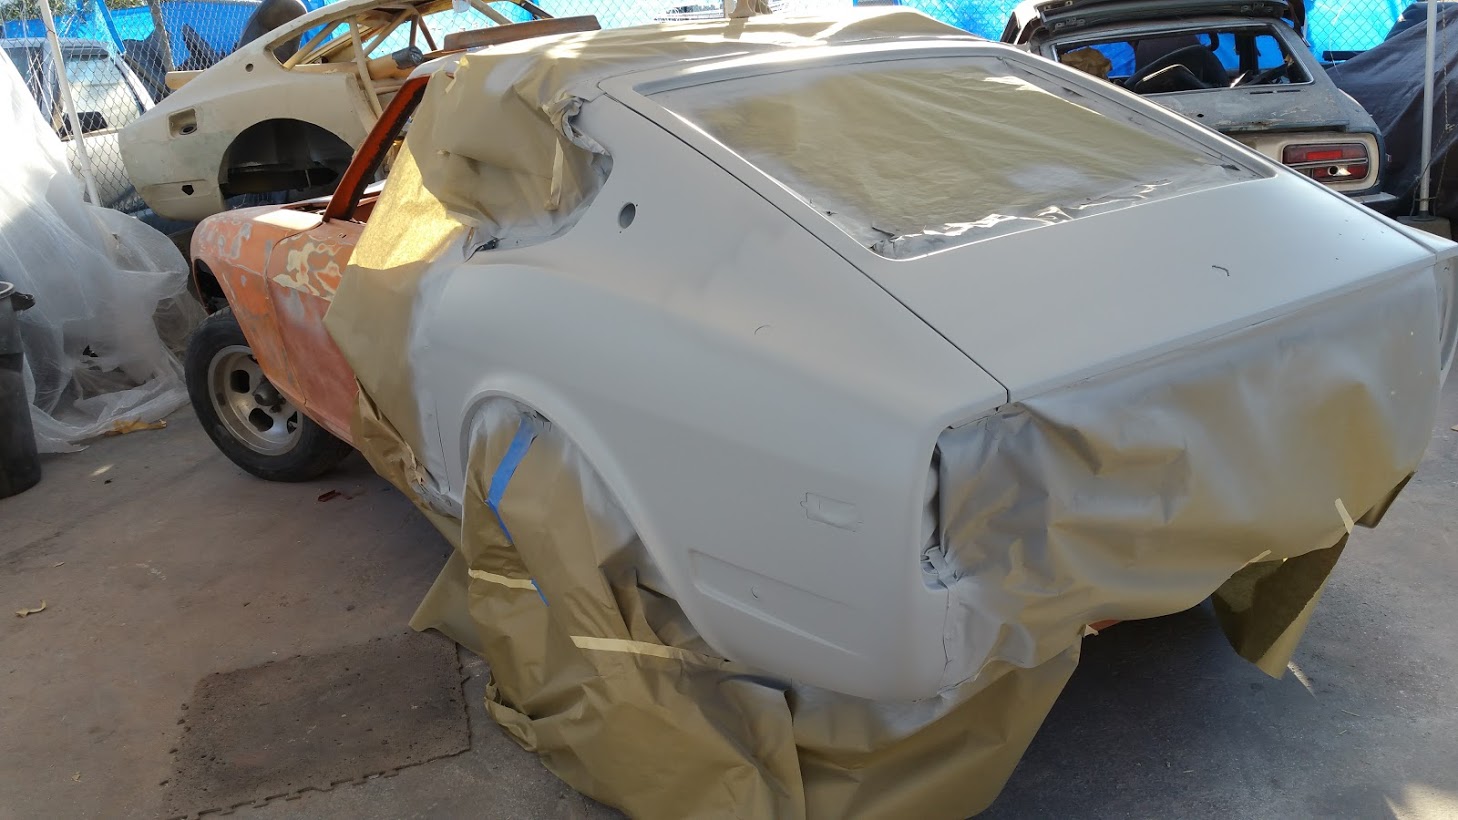
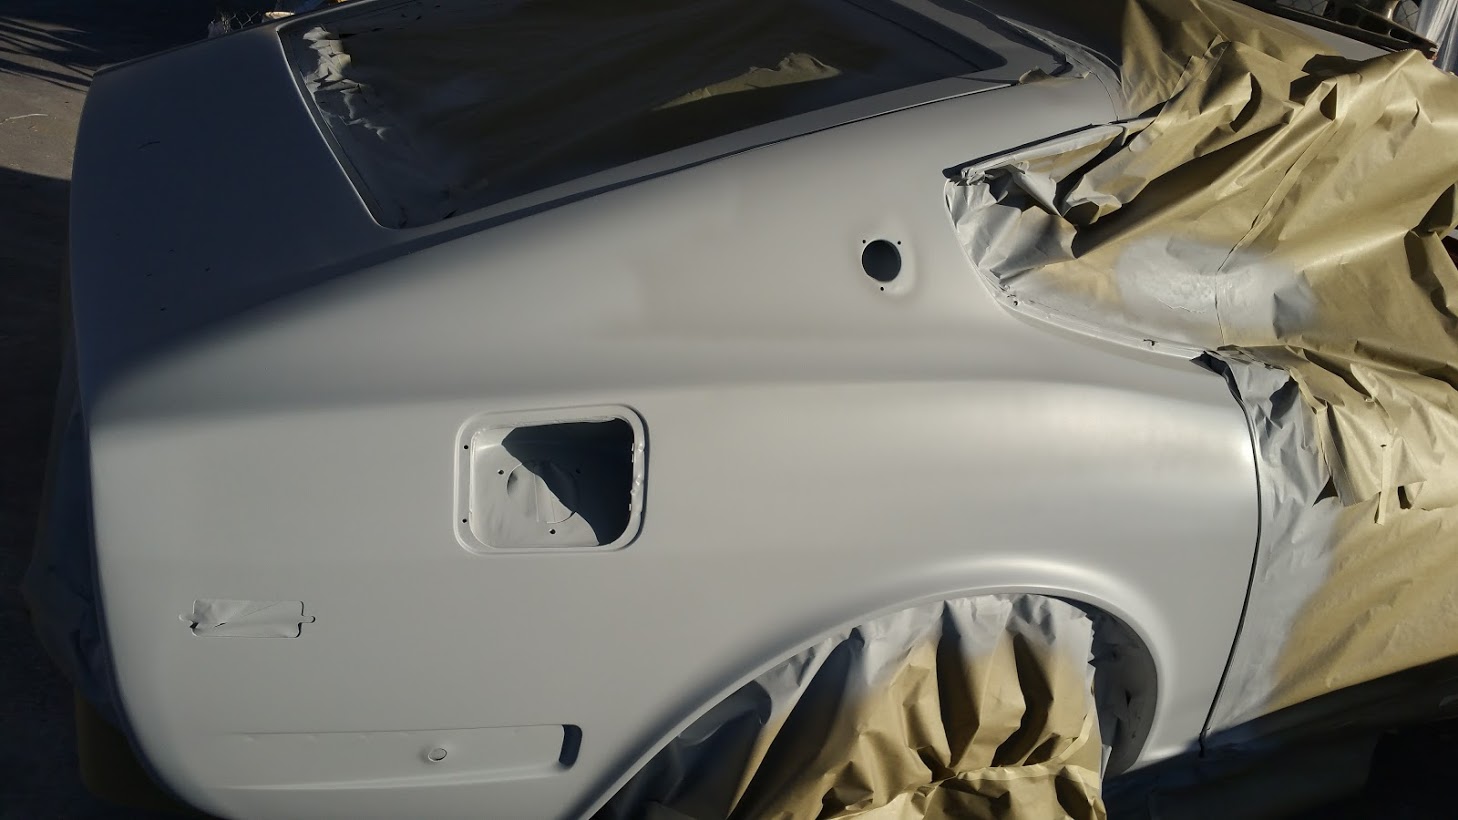
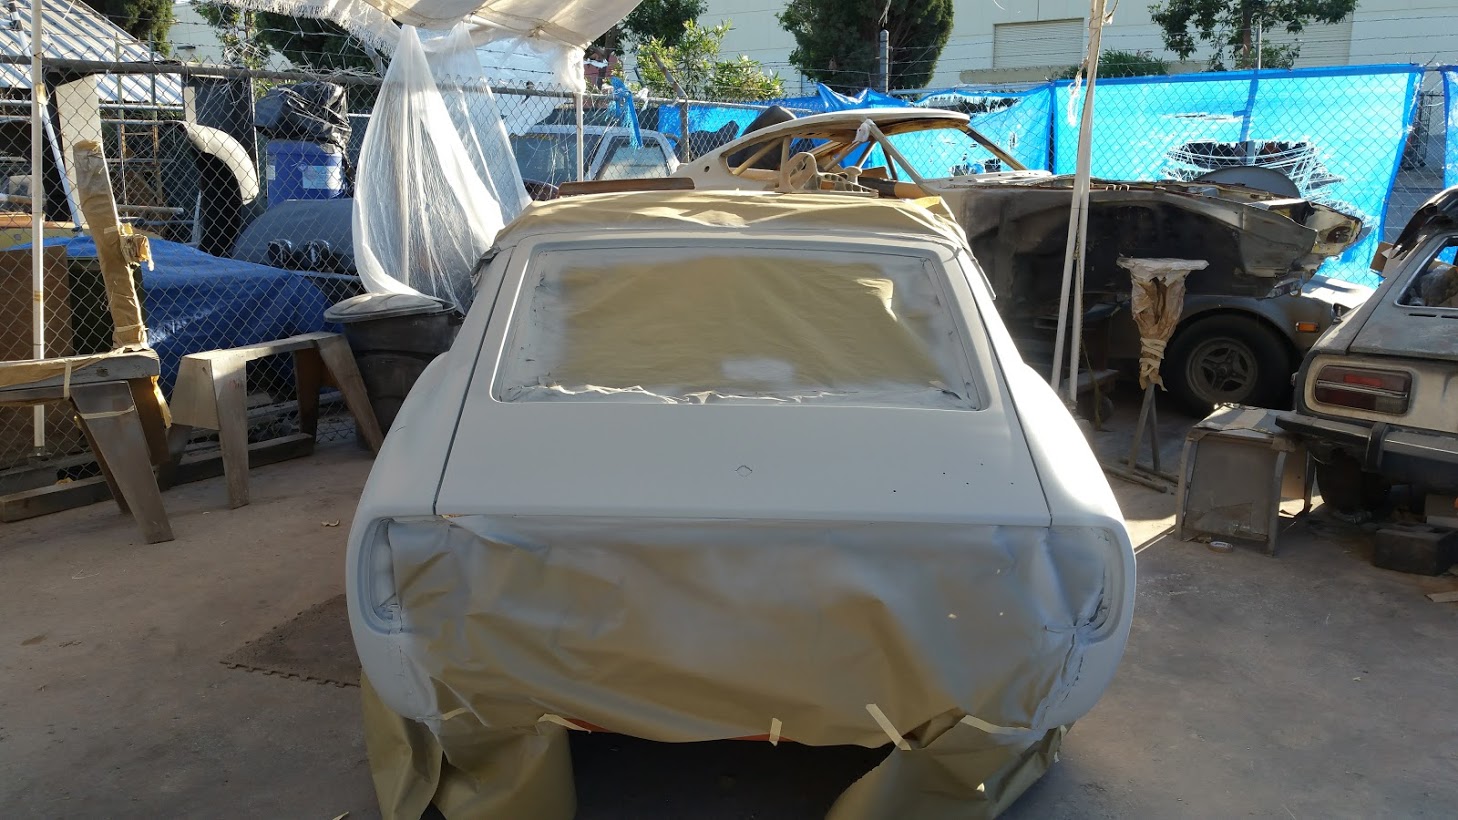
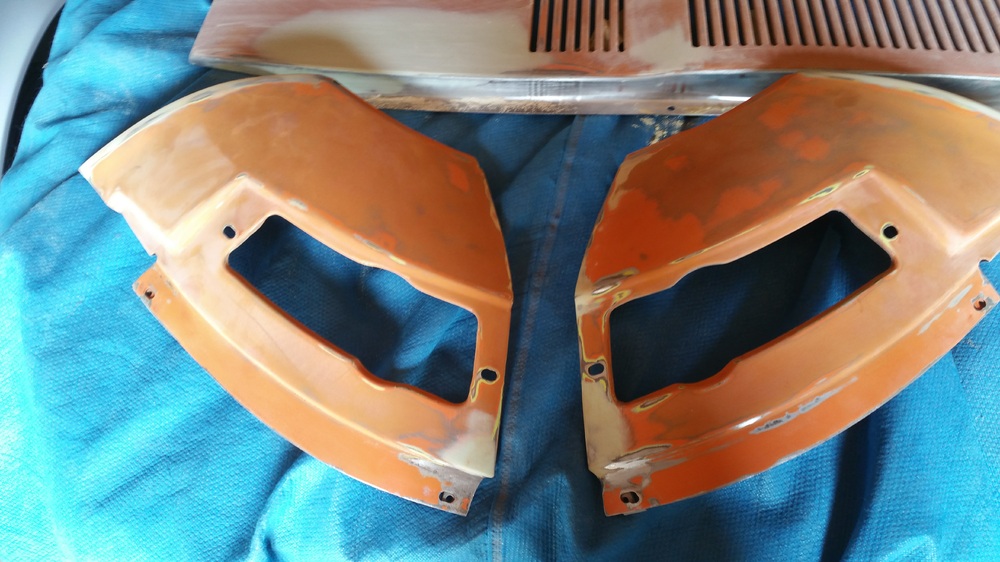
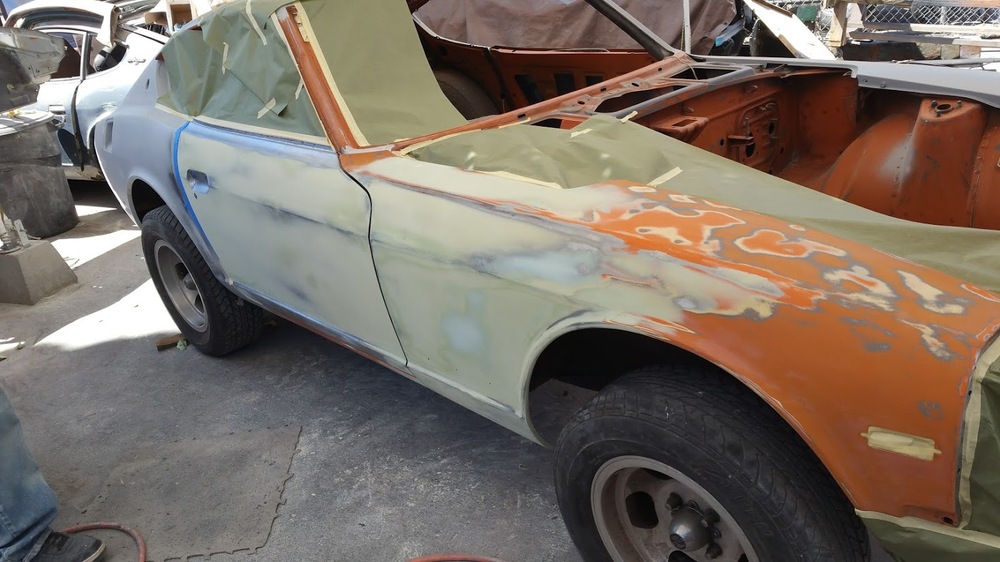
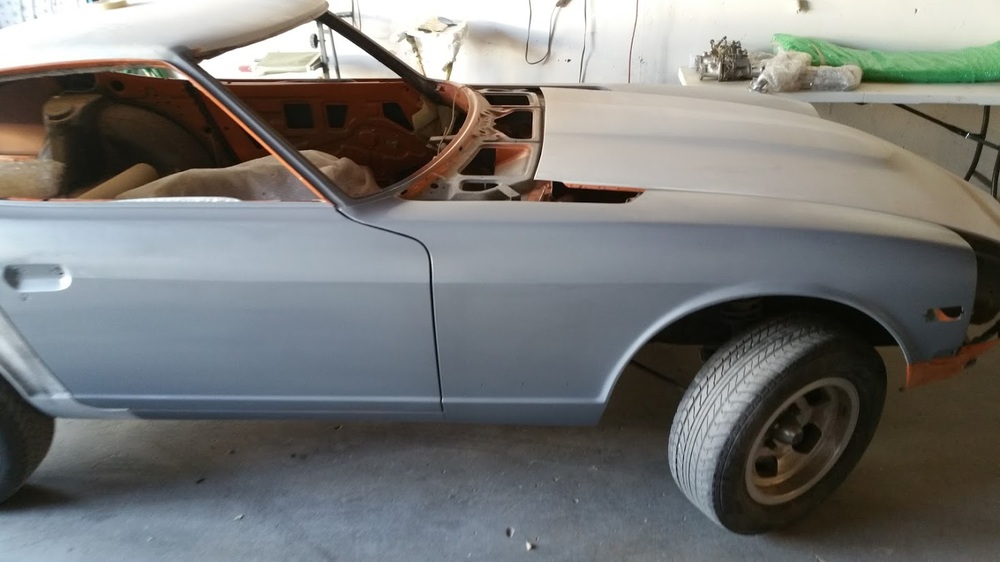
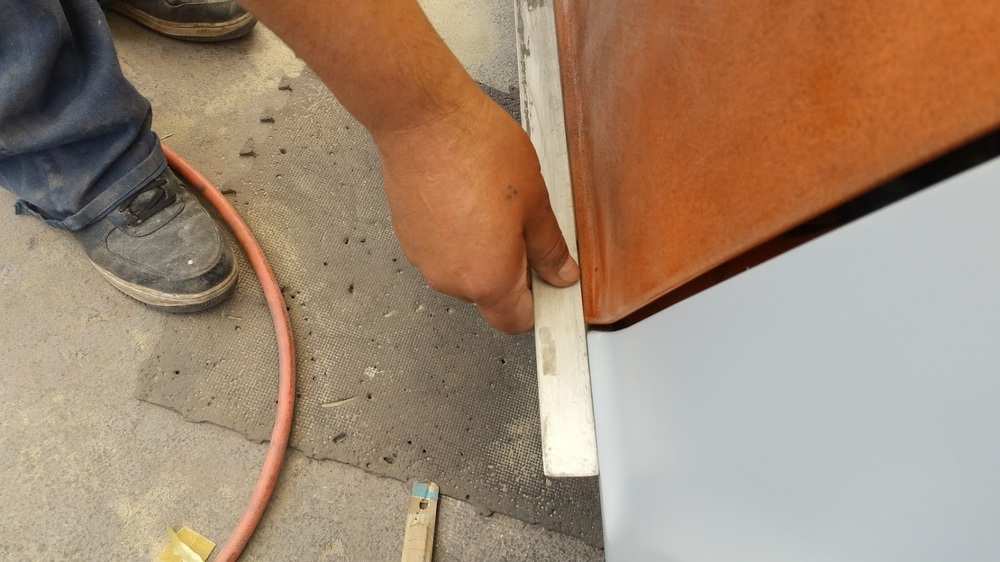
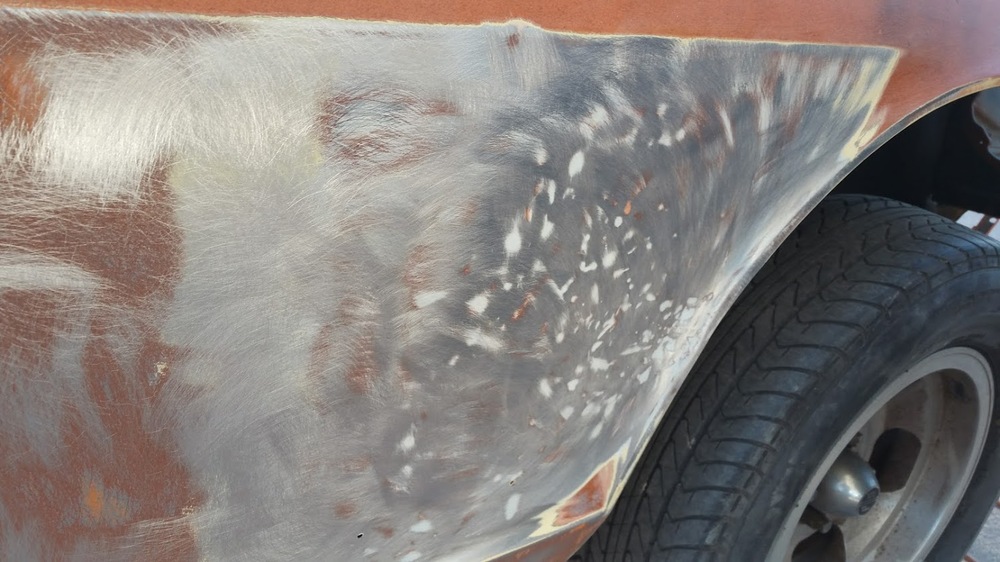
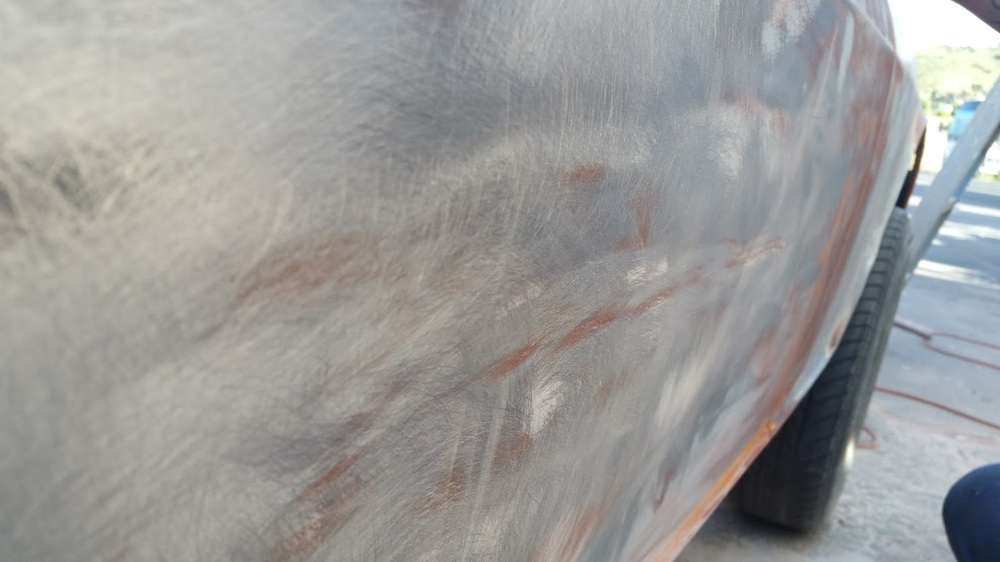
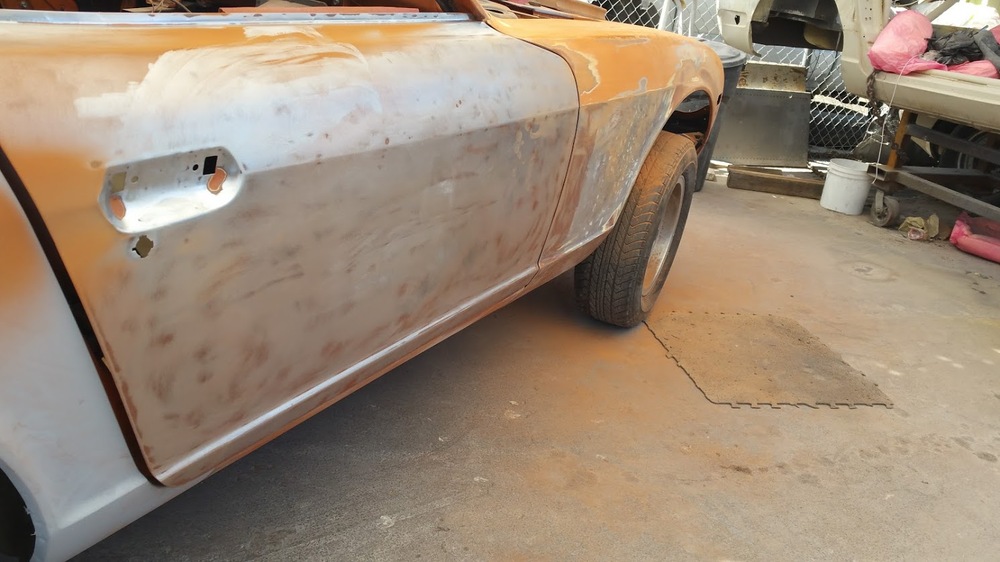
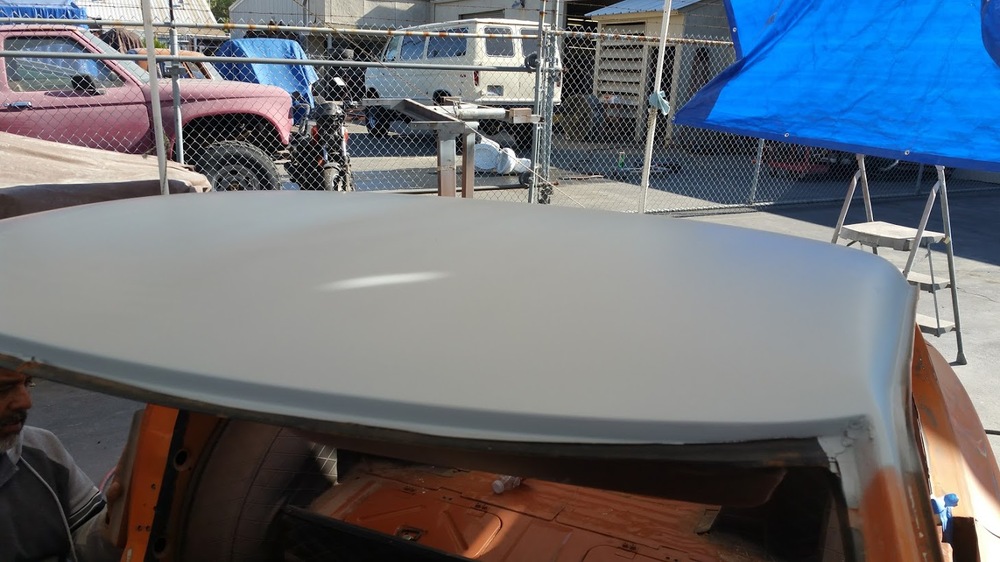
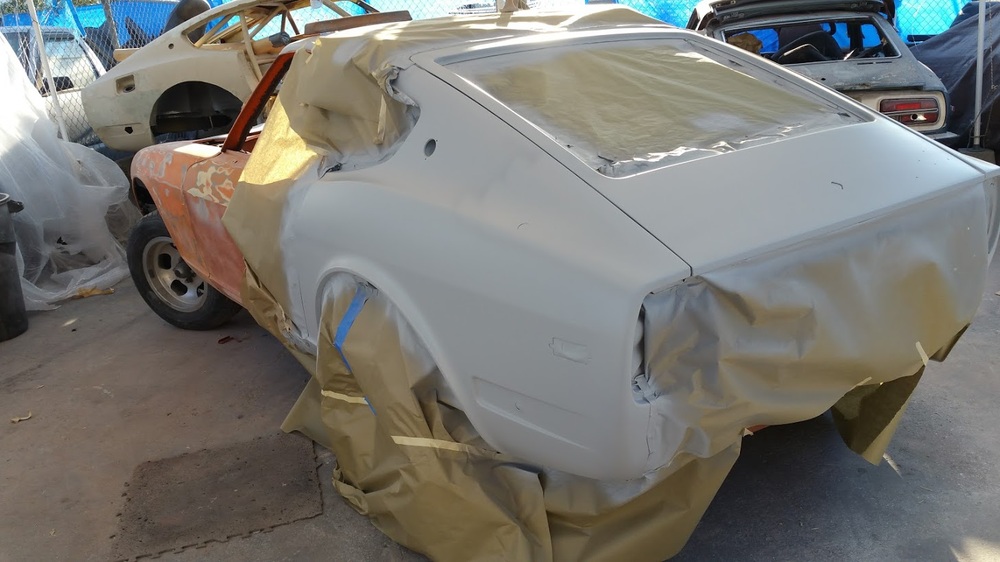
Updates from the paint shop. I love how clean the lines and gaps are, nicely done.


-
I will have to get me a pair or two as well. I just have the type with the alligator teeth and they pretty much tear up everything.
-
It looks pretty nice from the one picture. If it still has the flat top carbs I would be interested if I can find a place to park it. I think the 1973's are underrated. The thing I like about them is that they are the only 240Z with the flat tops and unique hardware. Most people have have tossed the flat tops in favor of the SU's, so finding an original will soon be pretty rare, thus the value. And don't harass me about the flat tops as I actually had a 1973 240Z (Stupidly sold in a short period of insanity) that had flat tops and it ran flawlessly, even in LA traffic. I may have @Montezuma check this out as he lives in Long Beach....not far from San Pedro.
-
Yes it is
-
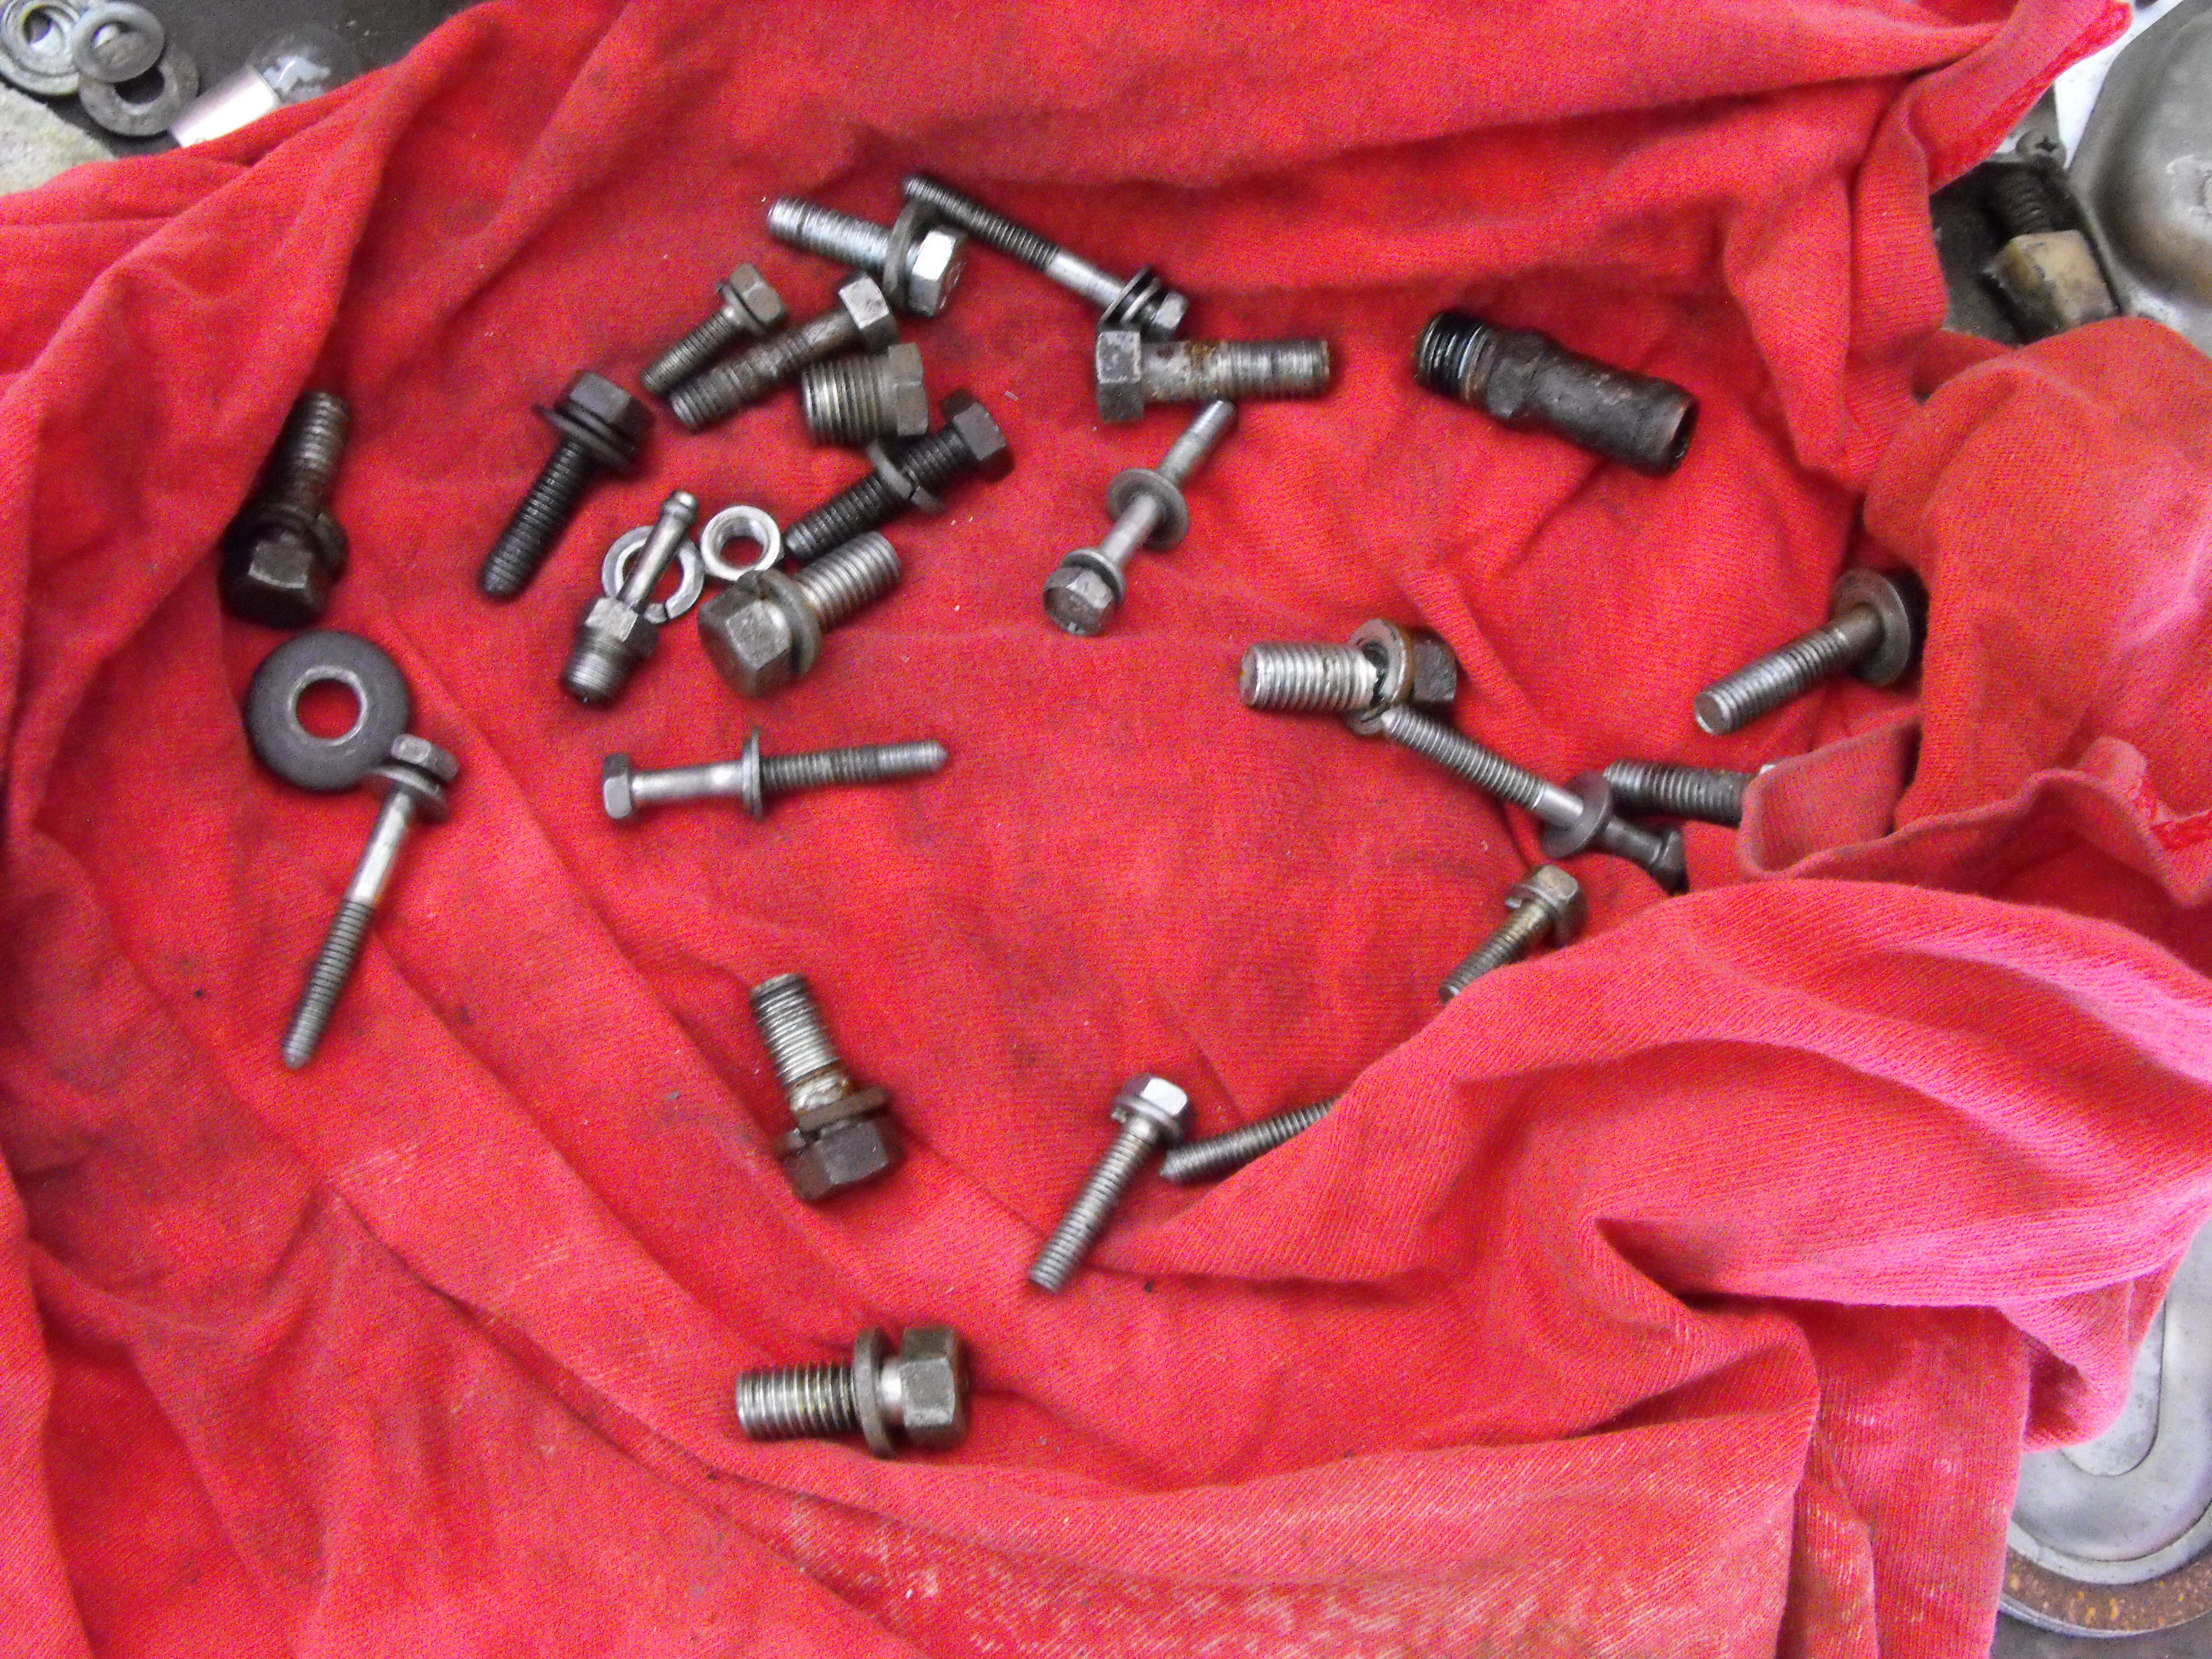
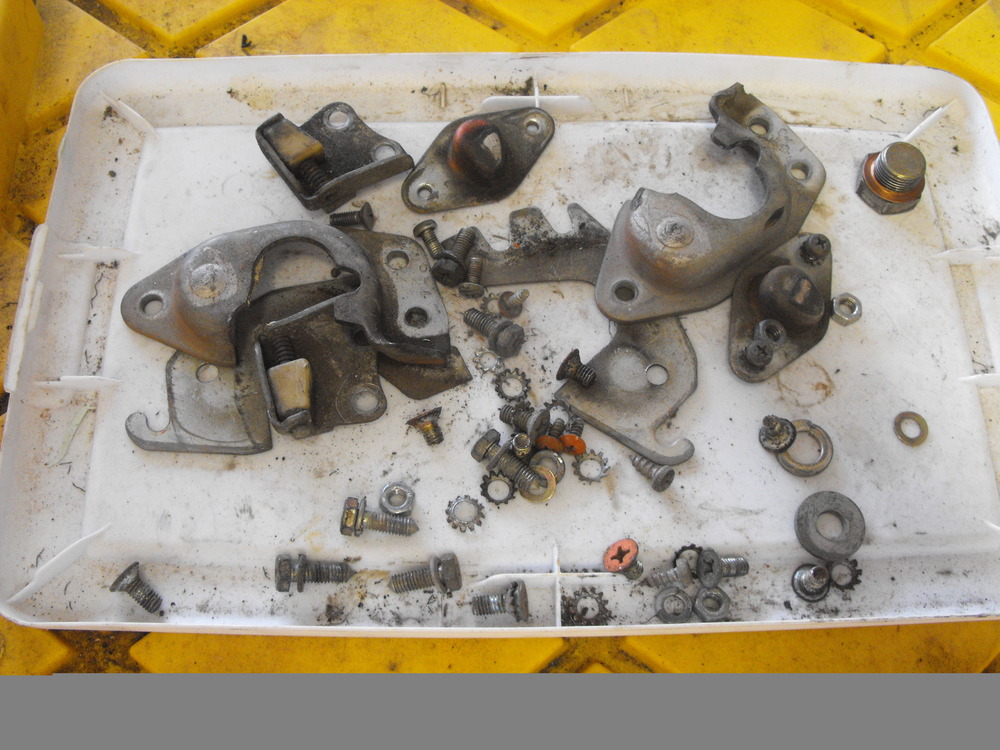
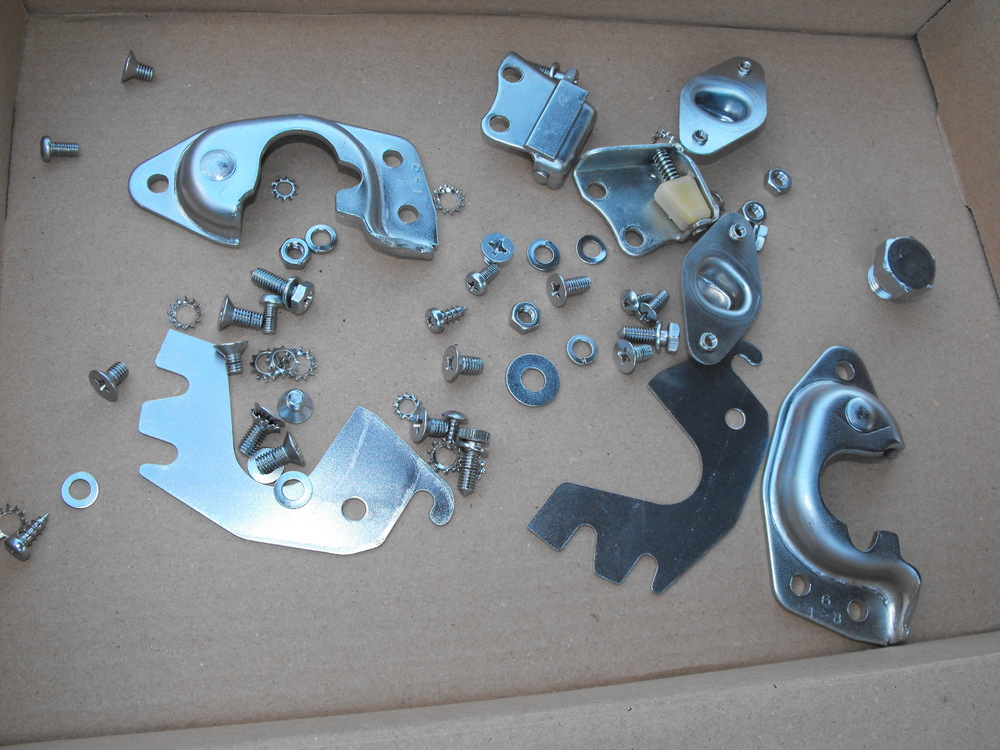
As far as the plating goes it's "Garbage IN, Garbage OUT". They need to be cleaned up but I think it is worth the work.
-
Got the silver zinc parts back from the plater. The parts came out great. Before and after pics are below.
-
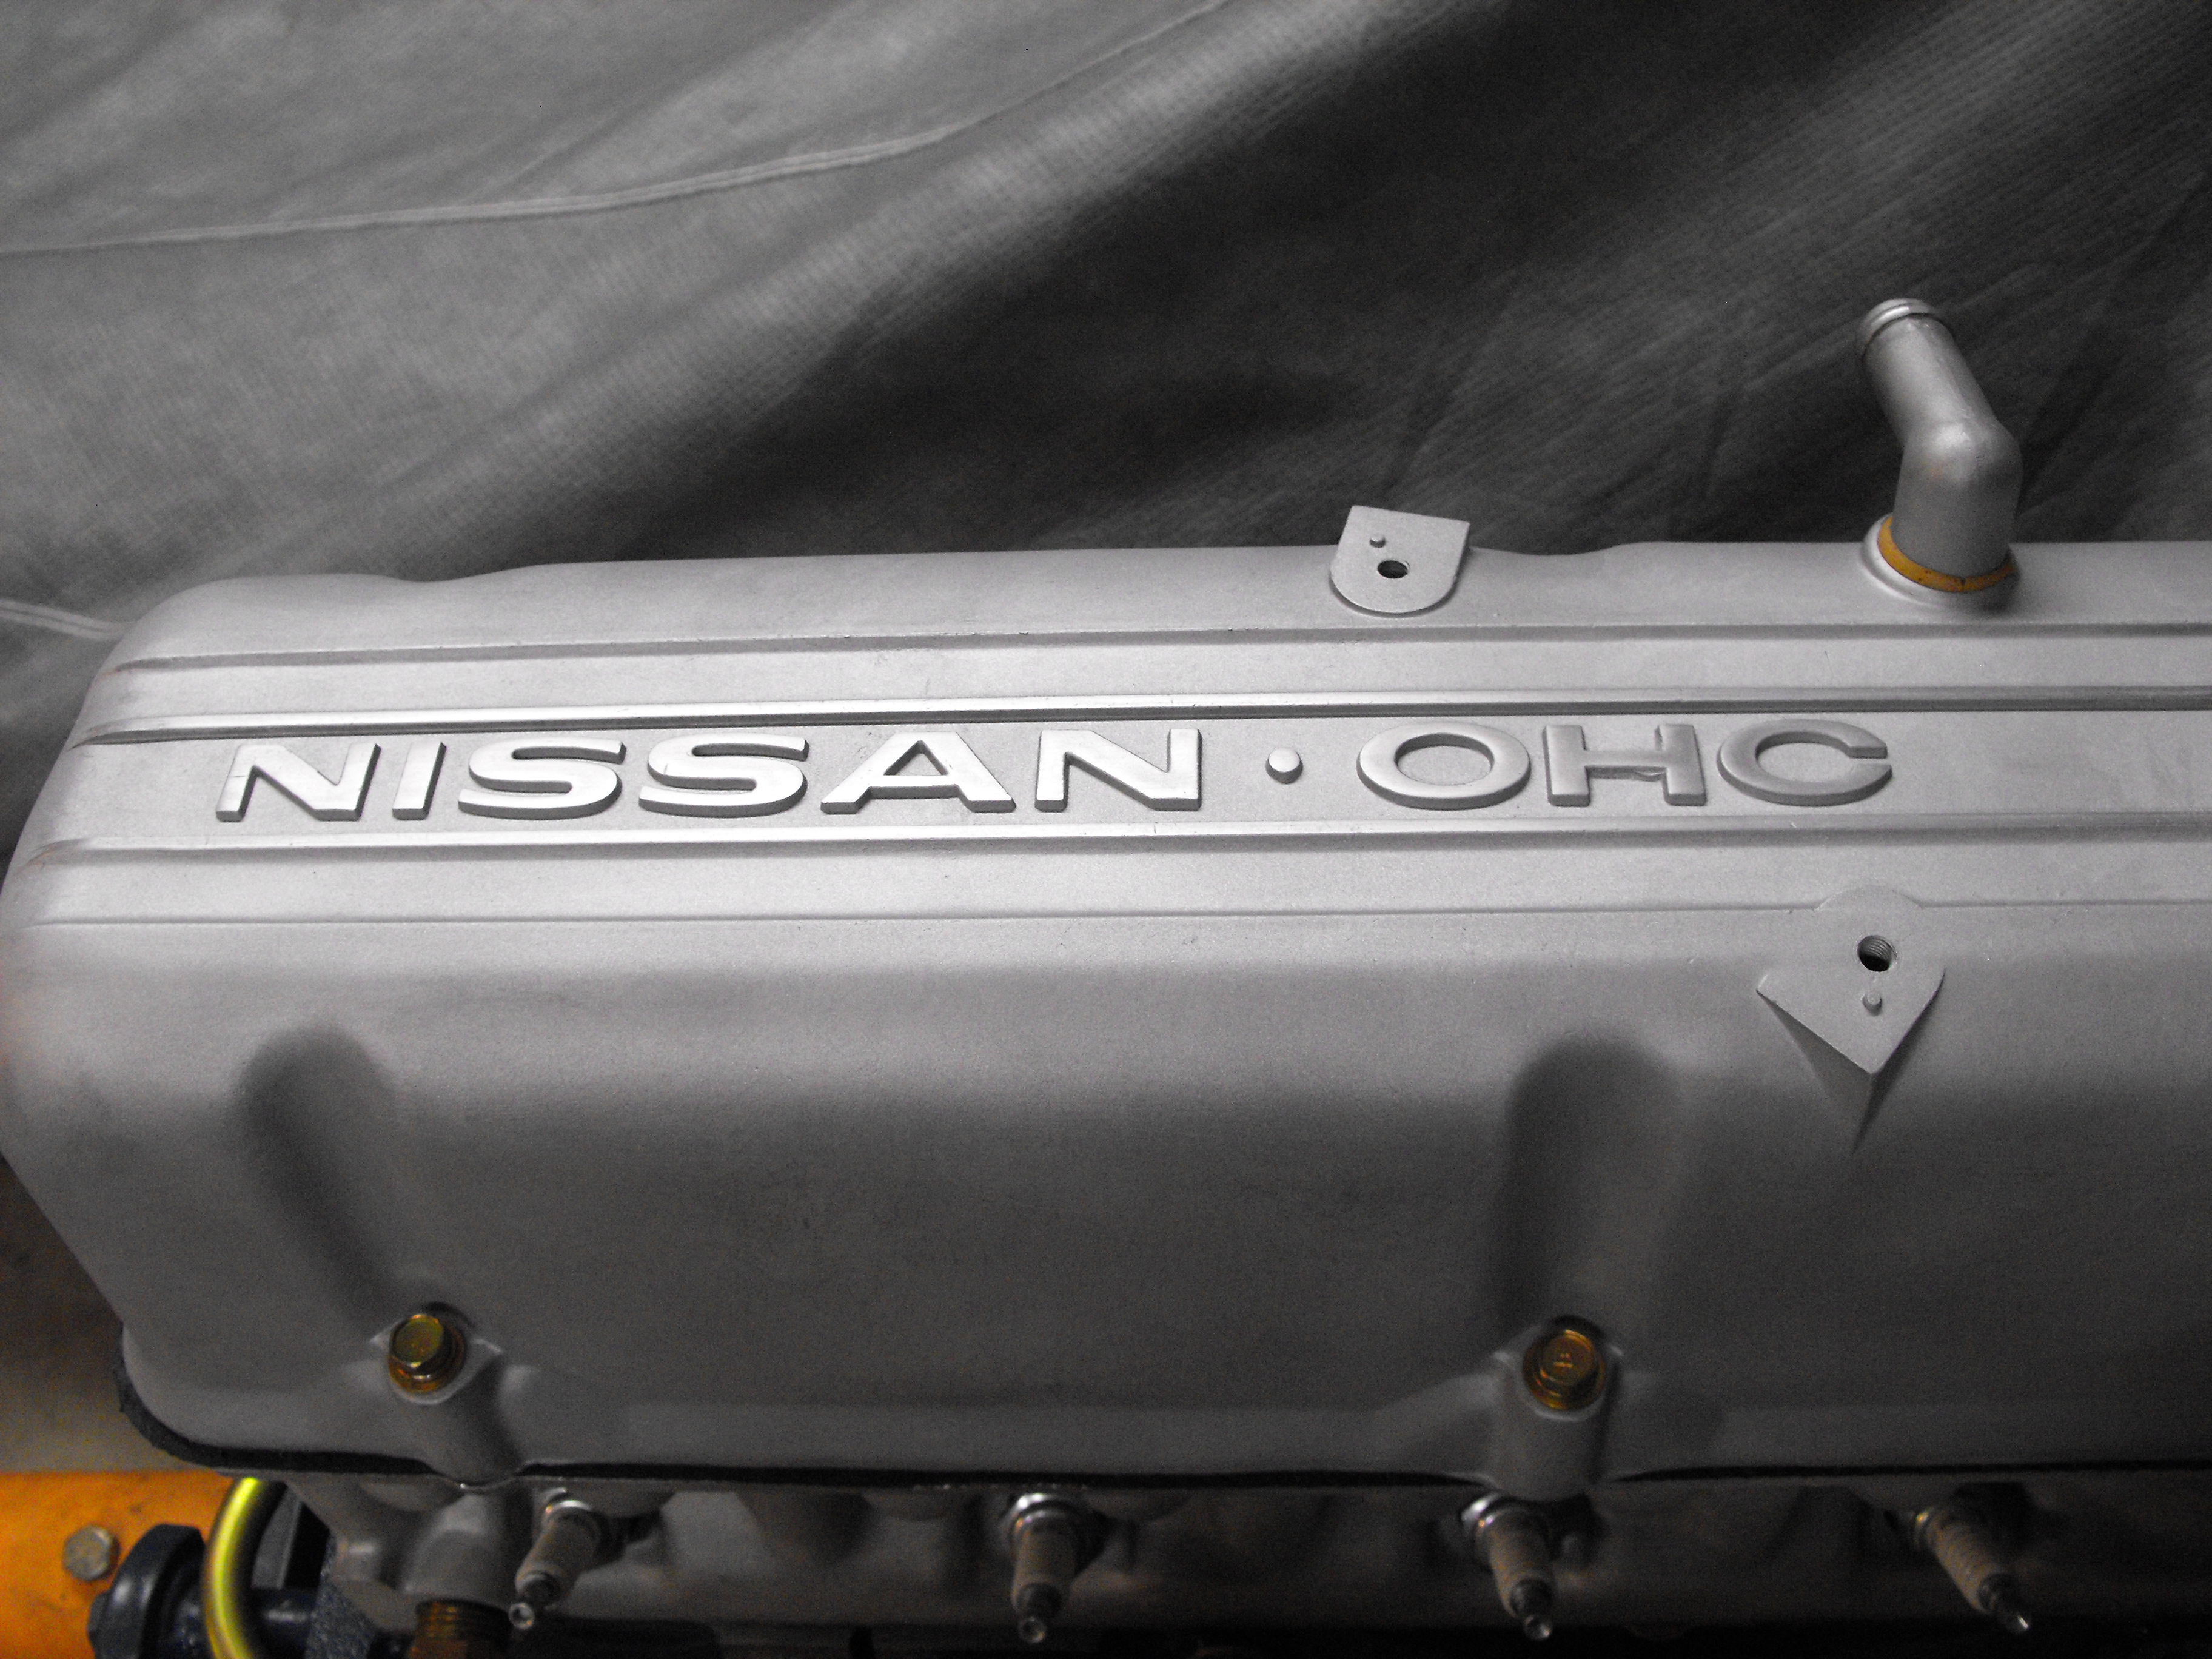
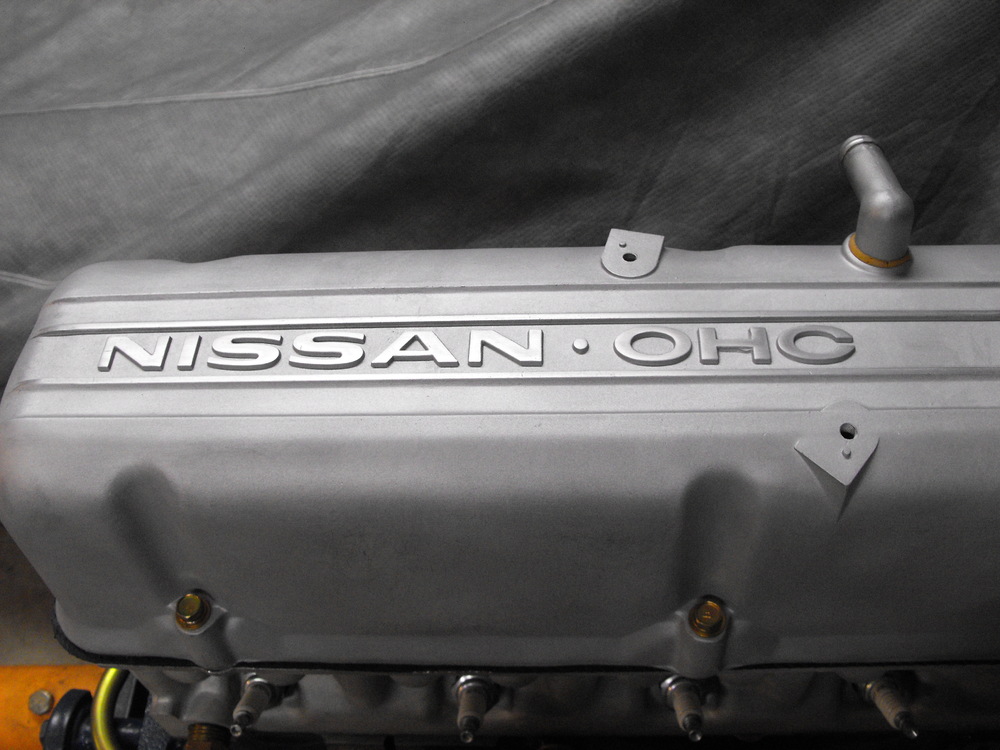
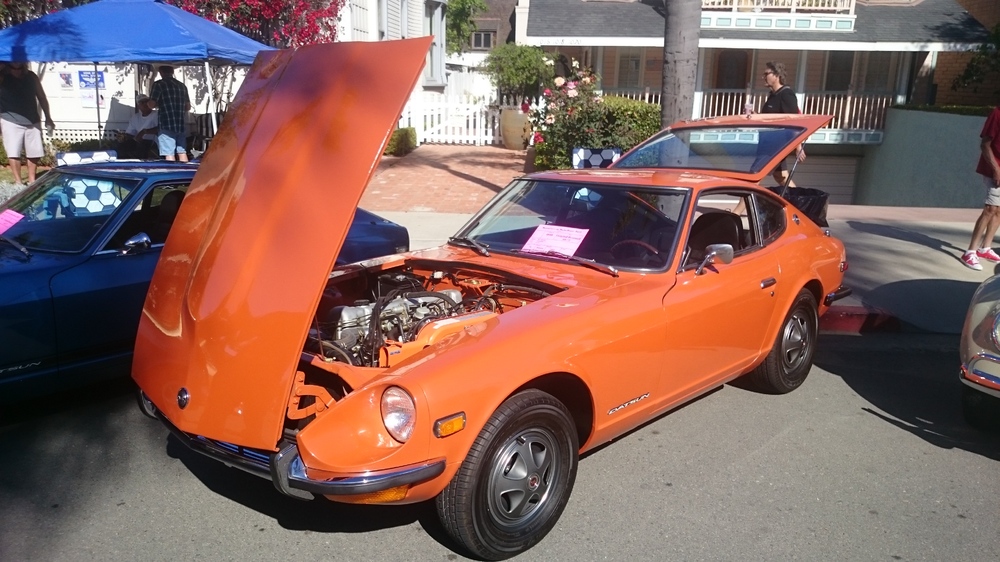
Some detail pics of the valve cover. I think this came out real nice. Took my orange Z to the Motorcars on Main Street show in Coronado today. Personally, I think it is one of the best car shows in San Diego. The Z cars get a lot of attention.

-
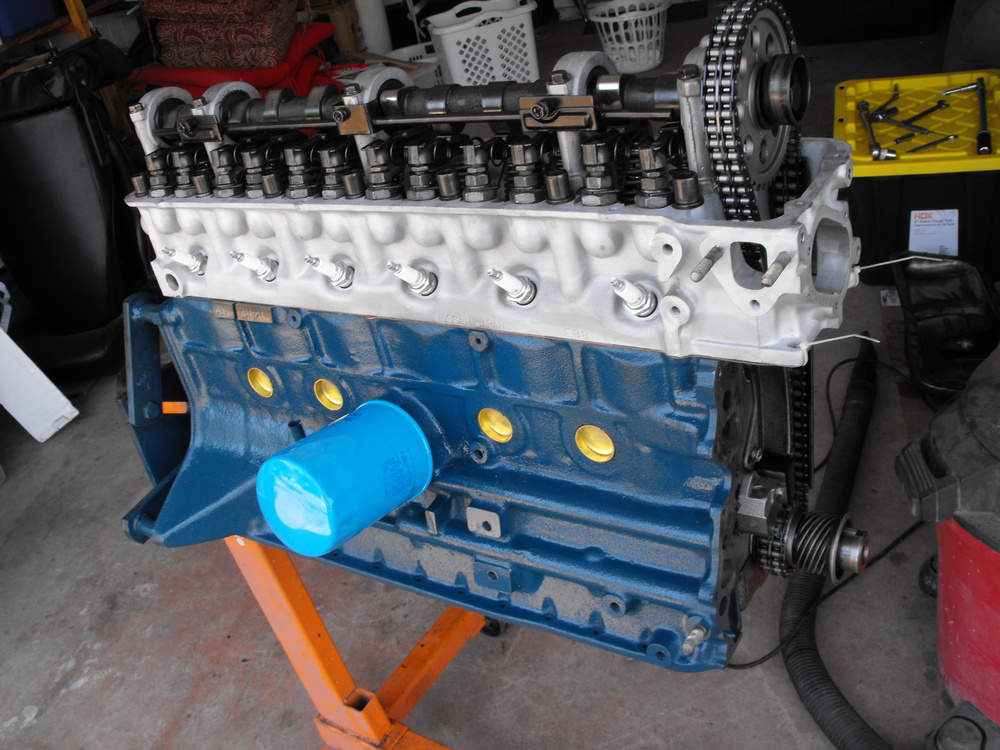
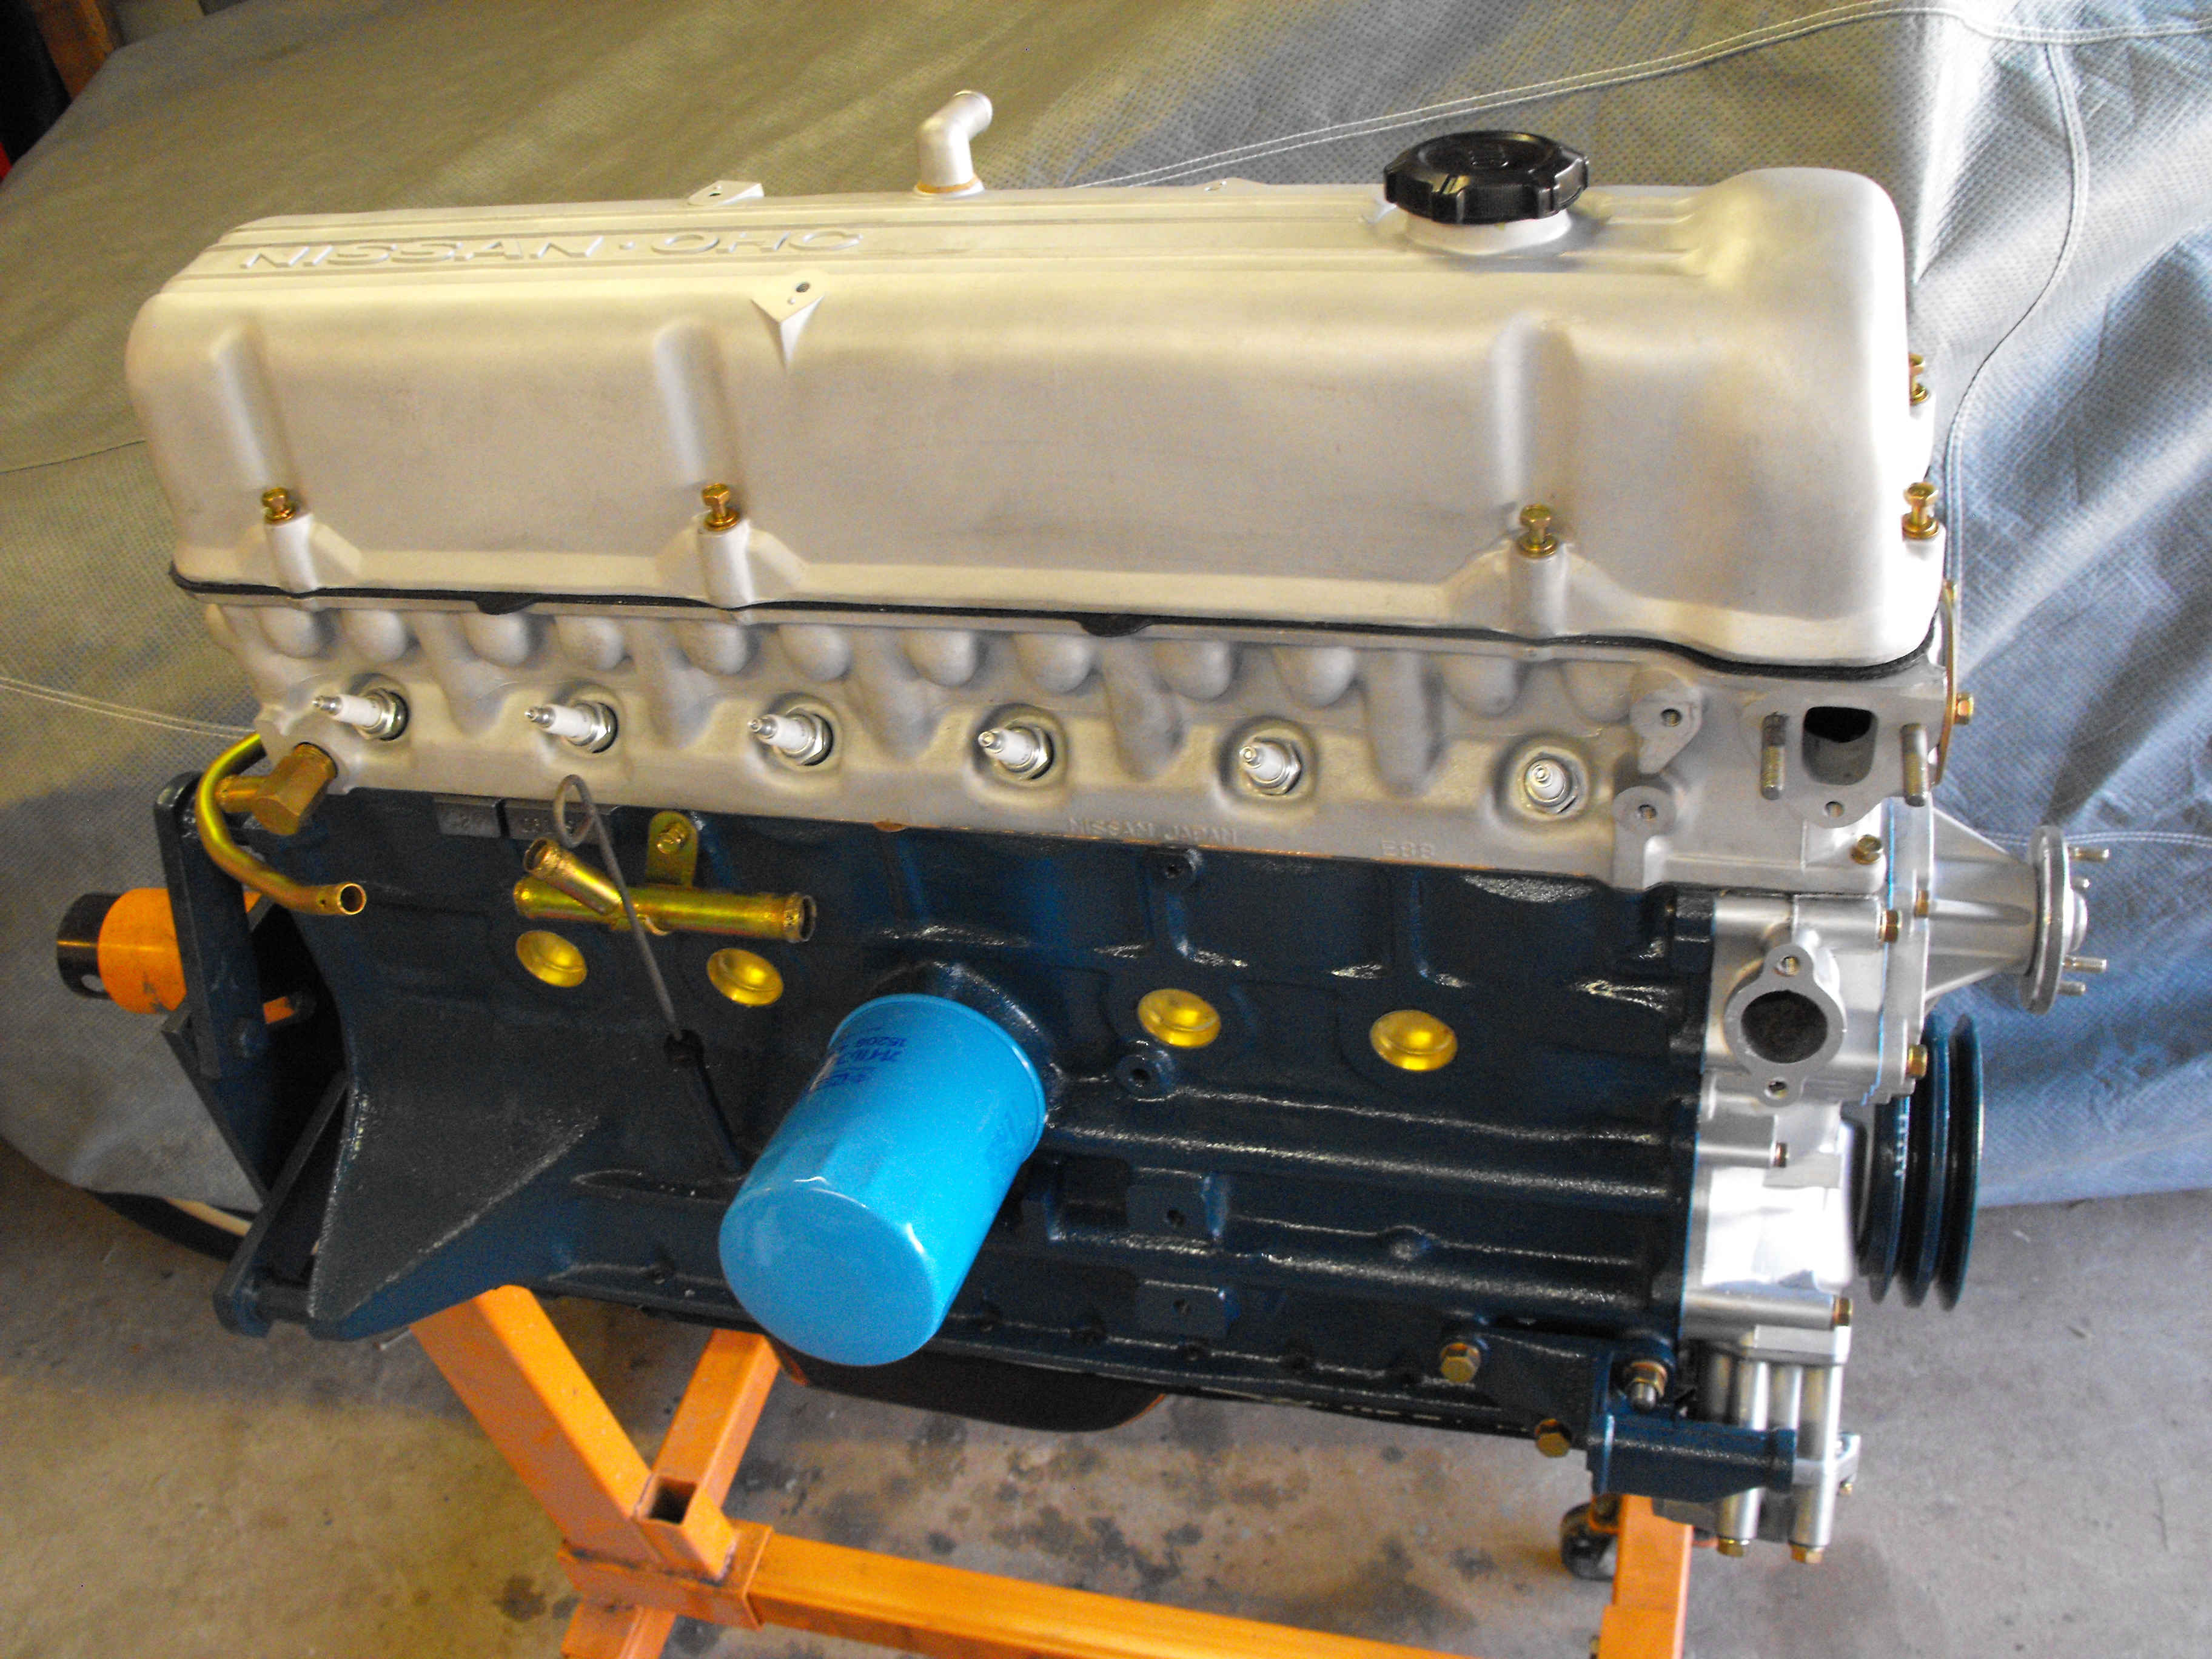
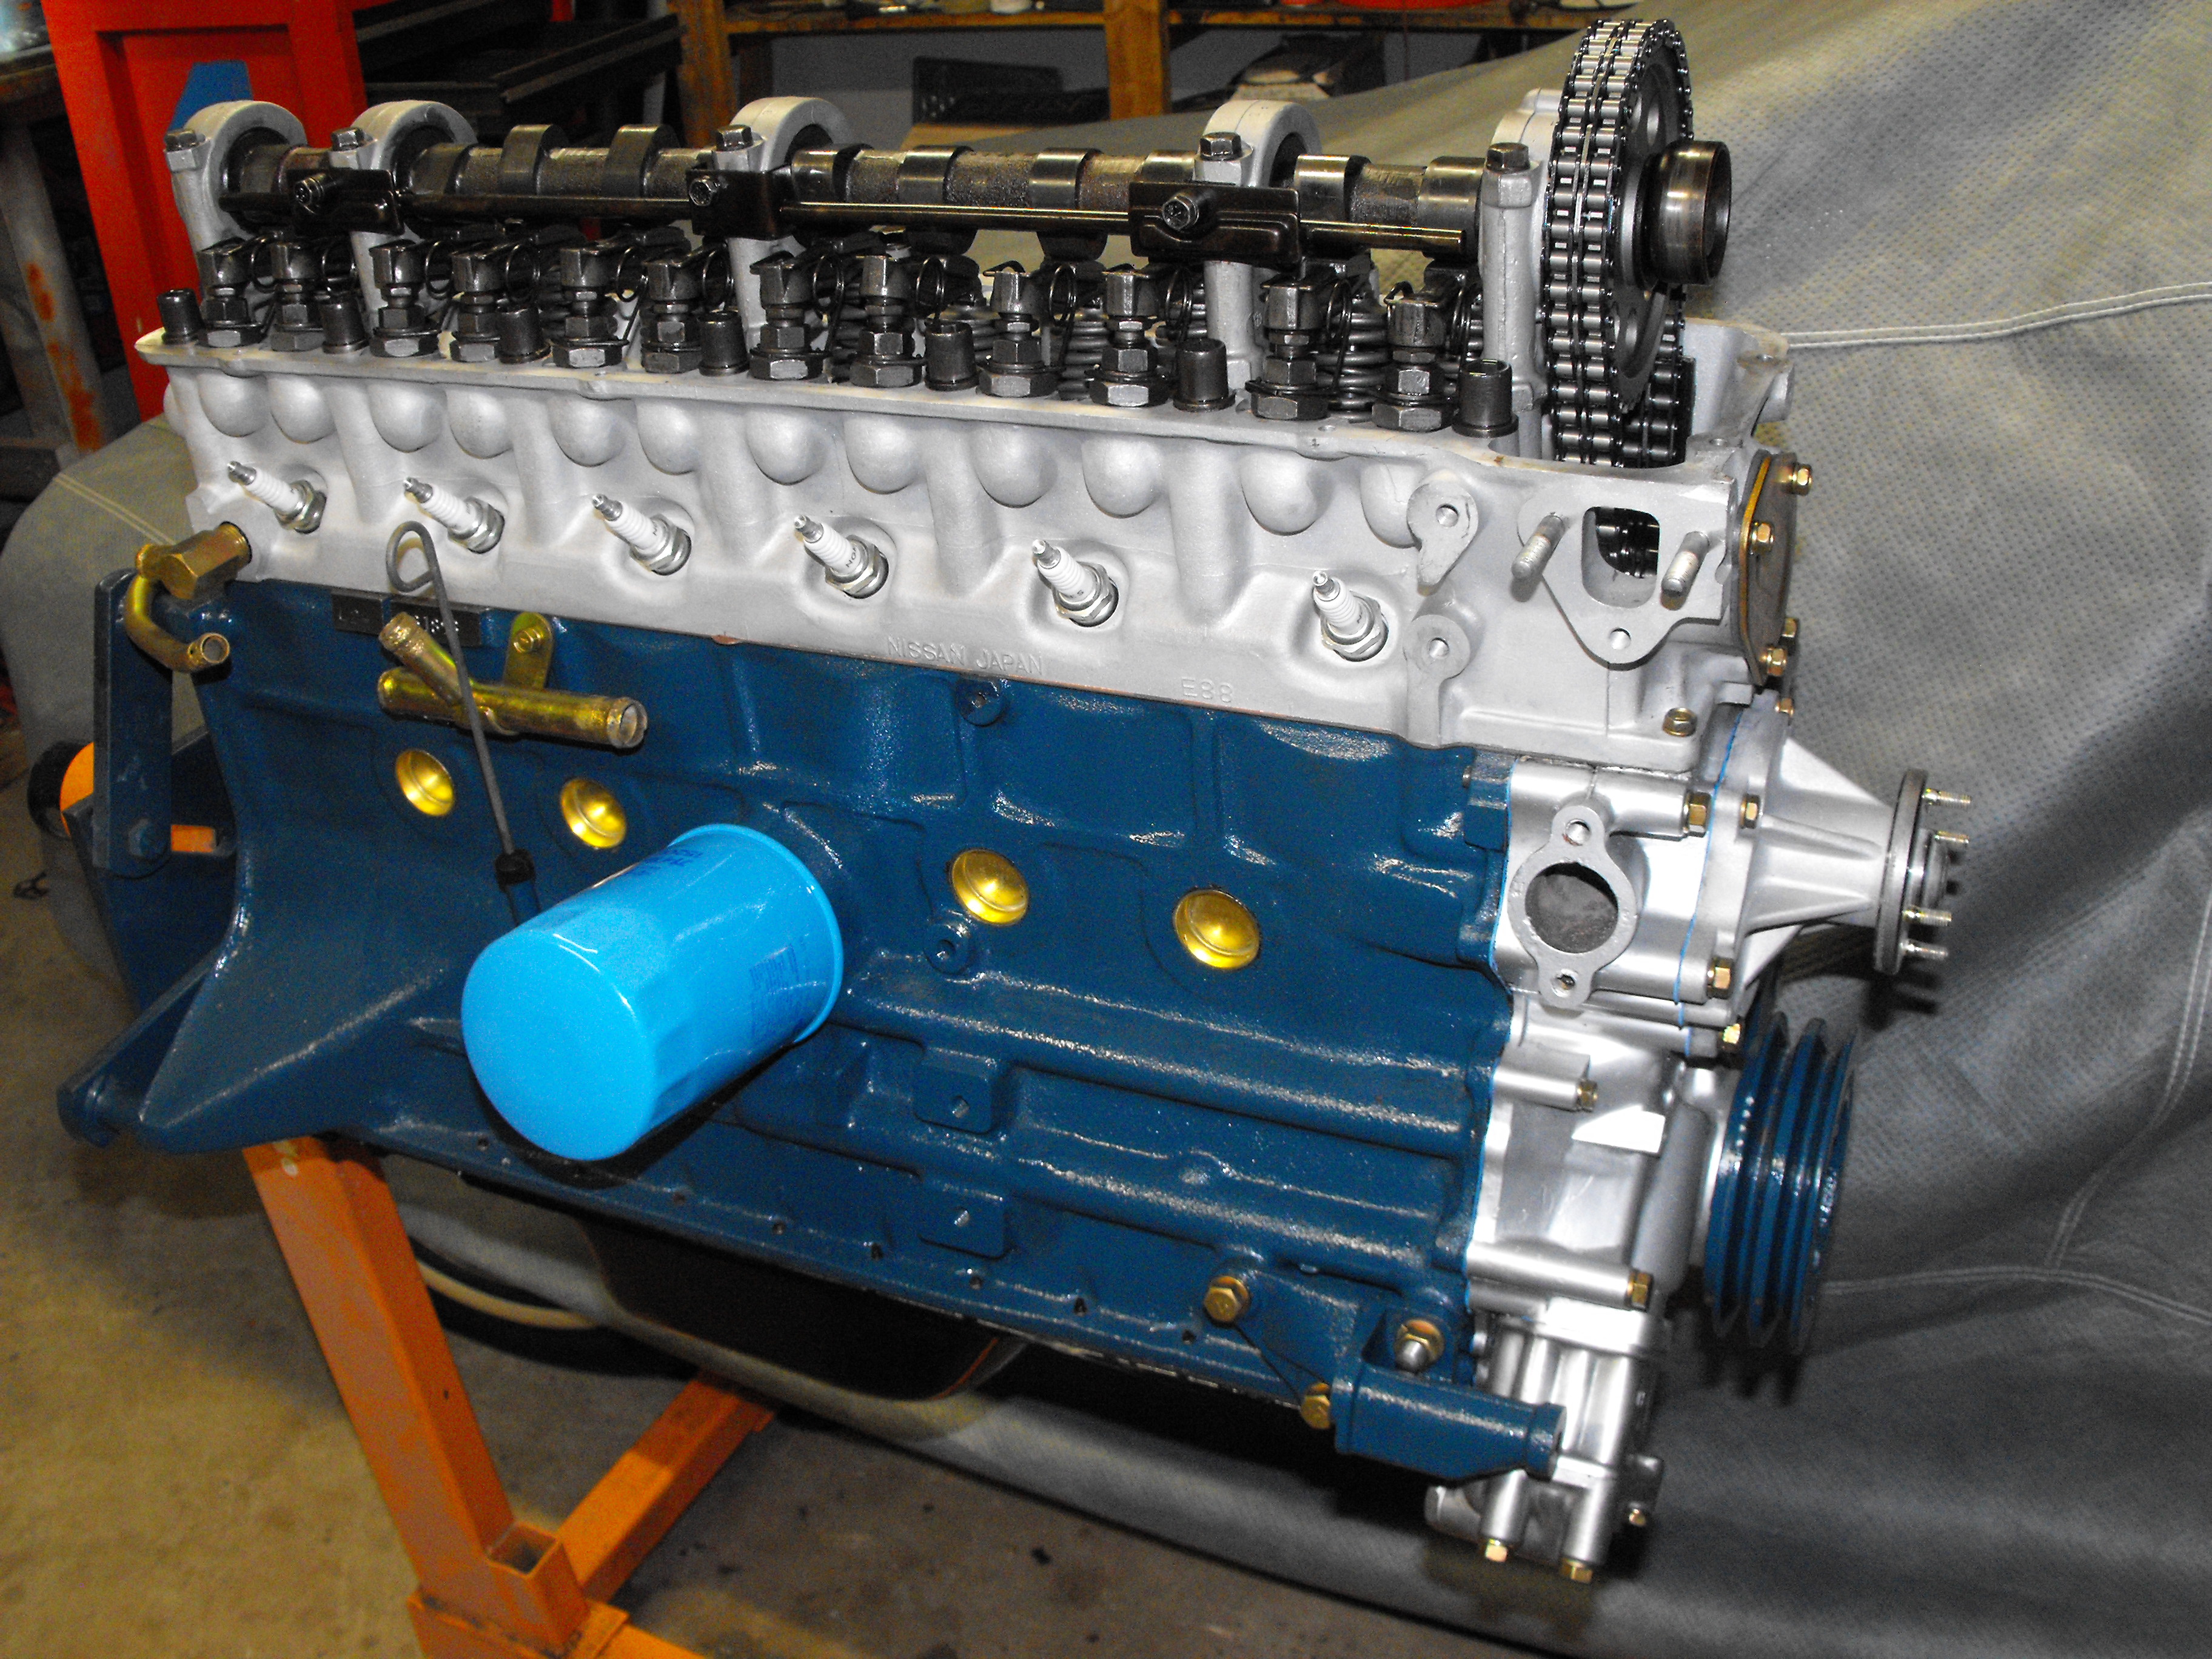
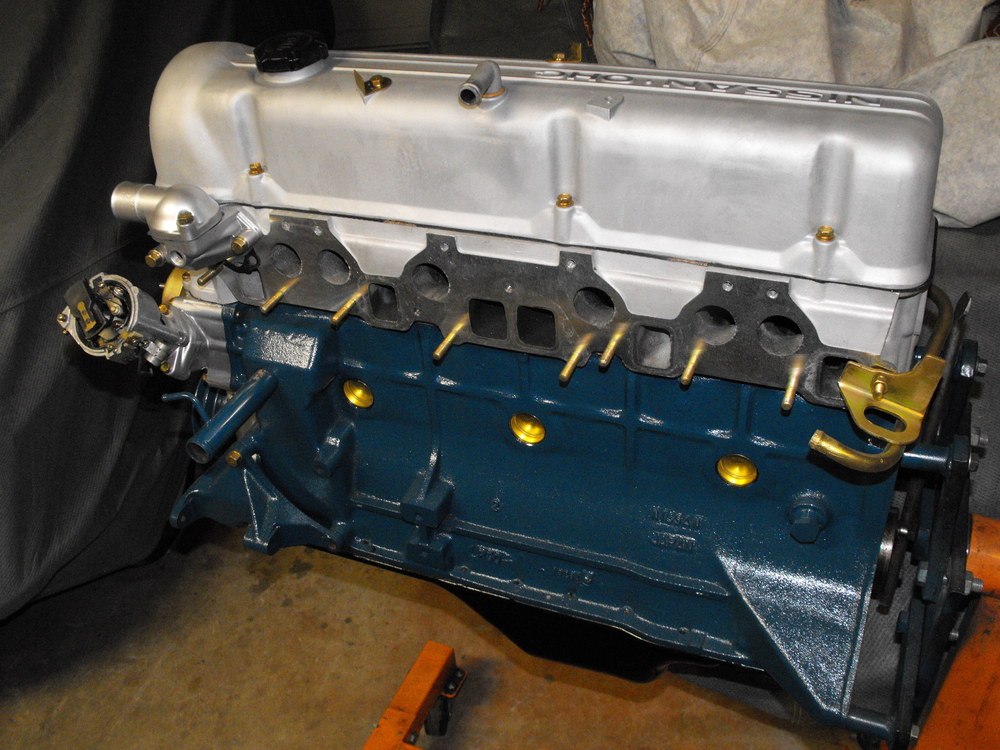
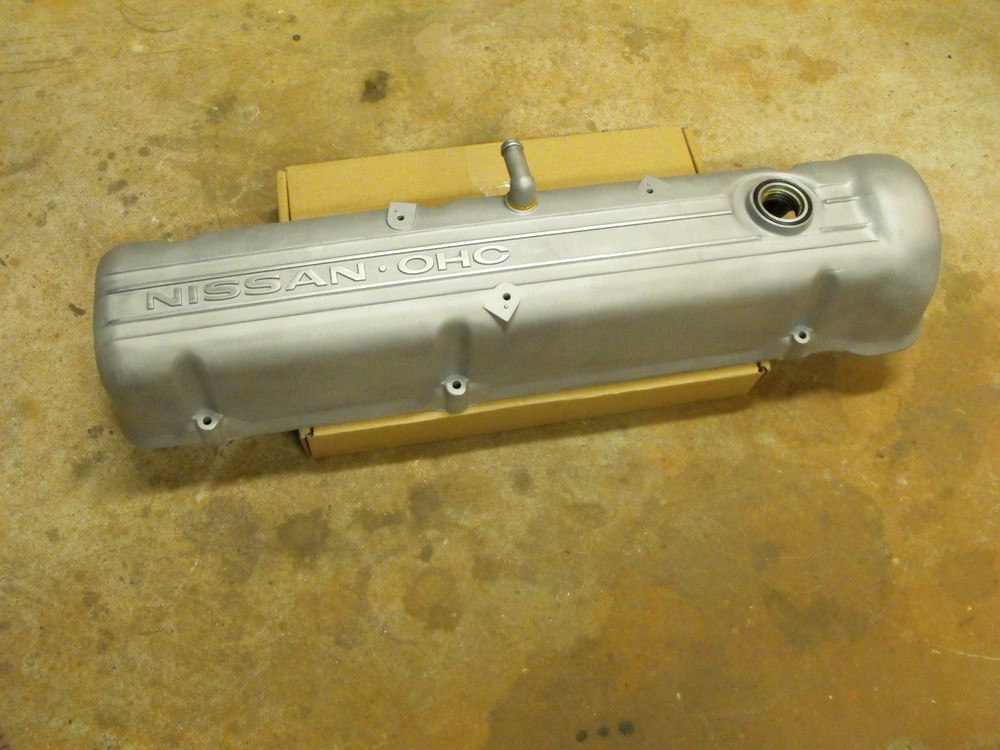
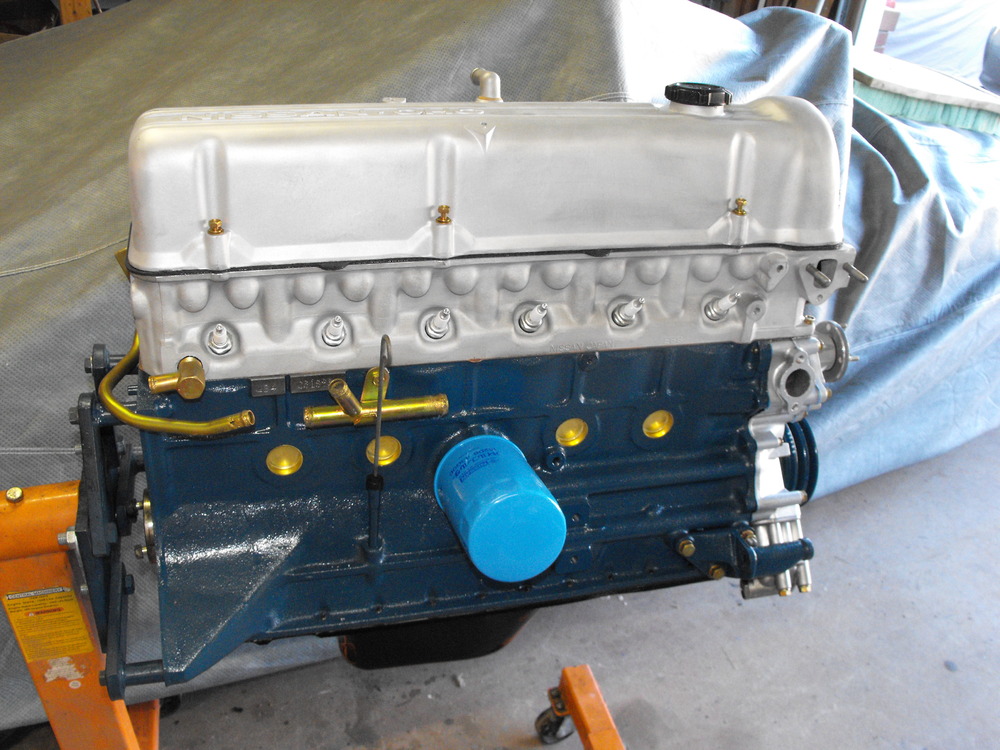
Got the valve cover back today. Just have it resting on motor for now. Will clear coat tomorrow and then install. Will also trim those silly tabs off of the valve cover gasket. Whatever happened to the old fashioned cork gaskets? These new ones are funky. I would actually be interested in picking up a couple of the cork/brown ones if they were available.
-
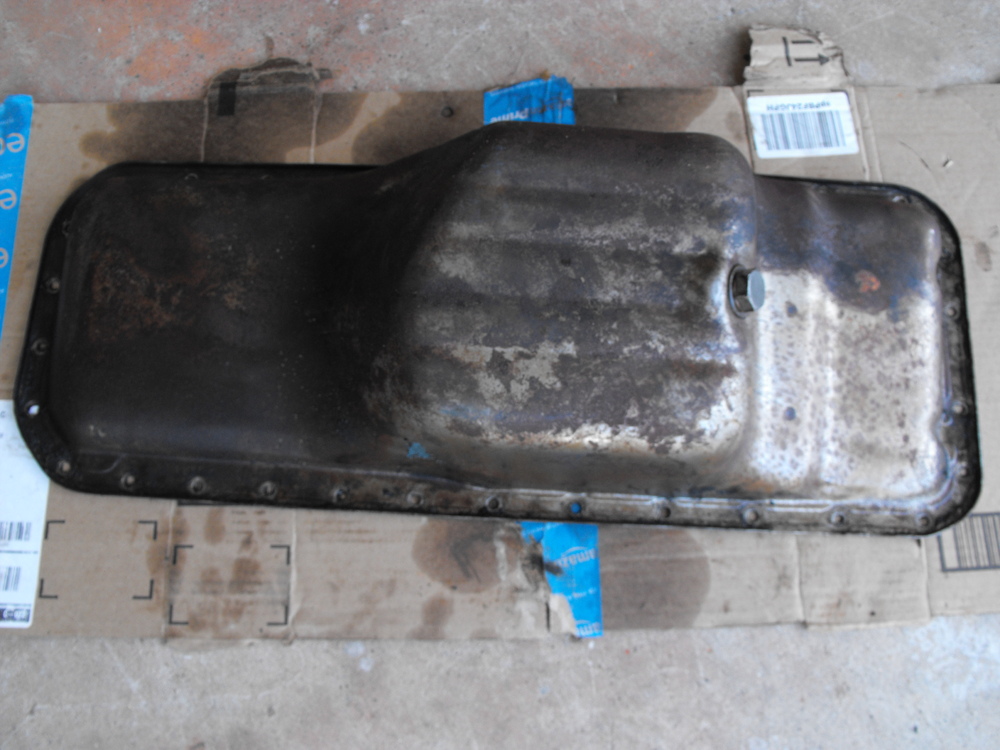
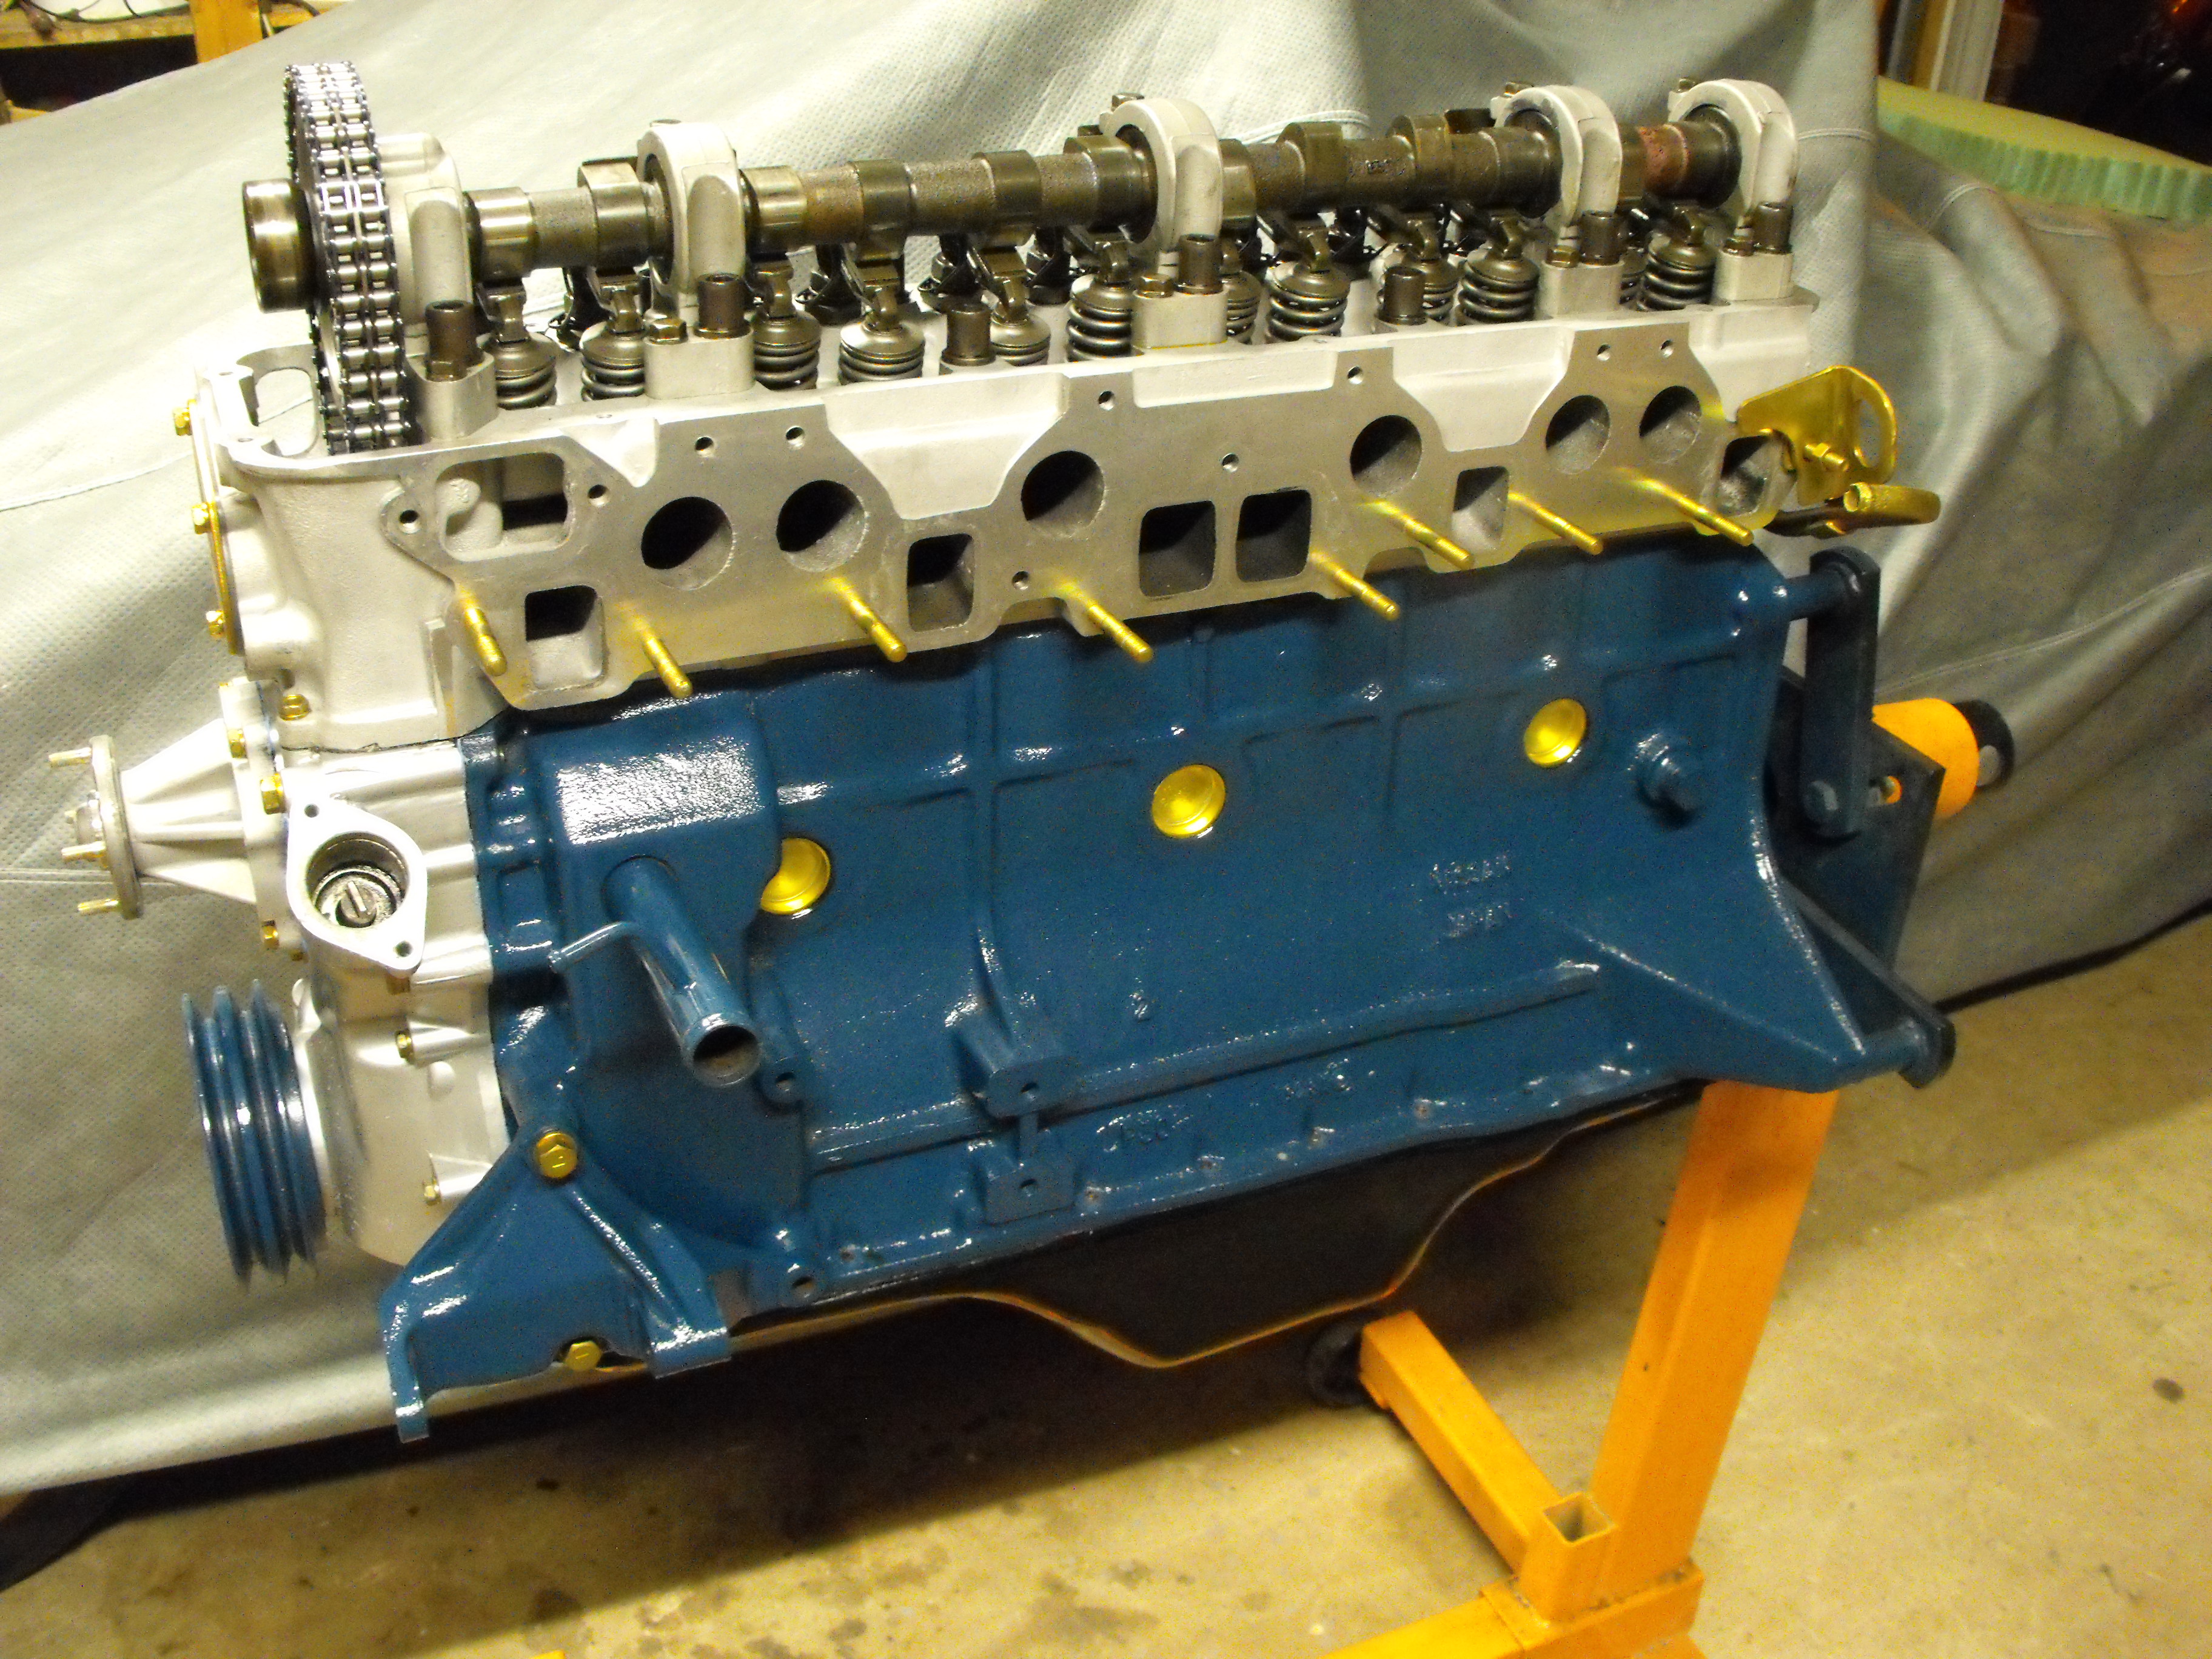
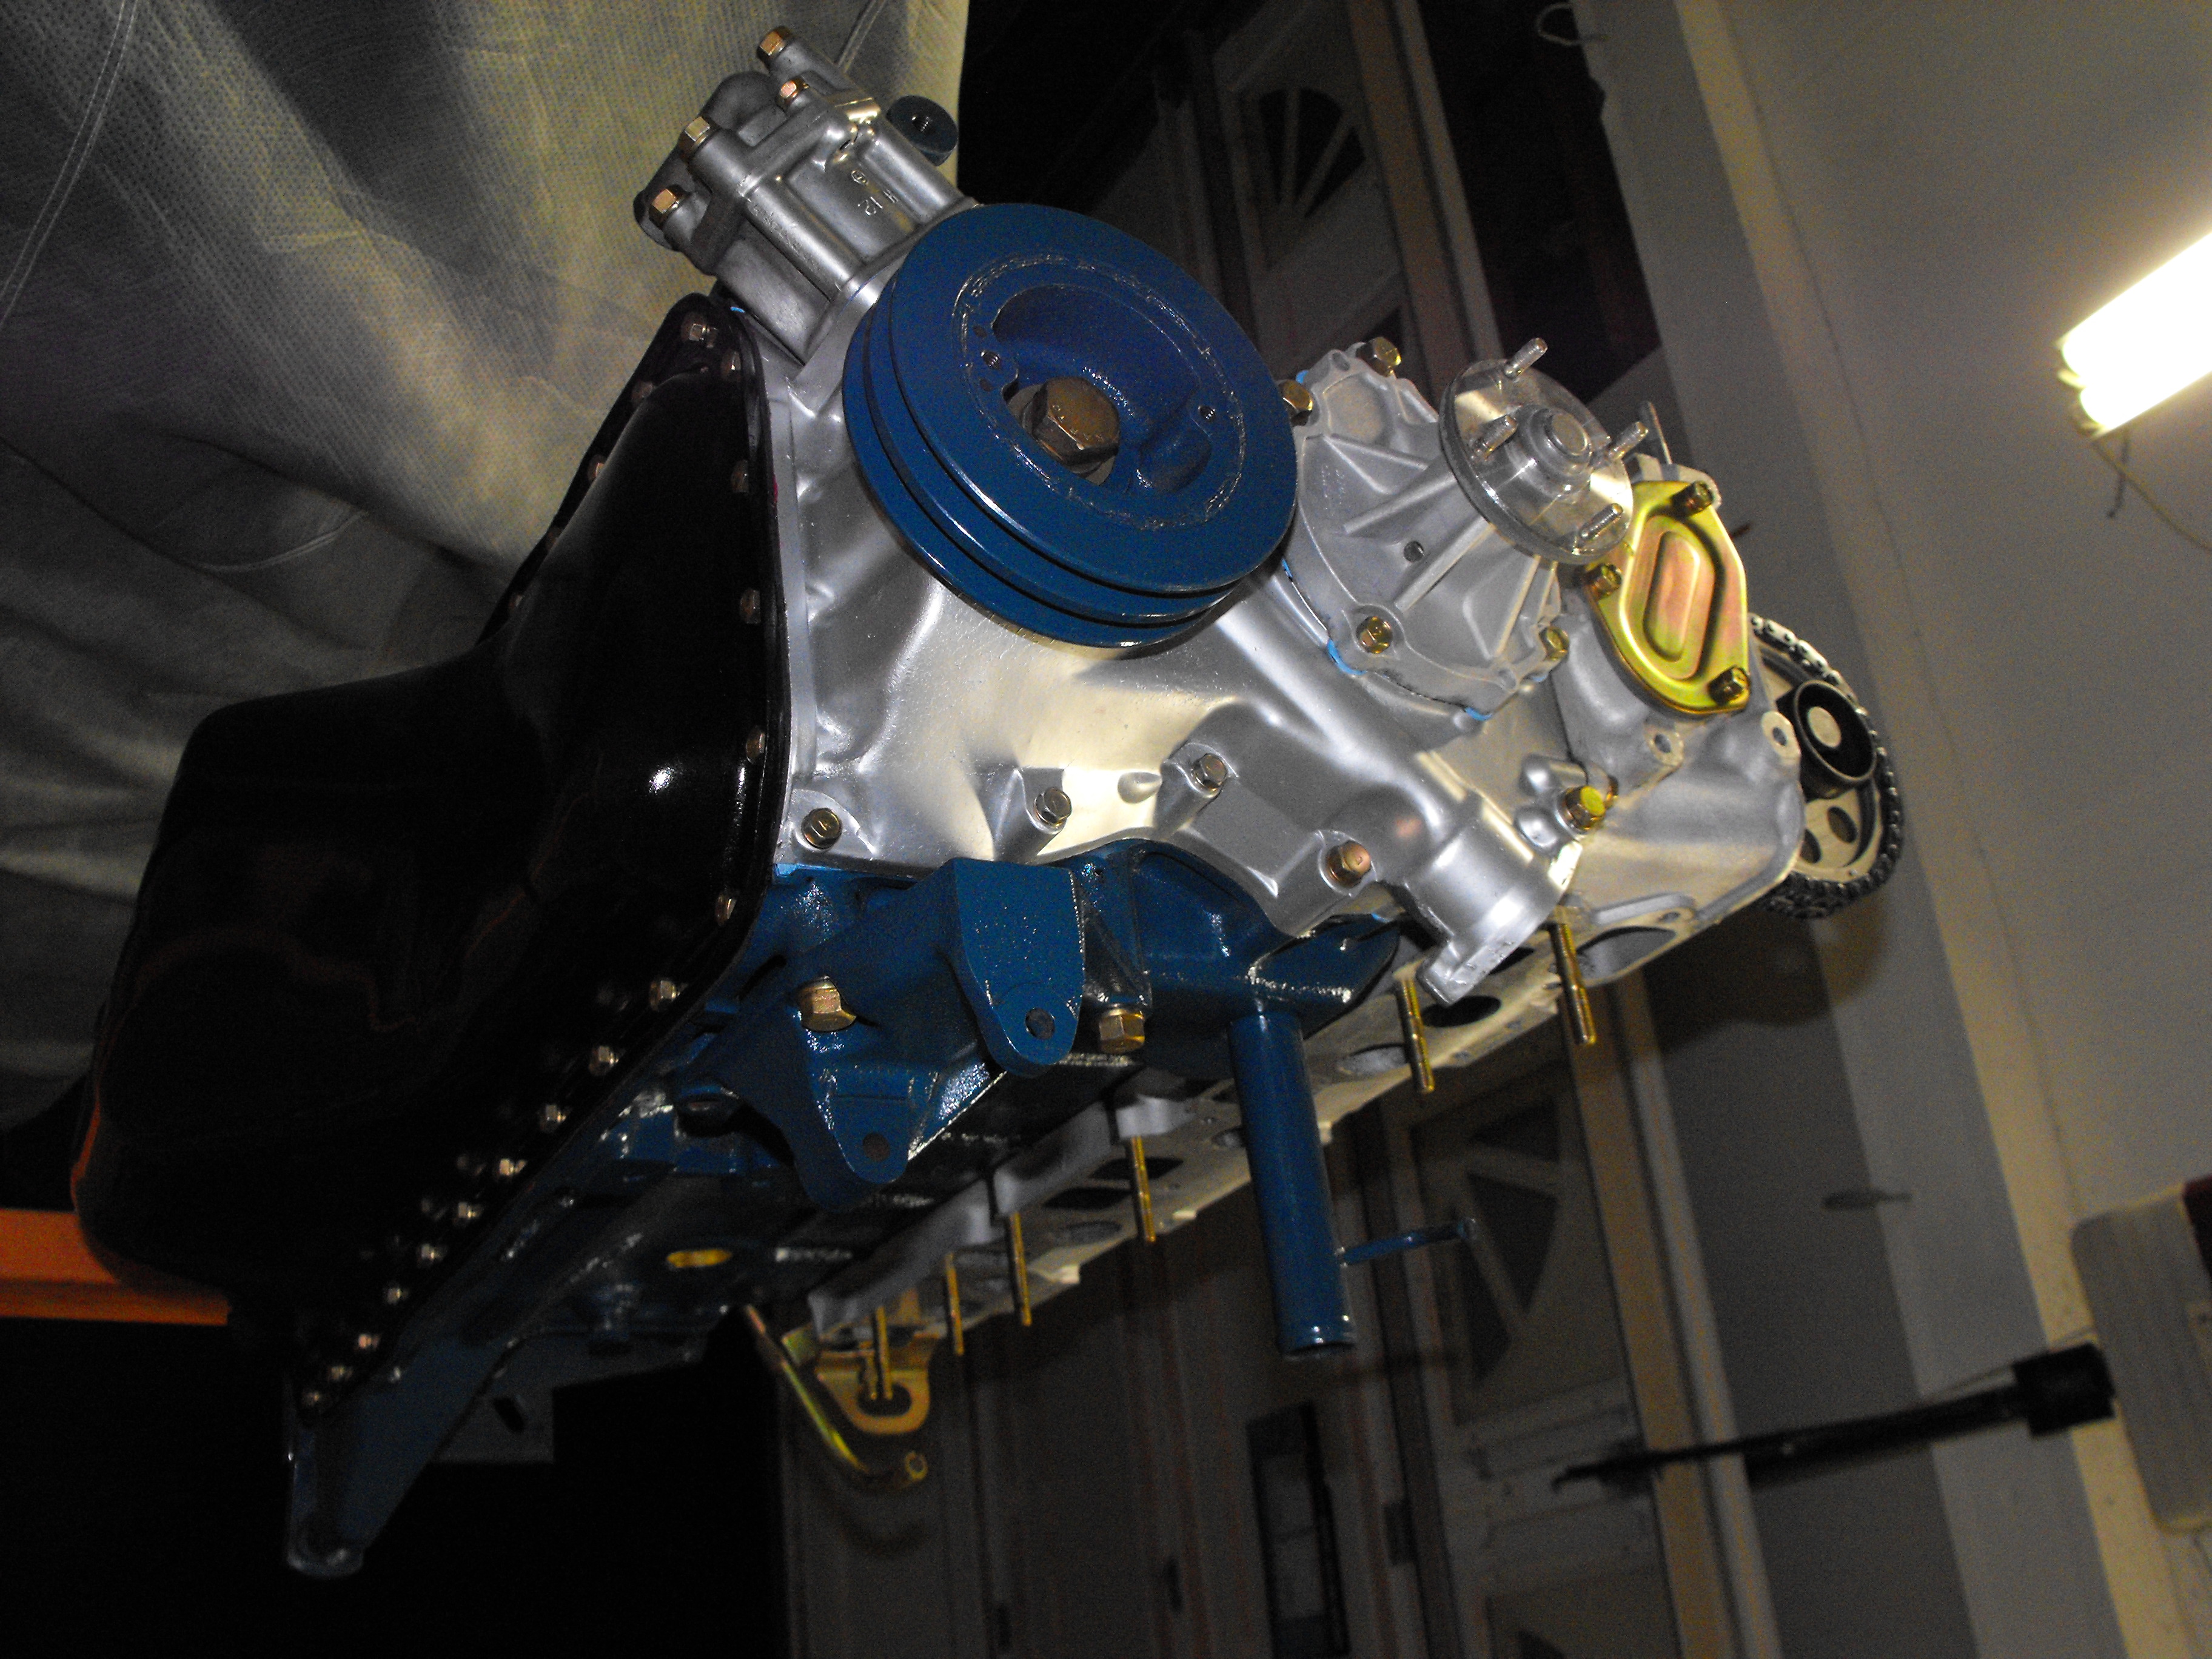
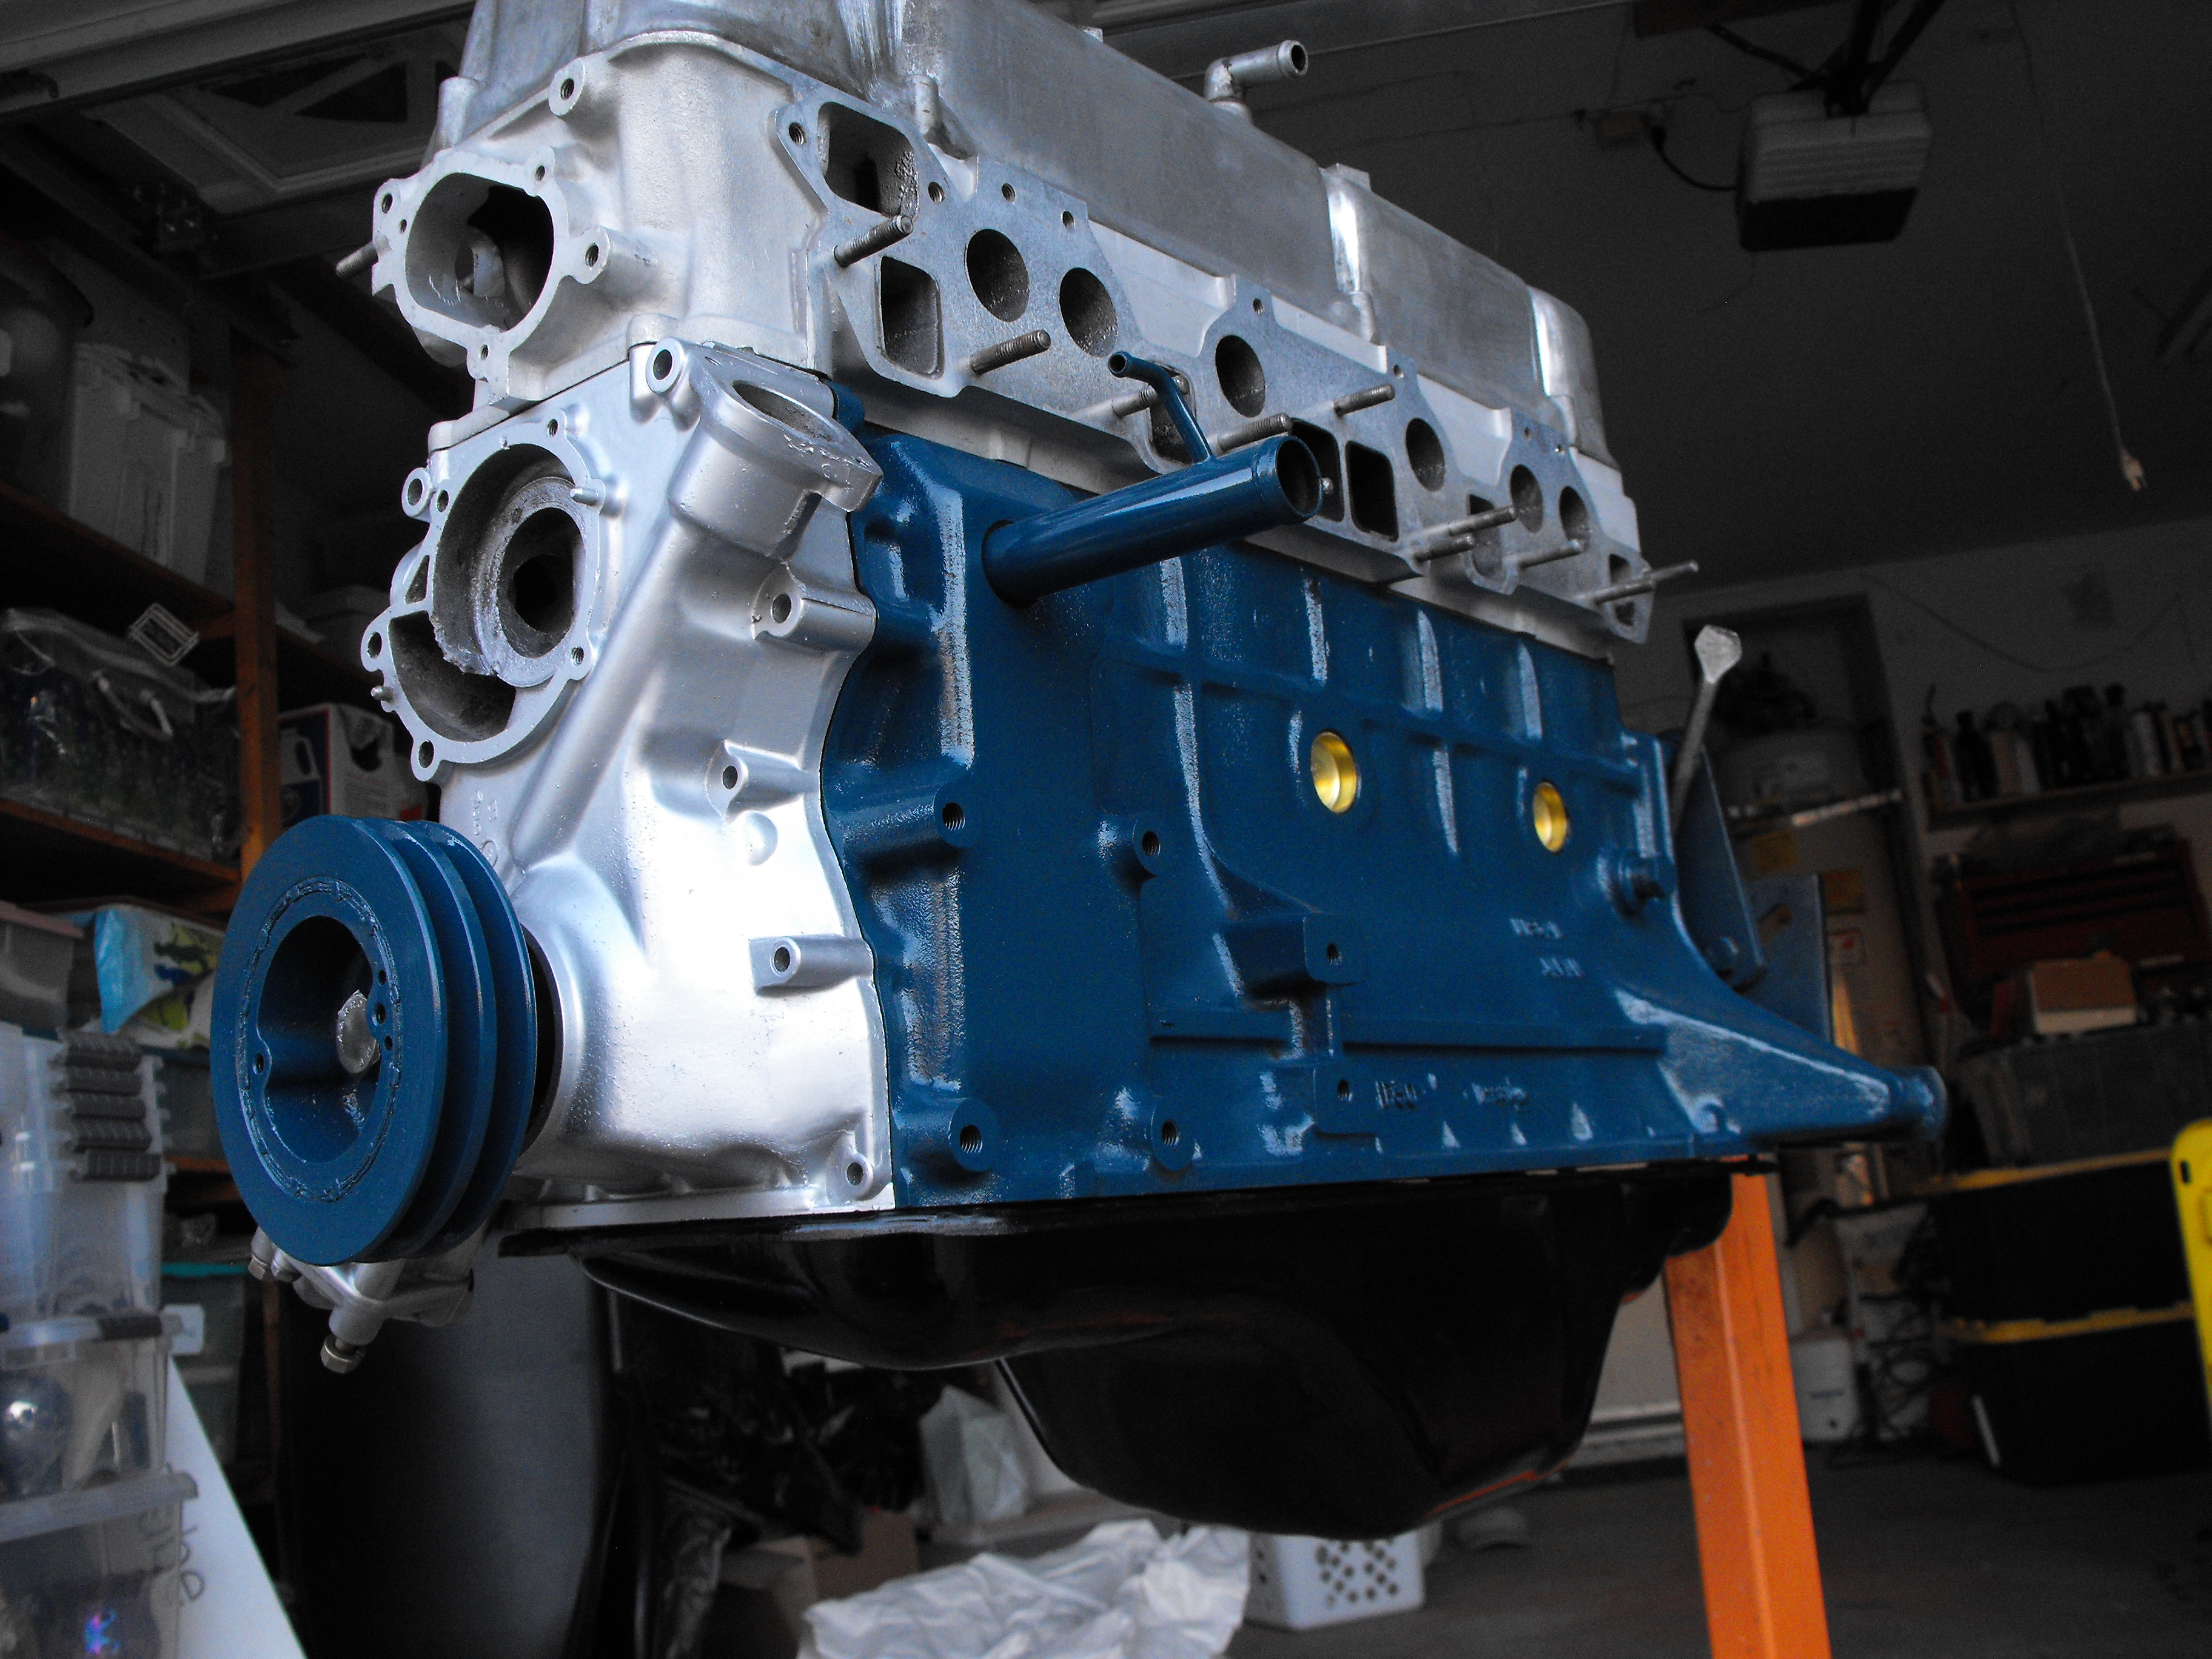
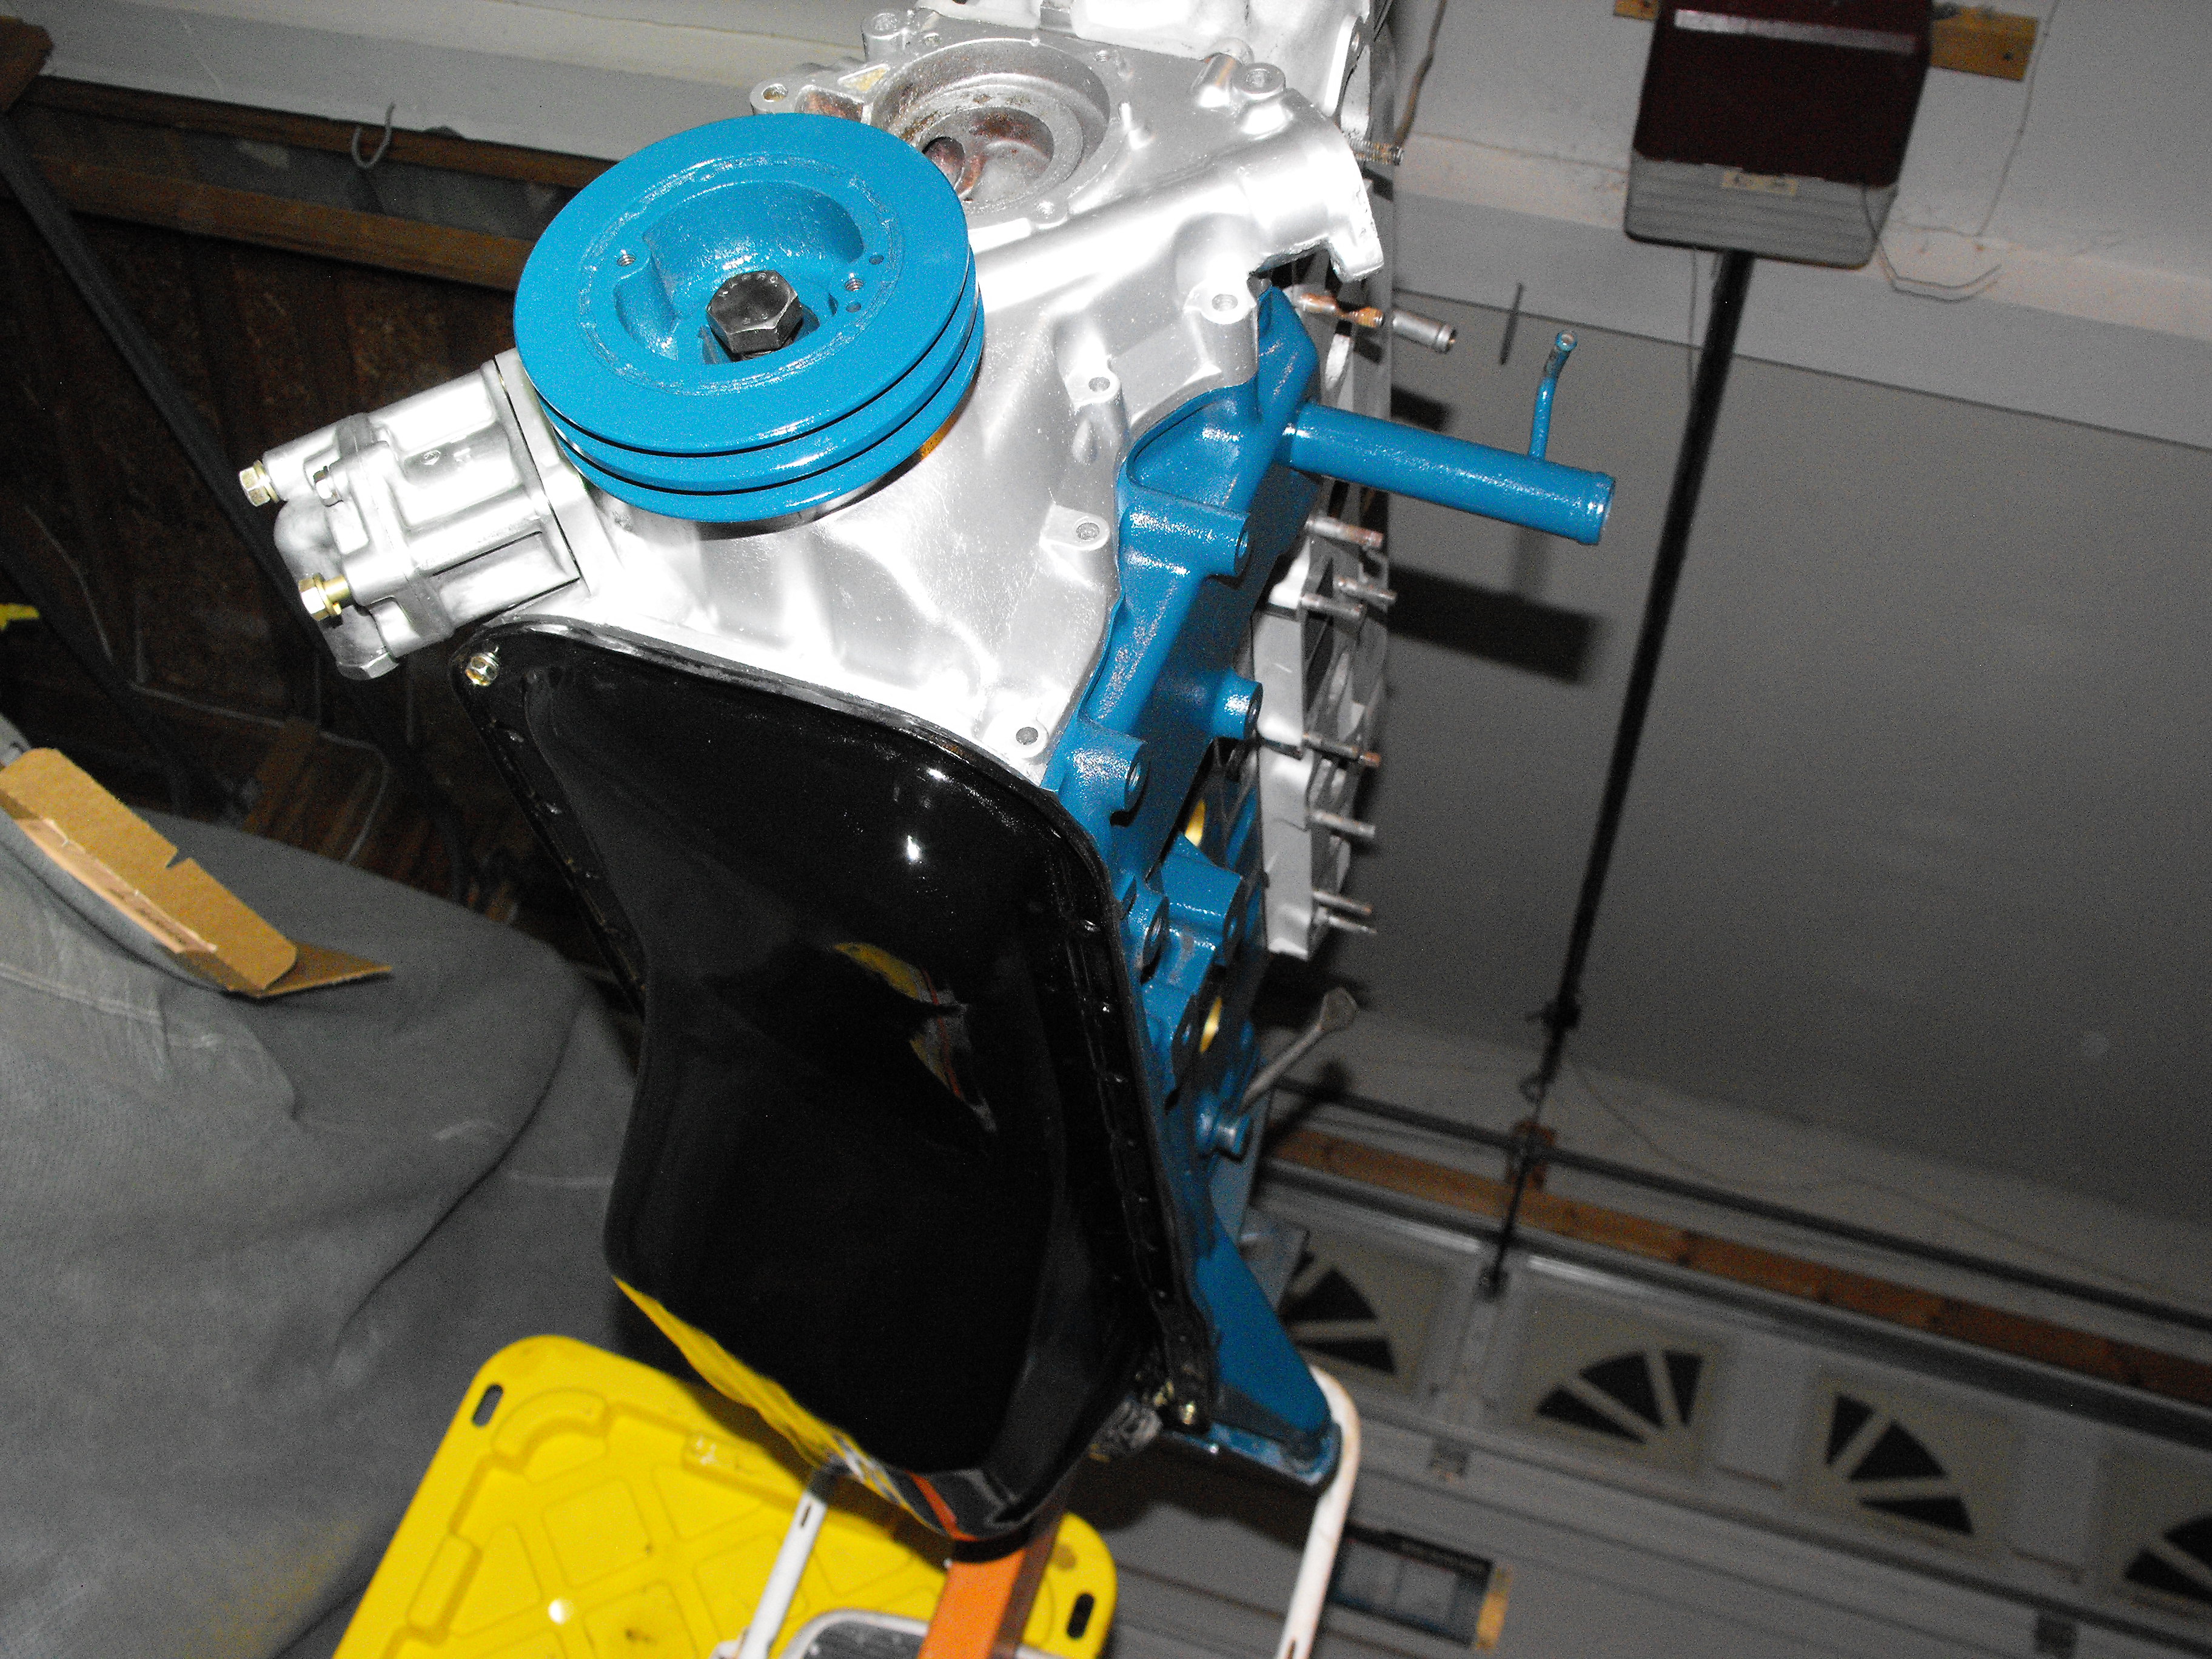
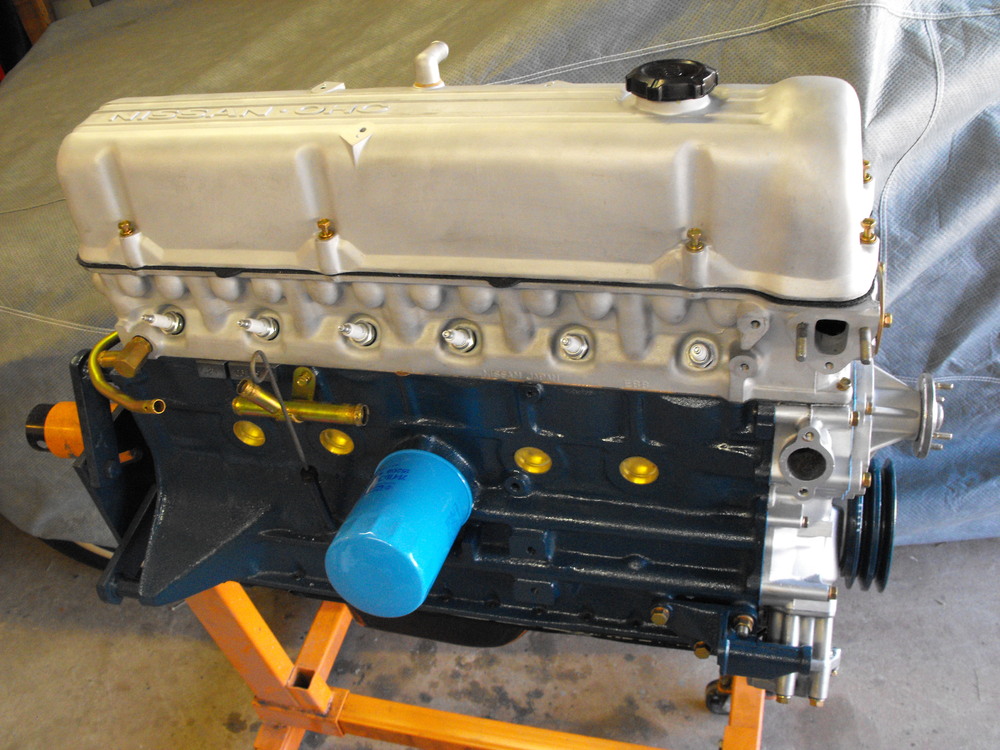
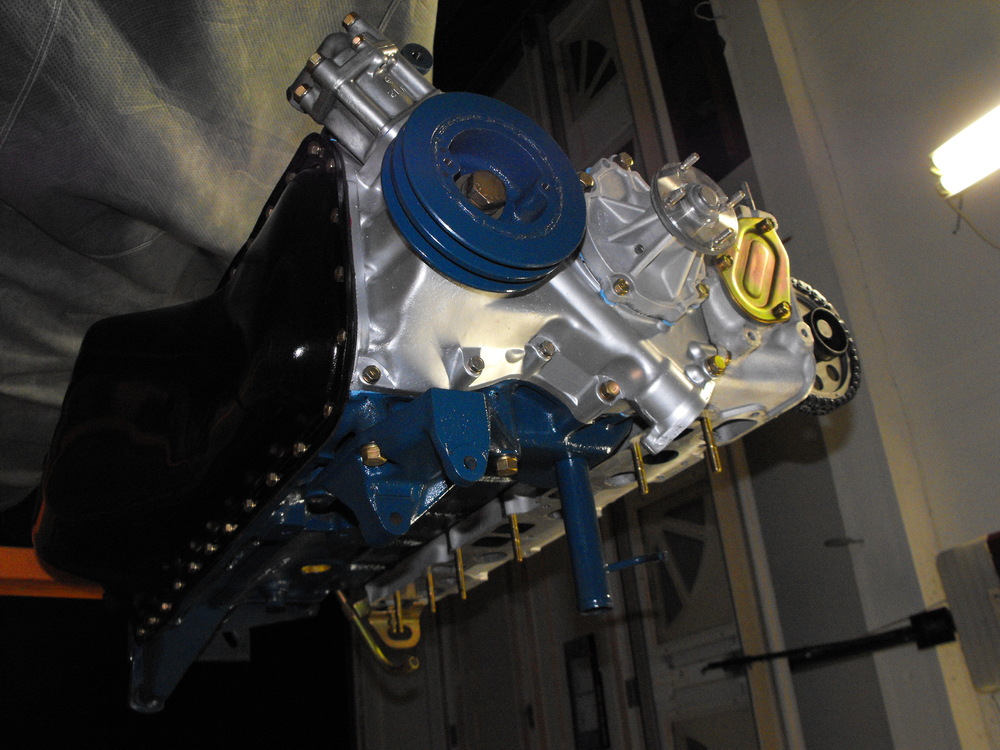
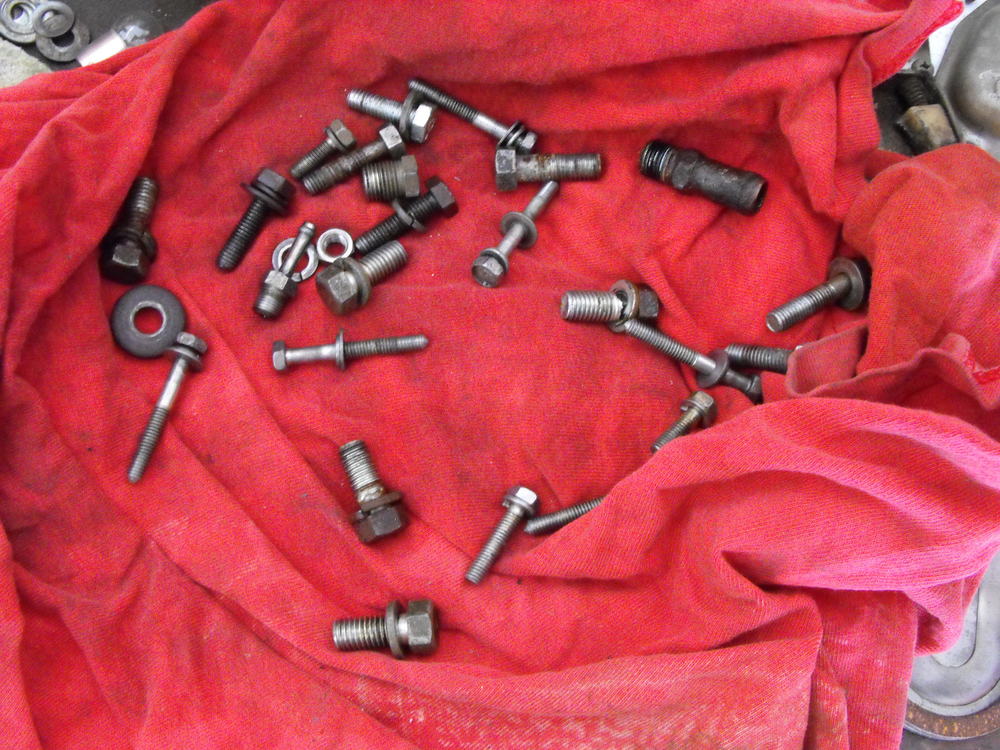
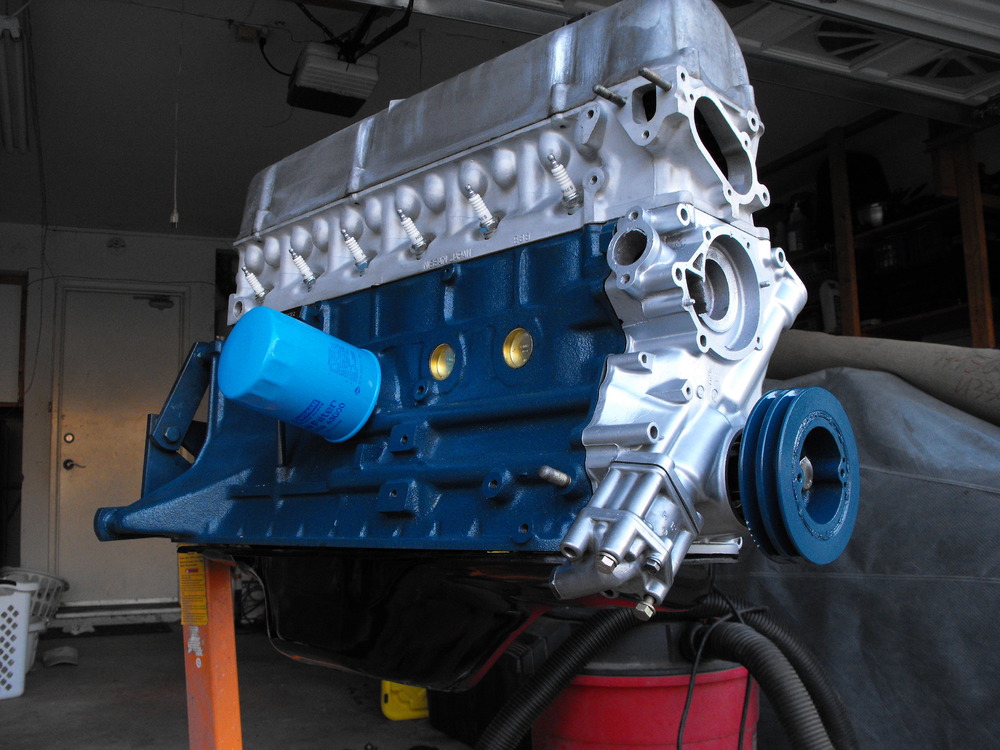
Started back on the motor assembly now that I have the engine bolts plated. Installed the timing chain cover, oil pump, water pump and oil pan. Will send the valve cover out tomorrow for the bead blast. Once that is done, the motor should be looking pretty nice and about ready to install when the time comes.


-
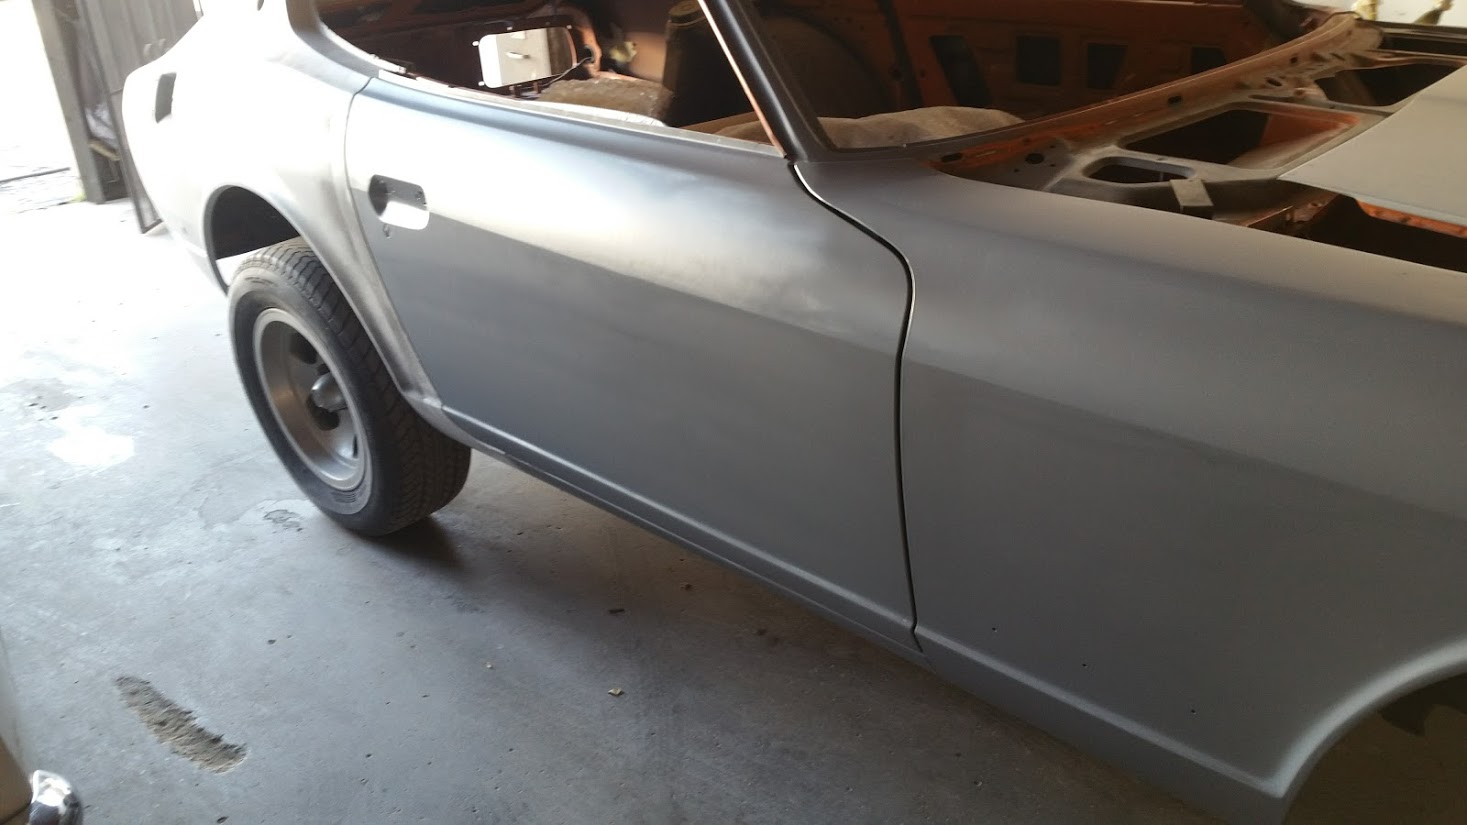
More updates from the paint shop. This is looking really nice.


-
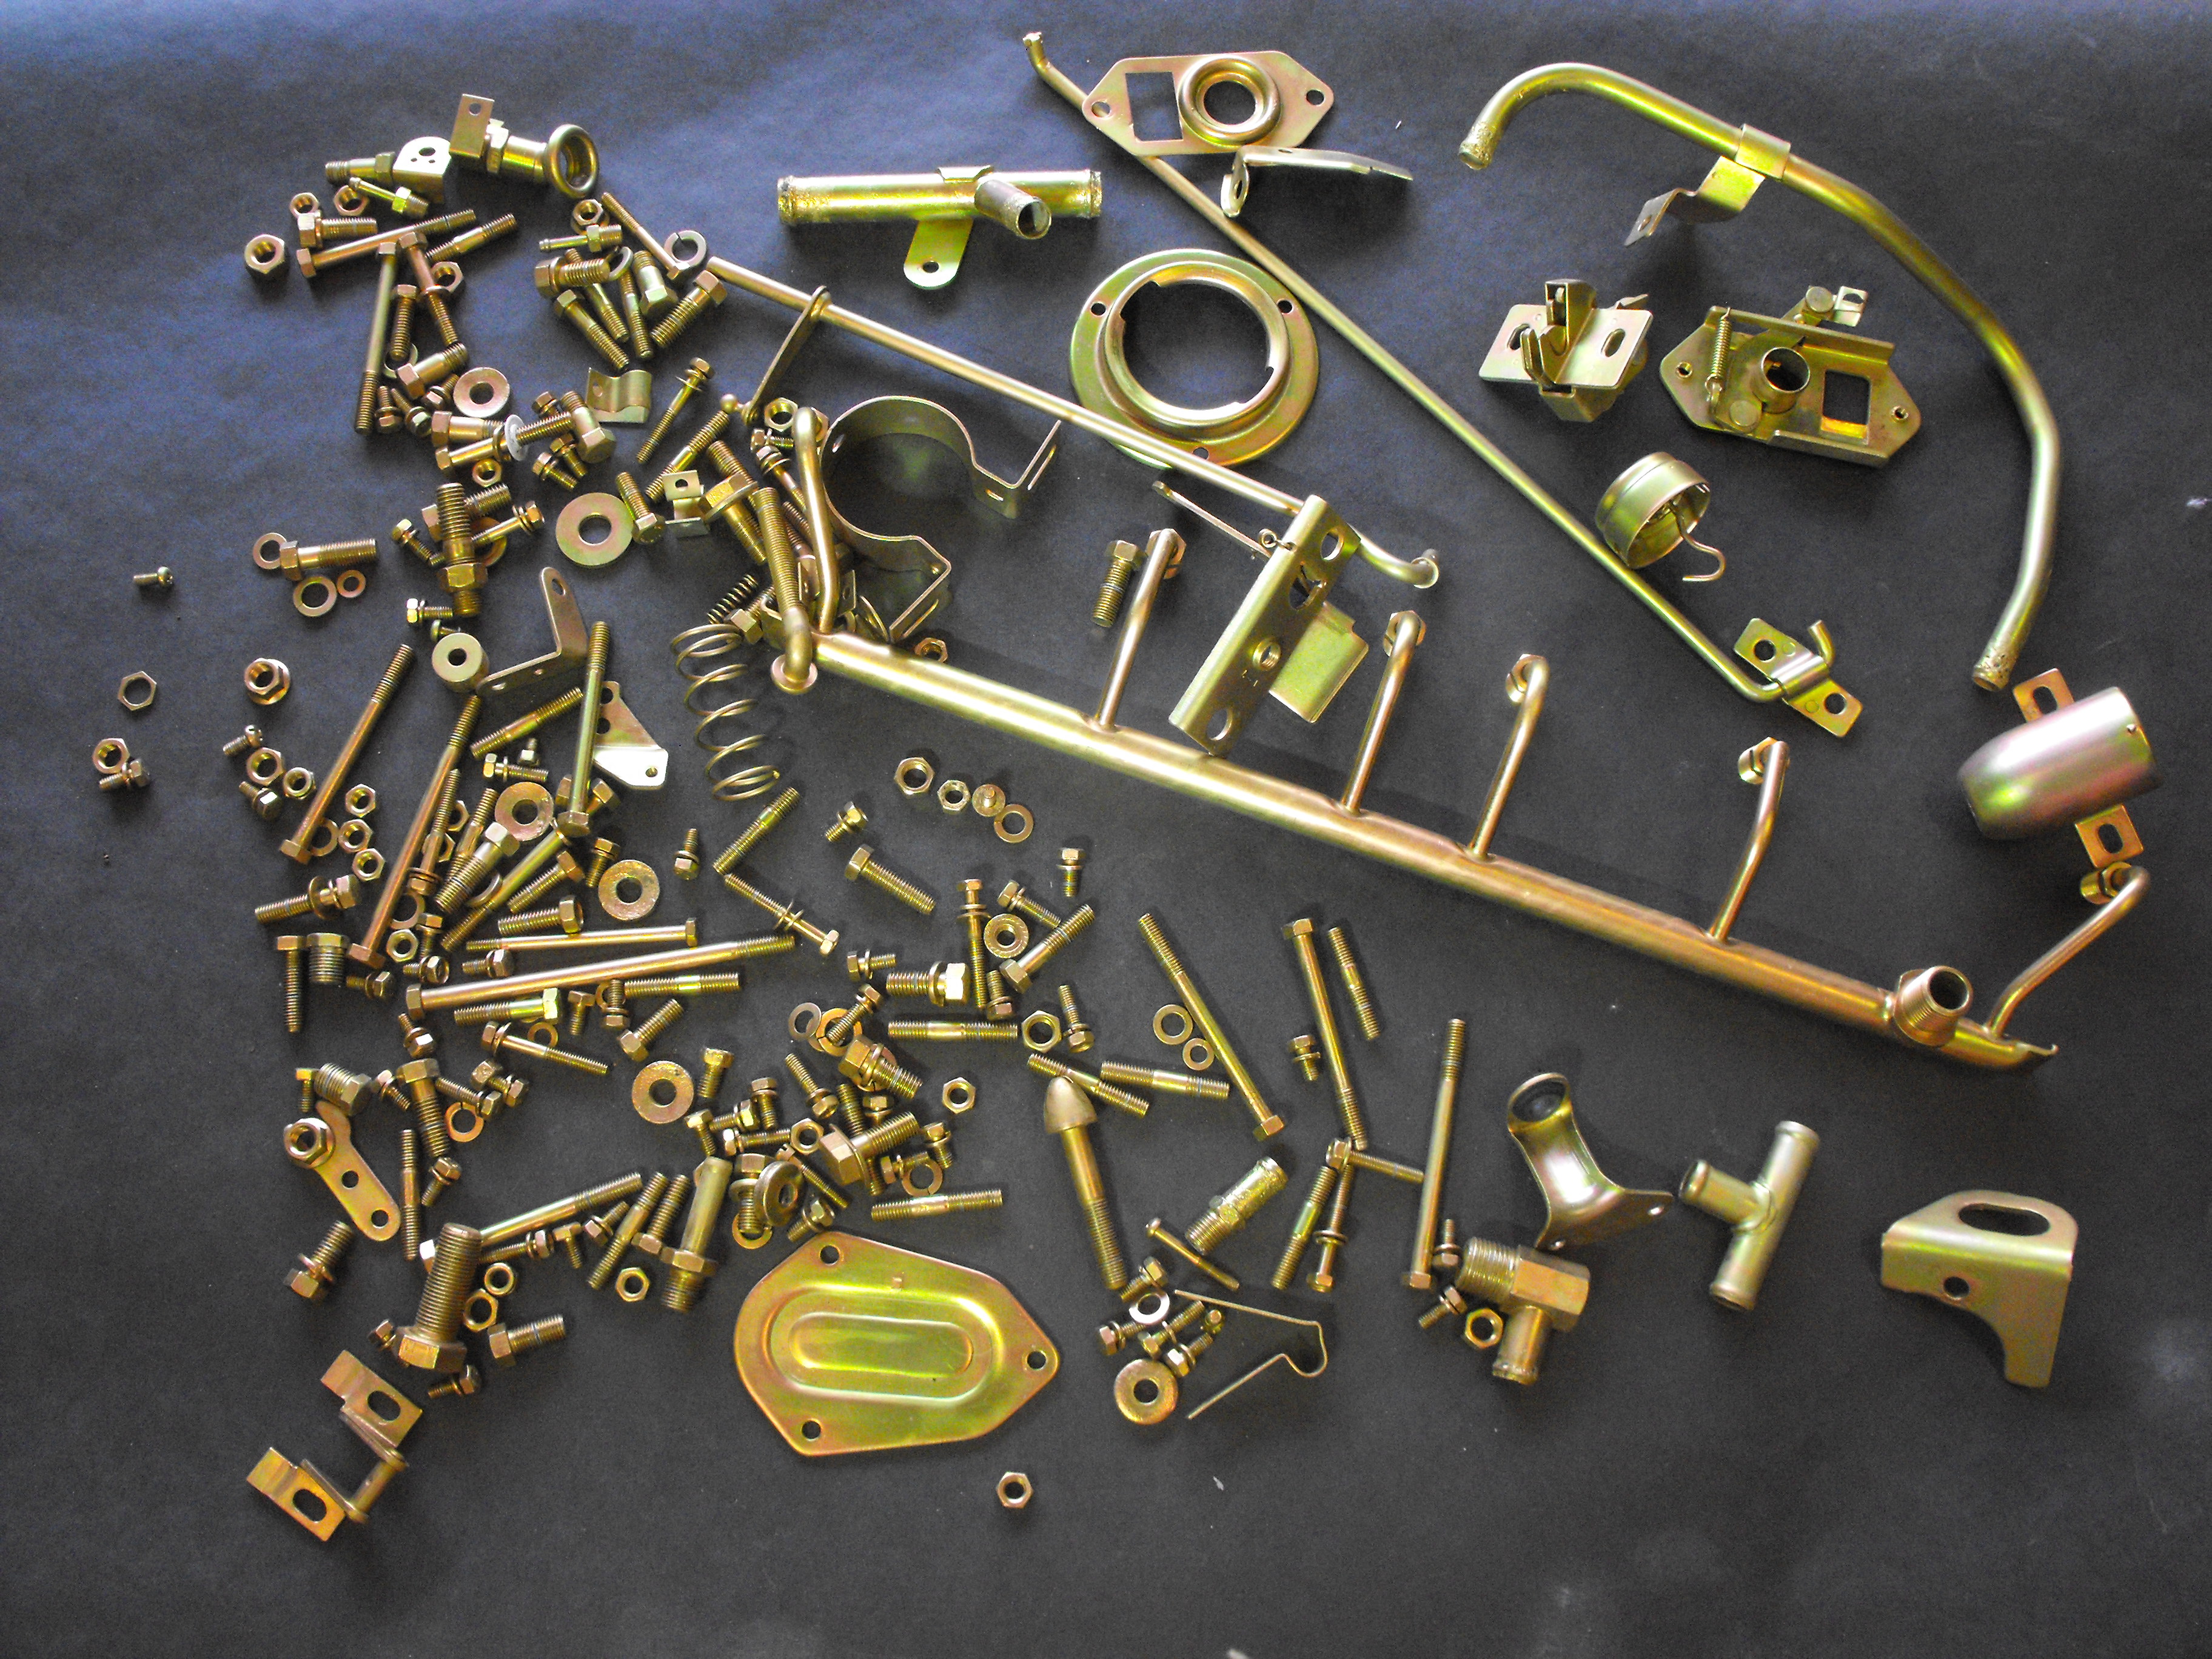
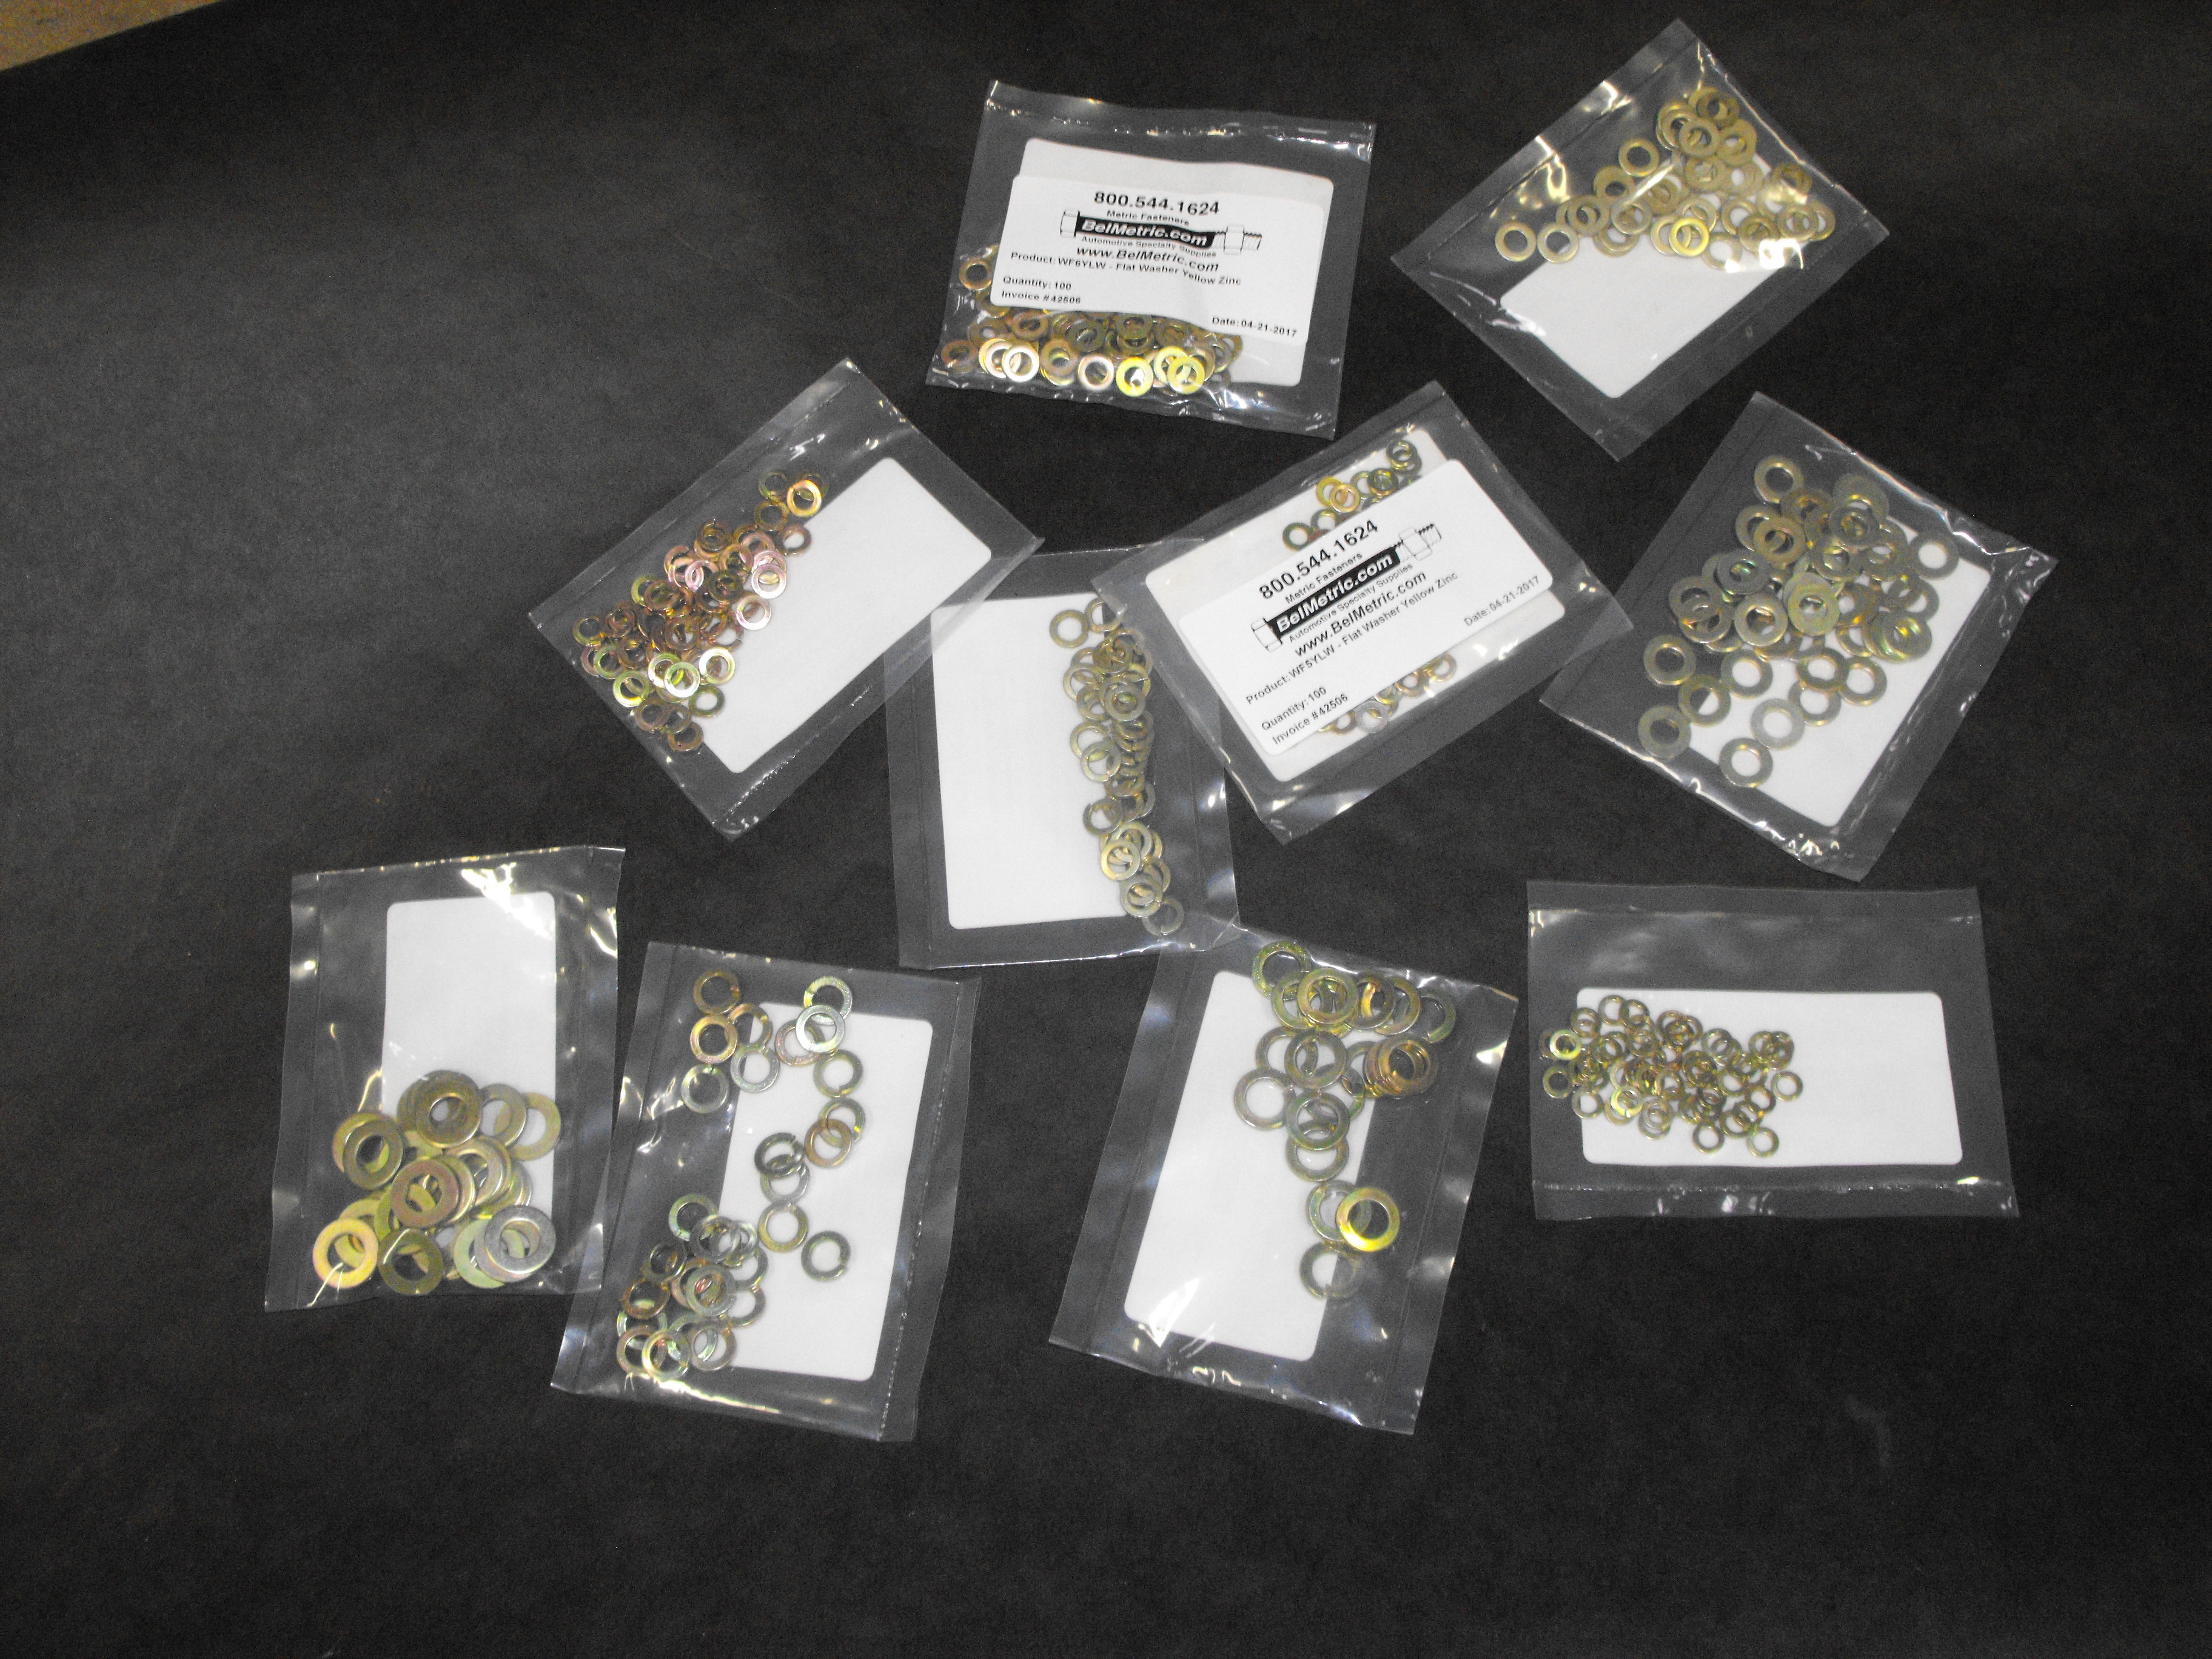
Hi Dave, The '71 will be fun to work on. Looking forward to it. Got the first batch of Yellow zinc parts back. They look so pretty! Pics are lousy though, flourescent lights are the worst for photos. Also got new flat and lock washers in from Belmetric. It's not worth the time to wire wheel and plate washers since you can get most of these for 6 to 10 cents each. Much cheaper and simpler to go this way for the washers.


-
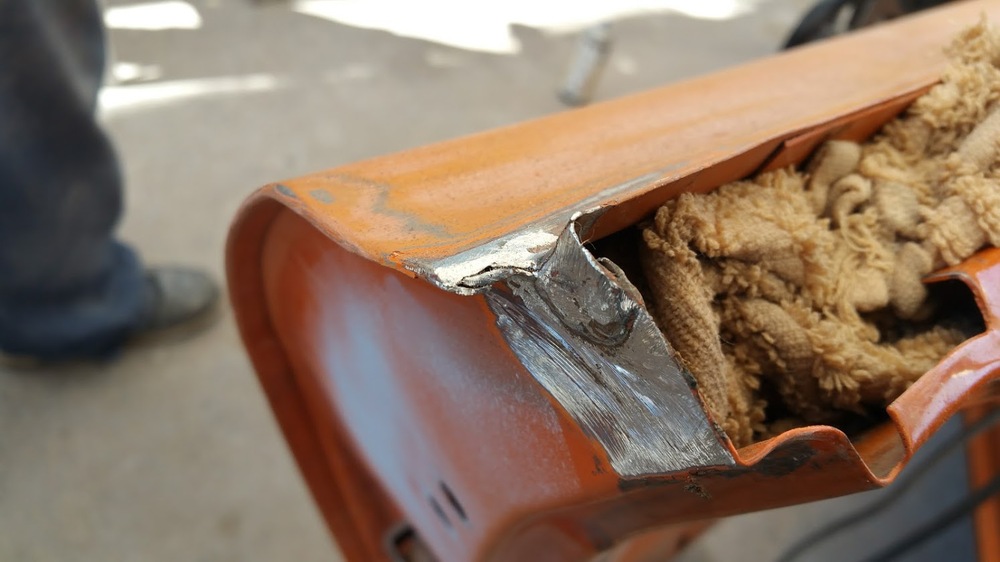
Hi Jim, Darn near impossible to get those fittings out in a clean manner. The list of items I utilized over the last week and a half include, PB Blaster, Kroil, Muriatic Acid, and a high temp torch. After all that, and using a 14mm flare wrench, I could not get those things lose. Anyway, I am glad they are out and fortunately I have a nice one to put on. Hopefully I will get that today with fresh plating. It's pretty exciting with all the stuff going on and things are progressing very quickly. Body is coming along well at the paint shop, dash is at "Just Dashes", sent the carbs and intake manifold off to ZTherapy last week (insured UPS shipping was just $28), and parts are being plated just down the street. Will be nice when this all comes together. Thanks for the words of encouragement. Best regards, Rich
-
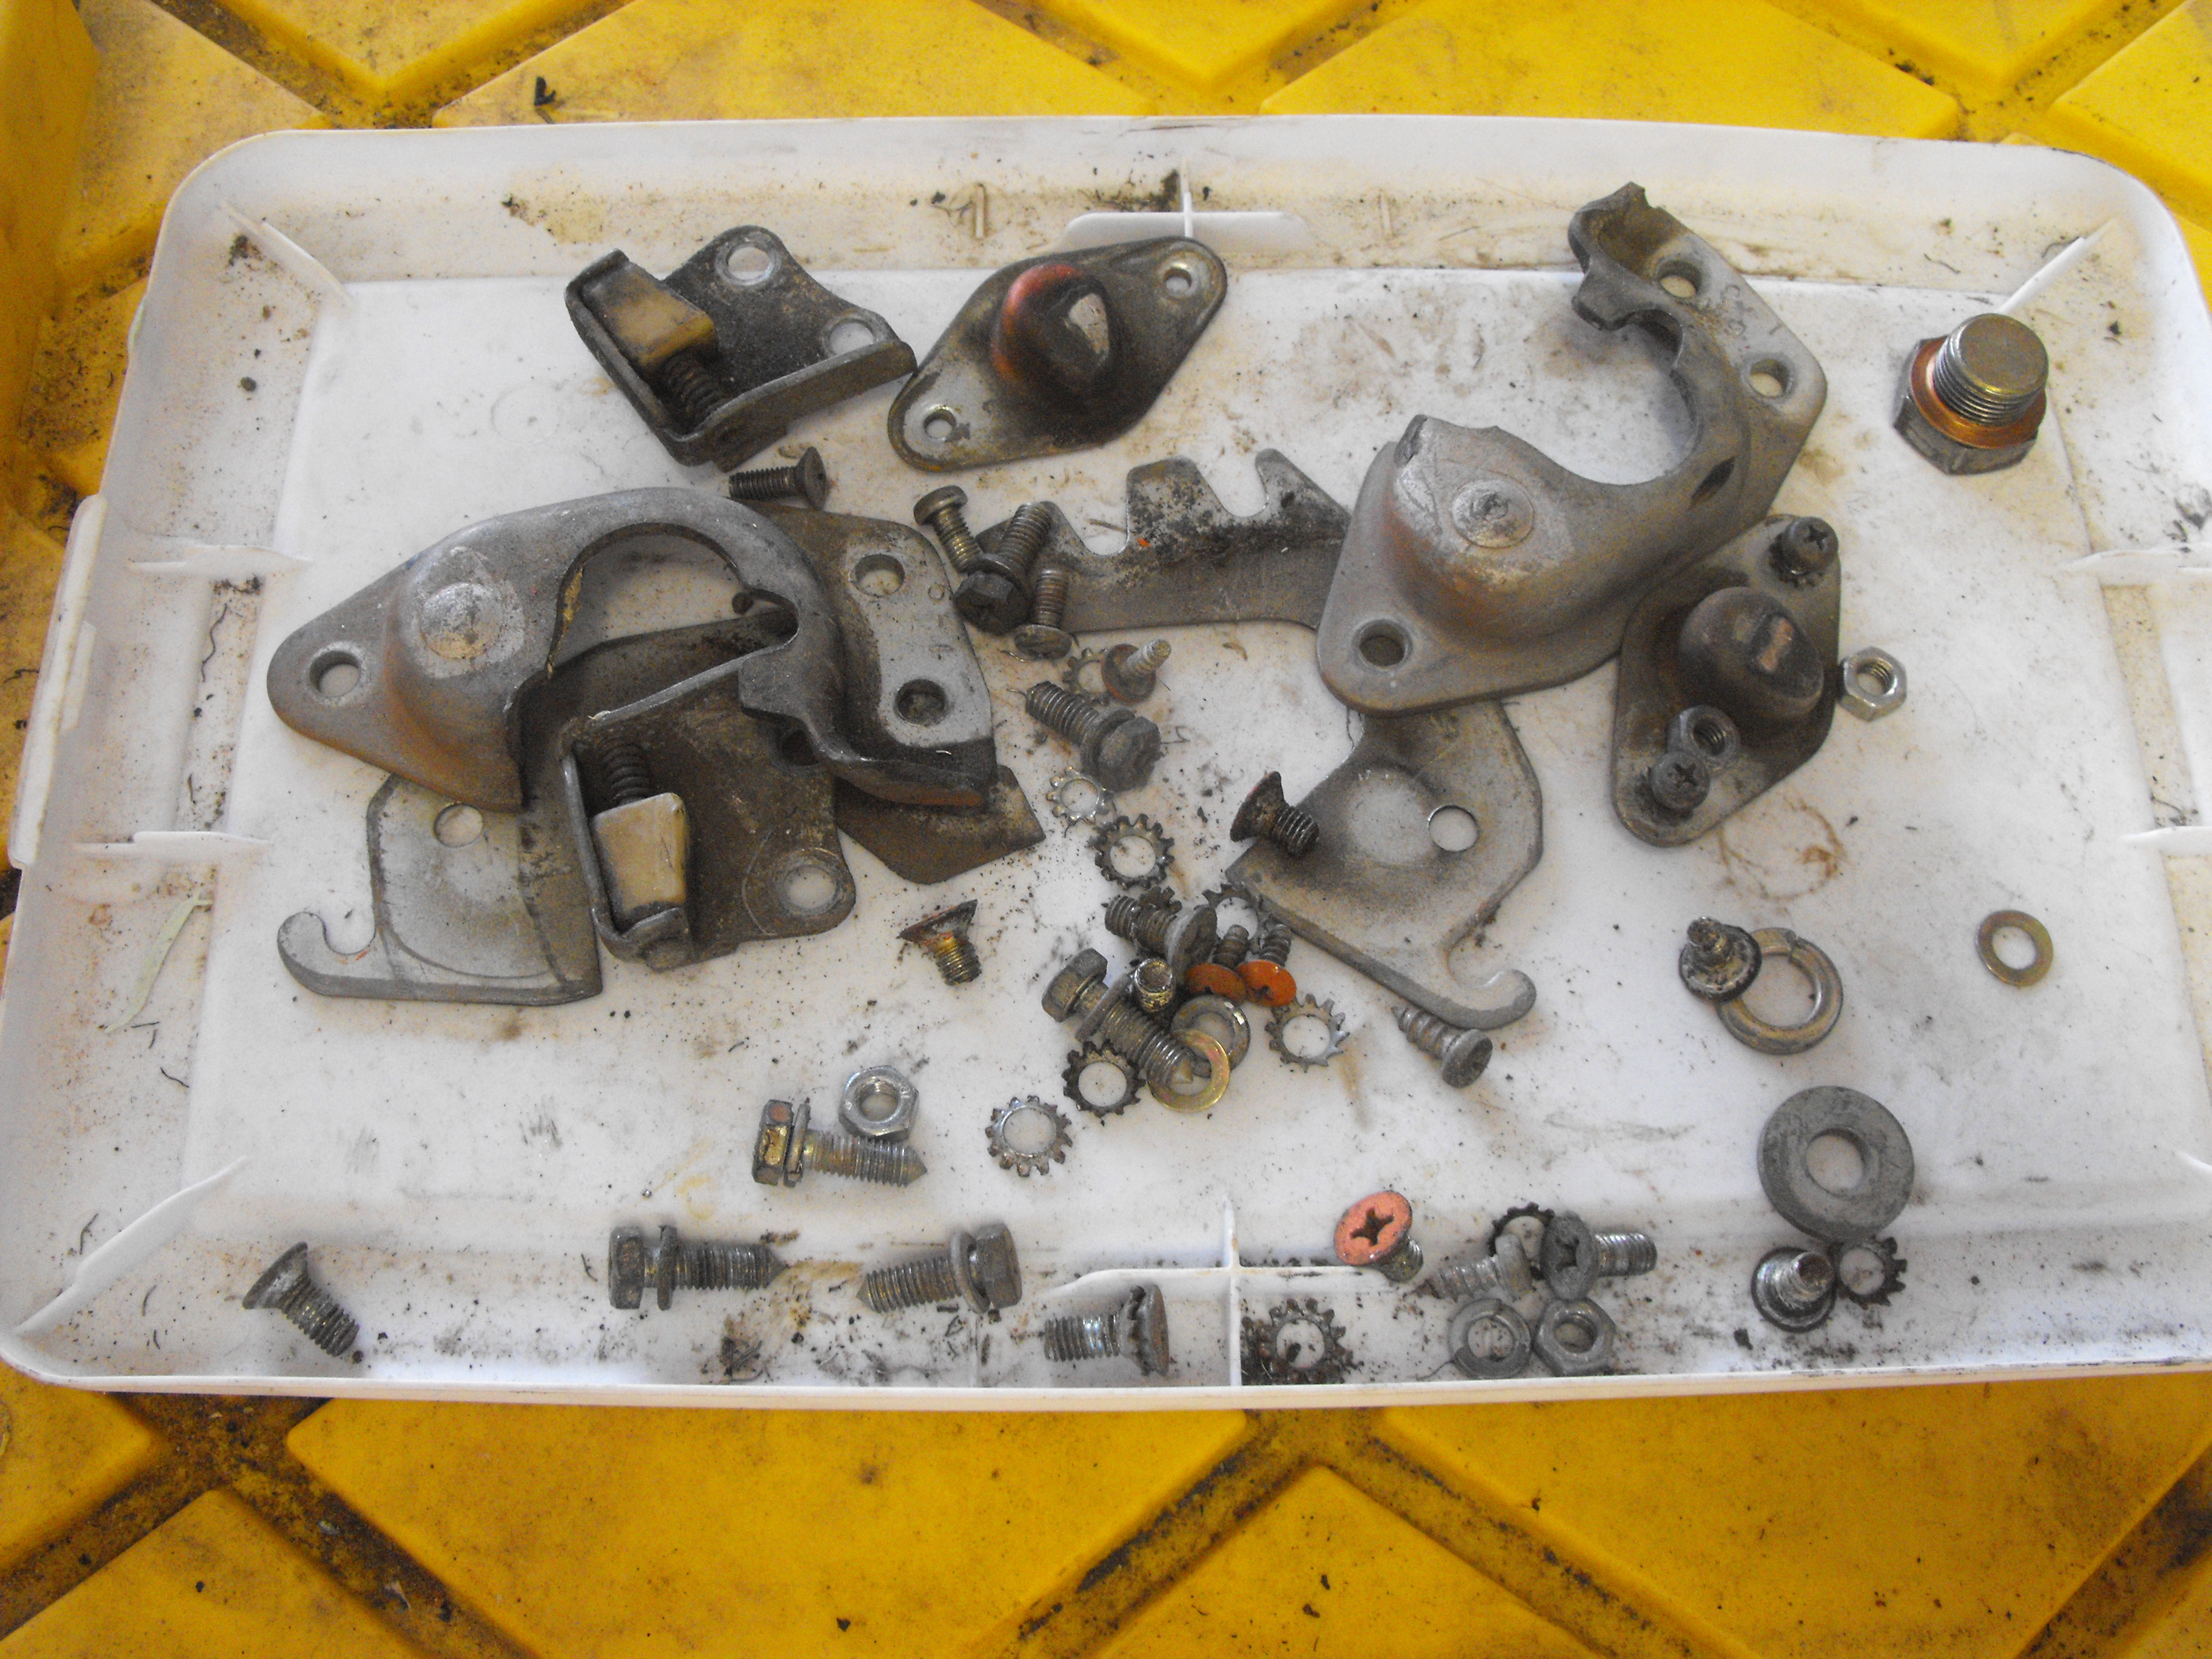
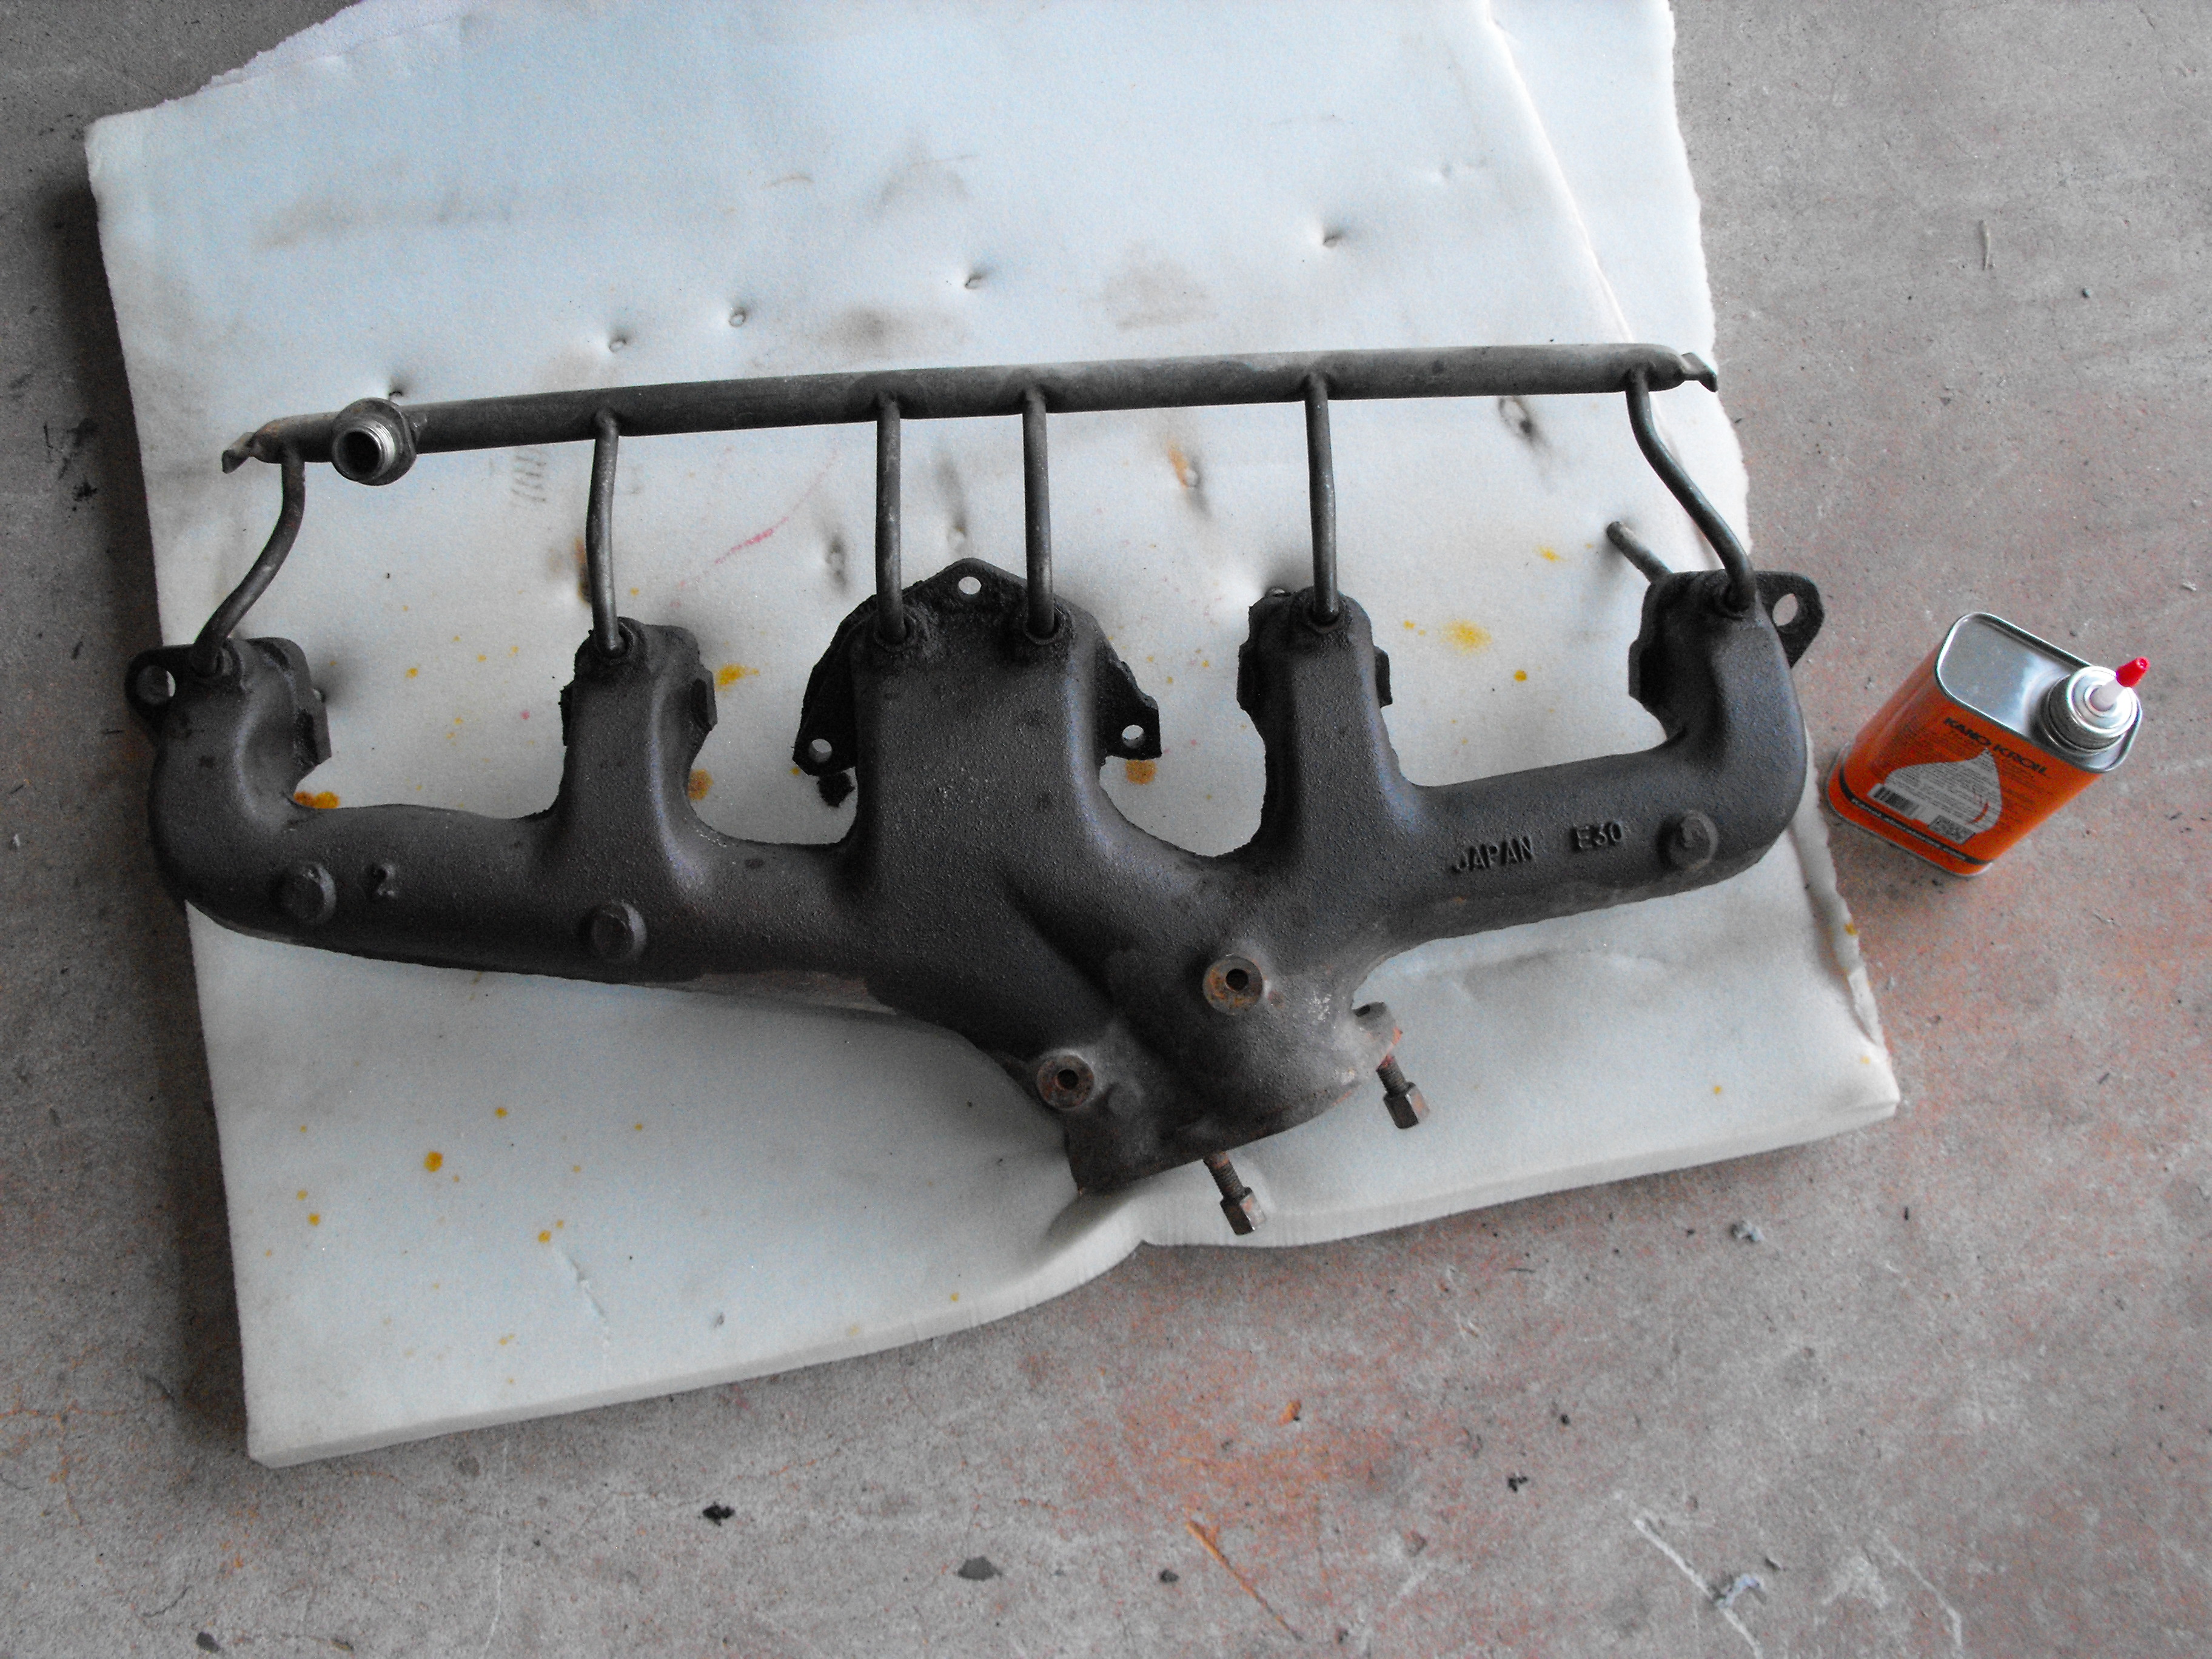
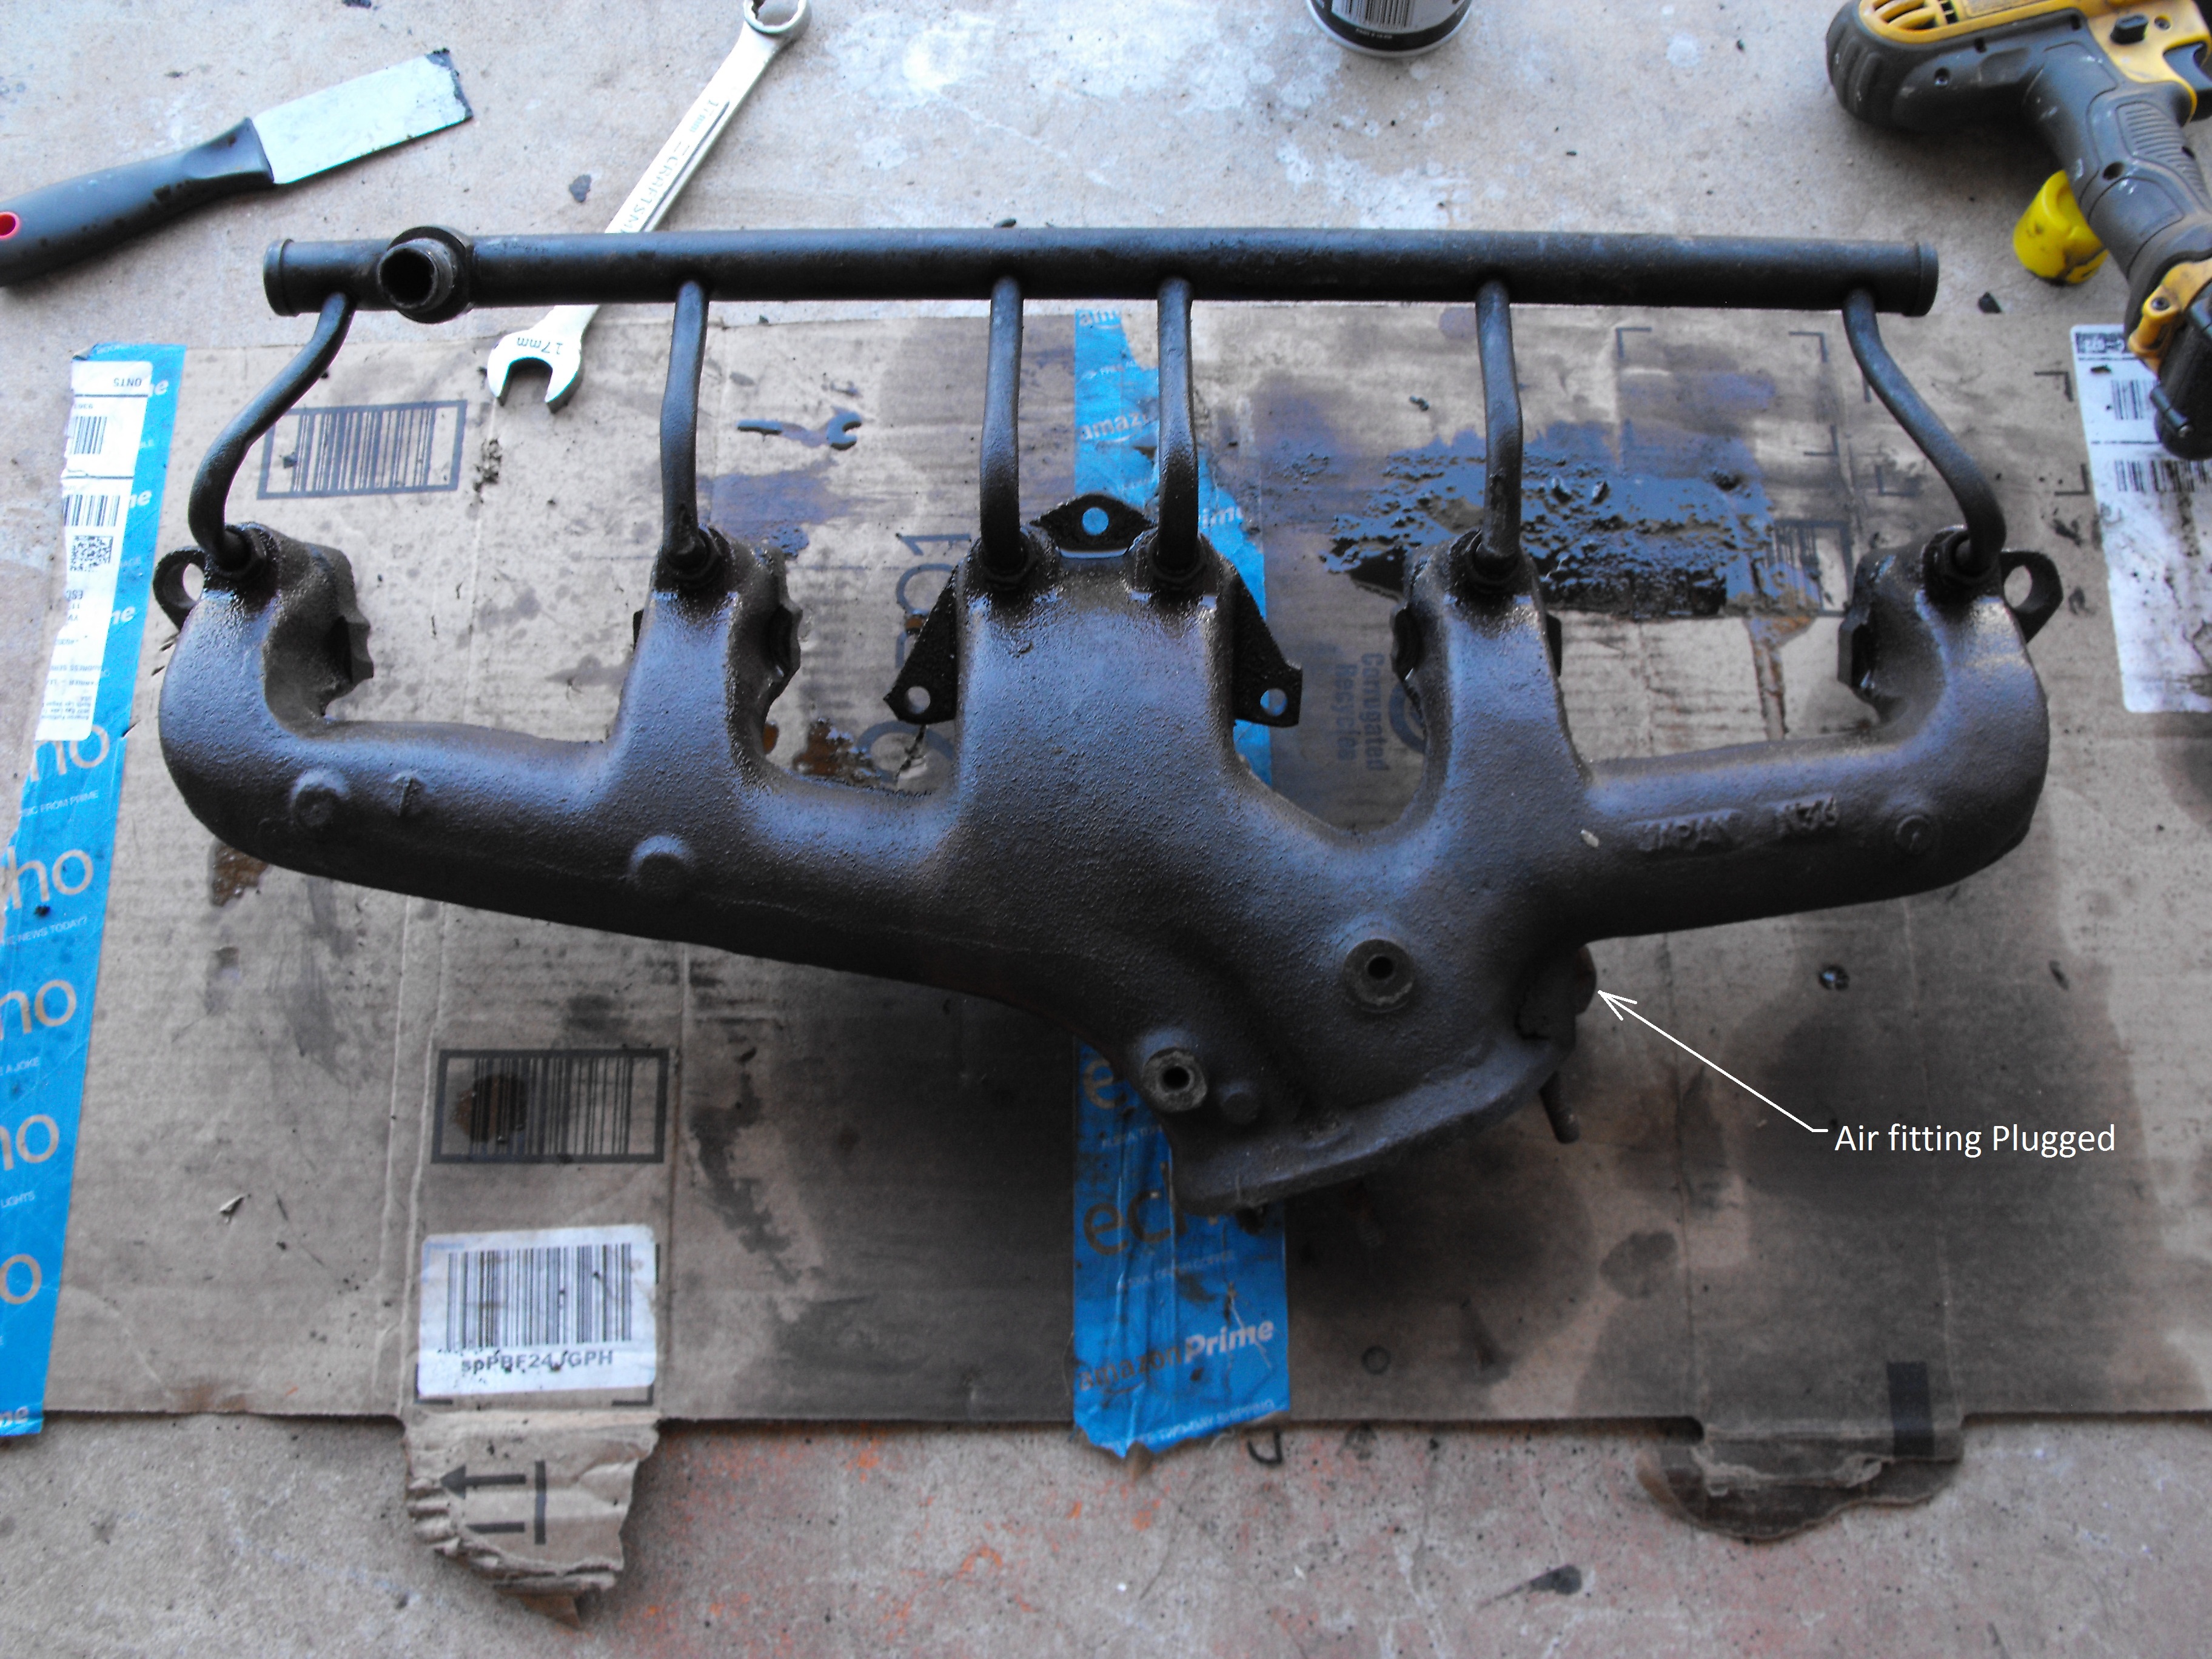
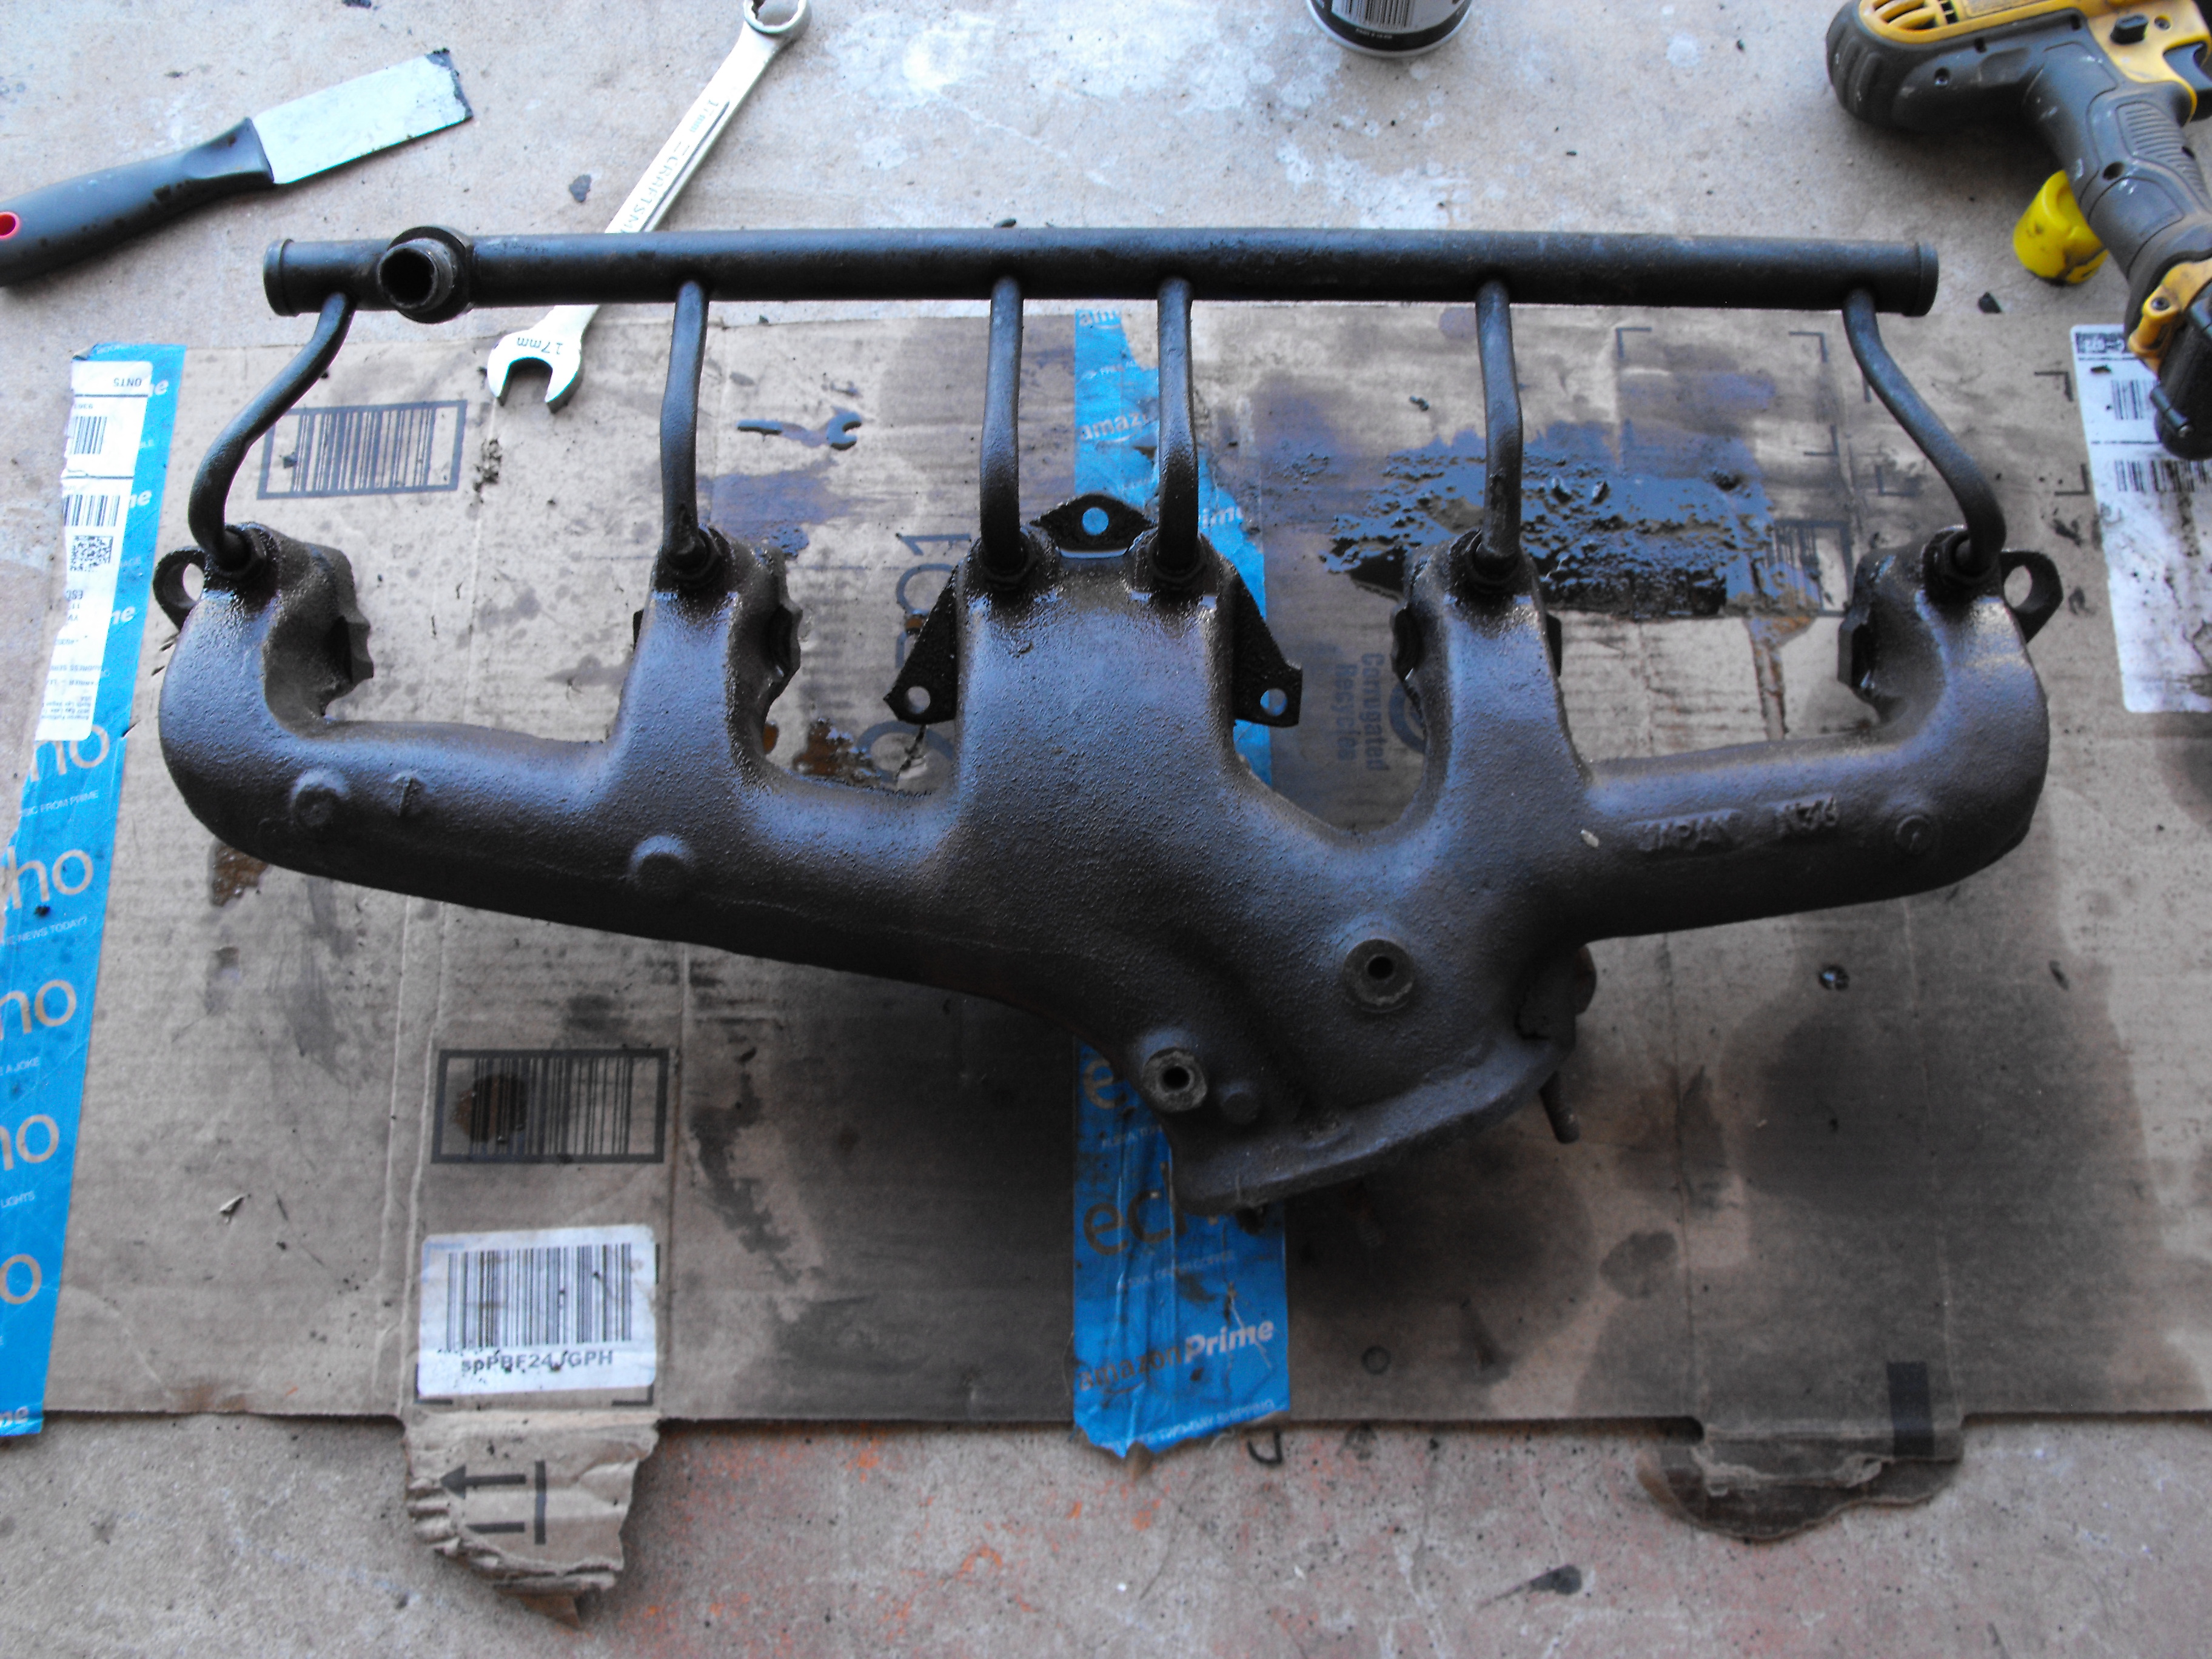
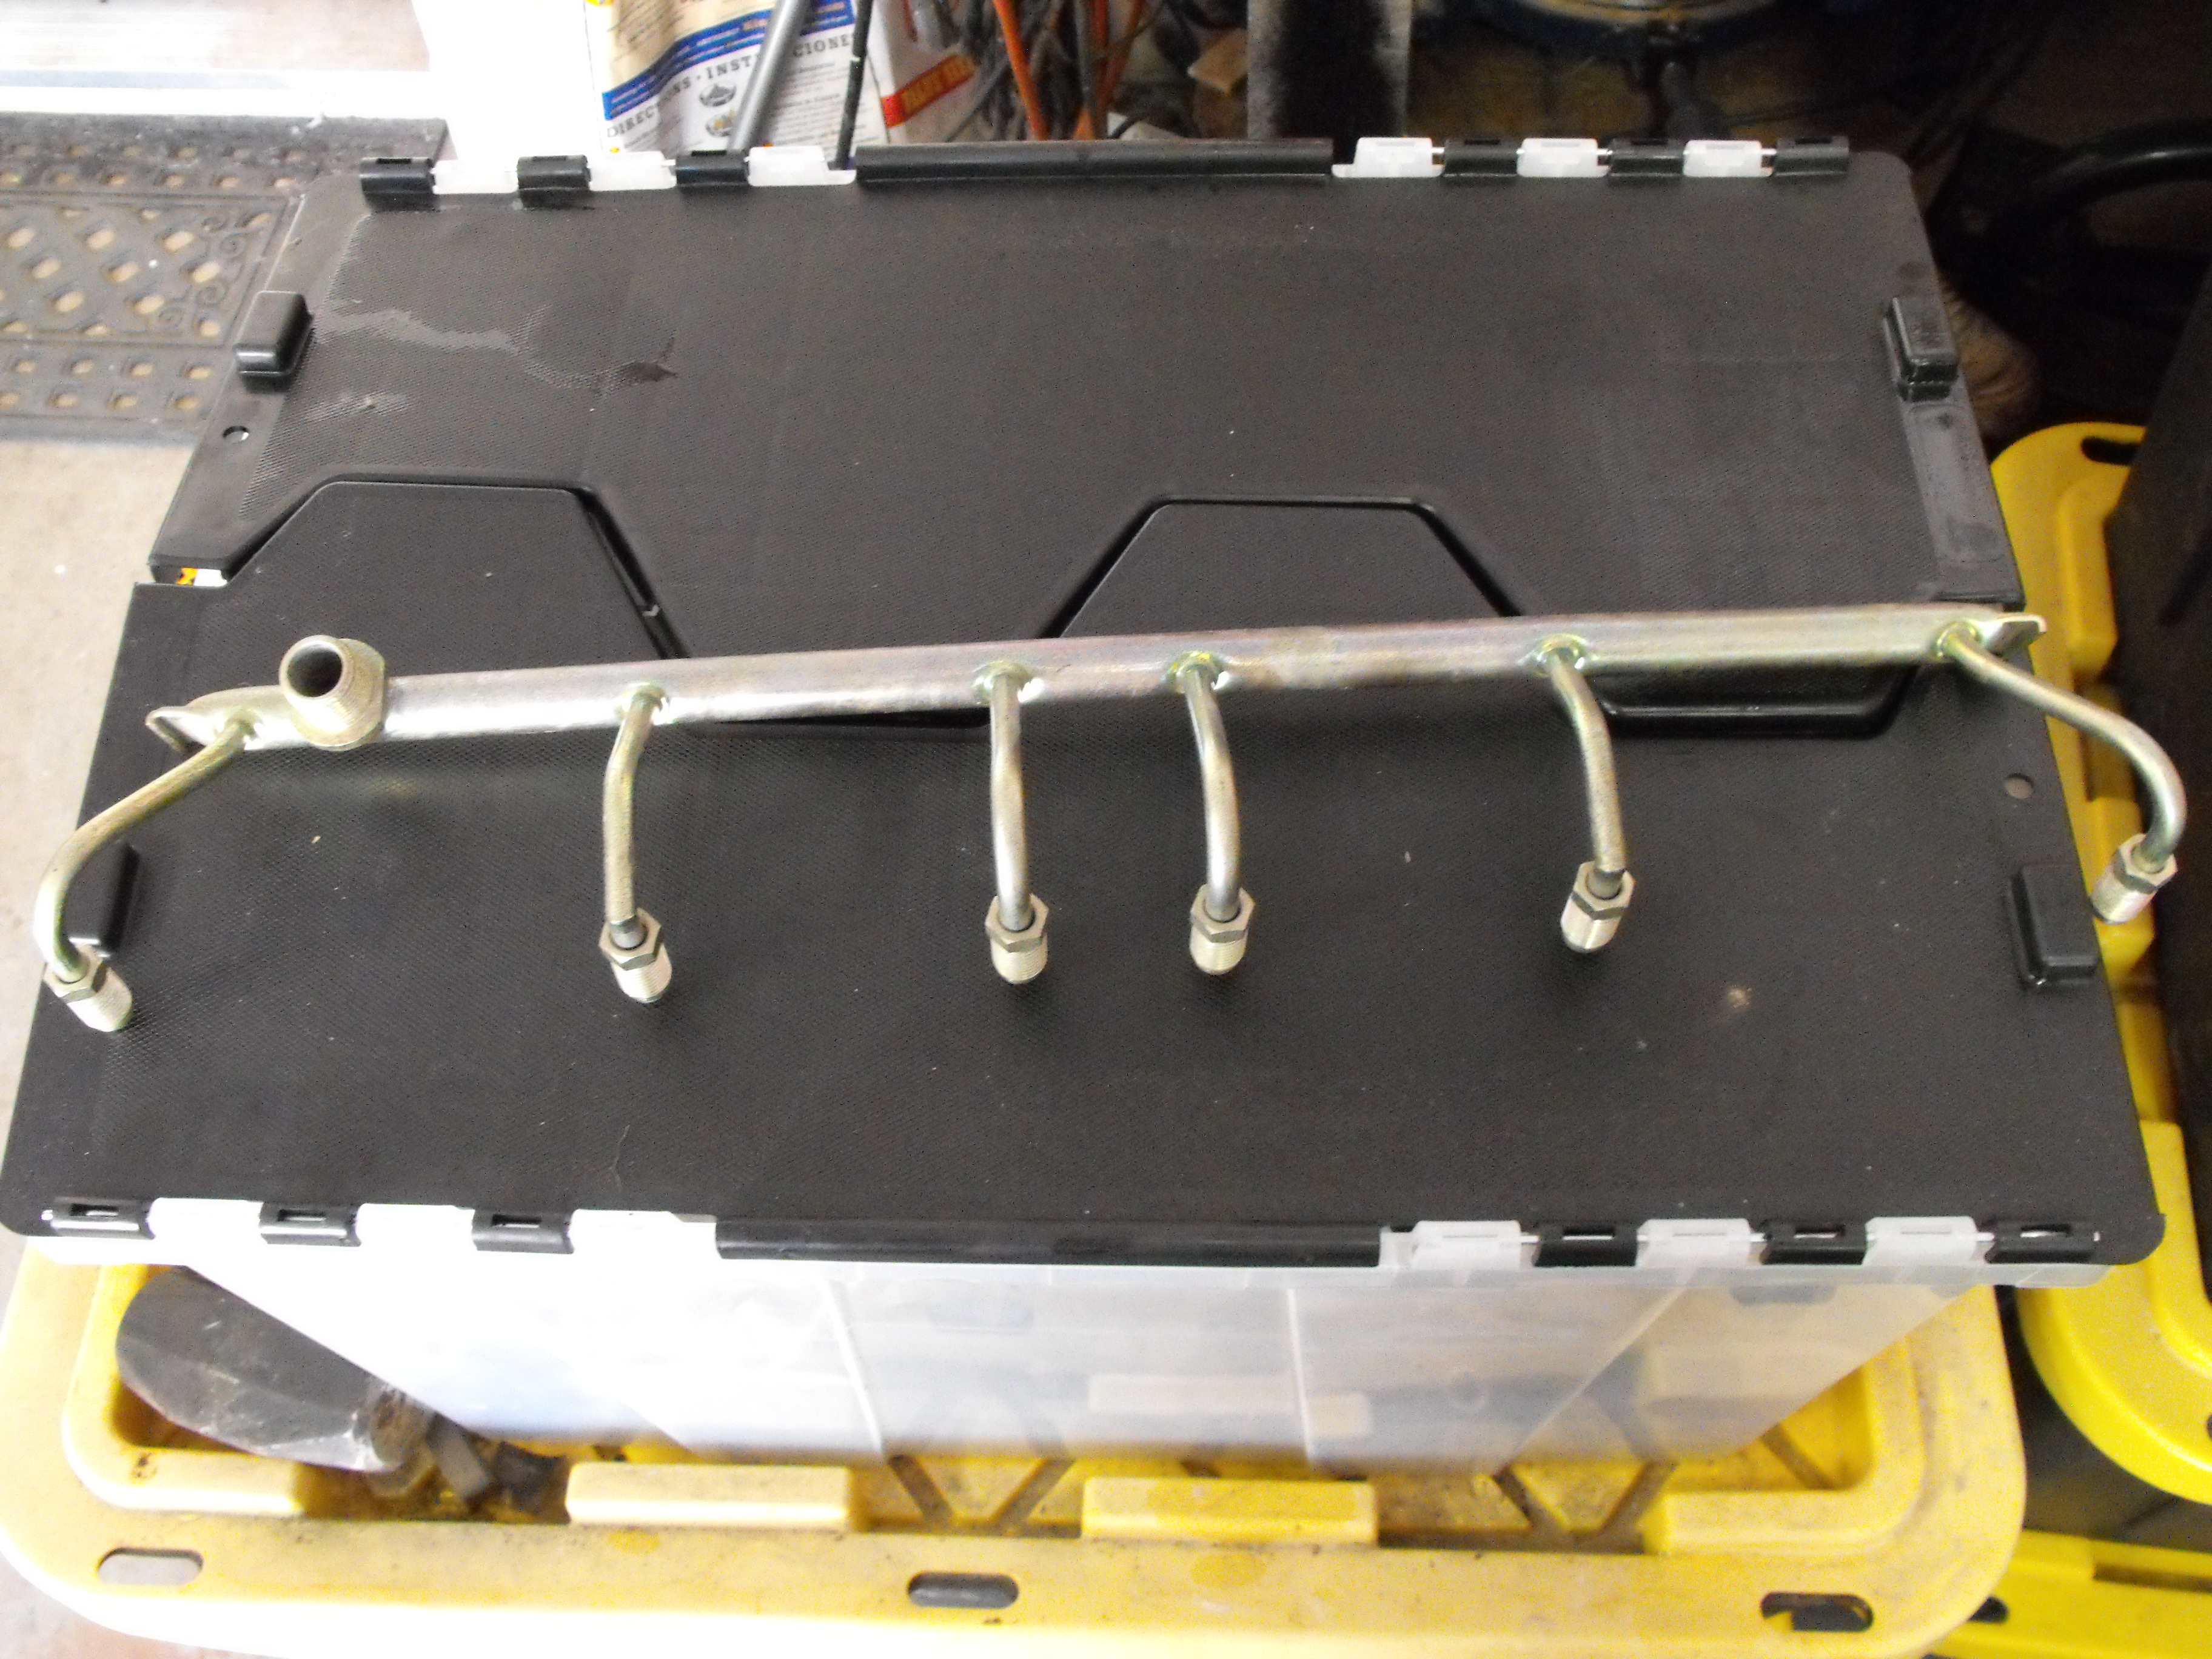
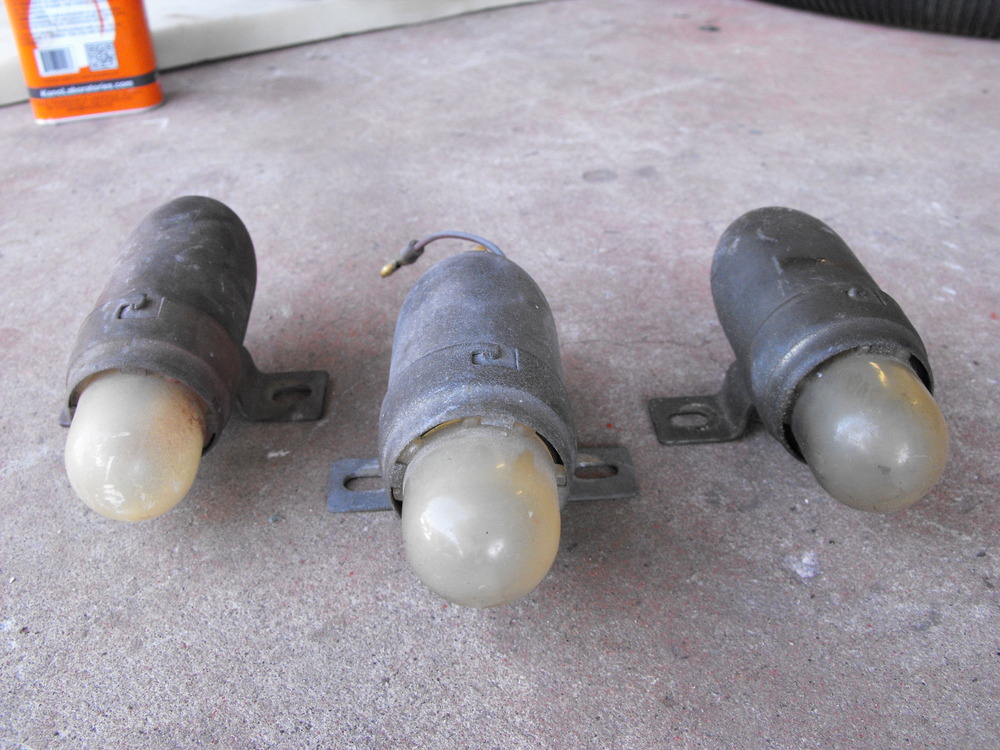
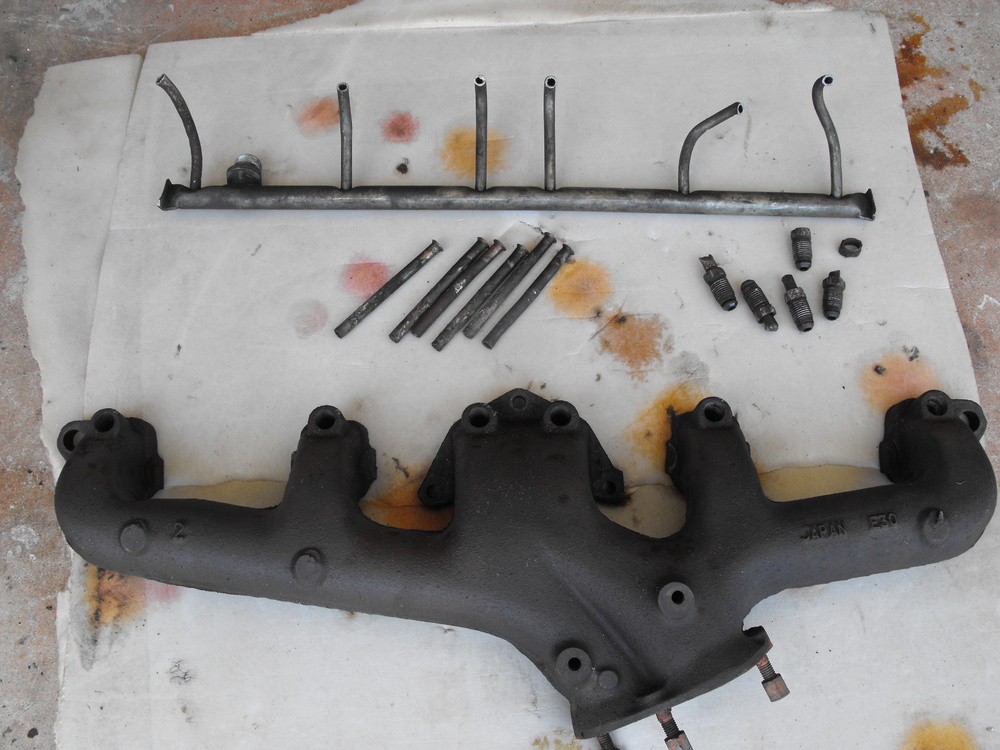
The inspection lights are multiplying . I cleaned up the original for this car and sent it off to the platers along with the engine bolts and other parts to get the yellow zinc plating. Should get those parts back tomorrow. Can't wait to see them. I will drop off the silver zinc parts when I pick up the yellow parts. Still had a very hard time getting the air galley off even after soaking the air fittings for well over a week. I was not able to salvage the air galley that came with the exhaust manifold, but I was able to get out all of the fittings in tact, mostly. Five I was able to unthread using vise grips and a hammer. One I had to drill and tap, so not to bad. Tapped with the 1/4 BPST tap. I will run the tap through the other five ports just to make sure they are all cleaned up. Then I will send this off to get ceramic coated. Pics are below

-
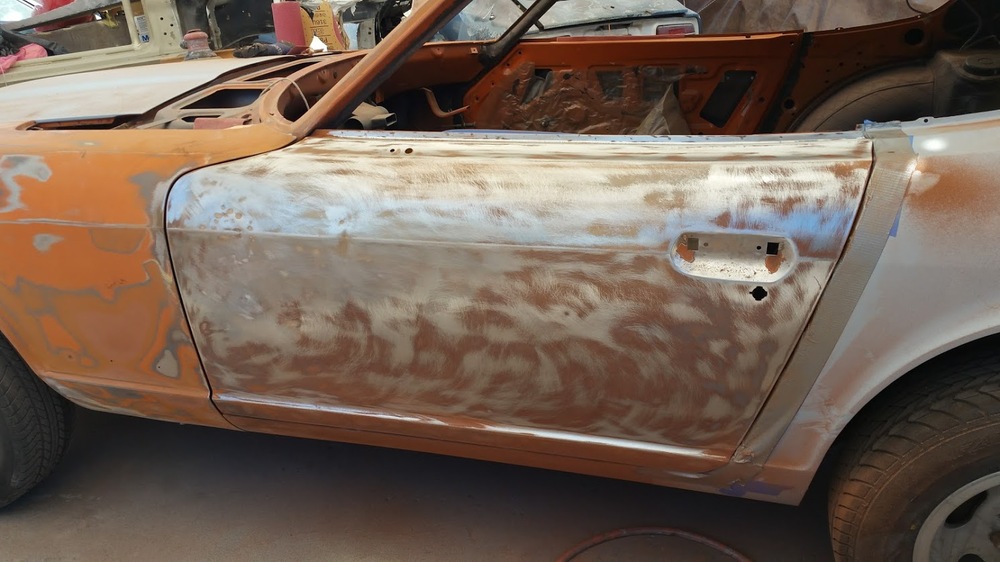
Updates from the paint shop


-
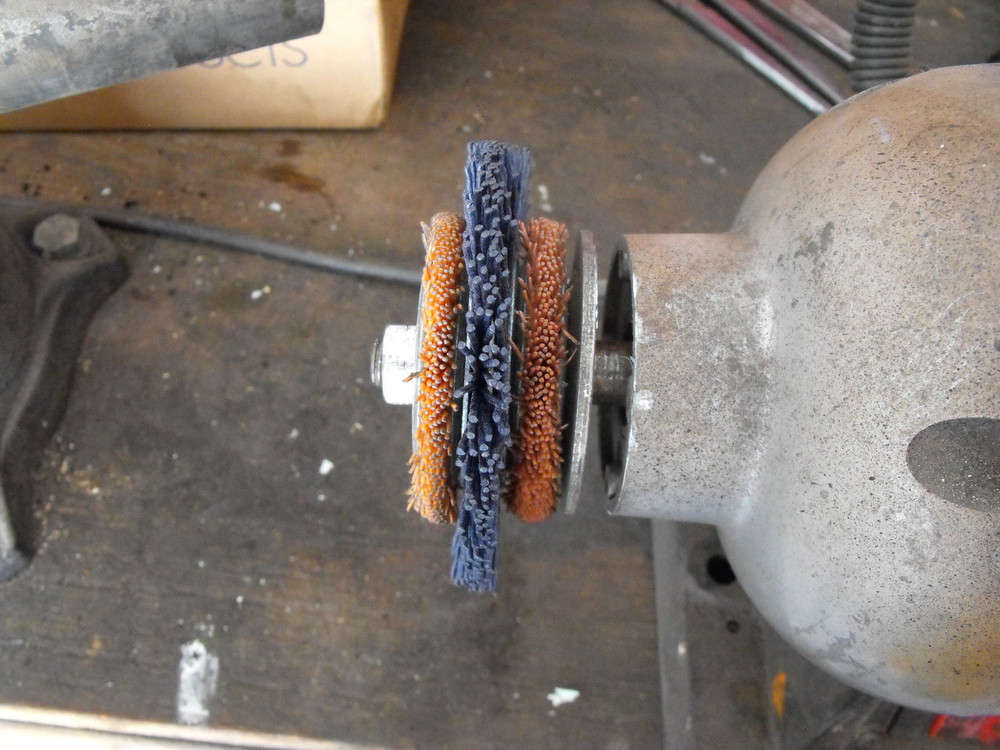
The two orange ones are kind of worn out, but they came with the Caswell plating kit. Caswell lists them as a 'Nylon abrasive wheel' with no grit specified. Since they were worn, I got the blue one at Home Depot. It is designed for a drill, but I drilled out the center drill shank with a 1/2" bit and sandwiched it between the two orange ones. Seems to work pretty well. I don't know what the grit is but it originally looked like this. https://www.amazon.com/Dico-541-784-4-Nyalox-Wheel-4-Inch/dp/B00004YYD9/ref=sr_1_3?ie=UTF8&qid=1492481361&sr=8-3&keywords=Abrasive+wheel 240 grit is about right.
-
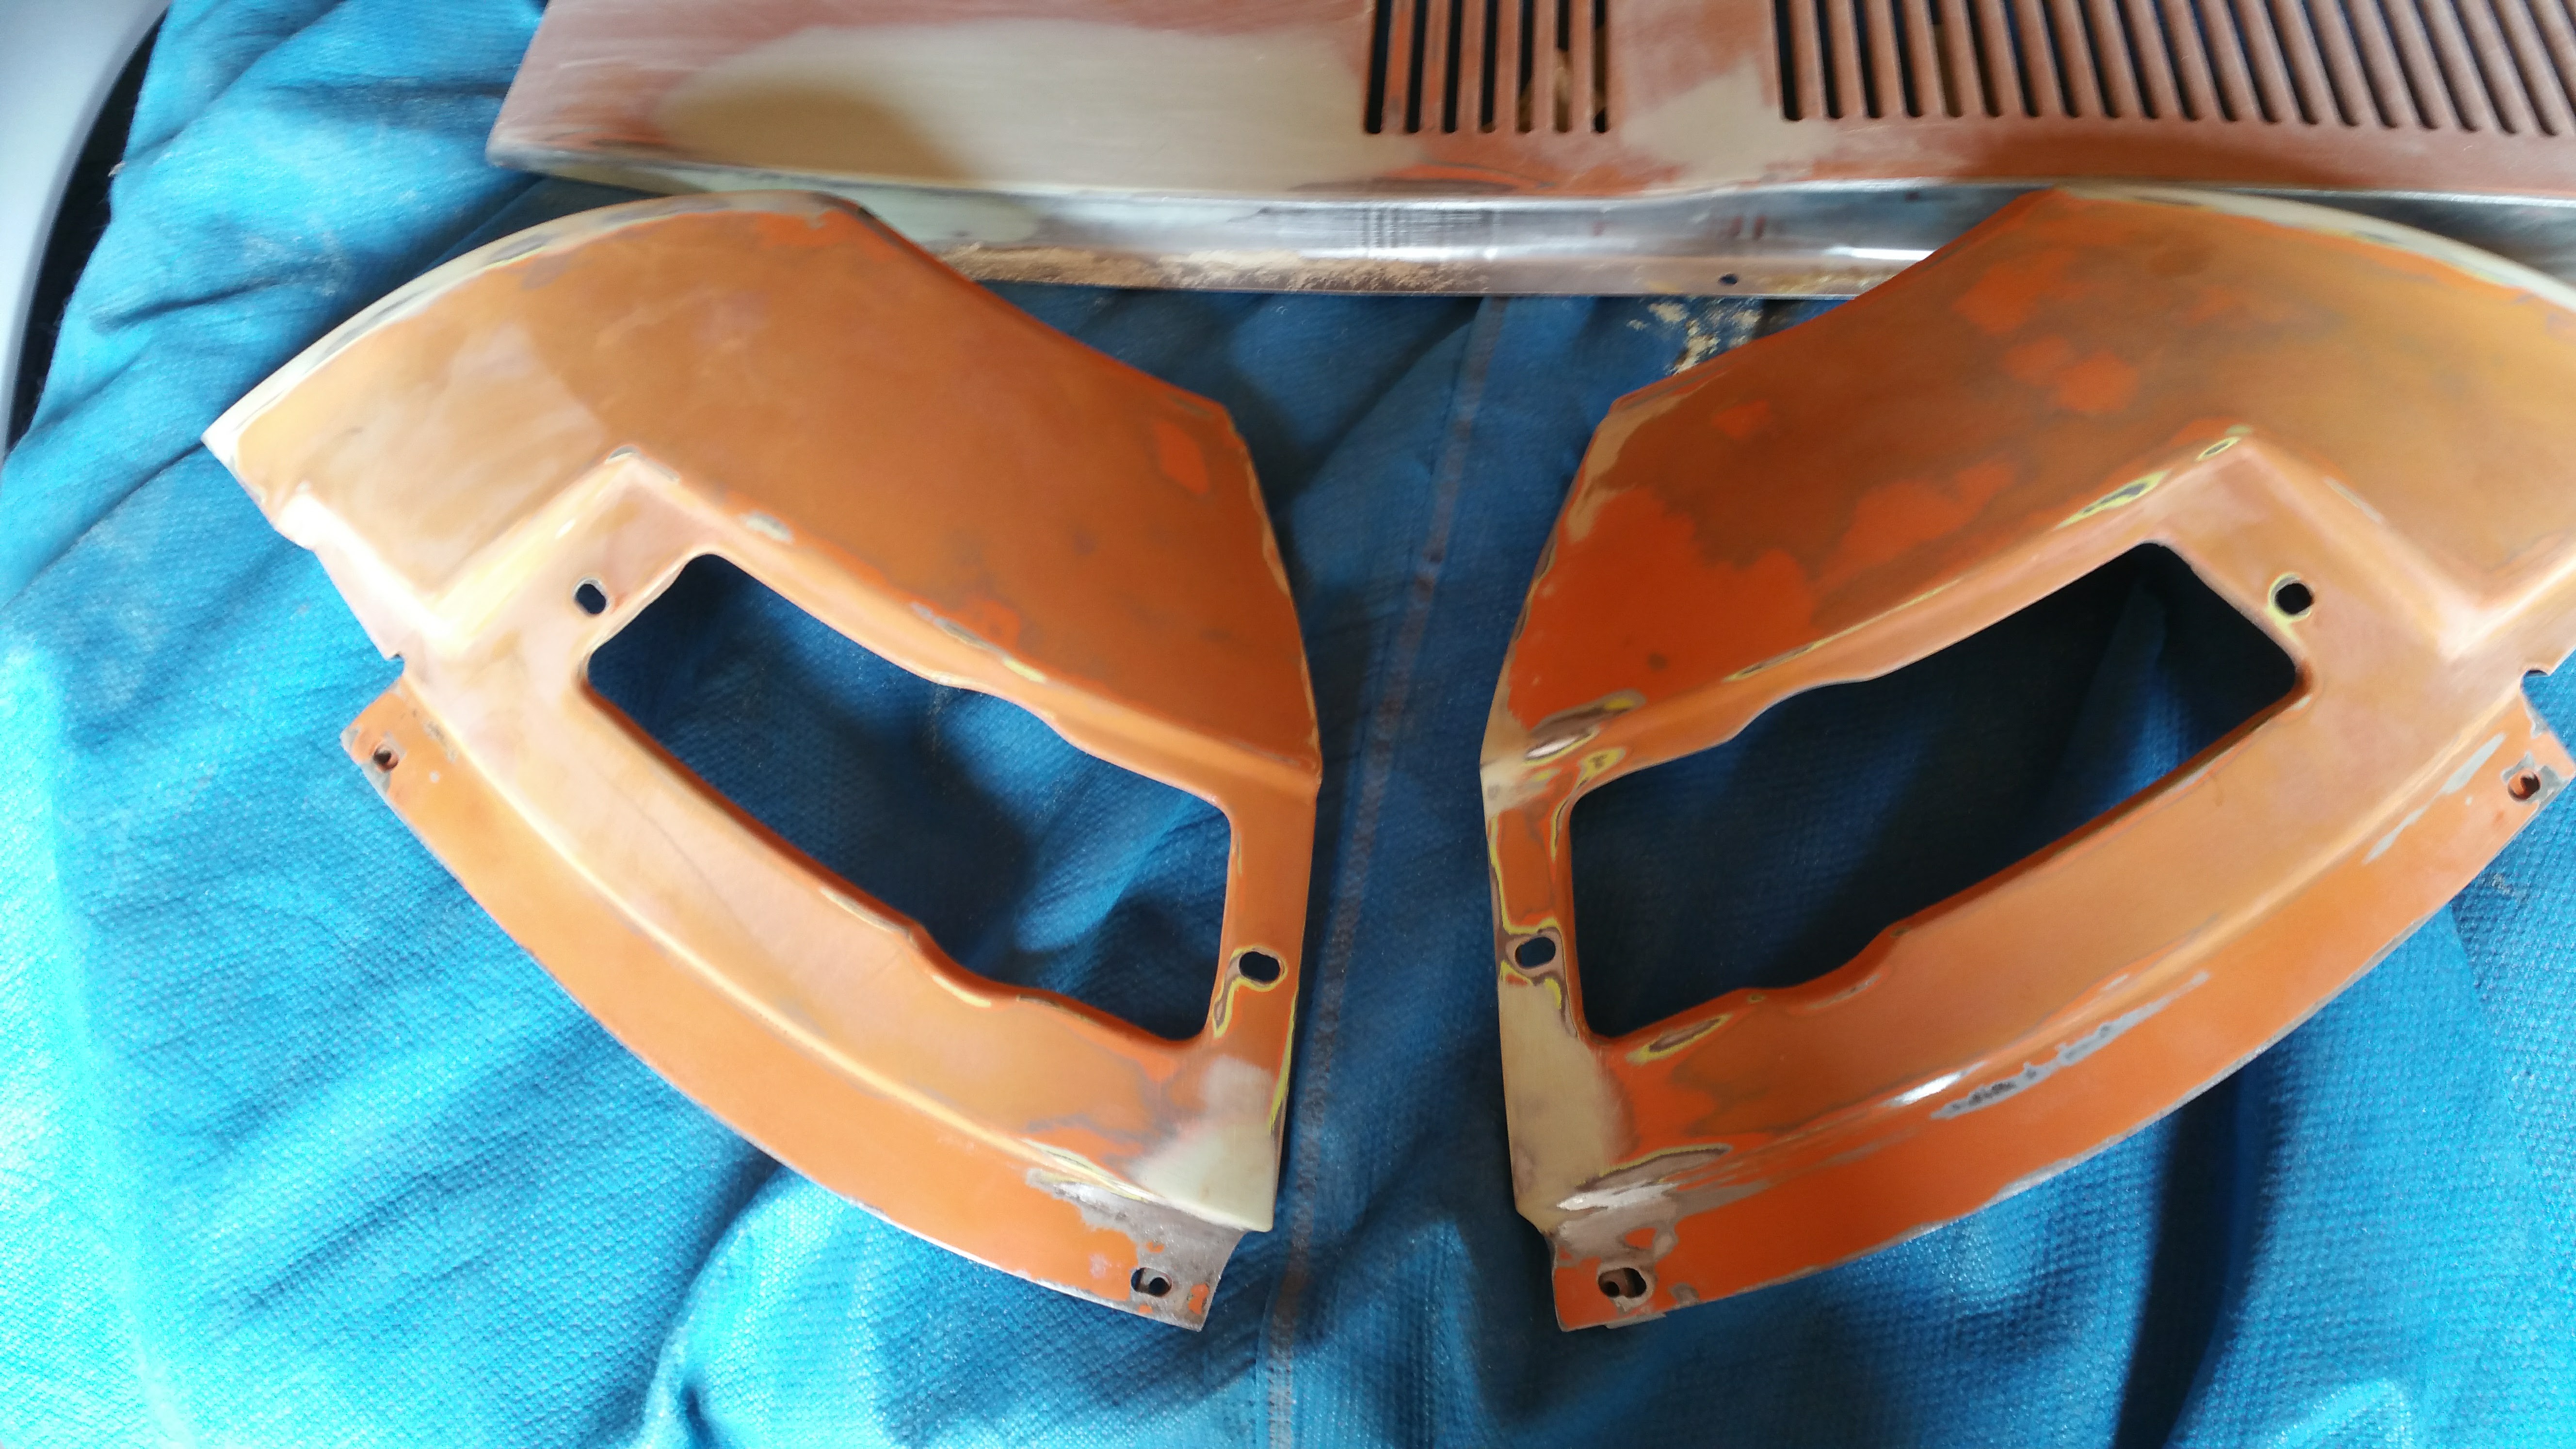
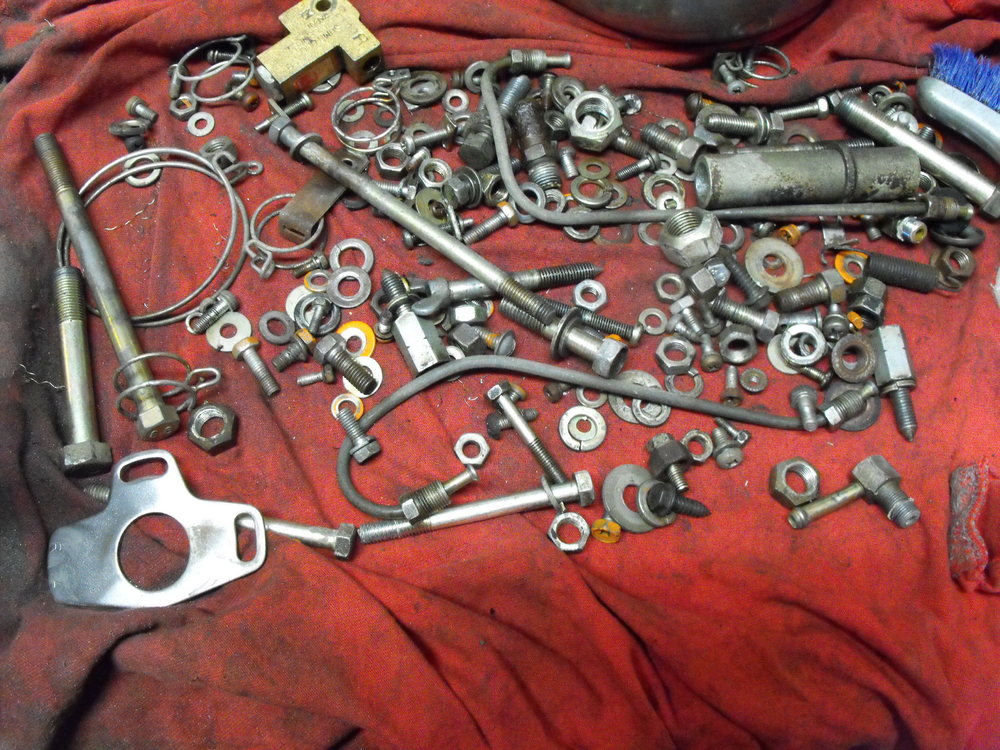
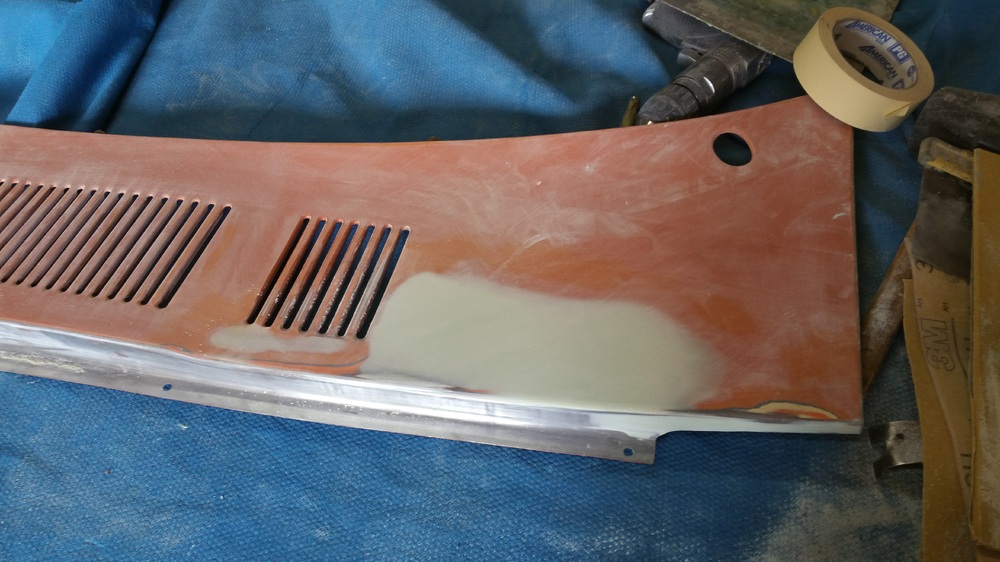
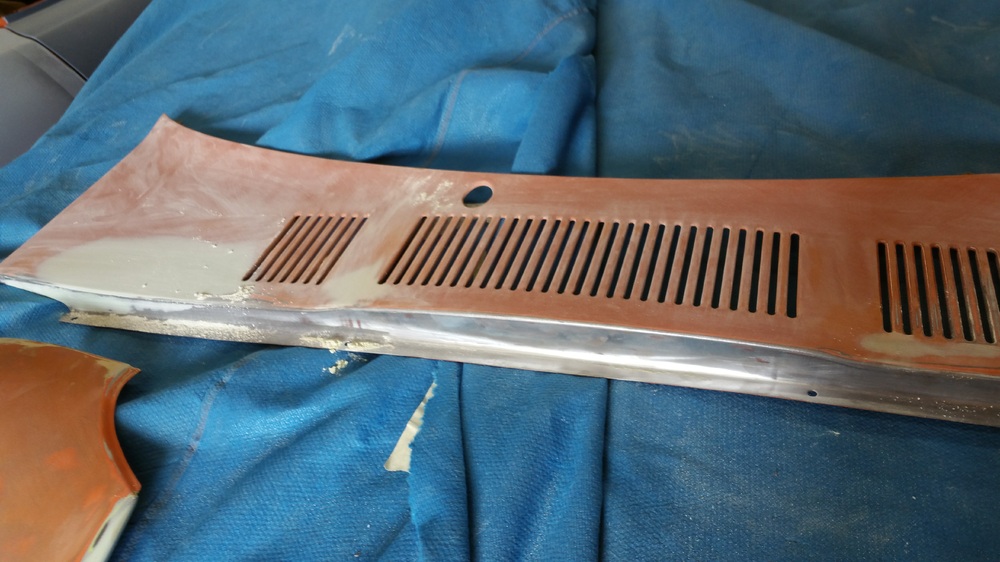
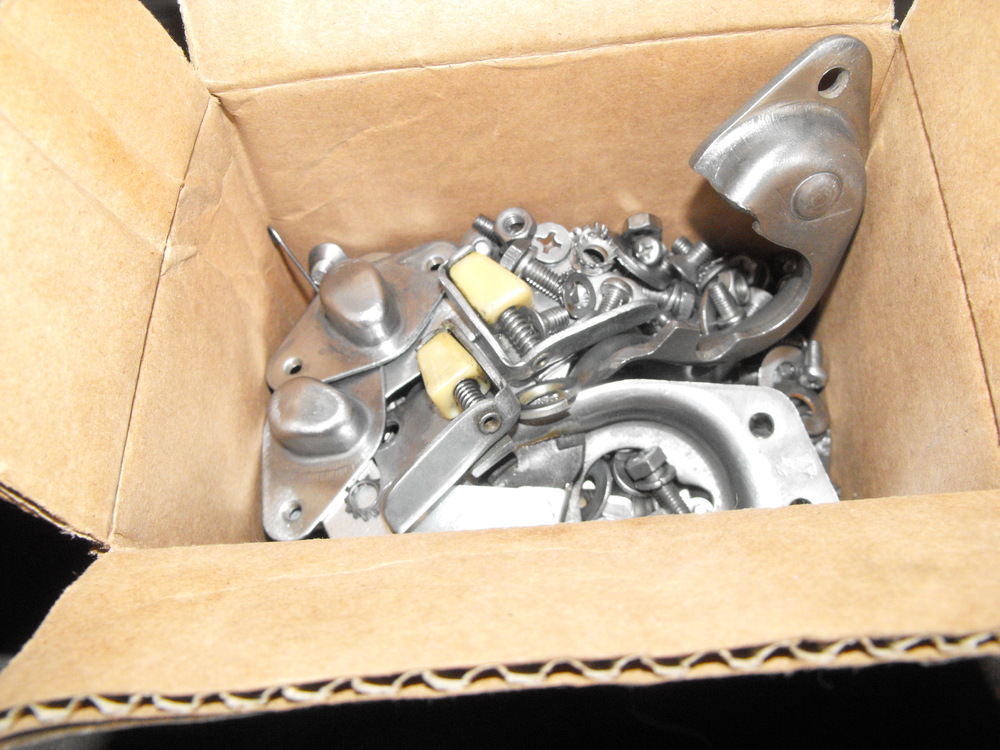
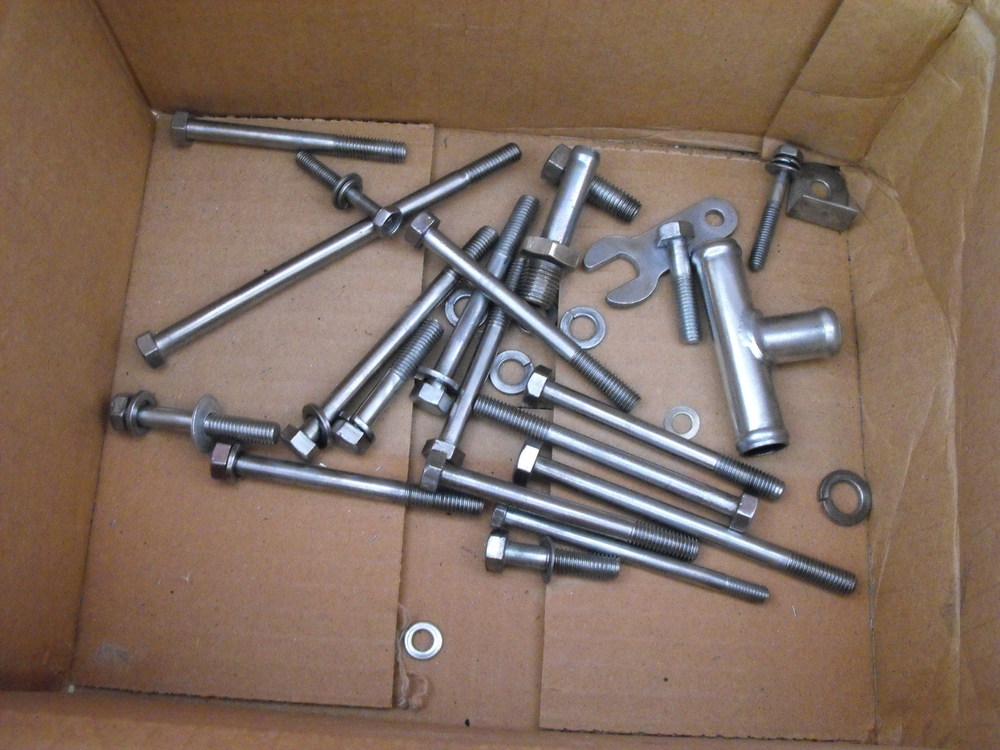
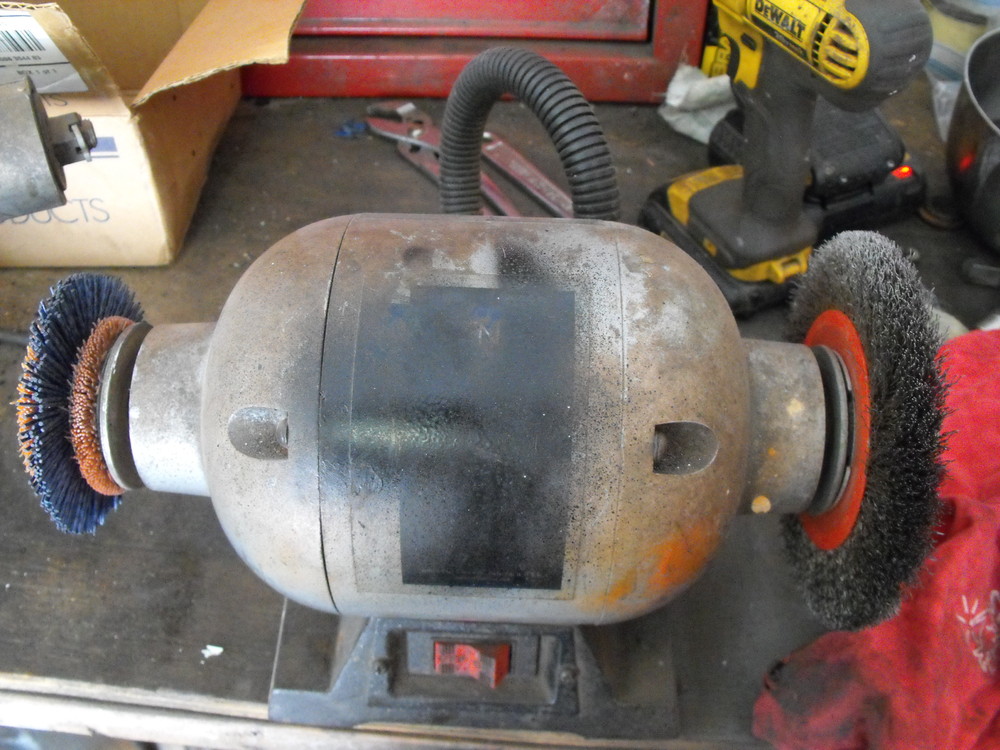
The Plating Process: Spent several hours yesterday (before Easter activities) prepping parts for plating. The plating is a very involved process and prep is the most important thing. Since I am doing a large number of parts, I will be sending these out for plating where they can plate these in large barrels. I have my own set-up, but it is better suited for low quantity work. The first step is to clean the oil and gunk off of the original parts. Usually I will do this by putting the parts in my paint thinner/lacquer thinner mix, using a brush to clean off the parts. This will remove most of the oily stuff and loose junk. Then I will dry the parts on a cloth. The parts need to be free of oils or they will contaminate your wire wheel. Once that is contaminated it spreads to all the parts, so this needs to be clean. I also intermittently clean the wire wheel with lacquer thinner just for good measure. After the parts are dry, I remove all the rust, paint and plating using the wire wheel. This can be a bit tricky as most of the parts are somewhat small. Typically I will wear a leather glove on my left hand and thin latex glove on the right. Goggles are a must as the little wires will occasionally fly off in addition to the debris and occasionally the part itself. A small breathing mask is also useful due to the dust. The part needs to be completely cleaned of the old material or the new zinc will not stick or look good. I also use a fiber wheel for cosmetic purposes after the parts have been wire wheeled. The fiber wheel makes surfaces super shiny which will also make the plating super shiny. Usually I will do the bolt heads and other very visible parts on the fiber wheel. At this point the parts need to be plated fairly soon or they will quickly rust. The parts are essentially naked at this point. Some people prefer to sand blast parts before plating. This is convenient for tight spaces but results in a somewhat dull finish. This is a fairly laborious process, but it's the little details that really make the car. Pics are below.

-
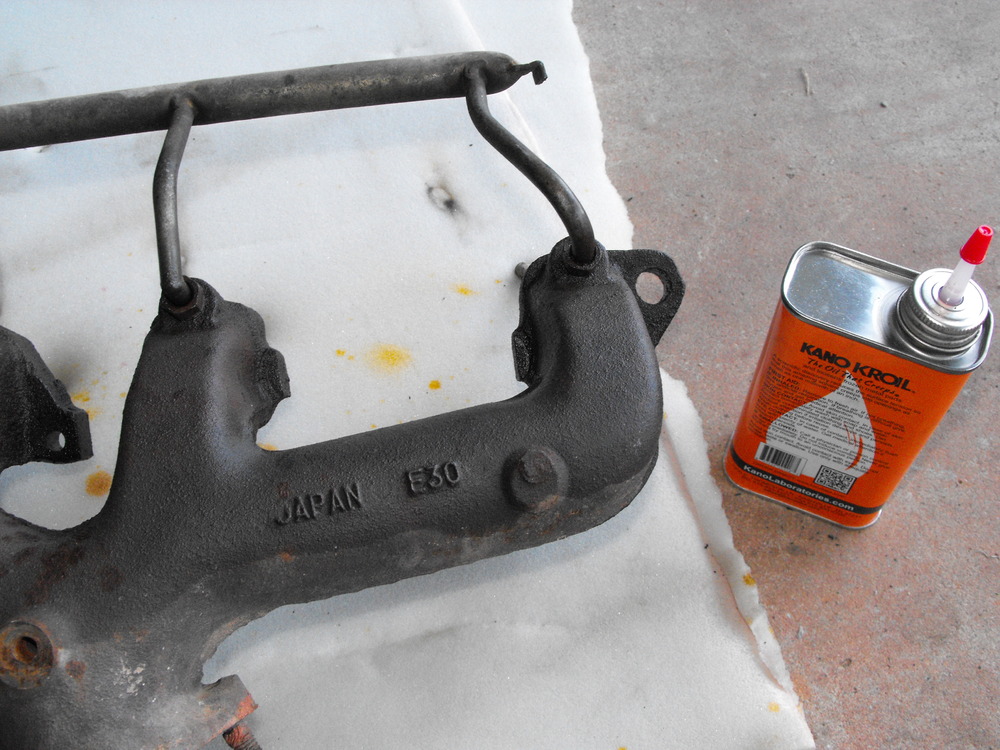
Did a little more clean-up on the engine parts. Cleaned and painted the oil pan and front pulley. Cleaned and put a light coat of high temp aluminum paint on the front timing chain cover. Parts are just loosely attached to the block since I don't have the nuts and bolts ready for plating. Hope to have those to the plater this Monday so I can start actual assembly soon. Will also get the valve cover glass bead blasted so that looks nice and pretty. Got a nice E30 Exhaust manifold with air galley off of e-bay (replaces the N36 that was installed on the car in 2013 and not original). Will douse the air galley fittings with Kroil and let them soak a bit before I try to remove. The air galley is in nice shape so I would like to try and preserve that. Pics are below.


-
Yellow zinc plating
-
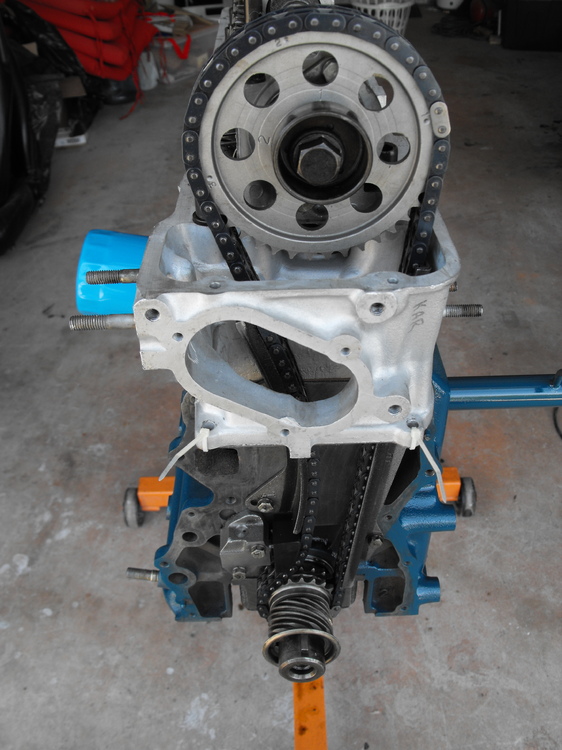
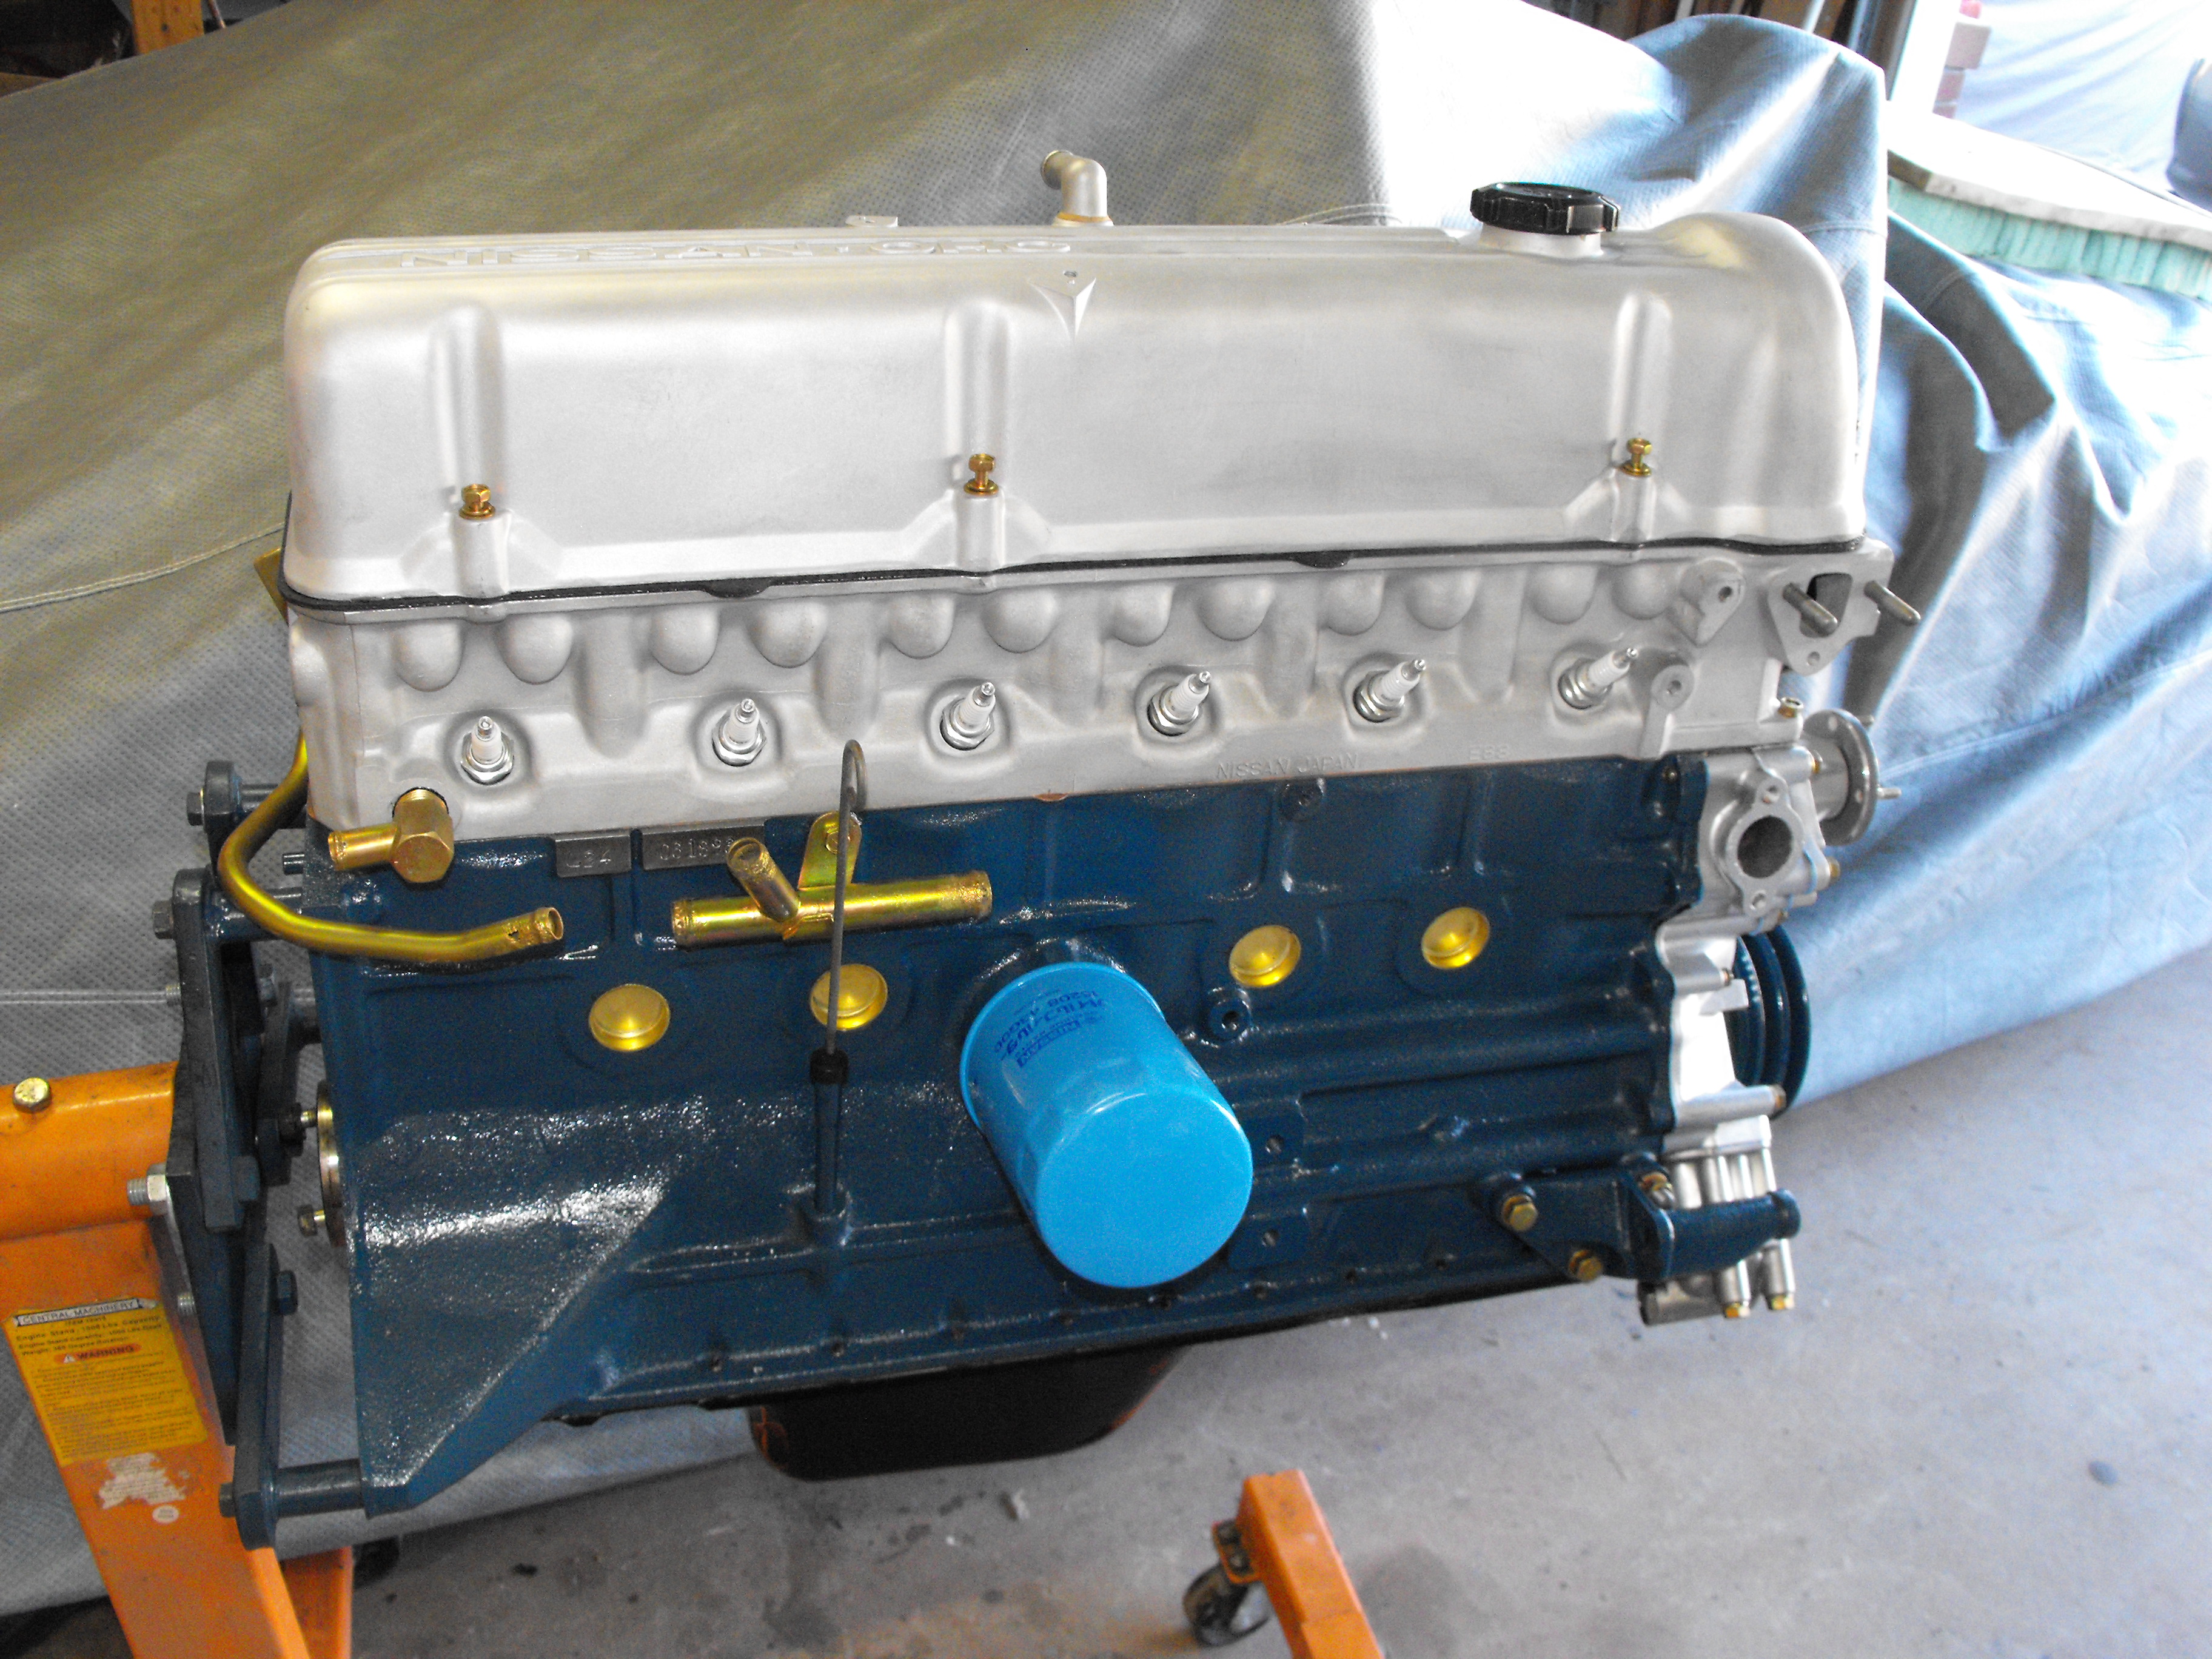
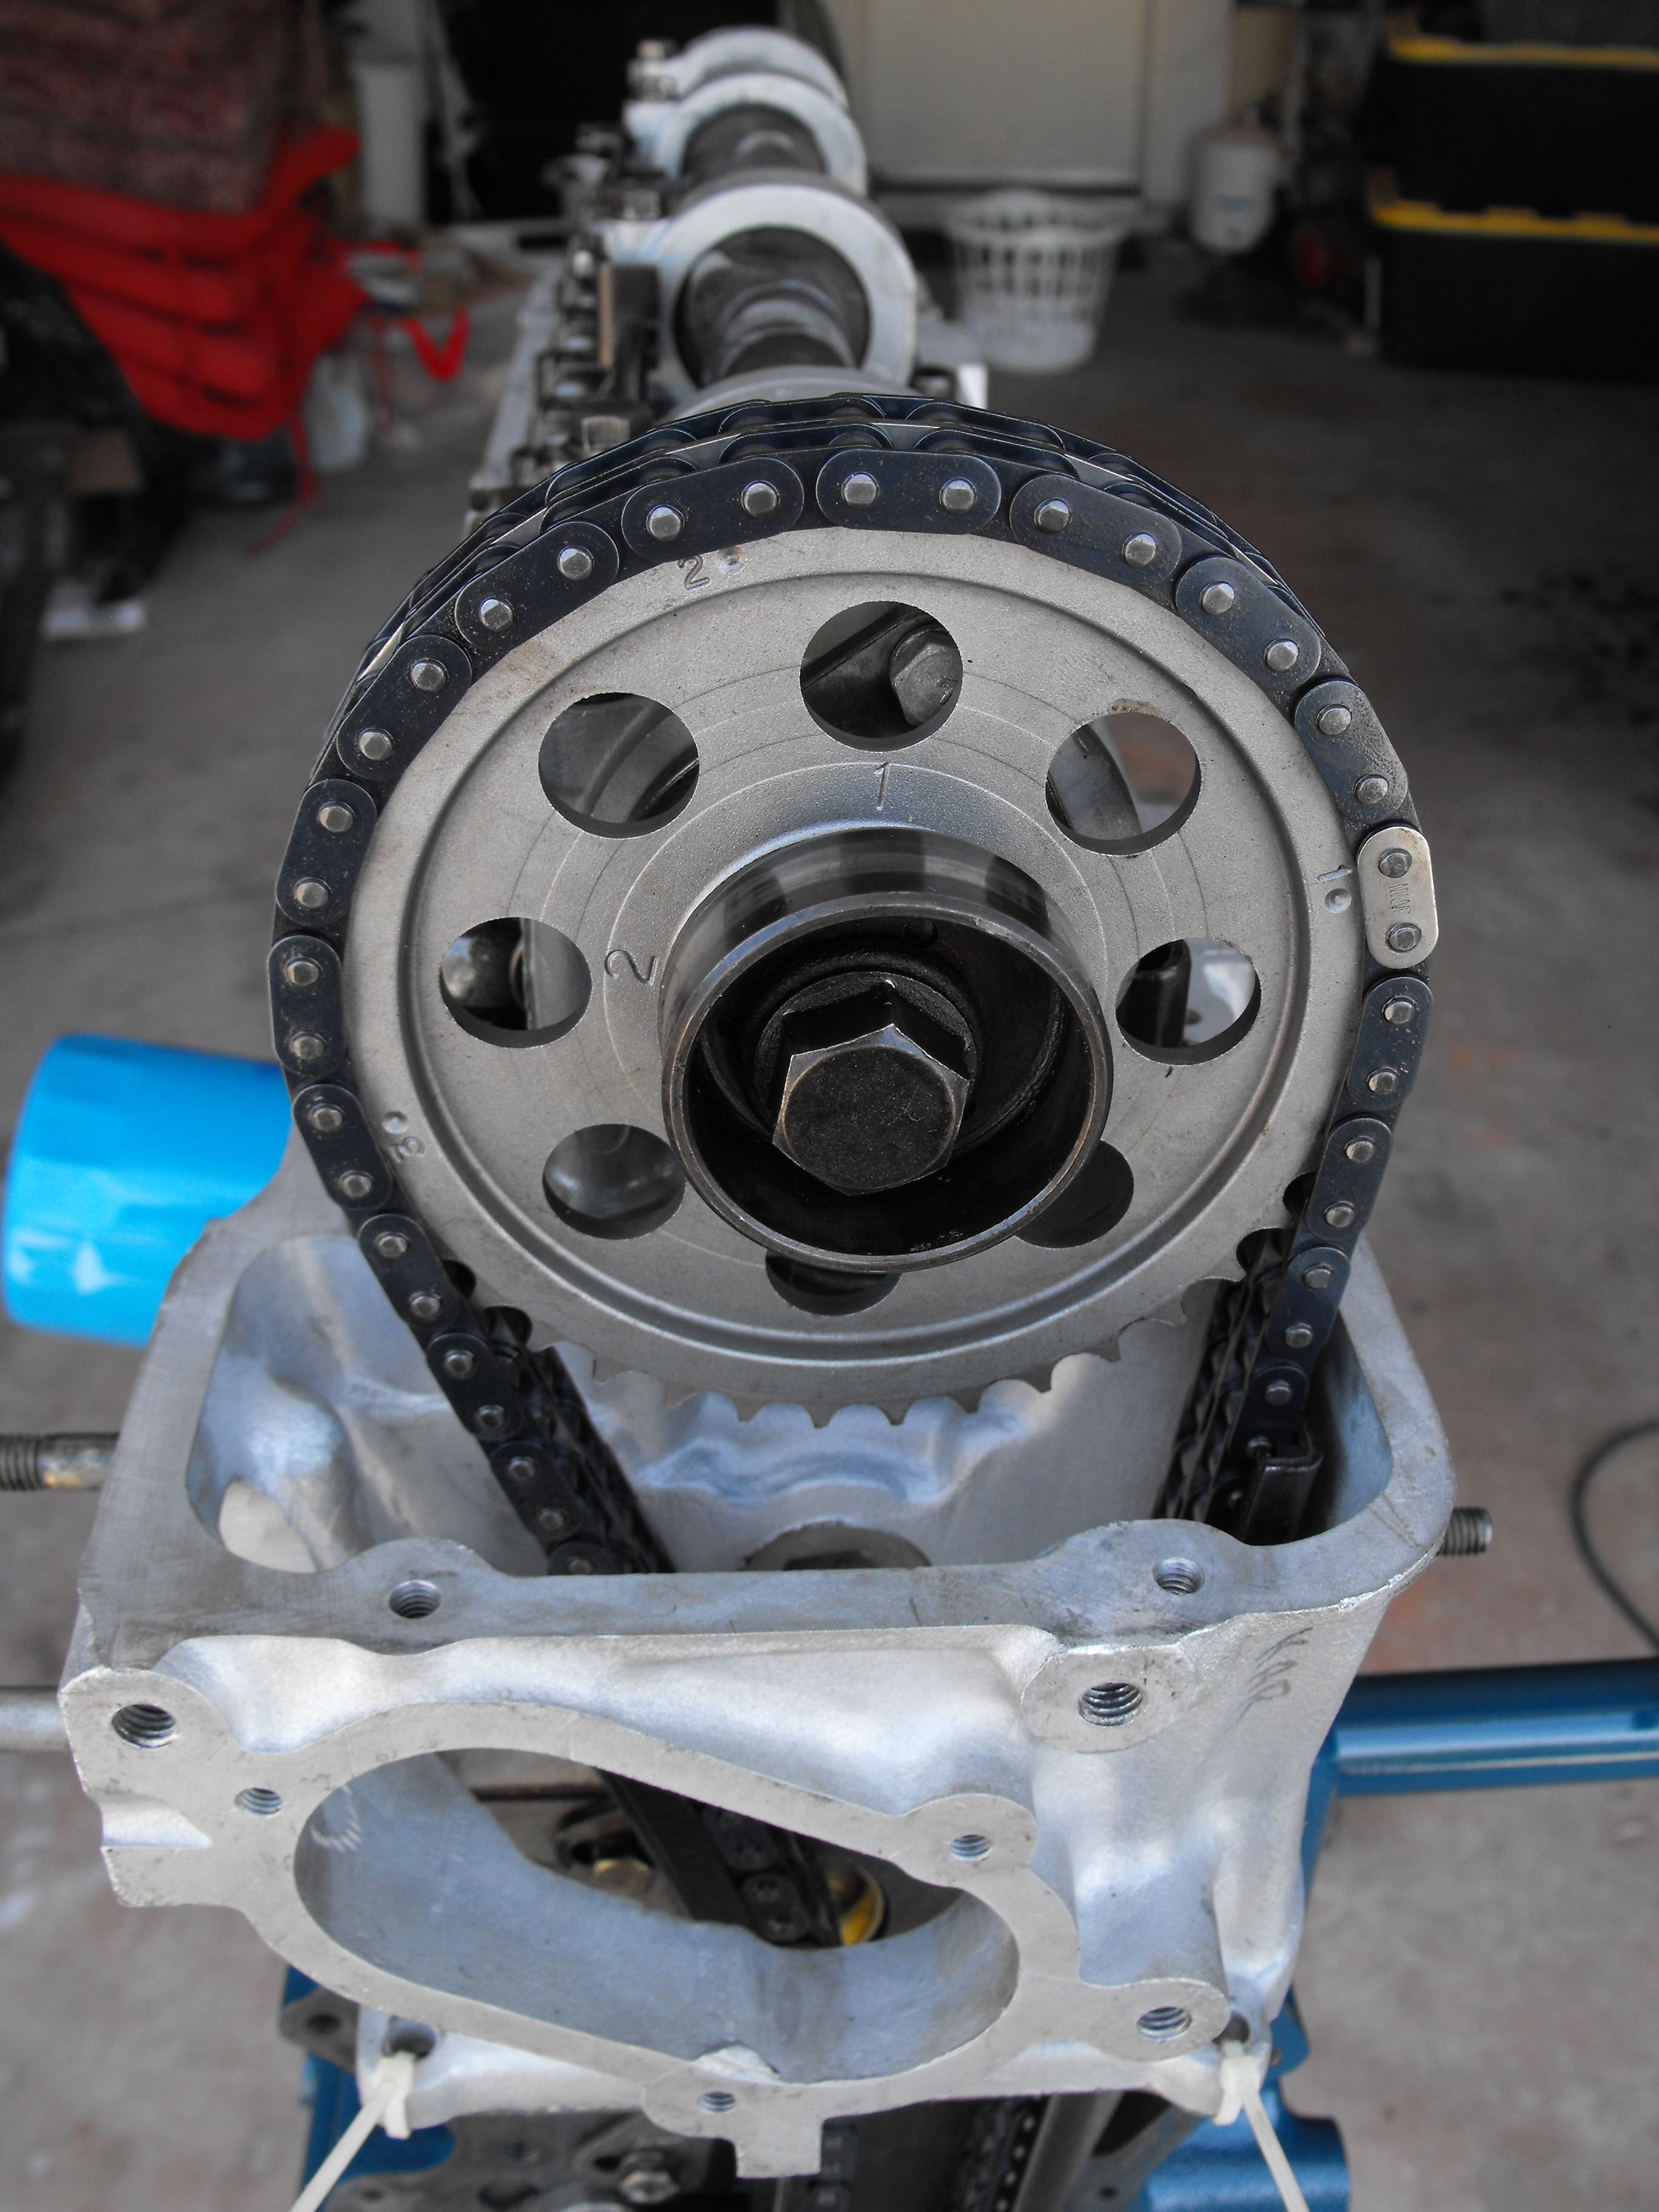
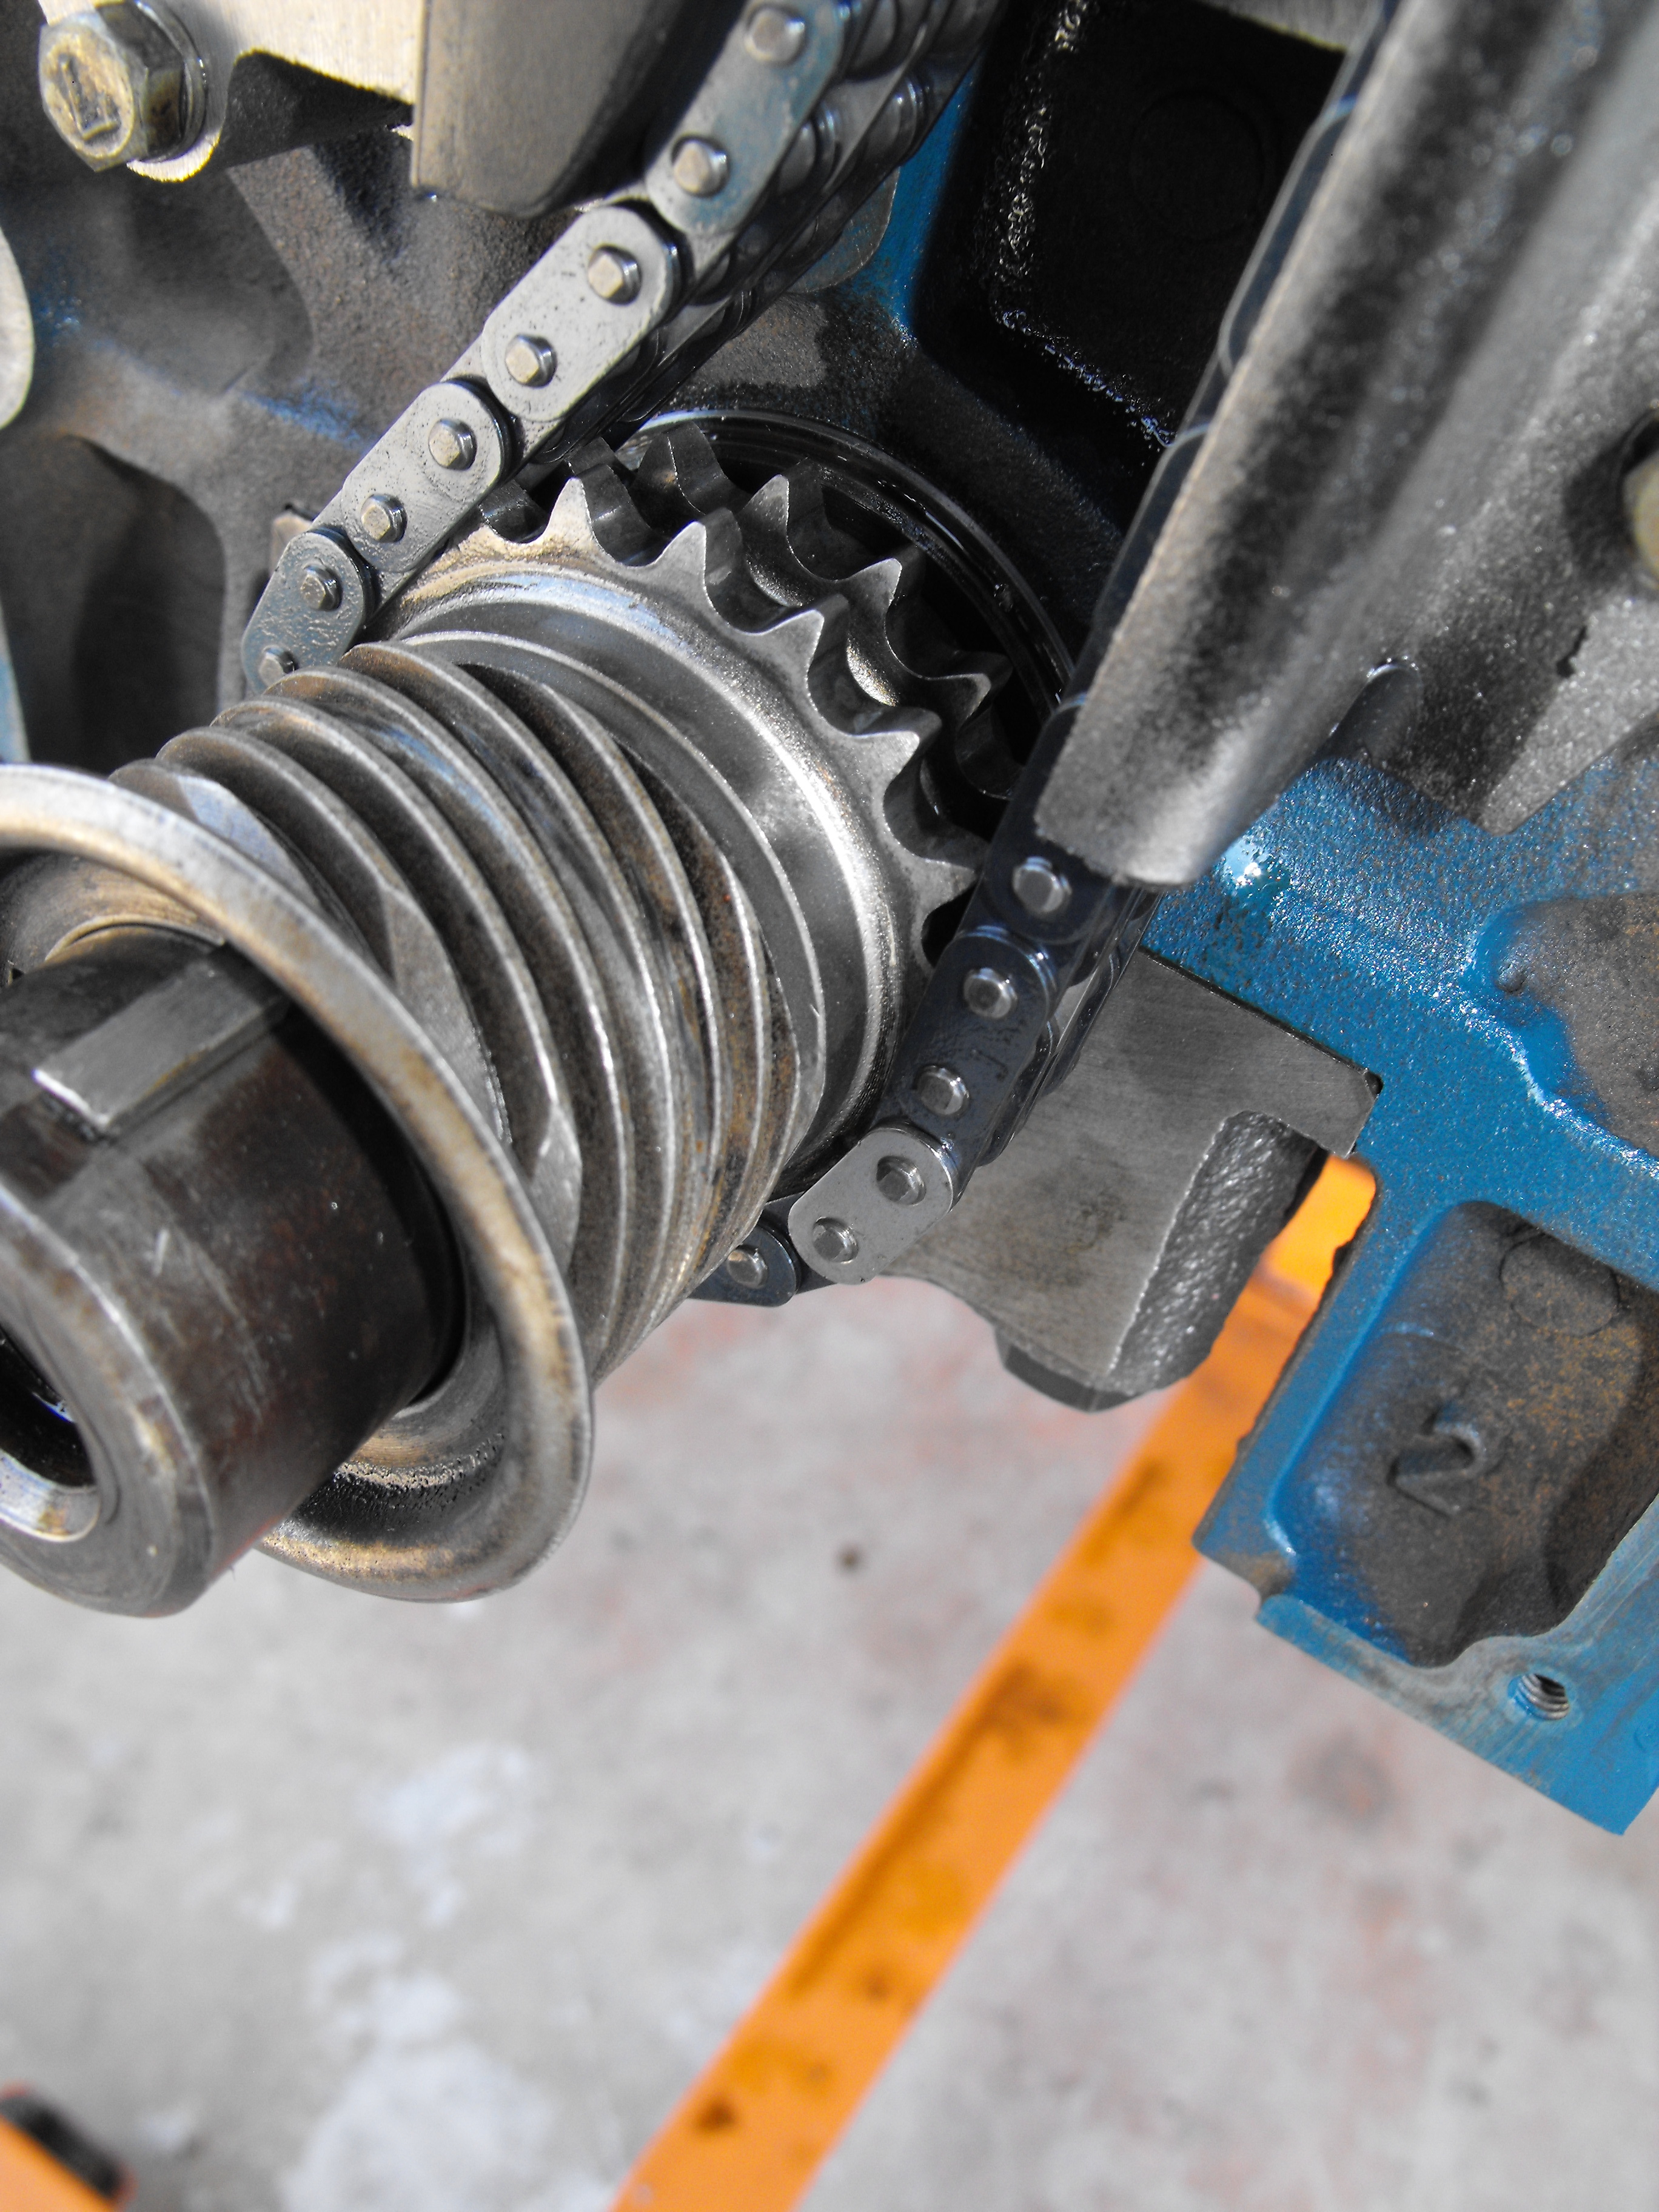
Got the head on and torqued down. Put on the timing chain with number one cylinder at TDC and aligned the shiny links to the dots. Adjusted the valves, .007" gap intake and .010" gap exhaust. Put on the oil sump. I think this was all the easy stuff. Now it's time to attack the oil pan and exhaust manifold. I got a semi-new air galley for pretty cheap on e-bay so I will install that once I get the after market air galley off. That will be a bit of a challenge. I have been soaking the air nozzle fittings for about a week now in PB blaster with little progress. I am almost thinking that the easiest way to get this off would be to drill and tap. Anyway, things are moving along Oh, and I cleaned off the 'KAR' from the front of the head with lacquer thinner. Not sure what that was from.