motorman7
 Subscriber
-
Joined
-
Last visited
Everything posted by motorman7
-
 The tape is just kind of worn/slightly torn from contact with the block, so I am leaving it 'As Is' for now. If it gets too bad, I will just re-tape it. I think the tape is just a secondary restraint for the magnets.
 -
I had something like that happen to mine. The problem was the wire going to the dizzy would short on the exhaust manifold. I have since re-routed the wire to keep it way from the exhaust manifold. Just a thought. Also, check the terminal fits on the contacts for the entire ignition system (wires going to resistor and coil). Make sure they are clean and snug.
-
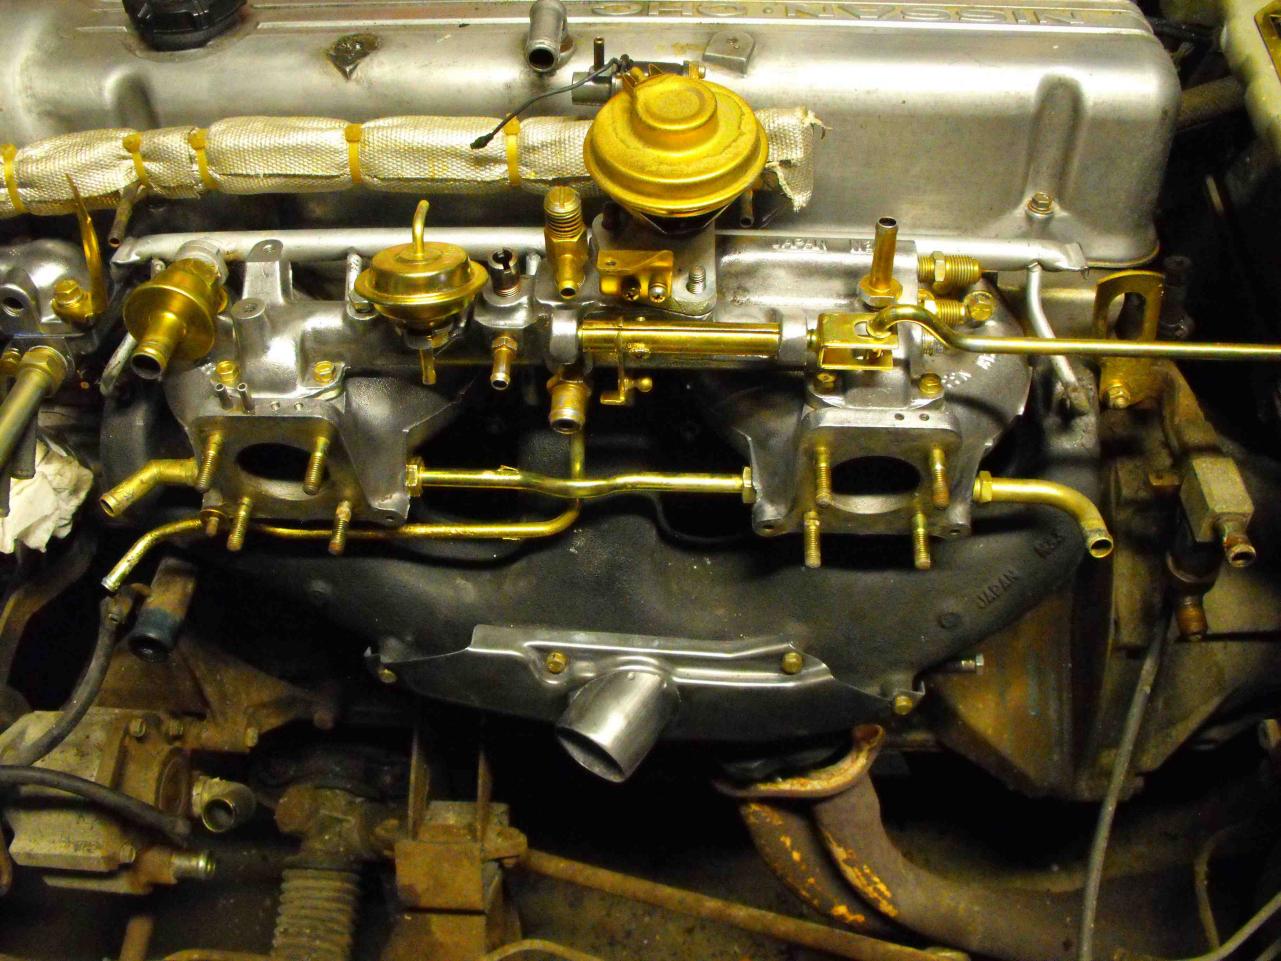
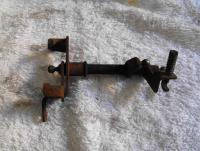
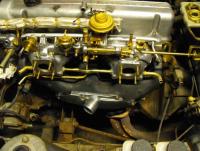
A couple observations from my install: In step 4; it seems very odd to me that they have an adjusting screw and then two fixed countersunk holes. What's the point in the adjusting screw if the assembly is fixed? The second countersunk hole (without screw in the picture), should be a slot just like a set of points. That way, when you assemble the magnet collar and it contacts the 'Hall effects sensors assembly', you can adjust it to avoid contact. Not only do you have worn dizzies, but you have tolerances of manufactured parts (petronics rivet assembly) that vary from assembly to assembly. After tearing up the green tape on my Petronixs because the fit was too snug, I slotted the countersunk hole. Much better fit...no problems. In step 5. What's up with the wire routing? The Petronics part should have been designed with the wires coming out the other side so you dont have 3 inches of wire flopping around inside your distributor. It should be on the other end, 1" then out the dizzy, no excess wire issues. The excess wire also tends to get pinched when you put the cap on. Anyway, just my two cents. Such is the curse of being a Mechanical Engineer. I think they could have done a much better job. Peace Out
-
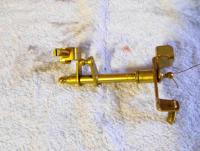
I must say that I really enjoy this zinc plating stuff. I think the enjoyment comes from the fact that in about 30 minutes you can take something that looks like complete garbage and turn it into something gorgeous. Here are a couple before and after pics of stuff I did today. The flourescent lighting makes stuff look a bit orangey. In real life, the parts look much better. The only problem I have here is Patience. I am supposed to let the Yellow Chromate dry for about a day since I dont bake it at 150 to cure it. The problem is that I want to assemble NOW. So, here is what I put together today. Most of this was plated and assembled today. Only a few pieces were done a last week. It makes assembly slow, but sure looks nice.


-
Yes, love the color. Very nice set-up there!
-
I have both bought and sold vehicles on Craigslist. I find what works best is a phone number. Typically if someone calls you it's pretty legit. I always call them if they leave a number on the ad. The only problem is that you get the occasional car selling company that wants to low ball you or someone that wants to trade you tatoos for your vehicle. Private parties typically work best. Cash Only. Be careful with non-craiglist e-mail addresses.
-
When I bought my '71, my daily driver, it had the Tokico 5020 Springs and Illumina adjustable struts. This was way too stiff for me. I changed to the Stock springs but still have the Illumina's. I like this combo much better. It rides about an inch higher. It is still a bit stiff (I have 7/8" anti-sway bars front and back), but very solid.
-
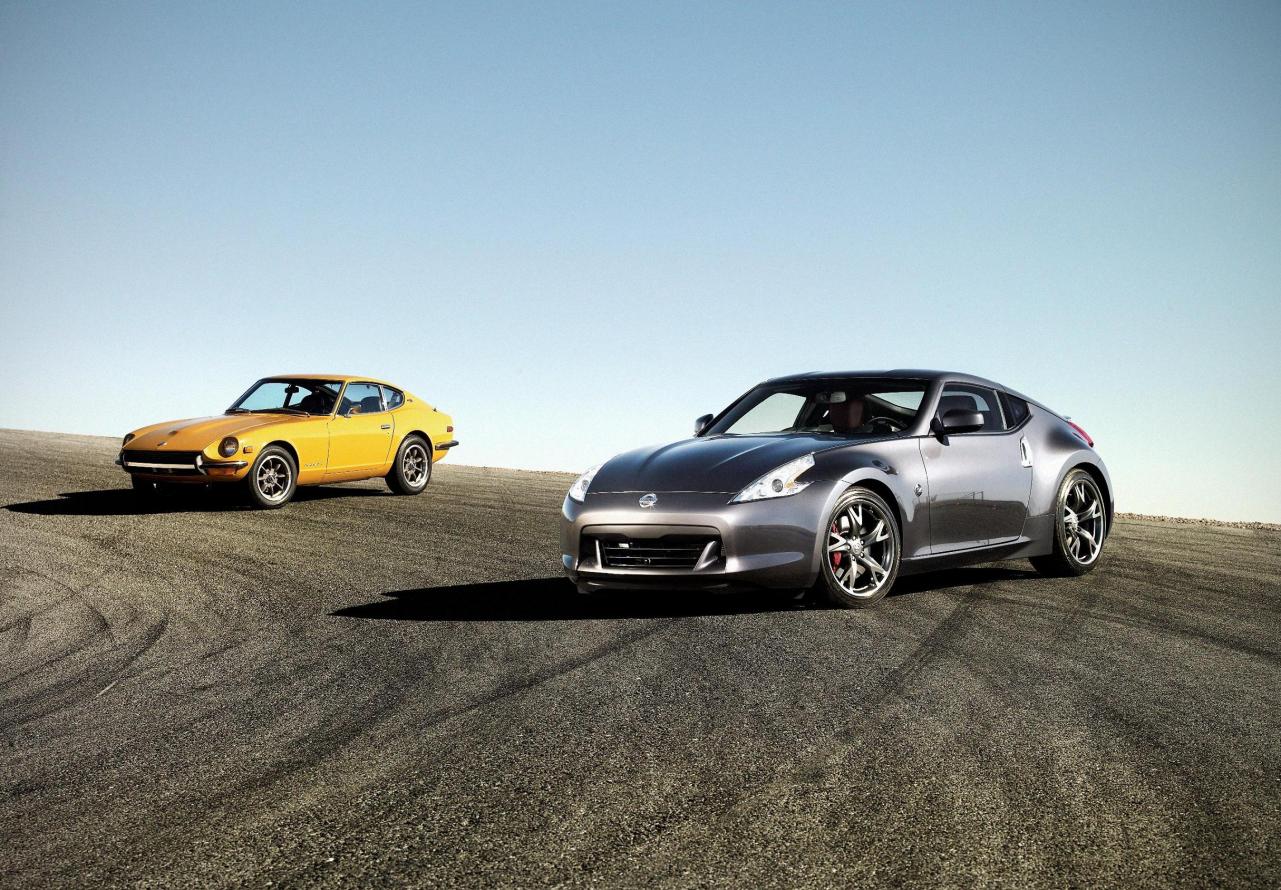
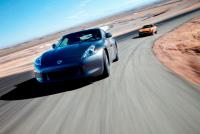
I was first introduced to the Nissan USA folks through our Z-club, ZCCIV. They had my car in thier booth for the October 2009 JCCS show along with Yokohama. They wanted an original '70 Z to show with a 2010 370Z. They recently called me up about 6 week ago and asked if the car would be available for this photo shoot. I will probably blog that experience later. Nice to see the car getting a little press. Dad will be happy to see that. I'm in the 370 and my son is in the gold 240 for the dynamic pic. http://www.autoweek.com/apps/pbcs.dll/gallery?Avis=CW&Dato=20100209&Kategori=CHICAGO&Lopenr=309009996&Ref=PH http://www.motortrend.com/auto_shows/chicago/2010/2010_nissan_370z_40th_anniversary_edition/photo_15.html

-
Yes , Just thought the whole spy thing was kind of funny as it was not very secretive at all. They did let me drive The 370 for the 'Dynamic photo shoot'. Was pretty fun with plenty of horsepower. Only bad thing is the track is really a motorcycle track and not a car track.
-
Of course we see a nice picture of the new 40th anniversary 370Z, but the spies have misidentified the 240 shown in the pics. It's obviously a 1970 Safari gold 240Z. What were they thinking?:stupid: http://www.autoblog.com/2010/01/25/spy-shots-2011-nissan-370z-40th-anniversary-edition-spotted/ http://forums.mazdaworld.org/index.php?showtopic=40760

-
That is GREAT news!..very glad to hear it. Thanks for checking into this! :)
-
I love Les's shop! I feel like a kid in a Candy store when I'm there. He has quite a number of roadsters there and they are all pretty sweet. Fortunately, I live just 10 miles to the east of the shop, so it's pretty easy to stop by and get things when I need for my Z.
-
I was thinking if MSA does not do the Nationals, that perhaps the local Z-clubs could put something together. Between, the SD Z-club, ZCCIV and Empire Z, you could probably get a pretty good showing.
-
And if I am not mistaken, last year they had 2 or 3 rimes more Z's than ZCON. It made ZCON look small.
-
Yes, it's disappointing not to hear anything. Was planning on bringing two cars. Maybe 3 if I can teach my daughter how to drive stick. Hopefully they put out a statement fairly soon.
-
Or maybe an 'N' for "not advanced"
-
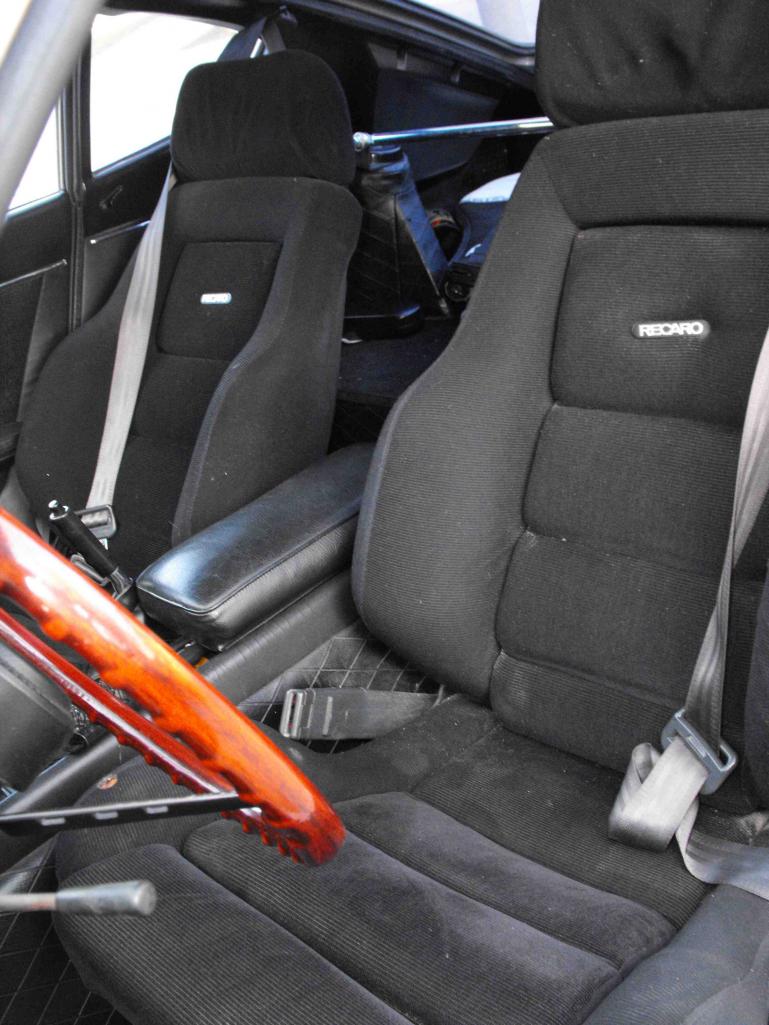
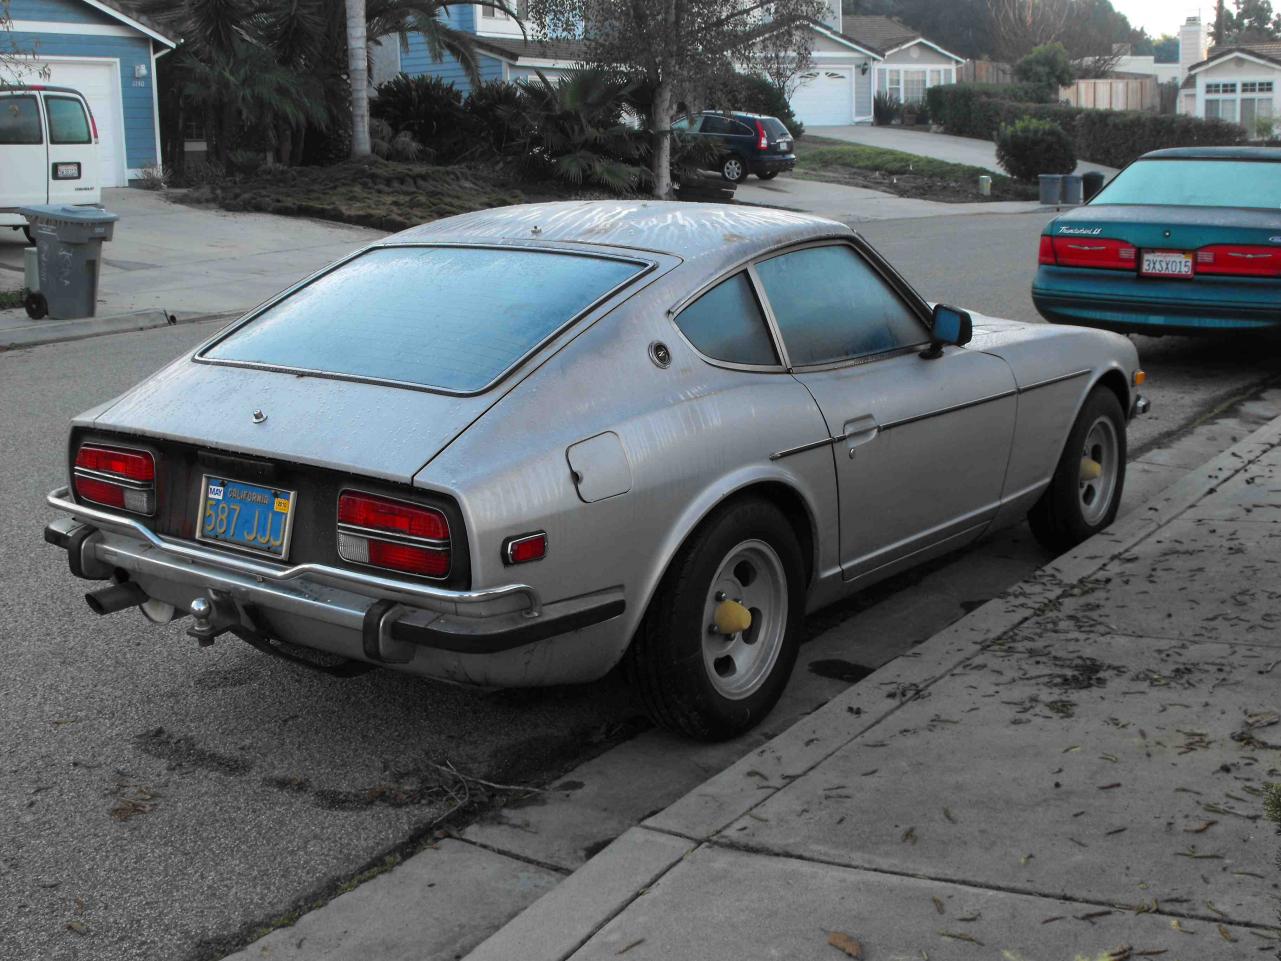
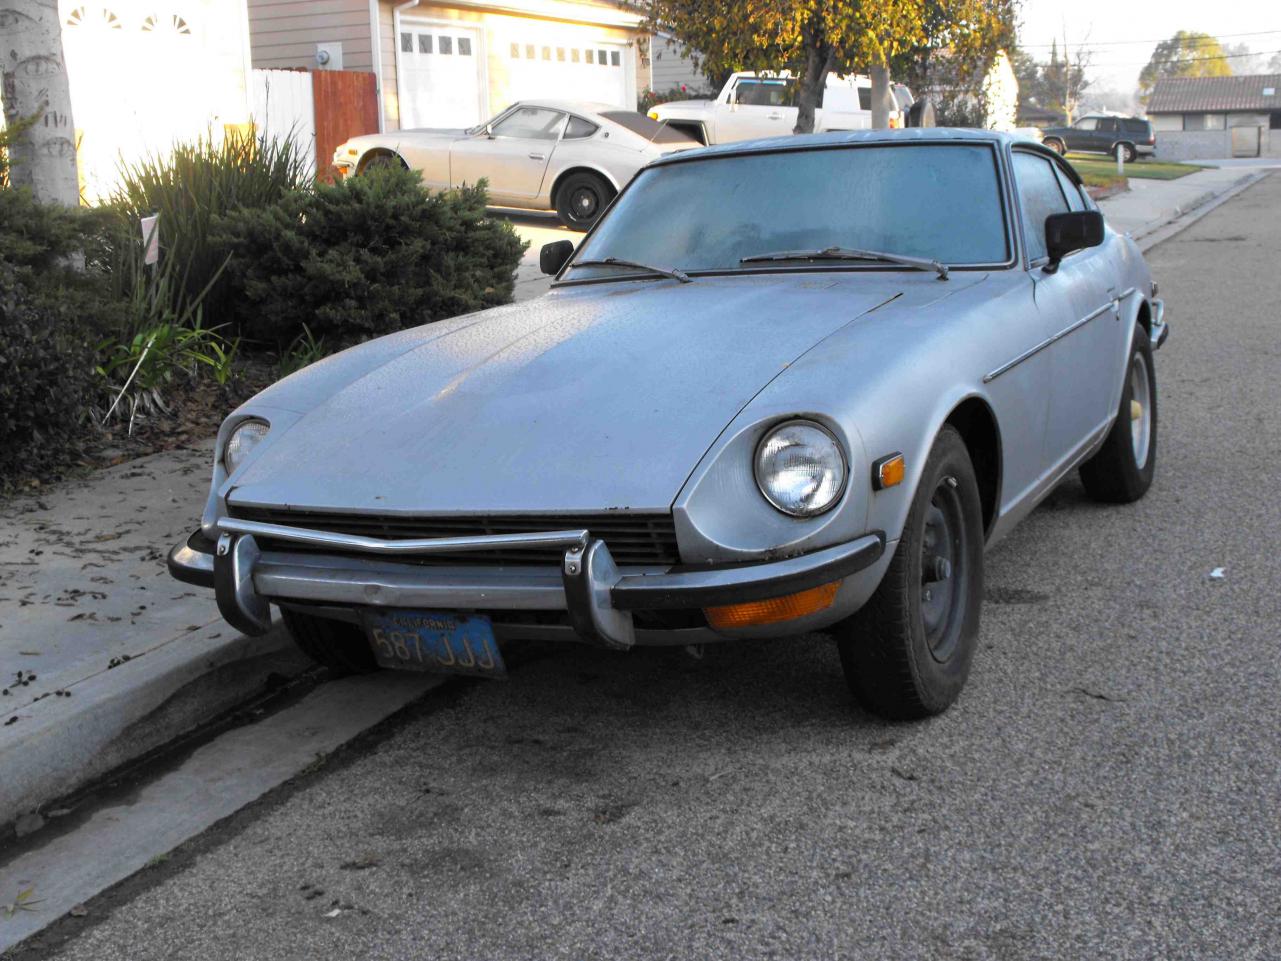
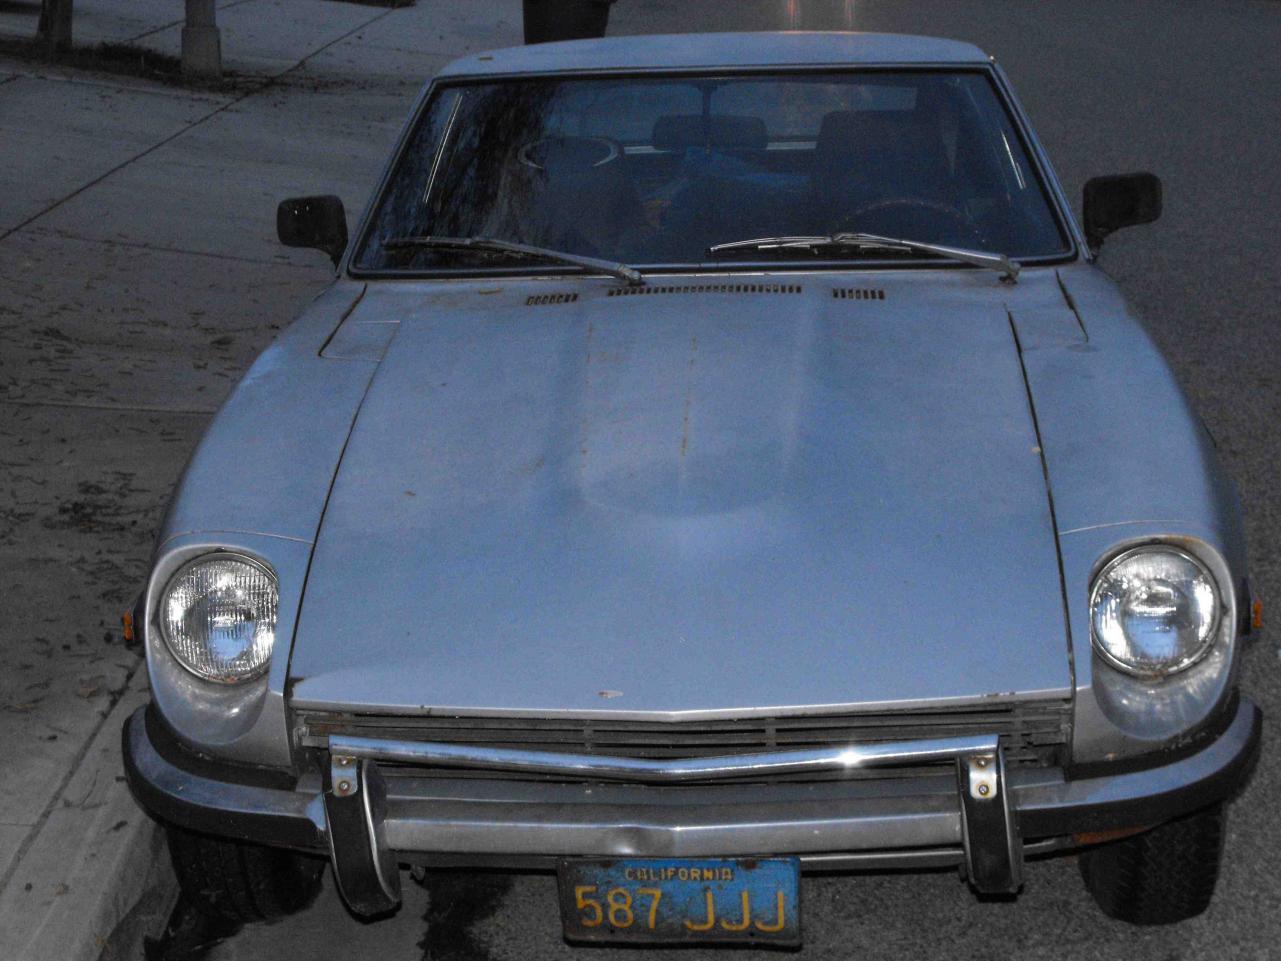
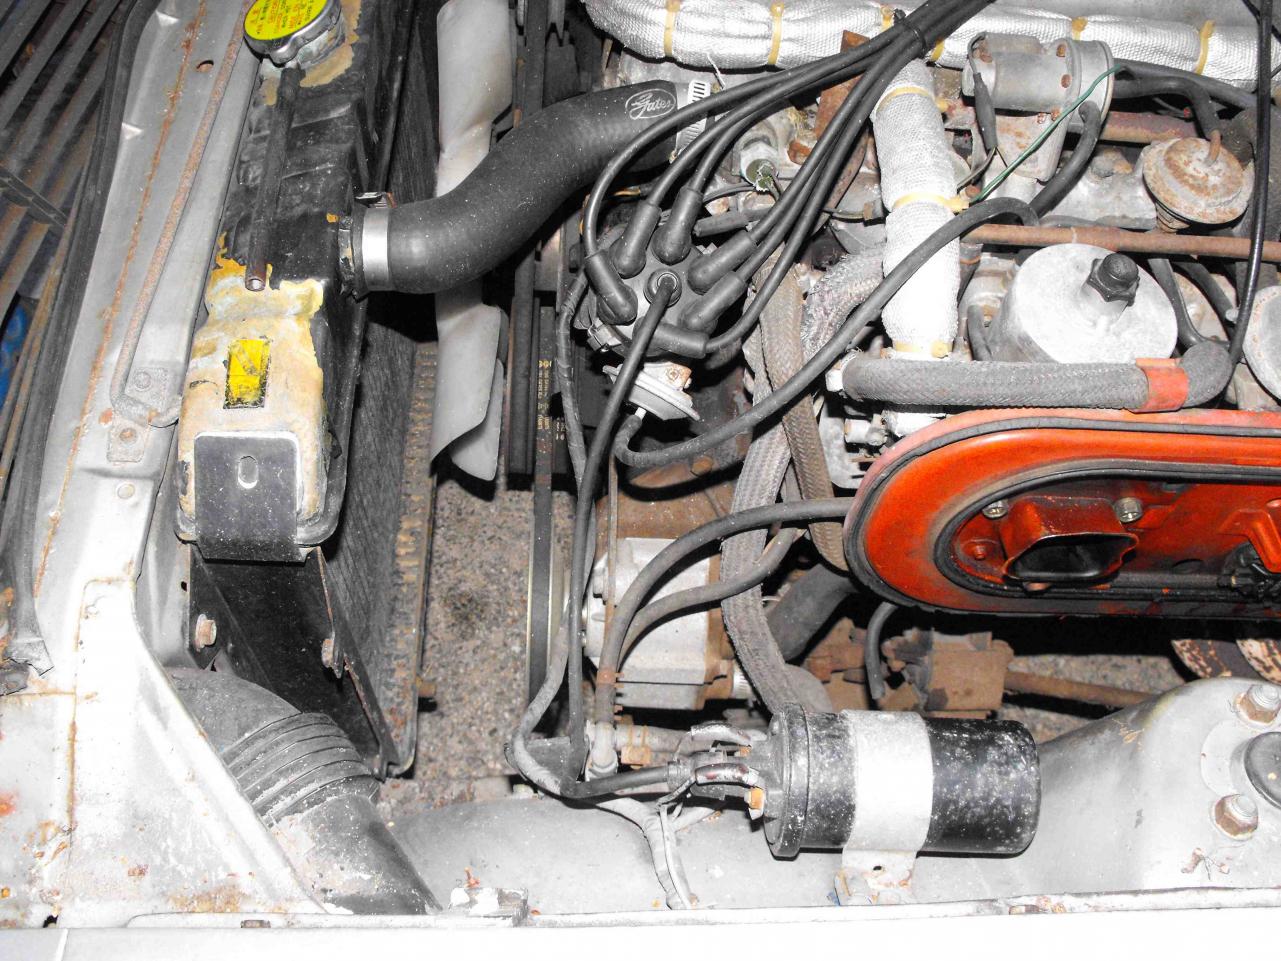
http://www.classiczcars.com/forums/showthread.php?t=37246&highlight=Z%27s This is what I got for $950. Very original, except for the Recaro's which are awesome. The interior is in very good shape and very little rust. All it needed was a new Mechanical fuel pump and the fuel lines blown out with compressed air. It sat for 3 years, and the previous owner lost interest. The plan is to clean it and keep it as original as possible. I will clean the engine bay, re-zinc all of the plated parts (here at home) and put a nice paint job on it.
-
PATIENCE is the key. Wait and a good one will pop up. Just be ready to scoop it up when it comes along. You should see what I got for $950 here in San Diego just a couple weeks ago. It will run circles around that thing. I had been looking for months. Just had to wait for the right one.
-
That's what I say when I turn it too far CCW.
-
OMG...of course I want to be very politically correct and not have anything offensive on my car. I know the 'A' on my distributor stands for Advanced. I believe the 'R' stands for Retard. I will bet it is even in my manual. How many people has my distributor offended? I offer my sincerest appology for my cars behavior. Good Grief:sick: This whole Palin-Emanuel thing is unreal. Sorry, just had to vent
-
I have a similar Brake Booster problem on my '71 only my RPM's increase; they go from 700 up to 1200. I wonder why they respond differently. I get the same whoosh/hissing sound. Also takes a lot of pressure on the brakes to get them to stop. I am planning on replacing the booster in a month or so.
-
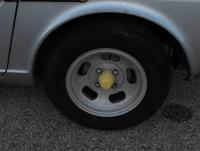
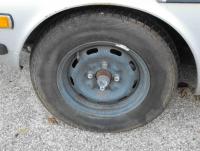
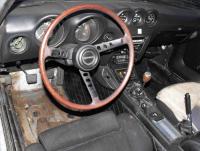
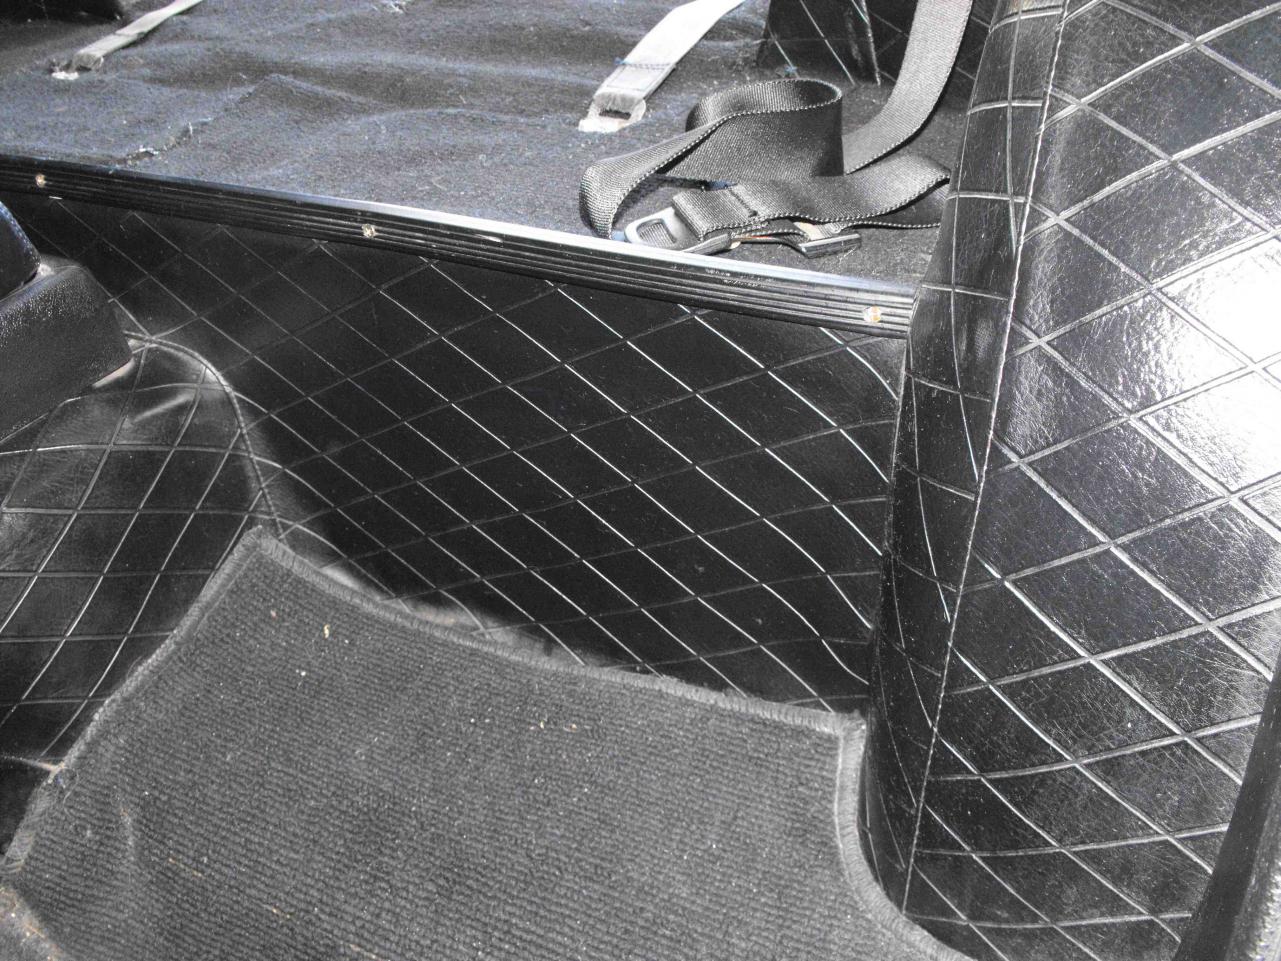
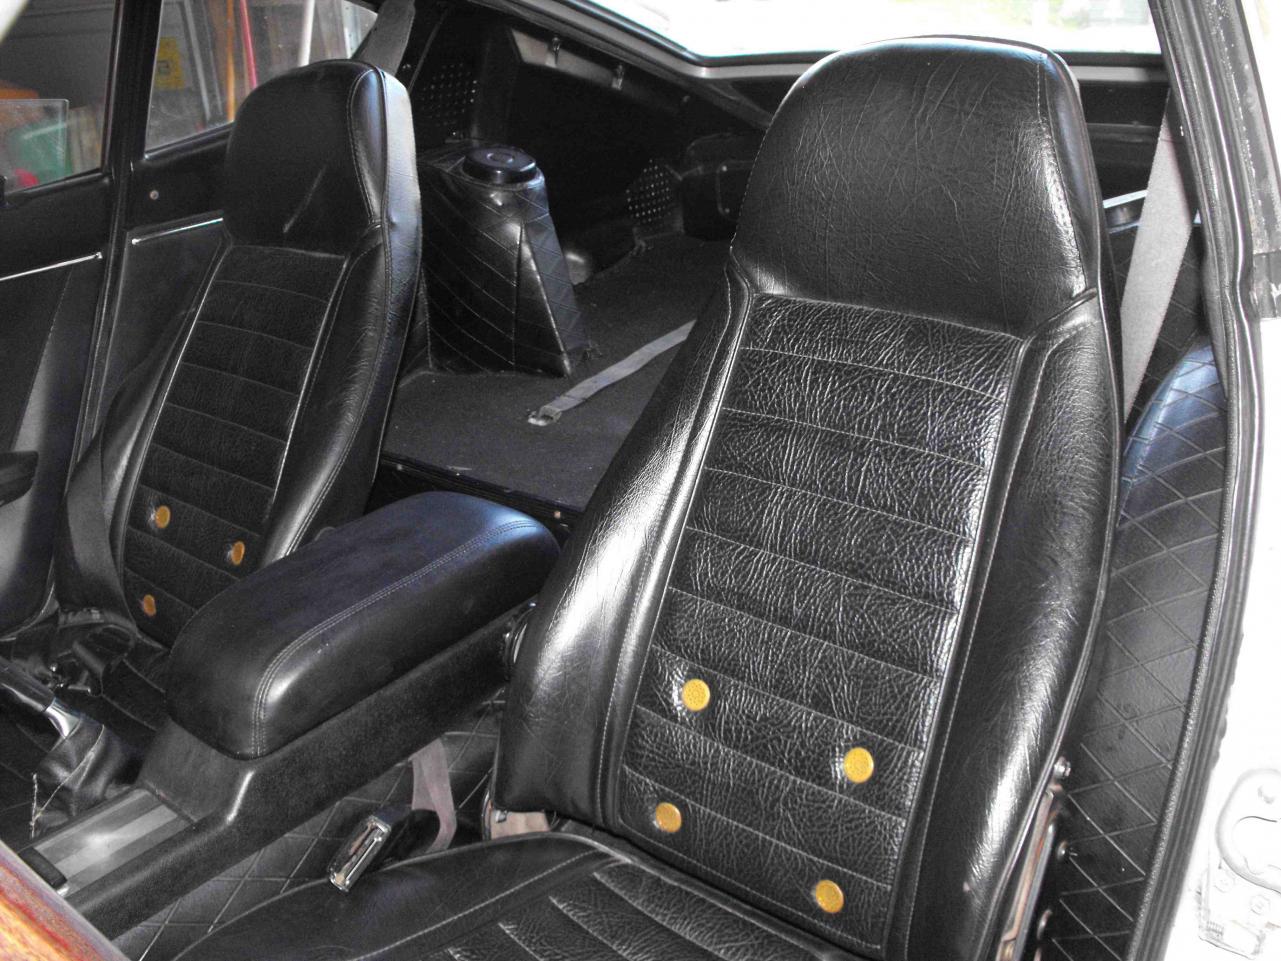
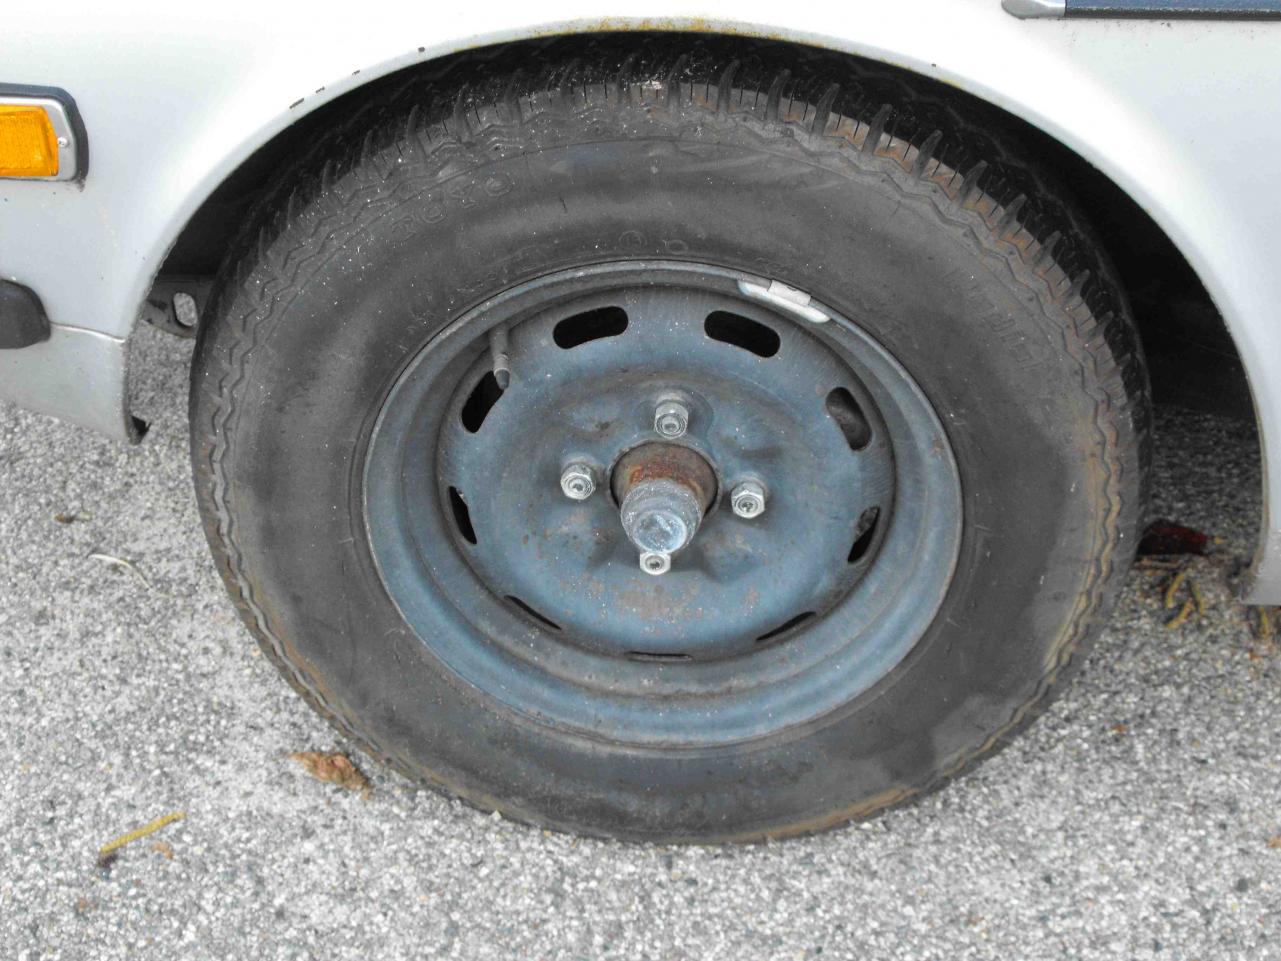
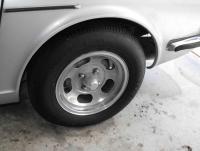
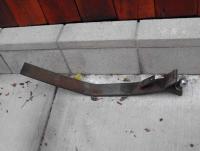
Too late for the yellow center caps. I already painted one silver to see what it would look like. The rims should clean up well too. I think I will leave the wheels like this. I'm planning on keeping the flat tops for now, although I love the round heads. I want to keep the car as original as possible. Hopefully they wont cause too much of an issue down the road. Did a seat swap today. Put the stock seats in the '73 and transferred the Recaro's to the '71. The interior of the '73 is in real nice condition. The cross-hatched vinyl is in good shape. The Only thing I really need is the driver and passenger floor mats. Also pulled of the Z tow hook. Wonder what I can get for that bad boy on e-bay. Guessing the PO used that to pull his golf clubs.


-
Boy, top part of spread sheet was really messed up. It said somebody else owned my '70 and they were parting it out:ermm: I fixed it, but I am sure others are messed up. The name and comments was disconnected from the S/N, engine, and colors grids
-
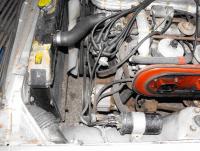
I had to find something to do since we ditched the cable TV. Lot's of time on my hands now. Amazing all the things I can get done. Actually, the latest Z is nice to have because I don't have to rush the work on my '71Z. I can drive the '73 while I prep the '71 for paint. Then I'll drive the '71 while I work on the '73. (I really don't drive the '70 except to shows). It's fun to work on the cars when you don't have to rush because the car is your daily driver. It's been more than once where I have been up past midnight working on something because the car is my daily driver and the only why to get to work. This should make things a little less stressful. Anyway, I'm taking tomorrow off, so that should give me a couple days to dink around with it and clean things up a bit; Oil change, fuel filter, tune carbs, polish mags, etc. Should be fun and relaxing Thanks for the comments all, Rich
-
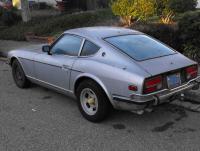
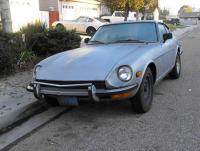
OK, I will stop with three. The latest looked so original (and cheap) that I had to get it. It's a 1973 that I picked up off of Craigslist for $950. Just needs a lot of cleaning and an exterior paint job. I will keep it the same color and try to keep it as original as possible. There is very little rust on the car; just minor spots on the rear doglegs and one spot on the hatch. No rust on the floor boards, frame rails or under the battery. Surface rust on the exterior in spots, but nothing bad. The frame rails are a little beat up. It comes with the old style mags. The fourth is in the back of the car with a flat. Trying to figure if the spare on the car now is original. It is a Toyo 175 HR 14. Haven't seen an HR in a long time. The other tires are 185/75 R14's. The dash is cracked, so may get a cap for that. It also has some nice Recarro seats which I will put in my '71. '71 has nicely recovered stock seats which will work well in the '73 to help with the originality theme. Once I finsh the paint on the 71, I will work on the restoration of this one. The odometer reads 41K, so I am guessing 141K . Anyway, should be fun. Here are a couple of pics. Rich