motorman7
 Subscriber
-
Posts
2,198 -
Joined
-
Last visited
-
Days Won
56
Content Type
Profiles
Knowledge Base
Zcar Wiki
Forums
Gallery
Events
Downloads
Store
Blogs
Collections
Classifieds
Everything posted by motorman7
-
Unfortunately I am running out or garage space Don't think my wife would be too happy if I kicked her car out of the third space. I do love the White color. Was hoping to get white or silver when the silver came up. It will be a while before I finish with that one. With both kids in college now my hobby funds have been reduced. Funny, now that I am about done with the gold Z, I was thinking of storing it in my folks barn (It's a NICE barn) to make space for another. However, I enjoy looking at it so much every morning that I don't see it going anywhere. Rich
-
Hi David, Have not received the bolt kit yet, but will let you know when I get it. Guy (Diseazd) says it is great and his pics look super. I didn't really want to put that much money into it, but I was not happy with the bolts at all. Every manifold bolt was bent and I think only two were the original parts, maybe. I do not think that the HD bolts are of the same quality. On my 70, I just had the bolts re-zinced. They were all in good shape, so no need for new ones. I have a long weekend coming up, so hope to have it up and running by then. I need to drive:classic: . It is really a fun car.
-
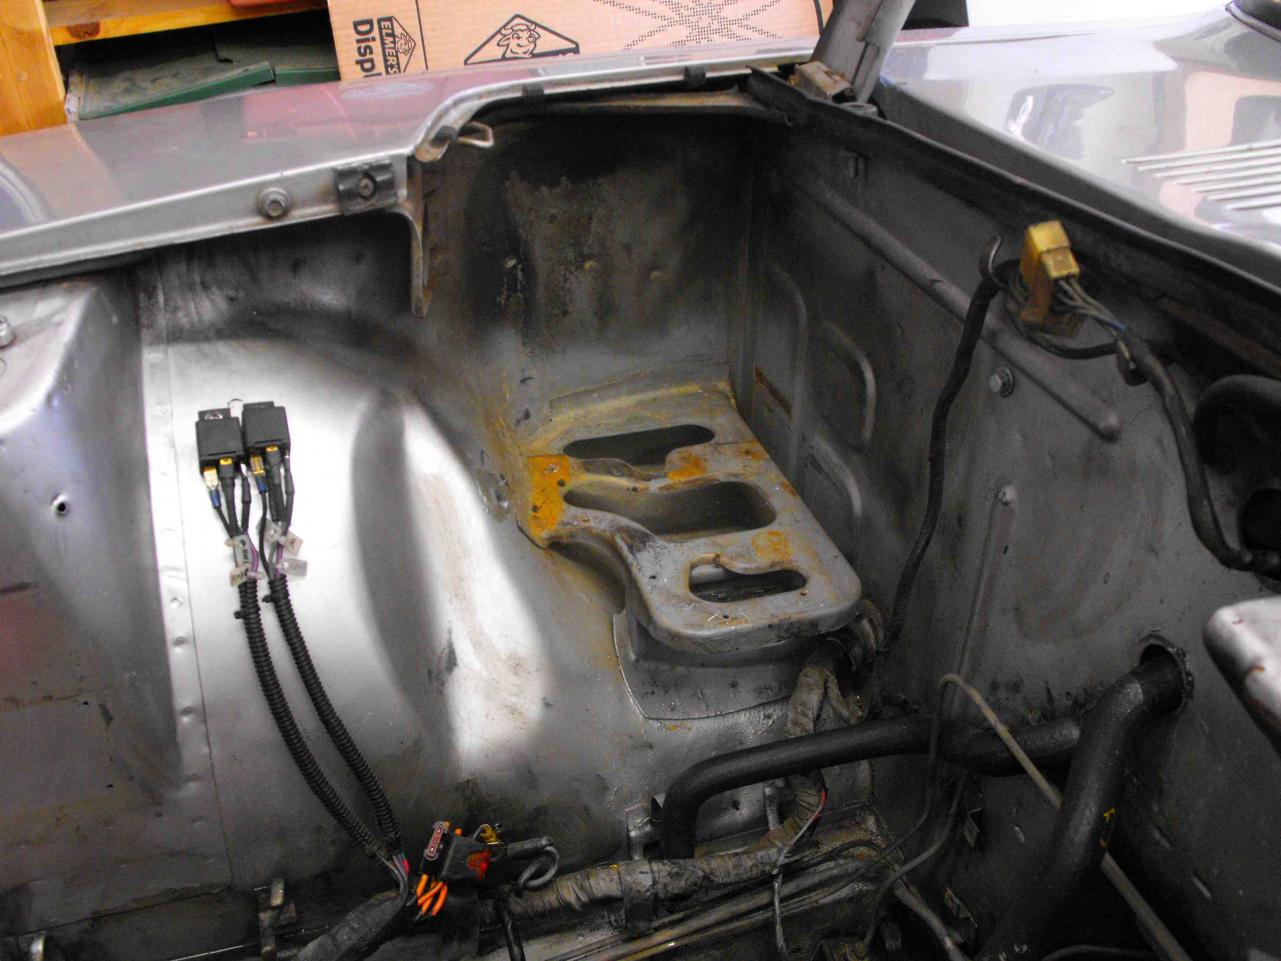
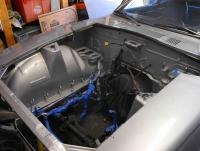
Started putting some parts back on. Also got the elec harness cleaned up and re-wrapped. Cleaned and routed the fuel lines. They should look nice when I get the newly zinced clamp tabs from CDM. I also put on a new engine bay light that I got from Banzai motorworks. Was on sale for $25; such a deal. Now waiting on the engine bolt kit from Eiji at Datsunspirit.com. Seems half the bolts on this L26 engine were either bent, missing or from Home Depot.

-
Contact Eiji at Datsunspirit.com (see below). He will set you up with the engine bolts, nicely zinc plated and labeled. $135 plus shipping. Not sure about the tranny bolts. Rich sales@datsunspirit.com
-
The problem is that I might take you up on that. I enjoy this far more than is normal. Probably need a vacation or something.
-
Wow, that really is sad. Sorry to hear about your loss. Not sure I would want to take pictures if I ever sold one of mine. Would be very depressing. Best wishes on your future endeavors. Rich
-
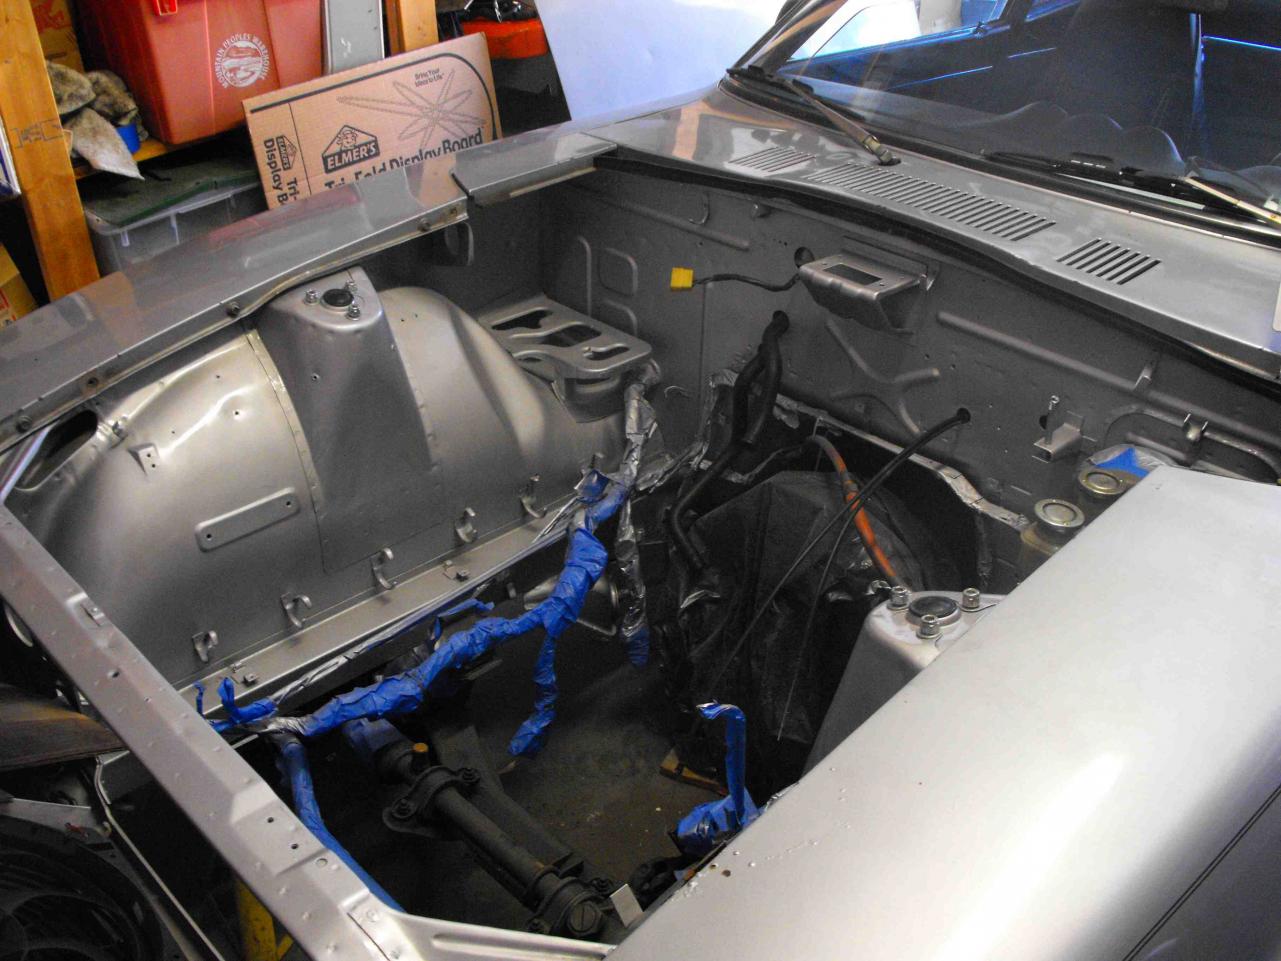
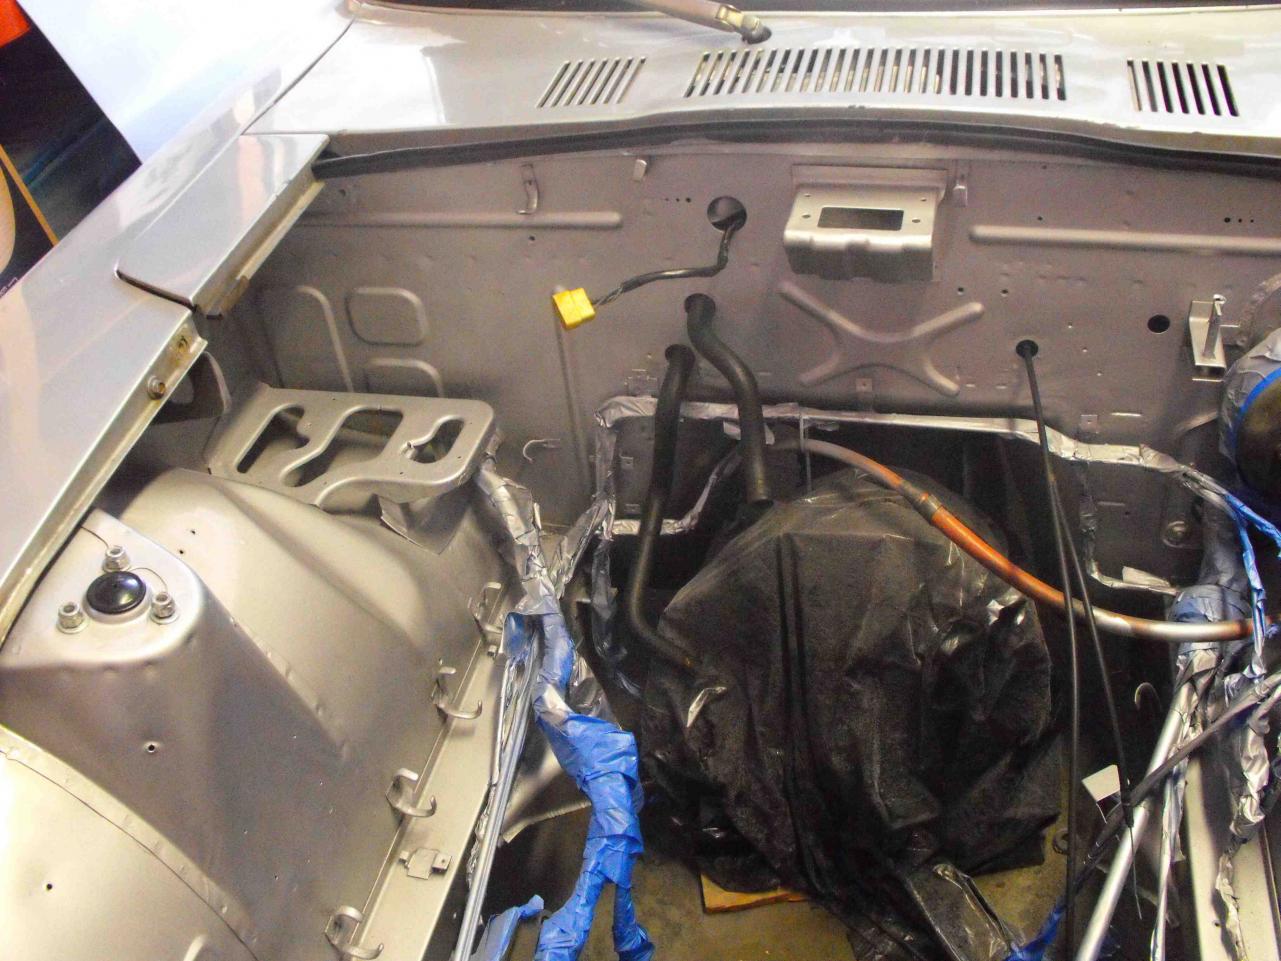
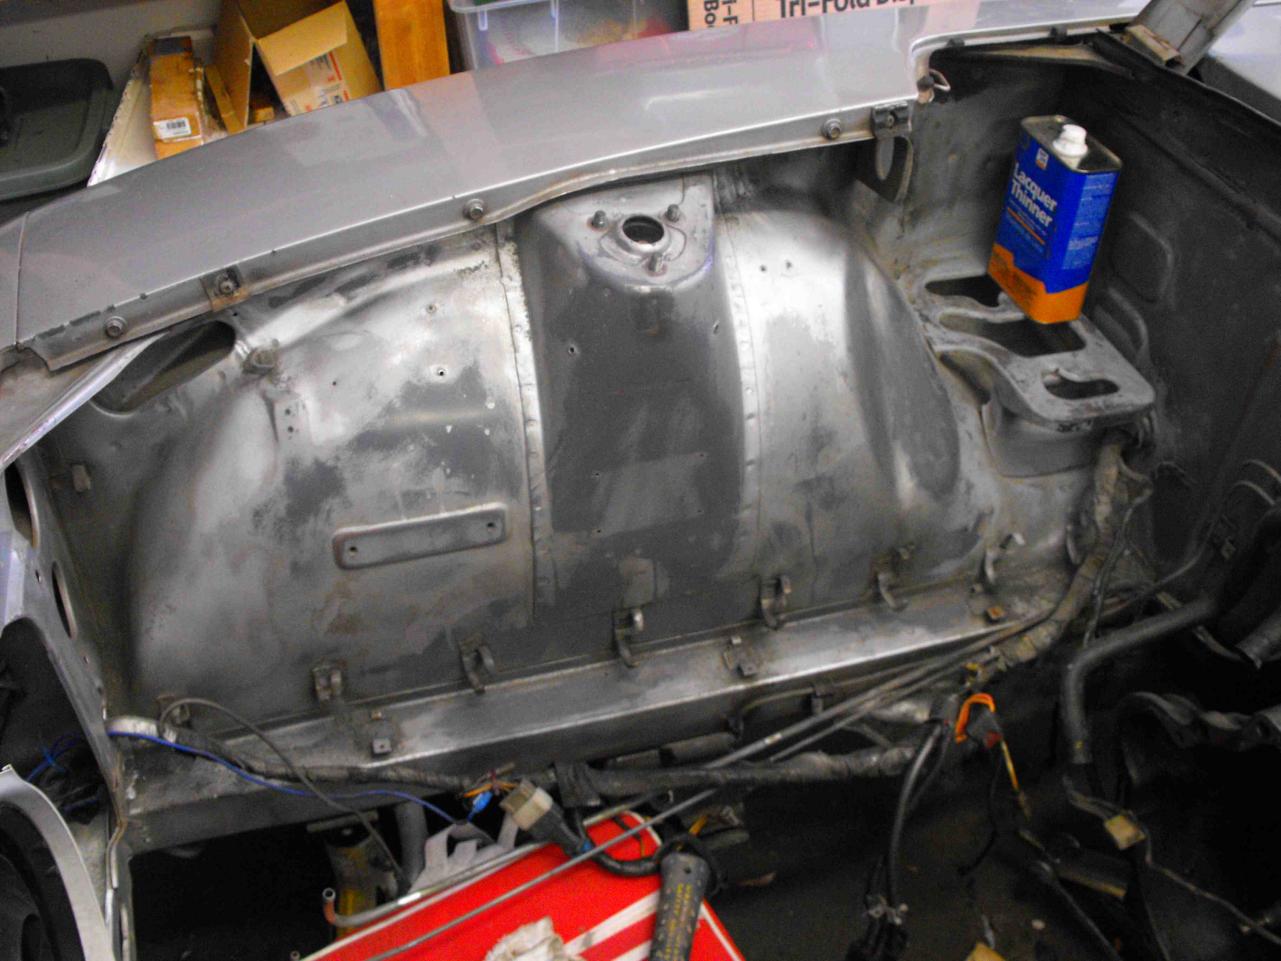
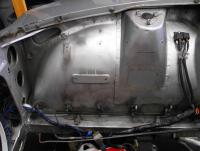
Got the engine bay cleaned and painted. The taping took forever. Probably would have been faster to have stripped everything. Now that this is done, I can start assembling. That's the fun part. It's not perfect but it only cost $60, so I think it's a good return on investment. The satisfaction of the bay looking nice is worth more than $60.
-
Those look great! Love that color. Where have I seen that before?
-
Possible. Did you check the pictures that I posted on cam and crank timing? Those are fairly clear. If you set the crank and cam that way, you should be fine for cam crank timing.
-
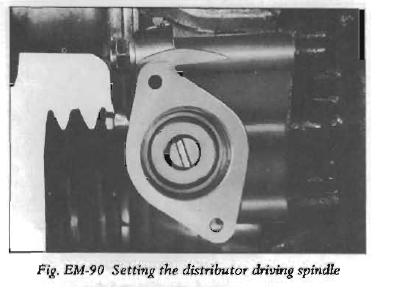
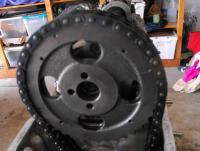
Hi Frankie, Just finished doing the timing chain, crank and cam, on my L26 and posted them on this thread with a number of pics. http://www.classiczcars.com/forums/showthread.php?threadid=35670 Hopefully that helps a bit. The fact that you got a couple pops seems somewhat promising. I am wondering if your oil pump/distributor timing was 180 out. As the slotted tab is offset, at 11:25, the key needs to be more on the 7 to 8 o'clock side than the 2 to 3 o'clock side. I hope that makes sense. see pic. Be careful moving a couple links. If you are off, you can bend valves.
-
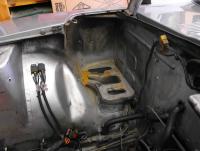
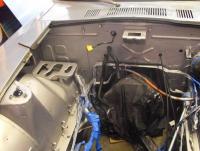
I got the block cleaned up and now need to attack the engine bay as you can see in the background. This is really a challenge. I have been using steel wool and laquer thinner for most of the clean. The plan here is to keep this low budget as this is not truly an original car. After engine bay clean-up, I will tape off the exposed parts and paint the engine bay with the 901 silver paint. I plan to eventually do some of the body work and repaint the exterior in the next year of two. That is about the extent of what I plan to do on this car


-
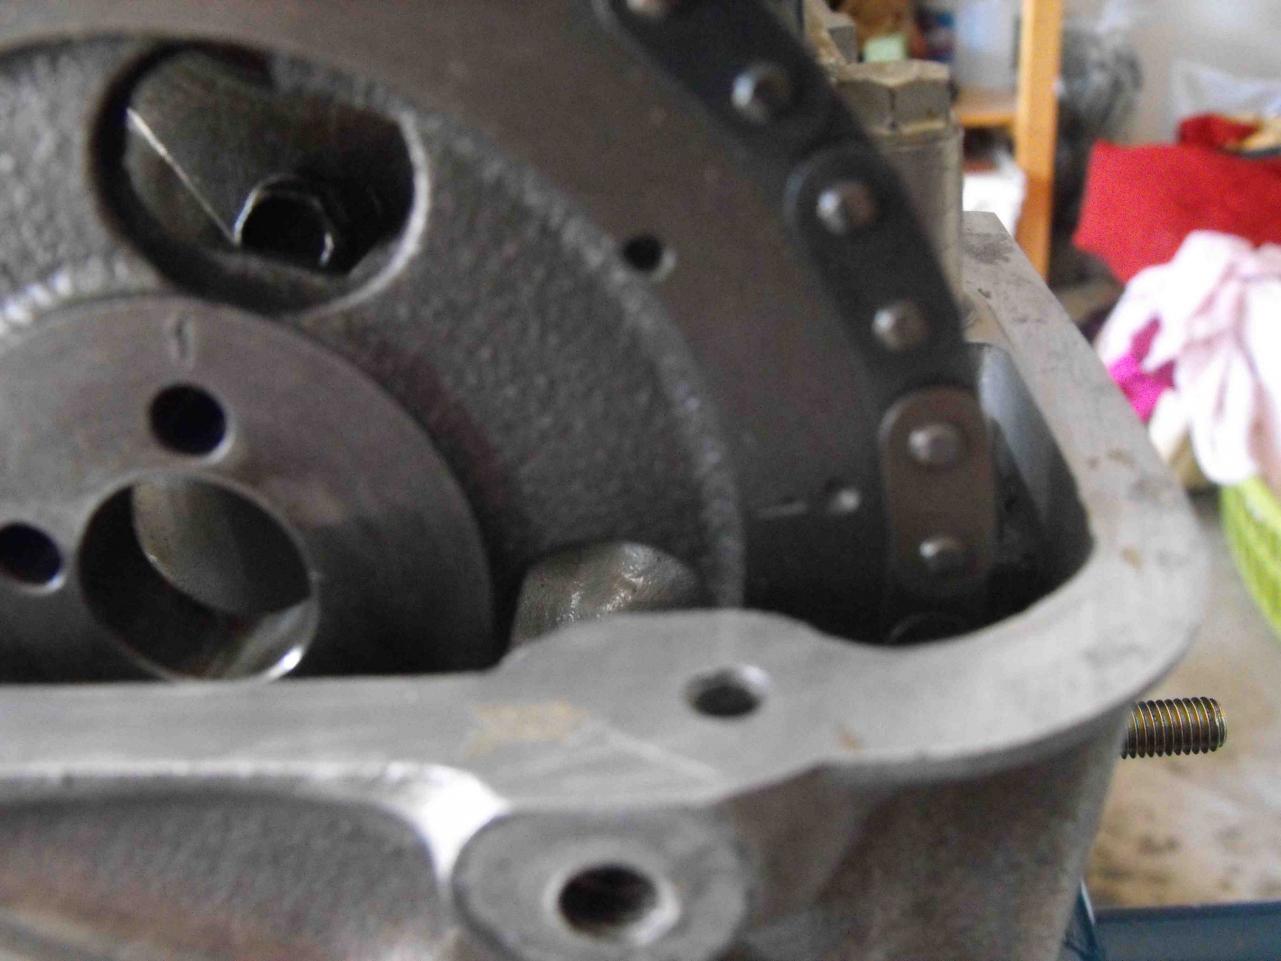
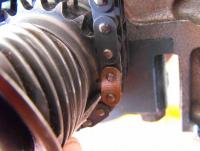
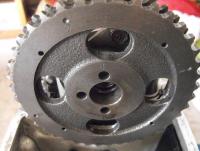
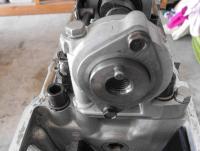
Step 5: Align 2nd shiney link with mark on crankshaft as shown in pic. This should align fairly easily if the first steps will follow. Make minor adjustments if needed. Next, install the chain tensioner. Step 6: While pressing in chain tensioner, reinstall cam sprocket with hole one on the cam alignment key. Install cam bolt and torque per spec.
-
Step 3: Temporarily attach crank sprocket to cam as shown in pic, with sprocket hole 1 over the cam key at 12 O'clock. Step 4: pick up cam chain and locate the two shiney links. They are 42 links apart. Holding chain vertical with one shiney link at 12 oclock, ensure that 2nd link is on the right hand side. Feed chain through head and insert shiney link on cam sprocket as shown in pick. Remove cam sprocket from cam and set on head as shown.
-
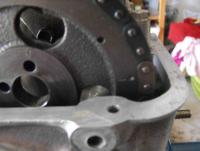
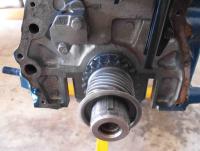
Since I just finished this, I thought I would take pics and document the install for those doing this in the future. 6 months ago, I had no idea how to do this and ended up on another site to get full details with pics. Now the info will be here for those who need. First step: Put number 1 cylinder at TDC. The alignment key on the crankshaft will be at 12 O'clock as shown in pic. This assumes that the head is not installed. Never turn crank or cam independant of eachother as this will bend valves or break things. Step two: On the head, ensure the cam alignment pin is at 12 o'clock as shown in the pic. Install head with gasket (I prefer the gasket well coated with copper gasket spray) and torque per spec.
-
Funny, I ran into the same problem when timing mine, only to find out that the dial on the back of the timing light was set to 10 degrees advanced. When I set it back to 0, the adjustment tab was right on the center line-perfect. Of course, that was after I had removed the screw facing up to the dizzy so I could go beyond the adjustment limits. When i did that, the car ran much worse, that how I figured something was wrong So, the car must be running if you can check timing?
-
Have you confirmed that you are getting spark from the distributor? Pull one of the plugs and turn engine over and look for spark)
-
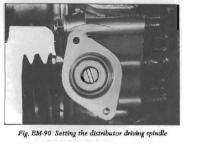
When the motor is at #1 cylinder TDC, the offset blade that turns the distributor (looking down into the distributor mounting hole) should be at 11:25 O'clock.
-
Really looking forward to the activities during this week. Will most likely have 2 Z's in the show. Now I have to work on getting some pictures out. Thanks, Rich
-
I would keep the bright links lined up with the timing marks.
-
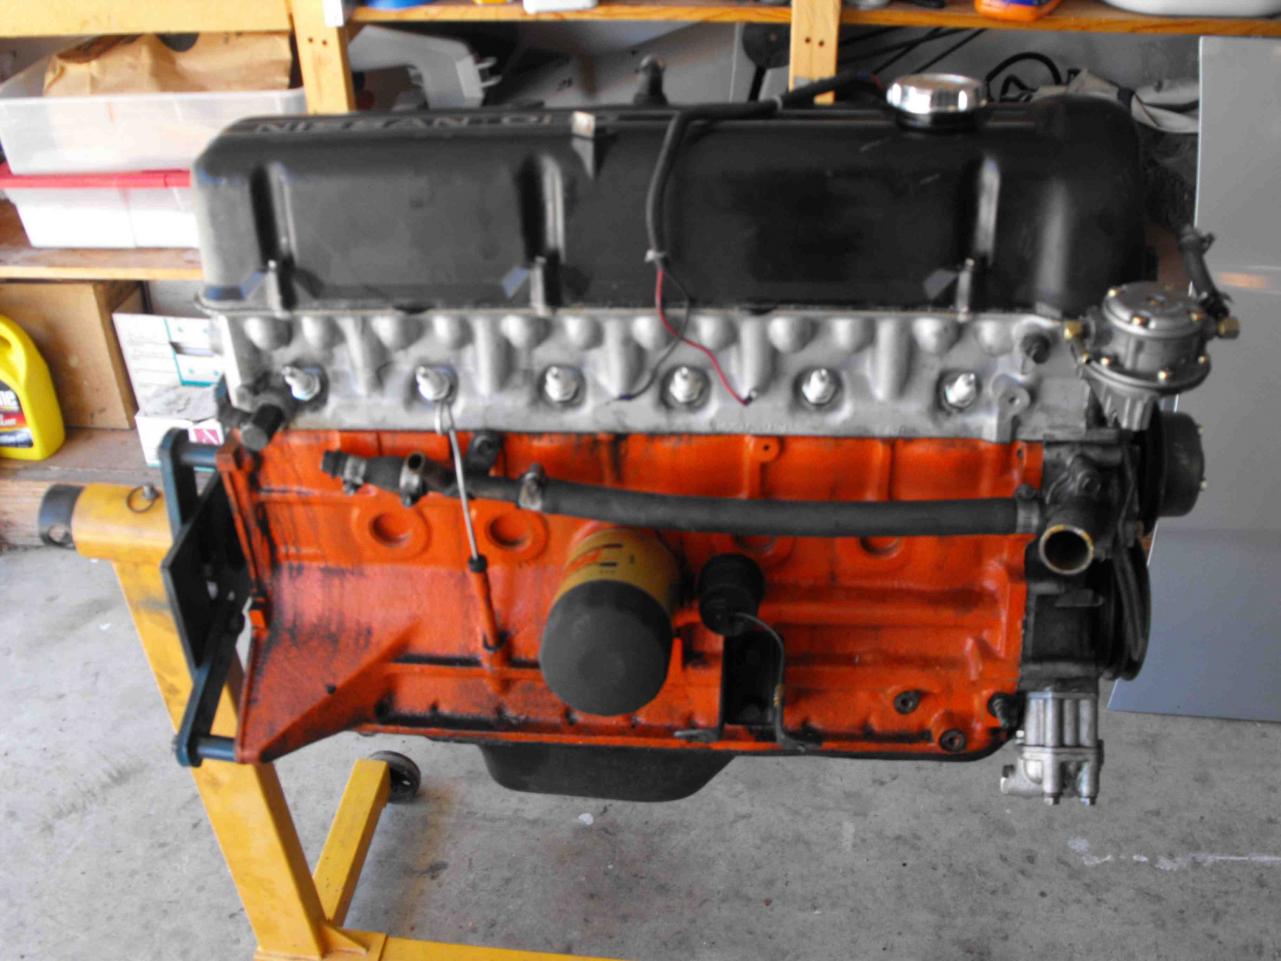
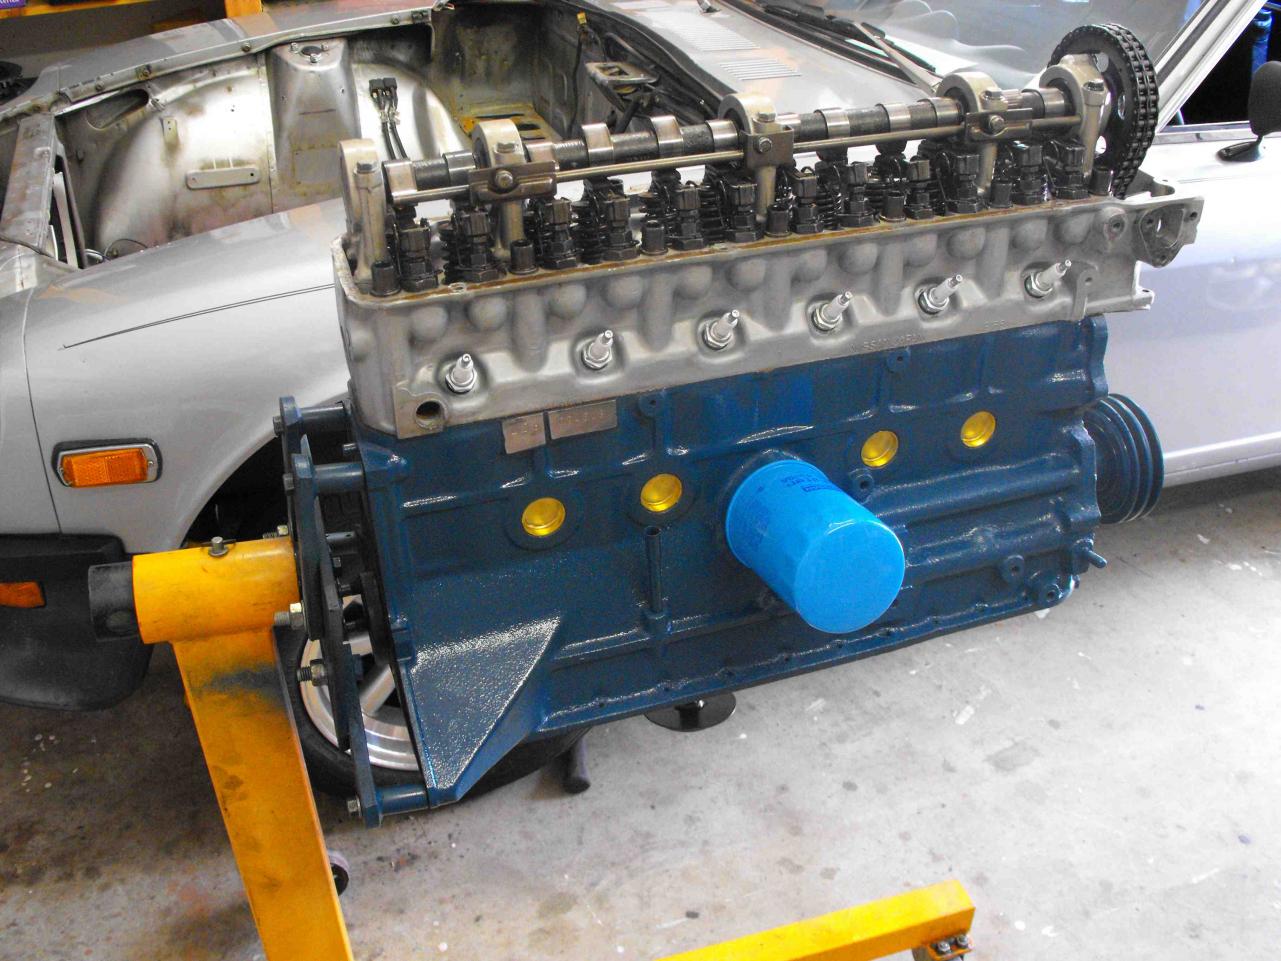
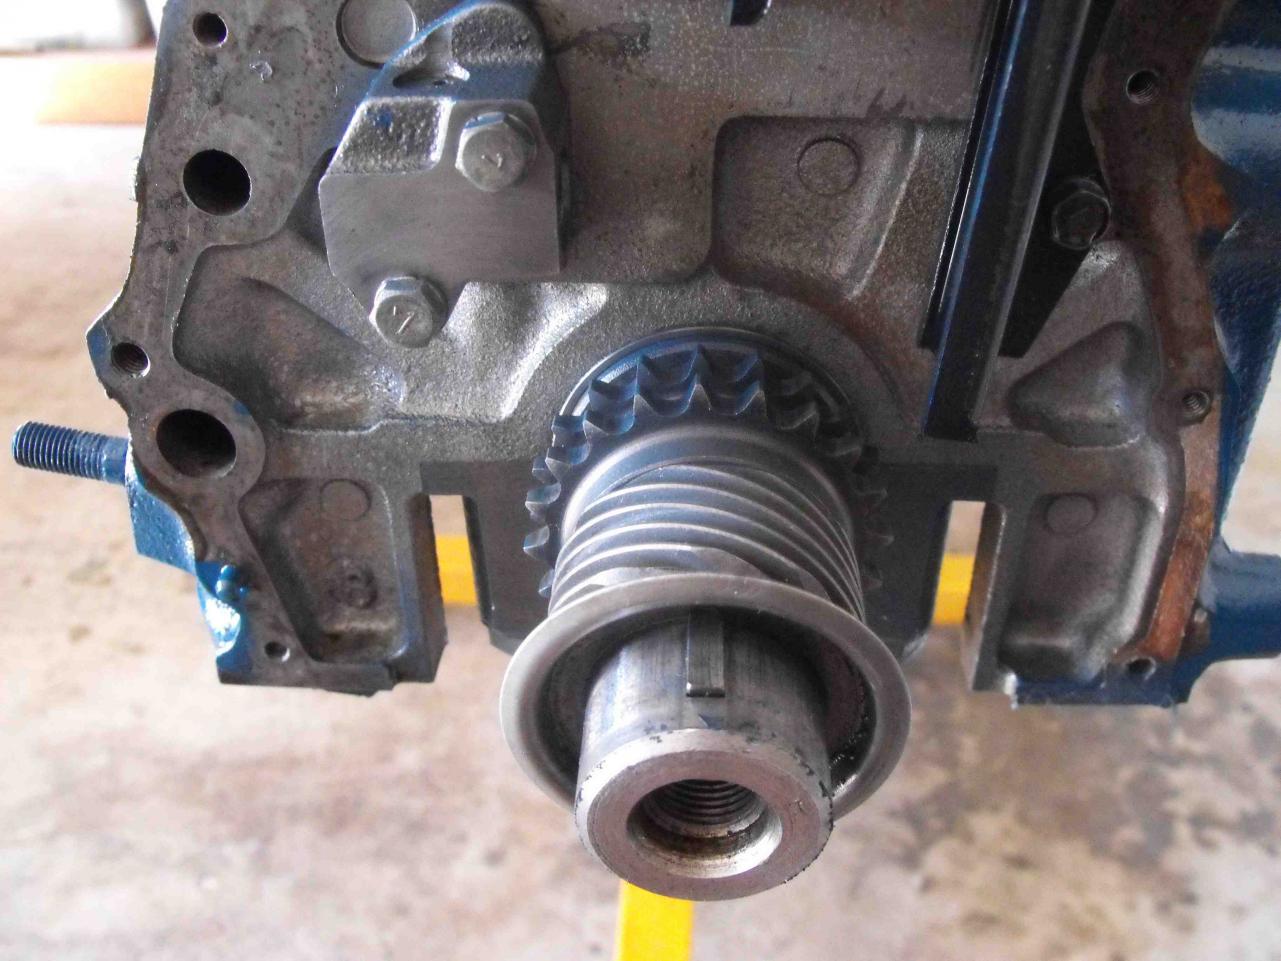
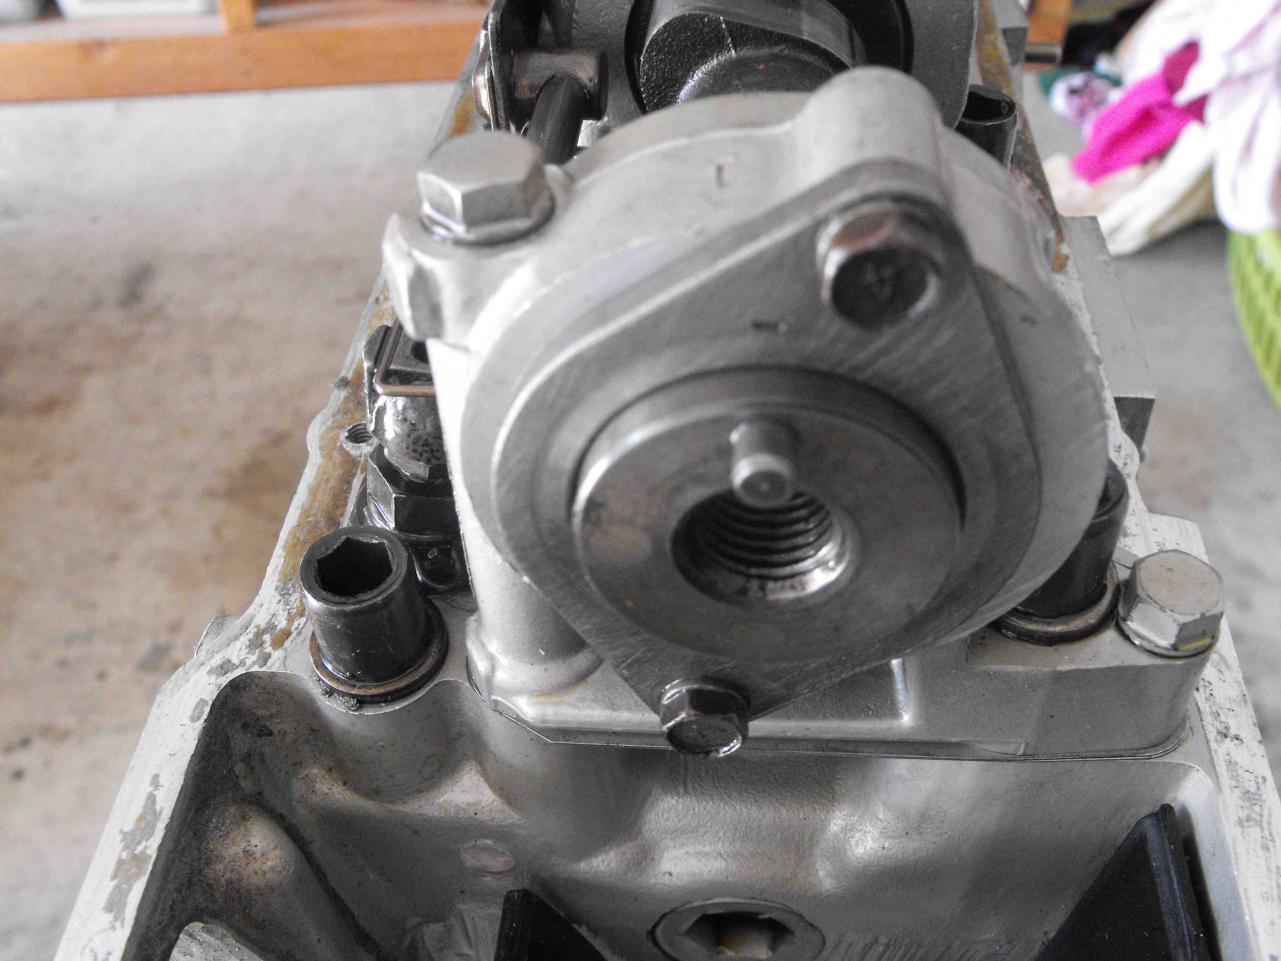
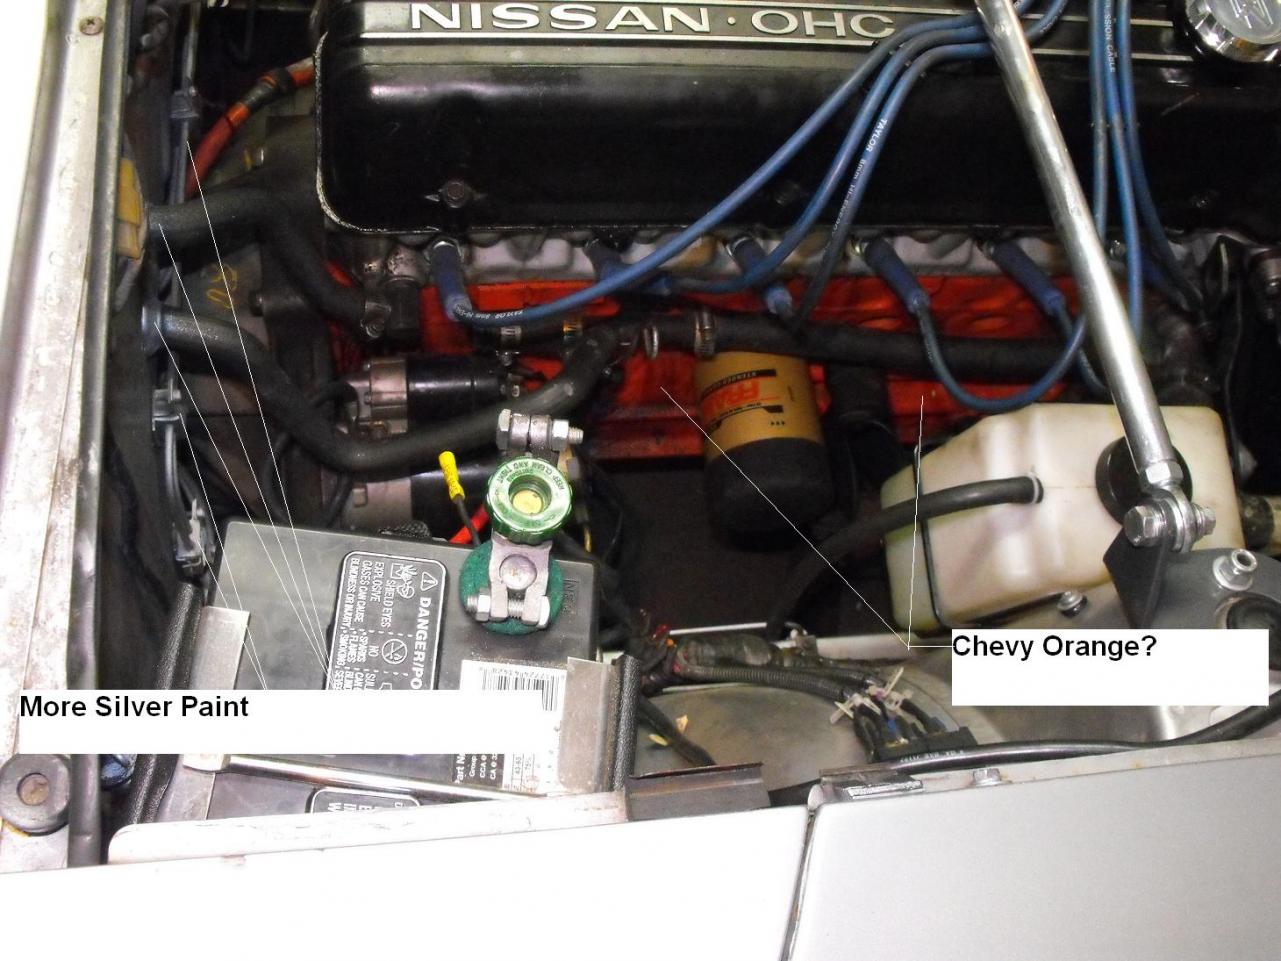
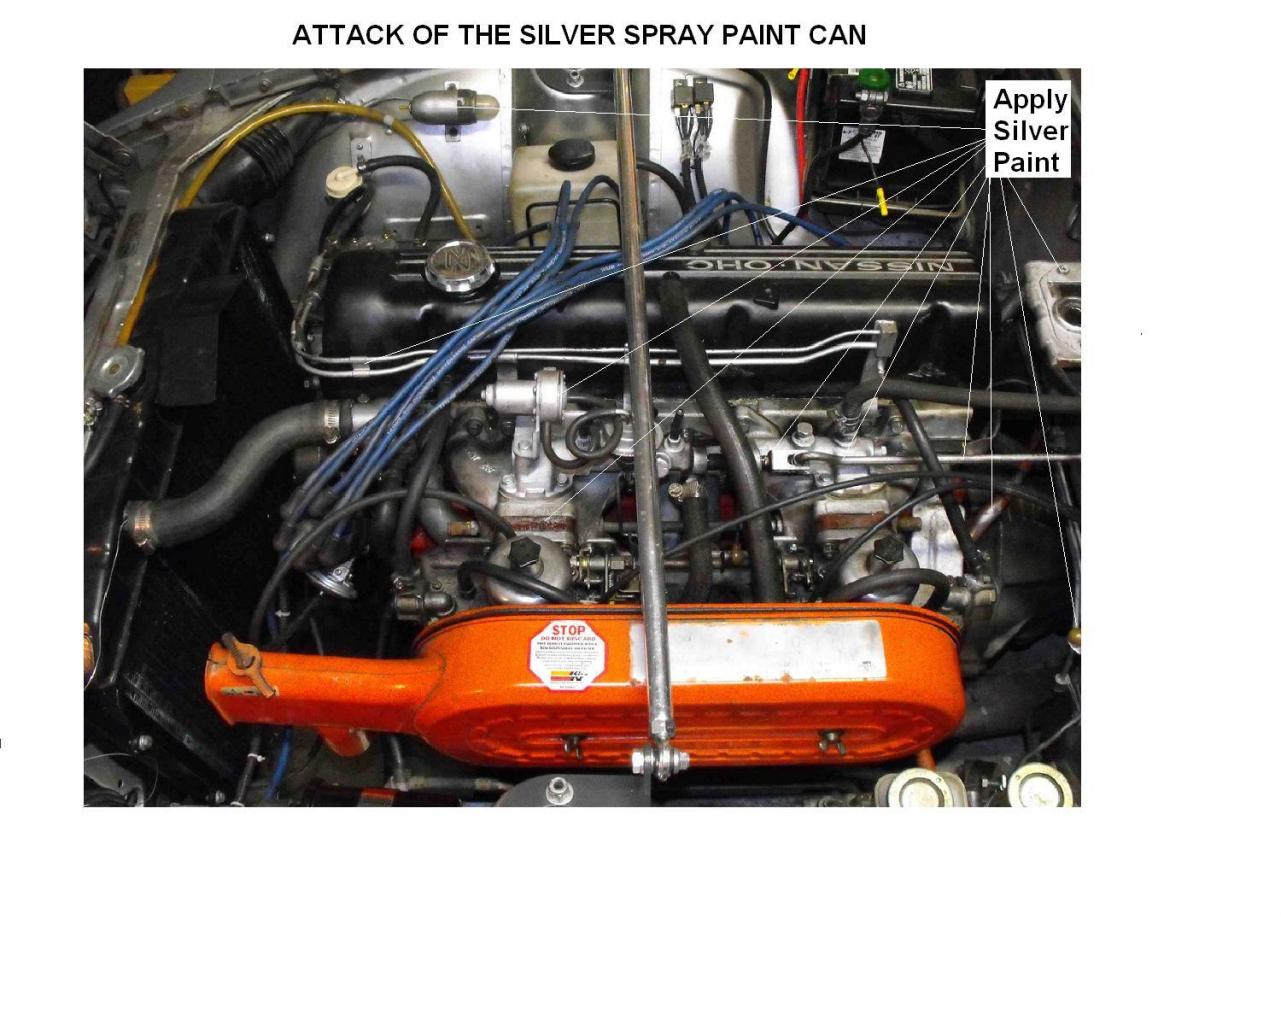
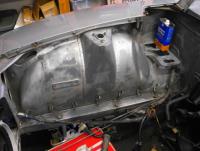
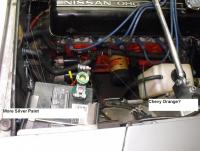
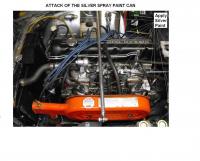
I enjoyed the engine bay refresh on my 70 Z so much that I have decided to do it again, only this time on my newly acquired 71Z with the L26 motor. Seeing as how the motor is not original, I will not be as careful about sticking to the originality of the motor and engine bay detail. I would like to keep it somewhat close however. The two glaring things I want to fix here is the block color:sick: and 'Silver Overspray'. Actually, we're not talkin' silver overspray, we're talkin' silver spray paint gone wild. I will clean up the block and paint it the nissan blue, clean all of the aluminum to its original non-silver condition, and clean or replace the silver grommets. I ran a compression check and the cylinders ranged from 190 to 205 psi.:classic: Also, no leaks from the head gasket so I will just re-check torque on the head bolts. I will then clean, tape and paint the block with the head in place. I will do the same with the oil pan. After that, I will attack the engine bay. That will require the most work. Here are some pics at the start of the project.
-
http://www.classiczcars.com/forums/showthread.php?t=34777&highlight=refresh&page=3 Check about 3/4th of the way down this page and you will see the cam timing marks and the crank timing marks along with the link marks (They are both offset by one link in the pics). Mine is a 240 also. The chain should have two marks (0's in the pics), 42 links apart. They should correspond with the cam and crank marks as shown in the pics. I believe in this configuration that the spline on the crank is facing up at 12 o'clock.