motorman7
 Subscriber
-
Joined
-
Last visited
Everything posted by motorman7
-
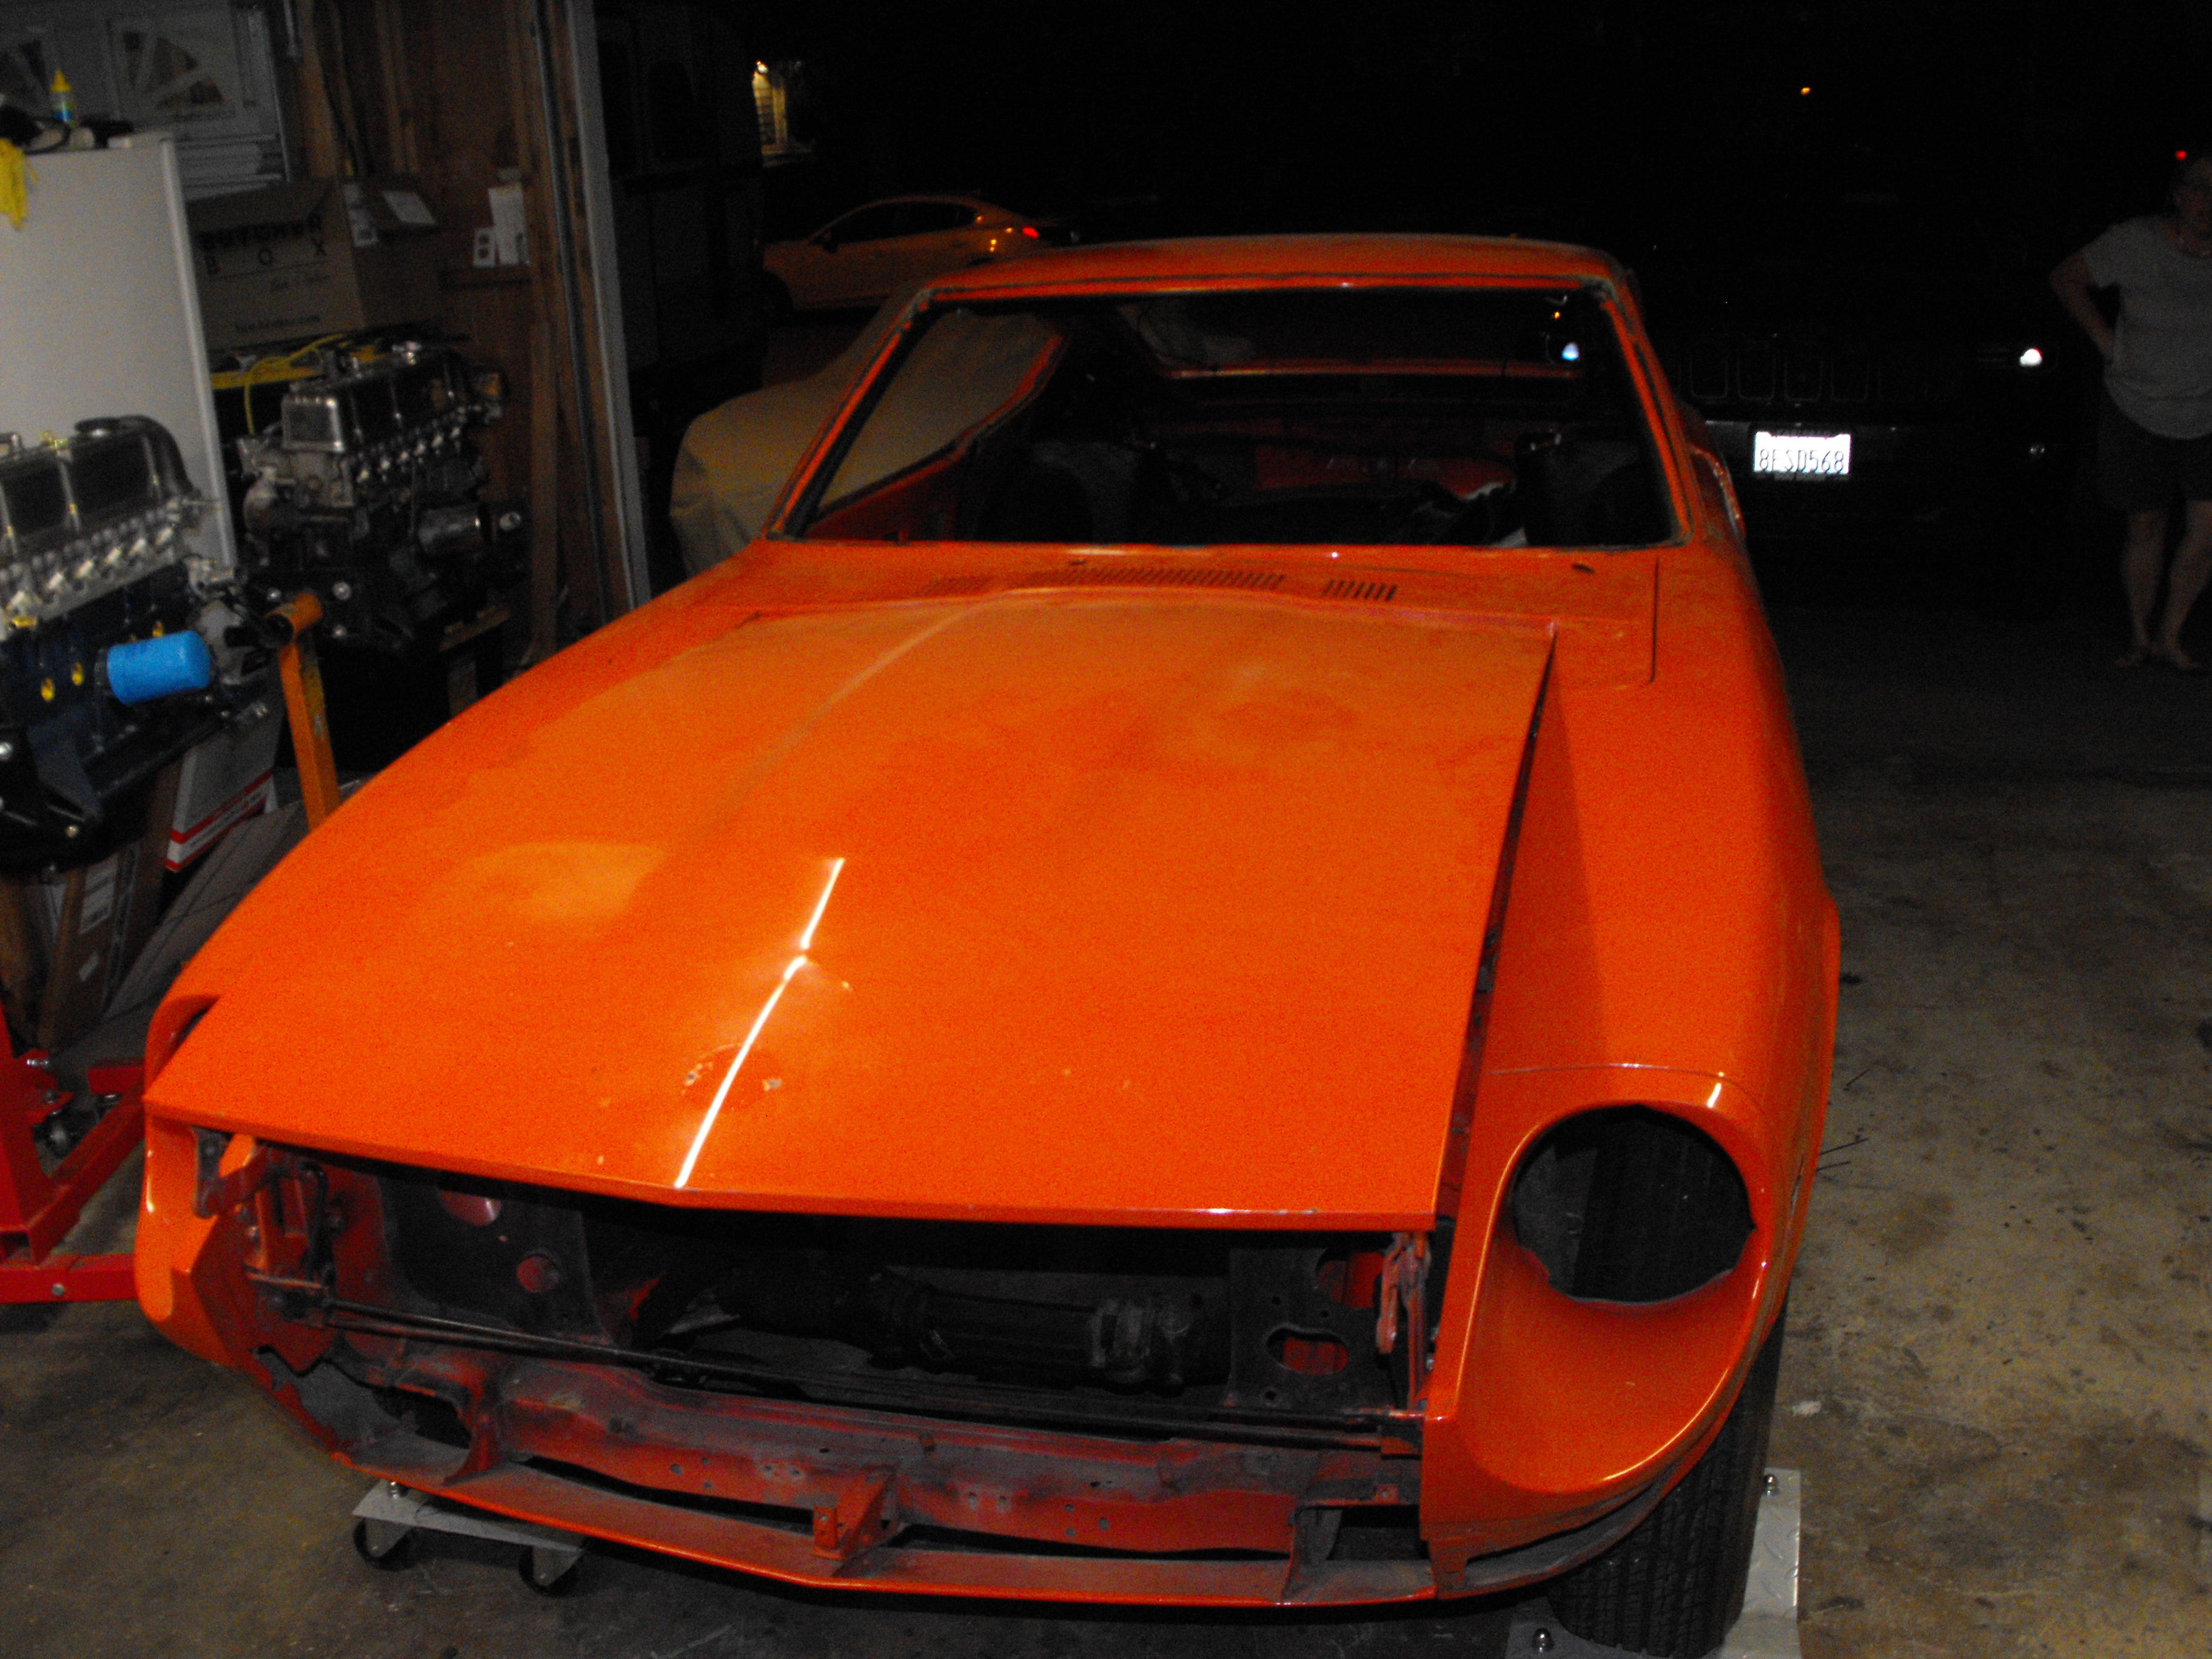
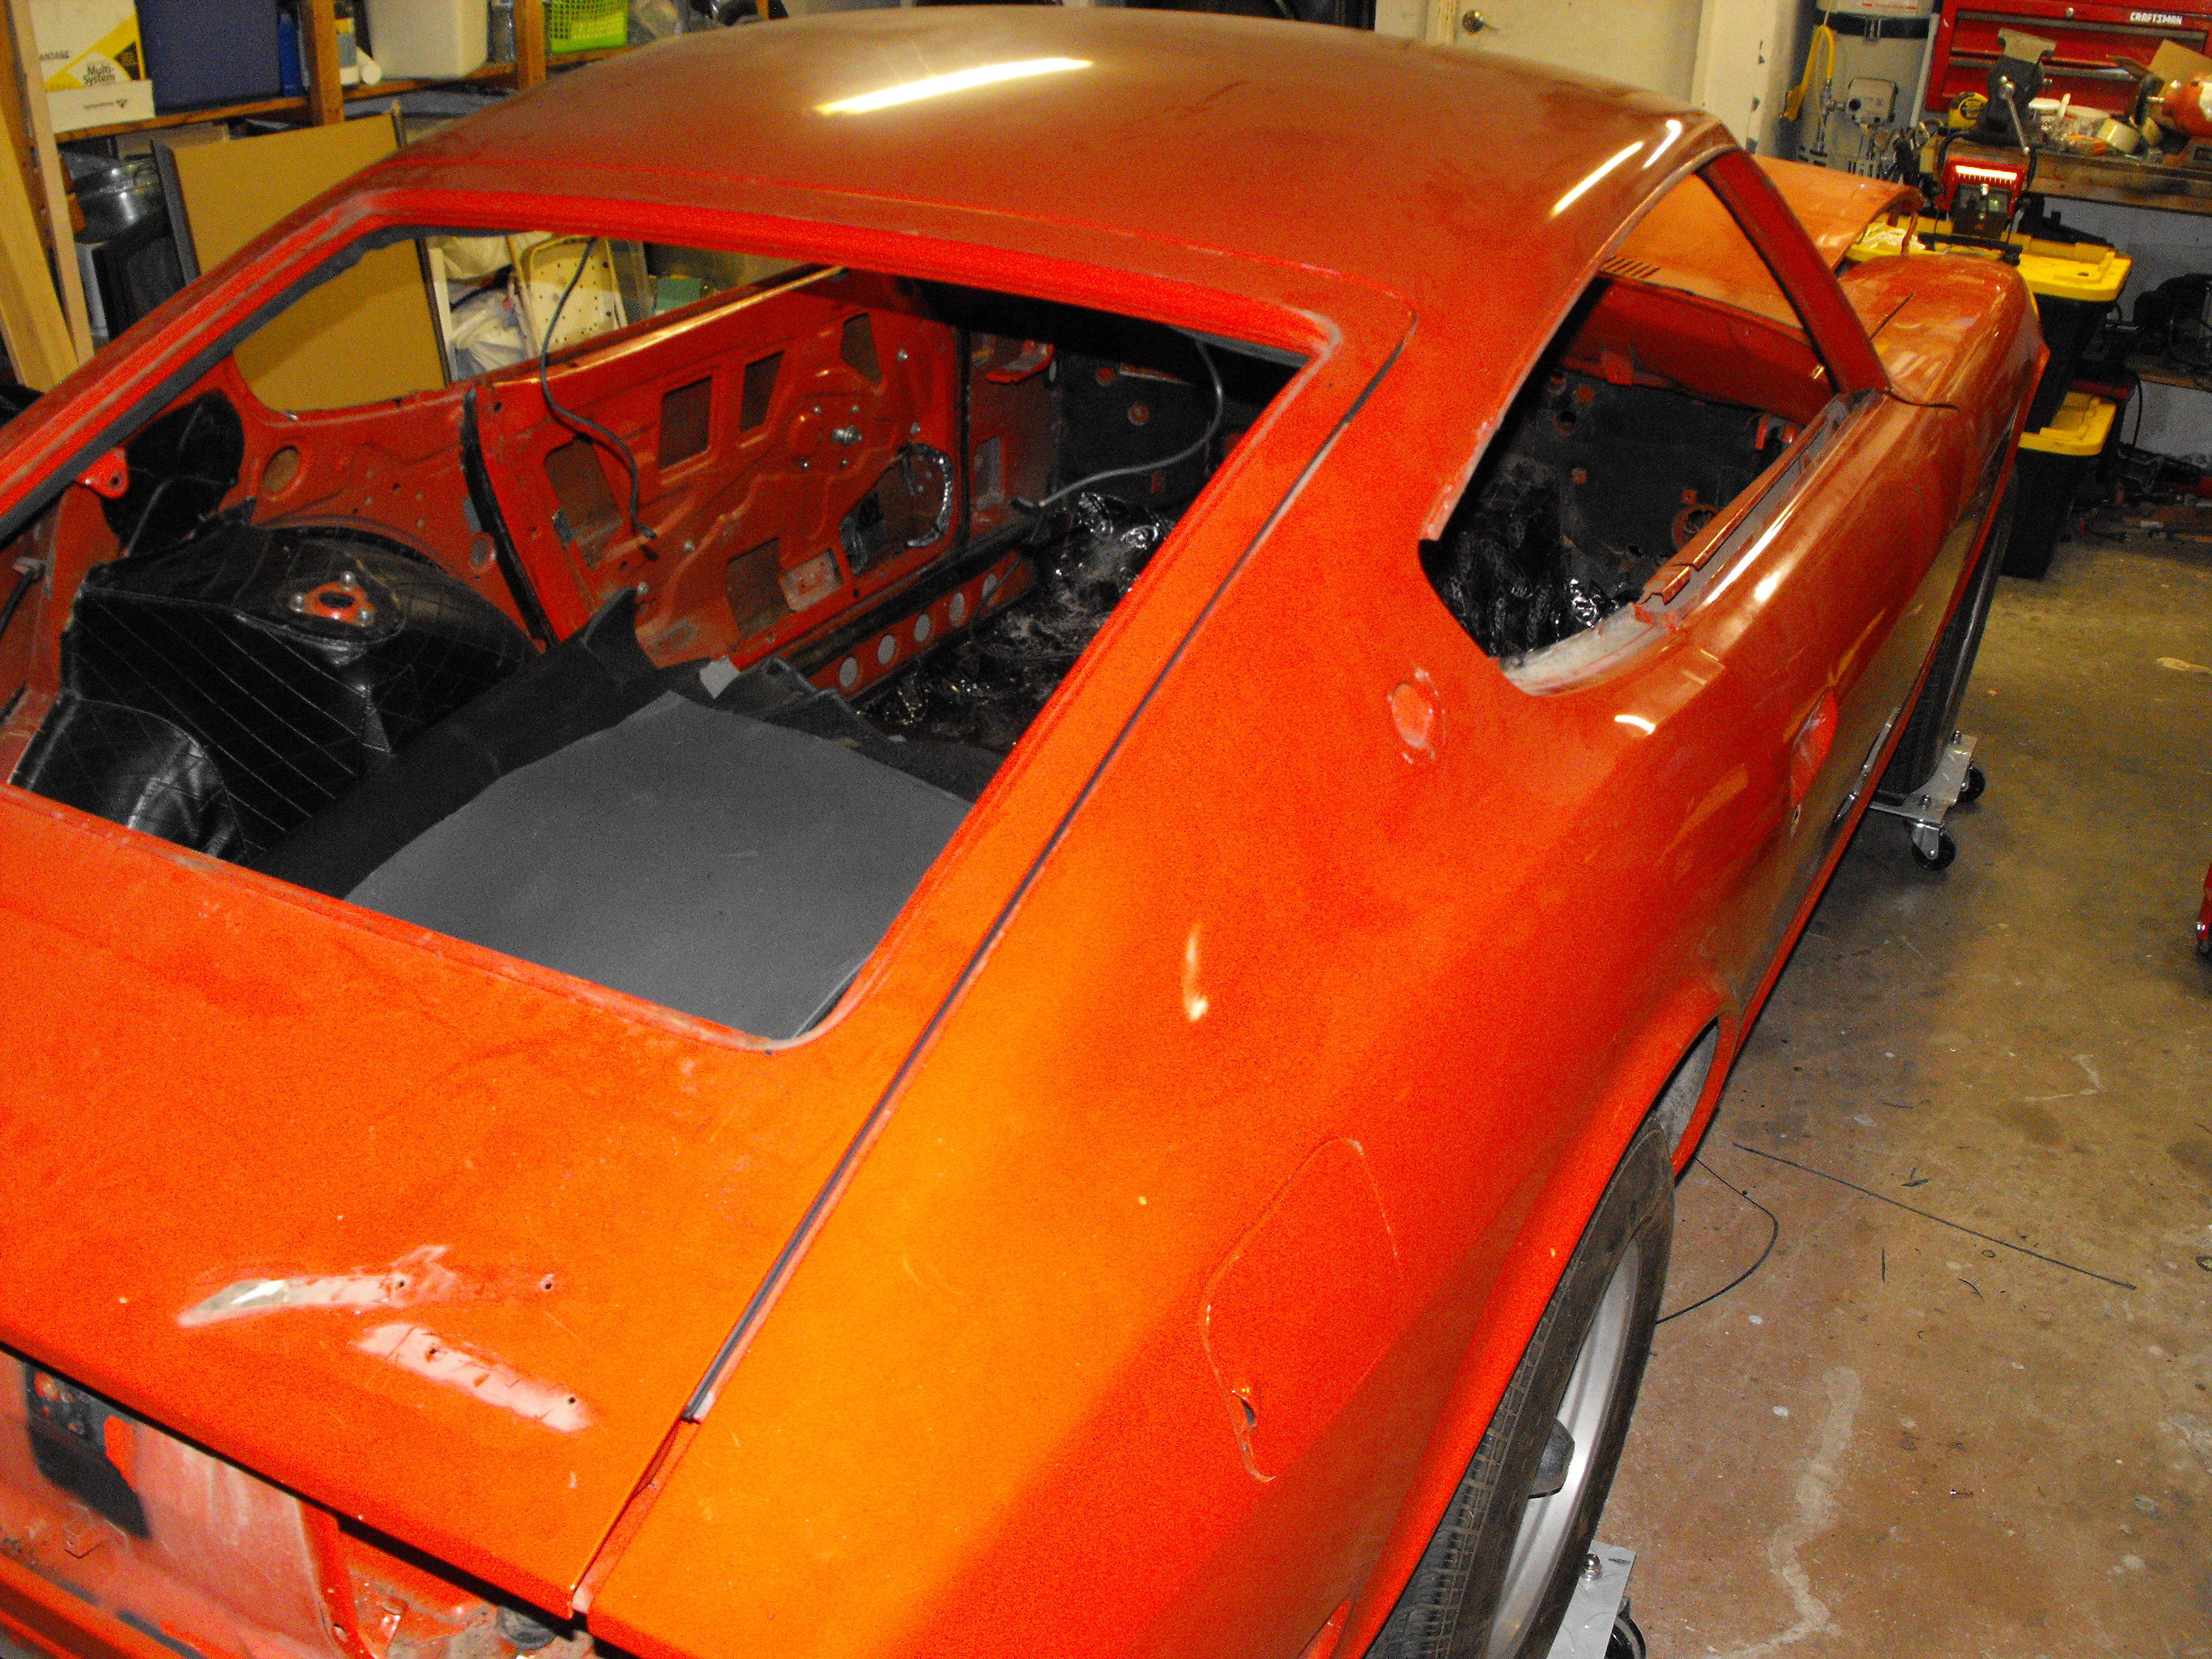
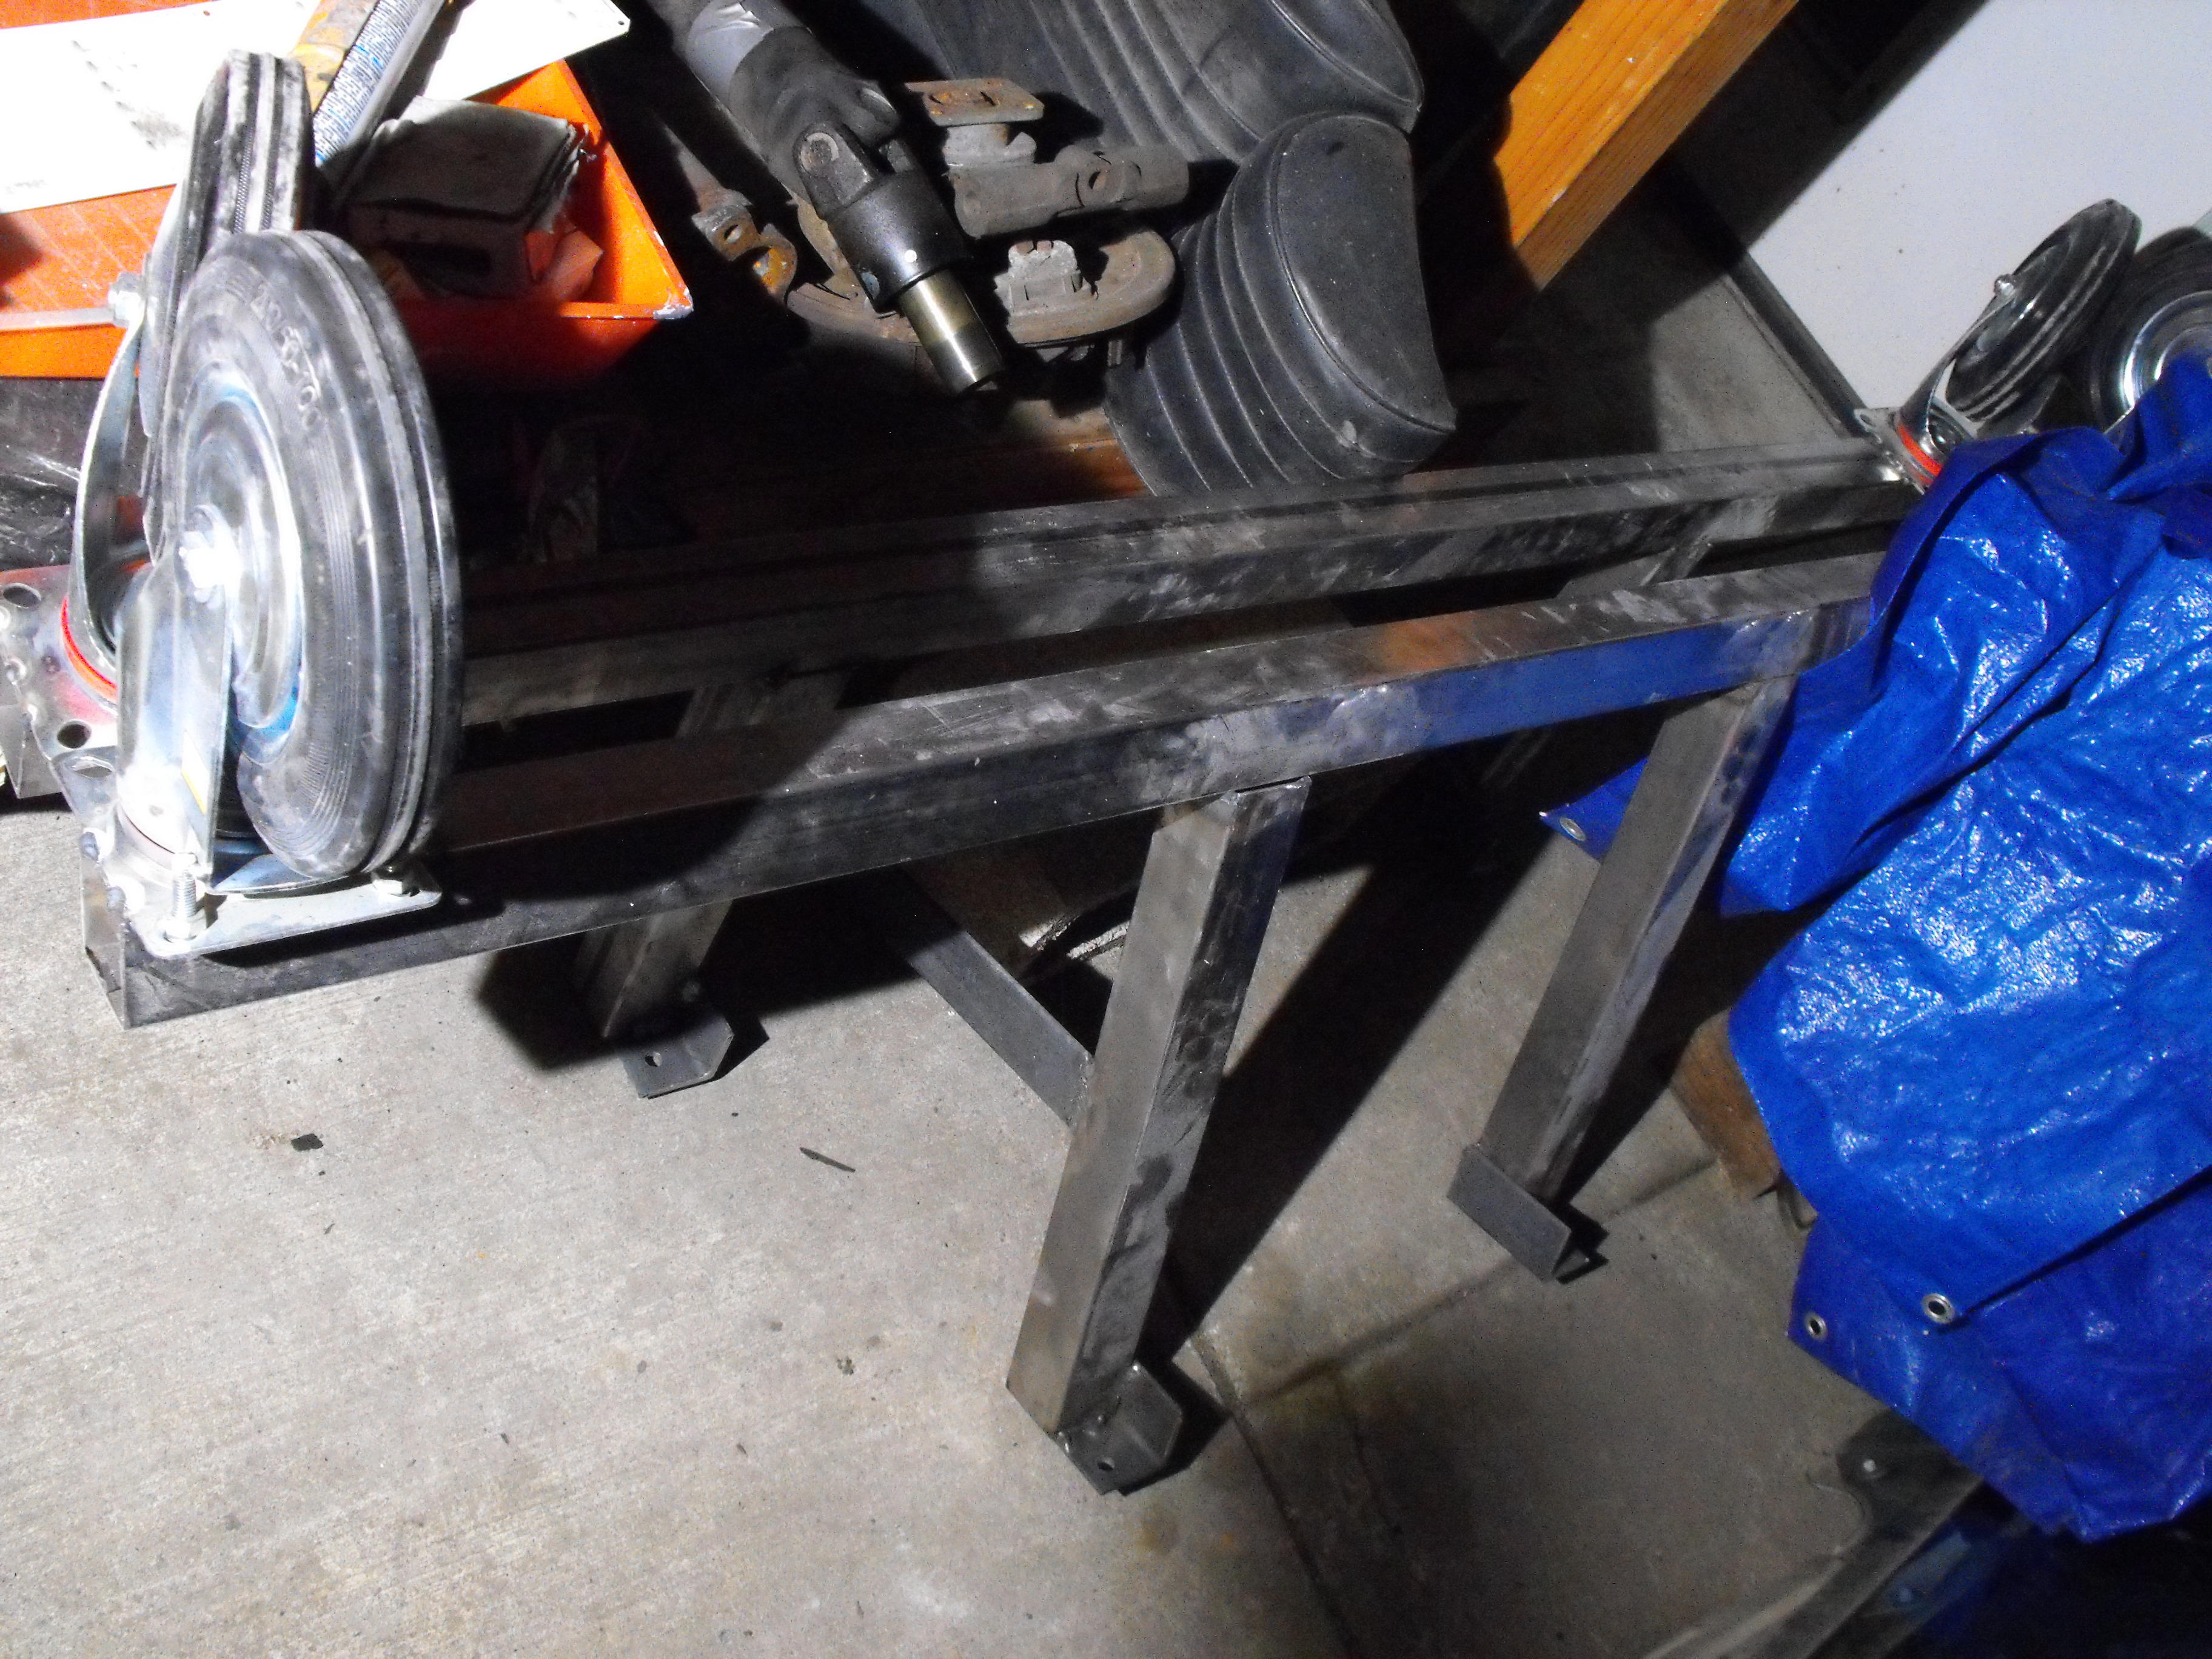
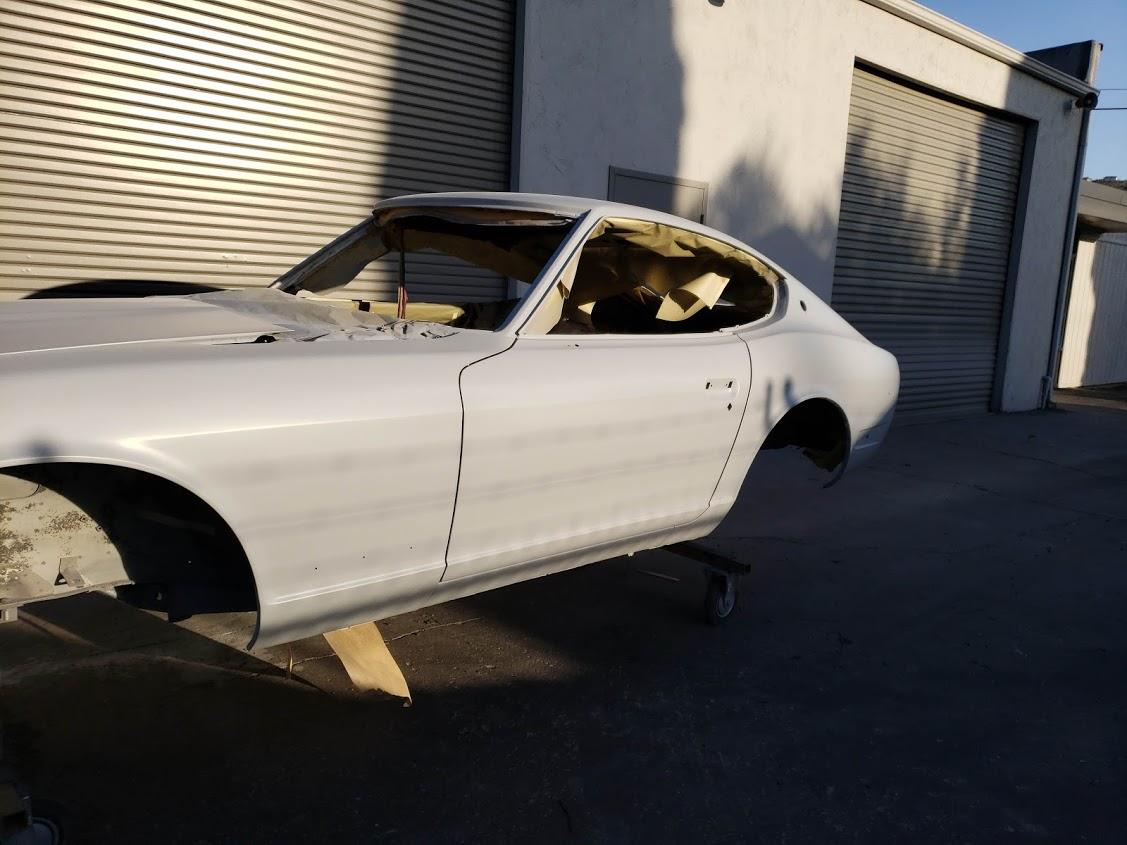
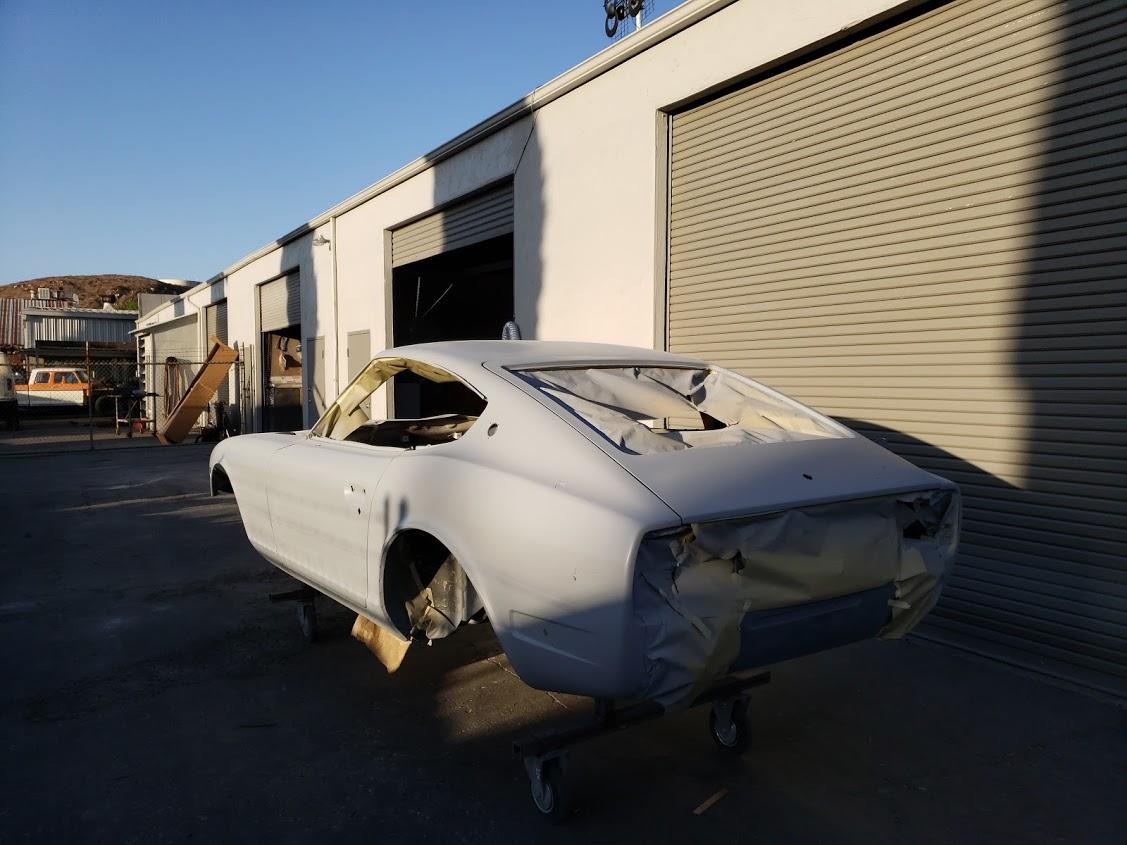
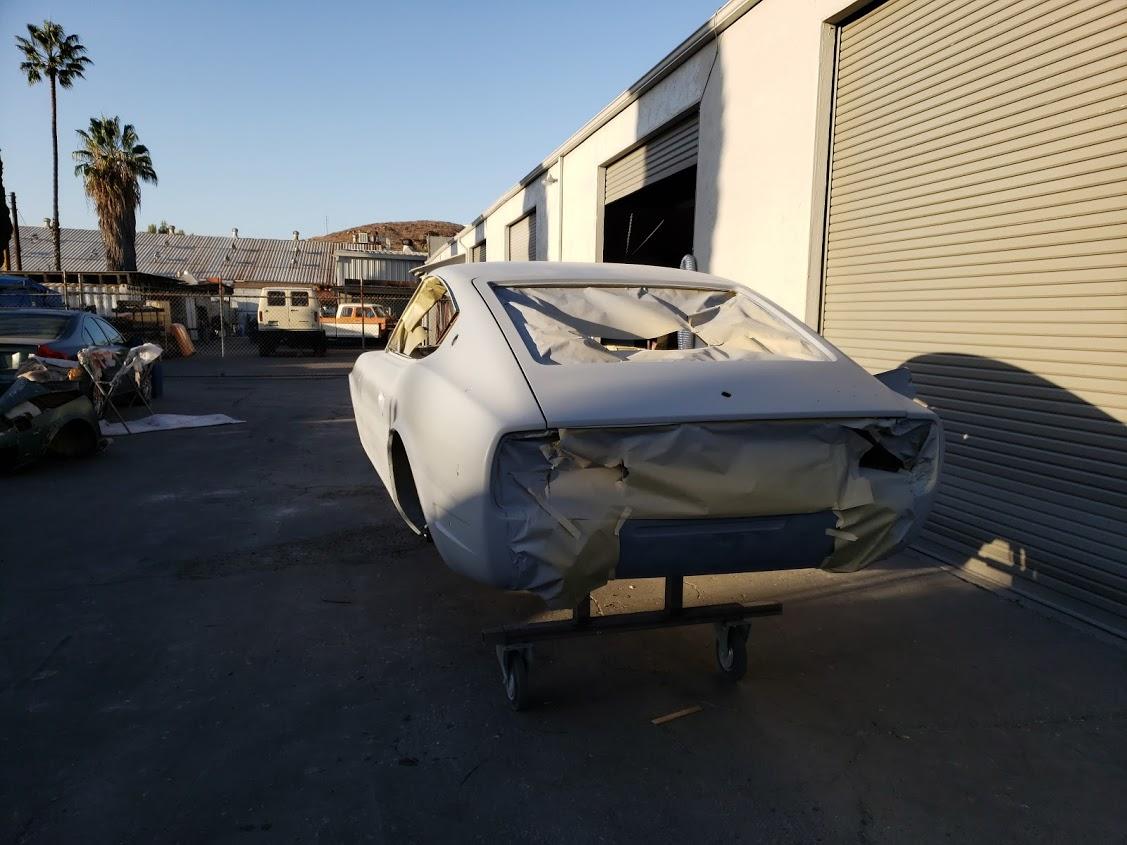
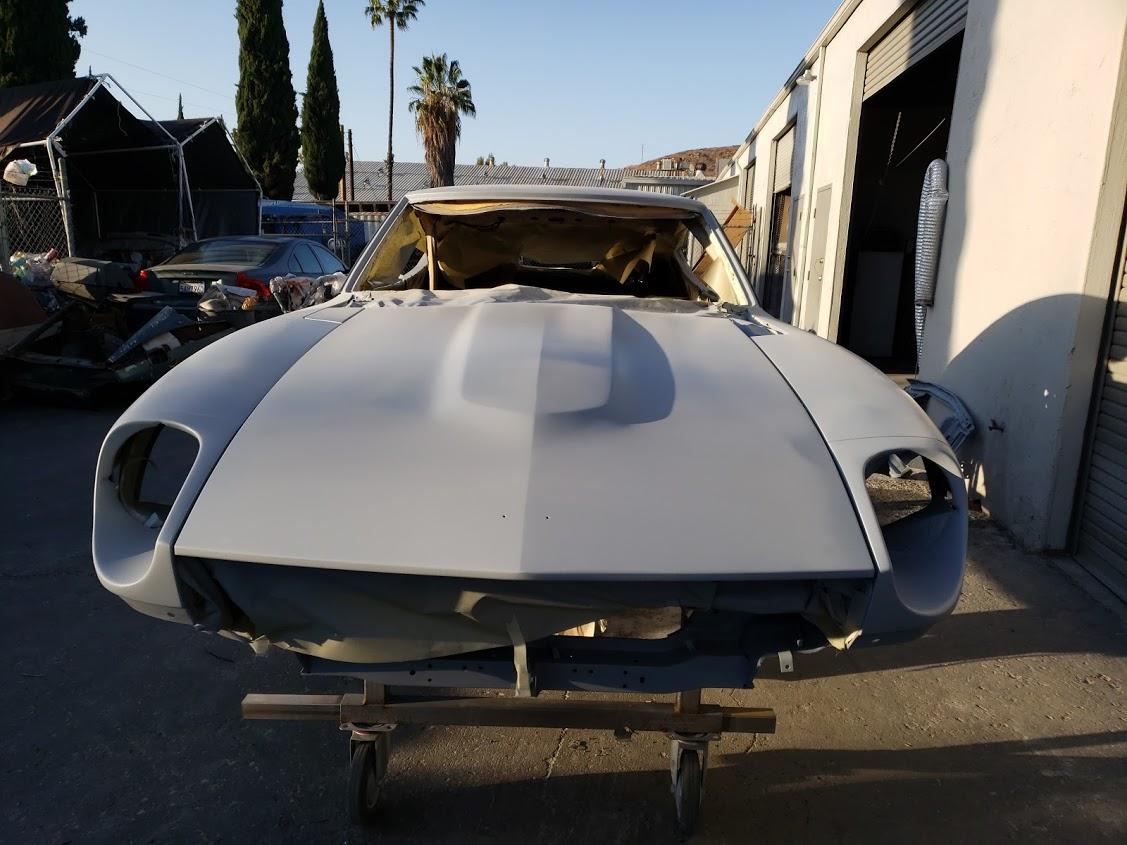
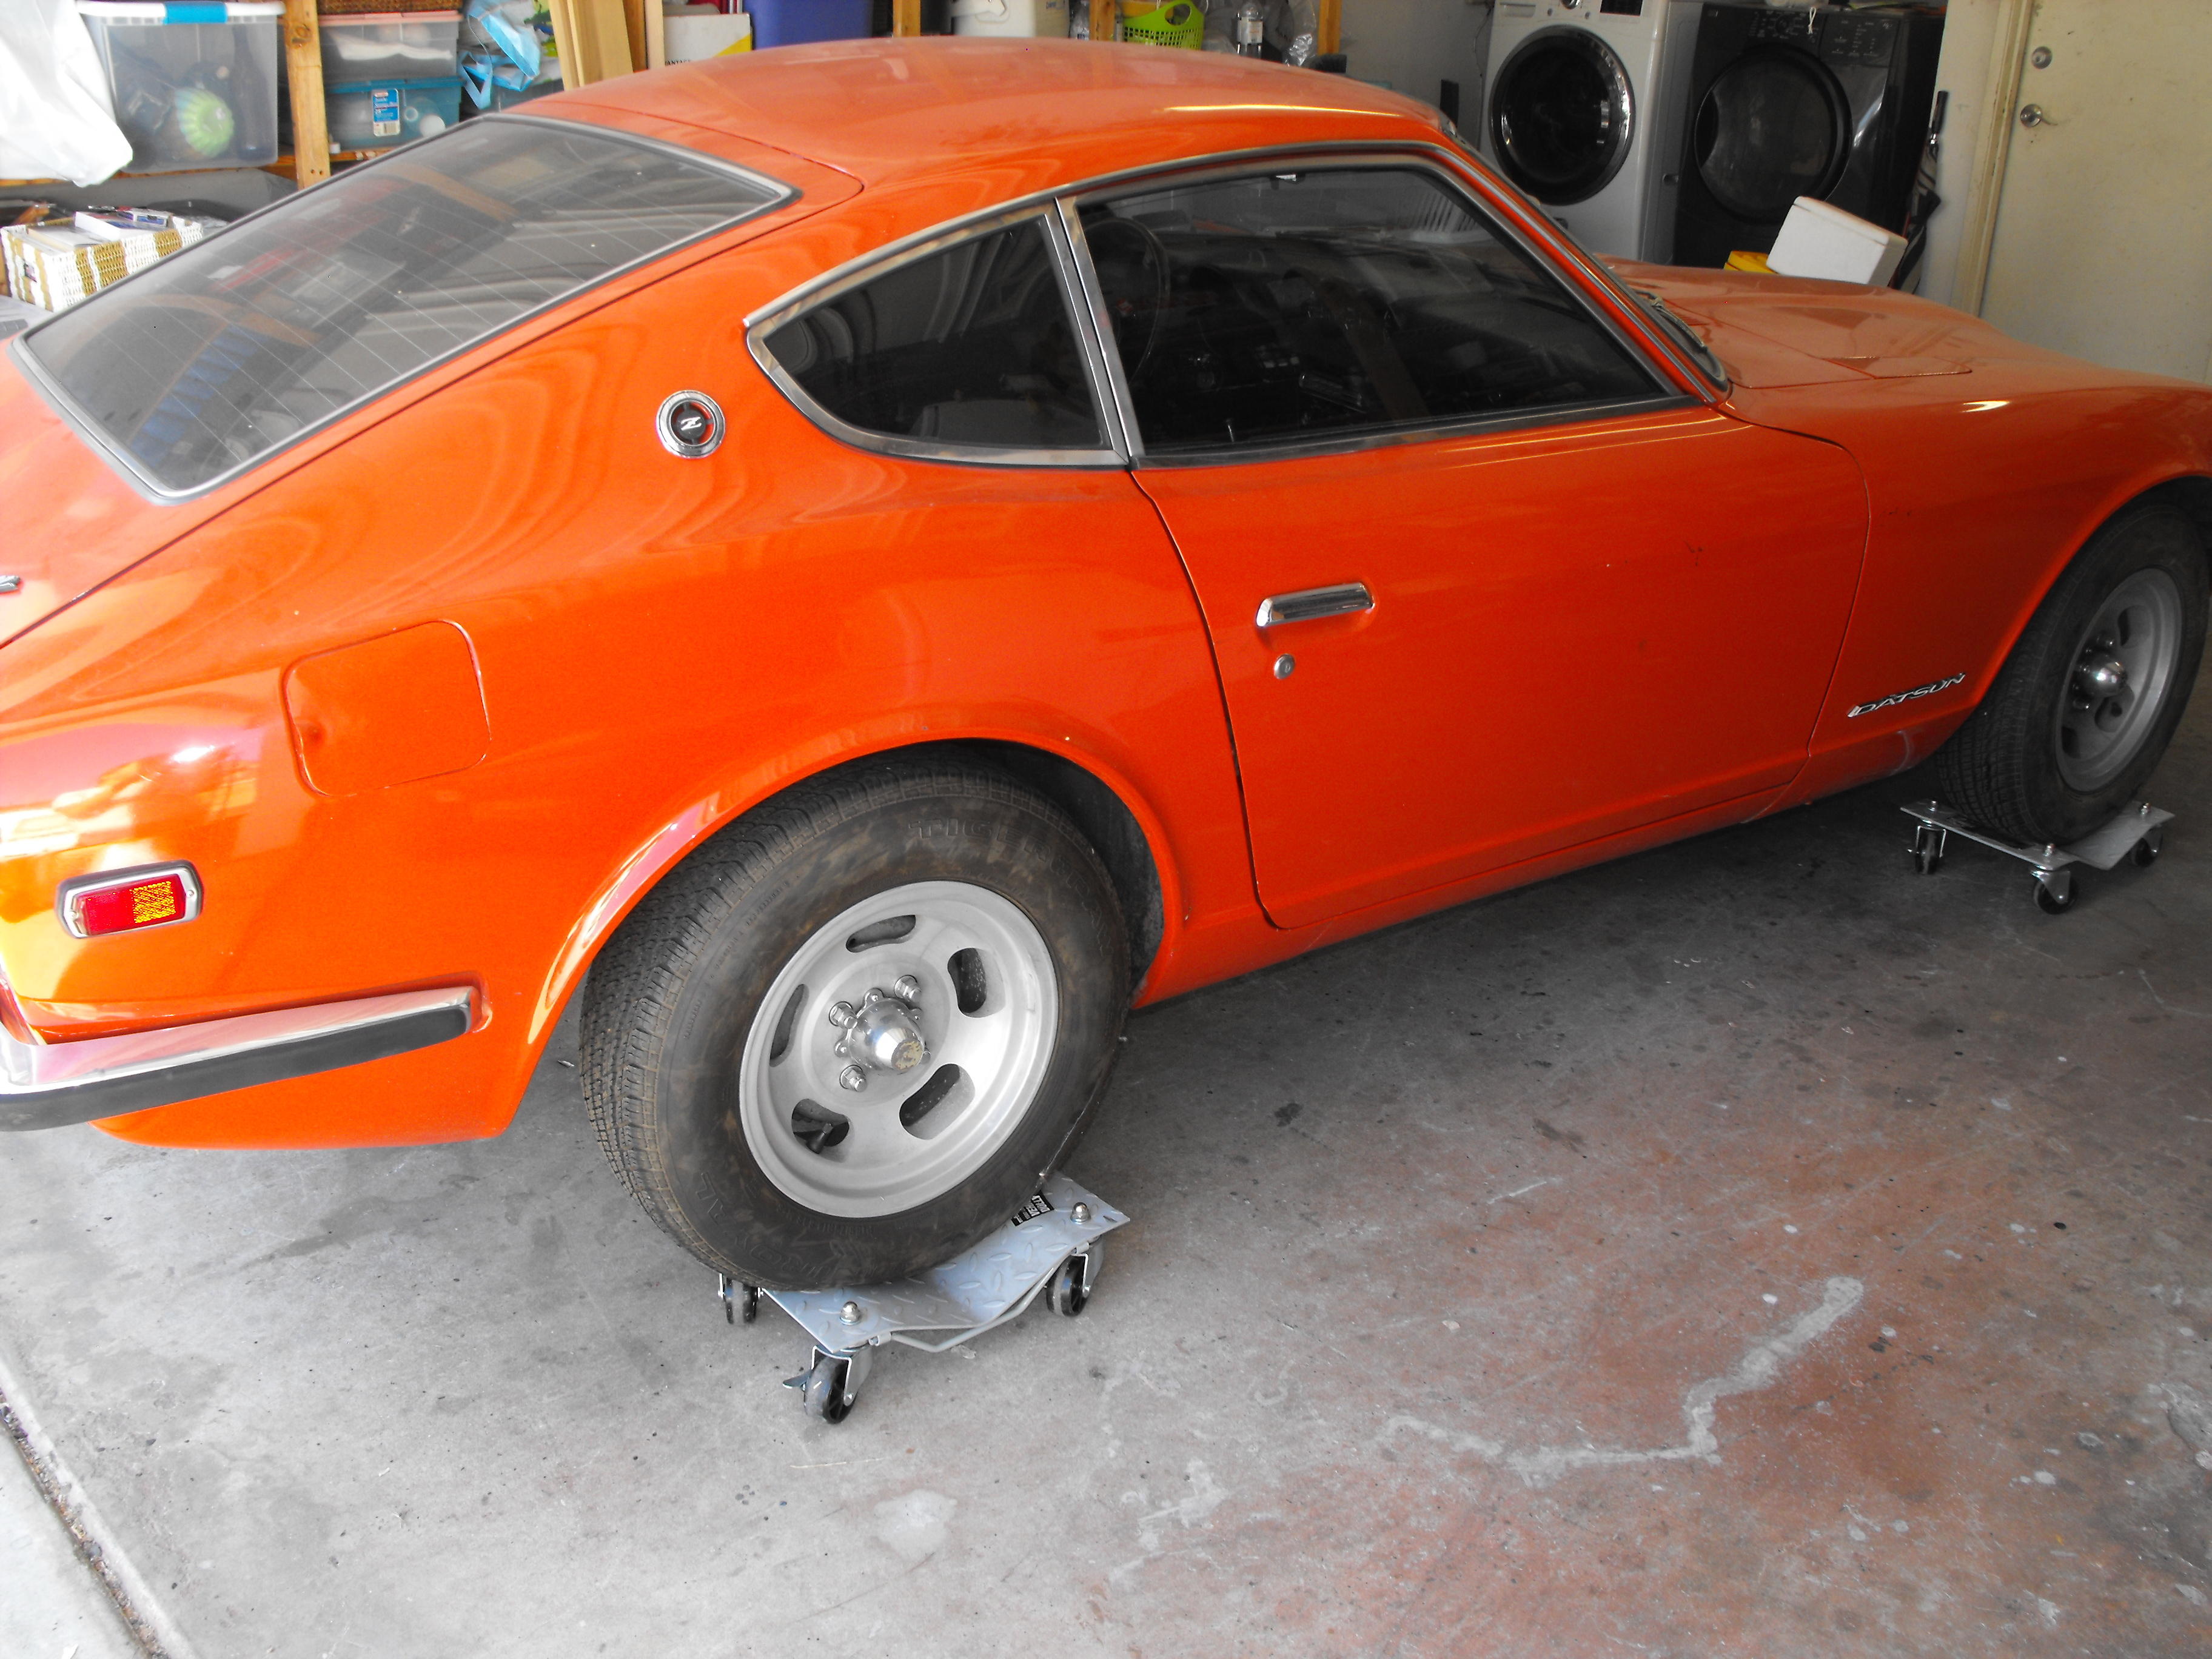
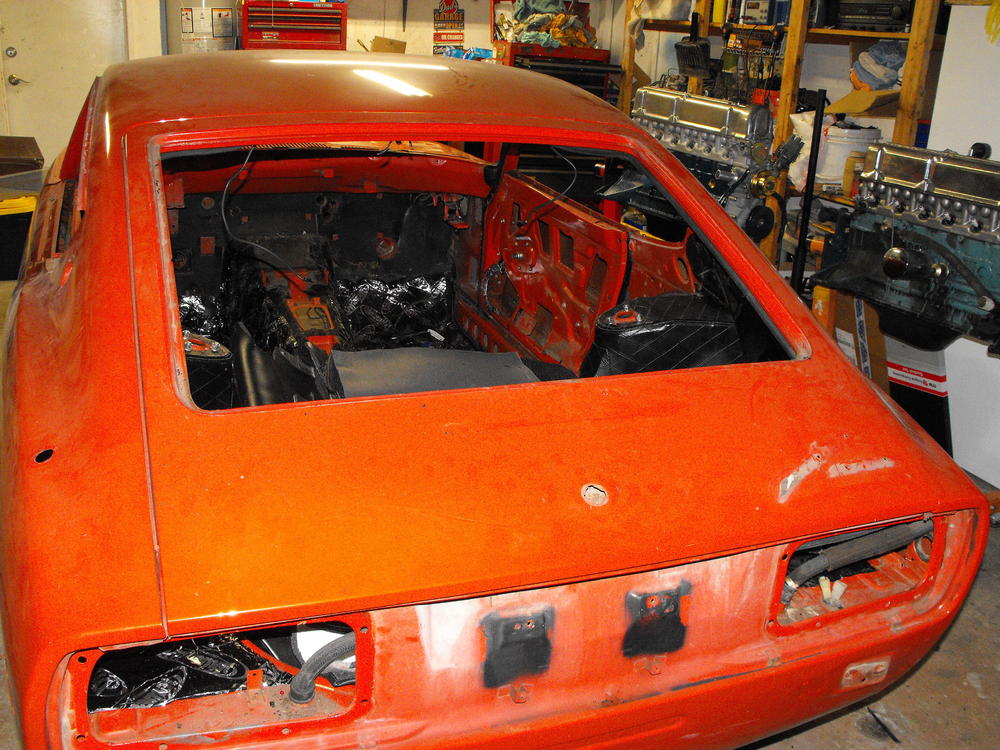
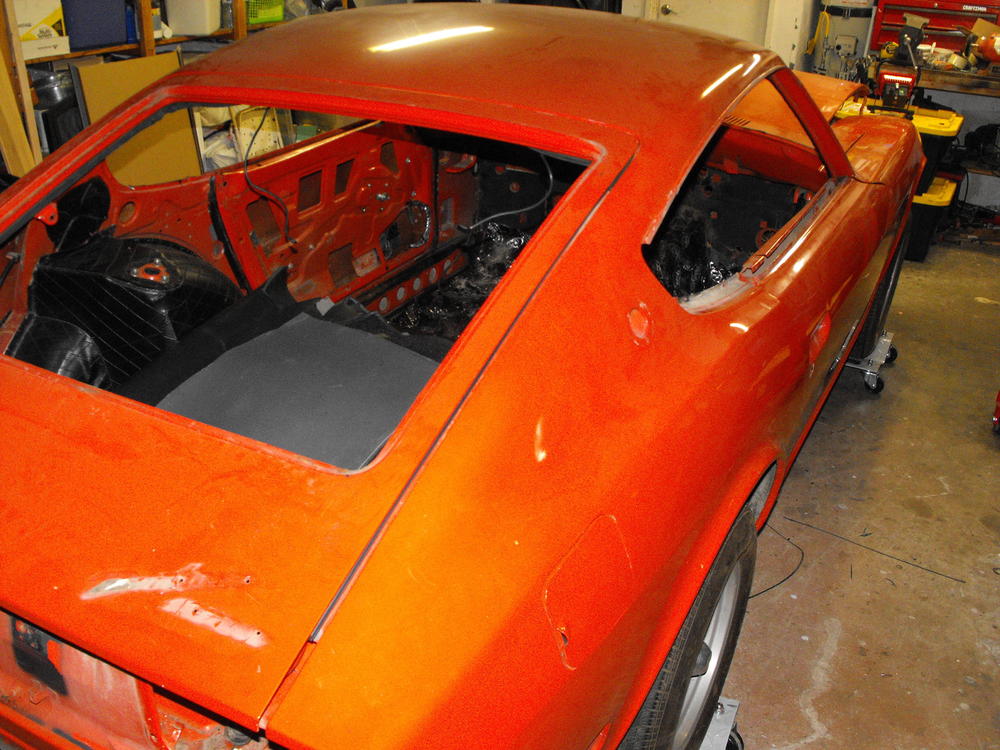
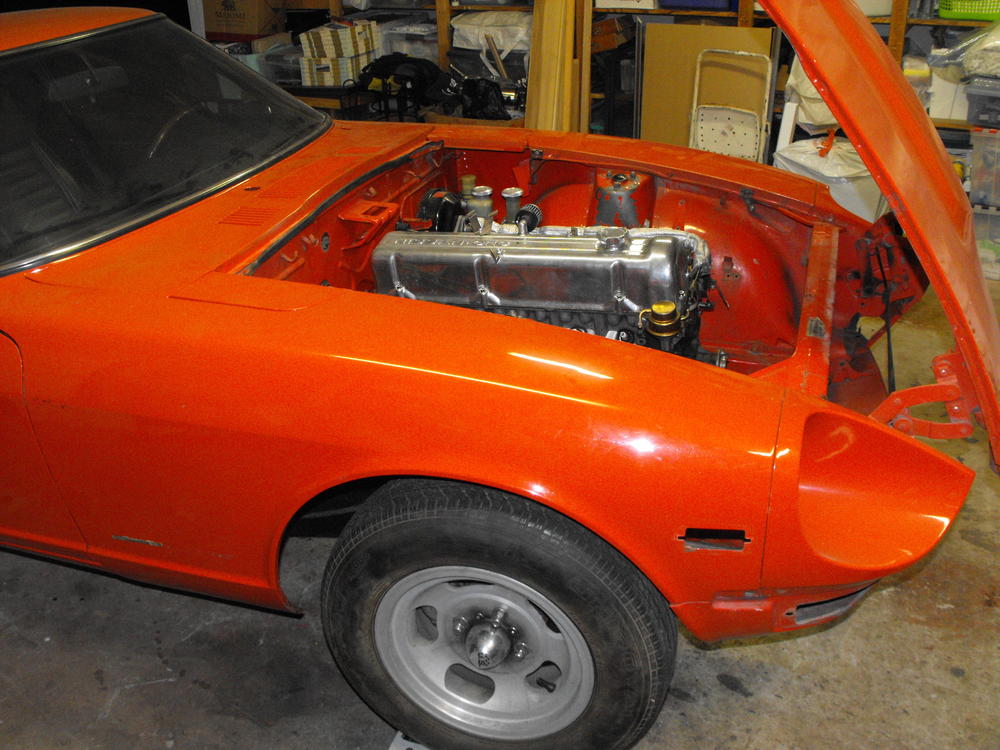
 Yes, car is really in decent shape. I would bet the 88K miles on the speedo are the actual miles on the car based on it's condition. Took the glass out this evening along with the door panels and attachments. Miguel gave me the supports to mount the body on. I will remove the suspension in the next couple days and have the car on rollers ready for paint. Should have this to Miguel by the middle of next week.


-
The 48" tanks are at the local plating shop which I typically only use for quick turn around. Personally, I think the plating at my local shop is too dark and not shiny enough. I spoke with Sav-On and they said they could handle parts up to six feet. This works well for the brake and fuel lines because then you only have to fold them in half. This makes for a better bend location as the middle portion that you bend would be in the transmission tunnel and not very visible. Also, it is in a straight section which is easier to manage. Folding in 48 inch lengths is not as good as the bend now is in the engine bay area of the tubing and there are other bends in that location. This makes things a bit more challenging. The cost for the larger tank items is more than the 5 gallon bucket items. These large parts get charged individually so the price is a bit higher. I do however, really like the quality of their work. They do a great job. When i send in the fuel and brake lines, I will cap them with tight fitting caps.
-
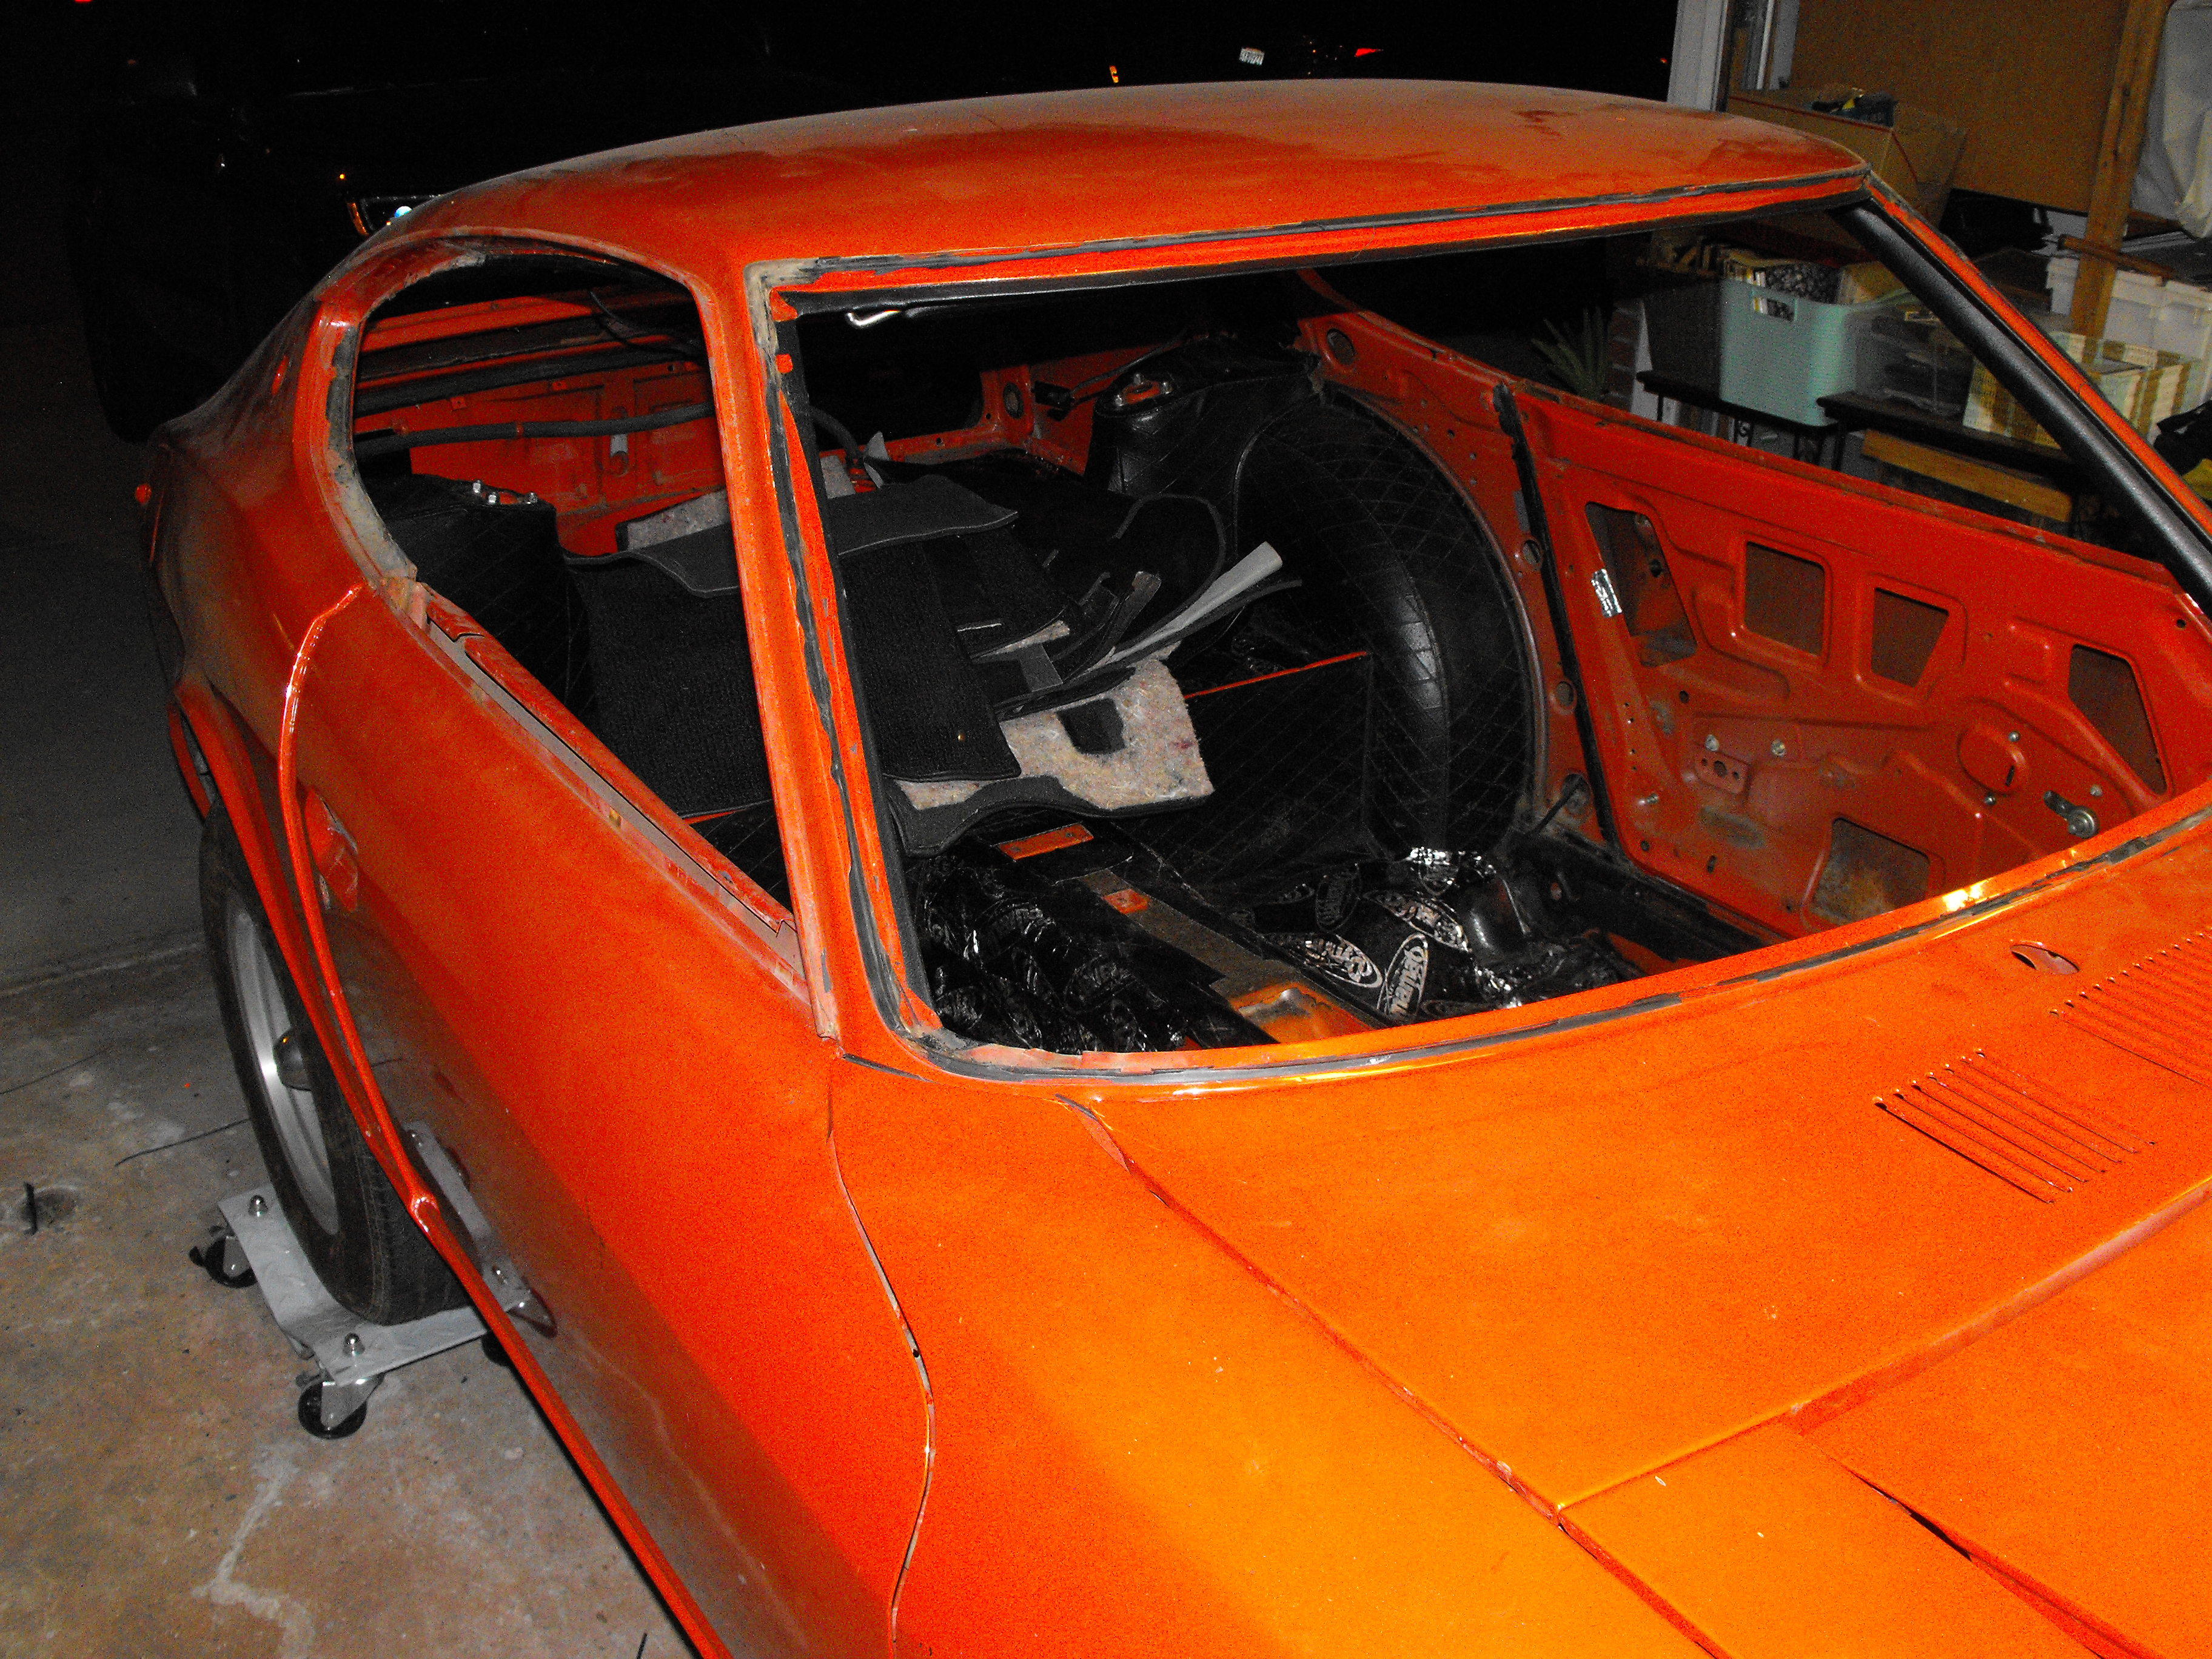
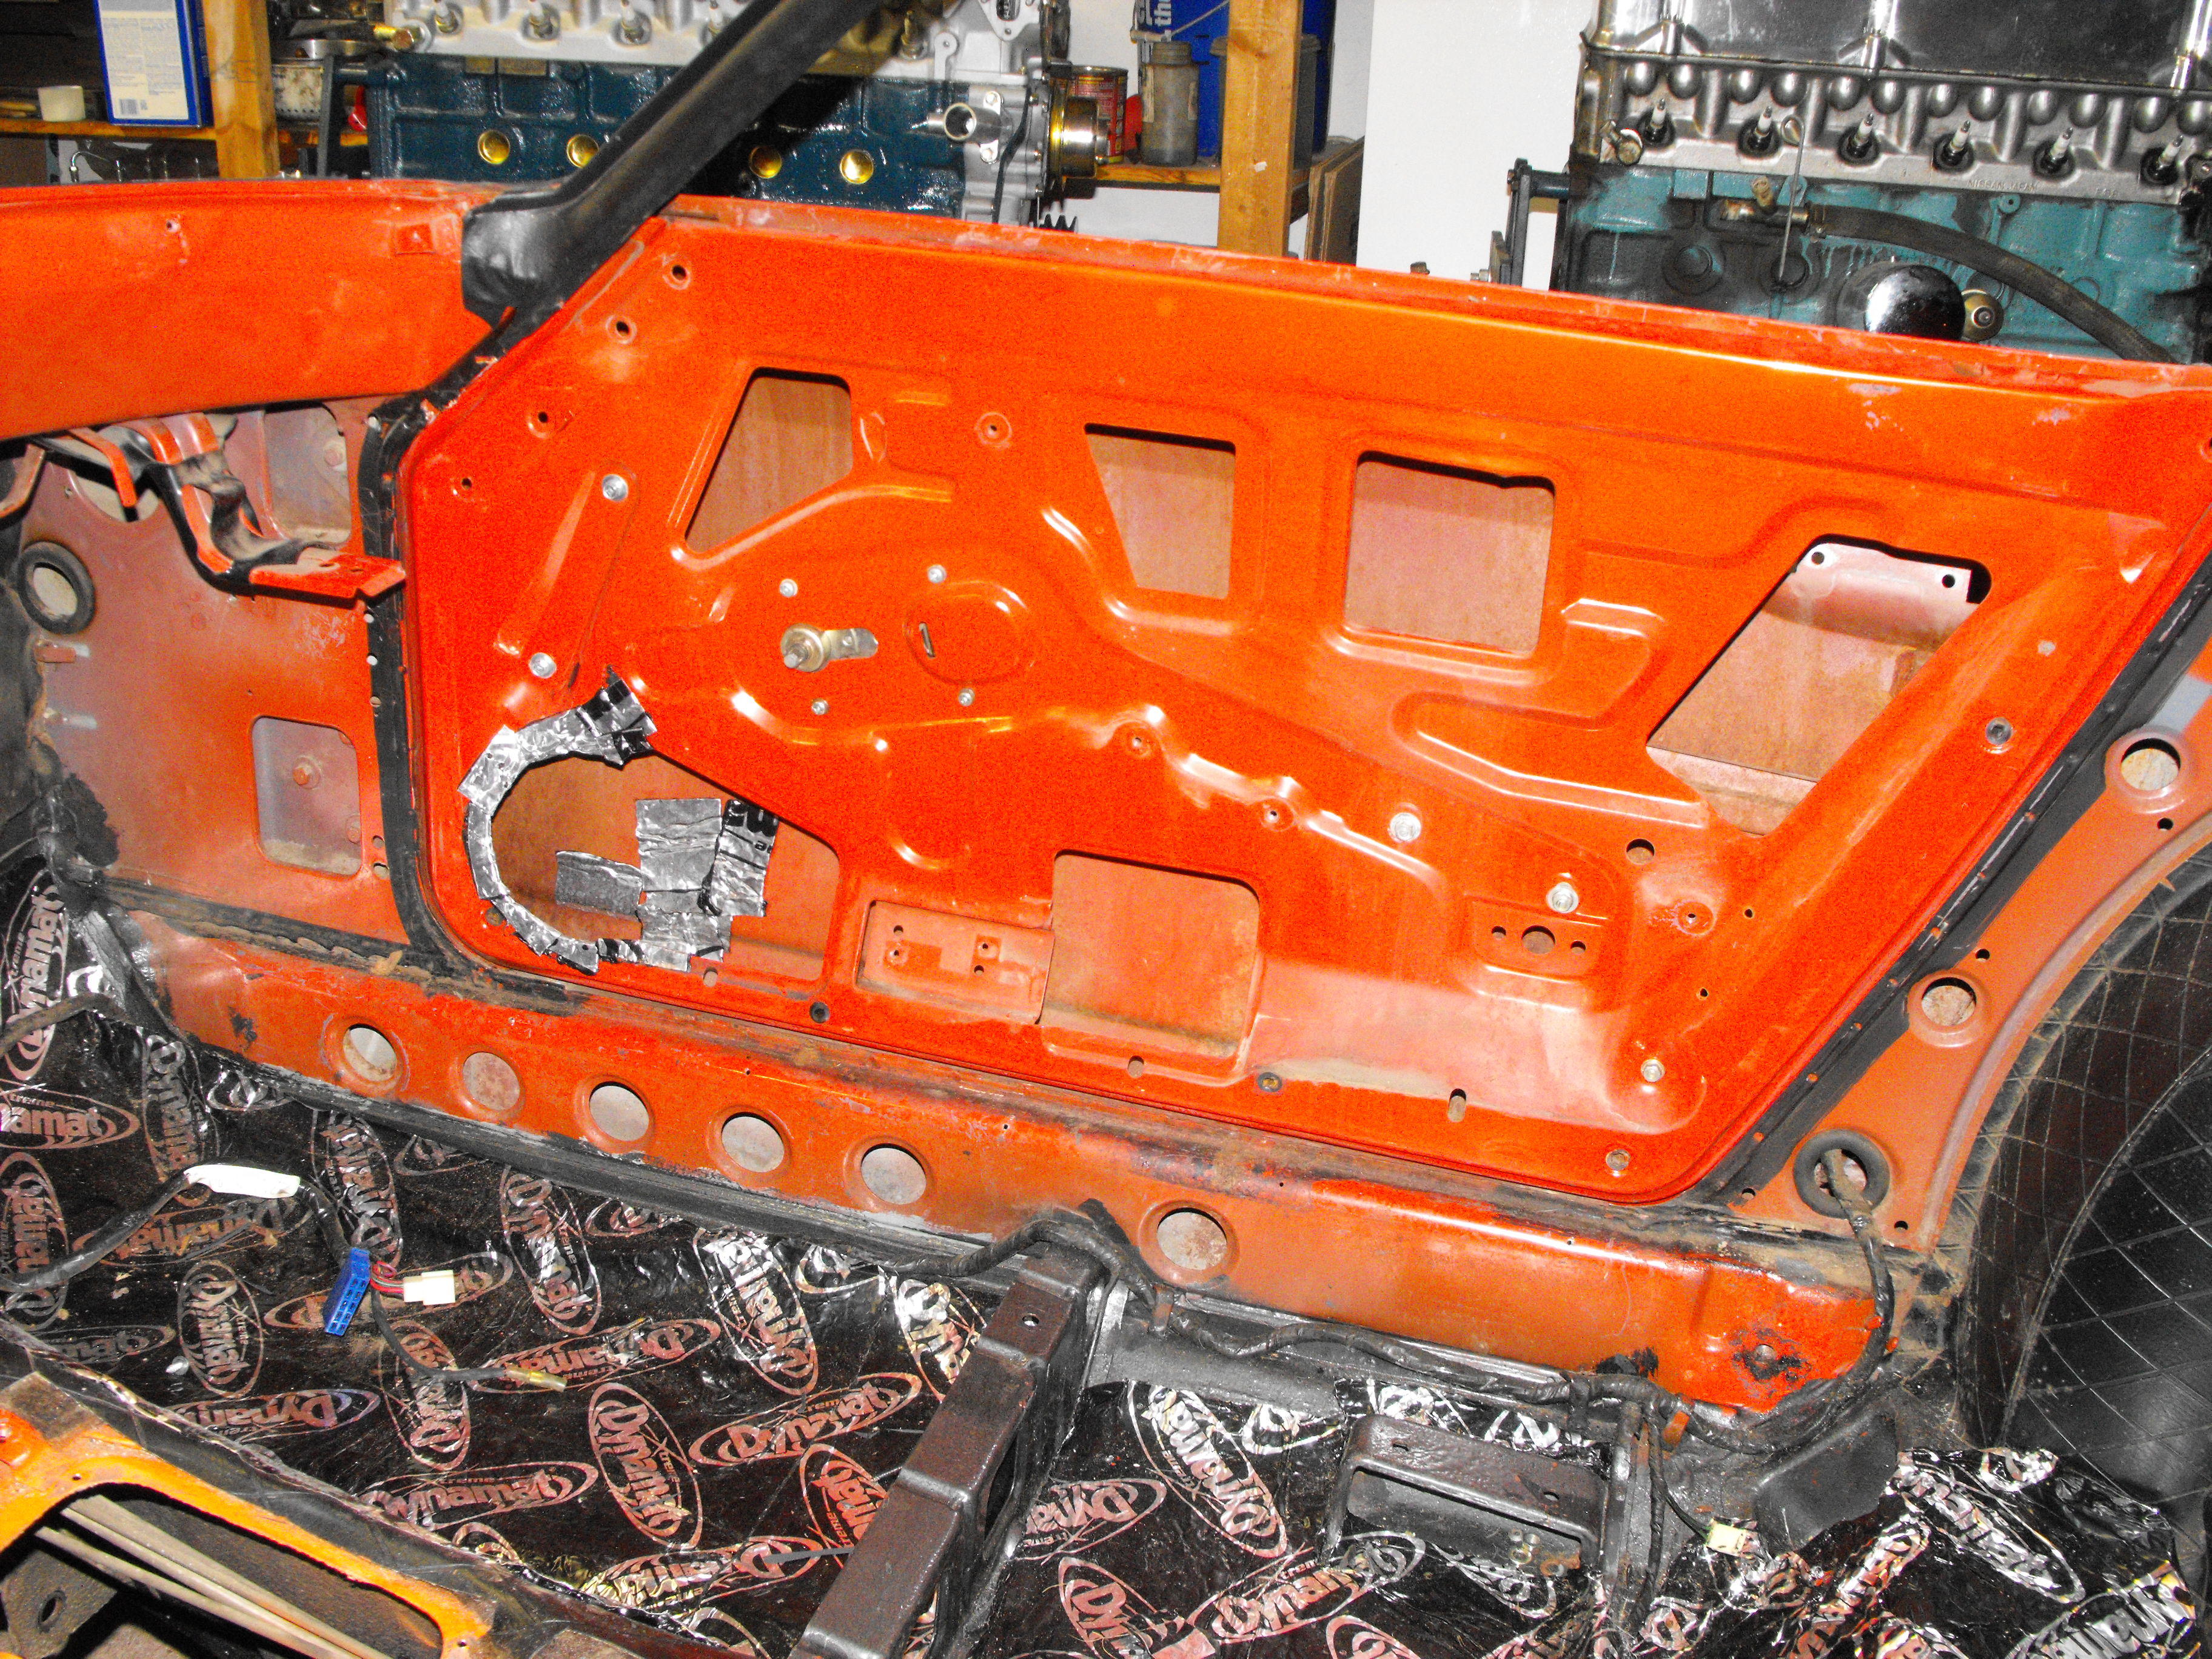
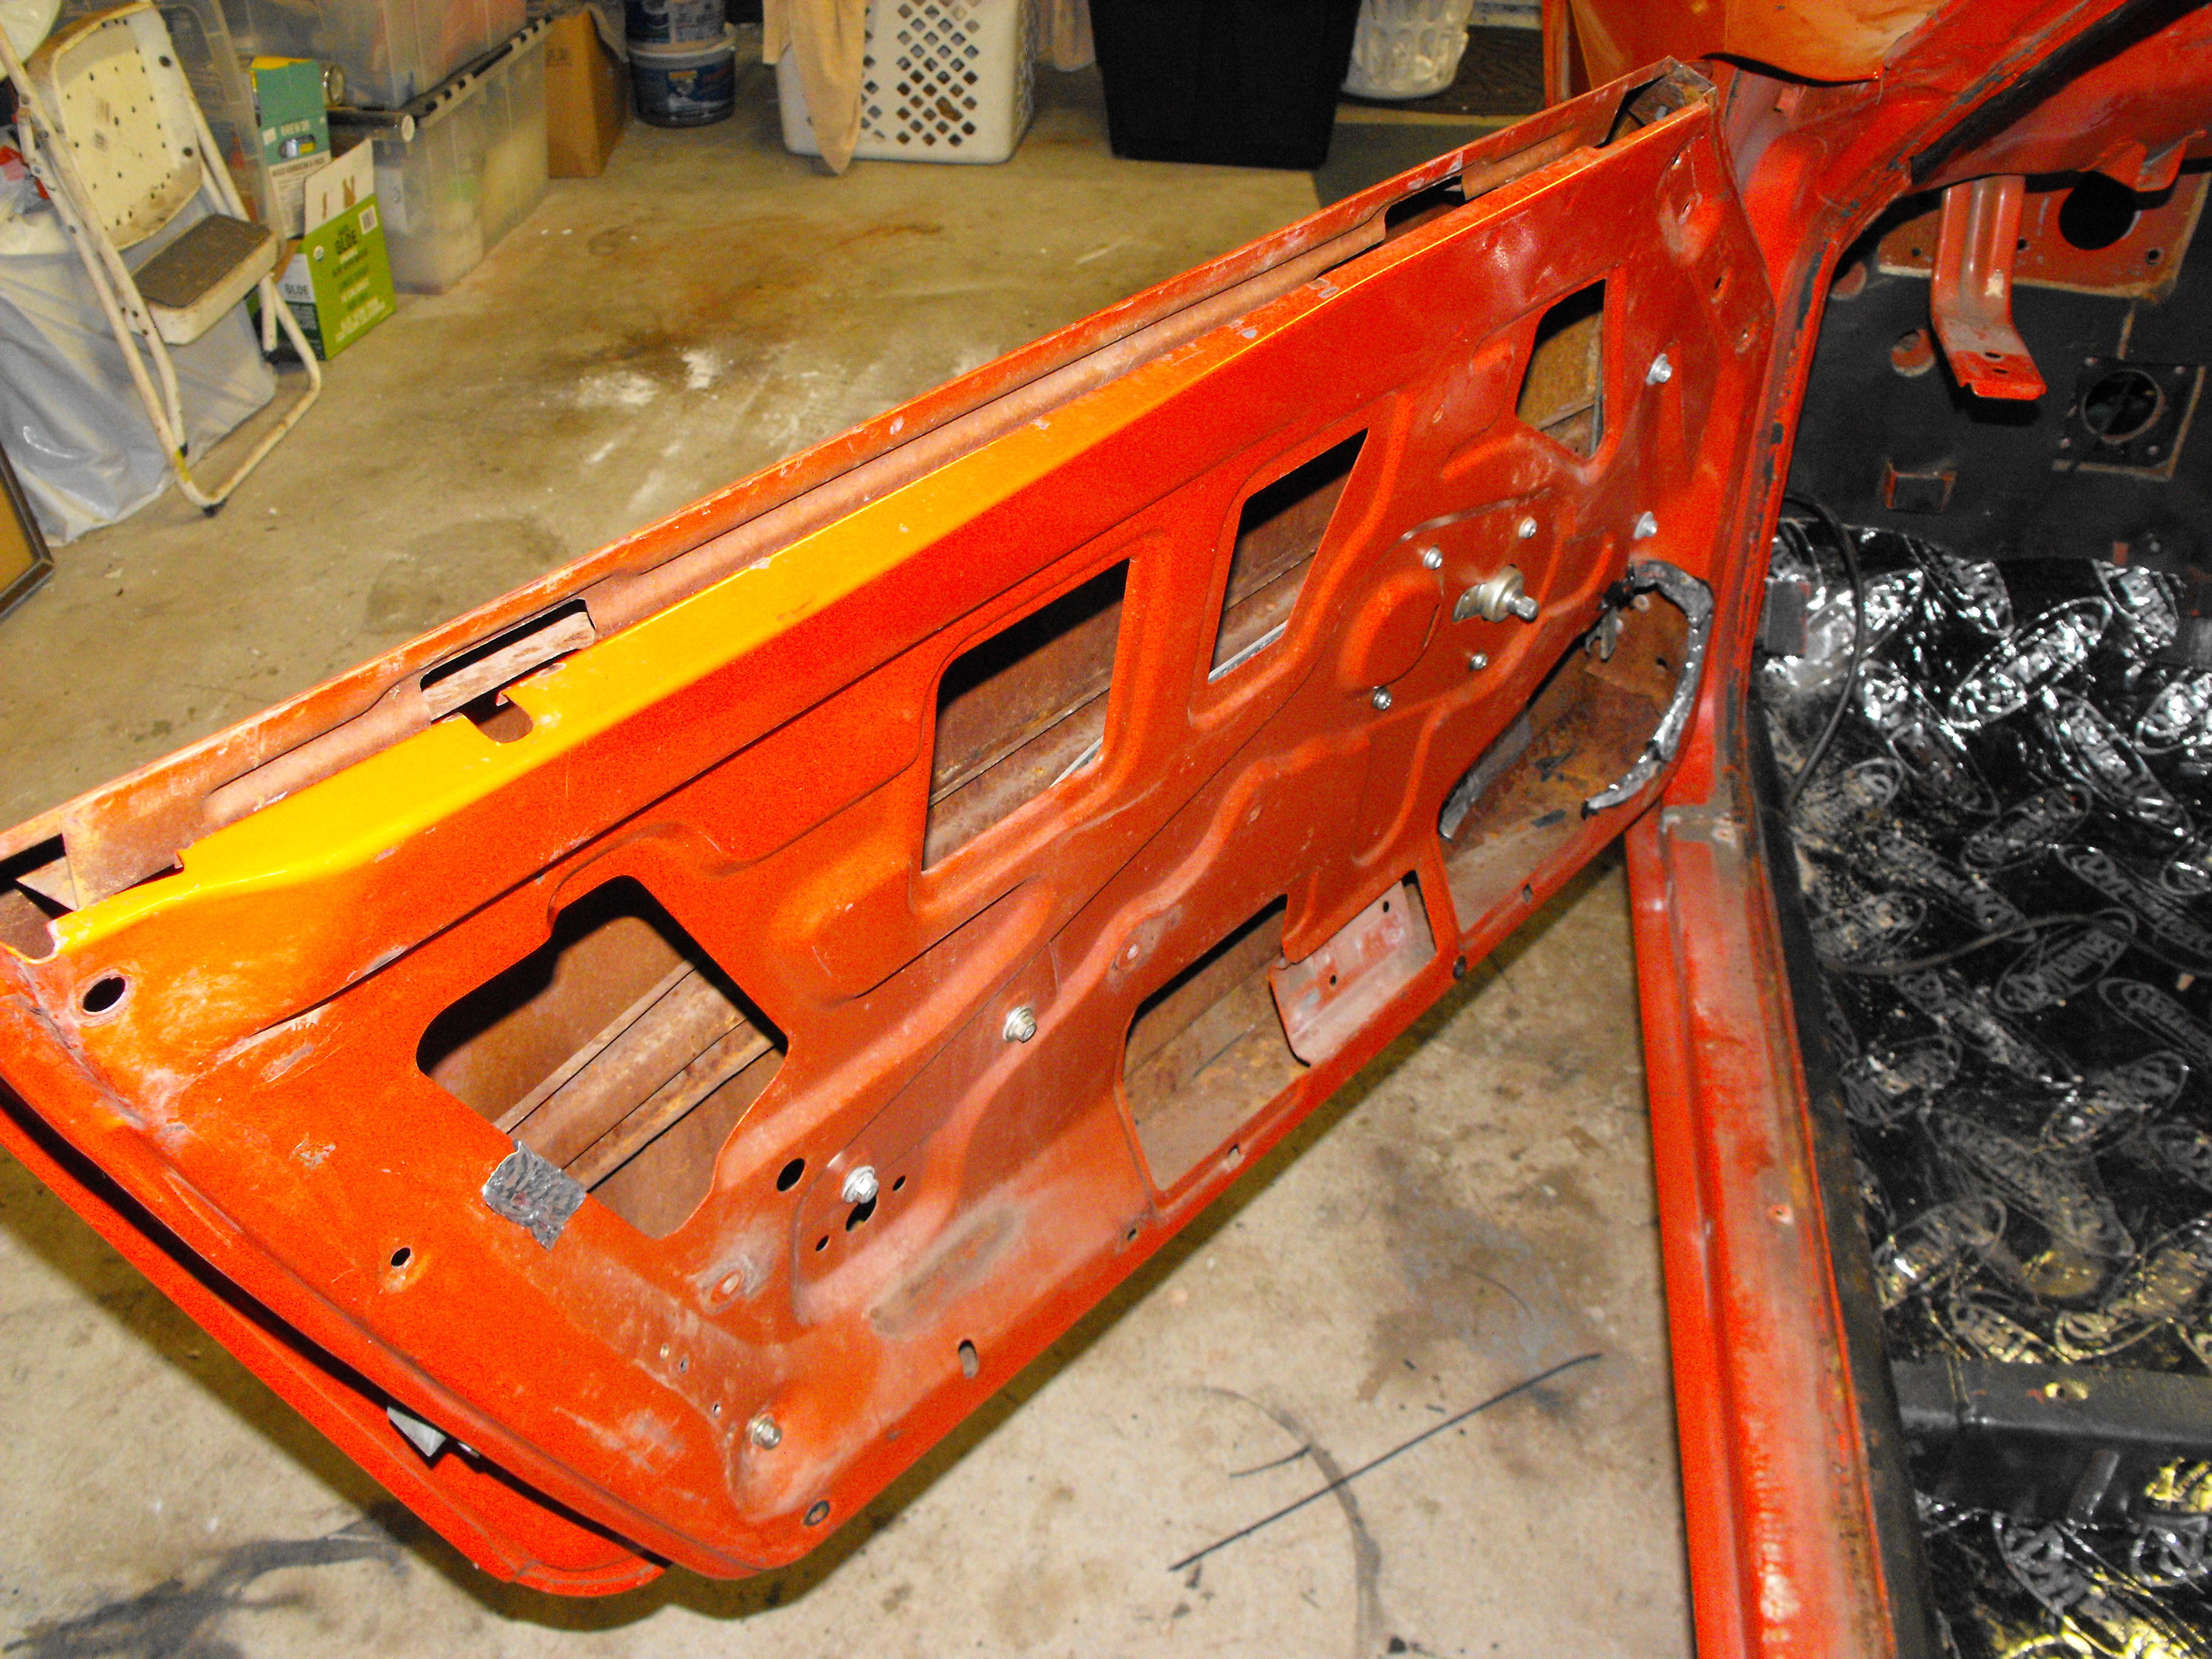
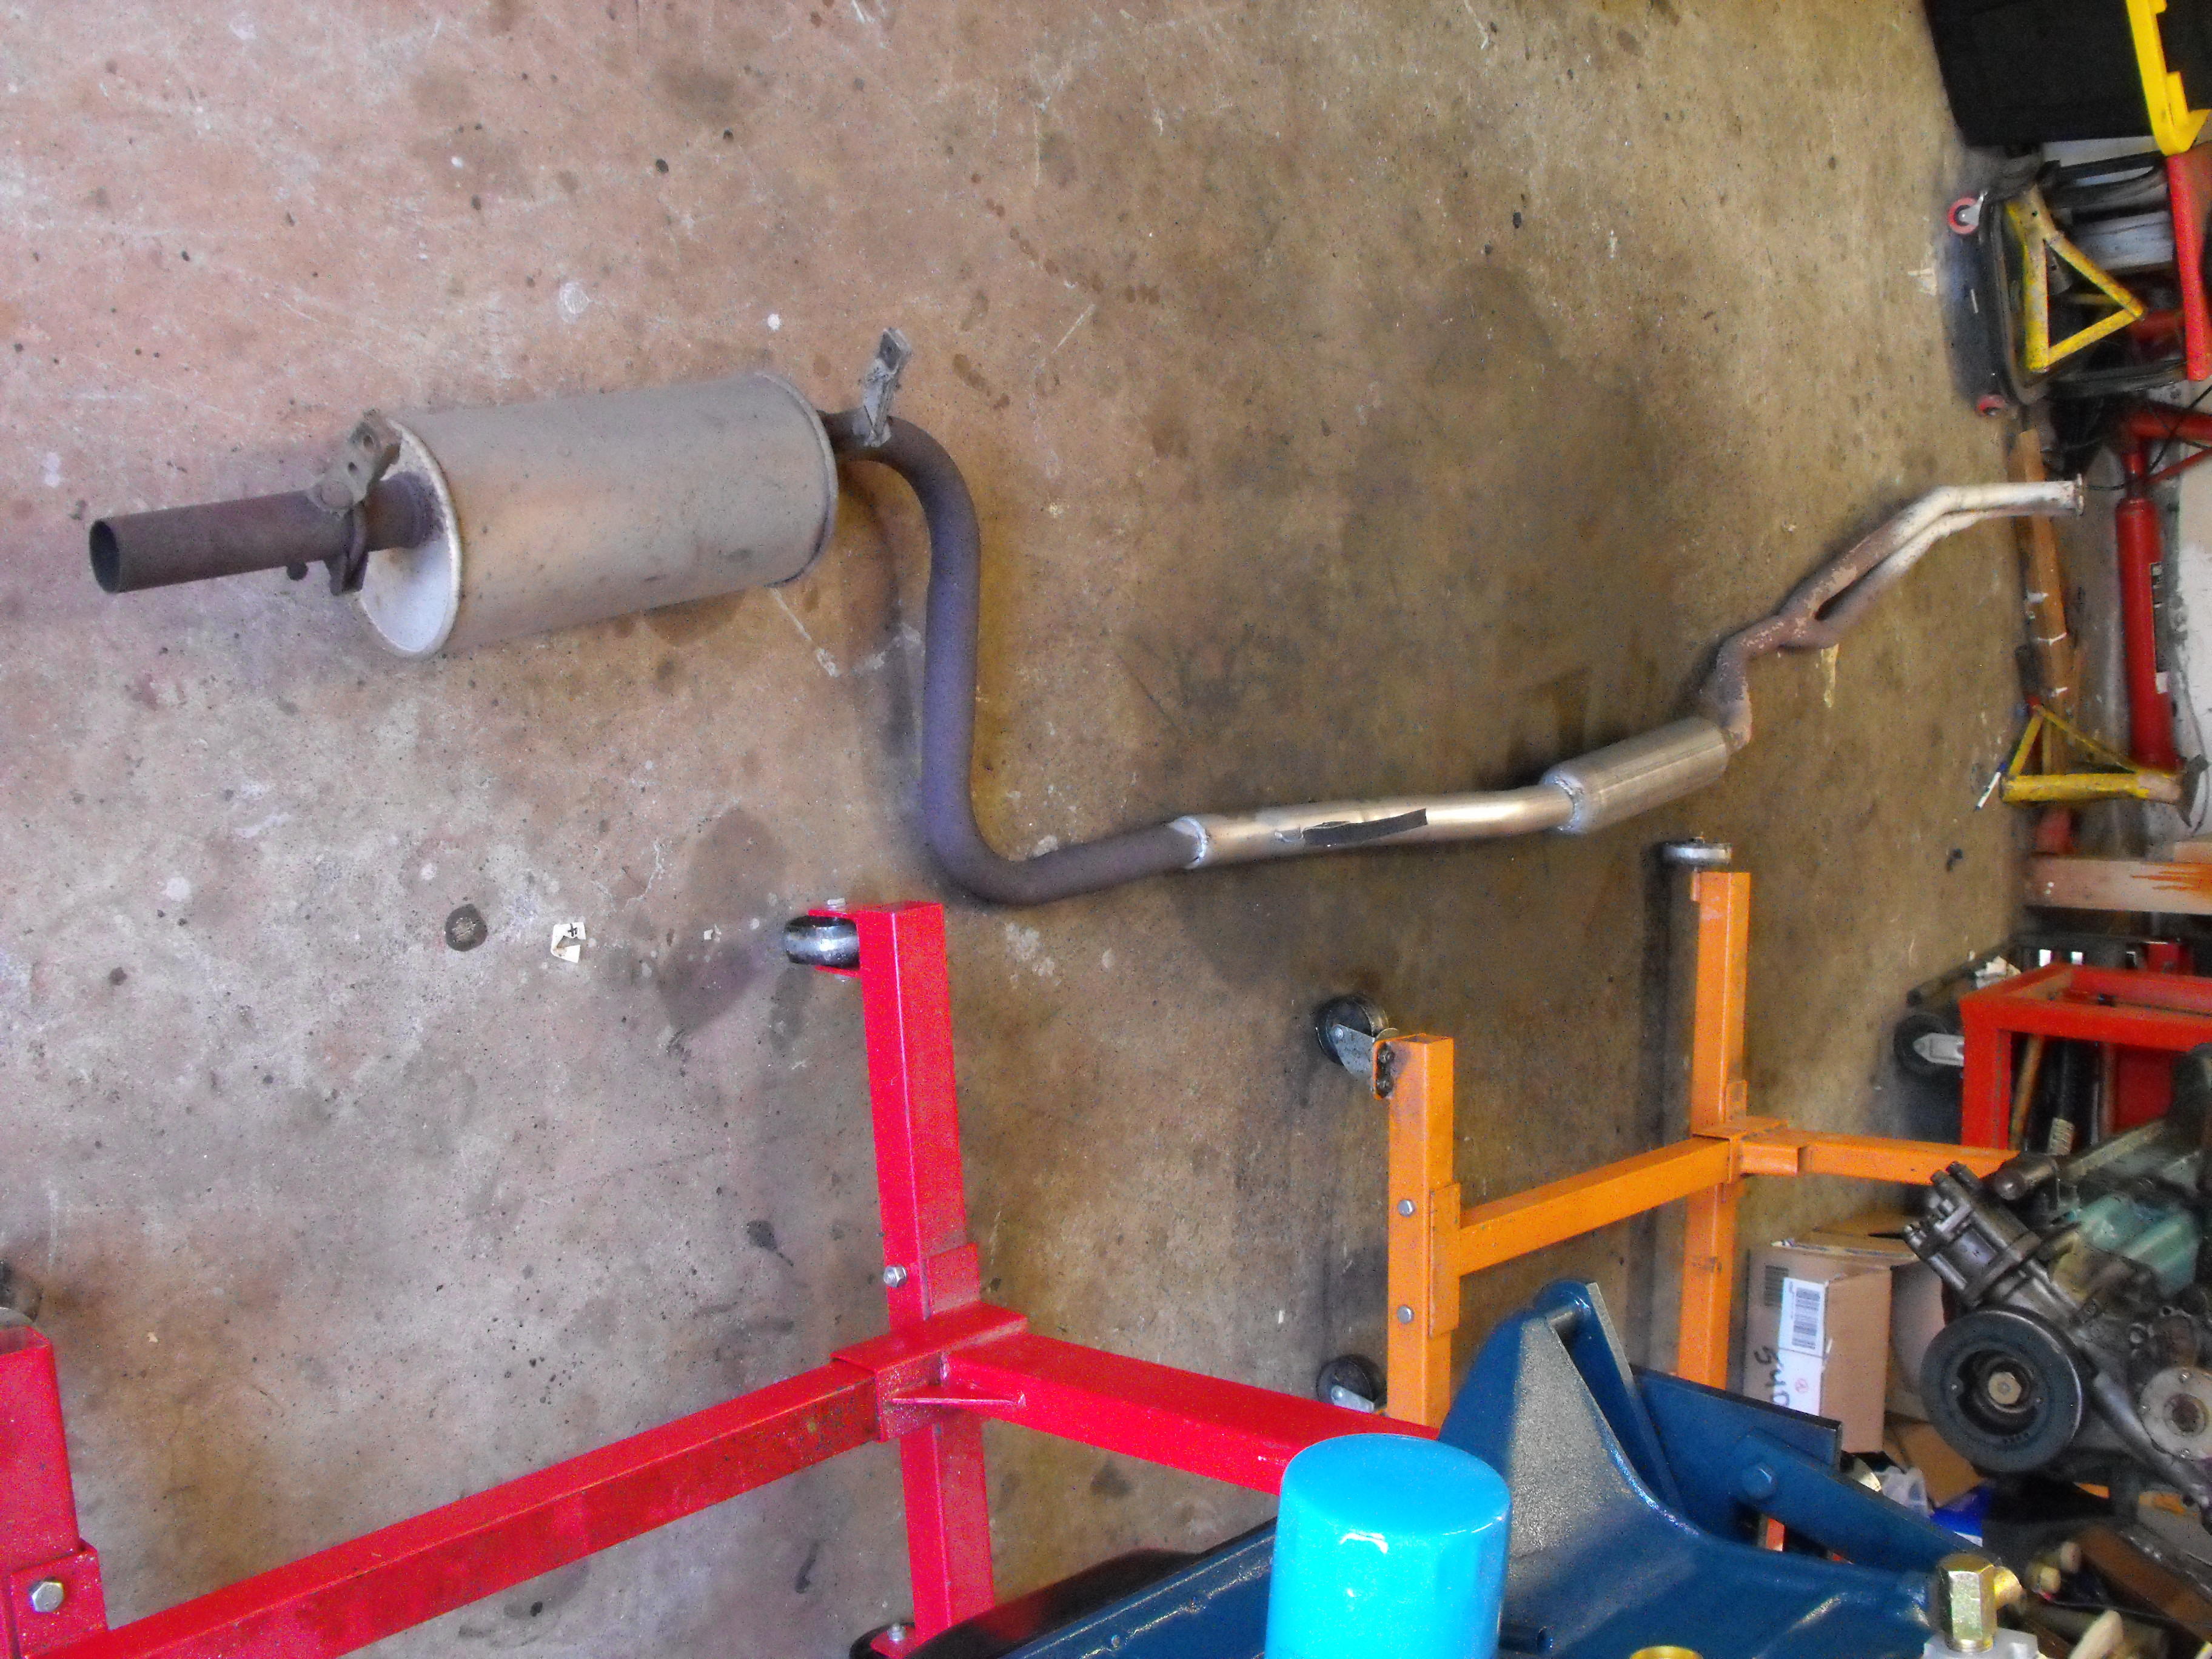
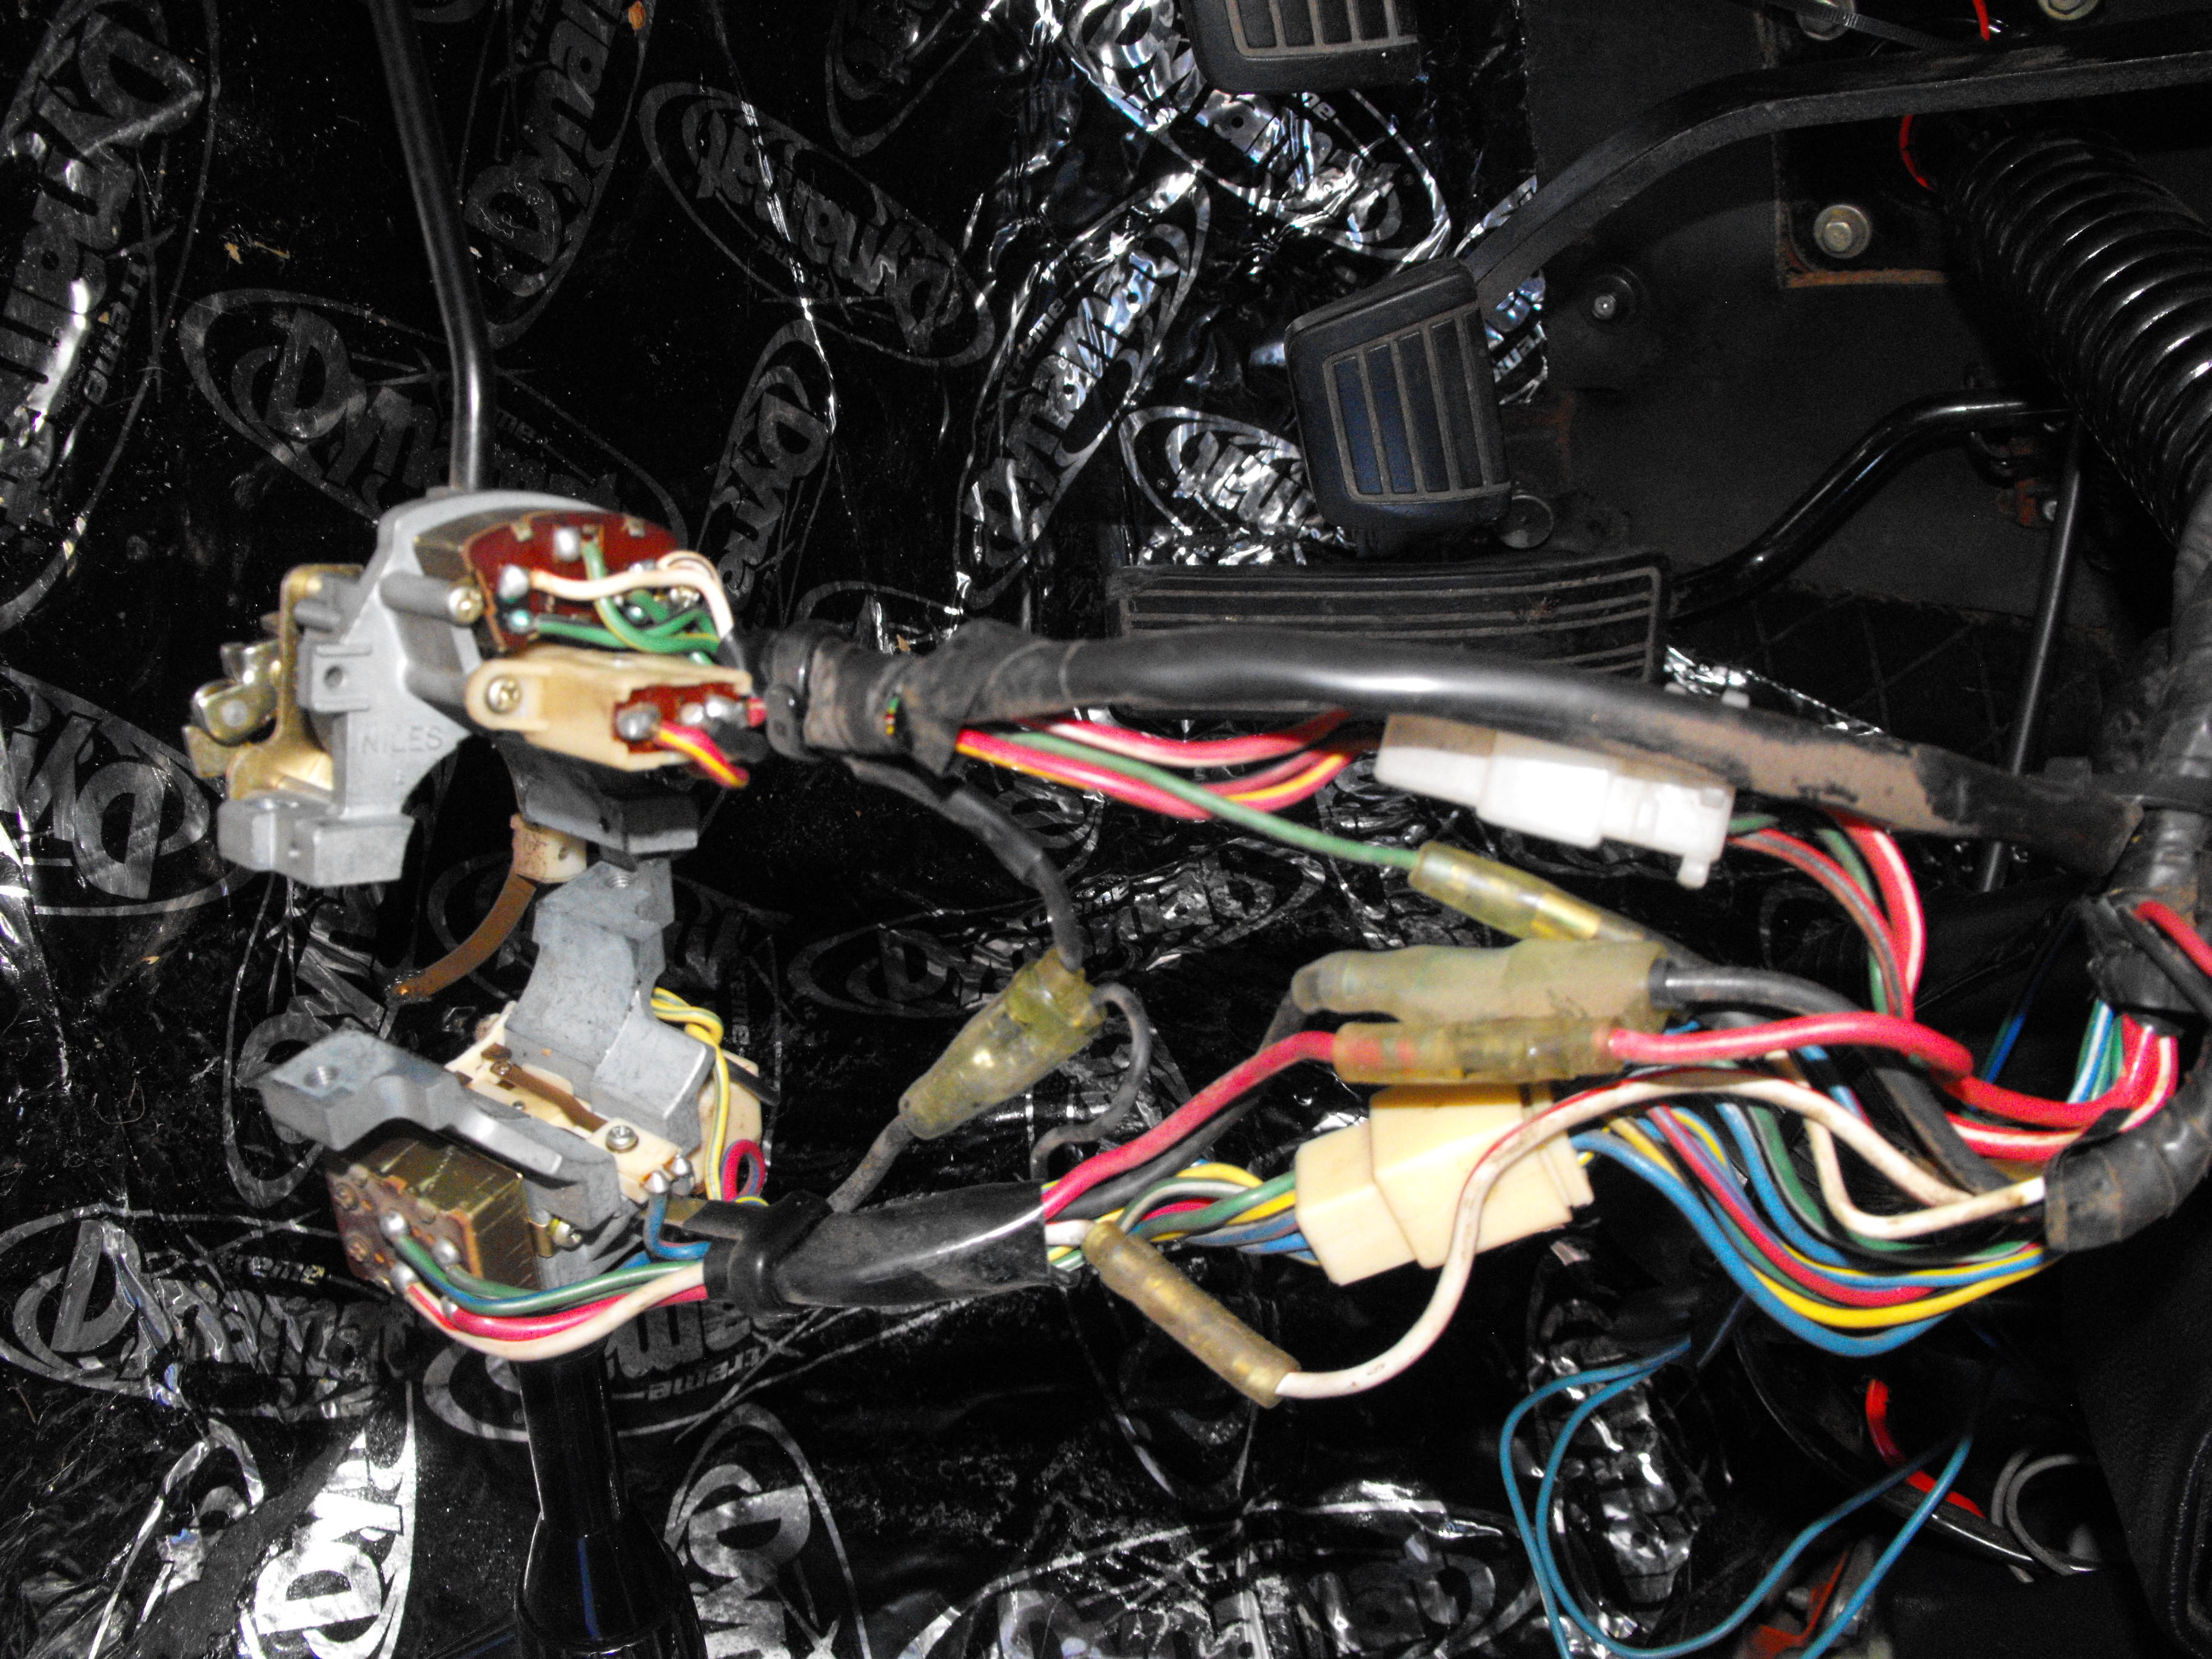
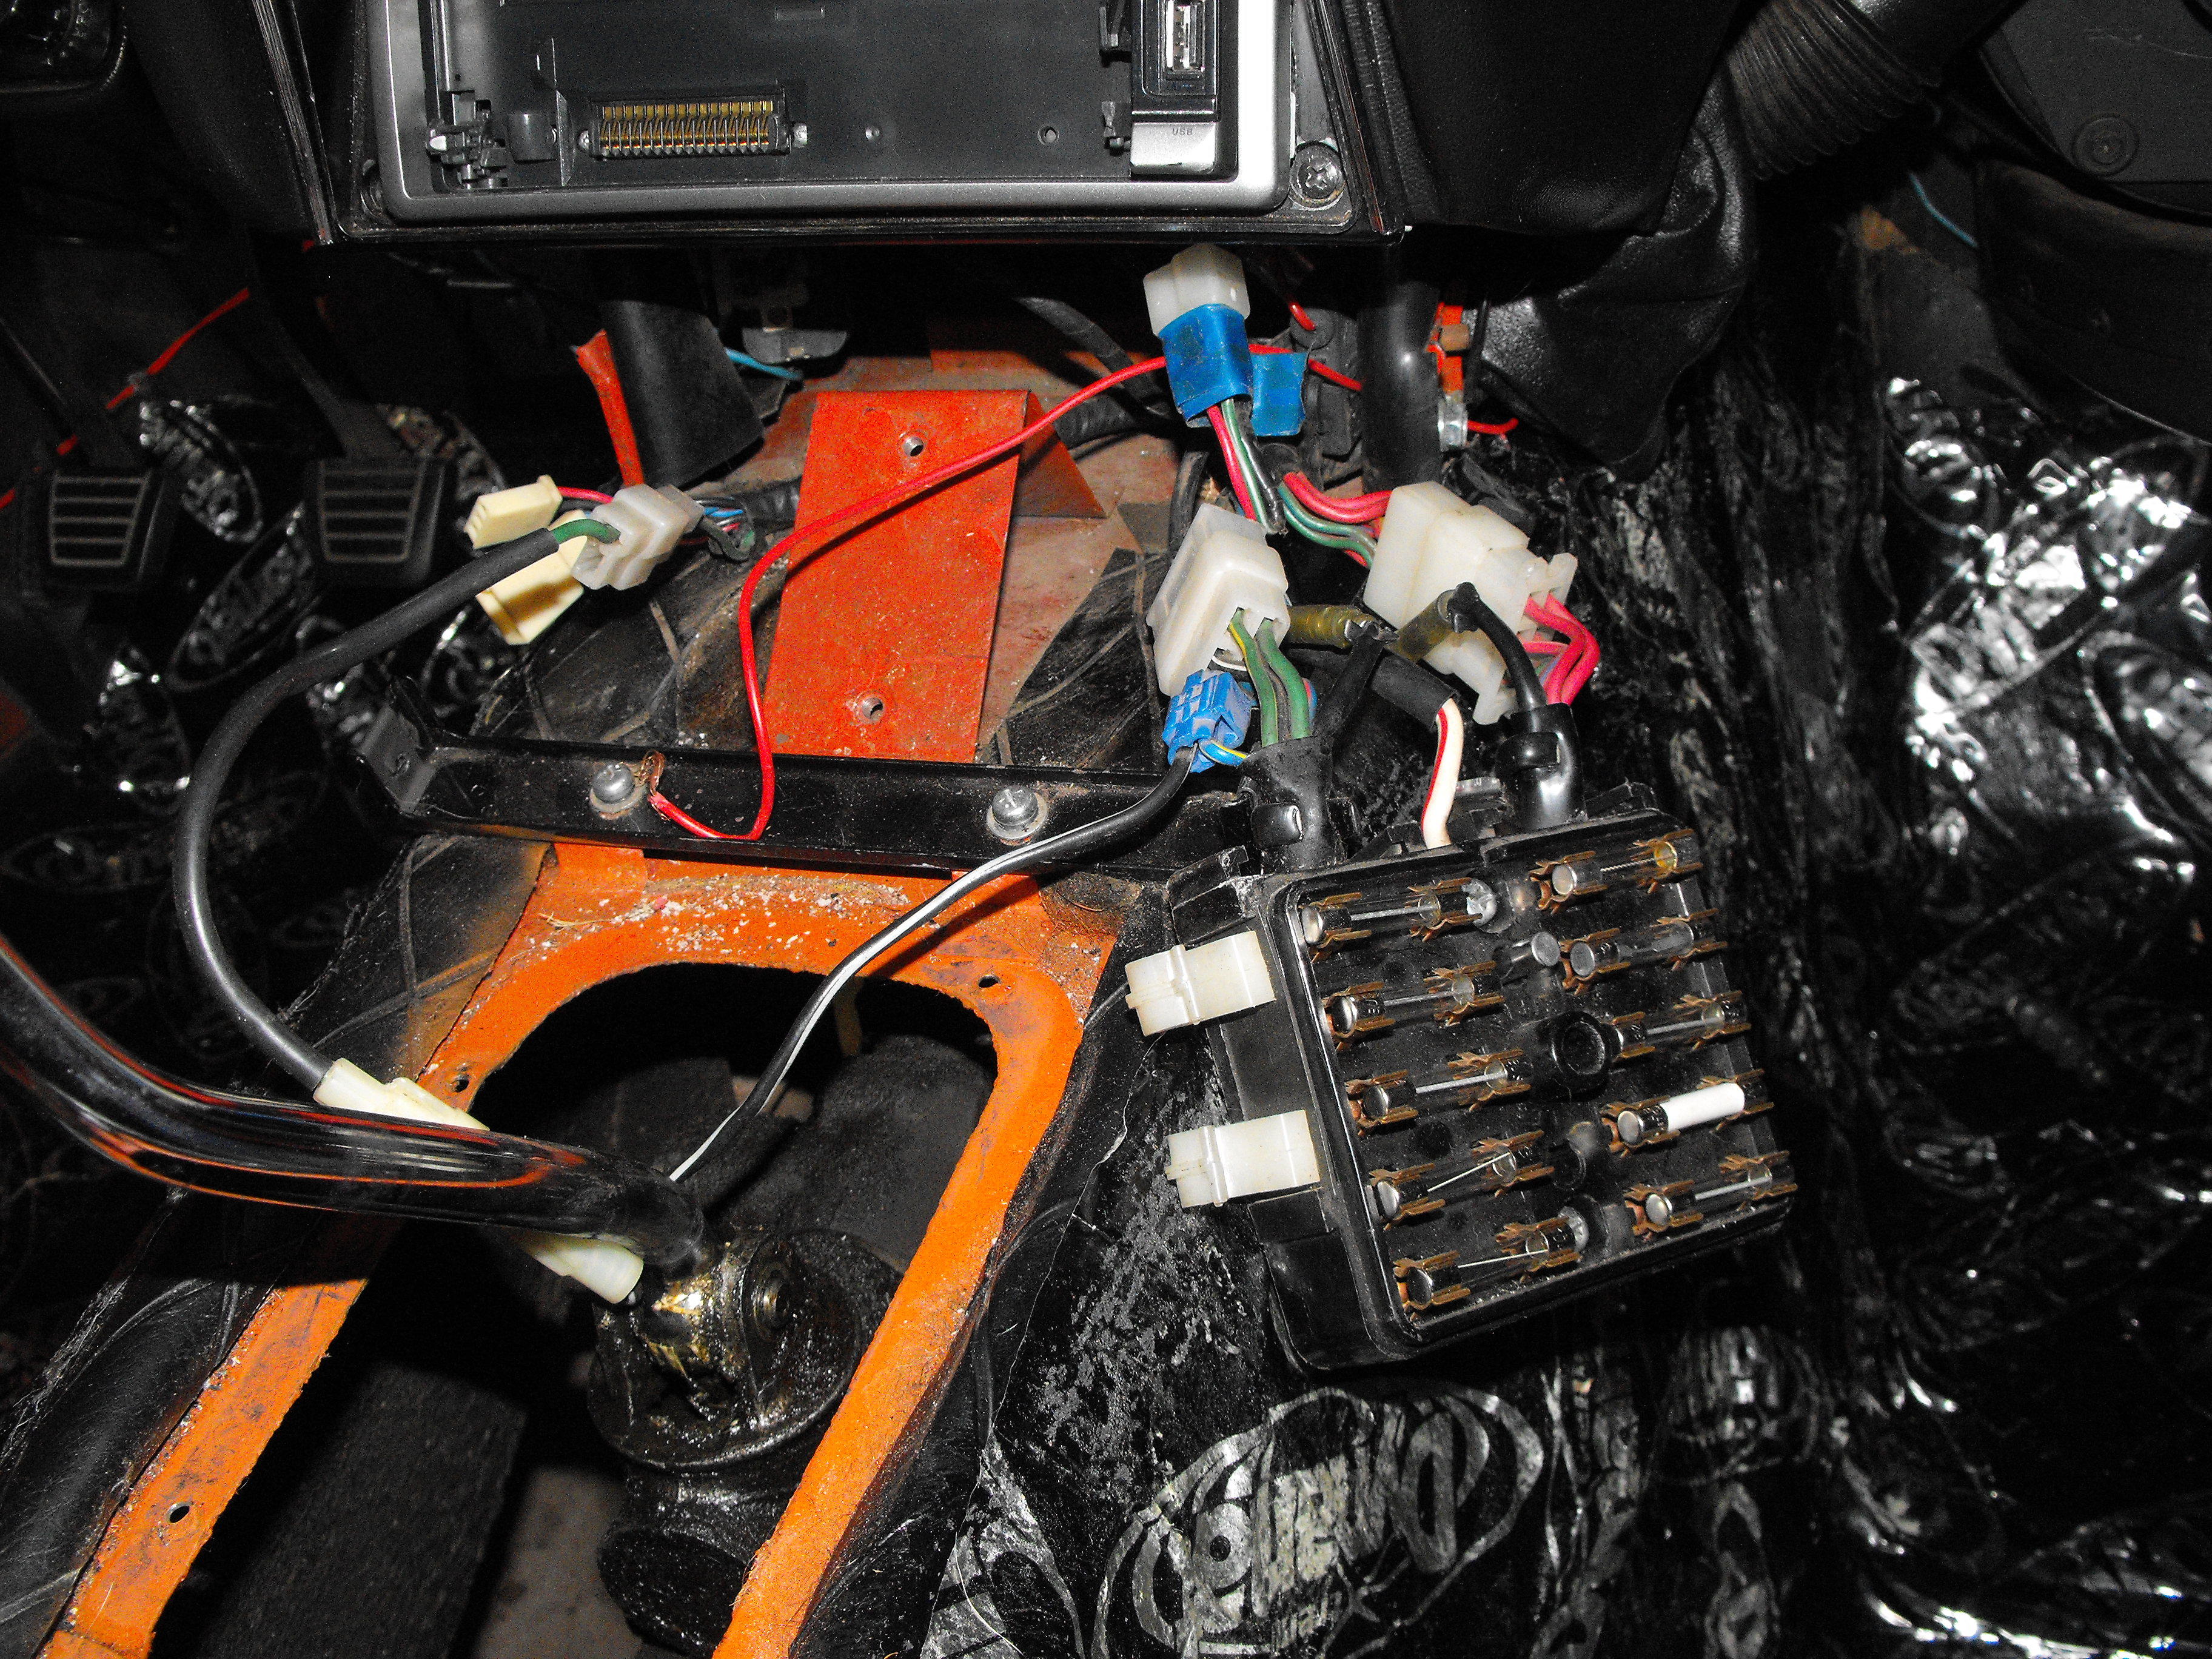
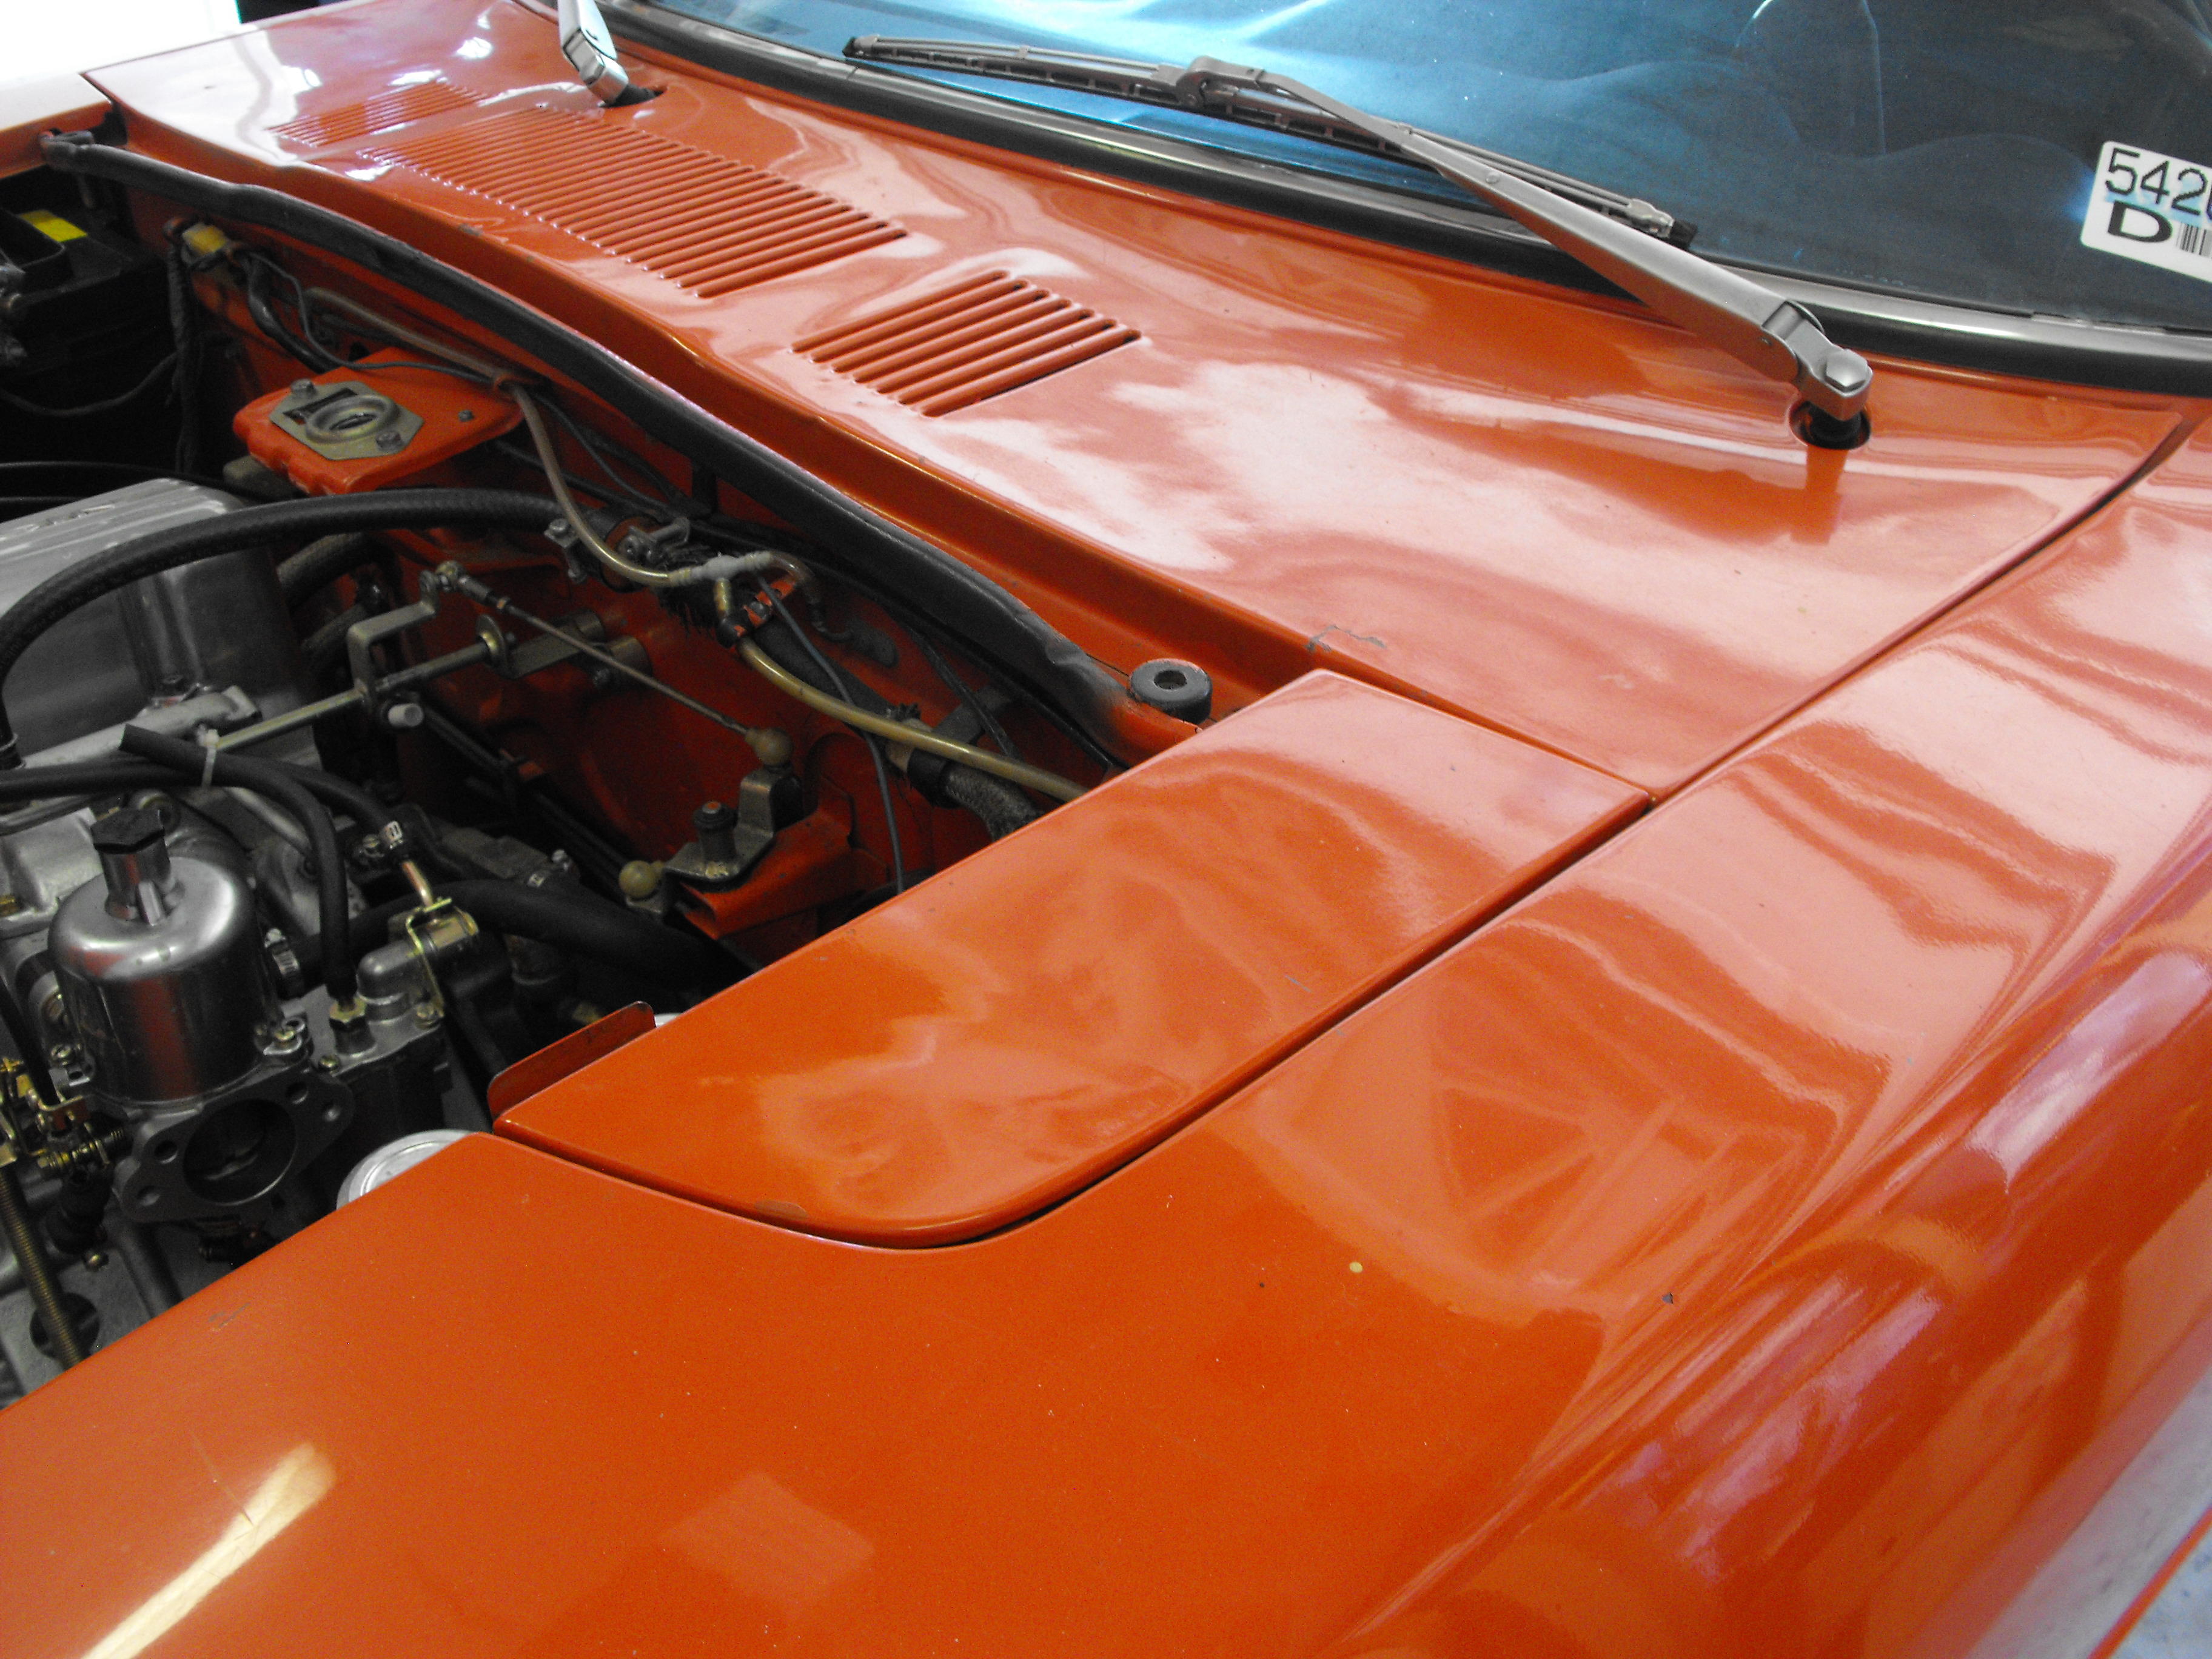
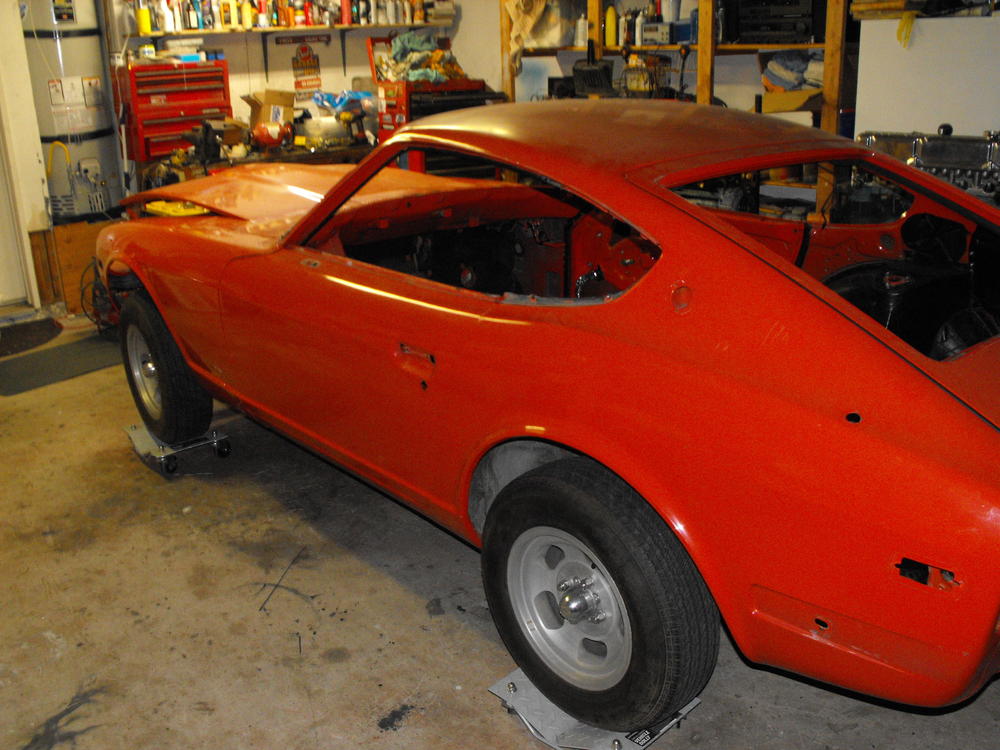
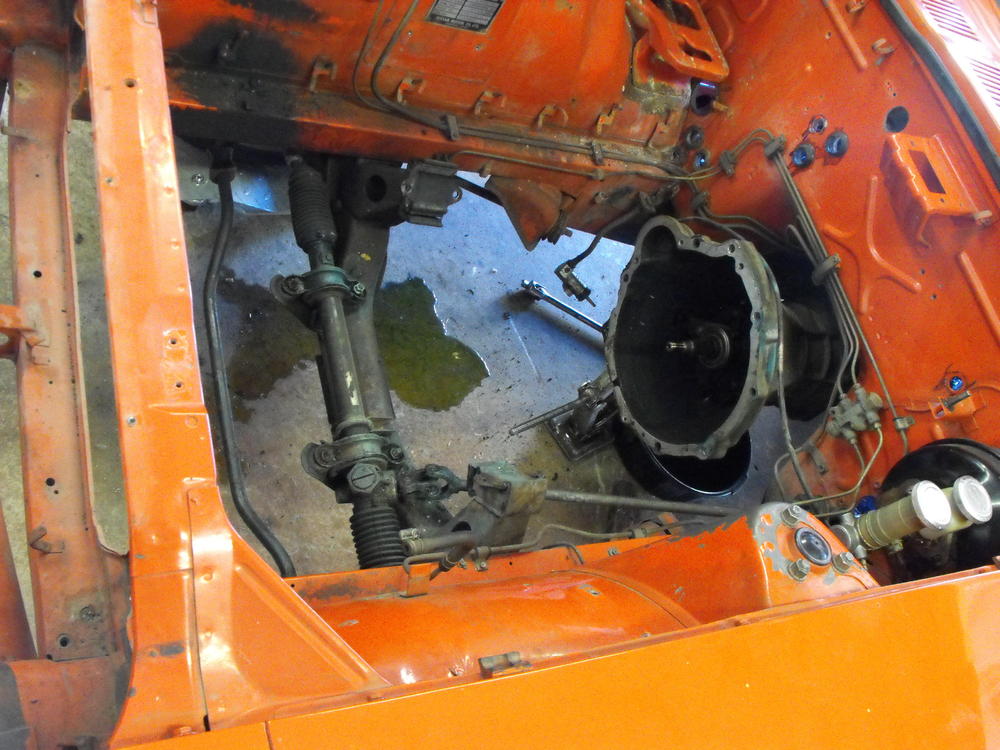
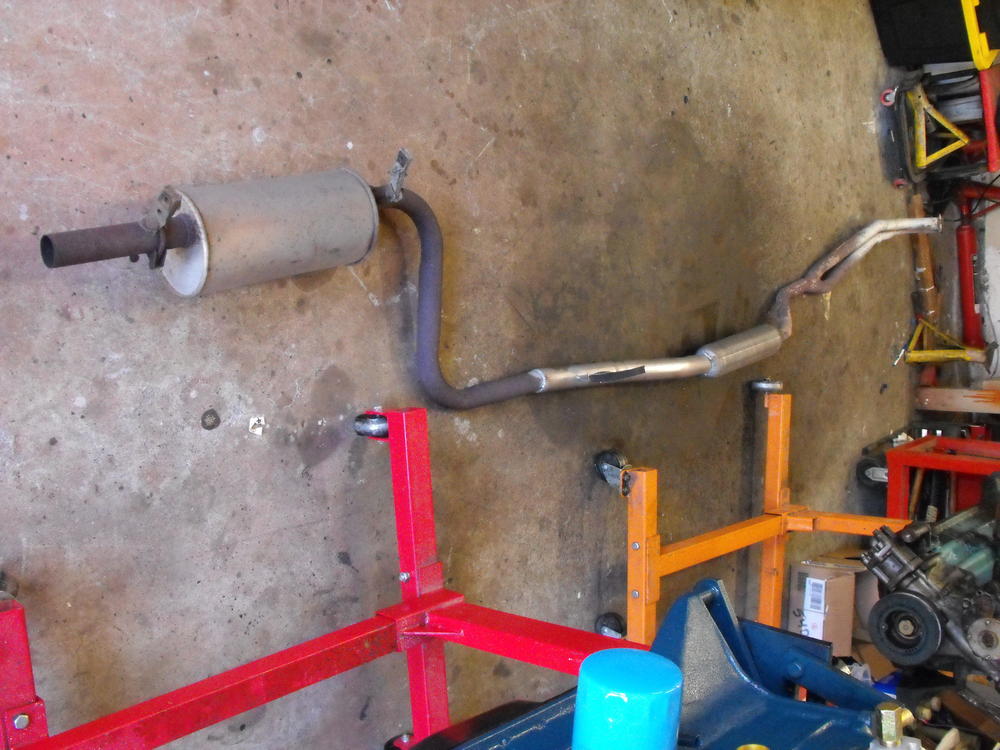
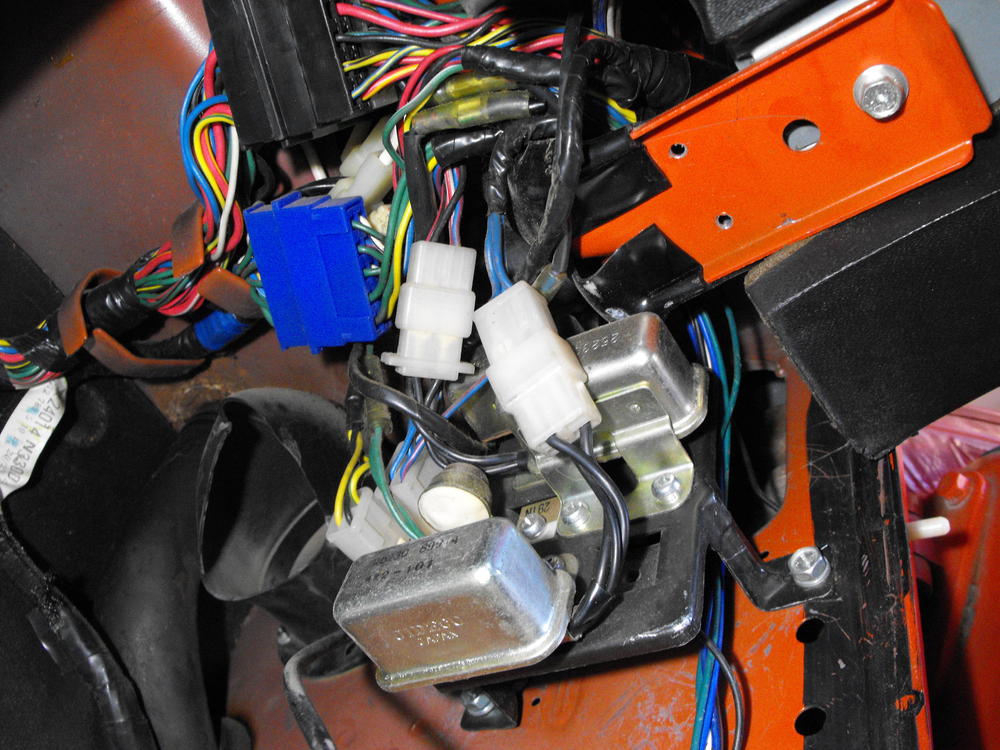
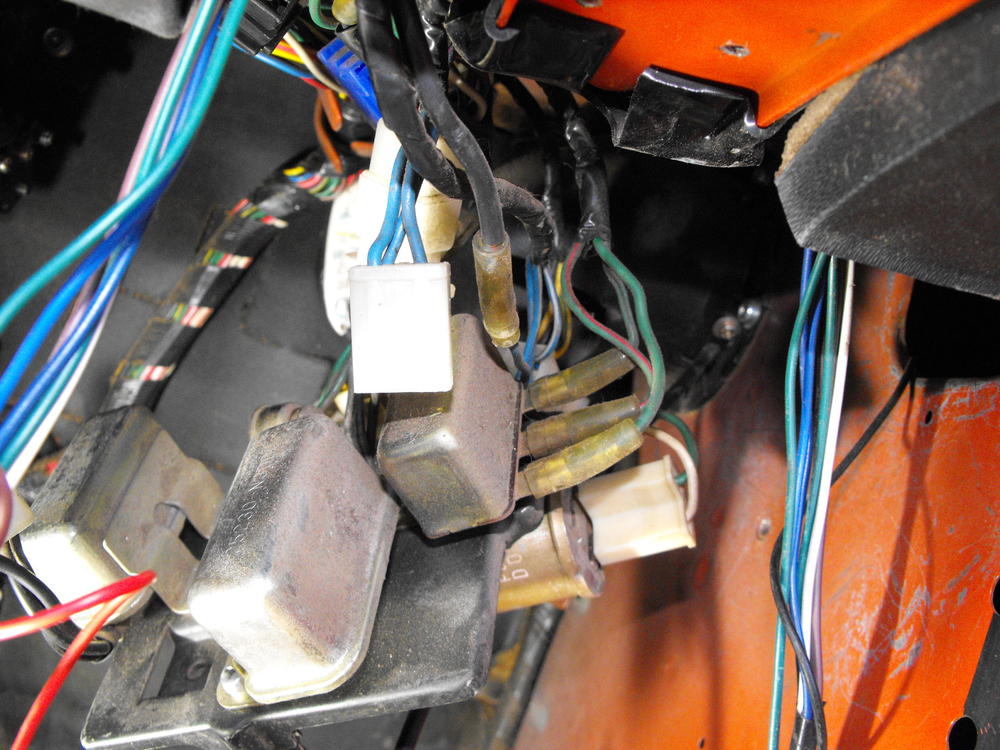
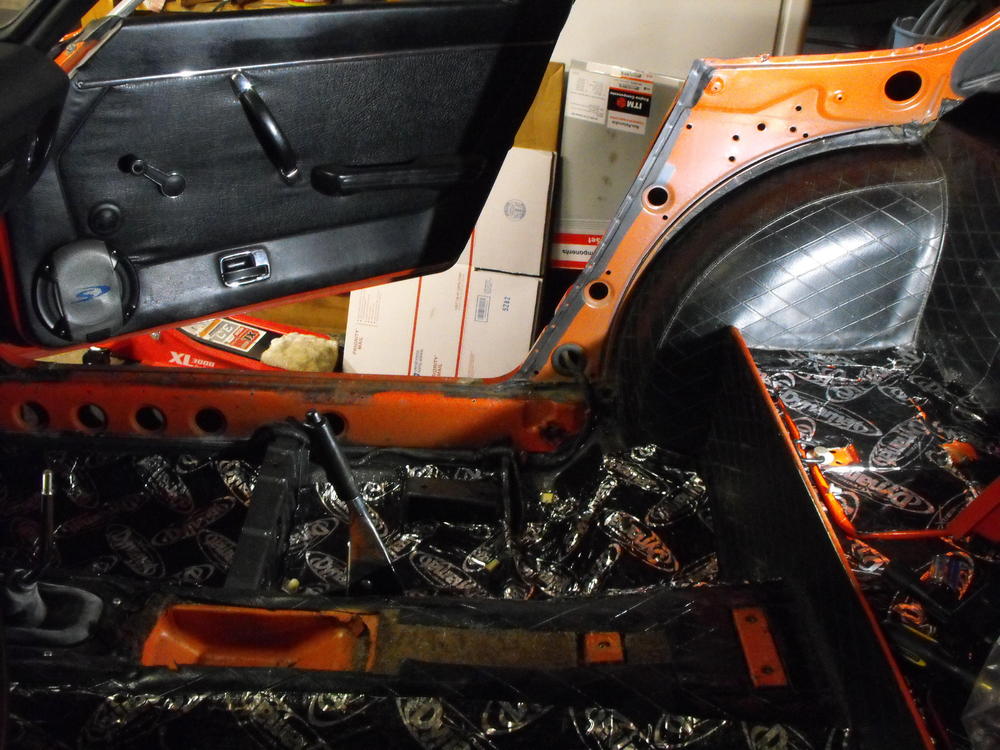
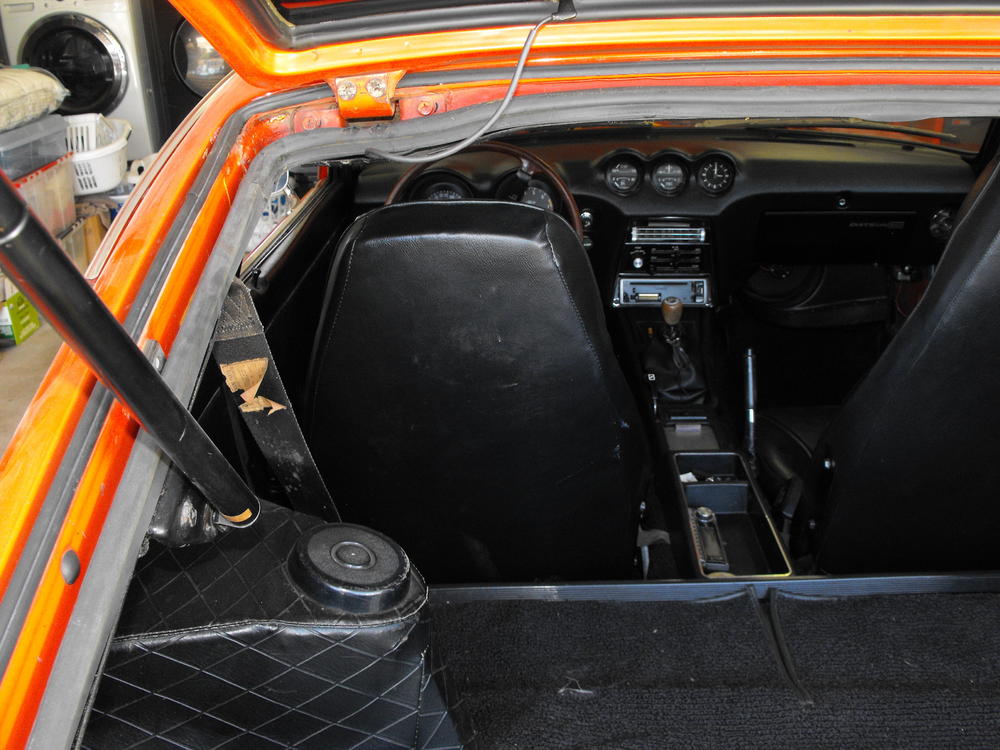
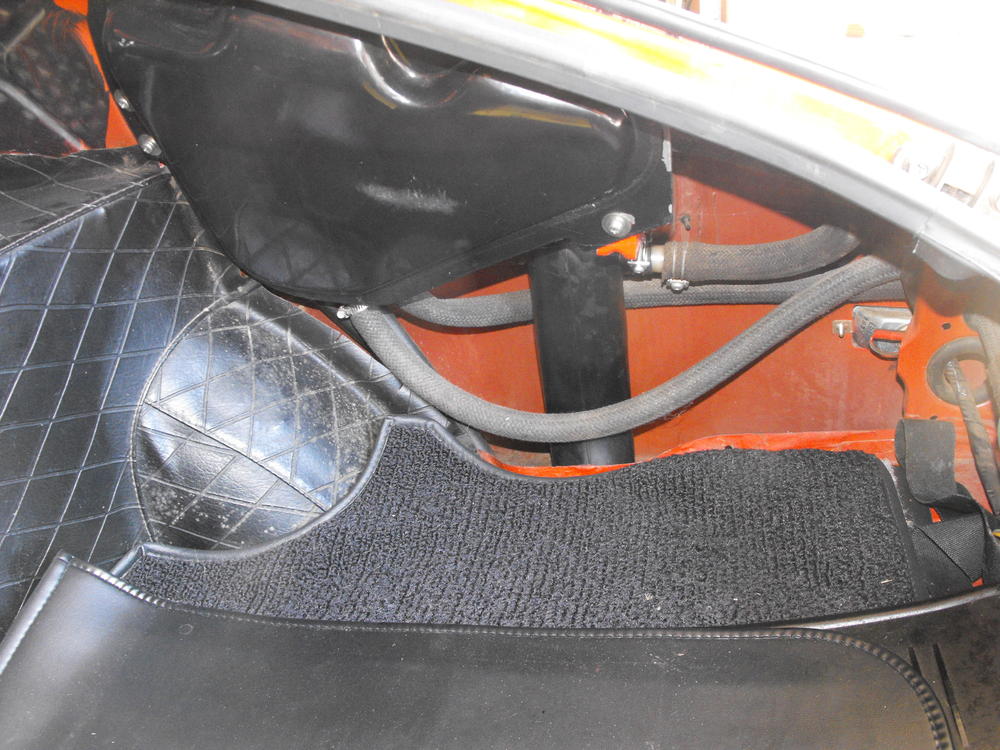
Continued disassembly. Got the Dash out and most of the interior out on Saturday. Got the motor, muffler and transmission out today and started the brake line removal. Took a lot of electrical pics. I removed the interior vent ducts and noticed that a small passenger had set up his home in the driver side vent. Nice spot, much better than under or in the seats. Looks like he was prepping for the cold Pennsylvania winters.


-
@Zaspen That is really a good question as there is more to plating than just sending the parts. 1) Typically rubber does fine and is not effected by the acids. 2) Plastic is a little more hit and miss. Some types seem to not be affected by the acids, others are affected. I notice that the plastic on the end of the carb linkages do not handle the chemicals so well. They come back very clean but seem to loose some of their shape. 3) The bigger problem is 'Cavities'. This is a big problem. The Vac advance would fall into this category. What happens is the liquid that is used in the processing gets into the cavities of these parts and does not get fully rinsed or evaporated from the cavities. Then, during shipping, as the box is manhandled and vibrated, the processing liquid comes out of the cavities and stains the other parts in the box. The cavity parts also corrode very quickly because this liquid is still inside. So now, I send the cavity parts for plating separately from the regular parts. Cavity parts get their own separate shipping bag with instructions to dry longer and ship separately (in bags) from the standard nuts and fasteners. 4) Also, on the last vacuum advance I sent in (without special instructions) it came back with the internals very corroded. So, I ended up using a vacuum advance with light gold paint to somewhat mimic the gold zinc plate.
-
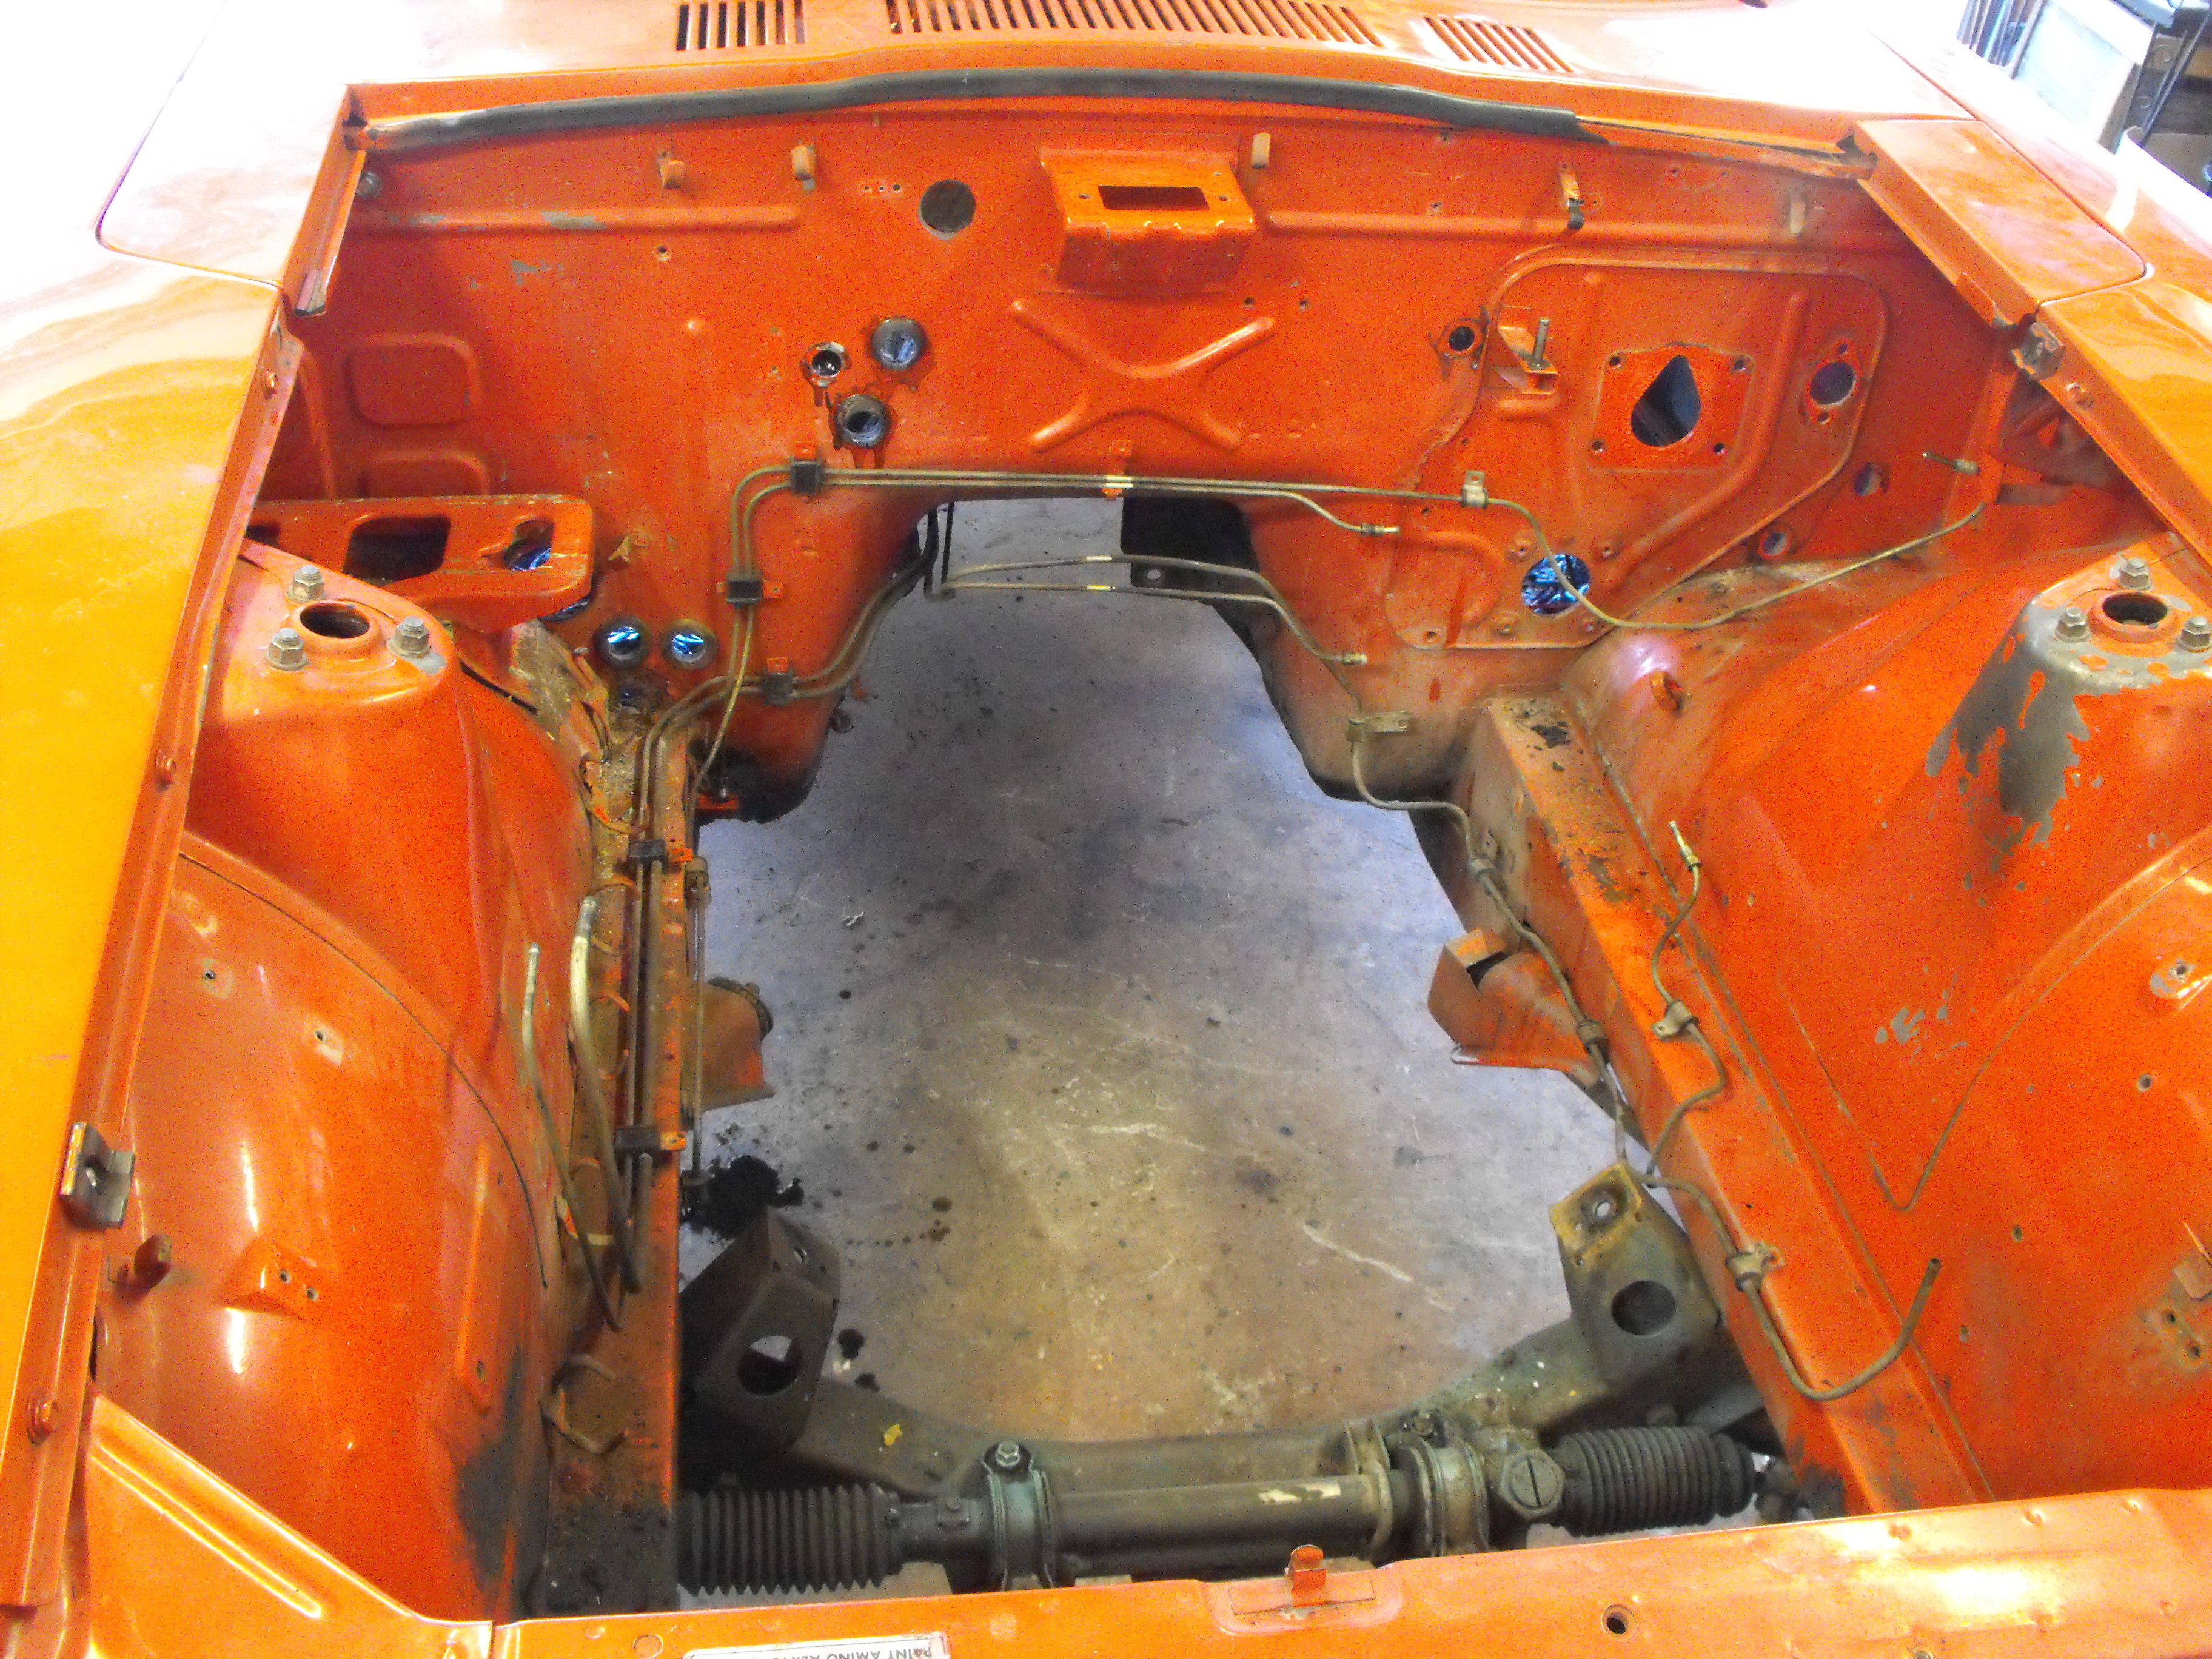
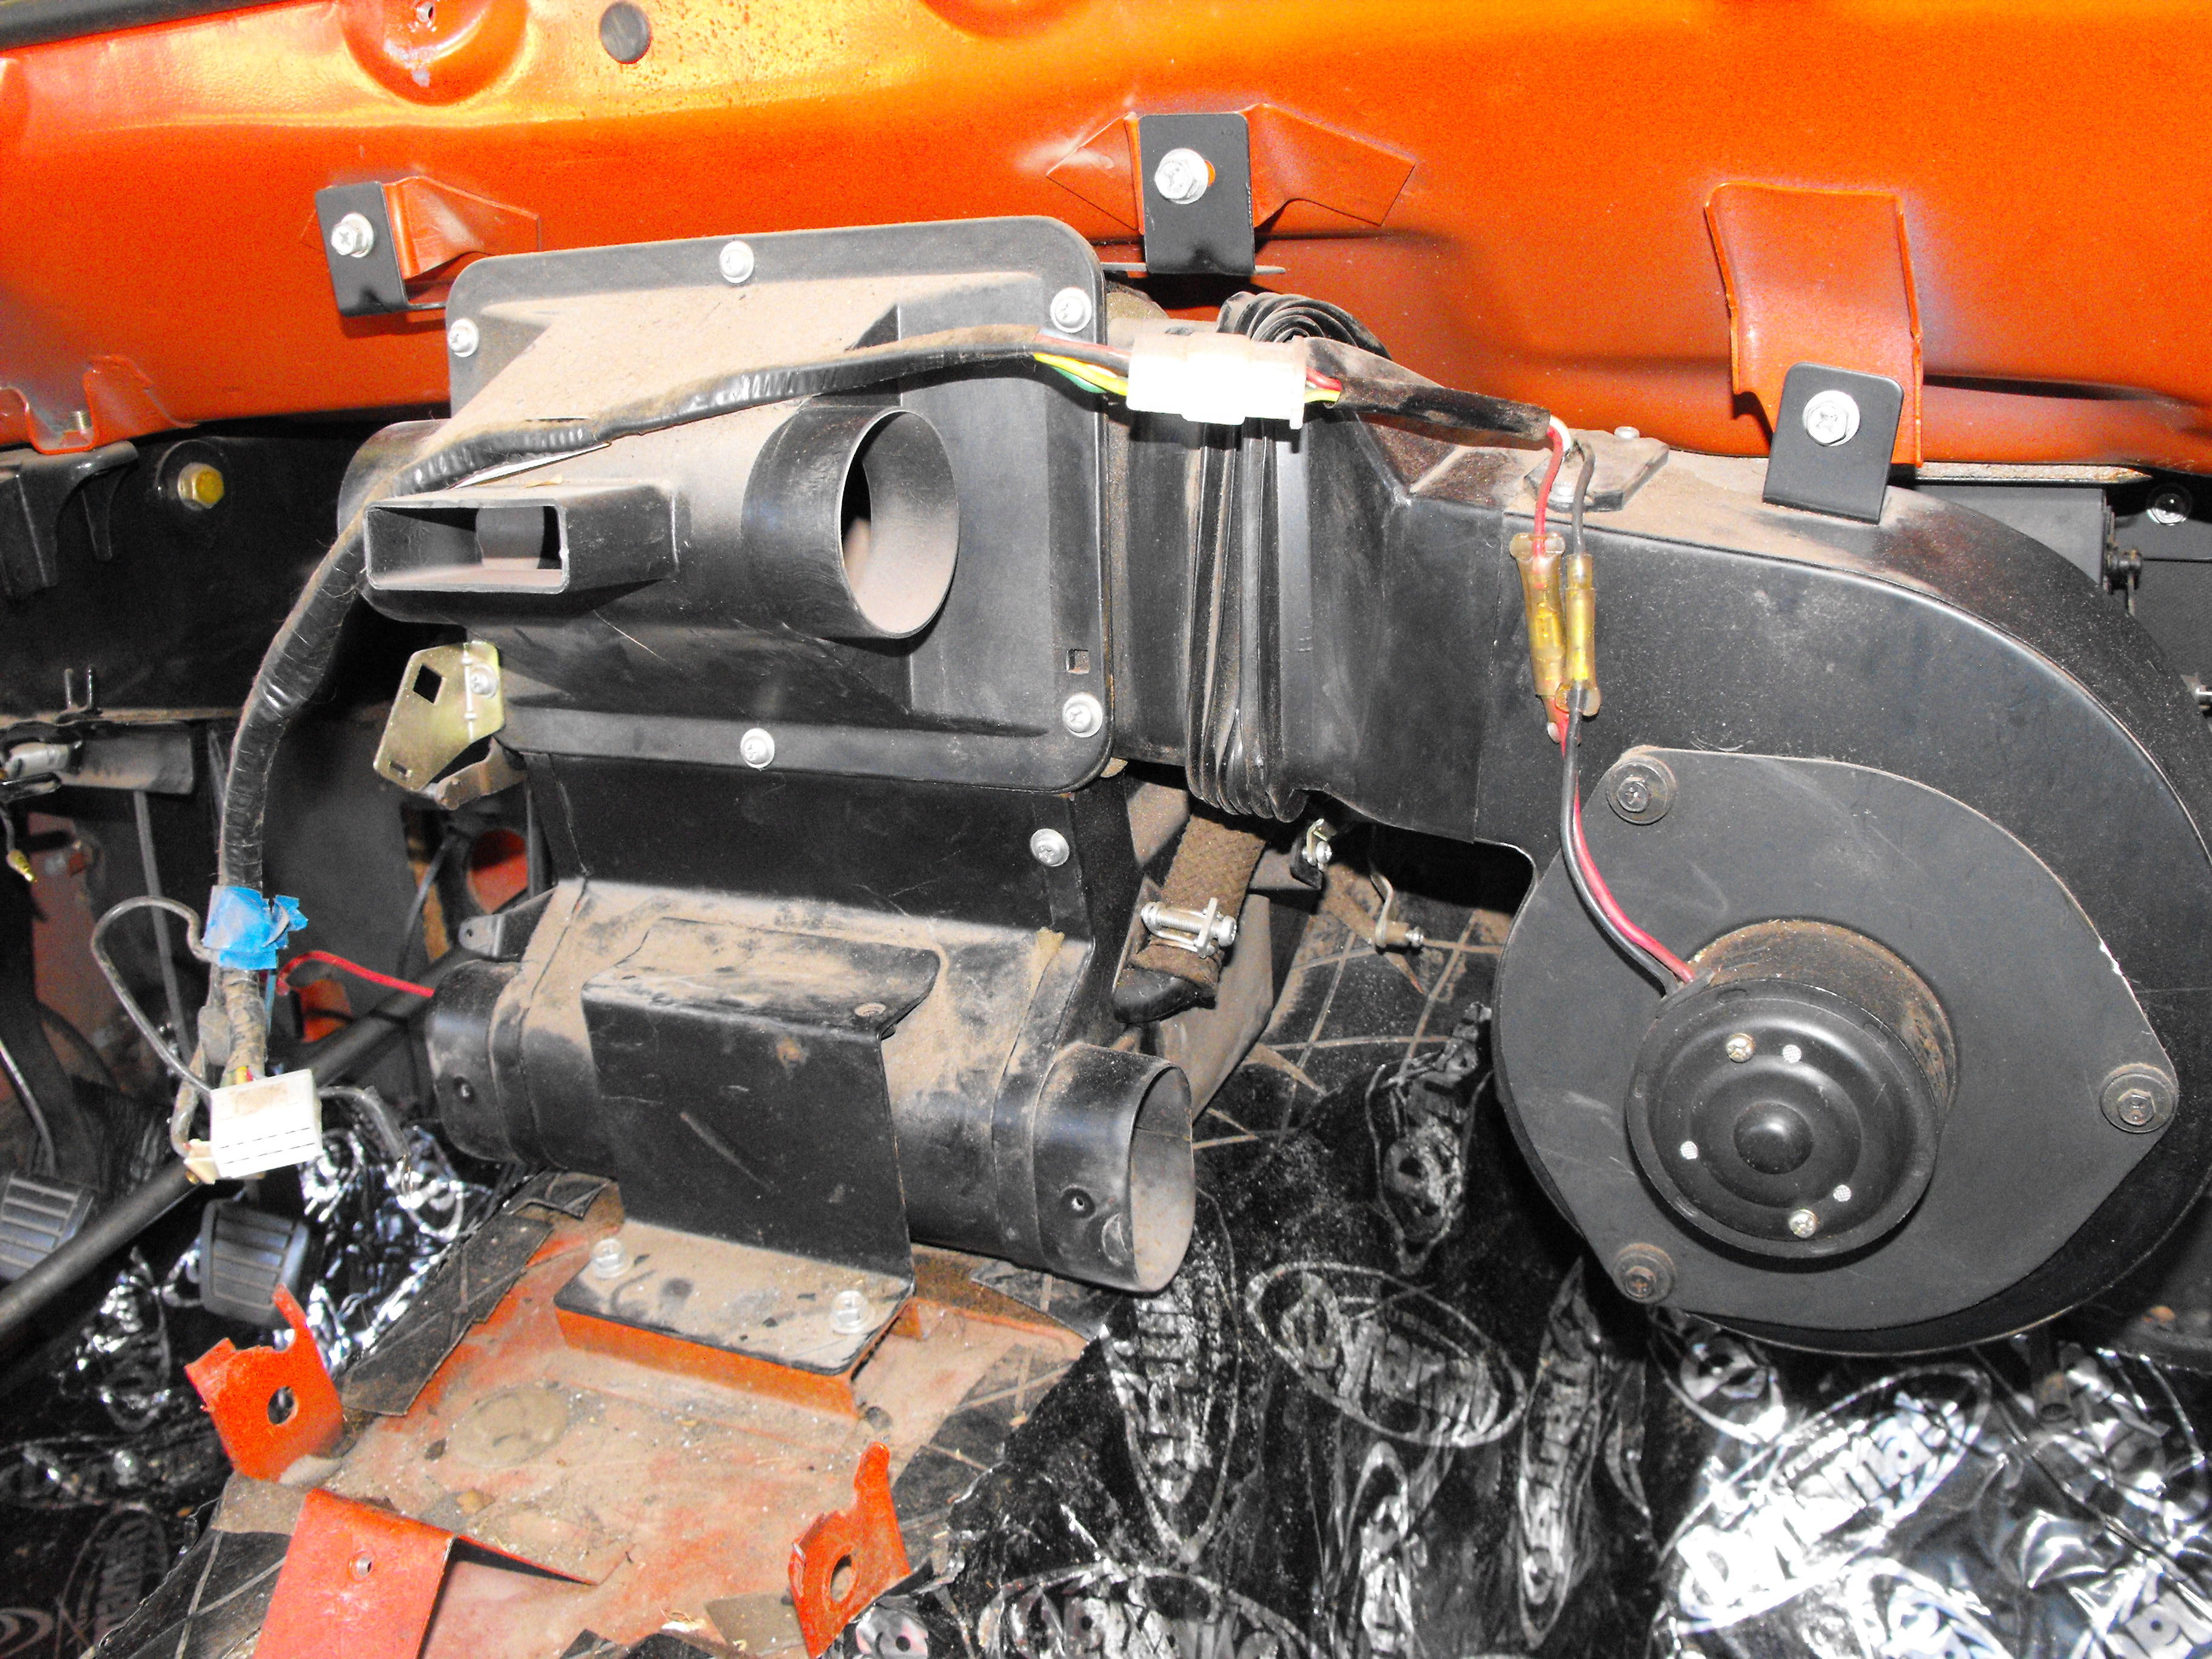
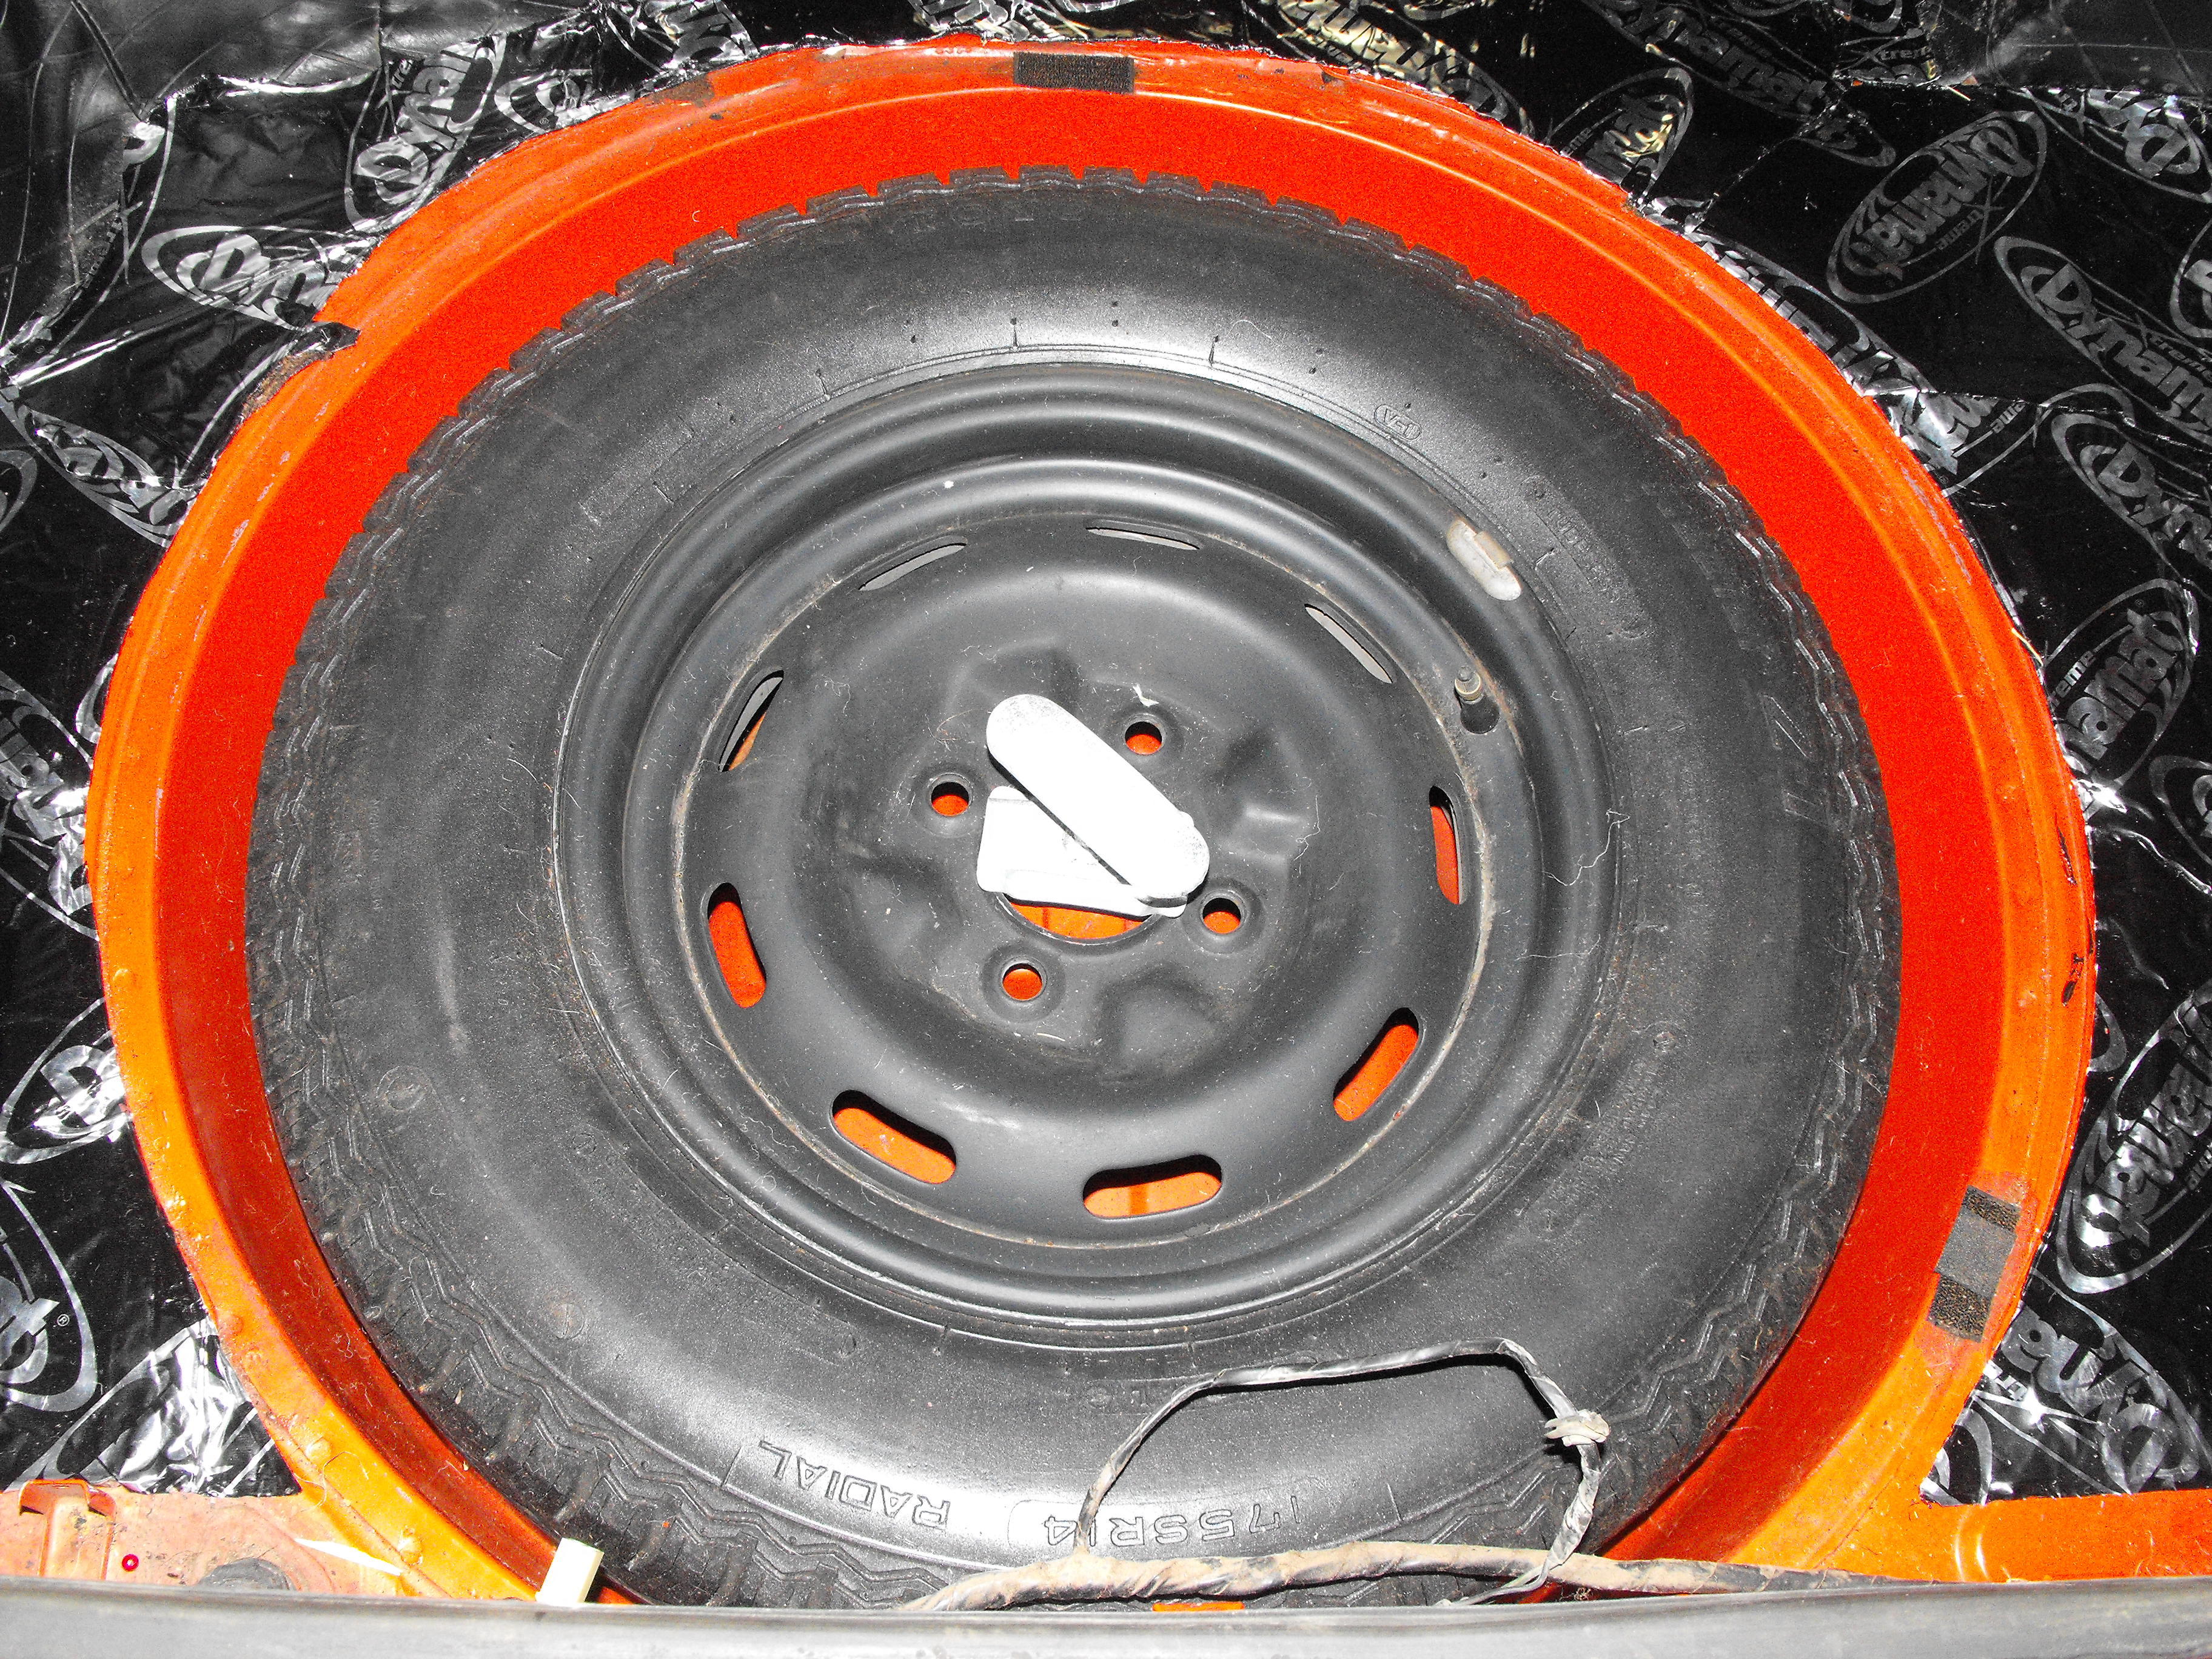
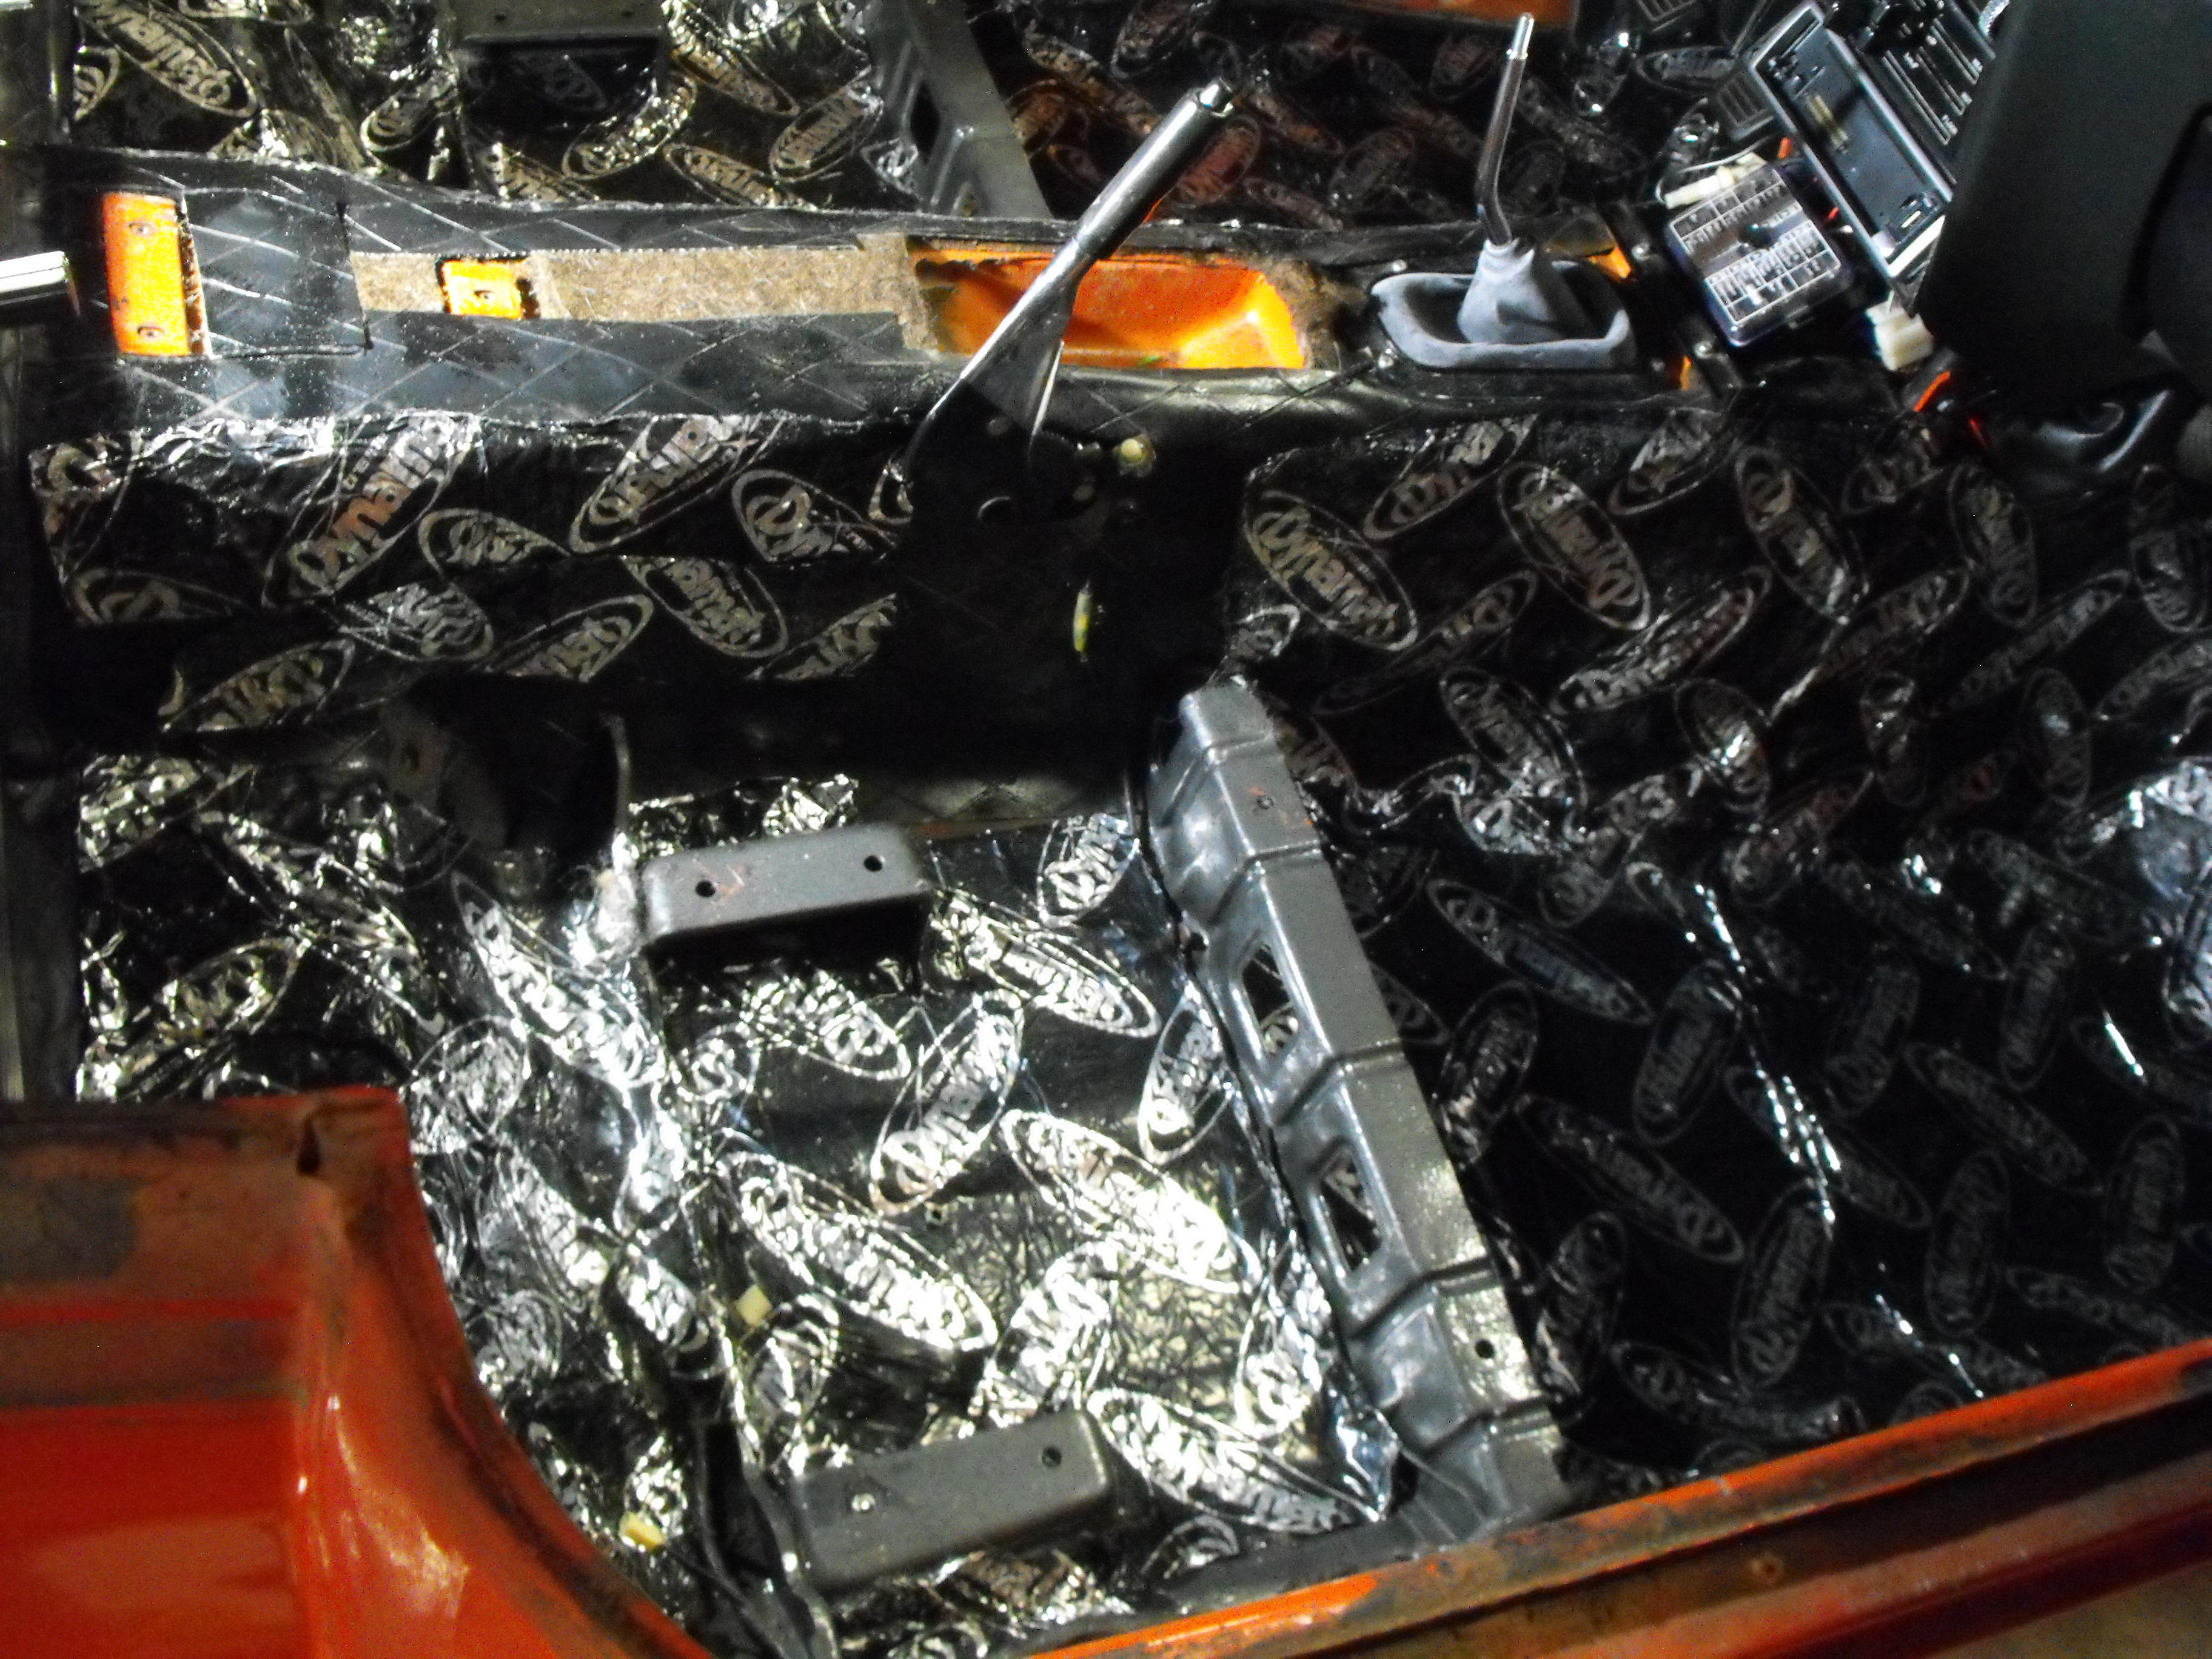
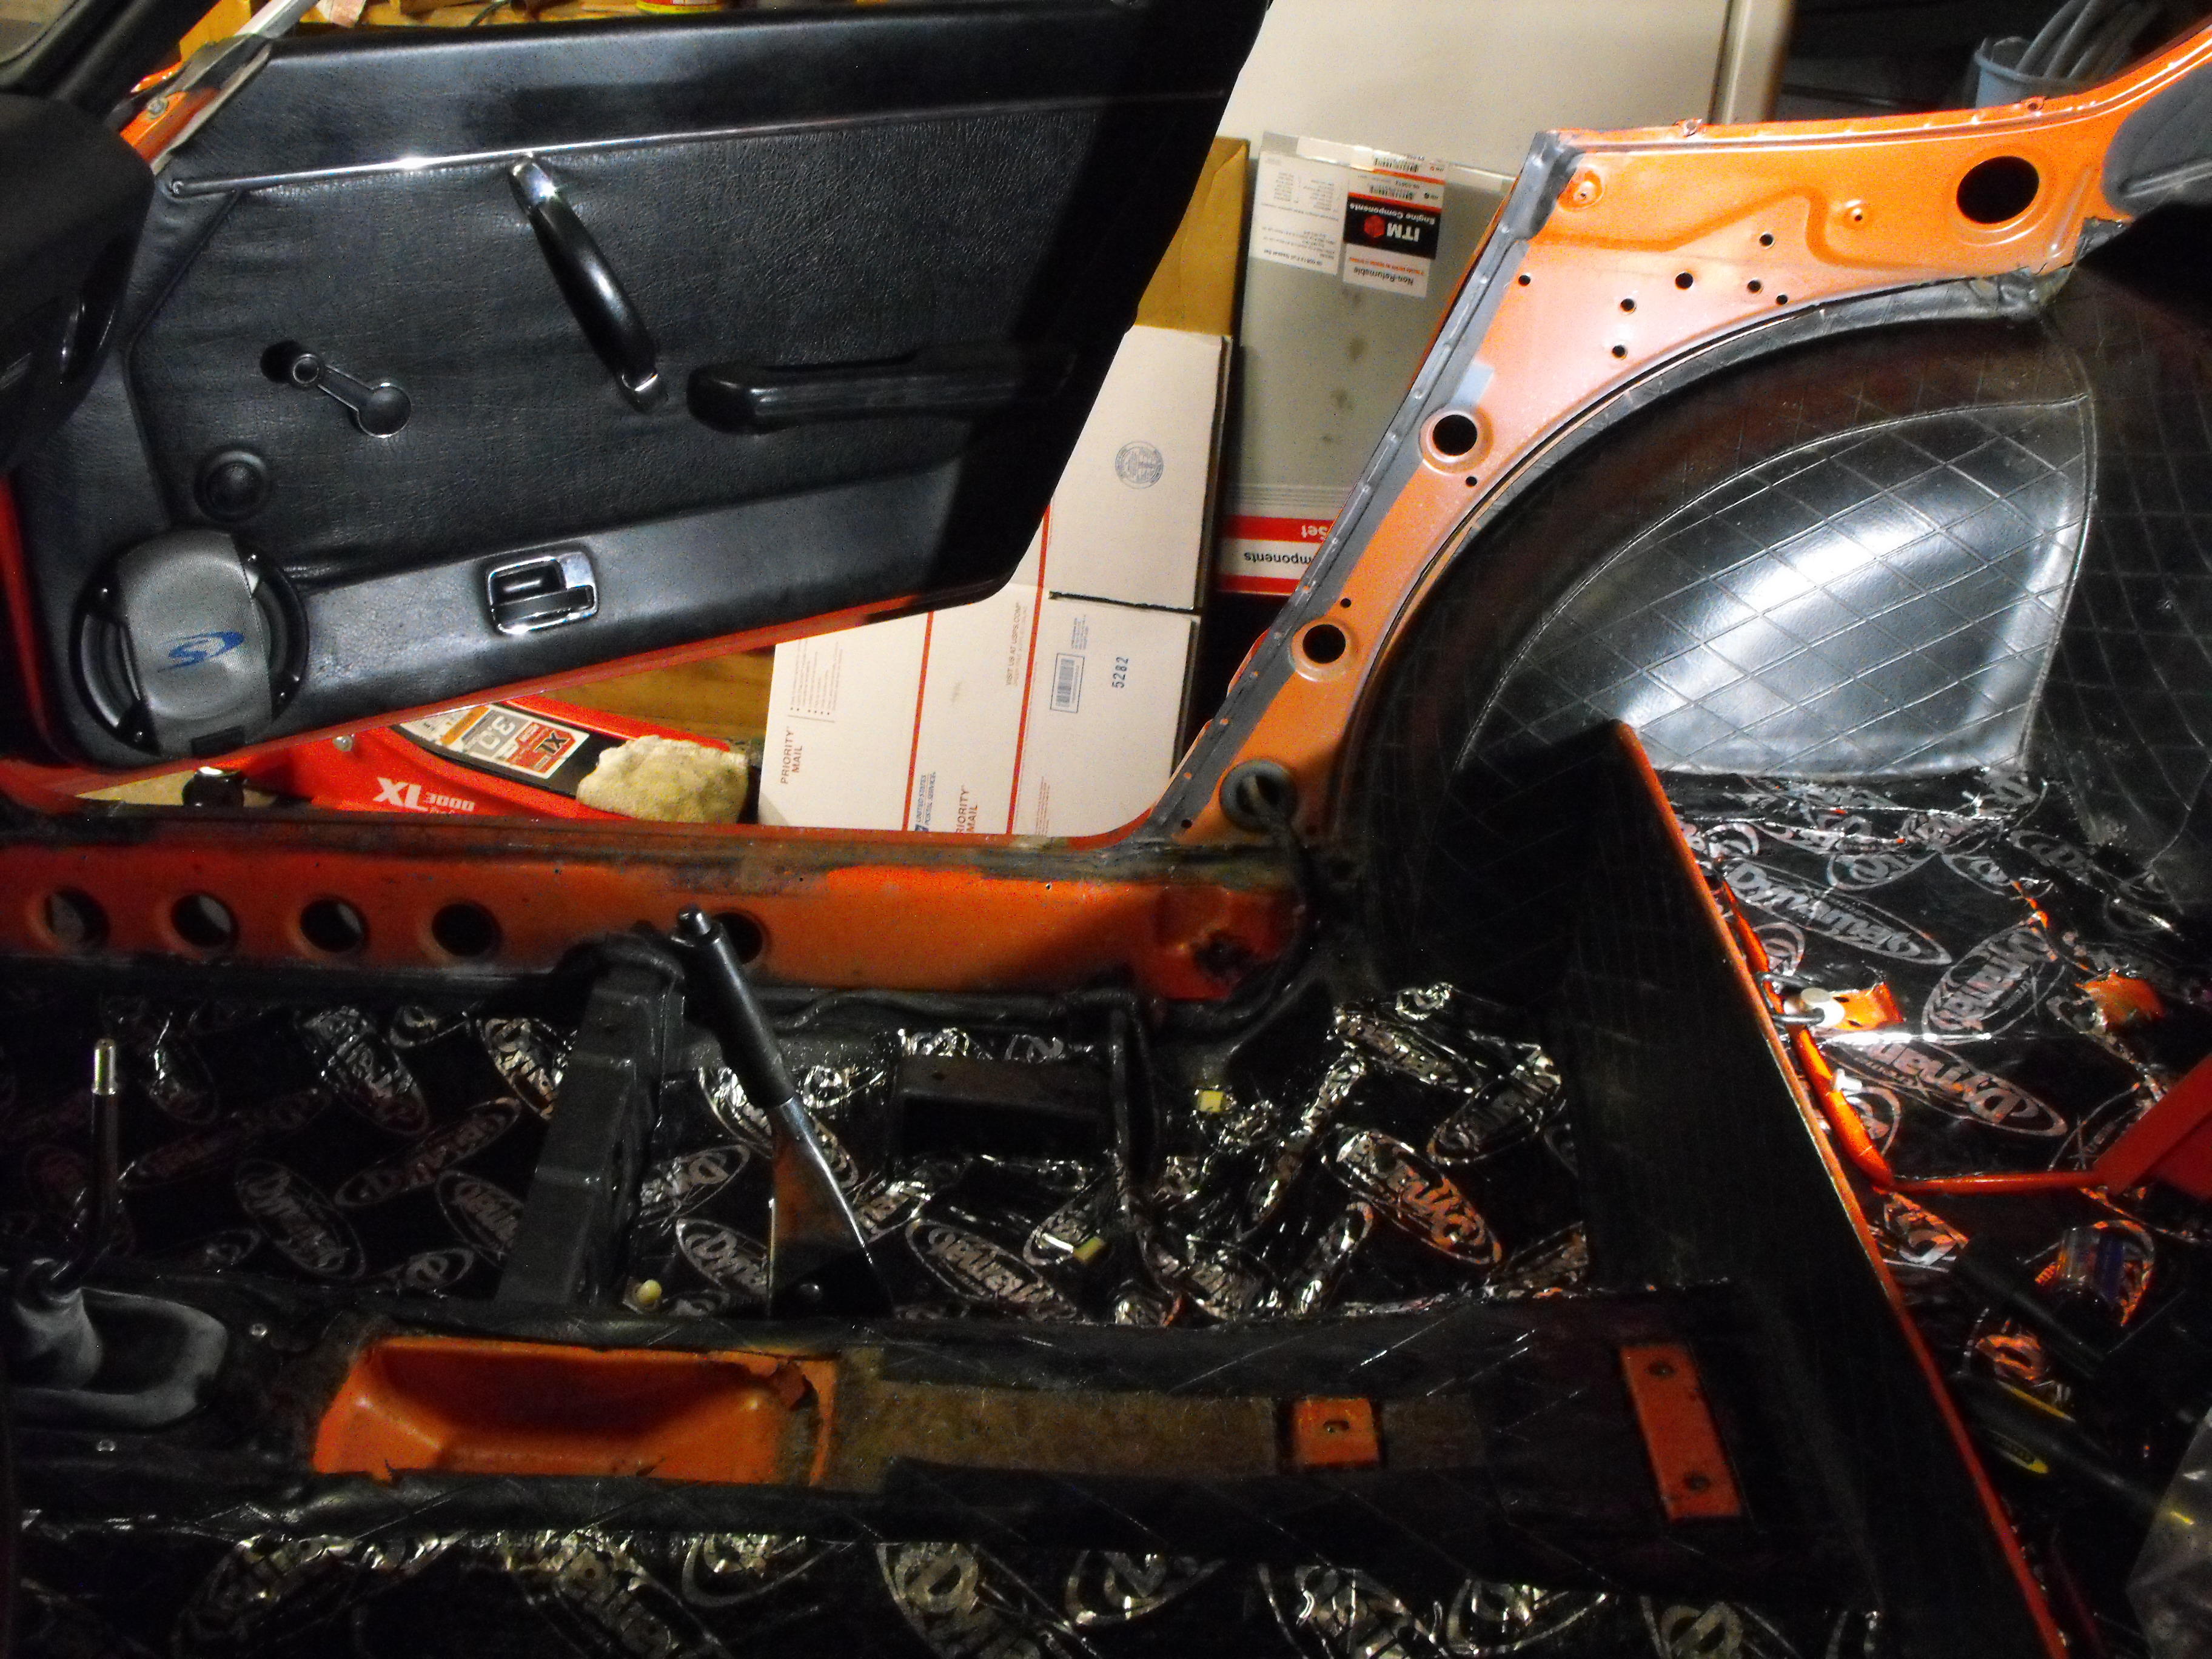
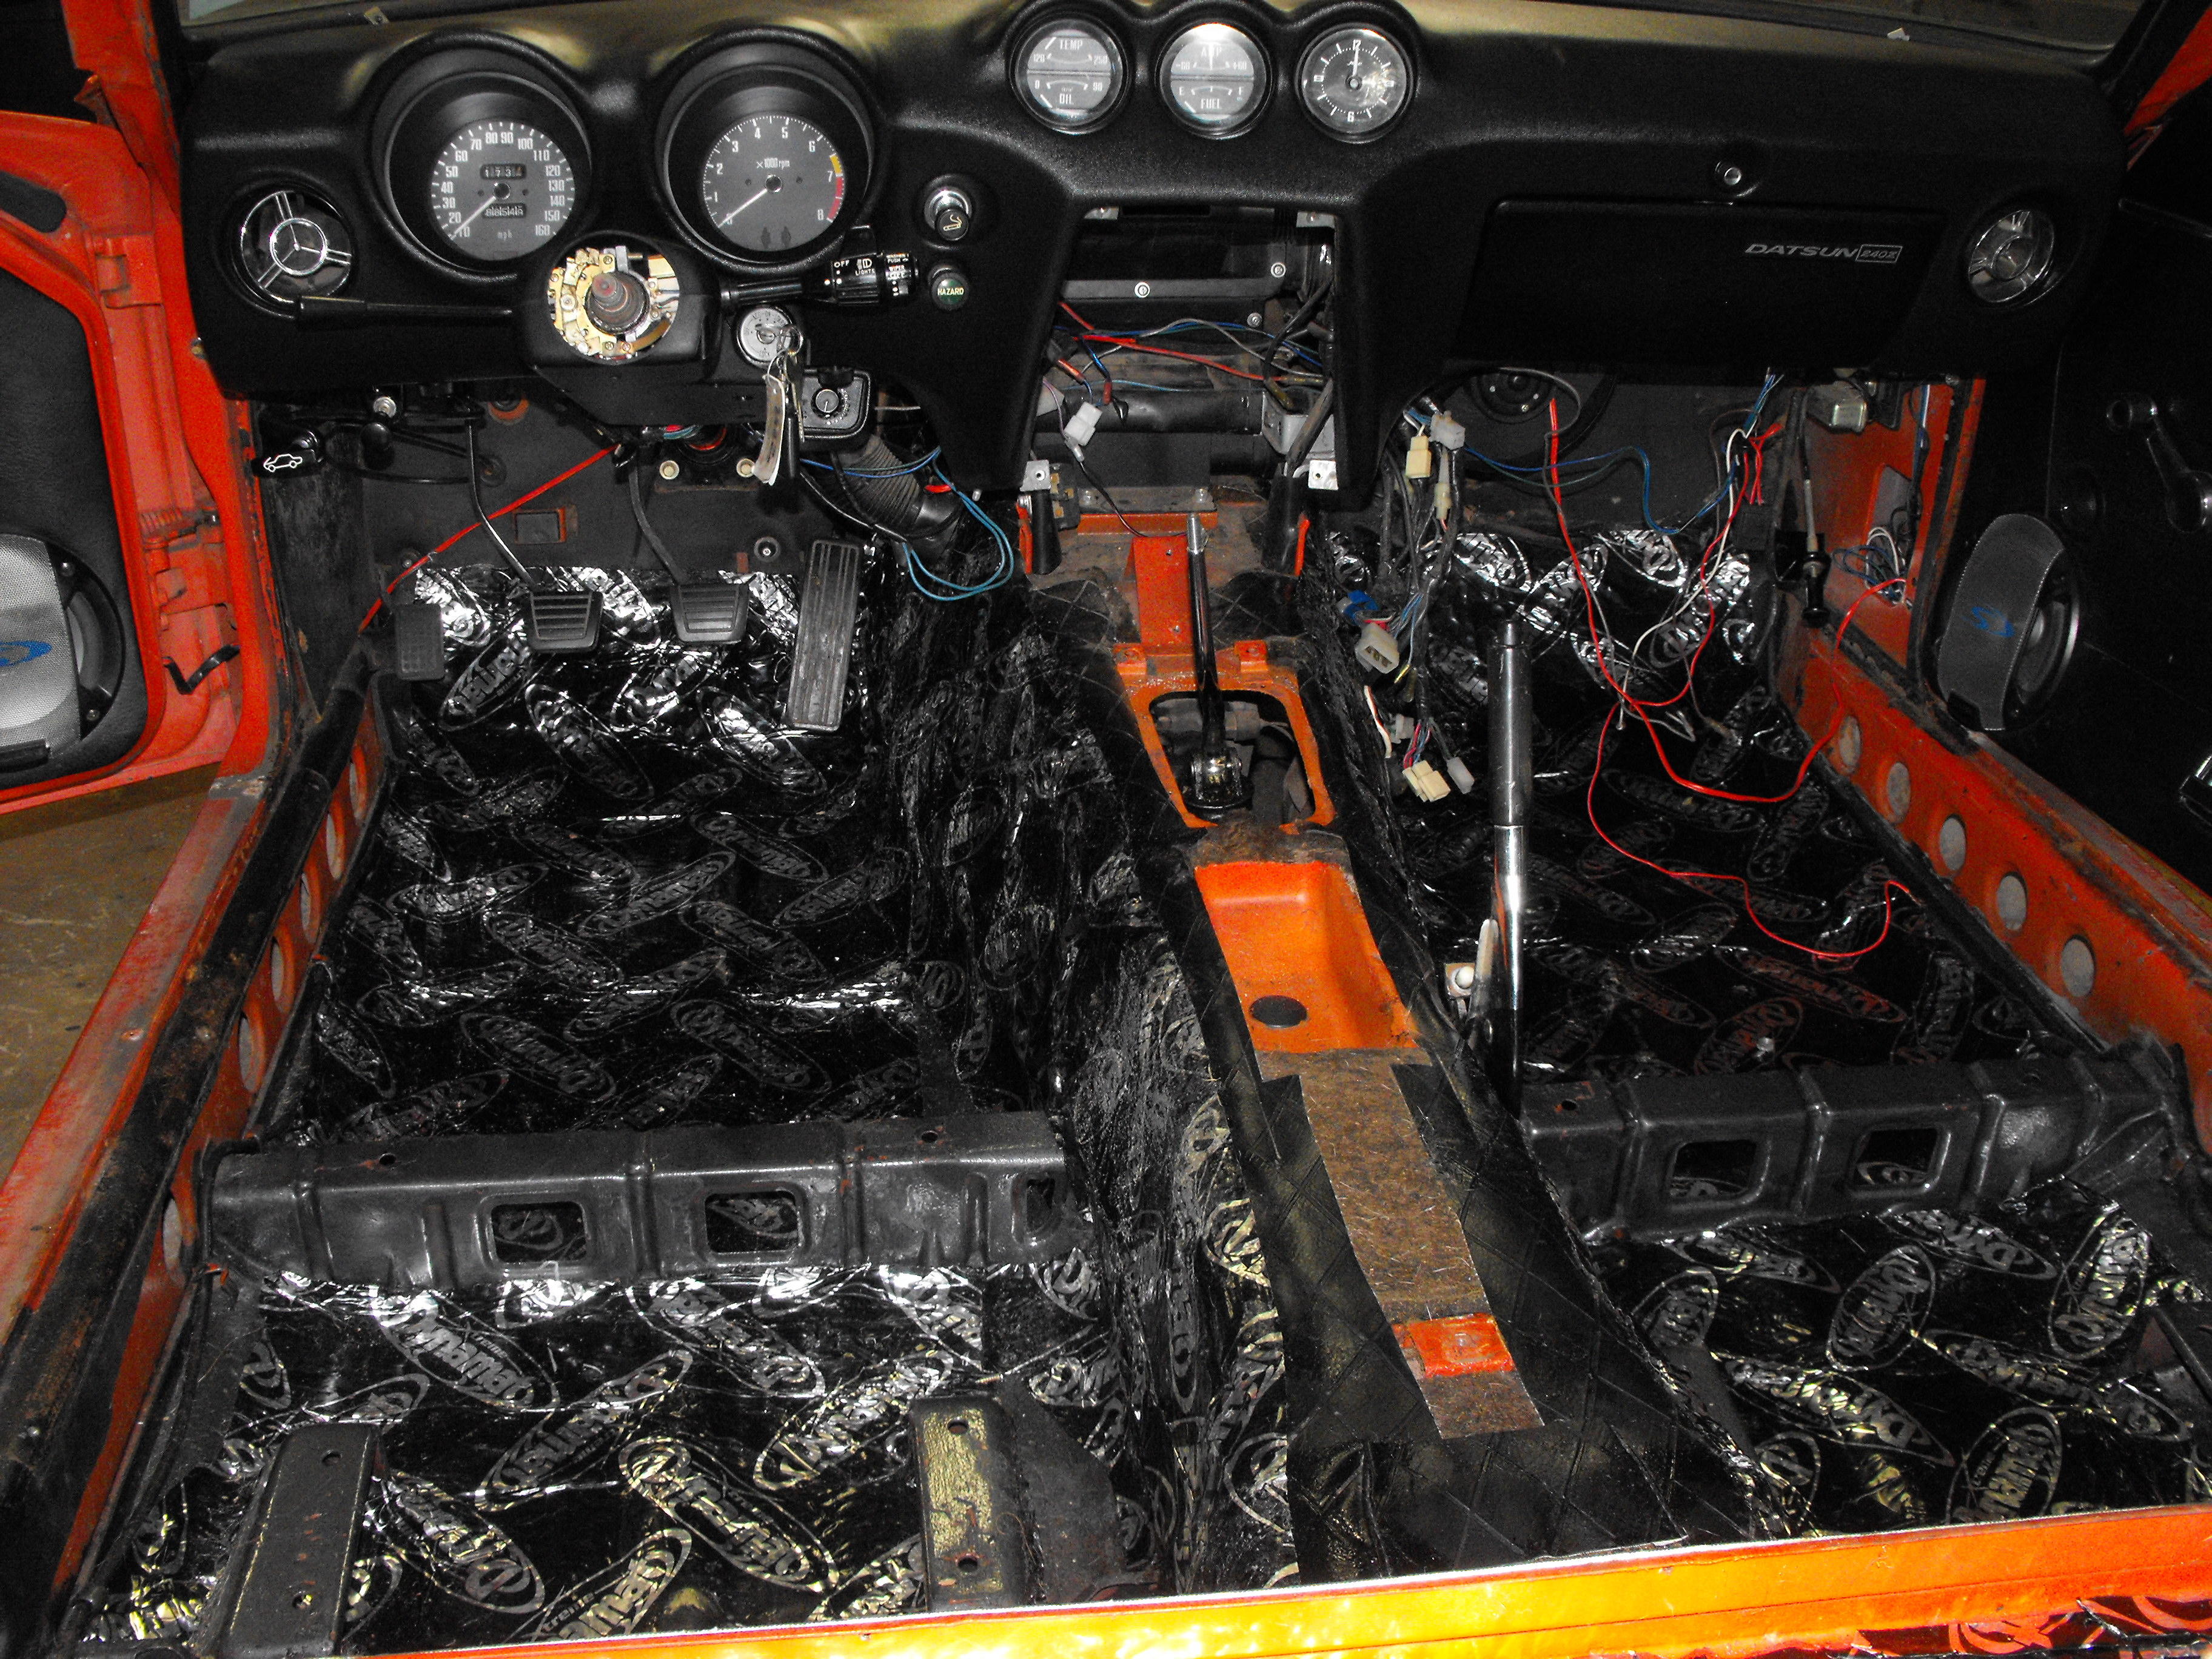
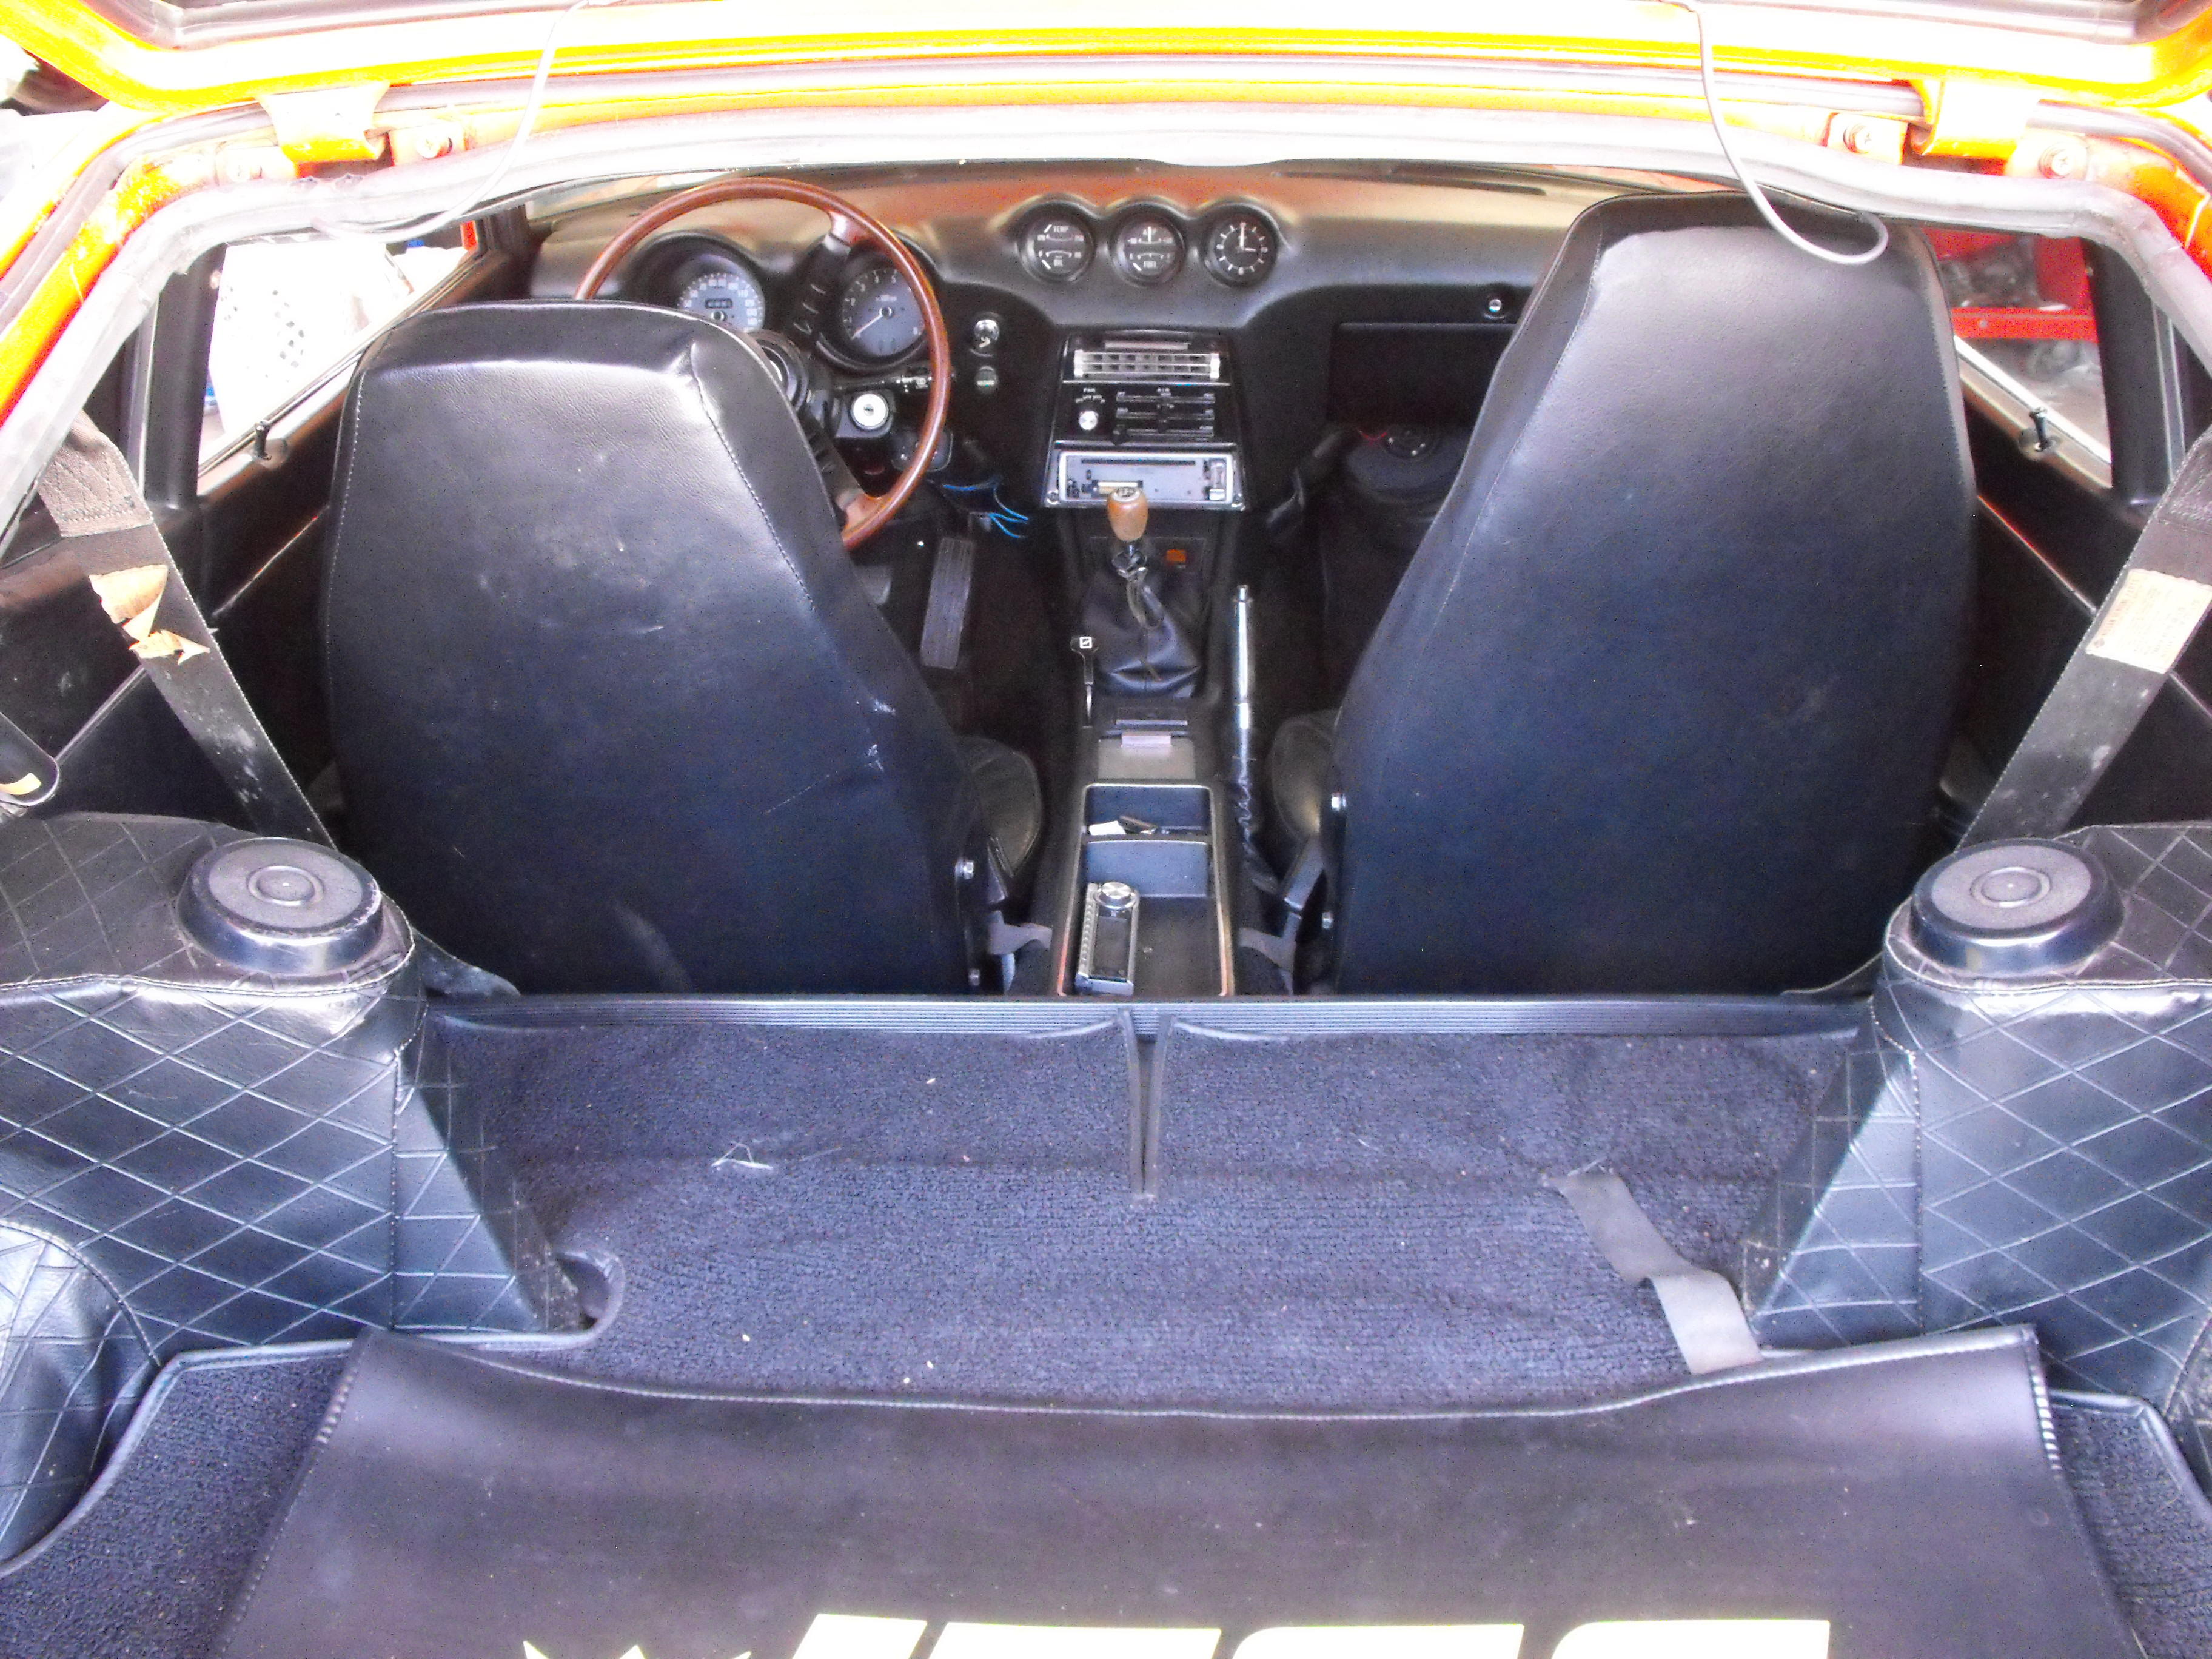
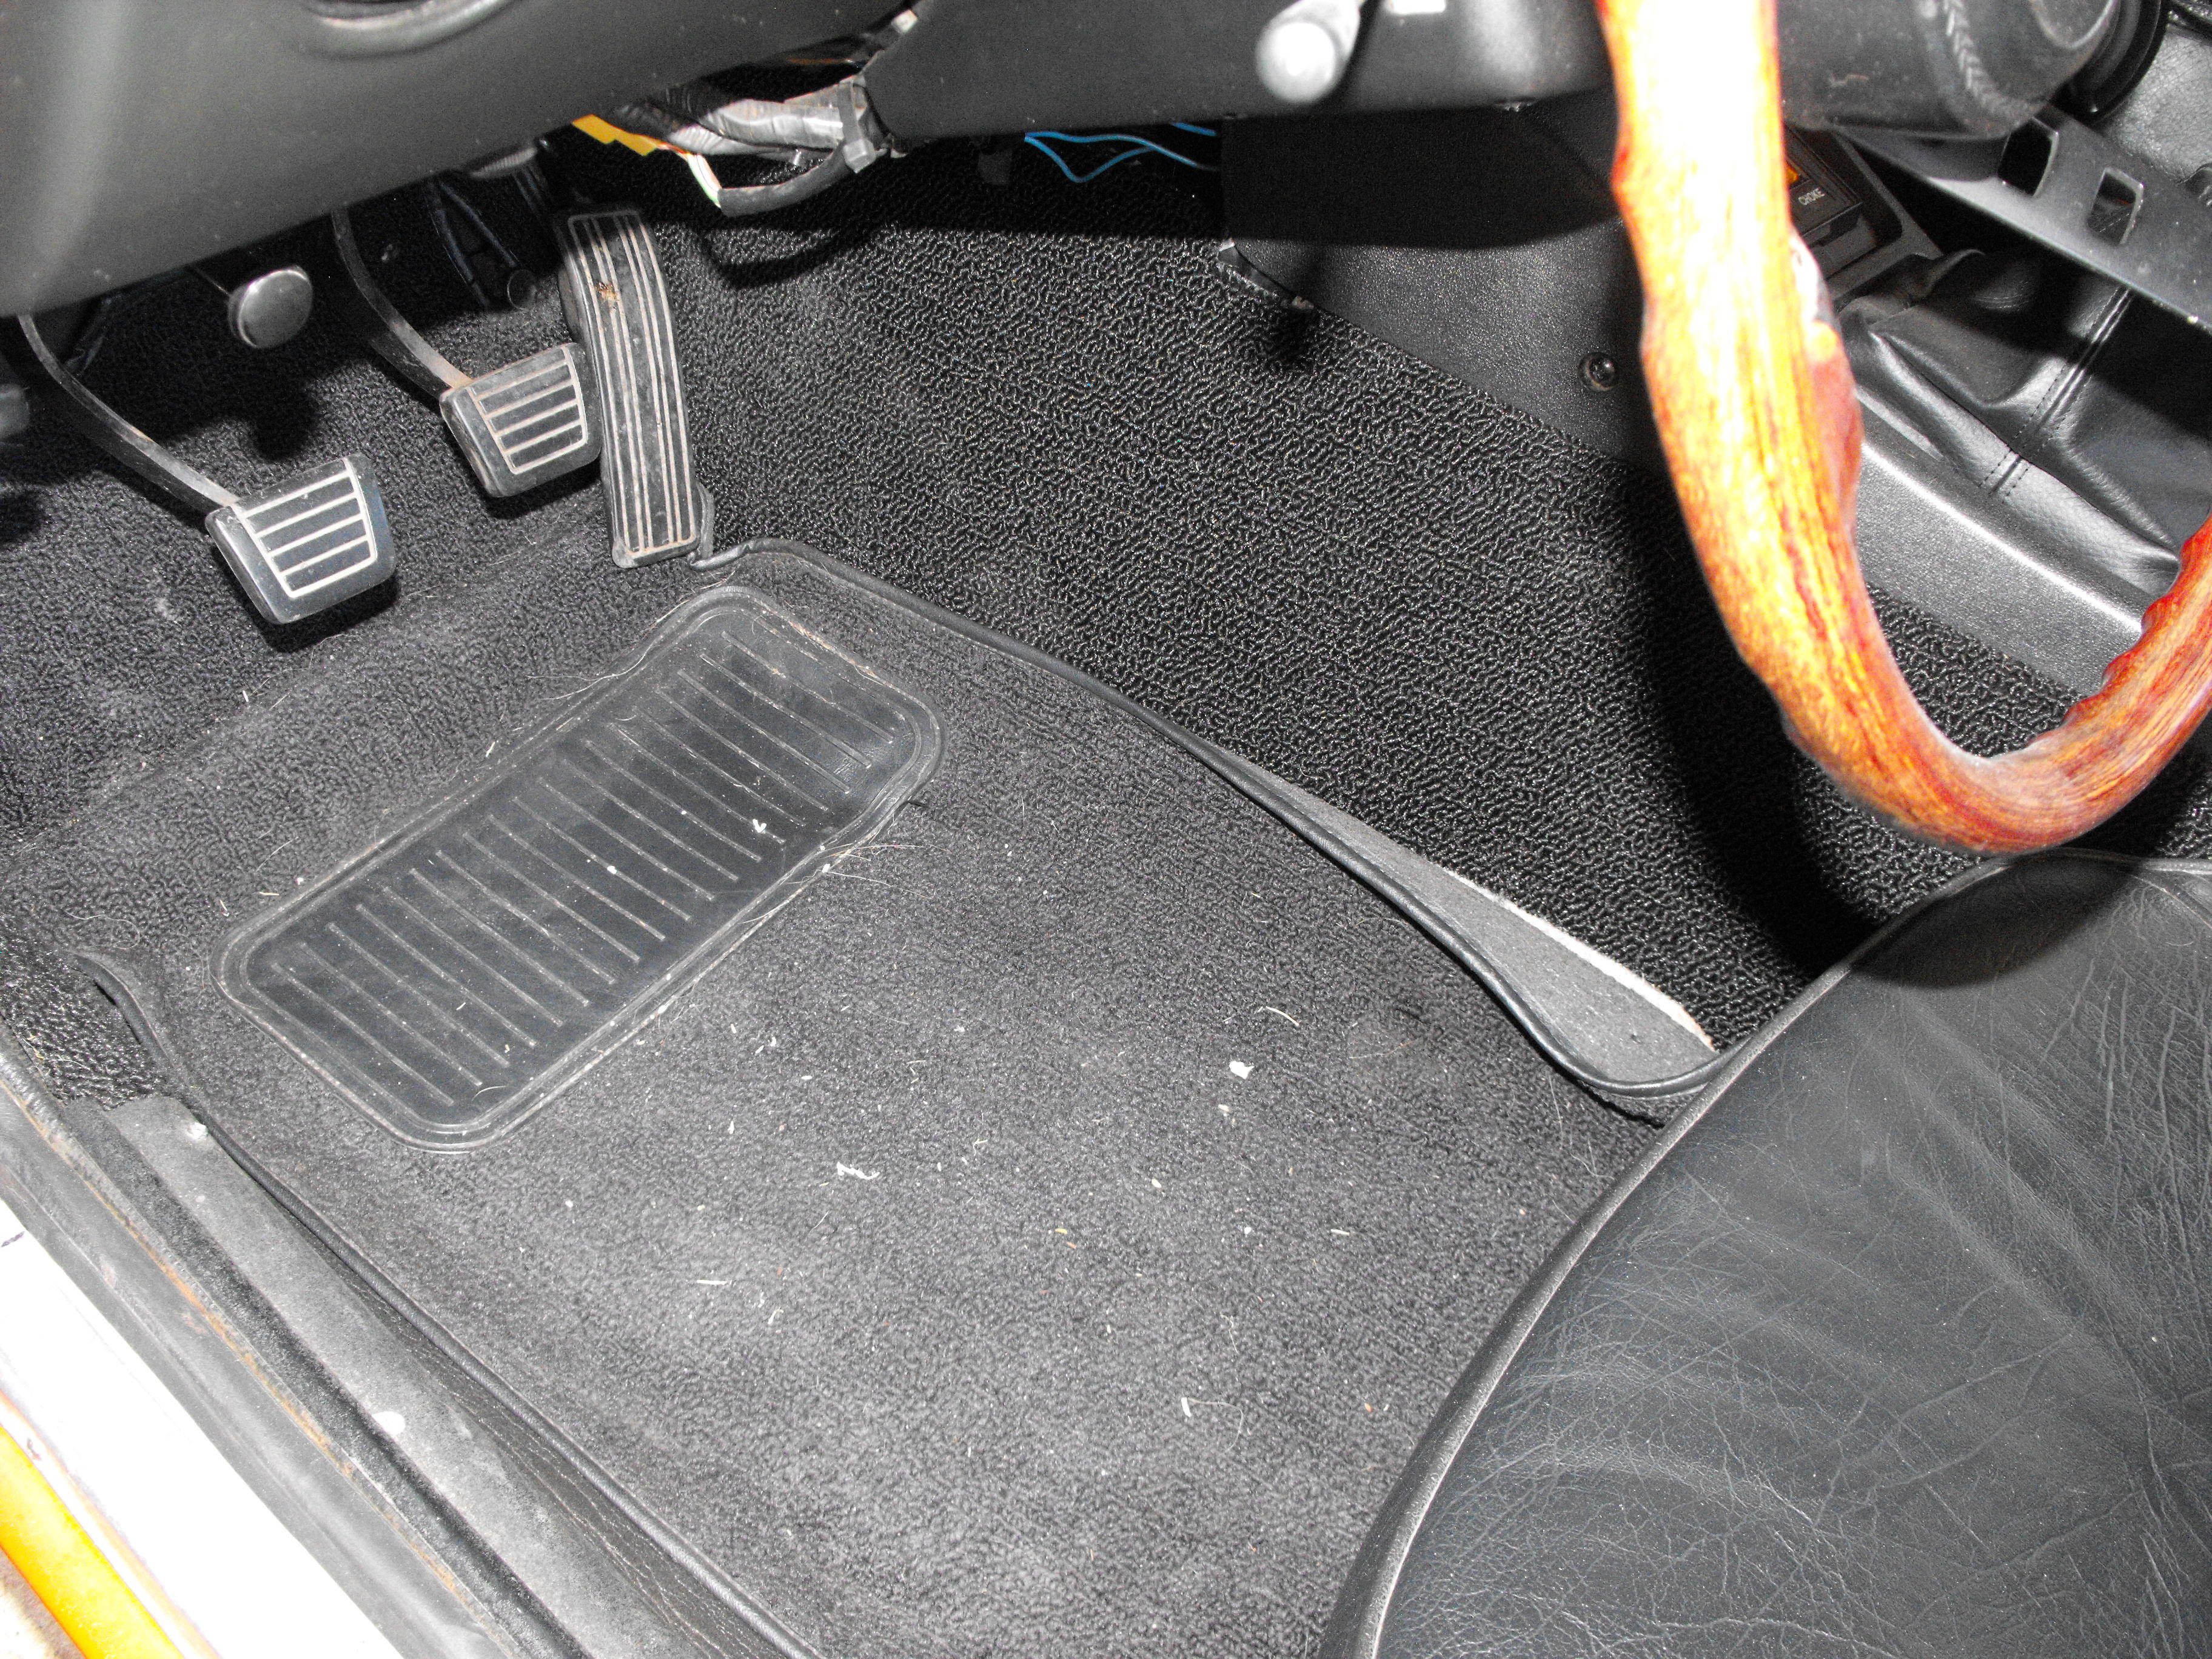
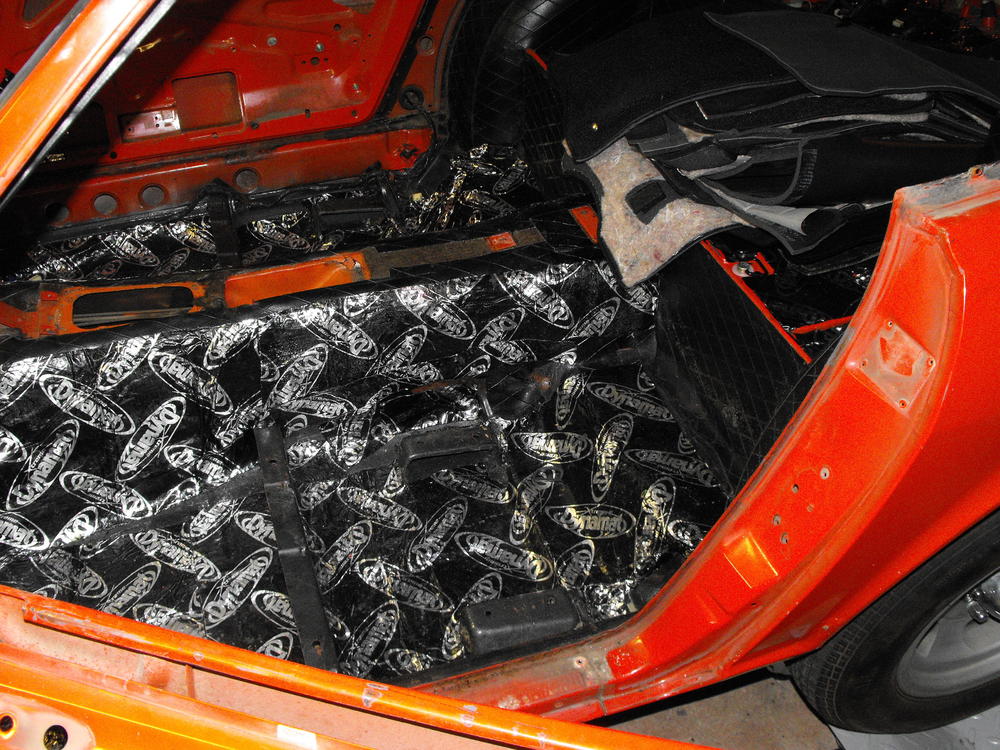
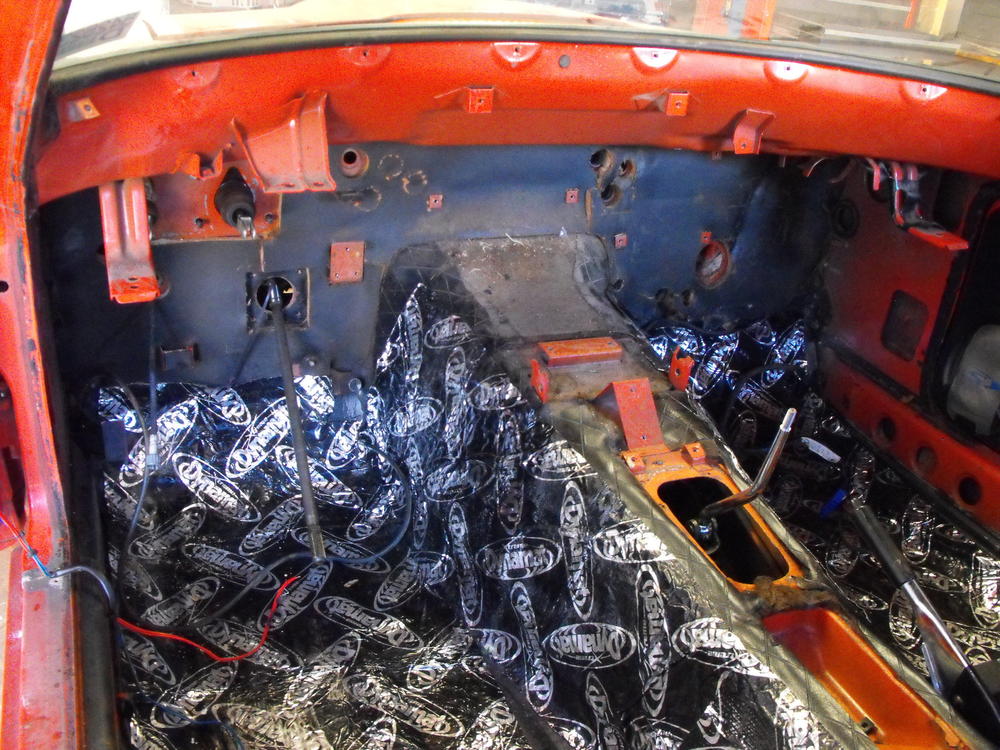
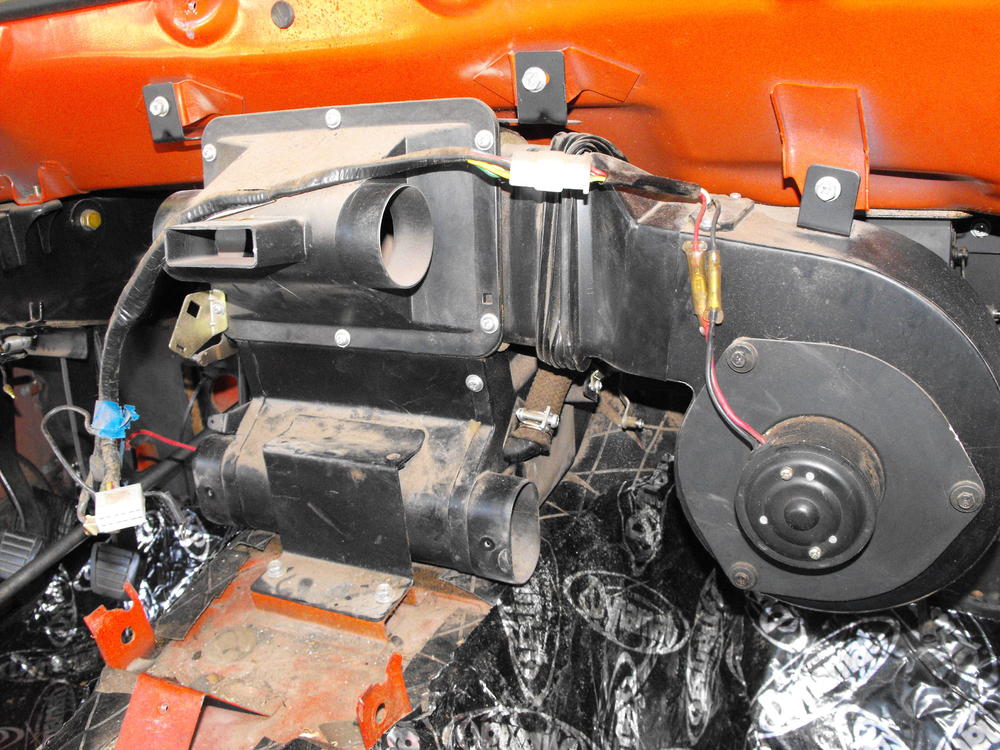
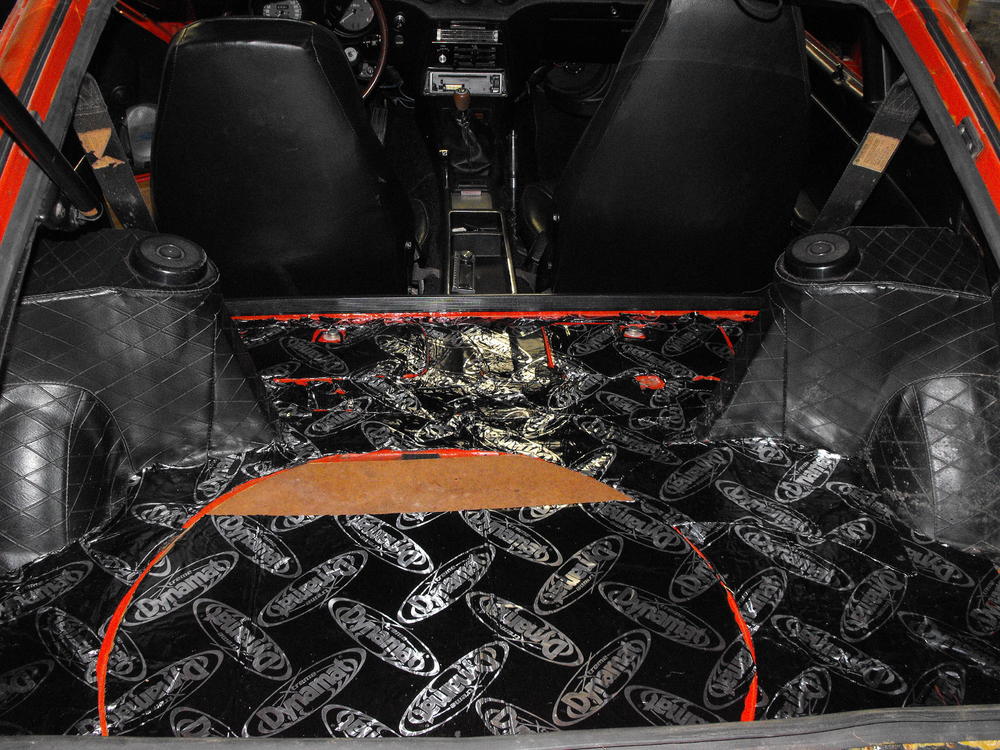
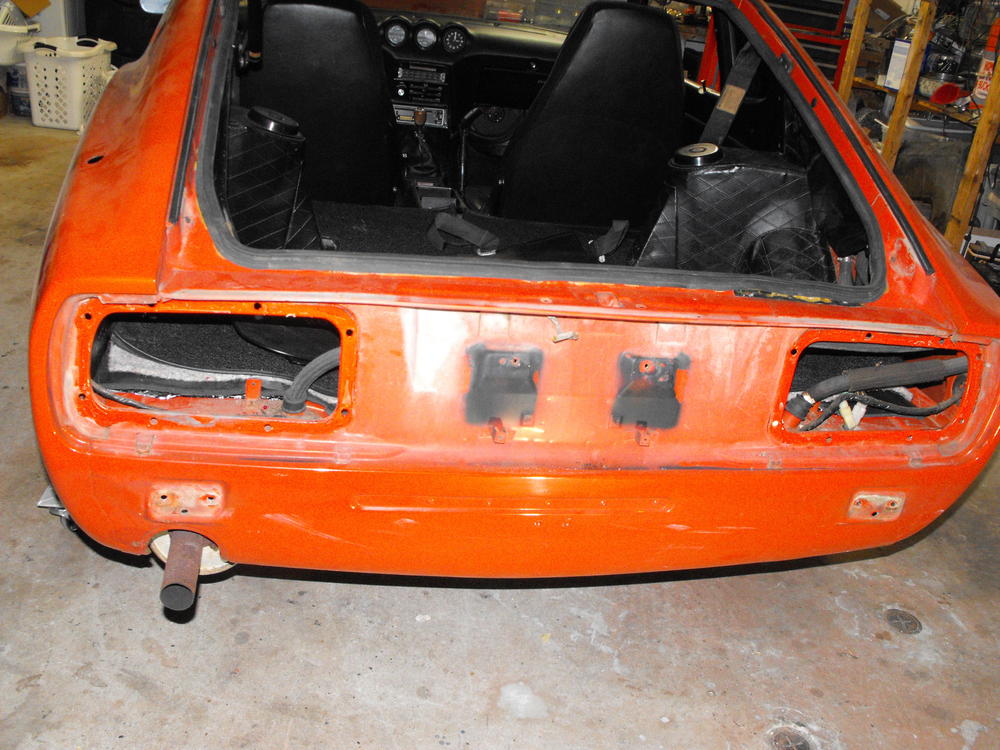
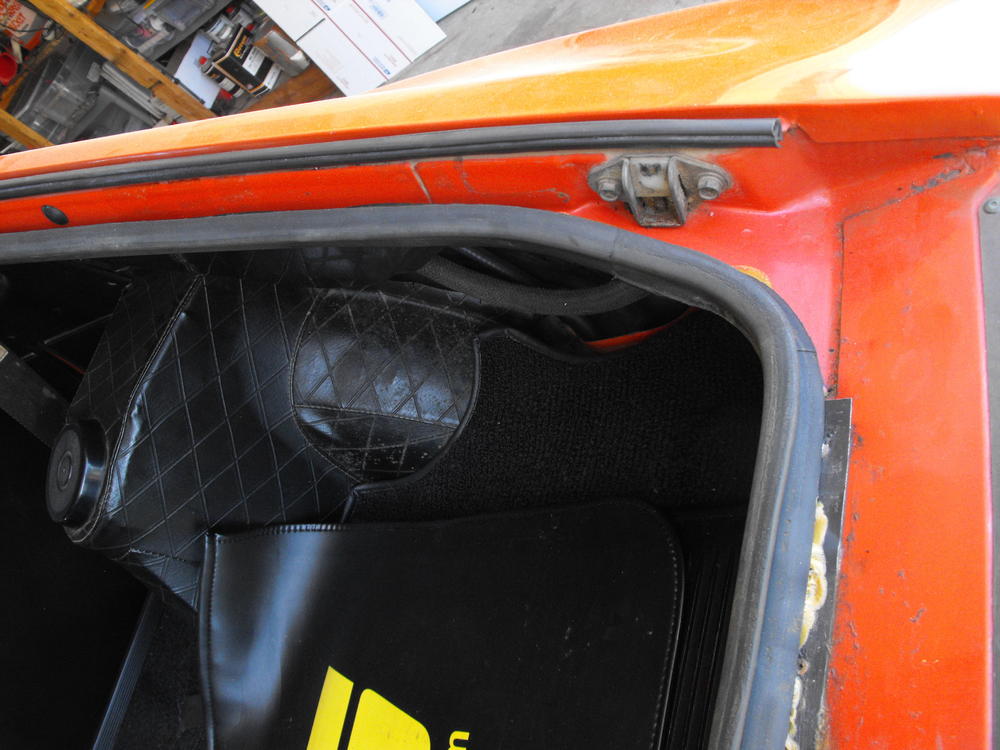
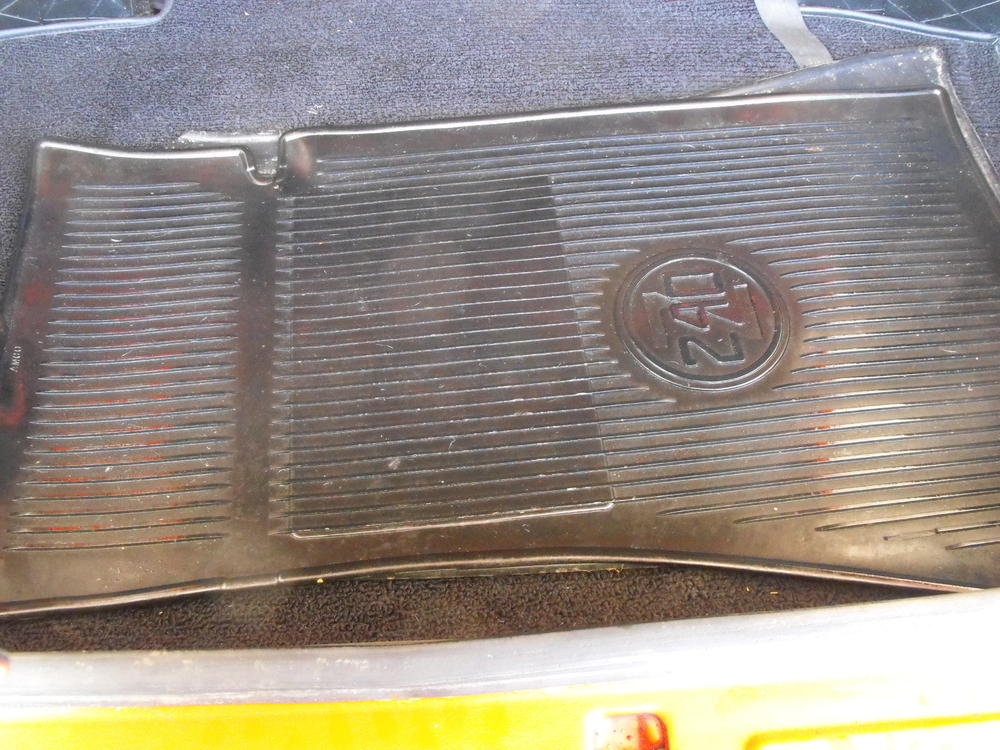
Continued removing parts. Did mostly interior this evening. Looks like Dynamat over the entire floor of the car. I think we will keep most of that except for the Dynamat on the tunnel. That was put over the original diamond vinyl. The spare looks great and original. Not holding pressure, but it looks great and spare tire well looks pretty clean. Removed the AC and Heater panel. Almost ready to pull the dash.


-
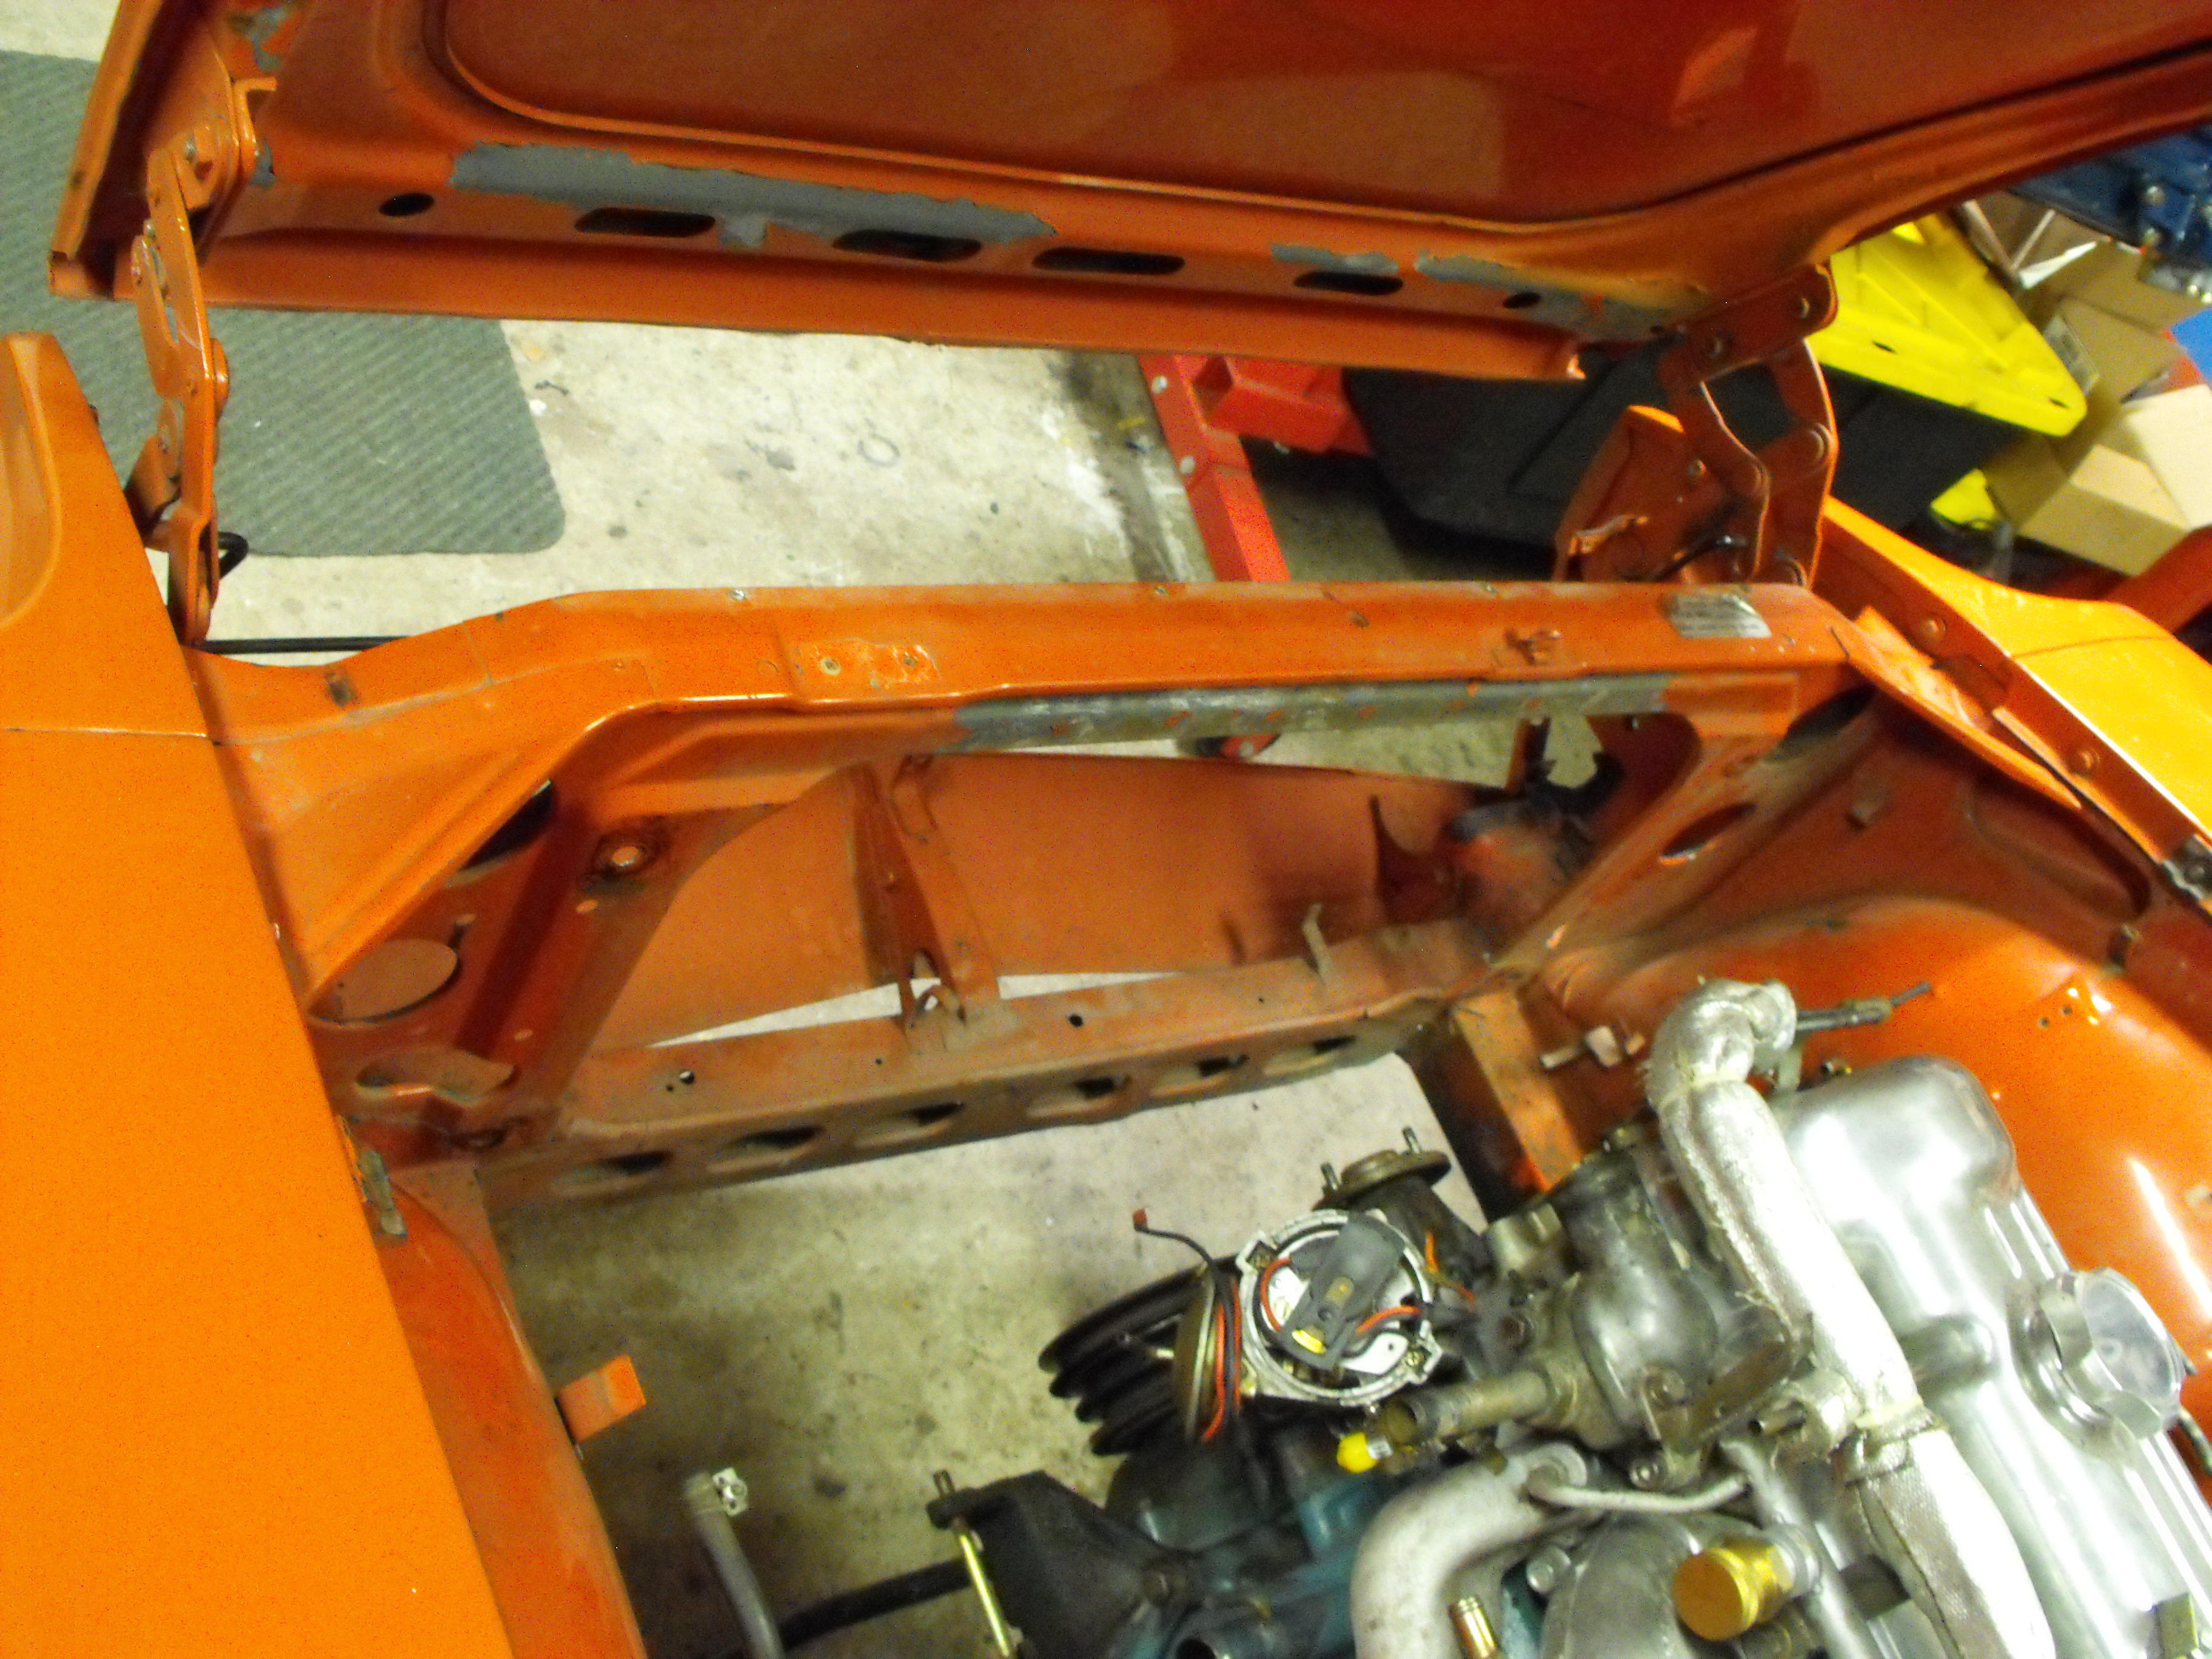
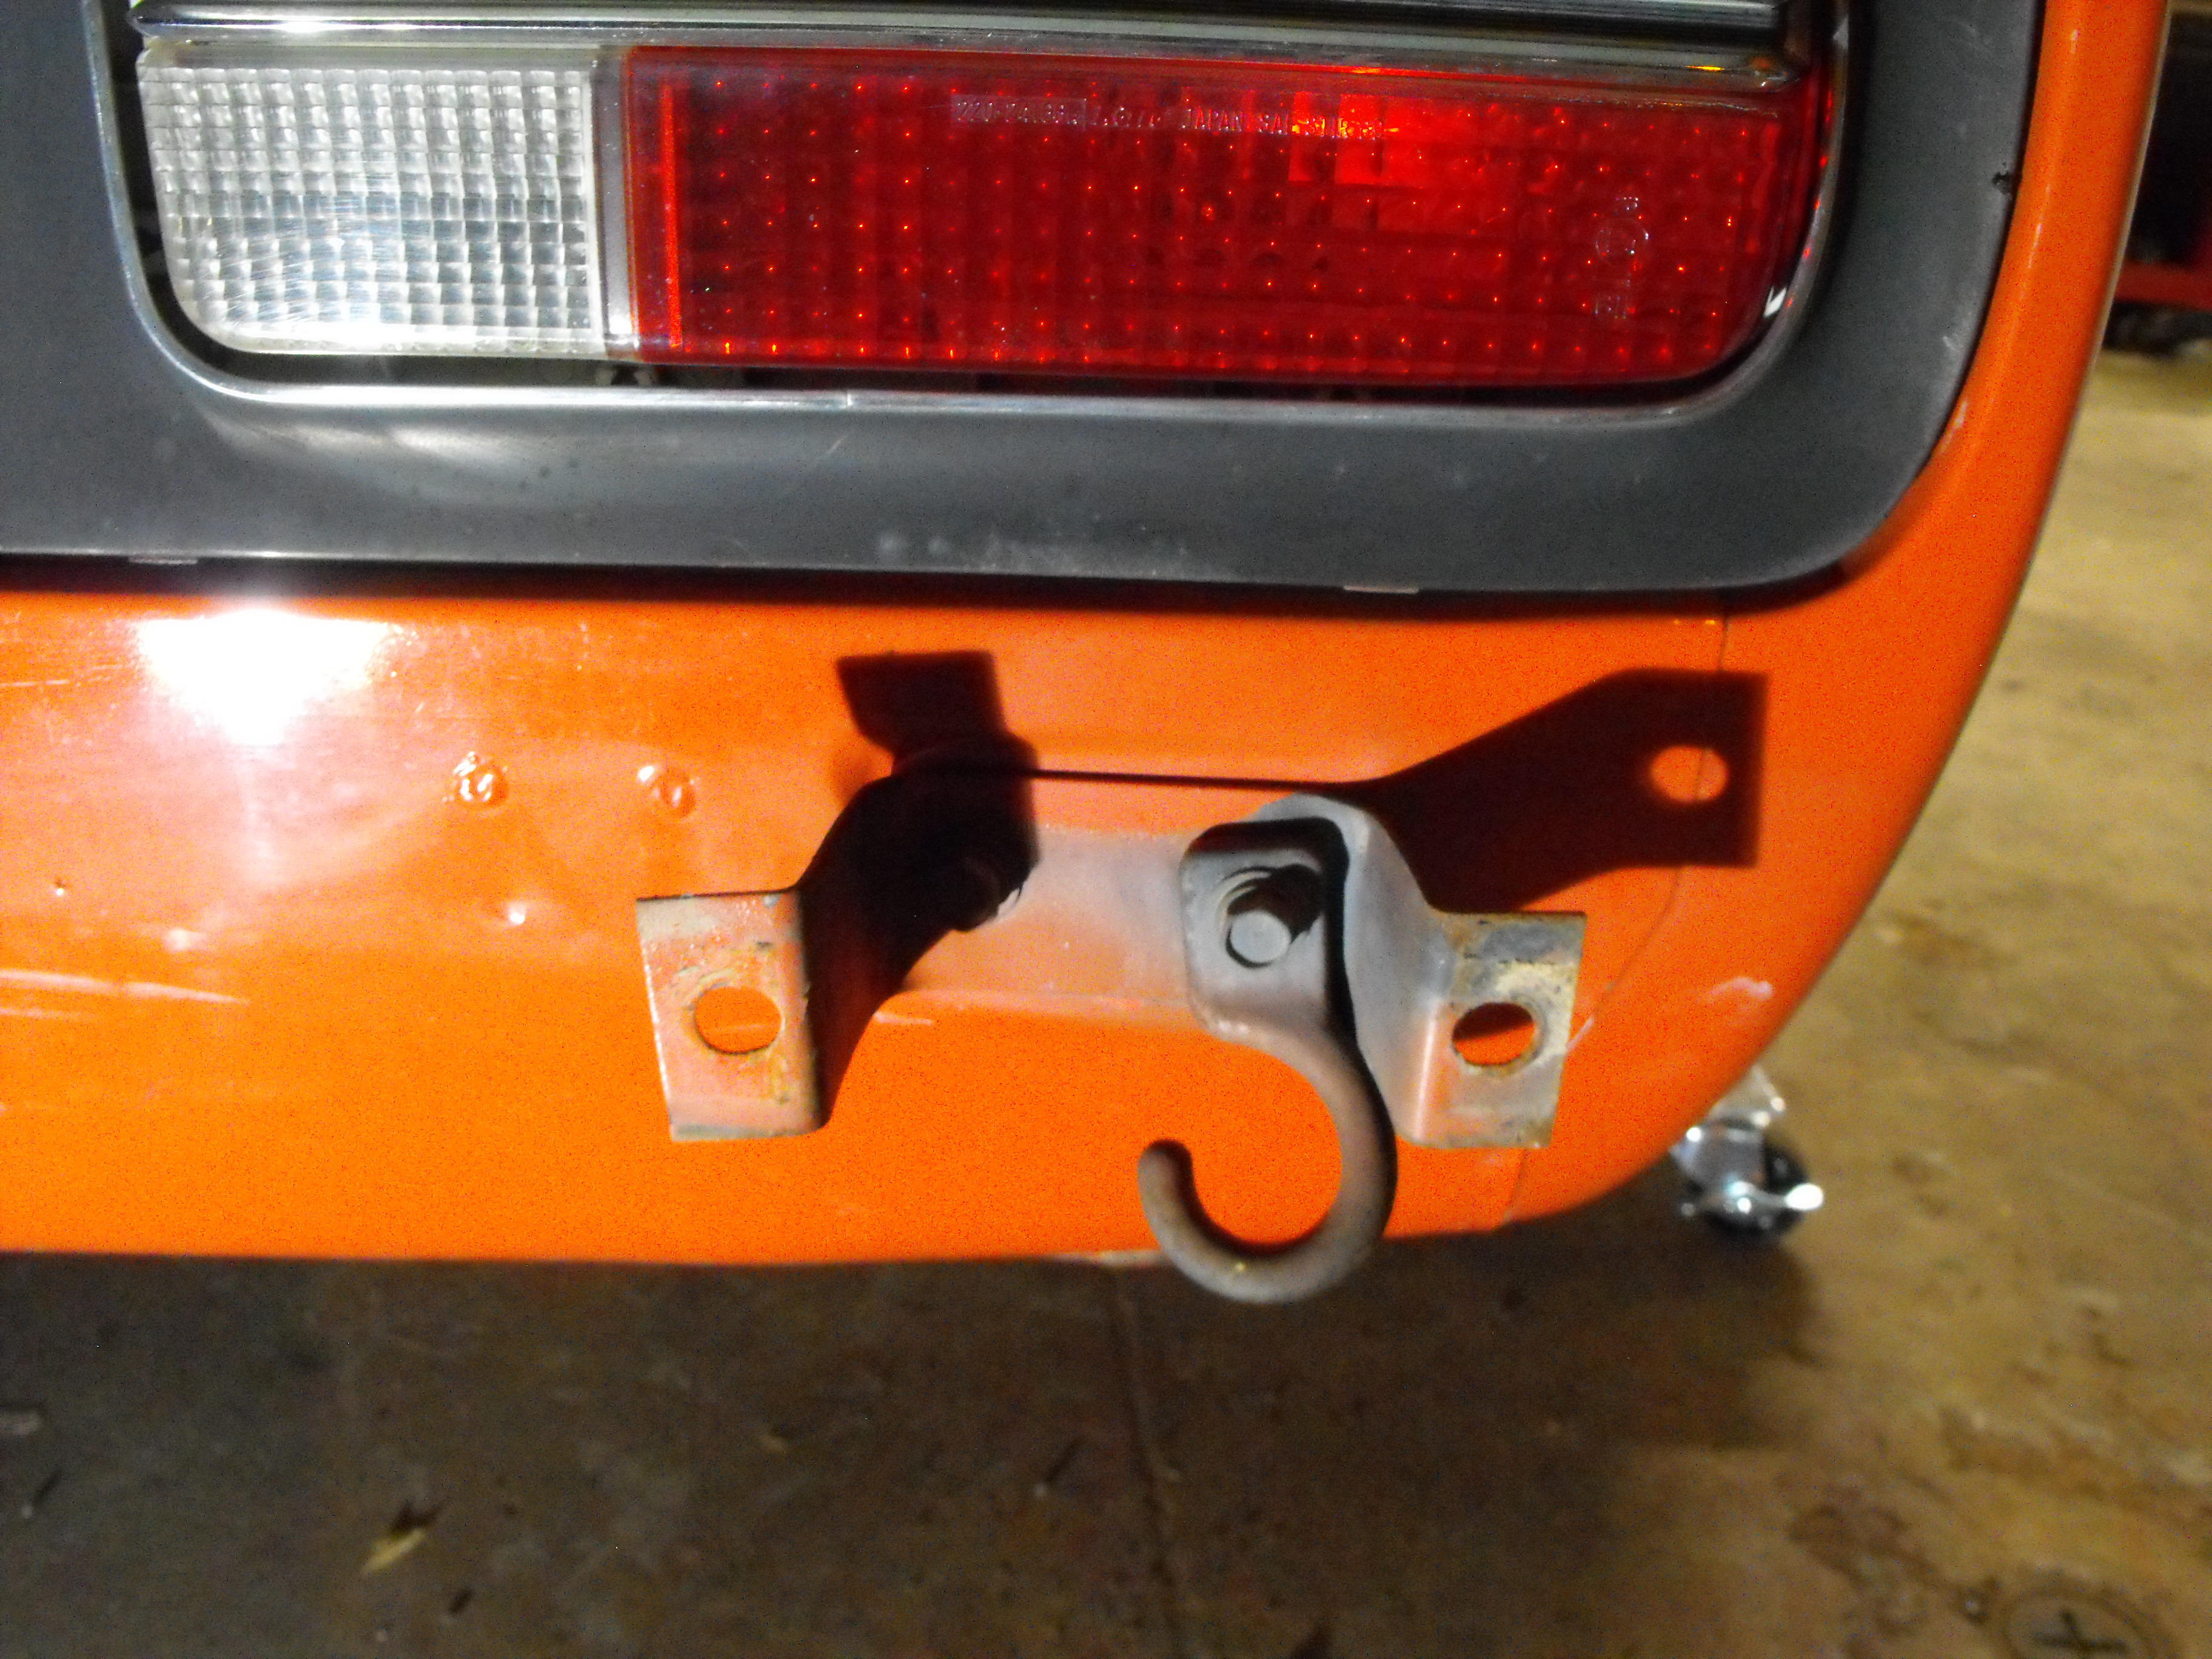
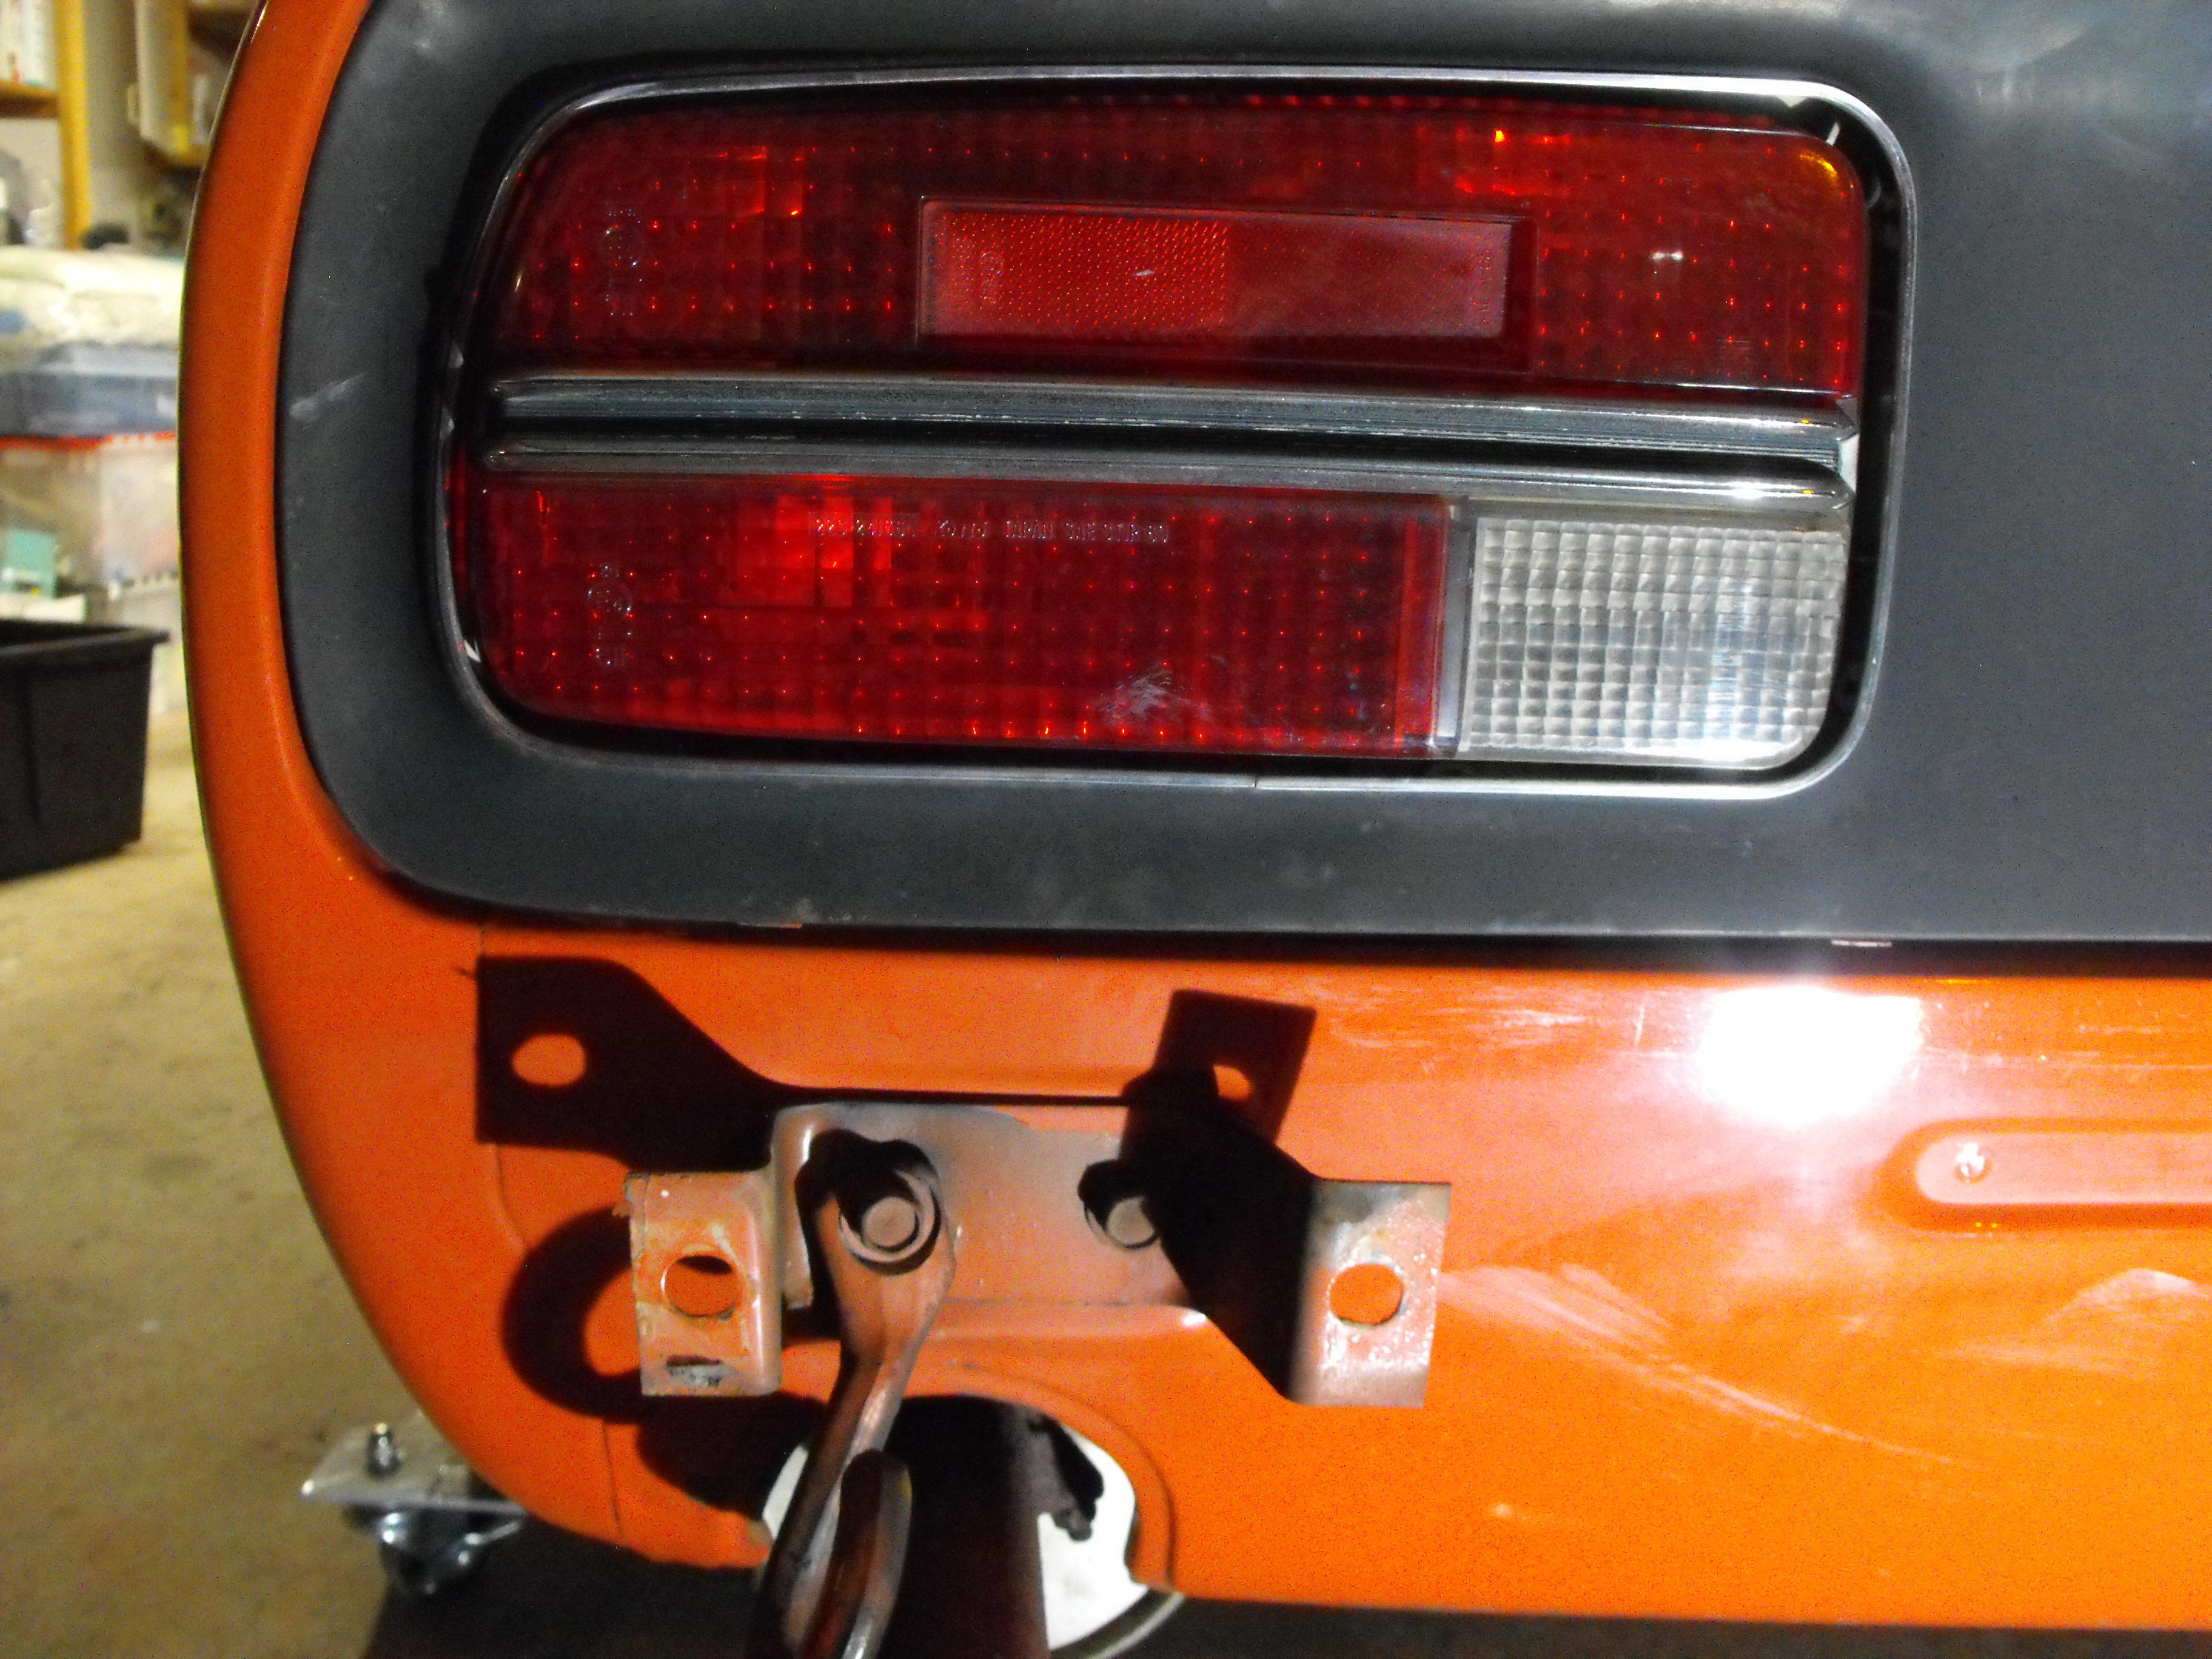
Continued parts removal. Got the bumpers off, grill, rear panels, wiper assembly and all the lights. Also removed a few more parts from engine bay.


-
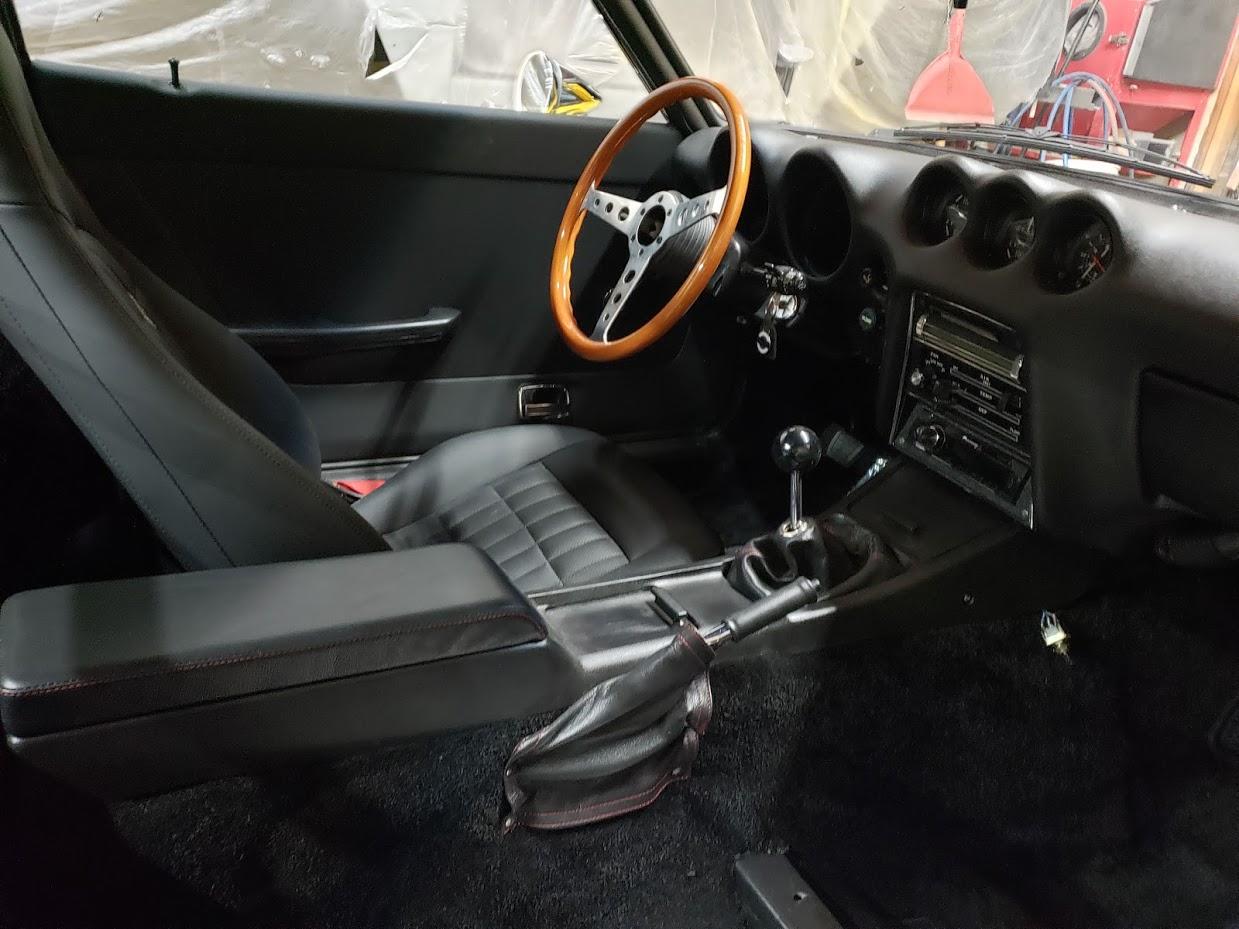
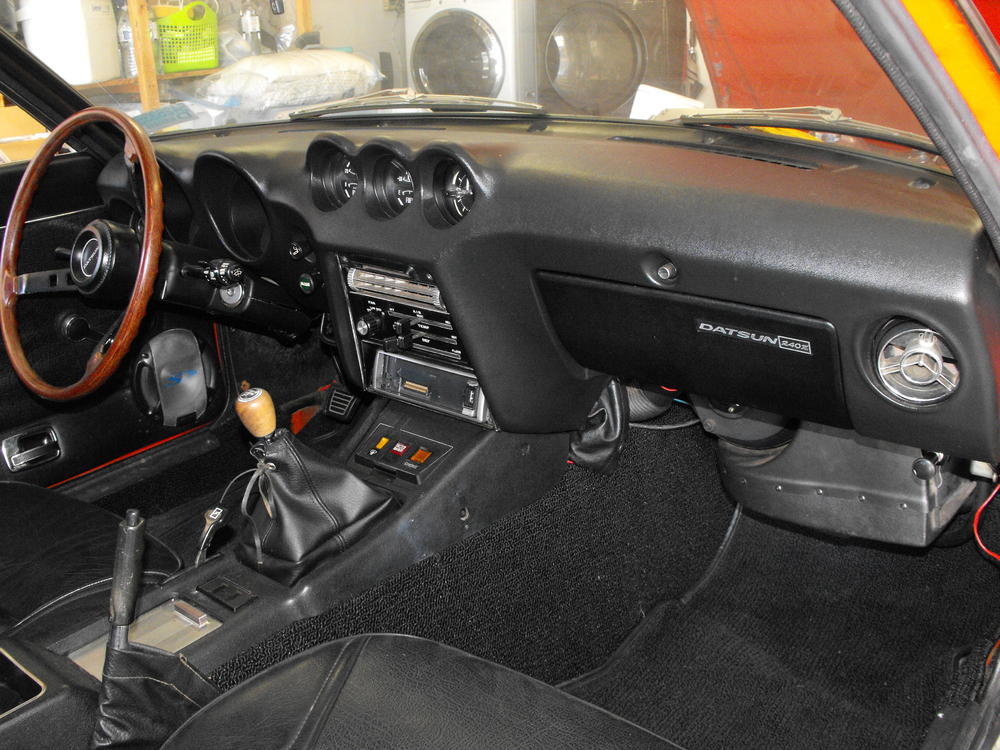
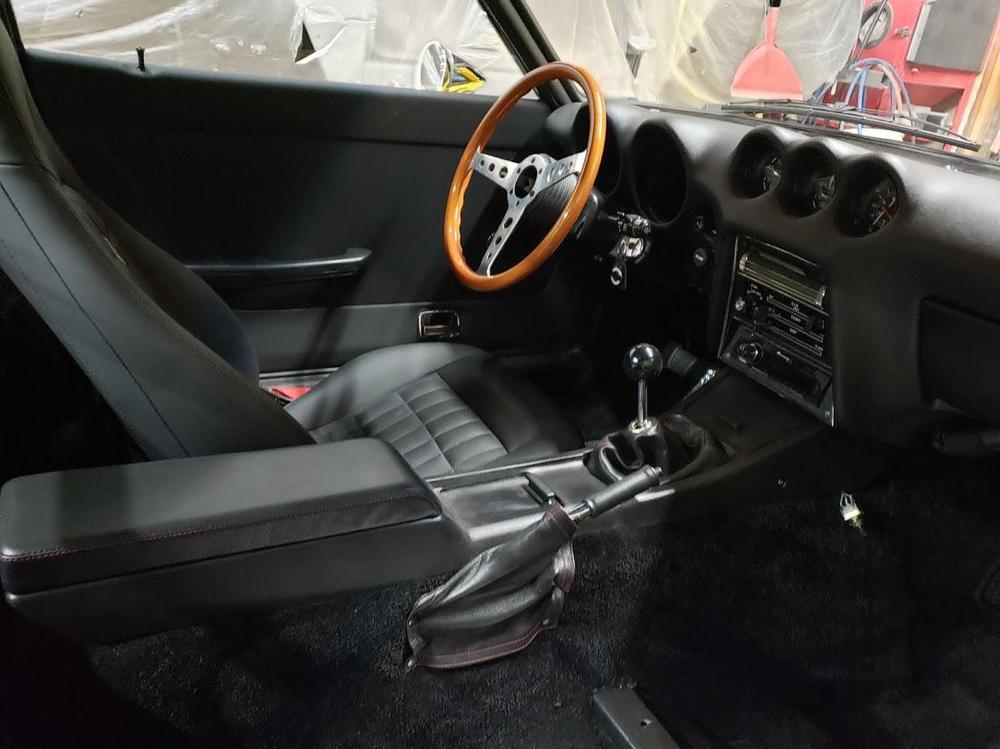
Good to hear from you! Look forward to your comments and input as the build progresses. Here is a little more background. This car is a very early '73 with a build date on the drivers side plaque of 9/72. The serial number is 122XYZ. The owner of this car contacted me after meeting the new owner of the orange Z that I sold last year. The owner of my orange Z provided the information to her and we were able to discuss the restoration of this car. Funny how things work out, small world. Early on, we were discussing moving back to the original Flat Tops, however, after reviewing the extra parts, there were no Flat tops or original balance tube. Also, a number of the unique '73 tubes were also not present. So the better way to go was to stick with the current SUs. And, since the SUs and balance tube look near brand new, we will stick with these. For the interior, the only changes we will make is to install an original radio and install the diamond vinyl onto the center console. The rest of the vinyl looks like it just needs to be cleaned up. For the seats, there are new, good quality seat covers and foam that we will install so that the seats match. I will be very careful removing the original vinyl from the passenger seat. We will want to save that.
-
I can not say that I have seen silver decals. I checked on my '70Z and even that is still gold in spite of its nearly 50 years of age. I thought maybe the gold could fade to silver, but not what I have seen. Bit of a late response here, sorry about that.
-
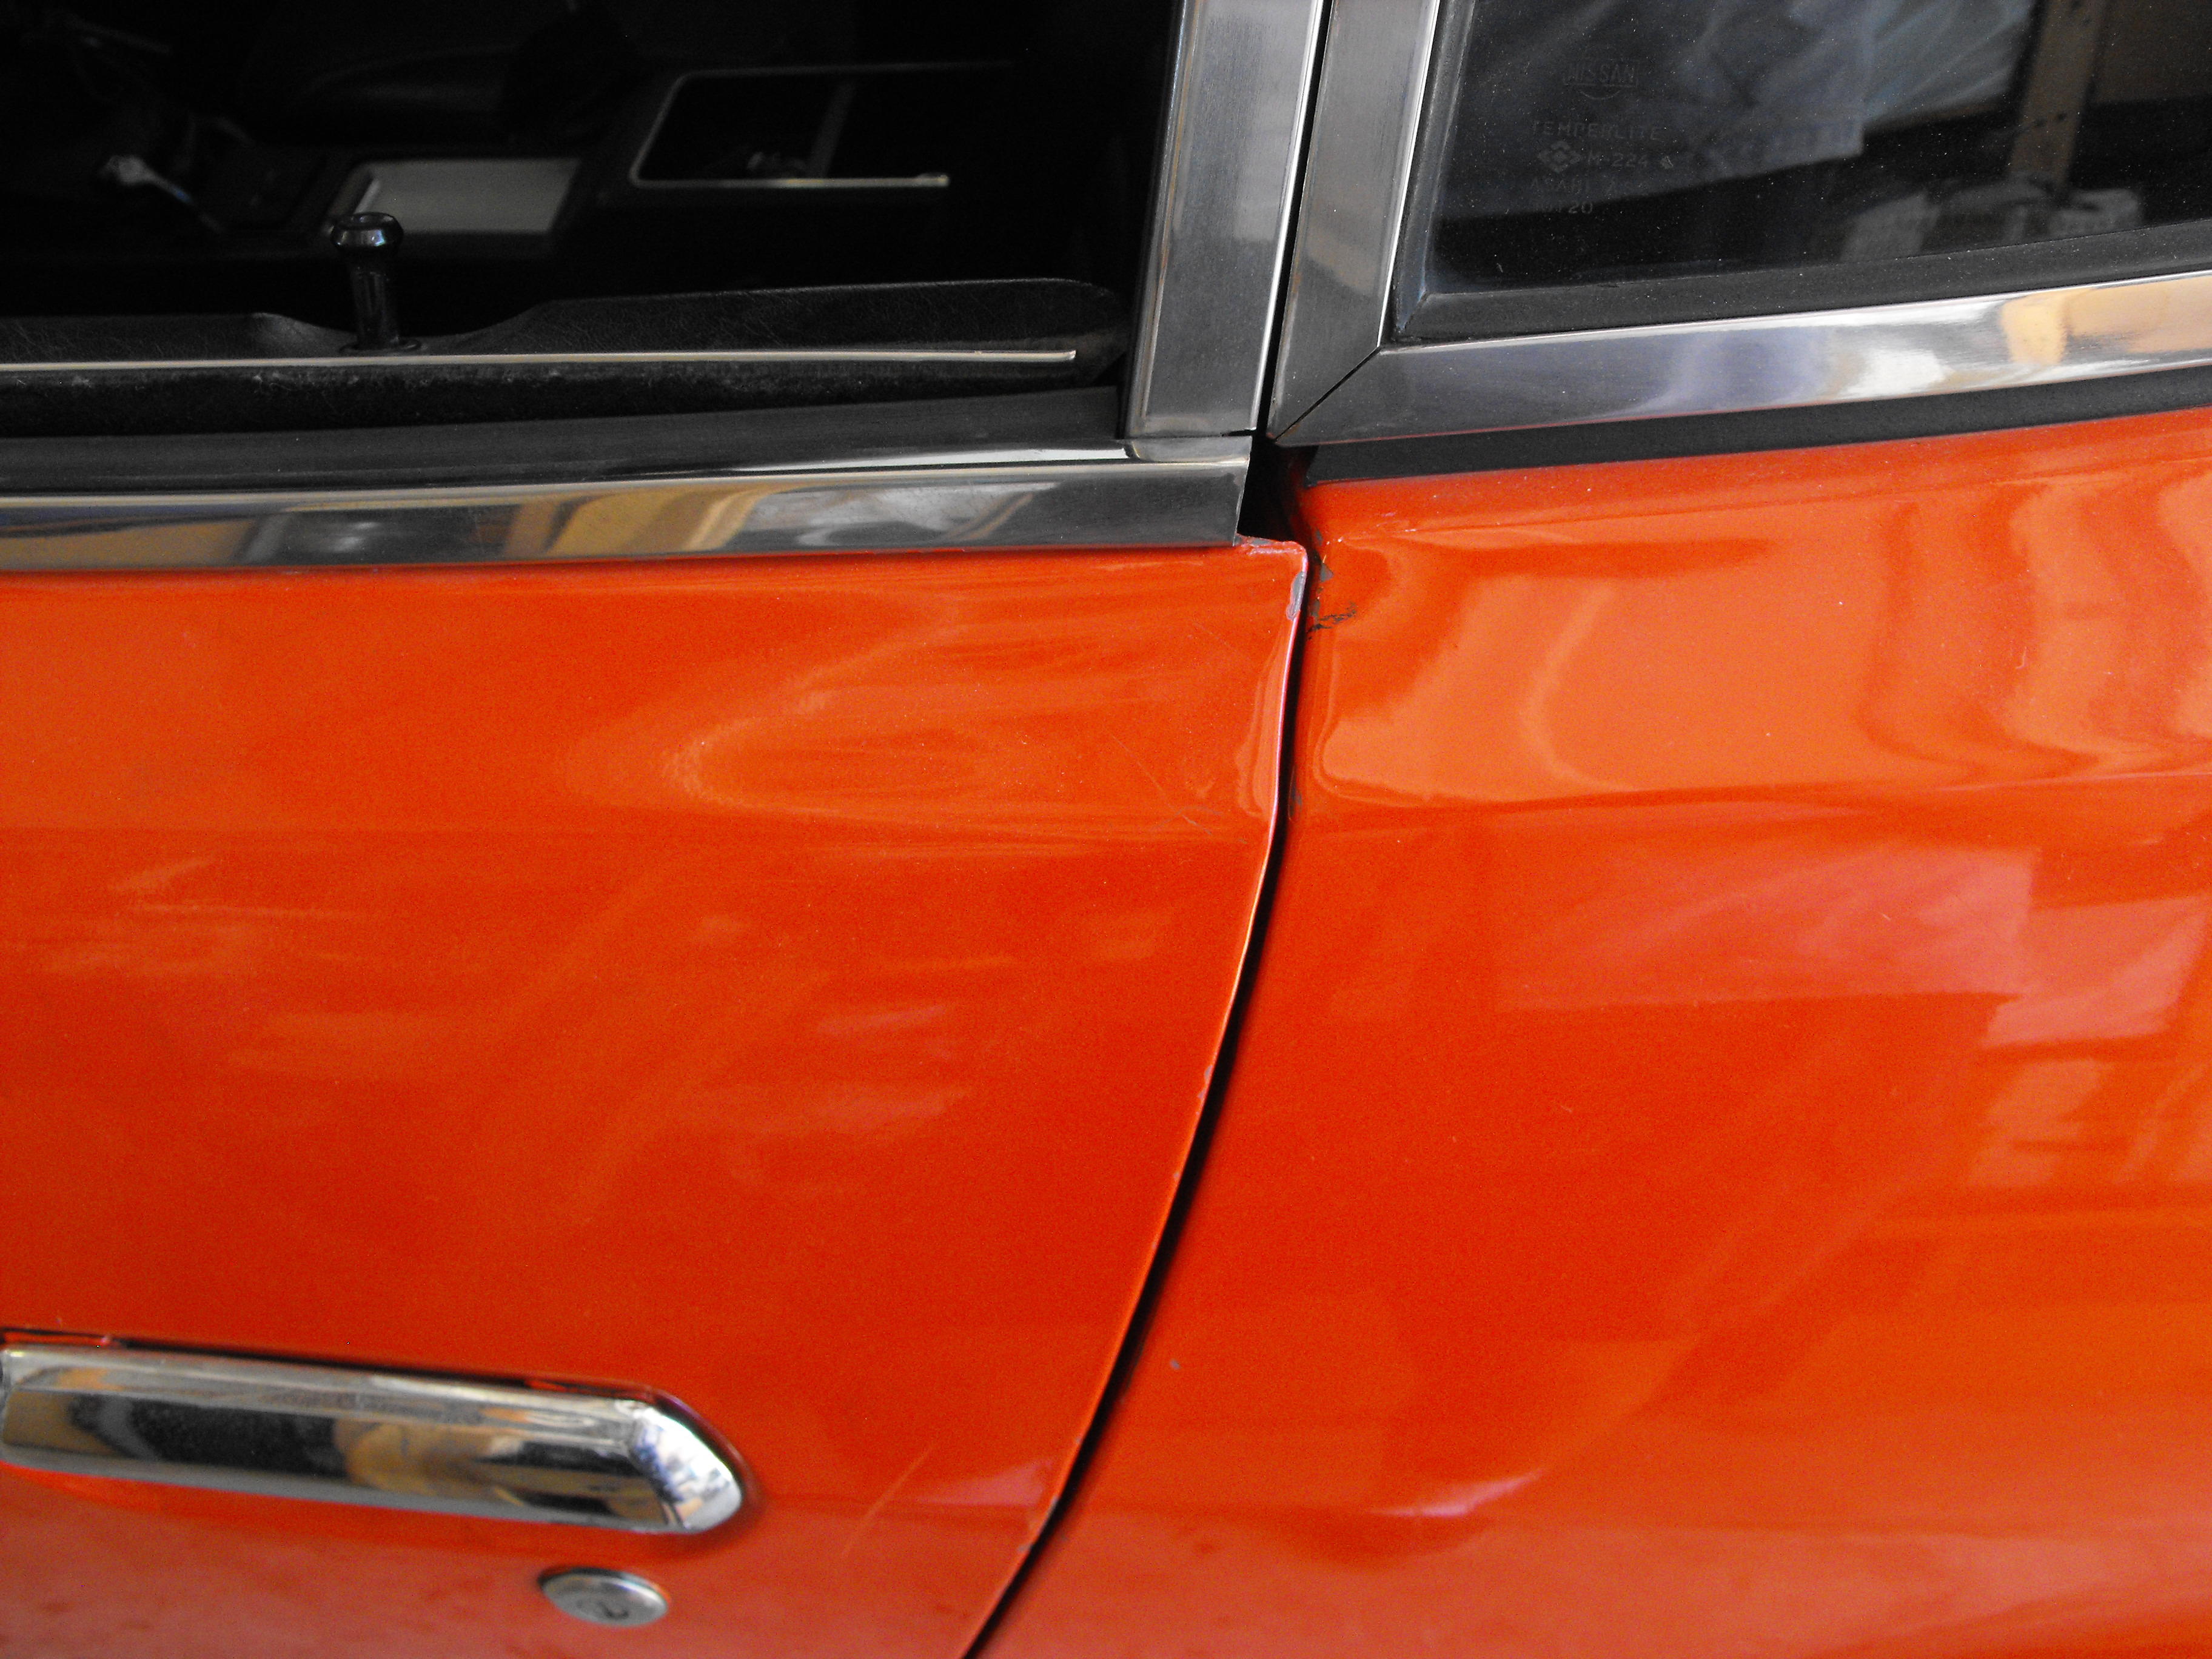
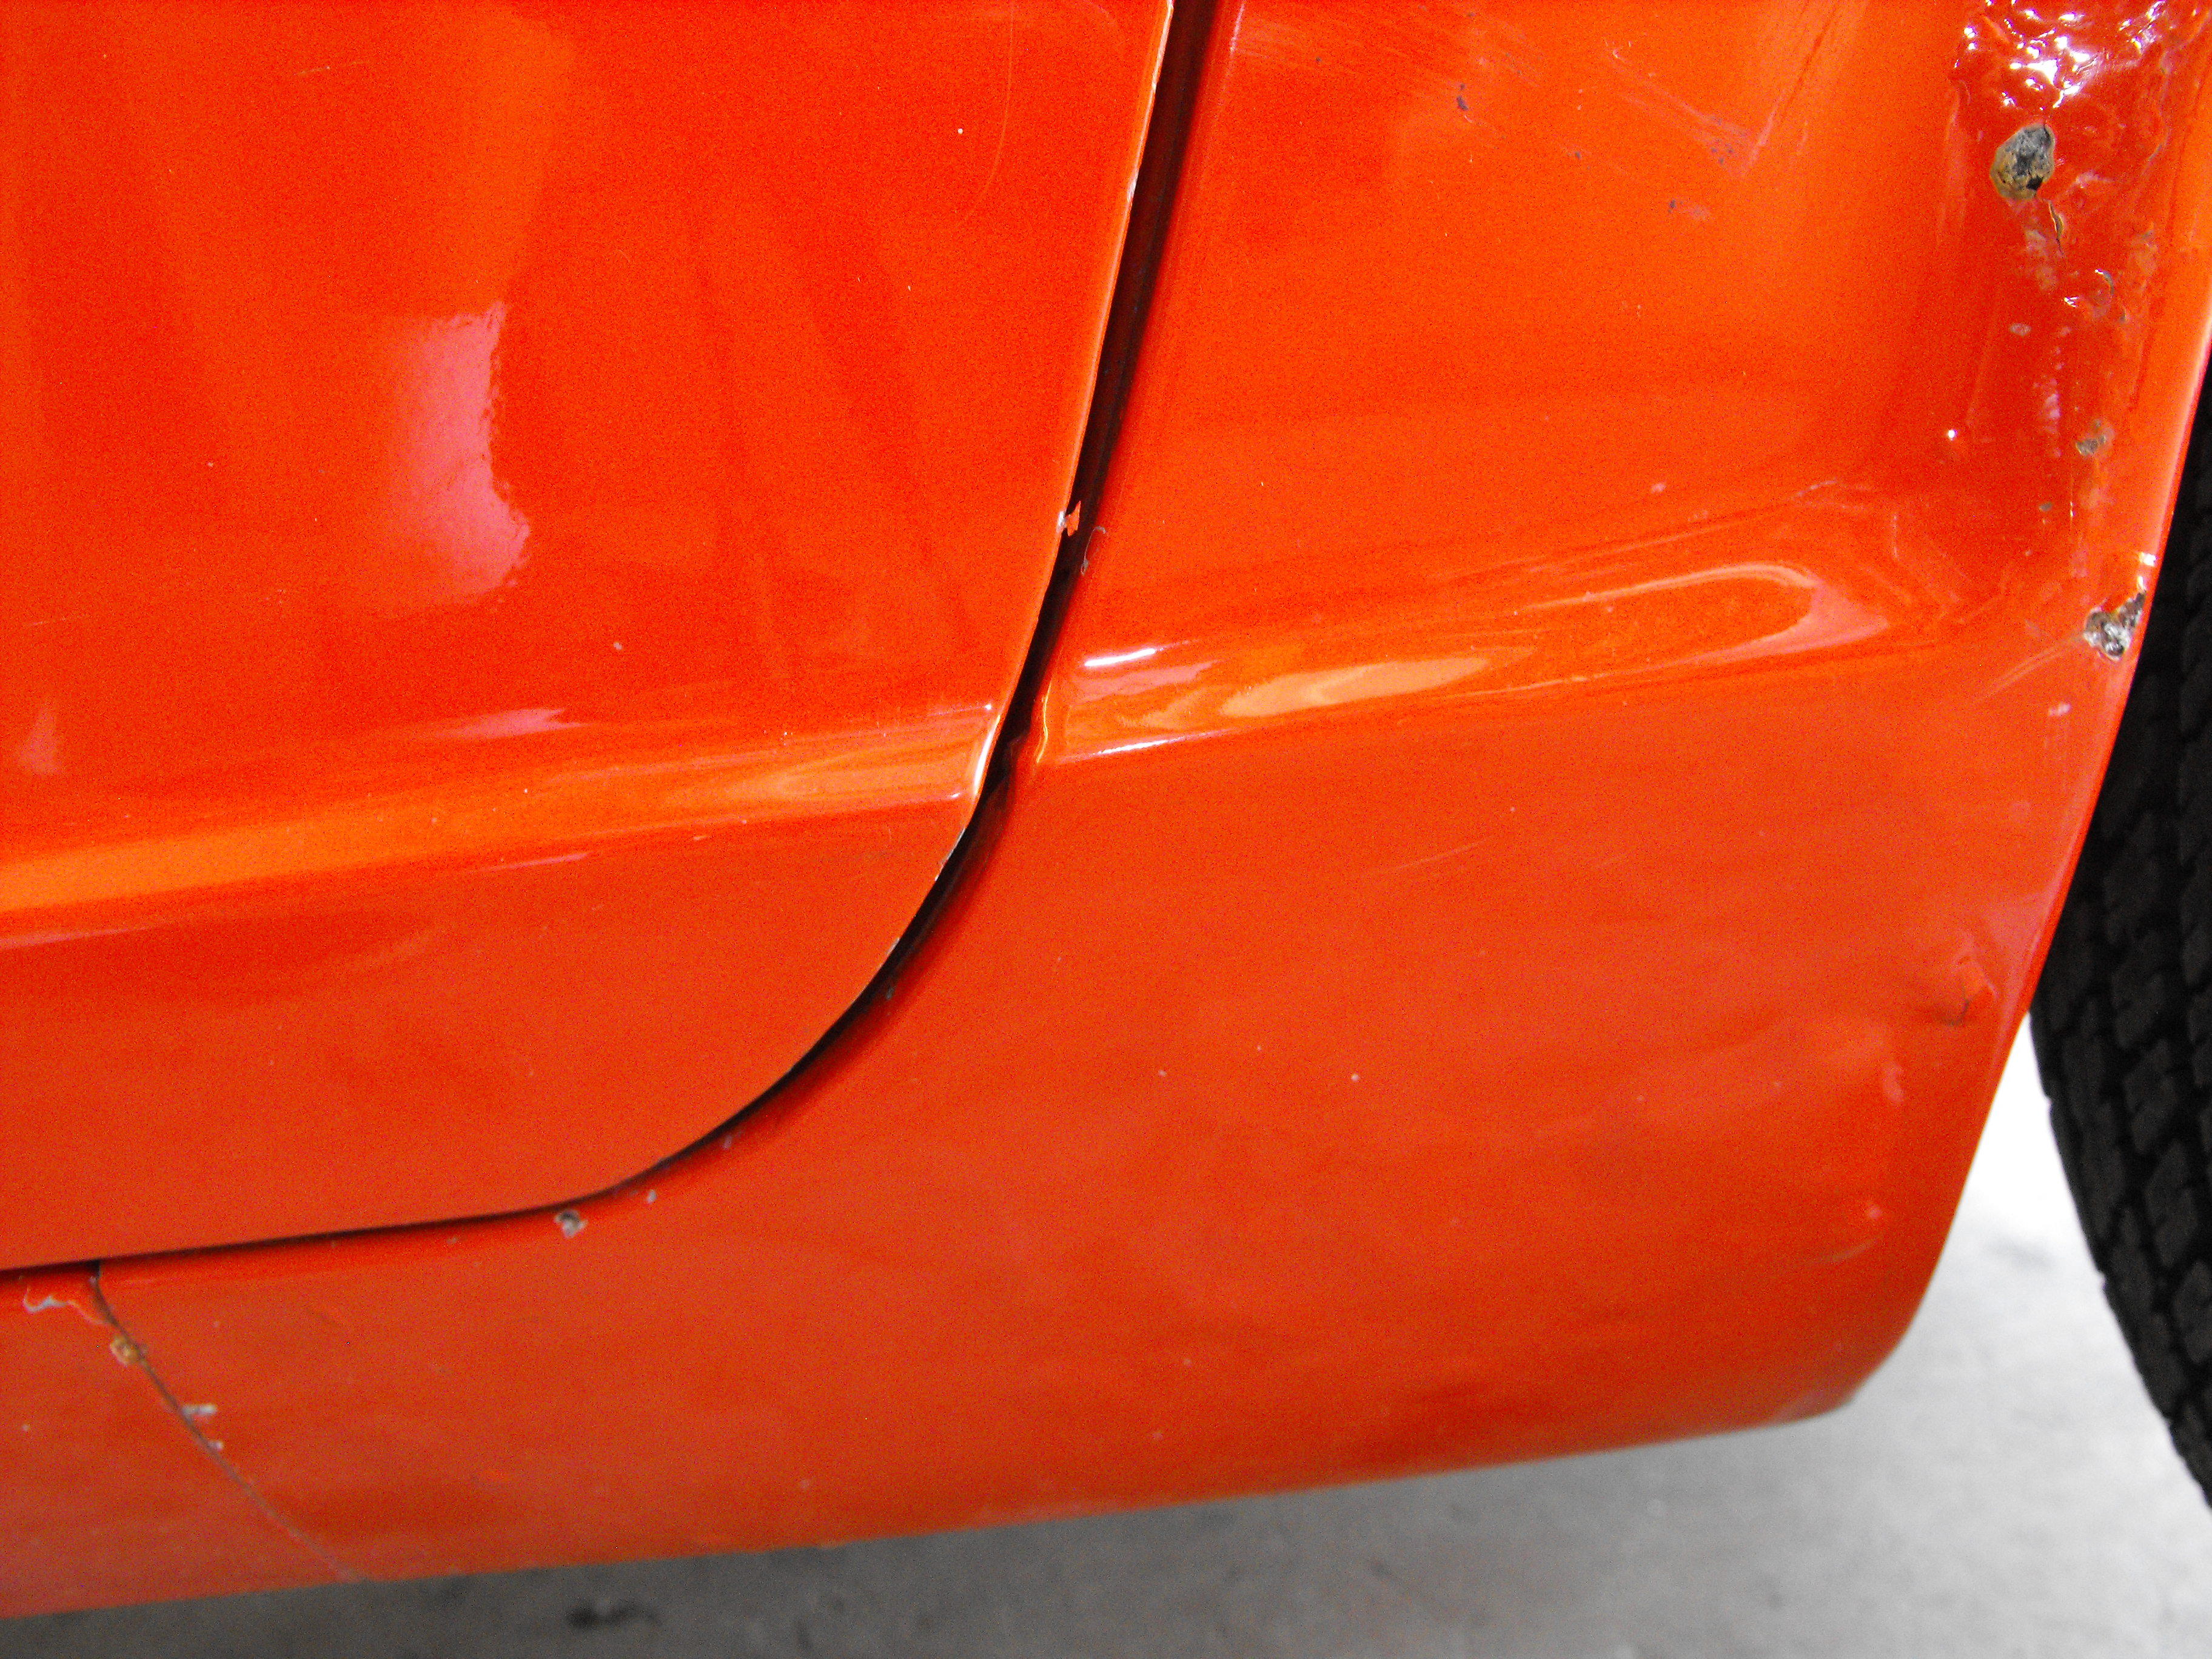
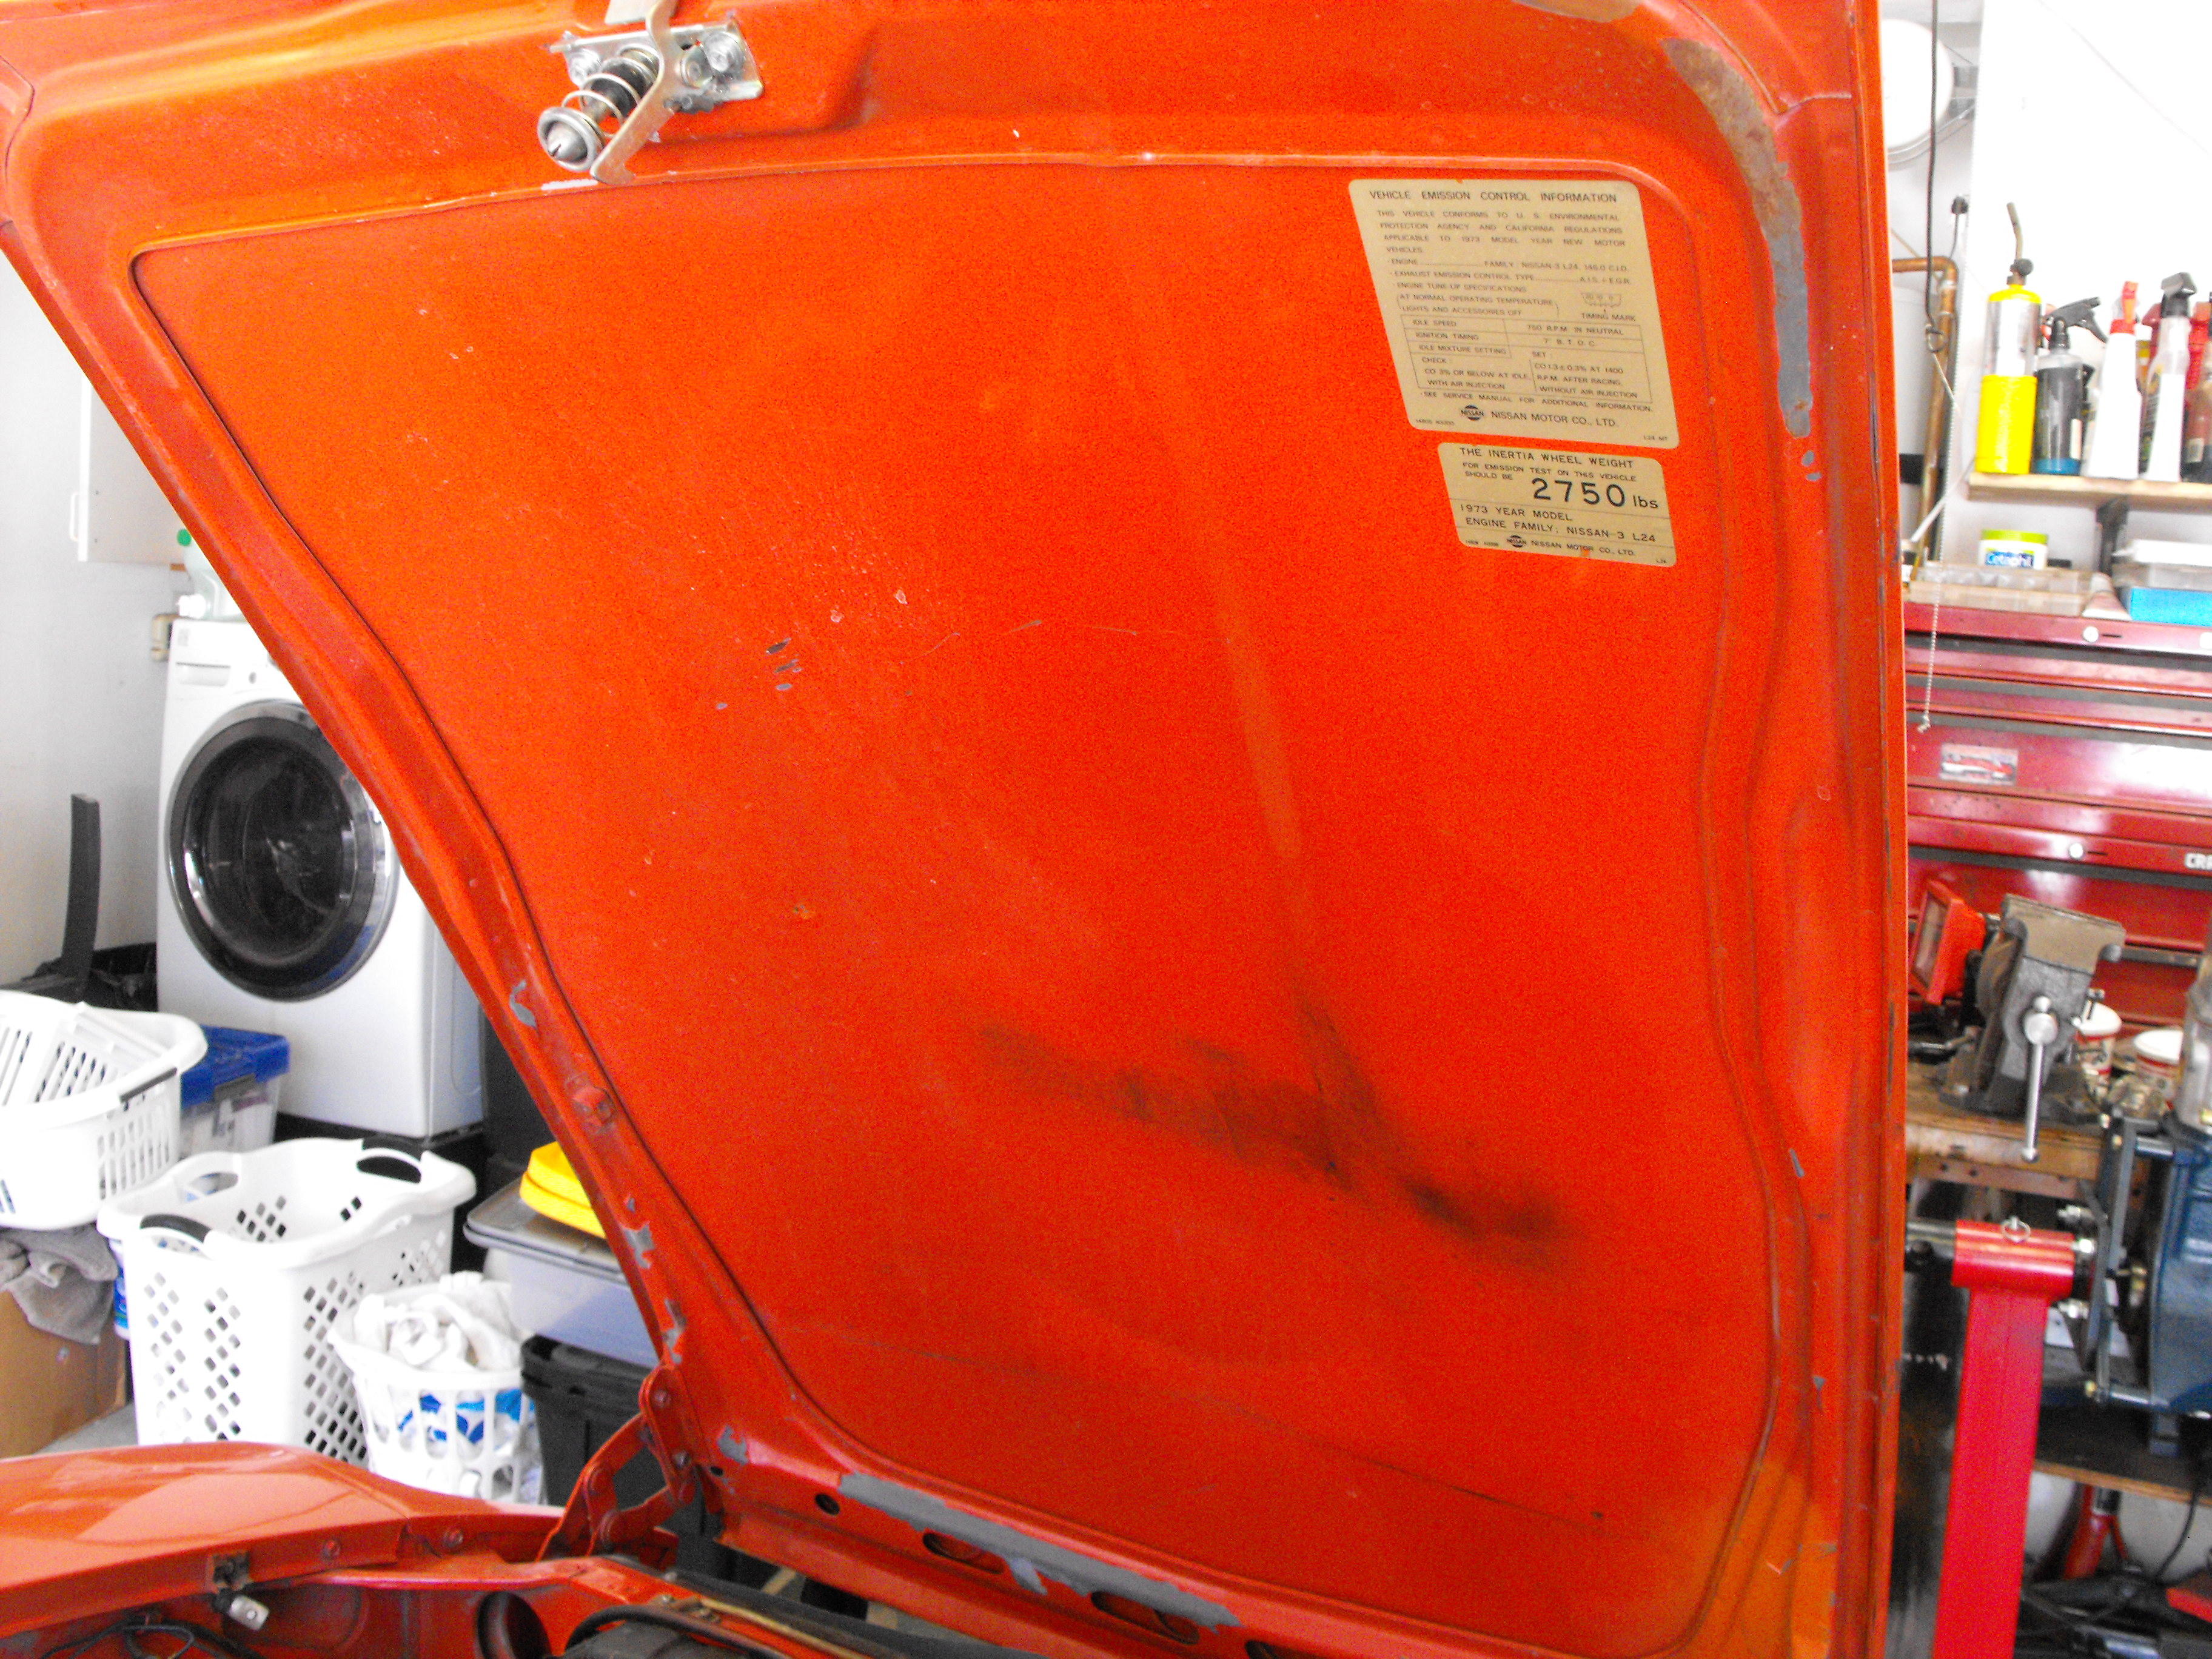
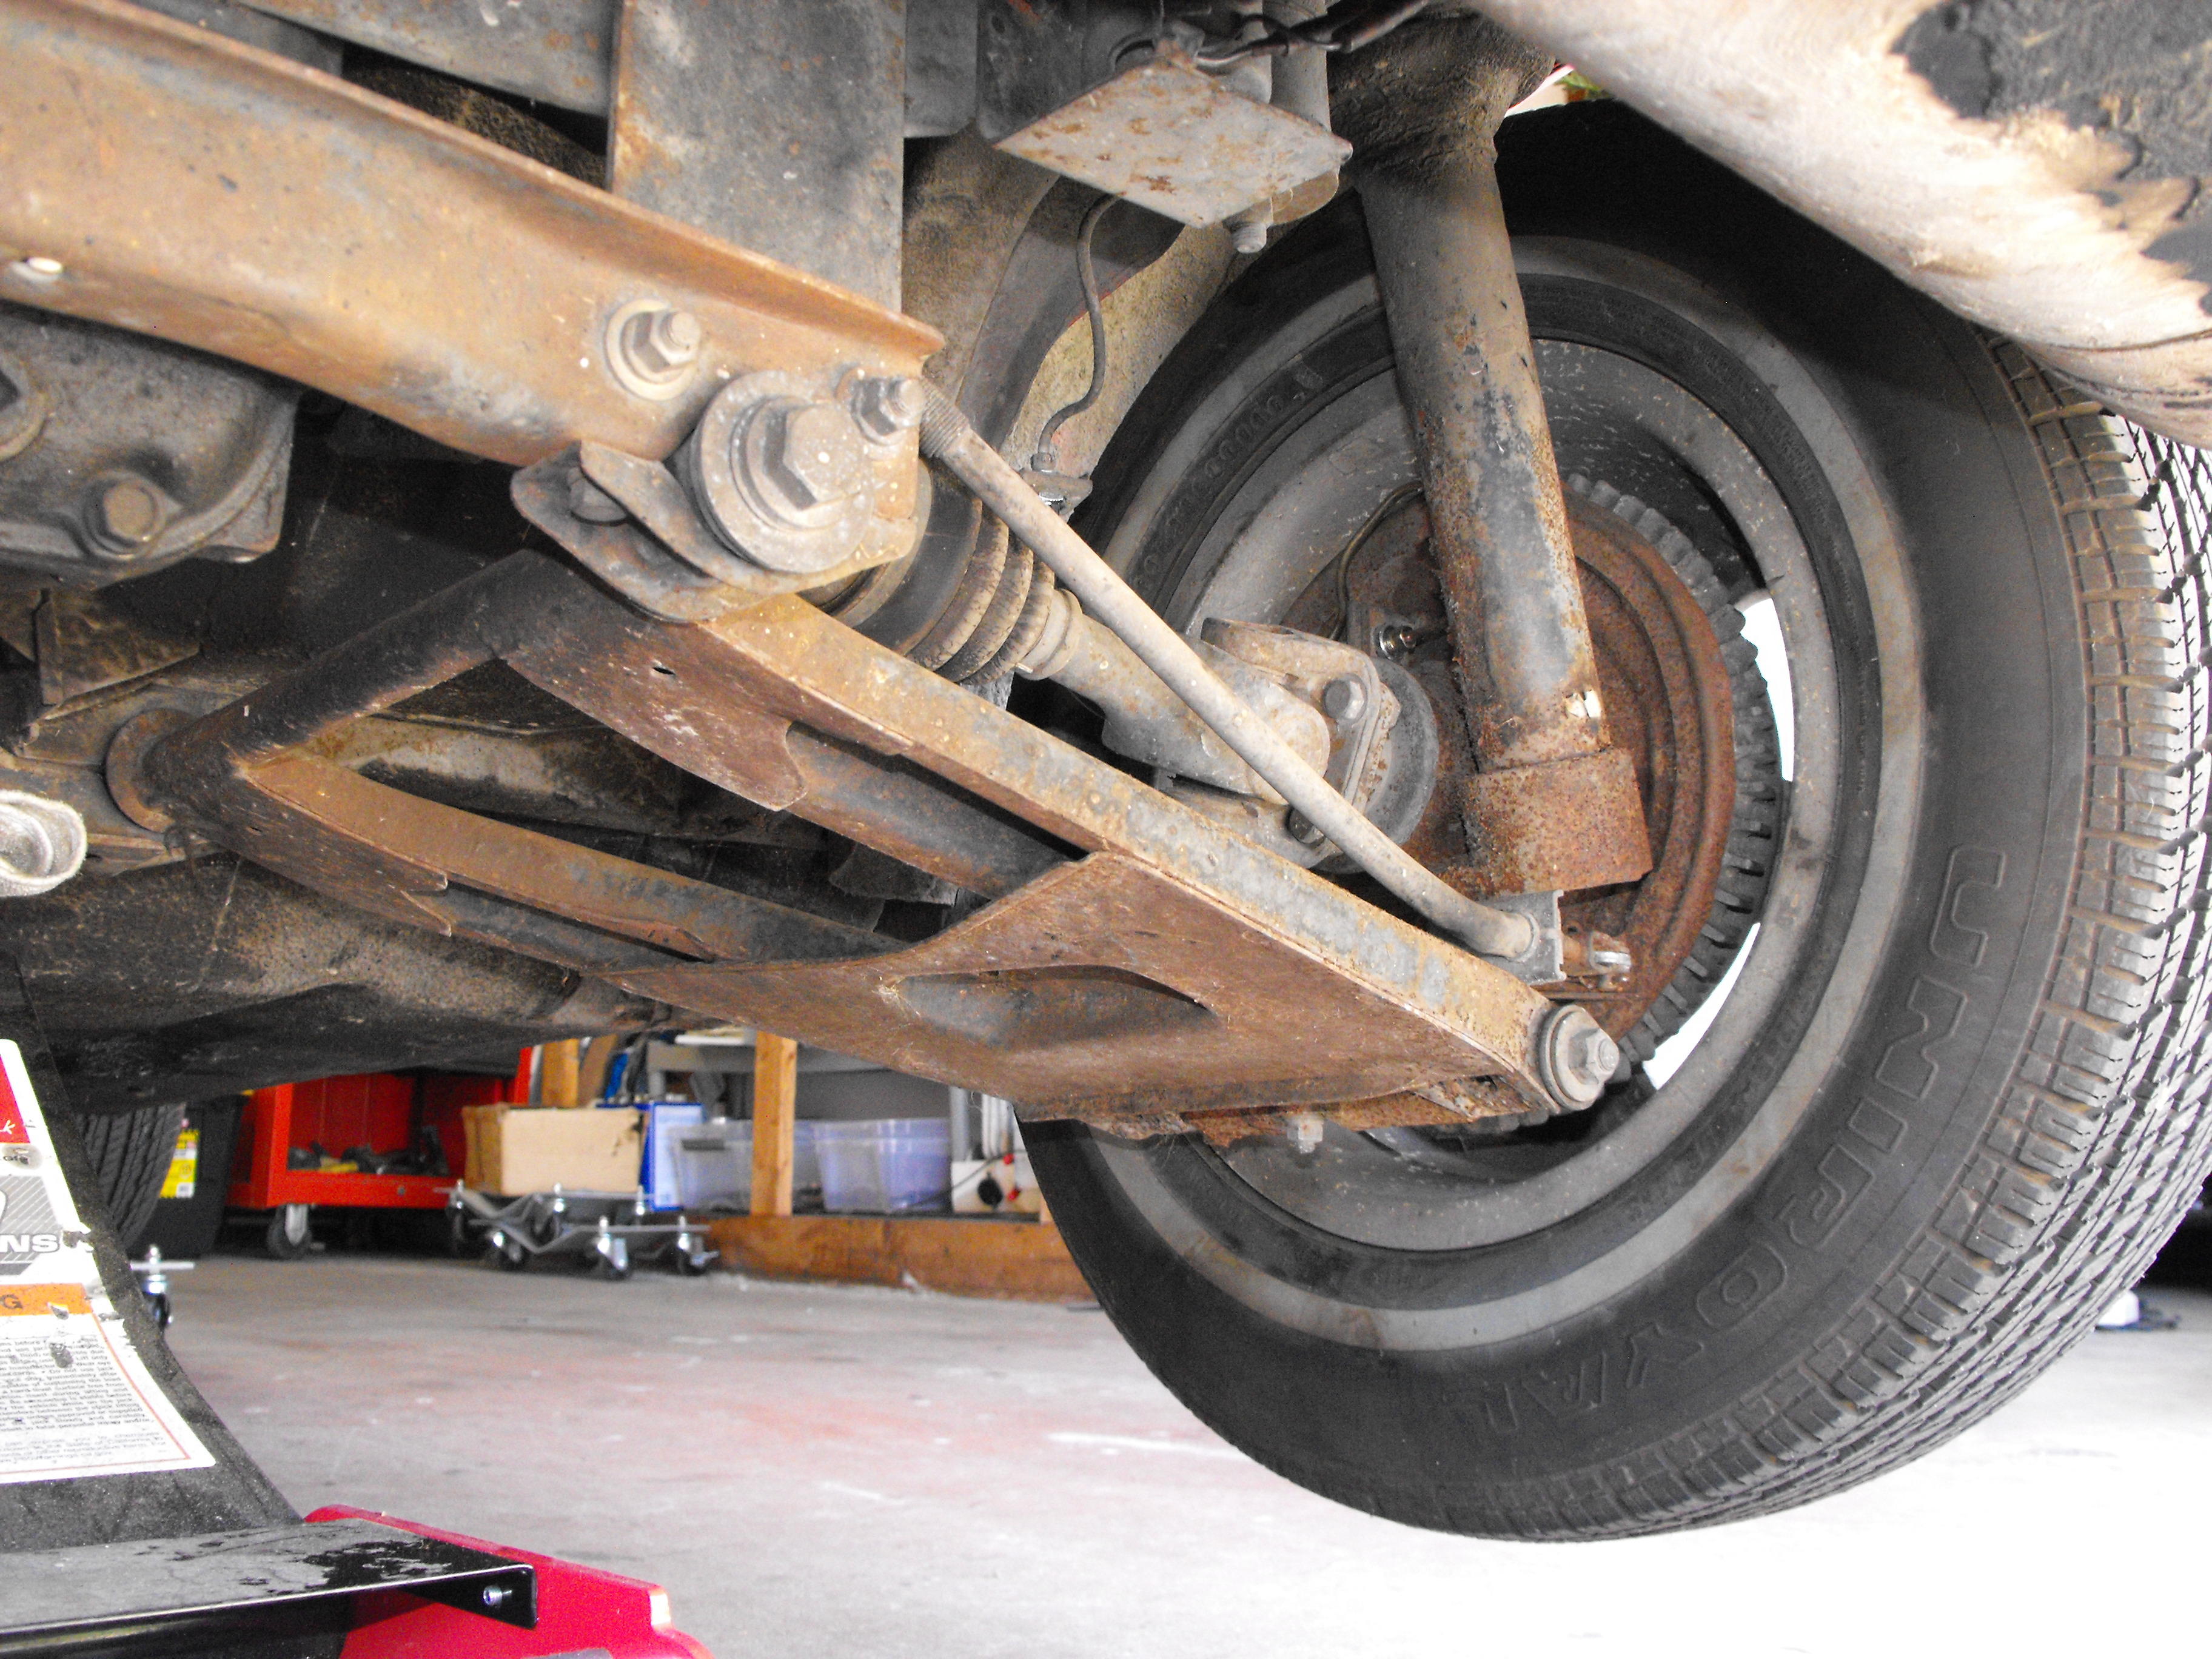
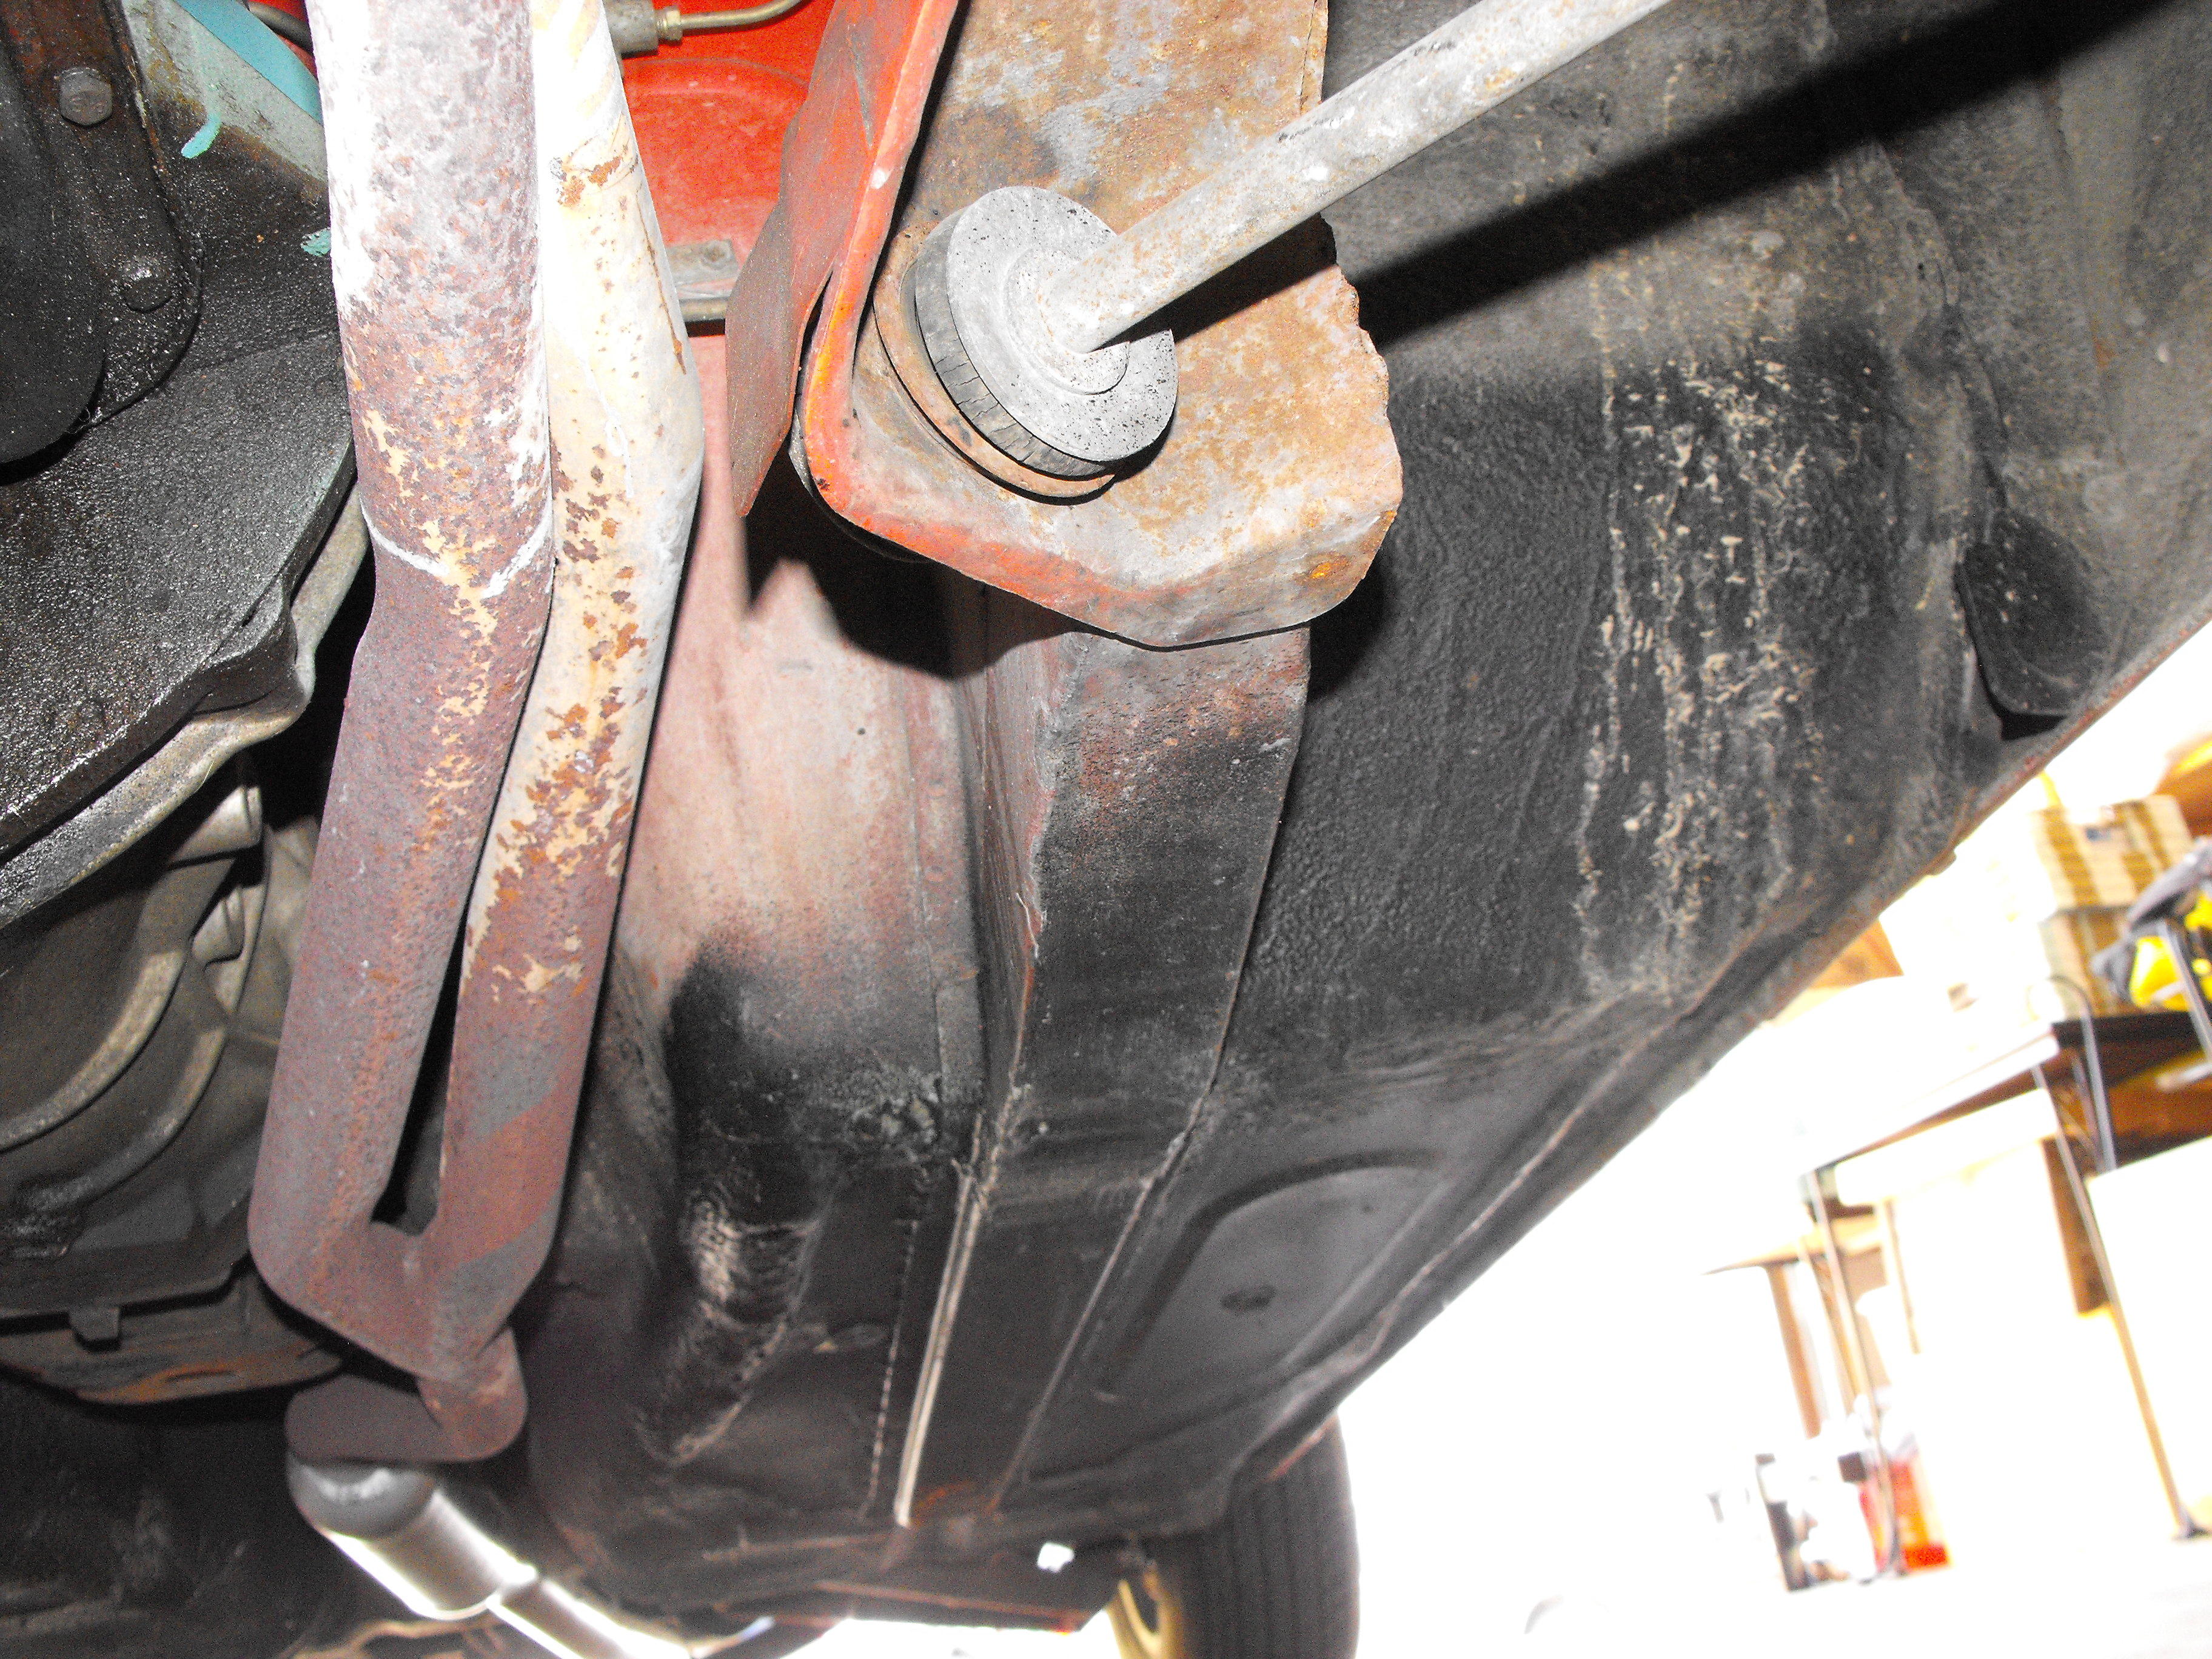
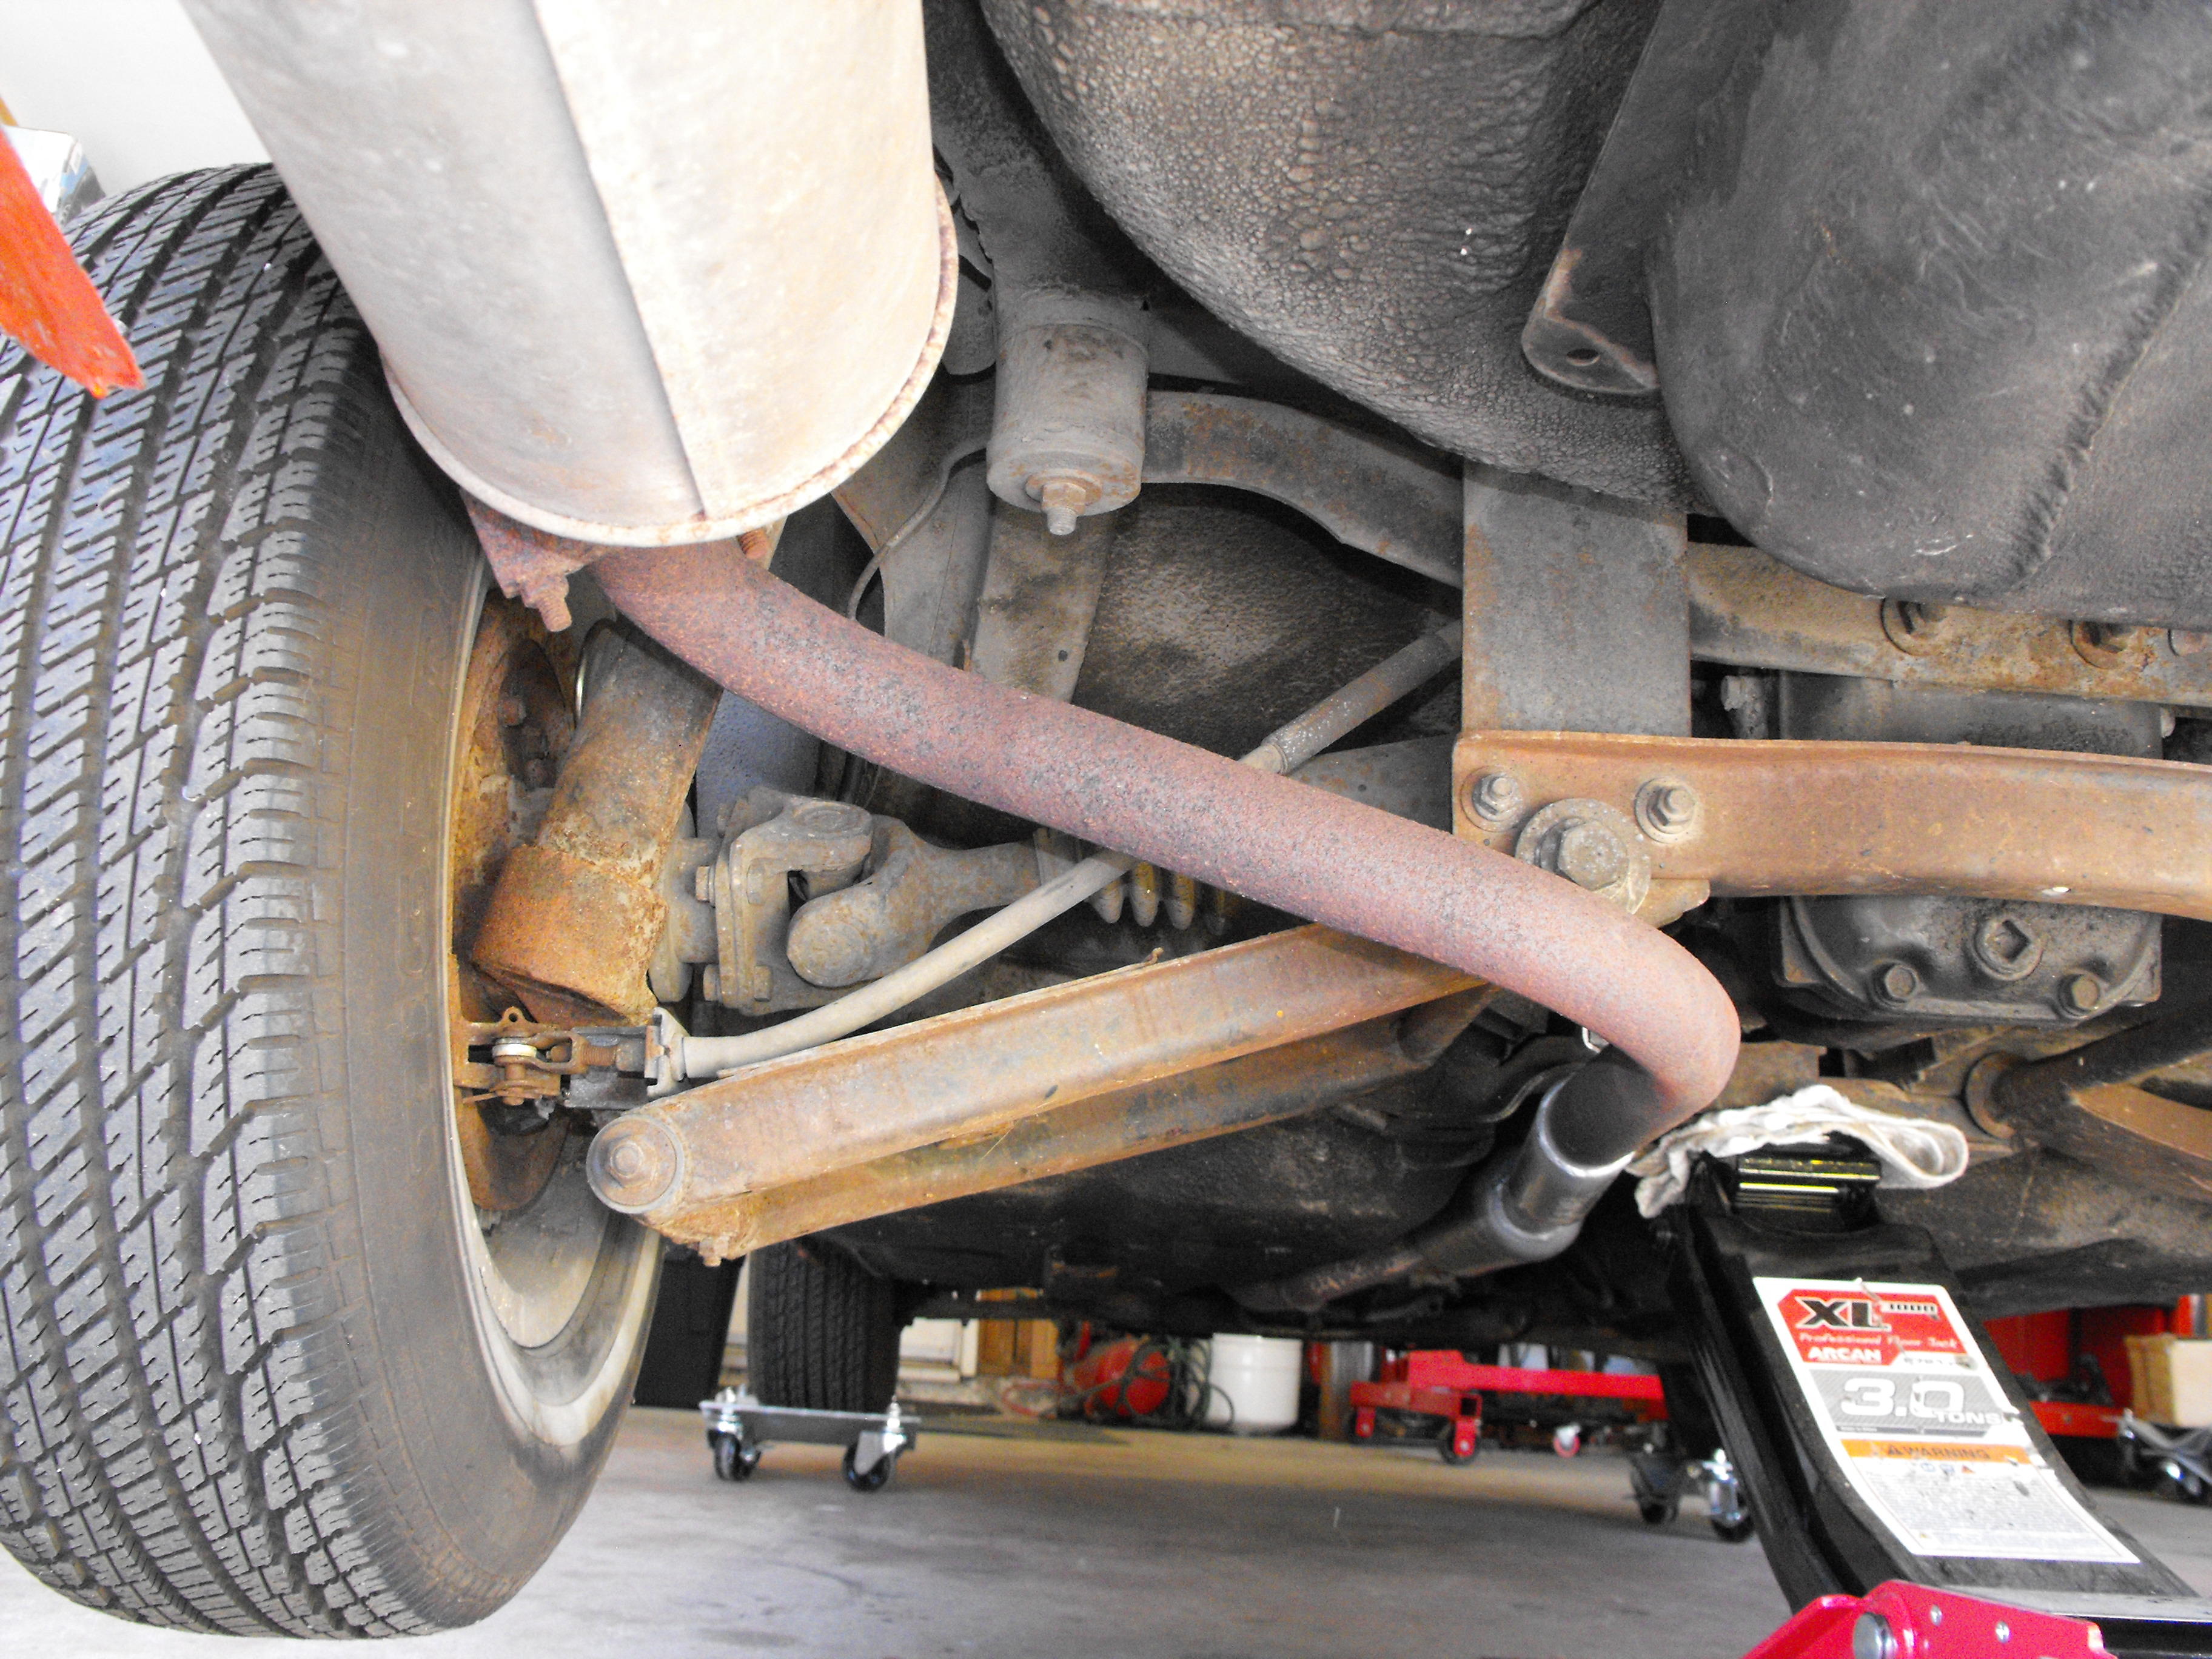
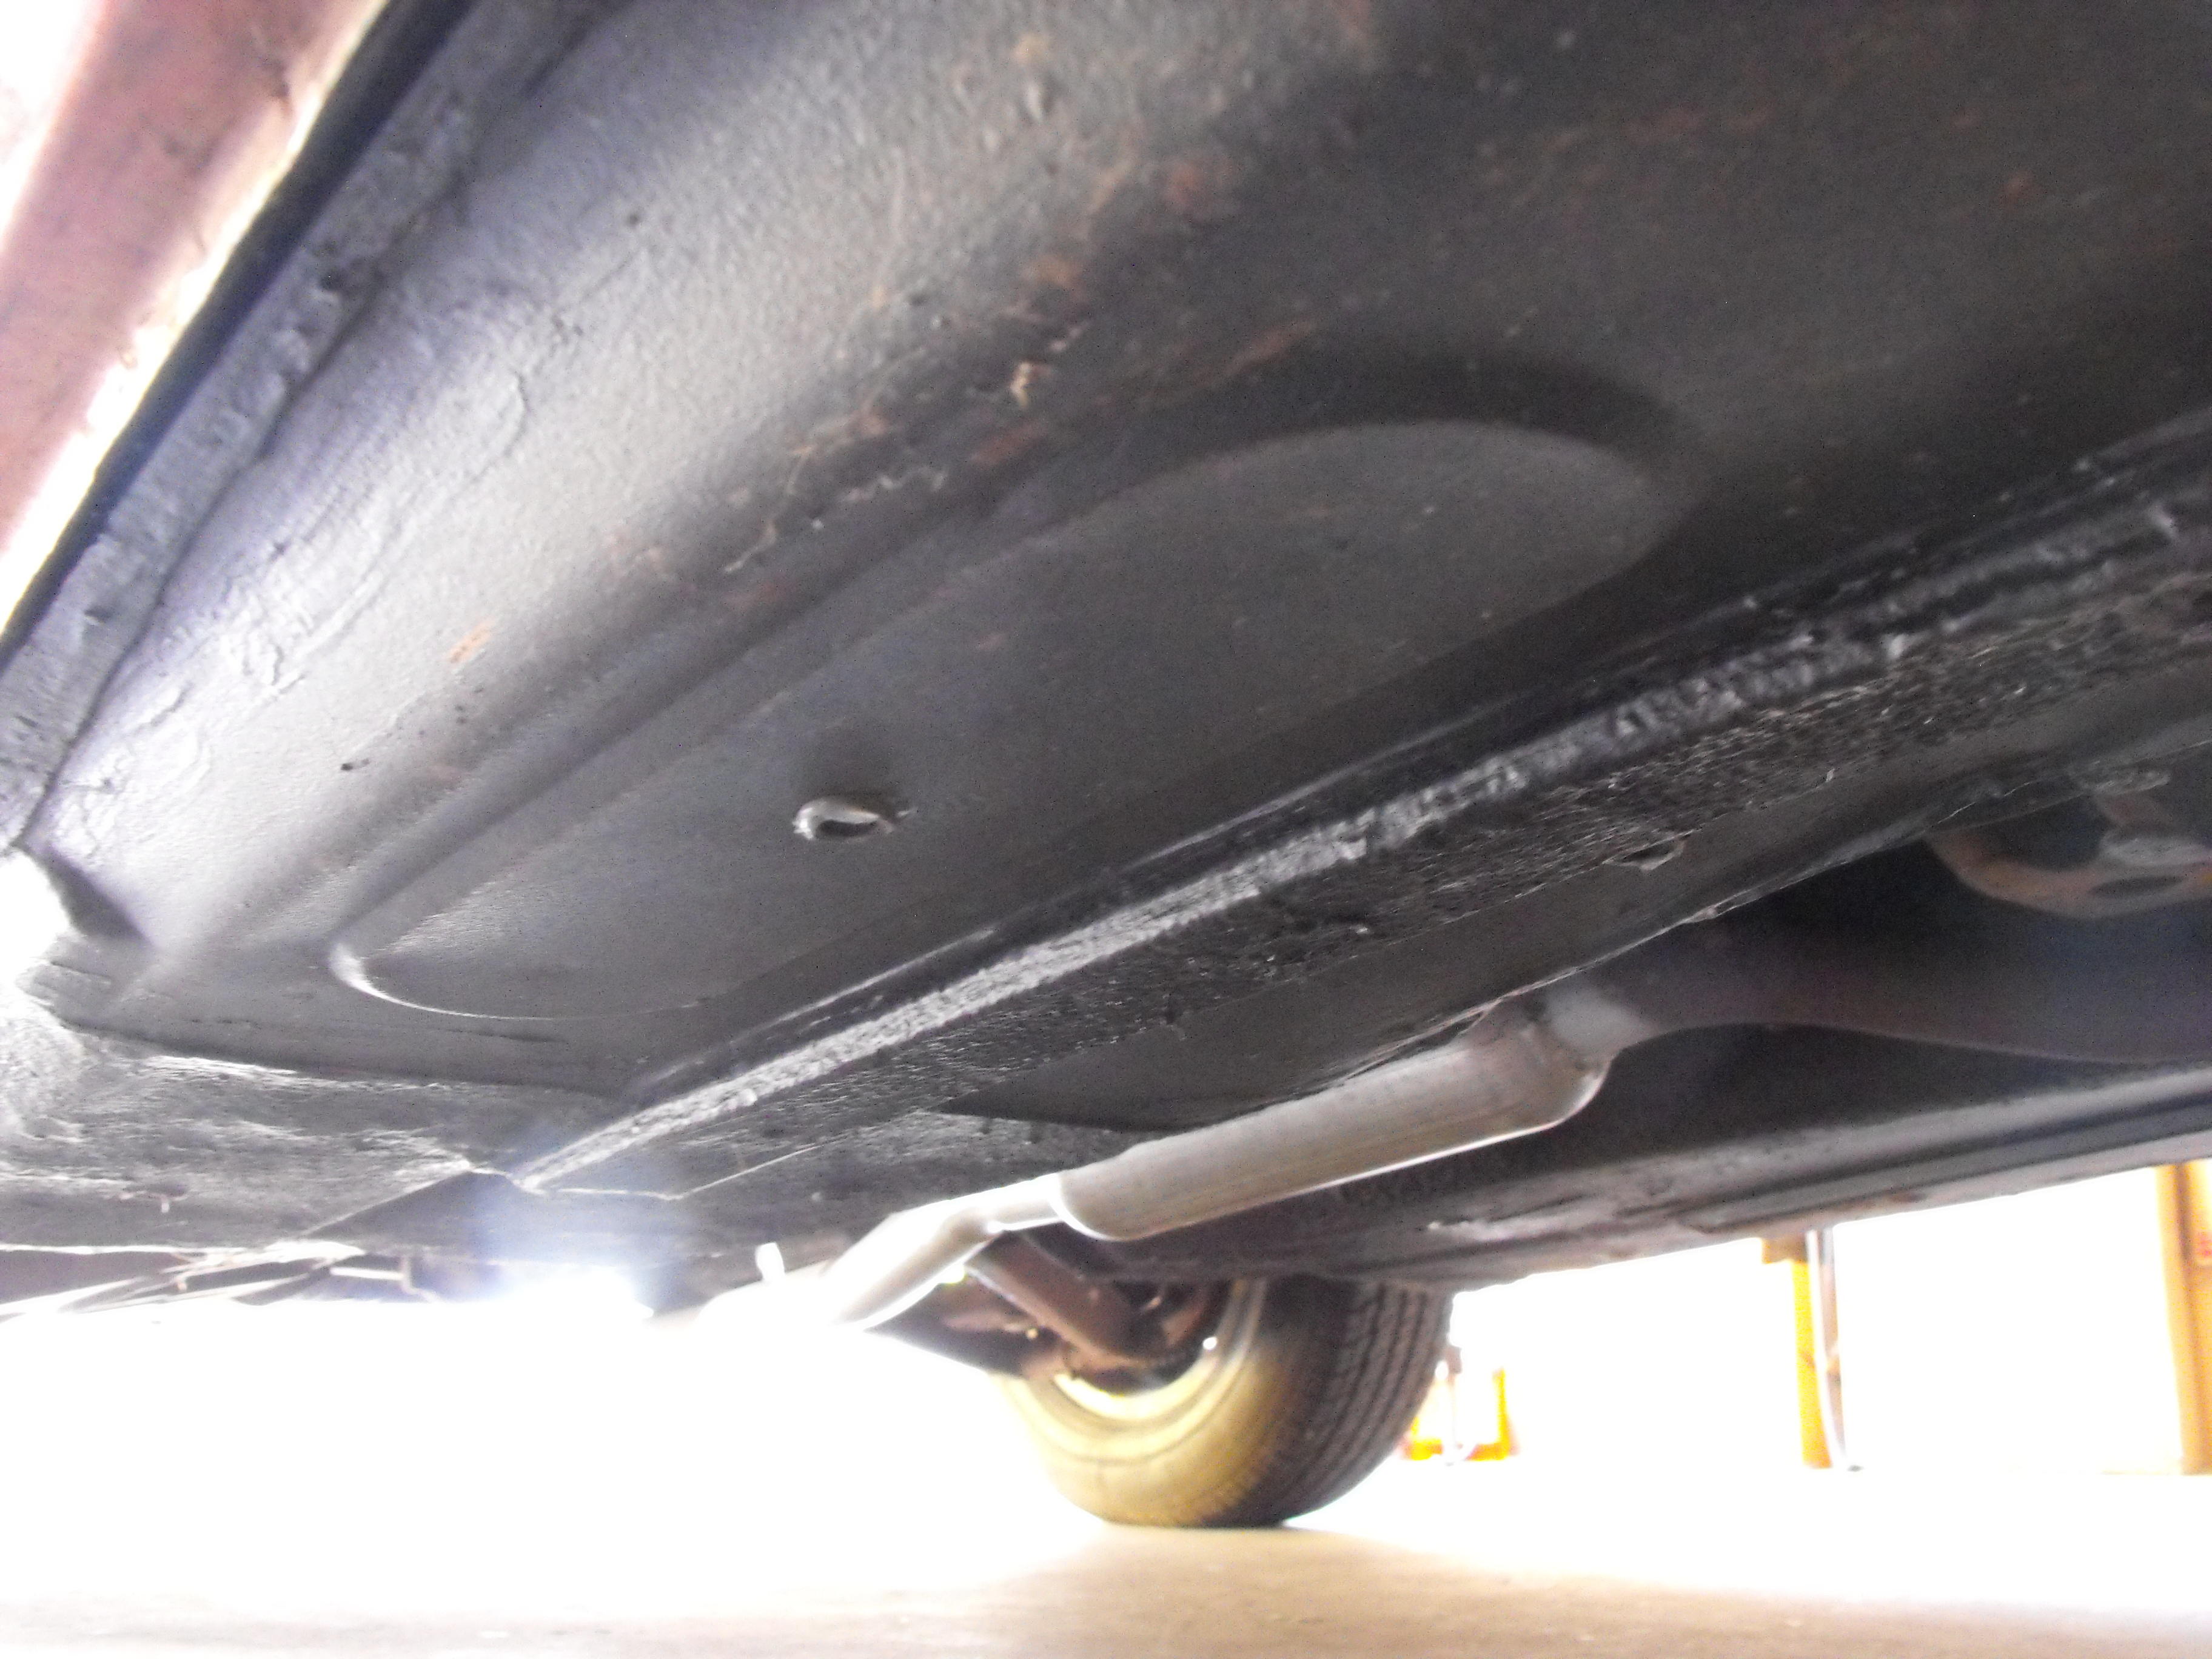
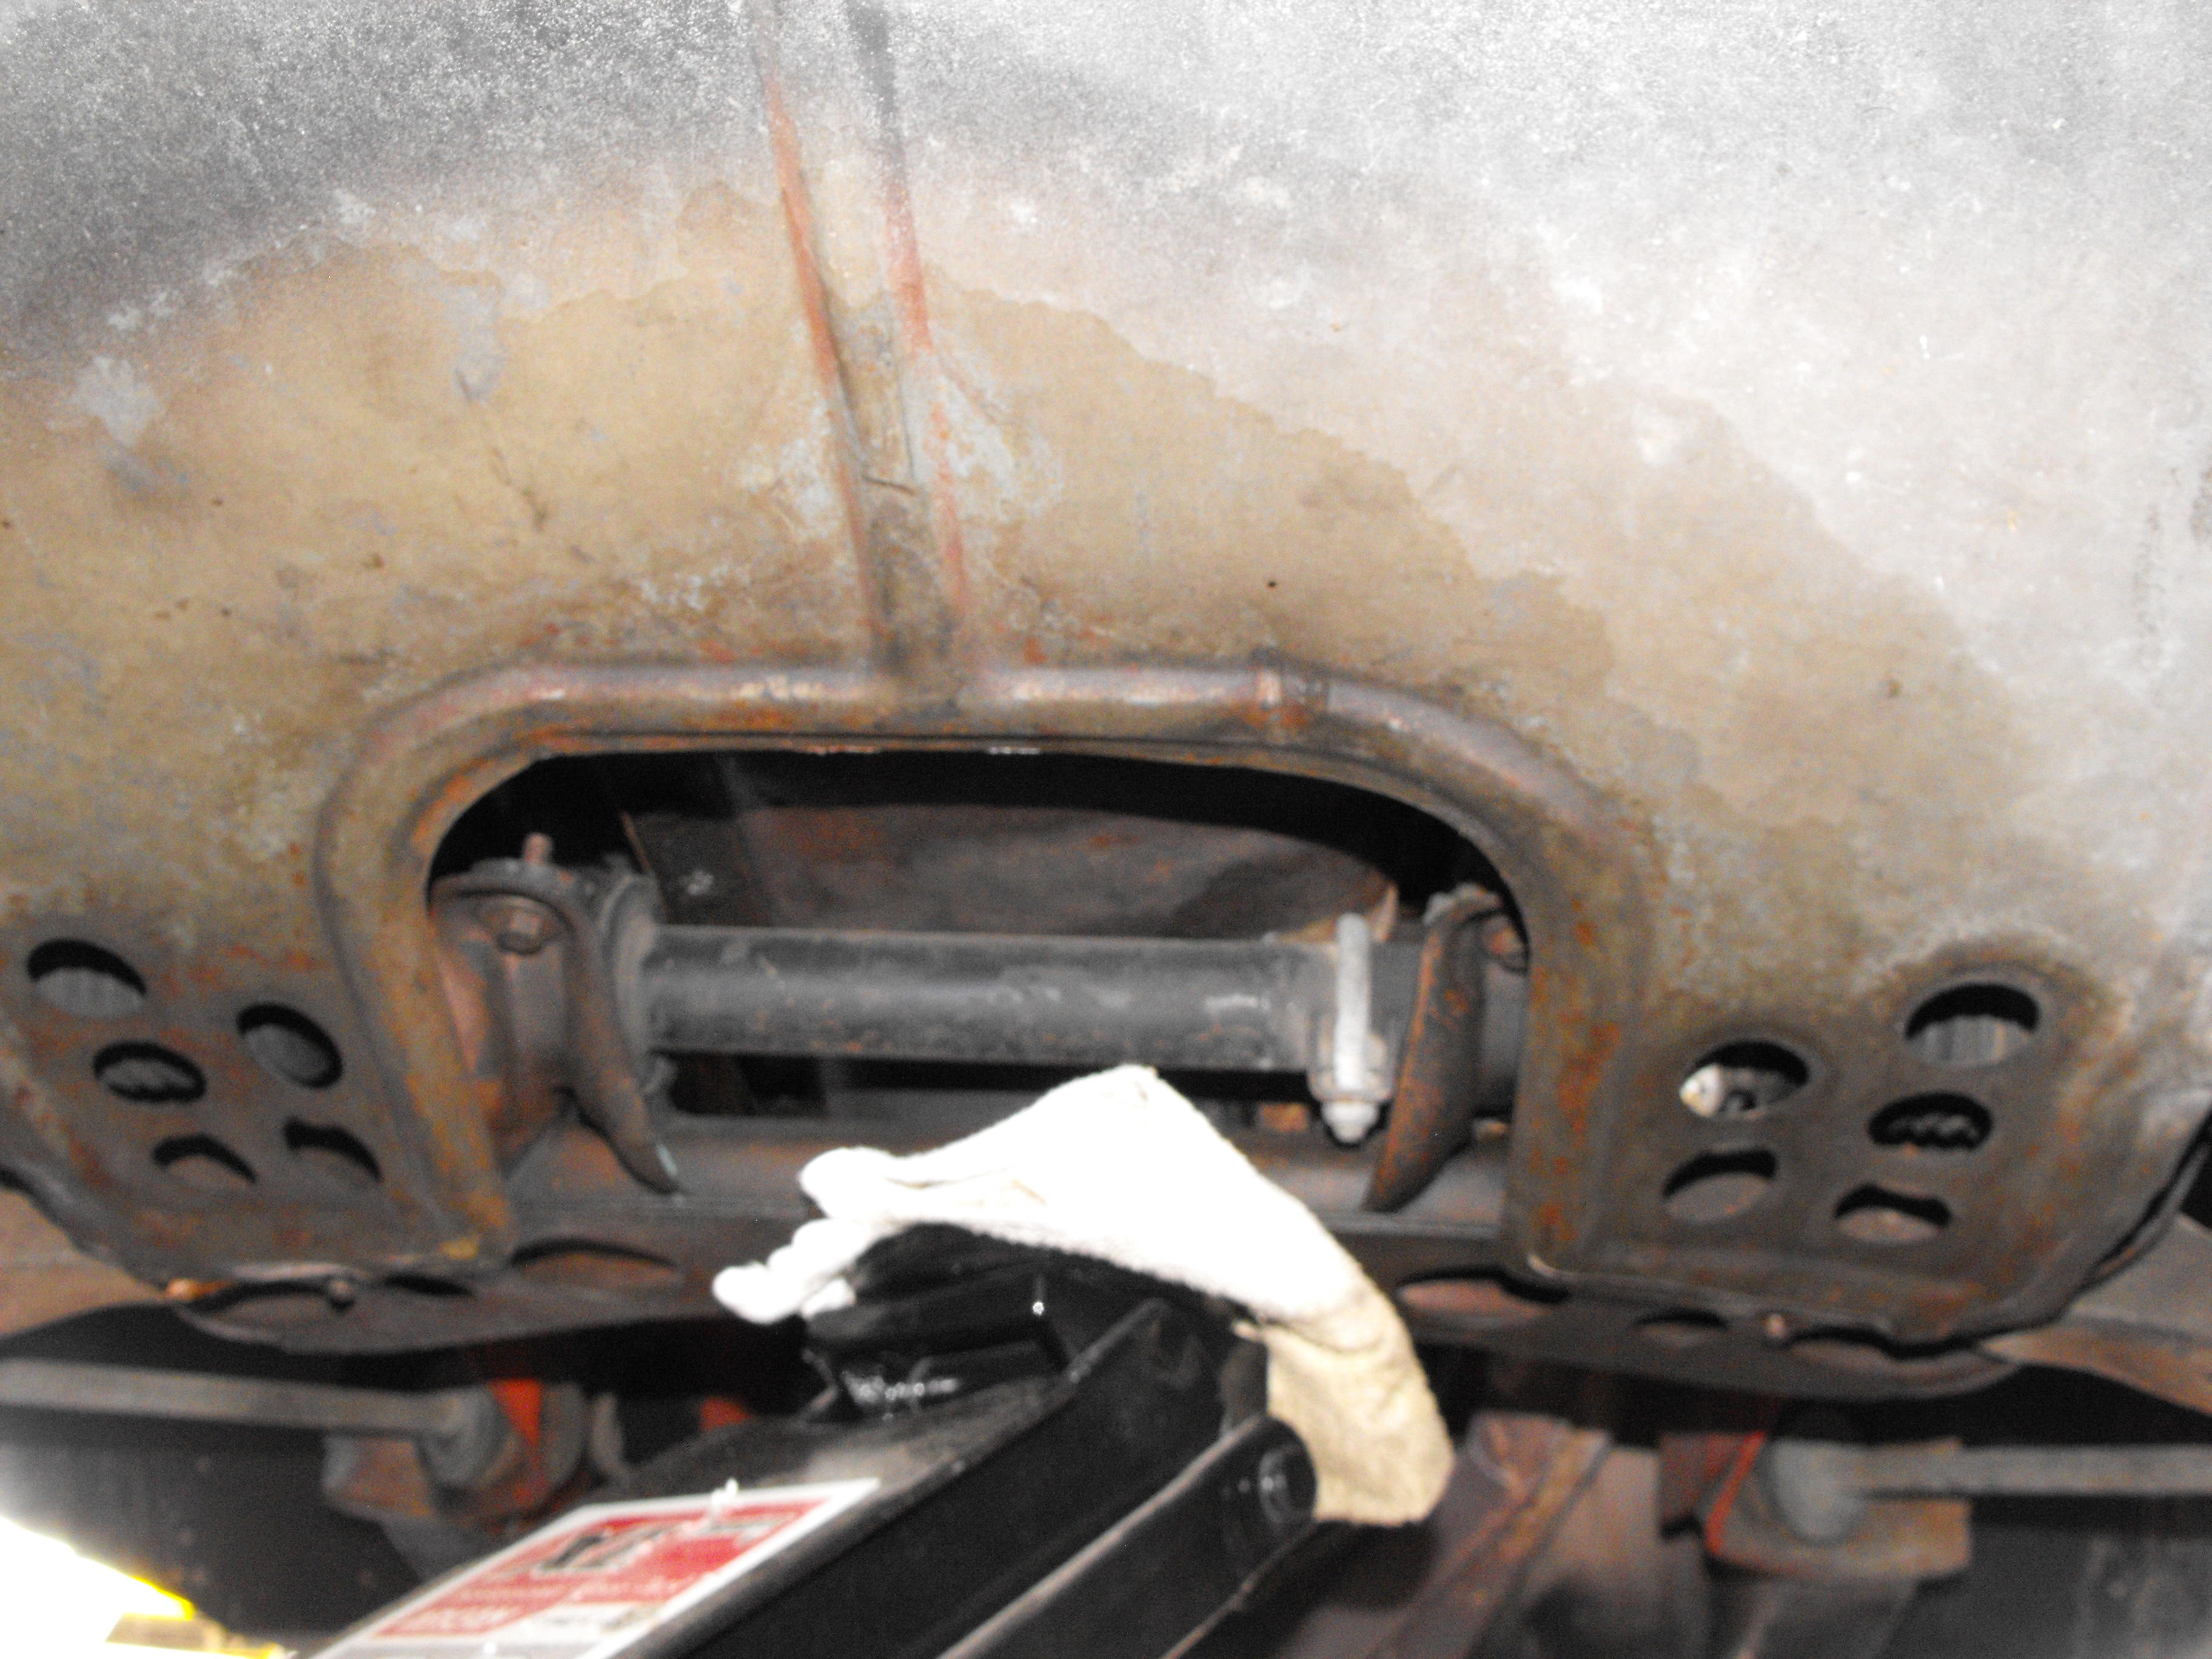
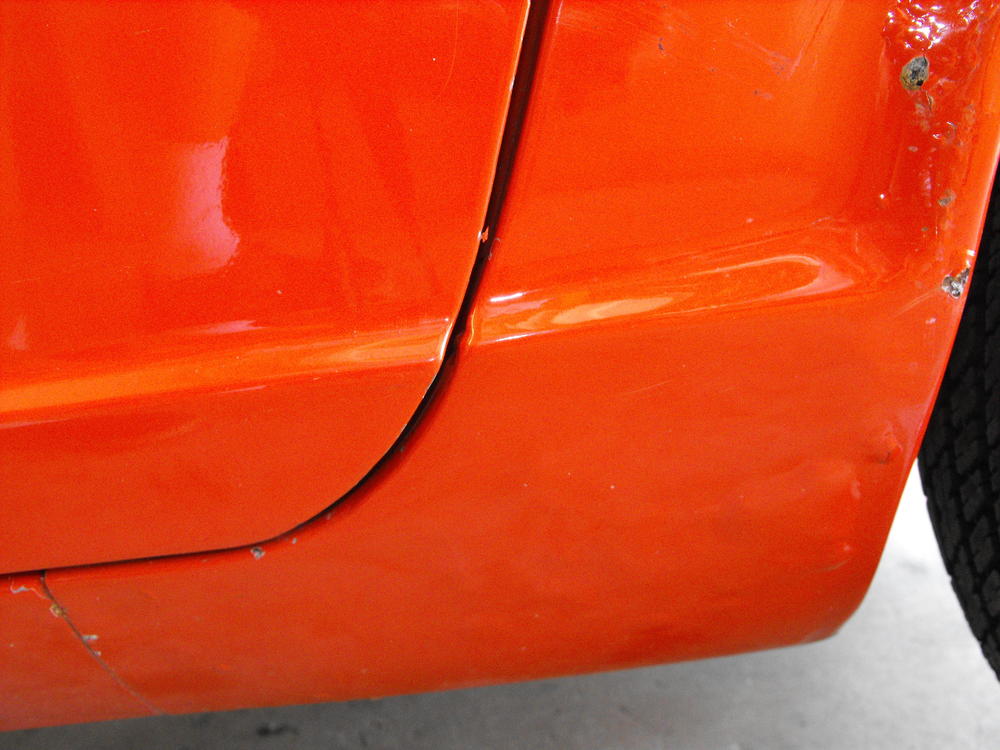
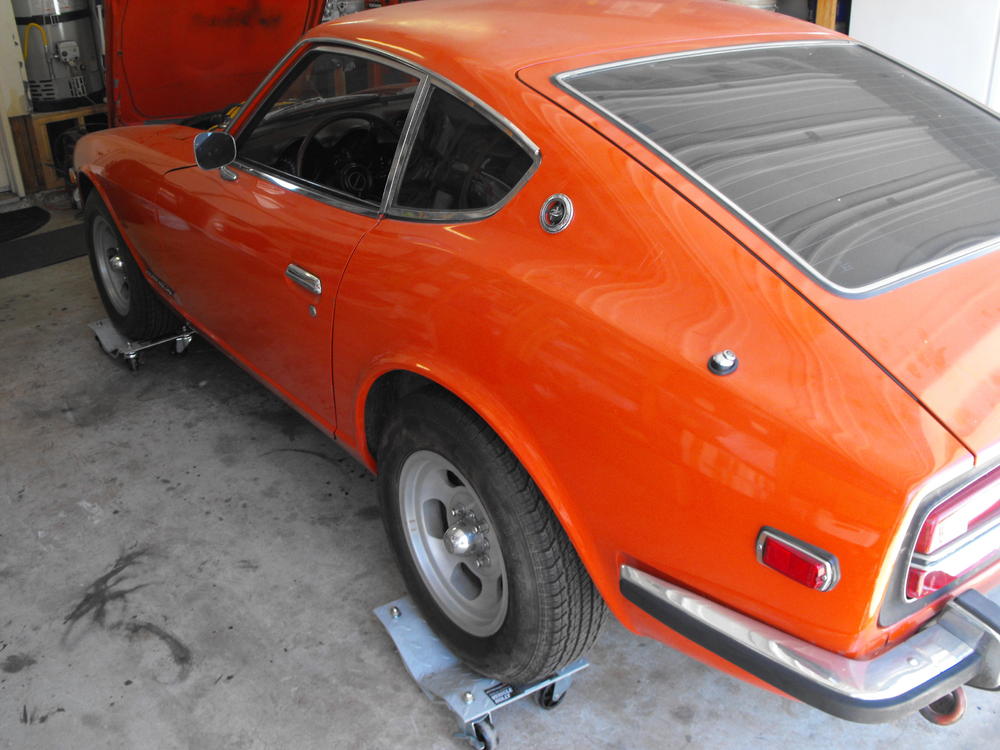
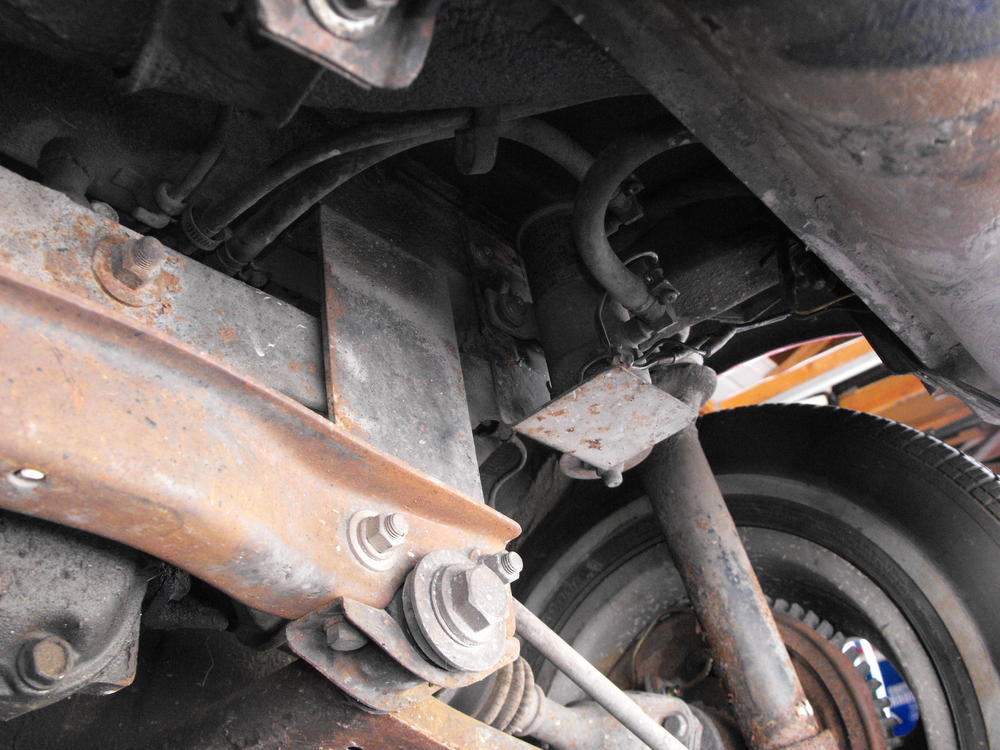
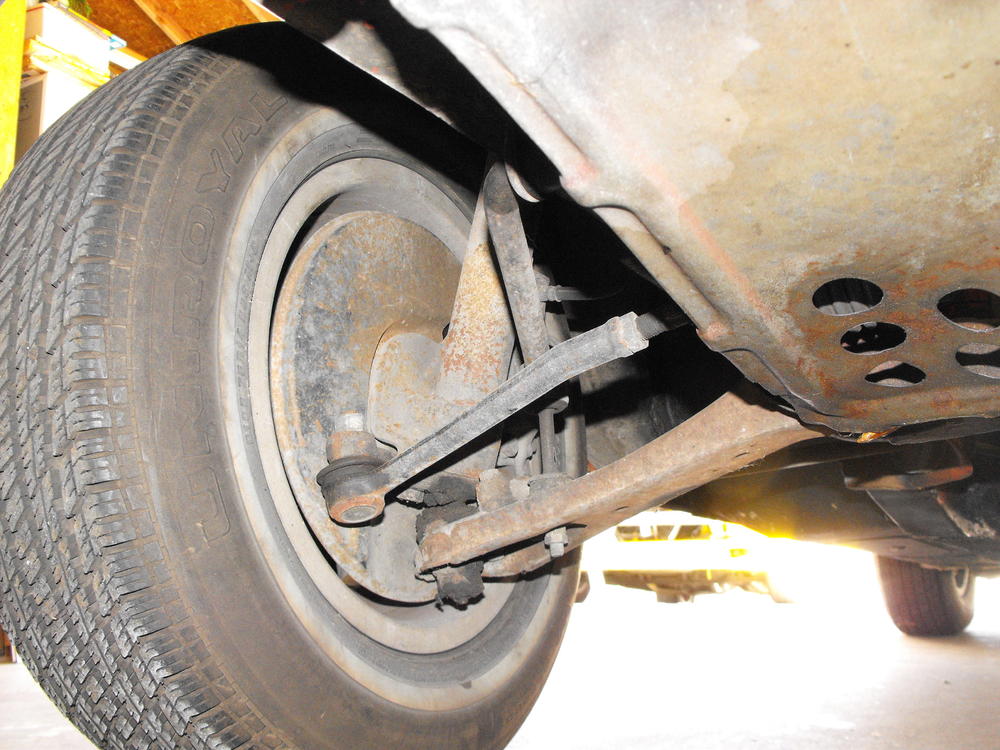
Yes, the underside of the car is one of the best I have seen. Just a few minor depressions in the frame rails which I may just correct with some filler. Otherwise the floor pans are near perfect. There seems to be a number of bondo areas on the car itself and the doglegs are pretty rusted. Probably a result of its time in Pennsylvania. Miguel will cut these areas out and weld in new patch panels.
-
I once used sealant on the outside of the rear seal and the seal squeezed out of its locations as I tightened the main bearing. I have not used sealant since.
-
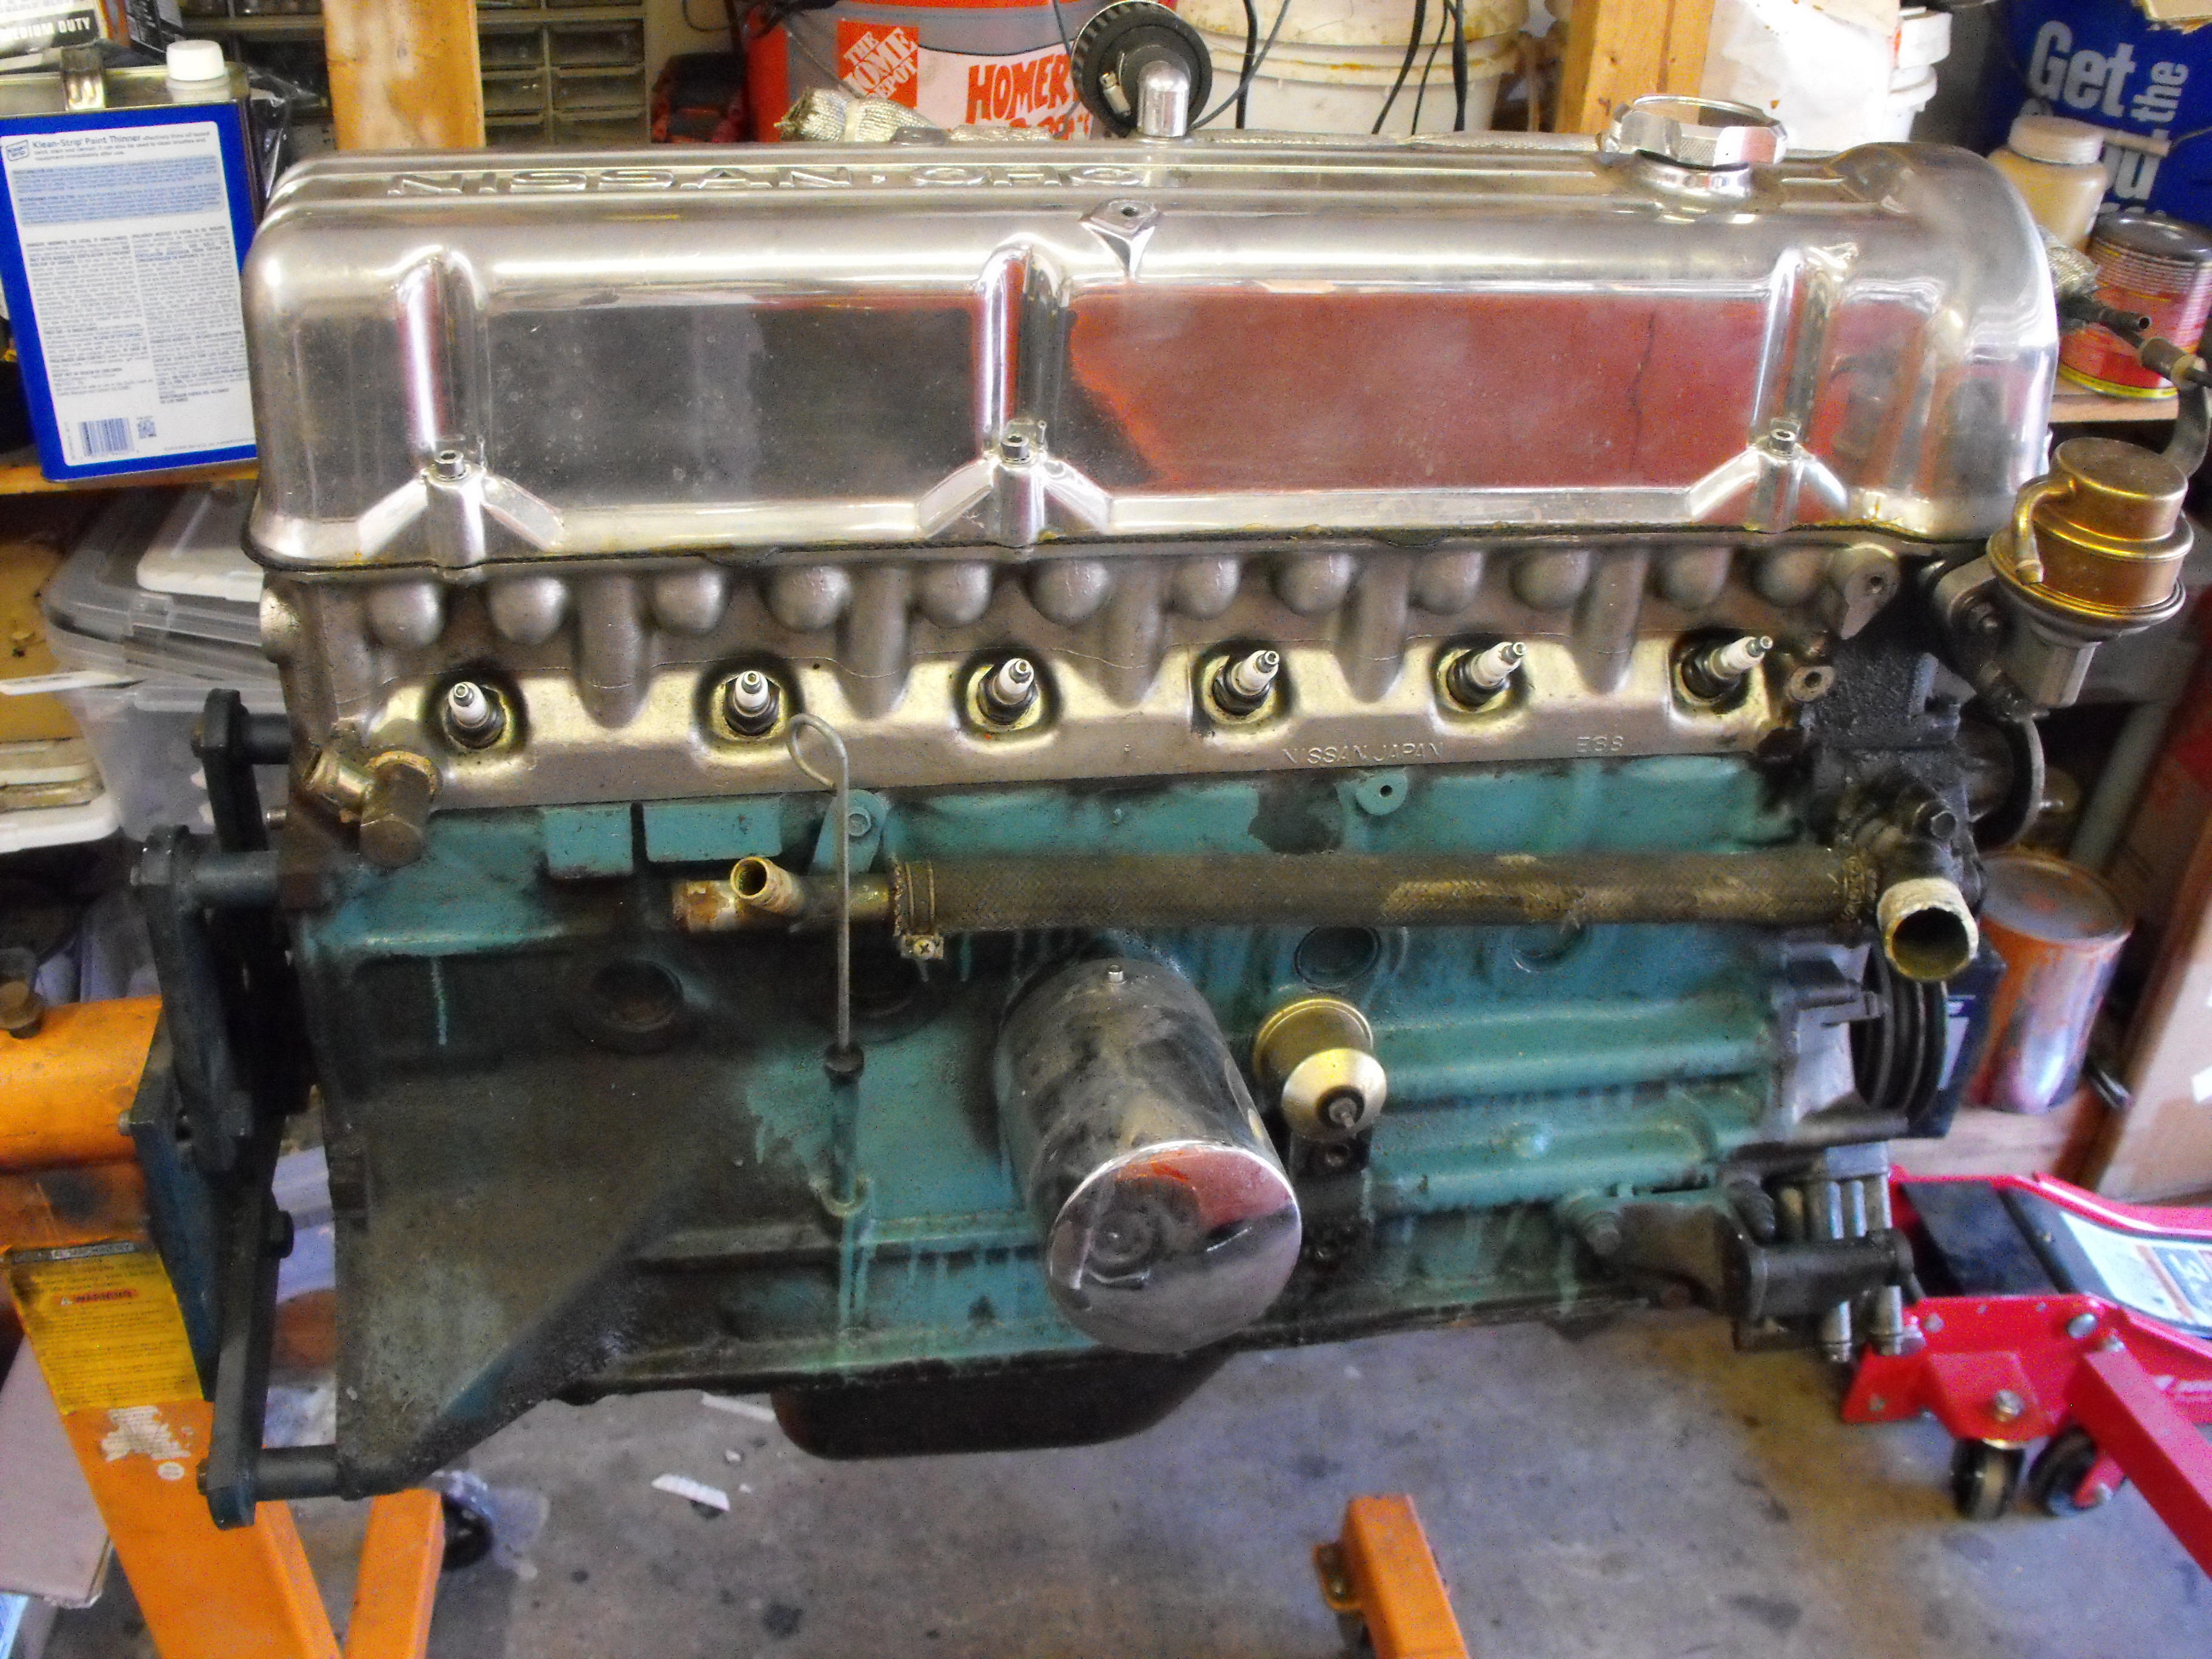
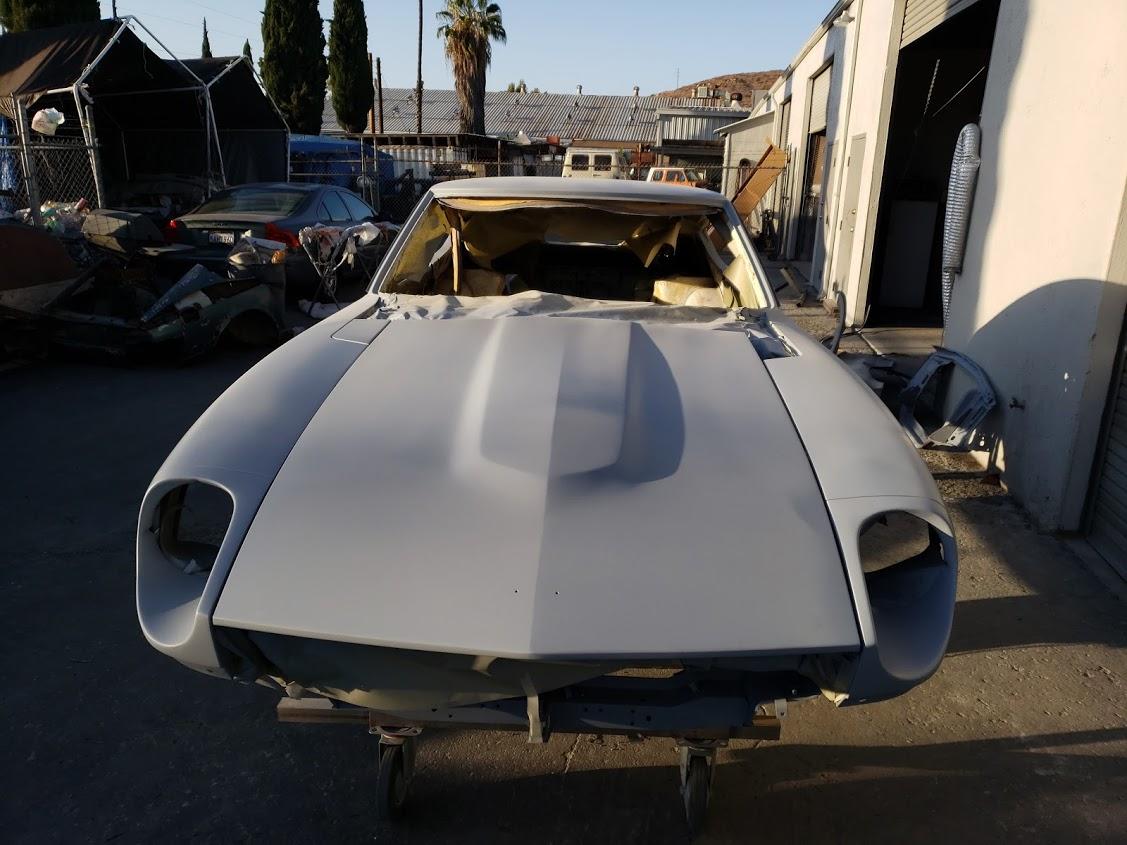
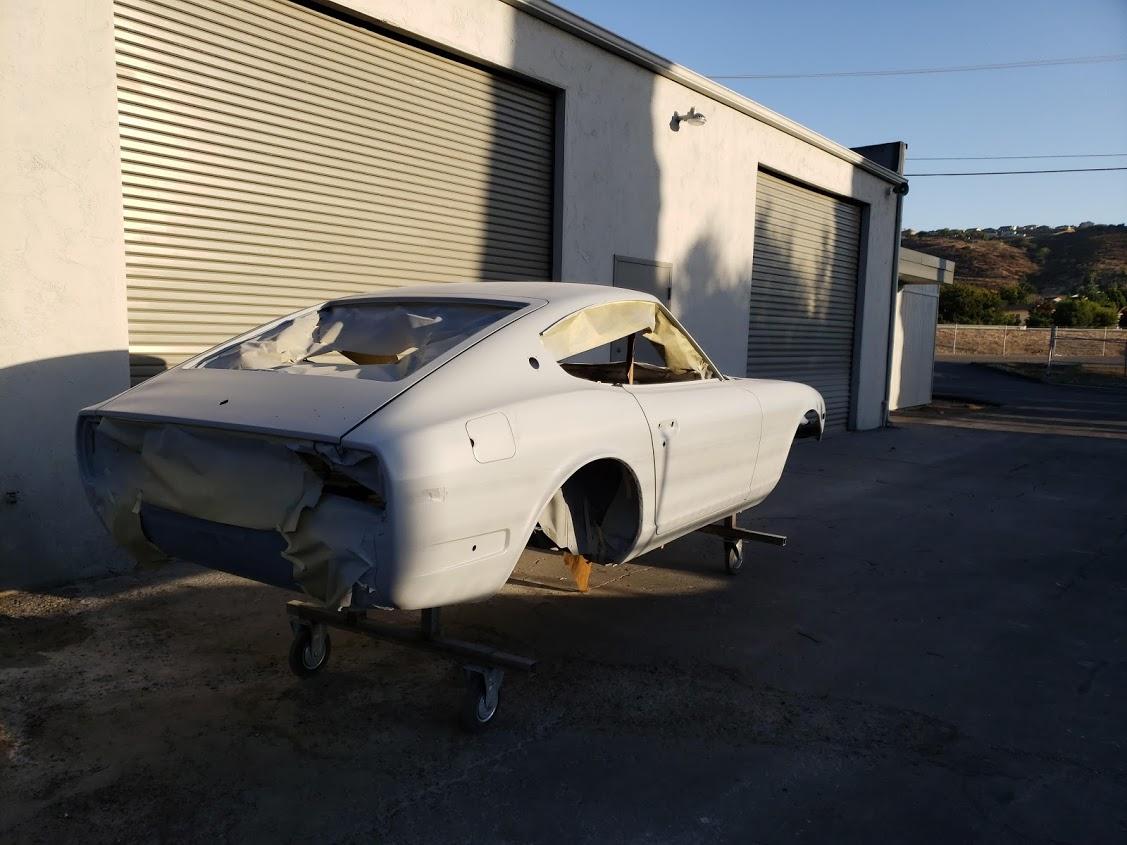
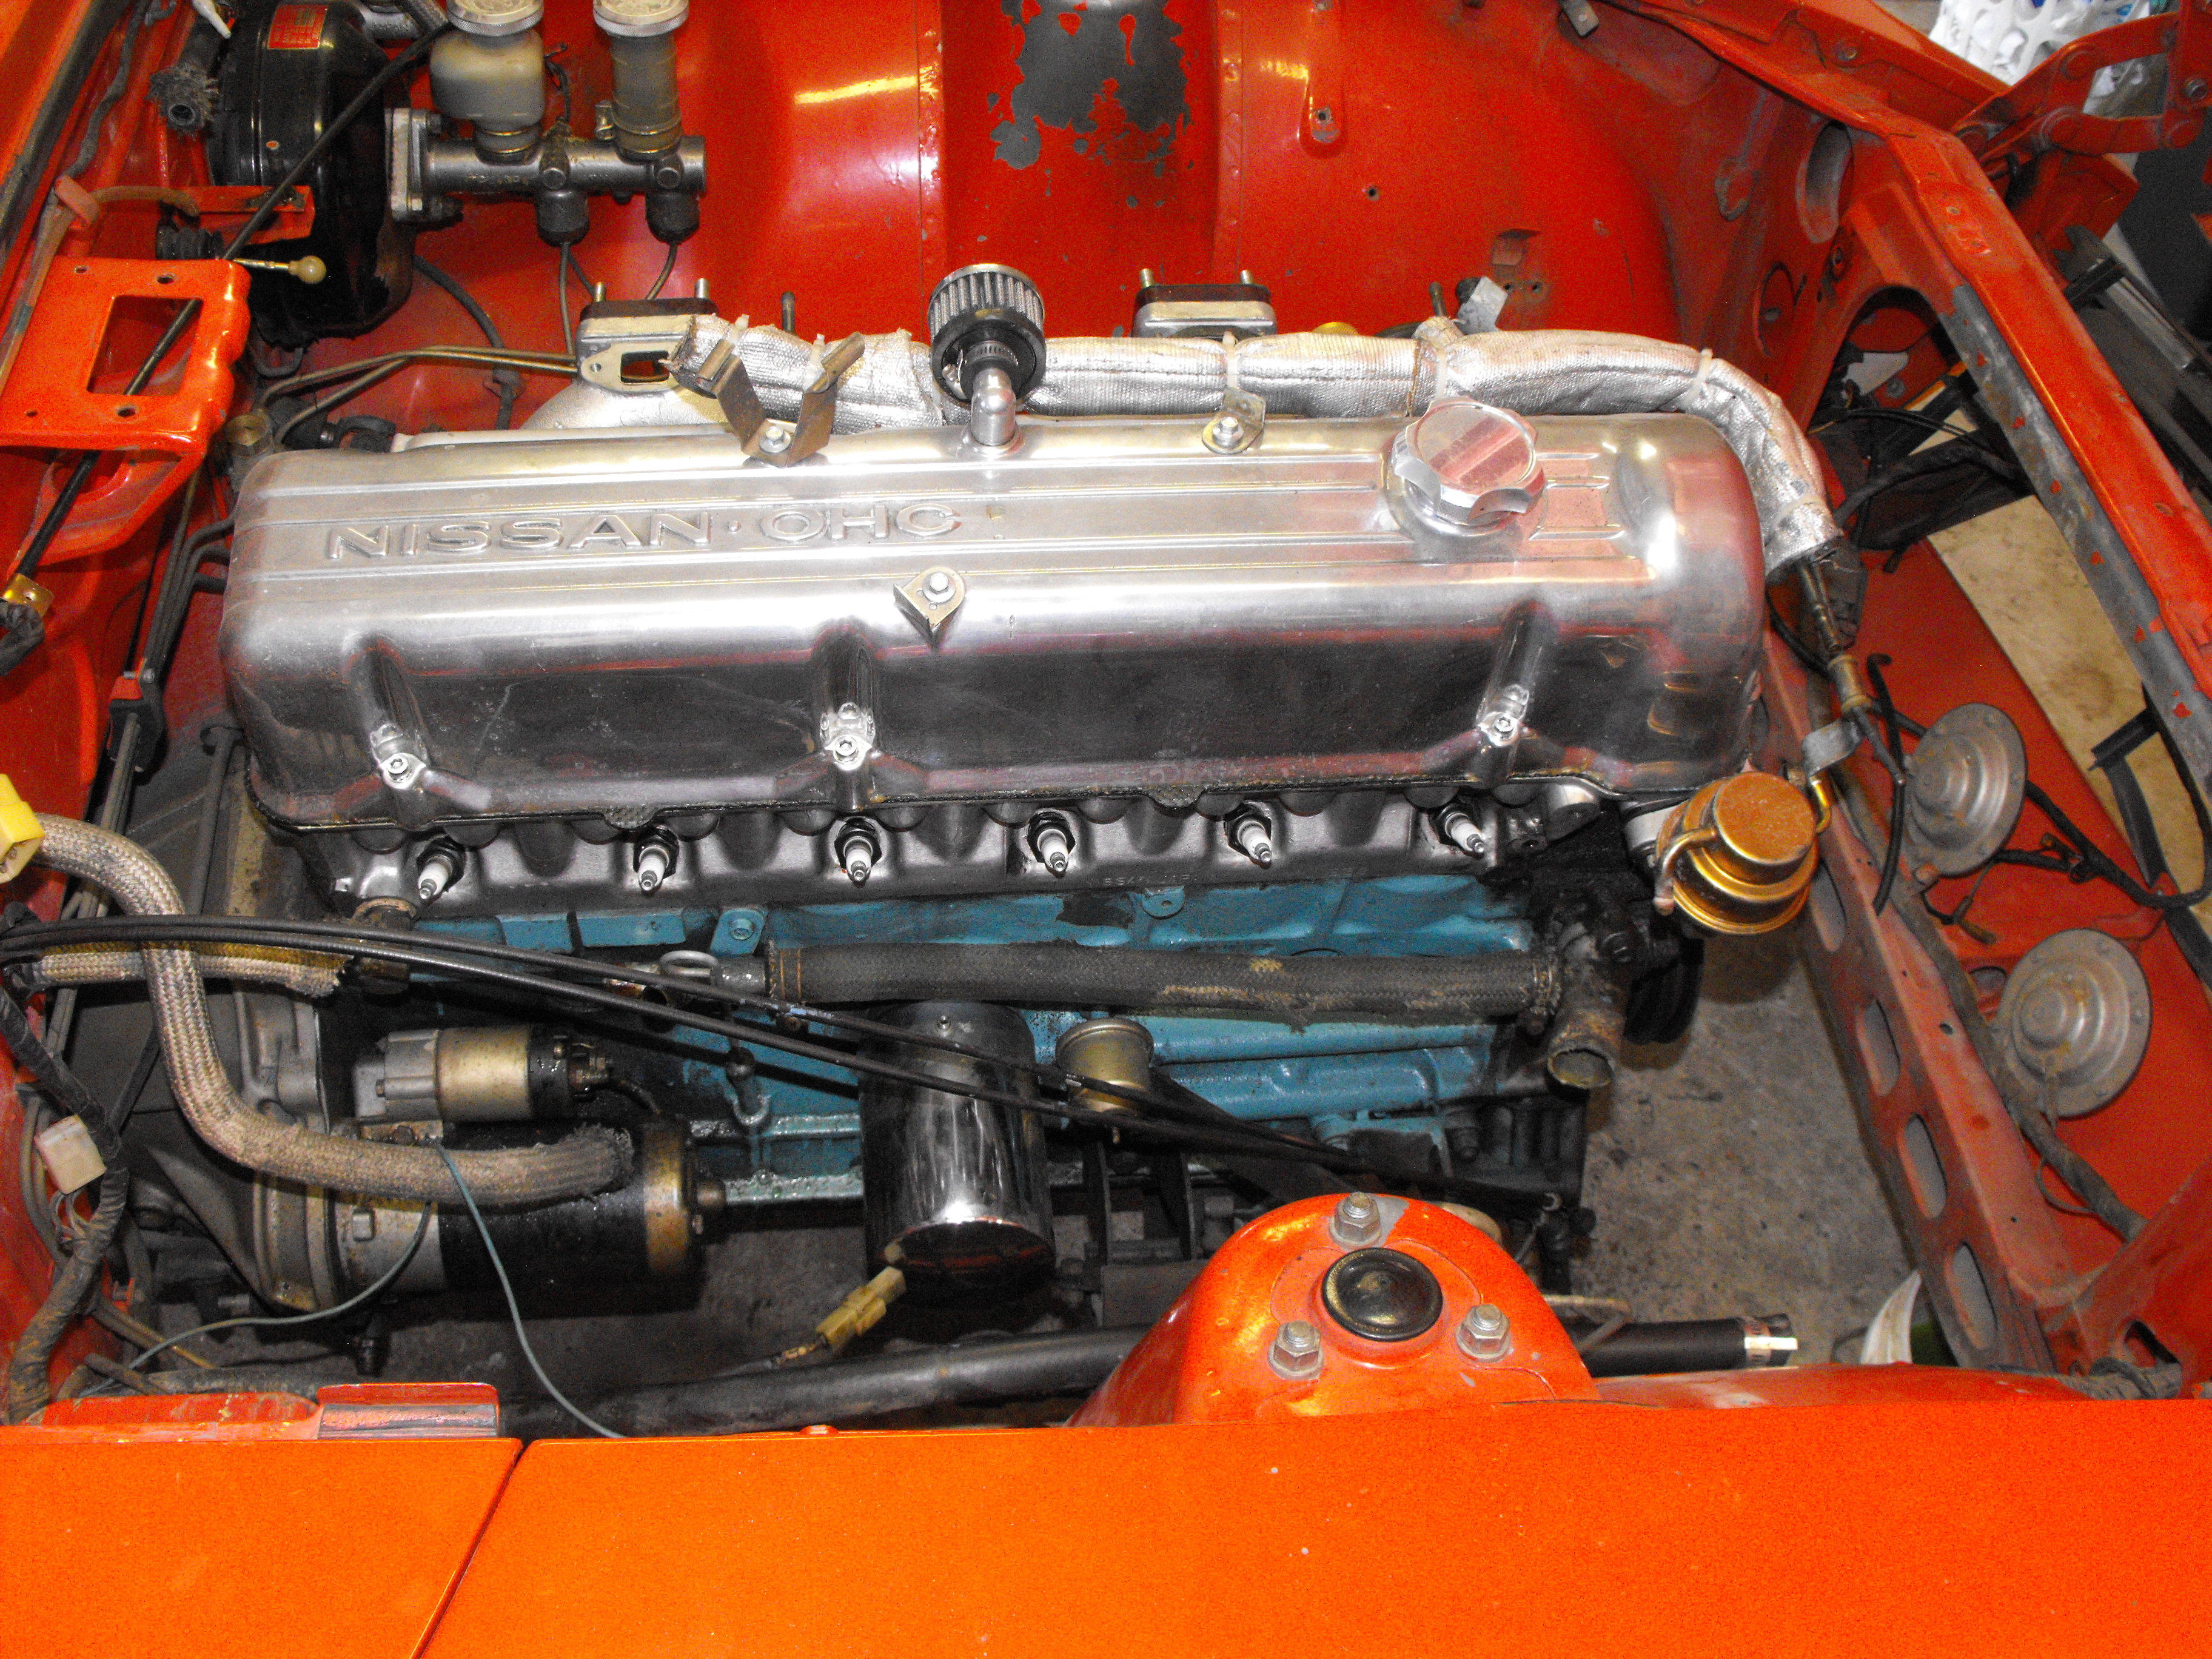
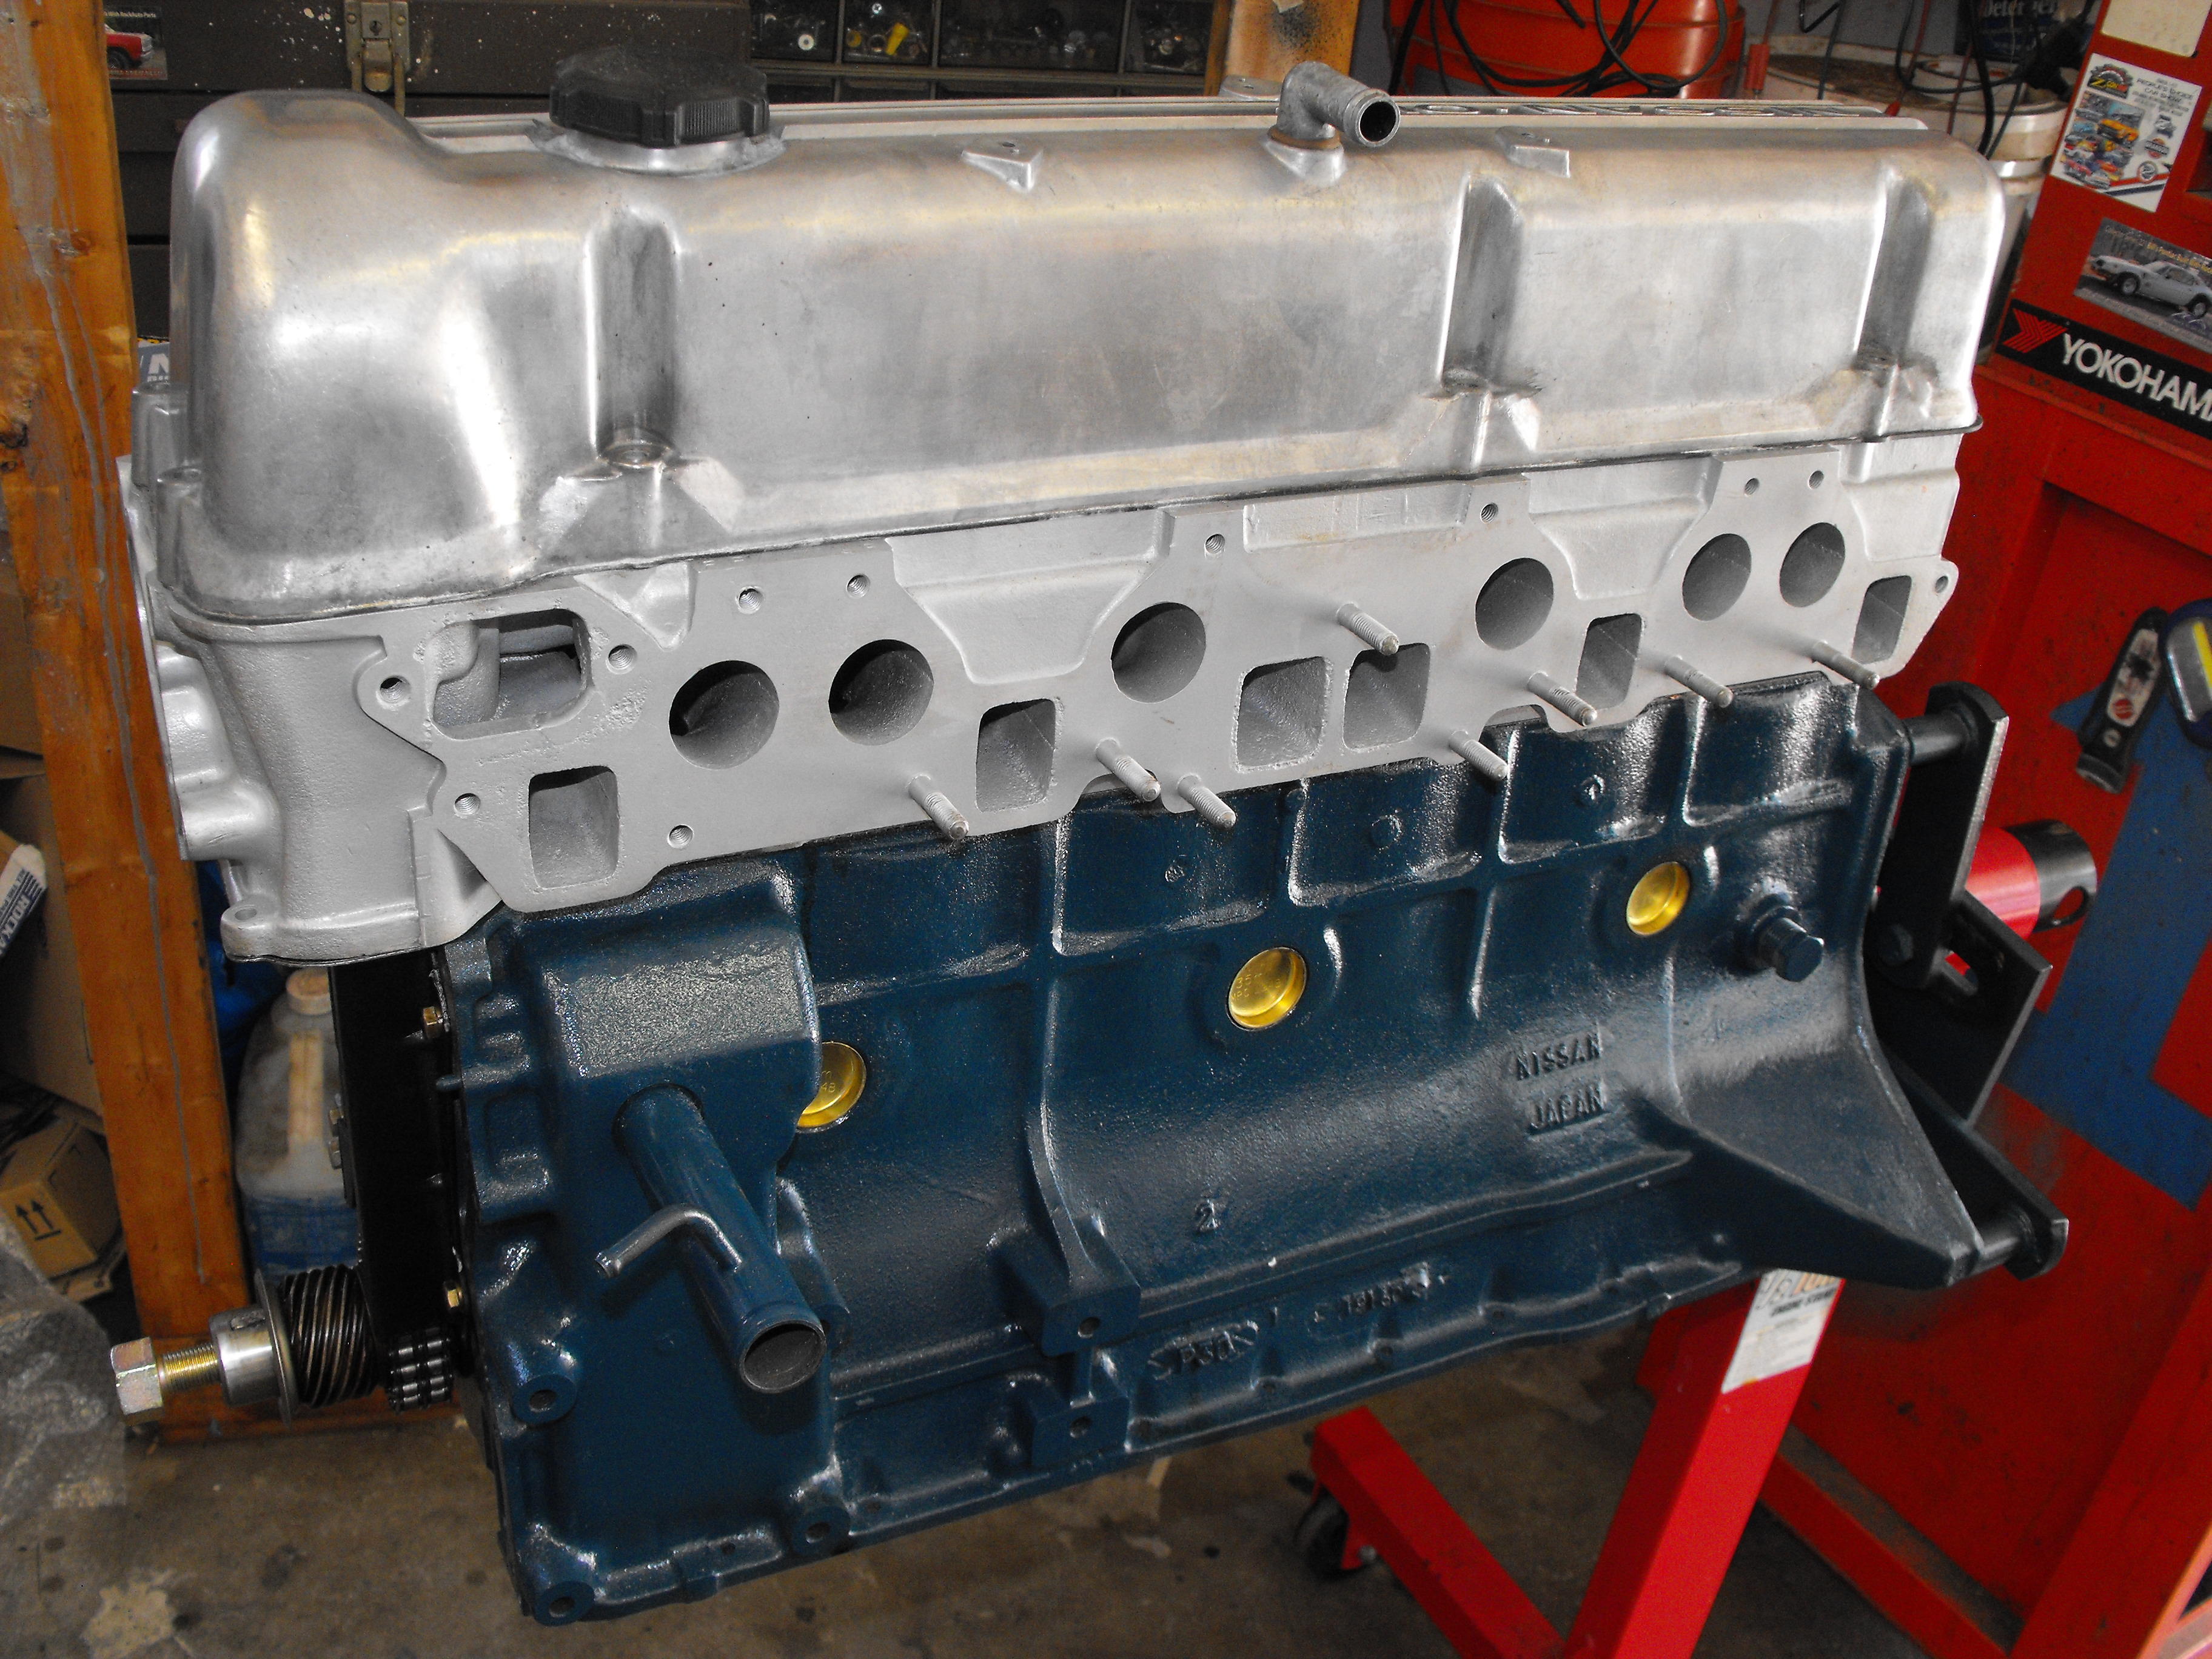
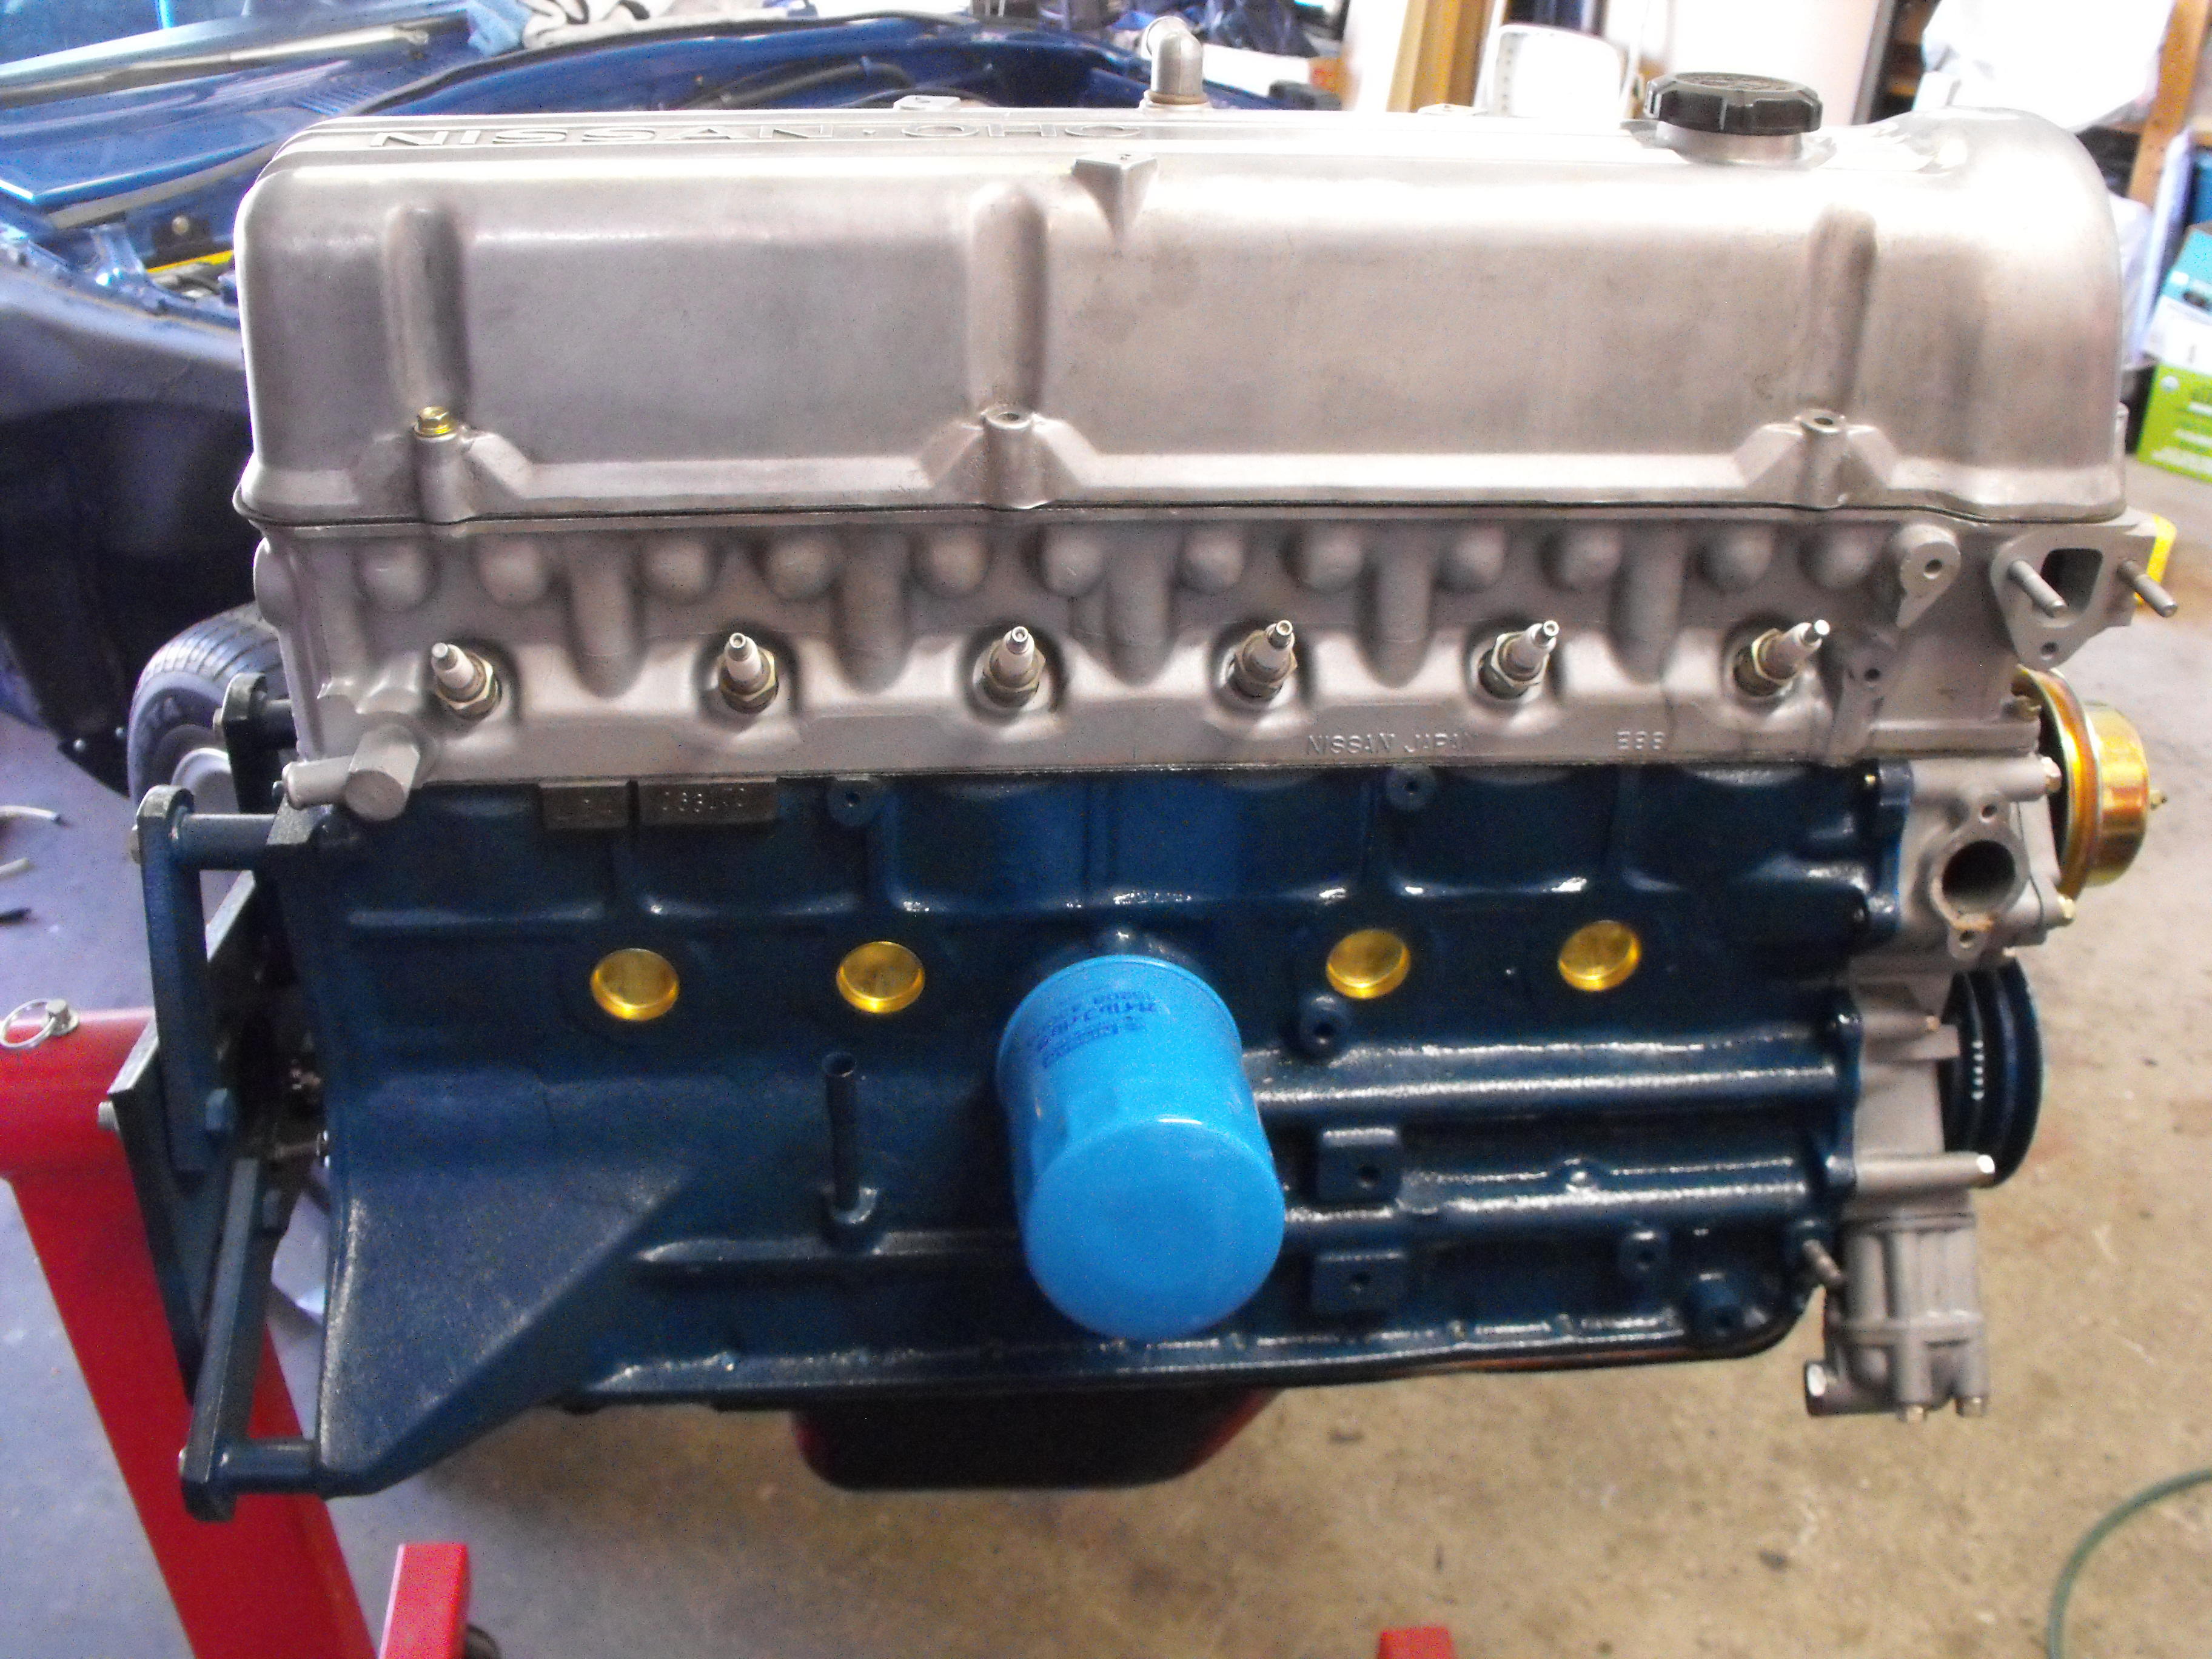
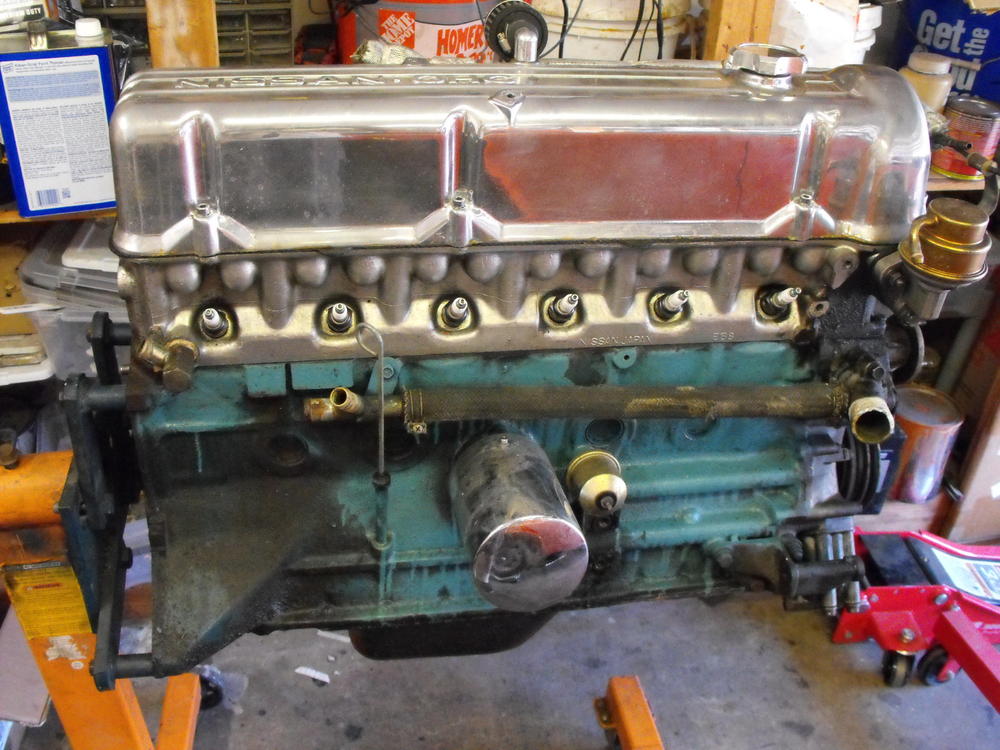
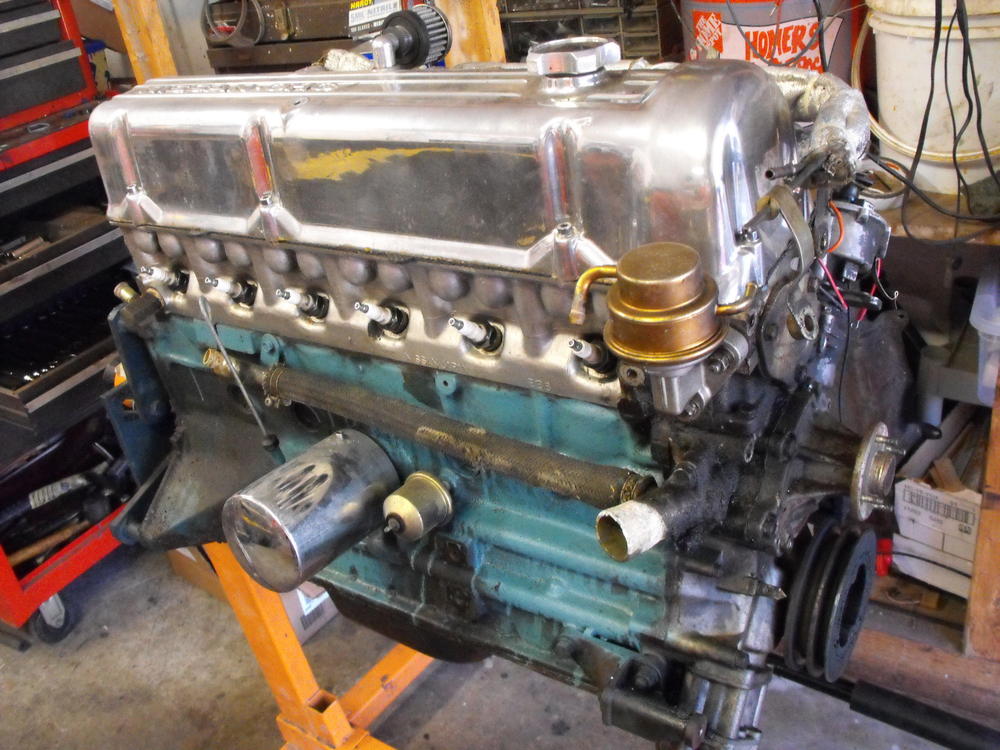
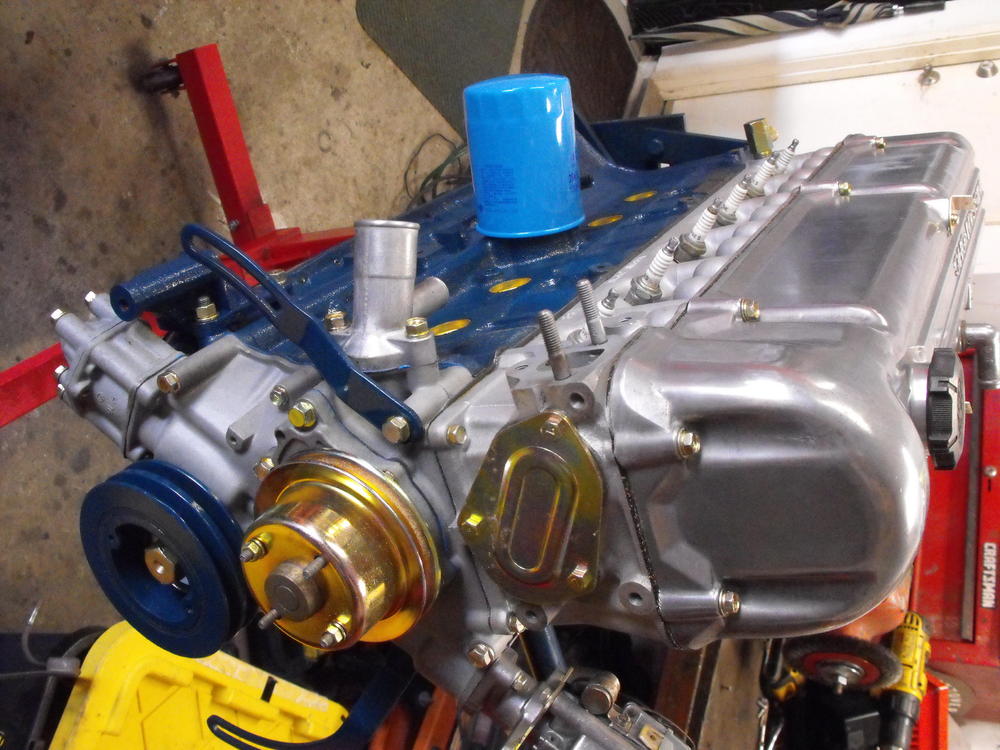
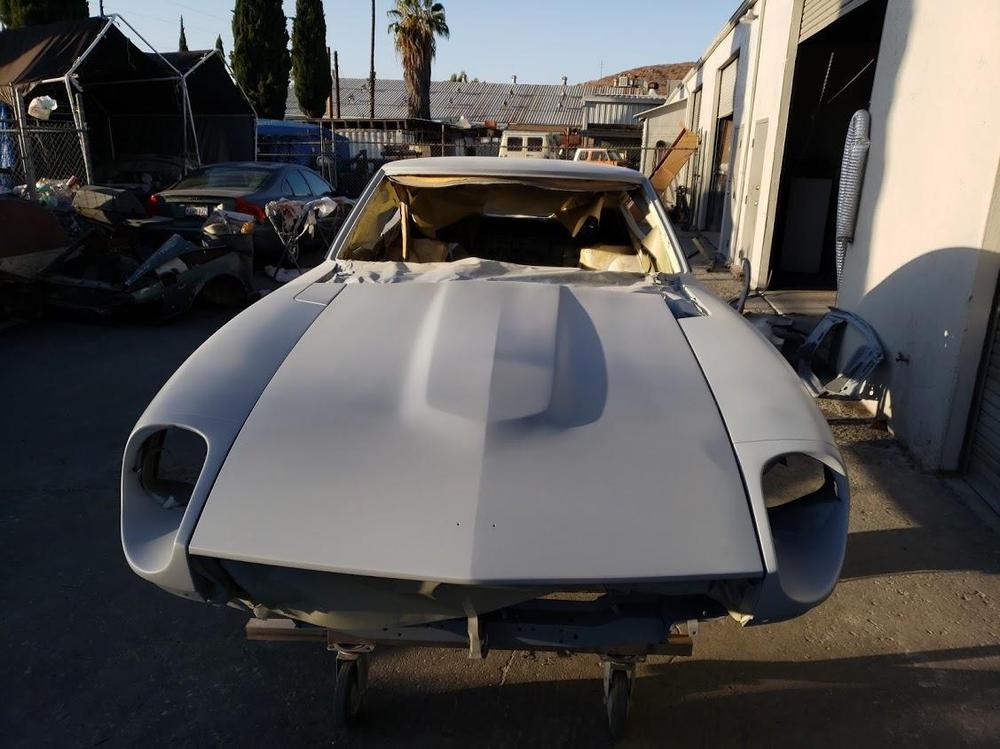
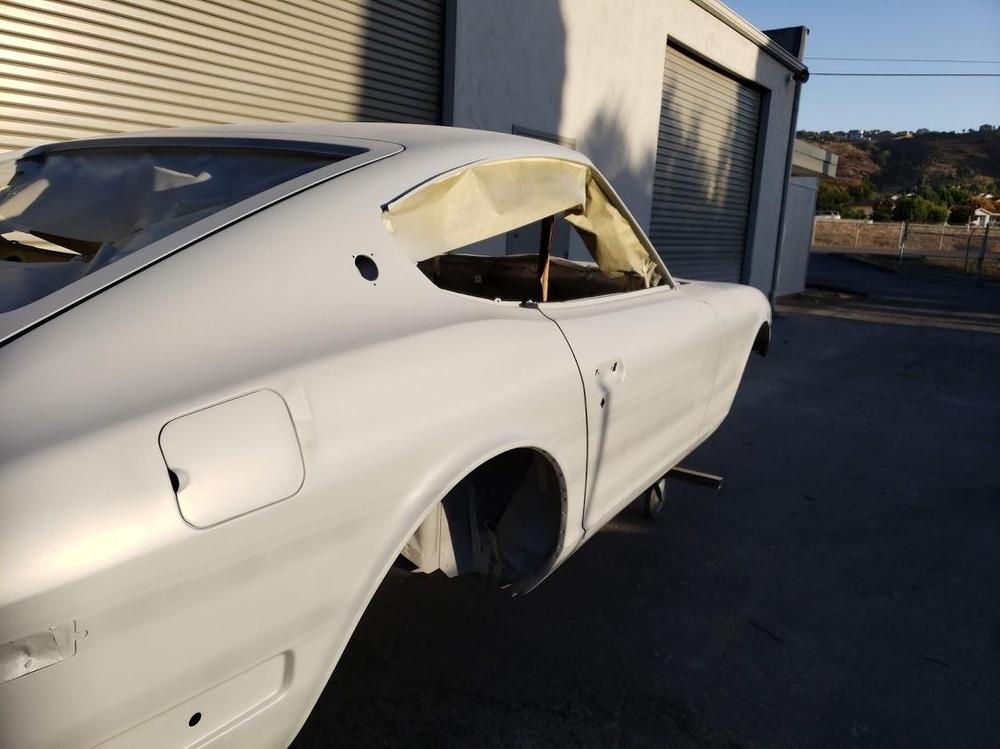
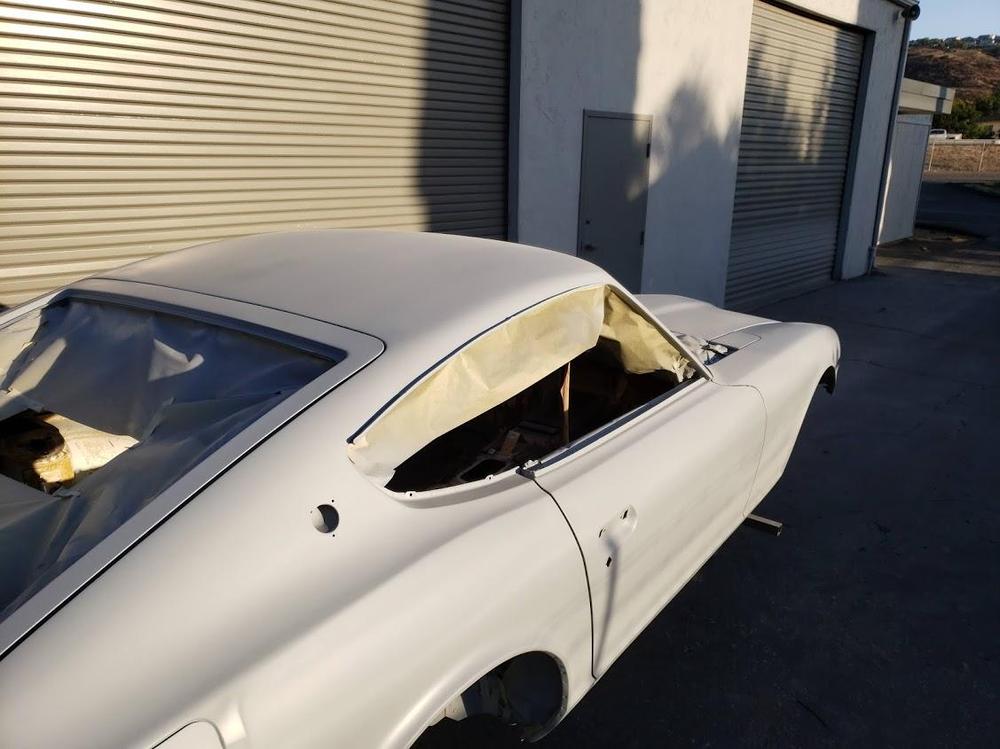
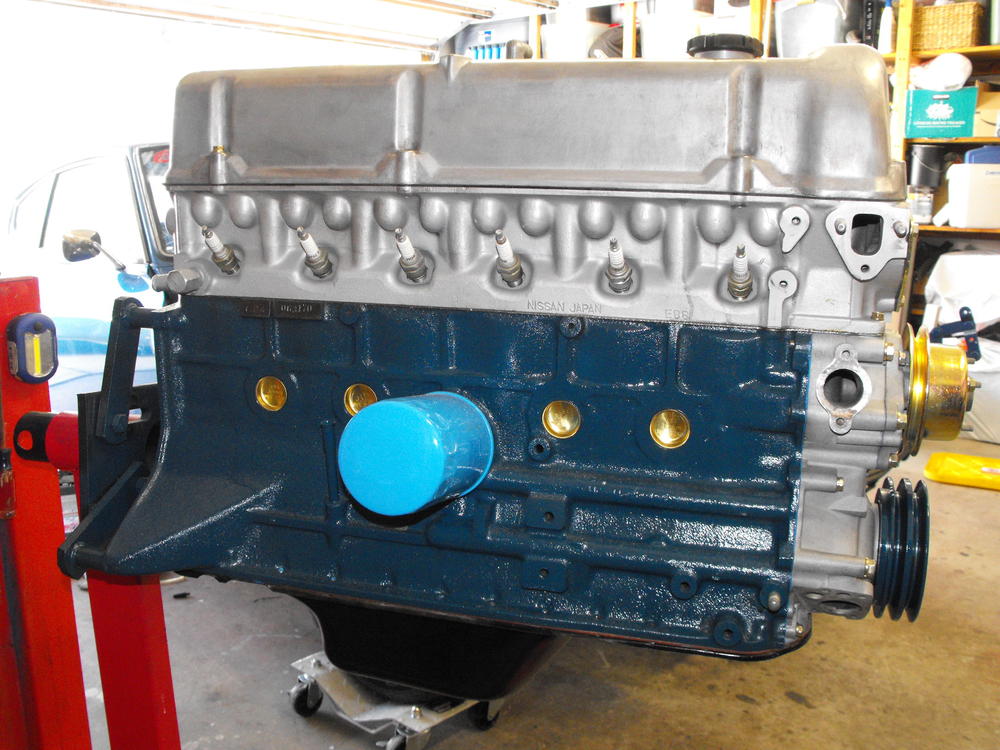
Just saw the thread on the valve cover finish. Will have to check that out a bit closer and see how it looks with mine. I used '0000' steel wool and phosphoric acid for the initial clean (wear your gloves and goggles boys and girls). It looked a bit dull after that. Then went over it with '0000' steel wool and mothers mag polish. I think the look is close, but will read up on the valve cover finish thread. Got the latest pics from Miguel. Body is not primered.......Woo-Hoo!


-
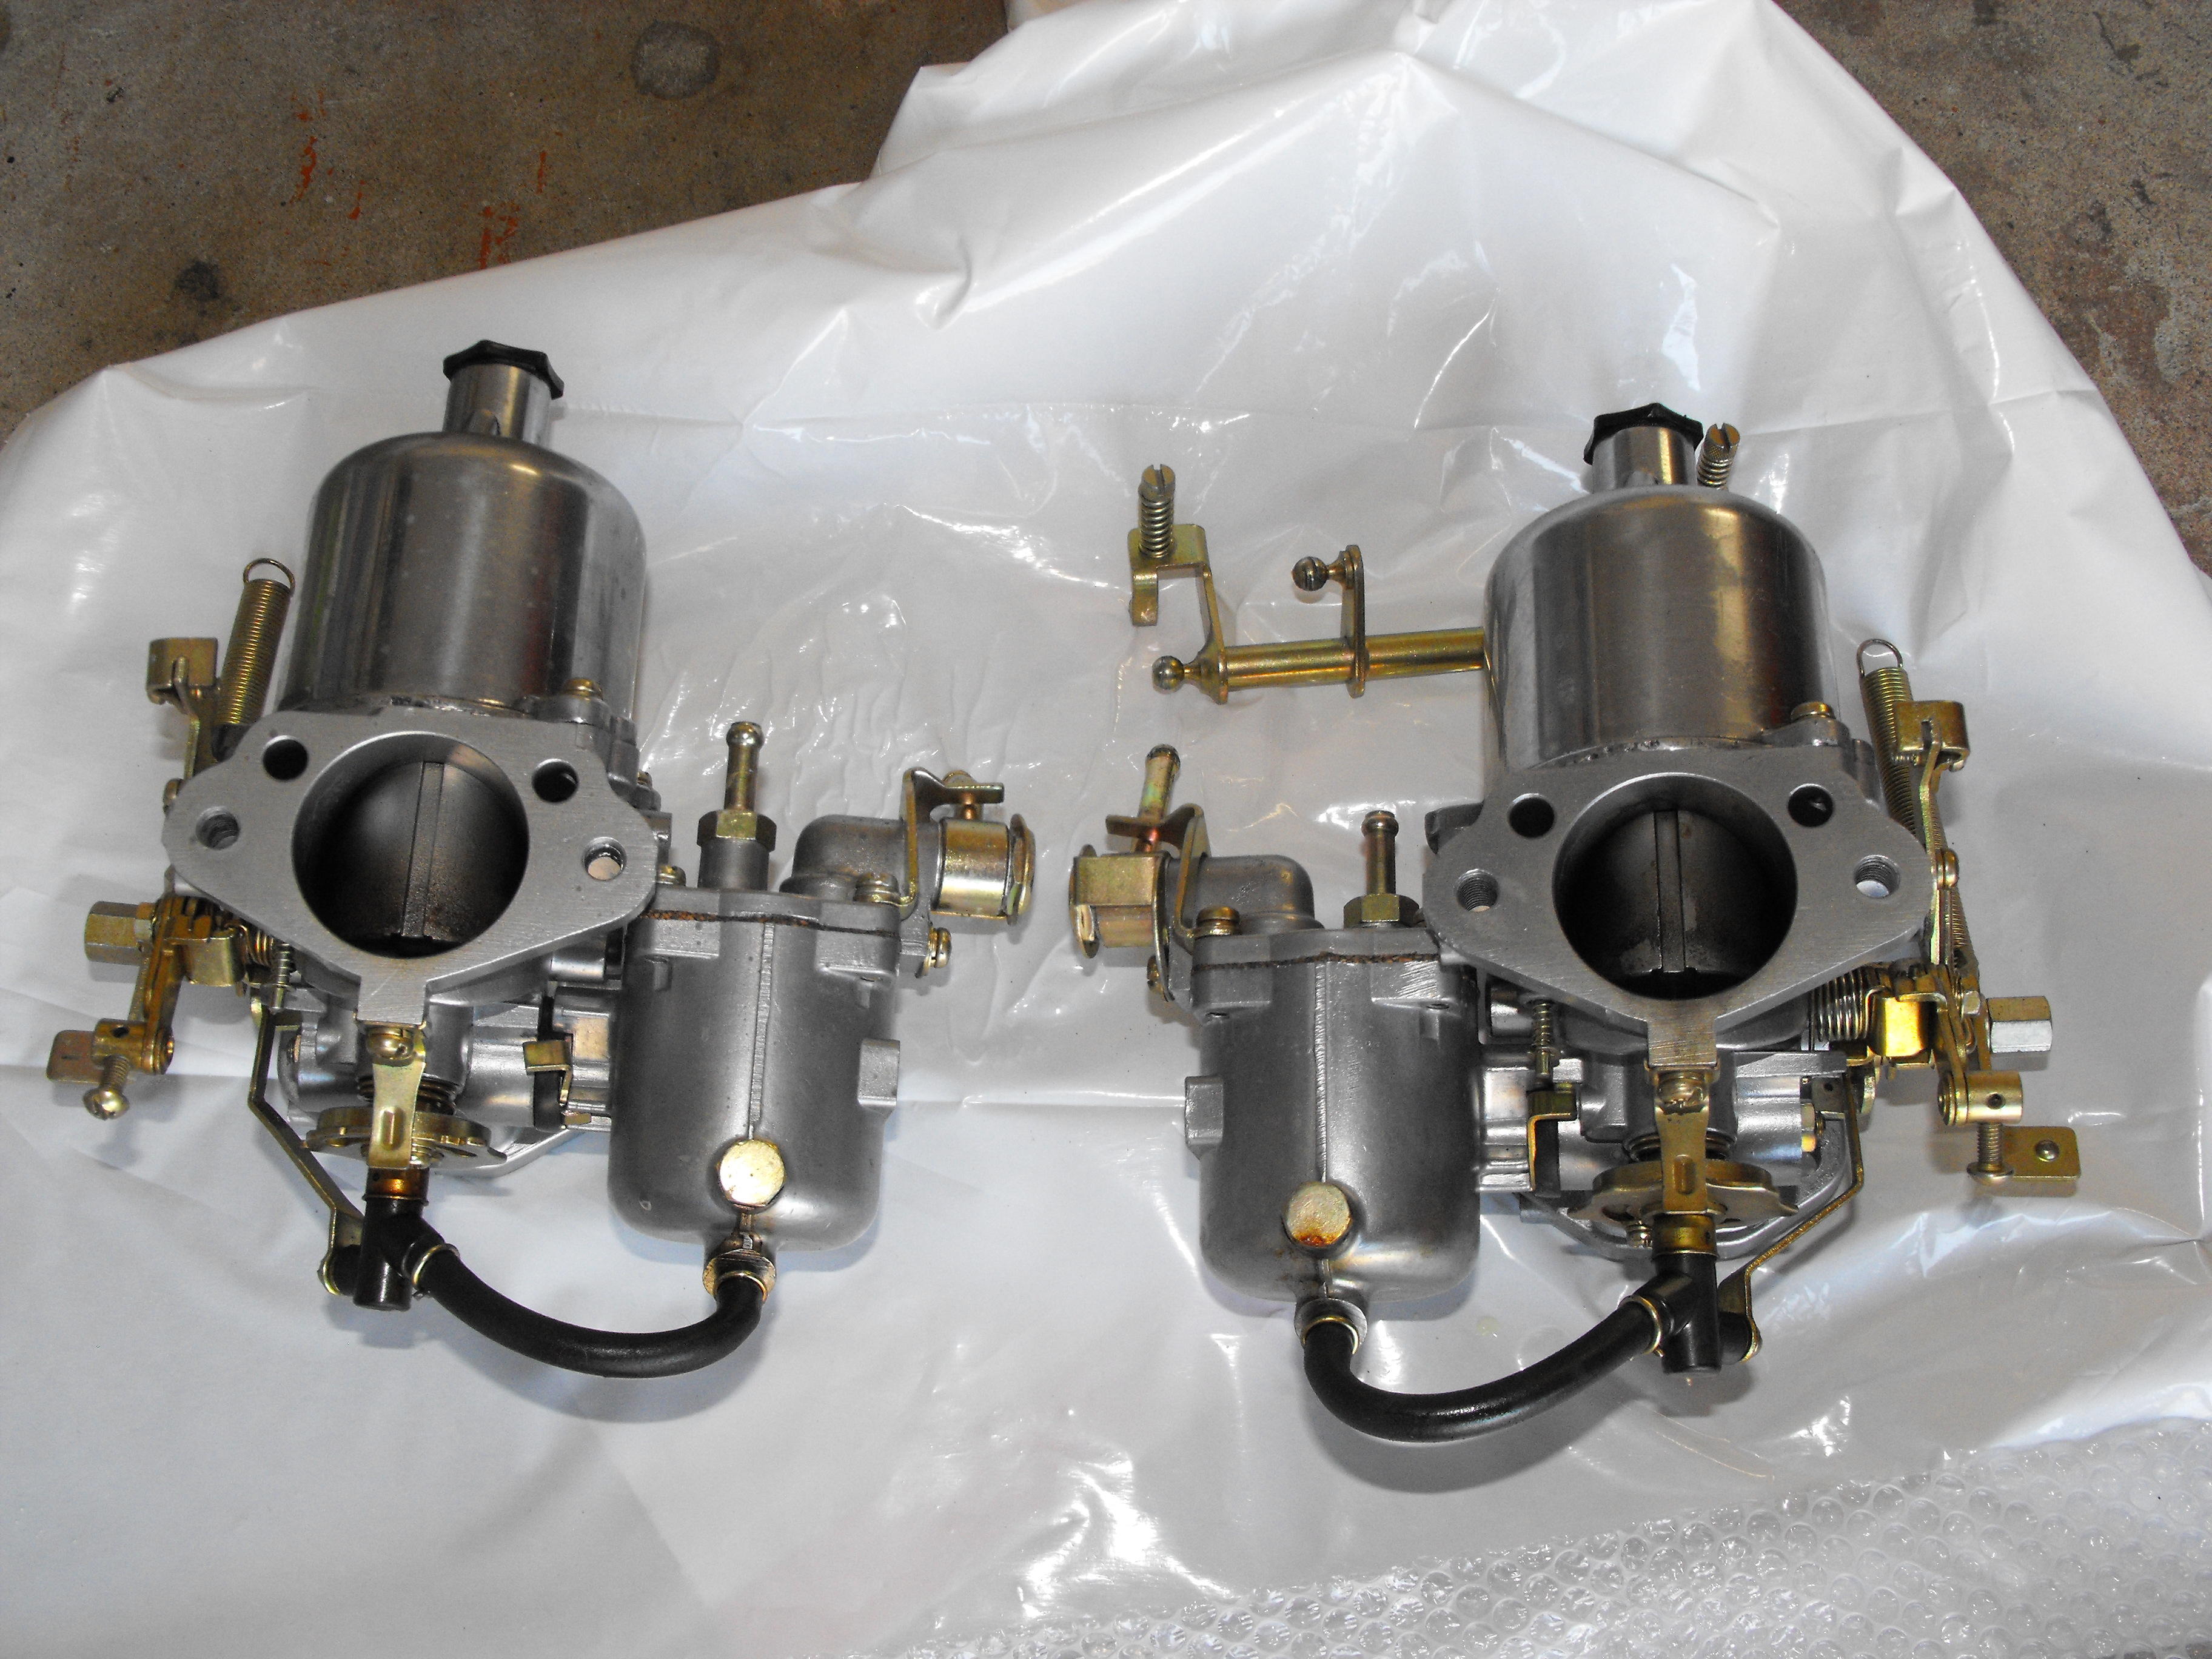
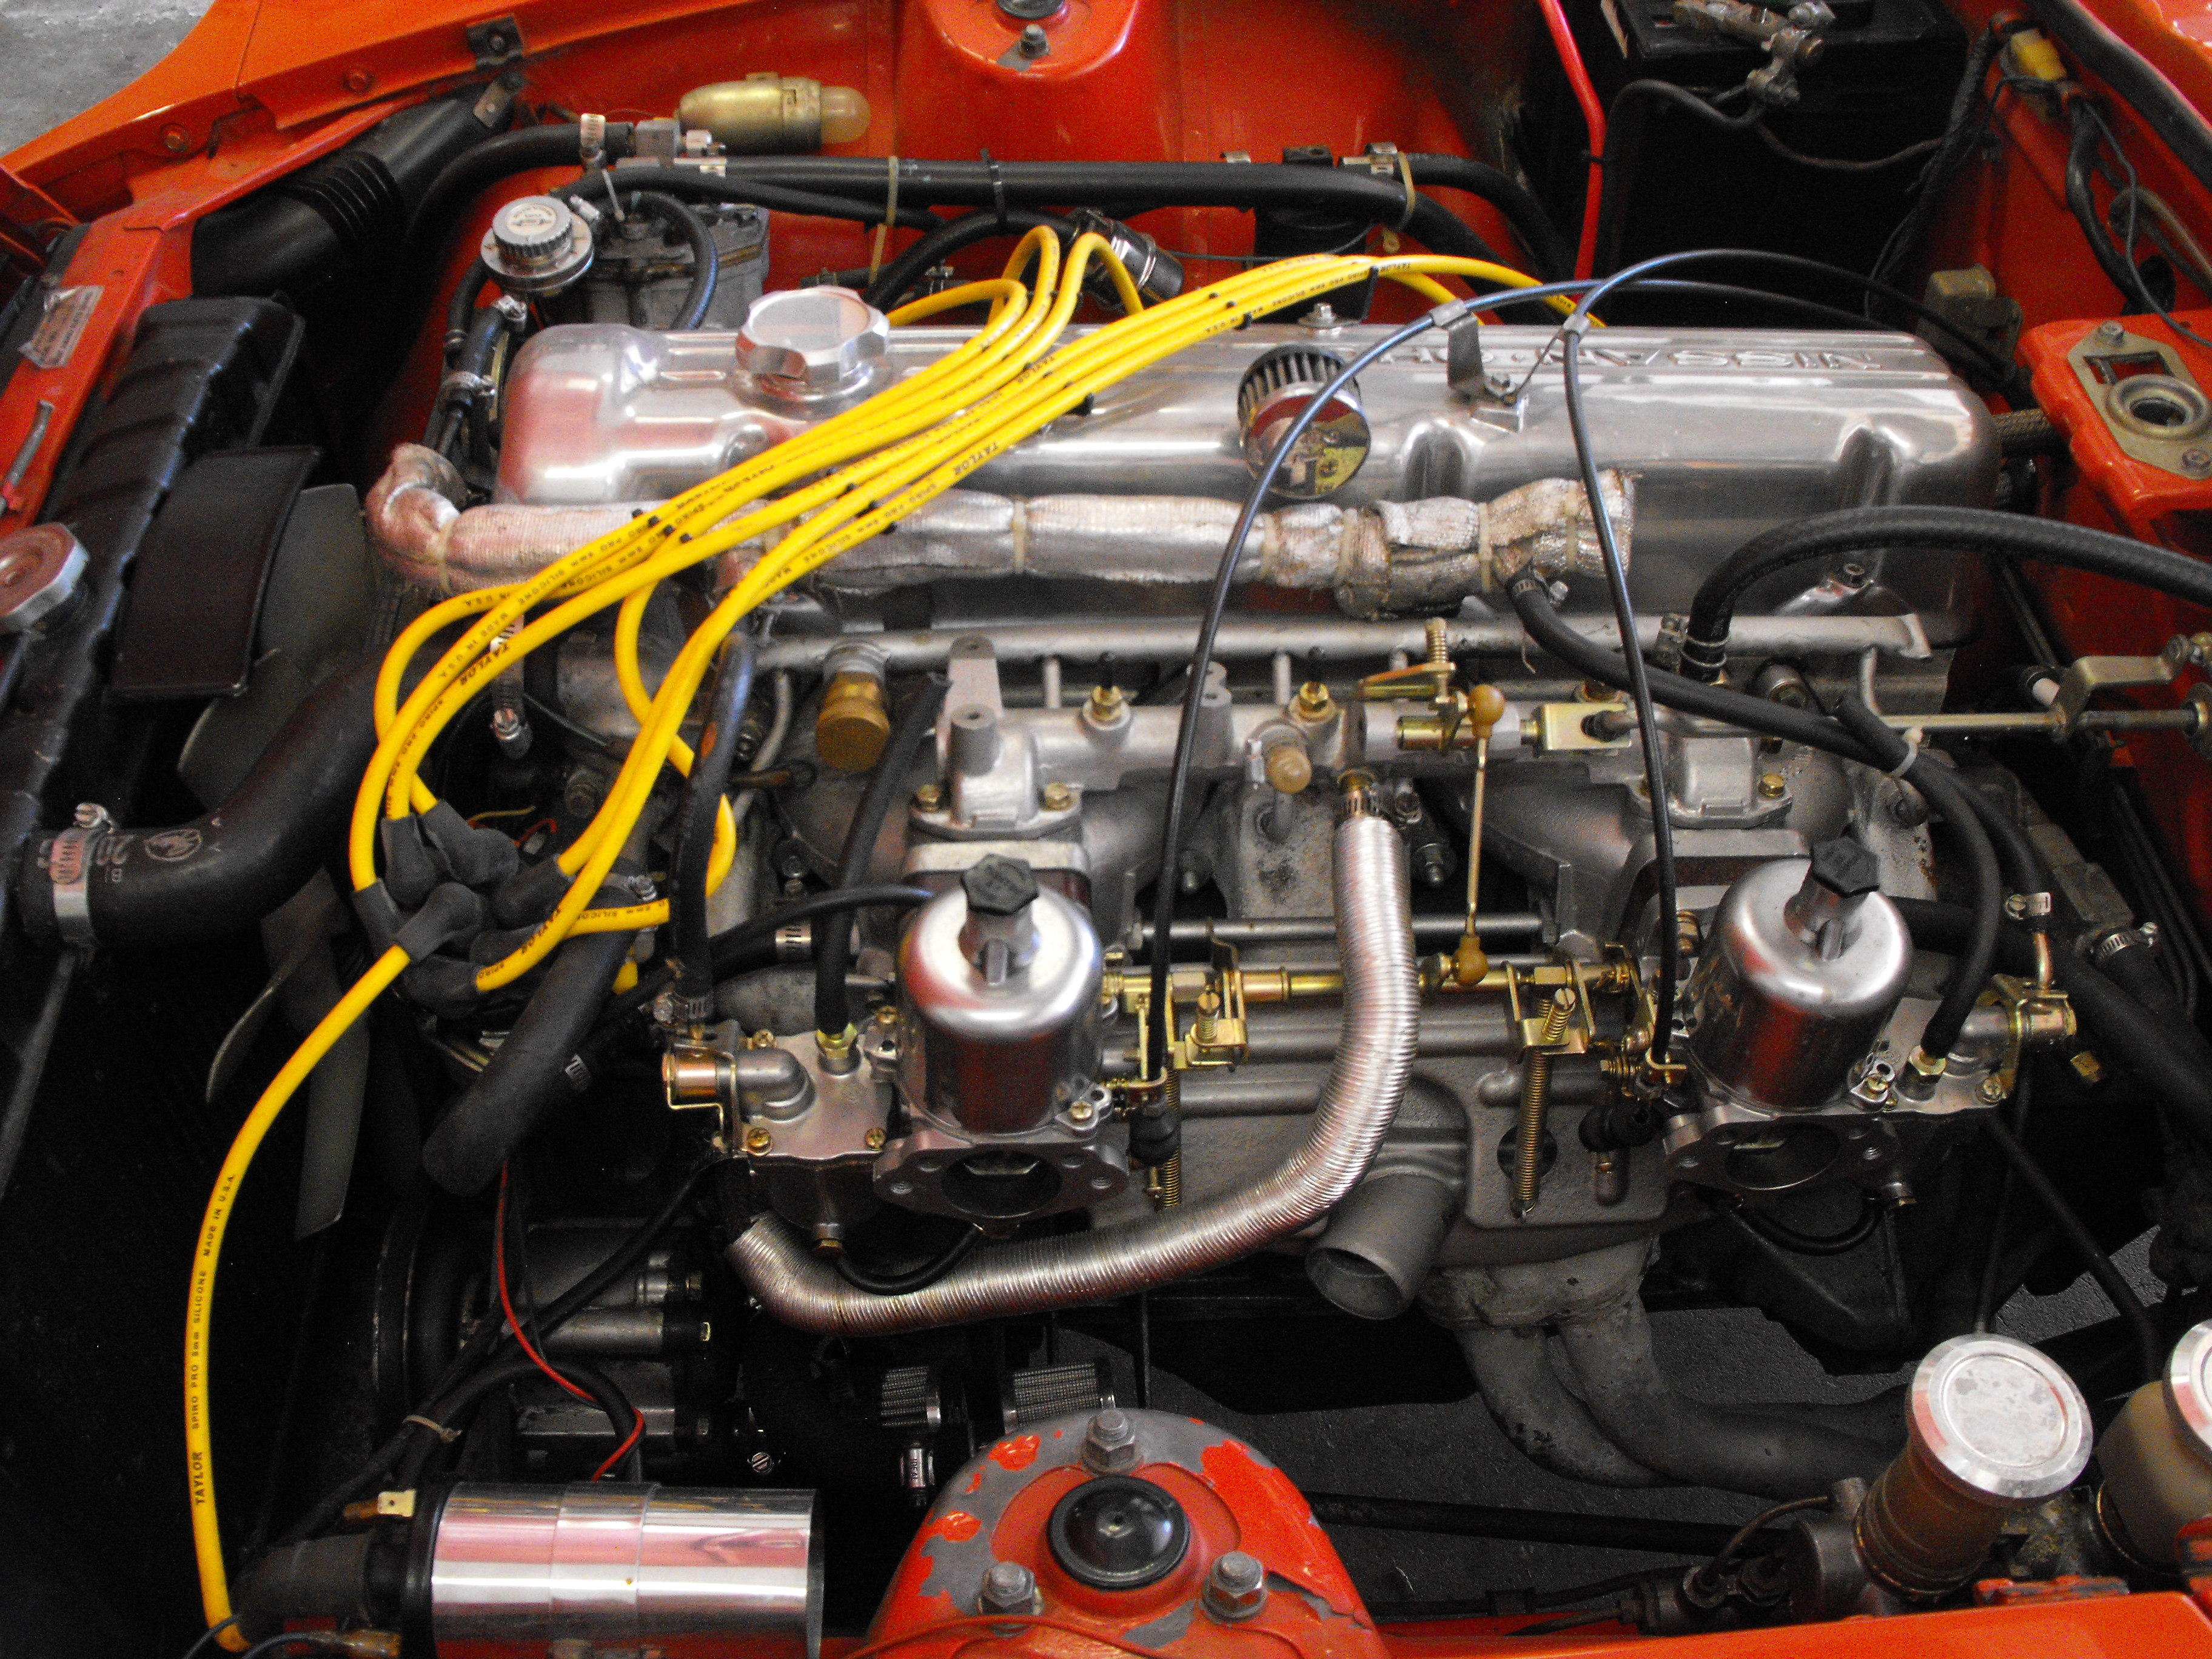
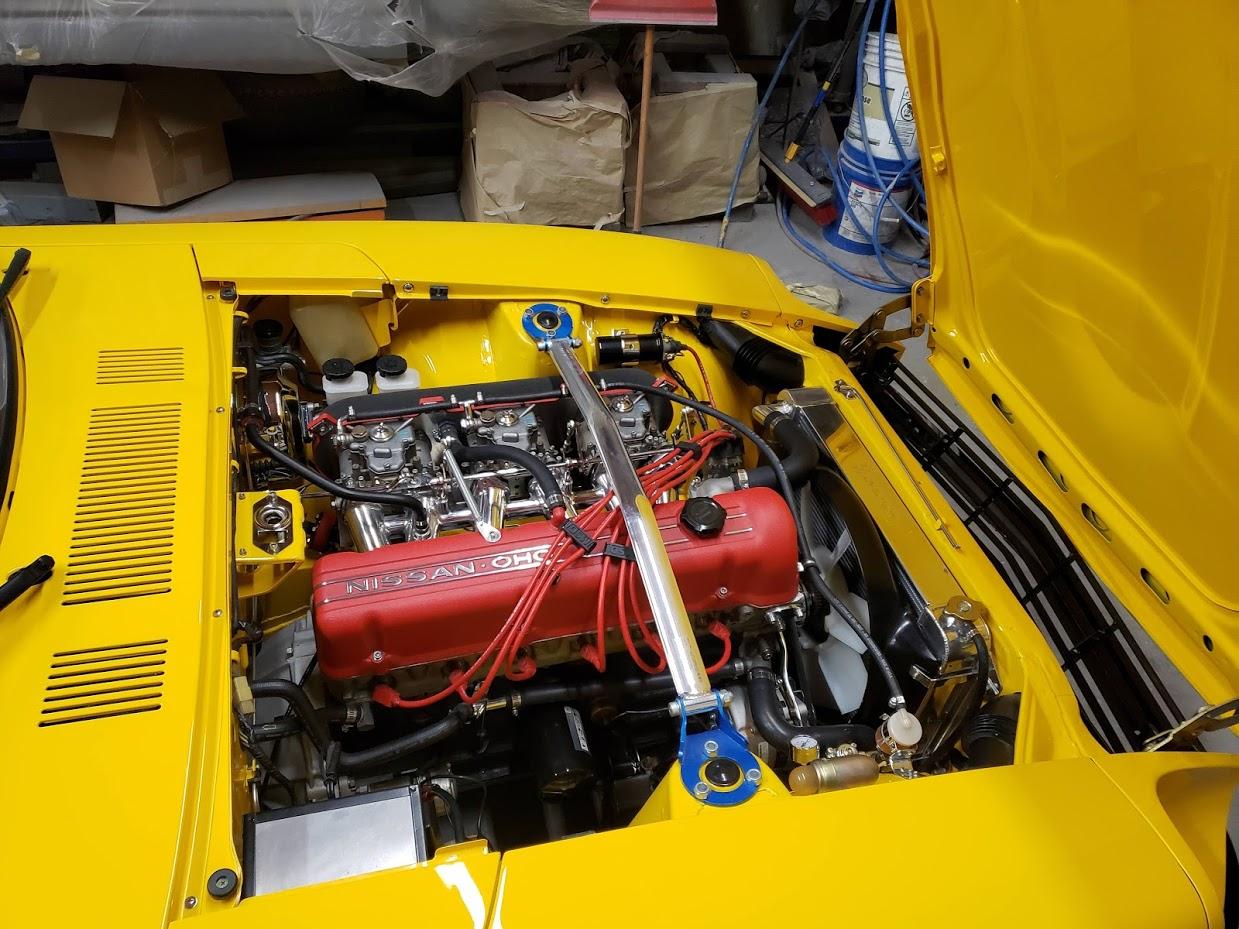
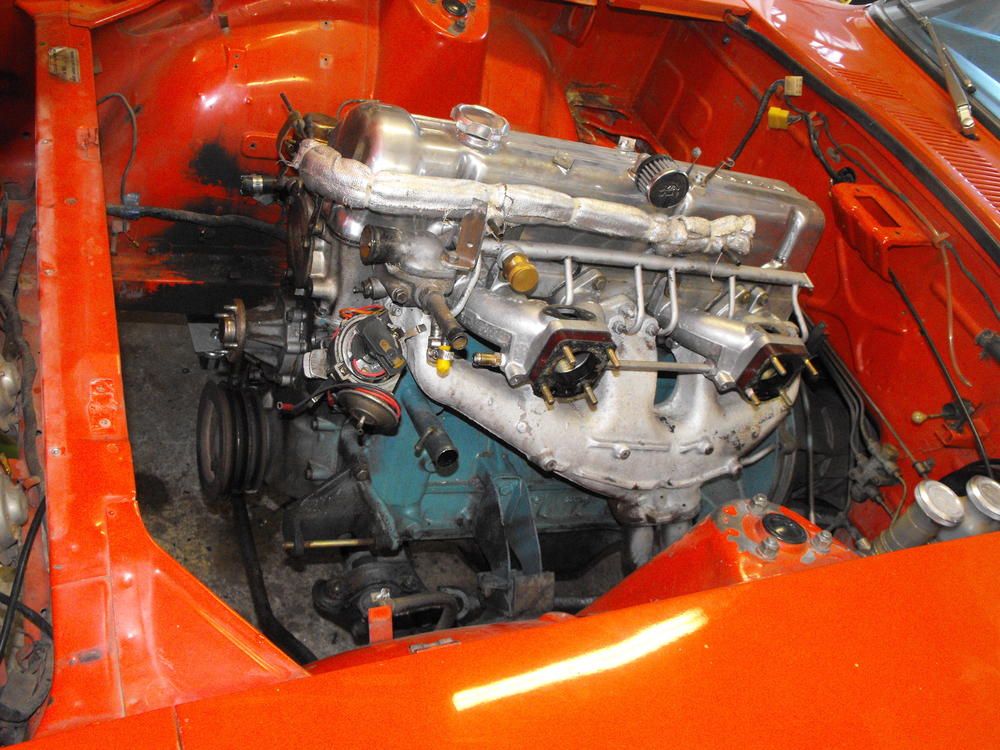
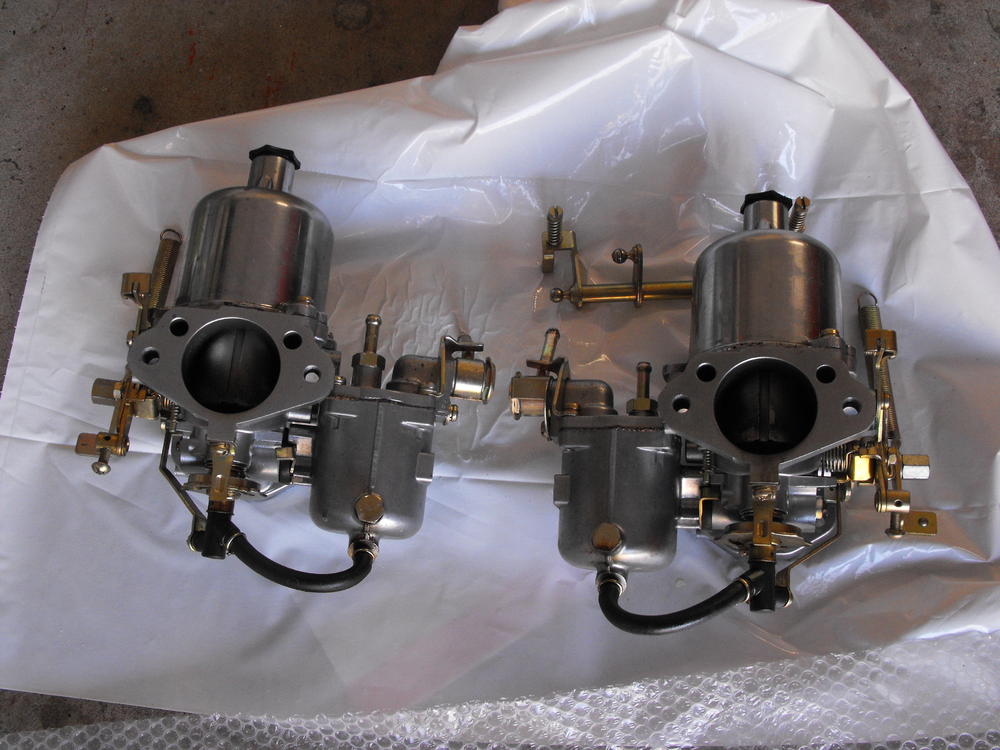
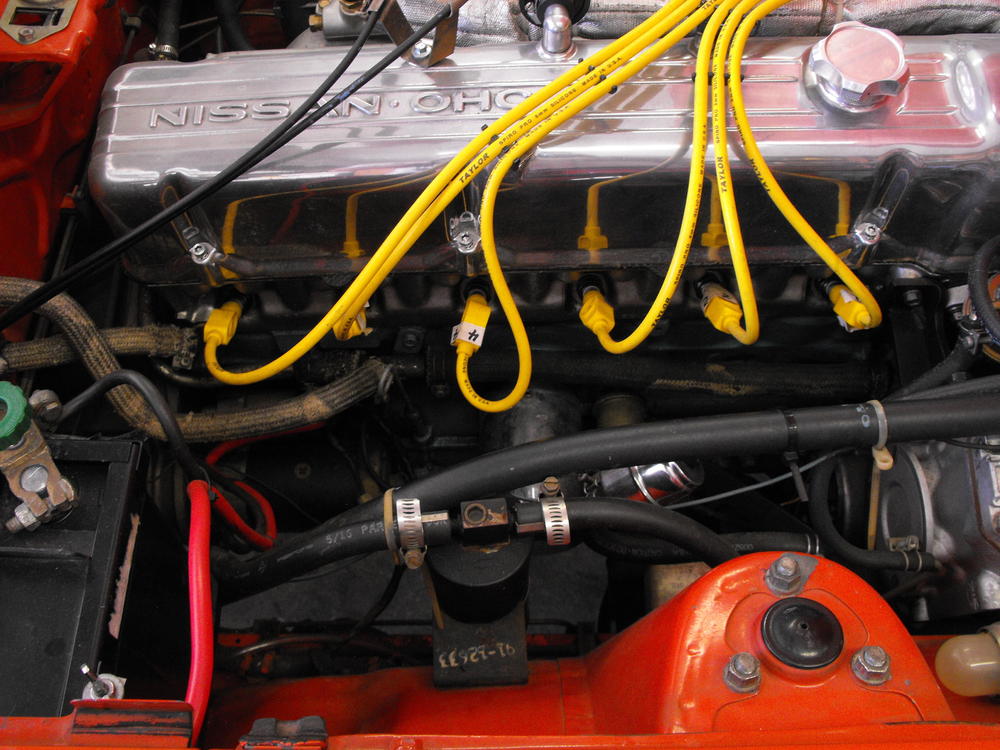
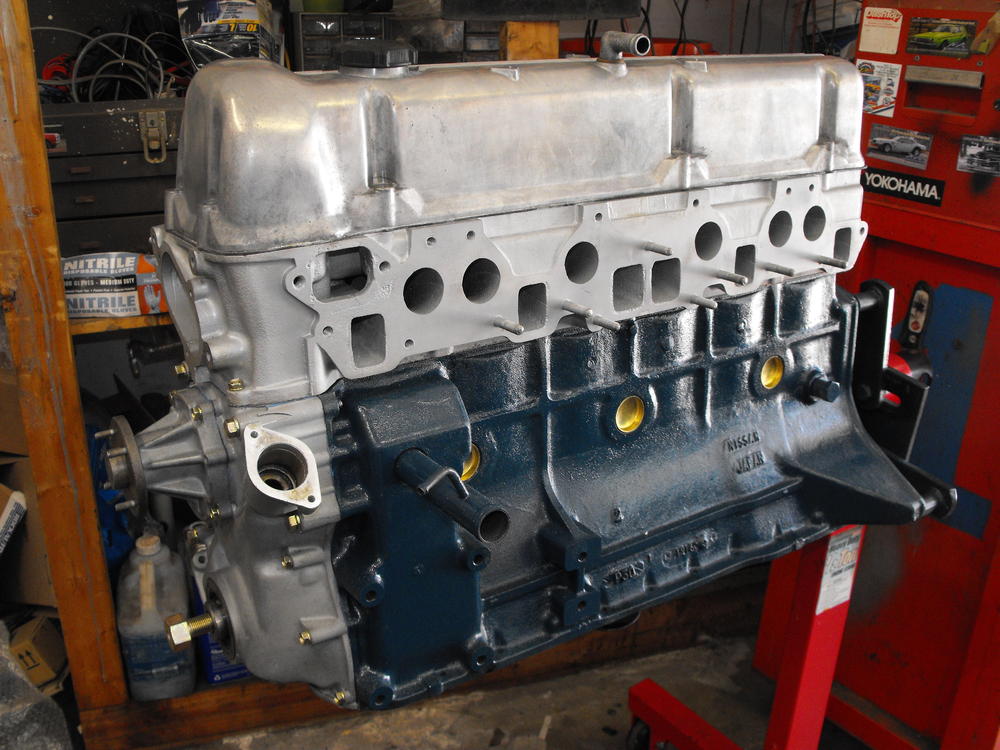
Engine is about ready to come out. Will probably do that next weekend. Wrapped those carbs in bubble wrap and set them aside. No need to touch those or the balance tube.


-
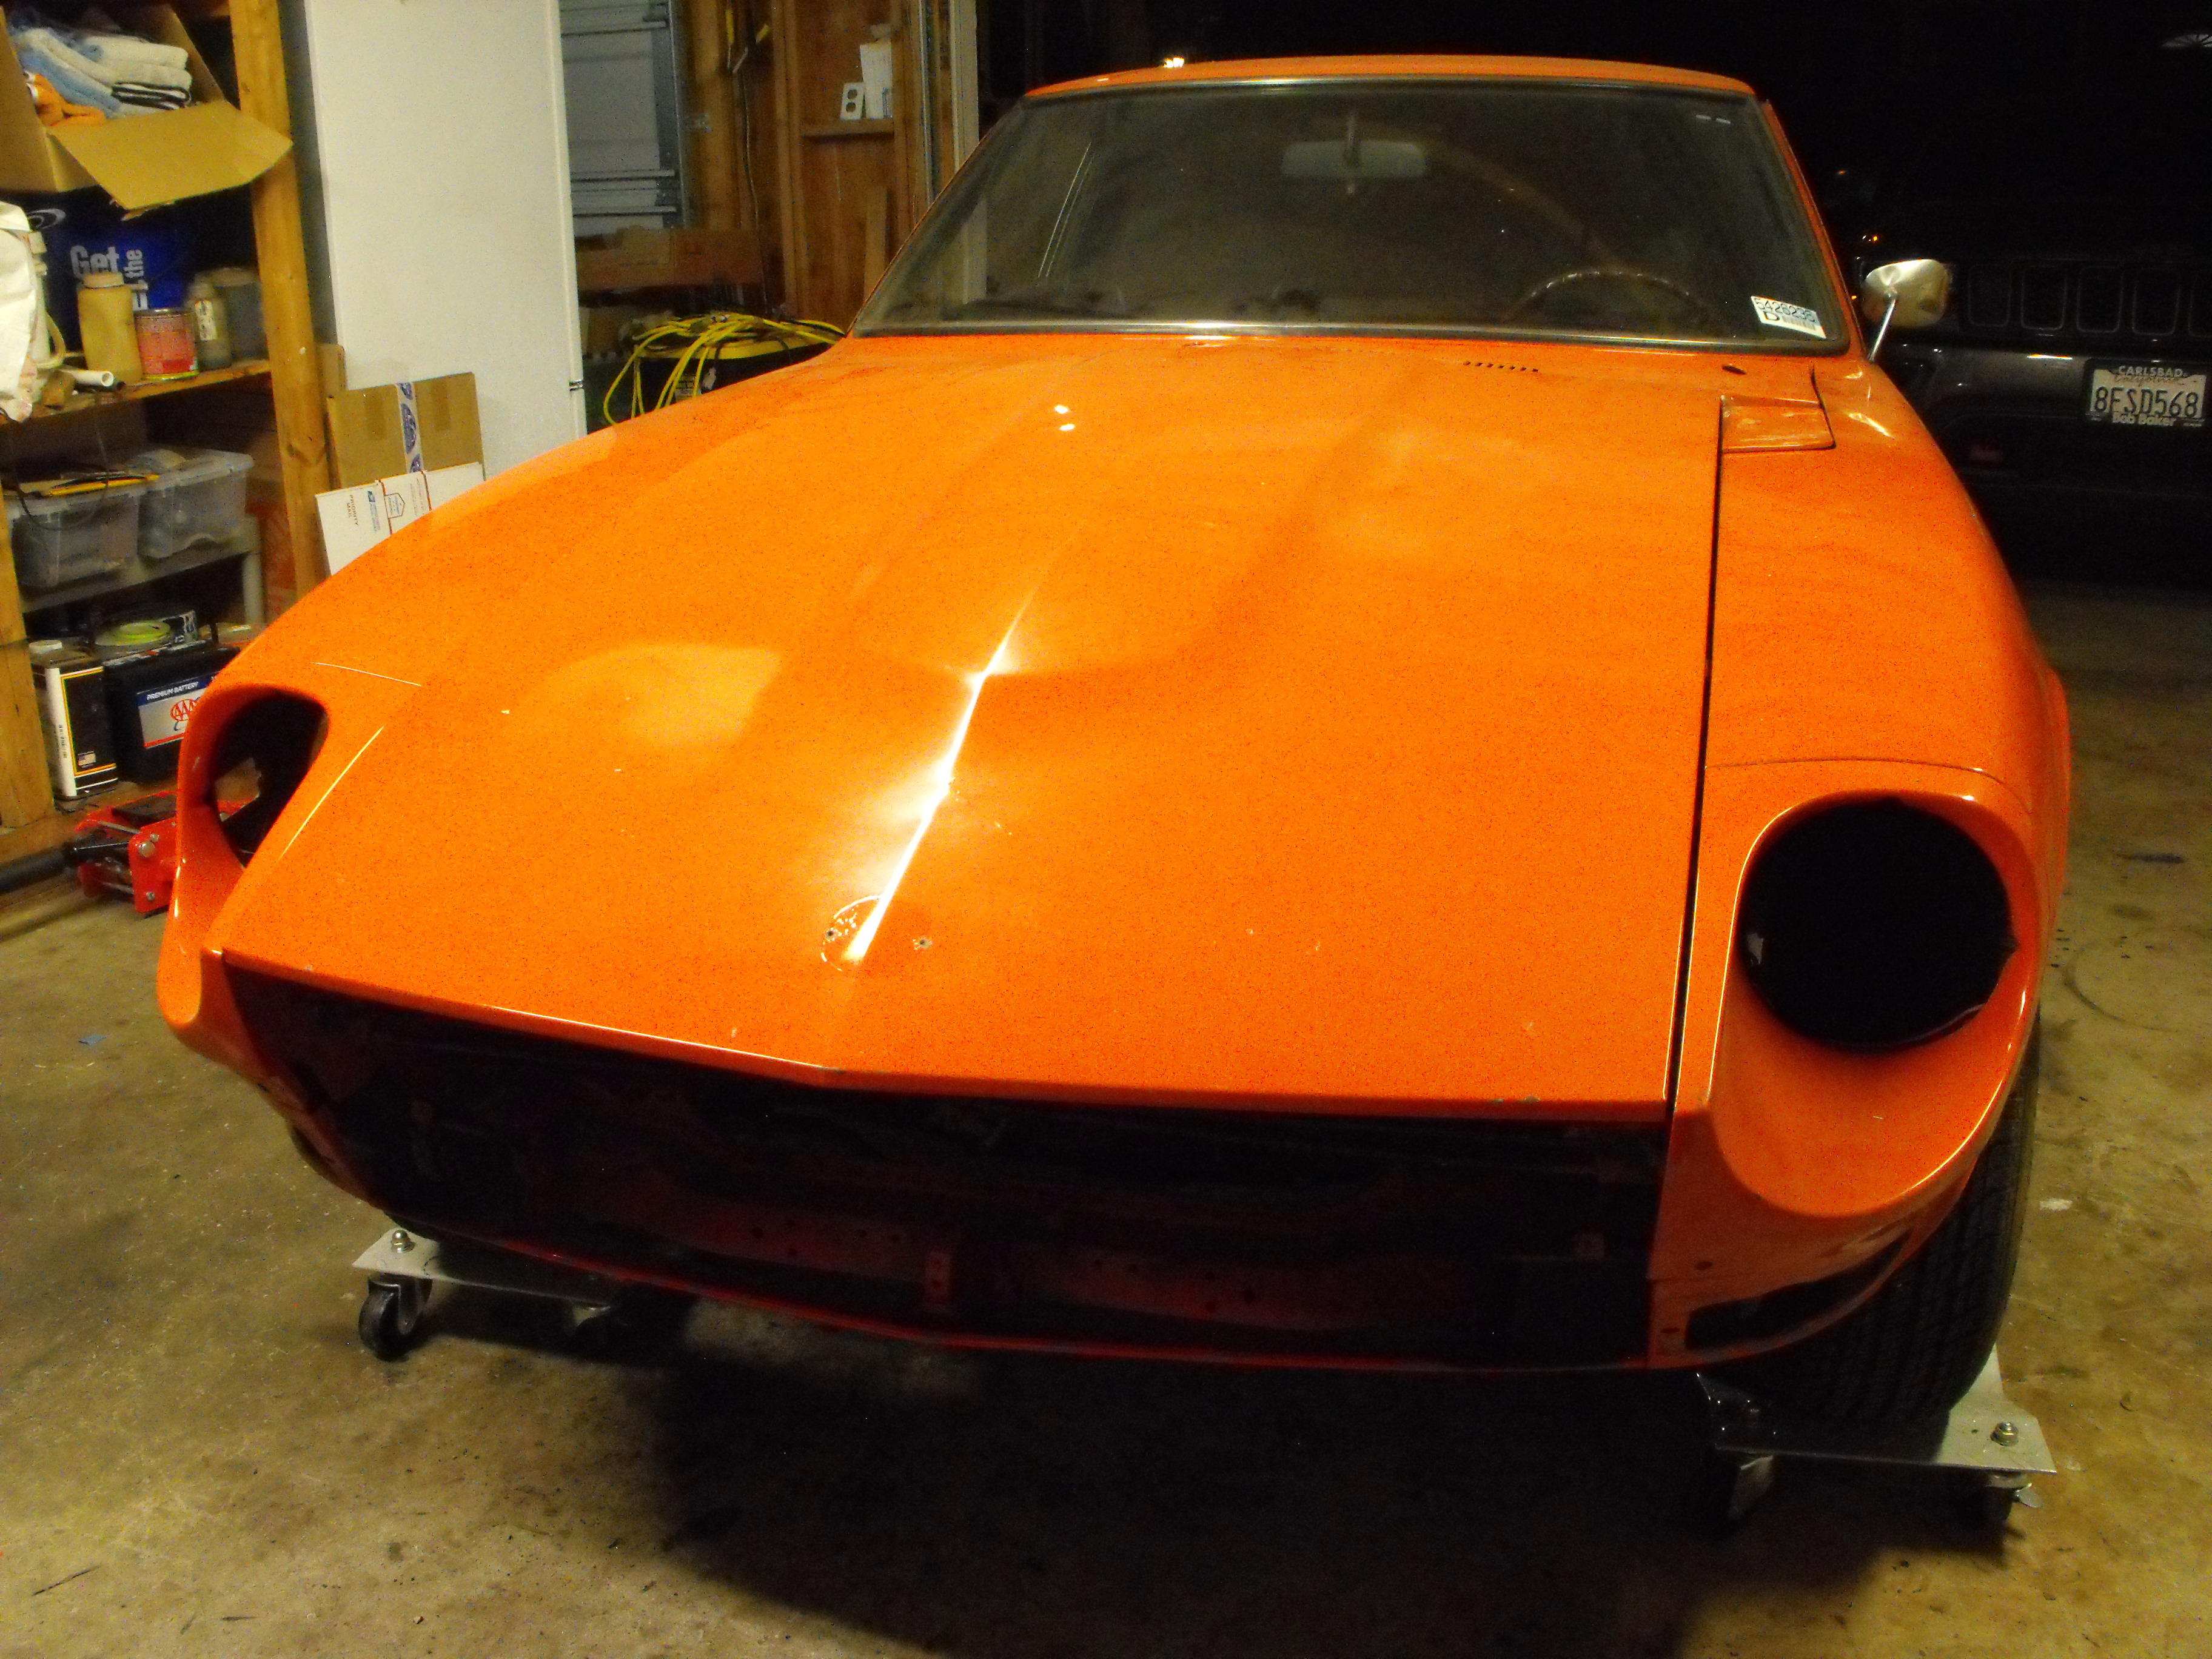
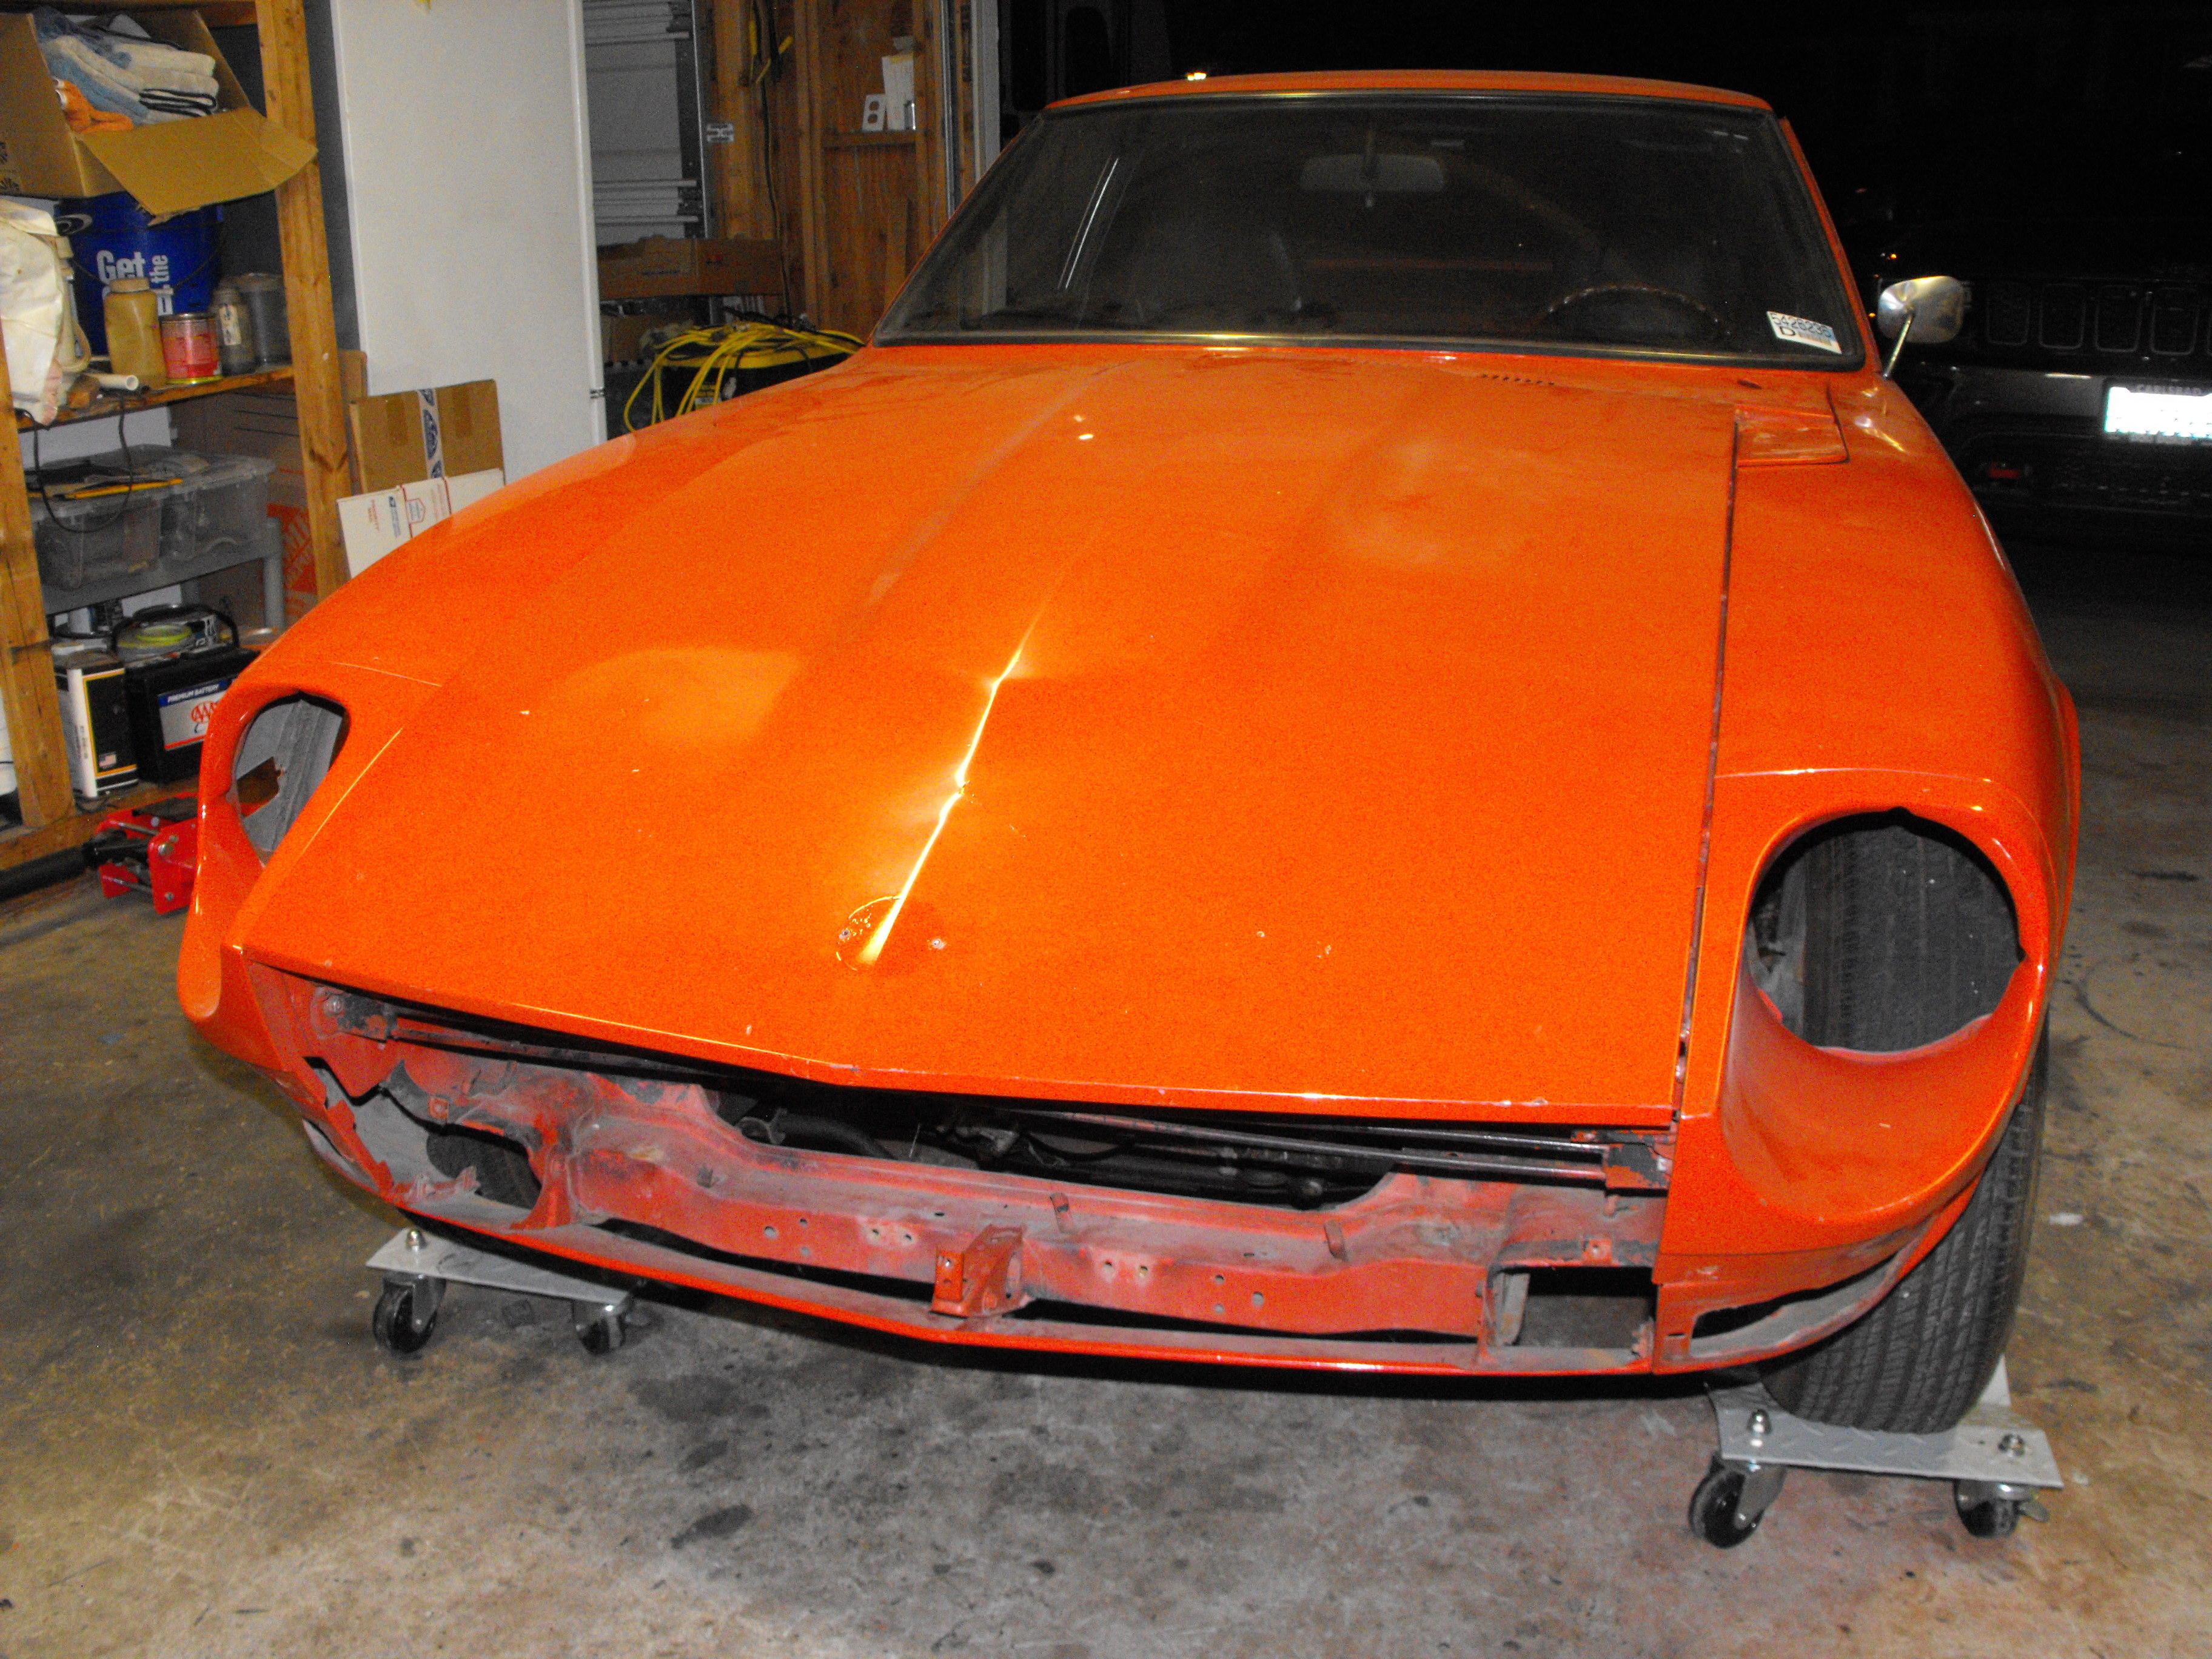
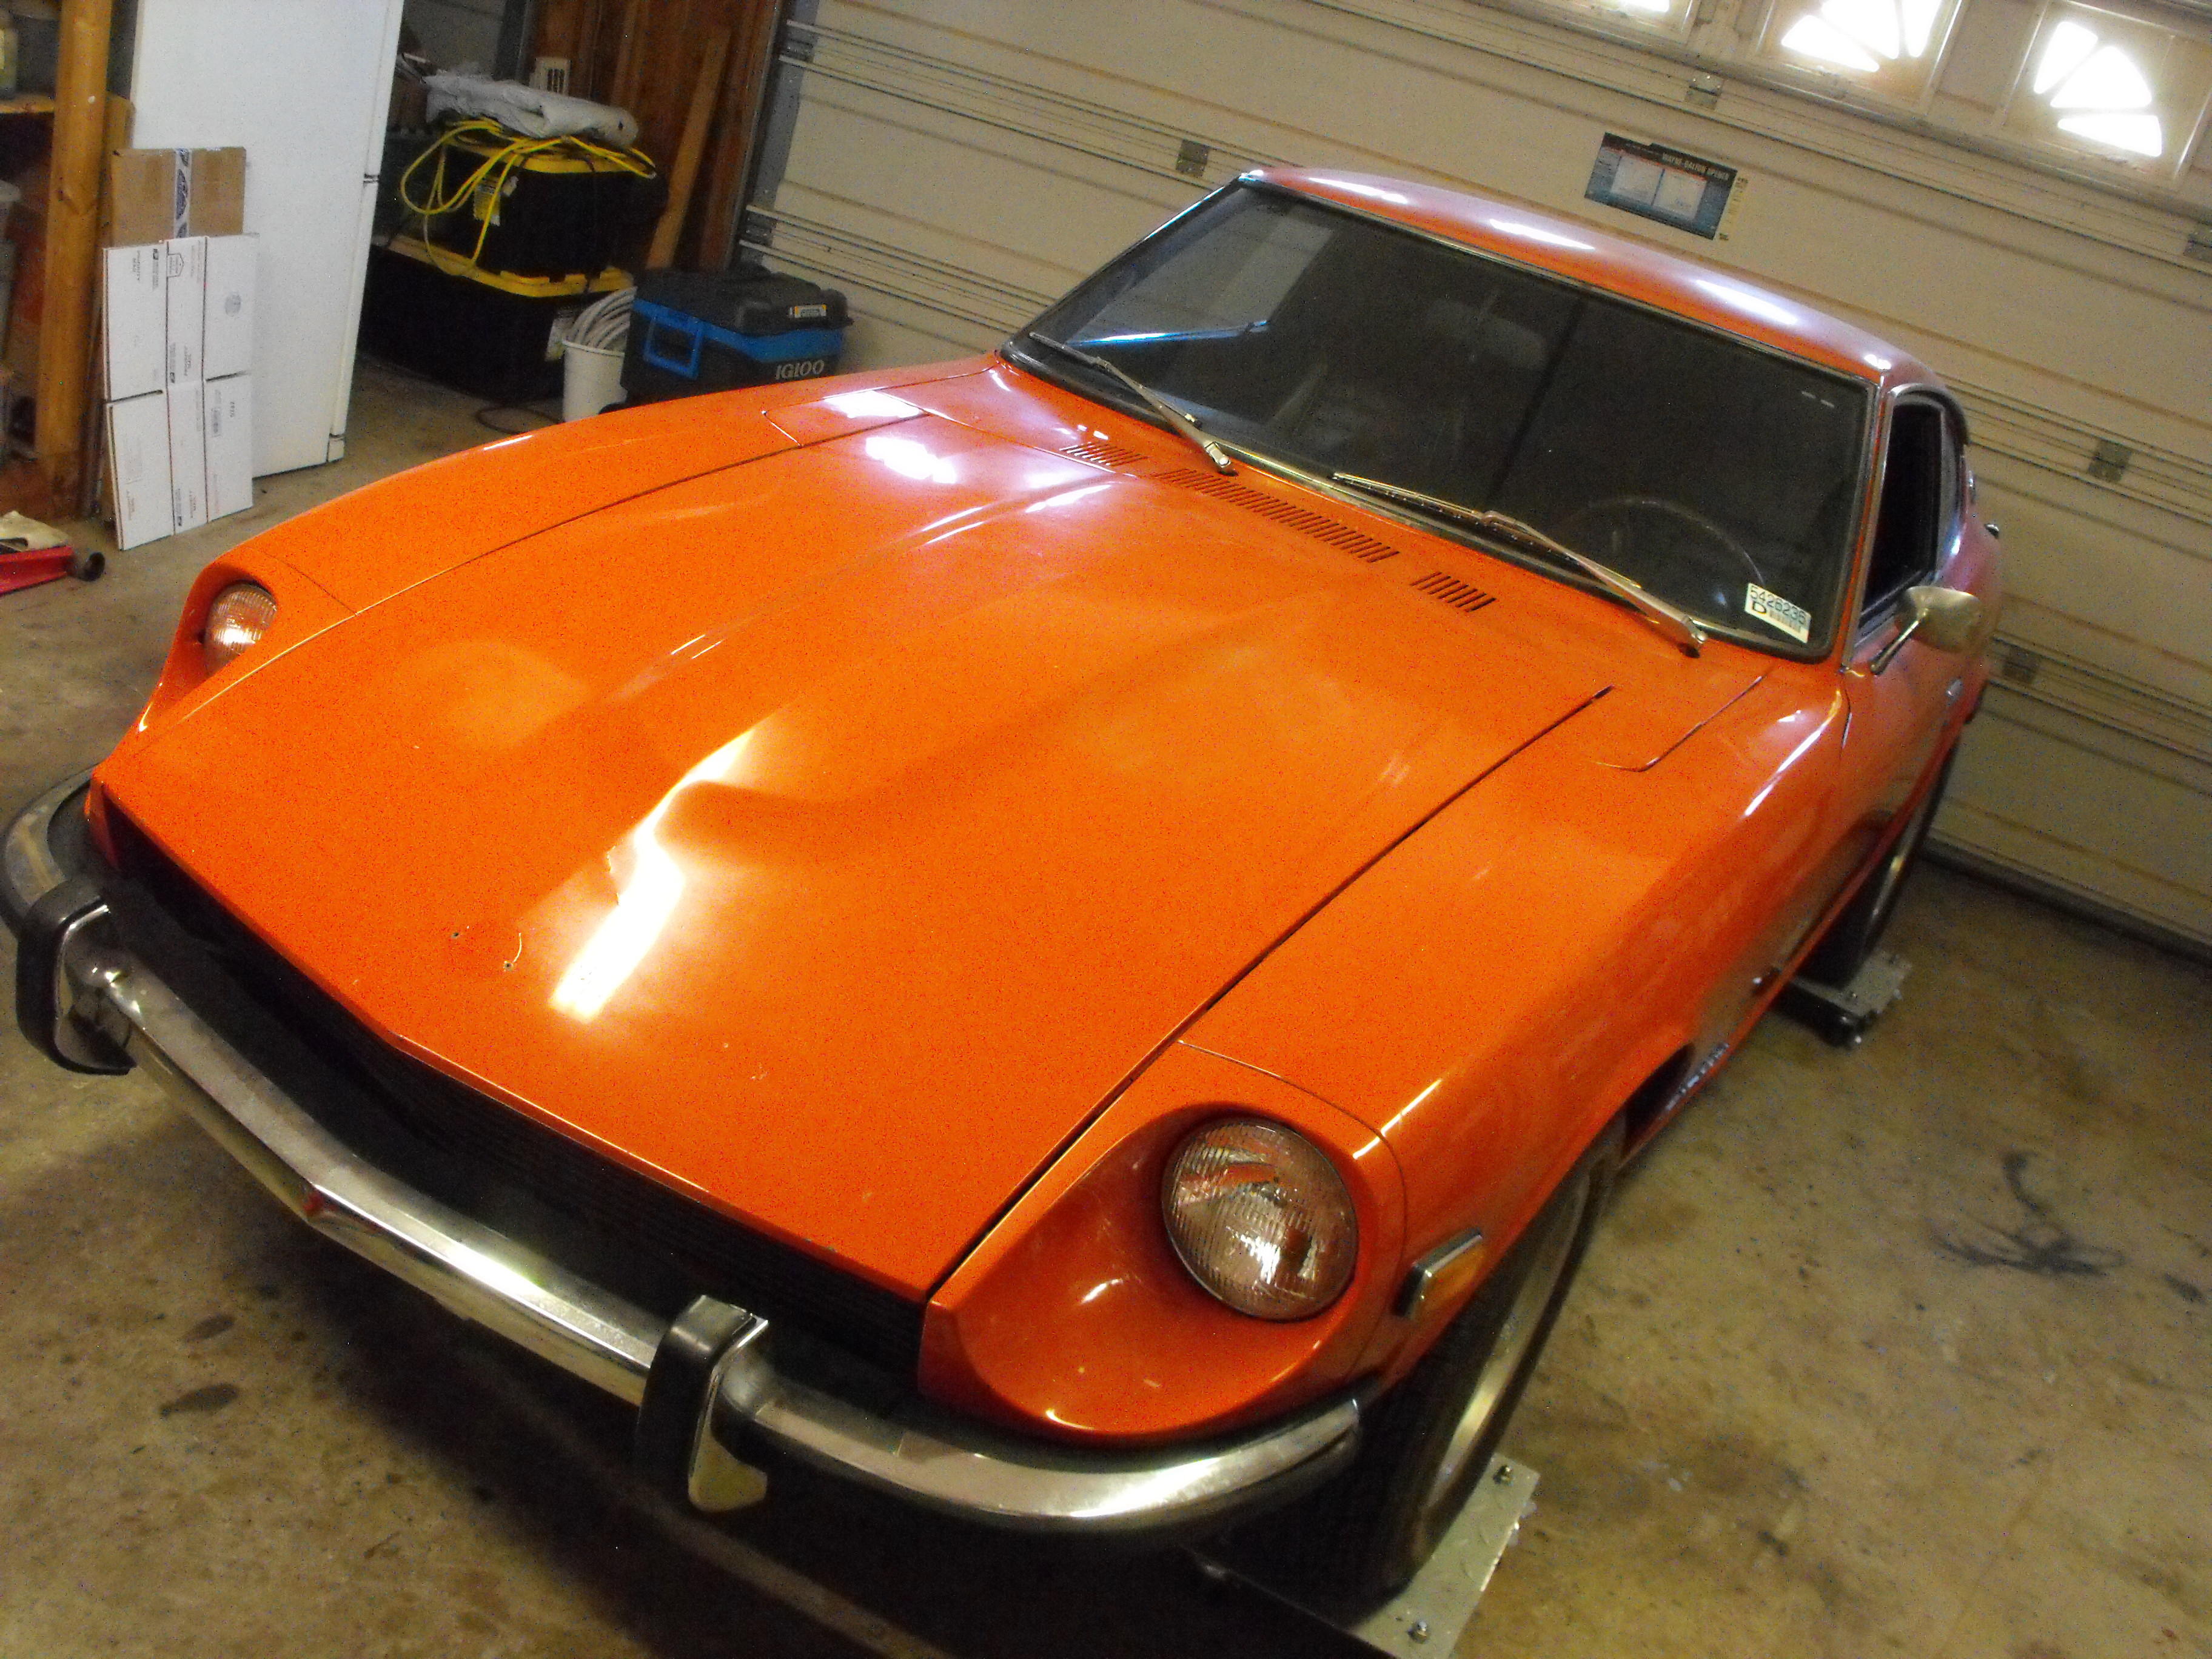
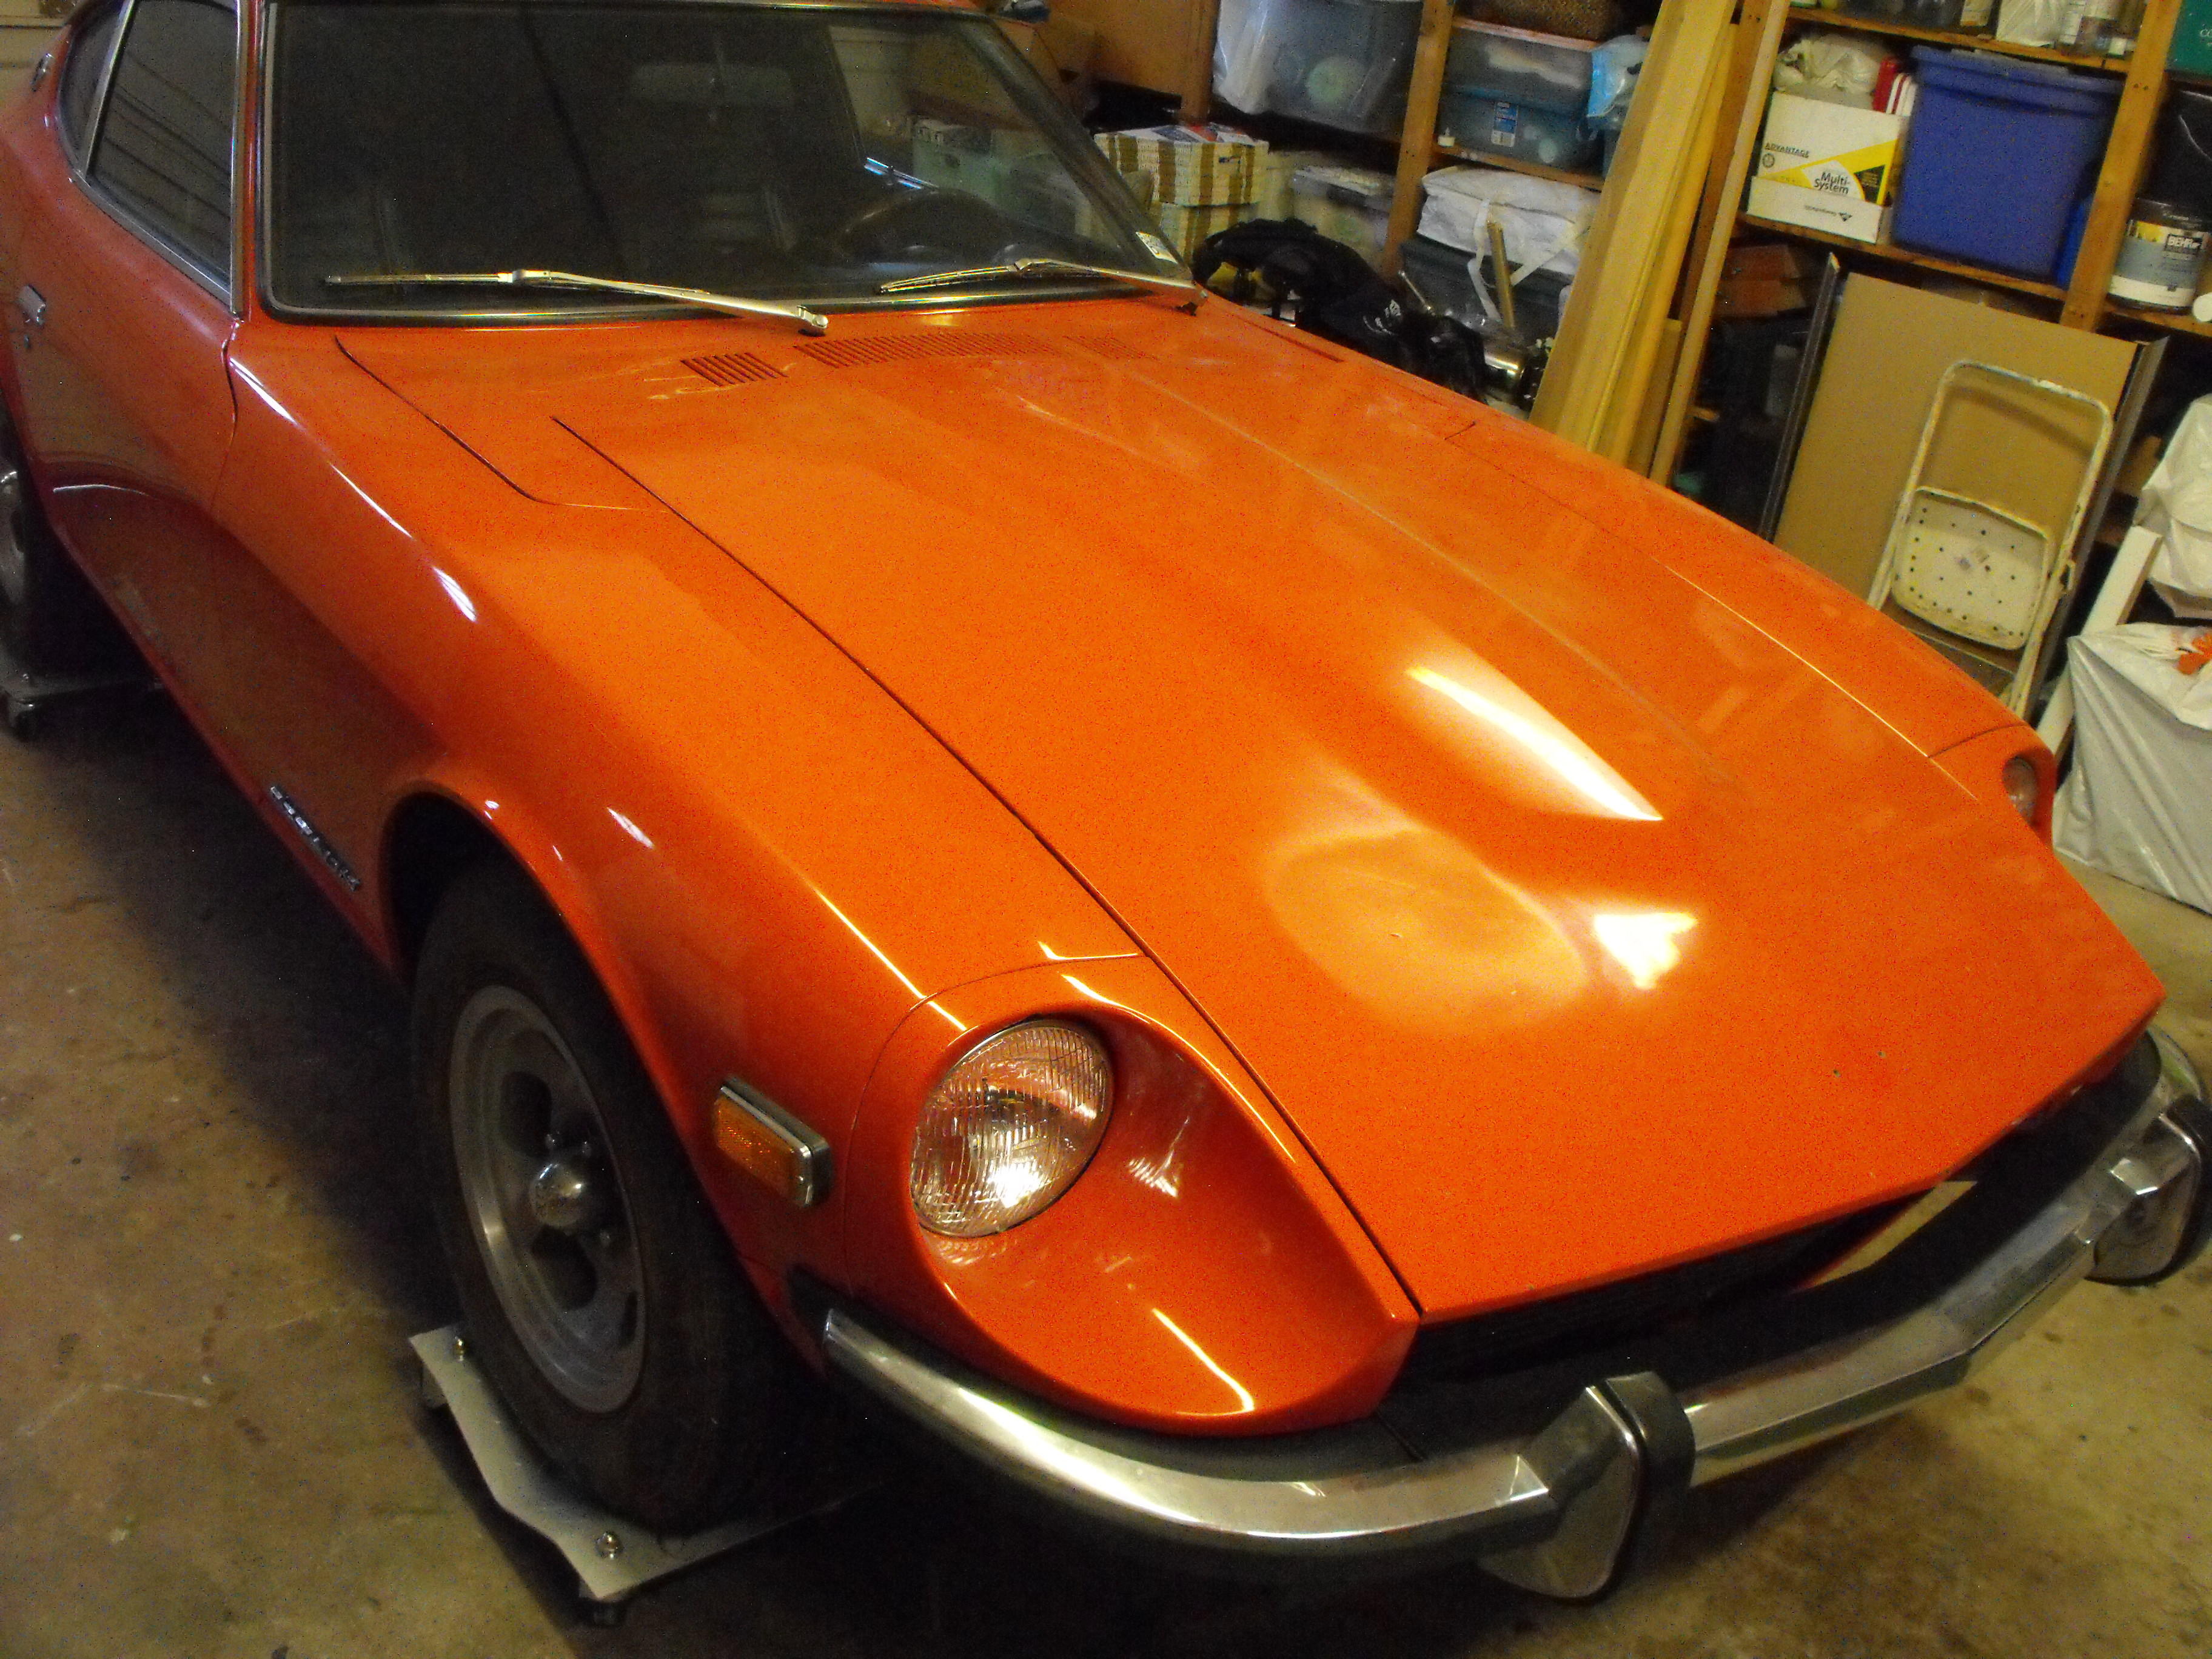
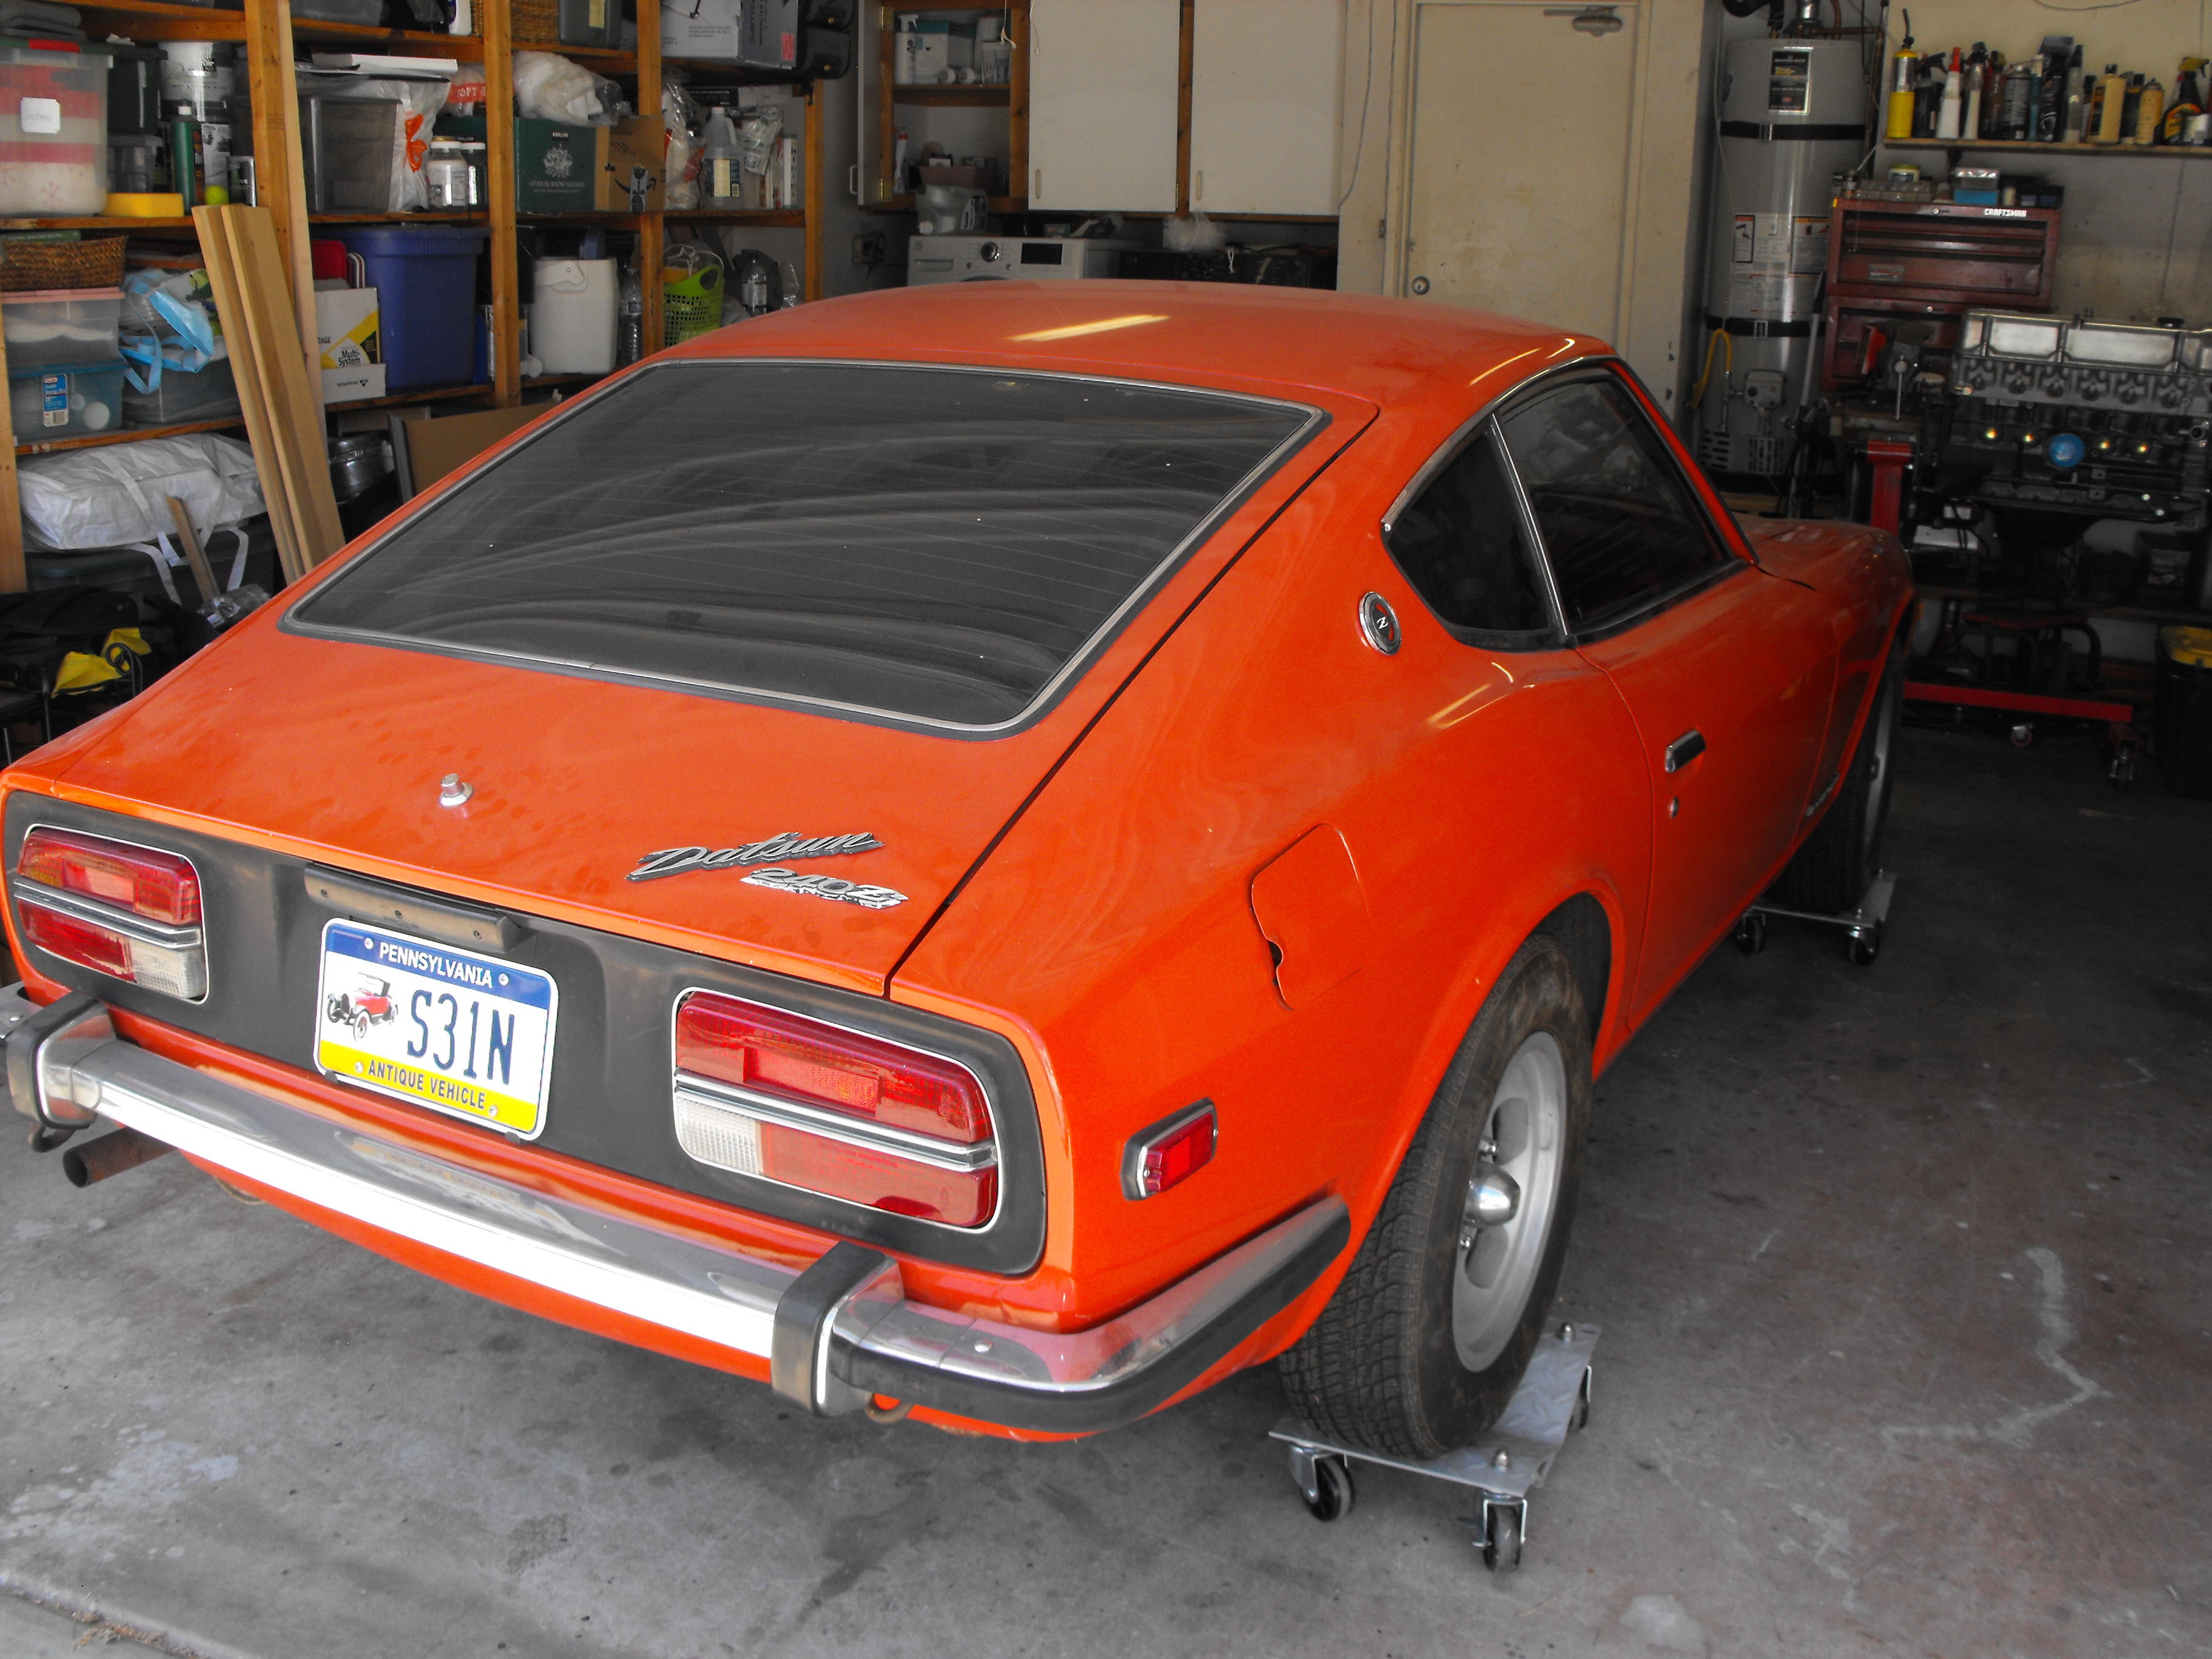
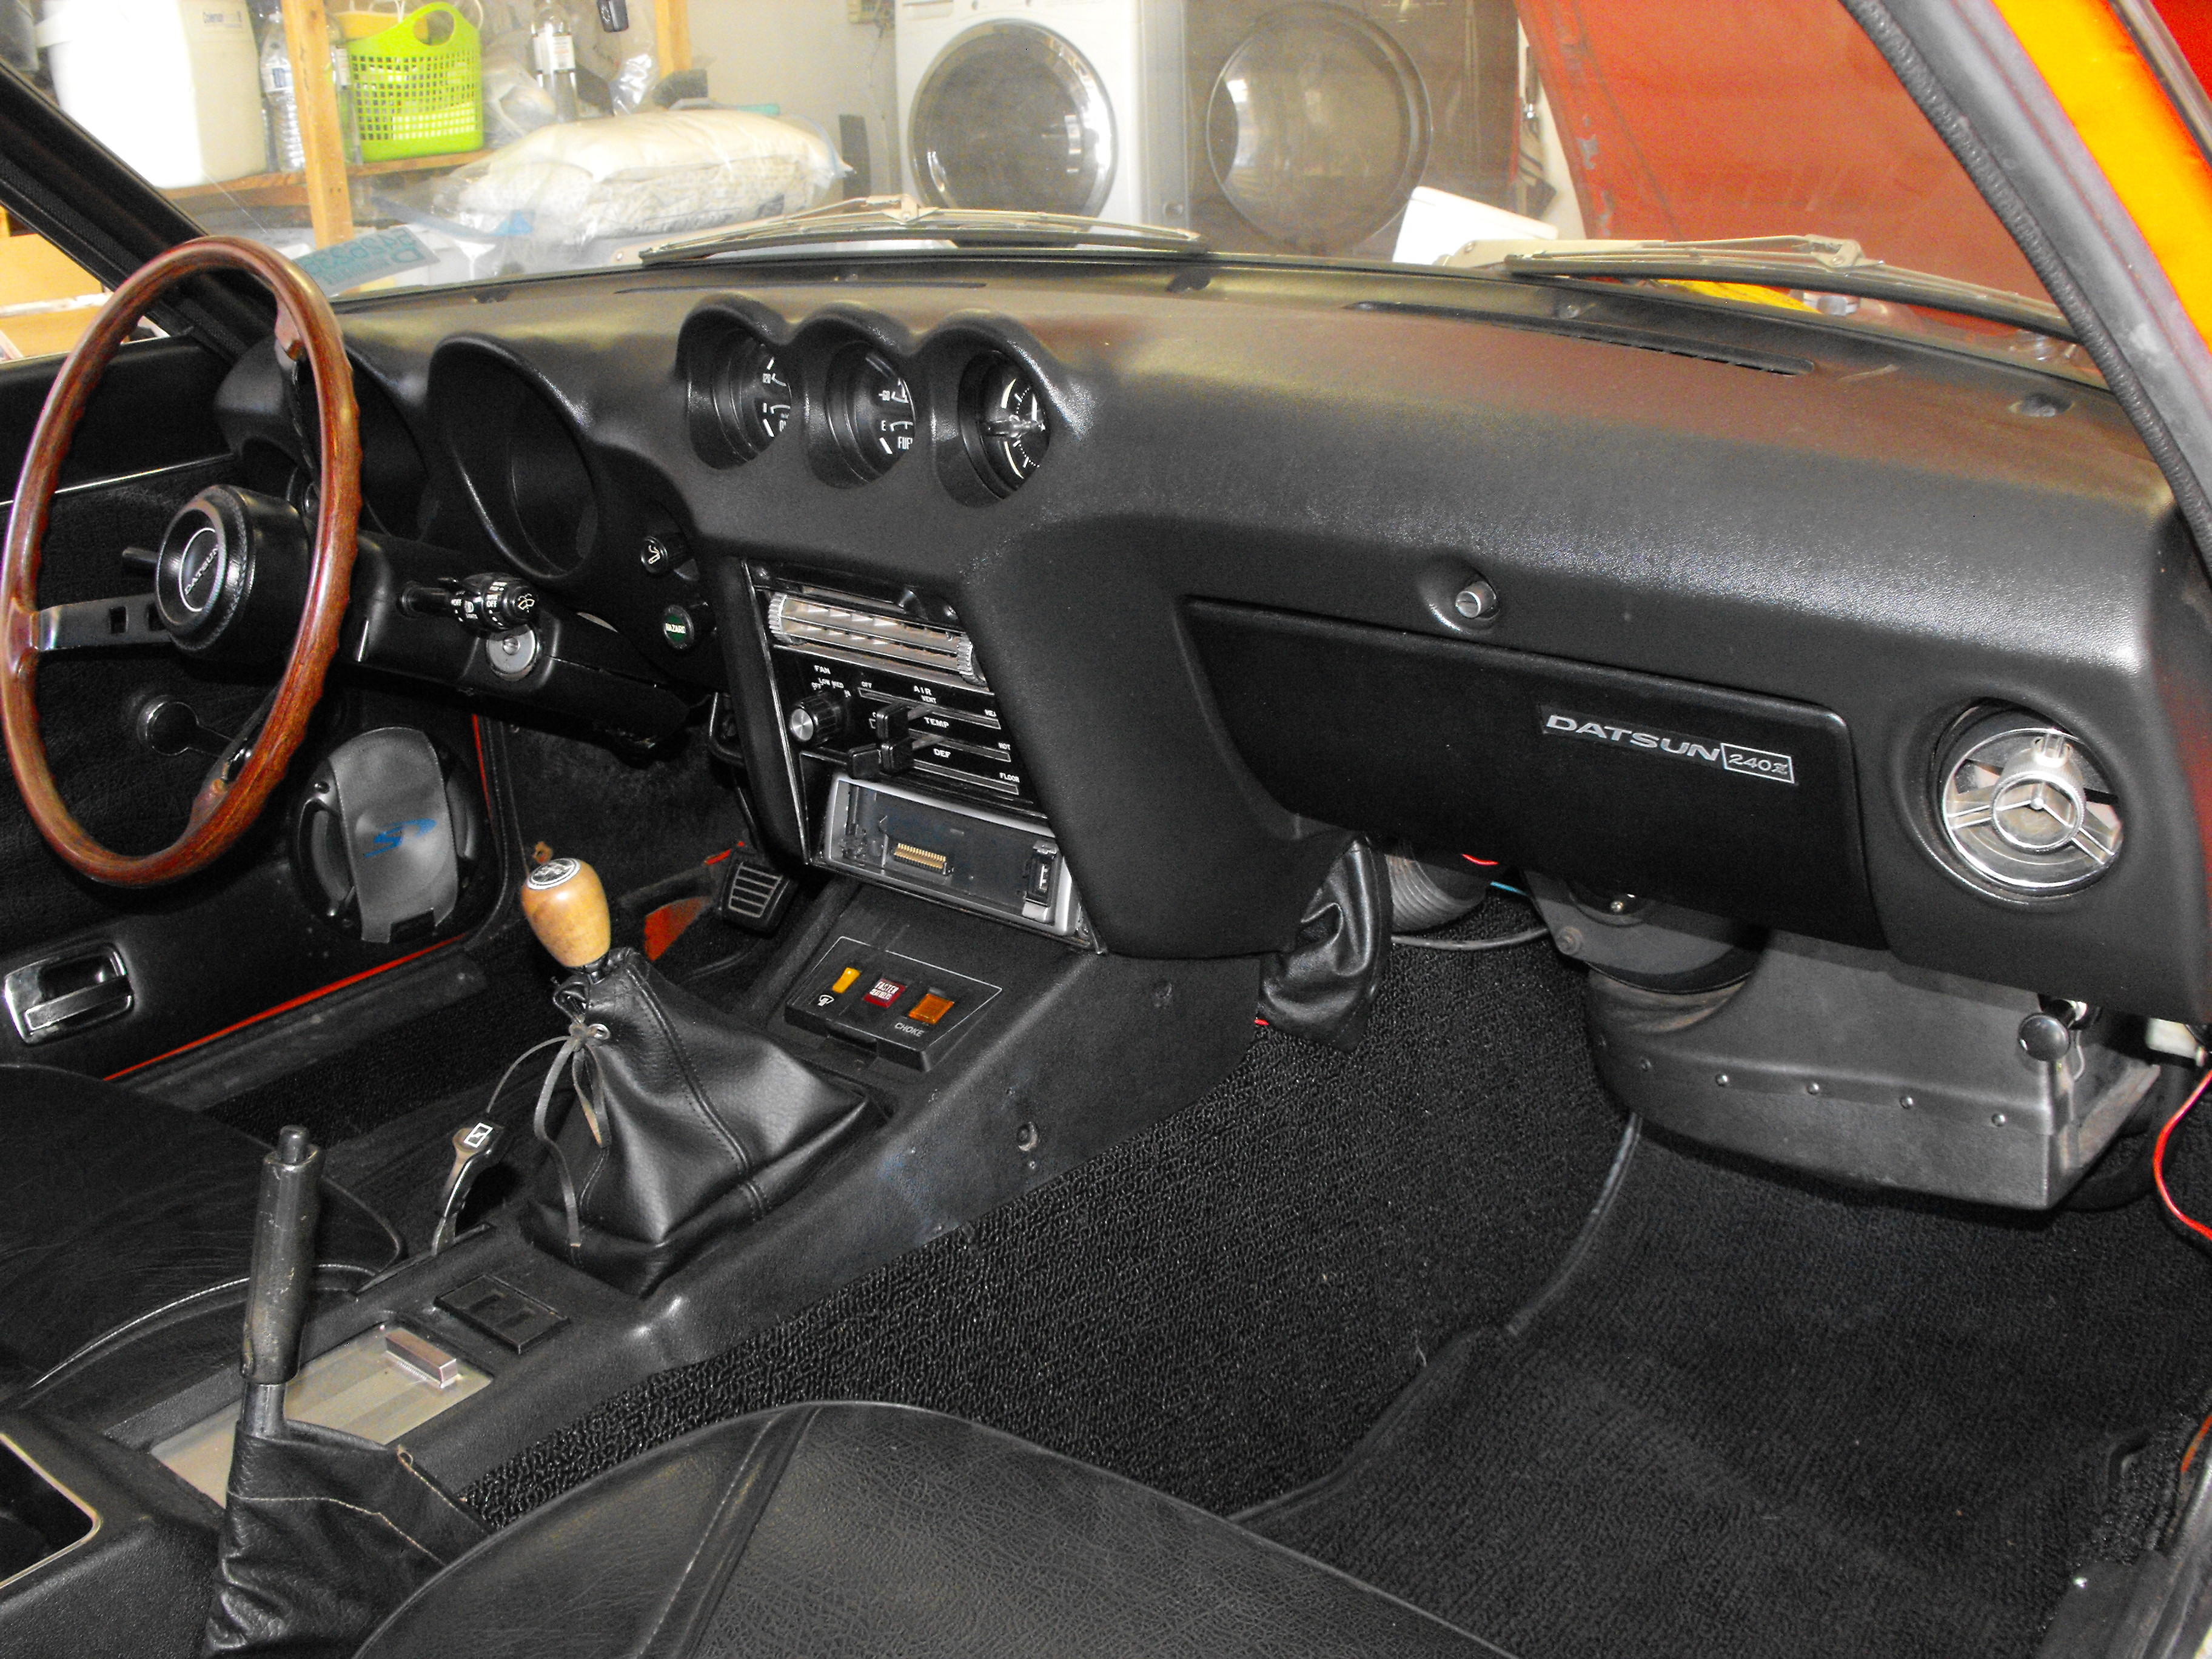
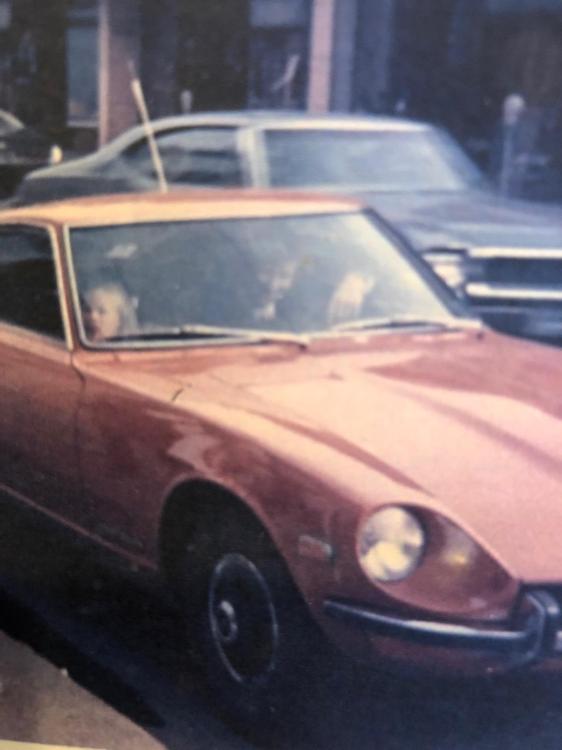
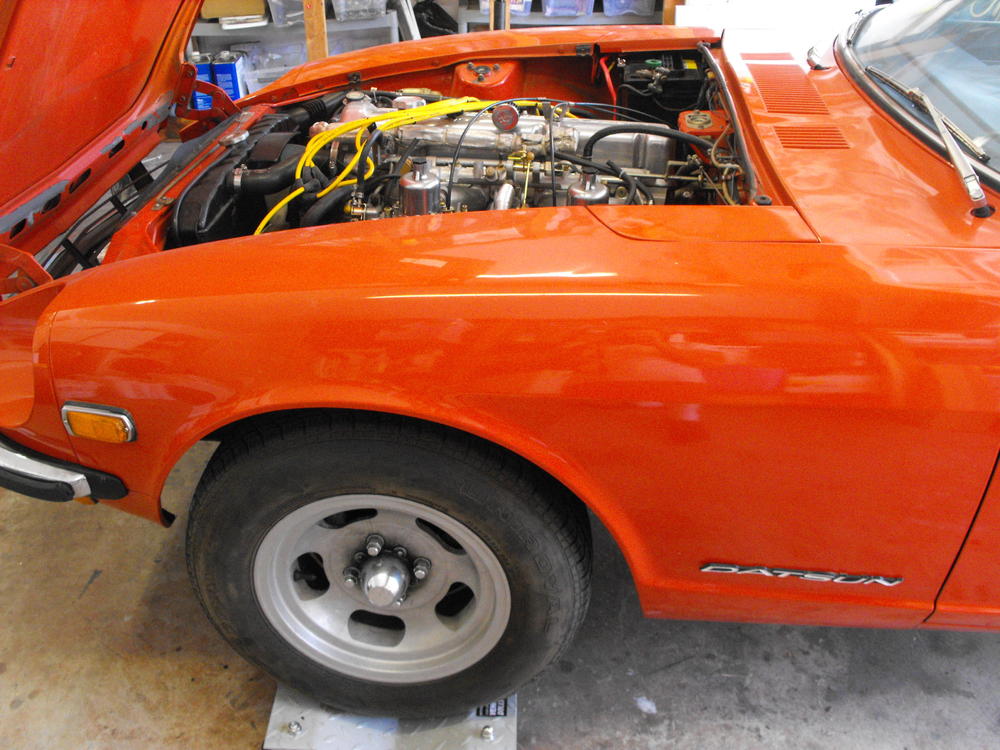
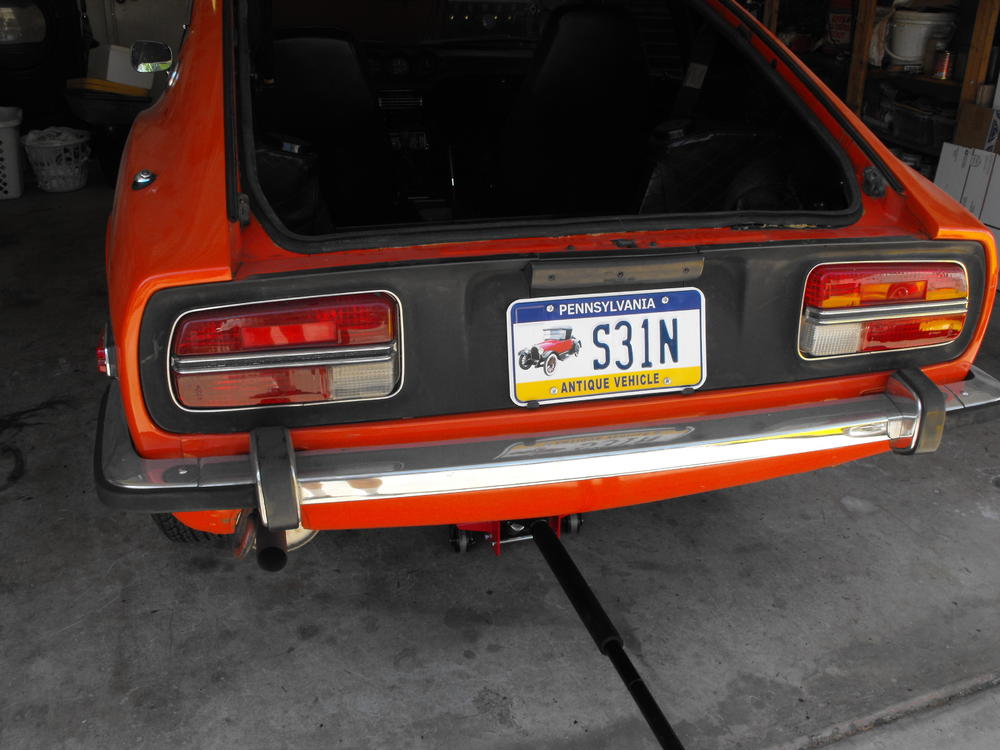
I am starting a new restoration for a local owner. This one has a good history,so I am looking forward to the build. The brief background is that the owners family had an Orange Z (looks to be a Series 1) growing up and apparently the car was sold some time later (Not really sure on that part). The family referred to their Z as "The Orange". To make a long story very short, The dad, the original owner, retired and the kids bought him this orange Z for him to work on in his retirement and bring back the memory of his youth. Gee that sounds familiar. Unfortunately, part way through the restoration, the father passed away and the Z is now owned by the daughter, shown in the first picture here. The owner contacted me and asked me to finish the restoration ( I will fill in a bit more background on this later). So anyway, the plan is to finish the restoration that the father started. And of cou rse, we will take this to a very nice level of restoration, similar to my previous two cars. We still have some decision to make on the AC, and we will most likely stick with the mags and the round tops, but otherwise we will keep this very stock. Below are some pics of the car. Other than the body, the car is in very nice condition and was derivable. Also, car has an original uncracked dash and a nice assortment of restoration parts to be installed later. Also, the passenger seat is original and in great condition. That is pretty rare. So, Lots of pics of the car are shown below. Will document the build here as things progress.


-
Looks like a real nice show. It's always good exposure to have the Z cars at the Concours events. Thanks for representing! When you mentioned that he was towing out the Volvo and 5 other cars burned, I am guessing that the Volvo was pretty special since he selected it over the other 5 vehicles. Given that choice, I would definitely take my most valuable or irreplaceable vehicle. Also, for what it's worth, you can add the 2nd place in a Concours event to your show resume ? . They usually ask that kind of stuff on the applications. No need to tel them that there were only two cars in the event. That's what I would do anyway, LOL.
-
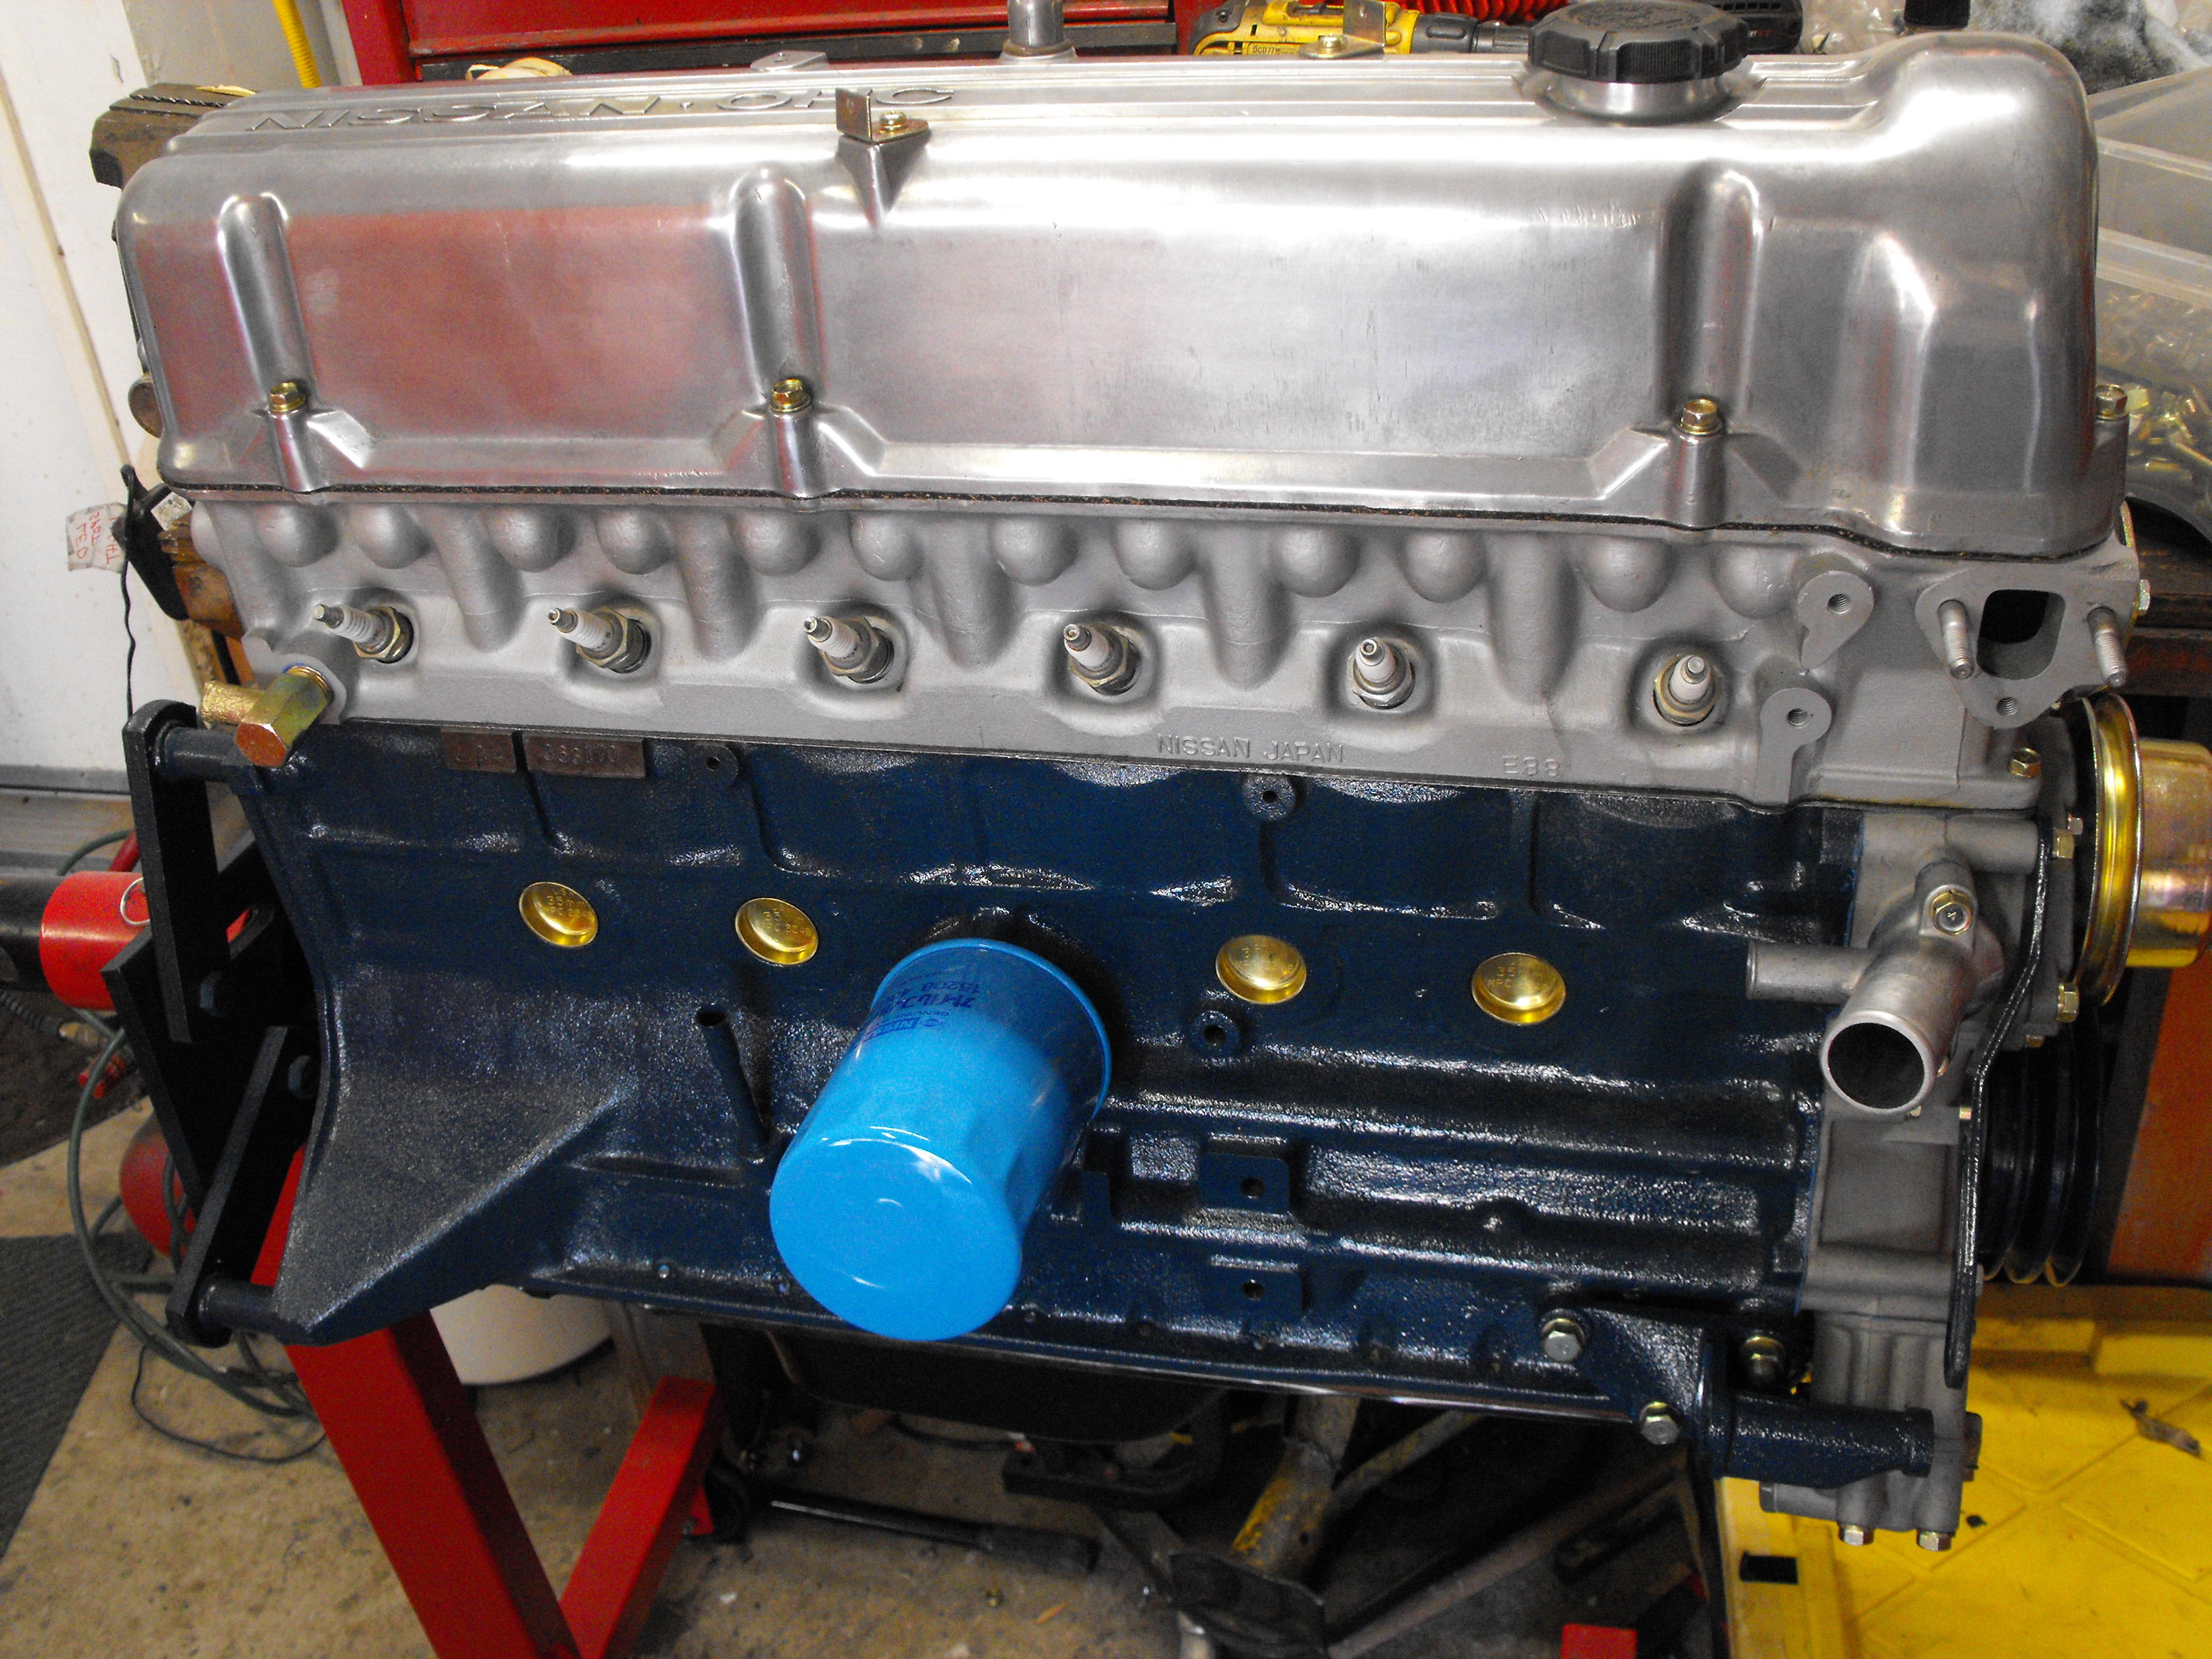
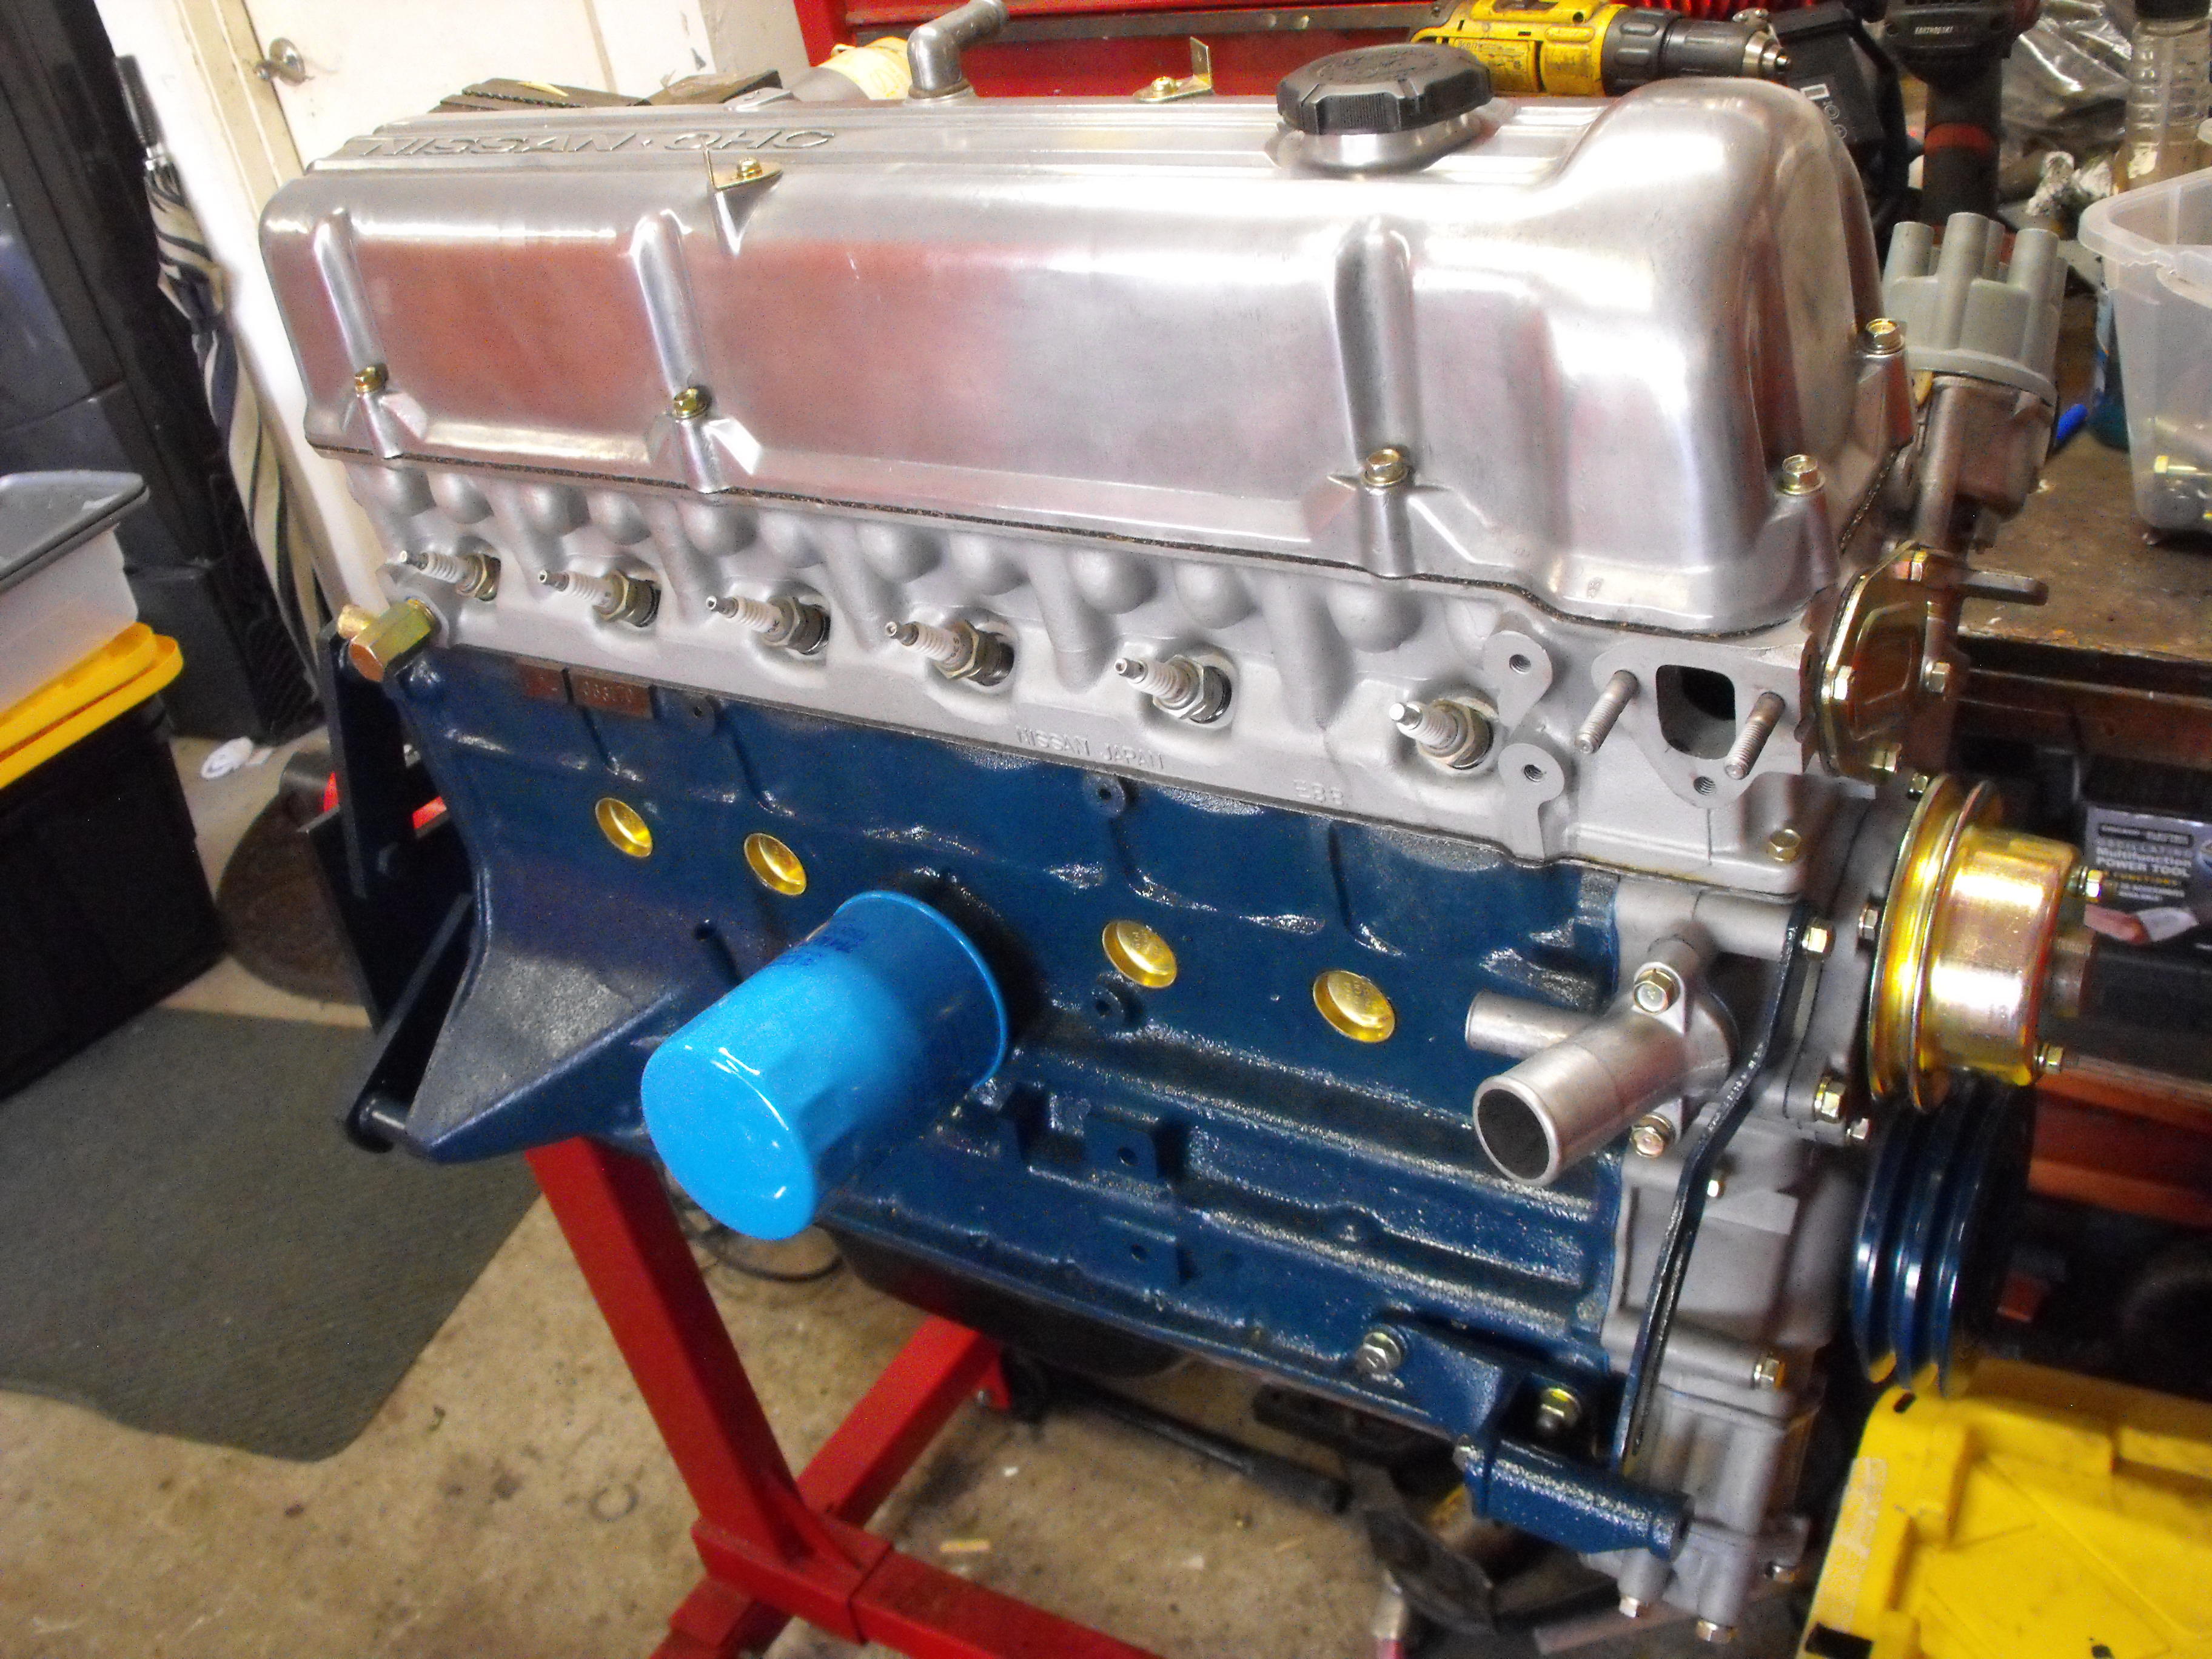
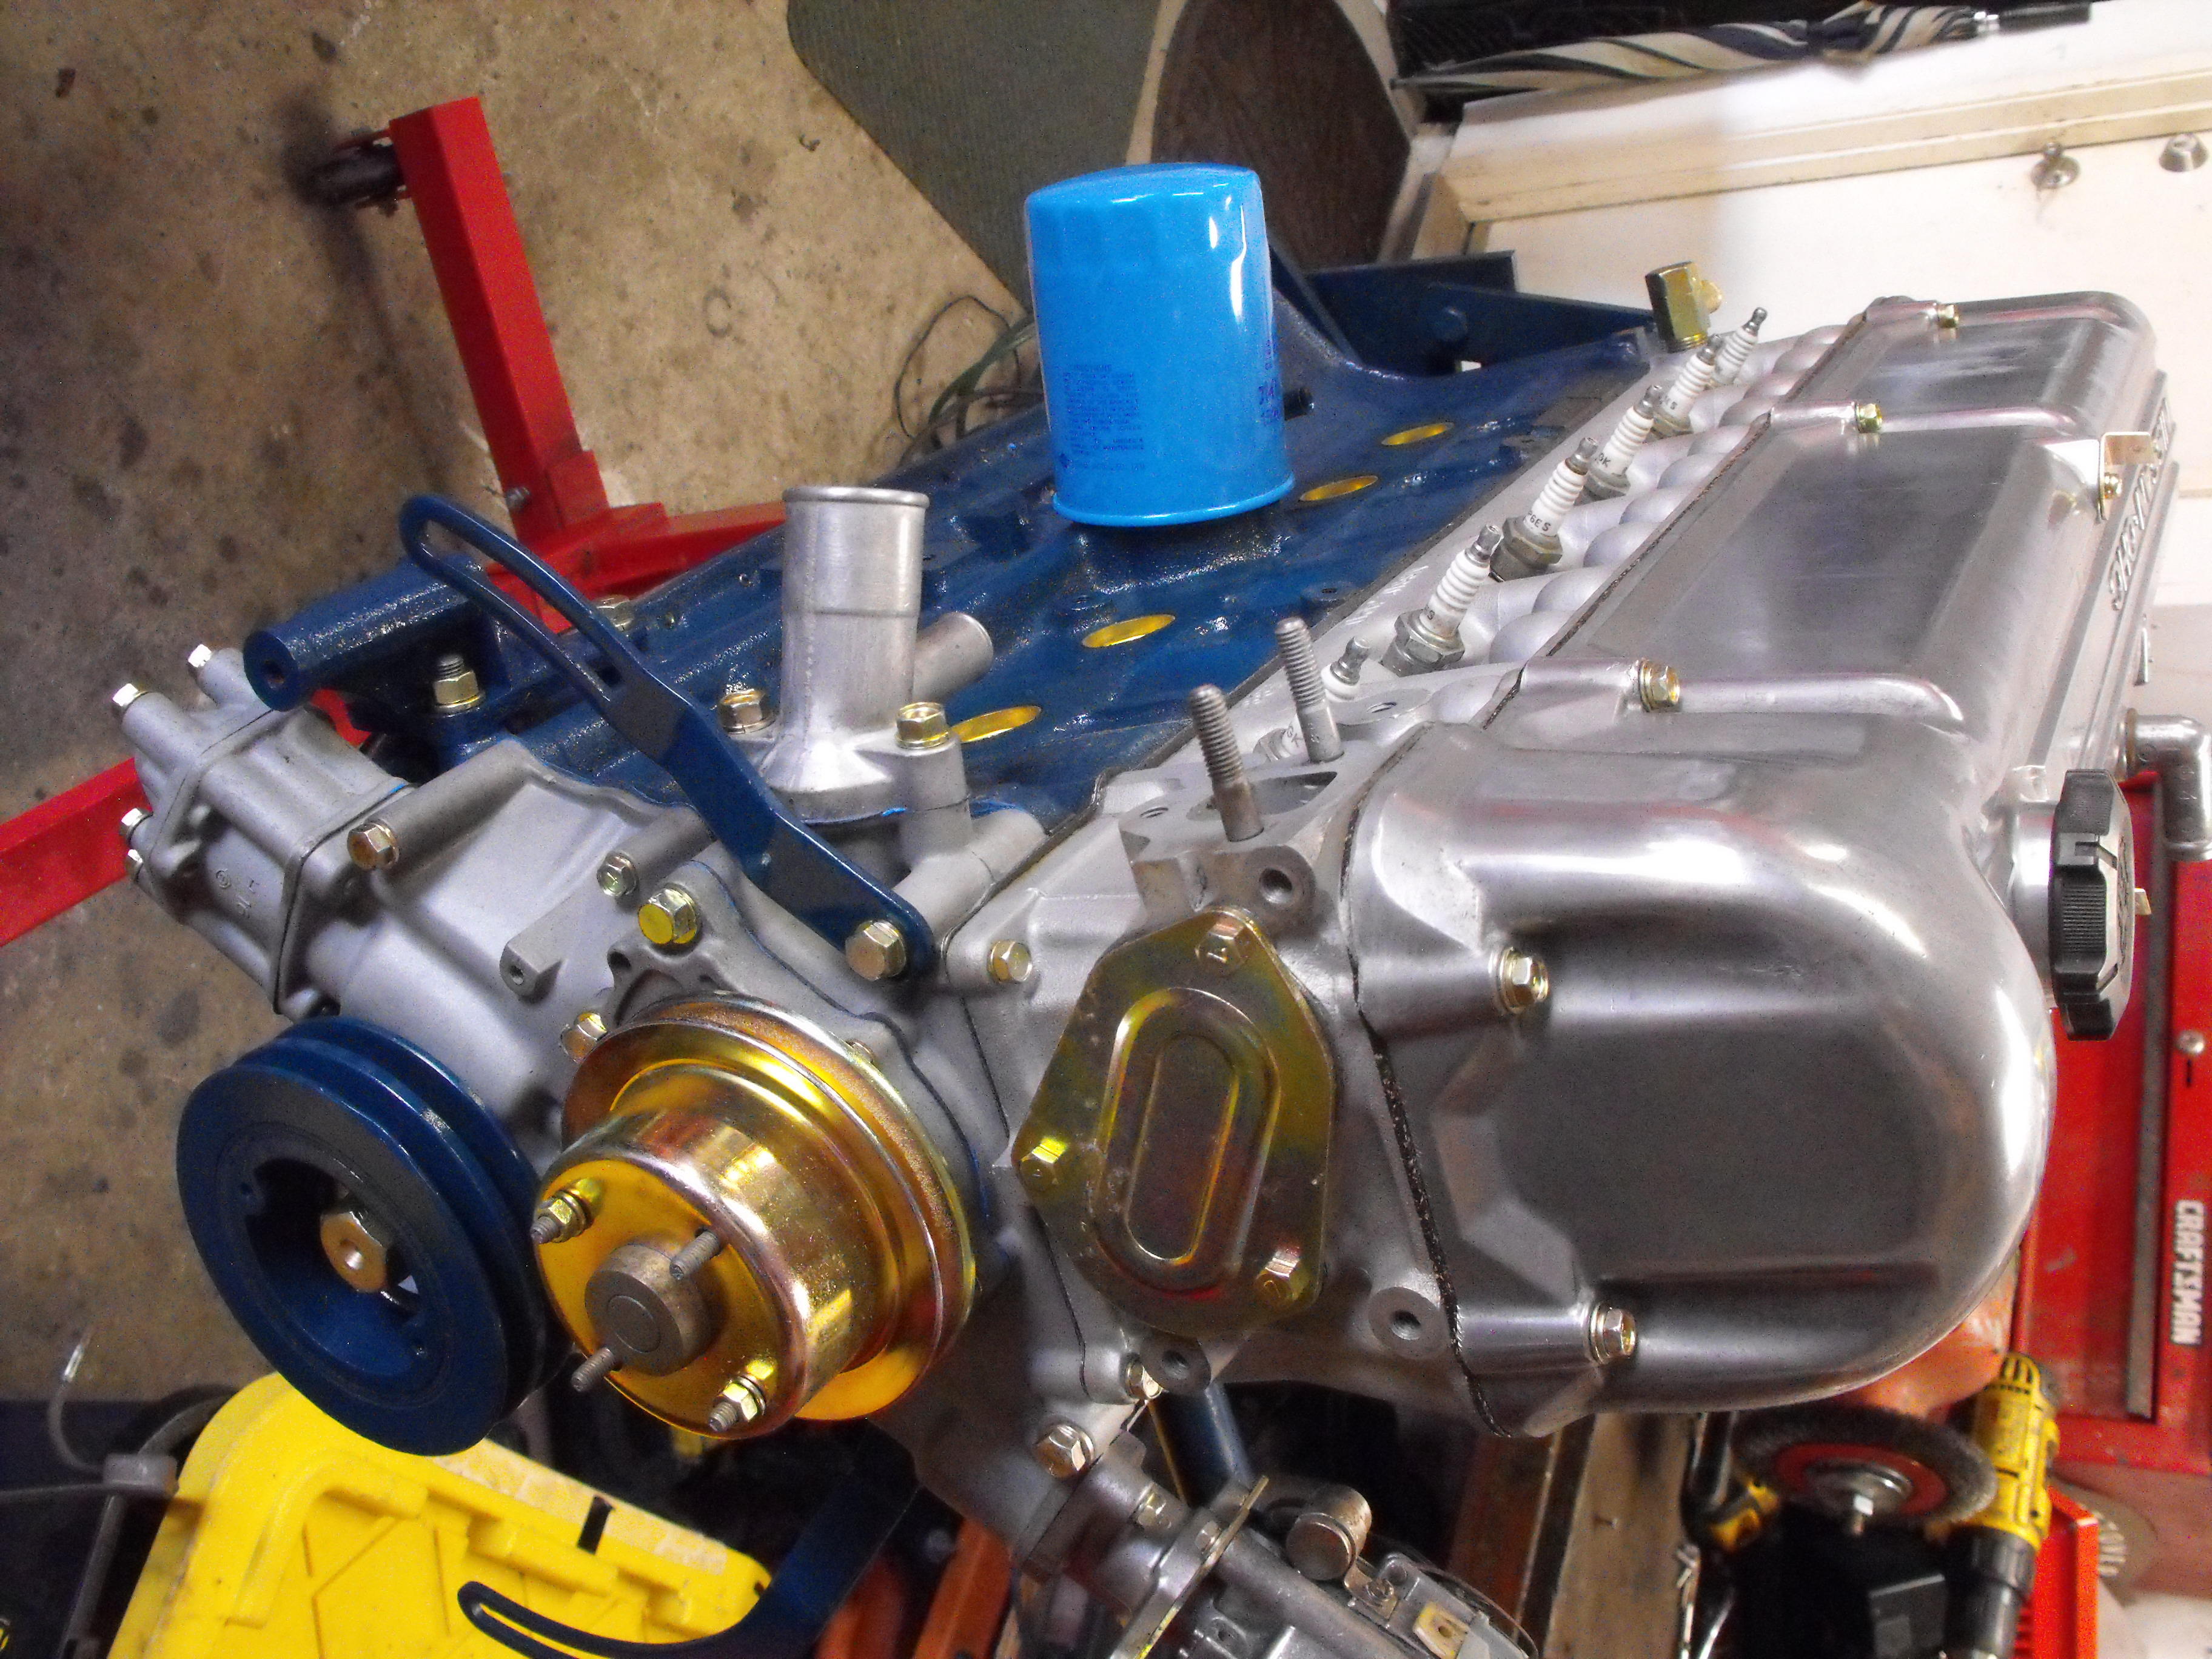
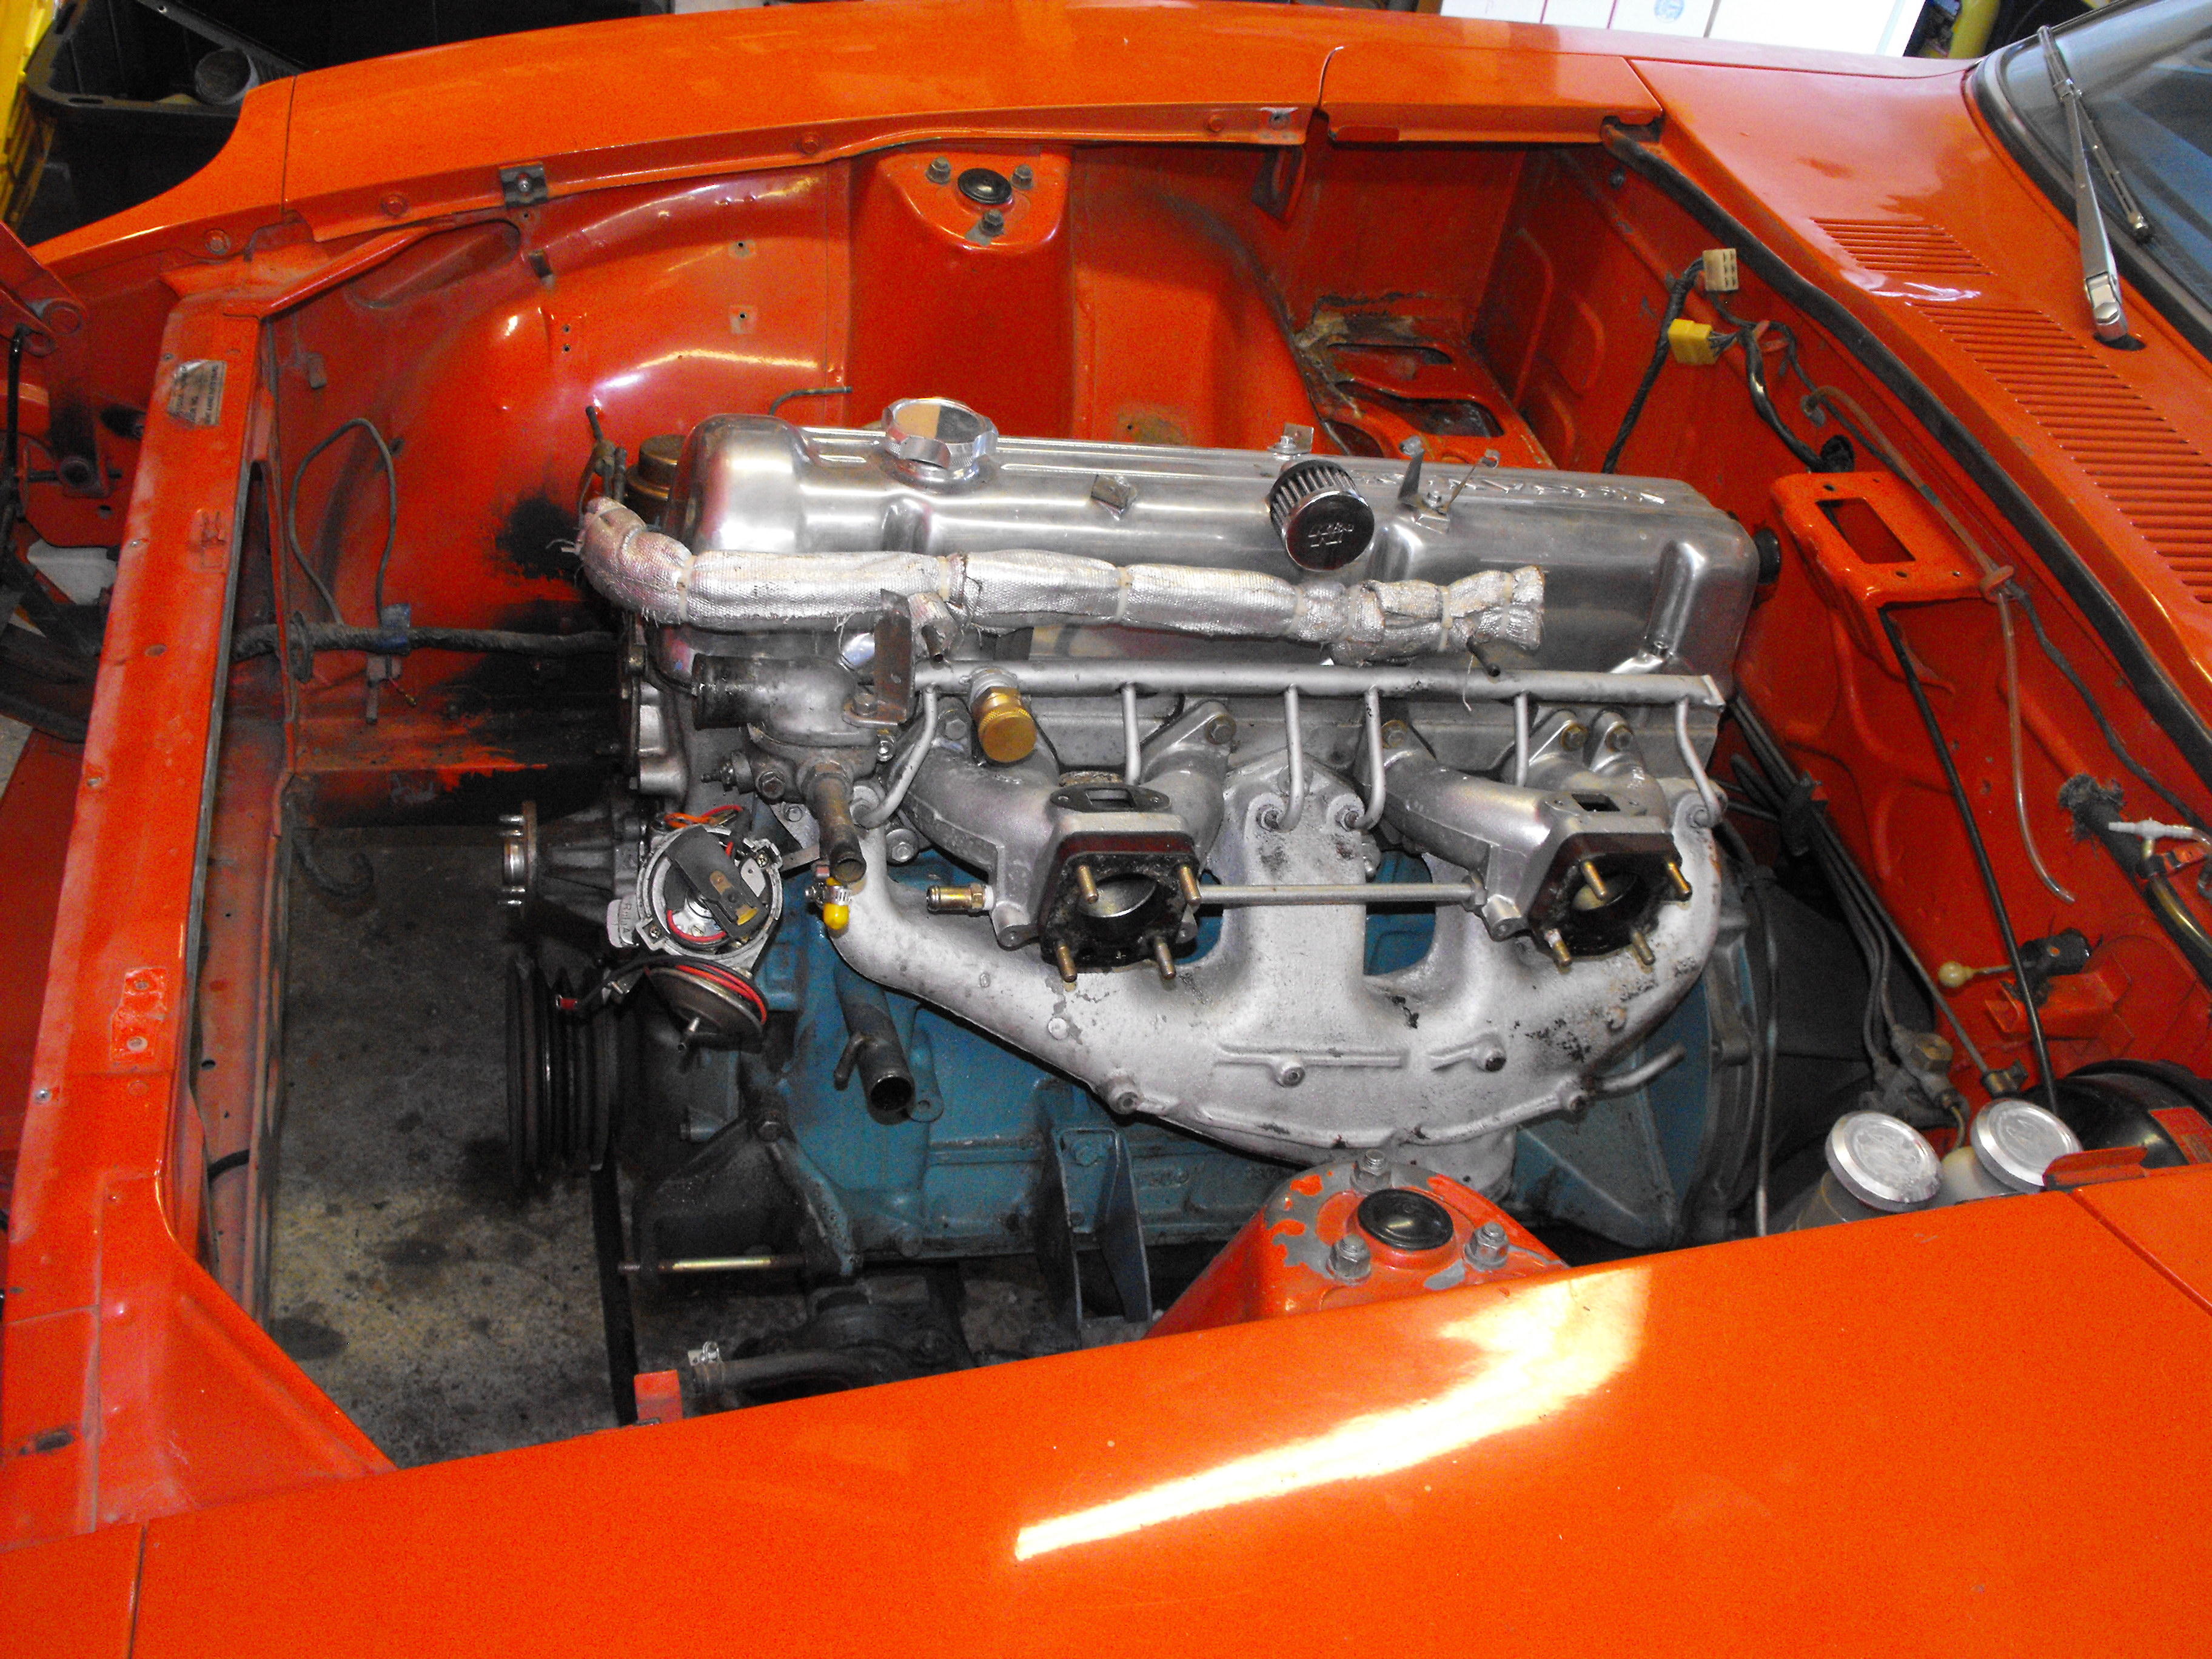
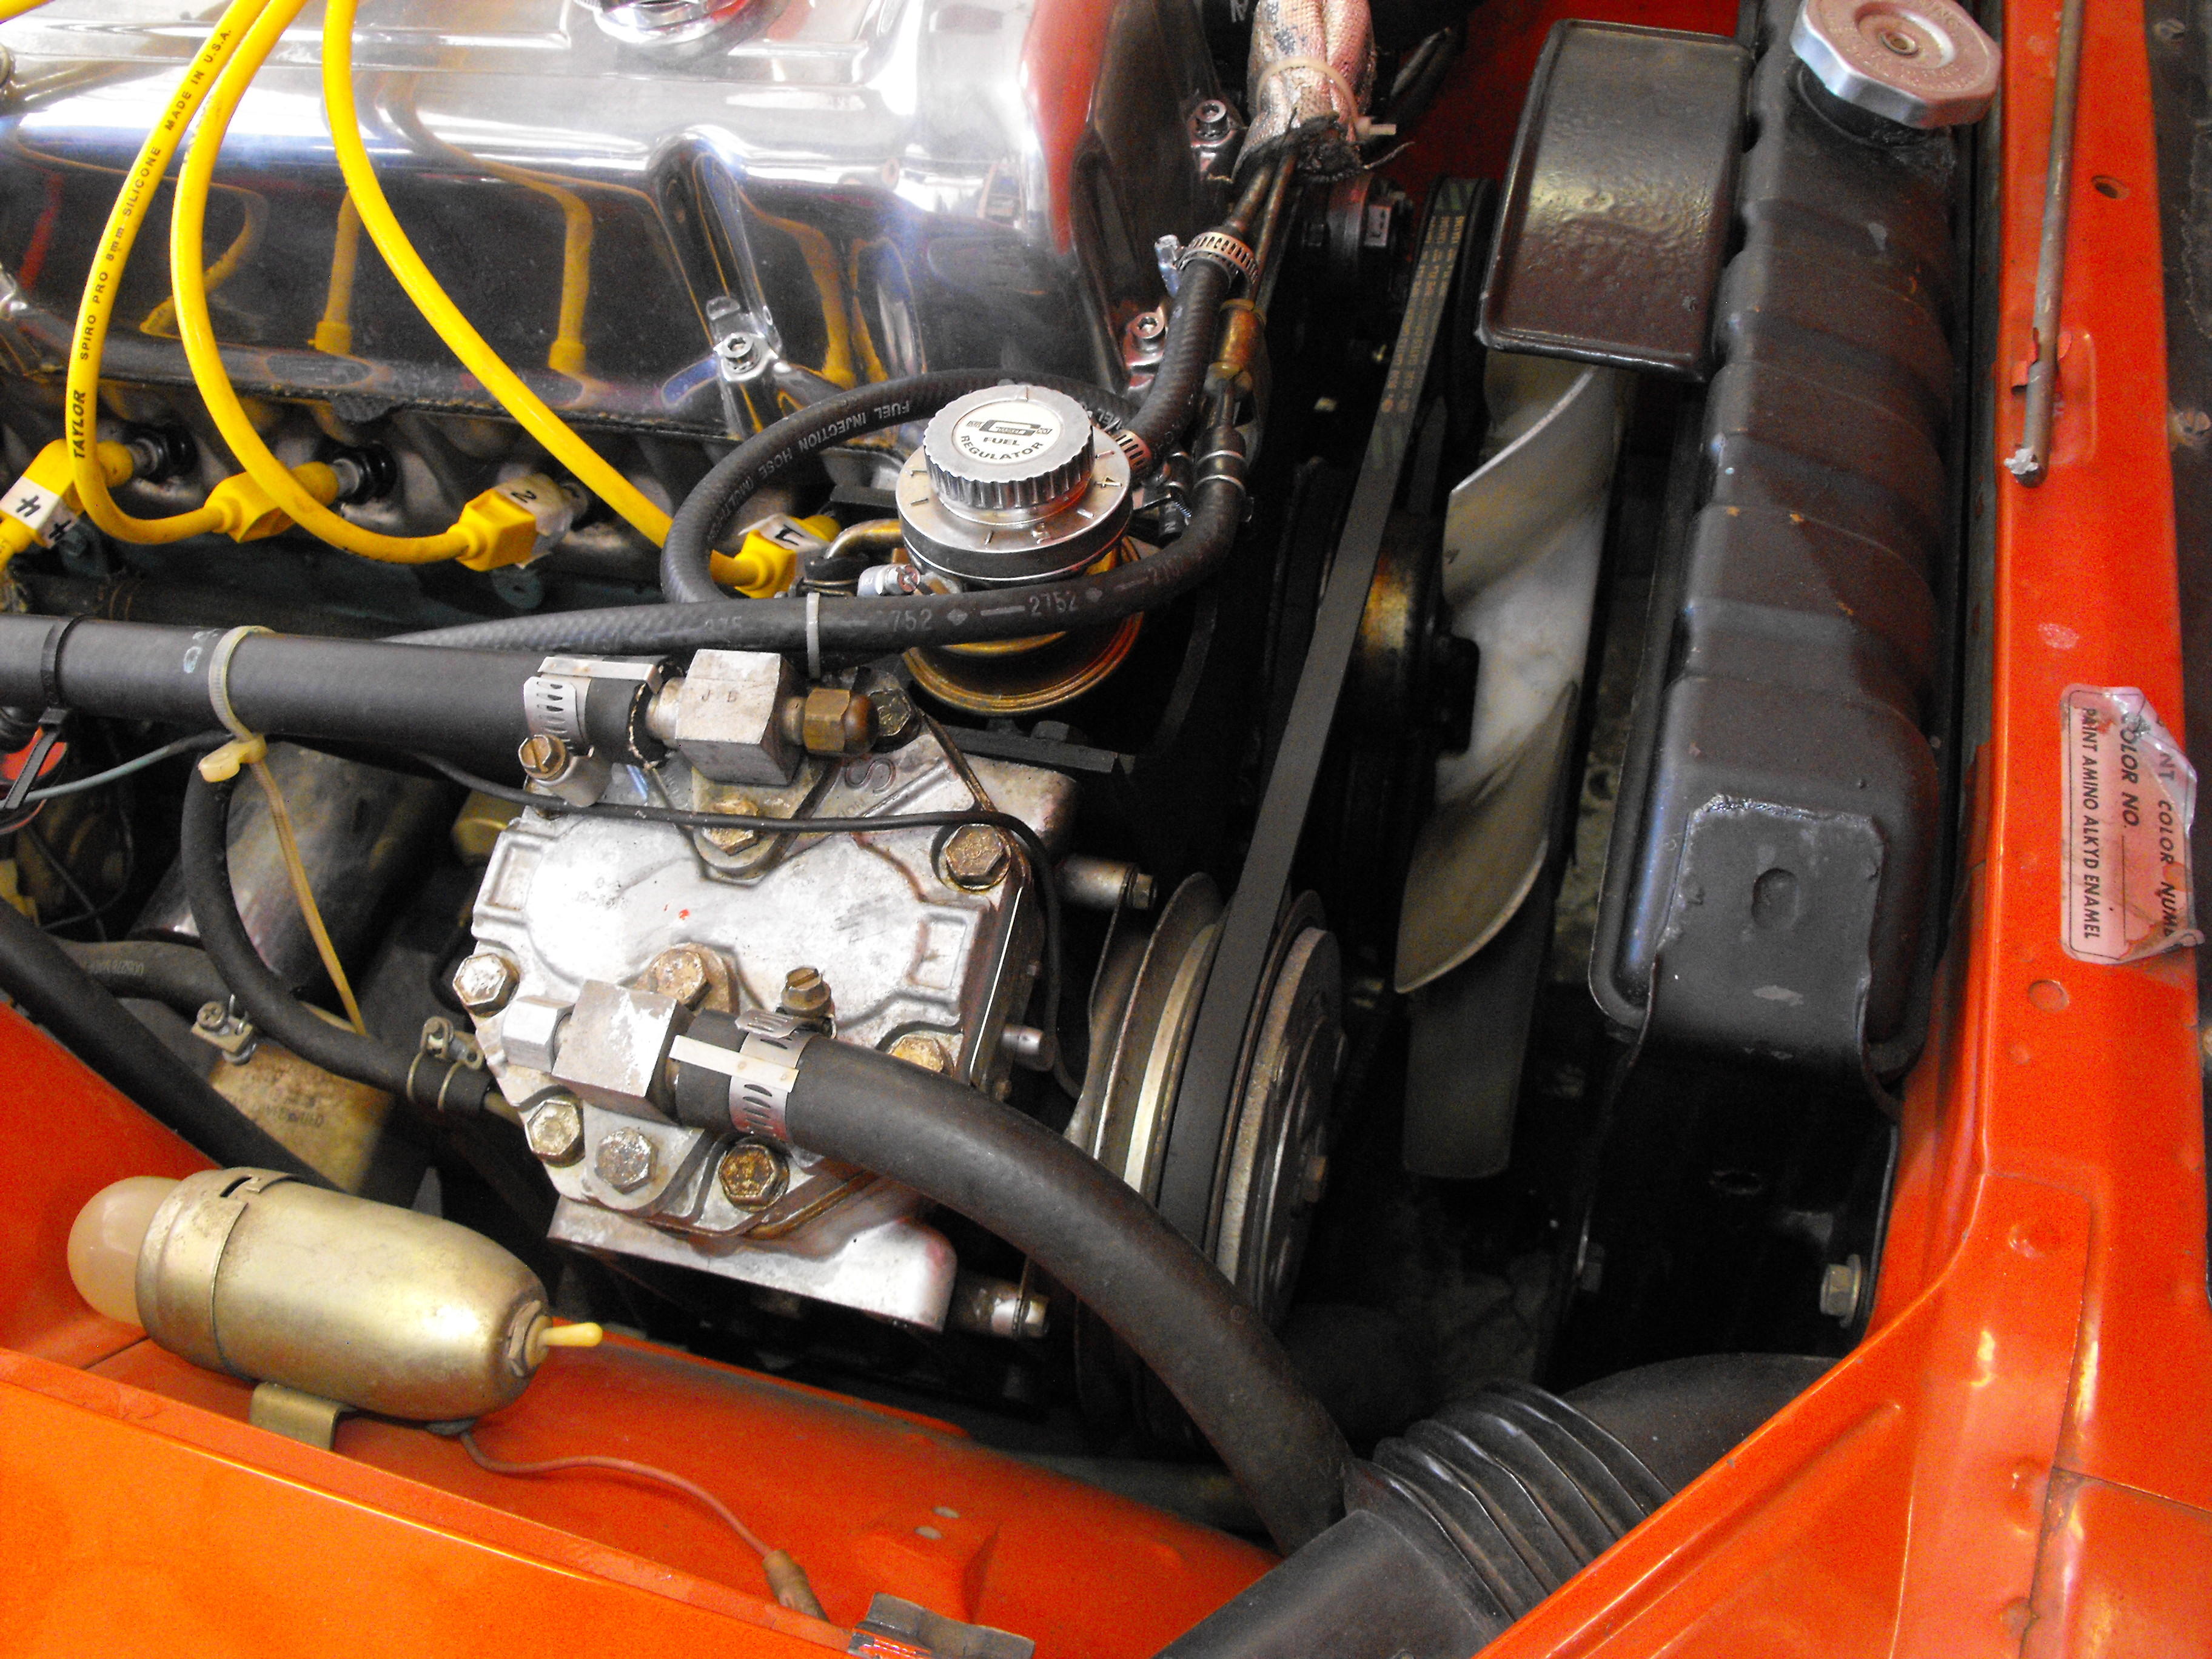
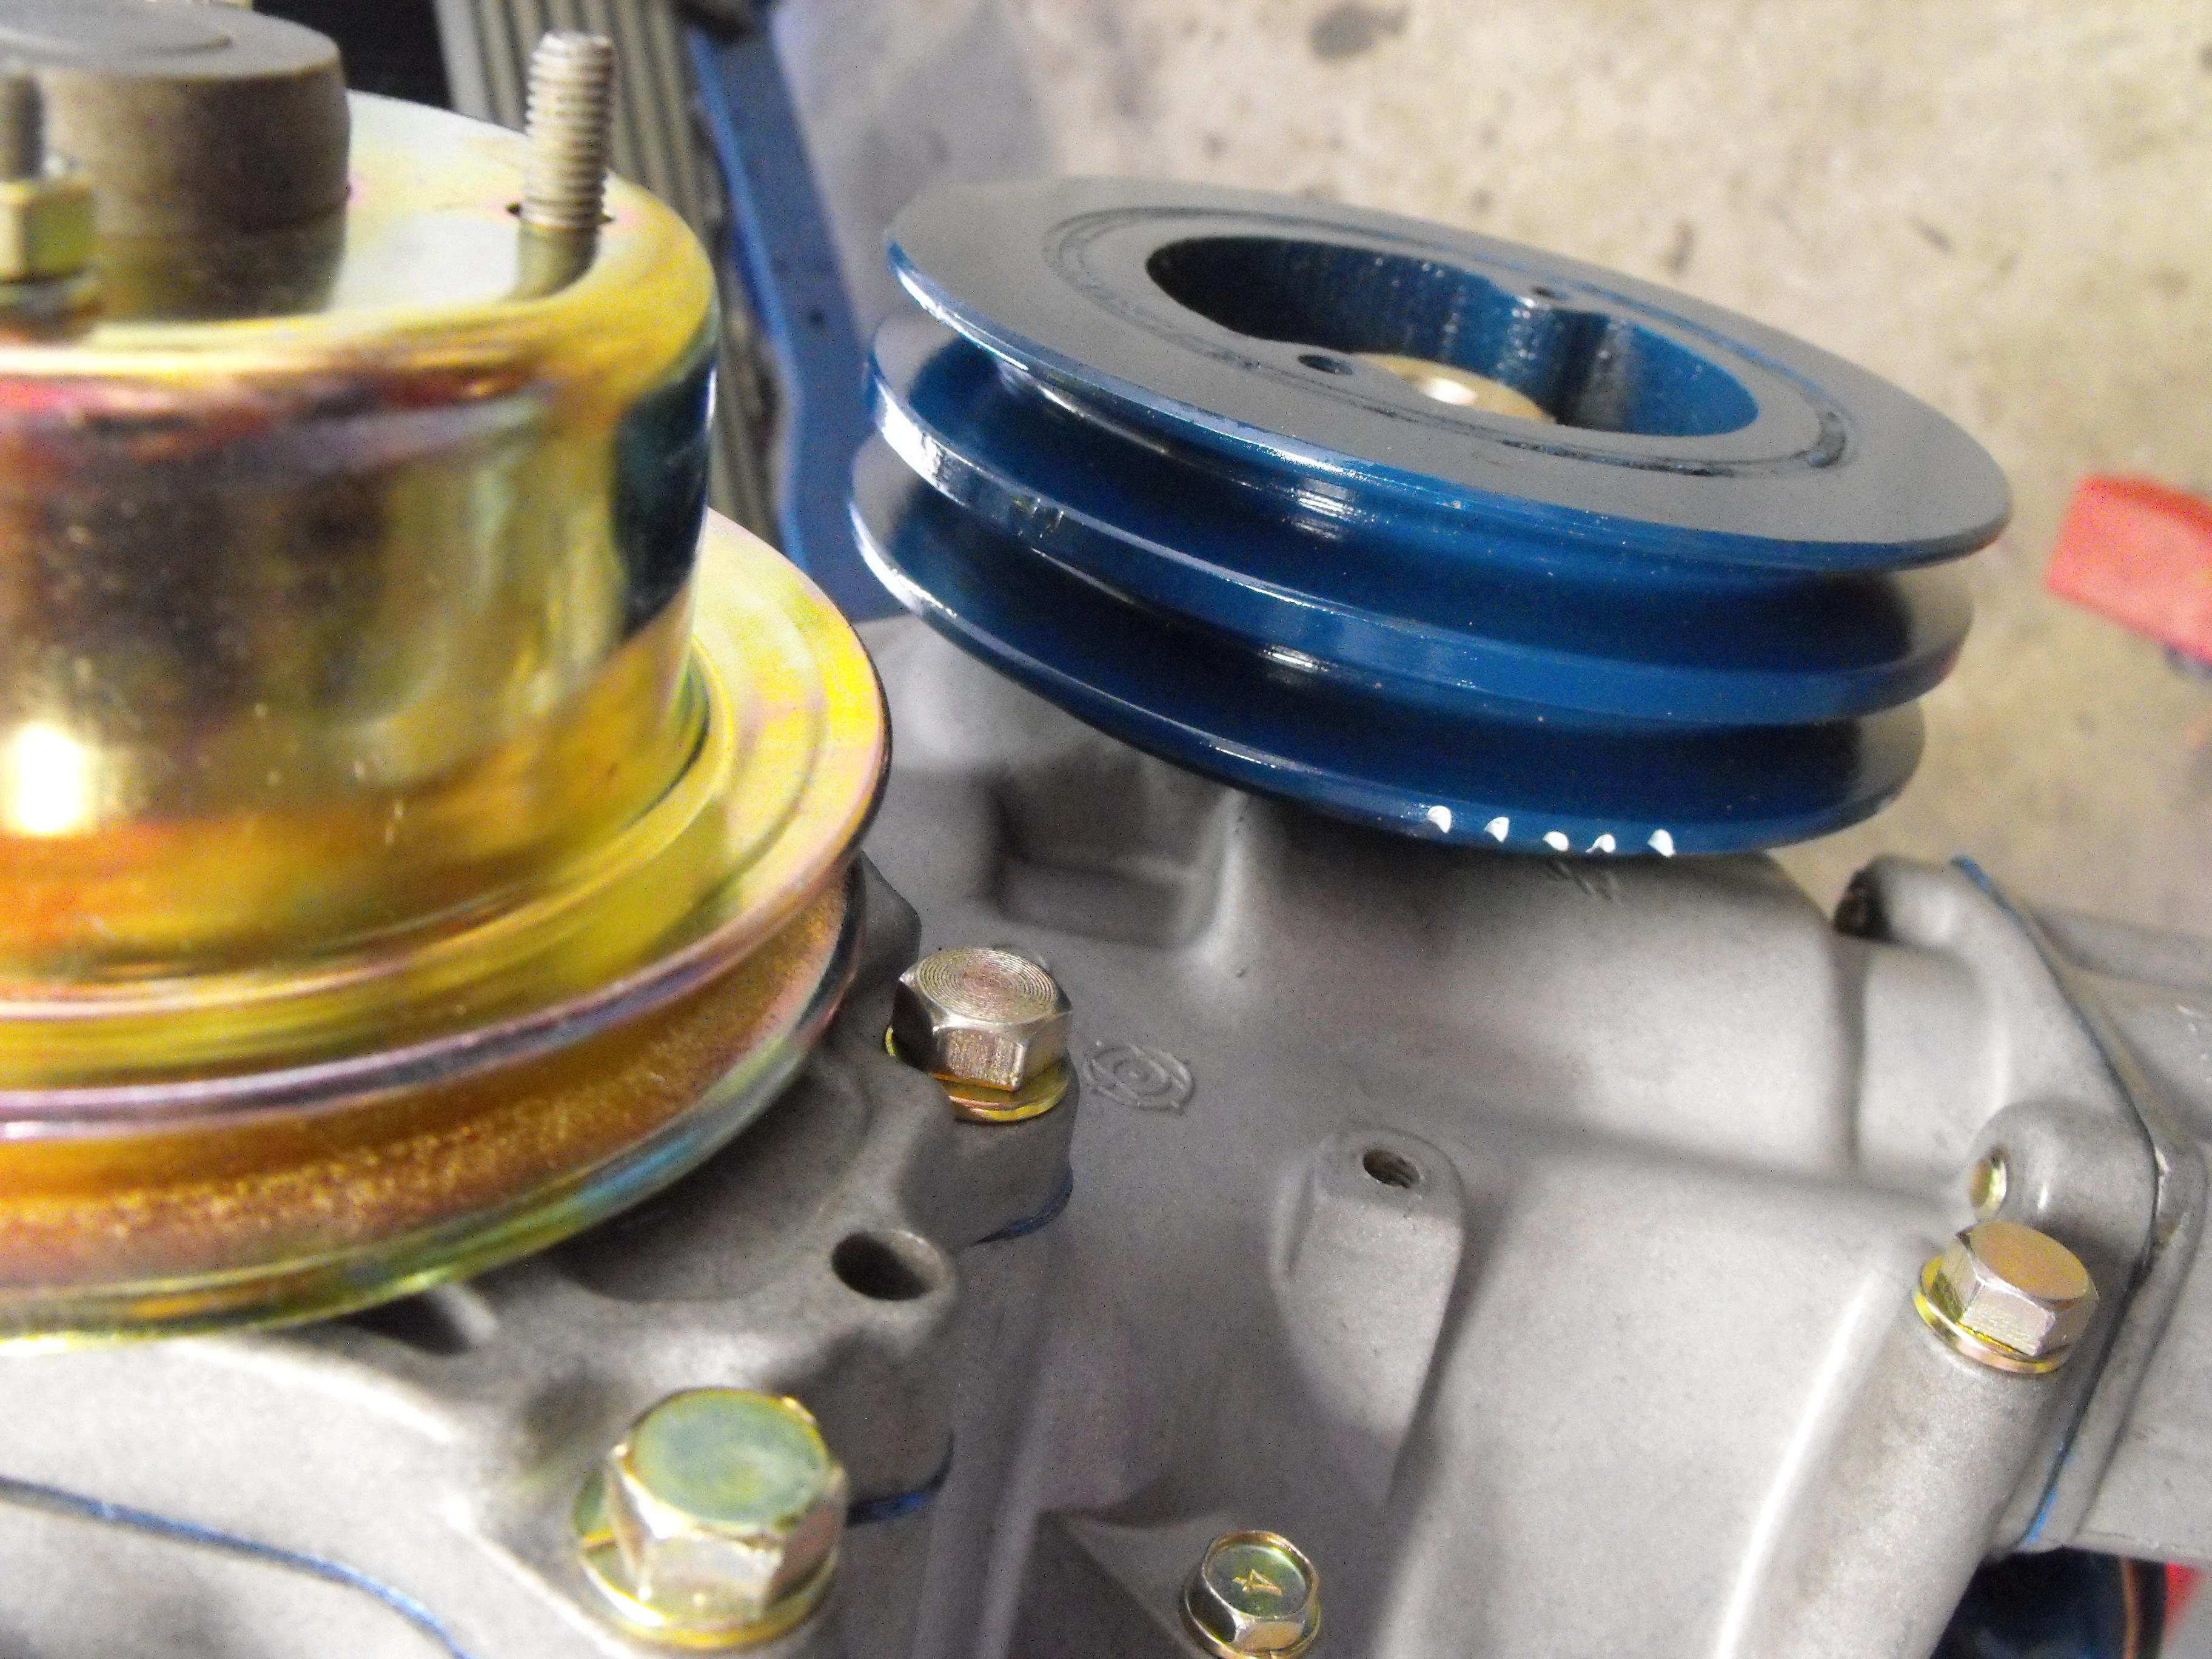
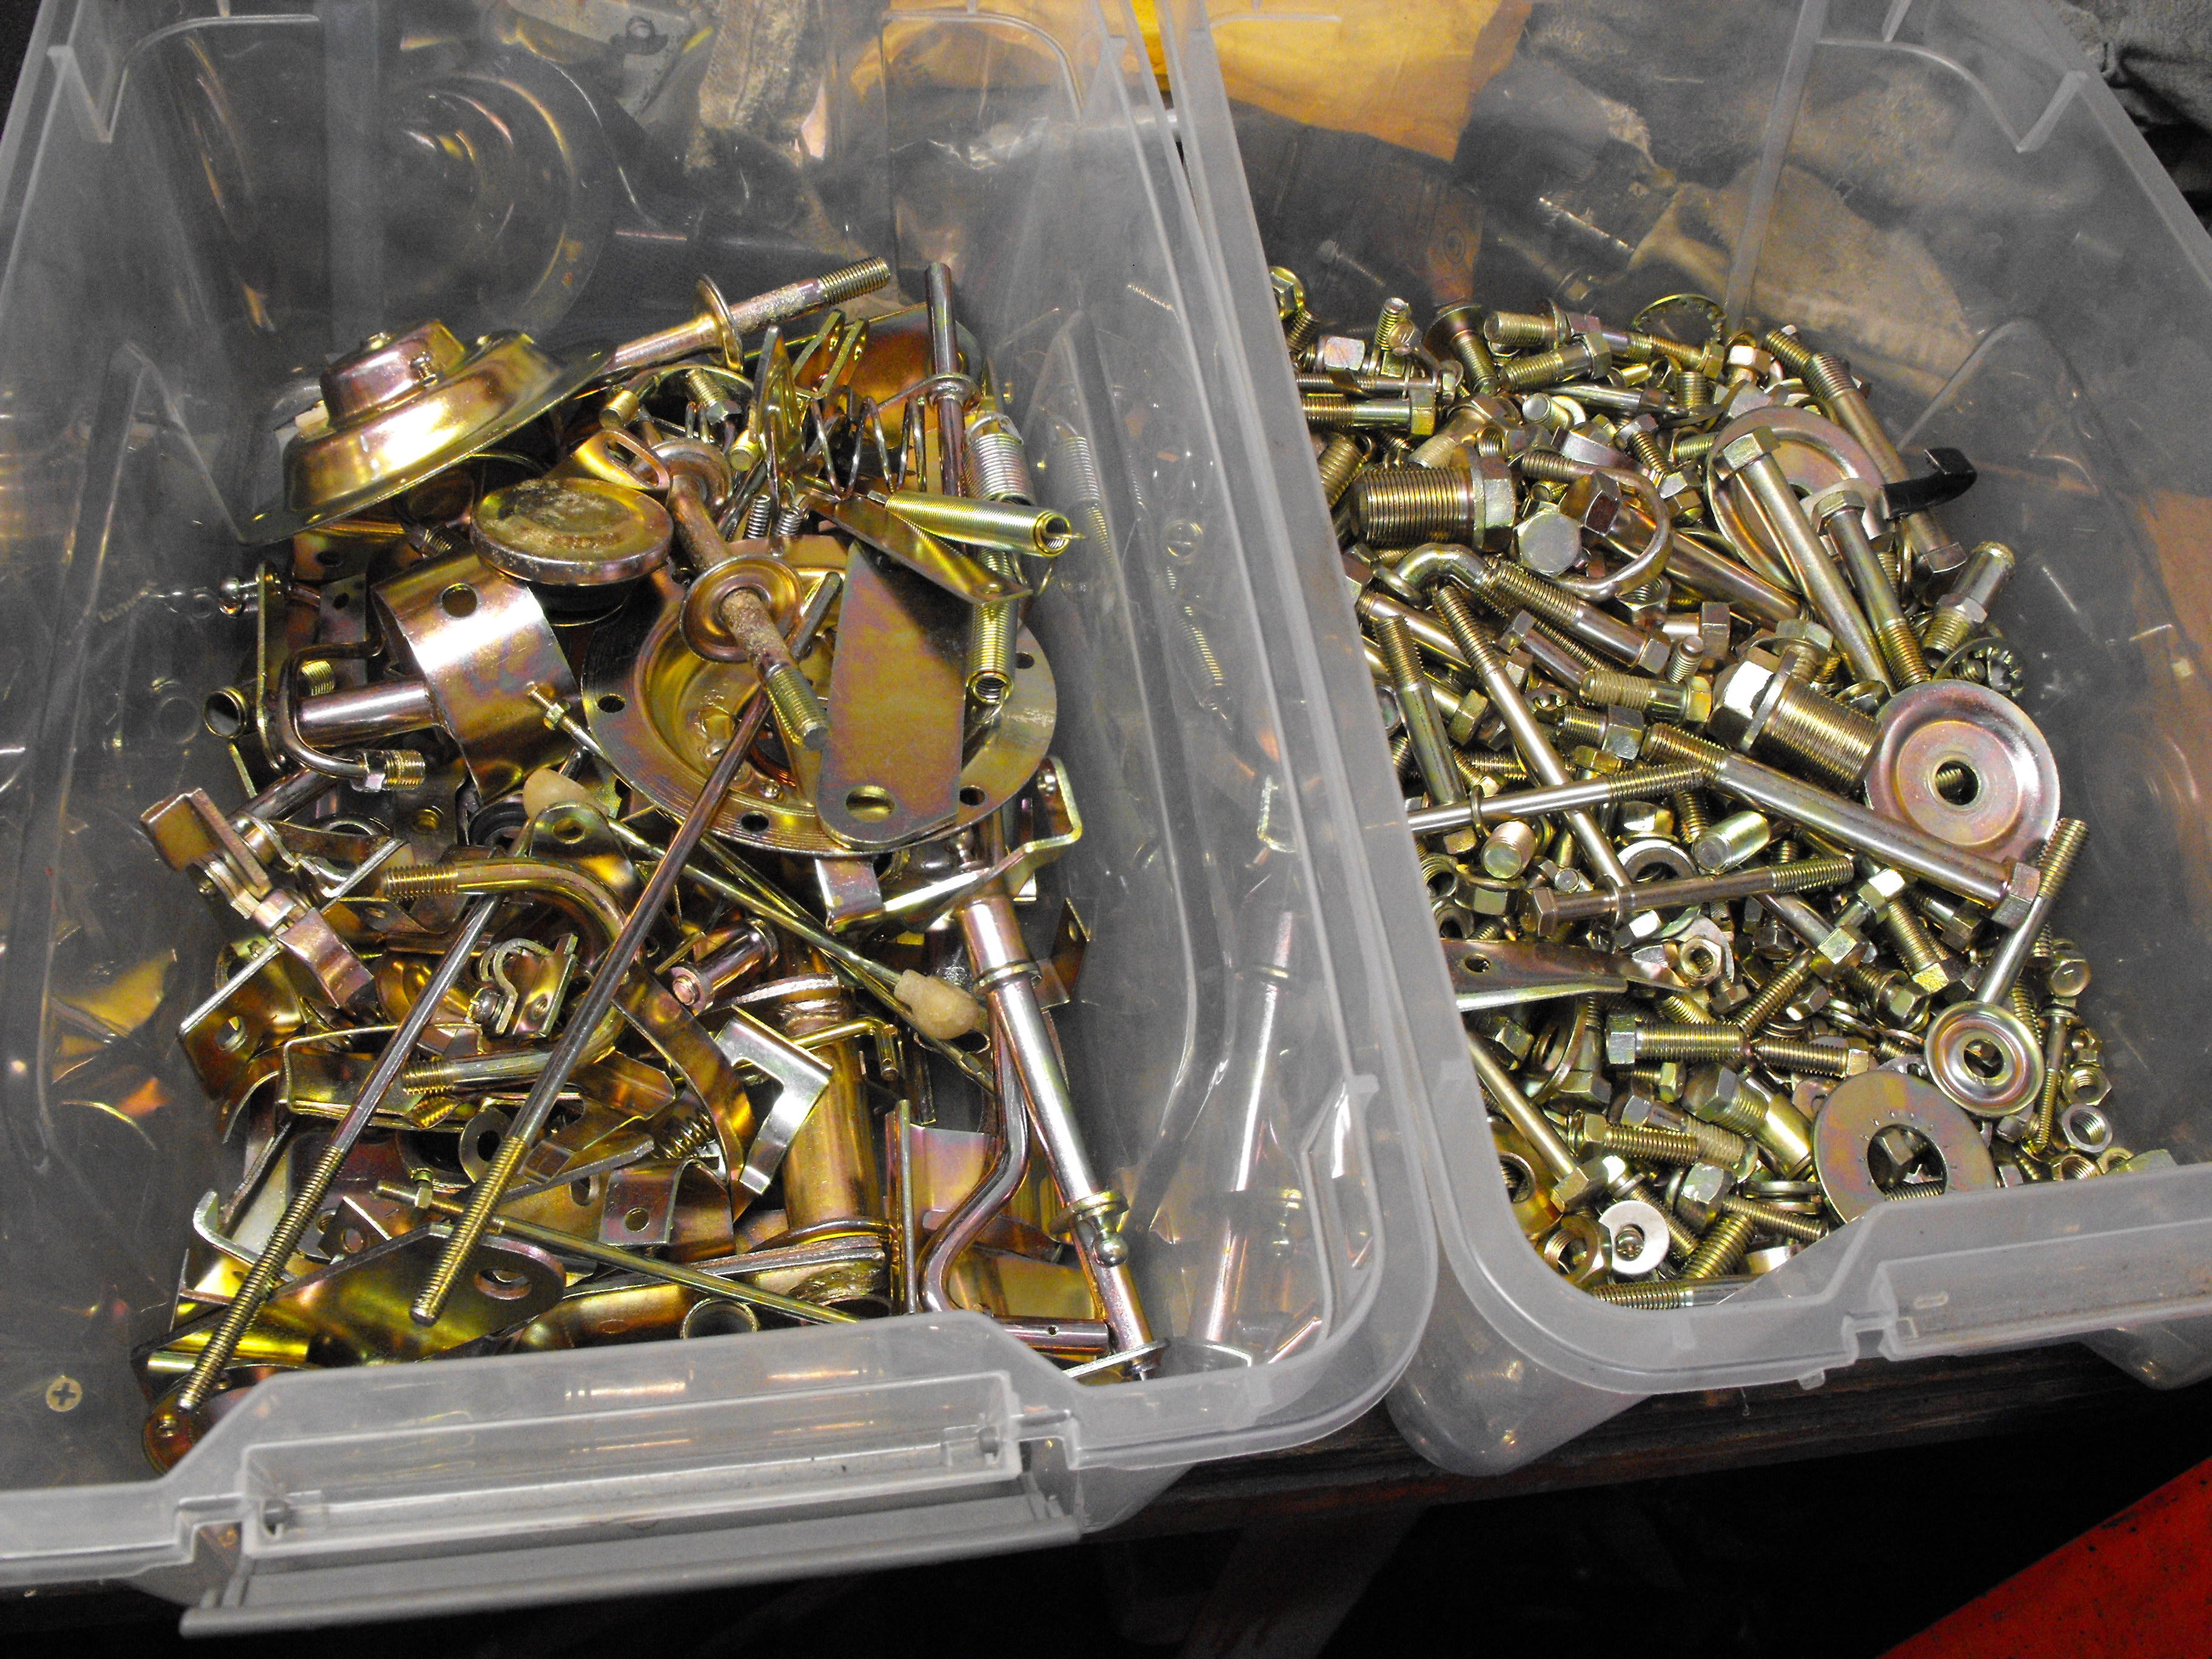
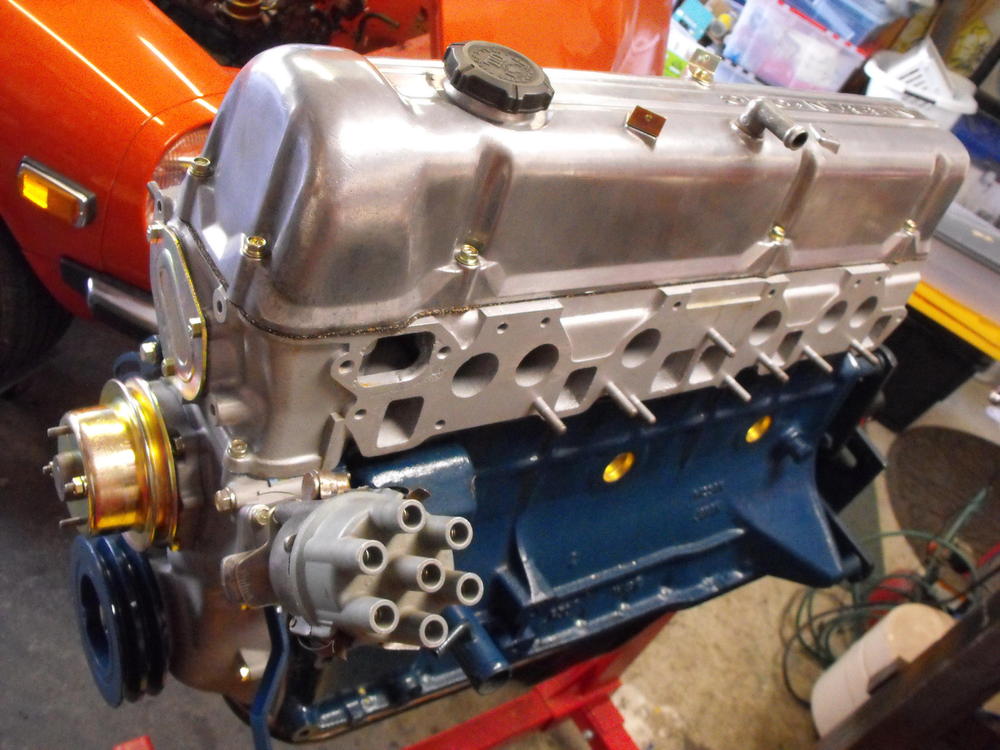
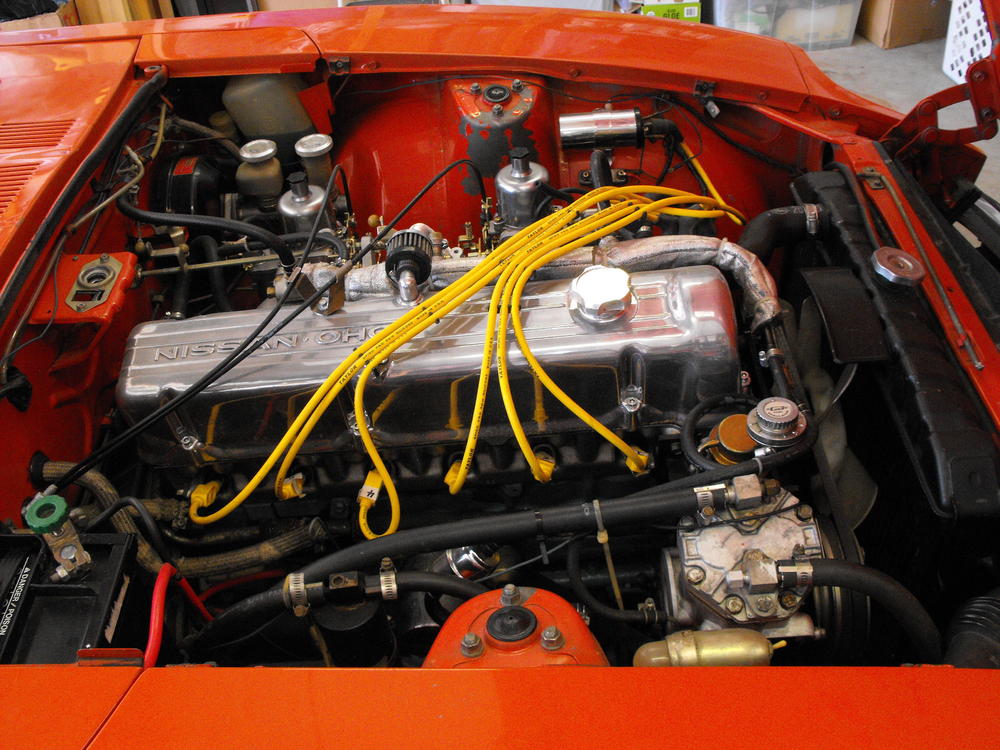
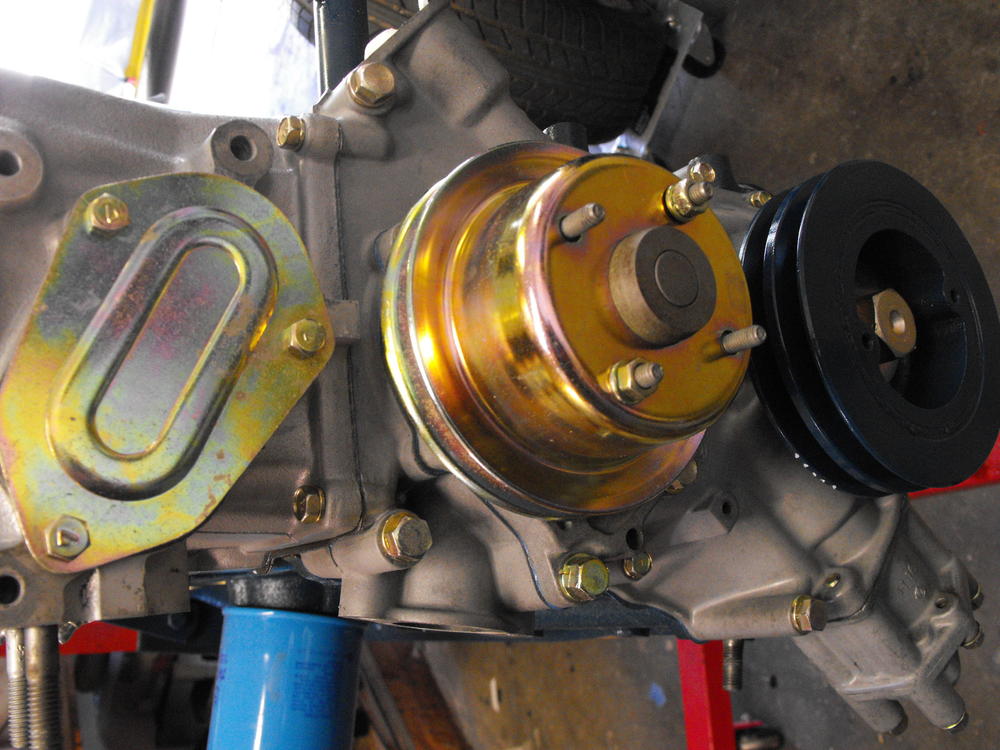
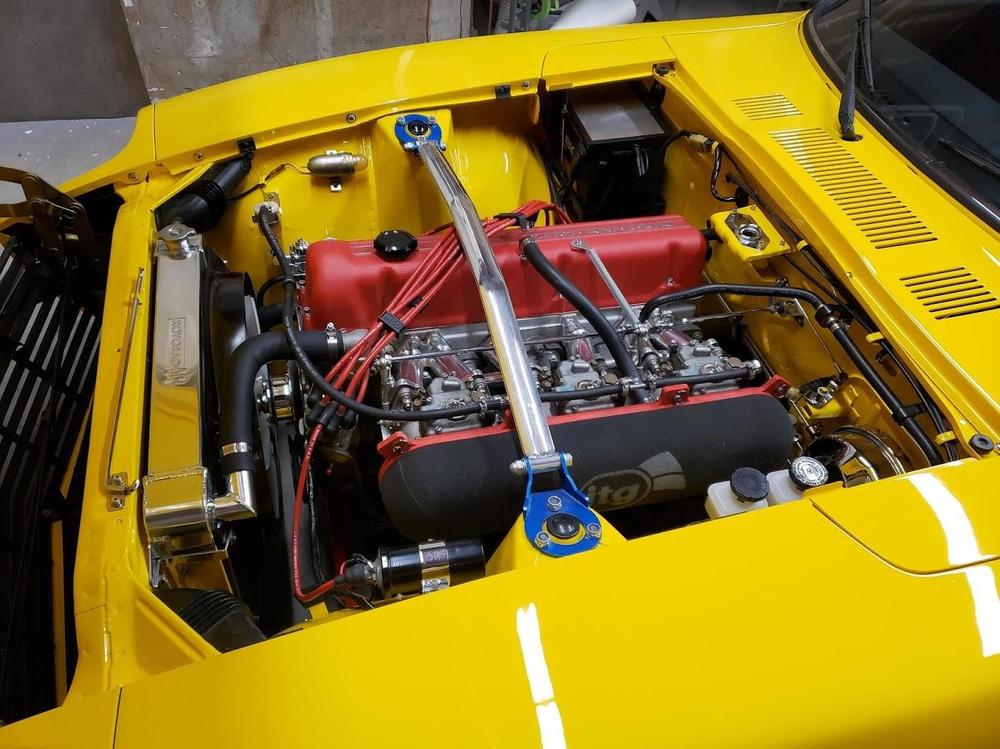
Finally have a little time to work on my car. Woo-Hoo!. Engine is coming along nicely. Car should be primered pretty soon. Will post those pics once they are ready. Here are some engine pics and jewelry pics for now. Still debating on what to do for the valve cover. Got dinged at ZCON for bead blasting cover. Will try just cleaning up with steel wool and see how that looks.


-
Another shameless plug https://www.kusi.com/dave-stall-50th-anniversary-of-the-z-sports-car/

-
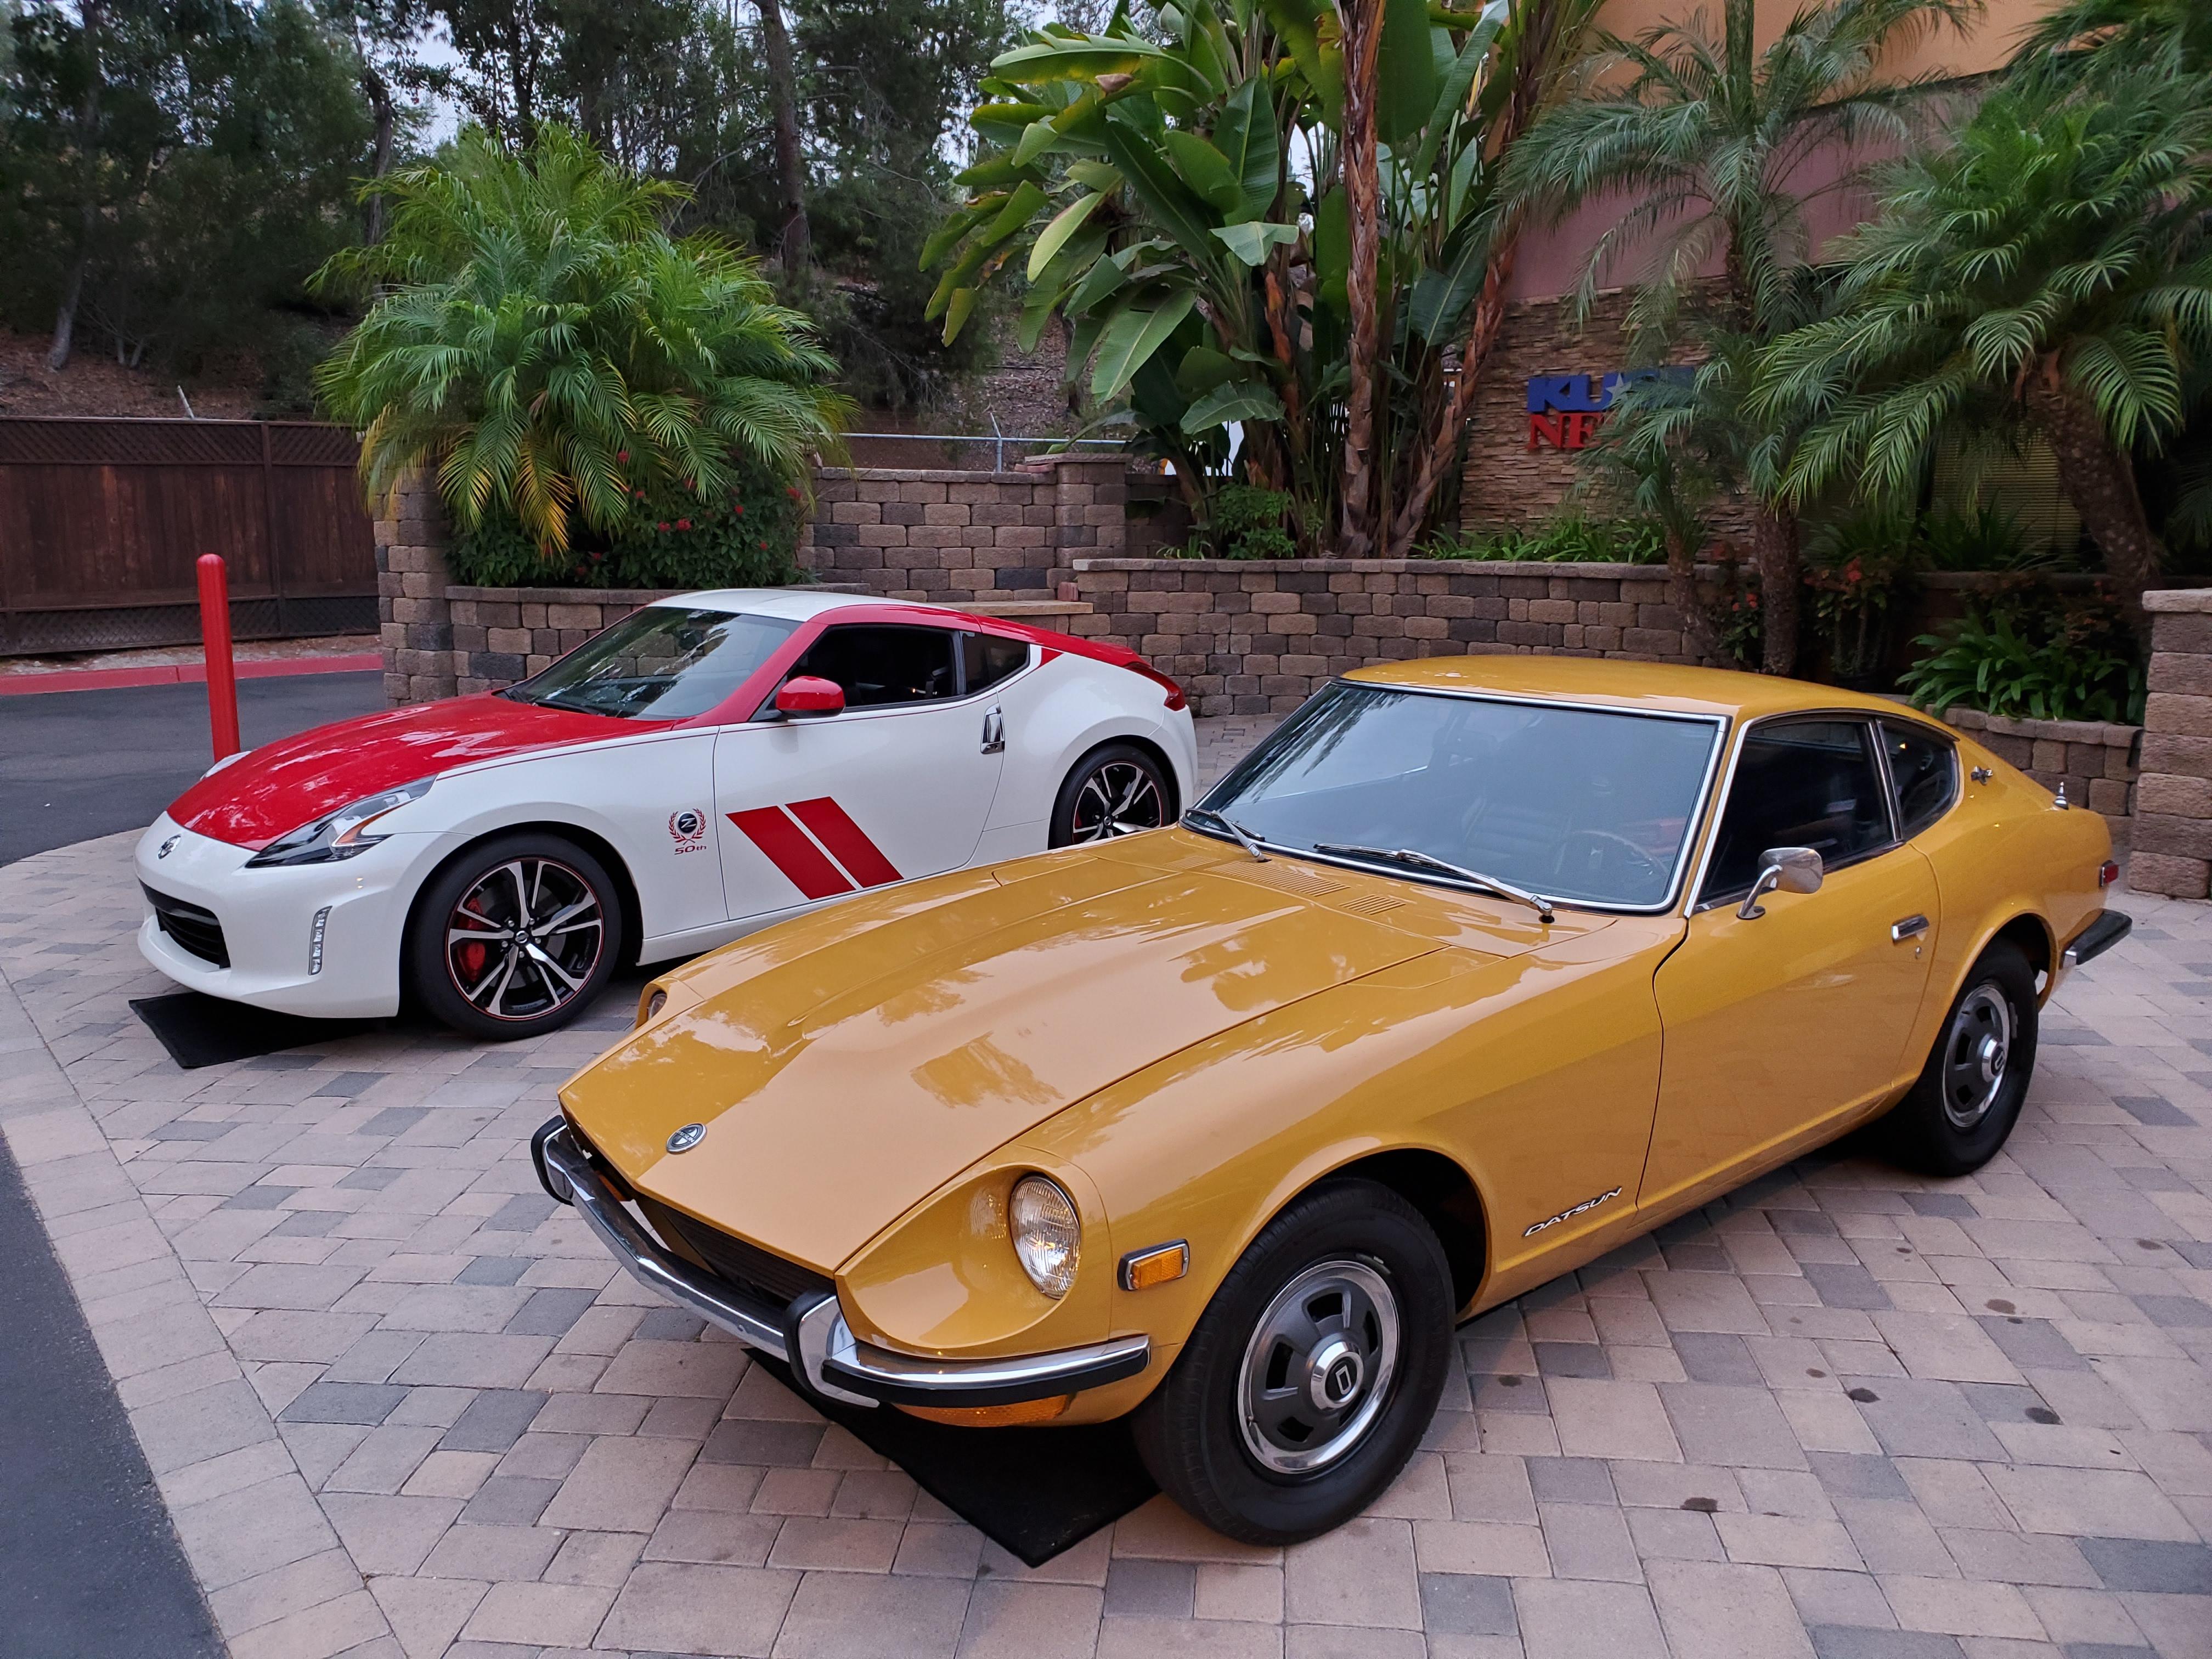
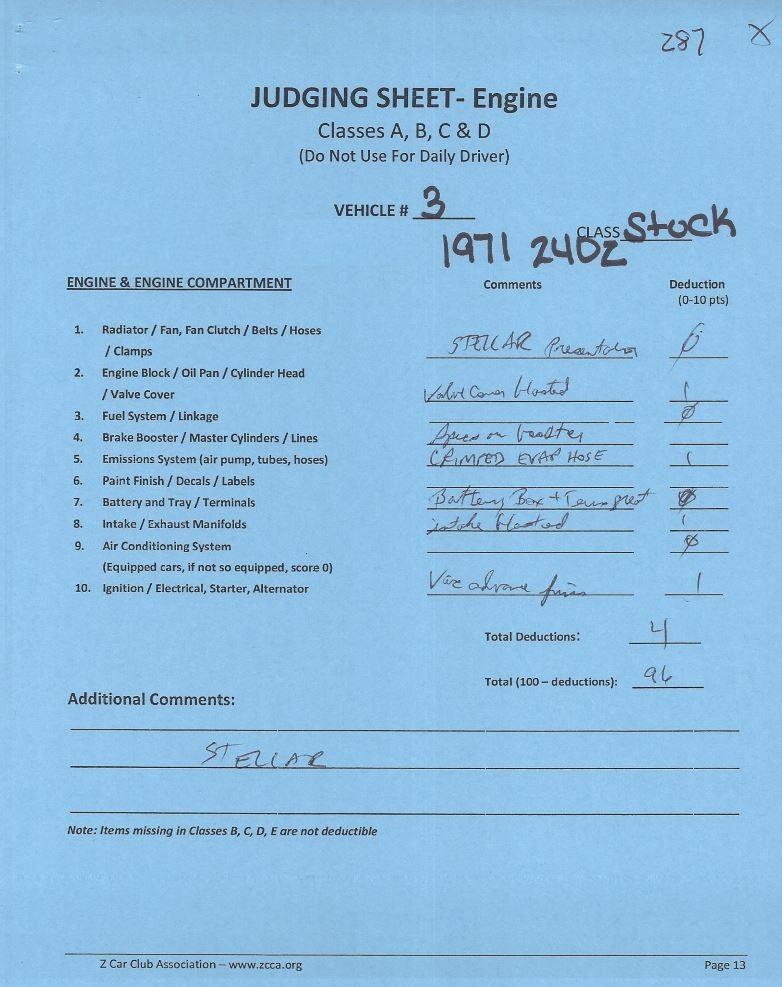
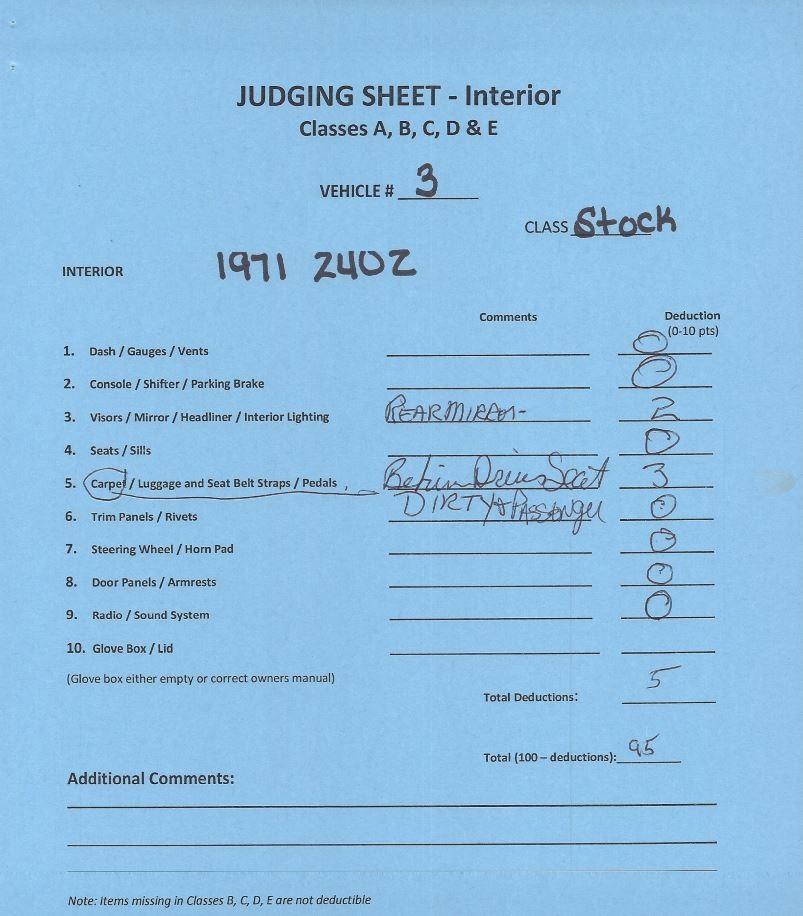
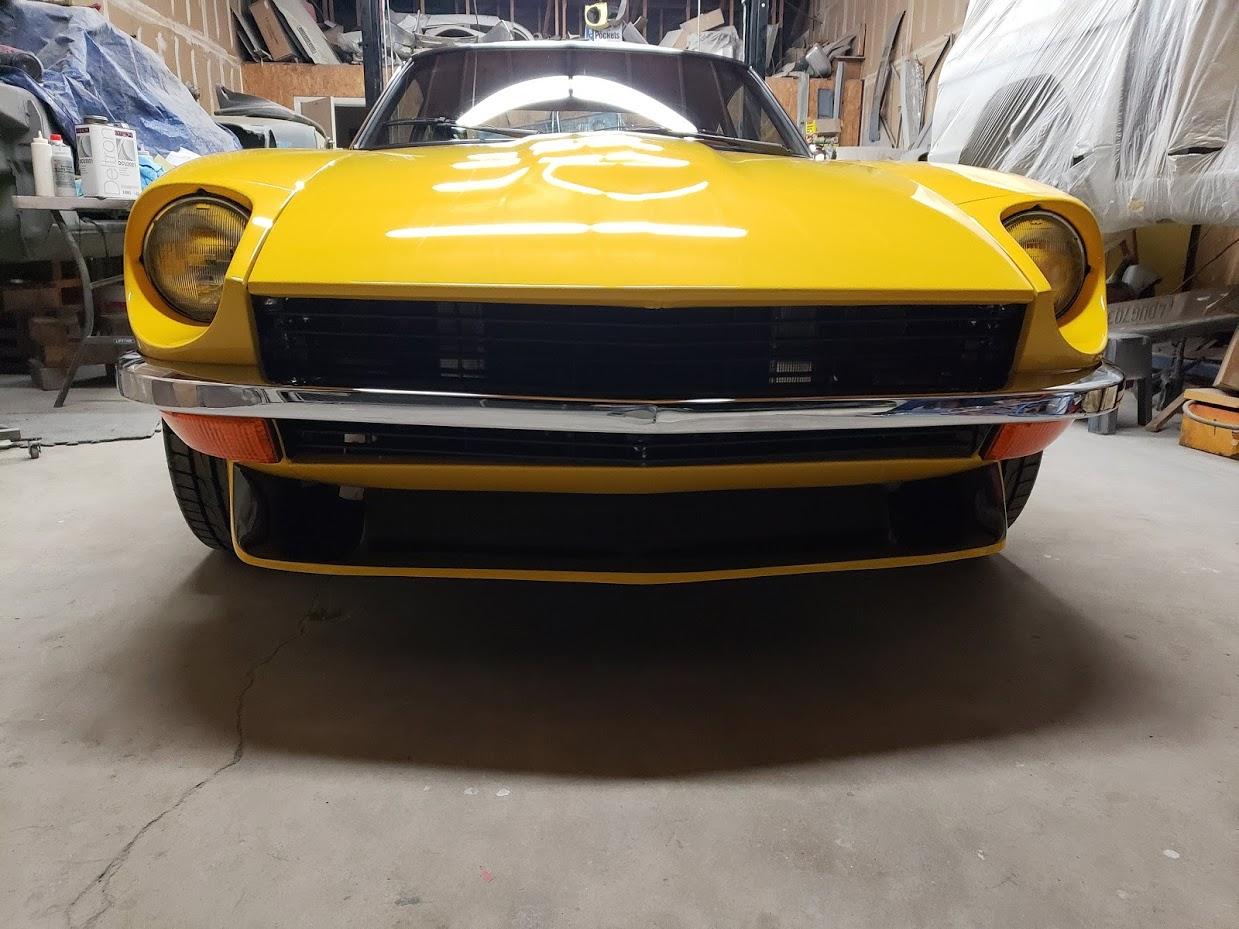
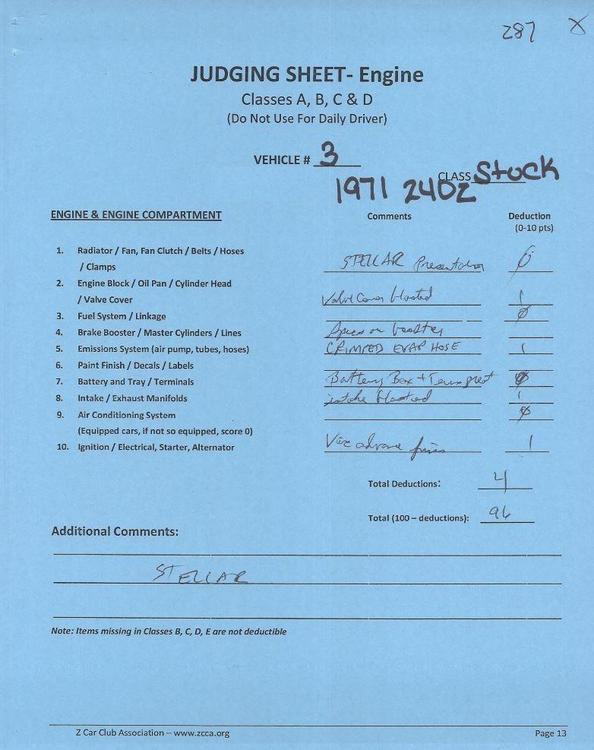
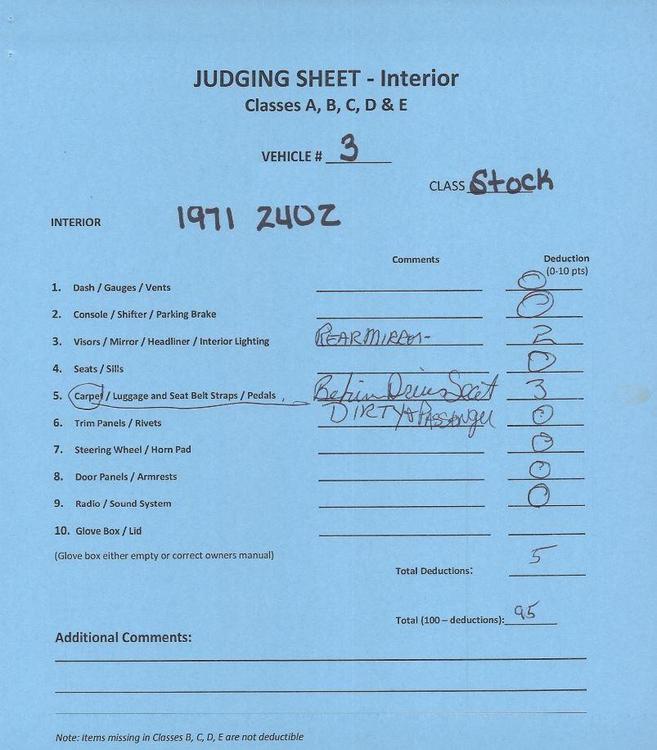
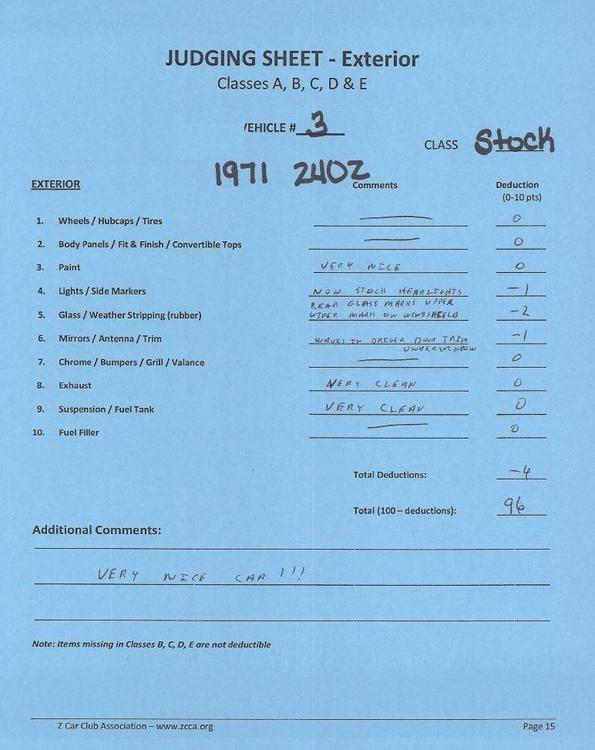
Thanks @mbz ! It really was a fun show and the car got lots of attention. Amazing how many cars there were (over 500) and the crowds that came out to the show. It has papers in the window...the original dealer sticker is posted on the passenger side ☺️. I don't think any other vehicle at the show had that. That is a small metal vacuum tube that goes to the EGR valve solenoid. It's a bit kinked, but still functional. Also, we got the judging sheets back. (Note: car is actually a 1973 and not a 1971, wonder which judge wrote that down) I think we did fairly well in spite of the mad scrambling the last couple weeks to get everything ready for the show. We were marked off 3 points for dirt behind the seats. Will have to pay better attention to that next time. Seems like a lot of points off just for dirt, but oh well. I was surprised the we were marked off for the bead blast finish on the valve cover and intake manifold. I thought that looked pretty close to stock that way, but apparently not. I wonder if all judges would mark that off or if it was just this judge. Personally, I thought the flat tops were too shiny and we would get dinged for that. We were also missing a few small vacuum tube clamps. That has since been corrected along with the kinked hose that has now been replaced with the correct hose (Thanks @Zup ). Most of the other items I was aware of and was surprised that we did not get marked off for some other items I knew about, like the rear carpet plastic trim finisher which was installed backwards or luggage straps that were installed with hex bolts among other things. These have since been corrected now that we have time, but I would have marked me off for those things. Guess that makes up for the 3 point dirt deduction. Anyway, the shows have been great fun. Car is now on it's way up to it's new home in the Bay area with @jayhawk .
-
I love their dashes. Very good deal and good quality. Will be using them for my white Z in the near future.
-
I have a stash of the broken white plastic switches for these engine ights. I picked up a metal one at Frye's similar to the one you have shown and used that instead. I did take a little white paint and painted the lever part white just so it looks a bit like the original.
-
Those original low mileage cars are going for crazy money. Can't believe a mechanic thought it might be $138K miles.
-
True, and unfortunately, I get drawn into these commentaries on BaT. I can say it here, but dare not say it on BaT as I would probably get pretty beat up there, but I have to say that the 'Guild' guy is pretty hard to live with. He has sold a number of Z cars on BaT and is quite the salesman, but is beyond obnoxious in pushing his points. And, he pretty much thinks that he is the authority on the 240Z, often embarrassing himself. It is sad that he is pushing the paint issue. While important, the only reason he pushes it is that it is a service that he provides. While considering himself a restoration shop, I consider most of his work average and for the most part incomplete. He will do enough work to sell a car and make it look nice, however, the work is often incomplete and just general clean-up. Again, just enough to make the sale. The thing that bothers me the most is that he claims to speak for the entire Z community and to be the top authority. Sadly, he is neither of these. Anyway, this is just my personal opinion. Sorry in advance to any who are offended.
-
I am not sure. I think they had one award for best foreign. Not sure what all the US car or modified classes were.
-
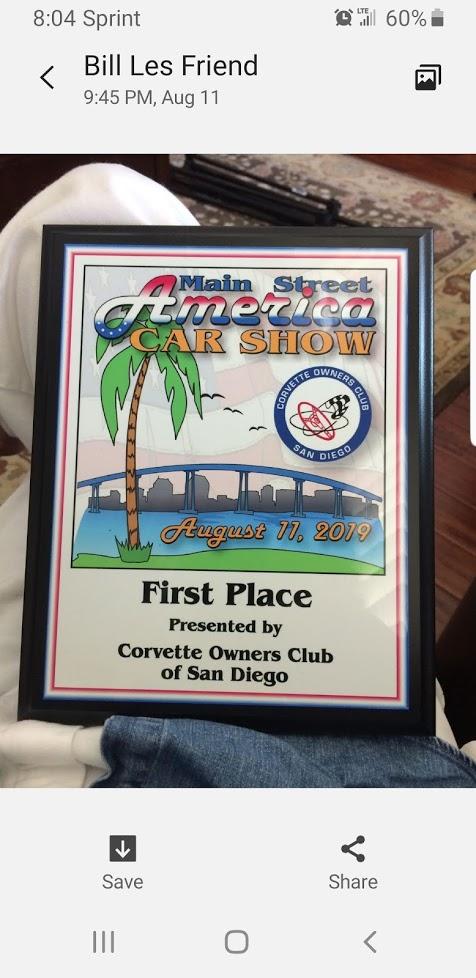
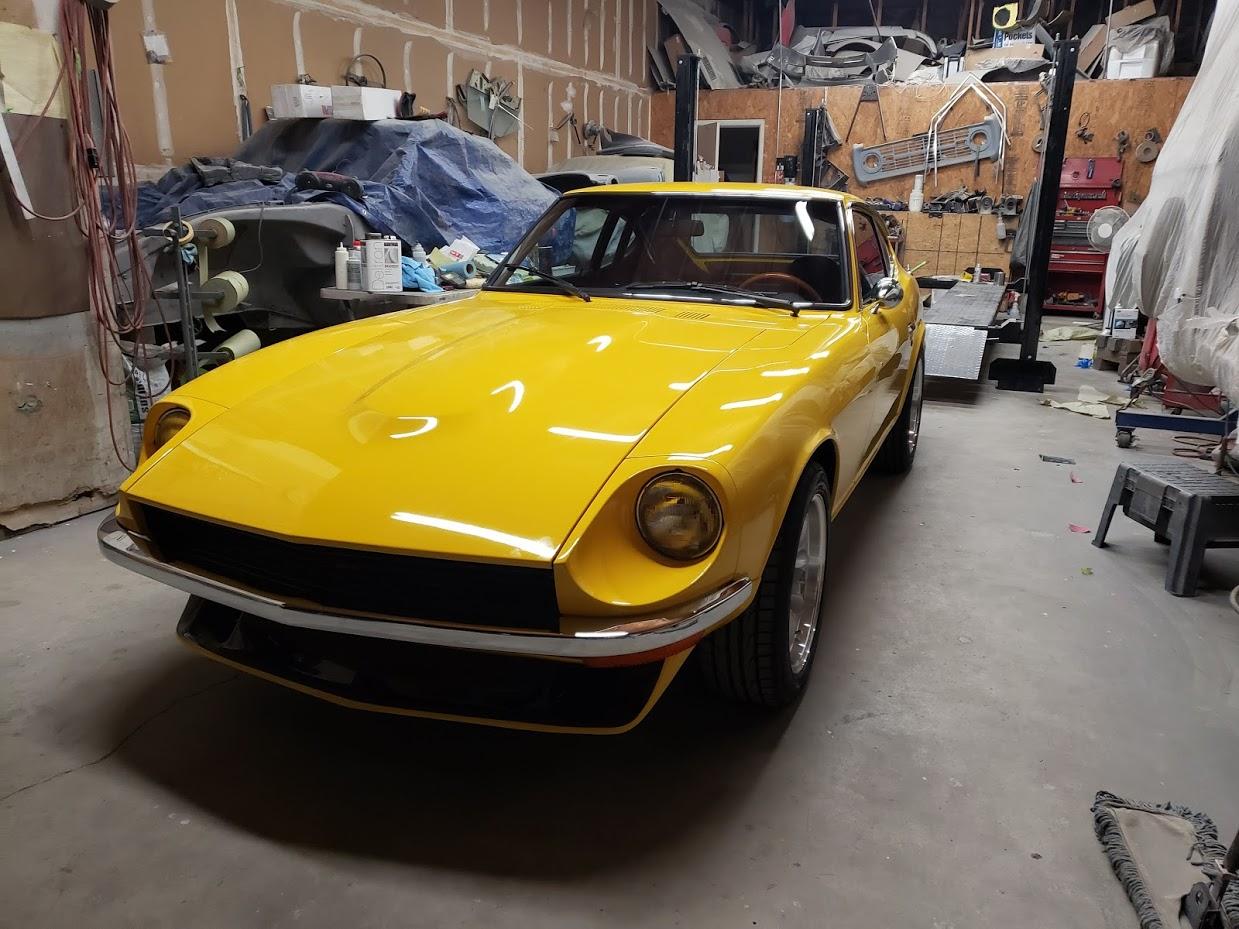
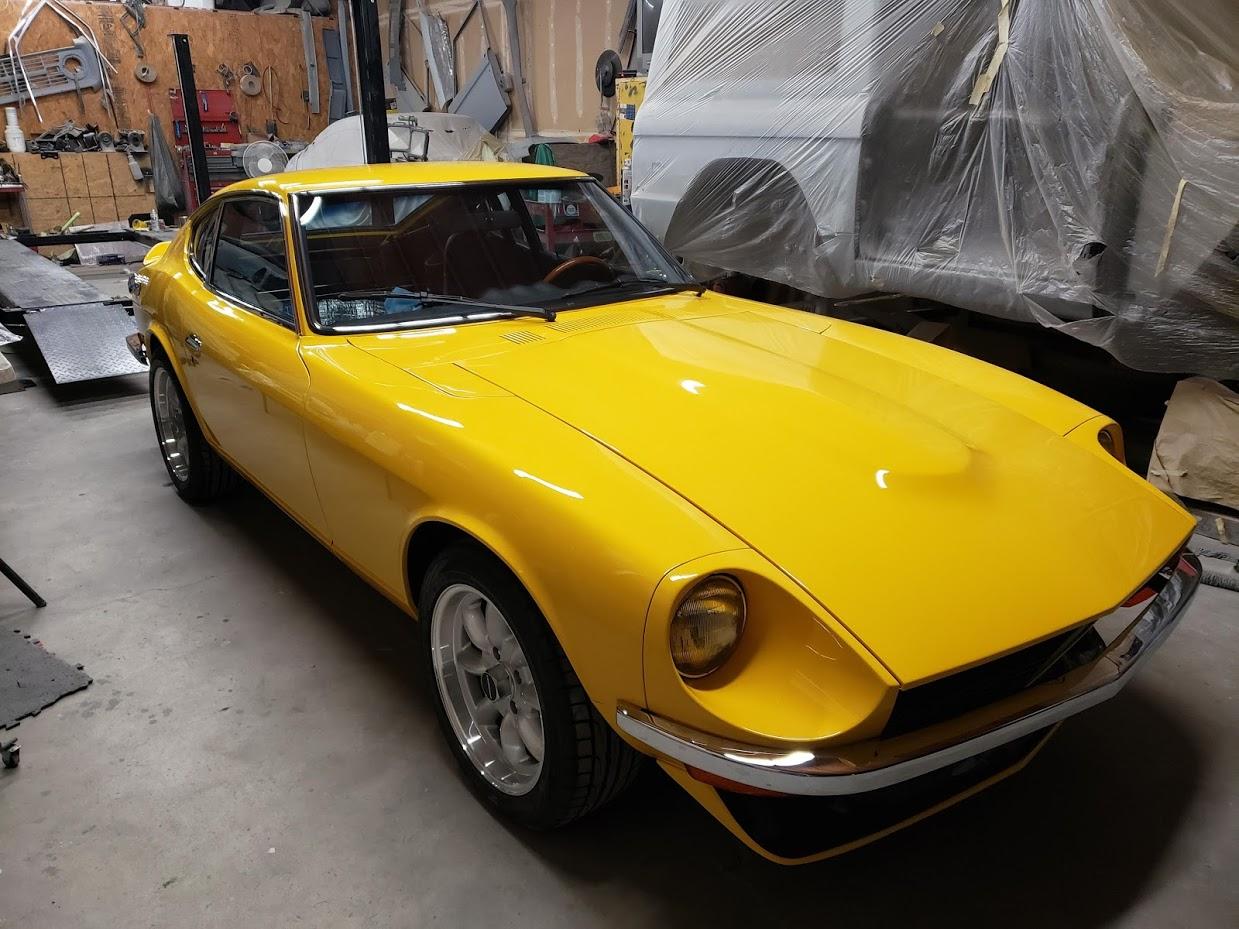
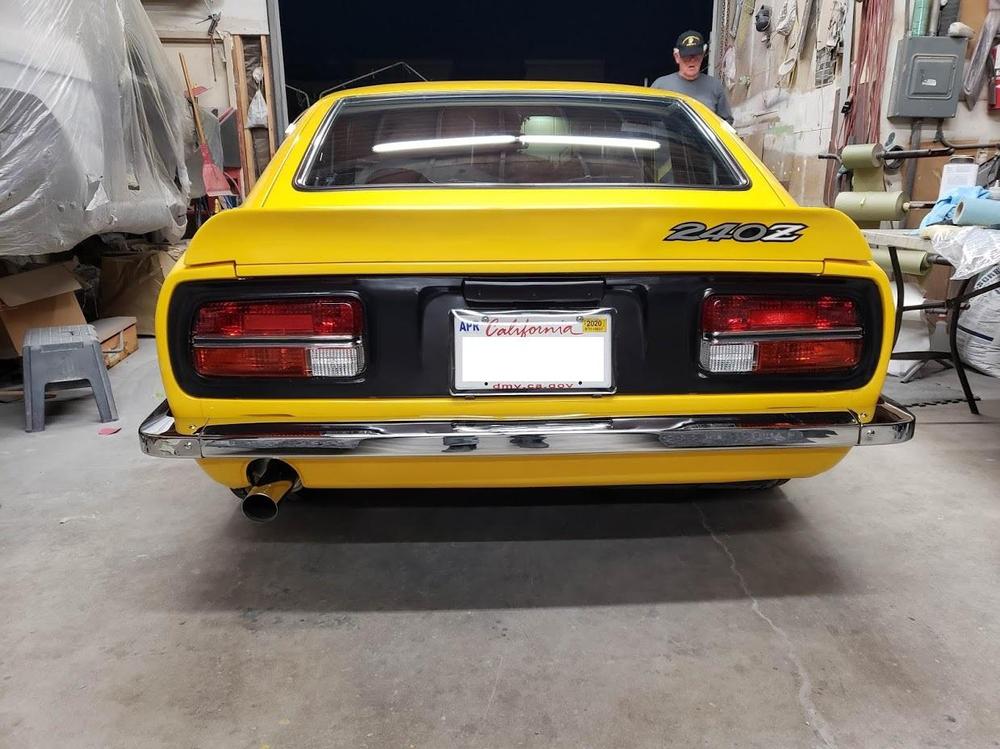
I thought this was impressive. The 'Main Street America' car show sponsored by the Corvette Owners Club of San Diego was held last weekend at Sea Port Village. Probably close to 300 cars there. Taking first place in the 60-70's modified class was this 240Z. Yes, he was in the same group as the Vette's, Camaro's and Mustangs. Incredible. I had my roadster at this show about 5 years ago and it was pretty much ignored as it is primarily an American car show. Nice to see the Z's getting some attention. Pics below are from cars final build at Miguel's shop, paint by Miguel of course.


-
Koito Headlights? I need 2
-
The older those fill tubes get, the harder they get. Old ones are very hard to work with. When installing the tank, usually I put it on a small board with cloth over it and SLOWLY lift the tank into place using a floor jack. The most important thing is to align the filler tube with the tank opening once they are close. Put the collar of filler tube around tank opening at this time. DON'T forget the clamp! As you slowly lift the tank, carefully feed the vent hoses through their openings as you lift. Attach all hoses before you lift into place as they are very hard to access once tank is installed. Should be two hoses toward the rear of car and one in front of tank (goes to vapor tank). That is the process I use.