


motorman7
 Subscriber
-
Joined
-
Last visited
Everything posted by motorman7
-
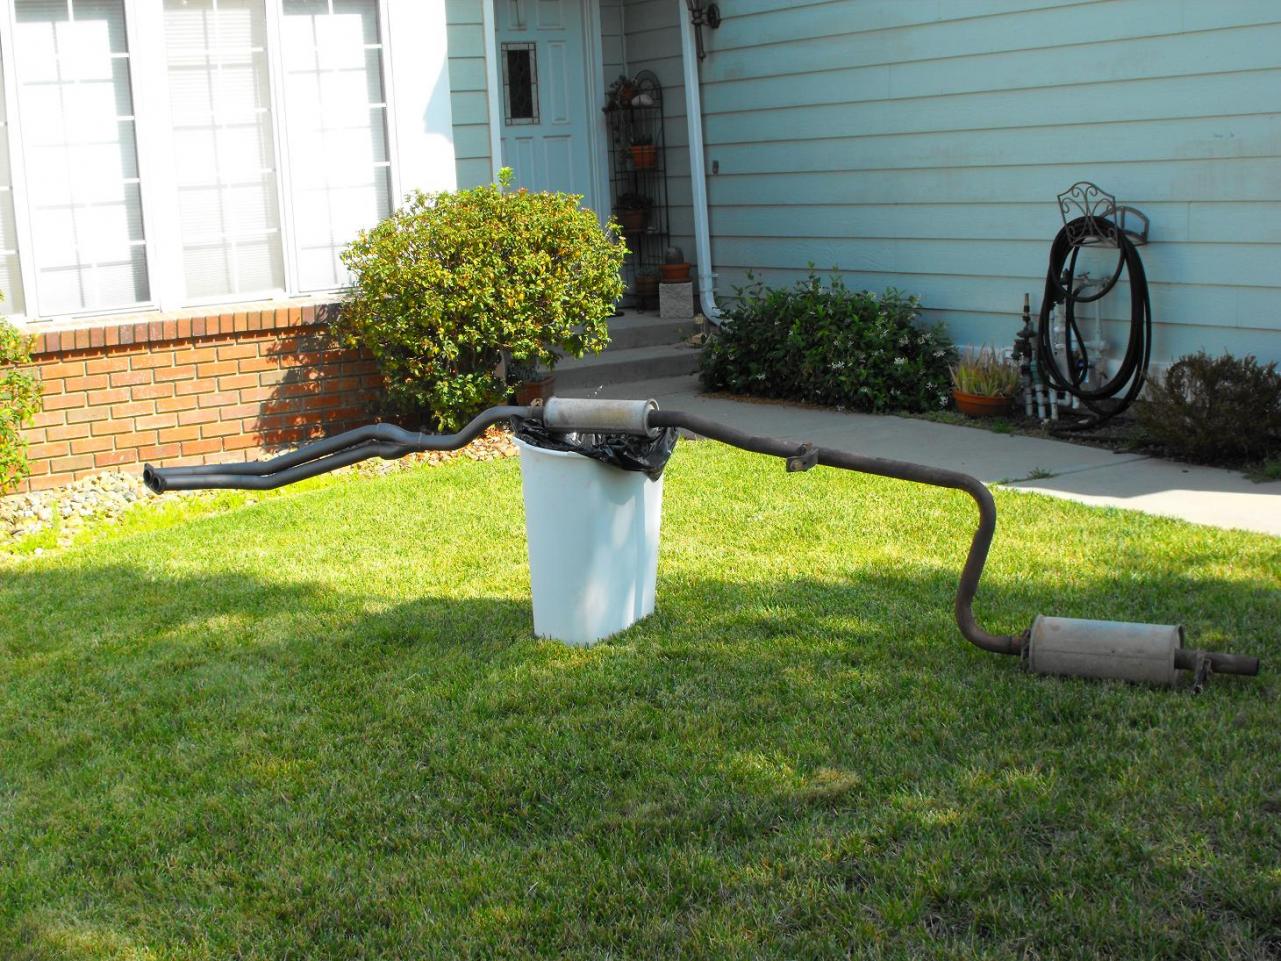
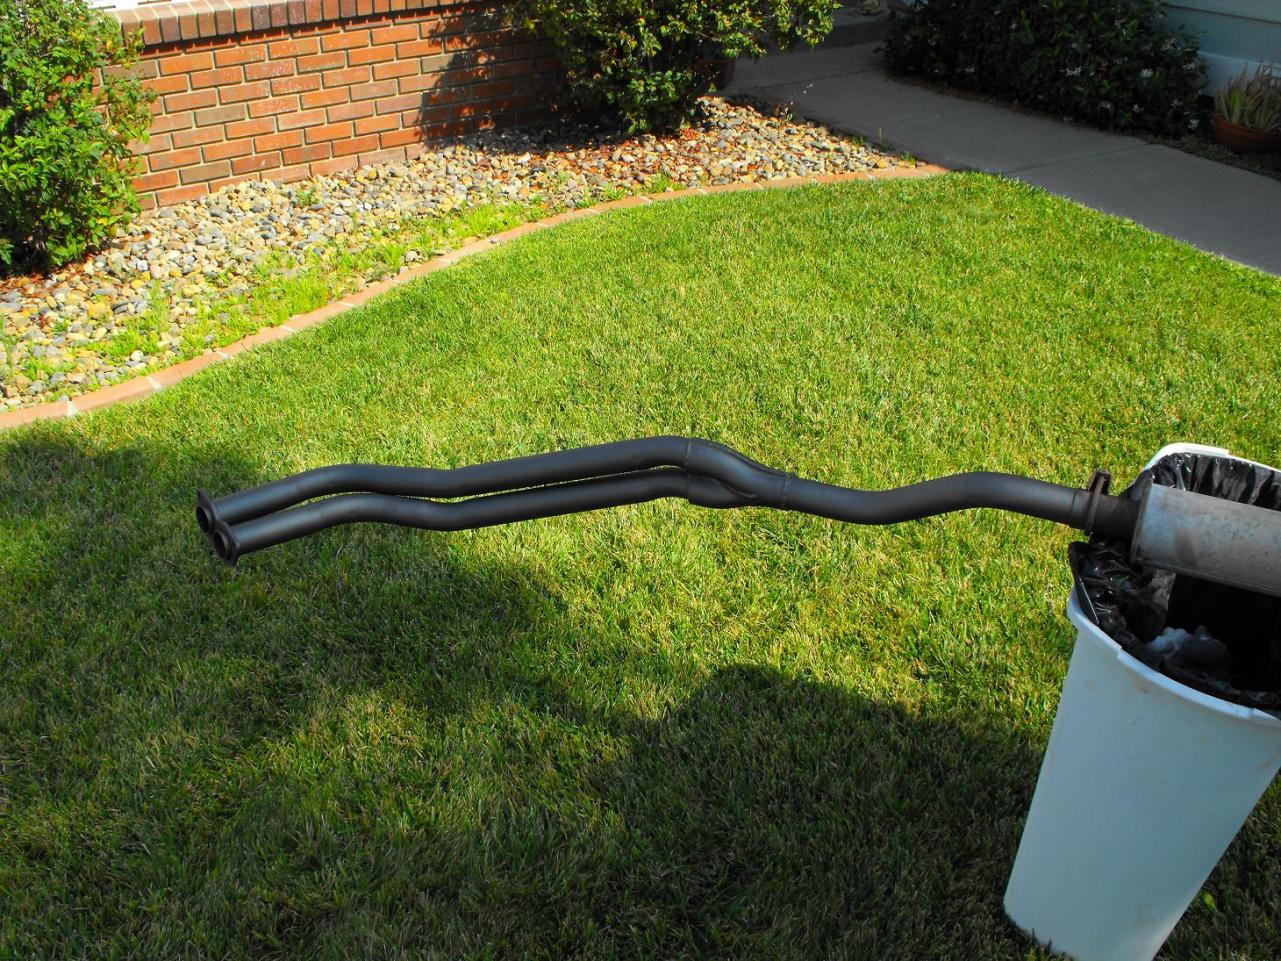
 For lawn ornaments, some people have Gnomes, others have Fountains; I have decided that the 240Z Exhaust System looks appropriate. We'll see how the wife likes it when she gets home. It's gotta increase the property value! PS: Can't believe how easy this was to take out- 3 bolts and 10 mins.

-
Thanks David, I'd like to get those from you when I do the front and rear bushings, after the engine refresh. Best Regards, Rich
-
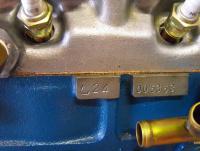
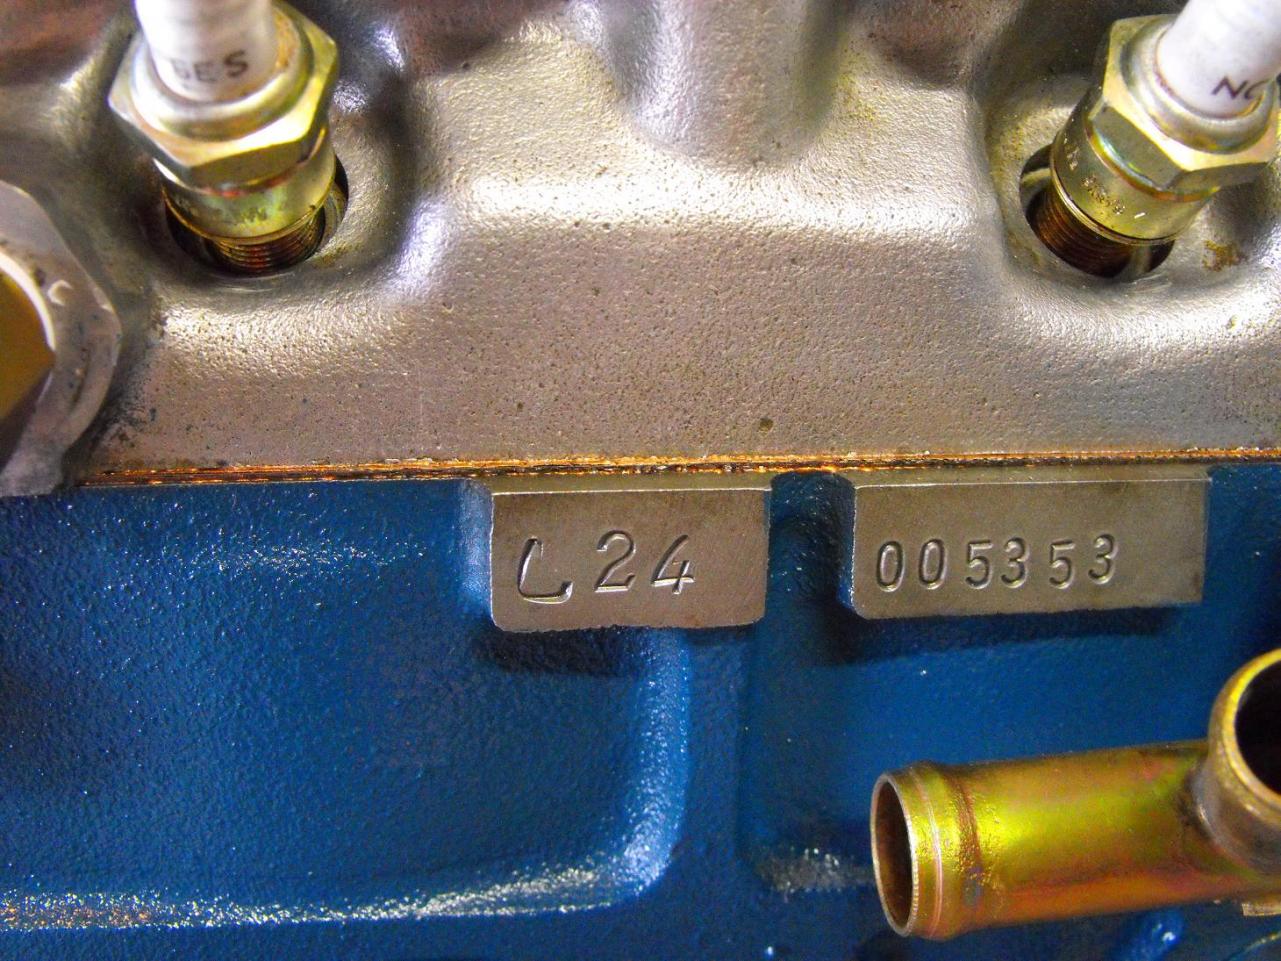
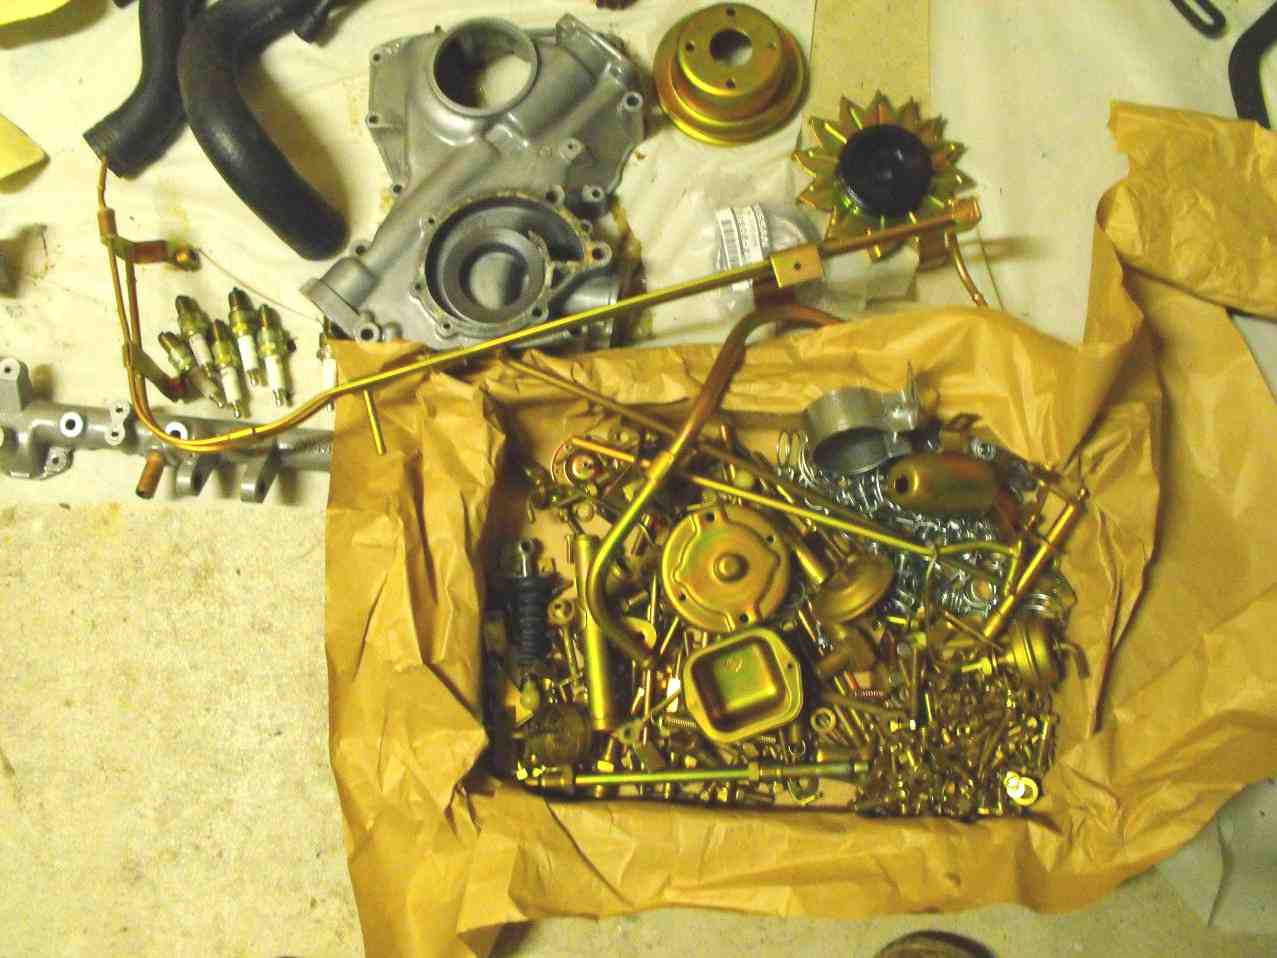
Hi All, Just thought I'd post the tags and numbers since they were easily accessible (and look cool of course). The head had 2 different size bolts. 5 long that were on the cam towers, the rest were short. Got the T/C bushings replaced. Got the new rack bushings but will need to find a shim material. May send my son down to the tire shop to get the tire weights. It's not to far away. So, back to work here. Should have the motor in today. Will show pics later. Rich


-
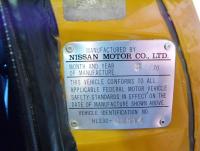
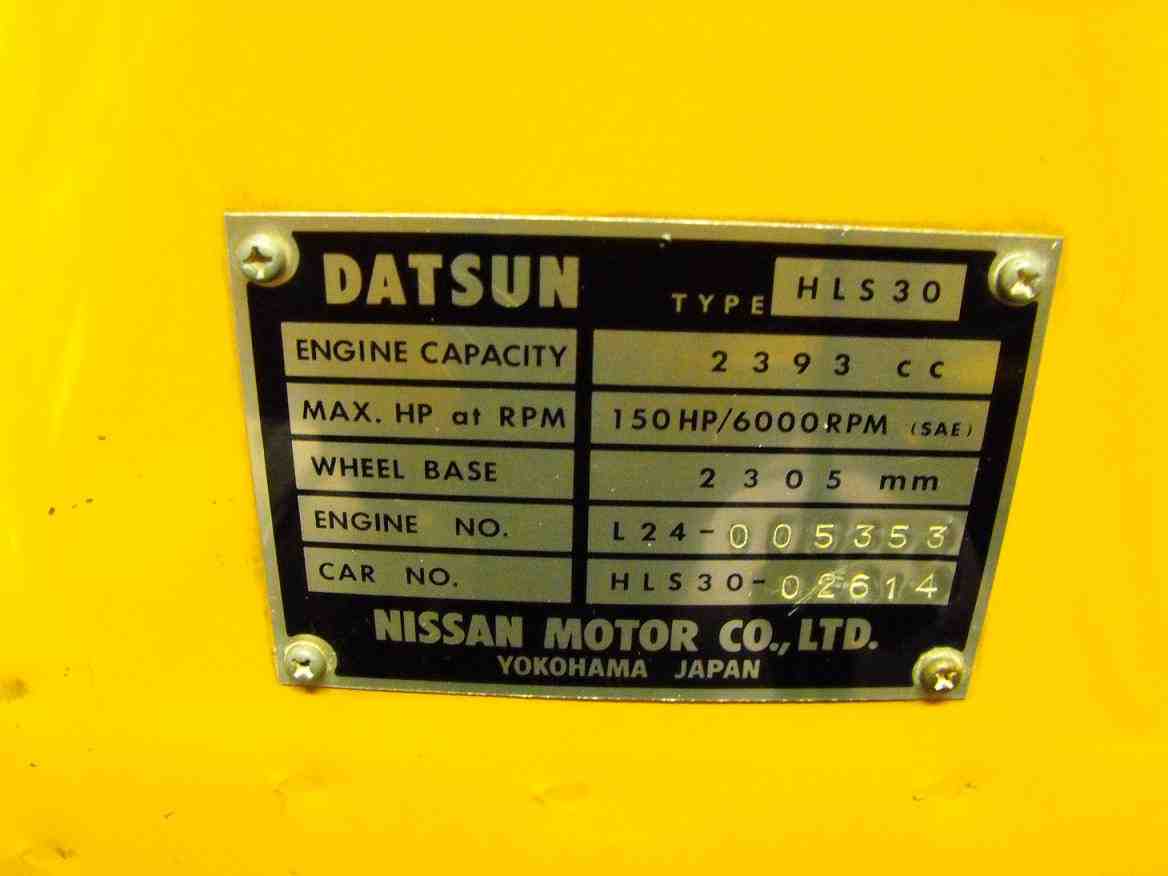
Hi Kats, I like your web site. Those are some sweet cars you have. Yes, odd thing about the engine numbers. It would be interesting to track the pairing of engine S/N with body S/N. I wonder if there is a sequence (backwards in some cases) or it is just random. Also, it is very educational taking these cars apart. The 'non-standard' items are very cool. I lucked out today; looks like Les has the bushings (Rack and T/C) I need. That means I should be able to drop the engine in tomorrow. I have a 3 day weekend so should be able to get a lot done. Best Regards, Rich
-
Thanks for the input Guy. I will definitely get that cleaned up. Easier to do it now before the motor goes in. Rich
-
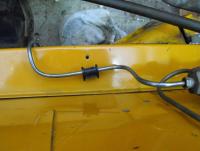
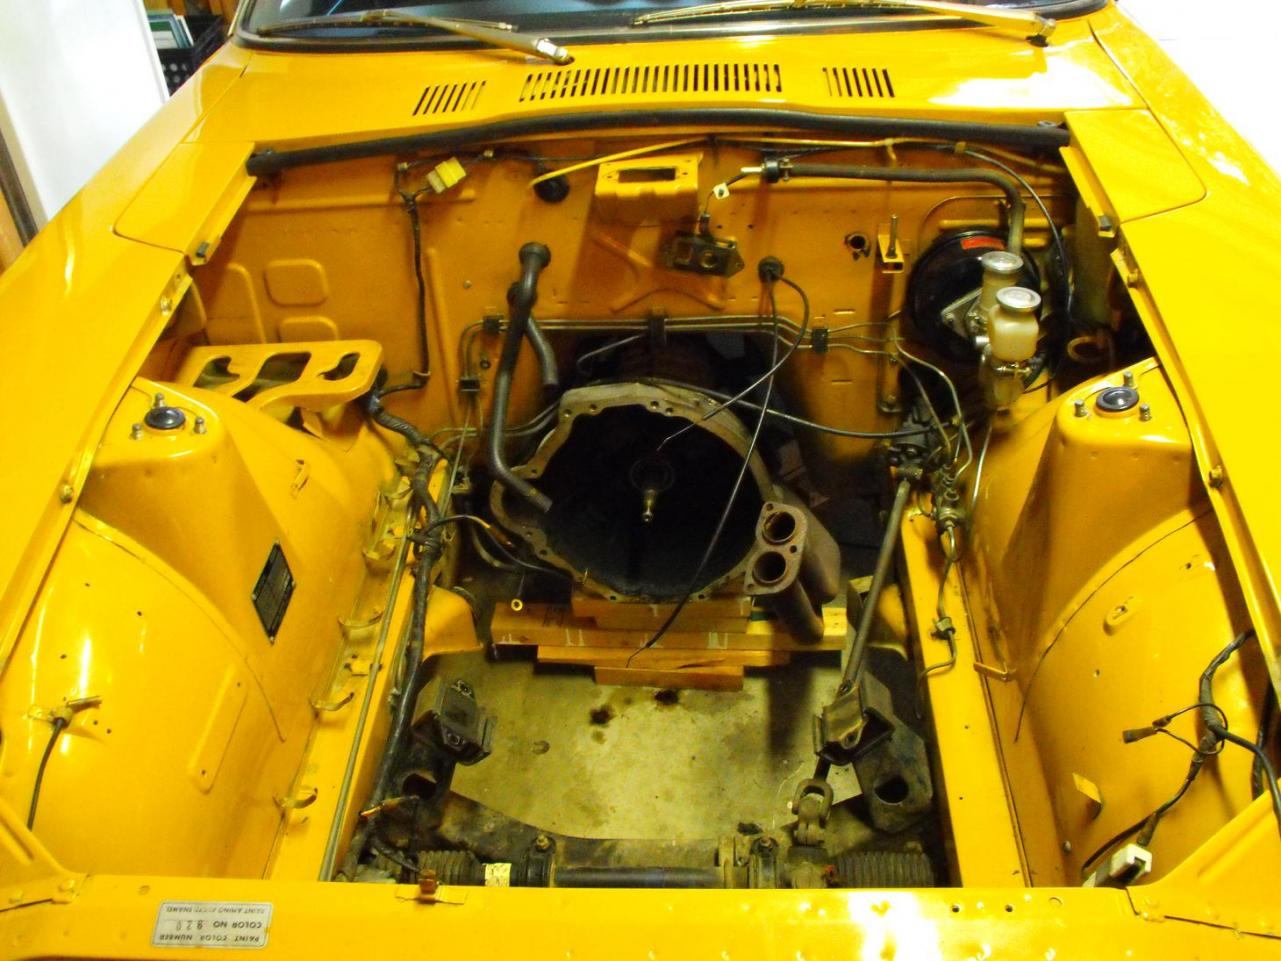
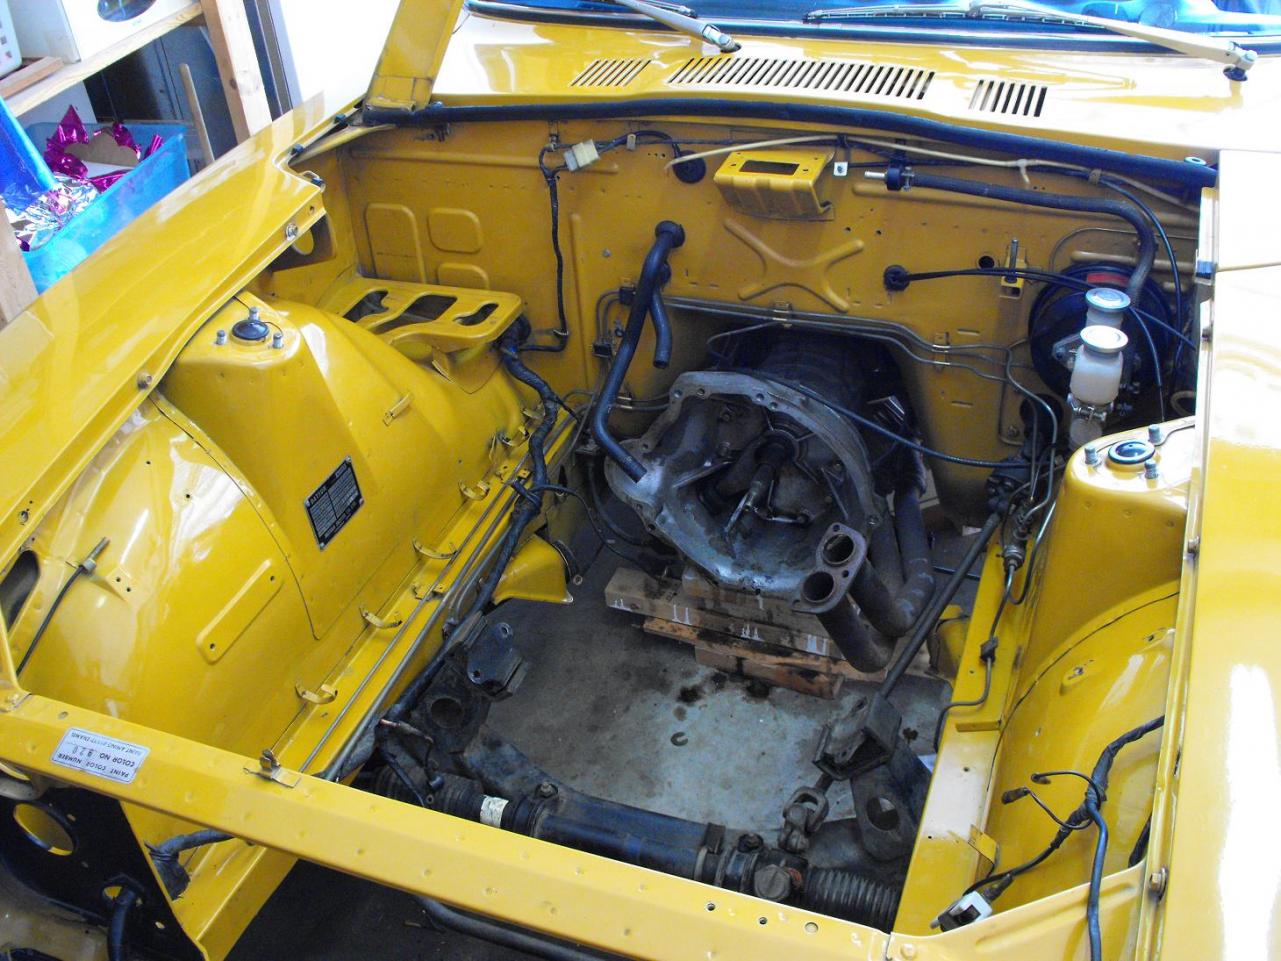
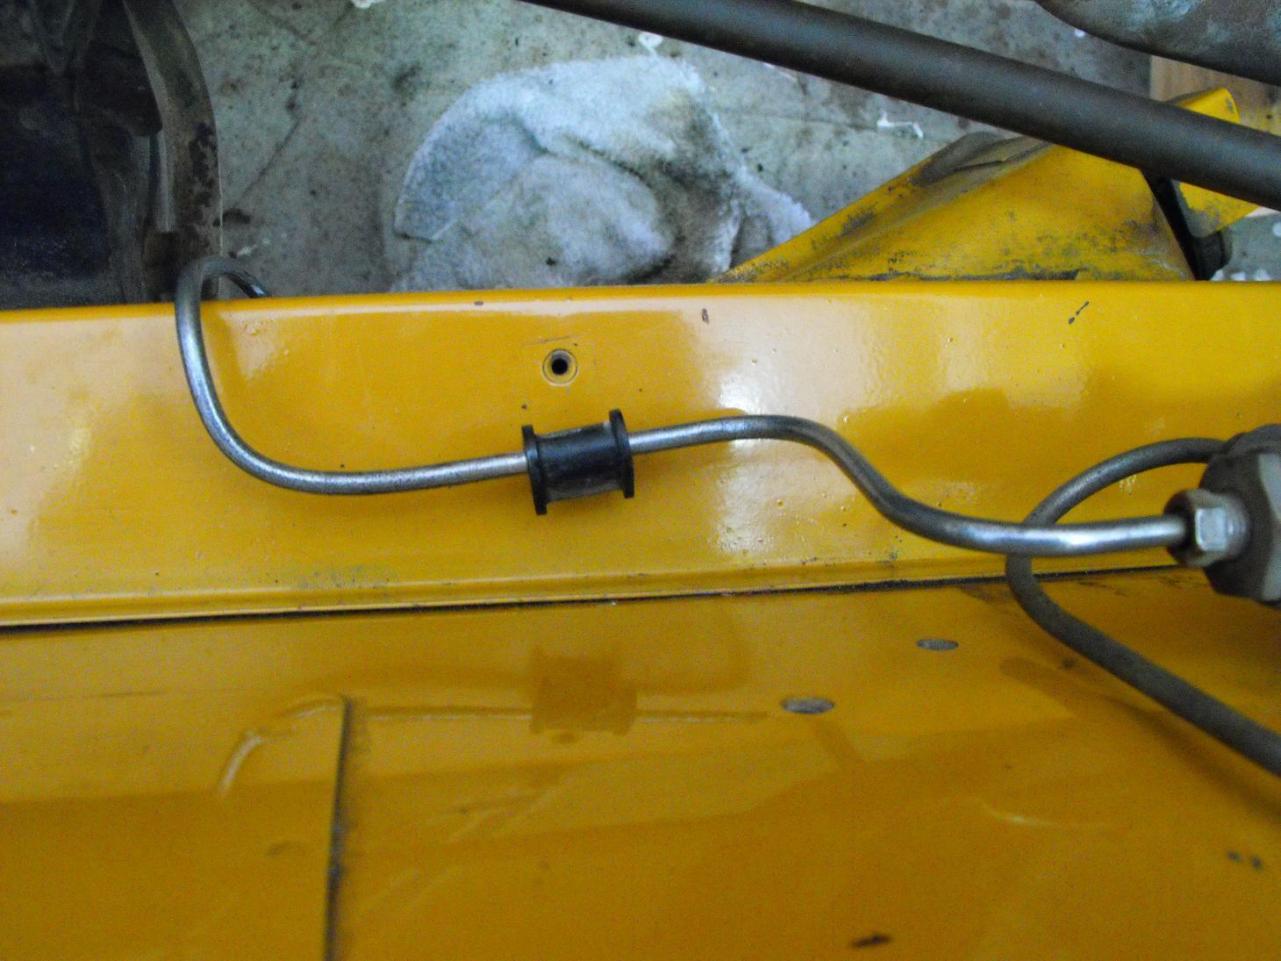
I am starting to put things back together. Both sides of engine bay cleaned up nice and are ready for parts. I need to figure out how to clean or replace the yellowed electrical terminal coverings. I am thinking I can buy new ones (somewhere) and recrimp the contacts. Also, white and blue tape on the Rack steering mechanism. I believe it is factory, but not sure why it is there. Does anyone else have this? Same colors? Rich

-
Depends on if your married or not
-
Wow! Put me in the old lady category along with my mom. I must say my typical shift point is at 3500 or lower. The only time the engine approaches 4000 is when we are on the freeway driving normal California speeds. And, I don't beleive that I have ever taken it over 5000 RPMs. I am pretty sure my parents drove the same way as they are typically the slowest car on the road (yes, even in the Z). So slow that I consider them hazardous and always offer to drive (Mom in 70s, dad in 80s). We all were taught the lower shift points were more economical and gentler on the engine (without lugging of course). FWIW, the engine had absolutley no carbon build up on the pistons and only a bit of white caking on the exhaust valve. Otherwise, the cylinders were very clean. Boy, I'm gonna have to rev that baby up one of these days when I get it back together. Rich
-
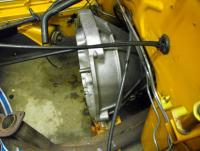
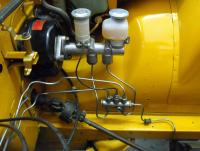
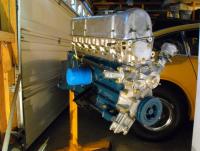
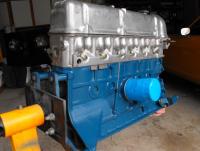
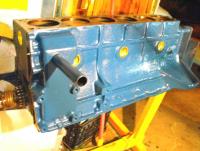
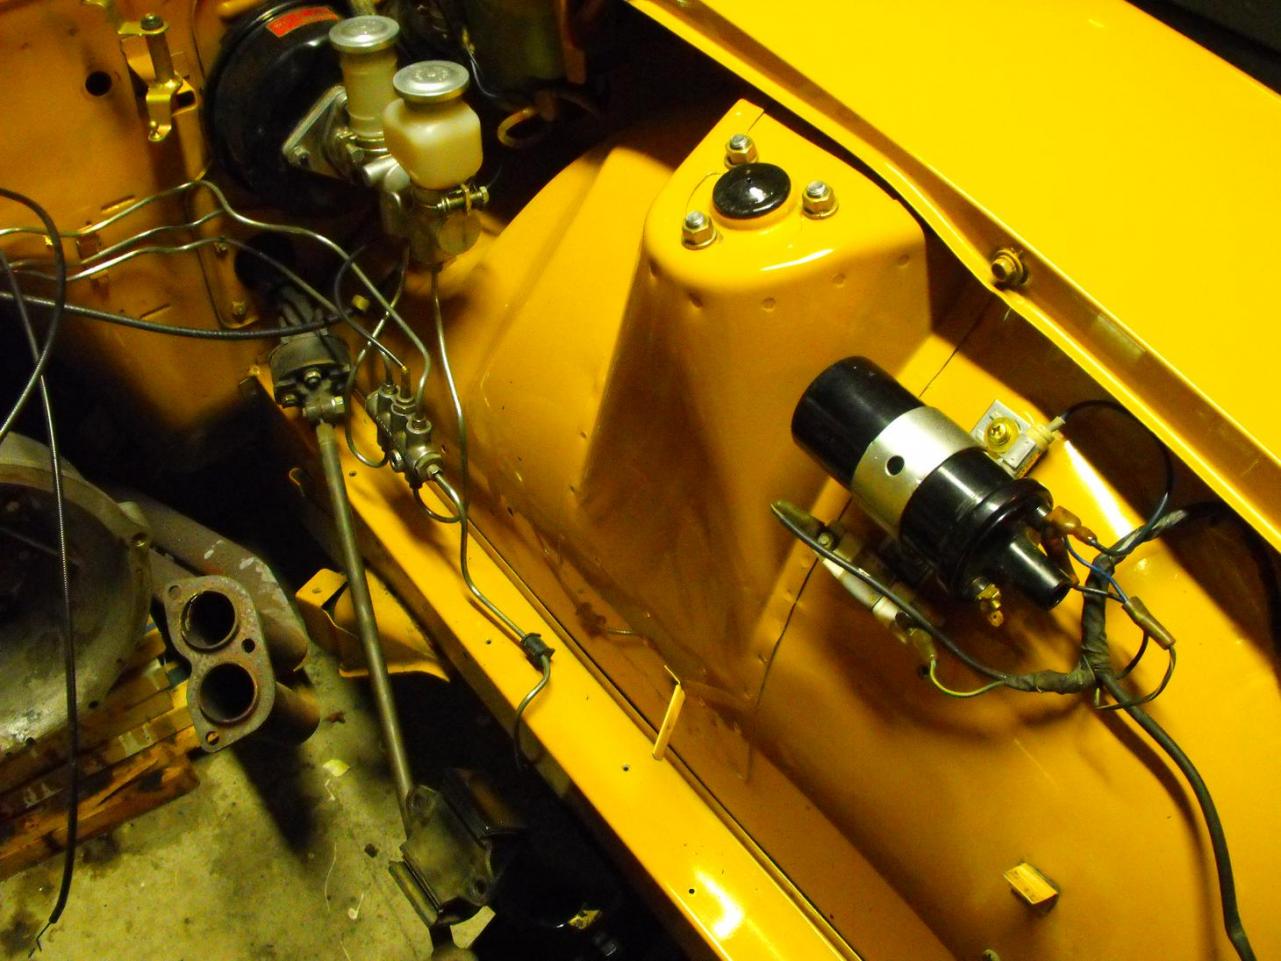
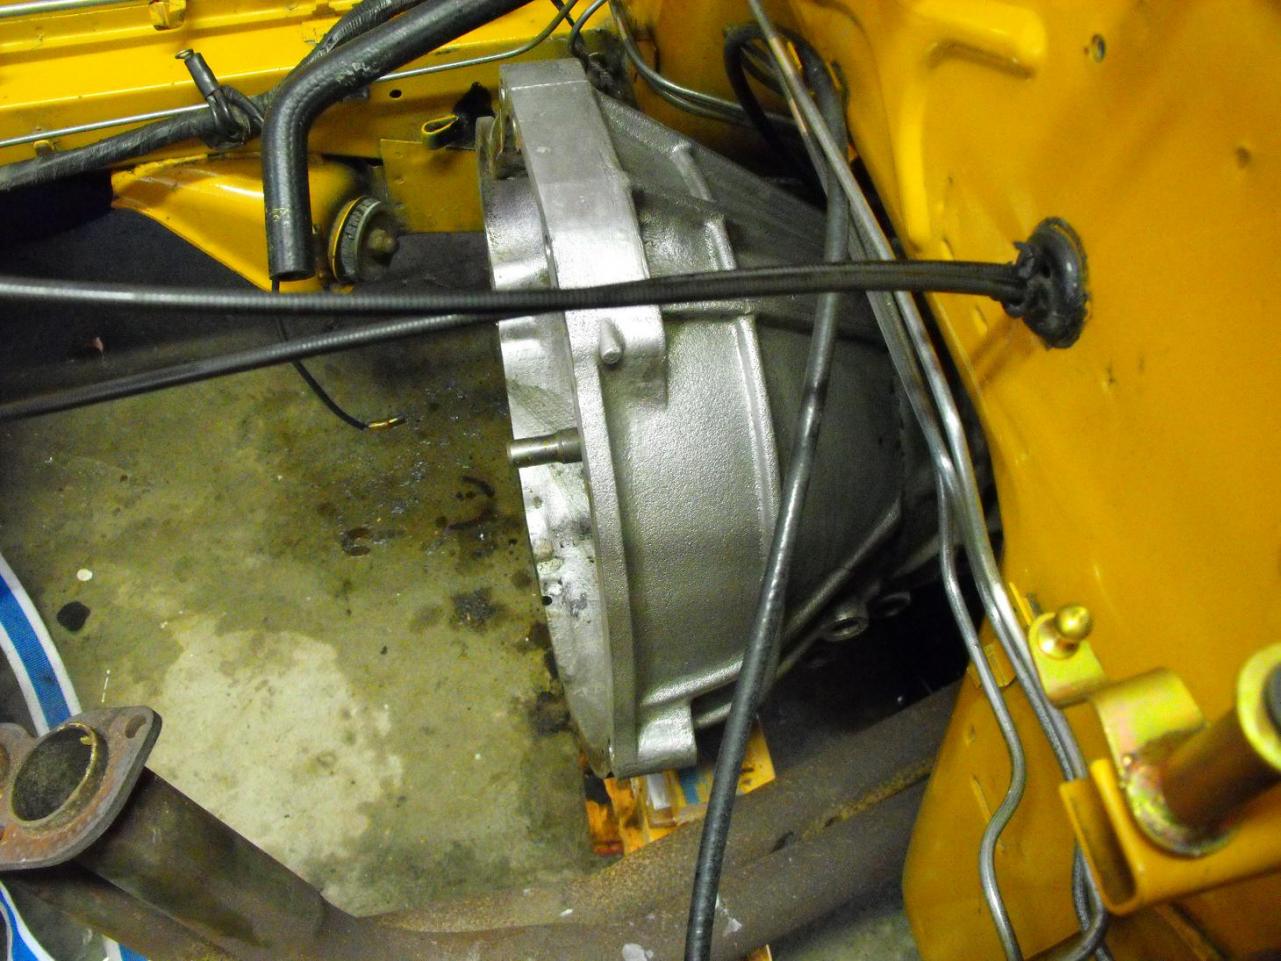
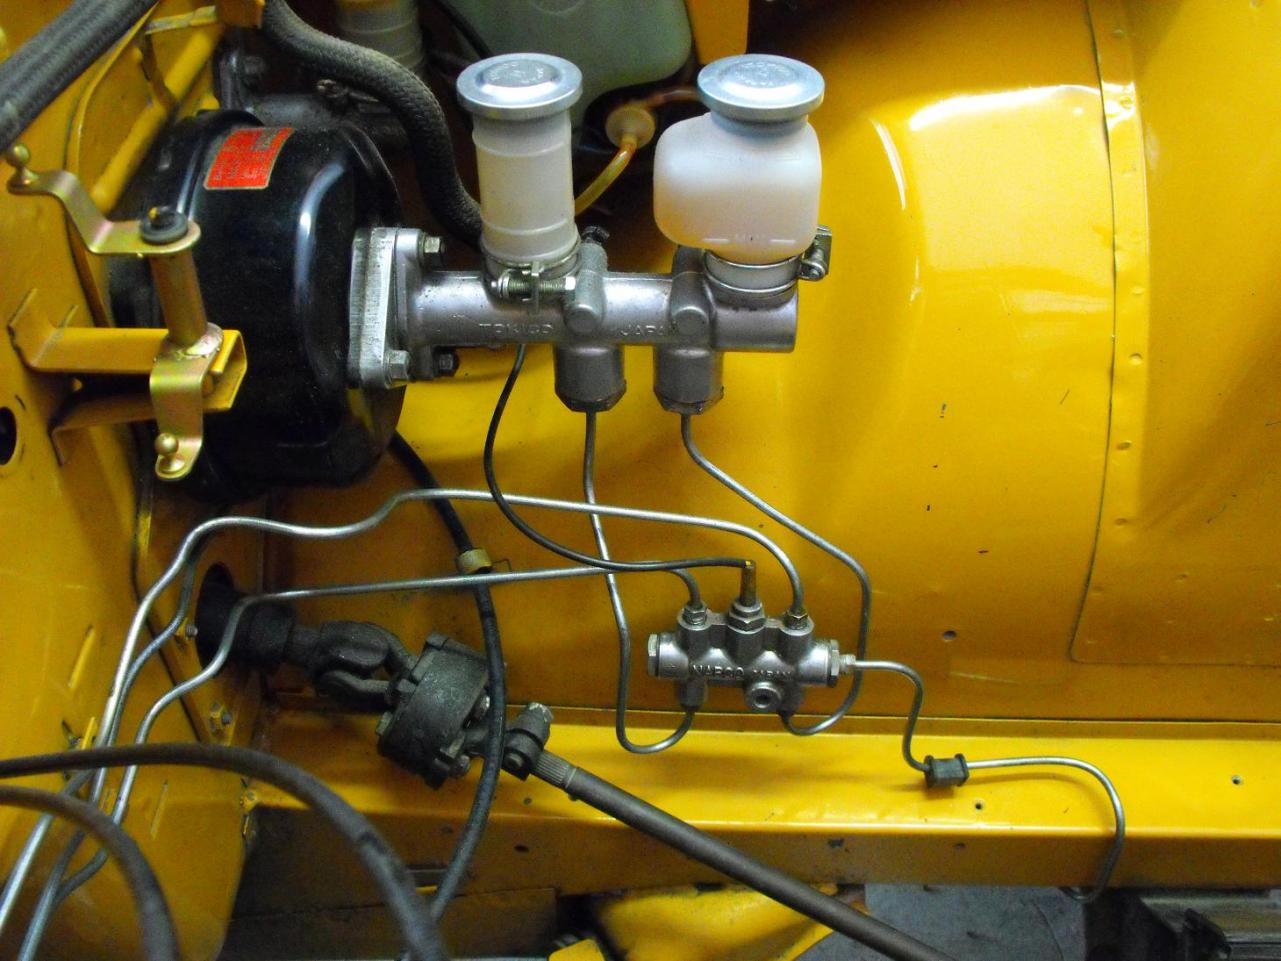
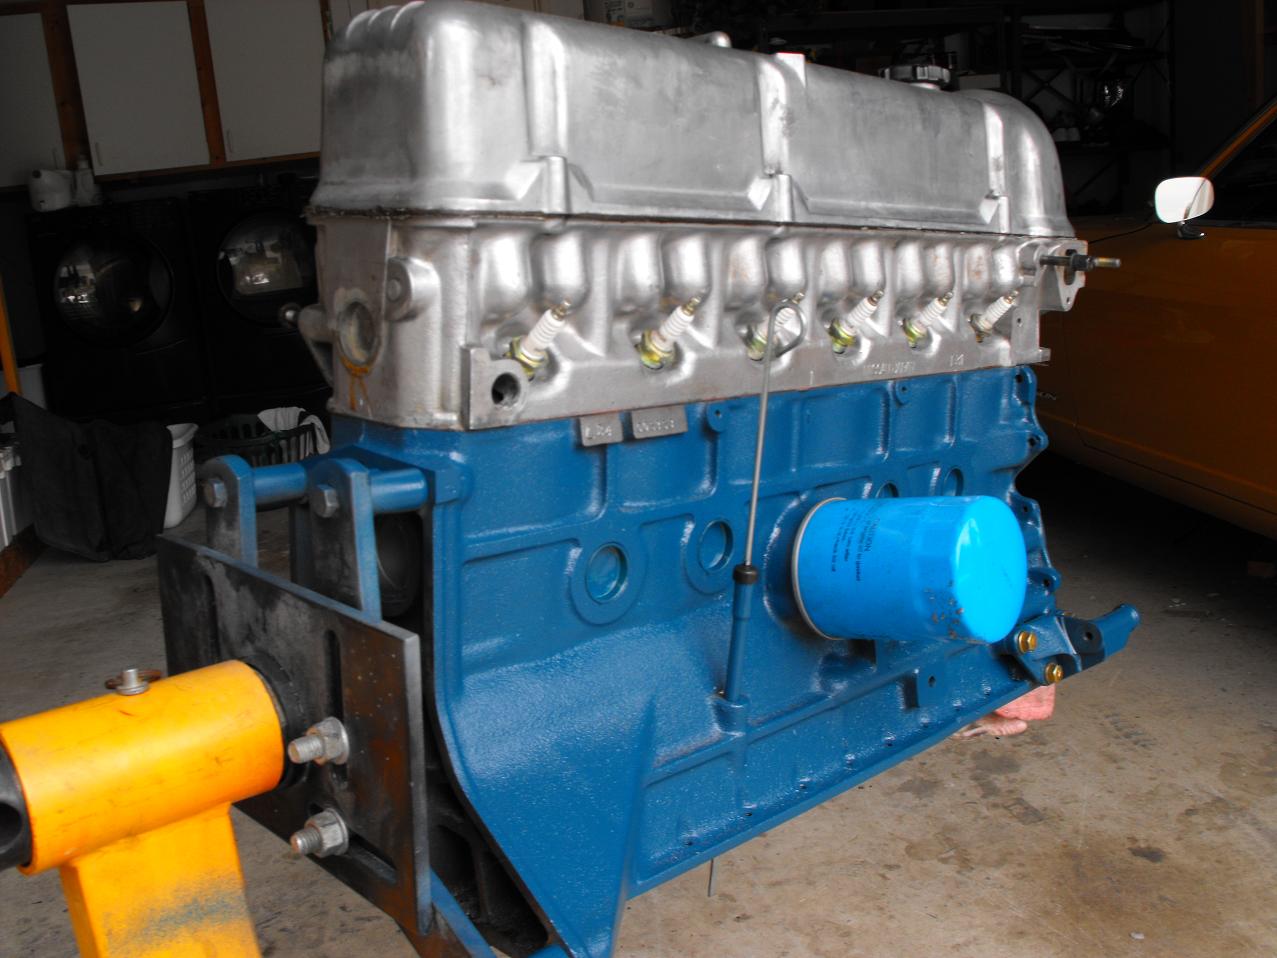
Thanks for the compliment. Really, this has become a 'labor of love'. I am really enjoying every minute of the cleaning, polishing, assembling, etc. It's very rewarding to see the great results of all the effort. It's also a tremendous learning experience. It has been a long time since I've pulled an engine. The engine is assembling well and looking good. I spent half of the last two days assembling and the other half cleaning. I cleaned the brake lines and coated them with clear enamel. Also cleaned the transmission bell housing. I will clean the electrtical harness (I am thinking soap and water for that) and then I will be about finished. I should be able to drop the engine back in toward the middle of the week. Below are some pics of the transmission, brake lines, pre-painted (original paint job) motor mounts, and engine build-up.

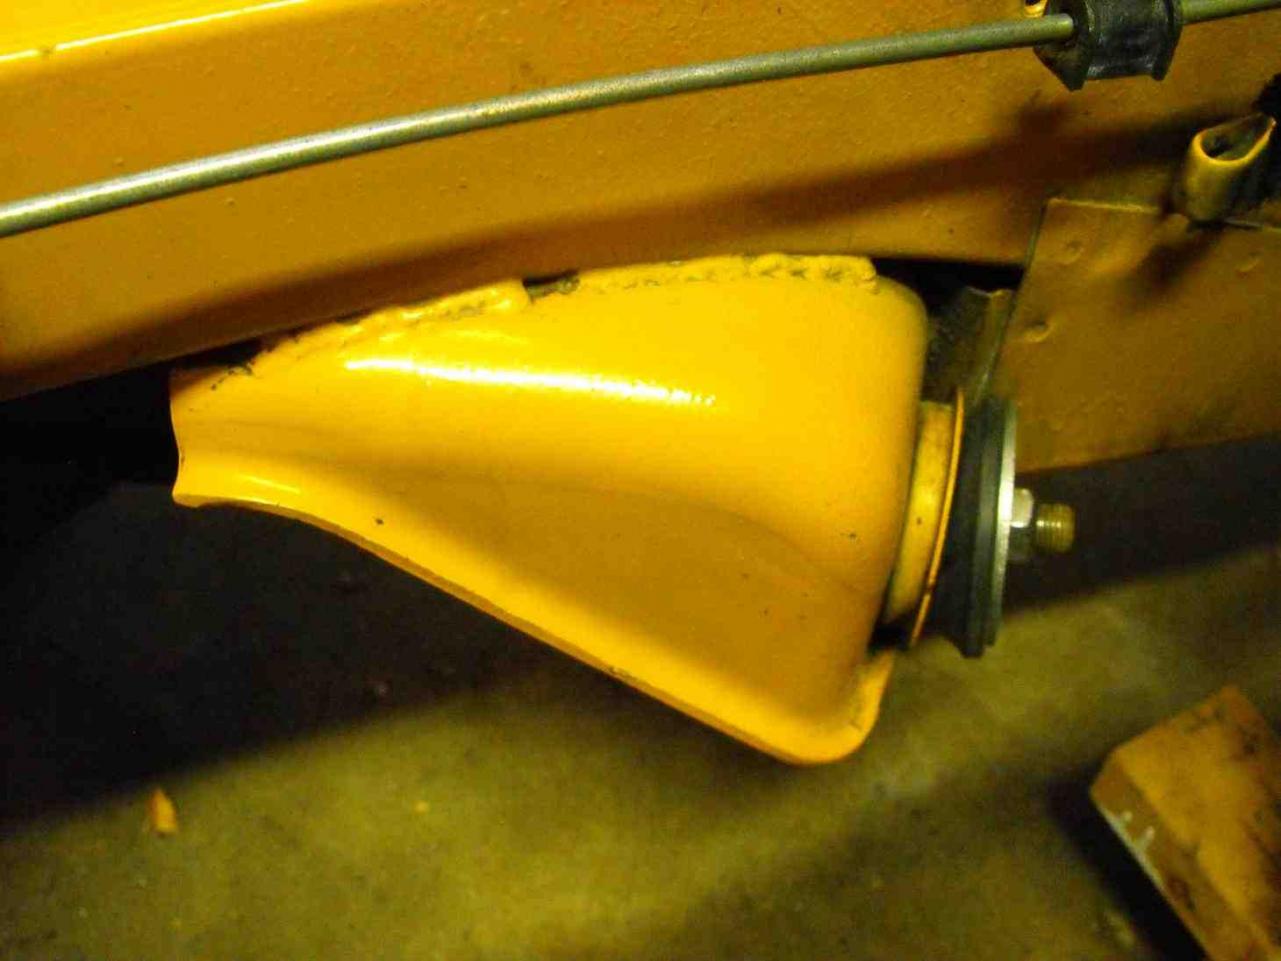
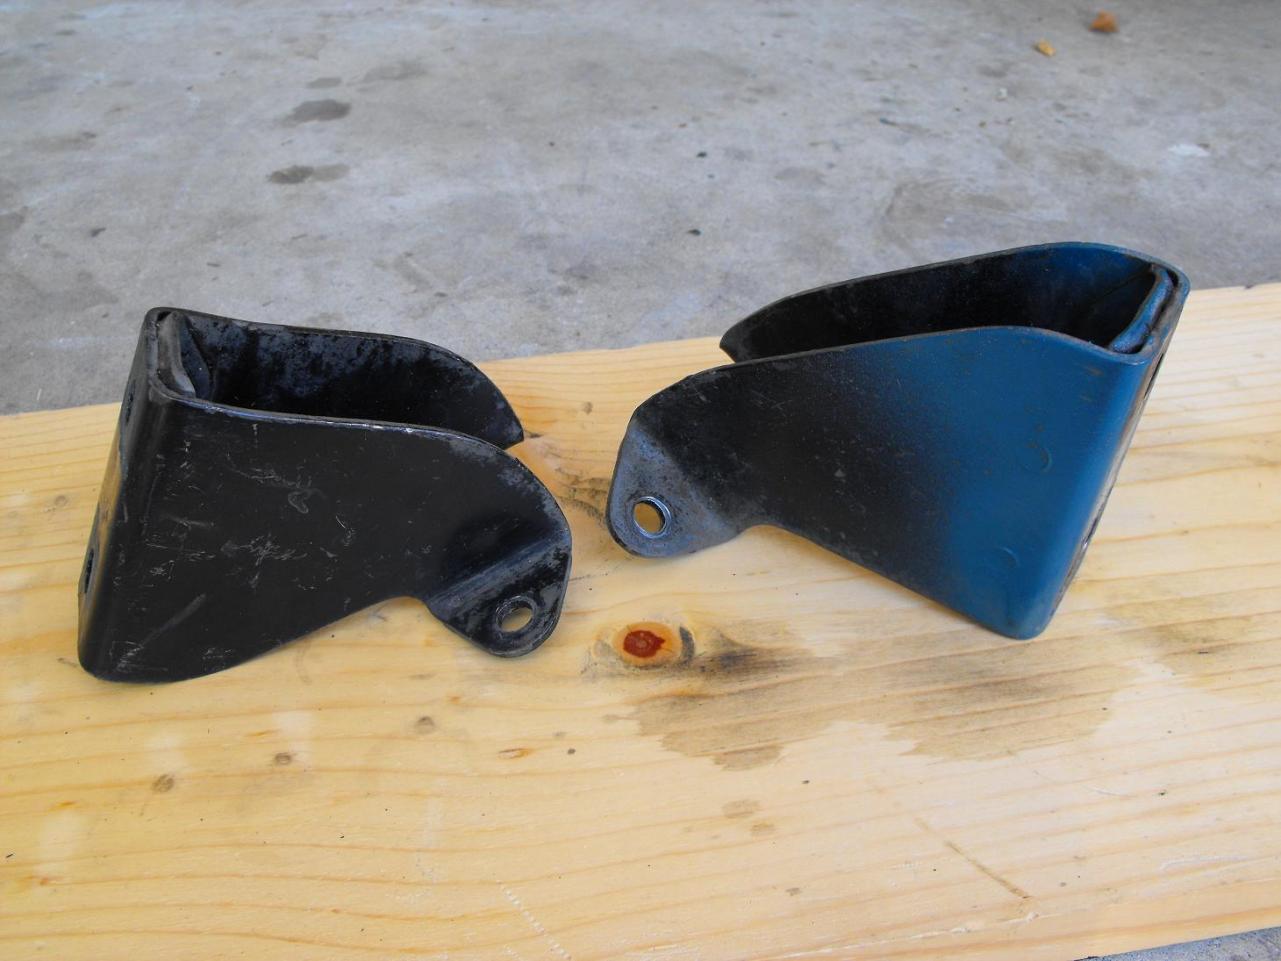
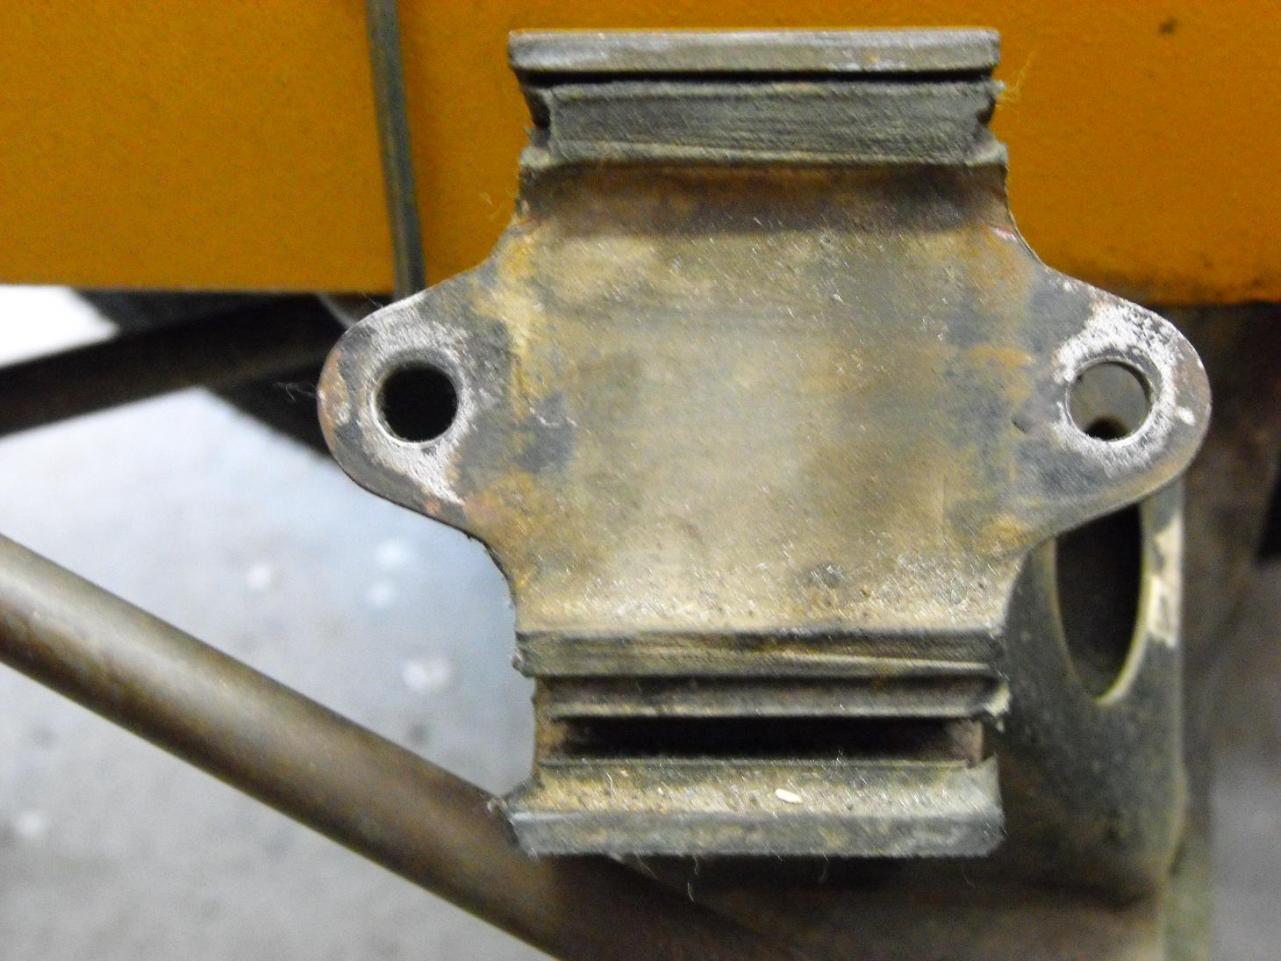
 Interesting, I am now painting my motor mounts and noticed that the passenger side mount is longer than the driver side by over 1 inch. Lends validity to the larger torque theory.
Here are pics of the two mounts. On the passenger side, you can clearly see the spacer outline. There is no spacer on the driver side. Very interesting. Why just one? Not sure? My guess on the purpose is that it was used to strengthen the mount that saw the most torque (compressive load) during acceleration, to prevent the tabs bending.
Interesting, I am now painting my motor mounts and noticed that the passenger side mount is longer than the driver side by over 1 inch. Lends validity to the larger torque theory.
Here are pics of the two mounts. On the passenger side, you can clearly see the spacer outline. There is no spacer on the driver side. Very interesting. Why just one? Not sure? My guess on the purpose is that it was used to strengthen the mount that saw the most torque (compressive load) during acceleration, to prevent the tabs bending.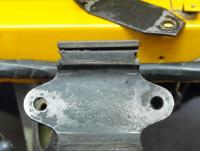
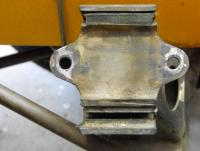 Hi Terry, Yes, mine is exactly the same as yours on the engine mount (I have not moved the transmission so not familiar with that). I have one spacer on the passenger side and none on the drivers side. I will post pics a little later. You can see the outline of the spacer on the passenger side, no outline on the driver side. Also, the serial numbers of our cars are very close so perhaps they were done the same. Rich Currently I am refreshing the engine and it is on a stand, so you caught this at a good time.
Thanks! That's just what I need. Rich
Does anyone know the "official color" of the mounts attached to the engine (The pieces going from the rubber part to the engine block). On my original '70, I have one mostly blue and one mostly black. Go figure. They look to be originally blue with black overspray. I am doing my best to keep the car as original as possible, but this one has me perplexed. Would prefer to have them both the same color. Rich
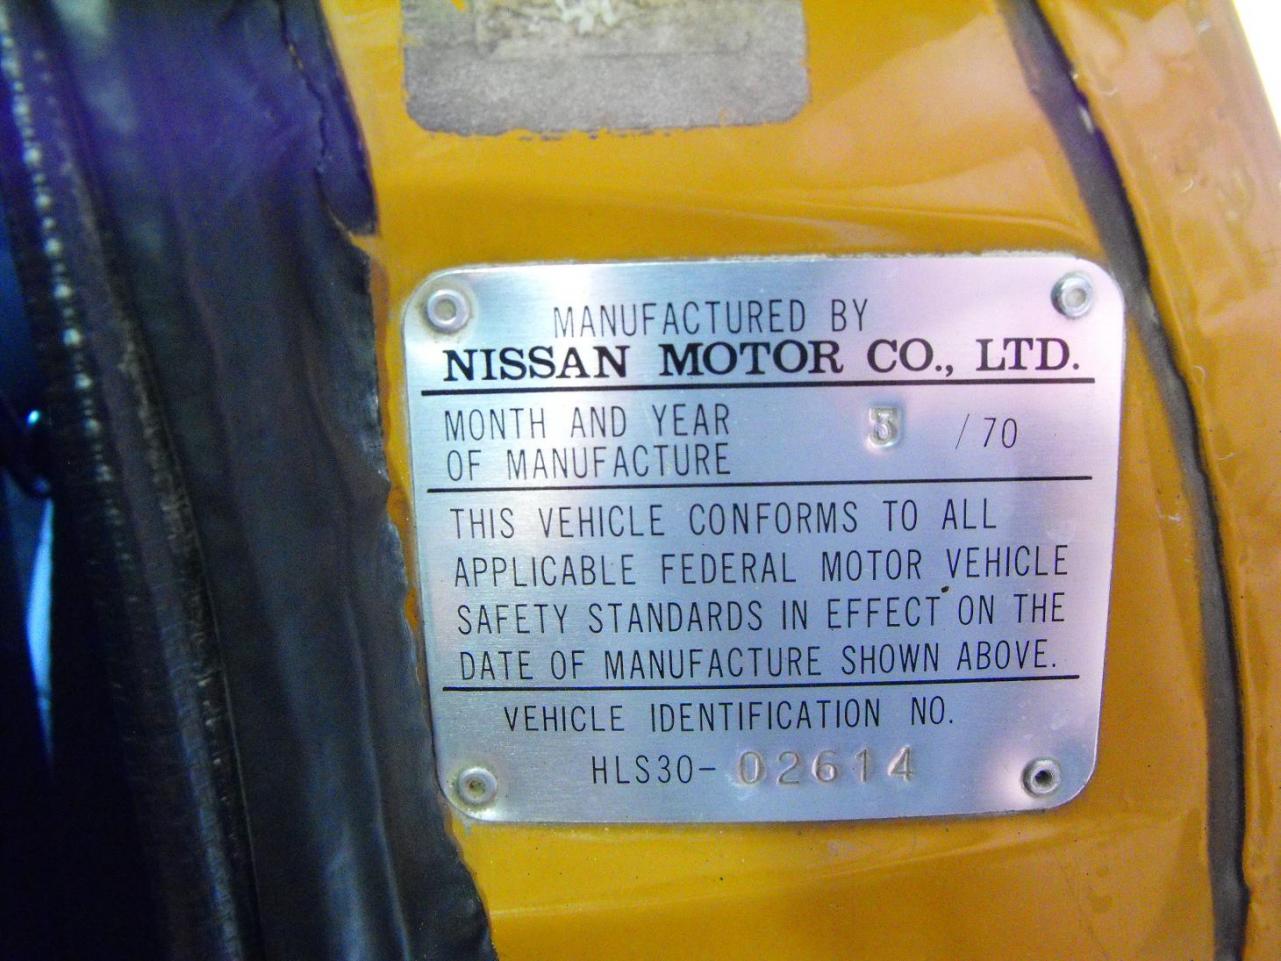
From 26th-Z: "The weld marks on your oil pan signify an early engine; unique to the early cars. A damper plate was welded on to the oil pans because of vibration." My car was built in 3/70 which was a fairly early build, so I guess they were still modifying parts on the line.
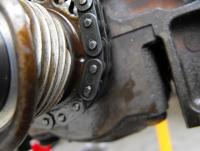
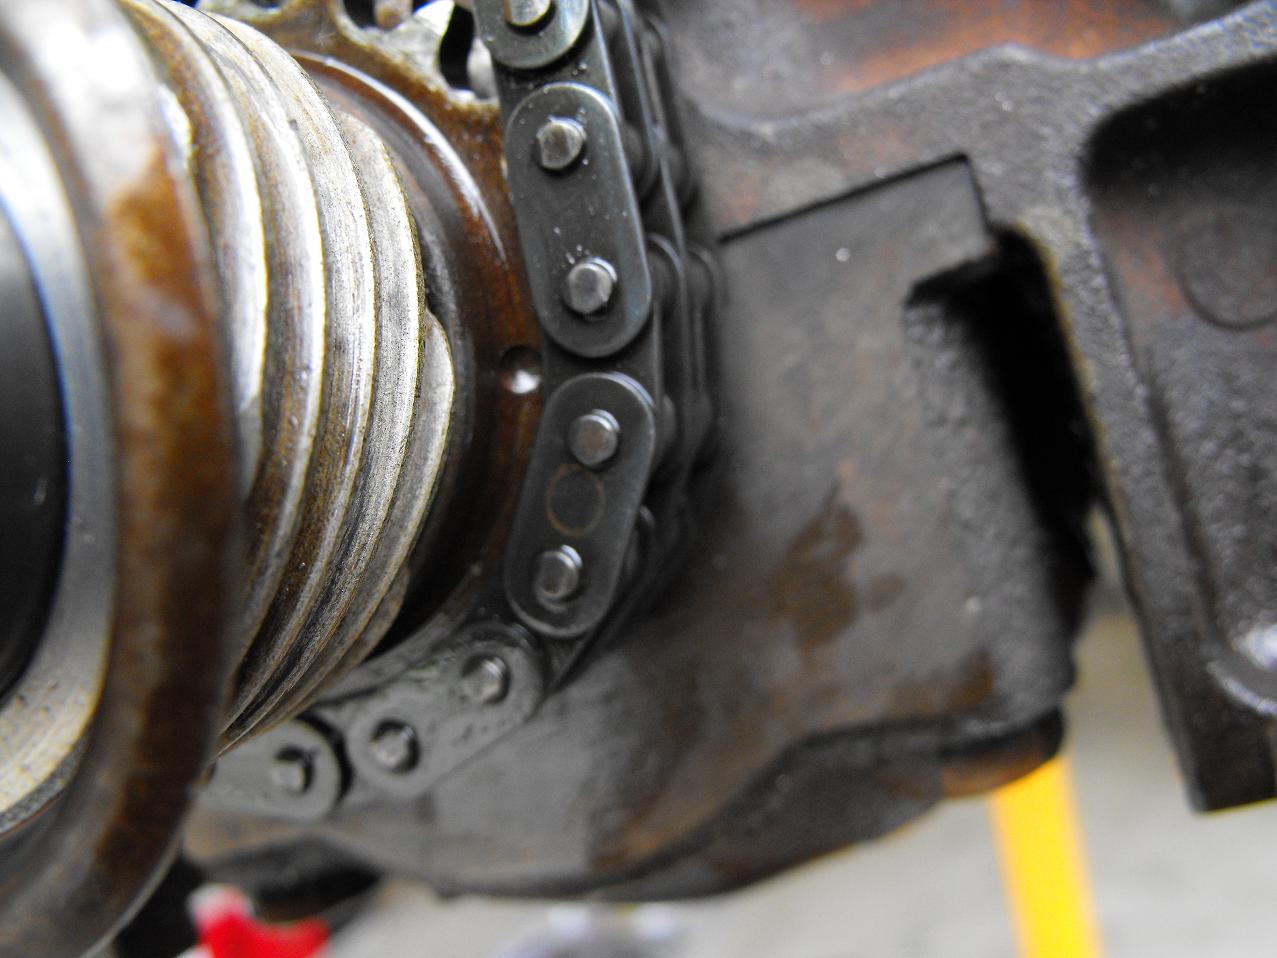
I didn't think it was a big deal so I left it. I am assuming all links are created equal. I had probs with the chain tensioner gasket. The one in the 'Ishano/Stone' kit did not match the tensioner body so I had to re-use the old gasket and carefully apply gasket sealer. May see if I can locate a new one here.
I put on the timing chain this morning. Attached are pics showing the chain markings next to the cam and crank markings (both one link advanced, 42 links apart). I was looking for a 'white' link, but actually the marks are 'O's. Kind of like the Oregon Ducks 'O'. Rotated engine from crank and everything ran smooth. Spent several hours cleaning the paint in the engine bay with Maguire's cleaner wax. The stuff works great. Had to get a toothbrush to clean the edges and under brackets. Still have more to go. Will likely do a little touch-up paint work in some areas, but overall, it's looking pretty good. Also cleaned out the transmission bell housing of oily matter. Still some stained parts, but I will let that remain. Starting to clean the brake lines. I was originally going to zinc them but everything was working well and tubes are not that bad looking. I will do a light clean of the lines with 0000 steel wool and then paint with clear enamel to prevent corrosion. Also, being that I am over 45, I set myself up with a nice cushion in the center of the engine bay. If I was younger, I am sure I wouldn't need such luxuries.
Hi Terry, Yes, mine is exactly the same as yours on the engine mount (I have not moved the transmission so not familiar with that). I have one spacer on the passenger side and none on the drivers side. I will post pics a little later. You can see the outline of the spacer on the passenger side, no outline on the driver side. Also, the serial numbers of our cars are very close so perhaps they were done the same. Rich Currently I am refreshing the engine and it is on a stand, so you caught this at a good time.
Thanks! That's just what I need. Rich
Does anyone know the "official color" of the mounts attached to the engine (The pieces going from the rubber part to the engine block). On my original '70, I have one mostly blue and one mostly black. Go figure. They look to be originally blue with black overspray. I am doing my best to keep the car as original as possible, but this one has me perplexed. Would prefer to have them both the same color. Rich
From 26th-Z: "The weld marks on your oil pan signify an early engine; unique to the early cars. A damper plate was welded on to the oil pans because of vibration." My car was built in 3/70 which was a fairly early build, so I guess they were still modifying parts on the line.
I didn't think it was a big deal so I left it. I am assuming all links are created equal. I had probs with the chain tensioner gasket. The one in the 'Ishano/Stone' kit did not match the tensioner body so I had to re-use the old gasket and carefully apply gasket sealer. May see if I can locate a new one here.
I put on the timing chain this morning. Attached are pics showing the chain markings next to the cam and crank markings (both one link advanced, 42 links apart). I was looking for a 'white' link, but actually the marks are 'O's. Kind of like the Oregon Ducks 'O'. Rotated engine from crank and everything ran smooth. Spent several hours cleaning the paint in the engine bay with Maguire's cleaner wax. The stuff works great. Had to get a toothbrush to clean the edges and under brackets. Still have more to go. Will likely do a little touch-up paint work in some areas, but overall, it's looking pretty good. Also cleaned out the transmission bell housing of oily matter. Still some stained parts, but I will let that remain. Starting to clean the brake lines. I was originally going to zinc them but everything was working well and tubes are not that bad looking. I will do a light clean of the lines with 0000 steel wool and then paint with clear enamel to prevent corrosion. Also, being that I am over 45, I set myself up with a nice cushion in the center of the engine bay. If I was younger, I am sure I wouldn't need such luxuries.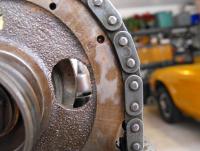


 Personally, I am not so happy. Last two items I ordered were billed as NOS parts (Wire clamps and rubber muffler hangers). Neither arrived in an NOS bag and neither item looked like my original. I have taken him off of my favorite sellers list and will no longer buy parts from him. Z-connection seems a bit better. Got the NOS bag with item from Z-connection.
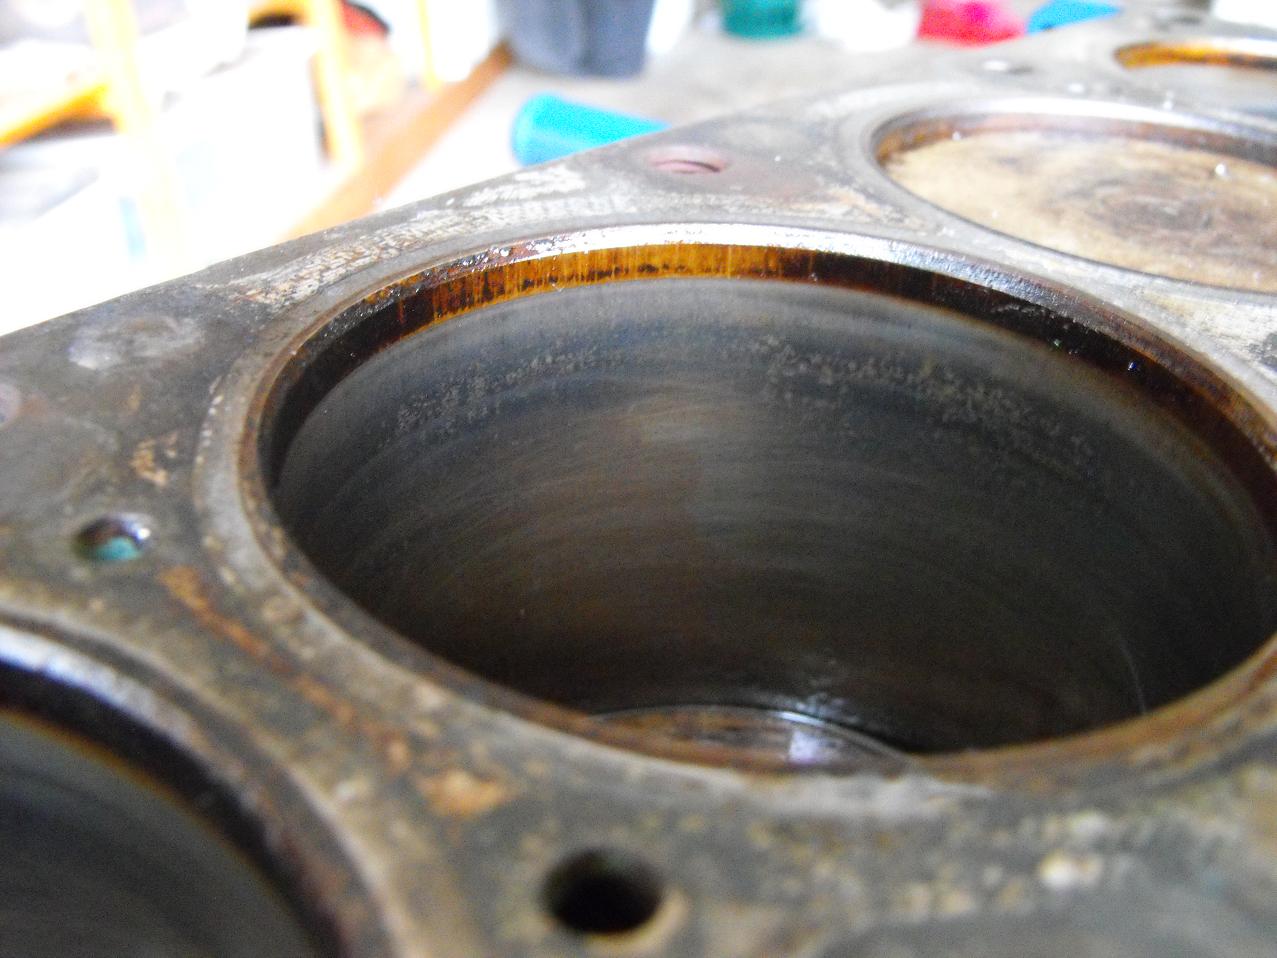
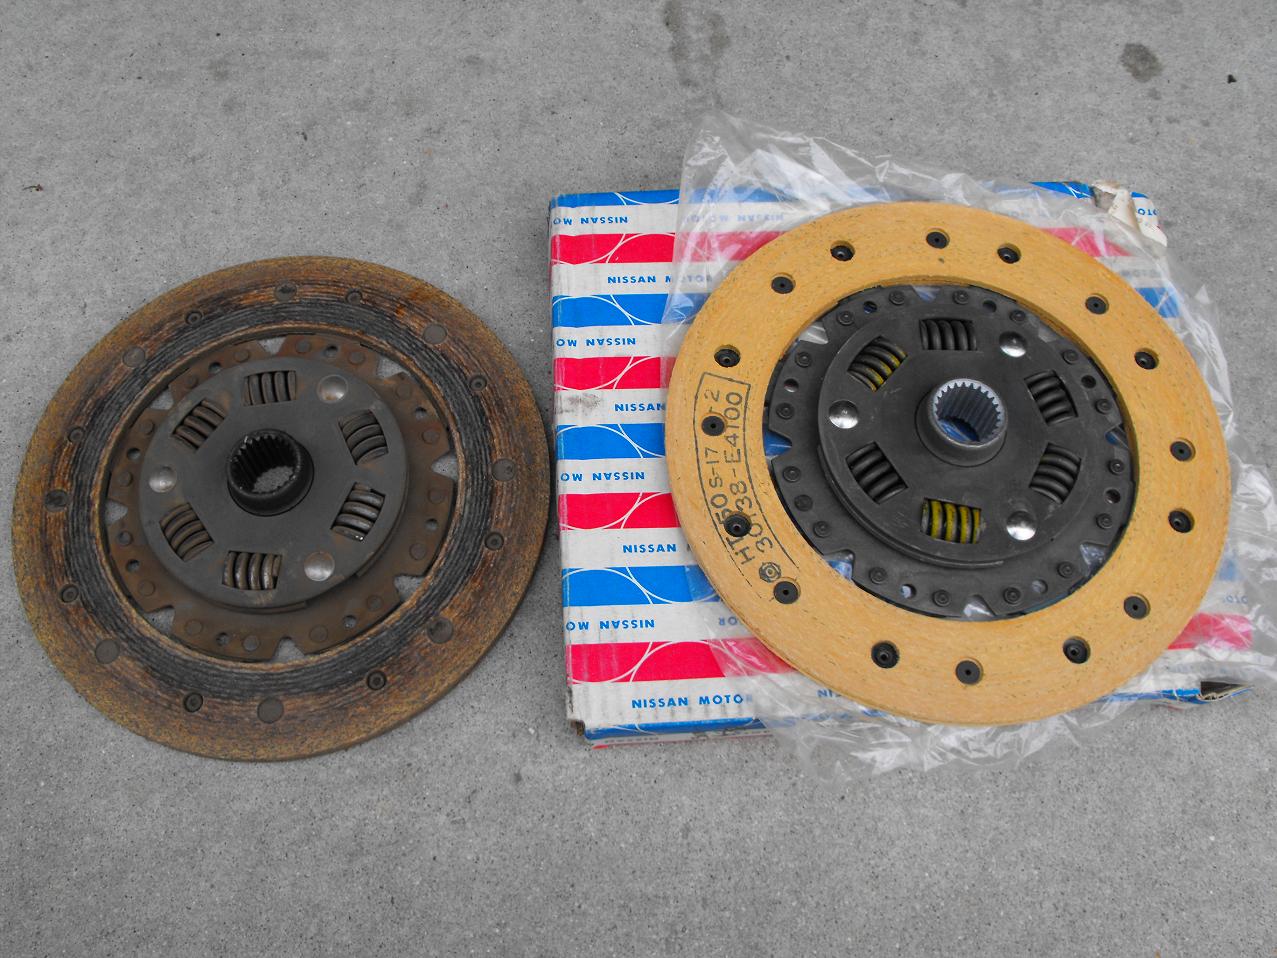
I painted the freeze plugs this AM. Looks like they came out well. I took a pic (see above) of one of the engine cylinders. On all of the cylinders, you could still see remnants of the original cross hatching. Not bad for 96K miles. Also, both cylinders and head were fairly clean with just a small amount of carbon build up. I threw in a pic of the old and new clutch disc. The yellow/tan color looks pretty nice on the new one. The old one is well worn with a bit of burn on it. Also, picked up the re-surfaced flywheel and headbolts yesterday. Bought a new throw-out bearing. The pressure plate is in good condition. I will clean the surface with some 600 grit sand paper before assembly. Put the head on this AM. It looks nice on the block but still needs a little clean up on the back end. I cleaned both surfaces with a sharp putty knife to get off the residual gasket material. Then cleaned both surfaces well with lacquer thinner. Put about 4 coats of copper gasket compound on the head gasket prior to assembly. We (son and I) then put the gasket and head on and threaded bolts (with permatex on threads) in loosely till they were flush. After dealing with one issue, we torqued all the bolts down per spec. The one issue we did have involved the hole with the earlier broken bolt. the new bolt would not thread in easily to the hole. We still had 1/2 inch gap before flush and the bolt was too snug to hand thread. I ended up taking two of the old long bolts and slicing grooves in them to make them look like a tap. We then 'Tapped' the hole till the long bolts were flush to the head without the washer. We then took the new bolt with washer and proceeded with the torquing sequence. I also added one pre-torque sequence to 20 ft-lbs prior to the 35 and 47 ft-lb sequence. Willl most likely take off Friday to finish the engine bay clean and wax. May get the motor in by Saturday. That would be nice. Sorry, I am no John Madden
Commentary to follow
Personally, I am not so happy. Last two items I ordered were billed as NOS parts (Wire clamps and rubber muffler hangers). Neither arrived in an NOS bag and neither item looked like my original. I have taken him off of my favorite sellers list and will no longer buy parts from him. Z-connection seems a bit better. Got the NOS bag with item from Z-connection.
I painted the freeze plugs this AM. Looks like they came out well. I took a pic (see above) of one of the engine cylinders. On all of the cylinders, you could still see remnants of the original cross hatching. Not bad for 96K miles. Also, both cylinders and head were fairly clean with just a small amount of carbon build up. I threw in a pic of the old and new clutch disc. The yellow/tan color looks pretty nice on the new one. The old one is well worn with a bit of burn on it. Also, picked up the re-surfaced flywheel and headbolts yesterday. Bought a new throw-out bearing. The pressure plate is in good condition. I will clean the surface with some 600 grit sand paper before assembly. Put the head on this AM. It looks nice on the block but still needs a little clean up on the back end. I cleaned both surfaces with a sharp putty knife to get off the residual gasket material. Then cleaned both surfaces well with lacquer thinner. Put about 4 coats of copper gasket compound on the head gasket prior to assembly. We (son and I) then put the gasket and head on and threaded bolts (with permatex on threads) in loosely till they were flush. After dealing with one issue, we torqued all the bolts down per spec. The one issue we did have involved the hole with the earlier broken bolt. the new bolt would not thread in easily to the hole. We still had 1/2 inch gap before flush and the bolt was too snug to hand thread. I ended up taking two of the old long bolts and slicing grooves in them to make them look like a tap. We then 'Tapped' the hole till the long bolts were flush to the head without the washer. We then took the new bolt with washer and proceeded with the torquing sequence. I also added one pre-torque sequence to 20 ft-lbs prior to the 35 and 47 ft-lb sequence. Willl most likely take off Friday to finish the engine bay clean and wax. May get the motor in by Saturday. That would be nice. Sorry, I am no John Madden
Commentary to follow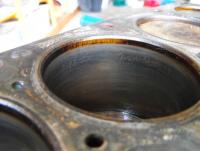
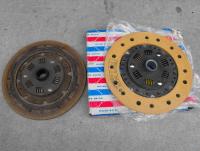
 Hi Carl, I used the permatex for the freeze plug installation. The plugs were a very tight fit, 35mm's. I was debating on painting the freeze plugs or not because they look kind of cool unpainted, but to be true to original they must be painted (although I will try and forego the drips). Will probably paint these up after work today. Also, will post a picture of the new clutch disc here later. It is an original Nissan part (old) with the yellowish material, like my old one. It actually looks too pretty to install. Rich
Hi Mike, I originally thought that the coil bracket should be the yellow zinc color (due to the exterior corrosion), however, the un-exposed inside part of the bracket was definitely the silver zinc, so it was plated with the silver zinc finish. Most of the parts were in this condition where the exposed surfaces showed the corrosion, but the unexposed looked vitually new. The brake line clips as well as most of the bolts were a good example of this. Rich
I picked up the yellow and silver zinc plated parts today as well as a new clutch disc, throw out bearing and pilot bushing. Also dropped the flywheel off at the machine shop to be surfaced. The pressure plate looks good, so I will just clean that part up. The block is painted and the freeze plugs replaced with new brass ones. Actually, the old ones looked to be in pretty good shape, but it is probably best to have replaced these in the long run. Still spending a lot of time cleaning. Will continue to assemble the block once the head bolts come in. Rich
Hi Carl, I used the permatex for the freeze plug installation. The plugs were a very tight fit, 35mm's. I was debating on painting the freeze plugs or not because they look kind of cool unpainted, but to be true to original they must be painted (although I will try and forego the drips). Will probably paint these up after work today. Also, will post a picture of the new clutch disc here later. It is an original Nissan part (old) with the yellowish material, like my old one. It actually looks too pretty to install. Rich
Hi Mike, I originally thought that the coil bracket should be the yellow zinc color (due to the exterior corrosion), however, the un-exposed inside part of the bracket was definitely the silver zinc, so it was plated with the silver zinc finish. Most of the parts were in this condition where the exposed surfaces showed the corrosion, but the unexposed looked vitually new. The brake line clips as well as most of the bolts were a good example of this. Rich
I picked up the yellow and silver zinc plated parts today as well as a new clutch disc, throw out bearing and pilot bushing. Also dropped the flywheel off at the machine shop to be surfaced. The pressure plate looks good, so I will just clean that part up. The block is painted and the freeze plugs replaced with new brass ones. Actually, the old ones looked to be in pretty good shape, but it is probably best to have replaced these in the long run. Still spending a lot of time cleaning. Will continue to assemble the block once the head bolts come in. Rich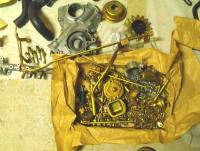
 Was cleaning parts last night and ran across everything you noted above. It's really very amusing to look this stuff over. There is blue paint on the head, intake manifold, timing chain, cover and oil pan. I have one motor mount that is mostly black and one that is mostly blue. Among this there are the numerous paint runs on the (mostly) blue block. Very random and creative. I am trying to imagine the scenario's in which a paint job can turn out this bad on the assembly line. My two main thoughts are that the paint guys supervisor gave him 15 seconds to paint the engines, or they were employing children, or drunks (but not drunk children). Anyway, I posted a couple of the inspection marks which will remain. Rich


Important Information
By using this site, you agree to our Privacy Policy and Guidelines. We have placed cookies on your device to help make this website better. You can adjust your cookie settings, otherwise we'll assume you're okay to continue.