fiveleaf
Free Member
-
Joined
-
Last visited
Everything posted by fiveleaf
-
 I had my z idle and rev fine, but stumble and die under load. It also was not capable of going too fast during this time. My problem was intermittent spark to various cylinders at different times, which was not noticed when looking at timing. Checking this is quite simple, just attach the timing light to each plug wire (for maybe 30 sec) and aim the light at a dark area. It should be consistent, steady flashes on each wire.
 -
So I was driving back from a few hours worth of errands in town, and I start to get backfires. I'm unsure as to whether it was from the carbs or exhaust, but I got them while pushing the pedal more than 20%. I was low on gas, and the power loss felt like I was running empty. I've ran empty before, usually doesn't backfire. I put some gas in her today, and charged the battery. Didn't start. Tried to a couple times, backfireing from the carbs. Typical if the webers are flooded, but may be an indication of another problem? Looked at the ignotion box (Crane HI-6). If anyone know's these boxes, they have a red indicator light on them. Solid red on "ready", and flashing while on "start". Some electrical issues getting power to the ignition box, fixed them and there's still an issue somewhere. Solid red on ready, stays solid while turning it over (which should mean it is not giving spark to the coil). So my question... What can cause an ignition box not to give spark while turning the key? **With this box, the light also flashes, in different patterns, if various problems are detected. No patterns, just no spark (stays solid). The car: L28, recent top-end rebuild/bore Triple weber carbs, recent professional tune/jet (Not Dyno, but damn better than they were). Mallory unilite distributor Crane PS92 Coil (for Capacative Discharge ignition) Crane HI-6 ignition box. Rev limit at 5K for now. About 2-3 months old, kept on the interior of the firewall.
-
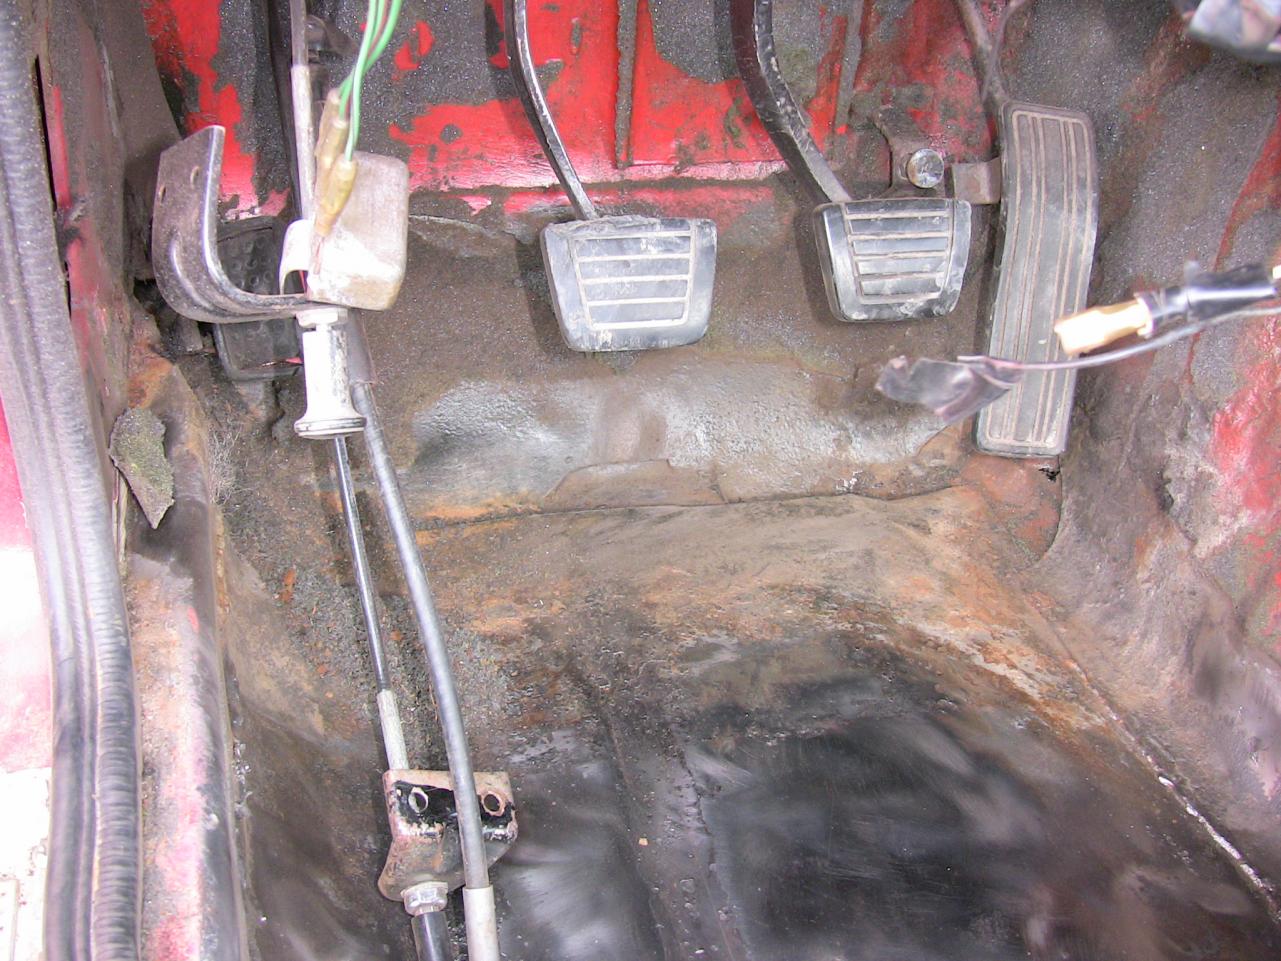
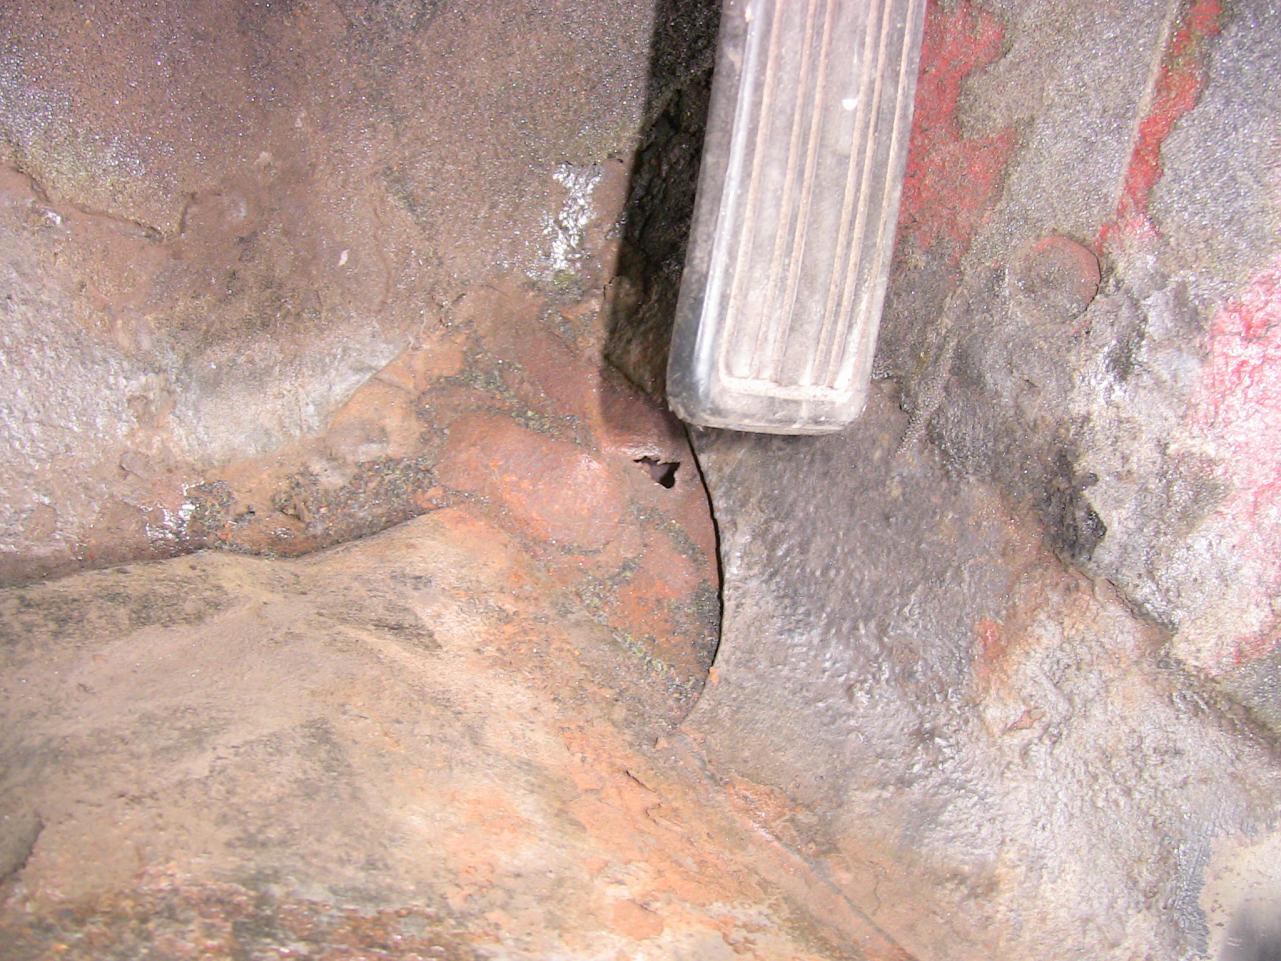
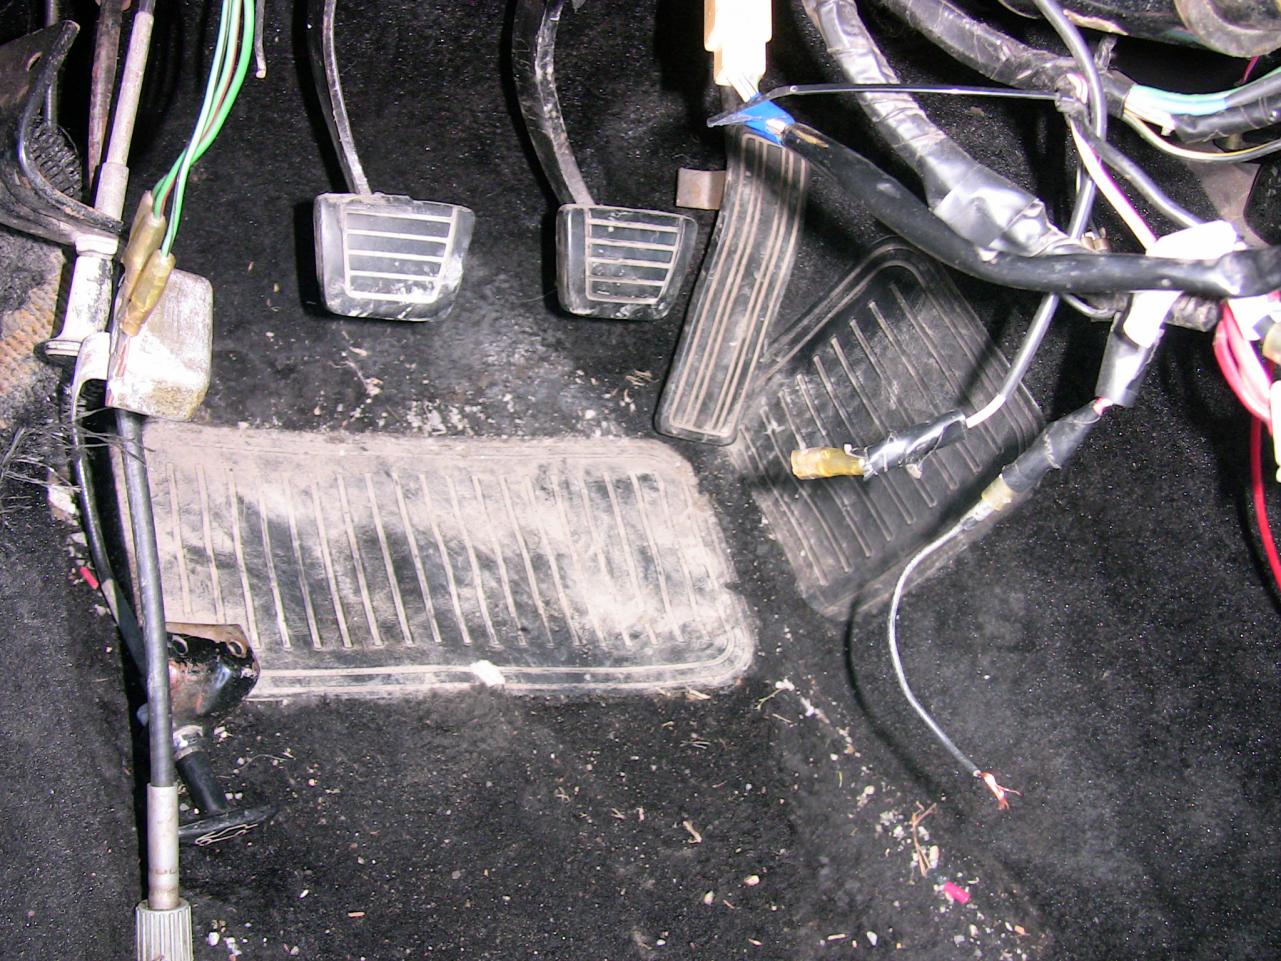
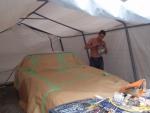
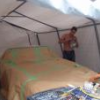
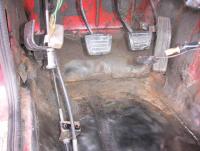
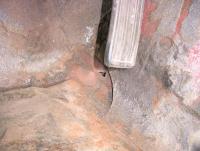
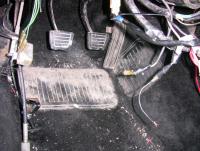
Money is not an object for rust-proofing. I'm still going to wait on the sound deadening until I graduate. There are more important things to do than sound deadening anyways. My order for POR-15 had already been paypaled, but was just refunded because of spelling on the street name. I'll look into the Zero Rust; thanks. Until then, I could really use something more effective than a wire wheel for saning. I'm thinking a grinder attachment... It also looks like the floor panels were at one time painted with a really tough topcoat, which looks good until you grind it hard for about 15-20sec, when it reveals the rust below. Another issue is the hard-but-tacky sound deadening on the firewall and centre console to the floorpanels. Too soft for the wire brush (gums it up), too hard for a scraper. About 1/4 to 1/2 inch thick. I will need to remove the pedals to repair to weld over the rust hole on the driver's side. I couldn't find any screws or bolts, looking with a mirror. I have new pedals coming. Is there a trick to getting these off? This carpet kit is cheap, and not what I will end up using. For $150, I think I'm going to temp install it with minimal ammounts of glue for the next couple years, then give it away when the time comes for another interior job. hmmm... Need to pick up the new seats/dash cap/anti-rust before taking eveything apart. I don't want my seats and dash out while waiting for parts. I still need to daily drive it!
-
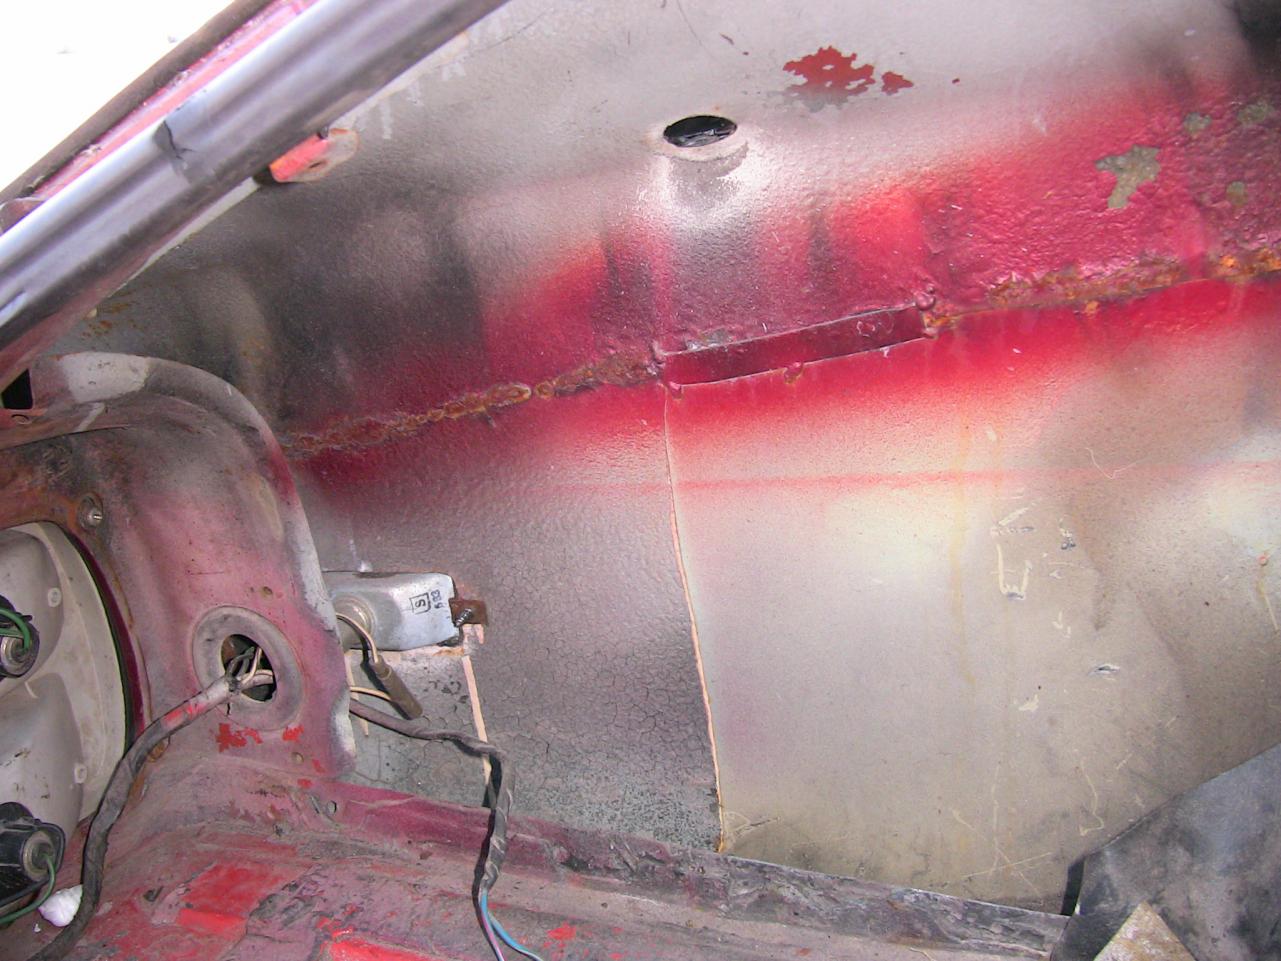
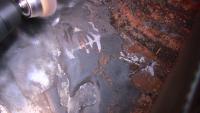
There must be a faster way to do this. I'm searching for a tool that does this job better than a drill and wire brush attachment. You can see it in picture #5 (above). The wire brush also wear's down faster than I would imagine. Especially in the non-smooth areas (under the pedals). I tried to dremel it with a wire attachment and wore that little brush out in about 120 seconds.
-
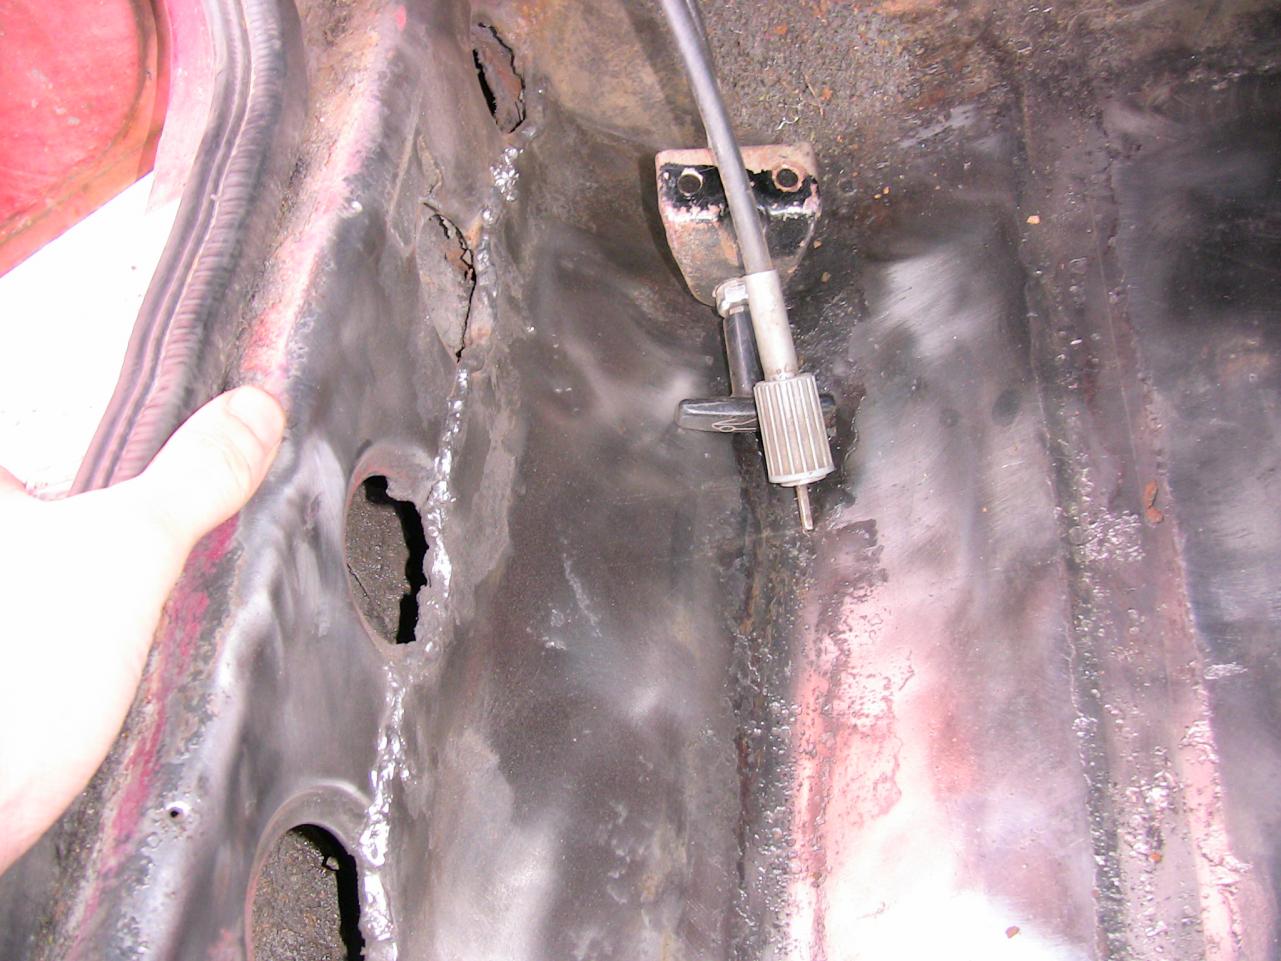
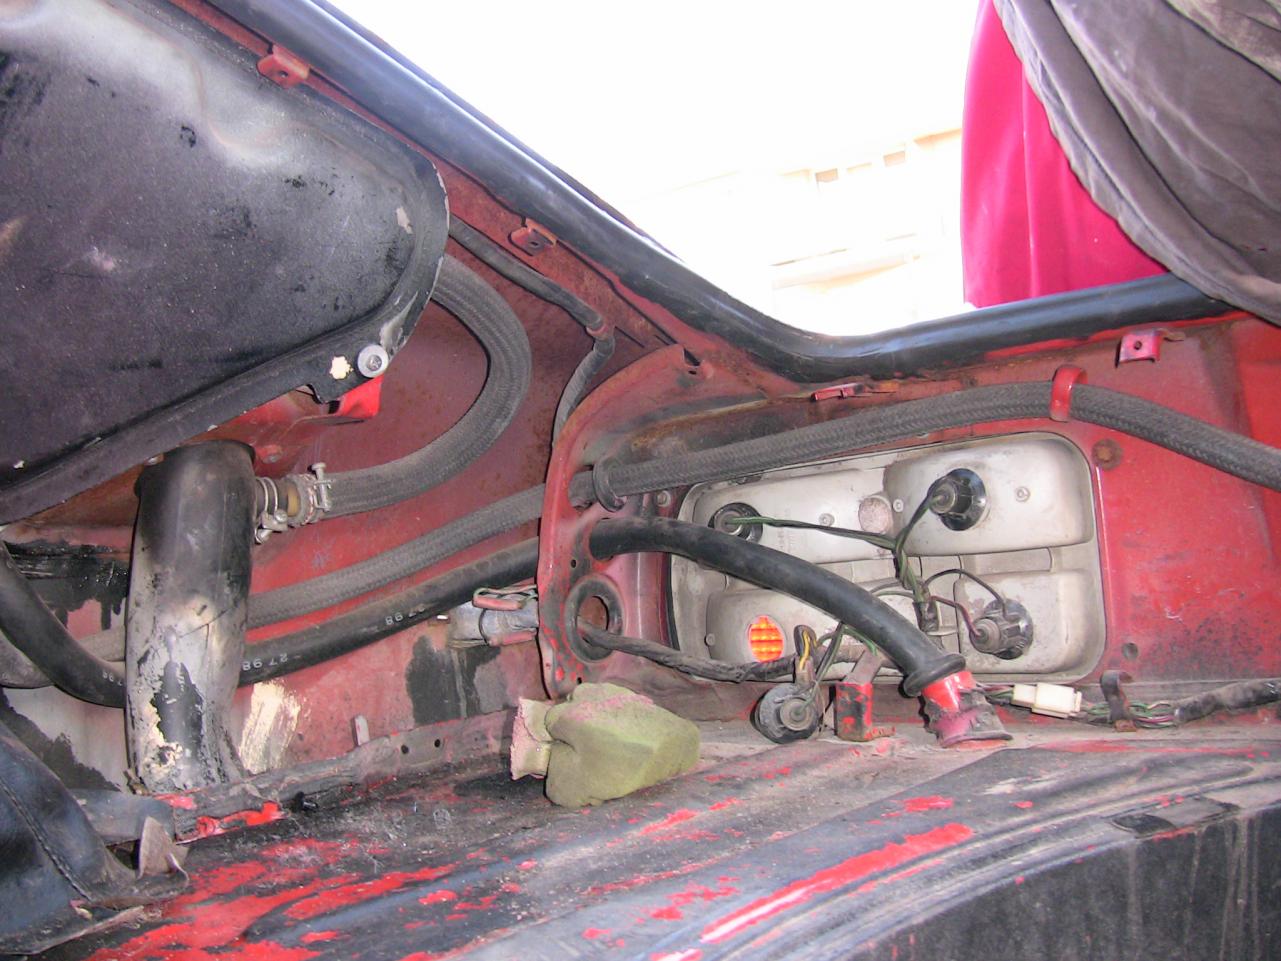
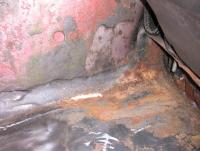
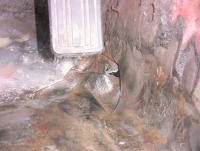
Holes near the taillights are to suck the fumes in, which has the effect of freeing up the passenger space of anything female. I just ordered 4 quarts of POR-15, for $160, two silver and 2 black. I also found some paint-over gloss black POT-15 topcoat. The two products should have a nice effect when I'm done. The inside of the dash, passenger dogleg, and eventually the rear hatch will also need to be done. Reccomendations on the hole? cut out a patch and weld it back in? I've never done any of this before, just seen pictures. Here's after some sanding... or cheap $30 drill + zapstrap "ON" + wire brush Also, starting pictures have been added to my second post.

-
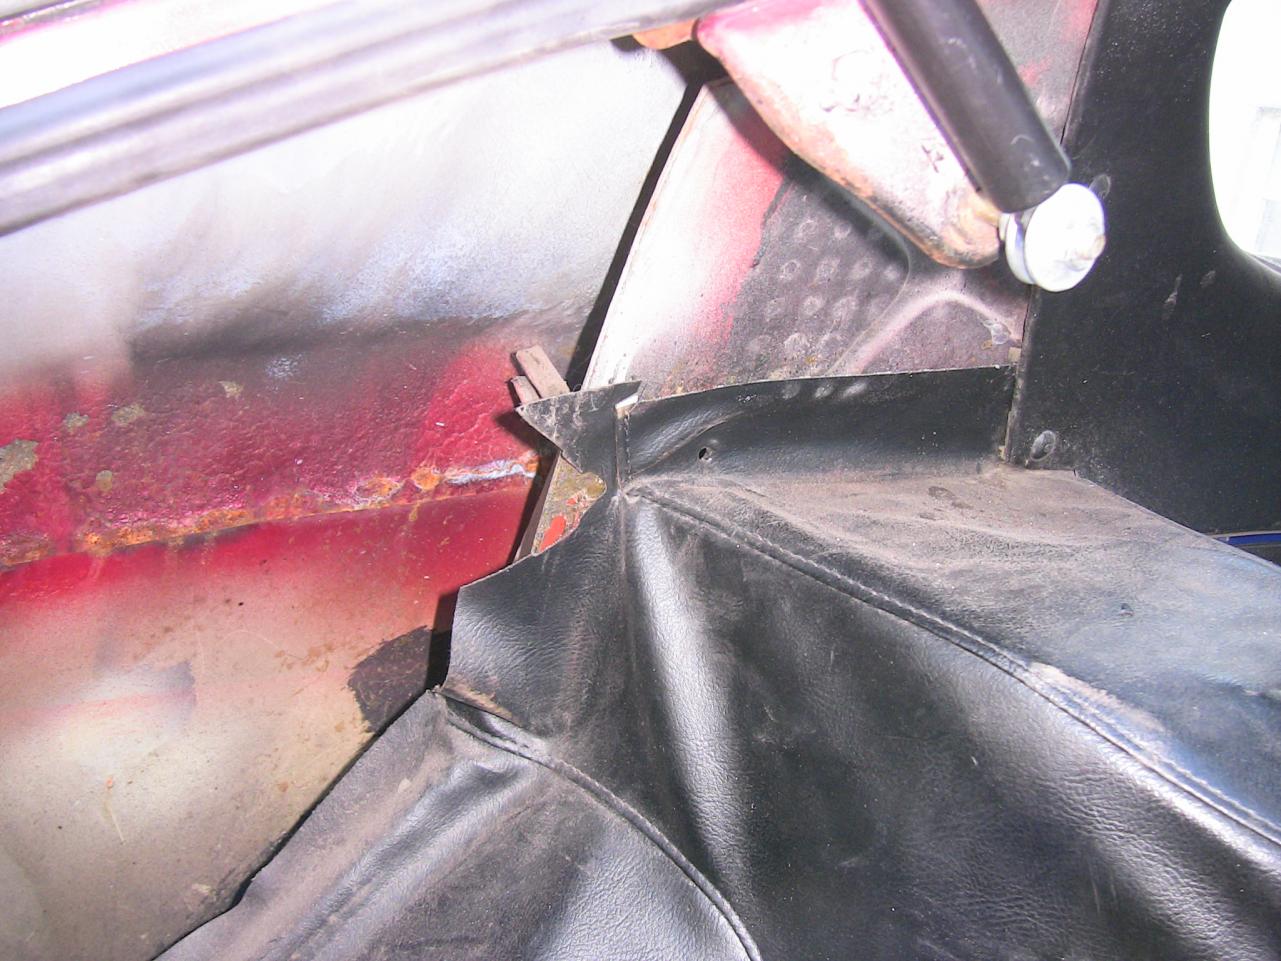
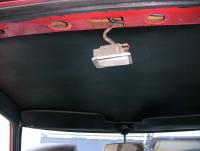
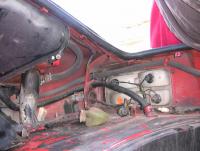
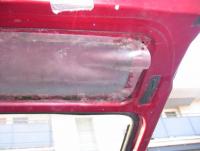
Then it would be +insulation and +carpets (thanks for that ebay carpet seller tip). I really don't mind waiting until I can do the job to what I believe will be absoutely top-notch. I also enjoy learning about it, and have many more tech articles to go through about the acoustics of a car. I'll admit, sometimes, part of me want's to say screw car audio... but the wife and I disagree in our music tastes. I can't stand club hits. Can't stand them. She won't let the hip be played in the house anymore. This means headphones. You think I should drill holes under the taillights? She doesn't like the way it smells. I know. Right, sound deadening... I was thinking of this. Seems overpriced, but I'm still looking for "the one", really. For now, "Second Skin Audio" makes many products, and is regarded as one of the best... as pricy as it is, it's not as bad as Dynamat Xtreme. http://www.secondskinaudio.com/ Edit for pictures. Anyone know a way to seal this plastic cover? Or where I can find one that is actually aftermarket? I tried to make a new one about 4 months ago, and it's coming apart already (picture 6) Also, what wires are supposed to go in the harness clamp on pic 8?


-
I'm exited. Happy for the car. It has been waiting, wondering what will become of it, wondering why it has been neglected for so long. I hope you two are happy together. Maybe your z will feel like mine did earlier today, "like a dog in the summer heat, finally having it's matted winter coat being brushed out".
-
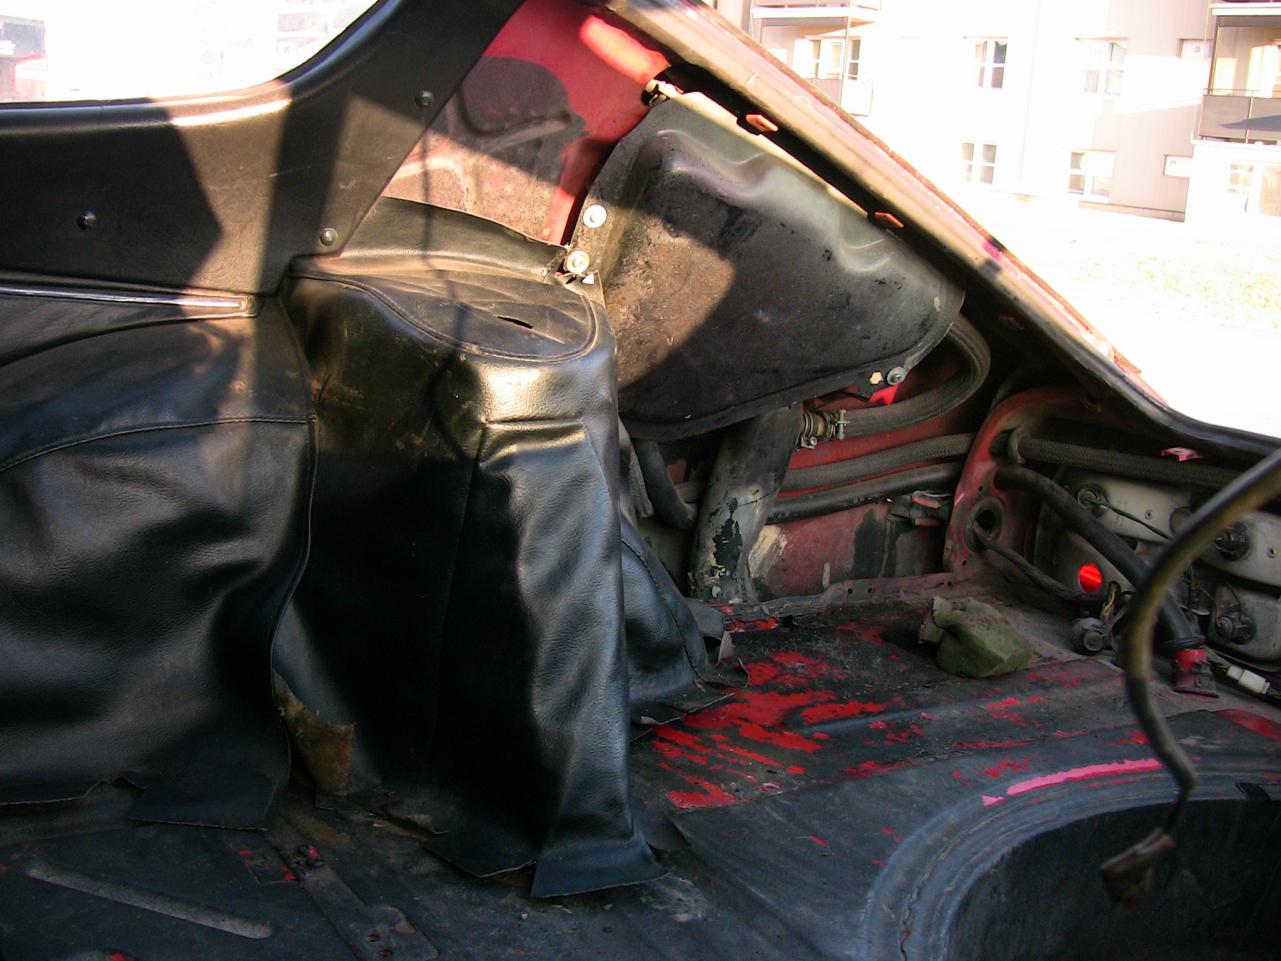
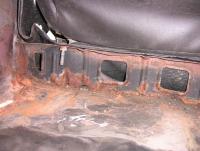
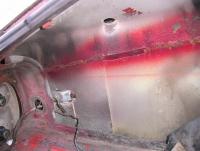
So my z sat outside, semi-neglected, in the driveway for 10 years. I've recently driven it across canada, and figure that it could use a rust check. It will be another two years before I graduate, recieve a rather large promotion, and am able to afford some nice sound deadening and insulation. I figure if this is going to be my daily driver in the summer, we better stop thinking about weight. I can buy a 240z to SCAA modify at a later date, and worry about fibre-junk and drilling my alumimum blots out at a later date. I have more important things to spend my $ on while in college (electrical, gas, and food [in that order]). But I can't leave what I know is certain to be rust, untreated and wet under the floor below me... so I decided to strip the interior to bare metal, then POR-15 it and live with a noisy interior for a couple years. The seat's can't come out until the new ones get here, but I got eager today and ripped the drivers side carpeting out, from in front of the seat to the firewall. The floor panal had two well-rusted grooves which facilitated easy removal of the bottom layer of sound deadening. Where it was not rusted below, I tried a drill with a wire head on it. I was using it to remove rust, but instead of melting, all the deadening came off in tiny plastic flakes. If you're having a hard time removing non-tacky deadening, the drill worked wonders for me. The rust is all surface (so far), and it's all going to be gone by the time I POR-15 it. I am wondering what to use overtop of the POR. It should be cheap, glossy, and preferably clear. I know the POR is supposed to be good by itself, but for some reason, I think a clear coat (or gloss finish) will prevent moisture more than the matte POR finish. What do you think?
-
Thanks. I probably wouldn't have even known for another two years. I genreally don't open things until it's time to install them. I ordered the same kit. How annoying. I just canceled the order. If it's already shipped... RTS! EDIT: There is a link over at Hybridz on this carpet kit. This guy did a decent job of installing them. I believe he added some trim to the edge of the carpets to keep them from fraying. http://forums.hybridz.org/index.php?/topic/66849-my-new-carpet-kit/page__st__20
-
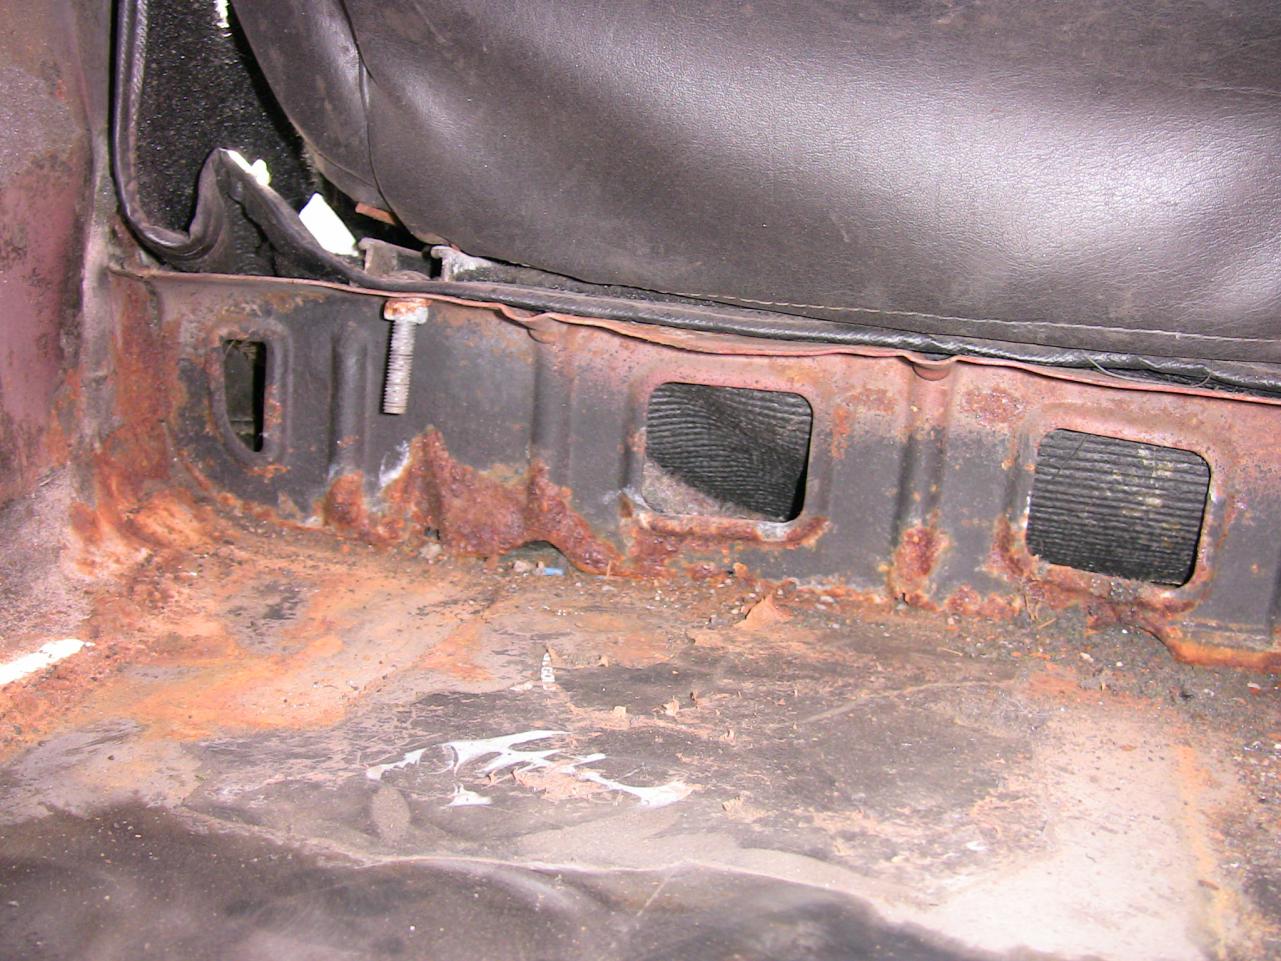
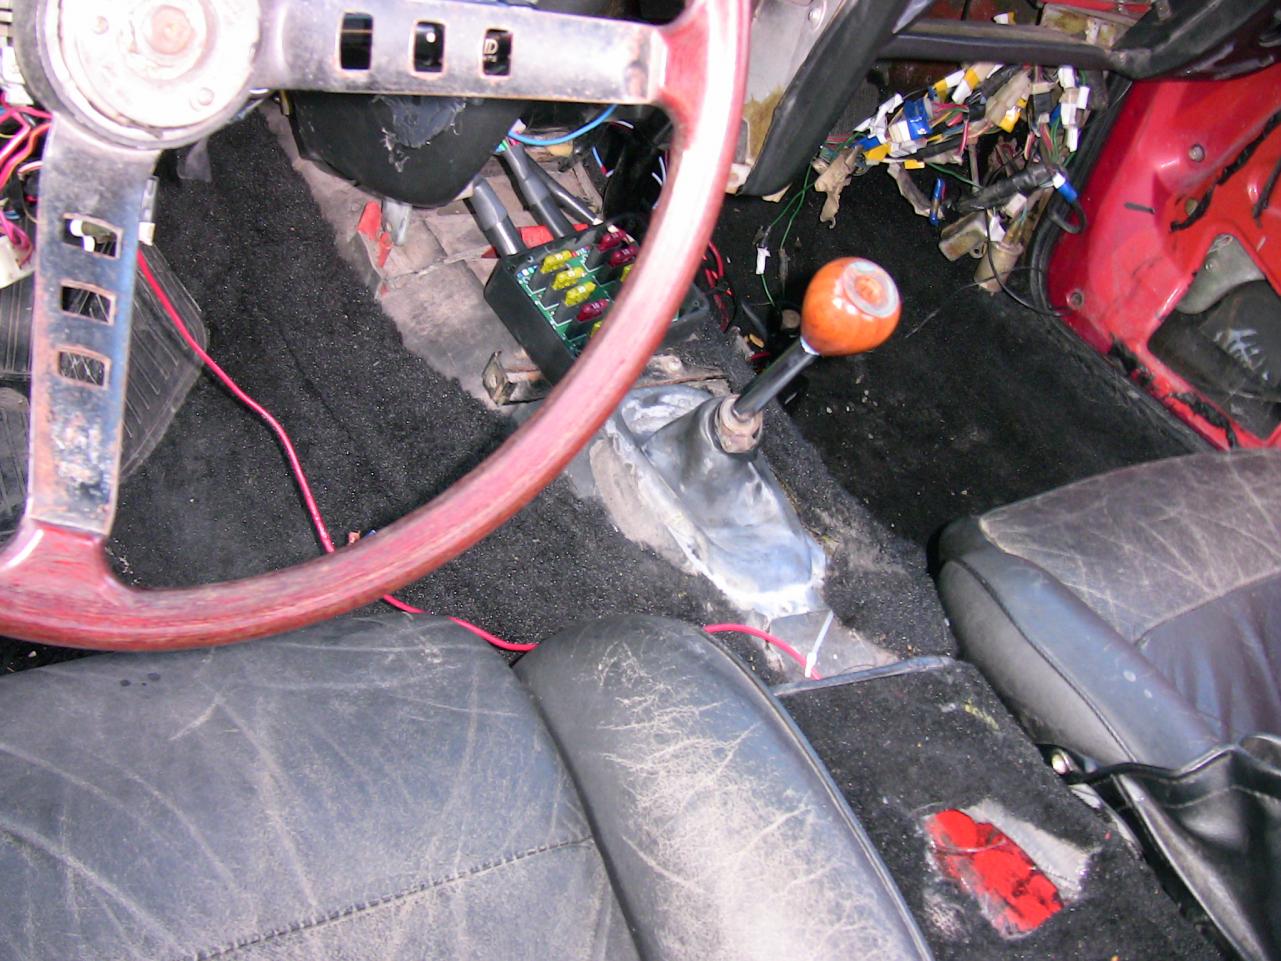
Yes, she has some issues. Until recently, I have had full control over my turn signals. The TS fuse blows upon insertion. I believe it is the 10A common. I swapped it for a 20A, and instead of one side going blinking, all of my lights blink. More of a dim, really. Headlights, taillights, interior/dash, fuel pump, everything dims. Hudge amperage draw while dimming, as shown by the dash indicator. Sometimes it starts by clicking really fast, quickly slowing in tempo, usually stopping by itself. I had one headlight for the longest time, and two high beams. Nothing now, and no blown fuses. It's probably a loose wire somewhere. Brake light fuse (20A) blows upon insertion. It worked until about a week ago. Anyone know a common location for this to short? Dash will come off shortly to change the tach, and get the (extensive) surface rust back there with POR-15. Seats coming off shortly, halfway through carpet removal and floorboard rust sanding (wire drill works wonders for this!) Everything should be really easy to get at, and I want to fix these electrical issues "for good". I can't wait to get at the bubbley and cracked dogleg. I had recent thoughts about doing the whole dash harness, until I found this thread http://www.classiczcars.com/forums/showthread.php?p=314100#post314100 I then ordered a "good dash harness" for $60 shipped. zcar dot com. The only problems I see are figuring out which wires to tape off (5spd L28 swap, other aftermarket items) I also ordered a bunch of OEM-style terminal plugs (pigtails?) from Vintage Connections, but also want some really good all-weather interconnects for the engine bay (distributor, starter, etc) and anything else I feel like using something special for. Does anyone know if there are better connections out there than these to use? I am going to call their office tomorrow to find a local distributor. http://grote.com/cgi-bin/goc/goc.cgi?product_number=83-6536 http://grote.com/cgi-bin/goc/goc.cgi?product_number=83-6503 Think this kit compares to that second link? http://www.calcentron.com/Pages/fusion_solder_heat_shrink/fusion_solder_heat_shrink.html Grote also offer "solder and seal", and "crimp, solder, and seal" terminal kits. Anyone have exprience with these over the built-in shrinkwrap style? FYI, Dave, the taillight issue was the green-white wire in the 6-prong connector under the passenger's feet.
-
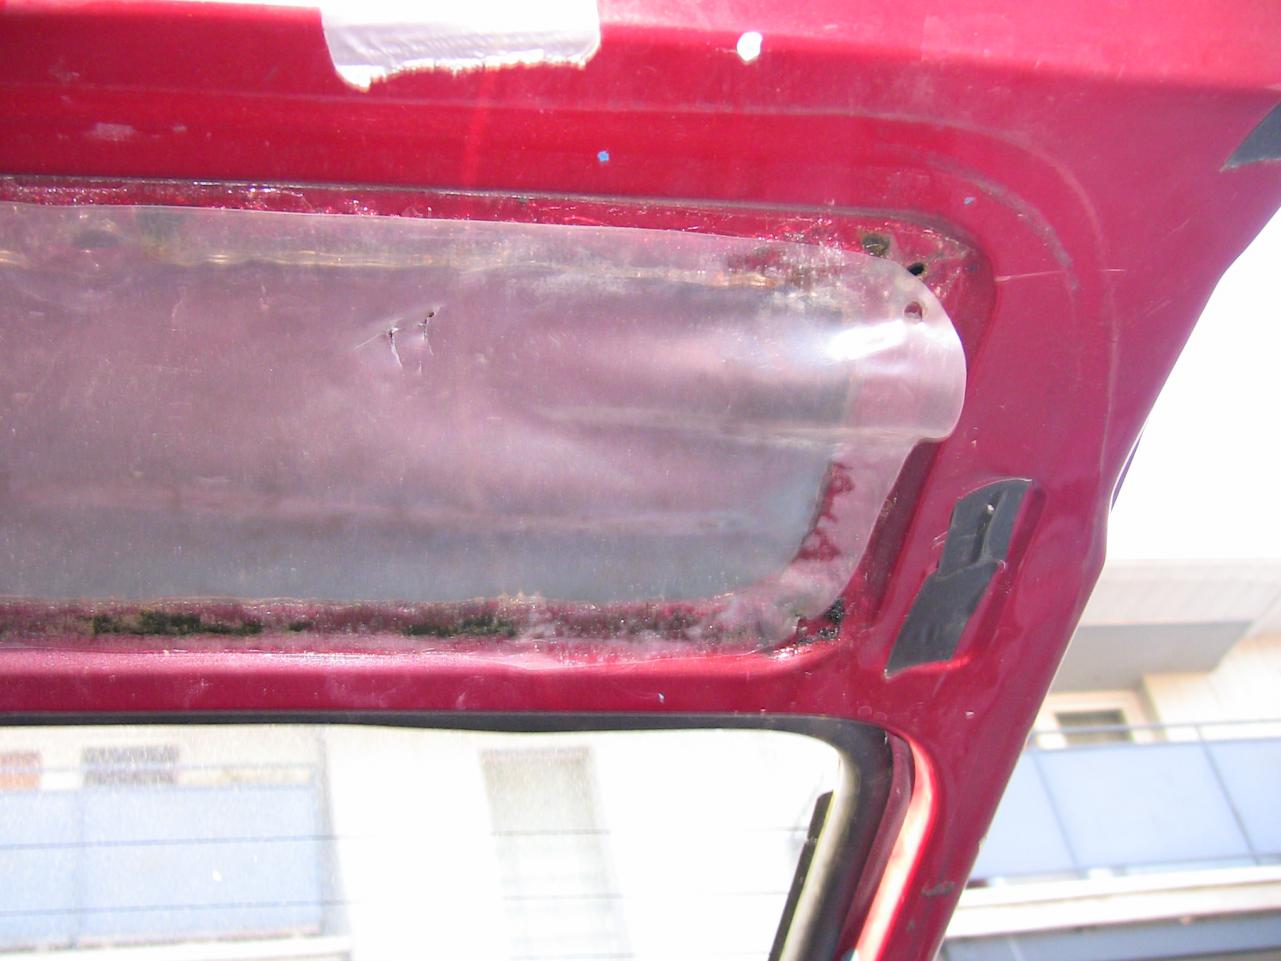
I can now shut my passenger door without worrying about shattering the glass, if that says anything. I have some "minor" allignment issues, probably caused by prepetually having to slam my door. I can also shut it without having to push it "all the way". I can slam from afar, without worrying about it bouncing back. Also, remember that this kit does not come with the middle or far right pieces (in the previous picture). I'm not sure what it's called, but the spring was rock solid on the psngr side. Mine was rusted and wedged with little rocks. Some love made it spring again. That was the first actual part that I installed the day it arrived. Would have taken 15min for both sides, had it not been for the siezed spring. My doors were a 6-7/10 on the PITA factor. They are now a 4 (excluding locks and psngr exterior latch). EDIT: Contacted the seller. He think's they are iron. Edit: The weatherstripping on my 240z is now about 6 months old now. Fresh, but past the break-in period. The door (drivers was a 280 door) was replaced with a perfect 240z door (Previous Owner). Shutting the doors was still a sight to see. It looks like personally, I just need to look at allignment and the "sticky" hinge part on the door. I'm sure it sprang back to it's orginial position after being turned when it was new. I'm going to get these doors to close properly, and damned if I can't do it on a budget.
-
They can be replaced, and you can have them keyed to match the ignition. Then "just install them". There is also a seal that goes behind the lock that you might consider ordering with the locks. NOS Lock sets are insanely expensive to buy. You could take them from a parts car (and re-key them), or I'm sure somebody makes an aftermarket replacement. This guy claims his will fit: http://cgi.ebay.ca/DATSUN-510-240Z-260Z-280Z-1200-DOOR-LOCKS-WITH-KEYS-be_W0QQitemZ310205857981QQcmdZViewItemQQptZMotors_Car_Truck_Parts_Accessories?hash=item4839b5c0bd
-
I ordered the ebay strikers last week. They arrived via USPS First Class today. Looks solid, I paid $37. Looks/feels like new cast iron. Spring on the back is new. No mounting hardware, this is just the striker. Hopefully no more slamming the doors? Or will there be more of the continous allignment issue... I bought from seller "vehiclepartsunlimited". Without asking, he marked the price as $6, and they came right to the apartment.
-
Two 12" in a z? You're crazy. How much improvement do you expect over 1) 12"? I'm also going to fibreglass a rear sub enclosure. Should be eaiser than the front kick pods. That resin is expensive. You might convince me to find a second 12" if you're not careful. Can I ask you to take the same detail with the front kicks? I'm about to get my first expierence with fibreglass this summer. PS, you know you could have just taken the heater core out and put your amps there... just make sure to have what the English would have called a "Driving Blanket", for those colder (all) nights. Really nice writeup, and I think the amps will juust barely hide from sight when the rear hatch closes. I remember dad cursing whoever stole the last set of kick pods from this car. Worthless to anyone else, but perfect for the z. Edit: I also didn't know the red 240 had tinted windows. Do they just look that way in the picture (Post No. 43)?
-
-
Just wanted to add, that many hi-fi audio stores mark the little products up ridiculously. Jewlery store markup. Anyways, audio companies (ie Ph.Gold) sell things like battery terminals, power distribution/split blocks, inline fuses, etc. for insane prices. Try going to marine or electric/circuitry stores for these kind of items. I recently found hi-fi $5 inline fuses, $7 power terminals, and $8 battery clamps (all gold-plated) online. I'd look closer to home (this is from a electronic kit store local to me), but in case you can't... http://store.qkits.com/category.cfm/CAR or http://www.qkits.com Dave, can you comment on whether if the LED strips they sell would perform as well as your cathode-tube floor lighting install? I'm thinking of copying you, but don't trust myself (or my friends) around fragile equipment. I'm not as familiar as you when it comes to LEDs. http://store.qkits.com/moreinfo.cfm/LDB1-HS3018AB
-
Just realized this thread is 6 years old. Crane and Mallory also make adaptors.
-
I'm using the Crane xr700, but triggered by an HI-6 box. Distributor is from Mallory, only I've forgotten where along the line I needed the tach adaptor. Someone's got to know what I was talking about with the current sensing tach that does not work with the newer (pulse? magnetic?) imput. EDIT: I looked up the crane tach adaptor because this was bugging me. "...for use with pulse or current sensing tachometers that will not function correctly when connected to..." a magnetic output.
-
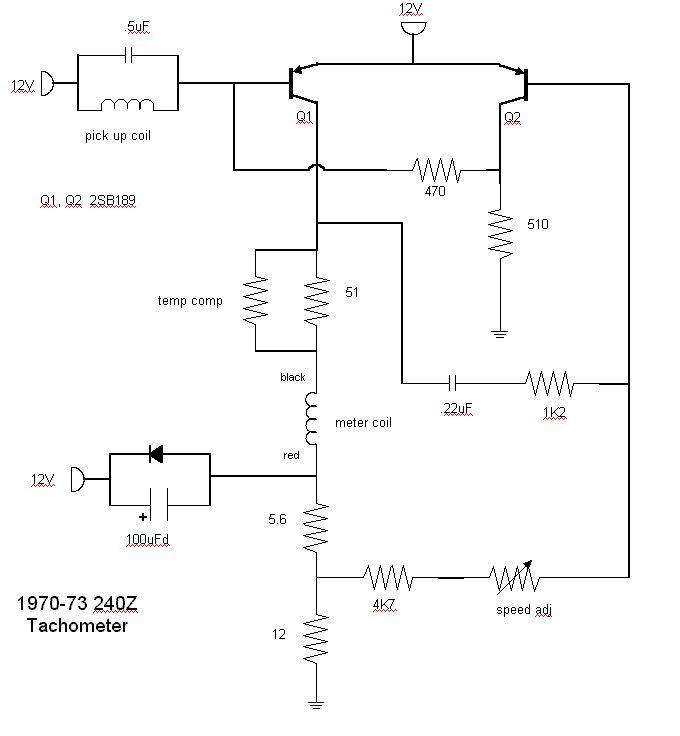
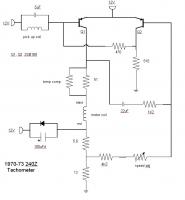
I'm sure someone else can clarify, but the 240z tach is incompatible with many after market ignitions (and distributors?). Something to do with a current sensing tach and an output from the ignition that is designed for a later system. Magnetic comes to mind. I would actually like to know more on this myself. I needed a tach adaptor after the HI-6 and unilite. If his system is stock, and he's willing to take the dash off himself to change the old tach out... there is enough information on this site to help him rebuild his old tach. Here's some info on what usually fails and a wireing diagaram. Mine still doesn't work. The tach is beside me. I'll post pictures of the rebuild in a new thread after I finish.
-
Crane xr700 manual http://cranecams.com/pdf/90002000a.pdf (Crane is back in business, by the way. Their customer support is open.) 1978 (280z) wireing diagaram attached. With these two documents you should be able to figure out your wireing issues. Are you using an aftermarket distributor, or a Capacative Discharge (e.g. HI-6 or MSD) ignition box with this unit? This will affect which wires go where from the xr700. Found this awhile ago and saved it in "wireing diagarams"... just because you never know. 78-280Z_wiring.zip
-
I fondly remember my first lessons on how to drive stick, from the same 240 that is my current daily driver (I walk most places in the winter). my opinion Some new wires, sanding out the rust, letting little projects get out of hand (ie painting) etc... even electrical issues, it's all part of the process. Slightly dented fenders can't be hard to replace, the dash looks new after a nice full dash cap, and even a clock/tach that doesn't work (my current little project) can all be done with a little intuitive thinking and a good set of tools. A good frame is, of course, important... but just about everything can be fixed. Don't get me wrong -- I started with the least daunting of tasks myself (removal of old weatherstripping). Two days ago I was all excited after making my first actual creation from sheet metal -- A pair of flat oval brackets to mate something to the front bumper. Soon enough I'm hoping to go through everything from brake bleeding to body rust to fibreglasing. Edit - body rust is currently hidden by paint, fibreglass=speakers. It's not as "bad" as that last sentence sounds. Sure, there are days when the car doesn't run. It does run most of the time, and sometimes you can even plan out when it won't be running. Has it ever left me stranded? Absoutely. The cost? Being an ongoing project, you can pick the cheaper and lenghty things (clock/tach rebuild, cleaning wireing terminals) when finances are tight... and save the more expensive (gauges, interior trim, fibreglass resin) for when the budget sees a little room to expand. Lots of love, too. It actually runs probably 95% of the time I want/need it to. Maybe not perfectly, but working out those quarks is... can I say... part of the experience? I really understand what you mean by wanting to be able to drive it off the lot and drive it home... just realize the first thing you are going to be doing after inspecting it is (probably) ordering parts. It's addictive, watch out. It's really great that you have a seperate daily driver. As much as I love mine, there were days when I just wished it worked. No quarks in the powerband, no slamming the doors, no keeping the window rollers in the centre console. Then again, after I worked out the powerband, I really was able to appreciate the torque of an L6. After fixing the passenger door so it doesn't slam, I notice it every time it closes. And I'm sure that after I fix the tach, I'll certainly appreciate having one a whole lot more. I'm not exactly sure what I'm trying to say, maybe that I absoutely believe in "The Journey" you will take with your car, and not the final result. Really, as the owner and mechanic, only you will be able to really appreciate and love it on it's way. I say this as you seem that you want this journey. Some don't, or have already gone through it, or are willing to pay $20k for an amazing z. Their cars look the true 98 points in show. But to me, there's really something to be said about the "Amateur" approach in loving your z. Frank, from CTZCC, said to me awhile ago, "It's a weird phenomenon, but many Z people would prefer to see a lovingly but well-used and driving Z than one that is crated around and taken to shows [paraphrase]". I'm pretty new myself, and the only advise I can really offer is to make sure the engine is good. Engine work is expensive and not something I was willing to try my hand at. Edit... and "there's the perfect tool for every job". Quoting my grandfather, a freelance millwright. If it doesn't feel right with the tools you have, there is a tool designed for exactly the job you are trying to do. Edit 2.0 And buy a bunch of the nice big ziplock bags. Label everything that comes off. You think you will remember, but you will froget. I apologize for spelling. I need to get back to this psych asignment.
-
EDIT: I am the new owner tomb's 240z. Below was my route to solving the problem. I am his son. Well... you start with bypassing the HI-6 to make sure the box is the problem. It might runs well, but will give some spark issues after a few miles. Then go to the plugs and distributor, because that got to be the next probable thing to go wrong. Change the plug wires, just in case. If things don't immideatly get better, change the fuel pump, filter, and oil. Just in case. You are then free to go on limping with di-electrical grease for a bit, changing the plugs daily, before you think... "It's gotta be those carbs... right? I mean, the filters were dirty, so why not?" So you spend a few days taking the triple webers off, making sure all the tubes are the same, no float chamber issues, etc... but they will all be pretty clean, and you are free to scratch your head for a bit. Hey, what if some of the equipment was faulty? Well... then buying replacement's would be a waste, so I advise you to upgrade it all. That way, it the upgraded part wasn't the problem, you can write it off as a "peformance upgrade". New (used) HI-6 and a Mallory Unilite should do the trick. Unfortunatly, the HI-6 will have it's wires pulled, and the unilite won't spin. You should then kick yourself for buying a used ignition box, and actually cough up the dough for a new one. You are then free to learn firsthand that rust isin't just the bane of zcars, but also for distributors. After many pictures, hours of intutitive trial-and-error, and the experience of "Oh F***, I frogot to make markings before taking the old distributor off", you're ready to get it running again. Replace the fuel pump again just for good measure. It still won't be right, so play with every possible combination of fuel, idle, and advance you can think of. Then decide that it must be the carbs, and send it to the shop to have somebody who knows more than you look at it. They will call you in a few days and tell you you need a full top-end engine rebuild. Kick yourself, because after thinking it "must be the carbs" all along... it wasn't. Sorry for reviving this thread, but it really needed an ansewer. Maybe it now belongs in the "Open z-car discussion" fourm.
-
If you don't like dealing with EBay... I just emailed Norm at zeddsaver. Complete new striker set (listed as "more info coming soon"), is $185(CDN) for both sides. The parts page is at http://www.zeddsaver.com/interior.html And the picture:
-
I'm interested in the exact same seller. The one in the UK (listed in pounds), right? I sent him a message about the strikers earlier today. Thouse with EBay stores are usually willing to deal outside of EBay and Paypal to avoid the associated fees, and give you a lower base price. Might even send it to you as a gift... Also... if your strikers are only a "little worn", take a look at the thread below. I got my passenger side just about perfect by using his method. The dremel slipped on the driver's side, and I took a chunk out of the striker. I guess I could add a little more metal (welding), but by that time it will probably be beyond recognition. I don't trust my welding skills with something so small. http://forums.hybridz.org/index.php?/topic/36105-fixed-the-door-slaming-issue/?
-
There is a lot of info on the brake upgrades over at Hybridz. A great start is the Brake/Wheels/Suspension FAQ section, under: http://forums.hybridz.org/index.php?/topic/38566-faq-hyperlinked-table-of-contents/.