Terrapin Z
Supporting Member
-
Joined
-
Last visited
Everything posted by Terrapin Z
-
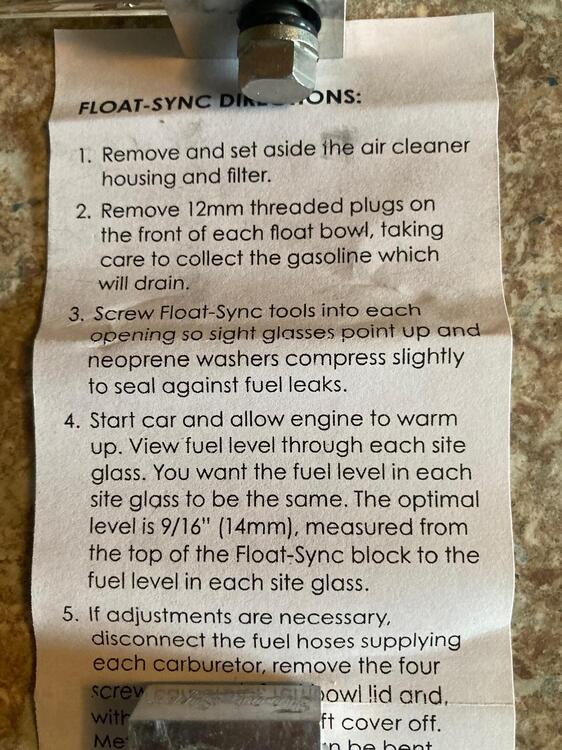
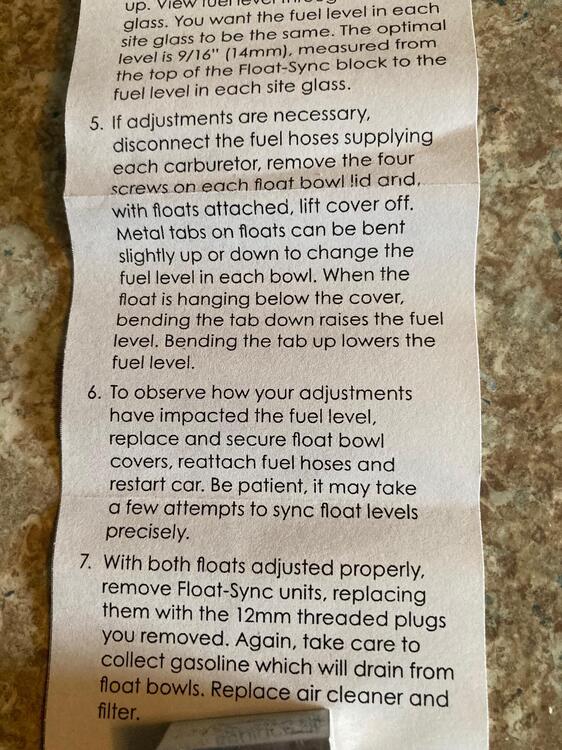
I read the instruction, you should have these instructions too if you have the sync kit. "More bending?" I have no idea as you don't show the measurement. "Leave as is?" I have no idea, you have to decide. "Problems?" I have no idea, There is a lot more to the car than just a float adjustment. In case you lost your instructions.....
-
-
I take a 14mm hex head bolt and lay it on the sync block and adjust until the fuel in the "straw" is level with the bolt head. Bend until that level is reached.
-
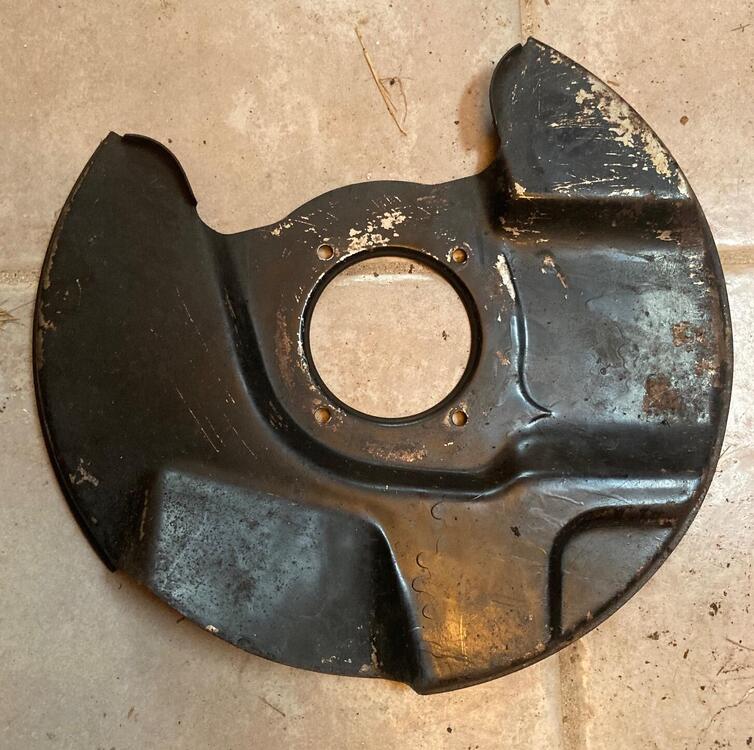
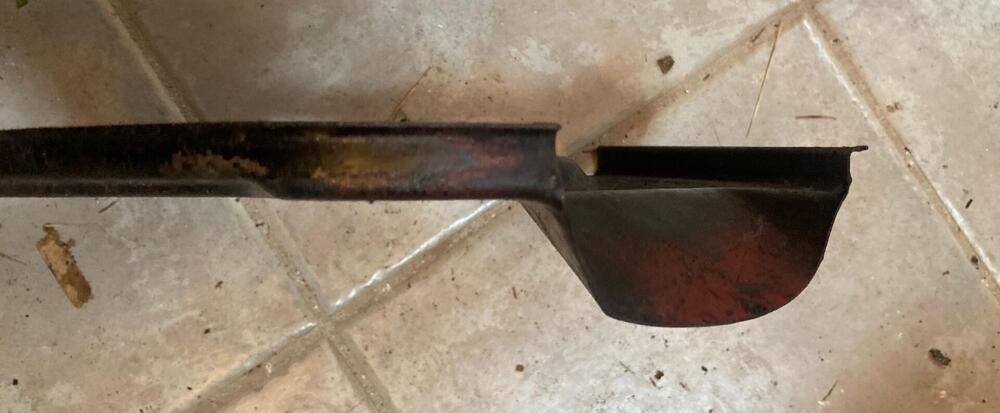
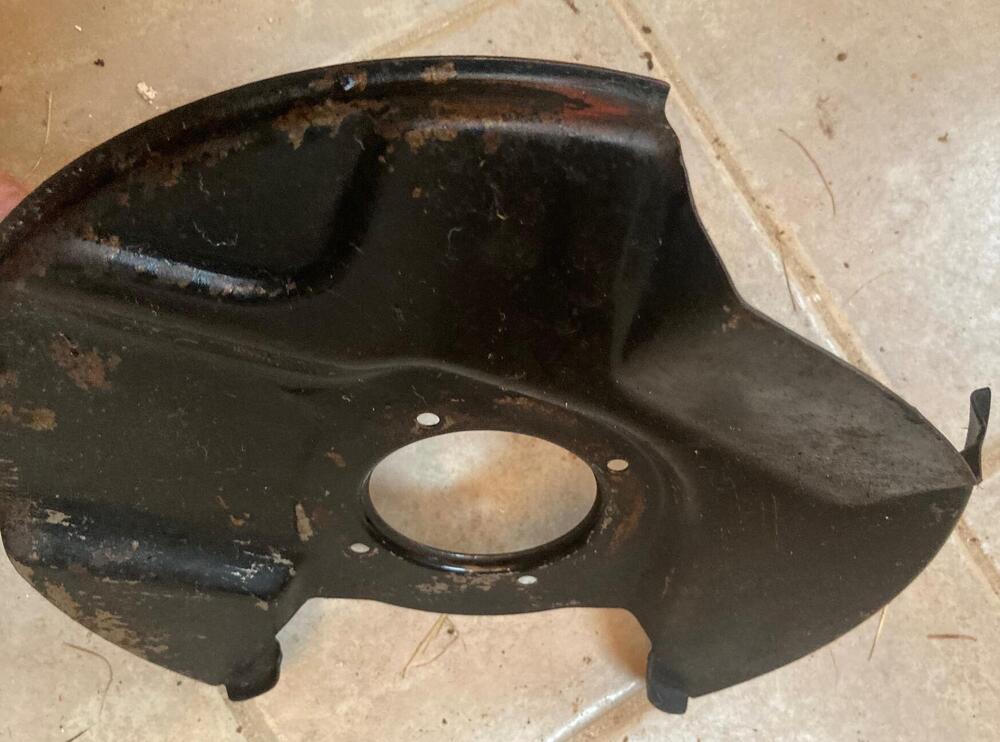
The early cars had a scoop built in to the backing plate. but later flattened that out and settled on the ones you have now. The scoop might have been worse for catching rocks and debris. Trapping it against the disc.
-
-
My float sync instructions said 9/16"(14mm) from the top of the sync block to the fuel level in the tube. Keep adjusting until that level is obtained or it will not idle/run correctly.

-
It could be either issue, the valve not sealing up or the float not rising, check both.
-
-
-
-
Still available from Nissan as well. 25251-37700
-
Still just a mash up for all the S30 years to me. Angles.....


-
The first are two 280Z towers, first a 78 and then a 75. They both have the single angle slope where the seatbelt mounts. The next set are both from 73' 240Z's and look just like the ones in the China car. Your early car pic's do look a little different with the 3 hole support.


-
240Z strut mounts, they have two angles, whereas the 280 is just one angle. I looked at my parts cars just now. 280 tail light holes. No fake floor mounts. Looks like a full size spare hole indeed. 280 hood vents. 240 rear bumper indents. Kind of a mash up.
-
The local Olympia WA dealer has a Datsun tab in their website that lists a lot of still available parts. I still look up parts on CPM to get my own numbers then enter them in the search window. It always surprises me what is still available. https://www.nissanparts.cc/c-datsun-51
-
Aside from my "all the time" tool kit, which includes some basics like bailing wire, zip ties, a bag of nuts and bolts, fuses, and a length of para cord. I have a Alt. belt, a cap and rotor, points and condenser, a set of plugs. Then if I have been working on any particular part I might bring related items for that. I.E. I rebuilt a 606.52 distributor to replace my 612.52, So for a 200 mile drive I led for my Z club last weekend, I had the old distributor and parts and tools related to that. Including a timing light. No issues arose on the drive. If everything seems to be working I will remove those items for future drives. I always have my AAA card though. 😅
-
Dean at Datsunparts does sell nice stuff and even works with shops that will make parts to his spec's. Mostly for Roadsters, but some parts for Z's as well. I would agree that these are new.
-
For what it is worth I checked my 78 280Z dash and did not see anything like those brackets.
-
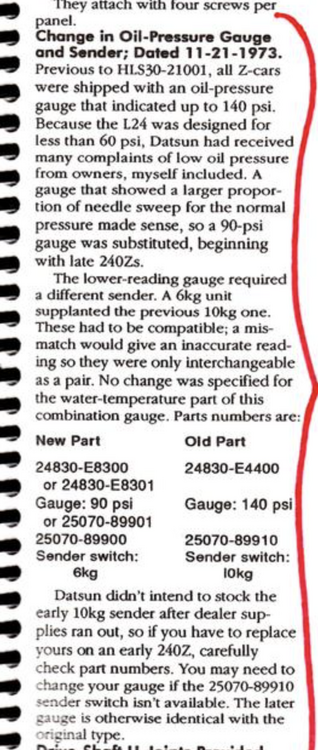
You are correct, it looks like upto Vin 21001 had the 140 gauge and sender.
-
CB radio mount for the glovebox??🤣😂
-
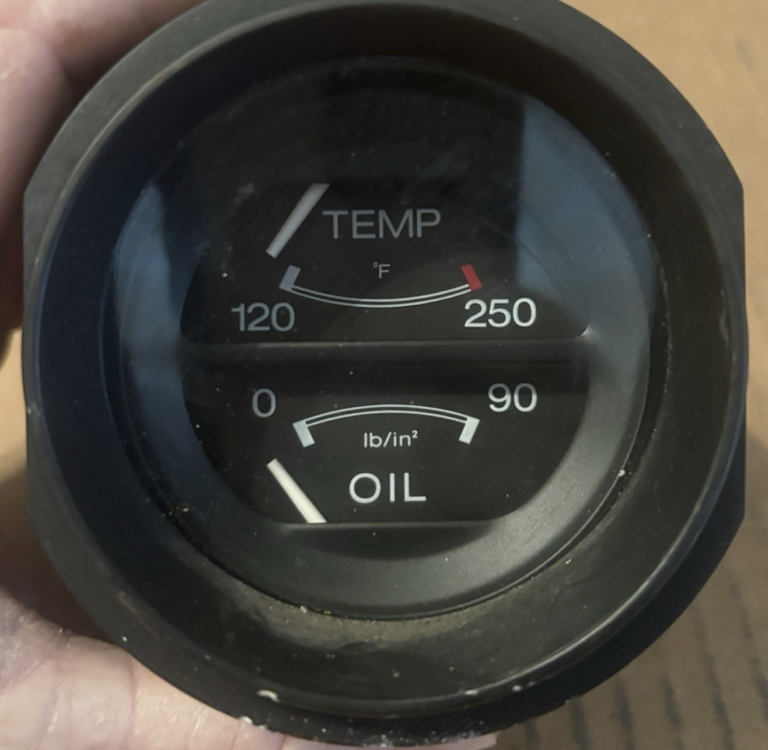
Only the early 70 cars went to 140 (10 bar) everything after that was 90 (6 bar) Here is the other font I found so far. 77-78 280Z. The temp starts at 120, no mid line either.
-
As @Zed Head stated there were different fonts on the gauges. I see at least two in my stock. The earlier cars seem to have a tall narrow "O" for the word oil. Whereas the later cars 280's look to have a more round "O" The other letters are different too I just used the O as an example. There maybe more differences in the early cars, so If you are interested in a replacement, perhaps you can snap a pic of your gauge to compare.
-
I looked at my gauges and the are paired as Temp / Oil Pressure on the left of the three. The middle is Amp / and Fuel. The Right side being the clock. You put the Temp and Fuel together. Can you clarify? I may have some used gauges I can part with.
-
To check it you would need to pull the master off. Then dig the spring/locking washer out. Carefully pull the push rod / piston out and see if the round disc is still on the rod or in the hole where the plunger sits. If it has fallen off you then have to pull the whole booster and shake it for confirmation of the disc being in there. If it is keep shaking and check the plunger hole till you can see it and grab it with needle nose pliers. I glued mine to the plunger to avoid future issues. When in the proper place it won't move. just when the plunger moves outward do these issues occur. I had a rebuilt booster from MSA do this before installation and it took a while to figure out. The pushrod "nut" on my new booster was too short and I had to swap out my old long "nut" to even get the rod to reach the M/C. You can see the longer "nut" in this picture, as well as how the reaction disc sits (or falls off). I hope you can get this resolved.

-
When you started mentioning the brake pushrod, my mind went to the reaction disc. If it has dislodged you would have some free play there. Just another thought.....