Everything posted by Mike W
-
Thinking of selling my Z... I have the GTV bug REALLY BAD
No way. Can't happen. Just look at the smile the Z car brings to your face!! Not denying the need for an Alfa, but not at the expense of the Z. Mike.
-
hole in floor next to fuse box?
I'm 95% sure that is a drain for the A/C system. On my car, there was a hose running through there, with a sealed grommet of course to keep out weather. My A/C was no longer functional so when I removed it from the car I just capped this off with a rubber plug sealed with some sort of weatherproofing. Hope that helps. Mike.
-
New gent from Fort Hood TX
Jay, Welcome to the Z club and it certainly looks like you scored a really nice ride. And I also thank you for your contribution to our nation's security. If you are up in Killeen / Fort Hood, I don't think you are that far from Austin and so might want to consider hooking up with some of us from the Capital Z of Texas club (CZOT for short). Although we welcome Z's of any vintage to the club, it is dominated today by the older S30's and so you have a huge wealth of knowledge on the care and feeding of the older Z cars. You can check out the club at czot.org, but we have a pretty good cross section of activities including monthly drives, wrenching days, show and shines, etc. We are also fortunate to have a Datsun / Nissan specialty shop in Austin called the Austin Z Clinic. The owner is pretty active in the club and also provides great services especially on the older models. He has also done many restorations and so is great resource to have locally as well. Hope to see you in Austin soon and to checking out your new Z. Mike.
-
Best Way to Paint Interior Silver Trim & Lettering
I have tried numerous approaches to replacing the silver / chrome on the door strips and so will let everyone know what I have done which will hopefully save you some time and money. First, the strips will need to be really clean (they look like blue plastic once the silver has been removed). This will help the adhesion of the material. You will also need a really sharp and accurate exacto knife to get the final cut correct (as well as a really steady hand). My first attempt at this was to use the chrome trim tape which I purchased from a local Advanced Auto Parts. It definitely had the right look but the problem was that it was too stiff and when I tried to bend it over the radius of the strip, it just peeled back and laid flat on top of the radius. Attempt 1 - failure. My second attempt was to use adhesive backed mylar tape. I purchased a number of different rolls of this stuff including one from 3M. Unfortunately, the same thing happened as with the chrome tape, although it was not as severe. I purchased rolls that were approximately the right width so that I did not have to cut as much. Initially the tape laid down pretty well over the radius, but within about 3-5 minutes it also started peeling up in places and did not look good. Both brands of tape that I used had similar results so the 3M did not seem to perform any better (although I had high hopes for this brand). I believe the thickness of the tape that I used was 2 mil. Attempt 2 - failure. I then decided that the adhesive on the tapes was not strong enough, so I purchased a roll of silver mylar (typically used in greenhouses for intensifying the sunlight) that was also 2 mils in thickness. I masked off the strips from the door panel so only the strips were showing and used the best 3M contact spray adhesive I could find. I cut strips from the large roll that were approx. the correct width so that I could minimize cutting. Unfortunately the results were the same in that the adhesive was not strong enough to hold the mylar over the radius of the strip. On top of that using spray glue was very messy and did not produce results that were any better than my first 2 attempts. Attempt 3 - failure. So on to attempt 4 where I used the shiniest aluminum tape I could find. The aluminum tape is very pliable and moldable and so I did not have the same peeling issues I had with the other attempts. It laid down nicely and stayed put. You need to have a very steady hand to make the final trim cuts as it is easy to go astray and cut into the strips themselves. However, this produced the best results by far and from a few feet away you cannot tell the difference from the original. I will also warn you that this tape sticks so well, it is very difficult to remove if you make a mistake. I will also say that you basically get one chance to get it down right because if you "kink" the tape as you are laying it over the strip you will likely have to start over again. Ask me how I know that. Attempt 4 - success. So this was a very tedious process but in the end the aluminum tape produced the best results from my experience. About the only other thought I had, which I did not try, was to go with mylar tape that was thinner (ie 1 mil) which might adhere more easily and remain in place over the radius of the strip. Hope this helps everyone. If you have other questions just let me know. Mike.
-
Retrosound troubles again?
Curtball, I'm in austin but my son actually lives in Dallas and he has done a lot of work on the car with me. Would be cool to hook up by phone so I can give you all of the details on my stereo install as well as anything else you may be interested in. Send me a PM and we can exchange numbers and set up a time to talk. Mike.
-
Cooling fans
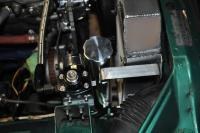
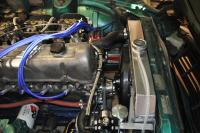
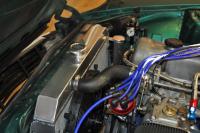
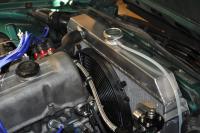
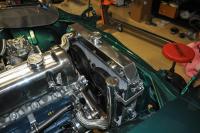
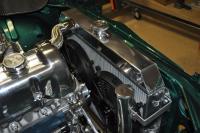
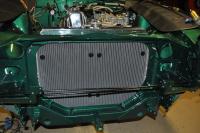
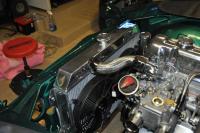
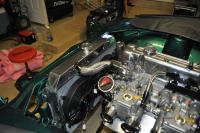
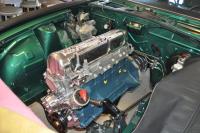
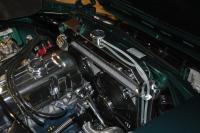
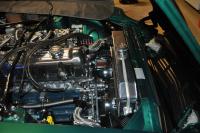
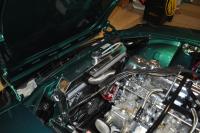
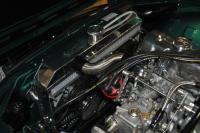
So I've received a number of requests for some pictures, so here goes. First some from the phase 1 attempt. Pay particular attention to the welds as well as the small brackets down the passenger side of the radiator, which I figured was to hold an overflow tube in place. Unfortunately I do not have a picture of the controller that I used, but I believe that it was from Painless Performance. Worked well and had an adjustable turn on control, but just didn't like the way the temp sensor attached through the fins of the radiator. OK. Next ones are from phase 2. I made this change when I was in the middle of an engine / body overhaul so it was a good time to do it. This one was a polished Champion, but I also believe that both Champion as well as American Eagle (first phase) are from the same company and are all made in Asia. This one has a slightly better build quality and certainly the polish makes it look better, but I can tell you for sure that the cooling capacity was no better than the phase one install. Also notice that I went to dual generic fans which I was hoping would cool better than the single 16" I used in phase 1 just given the amount of surface area covered, but no dice. I don't have a picture of the Dakota controller, but I ended up mounting it my glove box so the display would be accessible while in the car (for troubleshooting purposes and to keep it out of the heat of the engine bay). However, the last picture shows on the engine block where I removed a plug towards the back of the block near the firewall and replaced it with a temp sensor that is actually in the water jacket. This made for a nice clean install with no more probes through my radiator. On to phase 3 and Wizard. So as I mentioned earlier, I just stumbled on this company and actually found a part for a 280Z. Proceeded to call them and believe that I spoke to one of their engineers named Tom. He proceeded to tell me about why their radiators were superior to the cheaper ones from Asia and that they could easily do custom work as well, including polishing. When I explained some of the things I wanted change from my current setup, he even told me that the "tie wrap" mounting approach for fans actually voids the warranty on their radiators. The last picture is the final drawing (open it as PDF) I received from Wizard before they began work. It shows their attention to engineering detail as well as their focus on customer satisfaction. Notice the welds and how uniform they are. Notice the custom bracket they designed for my fans (and polished as well). Also notice the Spal fans (which are actually from Be Cool, but they only use fans from Spal). These things are like turbines when they turn on, noticeably more powerful than the generic ones these replaced. Finally, notice the brackets that I requested be attached down the side for my overflow tube. The unit is a piece of art and it cools like you can't believe. I can be in stopped traffic in 105 degree weather, will hear the fans kick in and will actually watch the temp come down. Anyway, judge for yourself. M Wodopian 260z(drawing) (3).pdf Hope this helps anyone looking at a cooling upgrade. If you have other questions, just let me know. Mike.
-
Cooling fans
So I have been down a number of these paths WRT aluminum radiators as well as electric fans. I'll share with you what I have experienced. Bear in mind that I live in Texas and so the cooling expectations are fairly high given the extreme heat in the summer and so your requirements may not be as demanding. Note: My car is a late 260Z and so the radiator is equivalent to the early 280. Phase 1 I replaced my original OEM radiator and fan with an American Eagle 3 row aluminum radiator and single 16" electric fan. Pro's of this setup was that it was relatively inexpensive and provided reasonable cooling. The build quality of the radiator was low to poor. I had to straighten the mounting tabs and the finish on the ends was so poor that I ended up repainting them as well. Did not like the fan mounting mechanism at all. Plastic round tie wraps that went through the core of the radiator fins essentially held the fan in place. The earlier 240 / 260 models offered a shroud mounting mechanism for the fan, but I was not able to locate a similar setup for the late 260/280. So I lived with this tie wrap setup. To control the fan I used a relay based controller where the temp sensor was embedded into the fins of the radiator (similar to the tie wraps for the fan). The on temp was adjustable on the controller and that was handy, and it worked as expected, although I did not like the bulk of it or the way the temp sensor had to be installed. Phase 2 So after living with the initial phase one install for some time, I decided to upgrade this system while I was in the process of a major engine / engine bay overhaul. The decision to do this was admittedly more for cosmetic reasons than cooling performance (although I was hoping to improve that as well). So I purchased a polished Champion 3 row radiator along with dual 11" generic fans. I say generic as there was no brand indicated on the fan, and as I learned later this is a very important factor. I also ditched the analog controller and went with a more capable unit from Dakota Digital. The build quality on this radiator was definitely better than the first and the mounting tabs did not need to be bent back into place in order to fit on the car. The polish was well done and so the outward appearance of the radiator was very good. Unfortunately the fan mounting mechanism was exactly the same as my first phase but now I was mounting 2 11" fans instead of 1 16" which required twice the number of "tie wraps" through the cooling fins. Still not liking this. The Dakota Digital controller is awesome. Instead of the sensor being embedded into the radiator, I purchased a threaded sensor that I attached into the engine block where a plug had been previously. Wired that into the Dakota and used a solid state relay to drive the fans, and it worked great. Also, everything about it is programmable. You can program on temp, off temp, how long the fans run after ignition is off, etc. If you are going the electric fan route, I highly recommend this controller. Unfortunately, the cooling performance was no better than my phase 1 attempt, and in fact may have been a little worse. Certainly not a problem at all in the cooler weather of Texas, but when I was in stop / go traffic in mid August, it just couldn't keep up. On to phase 3. Phase 3 In attempting to develop a strategy on how I was going to address this cooling issue, I stumbled across a company that does a lot of custom radiator design, and from their website, they had one for a 280Z. Company was called Wizard Cooling and were located in upstate NY. Time to give them a call. These guys were awesome. Everything they build is made in the USA and they explained to me why their radiator design was superior to the 3/4 row radiators that had been broadly advertised. Had to do with the design of the core itself (which they did not manufacture themselves but purchased from another made in the USA company) as well as how they designed the overall radiator itself. I inquired about better ways to mount the fans and they told me they would do a custom design to support this requirement. Sent me drawings a day later, went back and forth on a few things, and then finalized the design. They also had a local partner company that would polish the product when it was done. Custom built to my car and my specs and it turned out awesome. They designed a separate mounting bracket that bolts to the radiator body and is easily removed. No more tie wraps through the core. Also decided to go with name brand fans and so went with 2 11" fans from Spal. Wizard apparently works very closely with Spal and so has all of their drawings. The mounting bracket they designed aligned perfectly with the Spal fans because of that. All I can say about phase 3 is unbelievable. The workmanship of the radiator and mounting bracket is world class. Night and day with the Champion or the American Eagle. The fans are like a tornado. Speaks volumes for the Spal product. Even in the most intense Austin heat in the middle of the summer, I never went over about 185 degrees. And that was standing in traffic in 110 degree weather. The customer service from Wizard is also world class and they will work with you on an individual basis to get you what you want. I can't say enough about them. Cost. Well that's another story. The advantage of the cheaper aluminum alternatives is definitely price and the Wizard/Spal alternative is going to run 2-3X that. But if you never want to worry about overheating again and have an eye catching cooling system in your engine bay, you'll never go wrong with that alternative. Hope this helps. Would be happy to post some before / after pics if anyone would find that useful. Mike.
-
Rack and pinion U-bolt clamp ? 71Z
I have the same question as Grannyknot. What was the original purpose of this clamp with the small rubber bumper? This was attached to my original rack, but when I rebuilt it and reinstalled it, I left the clamp off and have not observed any negative effects of not having it on there. I still have the clamp and so if this is critical and needs to be reinstalled, that would be good to know. Thanks. Mike.
-
Plastic Chrome Plating - Year End Special
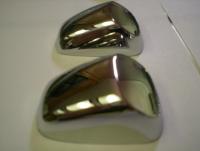
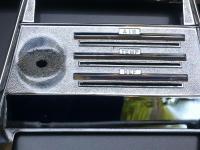
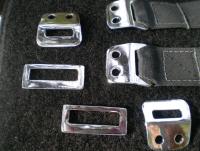
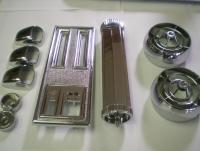
Our plastic chrome plating business has done well in 2013, but the root of our business and resulting success lies with the members of the world wide Z community. Based on that and as a gesture of our appreciation, we have decided to offer a year end special on plastic and metal chrome plating specifically targeted to members of the Z community. The year end special will offer a 10% reduction off of our standard pricing for any plating needs for our Z cars. The offer will work as follows: 1. We have one shipment remaining for 2013 so all customer orders must be received by us at our Las Vegas depot by December 18. Turn around time will be approximately 45 days. 2. We have pricing for many of the more common Z parts (listed below) but also have the capability to chrome plate any rigid plastic piece, even if it was not originally plated by the OEM manufacturer. If you have the need for this customized service, please contact me for a specific quote. 3. The customer needs to ensure that the parts to be chromed are disassembled to the point where only the pieces to be chromed are provided to us. Other than that, no other preparation is required by the customer as all other stripping and prep work will be completed by us. 4. Shipping costs to/from our depot in Las Vegas will be the responsibility of the customer, however return shipping will be a flat rate of $9.95 regardless of the number of pieces shipped to the lower 48 states. Any single order that is over $200 will include free return shipping. 5. Orders need to be shipped to the following address: M. Robbins/ H. Nguyen 7250 S. Durango Dr., Suite 130-164 Las Vegas, NV 89148 6. Pricing for the most common Z parts are as follows (These prices include the 10% year end discount): 240Z Heater Control Face Plate $81 (reduced from $90) 260Z / 280Z Taillight Surrounds $180/ pair (reduced from $200) 240Z Taillight Finishers $90 / pair (reduced from $100) A/C vents (center and round) $39.60 each (reduced from $44) 260Z / 280Z Door Pull Finisher $18 each (reduced from $20) Door Handle Escutcheon $19.80 each (reduced from $22) 240Z Series 1 Hatch Grill $30.60 each (reduced from $34) 7. All financial transactions will be completed through PayPal. Please contact me via PM for quotes on any other parts or anything custom. I've included some pictures below which are a representative sample of the quality of the work that we have been doing on Z cars for the last year or so. Please PM me with any questions that you may have as well as for any custom quotes. Thanks. Mike W.
-
Recommended vendor for S30 Electrical Connectors
Ditto to both of the above. Purchased a connector kit from him as well as the crimpers. Worked perfectly and definitely the best prices on the crimper. Mike.
-
Rewinds on Mine
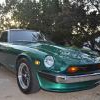
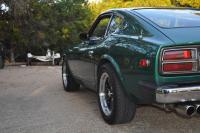
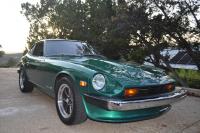
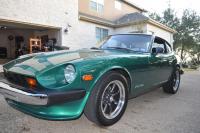
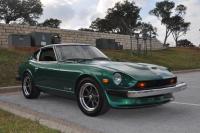
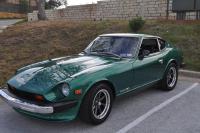
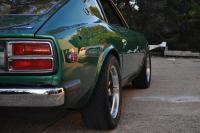
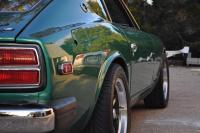
I also have the Konig Rewinds and went with the darker graphite / charcoal interior and the polished outside lip. My son pushed me in this direction, as opposed to the all silver version, and I was a little hesitant, but am really happy at how they turned out. I get lots of compliments at the shows I attend as well, so they seem to be universally accepted (and also look very period correct). I went with a 16 inch version and run 225-50 Michelin Pilot Sports all the way around. No issues at all with front clearance. My car is a late model 260 (with the original 280 body style) and I have an aftermarket air dam up front. I did have a little rubbing on the back when I would hit a sizeable bump / depression in the road at higher speeds, but I had my rear fenders rolled and have had no issue since. Here's a few pictures to get an idea of look / stance. Mike.
-
Retrosound troubles again?
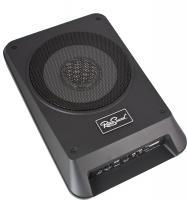
That's exactly what I did. I used a Rockford Fosgate which is a 4 x 75 Watt amp that is about the size of a paper back book. It was small enough to mount inside the glove box on the top panel so it is out of the way but still very accessible if I need to make any adjustments (ie gain, crossover freq, etc). I only use 2 channels as I only have a pair of Infinity 6x9's in the rear box (the one from MSA that replaces the tail light finisher). Amp works great and it has no problem driving the infinity's and I have 2 spare channels just in case I decide to add a couple of more speakers down the road. I was worried about the heat generated by the amp in an enclosed space so I even added a small 12v computer muffin fan to the side of the glove box and actually use the antenna lead from the Retrosound to power it. Works like a champ and I have had no over heating problems even in the hot Texas summers. For bass, I used 2 Retrosound low profile powered sub's and mounted each of them on the "wall" behind each of the seats. They fit perfectly, are out of sight, and sound great. The space they take up is pretty much unusable anyway, so it was a perfect spot for them. Would highly recommend these to anyone looking to add a little more bottom end to their system. Mike.
-
Almost finished
Awesome job. Looks great. Congrats on all of the hard work. It will be worth all of it and more when you get it back on the road. Where did you get the throttle control arms for your Weber's? They look really nice. Also what size is the throttle rod that you are using? Mike.
-
Rear bumper chrome assembly bolts?
Jerry, One other thing. It does require 4 of each of the above part numbers according to my documentation. Mike.
-
Rear bumper chrome assembly bolts?
Jerry, I believe that it is the correct bolt. It is the only one listed as "special" so I assume that that was related to the fact that they were chrome. I was also surprised that a nut was not listed and in fact the diagram makes it look like the part labeled "Washer, Luck" should be a nut. Perhaps a bad translation. Let me know if you need anything else. I'd be happy to try and help you out. Mike.
-
Rear bumper chrome assembly bolts?
I checked out my CD ROM micro fiche and this is what I found. Seems to be 3 parts to the assembly. 52663-18000 Bolt, Special 00915-51510 Washer, Plain 00911-11410 Washer, Luck Hope that helps you out. Mike.
-
Rear tail lamp area
Skyline34, My 260 is emerald green metallic. It is the original color. #303. Mike.
-
240Z Audio System Install
Sean, I have not installed tweeters in the dash embellisher (metal finishing plate below the windshield), but I do have a spare one for a 240z. I purchased this as a part of the resto on my late model 260z only to find it did not fit after I had completely refreshed the piece including new paint. It looks brand new. Apparently they changed the number and location of the mounting holes I believe around the time they introduced the 260. Would be willing to let this go for what I paid for it. Let me know if you are interested. Mike.
-
280z Plastic Inner Fender Question
For the record, I looked into this on the Z Car CD Rom which has digital copies of the original Datsun parts microfiche. It looks as if they moved to the one piece inner liners in June of 1976 according to the microfiche. The 3 piece version shown on eBay appears to have been used from 1/74 to 5/76. Prior to that, on the 240's, it appears that only the rear part of the liner was used. The microfiche does not seem to show a top or front part of the liner at all. Hope this helps. If you need any more info from the microfiche, let me know and I would be happy to research it. Mike.
-
source for "DATSUN" door sill thresholds new/nos..?
If you are unable to find a new set, you may want to consider what I did. I too looker hard for a NOS set of these with the Datsun insignia, but to no avail. So I sandblasted my original ones down to the bare aluminum and then had them powder coated to match as closely as possible the original finish. They came out quite well although any dins and dents in the aluminum are still there. Fortunately my originals were in fairly good shape so you have to look pretty closely to see the defects. Hope this helps. Mike.
-
source for "DATSUN" door sill thresholds new/nos..?
I may be wrong, but I do not believe that the new ones available from Nissan have the "Datsun" name on them any longer. The ones I have seen are identical to the originals but minus the logo. I think it may be very difficult to find NOS versions of these that include the Datsun logo. Mike.
-
Anyone know a supplier of these flares in Japan?
Philip, Here a couple of links for you. Hope you are fluent in Japanese or know someone who is. Good luck. Mike. RockyAuto - ?????(?????????????????Z?GT-R)???? ??????? http://blog.cardomain.com/2010/01/21/a-favorite-of-mine-rocky-auto-s31z-fairlady-z/
-
mechanical throttle linkage, what's the problem ?
So unless you have an aversion to moving away from stock, which is a perfectly valid reason to stick with the OEM setup, then moving to a throttle cable is the best and only way to go in my opinion. I run with triple Webers and have for years, and constantly fought the "drivability issues" that the OEM linkage introduced. I know that some have been successful with getting the OEM setup correct, but no matter what I tried I could never get there. So I went with a Lokar universal cable setup. It did take a little modification at the pedal to get the connection right and I also had to figure out the connection to the throttle rod for the Webers, , but enough other people had done this, I found numerous choices. I wish I had done this years ago. My car is some much more drivable and responsive it just makes you want to drive it more as I am not constantly fighting the jerkiness, etc. And the return to idle is always perfect now. This probably ranks in the top 2 improvements I have made to my car and could be #1. I'm so happy with it that when I had my car painted last year, I had the shop totally remove all of the brackets in the engine bay associated with the OEM linkage. Needless to say, I'm never going back. Mike.
-
The Lime Green Machine Restoration Thread - 1972 240Z
I believe that it is from MSA. At least they sell one like it which is where I purchased mine. This is a 6 into 1 and the header is ceramic coated. I've had mine on for 2 years now and no complaints. The entire exhaust system bolted in pretty easily and was a straightforward install. I did end up changing out the MSA provided muffler from Dynomax for a slightly smaller unit from Magnaflow and am very happy with the results. You can find the MSA header here: Motorsport! MOTORSPORT TBC Coated 6-1 Header, 70-76 240Z-260Z-280Z - The Z Store! Nissan-Datsun 240Z-260Z-280Z-280ZX-300ZX(Z31/Z32)-350Z-370Z Parts Mike.
-
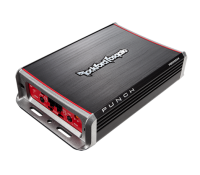
Depth space in rear side panels
So as an alternative to the locations for the subs you are considering, I mounted two 8" powered compact subs from Retrosound on the "wall" behind each of the seats. They are out of the way, sound very good, fit perfectly behind the seat, and nearly invisible. Install was quite simple as well. I've attached a picture of the sub so you can see it's size. In addition, I also use the Retrosound Model 2 (BT is a great feature BTW) and highly recommend it. I also mounted a very small 4 channel amp from Rockford Fosgate on the upper portion of my glove box. It is model Punch PBR300X4 and is about the size of a small paper back book. It is a 4 channel amp but I only run it as two channel to drive the 6 x 9 Infinities I have installed in the MSA speaker box that replaces the plastic cover over the rear tail lights. I only use the pre-amp outputs of the Retrosound. I was rather concerned about the amp creating too much heat in the glove box so I also installed a very small 1" muffin fan that is powered from the antenna control of the Retrosound Model 2. The fan draws very little current and the output of the antenna control is more than sufficient to drive the fan. This cools the glove box sufficiently and even in the 100+ weather here in Texas I have never experienced a heat issue with the amp. It all works and sounds great and was a relatively straight forward install. About the only hassle is that you have to remove the inner part of the glove box to install the amp but I also added a quick disconnect to the amp wiring so removing the glove box is still straight forward. I'd be happy to post some pictures of my specific install if anyone here is interested. Mike.


