Mike W
Free Member
-
Joined
-
Last visited
Everything posted by Mike W
-
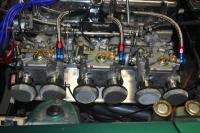
 A couple of comments on the fuel pooling you have observed on your heat shield. I have seen this same phenomena on my setup with two different sets of Webers. I did some research on this on the Sidedraft Central news group and apparently fuel leaks out of the front of the DCOE's is a fairly common problem. There is a thead where you can read about it here: http://autos.groups.yahoo.com/group/sidedraft_central/message/5412 Given that I had the same issue I decided to try and fabricate the rubber washers that the author of the post above identified as a solution to this problem. They were a little tedious to fabricate, but I made and installed them to see if they would resolve the leak issue. I would say that I had some minor improvement but could never really get the washers to fit tightly enough to eliminate the problem. So I decided to go another route. I took some pretty precise measurements of the air horn OD, the choke body ID, and a few other areas and identified a couple of O Ring sizes that could be used to really seal off this area. I purchased some O Rings from McMaster Carr that had and ID of 44 mm and were 2 mm thick. The McMaster part number was 9262K529. I also purchased some o ring lubricant which I applied to the parts before assembly. So I put the O Ring over the inner part of the air horn before inserting into the carb body. I find that it takes a little pressure to "force" the O Ring into the channel between the air horn and the carb body, but you can actually feel it snap into place when it is fully seated. Tighten down the air horns and you are good to go. After driving with this configuration I can say that it solves 95% of the problem. I might see a few drops of liquid on the heat shield after 50 - 100 miles of driving so I think this largely solves the issue. On the Sidedraft Central forum however you will also read about the notches that are cut into the carb body to allow for alignment of the choke and aux venturi and the opening they provide to exacerbate the fuel leak problem. I posted some questions about this issue and proposed fix which you can read about here: http://autos.groups.yahoo.com/group/sidedraft_central/message/5456 Presently my solution only uses the O Rings and does nothing specific for the notch issue, but from my experience so far it looks like this solves 95% of the problem. Hope that helps. Mike.
 -
Not sure what heat shield you are using so I may not be of much help, but I will tell you how I have done this on my setup. And you are correct, it is tricky. I have one of the aluminum heat shields that were made for Webers and I believe was sourced from Japan. I learned about it on this forum but would have to go and do a search to find the thread. It was actually pretty expensive for what it is, but it does work well and although tricky to install, it can be done. So I start by installing each of the carbs using the springs, nuts as well as a washer that I place between the spring and carb itself. I leave the bottom ones as loose as I can get them without having the nuts fall off. I then maneuver the heat shield onto the studs by starting from the front end making sure that the shield is sandwiched between the washer and the carb. Once that first stud is in place, I will tighten up the nut a bit by hand. Now as you move the heat shield in place you just have to make sure that you have it sandwiched between the washers and carbs and once I have all of that aligned, I will tighter the last nut (closest to the firewall). You really cannot see in this area so you end up having to do this all by feel, but I found that after doing it the first time and developing a process, subsequent installs were pretty easy. The other challenge is tightening the nuts as there is not a lot of room to get a wrench in there. I believe that I use a 3/8 drive socket with extension and it just barely fits, but I can manage to get everything tight. In any case, hope that helps. If you need it I can look up the vendor where I purchased the shield as I don't recall off hand where I sourced that part. Mike.
-
The G2 product that I mentioned above is a 2 part epoxy paint that you also brush on. Once mixed you have about 3-4 hours to finish the job which was plenty of time for 2 complete coats. They came out very nice and although I have only had them back on the car now for a few months, I have not seen any signs of degradation of the paint itself. So far, so good. Mike.
-
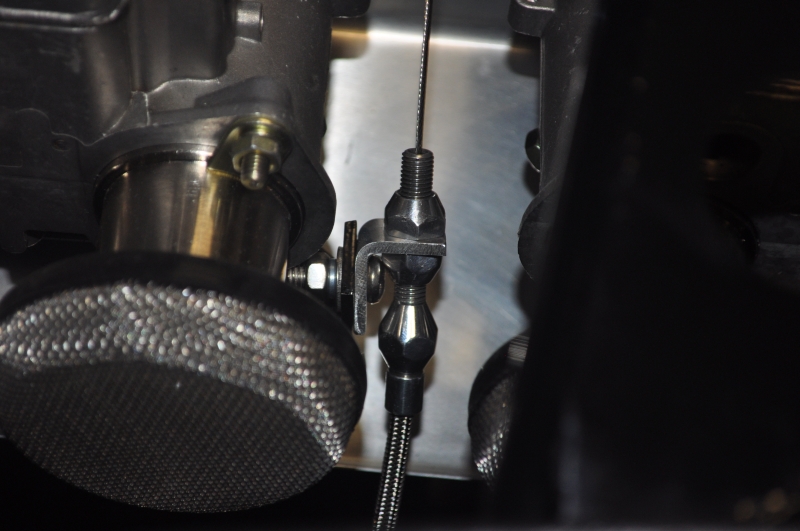
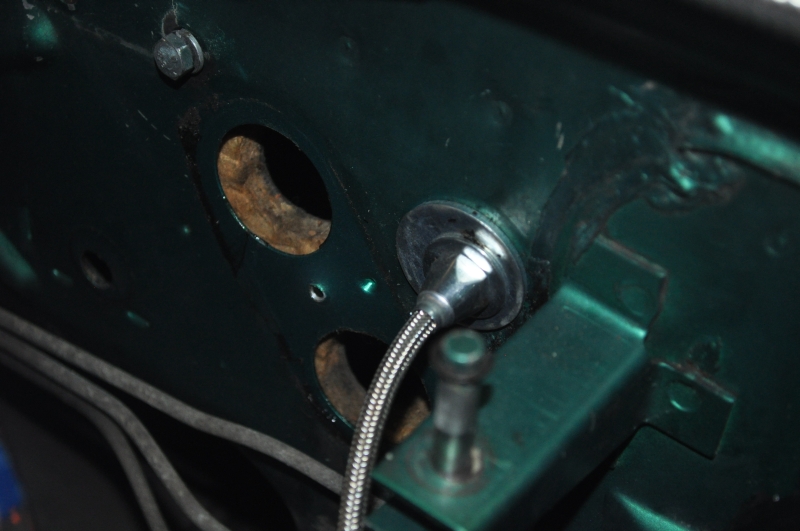
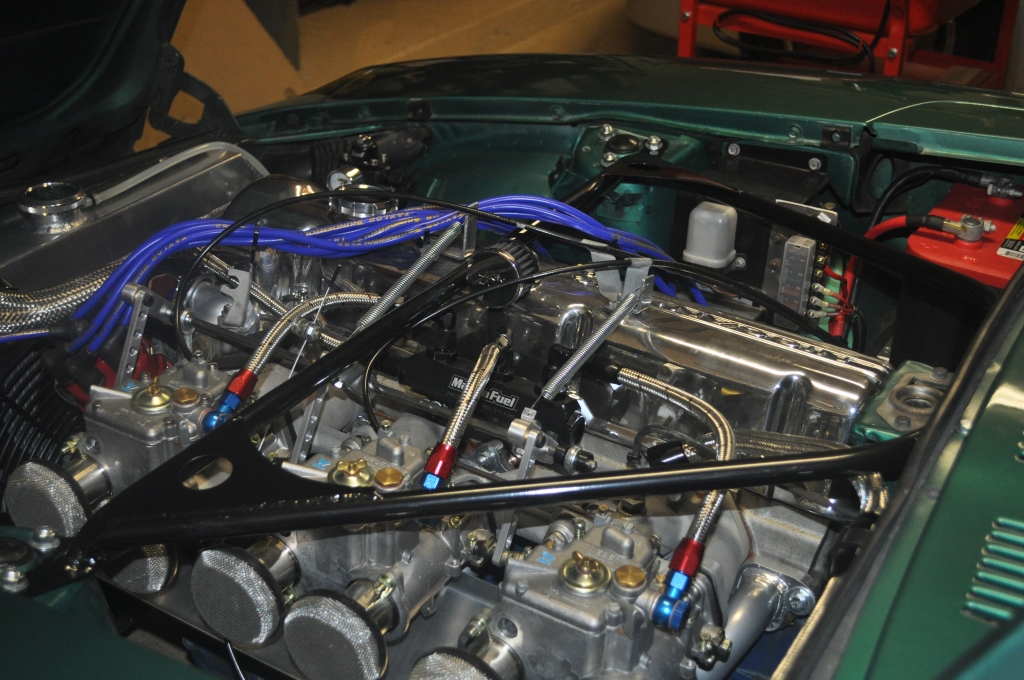
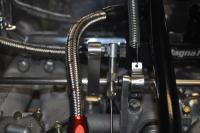
So the most complicated part of this for me turned out to be the connection at the carb end, not the pedal. At the pedal, I drilled out the "ball" connection for the initial part of the OEM bell crank and replaced it with a fitting that mated to the Lokar cable. That was pretty straight forward, although I will have to go back through my files to find the exact fitting that I used. On the carb end, I managed to find a bracket that mounts to the underside of one of the webers and was designed to acceept a more general purpose throttle cable. I ended up fabricating a small aluminum L bracket that allowed me to adapt this bracket to the Lokar end component. On the firewall, all I needed were some large washers that allowed me to attach the threaded end of the sheath on the Lokar part to the firewall. As I recall, I purchased a Weber throttle cable kit some time back from Top End Performance, and that's where I got the bracket. It's pretty simple so I think that it would be fairly easy to fabricate. I've included a couple of pictures that might help to illustrate this better, although I don't have any of the pedal area. If you want some of the pedal, let me know. I can probably sneak a camera up there to get a shot without too much of an issue. Mike.

-
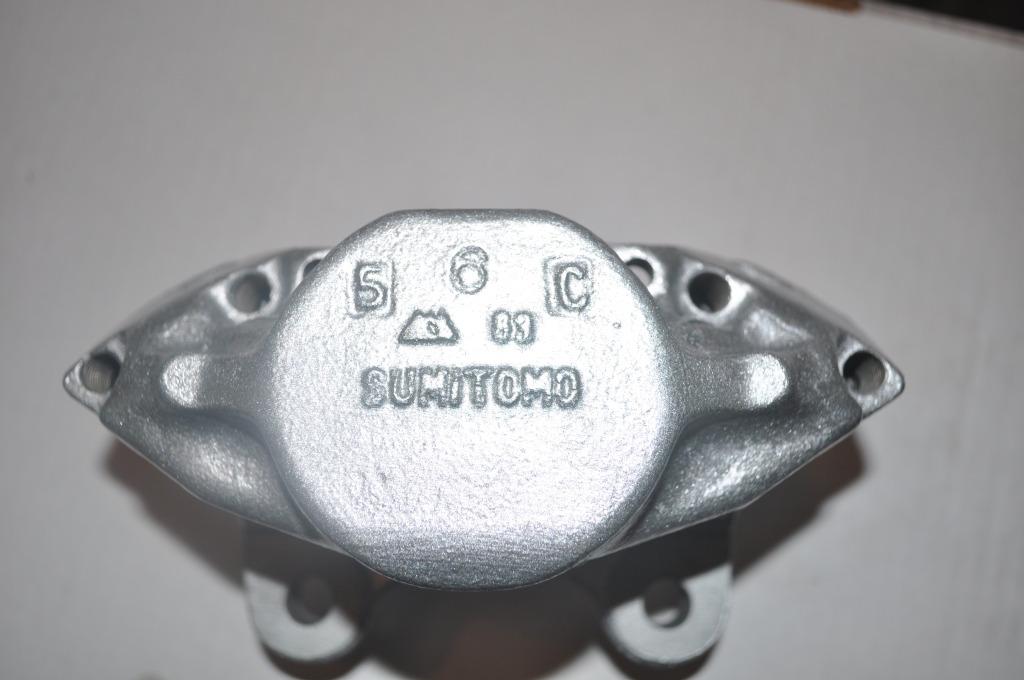
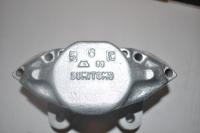
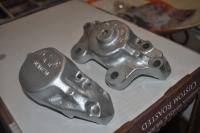
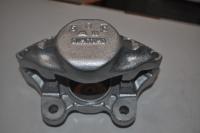
I used a product from G2 recently. It is made for calipers. You can see more info about them here: http://www.g2usa.com/ I went with a silver color and mine came out great. My only issue is that you cannot see them through my wheels like you can on more modern cars with modern wheels. Here's a few pictures of the G2 product on my calipers. Mike.
-
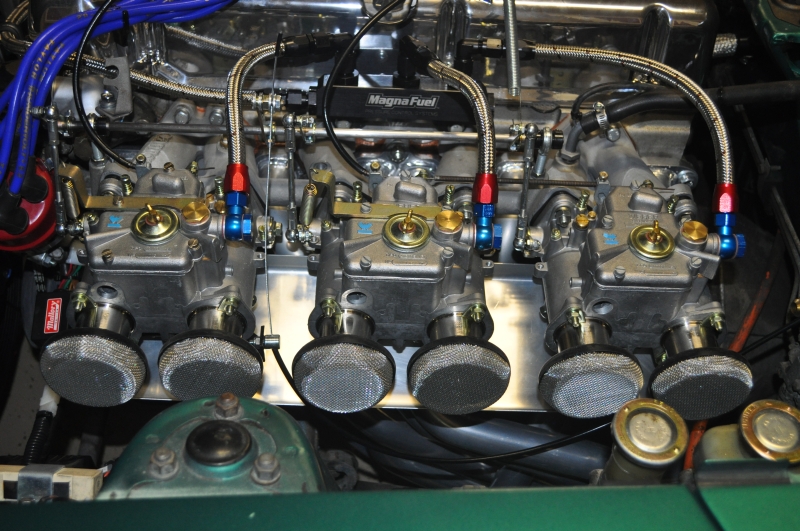
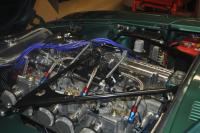
I got the air horn filters from Pierce. You can see them here: http://www.piercemanifolds.com/category_s/172.htm On your question about the return springs, I have tried to balance "throttle force" with drivability. With a third spring, there is too much force (in my opinion) on the gas pedal and it gets fatiguing to drive because of that. I will also way that with the old OEM linkage, the addition of a third spring resulted in a very jerky acceleration, especially off of idle. In fact this jerkiness existed even with two springs. The addition of the throttle cable has completely eliminated the jerkiness on acceleration. I have found that 2 springs gives good drivability, reasonable return to idle, and no driving fatigue. I also wanted to make the return spring install clean, and so tried to find areas that would accomodate the installaton of a spring end. I ended up having to fabricate some aluminum brackets for the valve cover as well as the throttle arms that Cygnus made to accept the springs and still look pretty good in the engine compartment. In the end, they work pretty well and don't look too obtrusive. BTW - Any chance that you are planning to attend the NISMO fest in San Antonio next weekend? My wife and I are planning to go and it would be grewat to finally meet you in person. Mike.
-
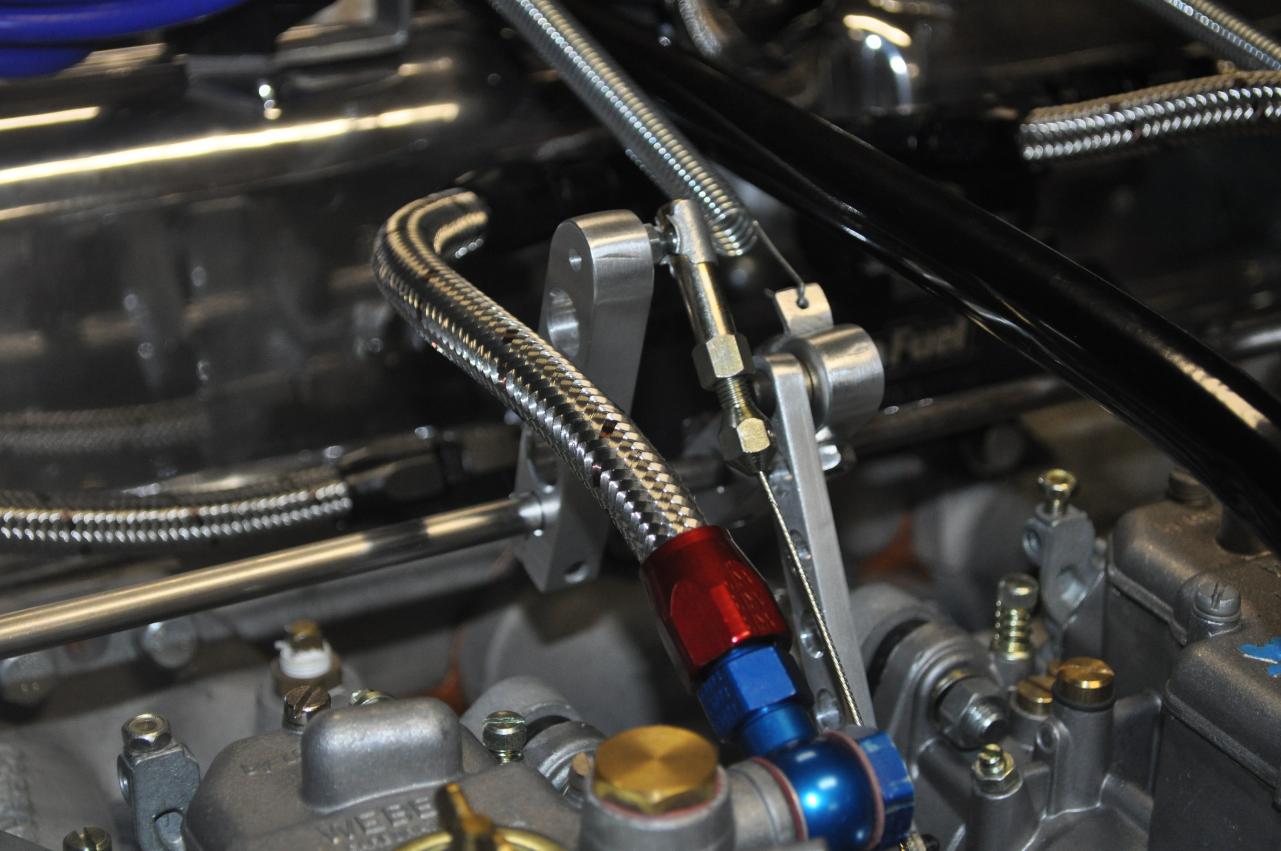
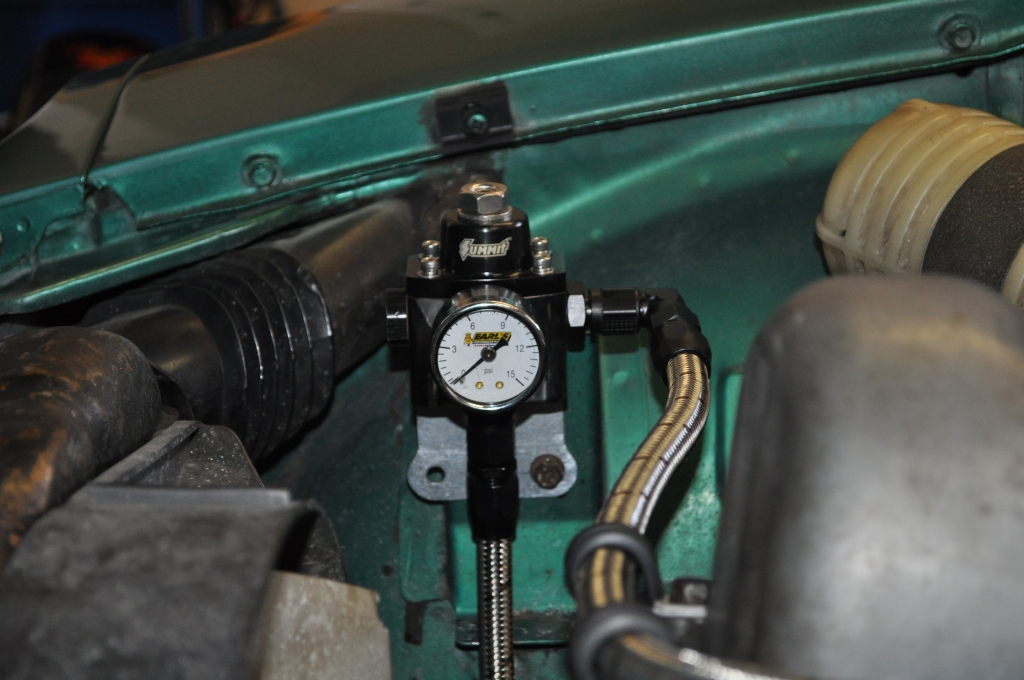
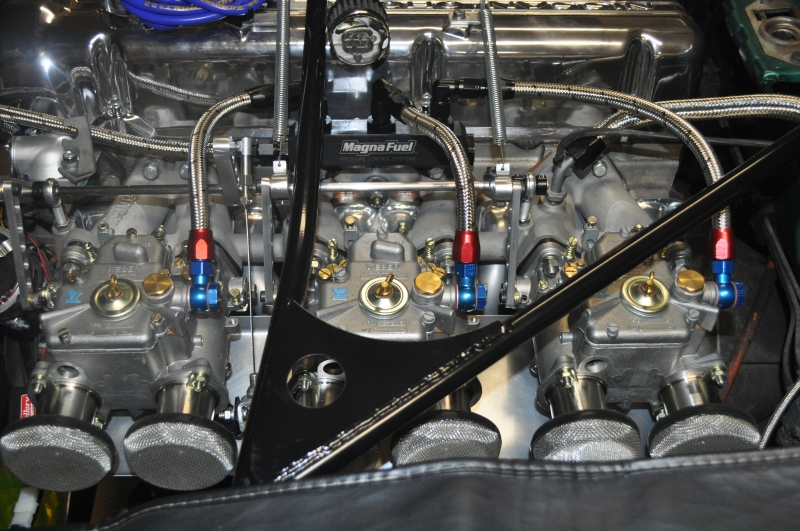
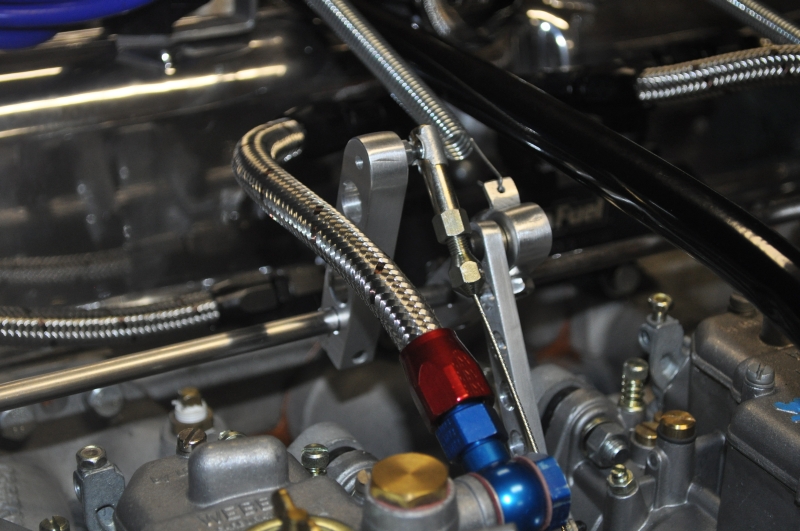
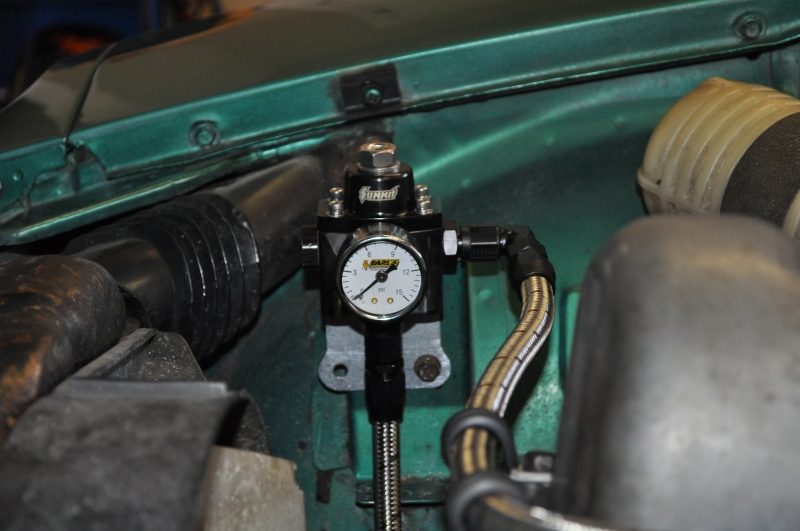
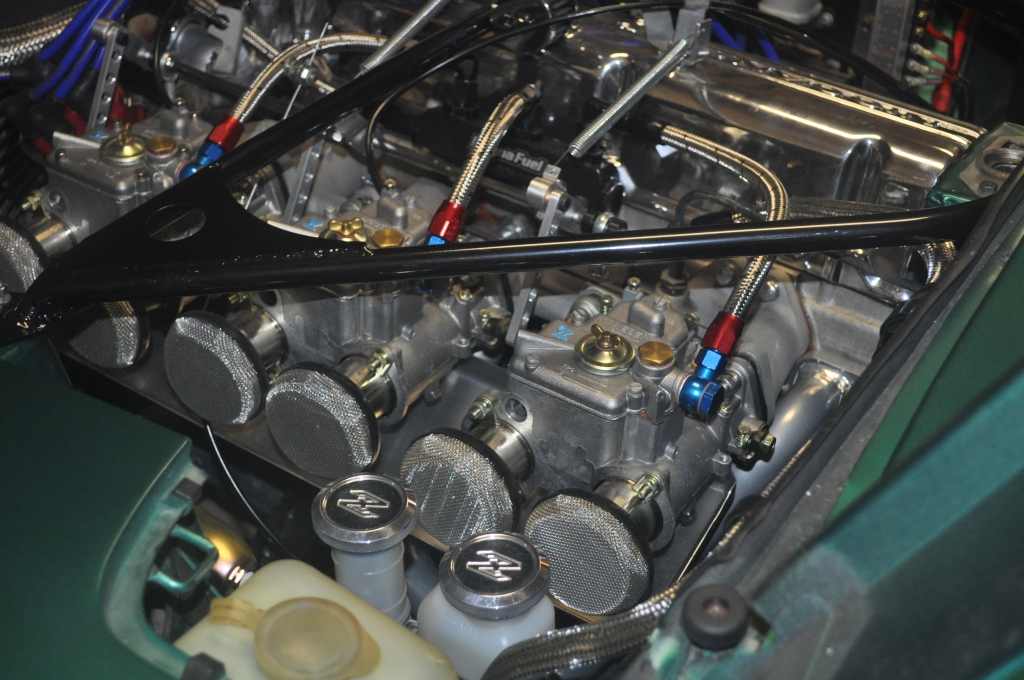
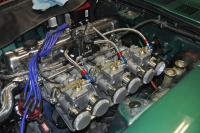
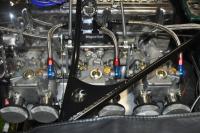
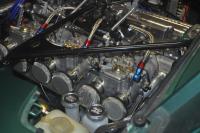
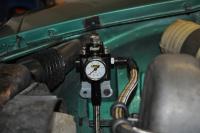
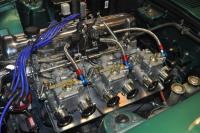
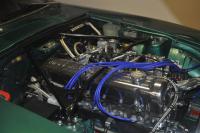
Steve - Here's another input that I hope will help you (instead of confusing things further). I run triple Webers, not Mikunis, bit I suspect that a lot of the issues are the same. I also searched high and low for an appropriate FPR and did find al alternaitve to the Holley. It is from Summit Racing and the P/N is 220065. It has a range of 3-12 PSI, supports one inlet, two outlets, and also has a gauge port. I admittedly have it adjusted to about as low as it will go, but so far it is working great for me. I also used a fuel log to distribute fuel to each of the individual carbs, but was worried about the mounting location that I chose as it was right above the intake manifold and I was concerned about heat and the resulting vapor lock. Surprisingly I have had no issues to date and this is even in the heat of the Texas summer. I do run the MSA headers that are coated as well as a heat shield undert the Webers. Here's a few pictures of my system. I have all of the details of this in a power point file if this will help you out. Just let me know and I will send it off to you. Mike.


-
I think that you will really like the Webers once you get them dialed in. I purchased my first set decades ago and never had the patience to really understand their principal of operation and the effects of small changes to the different components of the system. In the end they are nothing more than a mechanical computer and once I had that figured out and used a more disciplined process to fine tune them, it actually turned out to be pretty straight forward process to get them to run correctly. As a point of reference for you, the new Webers that I installed recently (purchased from Pierce Manifolds, so a differert vendor from yours) came jetted as follows: Main 125 Choke 30mm Emulsion tube F11 Air Corrector 160 Idle Jet 50F9 This was actually not the stock configuratiion, but one that I had requested given the starting point of my older Webers. After tuning, and using an AFM, I ended up with these settings that are much more ideal at least for the way my car is configured: Main 115 Choke 30mm Emulsion tube F11 Aircorrector 160 Idle Jet 55F9 Initially I did have the off idle stumble but found that the idle jet sizing had the greatest impact on resolving that. Going to a slightly larger jet eliminated 98% of the stumble that I had experienced for years. I'm sure that every car is different but this was how it worked out in my case. As to your bent linkage, I actually went to a slightly different setup when I moved to my new Webers, but I believe that my original configuration is similar to if not exactly the same as you received from MSA. I decided to go to a different throttle rod and ended up ordering some 5/16" stainless steel stock from McMaster and just cut it to size. I believe the size of the original rod is actually 8mm, but the 5/16" turned out to work fine. I have the part number somewhere if that will help you. Also, I did have some binding issues with the setup and ended up eliminating the middle "ball joint rod end" that the throttle rod goes through. Because of the stiffness of the SS rod it worked out fine and eliminated a potential point of binding in the system. With regard to the OEM linkage, I tried for years to get the OEM setup to work properly and keep the engine period correct in this area, but after switching to a throttle cable and experiencing the difference in drivability, I kicked myself for not doing this years ago. For me, it was the single biggest improvement to the overall drivability of the car and I have no regrets other than wishing I had done it sooner. I think the OEM linkage is actually a good design, but with all of the joints, etc, I just don't think it can compete with the smoothness of a cable. On your return line question, I went through the same process of rethinking this again and again. In the end I went without a return and used a FPR that did not require one. I used a Summit FPR that had a range of 3 - 5 PSI and it has worked out great so far. I do have the MSA coated headers and also run a heat shield under the Webers, but at least so far I have had no issues with vapor lock or fuel starvation in general. Finally, I think that it was Leon that mentioned the linkage kit from Cygnus. I actually have that kit installed on my car and it is far better and far nicer looking than the stock one from MSA (same one that I used to have). Dave is a great guy to deal with and even went as far as to fabricate an additional arm that I used with my cable setup. I highly endorse his product and he is a great guy to deal with. Here's a few pictures of my system that might help. Let me know if I can help you out on anything. I think that you are in for a lot of fun times!! Mike.


-
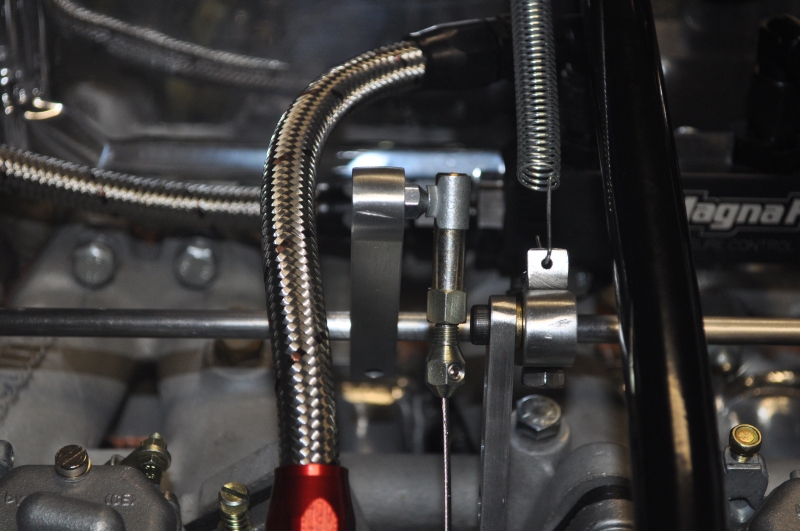
Leon, Thanks for the nice comments about my throttle setup and the return springs. A few other comments that might help you out. 1. The springs that you saw in the last pictures that I posted are no longer on my car. These were springs and brackets that were made for the 40 DCOE (and that I purchased directly from Pierce Manifolds where I also purchased the carbs) but unfortunately they only work on one side of the carb (unless you decide to modify them like I did so you can use them on either side). Although I liked how clean the installation was with these, they ended up not working for me as they did not provide sufficient return strength to always get my engine back to a normal idle (900 - 1000 RPM's). I think that a part of this was due to the fact that I could only use 2 springs for the 3 carbs and that I had to locate the springs in a different place on the return arm than what the original design intended. Much of this was due to the nuances of my particular installation. The pictures that I have attached to this post represent the latest version of my return spring setup. 2. The throttle cable setup I have has evolved over time. I originally bought a complete setup from Top End Performance (who apparently does a lot of aftermarket stuff for Z's) and this included a special bracket that attaches to the 4 bottom screws on one of the 40 DCOE's. The rest of the seup from them was fairly generic other than the attachment mechanism at the pedal. This did require a slight modification to the pedal, but it was not a big deal. Since then I have changed out the cable to one from Lokar. The Lokar cable is much more substantial, is done in polished stainless steel (so it looks a lot nicer) and has much better attachment hardware in general. You should be able to see this in the attached pictures. The Lokar P/N is TCP-1000HT and I purchased it form Jegs for about $70. I did reuse the carb bracket and the pedal fitting that I originally purchased from TEP. I really like the look of this as well as the performance. It is a much beefier setup than the one from TEP as well. 3. Finally a plug for Dave Cerutti. Dave has developed a really nice throttle linkage setup for the Webers and he fabricates these in billet aluminum. He even went as far as to make me a special arm that I use just for the throttle cable assembly. Again you can see it in the atttached pictures. They look great, are easier to adjust, and in my opinion are a lot sturdier than the standard throttle arms that typically come with aftermarket Weber setups. He is a great guy to work with and has a fabulous product. I believe that he has advertised these in the classified section of this site. If you would like to try the older return springs that I used prior, just let me know and I would be happy to send them to you to see if they will work for you. As I said, they are a very clean design and made for the DCOE's, but I just couldn't get them to work in my setup. I find that one of the finicky parts of the Webers is throttle return and I have had to go to a couple of fairly strong return springs so they work in my setup. Let me know if you need anything else. Would be happy to try and help you out. Mike.


-
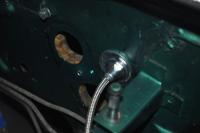
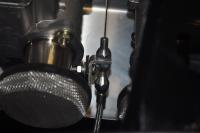
The Webers do not have a choke circuit per se, but they do have an enrichment circuit that will help during cold starts. The choke cables are the original OEM cables that I cut so that I could use them to engage the enrichment circuit on a dead cold start. That is what you are seeing. I will say however that for the most part, I never really have to use them especially given the weather here in Texas. I find that typically on a cold start, all I have to do is pump the carbs a few times and the accel pumps provide sufficient fuel to start the engine and so the effect of the chokes is not really necessary Since I have taken this picture, I have actually removed those cables and cleaned up the engine compartment a bit. I also replaced my center console recently and wanted to avoid the console cracking issue where the choke assembly attaches to the console so at least for the time being I have taken them off. When you do go to the Webers I would strongly recommend removing the stock throttle linkage and replace with a throttle cable. This is probably the single biggest improvement that I have made to the Weber setup as it makes the drivability of the car so much better. I used a cable setup from Lokar and would be happy to provide more details on what I did if you decide to go that route. Hope that helps. Mike.
-
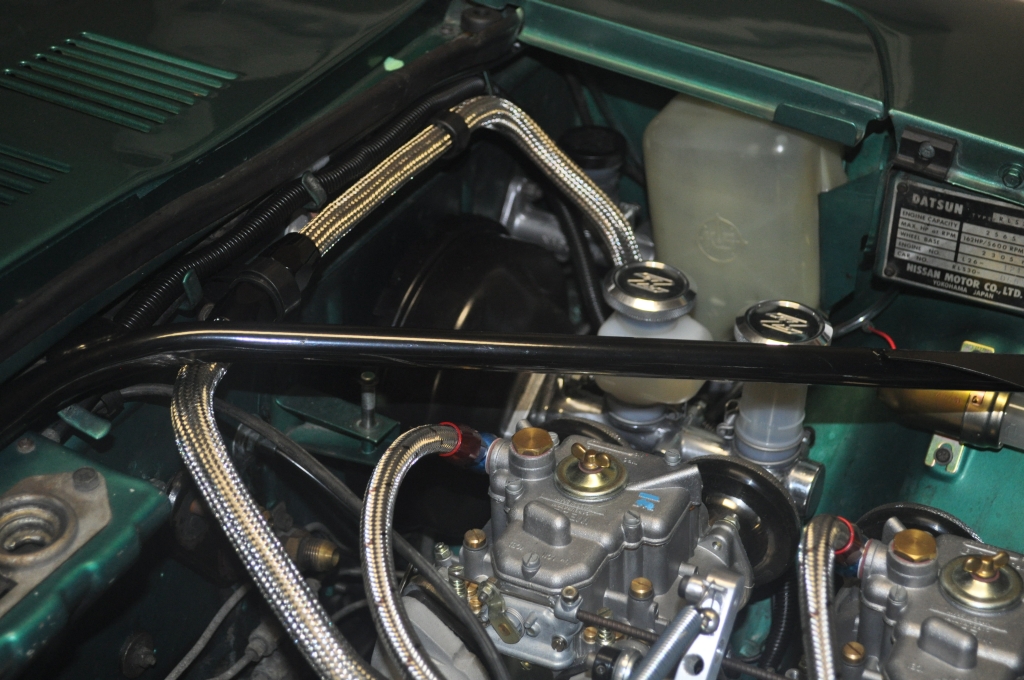
I also run triple Webers (40DCOE's), but had to fabricate the fuel line that I wanted from individual components. I could not find anything that was off the shelf that met the design goals that I had, including the use of all stainless steel braided lines. I have the whole design documented as well as a bill of material if you are interested. This includes not just the fuel lines, but also the pump setup and regulator that I used. I am not familiar with the Holley regulatr that you selected, but I do know that when I was researching my system there were distinct differences between regulators that required a return line and those that did not. If you plan to use a return you might need to check on the capability of the regulator that you selected to ensure that it supports a return line. I've attached a few pictures of my setup for your reference. I also agree on the sidedraft central forum. I've only posted there a few times but the folks were very responsive and ultimately solved one the problems I was struggling with. Some very informed folks over there. Mike.

-
Grant, If you are looking for the Datsun part numbers for the front and rear suspension, I actually have all of that detailed in a spread sheet. It includes the part number for all of the bushings as well as all of the other various hardware (ie nuts, bots, washers, etc). I have even included an item reference number to correspond to the micro fiche numbers from Datsun. I have posted this somewhere on the forum, but if you can't find it, just send me a pm and I will shoot you a copy. Mike.
-
Black Dragon has them in stock. Just ordered one and received it about 4-5 days later. Looks to be of good build quality although as I indicated above, I have not yet tried it out in my car. Waiting to get the rest of the interior refreshed and installed before I do. Would be happy to post some pictures if that would help. Mike.
-
I just purchased a new heater core from Black Dragon for my 75 260Z. I believe they also have them for 240's as well. Both are priced at $99.95 with no core required. I received it quickly and from inspection it looks to have good build quality and is the same as the one I am replacing (size wise). I have not installed it yet and so cannot speak for the operational aspects of the core, but I'd be glad to update you once it is back in the car. Mike.
-
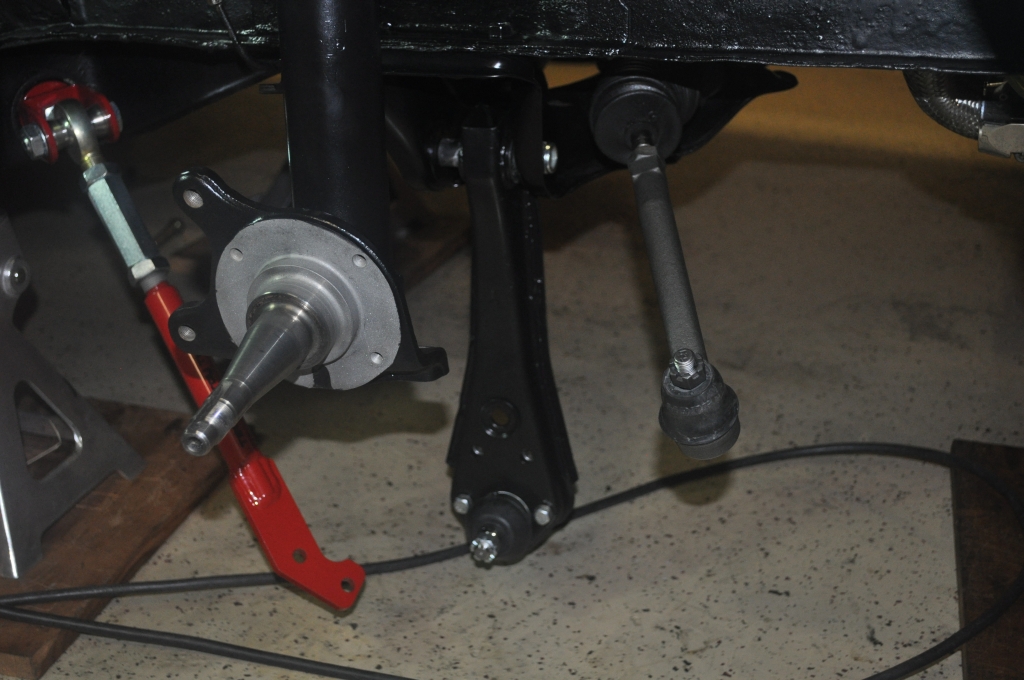
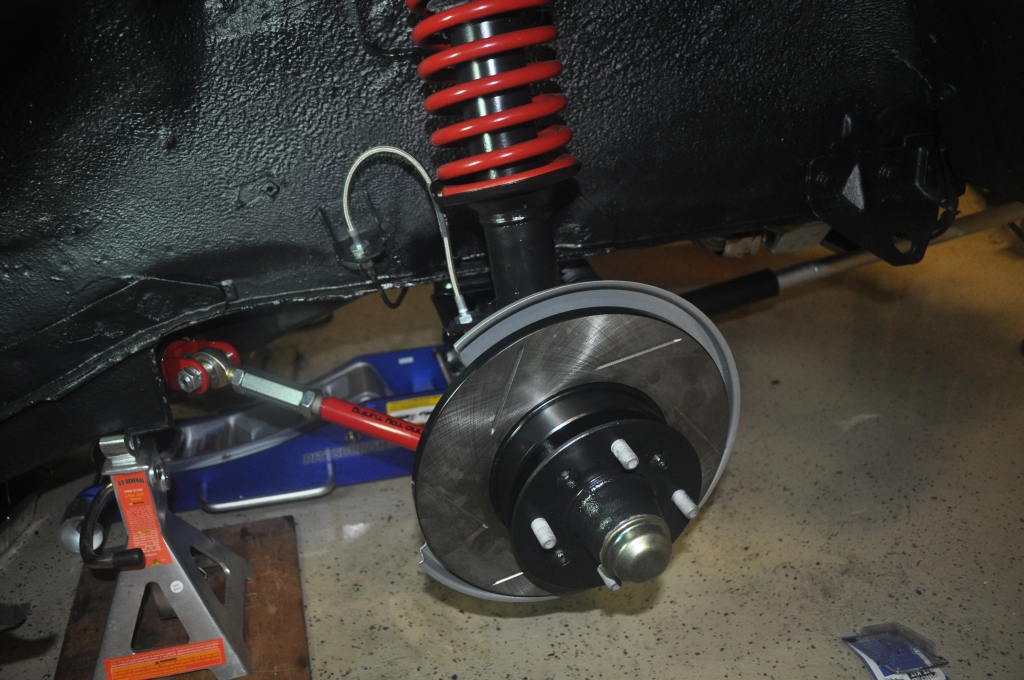
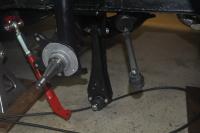
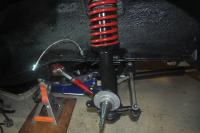
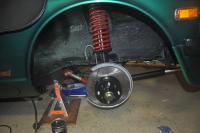
I just completed a total refresh of my front end, including brakes, master cylinder and booster, as well as an upgrade to the Techno Toy Tuning t/c rods. They are an extremely well built upgrade to the stock t/c rods and also do give adjustability to caster. I did get a little concerned about using them after I read a number of nightmare stories where t/c rods were breaking due to the use of poly bushings on the rods. You are correct that the TTT rods bolt up to the frame member with no bushings at all, and that caused greater concern given the lack of any flexibility at the mounting point. Based on my concerns I did talk to Gabe at TTT about this. I believe that he is the owner as well as the designer of many of their products, and he assured me that I did not need to worry about this under any normal driving situation. He told me that the hime joint will absorb the energy from normal impacts and these would not be transmitted to the frame in any great amount. So I installed them and set them at the closest setting that matched the OEM length. I had the car aligned right after this installation as I had also changed my rack and tie rod ends, but it turned out that the caster was pretty much where it was supposed to be so I really didn't get the benfit of having this adjustable. I have only driven the car for less than 100 miles sinced I completed all of this work, but I can say for certain that responsiveness, tightness, etc are much better than before. I am not able to tell you the contribution of the new t/c rods to this improvement as there were so many other things that I changed / upgraded at the same time. Finally, I can tell you they look great as well. I've attached a few pictures so you can see them being installed on my car. Mike.

-
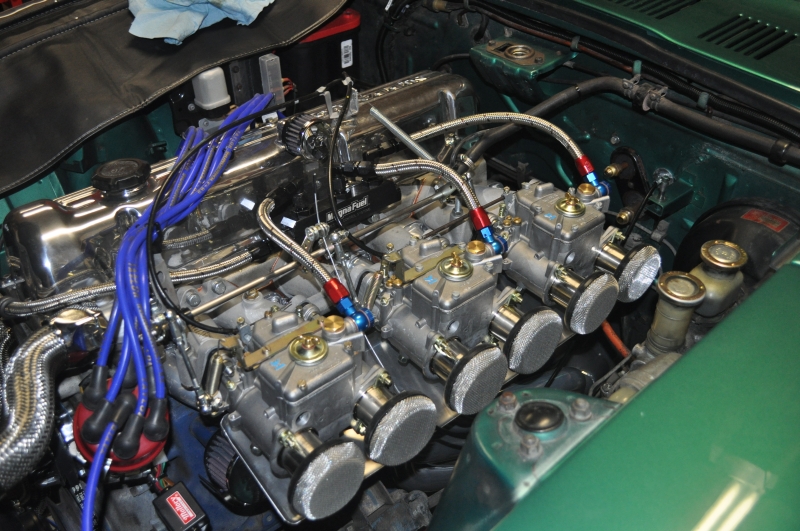
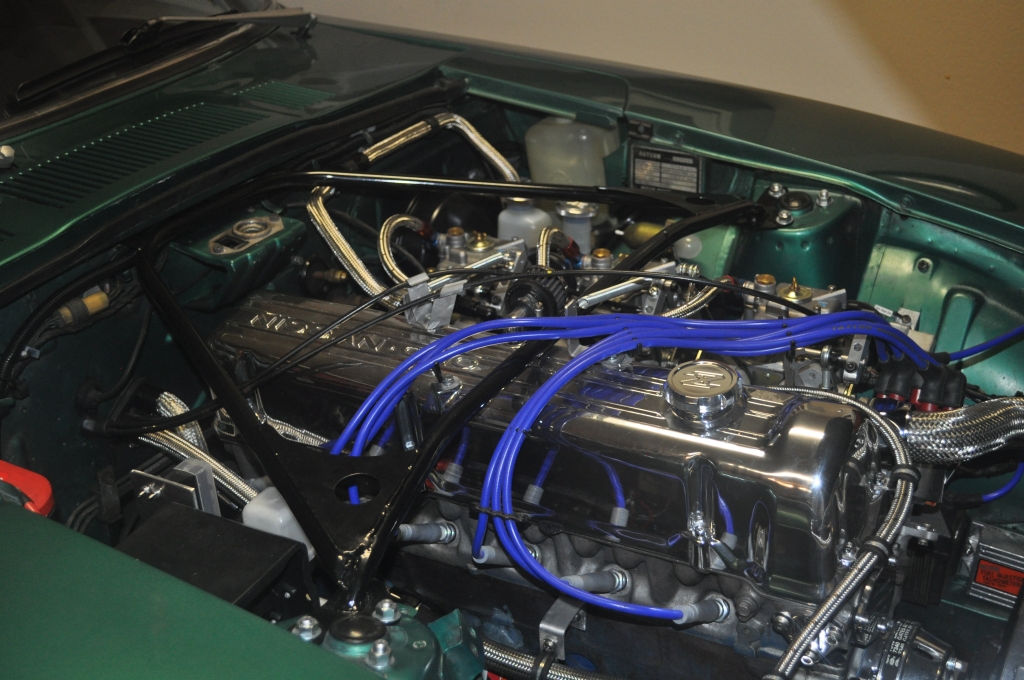
Rocketdog, I don't think that you will have any issues with using your existing OEM fuel pumps as long as you add an appropriate regulator before the Webers. You can get fairly inexpensive regulators that will work with the existing rubber fuel lines for your initial setup if you decide to stick initially with the OEM fuel system. This will be a throwaway item however when you do go with SS as you will need a regulator with AN fittings. I also run triple Webers but in my case found that if the car sat for any lengthy period of time (1-2 weeks), it was very hard to start. Figured out it was fuel related and that the fuel bowls were essentially evaporating and that the mechanical pump was not able to prime the carbs efficiently. That's why I installed an electric pump that I could control before start. Also if you have a late 260, this is the same car as mine (manufacture date of 11/74), its important to understand that the OEM electric pump does not operate until the engine is started and so it has no impact to initial fuel delivery in the OEM configuration. On the return line, I ran my first set of Webers with the same setup as you see on MSA and did not use a return. Never had any real issue with hot fuel and the resulting hard start problem. Also I do believe that if you wanted to use a return with the MSA setup, you would replace the last L with another T and connect to a return on the other side of the T. I also believe that in this configuration, you install your pressure regulator in the return line. My dizzy is likely different than what you have. I have a Mallory Unilite without vacuum advance. The mechanical advance mechanism has a curve that seems to fit my car well. However I did run with the OEM dizzy for years and all I can remember doing was advancing timing a few degrees, if that. The vacuum taps will vary based on the mainfold that you get. The one that I have does have two taps, but I have the front one plugged off. In the rear tap I have an adapter installed that has lines for both the small AC/Heater controls as well as a large one for the booster. Hope this helps you out. The Webers can be great but it does take some time to get them right. There is a lot of info here as well as other places that have great tips on tuning. It took me a while, but once you understand how they work and get a process in place to zero in on the best configuration for your car, it's not all that difficult. Also, I just recently purchased a new set of Webers for the same car and got them from Pierce Manifolds. I have no affiliation with them at all, but will say that they were quite helpful and had great customer service. I've attached a few updated pictures of my engine bay since I completed the SS fuel line upgrade that might help you out. Hope this helps. Mike.


-
I had a set of period correct Appliance "Mesh" wheels and was planning to refresh them. I ended up bringing them to a local shop here in Austin who actually recommended re-machining the wheels on a CNC machine. I was very nervous about doing this as the wheels were not replacable, but I went with their recommendation anyway. The resulting product was unbelievable. Better than when I purchased them new. I did a write up on this on the forum and you can find it here along with some pictures. http://www.classiczcars.com/forums/showthread.php?43224-Appliance-Wheel-Refinishing&highlight=appliance+wheels I would bet that there is someone in your area that can provide the same service if you are interested. Mike.
-
-
I have also been looking at alternatives for replacing my seat upholstery. In searcing this site, I see consistent mention of Classic Datsun Motors as well as Banzai Motors and have read good things about both of them. I have also found similar products from Z Car Source of Arizona. They have seat covers in both vinyl as well as leather and they appear to carry the foam as well. They also have a 10% off sale until this Wednesday. Has anyone here ever used their upholstery products before? I have done business with them on other items and have always had positive transactions, but I do not know much about their seat recovering products. Any comments would be appreciated. Mike.
-
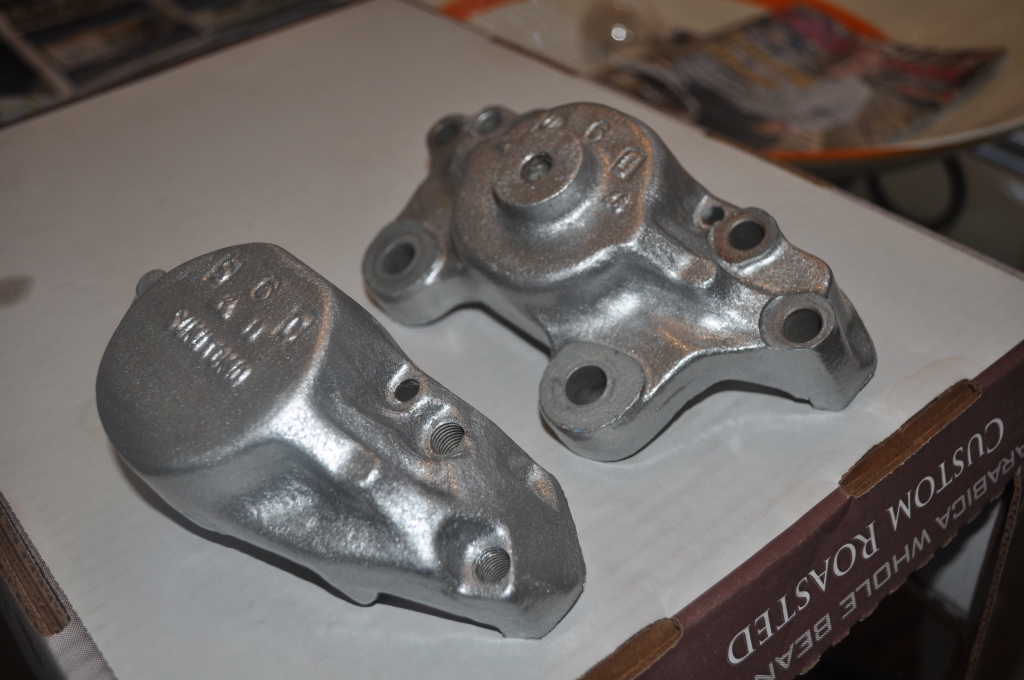
Same here on the rebuild. I just finished completely rebuilding mine including a replacement of the original pistons. I sourced the rebuild kits from Rock Auto and purchased the pistons from a seller on eBay. The rebuild kits were from Dorman I believe and they included the 2 flat o-rings that are needed to seal the 2 halfs of the caliper together. The pistons were from Raybestos. The only real trouble I ran into was removing the four bolts that hold the caliper halves together. I ended up ruining the head on one of the bolts although did successfully remove it eventually. It was a little difficult finding replacement bolts as the head on them is smaller than normal and they apparently conform to the Japanese spec called JIS. You may be able to get these directly from Nissan, but I finally was able to source them from an on-line company called Belmetrics who specialize in metric size hardware. Mike.
-
Not sure that I can help you out on the compatibility between the Unilite and the Crane but I can tell you how I installed the Unilite in my 260Z. I ended up using all Mallory products for my ignition setup and had no compatibility issues what so ever. I used the Unilite 45 Series distributor (p/n 4563901) which does not have a vacuum advance as I am running Webers. I also used the Mallory HyFire 6AL which is a capacitive discharge ignition system (equivalent to what MSD provides) as well as the Promaster coil from Mallory (p/n 29440). The only real issue that I had, and I think this might have been specific to some wiring issues that I had with my particular car, was getting my tach to operate correctly. I ended up using their active tach adapter and it worked flawlessly. Wiring was also straightforward and it was a fairly easy install. I will warn you however, that the Unilte is apparently very sensive to voltage spikes and noisy power lines and this is even acknowledged in some of the Mallory literature. Based on that they also sell a product called a circuit guard (p/n 29371) which is a filter circuit to ensure that the sensitive electronics in the distributor are always receiving clean power and signal. I have been running this setup for almost a year and it has been trouble free. Hope this helps. Mike.
-
Zedy, You will find the -18 or -151 number right after the general part number (ie 40 DCOE - which is stamped on the top part of the carb near the front. Also, I had been running a set of -18's for years (and never quite got them tuned correctly until very recently), and in the process decided to rebuild the ones that I had. Turns out that I ended up purchasing a new set of -151's instead of rebuilding my old ones immediately, although I do plan to do that over time so I can refresh the set that I originally purchased back in the late seventies. Also, the -18's were made in Italy, but production moved to Spain many years ago and so the -151's are made there today. I will also tell you that the jetting between the two is very different. When I installed the new -151's I started with the jetting that finally worked for me on the -18's and I ended up having to make some adjustments (especially to the idle jet setting) to get the new ones to run like my old ones did. For reference, I purchased these from Pierce Manifolds and had a very positive buying experience. I believe that they get them directly from Redline, so they are an real authorized distributor. They also had the best selection of other Weber accessories (like the shock mounts) and because these were being shipped directly to me from their distributor, they agreed to throw in the jets that I needed that were different from the factory jetting. They did that for free. Finally, I have been reading about all of the SU issues that you have been having with popping at mid - high RPM's and so understand why you are considering this change. For what it may be worth, I do have the spare set of -18's, which just came off my car and presently not in use, and so if you could find a manifold I would be willing to loan these to you so you could try them out before buying. I have a spare linkage and so you would only need the manifold. Although they look a little rough and I do believe they will need rebuilding, when they came off my car a few months ago and were running the best they ever had. I live in Austin, so the distance would not be all that great. Give it a thought and let me know if you are interested. Also, you planning to go to NISMO fest in San Antonio in April? Mike.
-
I have Webers, not Mikunis, but I second Mitchell's recommendation to get rid of the stock linkage and go with a cable system from pedal to throttle shaft. I purchased a setup (from Top End Performance) made to bolt up to a Weber but fairly generic otherwise, and the difference is like night and day. I too kept the old linkage, mostly for posterities sake. However, I never see it going back on my car. Mike.
-
I had a similar issue when rebuilding my calipers recently. One of the bolts holding the calipers together had a stripped head and once I managed to get it out, it needed to be replaced. I did not check with Nissan directly so it could still be available from them, and as many have already said the selection at McMaster is a little limited for these kinds of special nuts and bolts. This particualr one was unique in that the head conformed to the Japanese bolt standard (called JIS) and is smaller than the equivalent hex grade bolt head. So I finally ran across an on line company called BelMetric and they specialize in metric fasteners. It turns out that they actually stocked the JIS bolts I needed for my caliper rebuild and so I ordered them from this company. Got them in about 4 days and they were exactly what I needed. You may want to check them out as well. Website is: https://www.belmetric.com/ Hope that helps. Mike.
-
Chris, I faced the same dilemma a few weeks ago when I was trying to remove my rack and was planning to purchase a lift but could not find one in my area at the time. It turns out that I am also sourcing some parts for this rebulid from Z Specialities and was discussing this issue with him. He recommendedd just jacking the engine from the oil pan, which I must admit did not feel really good to me. I had visions of collapsing my oil pan and getting myself into a real mess. In any case I decided to try it and used a 20 ton bottle jack with a board on top that is about 12" x 12" x 1.5" and set it all under the pan. I then proceeded to loosen my mounting bolts most if not all of the way and slowly began jacking the engine up, ever so little at a time so I could see if anything detrimental was happening and stop it before it got too late. It ended up working like a champ. I raised the engine about an inch and that was all I needed to clear the rack so I could get it out. After that I lowered the engine back down on the loosened mounts so as to take the weight off of the pan, and that is how it is sitting right now. I am sourcing a powder coated engine cross member from Z Specialities so I can swap out a refurbished one with my old one as I start to put things back together, but for now it is just sitting in there with loose bolts and everything seems fine. If you do decide to try this just keep an eye out on your upper radiator hose to ensure that you do not stretch or twist it too tightly. It was not an issue on my car. Hope that helps. This method worked great for me. Mike.