Mike W
Free Member
-
Joined
-
Last visited
Everything posted by Mike W
-
 Steve, I am pretty sure that I purchased both the upper and lower "differential mounting stopper" new from Courtesy Nissan. Yes you are correct that they have rubber embedded in them and there are separate parts for the upper and lower mounts. I will have to check for sure once I get home this evening, but I believe the part numbers that I used are 55474-N4300 (upper) and 55475-N4300 (lower). Bear in mind that these part numbers from the MicroFiche CD that I have are supposed to be used on models after 12/74 manufacture date, but I assume that they would still be OK for your model. I also wanted my flare to be flatter, but honestly it is cosmetic only. After the initial flare was completed I was going to use my shop press to flatten them further, but decided against it. Have not had any issues at all so far. I will also tell you that I went to just about every shop I could find locally in Austin to try and get this work done, including Inland Truck where I purchased my Spicer U Joints, and got nothing but strange looks when I inquired about flaring the bushing. The closest I got was a large brake shop in Austin that also does work on trucks but the tools that they had for their brake lathes were just not the right size for the diameter of the bushing I was trying to flare. That's when they sent me to Scotty's Driveshaft in Austin who they claimed could do almost anything. He ended up making the tool to the right dimensions and completed the flare for me. I'd be happy to lend you the tool if you end up running into the same brick walls that I did. I will check the part numbers when I get home tonight and confirm the ones above are correct. Mike.
 -
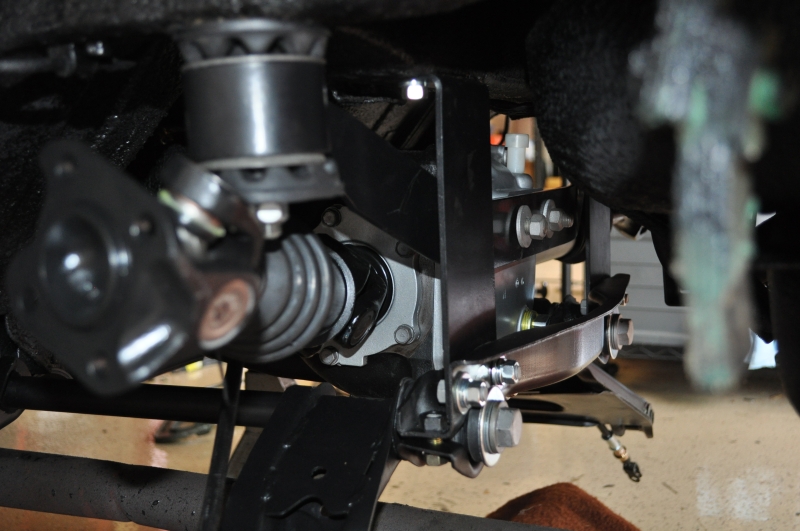
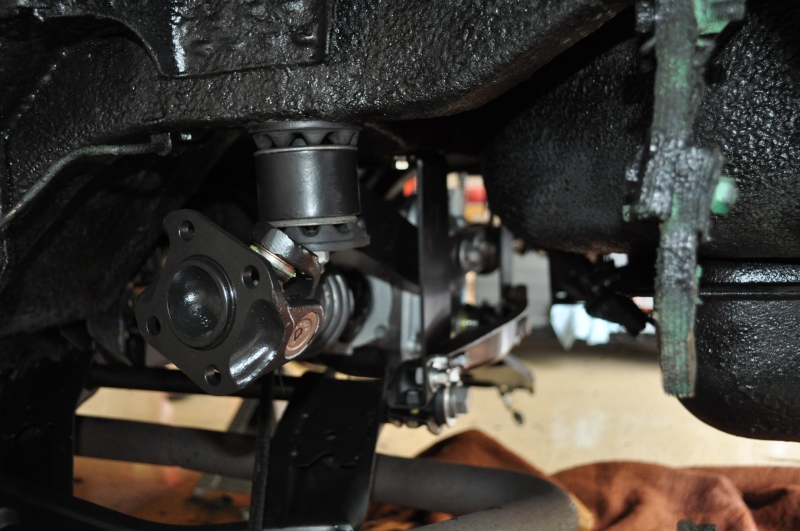
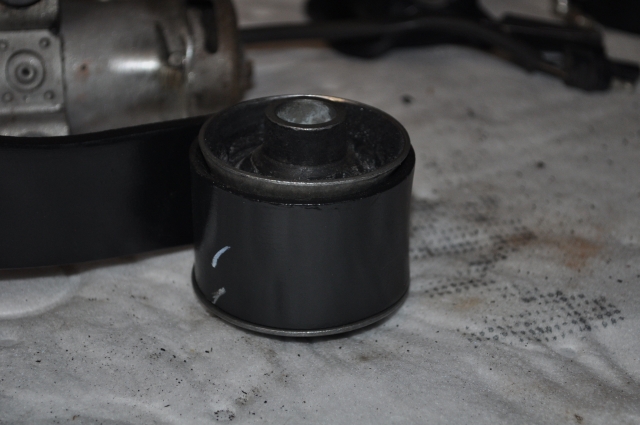
On the re-install of the OEM bushings, I went through this same exercise about 6 months ago and had the same question about flaring over the other side of the bushing. This turned out to be a real PITA for me, but hopefully my experience will help everyone else. I ended up finding a super machine shop in Austin and he actually made a tool for me that you can use with a large shop press to flare over the unflared end of the bushing. I did a write up on this that you can find here: http://www.classiczcars.com/forums/showthread.php?41782-Installing-OEM-Mustache-bar-bushings&highlight= I have already loaned this to another forum member in California and he had very good success using it. I believe that he went to the lengths of either hammering or further pressing the newly flared end so it was completely flush, while my install only used the new tool. In my case, it doesn't look flat but there is no way this bushing is coming out of the bar. On the hardware question, yes there are large washers on both the top and the bottom of the moustache bar and I was able to purchase those directly from Nissan who still has them available (at least as of 6 months ago). Here's a few pictures of how the finished product went together. Finally, if anyone wants to use this tool, I will be happy to send it to you as long as you take care of shipping costs in both directions and return it to me as soon as you have finished with it. Let me know if you have any other questions. Mike.


-
I am assuming that you are referring to the mechanical fuel pump as I do not believe that the early 240's came with the electric pump near the fuel tank. If that is the case, I do not believe that there is any adjustment to the mechanical pump that will affect pressure. For my setup (triple Webers), I actually removed the mechanical pump, replaced my original OEM electric one with a new one from Facet, and installed a fuel pressure regulator from Summit Racing that I have set for 3 PSI. Works perfectly. Not aware of anyone selling an OEM mechanical pump that has been polished. Mike.
-
I think that officially Cars & Coffee starts around noon, but a lot of people start rolling in earlier than that so they can get a reasonable place to park or congegrate with other similar car models. They are pretty well organized and usually have spots reserved for the more common models or at least major brands (like Mopar). If there were going to be multiple Z's it would be great if we could all be together. So if we wanted to be there around 11:00 to 11:30 I suspect that we would have to leave Fredericksburg at 9:00 or 9:30. It's about 100 miles and depending on road conditions, etc that would be ample time to get there. Nort sure what exactly is planned for Sunday AM, so this may be a little early for some. Mike.
-
Not sure if a lot of people woul be interested in this, but the local Austin area Cars and Coffee gathering meets the first Sunday of every month and it turns out that the last day of our Texas Rally event will be on the first Sunday in December. I have been to it a couple of times and have met some really cool people and have seen some pretty neat cars as well. It's held in downtown Leander and so its about a 20 minute ride from my house. I mapped the distance from Fredericksburg to Leander and it's just under 100 miles, but for those coming back to Austin or heading home to Dallas it could be a pretty nice ride to end the event. It would also be pretty cool to have a caravan of 5-6 Z's (or more) show up to this as usually I am the only one in a Z out of a few hundred cars. That would be quite a showing! Not sure how conducive this might be to our friends from Houston, as I think it in in the wrong direction, but it would still be neat if we could show up as a group. In any case, really starting to look forward to this and meeting everyone face to face. Mike.
-
So I have managed to plan around all of my travel to Asia and will have this weekend free. Just made reservations at the hotel and am all set on that front. My wife will be joining me as well. Am planning to drive, not tow. I am coming from Austin so it is not very far. I do a lot of my own work and agree with Frank on trusting your work, parts, etc. Never the less, I will have a care package with me of basic tools, parts, etc just in case. Am also interested in a reasonably priced T-Shirt as well. Really looking forward to meeting you all. I think this is going to be a blast. Mike.
-
Dave, Can you actually hear the pump running after the car is started? I can certainly hear mine while I'm in the on position on the ignition which I use for priming my Webers, but once the car is running I cannot hear it at all. Also did you install a pressure regulator after the pump? Hope it works out as well as mine has so far. Mike.
-
I cannot comment on the long term reliability of the Facet pump as I have only had it installed for about 2-3 months. So far I have had no issues with it but I only have a short time with it so far. I will try to keep folks posted as I put more time on the pump. As far as a check valve is concerned, I did not install one in my particular case. I can definitely see that the inclusion of one would help to keep the pressure up in the fuel system when the car is off and so this might be a good thing to consider as an enhancement to the system I have today. Also as far as overall pump output is concerned I can't imagine burning 32 gallons in one hour even at WOT with triples. I can definitely see a spike in fuel demand at WOT for a short burst of time and under extreme conditions this output might not be sufficient, but for the type of driving that is typical of my own profile, I do not see that this would be a problem. Perhaps for other driving scenarios the 32 GPH may not be sufficient (ie racing) but for my particular scenario I do not see it as a problem. Having said that, as I put more time and stress on this system I will report on any deficiencies that I might encounter. Mike.
-
Definitely coat your garage floor. Makes clean up very easy and it looks great as well. I did this to mine about 2 1/2 years ago and after much research decided to go with Epoxy Coat. The secret to getting a great result is all in the prep. I probably spent the better part of 2 weeks (on and off) cleaning, acid washing, power washing, removing paint chips, etc getting the floor prepped. It took a good 1/2 day to install the coating but was very straight forward. I found the following article on line very helpful both in the decision to go with Epoxy Coat as well as the application process: http://www.garagejournal.com/forum/showthread.php?t=14417 Highly recommend the "application spikes" which you attach to your shoes when applying. Makes walking over the wet surface easy and takes away all of the mess. You can read more about Epoxy Coat here: http://www.epoxy-coat.com/ I have absolutely no affiliation with this company other than having used their product. I can say that after 2 1/2 years it is in the exact same condition as it was when I applied it. No peels, no lifting, easy to clean, and looks fabulous. Hope this helps. Mike.
-
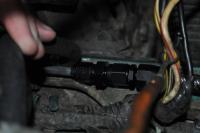
Dean, LeonV is essentially correct but it was easier said than done. The pump change was a part of a bigger fuel distribution upgrade I completed in the engine compartment to replace my old worn out rubber fuel lines with SS braided lines. I was also new to AN plumbing and so had a lot of basics to learn about that as well. As far as the power to the fuel pump I ended up locating the original wire used to power the OEM pump and used that for power from the rewired circuit. It turns out that the original OEM setup used 2 relays on the 260 to power the pump. I believe that one relay turned on when the car was in the on position and the other relay turned on at approx 600 RPMs. When both of those conditions were met, the pump received power. I located the relays, which are on the passenger side of the car above the fuse box. I had to remove the fuse box and most of the large harness connectors to get to these and it was a real PITA. However, this allowed me to locate the power wire going back to the pump as well as switched power from the ignition switch. I used these and added the inertia switch into the circuit to power the new pump. I also unplugged the old relays so they were no longer in the circuit. A little complicated but I hope that makes sense. Finally I mounted the inertia switch in the glove box so I have easy access to it in case of a false trip. I did a lengthy write up on this complete install which you can find here: http://www.classiczcars.com/forums/showthread.php?43489-Braided-SS-fuel-lines& It includes a complete parts list as well as diagrams to show what I did. Hope that helps. Very happy with the install so far. Mike.
-
I just re-plumbed most of my fuel system including a replacement for the stock electric pump. My car is a 260Z with triple webers. I removed the old mechanical pump and just use the electric. I went with a Facet FEP 59SV which I bought new on eBay for about $90. I rewired it so it runs anytime the starter is in the on position so I can prime the webers if they have been sitting for a while. I also added an inertia switch to the circuit which will cut off power to the pump in case of an impact. The pump can be heard while in the on position but before the car is started. Once started you cannot hear it at all. It is capable of 6.5 - 8 PSI and 32 GPH which is more than sufficient for my setup. Also it directly bolts into the same OEM bracket that came with the car so the install was pretty easy. Also use a Summit Racing FPR to get a steady 3 PSI at idle. So far I am very pleased with this setup and have had no trouble at all. Mike.
-
You can check out this link where I've provided a pretty detailed description of what I did on my car. http://www.classiczcars.com/forums/showthread.php?43489-Braided-SS-fuel-lines&highlight=AN+fuel+lines So far I have not had any vapor lock issues even though the fuel log is secured to the manifold through an aluminum bracket. I really like how solid the installation turned out as well as how it looks. Mike.
-
I've used them a number of times for Z parts and have had no issue with them at all. Their shipping was lightning fast and the parts were of good quality. They usually have parts from different manufacturers for the same product and so you just need to make sure that you pick the manufacturer that you really want. I'd use them again in a heart beat. Mike.
-
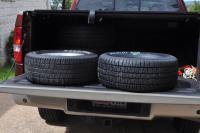
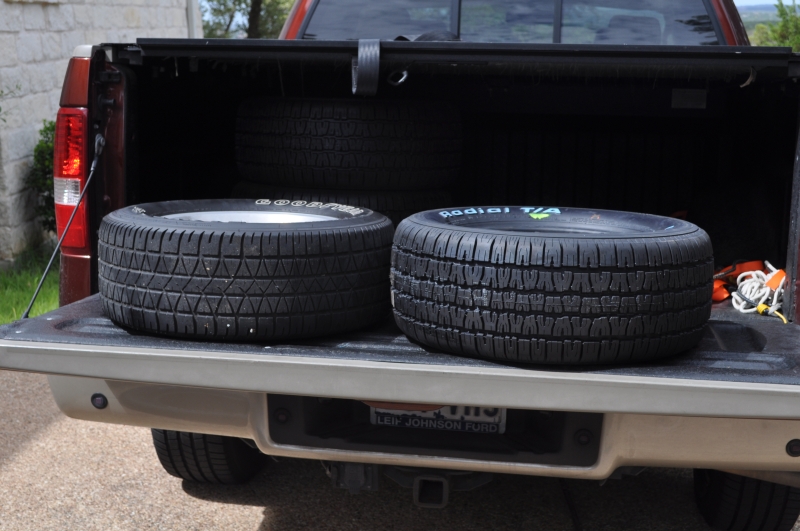
I run 225 - 60 R14 all the way around on my car. It's a late 260Z with new KYB's all around and slightly lowered. No issues at all with clearance. I also had a very hard time locating these locally in Austin and ended up getting a set of BF Goodrich of the size listed above from tirecrawler.com. I had never used them before and they were the only one that claimed they had them in stock. They also had the best prices at around $90. Was a little unsure about using them but pulled the trigger. Had them at my house in about 3 days. Worked out great. Mike.
-
dcruz, I have a 75 260Z that came with factory air but stopped working many years ago due to a leak in the condensor. When I rebuilt my engine the first time (again many years ago) I removed many of the non functional AC components such as the compressor and as much tubing as I could, but left some of the tubing and the dryer in the car as I was unable to get the connections loose. I'm now in the process of doing some work on my engine compartment to clean it up and used some Kroil penetrating oil on those connections and was able to romove all of the left over AC components including the dryer. Mine has not been used for many years and I do not even know if it is the same one as on your 78, but ironically I live in Austin as well and would be willing to let you take this to see if it solves your problem. The one I have does have a 2 pin connector on it and so it may be the same one as in your car. If you are interested, send me a PM and we can figure out a way to hook up. Might be fun to share some Z stories as well. Mike.
-
I haven't personally tried this company, but found them when trying to find touch up paint for my 74 260 with #303 Emerald Green. I did a search on their site and they do list 919 Yellw as being available in up to 1 gallon quantities. Here's the link: http://www.automotivetouchup.com/choosecolor/buypaint.aspx Hope this helps. Mike.
-
So I purchased one of these from a forum member before I did these for a third time and it worked like a charm. This was about 9 months ago but I can't recall the name of the person I purchased this from Apparently the design has changed over time and has gotten a lot beefier. The one I received used 1" all thread with a hole drilled into one end and a helicoil installed that matched the threads of the spindle pins (same as lug nuts as I recall 12 x 1.25 I believe). It also used a flared pipe over the all thread with a bearing on the nut end to keep everything moving correctly. Mine came out like butter and it worked so well the pins were re-usable. I can take a few pictures of the tool if anyone wants to see the details. Just let me now and I will post them. Mike.
-
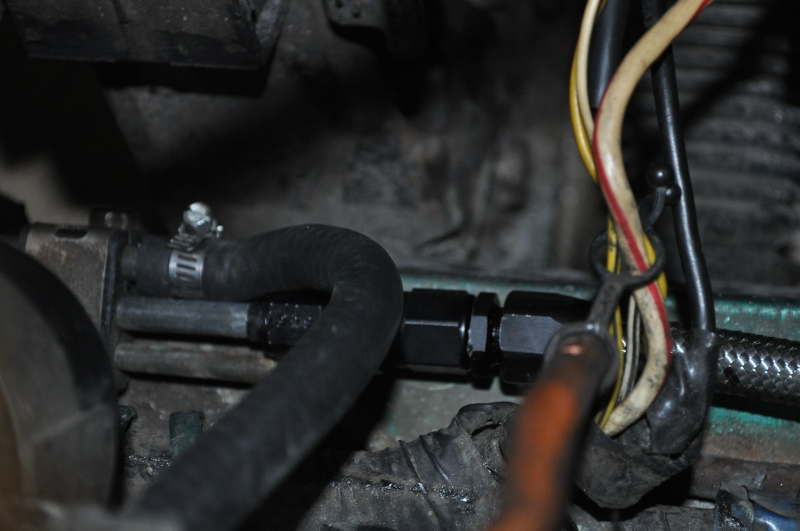
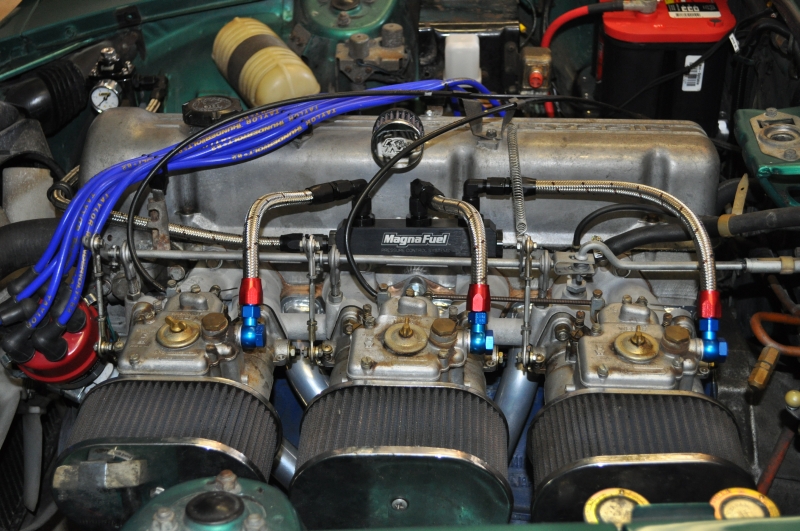
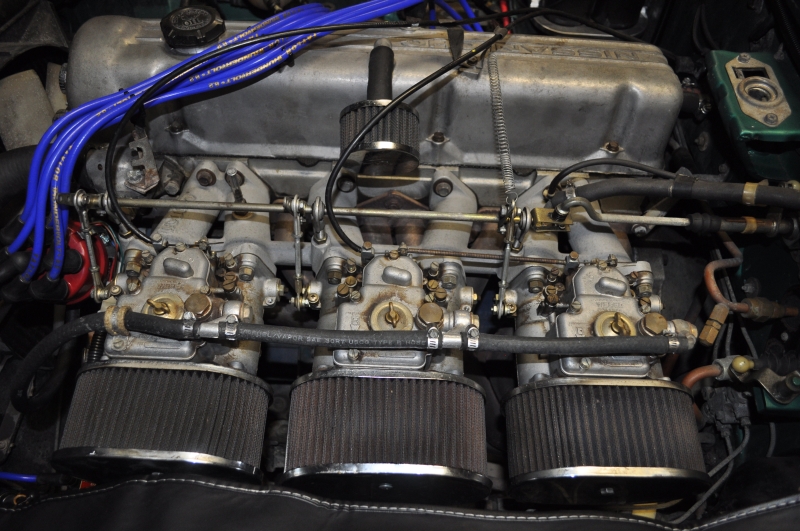
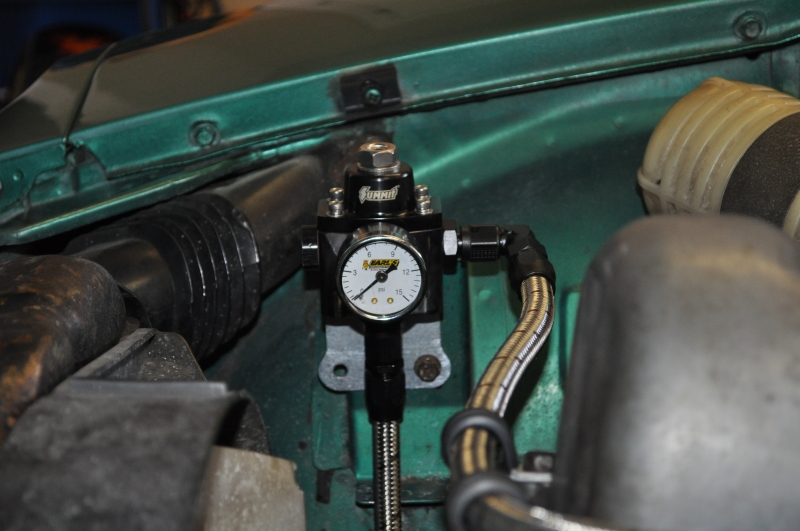
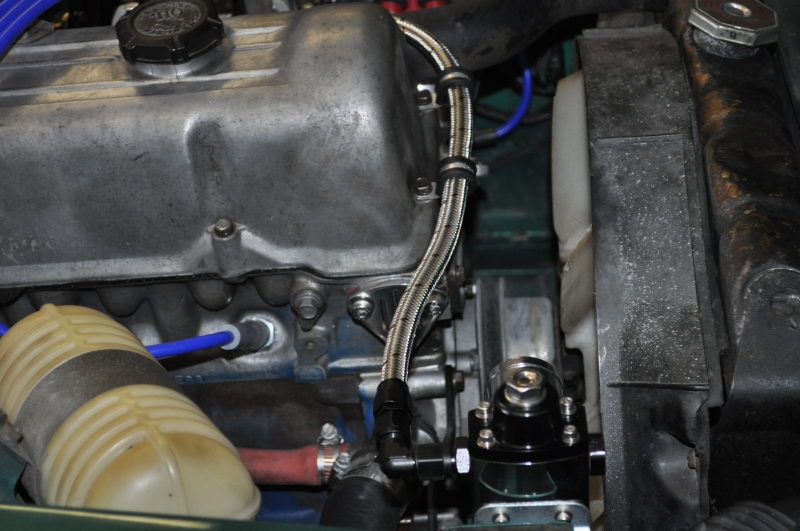
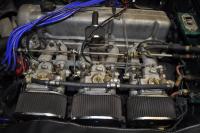
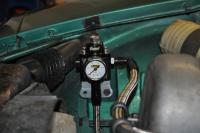
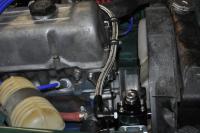
I will warn everyone up front that this is likely to be a long post. When I decided to install braided fuel lines in my 260Z I did not find a lot of info on this on the forum, so I thought that I would write up my experience so that others wanting to do this could benefit from what my son and I have just completed. I had been planning to change out the old rubber fuel lines in my engine compartment with braided SS for some time, and also did not find a lot of info on the site for this upgrade. I did contact Frank in Houston (D240zx2) who has done this and received some good guidance from him, but ended up having to make some design mods to make this work with my late model 260Z. The primary reasons that I wanted to make this change was to: 1. replace the old worn rubber lines 2. re-configure my electric fuel pump so that it would run at any time that the car was in the "on" position 3. add a more precise and better mounted fuel pressure regulator 4. bring individual fuel lines to each of the triple Webers I have installed 5. improve the overall look of the fuel distribution system in my engine compartment With the triple Webers on my car I have found that after prolonged periods of non use, the car was very diffcult to start. I believe that this was caused by a low / no fuel situation in the bowls of the Webers due to evaporation, and wanted to develop a solution that would allow me to pump fuel to the carbs without waiting for the mechanical pump, which seemed to take an excessive amount of time. So I put a plan together for the installation of a new electric pump, new pressure regulator, fuel log, as well as the SS lines themselves. At the start of this exercise both my son and I were complete novices when it came to AN plumbing and I found the multitude of different plumbing options to be very confusing. So I did quite a bit of research on this topic and found the following site to be very useful in terms of tutorials as well as a source for many of the products I needed to complete this exercise: http://www.anplumbing.com/ I also found that actually putting my plan down on paper with all of the necessary components was extremely useful as you could easily see all of the different adapters, connectors, etc that were needed for the installation. I have attached a PDF of the document that represents the final install that we completed over the weekend so hopefully this will help anyone else that wants to try this. There were 3 primary challenges to this project: 1. learning the ins and outs of AN plumbing 2. electrically connecting the new fuel pump by utilizing the existing wiring in the car 3. going from the OEM fuel hard lines in the engine compartment to an initial AN fitting I already mentioned a few things about basic AN plumbing but one other key thing to note is that all of the fittings utilize a 37 degree flare as opposed to the more common 45 degrees which I believe is used on standard NPT fittings. In order to connect to the existing hardline, you will need to flare it to mate to the appropriate 37 degree connector. This requires that you have a 37 degree flaring tool. (Sorry if this is boring to those that may already know this). Next the fuel pump. So on my late 260Z, the OEM fuel pump was configured to only run when the car was in the "ON" position and the engine was running at a minimum of 600 RPM's. Unfortunately this configuration did not allow me to address one of the key issues I was trying to solve, which was the abilty to pump fuel to the carbs with the car in the ON position but not yet running. I used my FSM to unravel the rather complex factory wiring and was able to locate the power wire that was routed to the OEM pump from the relays installed above the fuse box on the passenger side of the car. I ended up tapping into this and powered it through an inertia switch which I located in the glove box, so I still maintained the safety of killing the pump in the event of an accident. Now the pump will run anytime the key is in the ON position. Challenge #2 solved. The third challenge was actually the hardest and my son and I spent 3-4 hours getting an AN adapter on the stock OEM line. (I decided not to replace the hard lines all the way back to the tank as my lines were in pretty good shape). Unfortunately I was not 100% sure of the size of the OEM line, but I measured approx 5/16 inch with calipers. I didn't really know if this was a true 5/16 or some close metrric equivalent. I ended up using a "tube nut" and "tube sleeve" from Earls that supported a 5/16 inch hard line and it was a perfect fit. At that point we thought we were out of the woods, only to find that the hard line where we were going to connect had a slight bend in it and the sleeve would not slide over. We ended up having to cut the hard line further back (on top of the frame rail) where we had about 3-4 inches of straight pipe and could get sufficient room to install the nut and sleeve and have room to make the required 37 degree flare. This also proved a little challenging as the space was very tight and the flaring tool barely fit, but we managed to make it work after 3 or 4 tries. We did have to remove the clamp which held the fuel line as well as the 2 OEM return / evaporation lines to get enough room to make the flare but this was relatively straight forward. After that was completed, it was pretty much smooth sailing. We ran adapters / lines up to the new fuel regulator which we mounted where the carbon canister had once been installed. This was a perfect spot for it and the holes were already there. My son fabricated a bracket for the fuel log which we mounted on the center mounting studs of the intake manifold. I was a little concerned about heat and vapor lock with this position, but so far no sign of that and I hevan't even installed the heat shield yet. A few other noteworth items: 1. It was really hard to find a fuel regulator that supported the low pressure required by the Webers and had the AN fittings I was looking for. I finally located one on Summit Racing (P/N 220065) 2. The inertia switch I used was sourced from Advanced Auto and is made by Intermotor (P/N S9300). It was a little pricey at $80 or so, but I felt that this was worth it for the safety it provided. 3. I found a fuel pump that was nearly identical to the OEM one from Datsun and supported a pressure range that was consistent with the Weber requirements. It is made by Facet / Purolater (P/N FEP 60SV) 4. I needed an inexpensive flaring tool and found one also at Summit Racing under their own brand. 5. Finally, althouhg I am very happy with the results of this project, I will say that the AN pluming parts are very expensive. I believe that I spent somewhere in the neighborhood of $250 for all of the bit and pieces I needed as well as the SS hose itself. I would do it again, but just a warning for those who may not know. I've attached a few before and after pictures so you can see for yourself. I also apologize for the state of the rest of my engine compartment. I am in the early stages of doing a complete refresh and still have a lot of work ahead, but I at least have the fuel system done. If anyone needs any further info on this, please feel free to contact me. Hopes this helps out a few other forum members. Mike. Fuel Distribution Design - Final.pdf


-
I just completed this same job this week with a new set of headers (from MSA). I used a sealant by Permatex called Copper Spray-a-Gasket. Worked great. I let it sit for a day before firing the car back up and no leaks or other problems. http://www.permatex.com/products/automotive/automotive_gasketing/gasket_sealants/auto_Permatex_Copper_Spray-A-Gasket_Hi-Temp_Adhesive_Sealant.htm Would use it again in a heartbeat. Mike.
-
Assuming that I am in the country and not traveling in Asia for my job, I will definitely plan to attend. Already ran this past my better half and she is interested in attending as well. I live in Austin and have already made our local Z club aware of this (Capital Z of Texas or better known as CZOT) and so I expect you may see a few other attendees from the Austin area as well. I am also open to help with the organization of this especially if there is anything around the Austin area that would be of interest to people. There are really great drives around Lake Travis and this is far enough away from Austin proper that you will be away from the crowds and congestion. It's also not that far from Georgetown and so it could make for a really nice drive with great restaurant stops along the way. The sooner you lock down the dates, the better chance that I have to make my schedule work given all of the trips that I make to Asia annually. Look forward to meeting you all face to face. Mike.
-
Arne, I also did not know that there were companies that existed that would re-machine these wheels. It is what made me extremely nervous about doing this as I was very worried about them being damaged in the process which would not be a good thing for what is arguably an irreplaceable wheel. In the end, my fears were unfounded as the wheels came out great. If anyone is interested in doing this to their wheels, I would be happy to work with you and my local shop to get them done. Not sure what shipping would be to get them to Austin, but if you cannot find a local shop to do this for you, it could be an reasonable alternative. Just PM me if anyone has interest in this. MIke.
-
I had a similar issue when I received mine although I was running on a PC, not a MAC. As I recall it was an issue with Adobe reader. You need to go into the Adobe reader app, go to preferences and find the "internet" option. Unclick the box that says "display PDF in browser". I believe that's what I did to get mine to work. Let me know if you still have issues. Mike.
-
I don't think it is a chain although when you do a search on line for Hub Cap Annie, you find a number of different companies that go by that name around the US. As far as I know the one that I went to started in Austin in 1980 or so and it has been going ever since. From the folks that I talked to there they apparently have another location in Dallas, but I think any others that go by that name are unrelated to the one here. Here's a link to the one in Austin in case anyone is interested. http://www.hubcapannieonline.com/ Mike.
-
Threehz, I just finished the post on my Appliance wheel refinish. You can find it here: http://www.classiczcars.com/forums/showthread.php?43224-Appliance-Wheel-Refinishing Mike.
-
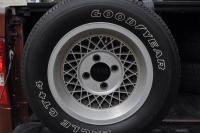
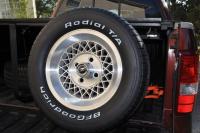
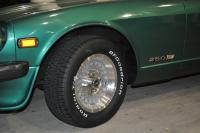
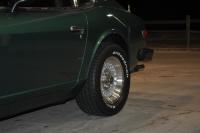
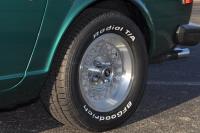
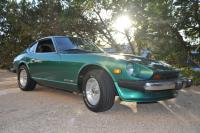
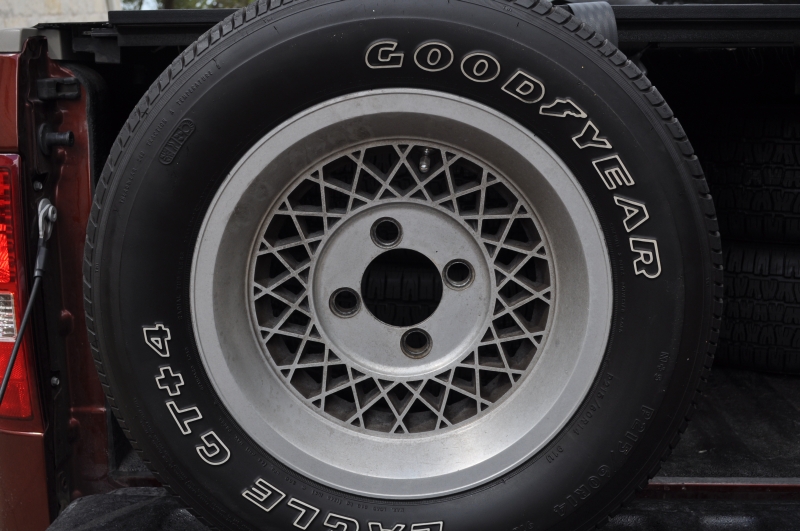
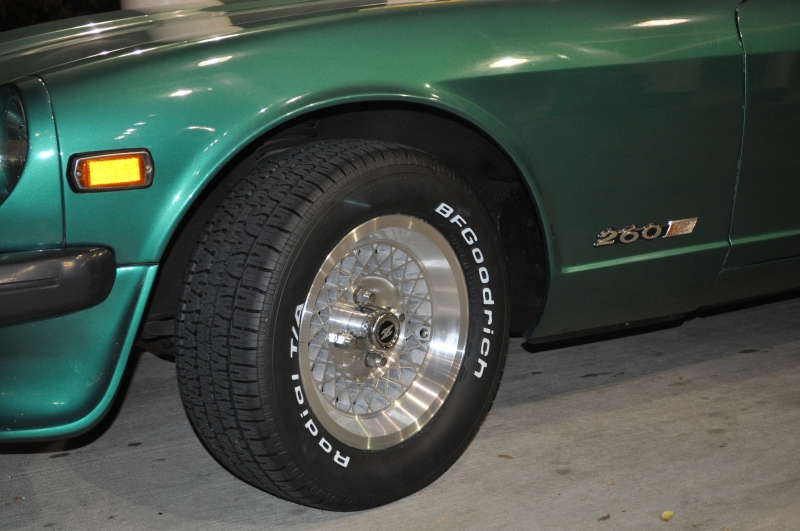
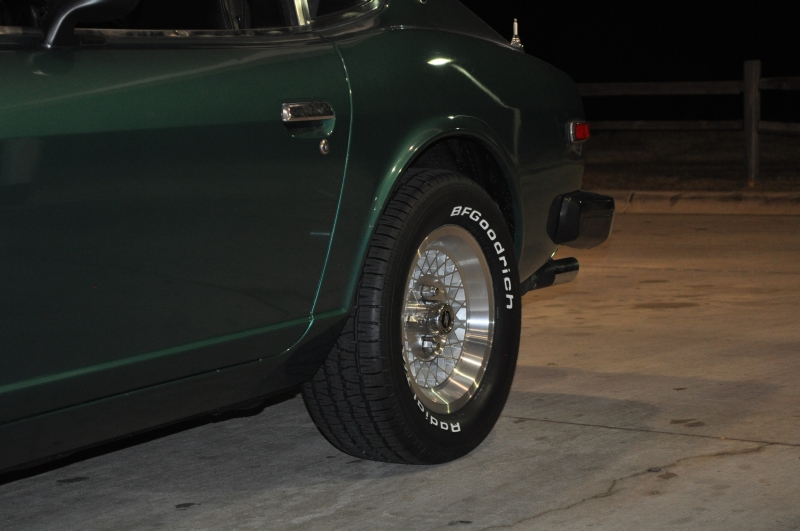
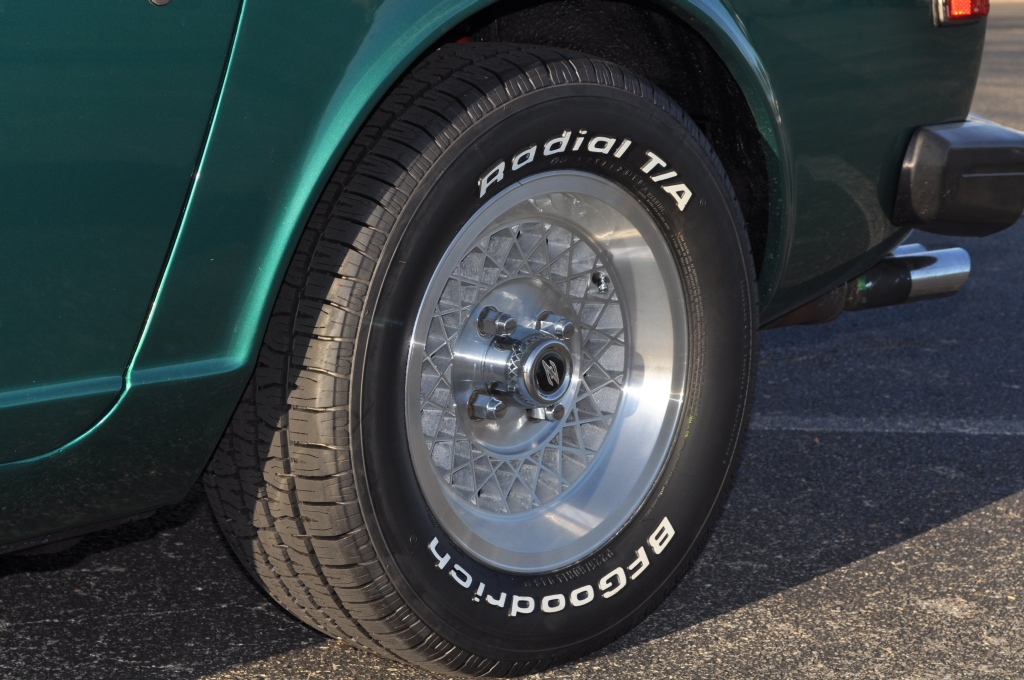
So as the original owner of my 260Z, I purchased a new set of Appliance mesh wheels (14 x 6) shortly after I purchased the car sometime around 1976 or so. I have had them ever since and have done my best to keep them like new, but admittedly after 35+ years of use, they are beginning to show their age. Recently, I was also in need of a new set of tires for my car and contemplated moving to a more modern wheel where I would also have a much wider range of tire options, but in the interest of keeping the car period correct I decided to stay with the Appliances (which I do like the look of on my car) and live with the limited selection of tires that are available for this rim. So based on that I did a fair amount of research on companies who refurbish / recondition wheels and found a number of them relatively close to me in Austin, TX. After speaking with a number of potential companies I ended up going with a local comapny here in Austin called "HubCap Annie" who has a lot of experience in repairing and recondiitioning aluminum and steel wheels and also had a very good local reputation. In any case, when I took my wheels down to them for an estimate on what it would cost to do this as well as the time involved, I was rather surprised at the recommendation they made to me. I was fully expecting that they were going to recommend a thorough cleaning of the wheels followed by a polishing and buffing. It turns out that my wheels had quite a number of scratches and scrapes and they were very confident that the "cleaning and polishing" approach would not remove much if any of these defects. They indicated that the wheels would look good and would have a reasonable shine to them, but the scratches and scrapes would still be there. This was pretty disappointing and not what I was expecting to hear. Instead, they recommneded that I have each of the wheels re-machined. Thye indicated that this would remove all of the defects and would result in a much better finish. Needless to say, this was pretty scary to me because if they were to screw them up its not like I could just go to my local tire and wheel shop and get a replacement. After much discussion and many questions on my part, I decided to go ahead with this. The process they used was first to thoroughly wash each of the wheels (not sure if it was an acid bath or not but it was definitely more than soap and water) to remove all of the grit and grime from 35+ years of use. If any of you are familiar with these "mesh" wheels from Appliance you know that the inside mesh part is extremely hard to clean and in fact the metal in the inner parts of the mesh is pretty rough from the original castings. This is how they were originally when I purchased them. They recommended that before re-machining the wheels that I have them painted with a color of my choice so that after re-machining the inner mesh would retain the paint, would look much nicer, and would be a lot easier to upkeep. I decided to do this as well and chose a color (silver) that blended in nicely with the rest of the wheel. After this step was completed they re-machined them and once that was done, they applied a clear coat to eac of the wheels for easier upkeep all around. Cost was around $125 a wheel and they quoted about 2-3 days to complete the work. This also included removal of my old tires and mounting and balancing of the new tires that I had already purchased. (decided to go with BF Goodrich Radial TA. 225-60 R14. Purchased from Tirecrawler.com. Best prices and the only ones that had them in stock) In parallel with this I ordered new center caps from Eagle Alloys as well as the "Z" emblems from MSA so I would essentially have a brand new wheel in the end. Well in the end, the results far exceeded my expectations and any fears that I had of this process resulting in a completely damaged wheel were unfounded. I am astonished at how good the wheels look with no real side effects from anything that they did. On top of that the radical improvement in ride and handling from the new tires made me feel like I was driving a completely different car. It had been so long since I put new tires on the car that I forgot how big of a difference they could make. Finally, with the clear coat, they will be a lot easier to care for and I expect another 35+ years of use from them. I've attached a few before and after pictures so you can see the difference. Fnally a quick plug for Hubcap Annie. These folks were awesome. They knew their stuff, executed as planned, and in my opinion were very reasonable from a price perspective. I would not hesitate to go there again or recommend them to friends and colleagues. Let me know what you think. Mike.