Z Kid
Free Member
-
Joined
-
Last visited
Everything posted by Z Kid
-
 Who's was the red Z which had the footage of it sliding all over the shop before disappearing off an embankment?
 -
Nah fair call, 99% of the time I am being dodgy, and dodgy would be a kind way to describe the way I do most stuff, but I figured with the Z it deserves to be done at least semi well (to the best of my ability). Yeah its nice to actually do something on the car after letting it sit for so long, not sure if I can still call it a car in its current state but what the hey. It was you getting close to finishing your project that got me all keen again. Chris
-
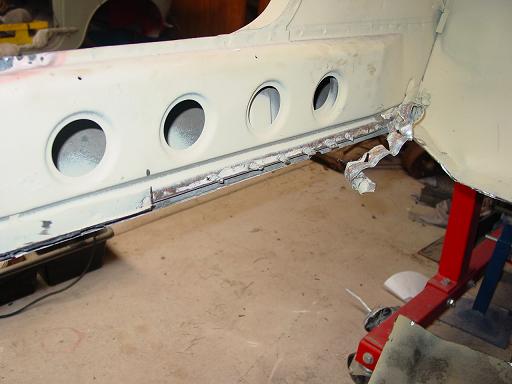
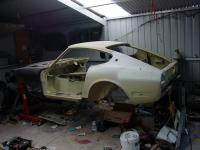
The rust that you can see in the pictures between the seams of the body is there because there is no way to get at it till after you cut the floors out,a nd after they are welded in I dont think there is anything I can do about it stopping forming. The primer that is on it is more of a temporary thing at this stage. Before that was applied, all surface rust etc on panels was ground back and then acided with the rust acid eating stuff. The rust thats left is the perforating rust that has to be cut out so its really obvious at first glance (I think in one of the photos you can see a patch thats been put in the sill), and its just got the lightest dusting of waterproof primer over it to prevent any deterioration. So yeah the rust (you can call it rust but chemically its no longer rust, its just the holes and pitting left where there was rust) on the sills etc is there and covered because its blatantly obvious and the surrounding metal is sound and I didnt want it to get surface rust (again). Where there are areas that require more than a small patch its still just bare metal ie rear beaver panel, floors and seat mounts werent undercoated, doglegs werent. Its a work in progress and the rate at which I work means that if it wasnt undercoated with waterproof primer it would just be a big ball of surface rust now. The areas of white primer and black primer are those areas which as far as I am concerned are truly finished rust wise . And as you can see there is still a long way to go.
-
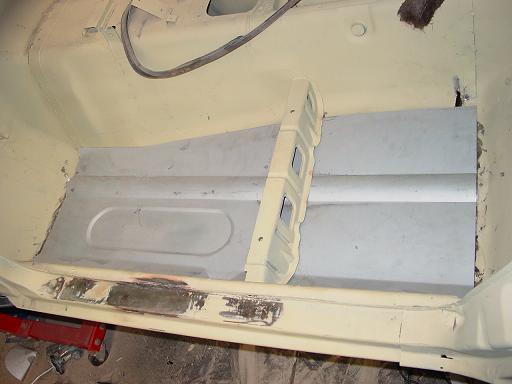
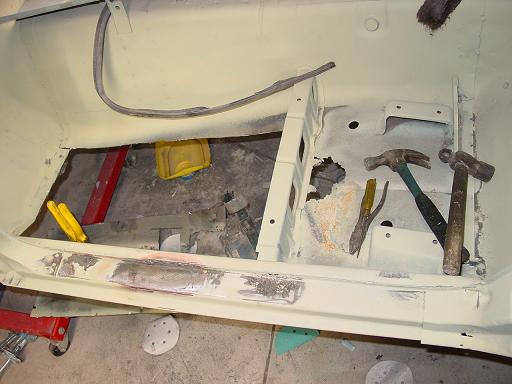
On my floor (which is a locally made item) the bump in the passengers side which stopped under the front seat mount in the original was continuous, so it needed a bit of cutting and shutting to get to fit flush with the seat mount. It was at this point that I hit my finger with a hammer trying to beat the seatmount into shape, and my faithful assistant "Jumbo" took off with my bag of tec screws which are still yet to be found, so more to come soon. (this is the second side I have done, so whilst I havent finished I know my method works well, I just didnt take any photos the first time round) First time round I also used a spotweld cutter, which took twice as long, and I wasnt as happy with the result.

-
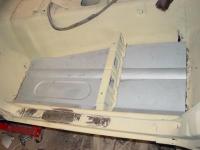
Once all the old floor is removed and roughly cut out to the right shape, you can now slide in the new floor. To do this the front and back openings you cut have to be the same width as the new floor, but the rest can be left oversize at this stage.
-
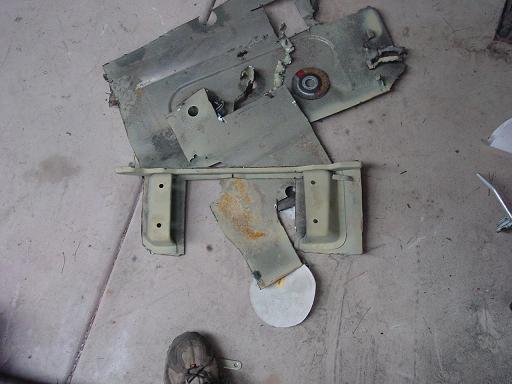
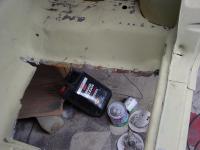
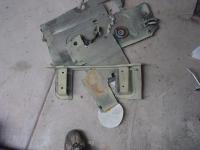
The main seat mount can stay in place, but the back mount is not independant of the floorpanel, so it can be cut out now (it also makes it heaps easier to fit the new floor), but save it for later. Once roughly cut out, you can remove all the old floor from it with the peel and grind method. Getting it all ready for reinstallation after the floor is tacked in place.

-
The main seat mount can stay in place, but the back mount is not independant of the floorpanel, so it can be cut out now (it also makes it heaps easier to fit the new floor), but save it for later. Once roughly cut out, you can remove all the old floor from it with the peel and grind method.
-
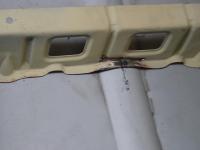
Repeat this step of removing the strips for everywhere that there is a line of spotwelds joining the floor to something else, and clean up the dags the same as above.

-
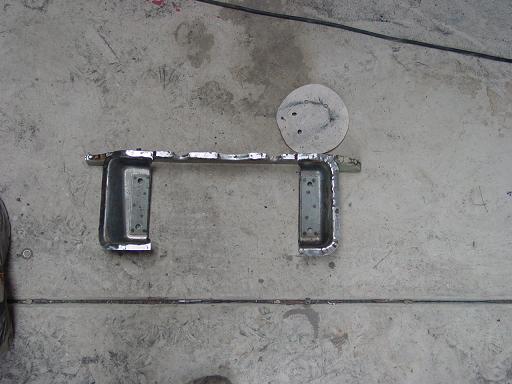
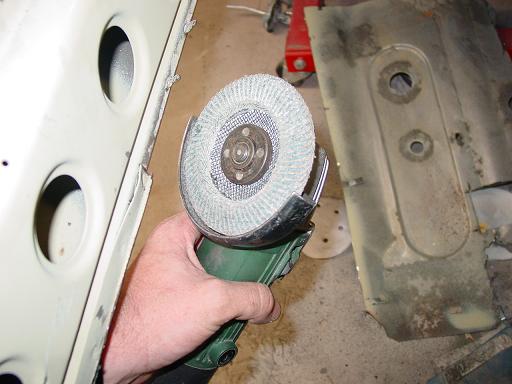
Once you have torn the strips off you need to clean them up, for this a flap wheel in a 115mm grinder seems to work the best, as its not as agressive as a grinding wheel, more of a polishing effect. God bless the man who invented these, but I wish he would strike the 3M man dead who patented it and now you have to pay 20 bucks per disc, but they last a long time.

-
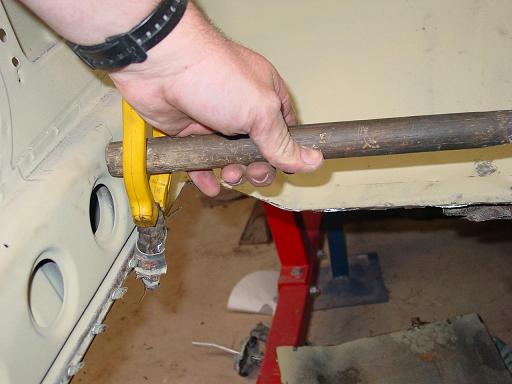
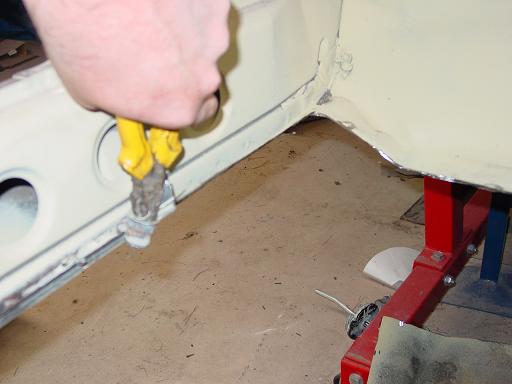
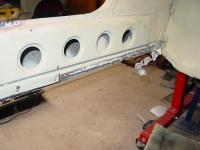
Now you have the flanges to remove where they are spotwelded, split or cut the strip in one place and grab that end with the pliers, now just roll it up and tear it from the body of the car, insert a lever into the pliers if you need some extra twisting power. If the thin flanges at the front and back distort, its not a problem, they can be tapped back into place with a hammer and dolly. This will leave you with just the spotwelds left attached to the car as seen in the photo.

-
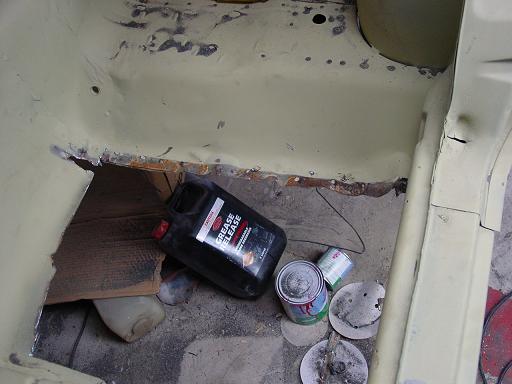
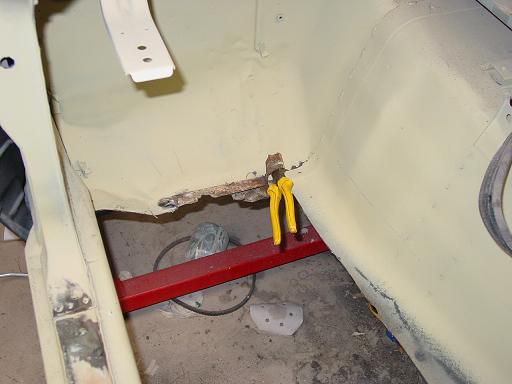
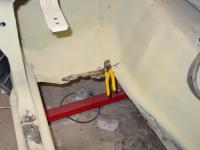
Replacing floor pans in your 240Z Materials: -Slab of beer -Angle grinder with cut off wheel -Angle grinder with flap disc (coarse) -A couple of pairs of pliers/vice grips -Hammer & dolly -Screwdriver Hello, just posting a few pictures/steps for people who are considering replacing their floorpans in the Z car. In mine the under floor rails were a bit rusty so they are being done at the same time. First of all start to cut out the bulk of the floor pan just leaving the flanges that are spotwelded to the body of the car. More to come

-
I would be looking into a mini van roof vent, or this http://cgi.ebay.com.au/ws/eBayISAPI.dll?ViewItem&category=50142&item=7969312979&rd=1&ssPageName=WDVW or perhaps , or course you still need to filter the air coming into the car after the roof vent. Fitting a heater blower motor under the bonnet with a pod filteris another option, for the helmets we use a kombi blower motor with a pod filter and it works a charm at keeping dust out of the helmets, so maybe scale it up for the K?
-
http://www.albinsgear.com.au/formulae.html this one tends to work fairly well.
-
Hello, I stripped down a 240K motor a while ago, I shall have a look in the shed tomorrow and see what I can dig up. Chris
-
You can buy a 7 inch petrol powered grinder for a couple of hundred dollars apparently, saw some bloke with one in a U pull it yard and he said he got it off ebay, might be worth a look. Made us look like a bunch of clowns as we lugged our generator and grinder down to the far end of the yard.
-
You have to watch out now, I live in a fairly small town, and the cop knows my car, my name and where I live (all for good things, the cops a car nut too). But a friend who runs a turbo Sigma (not sure if you have them in the states, but its a grandma car that he bolted a big slug to the side of) and he is known by first name, the car, his driving habits, his address, as well as the fact that he only has one point on his licence till the end of 2008. You now have the same treatment to look forward to that he has, frequent pulling overs, roadworthiness checks and RBT's. Good luck Bill, but you are now a marked man. I wont preach about the speeding fines, because I have racked up far too many, and always when rushing for something thats "important", I now realise that most things arent 2-300 dollar important
-
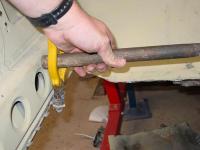
To remove a stubborn tierod end from the steering arm (Ie the tapered joing filled with rust), give the outer part a bit of a gentle warm with a gas torch, then belt once or twice really really really hard ideally with a sledge hammer on the side of the steering arm where the taper inserts from the tierod end, it causes them to shoot out every time.
-
Condition is pretty good, with no real kerb rash etc, tyres arent worth being on there but otherwise all good.
-
Just while you are on the topic of firing order, I would love for you to suggest a firing order that provides the required balance that doesnt end up with the same pattern as the L series/XKE engines in terms of carbs used/timing of firing. I have been thinking and thinking, and no matter what combination you use to get it to fire, in order for it to be balanced it has to have the same sort of ratio or carbs to cylinders and firing times. Incidentally triple SU's have an advantage over the webbers on other cars in terms of drivability because due to the venture style and lack of a pump type setup within the carb, when you put your foot down you cant really flood the engine unlike the webbers which can create a lot of popping and farting. I think well done with equal length manifold runners it could be a great conversion, and they really are a very simple carb to tune.
-
Peanut mags are those ones that you see on lots of old school cars, silver with 5 peanut/kidney shaped cutouts in them, they are 14x6ish I think, but can measure if you are still interested.
-
The model store near me had a couple of ZG 1/12 kits left last time I was in there a month or so ago for 100 bucks aus I just couldnt resist, so now I have the rally one (that I bought first for a stupid price) and the ZG one, yet I dont have the courage to start building either. Chris
-
15 dollars each per gauge, but sorry no working clocks.
-
The bracket is made up because originally the choke mechanism is mounted directly to the plastic console, meaning a few years of use and abuse cracks and destroys the console around the area, by making up a little metal bracket the choke can then be mounted directly onto the transmission tunnel meaning that the centre console has none of the stress as you pull up/push down the choke lever and should last forever.
-
I know its not original original, but from the looks of that shape, you would be able to go down to your local metal frabricator/trailer joint and have them fold you up one with an identical profile, for you to chrome at a later date? I had the local guy bend me up a pair of new frame rails and for 15 dollars a pair you cant beat it?
-
not sure if its too late but what I was shown as a handy trick was first batch well thinned, practice on a spare car you have lying round, or the wall of your shed etc till its thin enough. This goes on and looks a bit dry, and before the next coat just add a bit more thinners and so on and so forth until the last coat is about 80 percent thinners and nice and smooth. With acrylics I have found that you can actually apply a reasonable layer before it runs once again try the shed wall. And even if it does look dry as long as its got good coverage you can wetsand it smooth then clear over it. Chris