Z Kid
Free Member
-
Joined
-
Last visited
Everything posted by Z Kid
-
 A roof vent is only any good if you are not following any cars, and in bulldust this means that you need about 2-3 minutes on a still day? Are you really going to let the opposition get that far ahead of you on the dirt sections, surely you will be wanting to round them up . Just remember to shut it as soon as you start catching a car infront, or it makes the dust problem 10X worse.
 -
I looked at cutting the seat mounts out to install, however just having the transmission mount without the main seat mounts in means that you have move the whole trans tunnel to either the left of the right relative to the car without much effort at all. I agree I probably should have had the trans mount in, but hey it still fits fine (pure arse) I guess I struck it lucky, but I would be cautious to take out the front seat mounts and just have the trans X member, it would only need to move the whole engine gearbox 2-3mm to one side of the car and you would end up with the potential to have some awful driveline vibrations, and real difficulties getting at bellhousing bolts etc etc. Thanks for the tip 26th, and I will remeber to bolt up the trans X member next time I have to do a set of floorpans. I'd also be cautious about doing both floorpans at once though, I made a point of completing one before even removing the other one, theres not a lot of strength in the old Z shell without floors I wouldnt have thought. Chris
-
Come on, dont be soft , grab a kidney belt, bolt on an extra shocker or two, and I am sure the K will handle anything you can throw at it . Shrunk240K6.bmp Shrunk240K7.bmp
-
When it snaps its more of a rough splintery tear. If you want to hold it together while you are glassing it, a few strips of metal with a heap of tech screws into the spoiler will hold it in shape. However if it WAS on a car, then you should be able to get it back onto one without cutting and shutting. A heap of pressure over a sustained period may be enough to fix it. Dont try and fix it off the car, even if you take measurements perfectly the fibreglass will distort it as it sets it and you will spend all the time fixing it and still be up $^!# creek in a barbed wire canoe with a paddle at the end of it. Whilst fibreglassing is fiddly and itchy, its really not very hard to do, I have just finished rebuilding a spoiler off an IP car that got tapped into the car infront then driven over by the car it was attached to. With a bit of fiddling it should fit, when flexing it it takes a lot to break fibreglass, and just before it breaks you will hear a heap of fibres crackling, so you know its about to happen. Chris
-
Here in SA you can still get the tar paper stuff from a motor trimmers, there was a bit of a sheet left over here from when dad did the tail of his E type. It was about 20 bucks per square I think, but had to be bought in semi bulk.
-
If it was me I would cut and shut; Get a diamond disc for an angle grinder and cut it into at least 3 pieces. Mount the pieces up to the car and then using a flap disc grind back the spoiler at the joins until you get down to the fibreglass mat a few inches either side of the cut. Get some fibreglass matting and polyester resin/catalyst. Chop strand is cheaper and conforms to corners better, woven matting is dearer, more of a pain in the arse but slightly stronger (basically not worth it because the original spoler would have been done with a chopper gun which is one down from chop strand) So now you have it ground back, add several layers of fibreglass just over the joins/ground back bits with just enough resin to wet it out so its sort of transparent. With the catalyst, the more you add the quicker it goes off but is weaker, and also gets too hot in the container and sends toxic smoke everywhere, 2% is recommended, but maybe use 3 in winter. Build it up at the front a bit too much so you have stuff to grind back to shape. Once its dry/set remove the spoiler from the car and grind down the back of the joints till in the centre you reach the new fibreglass matt that you laid down on the other side, sort of like a V shape type thing. And lay down more fibreglass mat and resin over it. Now you can grind back the excess fibreglass with the flap disc on the front then skim fill with bog to get right. Also worth noting that after the front glassing up you should leave it on for at least 2-3days to ensure its totally set/stable. That said I would be very surprised if you couldnt bodge it slightly by just cutting in little pie cuts across the top piece and then glassing over them once its bolted up. Possible even from behind with a wheel off ie whilst its still on the car. Good Luck, fibreglass is evil $^!#, the spawn of satan, use a mask when grinding and expect to be itchy for days afterwards, and best bet jsut to keep the clothes you were wearing when you did it as purely for fibreglassing, and DONT throw them in with all your other wasing, or you shall become known as itchy. Chris
-
I can see the news headline now, "Bugbomb Bombs man", youd want to be a bit careful spraying an aerosol into a thing with an electric motor, the sparks from the brushes might be enough for an explosion. It would be like a tennis ball cannon, but shooting pissed off spiders instead.
-
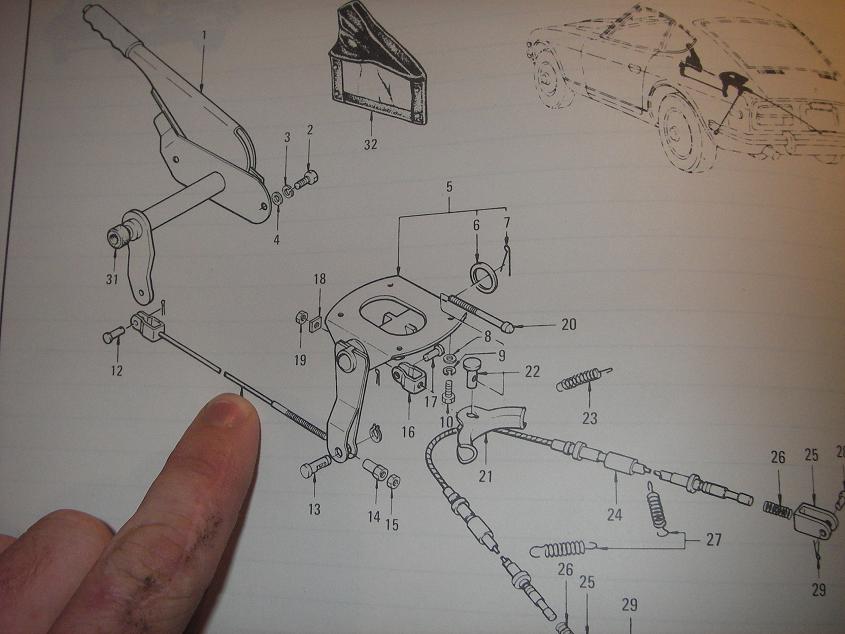
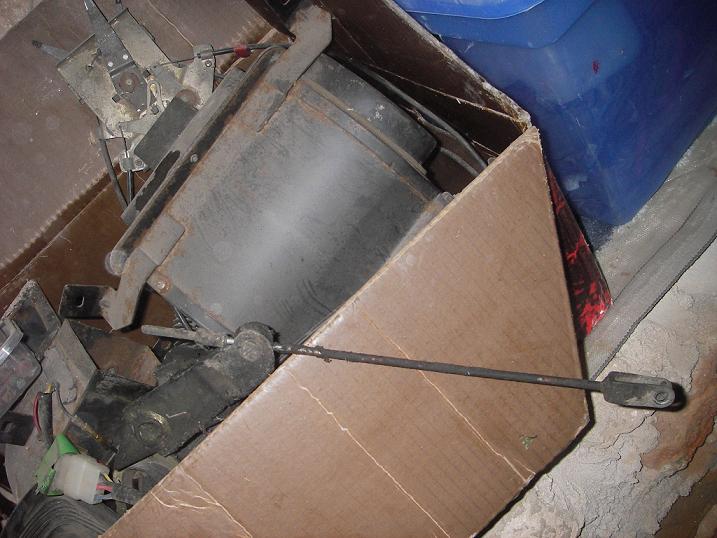
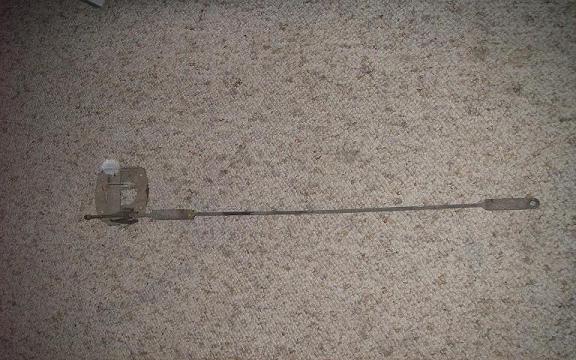
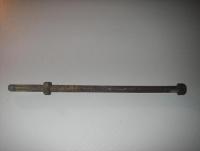
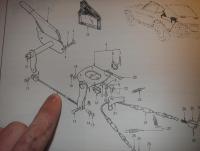
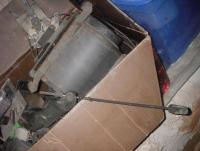
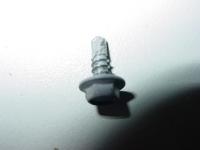
Well here it is, the end was not the bent part so it doesnt require any grinding down to fit etc. Its still slightly pissed, but probably only .5/mm along its length. Its now off and free etc so you can see it properly, if you can measure yours we will be able to see if its the same length as the 2+2 and go from there. The one in the photo is about 14.3cms long including the head of it.
-
There is a bit like that in the first pic of the 2+2 part, but its got a bend in it, might be just worth getting a high tensile bolt from a bolt shop and grinding down the fixed head to suit with a bench grinder? Sorry I couldnt be of more help.
-
The bit you are looking at in the photo is the bit that the somewhat disformed finger is pointing to in the picture. If this isnt the right bit, mark the bit on the photo thats the bit you are after and I can have another look (or just the number). Chris
-
This little sucker?
-
how much of it are you after? I assume this is the part, the only other thing I would have to do is drag out all the others and see if this is one from a 240 or a 2+2, I know I have the spare 240 one somewhere but not totally sure where. EDIT I just found a short stumpy very different version but still attached to the similar pivot point, so I assume that picture is a 2+2 and the stumpy one is the 240? So there is a spare 240 one, but I still need to work out which one is which.

-
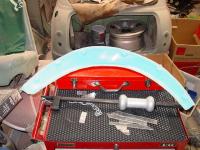
Cuong, there is an individual mould for each flare, ie 4 moulds, everyone is different. At the moment I have got to the stage where I am really happy with the quality of the front moulds and one of the rears, but the other rear I want to improve/redo. Chris
-
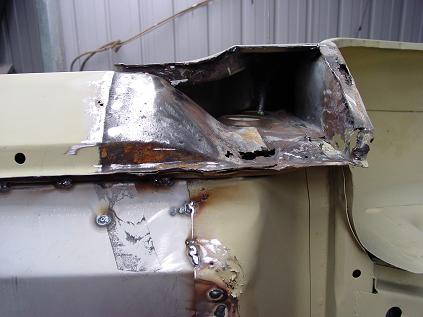
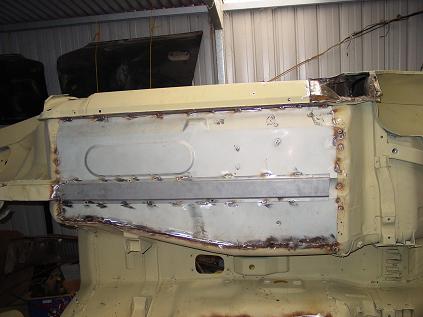
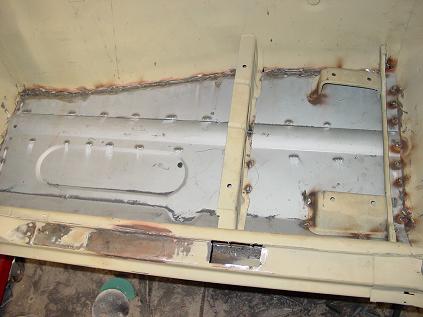
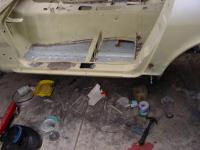
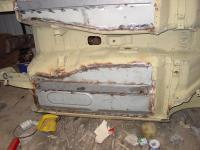
As can be seen by the last photo, I still have a shedload of welding to go before I can be considered to be "done". Now I just need to stop getting sidetracked by all those other projects such as the moulds for ZG flares seen below (a friend needed a set for his racecar and actually thought he would be able to borrow my flares to pass scrutineering, I think not, so I took a mould and knocked up a set). Happy floor pan replacing Chris

-
So now the floorpans are just about in, reinstall the back seat mount if you took/tore it out and fill up any remaining tech screw holes with mig. The next thing to do would be to cover welds with a waterproof primer, or in my case continue the fun of welding.
-
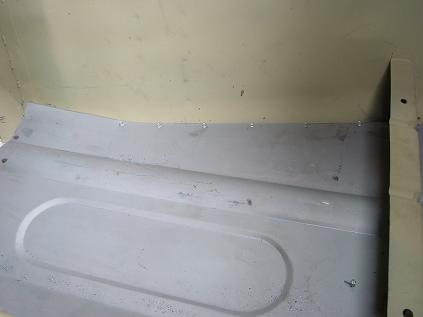
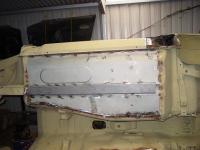
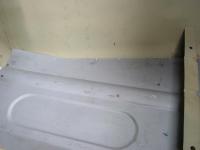
So once the floorpan is welded in its now time to add the underfloor frame rail, my pans didnt come with one so I went to the local engineering shop and for 20bucks had him bend up two bits in the right profile, slightly longer, thicker and zinc coated. These were techscrewed into place and welded in fairly straight, now would be the time that I recommend a few less beers during the above welding process, one of mine is about 2mm out, stuff all in the scheme of things, but still frustrating. As you can see on the second side I still need to close off the end/bend it down then weld it.
-
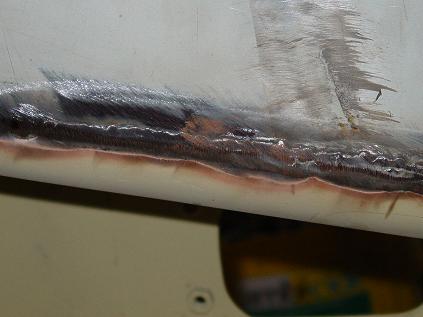
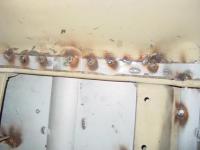
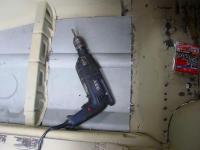
Well now the floorpan is stuck firmly in place, and the correct size so its time for welding. I am using what borders on a "toy" mig welder, but I do beleive at the very least you must have a gas mig, not a gasless, as the material is very thin. I have found .6mm welding wire to be the best/only wire I could get to work any thinner and the weld sits ontop and thicker and you blow holes everywhere. My floorpans were also made from a zinc coated material, and for safety/spattering reduction it pays to grind this off in the area where you intend to weld, just the mm either side of the weld. The gas is also toxic. Initially the best thing to do is just move round tacking the floorpan in all places and several times along the trans tunnel joint, ie every 3-4cms. So you now know for sure its all where you want it to be. Once it comes time to weld the long joint along the gearbox tunnel it needs to be done in lots of tiny bursts of welding with plenty of time to cool down inbetween otherwise you will end up with a slightly wavy finish as the metals cool at different rates etc. So weld a bit, go to the other end weld a bit more, then go tack somewhere else, remove a few tech screws have a drink of beer then repeat. Do this till its all done along the lenght of the joint and everywhere else is welded to your satisfaction. Once this is done grind down the welds till they are fairly neat and tidy, of course your welding could come out neat and tidy and you wont need to grind at all, but due to the nature of lots of small welds joining etc its not going to look perfect until you grind it back a bit.

-
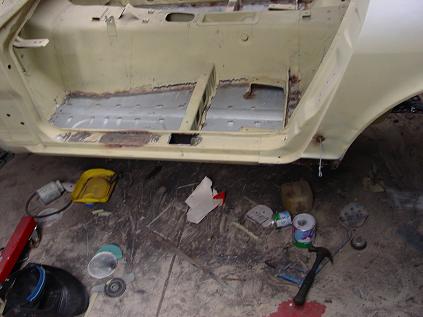
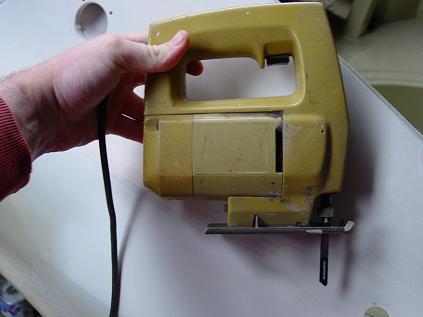
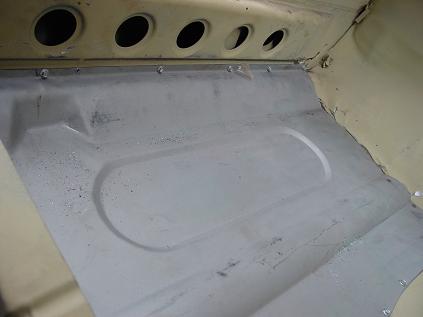
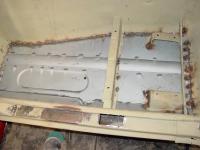
Once that is all in place, its now time to trim down the transmission tunnel side, which is in theory the only edge of the new pan which should need trimming. Tech screw the edge of the floorpan and the transmission tunnel together (as can be seen in the last photo above) then take a small drill/fine grinding disc and cut through both layers so that you can fit your jigsaw blade in and cut down the lenght of the floorpan. As an alternative you can use an angle grinder with a superfine blade, but angle grinders create sparks, remove fingers and the end result has far more sharp edges than the jigsaw with metal blade cut. As you cut along make sure you are cutting throught both layers and havent moved soo far offline that you are only cutting one layer leaving a big gap to deal with later. Remove the techscrews as you come to them, if using a grinder you could probably just cut through them, but the jigsaw didnt like this.

-
So its been a while, and I have bitten the bullet and bought another bag of tech screws, knowing the ones jumbo took will never be returned, well not at least until after I buy another box. Now the floorpan is fitted roughly into shape, tech screw it everywhere, till the point it wont/cant move around. There would be nothing worse than a half welded floorpan thats now not sitting on the floor like it should be. Below are some pictures of what a tech screw is (not sure if thats what they are called in the states) and a couple showing just how well attached the floorpan is with screws. Dont worry about the shedload of holes after you remove them, they can be filled with weld and form kind of a mig spotweld.

-
U Pull it here has them normally they are the same lugnut as what comes on pulsar/holden astra mag wheels, and they charge $1 each I think?
-
It wasnt my intention to get onto a political discussion, it was just to emphasize the irony of the situation. There was another statement that I was considering using but elected not to for crudeness. But likewise you cant say tomohawk did it so so can I, and he wasnt upset by the continued posting, he was just adding to a thread. Its odd logic, maybe I need some fresh air. Some more appropriate Ironic ideas: Unabomber - Mail bomb returned due to "insufficient postage" Ellen DeGeneres - Suffocates to death in the closet etc etc
-
And the amazing thing is if the two Carl's had resisted the urge to spread their wisdom, the thread would have been off the page of current threads and back into the archives where it would cease to irritate you. Does anyone else see the irony in posting in a thread whinging that it keeps going on and on, kinda like fighting for peace? It may just be my warped sense of humour after the last week of exam study?
-
Its cyclists like that (or any cyclist standing on their pedals) who were the inspiration behind me always having a fly swat in the car for the passenger to use at their discretion. And once you have fly swatted you have to pass or it can get nasty. Perhaps follow till the overtaking lane then fly swat on the way past?
-
Just clarifying this, but its actually a tub as opposed to being a shell isnt it, whoever ends up with it would need to add all their doors and other bolt off panels? If its got all the bolt on panels I agree with pro, but without them I think that your price is a bit high.
-
I think that shell as a bare tub would have to be worth at least 1000-1500 dollars the way the Z market is over here, crikey if I spend 1000 on my shell (which I already have ) and its not anywhere near as tidy as that. But then mine is matching numbers and bare metal etc etc. But for someone who damaged their Z or a racer who knows they will damage their Z it would have to be worth a reasonable amount.