tlorber
Free Member
-
Joined
-
Last visited
Everything posted by tlorber
-
 You can never assume that the old and new MC dimensions are exactly the same. That is why you need to have about 2mm of free play between the push rod and the MC plunger. I thought all of them had an adjustment (my '73 did, as did the new booster I bought that came with a "new" pushrod). You might be able to pick up some free play in the pedal adjustment inside the car, but that is not really the correct way to do it. If you are sure there is no adjustment you might be able to grind the pushrod down a bit, round and smooth it out to create the gap.
 -
[ATTACH=CONFIG]62660[/ATTACH][ATTACH=CONFIG]62659[/ATTACH][ATTACH=CONFIG]62661[/ATTACH][ATTACH=CONFIG]62662[/ATTACH] Oh, and one last shot of my garage at home... [ATTACH=CONFIG]62664[/ATTACH] So overall it was a great 3 days. Unfortunately, out of 105 cars there were only 2 Nissans (both Z's) but we did our job. Canepa If you are interested, I can post links to some of the videos that people took, once they become available.
-
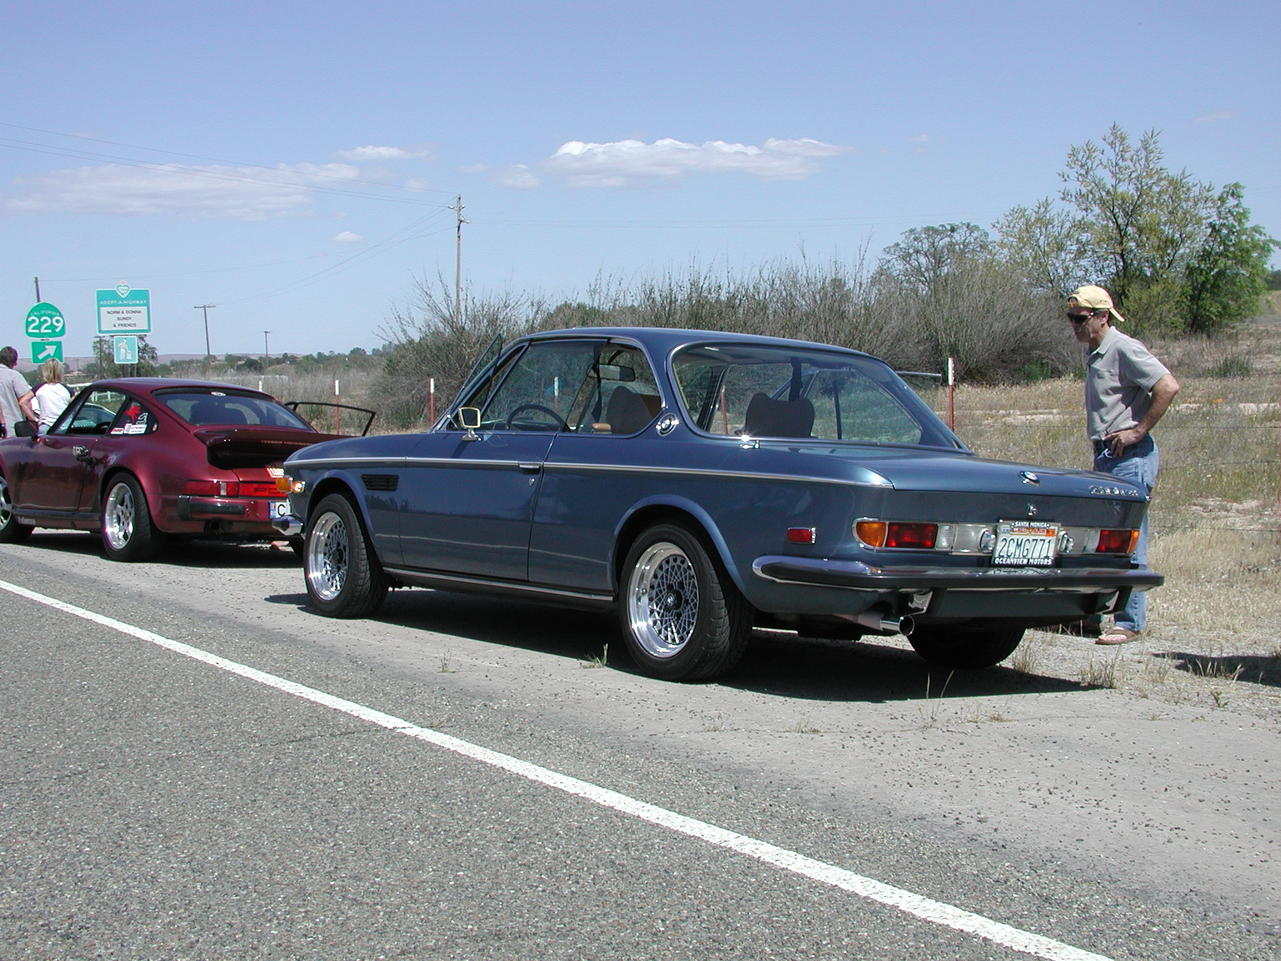
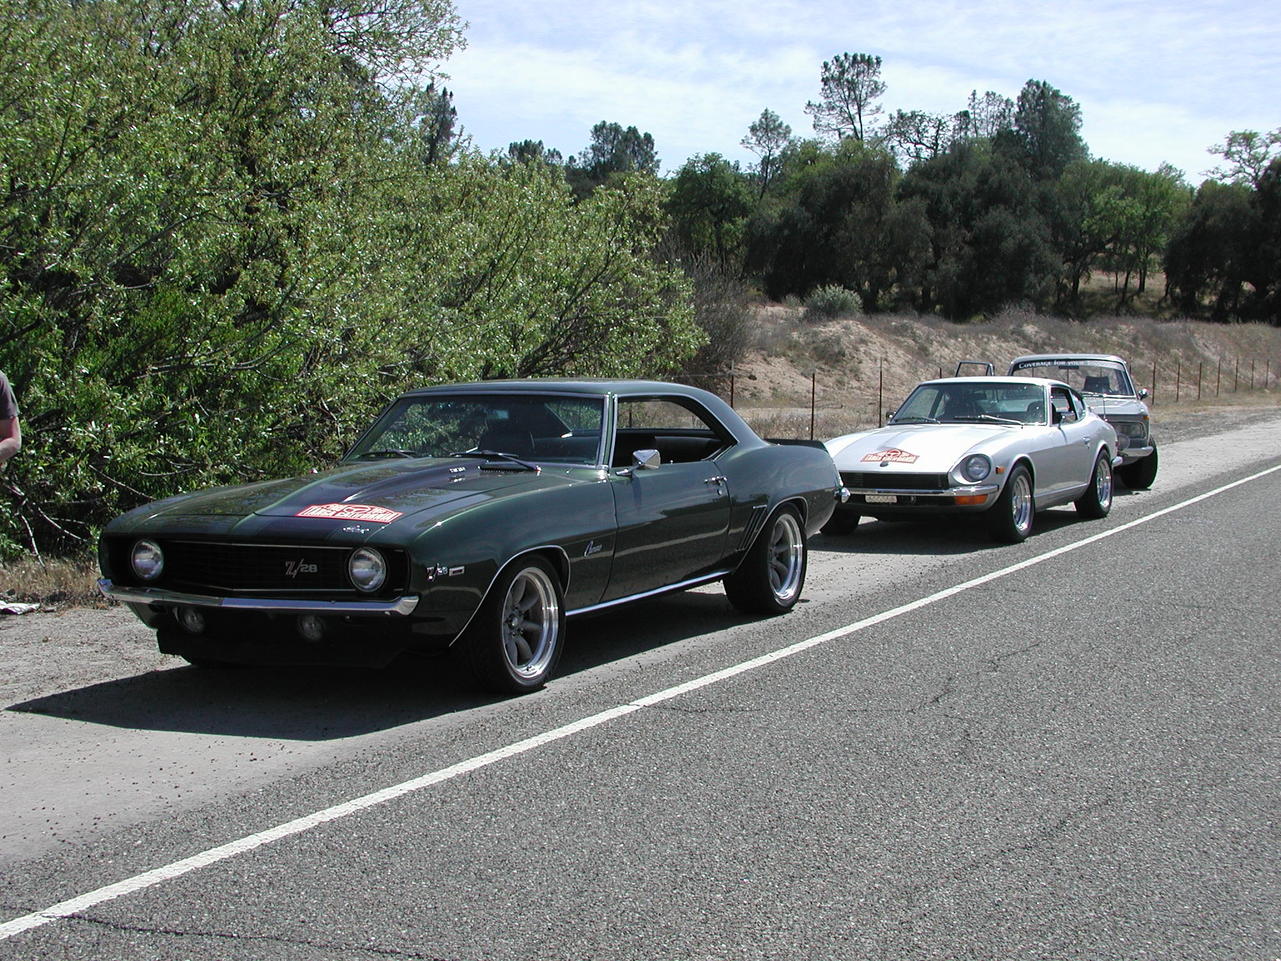
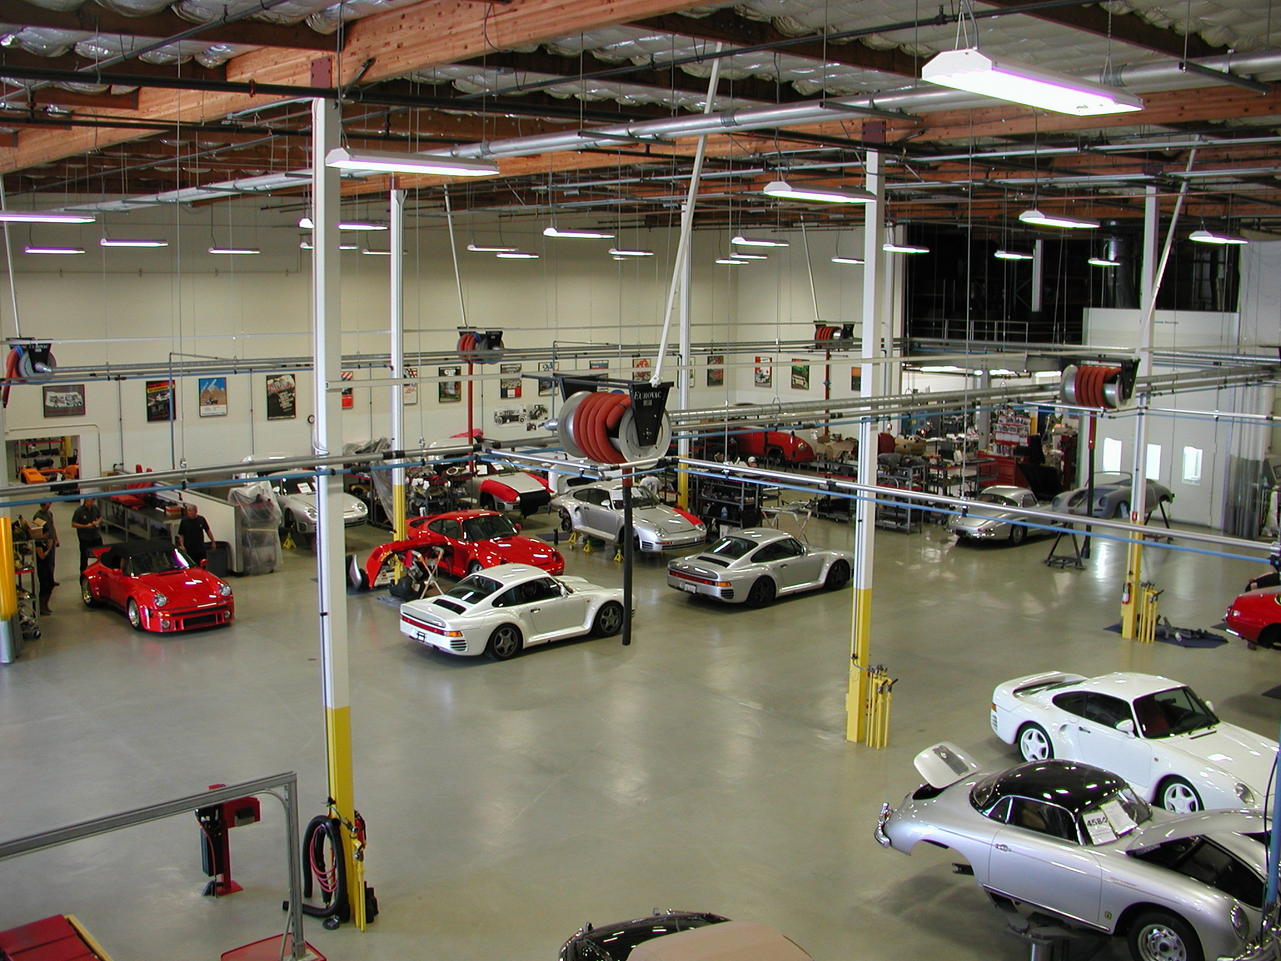
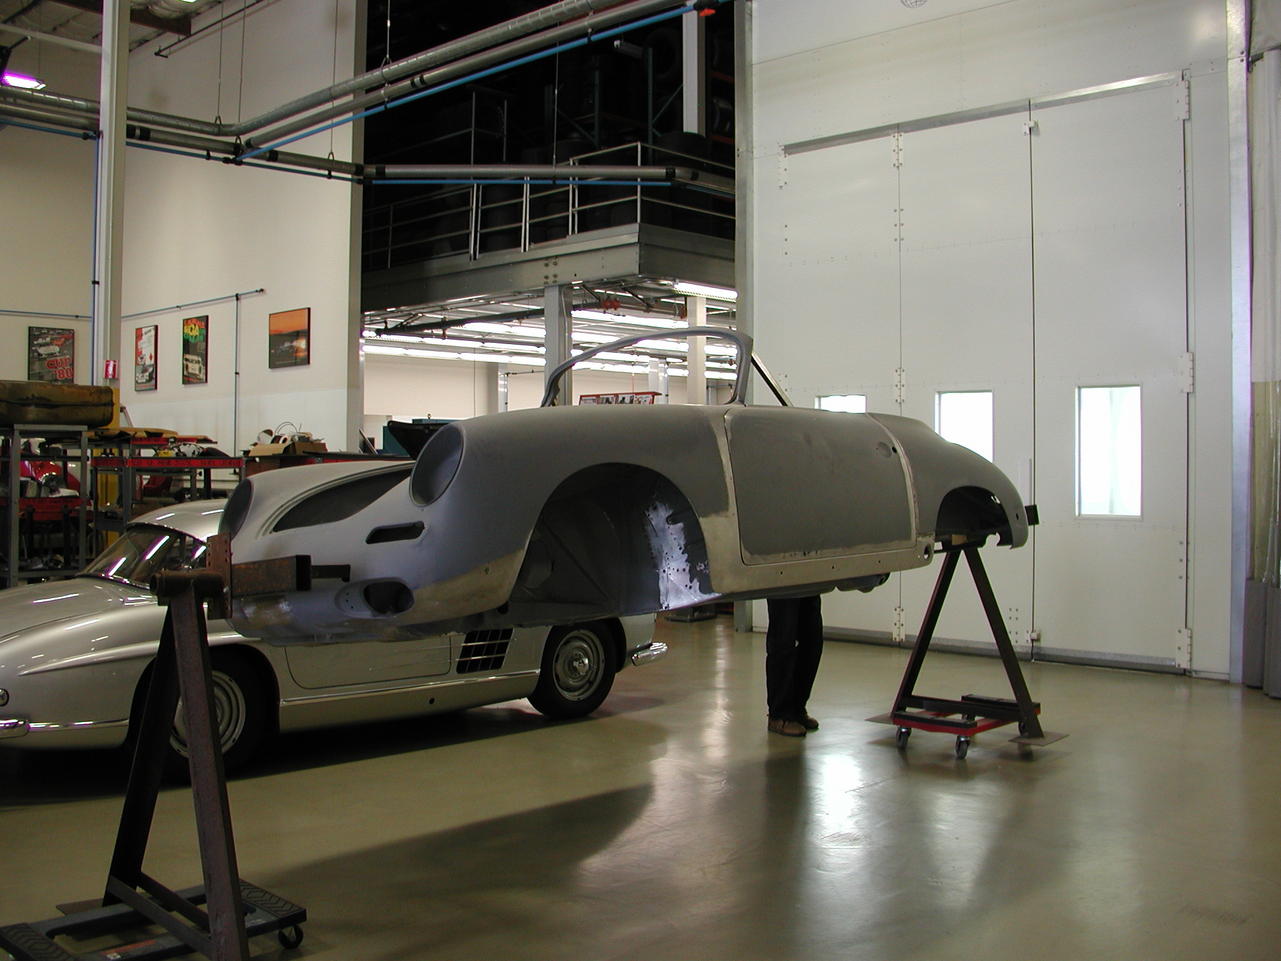
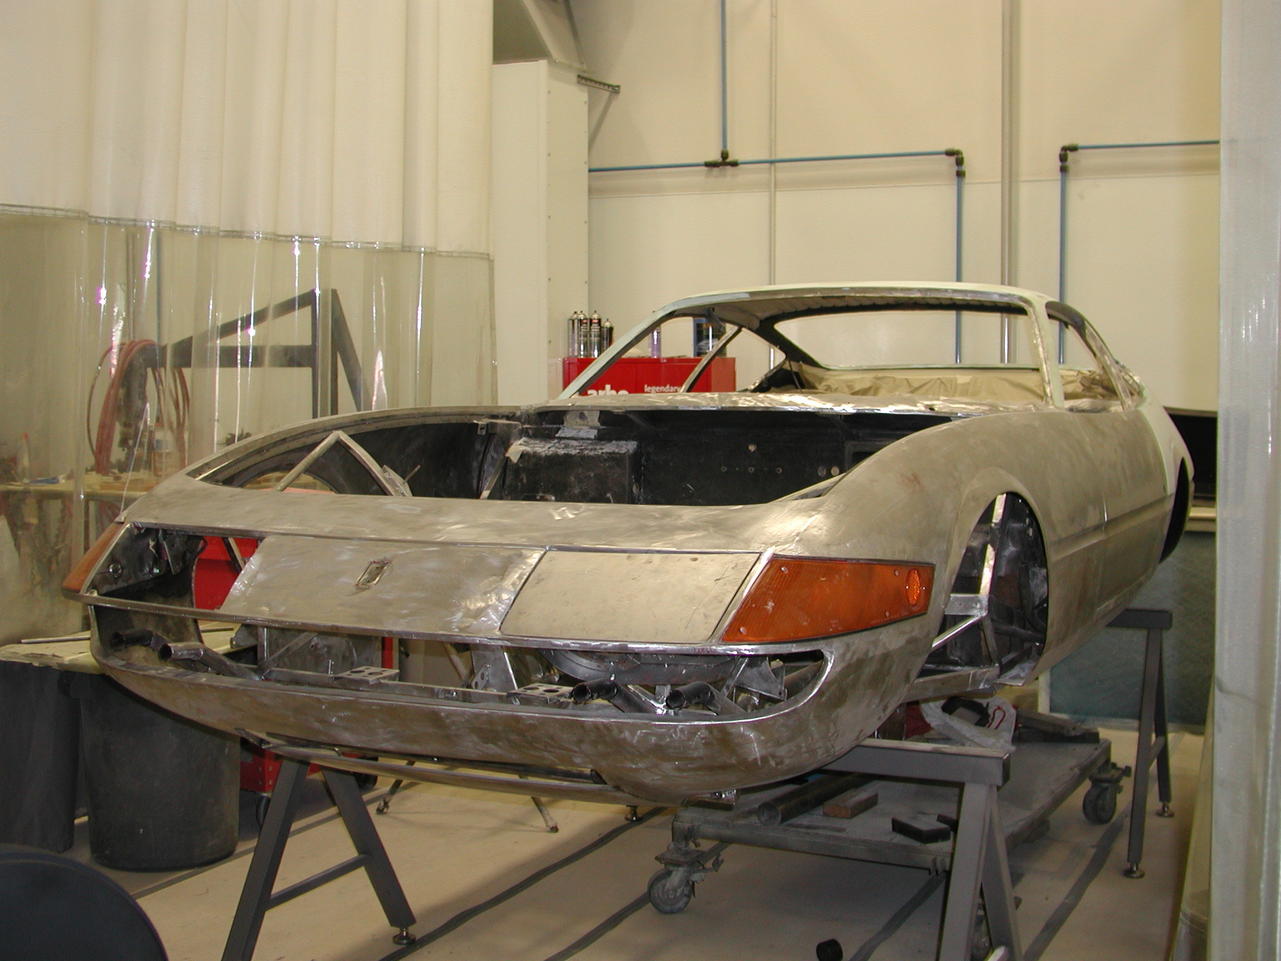
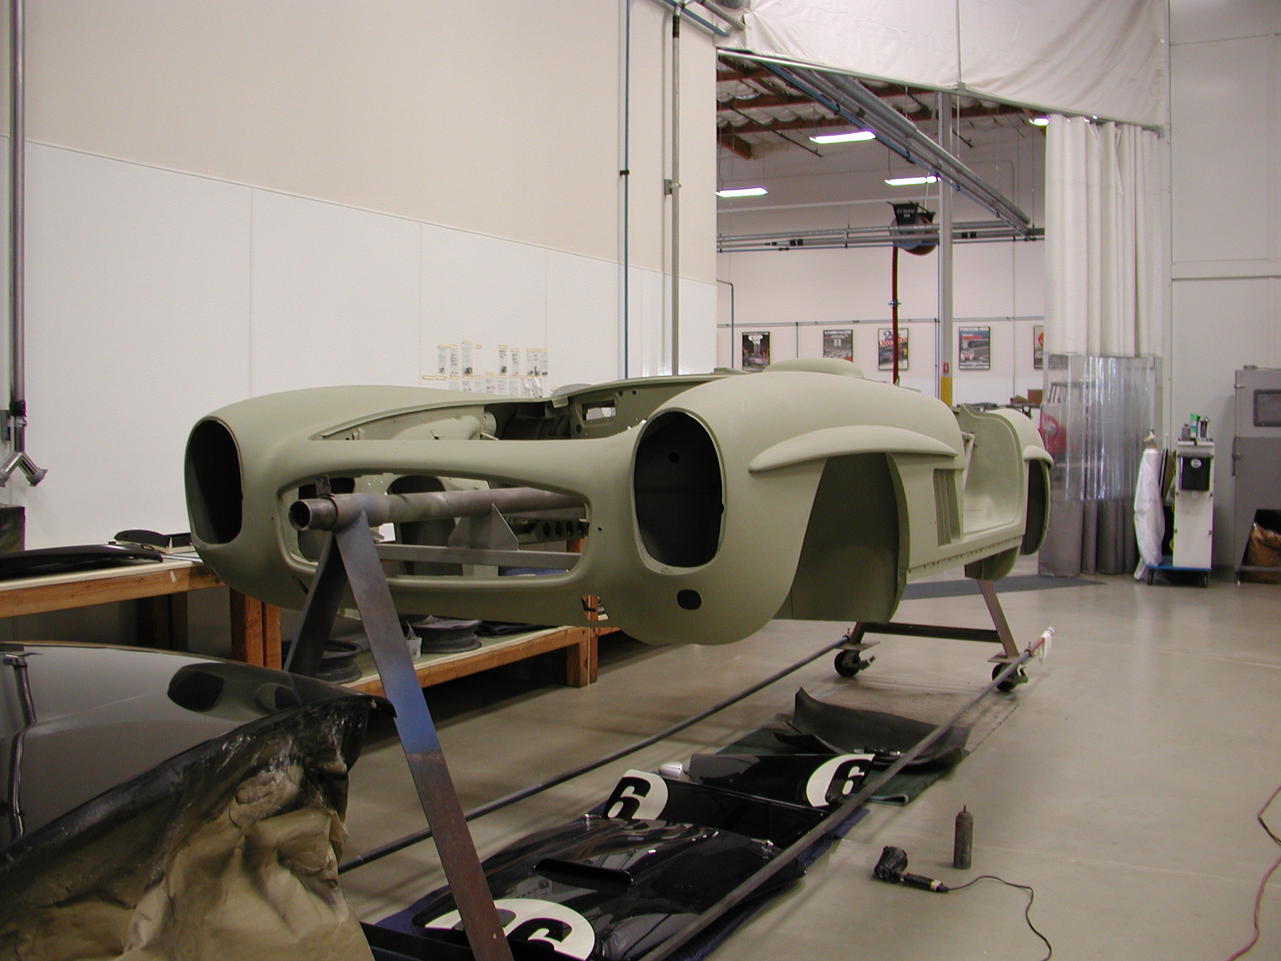
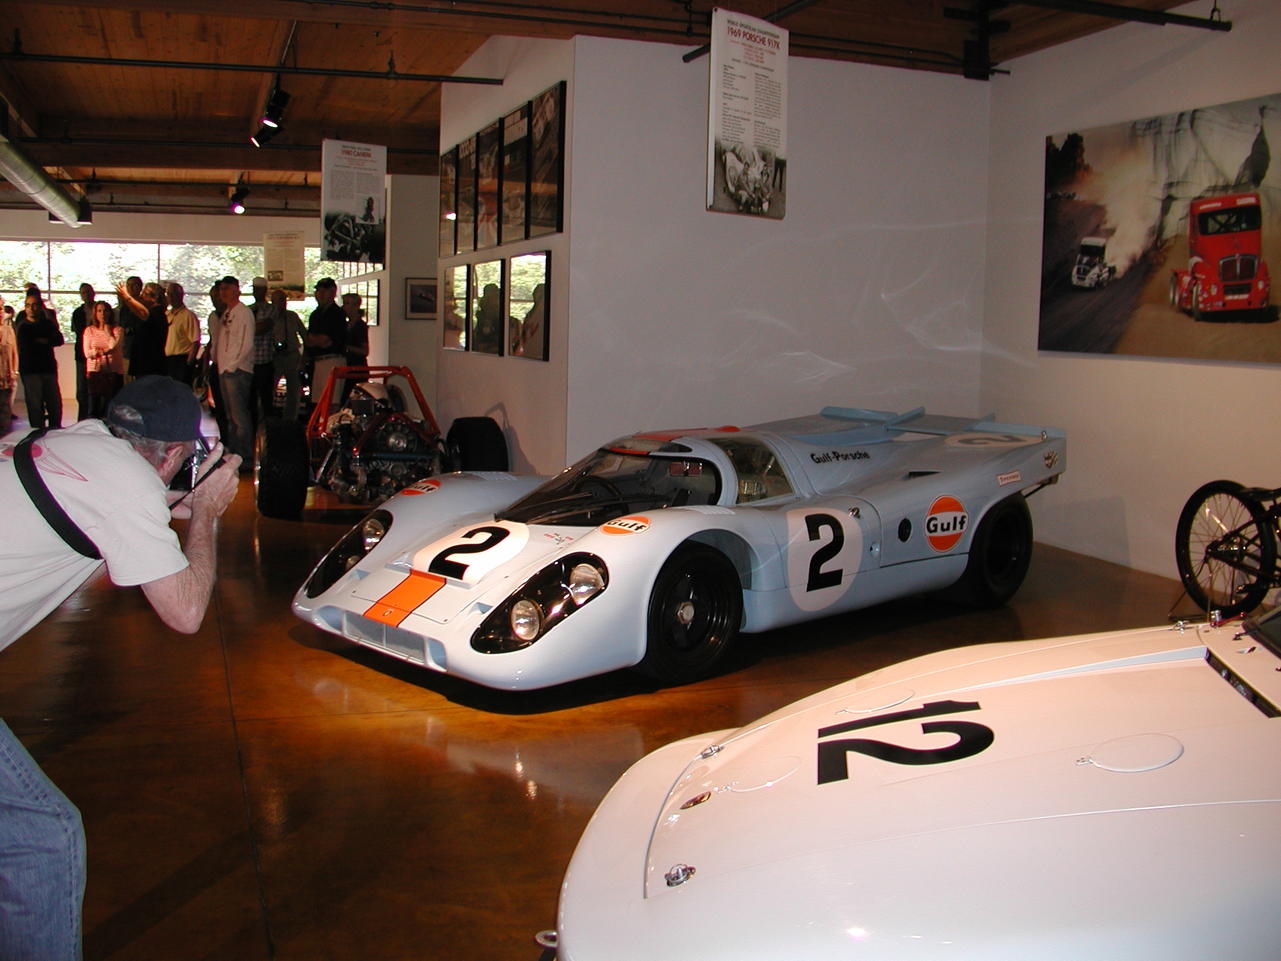
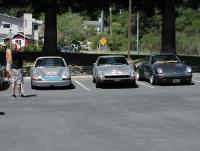
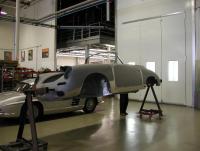
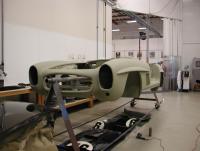
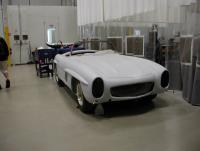
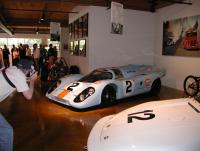
On Saturday we completed the Targa California 2013. Just over 900 miles of beautiful roads, incredible weather and some very sweet rides. I've attached a few pictures below: On the second day we stopped at the Canepa Design Center in Scotts Valley, which is about 40 miles north of Monterrey. For those of you into car collections and restoration, this is an absolute must. The pictures below don't do justice to what you can see there, but I have attached a link as well. They are happy to provide tours of the facility. Then onto the display area, where they have one employee whose full time job it is to mop the drool off the polished concrete floor. I'll have to attach these in the next post... 20130415091905820.pdf


-
I don't think the visibility is that great. Maybe you could stick them on with magnets in order to mock them up to see how you like them.
-
The rear Cusco bar is not adjustable. The holes are slightly slotted to give a bit of wiggle room. I don't know about the front. I bought Cusco over MSA's because the mounting brackets each connect to the bar at 2 points instead of 1. MSA's seemed a bit dinky to me.
-
Thriller, you can use a stud welder and a slide hammer to pull such dents. If you are unable to find the actual stud welder, you can weld the studs on with a wire welder on a low setting. This thing works pretty well on thin metal in conjunction with the welded studs. 20014 Steck Stud Lever
-
Blue, I'm trying to figure out exactly what those numbers for the MC's mean. Does "Deviation from Stock" imply travel distance of the pedal? Because from a volume standpoint, the larger the MC, the larger the cross sectional area and volume. By my math, (I put in a 1" MC a couple weeks ago) a 1" diameter results in a radius of .5" Squaring this yields .25. A Stock MC of 7/8 has a radius of 7/16". Squaring this yields .1914". .25/.1914 = 1.306, or 30.6% larger. Are we measuring the same thing here?
-
I would not plan on sanding down to bare metal-only to a sound surface, which in some areas will mean bare metal. 120 grit sounds a bit aggressive, but you can try it and see how it goes. Remember that the more deep scratches you put in, the more you'll have to fill or take out. You will need a good sanding block to get the surfaces as even and ripple free as possible. Another thing to be aware of is whether there are different kinds of paint (from multiple coats) on the car. If so, the solvent in your primer may soften some areas, while not affecting others. Look at these boundary areas closely before you shoot the color coat.
-
Blue, Are you saying that she did a Flintstone foot stop through the floor pan?
-
Nice work! Regarding the diff filler plug, (I'm pretty sure it was filler and not the drain on my '73) you might want to consider one with a "male" square instead of a female. Clearance is very tight behind the plug once the diff is installed, and I was not able to get a ratchet cleanly into the plug. A male one enables you to use a wrench, which does not require any clearance beyond the plug itself.
-
Awe come on. The clip cut off right at the explosion. Was there a car crash that you thought would be too painful for us to bear?
-
There is a product called Plasti Dip that comes in a spray can. It is made to spray onto a car, and then when you get tired of it, you peel it off. I'm not sure if they have gloss black but I know they have a flat black. Many of the flat painted cars you see these days (Including Ferraris and Maseratis) are using this product.
-
I had a matress tag that said something like "Illegal to remove this tag". That was in 1983 but I'm still waiting for someone to show up.
-
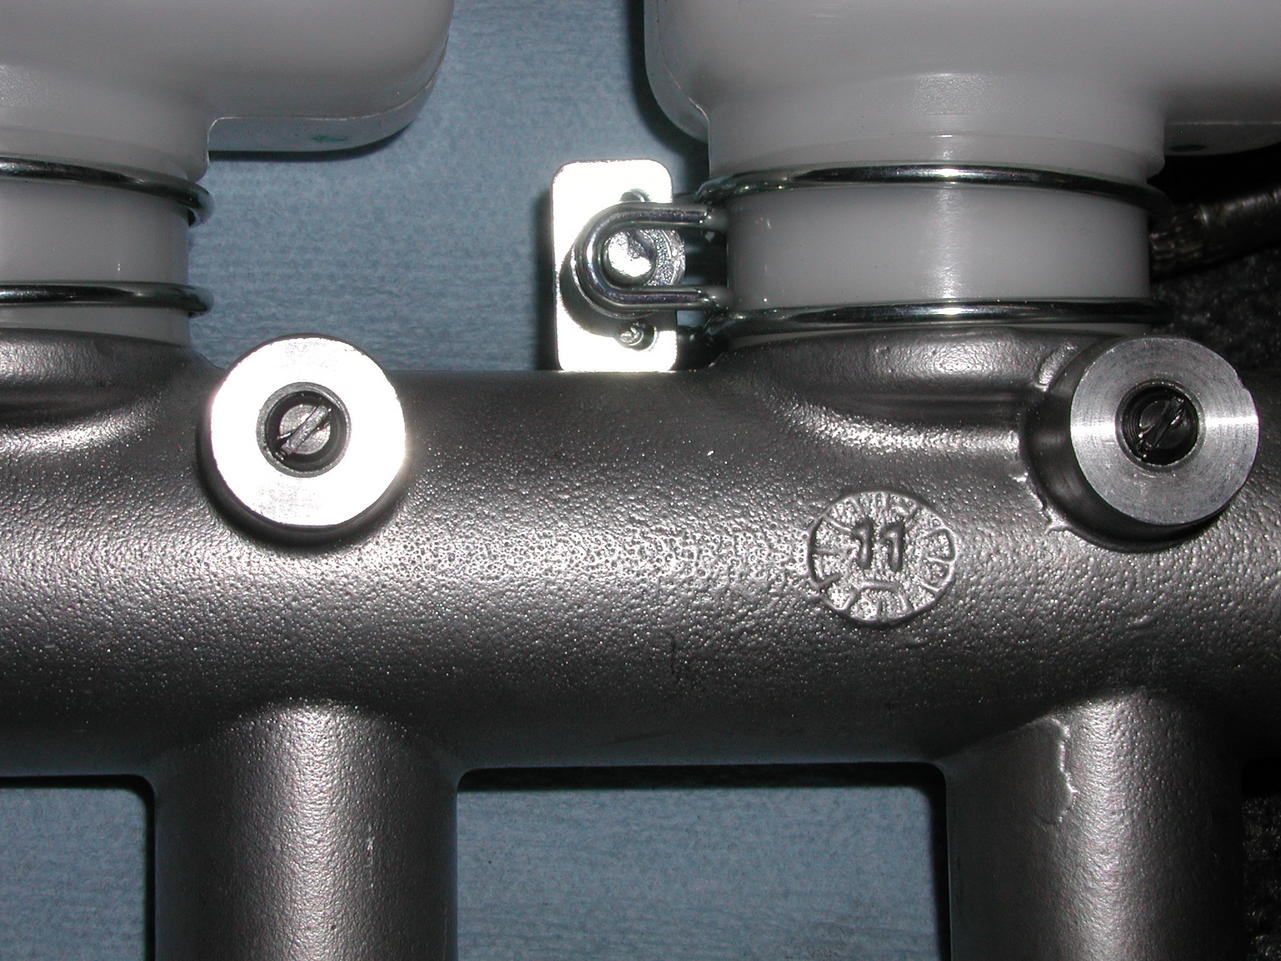
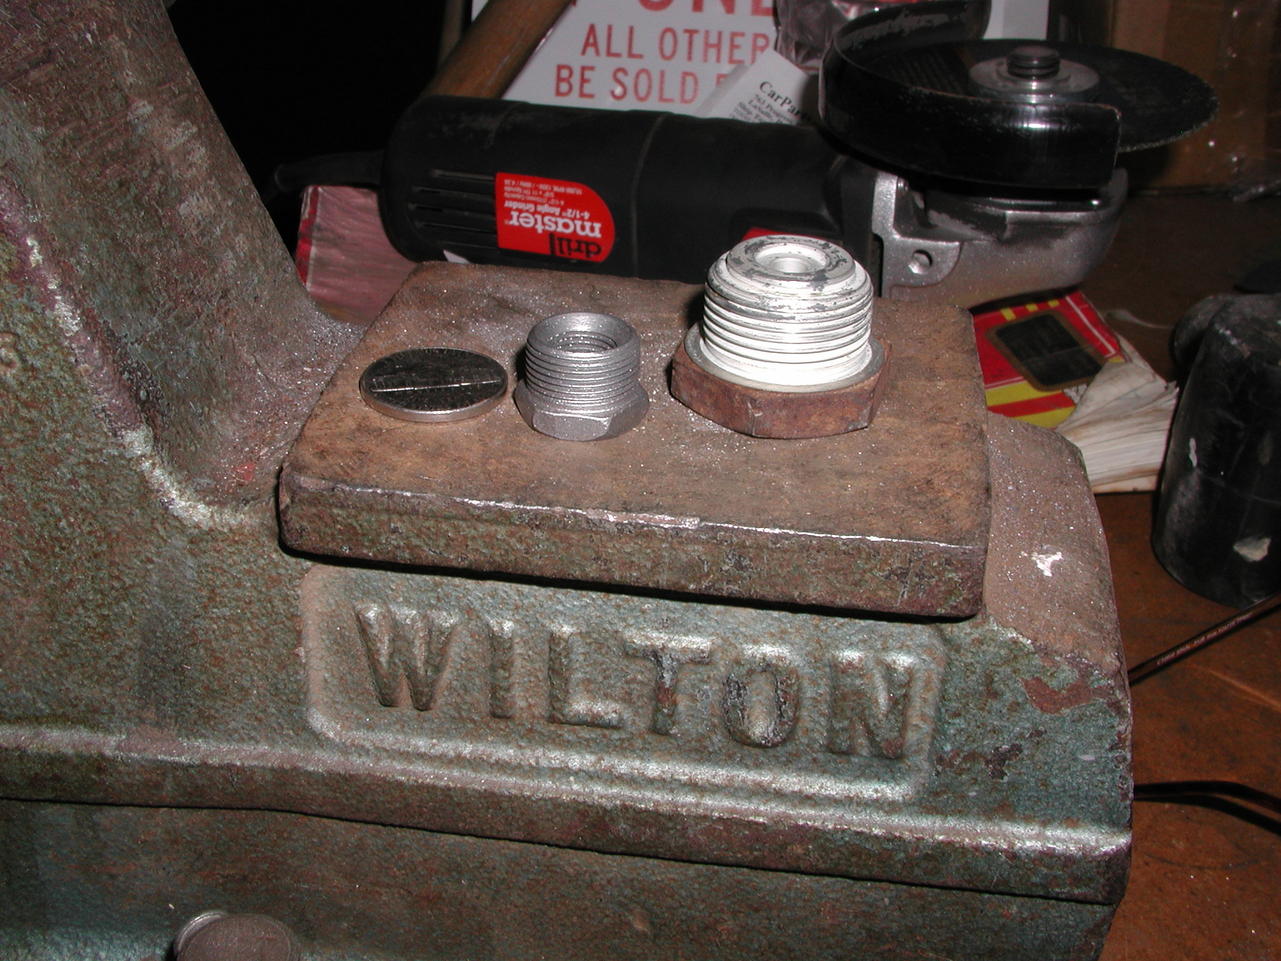
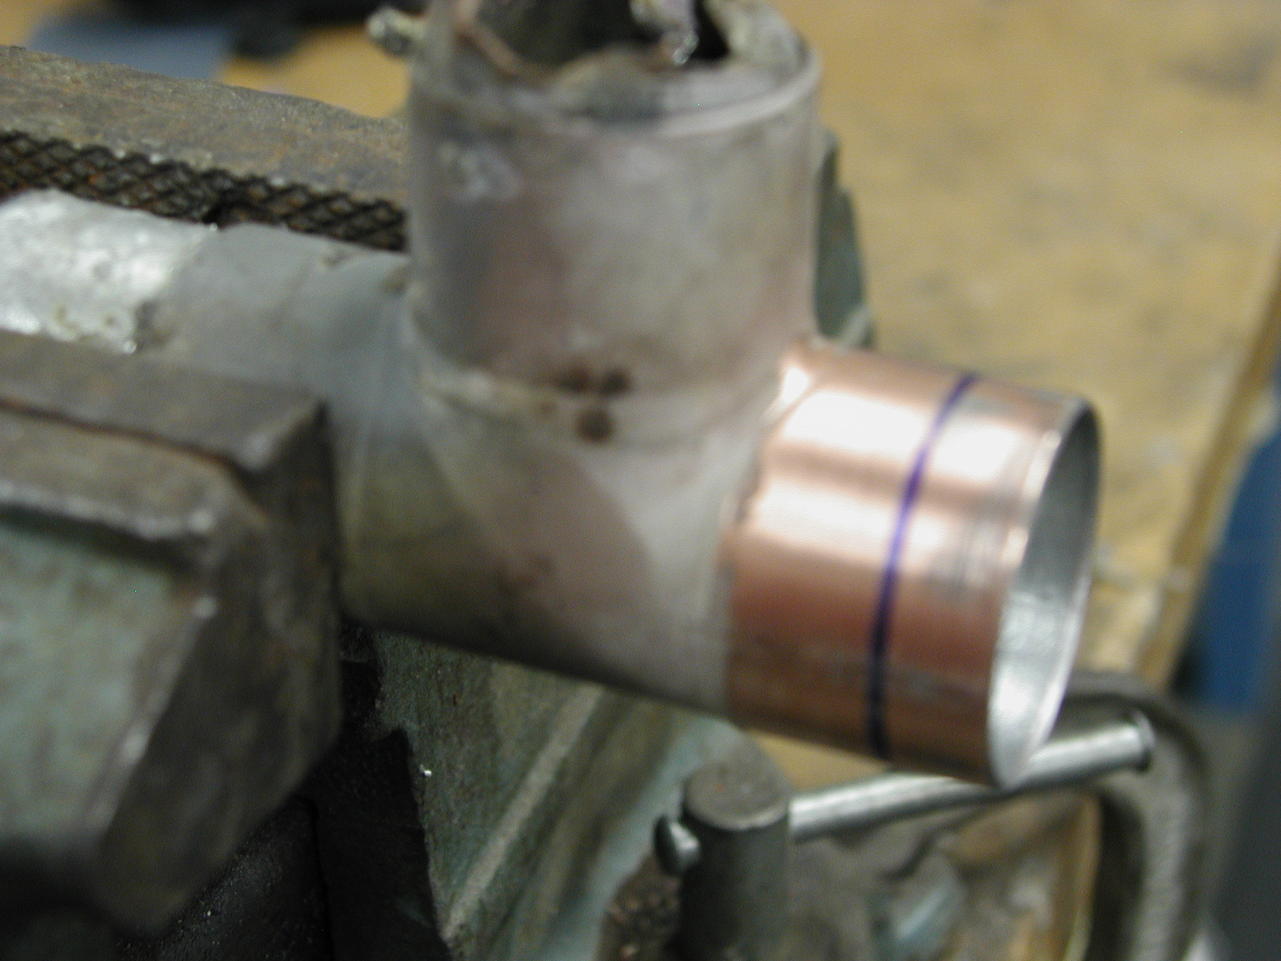
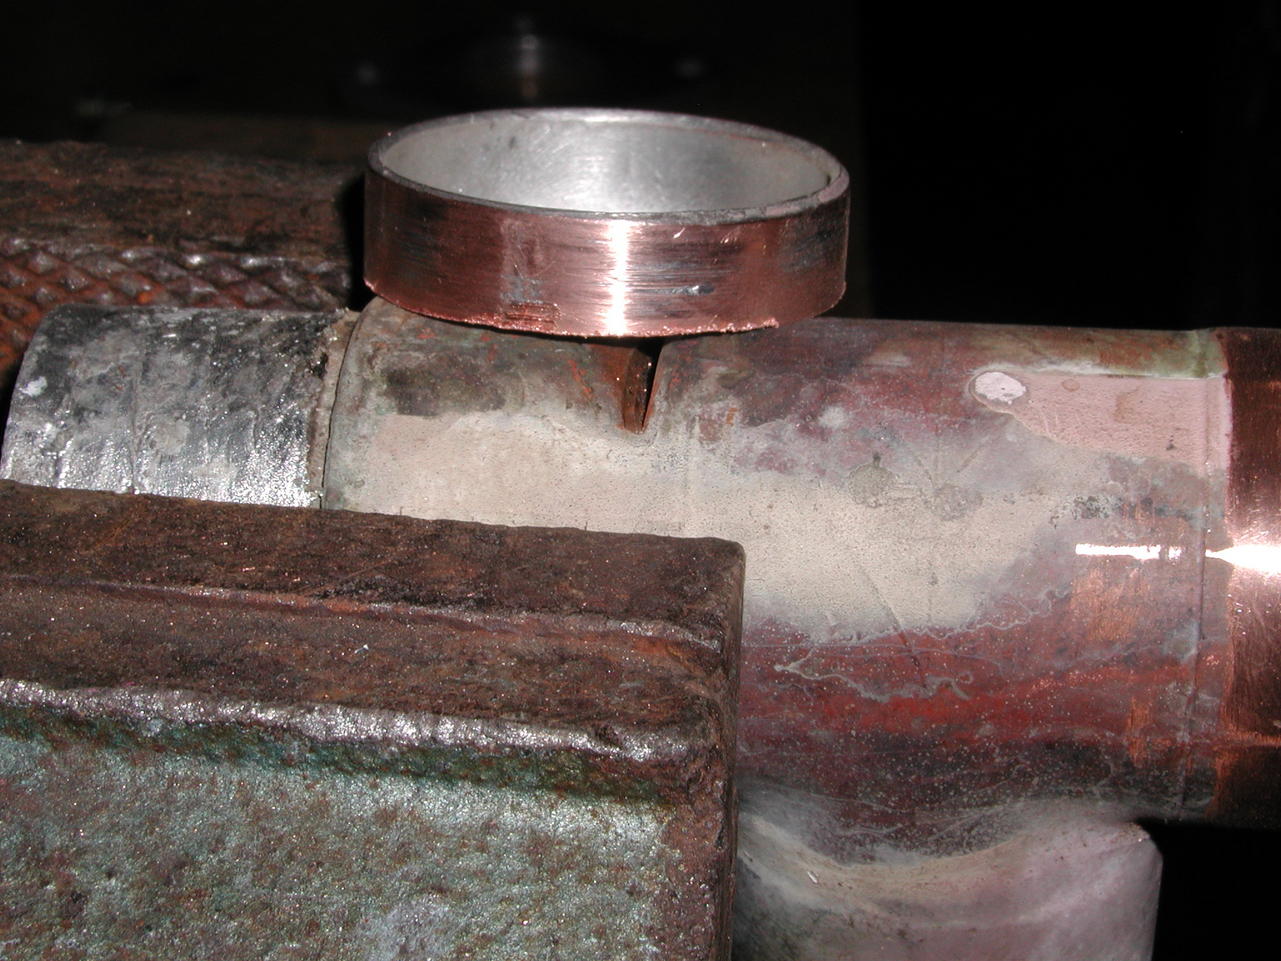
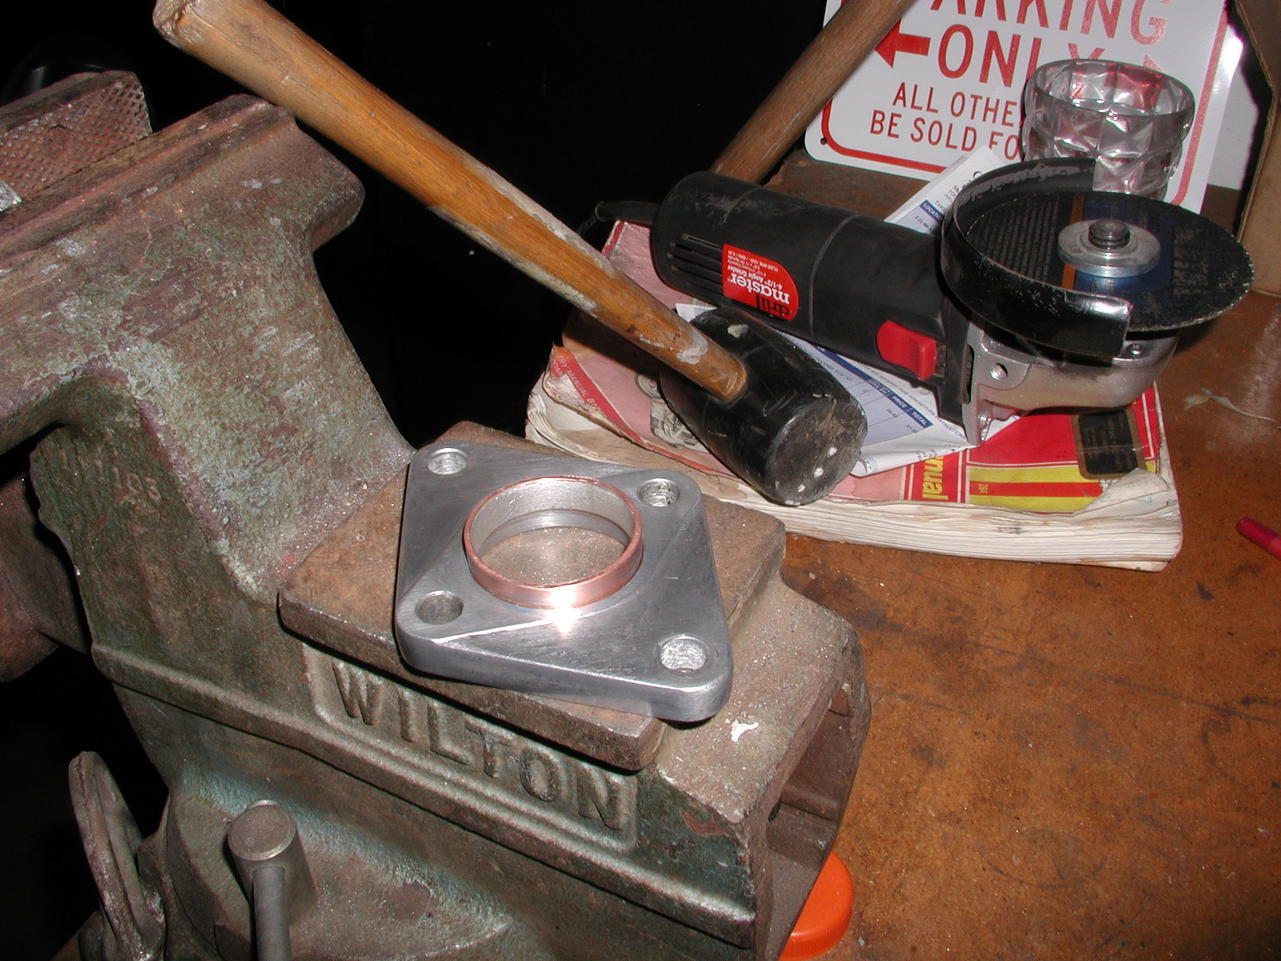
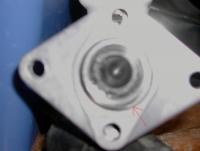
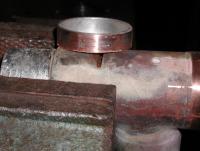
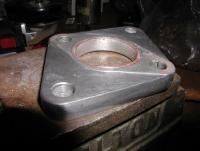
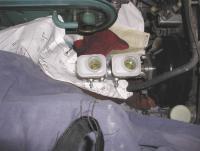
I thought I'd post some information on a new Wilwood MC (model 260-8794) that I just installed. I know that some of this ground has been covered but I ran into some things that were not covered so I thought this could help clarify. Also, its one of the few times I had my camera so I took some pics. 2 months ago I replaced the brake booster on my '73 (which has an 8.5" booster and the front brake reservoir in the rear, rear in the front). At that time I noticed some seepage near the MC's plunger seal, so I thought I'd swap out the master. Since I don't have time to upgrade the brakes now, but I want to in the future, I figured the excess fluid capacity would be a benefit as well. One of the items the conversion calls for is that you need to change over the brake line inserts from your original Master Cylinder. My understanding was that for a Tokiko or Napco this would not be a problem. However, the insert on my Tokiko (the one on the right) was nowhere close to the one required. Fortunately a guy around the corner from my shop had an old SANYCO MC and he was nice enough to pull them off for me. DO NOT START THIS PROJECT until you have the inserts ready. First off, the new MC is nice and very close in configuration to my original. While the bleeders are on the opposite side, the Wilwood has the ability to reverse the bleeders to the OEM side for the early Z's. You just have to remove the set screws (each of which is retaining a ball bearing that seals off the port) and swap them over to the other side. You have to elongate the mounting holes by about 1/16" on the top and bottom, but this is easily accomplished with a round file and/or dremmel. One thing that concerned me a bit was the gap between inner diameter of the the base plate (or what ever the diamond shaped aluminum plate with the 4 holes is called) and outer diameter of the MC. On the original they fit snugly-(sorry for the blurry pic). I happened to have in my garage an old 1 1/4"copper Tee that I had pulled off of a water regulator. This had nearly perfect inner and outer diameter to take up the space. I had to sand a bit on the outer diameter, but it ended up providing a very slight interference fit with the base plate-which is good to prevent it from slipping out into the booster. All said and done, it went back together fine. I hooked up the brake lines, bled the MC with a plunger, and then hooked it up to the booster. The pedal feels good. Mathematically I should be pushing about 30% more fluid, (requiring 30% more effort and 30% less travel). It does not feel all that dramatic, but I definitely like the less travel than I had with the stock MC. I will probably do one more bleed of the MC and the calipers but it already feels much more solid than before.


-
I've had great luck with fiberglass fabric and abs glue. You can continue to layer it on and build up if necessary. The glue dries quickly and sticks incredibly well to the interior plastic panels-and its black so it matches the original plastic.
-
Before you paint, make sure your hinge mounting points are solid. I reinforced mine with weld beads because there was some slop. I was able to cut out the glass seal with a utility knife. They DO tend to get hard and brittle with age. Heat may help.
-
Does anyone know WHY Nissan made the angle of the half shafts out of 90* on the series 1 cars? It seems like most other issues were thoroughly contemplated, but to go out of their way to have the rear end shifted forward is odd. Did they want a shorter wheelbase for handling purposes? Just curious.
-
I did the same with my tach but sent it to North Hollywood speedometer. They replace the guts with modern components. Stephen, if you think you will be replacing your dash cap or cover eventually, then if you can't shoehorn the tach through the dash cap perhaps you could use a dremmel to cut the off the part of the cap that goes into the tach recess. Nothing to lose.
-
Blue, given the larger volume of fluid that now needs to be pushed to your calipers, I don't think you'd want to decrease the size of your MC. Everything I've read says you need to go the other way to avoid increasing the travel of your brake pedal. I could see how increasing the diameter of the booster would help. '73's started with the larger boosters. If you swap the booster make sure you measure the length of the pushrod that actuates the MC in relation to the booster so that you do not throw another variable into the mix. Also keep in mind that the later MC's had the front and rear reservoirs reversed from the earlier ones, so if you change you might need to swap the hard lines to the MC.
-
I recently replaced my booster. Before I did so, when I applied the brakes, I would hear a hissing sound and the idle would increase by a couple hundred rpm's.
-
Mine is blue as well. Though my car is a '73, it has roundtops and the motor was a Nissan remanufacture. I know that this particular box was originally blue-but the original ones on the Z's were all orange. It is possible that it came off an 810 or a Maxima.
-
I saw a recent tutorial from Eastwood (with a bit less condescension) for a kit they sell. It was done on a Mustang, but the cool thing was that they cut around the rim of the fender leaving it attached at the very front and rear (near the bottoms, if that makes sense). That way, you just have to fold out the cut portion a much as you want if flared, insert the sheet metal into the gap, and stitch weld it back together.
-
I can't answer specifically what you are trying to do, but I can tell you what I did. I am running an electronic dizzy from an '82 ZX in my '73. I had my tach rebuilt by North Hollywood Speedometer (For around $175.00) because it was not working properly (even before the electronic dizzy). They basically remove the guts of the tach and replace them with more modern components, which they say will work with any wave form in triggering the tach. This allows you to use whatever tach/triggering system you want and the tach is more accurate than the 38 year old electronics, which were probably not all that accurate when new. I have bypassed the ballast resistor, because I don't need to worry about frying points. I believe the '73 tach is slightly different from the '72 but once the internals are replaced that shouldn't matter. As far as the MSD portion, that should not matter either since it is downstream from the dizzy.
-
Some nice eye candy here. I hope he gets his number. Datsun : Z-Series 240z | eBay
-
How about the springs?