Zed Head
Free Member
-
Joined
-
Last visited
Everything posted by Zed Head
-
 Your clutch is probably either worn out or has a problem at the friction surfaces. I had one that did what you described when it got warm. The hotter the weather and the longer I drove it the worse it got. It could get really bad, shaking the whole car. It was okay when cold. Changed the clutch, flywheel (I had a spare) and pressure plate and I was back to smooth take-off.
 -
I would think something from the driveshaft back to the rear wheels. Pieces that get extra load under acceleration and can twist out of shape if something is worn or loose. OR, it could be a sticky clutch. I had one of those. Does it happen while releasing the clutch pedal to get going, or after the clutch is fully engaged (pedal all the way up for those iffy on "engaged") and you're on the throttle?
-
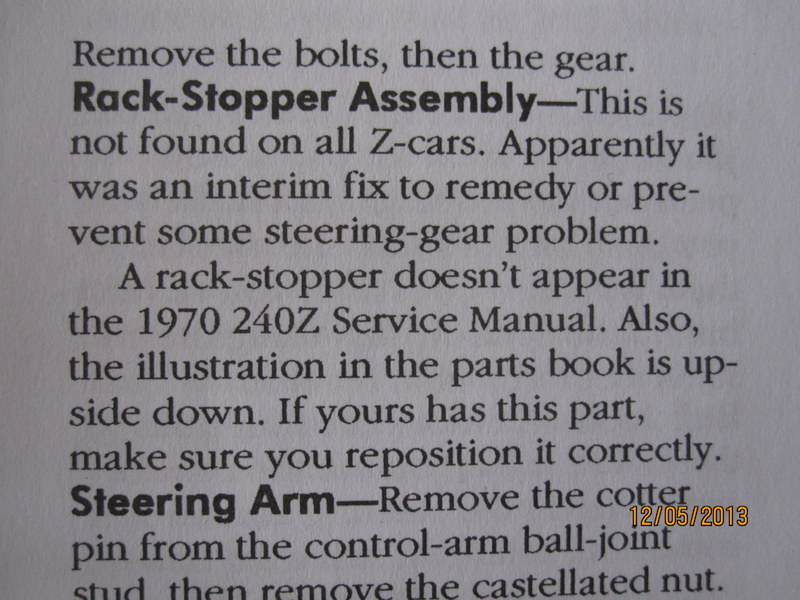
Here's an interesting paragraph from Humble's Restore book. I wonder if the forum's parts CD has an illustration of the referenced upside-down installation.
-
Looks like Black is ground (Earth). Hard to tell what it's grounding though from the drawings. Sometimes Nissan runs a dedicated ground wire to the cover. Check the cover for solder. Didn't realize also that you were dealing with past problems and broken wires, your first post made it sound like this was a fresh problem. That kind of changes the situation. The internally regulated alternator might be the way to go, although it could take some problem solving to fix other things that might be affected by the external VR. You'll go from 50 amps to 60 with the ZX alt which might be worth doing anyway. But I think that might be possible just by getting a 1976 externally regulated alternator. Many paths possible.
-
You didn't say anything about precision. I'm not sure what that means here, since it just needs to be wiithin a certain fairly wide range of charging voltage. Seemed like you were implying that you might have problems, and really, the only problem you have with a VR is when it fails. I was referring to VR failures. The solid state VR might last longer under normal conditions, but the mechanical would handle the abnormal conditions better, I think.
-
Actually, the solid state VR's tend to have more problems with stray voltage spikes from things like ignition systems, or too much current flow from things like charging dead batteries. The old mechanical systems should be fairly robust. You should call MSA on that alternator and see if you're paying the extra $20 for real higher output or just the turbo name. Ask if they have output specs. for each unit.
-
The drone is typically solved with a second muffler midway down the system. Stock Z's came with anti-resonation mufflers in that spot. You might try a simple modification there before buying a whole new system, at least to know what you need first. Many people use a glass pack instead of the stock anti-resonation muffler and say it does the job fine. The stock piece is a little bit restrictive.
-
I've had one bad ECU and its death characteristics were to die instantly, come back to life for about 1/2 mile, die again, start again, die again, flood the engine with fuel, then never start again. I replaced the two injector transistors and got it to work again (just for fun, not because I knew what I was doing) but have only taken it for a test drive since then. Something to consider is that the transistors used for the injectors are very similar to those used in the ignition module, and ignition modules do weird things before they crap out for good.
-
madkaw is right, that's a 280ZX pointer. I have one too but had forgotten what it looked like. But the damper doesn't look like a 280ZX or a 280Z. Your engine and head numbers are for a 75 - early 77 280Z L28. So you do have a bigger engine than came in the 240Z. If it's stock, it would have dished pistons and ~8.3 compression ratio. Somebody could have swapped pointers from a ZX, and a damper from some other engine. Who knows. Welcome to the world of old cars.
-
It's really hard to emphasize!!!@@@## how much better and smarter you'll feel!!! if you run the resistance test for the coolant temp. circuit from the ECU connector!!! Once you know that the ECU sees what it should see!@#$#% then you can stop guessing and buying parts @#%%$ Seriously, just unplug the ECU connector, measure resistance to ground at the right pin (13? I believe, it's in the Engine Fuel chapter) and compare the number you get to the chart in the FSM (it's in the Handbook too I think). You can do many of the other component checks also, like the injector circuit, Pin 1 to coil, etc. It's much easier than it seems and really, it's where everyone should start.
-
I'm not so sure that's an L28. Can't tell by the one picture in the thread. Maybe madkaw's assuming, because it doesn't look like an L24. That damper and timing marker might not be common to either engine. The L24's have a single pointer, with degree marks on the damper, and the L28's have a single mark on the damper with degree marks on the marker. But there are only six marks, in increments of five. -5, 0, 5, 10, 15, 20. You have something unusual.
-
So this is a project, that had not run for a while. Lots of unknowns then. Many of the auto parts stores can test alternators, batteries and VR's, all on the same machine. Even the external VR's. Worth a shot. Best to know what's wrong before you do a conversion, otherwise you can do excellent, careful, conversion work and end up with the same problem when it's done.
-
I don't think that these are signs that your alternator or VR is shot. Seems more like you mis-placed a wire when you put things back together. Do some of the testing described in the Electrical chapter. You might be on a wild goose chase. On the MSA plug, I think that it might work for an early 260. You didn't say what you have. Compare your wiring to a 240 and see.
-
Looks like you're using the EFI Handbook for your testing. The Handbook is a generic document for the 280Z's and/or the 280ZX's, depending on which version you have (1975 or 1980). You should start working from the FSM, with its information and diagrams that are specific to 1976. Read the first few pages of the Engine Fuel chapter and the Emissions chapter. They describe all of the weird little devices that you're working with. Then do your circuit testing from the ECU connector. Then you'll know if the wires and connections are adding resistance or shorted. Many people remove the CSV system entirely, the switch, the valve and the fuel lines. Cars are designed for a very wide range of environments, and I think that the CSV is for people in the mountains or the midwest. If you're worried about it being stuck open causing richness, just block the fuel line for a test. Index of /FSM
-
Check the Steering chapter, or the carpartsmanual link. There are pictures. Index of /FSM/240z/1972 Datsun 240Z/260Z/280Z Steering Gear (Rack & Pinion Type)
-
The coolant sensor is one of the major control components in the EFI system. If it's not connected the ECU "assumes" that the engine is stone cold and that it's in Antarctica. It has to be connected and working correctly to even have a shot at the engine running right.
-
Realized that I was looking at the wrong wire in the 76 diagram. There are three connected to negative, the big cable to the starter lug, a wire to ground, and another (the one we're talking about) which connects to 5, 16, 17 and 35 and the coolant temperature sensor. A dedicated isolated ground for the EFI system, apparently. 5 is also connected to 72 of the EFI relay. In short, the star ground shown in the Engine Fuel chapter, with 5, 16, 17, 35, 49 and 72 is actually the dedicated wire to the negative post. If that wire is disconnected, parts or maybe all of the EFI system is not grounded. New learning for me. superlen must know this but I was never sure of what that wire was connected to. I sure didn't know that it was the ground for the coolant temperature sensor. It should be a focal point for anyone seeing high resistance on the coolant temp. circuit. I went out and measured resistance from that small gauge ground wire back to the battery negative post and got 63 ohms. Resistance from the negative post to the valve cover was 0.7 ohms (control measurement). I assume that I was measuring resistance back through some resistors or transistors to ground. So, connecting those wires backward at the battery may or may not be guaranteed to cause damage. It's not a direct short but it's not open either. Had to write all that down just to burn it in to my brain.
-
I feel compelled to emphasize for any future readers of this thread, do not switch the positive and negative small gauge wires at the battery in an attempt to fix a "no injector pulse" or "no fuel pump power" problem. Bad things might happen. This thread is a special case of lucky. There must either be a mistake in the wring diagram or the car in this case has a ground wire that is not actually grounded. I have a 76 and will check that ground wire when I get a chance to see what's what, but the solution here is not quite right. It bugs me.
-
Any details on the GUI? Are you a programmer also? I Googled "Hellfire" and now I'm probably on somebody's watch list....
-
The BCDD is an emissions device, but not the most effective. It's main purpose is to let a little extra air past the throttle blades to burn fuel on deceleration while in gear. According to the FSM (Emissions chapter) it should only be replaced as a unit. They might still be available for only $252! Datsun 280Z E.F.I.(2) -Air Flow- L28E ASSY-BCDD :: Nissan Parts, NISMO and Nissan Accessories - Courtesyparts.com
-
The timing mark that you see is only relative to piston #1's position when the spark occurs in the wire to cylinder #1. Doesn't really matter how the spark happened, the oil pump could be off 80 degrees. That is assuming that the mark on the damper pulley is in the right place. Have you checked piston and camshaft position when the mark is at zero? The piston should be at the very top of its stroke (top dead center/TDC) and the camshaft should have both valves closed. Dampers do go bad and the mark can move. You might have a bad damper and a misplaced timing mark. Your pulley is kind of odd looking, with the teeth on the pulley. But I have a 280Z so maybe that's normal for the 240's.
-
Glad you found a solution although I have to say it doesn't make sense to me. The small gauge wire from the positive post is the EFI power supply. I can see how not having that connected would allow everything to work except the EFI components. But connecting the EFI power directly to the small gauge ground spade should have caused a short. I think. Maybe that is the EFI ground only and its isolated from the others. Or maybe yours is not connected to anything and you got lucky. The diagram shows it as connected to body earth so there should have been big sparks as soon as the small gauge positive was connected to it, shorting back through the large negative cable. Anyway, good luck and carry on.
-
Who knows what the other three shops did but it seems like the ground connection at the battery would be okay since the electrical system is right enough to give spark. And he has a good starter now. Looks like he's down to the fairly typical problems of no injector activity and problems making the fuel pump run. The ECU grounds the injectors base on the discharging of the coil with voltage pulses transmitted through the wire from the negative post of the coil to Pin 1 of the ECU through the blue wire. The tachometer and its in-line resistor need to be in place for the ECU to do that correctly (in case you have some things torn apart). Of course, the other half of that relay is the EFI relay. Have you measured voltage at the injector connectors with the key on? You should have 12 volts on both sides. Which I see that you have in Post 11. Check the circuit from the coil negative to Pin 1 at the ECU. You should have continuity.
-
Yes, they both are limited at the high end. The Chilton and Haynes books are notorious for having sketchy, mainly generic, advice. The FSM is the way to go. But, in looking at the 1972 FSM I can see where your problem lies, they don't say much, and the idle settings are pretty low, even for a good running engine. Looks difficult. I'll step out of the carb conversations. Looks like a messy scene. Edit - just looked at the 1973 procedure and it makes even less sense to me. If you do things in order, timing is set with load on the engine for an automatic, shift lever at "D", and the vacuum advance actuator hose connected, then the hose is disconnected for further tune-up operations. So, my comments above about what to do with the vacuum hose were totally wrong for the 240Z's and don't match anything I've ever seen on the US market cars I've worked on. Weird stuff. Good luck
-
Saw this today. Fun to just view the pictures, especially if you like the color blue. Notice the new vents behind the painted over 240Z symbol and the ZX fuel system cooling fan, cooling the carbs. No offense intended if it's a forum member. The car just has some unusual features. Rare Gem 1973 Nissian 240z ROAD READY