Zed Head
Free Member
-
Joined
-
Last visited
Everything posted by Zed Head
-
 Pressure should rise with RPM. You might rev the engine and see what the needle does. The oil pressure gauge and sensors are known for their inaccuracy on these cars.
 -
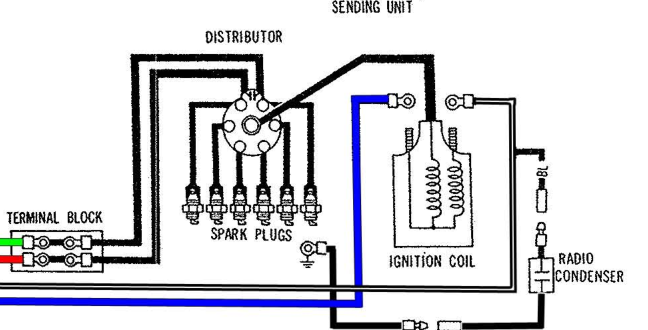
Use the factory ignition wire. Black with white stripe.
-
Wikipedia? https://en.wikipedia.org/wiki/Nissan_Z-car
-
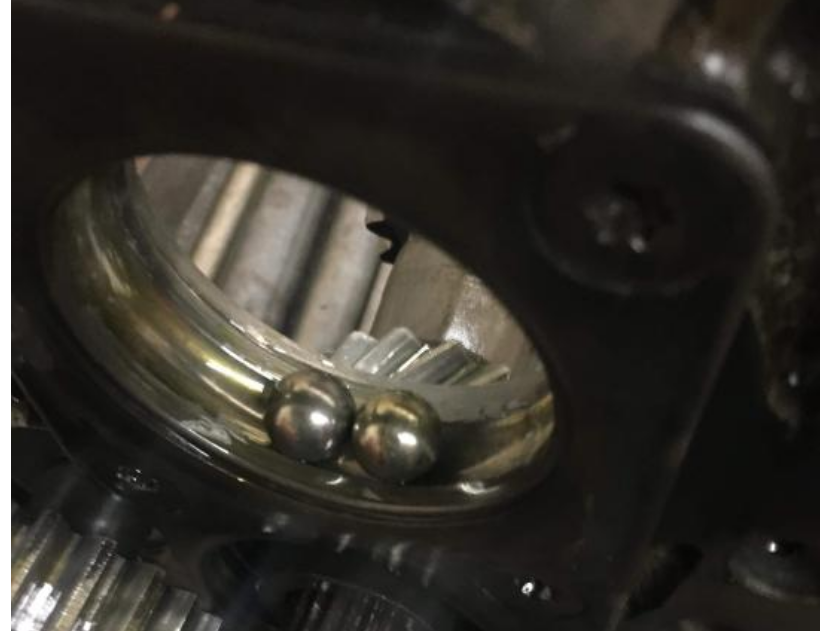
Probably the destroyed adapter plate bearing. I noticed that many of the shifters shown didn't have bushings which can also cause problems. Did you find any metal on the drain plug? That's a clue.
-
Analog would work too, really...
-
I never made it to Webelos. Got some Cub Scout stuff though. Tied some knots, climbed some trees...
-
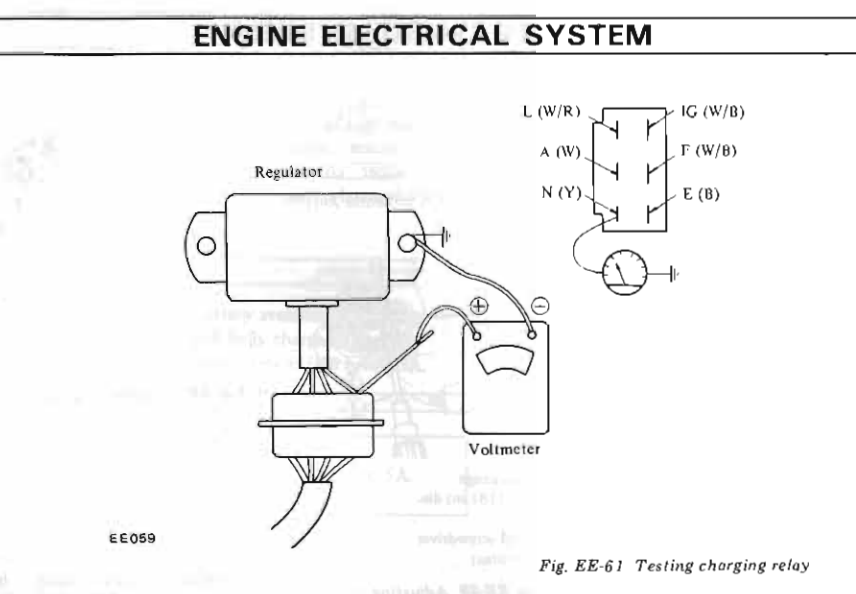
It will remove the external regulator from the picture. You'll know immediately. Good luck.
-
Are you using somebody's kit? It's not a direct swap. You need other parts. Much simpler to just buy a reman caliper. https://zcardepot.com/products/front-big-brake-kit-toyota-caliper-240z-260z-280z
-
With the external regulator doesn't the backfeeding happen at the regulator? It's mechanical, I don't really know how the things works. But, the "break" should be there, in the regulator, either a diode or a relay of some kind. Maybe it's just a sign of a bad regulator. Might be worthwhile to examine the plug and wiring very carefully, and the bottom of the regulator. There is exposed circuitry underneath, if I recall right. Might just need a cleanin'.
-
What's the material for the spacer?
-
I think you meant backfeed. MSA has been backordered on the backfeed prevention conversion plugs. Might need to show him the diode fix.
-
First gear is where you'll notice the changes. 4th gear is always 1:1. But between those two choices you have a 3.321 1st, or a 3.062 1st. If you live in a hilly area or do a lot of city driving, the lower 12.95 overall might feel right. If you live on flat ground and don't do a lot of stop and go, you'll probably find that 1st is pretty "short". Also, the other notable difference between the two choices is that the early 5 speed has a noticeable gap from 2nd to 3rd. If you're climbing or trying to accelerate you need to stay in 2nd longer than you'd think to get a good shift. Waa...waaaaaa...waaaa...waaaa...waaaaaa versus waa..waa..waaa..waaaa...waaaaa Don't forget to calculate the effect of tire size. 3.321 x 3.54 = 11.75 3.062 x 3.9 = 11.94 3.321 x 3.9 = 12.95
-
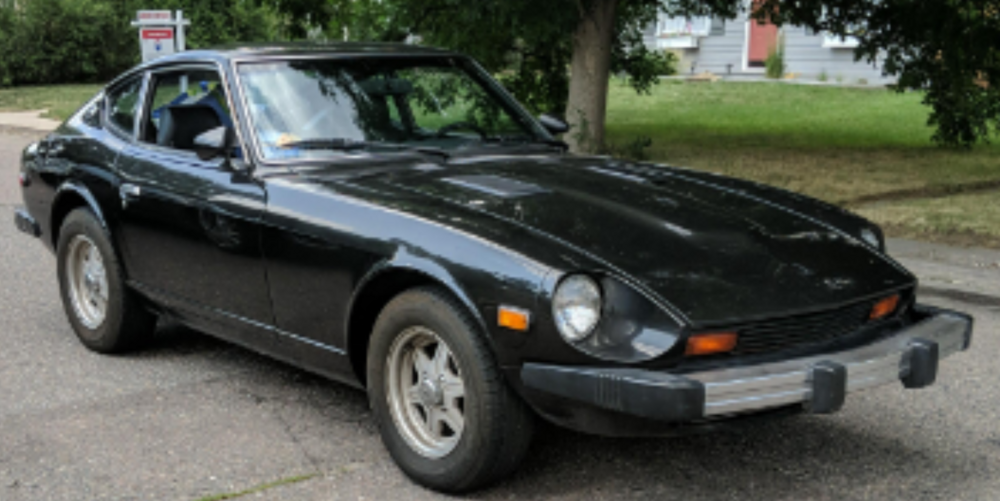
Well, that's a bummer. Looks like a nice car with no major problems. Add more pictures, a lot of them, with closeups (the single image you posted is from a distance), and you'll probably sell it pretty quick. Nothing wrong with hanging around if you sell your Z (I think).
-
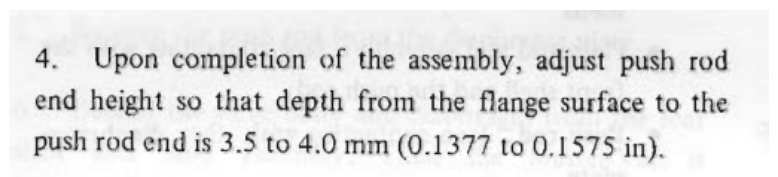
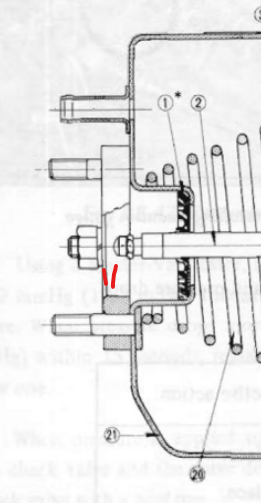
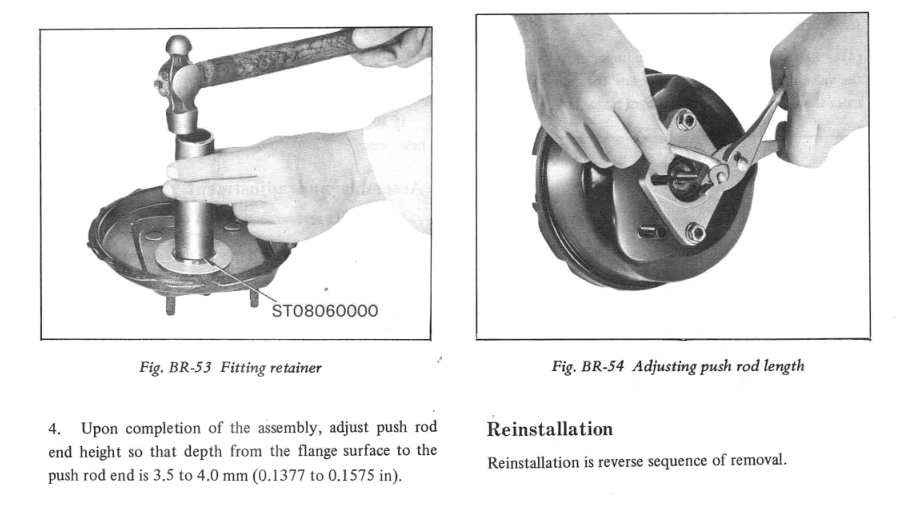
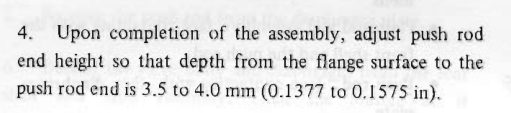
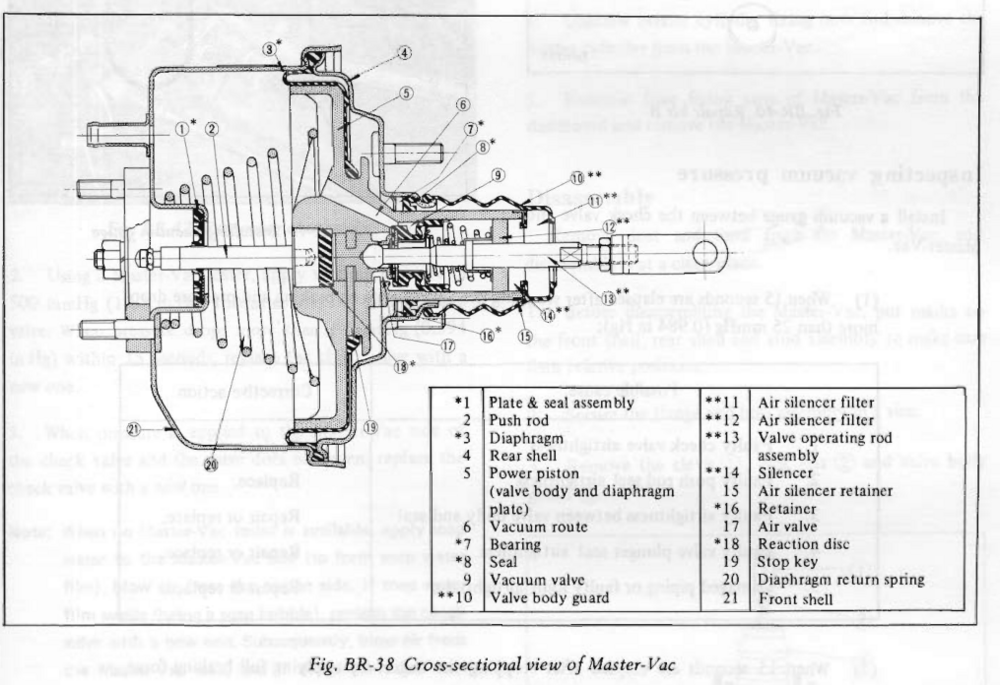
No offense intended, but it's all right there in the FSM. The booster is adjusted to work with the MC. You have to put the flange on the booster and adjust the rod to the proper distance.

-
The screw I vaguely remember. p.s. there's a circlip that keeps the piston in the bore. Should be visible.
-
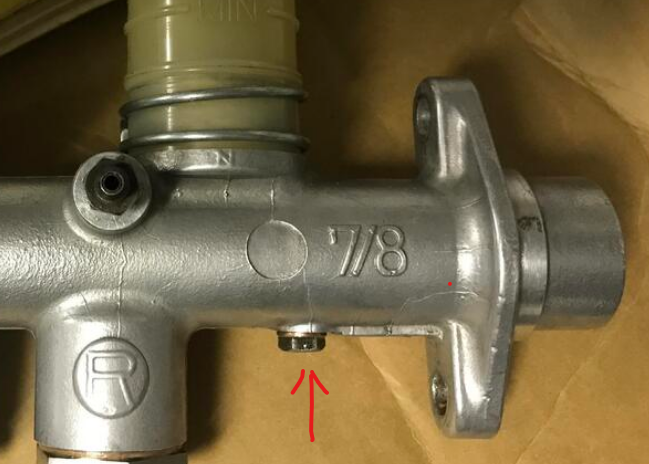
I have a memory of a "stop" screw in the M/C's that stops the travel of the piston in the bore. I wonder if your "new" Tokico has been reassembled incorrectly. The position of the piston at the opening of the bore should be the same for both MC's. They both have the same ID. All signs point to incorrect Tokico, or Tokico assembly. I'm going to guess that somebody put the piston on the wrong side of the stop screw. Post pictures of those same two MC's but from the open end.
-
They're very close to the same length and should work the same way. Sounds more like there might be something wrong with the "new" Tokico. Make sure you're fixing the correct problem.
-
What's the measurement? Sounds like you're mixing and matching parts. If I interpret your posts correctly it sounds like you're saying that the rod #2 is sticking out of the booster by almost an inch and is causing the Tokico piston to bottom out in the bore. Can't imagine it came that way. No offense but your words don't present a clear picture. How about a real picture, of the booster with the rod sticking out?
-
You could have the stock cam regorund if it wasn't damaged. But, the Z22E is an EFI engine and its engine management might not work well with a non-stock cam. 1982 is still pretty primitive, I don't think it's tuneable, besides the AFM and other parts designed for a certain cam profile. So, you might end up needing Megasquirt or one of the other engine management systems. https://www.racetep.com/engine-building/camshaft-grinding.html
-
What is the oil pressure doing? I think that they use the same internal voltage regulator. Might be a bad gauge. Measure resistance of both of those and it might tell you something. I'm not sure if the resistance curve is the same as a 280Z water temperature sensor but it might be. Put your probe on the body of the unit and the terminal to measure resistance.
-
The available stroke will not affect brake operation if both of them offer "enough" stroke. (That's what he said?...). I don't think that you should worry about the MC stroke. When working on the brakes most of the adjustment is in removing the play in each transfer of power, and getting each part in its proper starting position. If you can get the #2 rod adjusted as the FSM describes, and the other rod to the pedal, #13 in the cabin, the brakes should work as well as they could. The extra stroke of the Sanyco will not be needed (he said...). I copied the instructions above from 1972. Here is the from 1970, that I downloaded from CZCC.
-
I'd think that most people know the factory setting, assembled, but few know the length of the rod. Not sure why you're talking about depressed and stroke. It's just a starting point and the stroke distance is determined by the pedal travel. Also, the "piston" in the booster does not resemble a piston. Maybe you're talking about one of the rods?
-
I'm not sure but I think that you just peel the rubber boot back and pull them straight apart. That's how other connections are up there. Here's a thread with a picture of a set unplugged.
-
Examine the seals and feel how the joints move. If the seals are good and they move freely, replace the screws with Zerk fittings, grease them up and use them. You only need one Zerk, you'll only insert it for the greasing, then put the screw back in. They'll be tighter than brand new aftermarket u-joints.
-
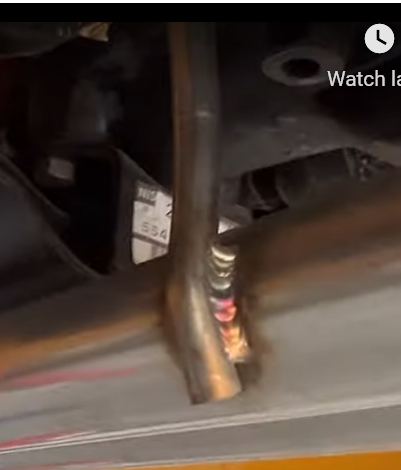
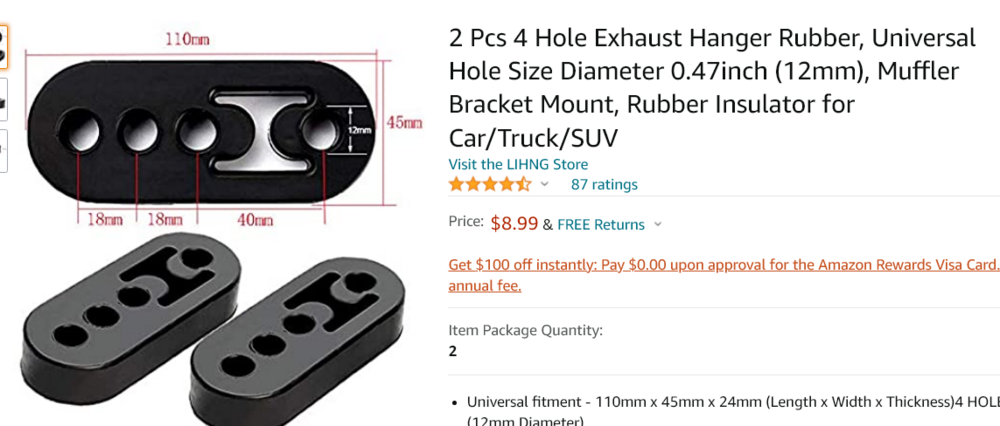
Everyone here thinks DIY first but it seems to me that the guy who installed it didn't get it quite right. Seems like he needs to lengthen a couple of hangers. Should be easy. p.s. actually if there rubber loops at the top of that hanger, it might be super easy. Just get a longer one. Or just bend the J hook that goes through the loop.