Zed Head
Member
-
Joined
-
Last visited
Everything posted by Zed Head
-
 This might help after you take it apart - https://engineering.timken.com/engineering-tool/seal-search/ That's a weep hole. It lets the oil out before it travels down the inside of front cover nose to the pressure plate if the front seal leaks. By the way the steel front cover will fit the ZX transmission if you find problems with the aluminum one.
 -
You showed the axle flange but not the backing plate. Check the backing plate for rub marks. Pretty common to get a slight bend in it. A hammer will fix it.
-
Sounds like the AAR is closing too soon. https://atlanticz.ca/zclub/techtips/aar/index.html
-
The parts manual shows only one propeller shaft for the 280Z's. https://www.carpartsmanual.com/datsun/Z-1969-1978/power-train/propeller-shaft And does show both transmissions. https://www.carpartsmanual.com/datsun/Z-1969-1978/power-train/transmission-assembly
-
Won't you have more heat with the headers? You'll be cooking that oil pan gasket. I'm sure a lot of work went in to designing and implementing that odd little piece of metal.
-
Hammer?
-
You'll want to block the heater core ports not loop them. Looping them allows coolant to flow back to the water pump without passing through the radiator. Carb cleaner will dissolve paint and swell rubber. I've found that WD-40 turns in to a gooey material over time. I hosed my distributor down and it was a mess inside when I took it apart months later. Seems like your dillema is whether or not you want to drive the car while you upgrade the parts.
-
My 76 original hoses split while driving and were blowing steam by the time I pulled in to my driveway. Don't forget that there are hoses in the cabin also. More to worry about. If you're going to replace them just make a slit lengthwise to loosen up the grip on the nipple. For some odd reason Nissan doesn't seem to have anything about the cabin heating system in the 240Z FSM's. It might be buried in a chapter somehwere but I can never find it.
-
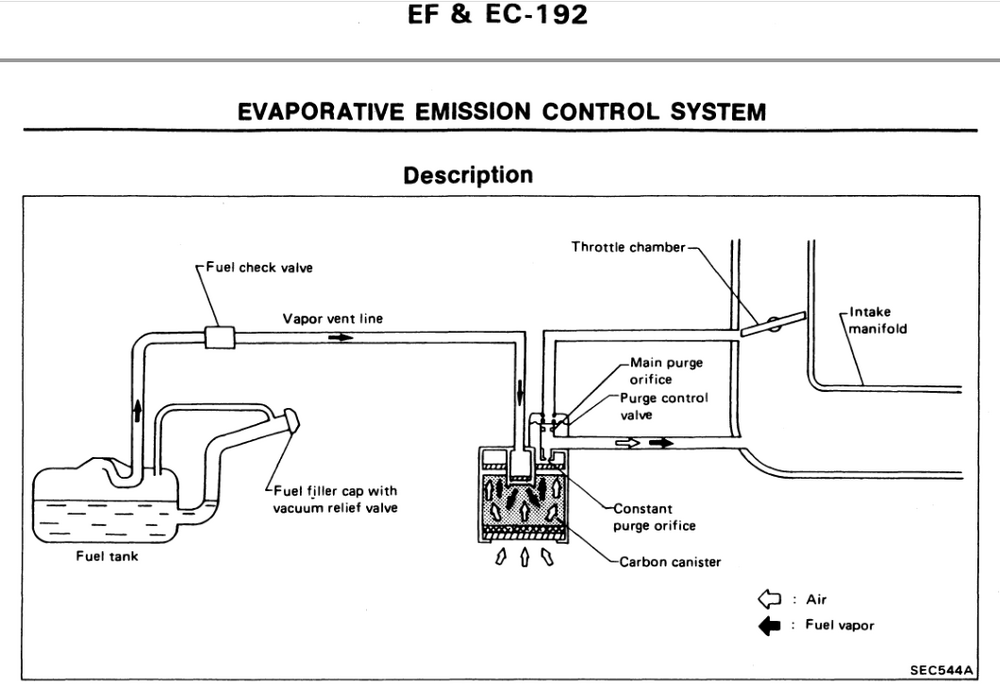
The purpose of the tank on the early Z's might have something to do with the position of the hoses. The fuel probably sloshes pretty hard on turning, pressuring the vent lines. Without the tank that fuel could get pushed in to the vent line to the canister. The way that the system is illustrated suggests that it has a "drain-back" purpose. Plus they called it a liquid/vapor separator (#3). I'd guess that the vapor hose entry points were repositioned in later tanks. p.s. I'm not sure I was following what you were reporting in your previous post about liquid in the line. I thought it was with the #3 tank in place. . .
-
You won't know what it needs until you get in to it. The quality of the garage will be important. How you prepared it for storage will affect its rebirth. Did you dran the carb bowls? Add some stabilizer to the fuel? On the fuel tank, a lot will depend on the gas cap seal. I'd take site's advice and just crank it up on new fuel. It's carbs so not much to lose. See how it runs and decide if you have a huge project or just some minor work to do.
-
Have you seen distillation in action? Vapor moves man! Actually, the hotter the tank is and the colder the line, the faster you'll build up liquid. I'd actually be surprised if condensation was not happening.
-
Here's an image from the 1991 300ZX FSM, just to look at. No vent tanks, just straight lines. And a check valve.
-
Good opportunity to do a "will it run" pictorial. Let's see that fuel tank turpentine.
-
How about safety wire? Or a set screw. With thread locker. I think I already mentioned tacking it with a weld. https://www.cornerspeed.net/2014/bikeprep.php
-
Vapor condensation? It's what they do when they get cold. Vapors.
-
Circular leverage.
-
Thanks for the update on the springs. I didn't know that they came with a plastic coating. Also didn't know that you could buy them from TireRack. Also didn't know that they were so fragile. Are you saying that this is the second set that failed? At least they're still an option. There was a company that came out with new springs a few years ago but I think that they might have folded already. Can't remember the name but htere was quite a bit of discussion about them back then. Eibachs had a reputation for unpredictable ride heights. Many of the Z's that used them ended up looking like Gassers.

-
Watch this from about minute 10:00.
-
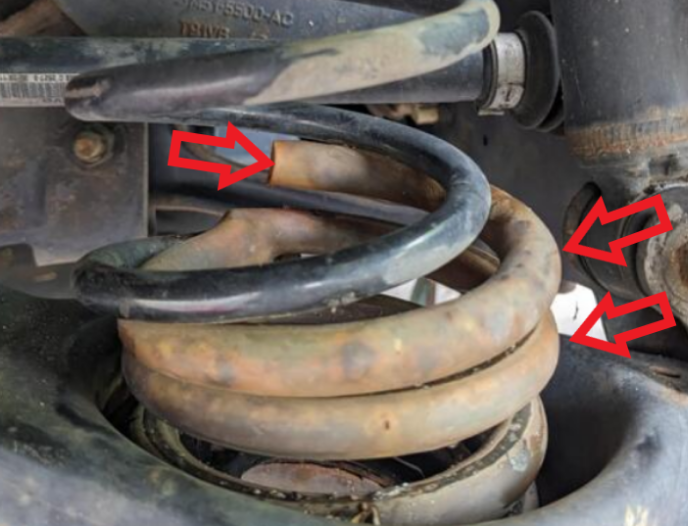
And, might as well ask since I'm here, are you saying that the Eibach spring or springs broke? Not trying to cause trouble, your writing implies that whatever it is is obvious to you. But you didn't really say what was going on and there's no broken ends shown for the Eibachs. The Eibach looks whole. Might just be me not knowing what I'm looking at but I've seen a few springs. I had some Tokicos in my car and a set of cut down stock springs.
-
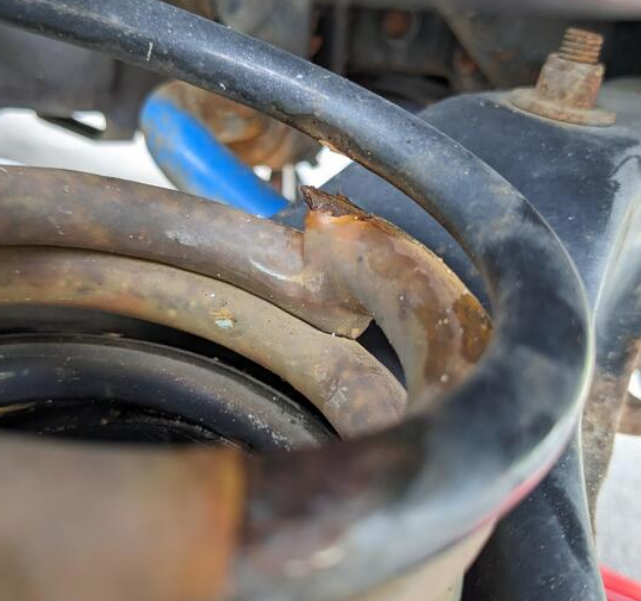
Still confused. The black Eibach spring is clear. But now you've added another picture of what looks like a remnant of some other spring, intertwined with it. Looks like a single spring plus one. Two springs. What's the brown thing?, is the question.
-
I assume that was the early body style shown in your sig? Maybe that matters. I used the 280Z 4 speed shifter on all of mine, it swaps right in. Never tried the ZX shifter.
-
I'd be surprised if they're not the same basic structure but with different trim for manual versus auto.

-
Have you tried to remove that trim piece? I'll bet it's held by screws.

-
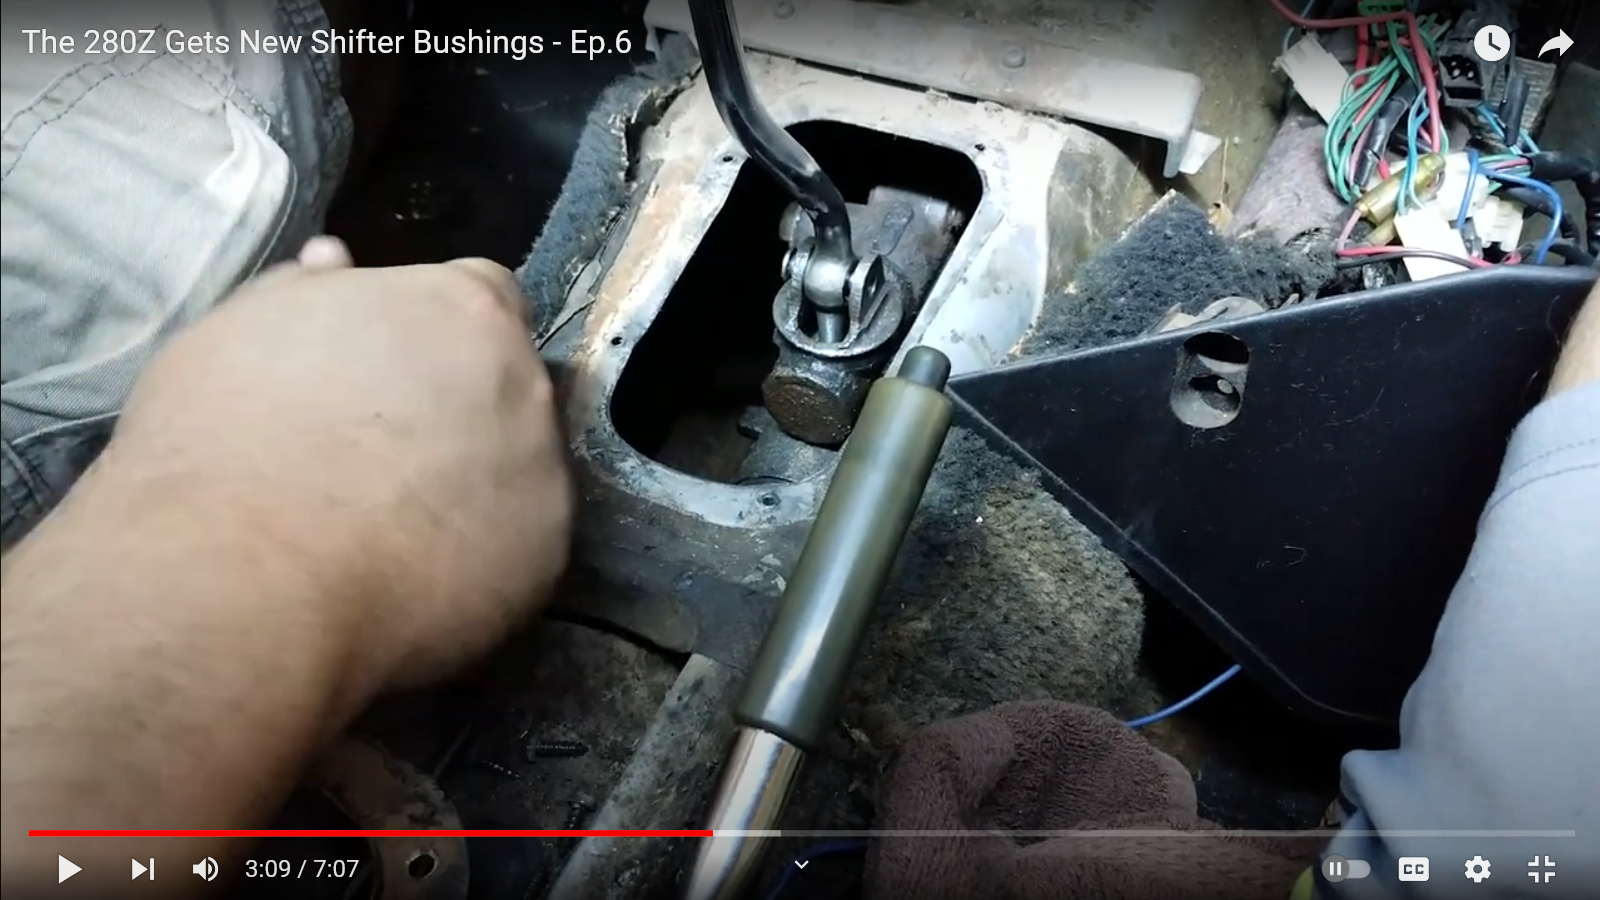
I found this video with a good image of the 280Z shifter hole, below. I don't think that the 280Z's need shifter bending or notching of the body hole. I had a 78, 81, and 83 5 speed in my factory 4 speed 76 280Z and had no conflicts. (I've mentioned that before in other threads.) I think that Grannyknot has worked on many 240Z's where that might be a problem. On the console - are you going to use the automatic console? No idea what that needs. I don't know why Nissan made the hole so big but it looks like you need that front portion of it. It looks like they left the pattern for you in your second picture, just follow the edges.

-
It's pretty easy to install and remove the shifter after the transmission is in. You could do any bending after the installation. Probably metal and console trimming also. Not clear what you're working on so can't comment on what modifications you might need to do. Good luck.