Wade
Free Member
-
Joined
-
Last visited
Everything posted by Wade
-
Ok, right on. Wonder why they even sell 72 nozzles and 71 nozzles if they are the same? And they specify that the you can not use the 72 needles with the 71 nozzles. I checked it, no burrs or anything, guess just on that one needle the head is bigger. I did get a little bend and also a nick, near the head, in the needle trying to get it out once I realized it just aint gonna go in like it should. I had to use pliers with a rag wrapped around the needle to pull it out, still nicked it. Not sure if I should just sand it down like you stated and try to straighten it, or just send it back and wait another week or so for a new one.
-
So the 70-71s nozzles use the N27, and the 72's nozzles use the N54(believe that is the number) needle. What is the actual difference in these, what would be expected if I used N54 needles with the 71 nozzles? Is there any difference in the base of these needles, or the base of the needles that are used for the automatics (N58s)? I have a problem with a set of needles I got from Motorsport, supposedly they are N27 needles, not stamped or anything so no idea what I got, they visually look the same to me but dont know my eyes arent as great as they used to be. One of the needles will not enter the piston, well it will go in about 1/4 the way but after that I would need to really jam down on it to seat it and most likely bend the needle, while the other needle I ordered slides in smoothly, this is trying them on the same piston, so something is just not right. Not sure if maybe one was not cut right or if I simply have a different needle.
-
- after i connected the power cable to the battery in the hood, how do i get it into the inside of the car? what hole do i use? Unless you have something available, drill a small hole and use a grommet, can do this to the right of the battery and have the wire feed thru firewall and come in behind the heater blower, careful not to drill into heater blower. This is where you can run your inline fuse also. - where will the power cable then enter into the inside of the car? by the glove compartment on the passenger side? or somewhere on the driver side? Same as for the other power feed, another option is to just run a single larger gauge wire thru and install a fuse panel behind the heater blower where you can then route separate power feeds to the amp, head unit, ect. This would be cleaner than running multiple wires thru firewall. - from there, where exactly do i go with the cable to get it to the amp behind the seat in a stealth way? through the middle console? You can do that, I dont like it tho, I have pinched wires there before, not sure if the series 1 console sits tighter then the later ones but I just dont like cramming too many wires under there. Can just run it cleanly behind the radio, up over the steering column area, down into the corner where the antenna wire is running, then down the body under the vinyl. Or do the same thing but on passenger side, some people do not like running speaker wiring along the same route as the power feed, but in a system like your doing I do not see why you would have any issues. - from the amp behind the seat, how can i get cables to the speaker panel in the back in a stealth way? Can pop the dog leg off, run fish them thru the body around the pillar and out the back, the same routing that the original antenna uses. Or just keep them under the carpet if that suits ya. - from the amp behind the seat, how can i get cables to the kicker panels? Same thing really, dog leg then pull the vinyl up along drivers side. Or just down and under the vinyl, the antenna runs that way, body clips along that area to hold the wires down, glue vinyl back down and reinstall scuff plate. Some run wires under the center console but I dont like that idea, especially on the series 1 with different console, the wires may get pinched and short out. I would just take the drivers seat out, more room to work, and I do not think you even need to pull the scuff plate, you should be able to just pull the vinyl up far enough to get the wiring positioned correctly. - how can i ensure the amp turns off when i turn off the car? what do i have to solder exactly? and where? i have no knowledge about electronics. Blue (remote) wire needs to go to an ignition source, a power feed only active when key on. Different options available, if not running electric antenna maybe run it to the existing antenna power. If not running electric pump maybe run it to the electric fuel pump power feed which is found to the left of the head unit (black/white with green wire next to it, check on this cant remember exactly if thats the color scheme). Or tie it into the white/red at fuse box. But I do not see why you cant just use an existing power feed not in use and save yourself any altering of the existing wiring, the remote wire to amp does not draw much power at all and existing wiring should be fine. I understand that you want to keep the stock radio in place, but I would agree with others that posted about your sound quality using just the ipod to the amp. I mean, your already tossing in amps and speaker panels and such, I do not see the harm in replacing the head unit as well and making the sound quality go up. That amp is way overkill. Headunits are much better nowadays, a decent head unit running to them speakers would be fine. There are plenty of head units that will fit into the existing slot with no alterations of the console. And you can revert back to putting the stock head unit back in at any time if you choose to go back. Guess what I mean is, you want original looks but you got other un-original items scattered thruout the car, just makes it more of a hassle I would think. But Im with ya if thats how you want to run it, how I listed everything should work out nice and be a clean look. Jackbox's idea of installing the head unit directly into the speak box is another great idea to consider, looks very clean, very clean indeed.
-
That looks nice, and I imagine you would never need to touch that tank again, good job. I wanted to add a tidbit of info about cleaning the sending unit or the entire tank if someone wants to do just a quick and cheap cleaning up of minor rust. Instead of using any high dollar treatments or chemicals, try a bottle or two of "The Works" toilet bowl cleaner, sold at Walmart, ect, for like 1.25 a bottle. Can soak the sending unit in it. If doing the tank, dump a couple bottles in and slush, let it sit, slush again, till clean then empty. Wash out then blow dry right away to get any remaining moisture out. Then some say use a fine mist of wd40, not really sure if getting too much in their would affect the fuel tho, always wondered if just slushing a little marvel mystery oil around would be better, then filling. Ive never actually done this on a Z tank, but have done it on a few other tanks for people who wanted fuel pumps changed out and their tanks had rust forming inside. Was rather amazed how well a couple bucks worth of toilet bowl cleaner cleaned out the rust.
-
I suppose I have mixed feelings when I see someone selling items for so much. I think "that is outrageous, this person is crazy" but at the same time I just think "well he is no different than anyone else trying to make a buck". Everyone does it, MSA, BlackDragon, other suppliers/services. Take MSA for example, oil pumps/alternators/filters, stuff like that you can pretty much find elsewhere for like half the price for the exact same item. Supply and demand I suppose, someone must be buying it if they or anyone can maintain the high price, I cant get mad over it because I cant afford it. Thats kind of the nail on the head I think for maintaining these old cars, you have the guys who do everything themselves, who try to maintain a nice looking car on a budget, who take pride in knowing everything about their car is personal. And then you have the guys who have the funds available to just pay everyone to do it for them. But it is still the same in the end, just different paths of getting there, we are all different. As far as shipping, Im kind of numb to it, anyone who has been around ebay long enough should be. I sure know I have bought plenty of items on ebay for like $5 but had $50 shipping charges. As long as you just think of shipping charges as part of the sale price, then no reason to worry about it. When bidding you have to take the shipping into consideration. From a sellers point I suppose I just have no issues charging a couple bucks more for shipping an item, its not as if the shipping price was not made clear ahead of time. My reasoning on this is that I just want to be fully sure I do not get jipped at the usps counter. If I charge $9 to ship an item, but the actual usps charge is $7.80, well I just look at it as that extra 1.20 just went to me getting boxes, tape, bubble wrap, and standing in line for half an hour. Especially if an auction is being started at such a low price and there is a big risk in making absolutely nothing in the transaction. I have sold my fair share of good items for .99 cents, in some cases I estimated the weight incorrectly and actually had to pay out of my pocket for shipping too. Boxing, ebay fees, paypal fees, waiting in line, and selling an item for a $3 loss kind of sucks. And getting back to the major companies again, as far as shipping, they are no different either, they all charge more than what is costs to ship. Its just people do not seem to care when its a company and not an independent seller on ebay.
-
It may just need to have the plastic seat spacers adjusted, unless they have been removed at some point. Or just re-tighten the nuts holding the seat on. Hopefully your mounting brackets are not cracked. The early seats didnt have full tilt, so as mentioned you just put seat all the way forward and have to maneuver your hand and a box wrench around the back and under to get to the bolts. Sockets dont fit well onto the bolt under the mounting bracket, kind of have to use a wrench. If you just got the Z, might want to just take the seat out and look around and see if all is well with the brackets and floorboard, maybe you will find some loose change down their to make up for your effort!
-
After them straps are undone and hoses off it pretty much falls out, but needs to pivot forward a bit due to the rear skirt. If alone put a smaller sheet of plywood or something on the jack as to not dent the tank and to give it more leverage. If you have someone around I find it best to just lay down under it and rest it on your chest as it comes down and other person there can undo any hoses or hand you tools as needed. But thats just me, I do transmissions like that too cause I get tired of fumbling with another jack. Careful on the ring to undo the sender unit if you plan on taking it out inspecting it or the inside of the tank, the tabs will break off fairly easily if you start whacking at it. People say not to use a metal screwdriver due to potential sparks, not really sure if tank explosion is even a possibility, but I suppose that word of advice came from somewhere! I just use a piece of wood or scrap brass, something like that. Also, if you are removing the unit, keep it clean as you do it, any dirt particles around that ring as you turn it will surely fall into the tank as you remove it, a small hand broom or something like that is always nice to keep brushing out the dirt so it does not enter the tank.
-
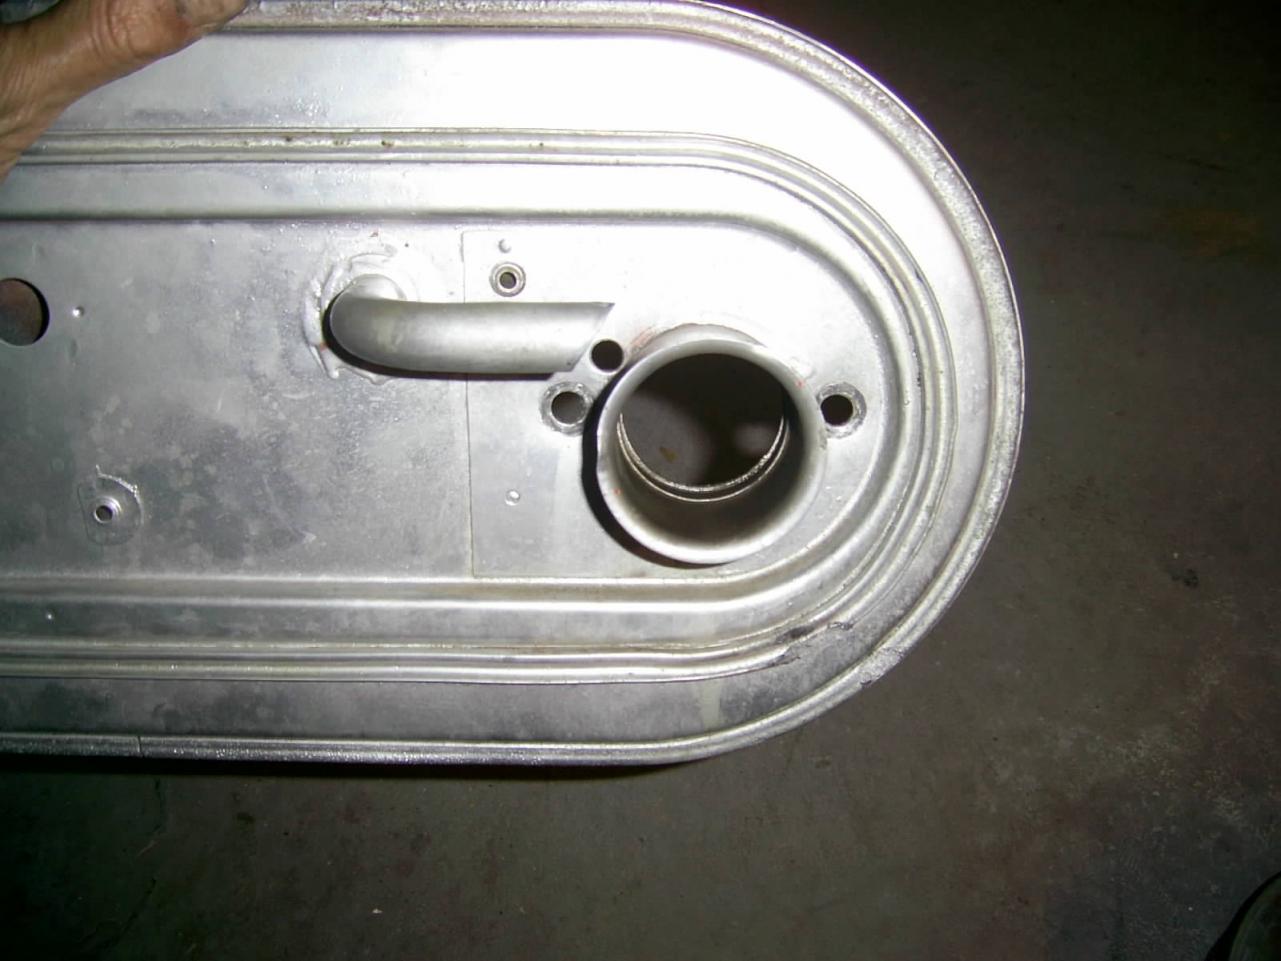
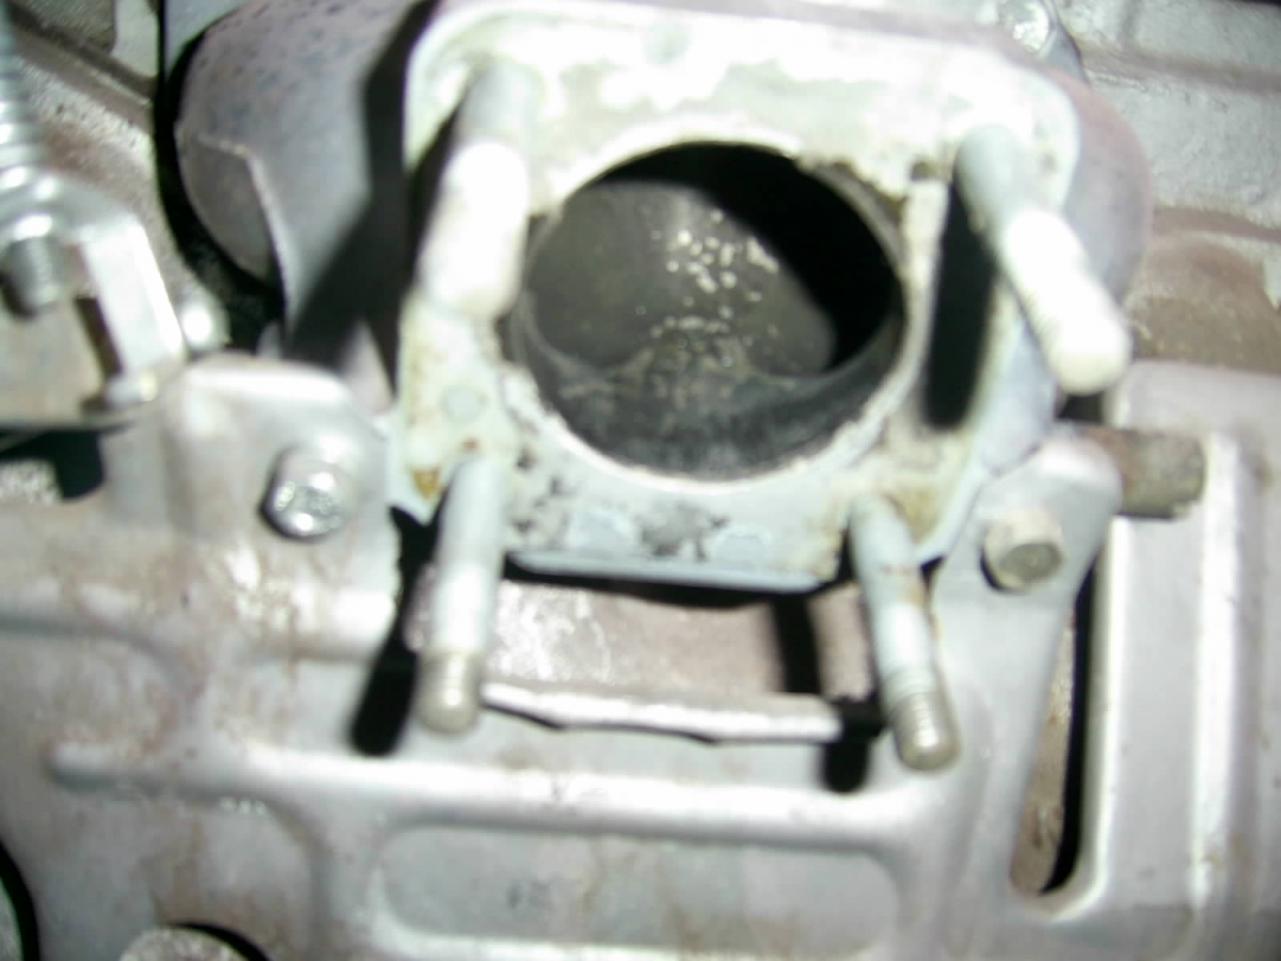
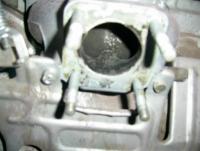
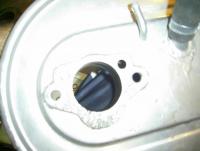
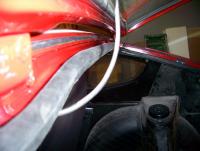
Hmm, wonder whats up with that. If I understand it correctly those holes feed the dome area air, the housing is notched out for both sides to feed it air, wonder if this is just one of them universal type things where it was manufactured for multiple purposes.
-
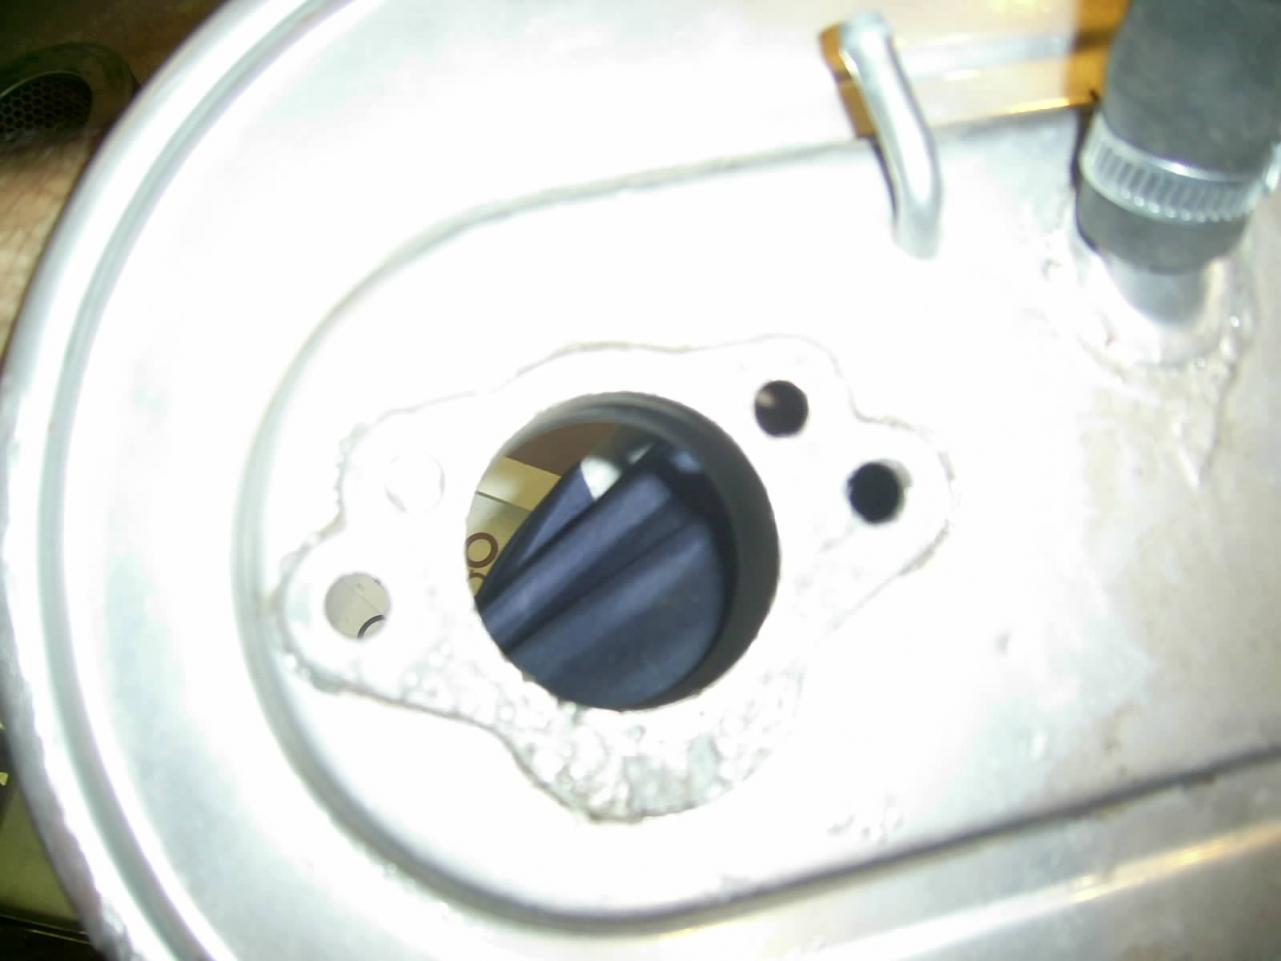
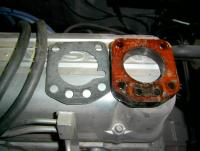
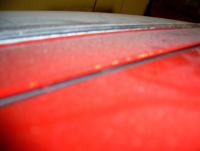
The backing plate has 1 hole, the gasket has 2. Here is a little bit better picture from the other side. Not really sure what year backing plate this came from and if I should have the 2 holes that feed thru to the carb dome.

-
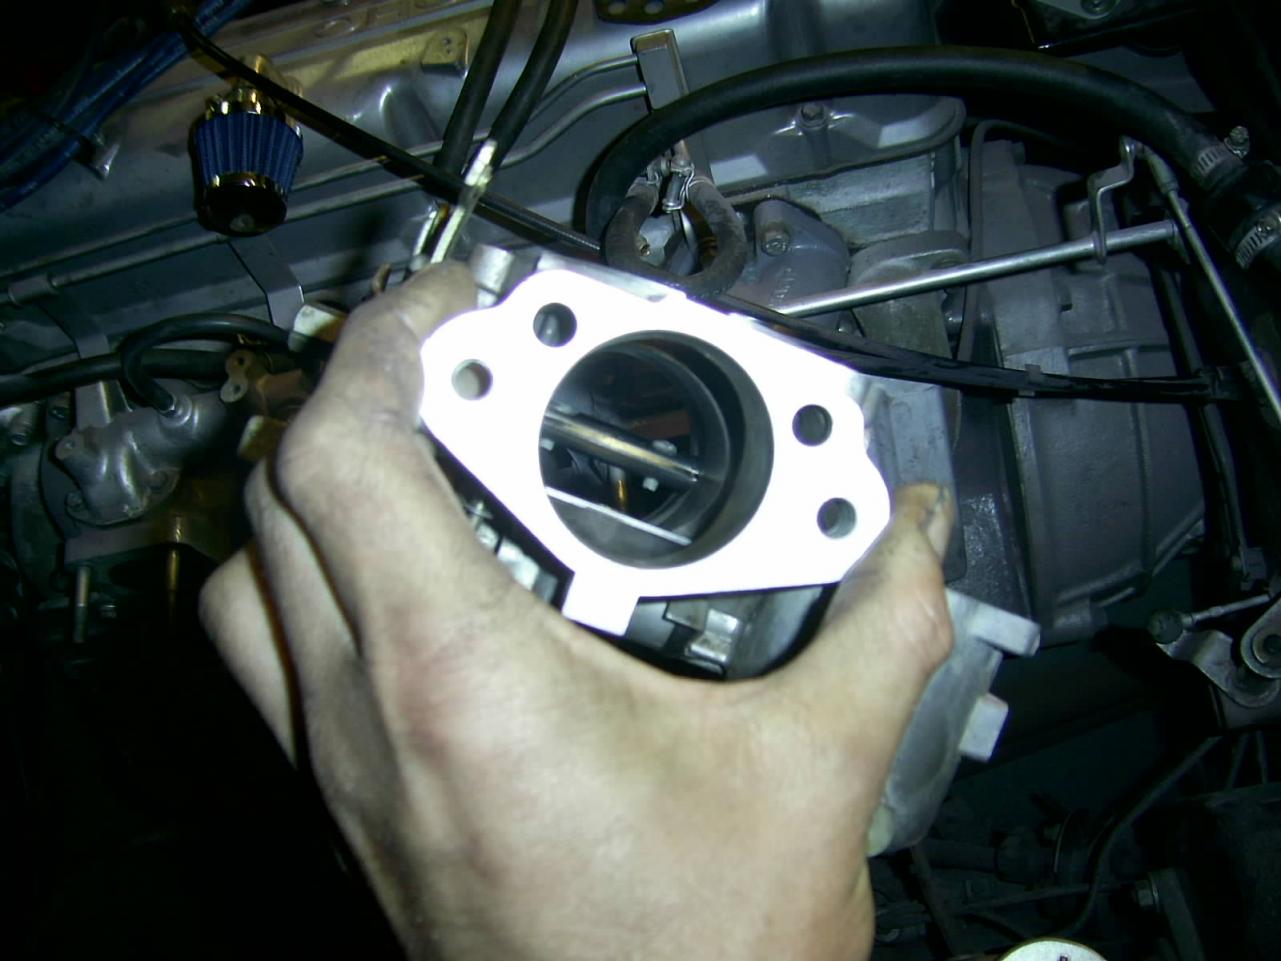
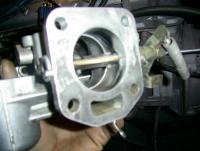
Making sure this is alright due to using parts from a 71 and a 72. I have a E36 intake manifold (believe this was from a 71), no water jacket going to carb. Then I have the 72 insulators with the water jackets. Going into the 72 SUs with water jackets. Ok, now for the air box side of the SU's, I have the 2 air ports at the top which I believe feed the damper. But my air box only has the one opening for the air port. Does this all seem compatible? I am currently not running the water line thru the intake, so I do not suppose there is an issue with the insulator but wondering if I should be using the earlier insulator with no holes. And for the air box only having one air port opening whereas I am just blocking off one of the air feed holes to the SU, not sure whats up with that and if I should drill that hole out or not. On a side note if I need to change the air box (gaskets not that great of shape), thinking of just changing over to the K&N filter such as listed here: http://www.ebay.com/itm/K-N-Custom-reusable-cleanable-Air-Filter-element-56-9096-/350523313506?pt=Motors_Car_Truck_Parts_Accessories&fits=Model%3A240Z&vxp=mtr&hash=item519cd14d62, not sure of how to run the float bowl breathers or the flow guide breather. Seen a couple posts asking about this as well but didnt find any info on what people ended up doing.

-
I installed a fuse panel and some relays behind the blower motor so I can clean up the wiring running to the radio, amp, fog lights, fuel pump. I put my windshield in today also, passenger side upper corner does not look like it is going to seal well, must of shifted over a bit or something when I was pulling from the inside. Corner trim pieces wont really stay in the grooves either, but owell I got a nice fuse panel installed and my radio is working so I will just turn it up and try to ignore the waves of water leaking into the cabin.
-
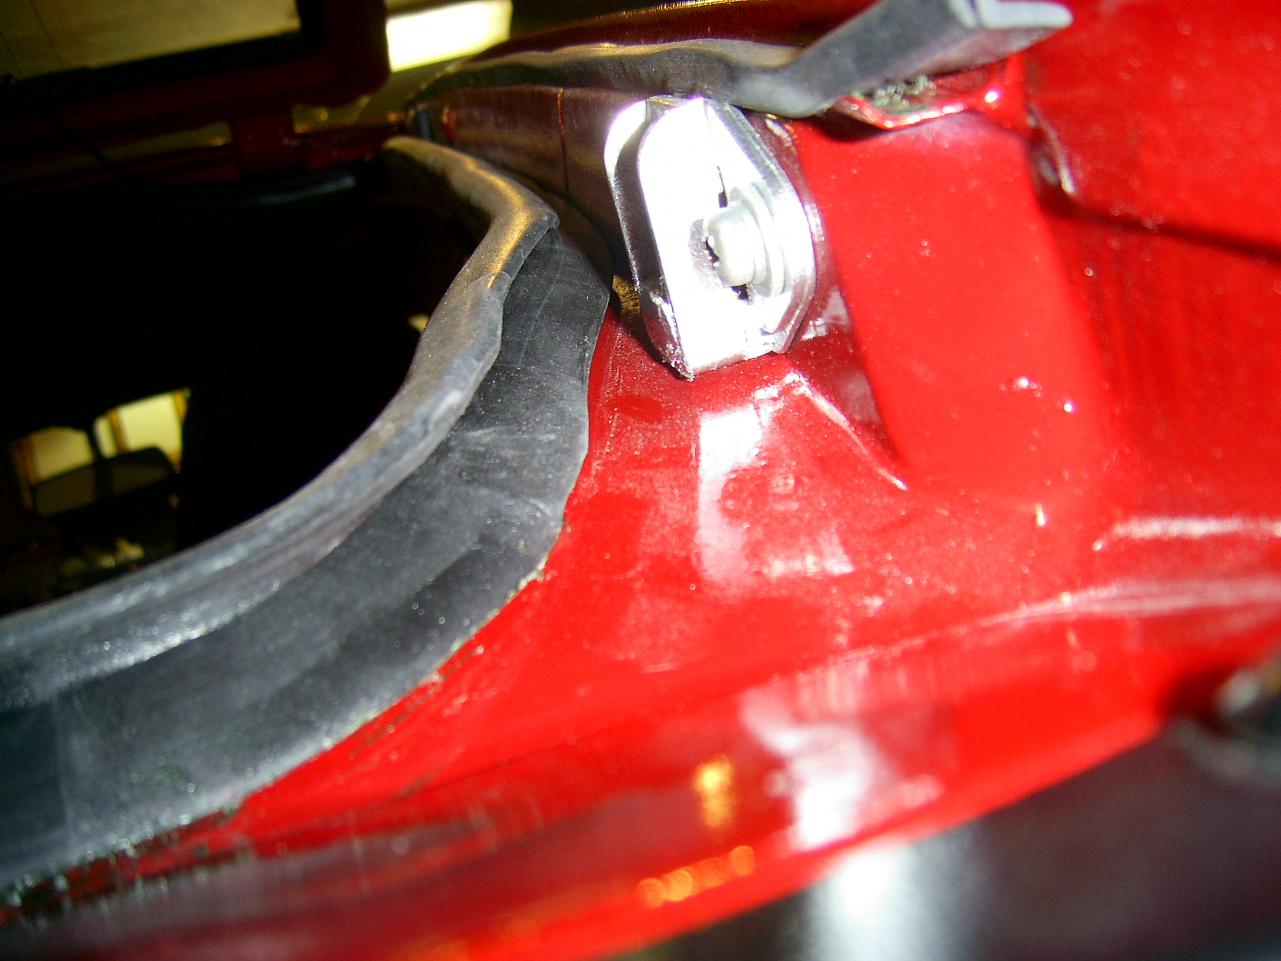
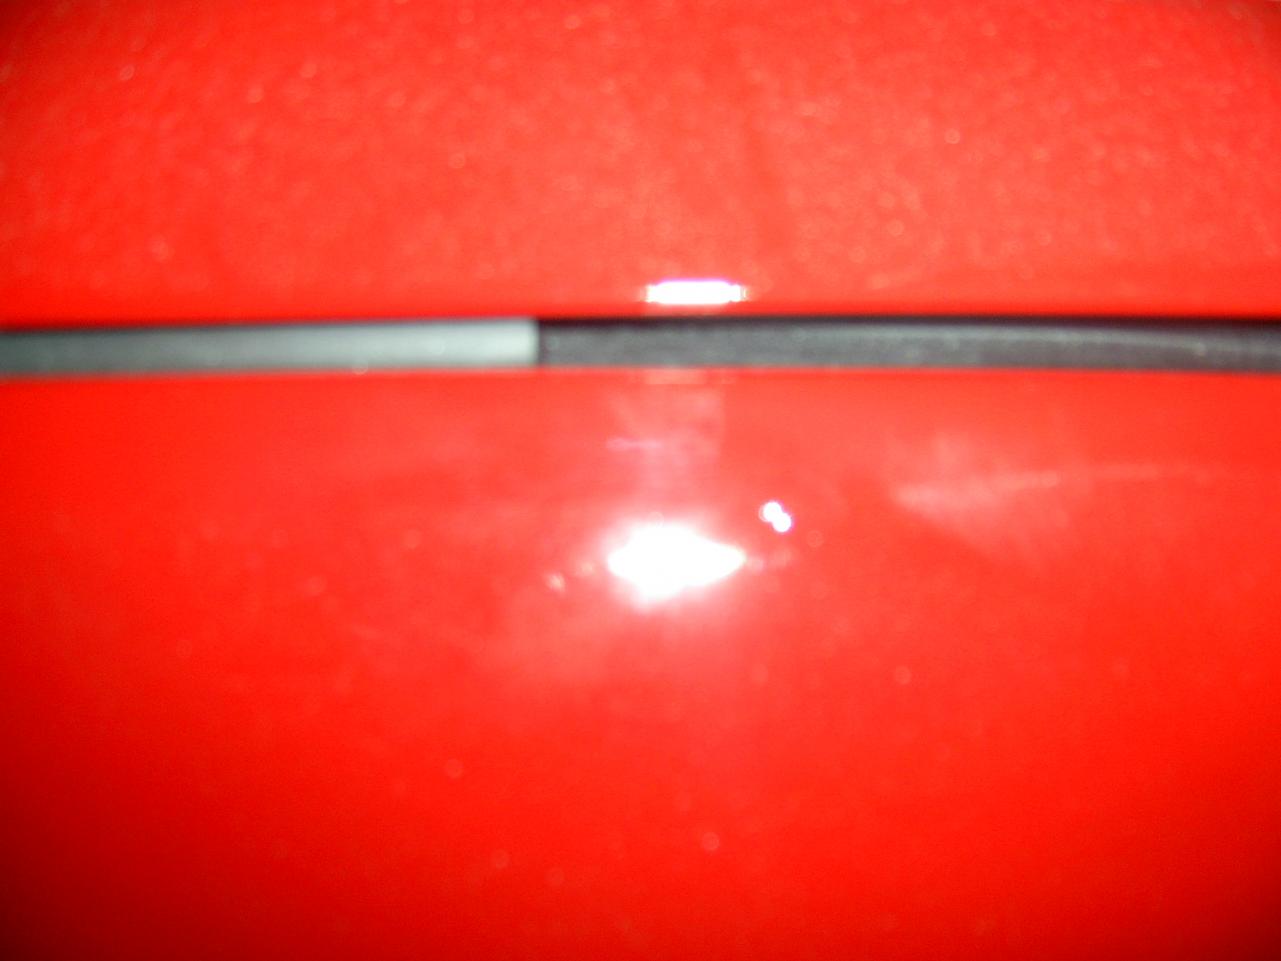
Silicone and slamming the doors shut and letting them settle is not going to work for me, tried adjusting hinges/strike plate and even adding in some spacers, its not even close to shutting correctly. Area around the dome light plunger and kick panel, that entire area, is just way to bulky. I can look up thru the bottom of the door where that stripping is and I have about an inch of spacing there, can see right up into car. Kind of bummed because I tried adjusting doors by myself and ended up causing a couple paint chips as well as bending the front chrome stripping on the door window area. I think I will just use a razor and trim those areas mentioned back halfway, hope to still get a seal going on.
-
Anyone know of a source for a new fuel door lock, or what is compatible?
-
Also, on the doors I still have the original metal lined stripping that went over the original weatherstripping. Is this a normal practice on the aftermarket kits to run this over the pinch weld or do most guys just leave it off. Im aware of the bulkiness of the door stripping, Im working thru the problems of getting the doors to shut by doing the silicone thing like Ive read here on the site, worried that adding the metal lined stripping will bulk it up even more. It does look much better having it on tho.
-
Jim, you know exactly what Im talking about. I referenced your post before and when I went to install it, it just didn't seem right, its as if my hatch body lip was more horizontal and whenever I tried to get the smaller edging over it the back end would just sit unevenly and the larger flat surface that you have glued down just would not sit in there correctly. I hope that makes sense! My corners are snug, its just the center of the roof area I do not get contact, are you getting a smooth contact with yours even in the center of the roof area? Ya know, when I look at the outer channel, I cant help but wonder why they didn't design it to come all the way down instead of just letting water puddle out onto the tail end like that, but that's just me staring at my car avoiding my weatherstrip woes. Leon, thanks and whew, got a little worried when I had parts laying around after reassembly, I must of mixed those in from my parts car on accident. Haven't got to the front windshield yet, going to hit that this weekend when I can get some help. I have a new neighbor down the street that does windshields I guess, I see his work truck full of broken windshields parked outside his house but I have never met him yet, might be a good time to meet my new neighbor. On the inner strip, I glued it in. I put it on for a few days to get accustomed, it was fairly snug on its own except for the hinge area I had to tape up. I started to glue it in then realized I needed to take the interior panels back off because the weatherstrip needed to be tucked under them a bit. I tried rushing the adhesive, instructions said wait a minute then apply, that wasn't working for me maybe because its kind of cold out here right now. I ended up running a strip on the rubber and on the body, then waiting a good 20 minutes or so, then applied and it went real smooth.
-
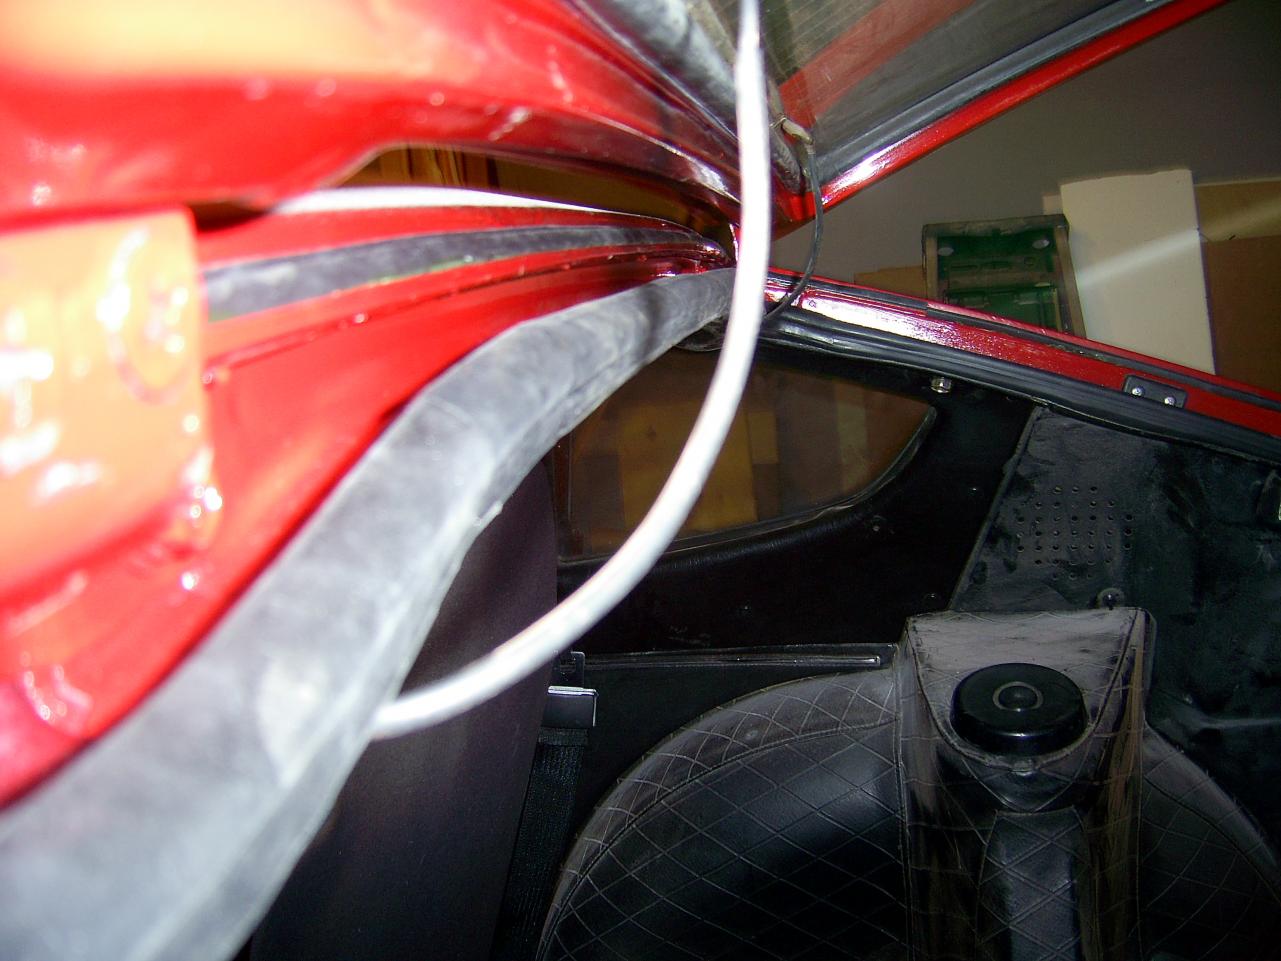
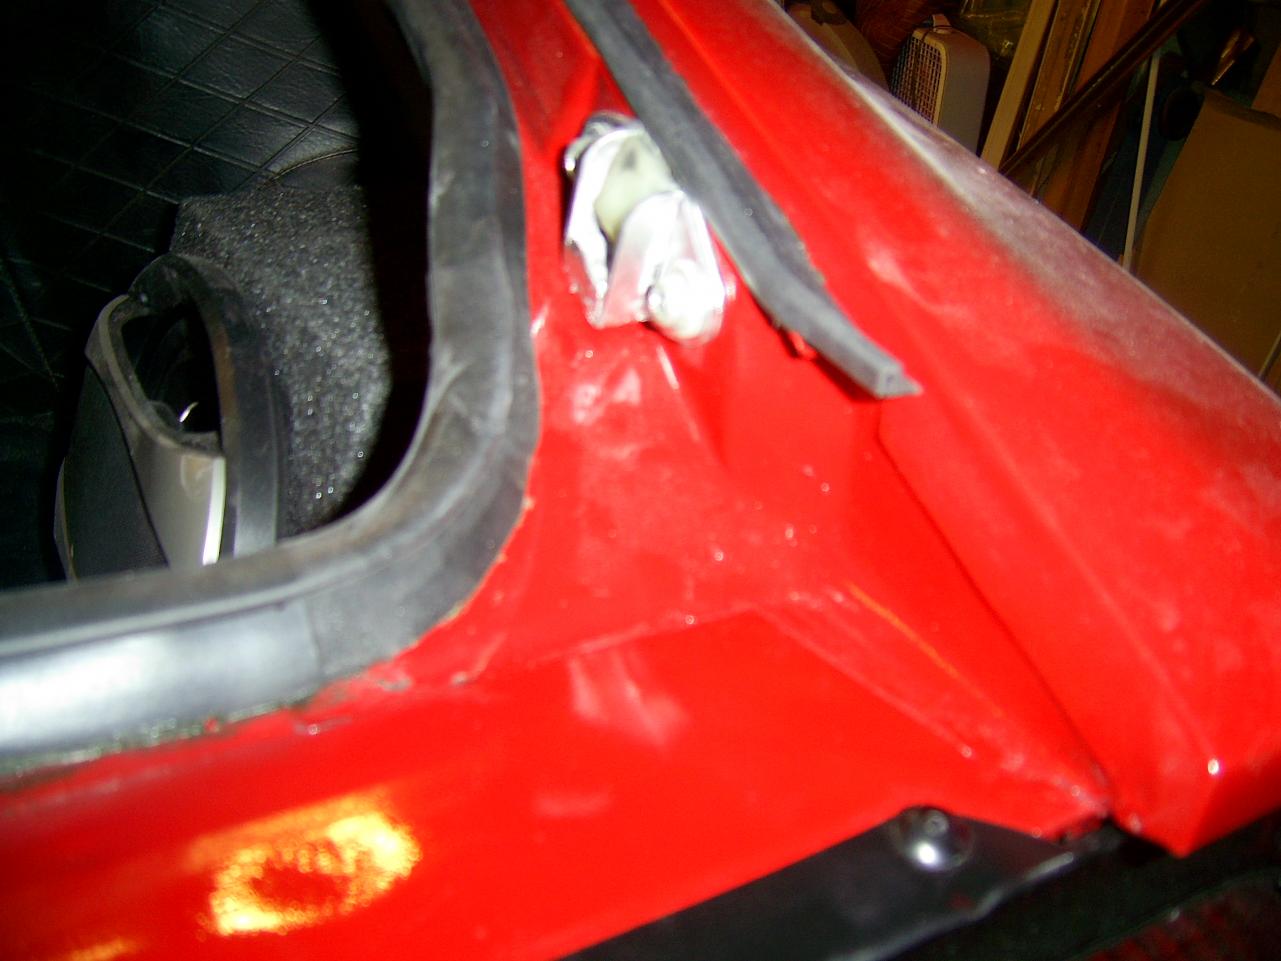
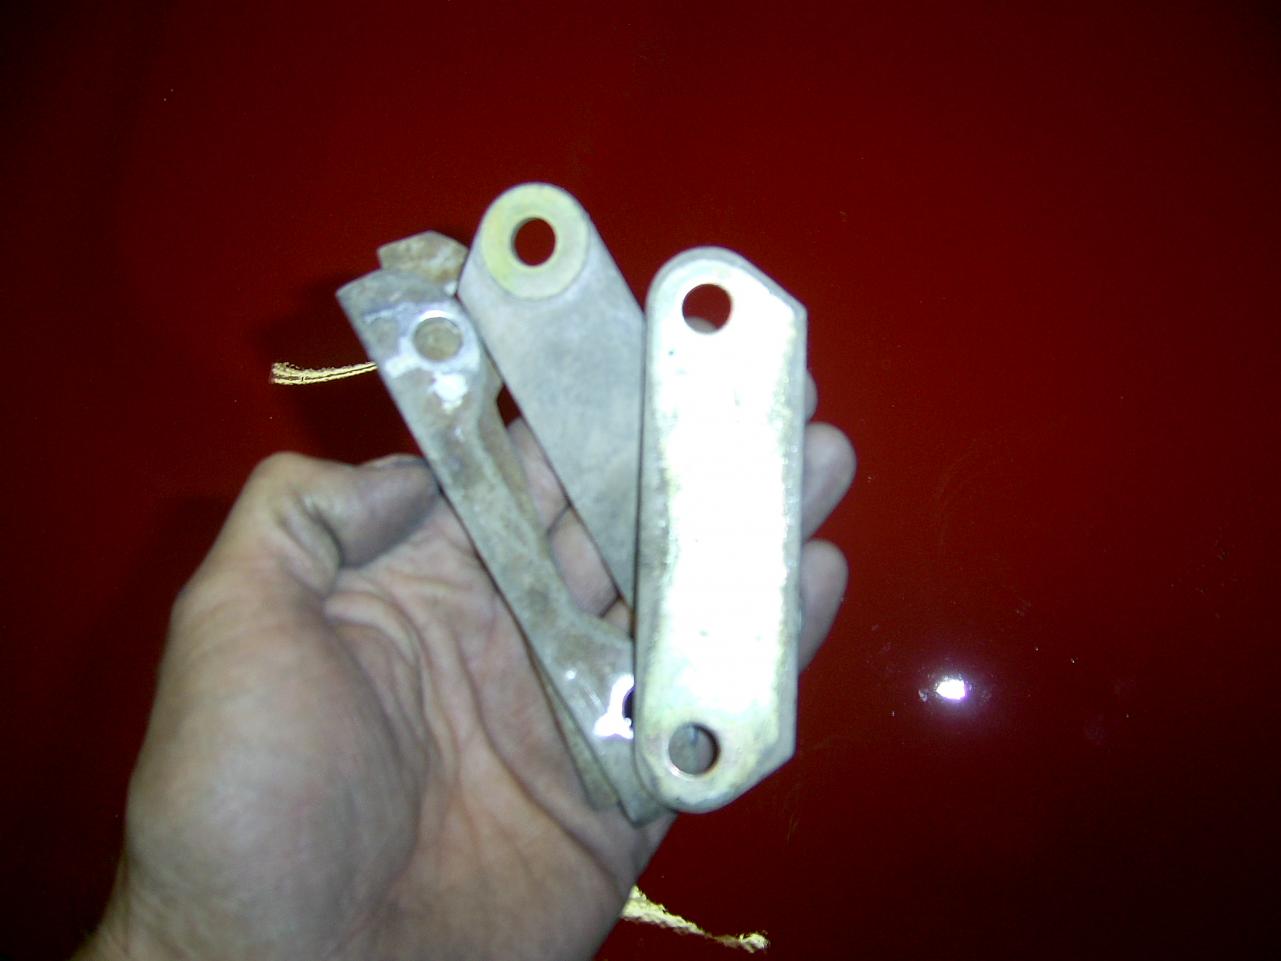
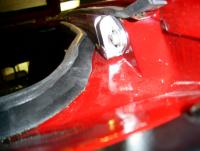
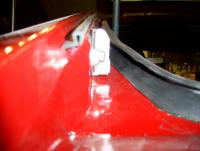
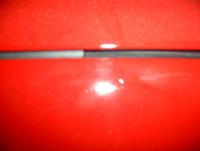
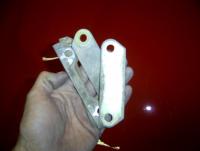
From reading thru other posts I think I have these on correctly, just want to make sure. Hatch weatherstripping from BlackDragon. I am still undecided on how the runners down the sides should be, I read about folks who just set them in the channel and others who ran the lip over the moulding. Here is the right side with the edge over the lip and the left side just in the channel. I dont think it matters because I fail to even see their purpose, when I shut the hatch I can see that the weatherstripping does not even make contact with the hatch body. This is on both sides. Same pretty much goes for the top piece, it didnt seem to fit right trying to get the smaller lip over the edging so it looks like it just lays flat in the channel. Its one way or the other, small lip over edging and the flat side does not lay in channel or get flat side to settle in channel and the lip has to just stay in. Both ways it still does not make contact in the center portion of the hatch, the corners are a good seal. Just dont see the point in having it there if water will still just roll right over it. Now upon looking at it, even if the water did get channeled down to the lower part of the hatch where the stripping ends, wouldnt the water just fall thru and puddle up in the rear panel area and leak its way down thru the tailight area? This area here. Thanks for any input, I have been reading up on it and I seem to find conflicting results. One last thing, can anyone identify these parts for me, I thought they were used as washer for the bumper brackets but they dont match up. Been too long since took car apart forgot where they go!

-
Ok, so scrapped that idea. As far as the crankcase tubing, guess its just for letting expansion gasses leave the tank in need, instead of leaving it just blocked off would I be best off running the tubing to the balance tube or leaving it just open and dangling down below the flow guide valve, perhaps maybe just putting a small filter on it there?
-
Yeah Mike, for the tilt so not exactly lumbar support as I called it. I was unaware of the word "rake" being used for that. Learned a new term today, thanks:)
-
Ill probably order up nozzles and needles from your place and see what happens, too much going on right now to get the bells and whistle treatment. I have to read up a little more on which nozzles/needles I should get due to being at higher altitude, in Denver so 5200 feet on average.
-
Cant get them balanced correctly, Im running but running a little rough. Spark plugs are sooty black, and getting black smoke out the pipe. The whistling leak I was hearing I believe is a nozzle leaking. I can feel a little bit of gas on the shaft of it. Bruce, guess that was the issue on the floats. The standoffs were different but the needles and seats were the same. Guess I should have a longer needle/seat to correspond with the longer standoff. As is right now the front bowls float is needed to tilt upwards a bit in order for me to get it to fill to the 23mm mark. But I did set both float bowls to the 23mm from the rim, if I understand it correctly I do not need to necessarily set it at the 23mm mark but I could lower it if need be as long as I set the nozzle level to match?
-
What would my best option be for my flow guide valve. Currently I have the tank line coming into it, the air cleaner line going to the back of the air cleaner box, and the crankcase tube just blocked off. Crankcase tube blocked because I have no nipple for it on this blocks vent outlet. My understanding is the 240 blocks have a smaller nipple coming off of the same vent that goes up to the pcv valve. Should I run the crankcase outlet up to the intake manifold? My thoughts on this is wouldnt this be pretty much exactly the same as running it to the crankcase vent that goes up to the manifold anyhow. Could I just scrap the flow guide valve and run the inlet from tank directly into the back of air cleaner? Not too sure about this idea, unsure of how much expansion the tank does and if it would send fuel into the air cleaner. Just keep it how I have it, at least I utilize the suction going back into the tank but I will have no expansion the opposite way when the car is shut down.
-
For the seats with the turn knob lumbar support, originally did these come with the knobs by the center console or should the knob be seen as you enter the car. My mind is playing tricks on me.
-
Ill look into that Bruce and see what is going on. I need to figure out where this vacuum leak is coming from, a real high pitched whistle, I tried using a hose to my ear but havent isolated the area yet, almost sounds as if it is internal on the front carb. Another thing that bothered me after start up was I was getting a drip from my valve cover breather hose that attaches to the air cleaner. To me it felt and smelled like a thinned down mixture of oil/gas, not too sure if this is just remnants of the gas I got up in my oil before and its working its way out.
-
These SUs are a real learning experience thats for sure, went back at em again today using the information the user Blue has up on here (that step by step article is awesome), and it started to make a little more sense to me. The front float just kept throwing me for a loop because in order to get 23mm level from the top of the housing the float is not level at all in the bowl and fairly tilted upwards. The lever attachment to the float is slightly loose so I chalk it up to that. I need to fully adjust everything correctly still, I tried for a bit using the book and it feels like I am not getting much air flow and when I do get the air flow up my rpms are high. I have a leak somewhere I need to figure out, I am getting a real high pitched whistle from somewhere but have not been able to find it yet.
-
Ok, sounds good, thanks for your guys responses.