Z-Engineer
Free Member
-
Joined
-
Last visited
Everything posted by Z-Engineer
-
I am not aware of the pullers being made in bulk. They are not cheap to produce and with the size of the nuts, large open end wrenches are needed to operate the puller. I expended between $150 and $200 for the wrenches and puller when it was all said and done. However, we have quite a few first generation Zs in our club and pull pins several times a year. These pullers were designed to last. Steve
-
I live in Austin and already have four tickets, but would like to join up with everyone. Please keep me informed. I'm a member of the Capital Z of Texas Club here in Austin and will spread the details to rest of the members.
-
The description of how to construct the spindle pin puller and the associated parts list have been posted at www.czot.org on the home page.
-
Jeff, I’ve really been thinking about this. Each corner of the suspension supports about 25% of the car’s weight. For basic calculations, let’s say about 550 lbs or so. That weight is split between the A-arm and the strut. I don’t know the weight distribution so let’s just say 275 lbs apiece. A force of about 275 lbs placed at a distance of approximately 1.25 feet (length of A-arm) generates about 344 ft-lbs of torque every time the car moves. So the issue comes down to whether or not thread-lock can with stand this type of repeated force and not break free over time. That may also explain the size of the key. I always thought it was rather large for what it does until I did the math. Too bad the spindle pin was not designed with crown nuts! That would have taken care of the situation. The down side is that should a pin settle in one position and corrodes in place, a pin puller may just pull the ends of the pin due to the reduced amount of cross-sectional material. I guess my key goes back into place as well.
-
Lee, The softer stud was also 1". That's why were able to use the same tube, nuts, bearing and washers that we were using before.
-
There was little deformation on the pin where the key makes contact. At first I thought it was going to be an issue due to the amount of time it took to get the keys to release, but they pulled out just fine. In addition, we did not try to match the taper of the pin with the stud. Each stud was drilled to an inch in depth and tapped. I have two studs that have not been drilled and tapped and two that have one end drilled and tapped. I may see what it will cost to taper the stud to match the pin to see if it makes a difference. On the pro-side, you get more surface area contact to provide a more solid connection. On the con-side, it will take more force to separate the pin from the stud once extracted. On a side note, a previous owner of the parts tried to remove one of the spindle pins. One end of one pin had been rethreaded and had a smaller nut. It just happend to be the first end we tried to attach the puller. I was about to have words with the machine shop. Knowing that over time parts get changed/modified, we tried the other end of the pin and everything was as it should be.
-
As an update, we used the prototype puller on a set of spindle pins on corroded suspension strut and A-arm assemblies that had been in storage for 15 or more years. Removal of the keys took place the day before removal of the pins. It took about 30 minutes to remove the keys due to corrosion. Pre-application of penetrating oil to the keys prior to attempting to the removal did not occur. I'm sure it would have helped to presoak the keys. Once the keys were removed, the spindle pins were sprayed with penetrating oil and left to sit overnight. After 24 hours, we removed the both pins in less than 30 minutes. While this may not represent all pin removal attempts, we used the following procedure: - we removed the nuts on the end of the pins; - the pin treads were chased with cutting dies; - the pins were sprayed with penetrating oil at the joints of the strut/A-arm and the key access point; - a lug nut was attached to one end of the pin using antiseize on the threads; - the puller was attached to the other side to the pin after applying antiseize to the threads; - the pin was placed into tension with several turns of the 1.5" nut; - several blows with a 6 lb sledge were applied to the lug nut to break the corrosion bond while the pin was in tension; - the 1.5" nut was turned to confirm the pin was moving; - additional penetrating oil was applied as the pin was being removed; - the spindle pin was removed from the extraction stud. I was amazed at how easy it was to remove the pin with this process. As stated, this may not represent all pin removal attempts, but this has been the easiest removal to date and first using this methodology. In my opinion, breaking the corrosion adhesive bond is the key to making the whole process easy. Heating the pin housing has been the traditional method to break the corrosion bond, but I think that using the stud material properties (elastic energy) to your advantage with a force multiplier (love taps with the sledge) and plenty of lubrication can make the job a snap. Placing the pin in tension also makes it a tad bit thinner allowing the penetrating oil to access more pin surface area in turn reducing the overall friction of the removal process. With the next attempt, we will use an impact wrench on the lug nut to try to spin the pin in place prior to removal. The pin will be lubricated with penetrating oil for 24 hours or more prior to starting this process. The sudden short burst of rotational force may be enough to break the corrosion bond and allow easy pin removal. Too long a burst may twist the end off the pin or torque/twist the pin. Use extreme caution with this process unless you like to use heat or a machine shop on your projects. I do have a favorite machine shop to address theory that does not translate into finished product very well.
-
From reading back through the thread, we may have purcahsed our original pullers from Gary some years back. His comments on the design describe our pullers pretty well. If he is the source of our pullers, he did a great job with the original design.
-
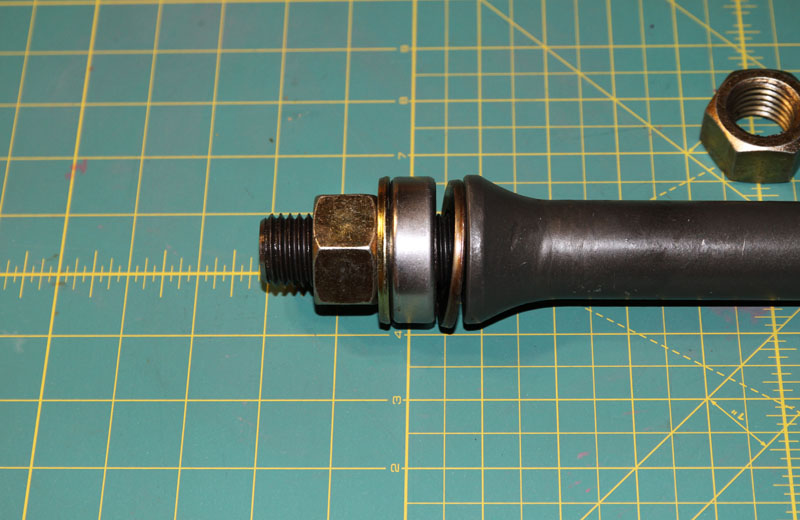
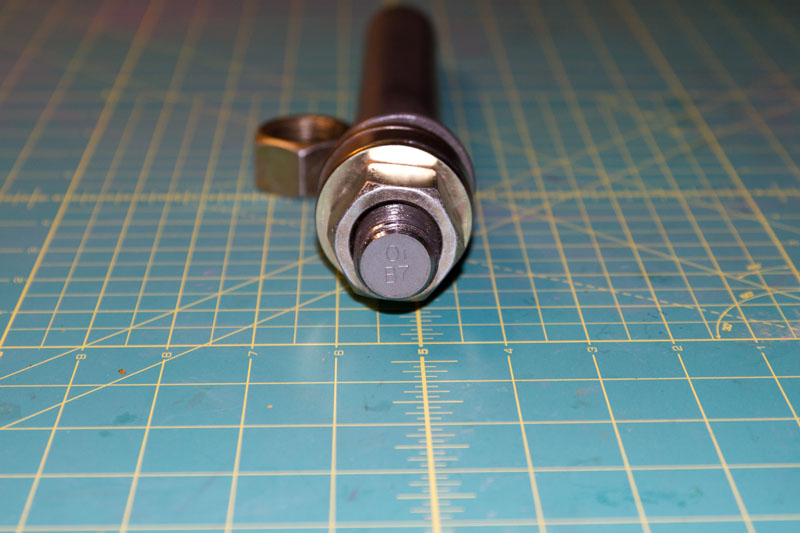
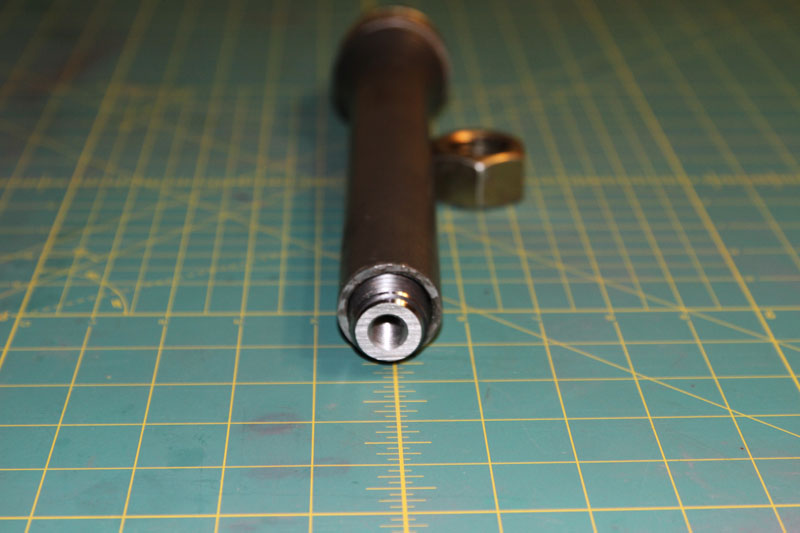
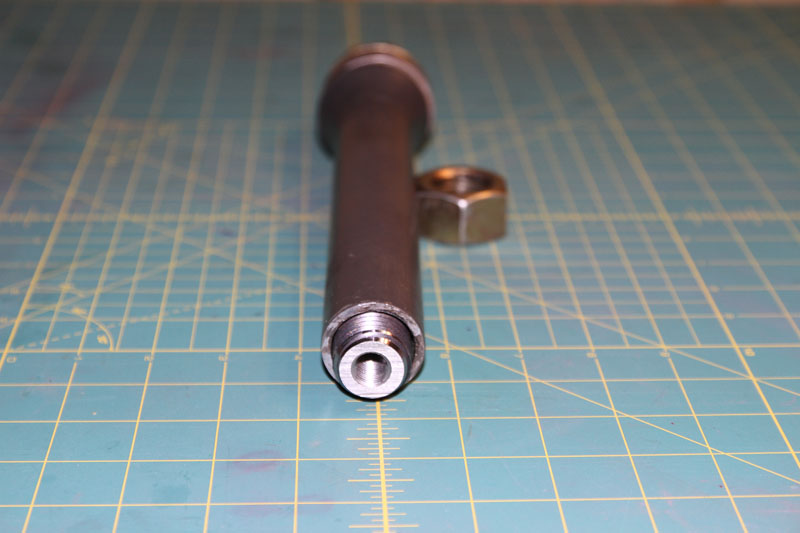
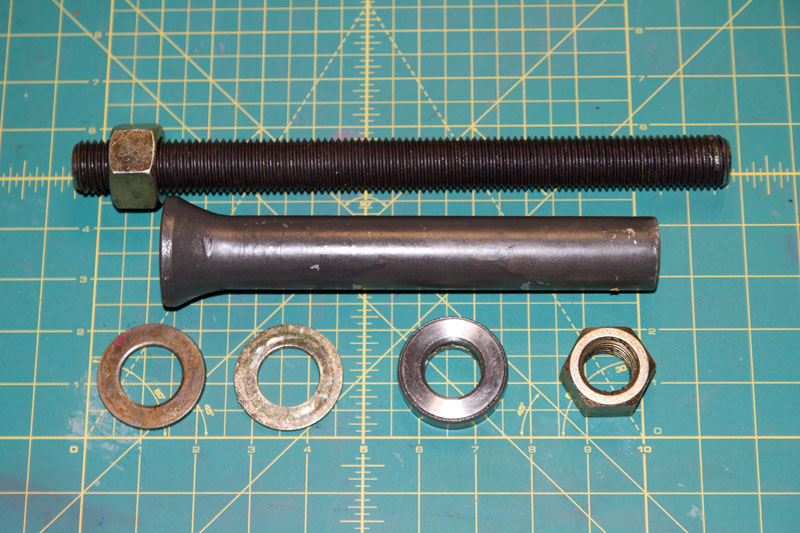
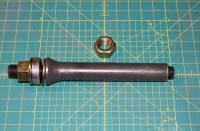
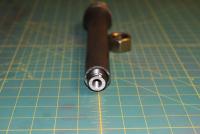
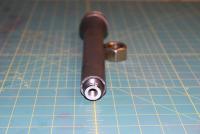
If you take a good look at the flared end (bottom picture), you should be able to see two flat washers welded to the end of a piece of pipe. The taper was made with an epoxy filler to keep it from catching on things. The tube was part of the original puller we purchased. As you can tell we have not drilled both ends on this stud yet. We want to make sure the lenth is acceptable before the other side is drilled and tapped. The flat washers, additional nut, harder alloy steel threaded stud and drilling both ends are the modifications we made. The original design was good for pulling a set or two of pins. The modifications will allow the puller to outlast those pulling.
-
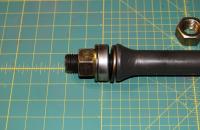
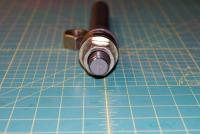
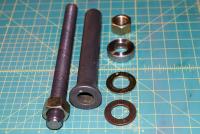
Attached are pictures of the pin puller that we redesigned.

-
I think the key just allows you to center the pin and tighten the nuts on both sides. My 71 240 hasn't had the key in place for the last decade. Once the crevice corrosion starts, everything is pretty much locked in place. I don't think the nuts are even on the ends of the pin. My cars will get the pins pulled and new bushings soon. Again, just thinking out loud.
-
Two things that we came up with on the puller: - The pin can deform with the key inserted firmly. Rotation to separate the stud from the pin while it is installed may cause more deformation than just setting the key. This could make future removal more difficult. - Since a lug nut can attach to the threads on a pin, it may be possible to spin the pin in place with an impact wrench. Several short bursts may be able break the pin free of the corrosion. Removal would be easier once the pin breaks free of the corrosion.
-
Jeff, that's one thing I haven't tried! And it may work well. We've always just removed the pin so that it can be tapped back into place with a rubber mallet. I'd have to see if a mallet can still be used to reinstall it with the pin still attached to the stud. There may be enough room under the car to make this work. The two nuts tightened against each other on the stud would allow the pin to be indexed easily for installation of the key. I have located all the parts and will post pics tomorrow or Sunday. It's not pretty, but works very well. Electro-Z of our club is a lifetime friend and the one that started modifying the design of the original pullers we purchased. He really should get credit for most of what has been done. I worked on finding a stud steel that compares to a Grade 8 bolt (our standard of hardness) and drilled/tapped both ends of the stud due to an breakage during extraction of the first pin on a bushing replacement project. Four different members had input over the last six months on the final design for the prototype. We all turn wrenches together just about every weekend on a First Gen Z.
-
The only thing that we were not able to address to my satisfaction is separating the stud from the extracted pin. Depending on the amount of torque required to remove the pin, it can be difficult to separate the two without damaging the surface of the pin. We have used strips of rubber or leather wrapped around the pin to protect the surface from the teeth of vice grips or channel locks. However, we have still managed to scratch a pin's surface from time to time. We file the burrs off, polish up with fine sand paper, coat with antisieze and reinstall the pins once the bushings have been replaced. Some pins come out with little effort and others take time. It really just depends on the environment the car was driven. Corrosion from de-icing agents isn't a problem in Central Texas, but car from up north may present a challenge to the design we have developed. The pre-removal prep may need additional processing to help deal with a more corrosive environment.
-
Jeff, I hope to get to do that over the weekend. I just have to find all the parts since it was dismantled to evaluate everything. We should have a thread on how to construct it with a parts list on the CZOT.org website very soon. Another member has the same puller and will be working with one of our prototypes to evaluate how well it operates. Lee's puller was a different design and is at the Z Clinc here in town. Kevin, the owner, will test one of the four prototypes as well.
-
To reply to Captain Obvious observation, "I'm just thinking that cranking on that big nut with one hand out in space a foot away from the spindle tip pictures a little off. Might be better if you could translate all of that side load directly into rotation and tension while you were tightening the nut?" At first the concept of having a puller extend a foot back in line with the pin and placing a perpendicular moment force 20" or more seems a little odd, but when you start to consider that you have made a mechanical connection to the strut assembly and A-arm, and note that the structure itself is subjected to large lateral loads (reference to my style of driving) well beyond that to remove the pin, the applied rotation force does not have a major impact to the structure. While the length of the wrench applies the force, the rotational force is being applied where the treads of the nut meet the threads of the stud. Therefore, you really are applying the load directly into rotation and tension while you were tightening the nut. Once the extraction assembly is connected to the pin, you have a very firm platform to apply the torque needed to remove the pin. It is pulled so tight onto the side of the A-arm that you do not have to support the extractor assembly during pin removal. It is as if it were part of the car. I hope I addressed your concern. Please let me know if I just total missed what you are trying to convey.
-
The all thread stud has a 1-8 thread, which matches the nuts on the original puller. We use two nuts locked together to remove the stud from the pin because sometimes the force it takes to extract the pin tightens the stud/pin connection to the point it is difficult to break free. Flat washers were added as well to distribute load and assist with reducing friction between components. The concept of using a 1" diameter treaded stud also addressed the amount of force it can take to remove a pin. The large diameter stud has an increased amount of treaded surface area in contact with the nut to distribute the force to remove a really stuck pin. The size of the stud and nut eliminate them as a source of mechanical failure during the extraction process. The pin is the weakest link with this type of puller. Your idea of a giant wing nut may work, but some pins have been so corroded in place that it sounds like a rifle shot every time you turn the wrench. The length of the handle becomes important to provide a large enough moment of force to turn the nut. Pipe wrenches or large crescent wrenches can work as well. We just pull enough pins in our club that having the gear wrench and an additional open-end wrench allow the nuts to be tightened enough to break free of the pin if the connection is too tight while making the whole set up easy to use. We are drilling and tapping both ends of the stud in the event that the end of a pin breaks off in the stud while being pulled. If that happens, we just use the other end of the stud to pull the other pin. It may not happen often, but it has happened. The strut and A-arm assembly is removed to deal with a pin that has had the end pulled off.
-
Jeff, I am one of the CZOT members (engineer) working on the redesign of a puller that we had been using. The threaded 1" stud made of mild steel finally gave out on a puller I have had for a while that was purchased on eBay. A second one owned by another member removed over twenty spindle pins over the last several years and is beginning to wear out. When the threads on mine stripped out, I had the other end drilled and tapped. The machinist stated my stud was made out of butter and that it had a limited use. I was told to get some "real steel" and come back. We researched over the winter and tried to find a threaded steel stud equivalent to a Grade 8 bolt. ASTM A193 Grade B7 01 is what we ordered and sent to the machine shop to be drilled and tapped. I picked up two of the four threaded studs today and gave the machinist an additional $50 for the broken/dulled drill bits and taps. These 1" treaded studs are 12" and 3/4" longer than what were using (and should outlast the owners). They are very hard steel. I just need to verify that the additional 3/4" in length will leave enough room to remove pins with the A-arms still installed in the cars. This puller will function without having to neck down the 1" stud. The 1.5" nuts used to pull the stud and pin require a 1.5" open end or gear wrench. I have both which totaled about $100 for the wrenches alone. The preparation and rate of the extraction are the critical parts of pin removal. Penetrating oil applied a week or more in advance helps the pin break free during the extraction process. The slow removal of the pin is what will make the extraction successful. As a pin is being pulled, the metal yields or stretches until the pin moves as a whole. If you crank on it too fast, the pin yields to the point of failure and the end comes off the pin. Been there, done that. The amount of deformation to the pin where the key locks it in place is another obstacle in the removal process. If the key is too tight, it deforms the pin and you have to pull the deformed pin out which can be difficult. Too get the pin moving, a lug nut can be treaded the opposite end of the pin. Once the pin is under tension from the extractor, tap on the lug nut to assist in breaking the pin free from the corrosion of the last thirty or forty years. It should start moving. Just make sure you go slowly. A gear wrench makes extraction easier, but it also allows you to try to remove the pin too fast. If it is not moving and you keep wrenching, the pin will break. Yep, that's what happened the first time we tried the gear wrench on a really stuck unlubricated pin. Now that I have the new treaded studs, I will photograph and post all of the information needed to construct what we have done. The old one worked great. This new one will work better. Keep in mind that this was constructed to last and is not cheap to assemble. Steve