S30Driver
Free Member
-
Joined
-
Last visited
Everything posted by S30Driver
-

-
John, if you are intending to remove the rear bumper fairly soon.... there are 3 bolts for the bumper shocks on each side that secure them to the cars underside. Only the middle bolts on each side are only accessible by lowering the tank for enough clearance. You could remove just the middle bolt on each shock mount prior to mounting your refreshed fuel tank, allowing you to completely remove the shocks in the near future without dealing with the tank. The rear finisher is spot welded on and can be removed with a proper drill bit for those numerous welds.
-
Many people swear by AC Delco friction modified synchromesh transmission fluid being superior to any other brand in the Nissan gear boxes. There have been numerous discussions of this over the years.
-
Next meeting is May 17, likely at the Apple Blossom Brewing Company in Fayetteville, around 6pm. Or ..... a whole bunch of us including Mike W will be in Branson, the week after memorial day for the big annual event there. Worth the admission just to see Mike & Zup's award winning cars.
-
It looks to be not the correct type or defective. The gauge & wiring appear to be functional. You can get a correct one from ZcarDepot for about 30 bucks.
-
Yes, jeffc, I am in the Prairie Grove area & the other Jim is nearby in Bentonville. We also have a club here, NWAZCC that meets once a month.
-
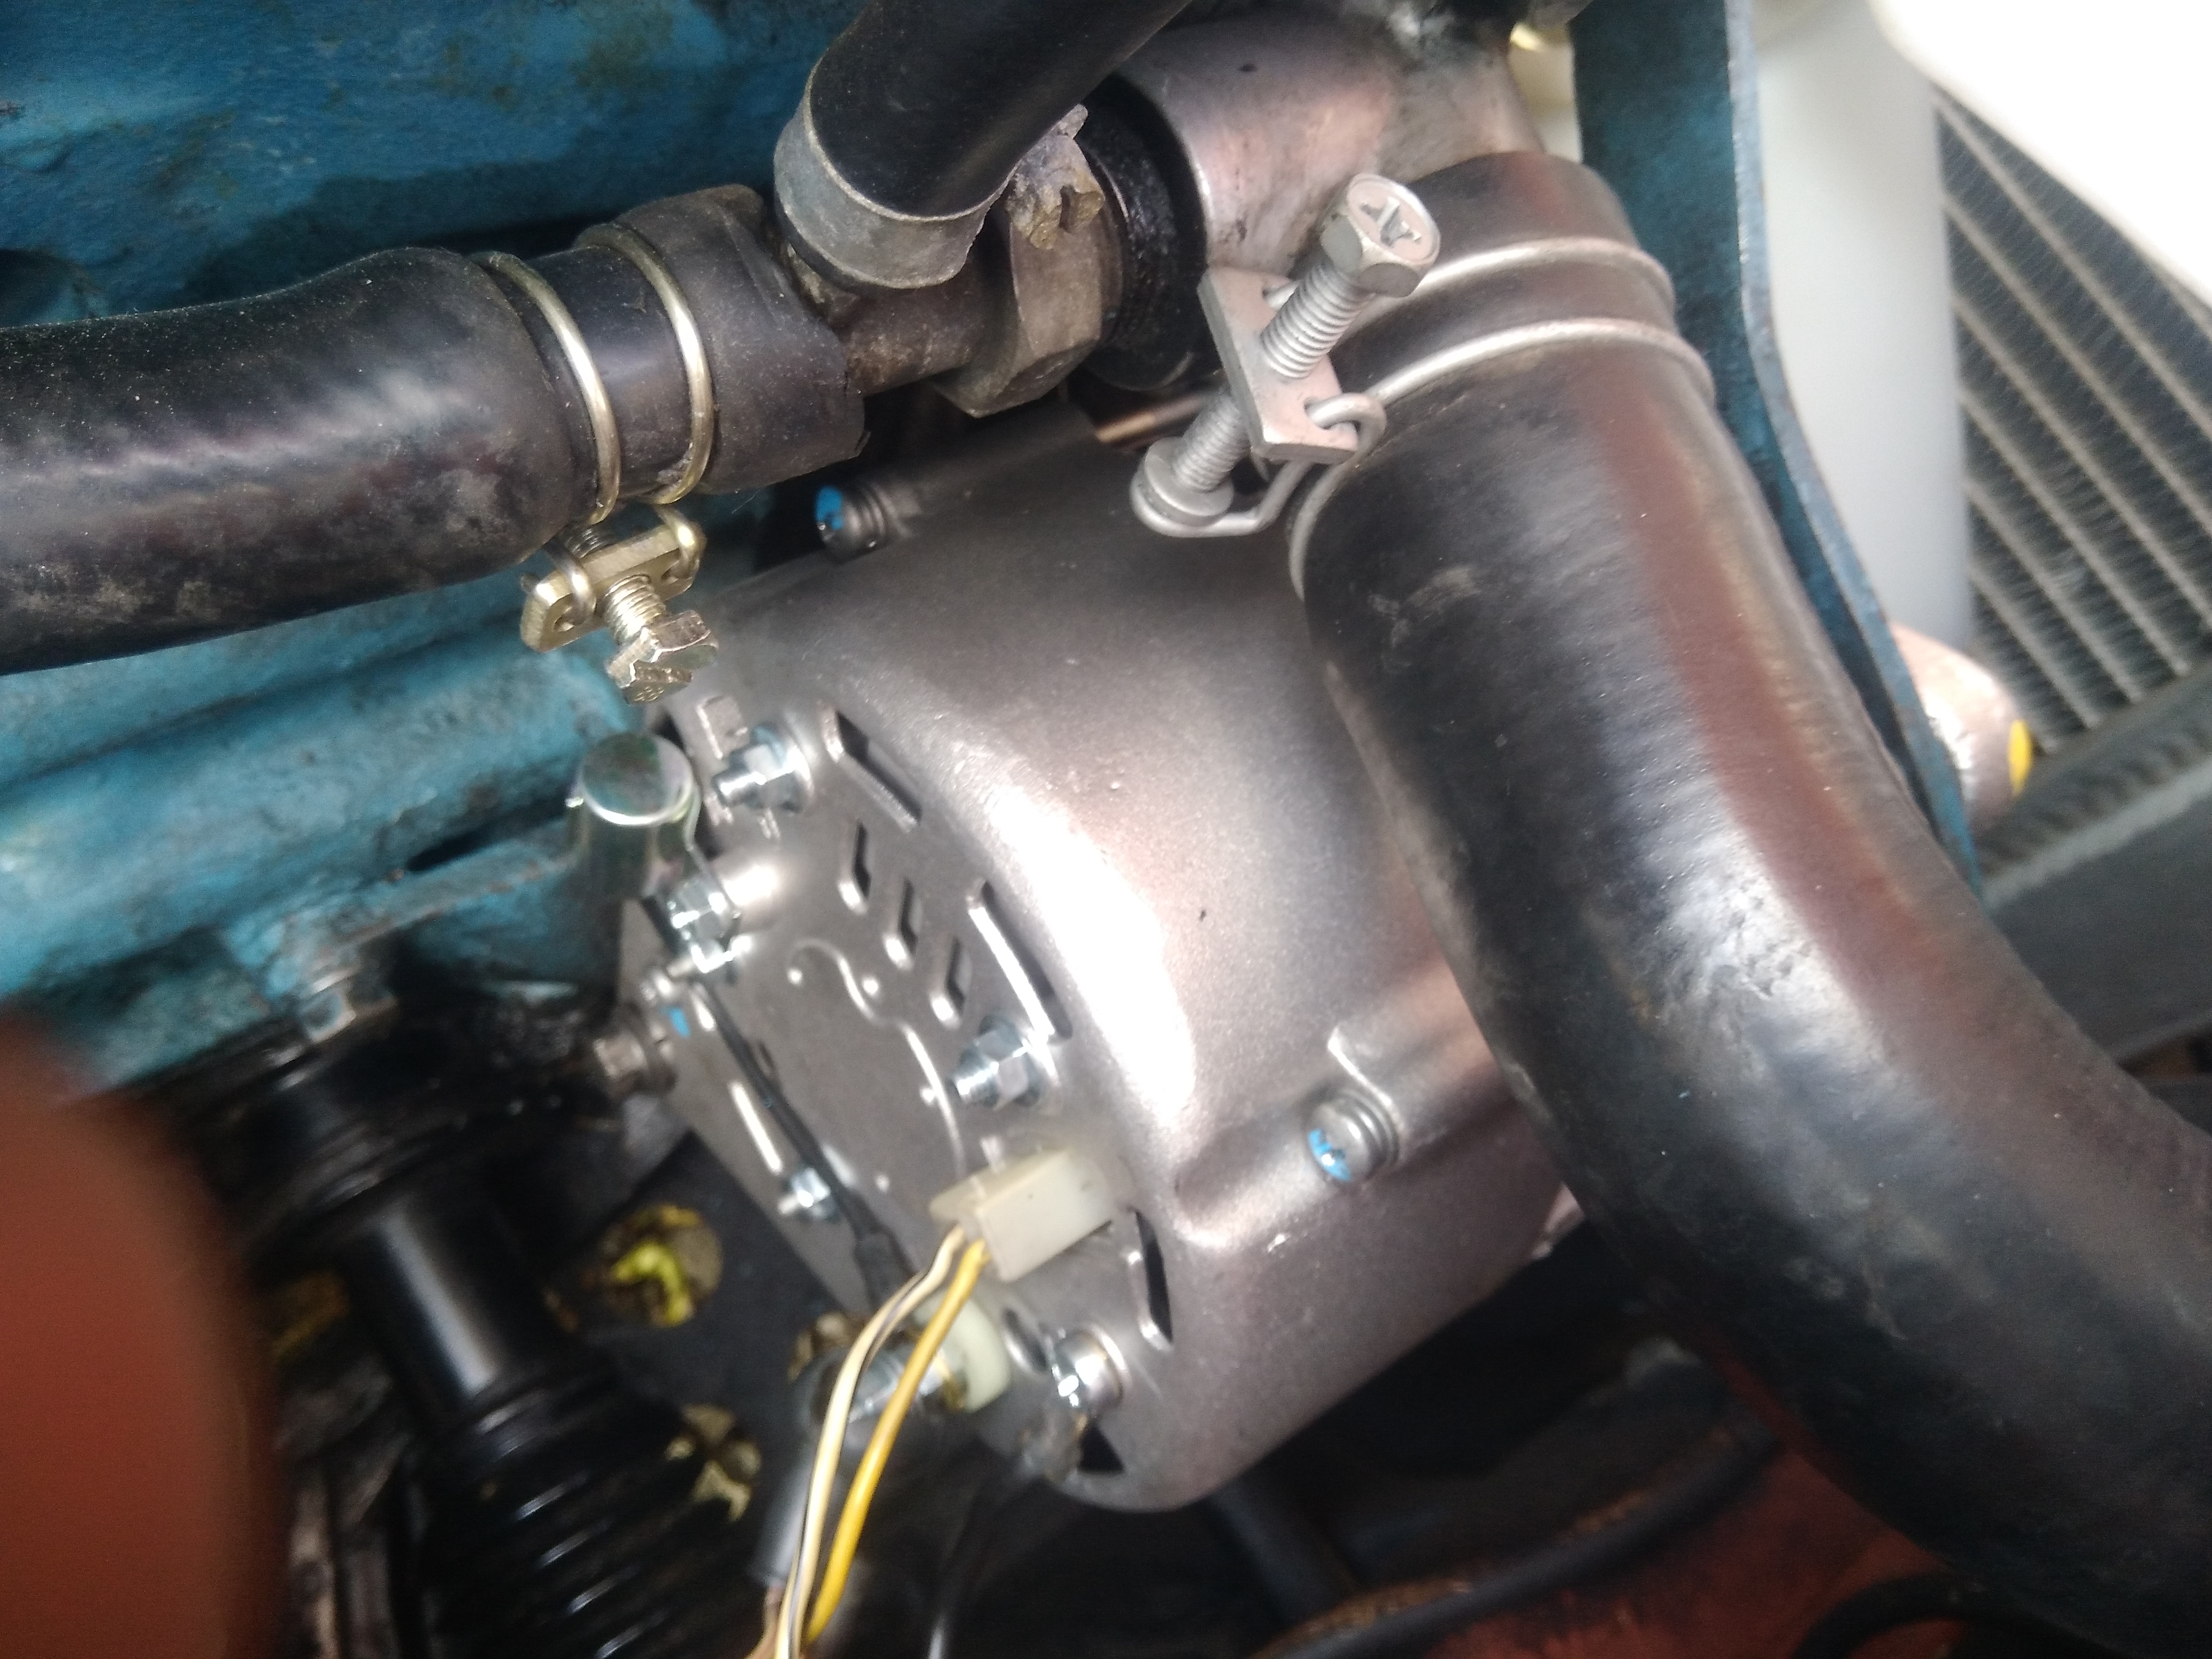
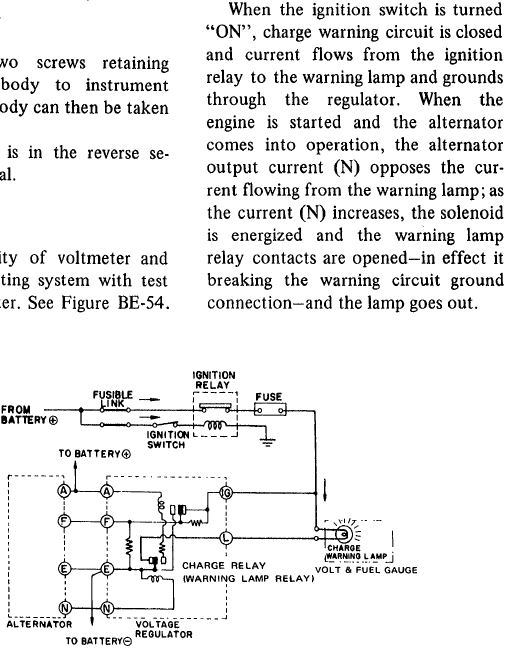
Looks like my pins 2-5 jumper does indeed drain the battery while the motor is not running. Will re-pin for 1-5 again and give that a try. With all accessories on at idle, the 60amp alternator output drops to and maintains about 12.65 volts. I'll make that measurement again when I have the battery back to a full charge. Bruce, this is the circuit I am looking at in the 77 shop manual (BE41) for the charge lamp problem ........
-
Pretty much. At least I saved the brain damage of getting it tested at Oriely's. ZcarDepot covered the shipping on the replacement & the return is prepaid. Dave, I did a quick test with all the lights on at idle, about 8 to 900 rpm , it held at 14.8 volts. Will test it tomorrow with a bigger load, fan, brake lights, seat heaters etc. and update. Only thing left to do is I lost the functionality of the charge warning light in all my experimentation. It does not come on any more with the ignition on and the motor not running. I know there is a fuse & a charge relay associated with that circuit.
-
Update : The alternator gods have finally smiled on me today! After much troubleshooting, I decided to verify with the manufacturer the alternator part number and sure enough, the alternator sent to me was the externally regulated one instead of the later internal model. ZcarDepot had put their wrong internal stock number on the box. They agreed to send me a correct replacement unit which arrived today. Installed the new alternator, unplugged the external regulator & jumpered pins 1-5 2-3 on the harness connector ..... no charge output. More vom troubleshooting and after jumpering pins 2-5 only ..... voila ... charge voltage output. Pin 5 is the white black wire going to the alternator L connection, pin 2 is the white red wire on the alternator output battery connection. Ordered a plastic cap to weatherproof my jumper plug but was shipping delayed till Monday. Problem appears to be solved.

-
How much oil are you loosing? If its enough, could be the rear main seal.
-
Thanks for the feedback Zed! Looks like I need to investigate the L wire connection. My car is down at my garage/shop a couple of miles away & the weather is closing in today - severe thunderstorms, probably won't get back to it for a day or 2. I did not disconnect the T plug when I checked the voltages, just plugged the meter probe in from the back of the connector.
-
Ran a voltage test with ignition on and regulator unplugged with jumpers 1-5 2-3 on chassis harness connector. The yellow wire on the alternator T connector shows 12.65 volts (battery voltage) I believed this is the S connection. It shows this voltage weather the ignition is on or off. The white wire on the T connection with ignition on looks like it confuses the auto range on the meter, is probably 0 but floats up to 40 and then back down. With ignition off it shows 0 volts. The 2 short male pin jumpers I made for the female plug end are good.
-
Will check those voltage points tomorrow.... thanks
-
1977 280z the last year of externally regulated alternators for the z cars. Over the winter I purchased some parts for the cars, one of which was the 60amp zx internally regulated alternator from Zcardepot to gain the reliability on the integrated voltage regulator . This is a common swap that I am sure has been done a thousand times or more. Of course, after removing my perfectly functional externally regulated alternator and installing the new one - no charge output. I used Blue's well documented wiring diagram to unplug the regulator and make the connections on the 6 pin harness connector to jumper sense line and complete the circuit. Pins 1 to 5 and 2 to 3 according to the 77 wiring diagram. When this is done, the alternator output is the nominal battery voltage ( about12.8 to 13v) obviously not charging. I verified all the wiring and connections, the color code of the harness plug matches exactly to the atlantic z diagram. Also when pins 1-5 are connected, the charge warning light on the volt gauge comes on. For fun, I removed the jumpers and plugged back in the external regulator - it now charges, looks like overcharges 14.8 - 15.5v Its looking to me like I may have to uninstall the new one, take it to Oriellys to have it tested and go from there. Other than a bad alternator or a externally reg one put in the wrong box, anyone have any further suggestions to try and correct the issue or possibly I have missed something...

-
Looks subtle and nice! Love that clock too .....
-
The judge's got it right! Beautiful award and car!
-
Agreed, the results are great.
-
Wait for the beverages to wear off before coming to the decision not to do it ....
-
FYI, if you have not stocked up on oil filters, a excellent choice is NAPA's gold 1515 or Wix 51515 (they are the same). Genuine Nissan is of course great. Looks like you have STP currently, not know for quality.
-
Nice job!! Get that oil changed & fire her up, Hear the roar of that inline 6 come to life ....
-
When I had an issue with the bolts for the brake upgrade from him, I called him direct, he answered right away & was very responsive. Maybe try giving Edan a call (818)636-2797 and see if that works...
-
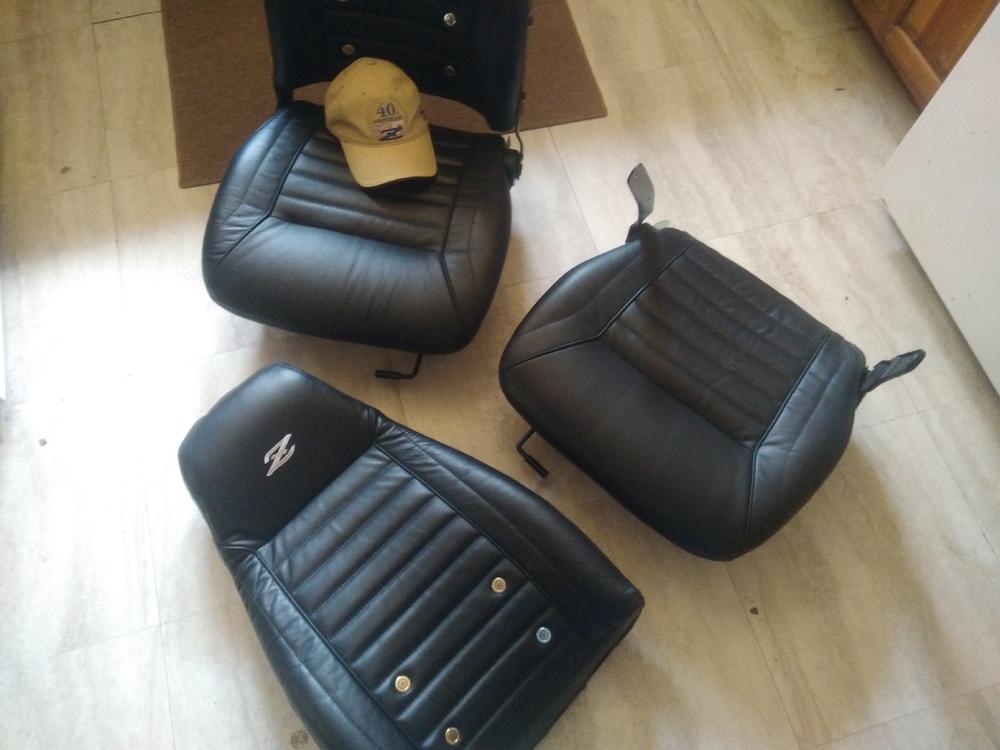
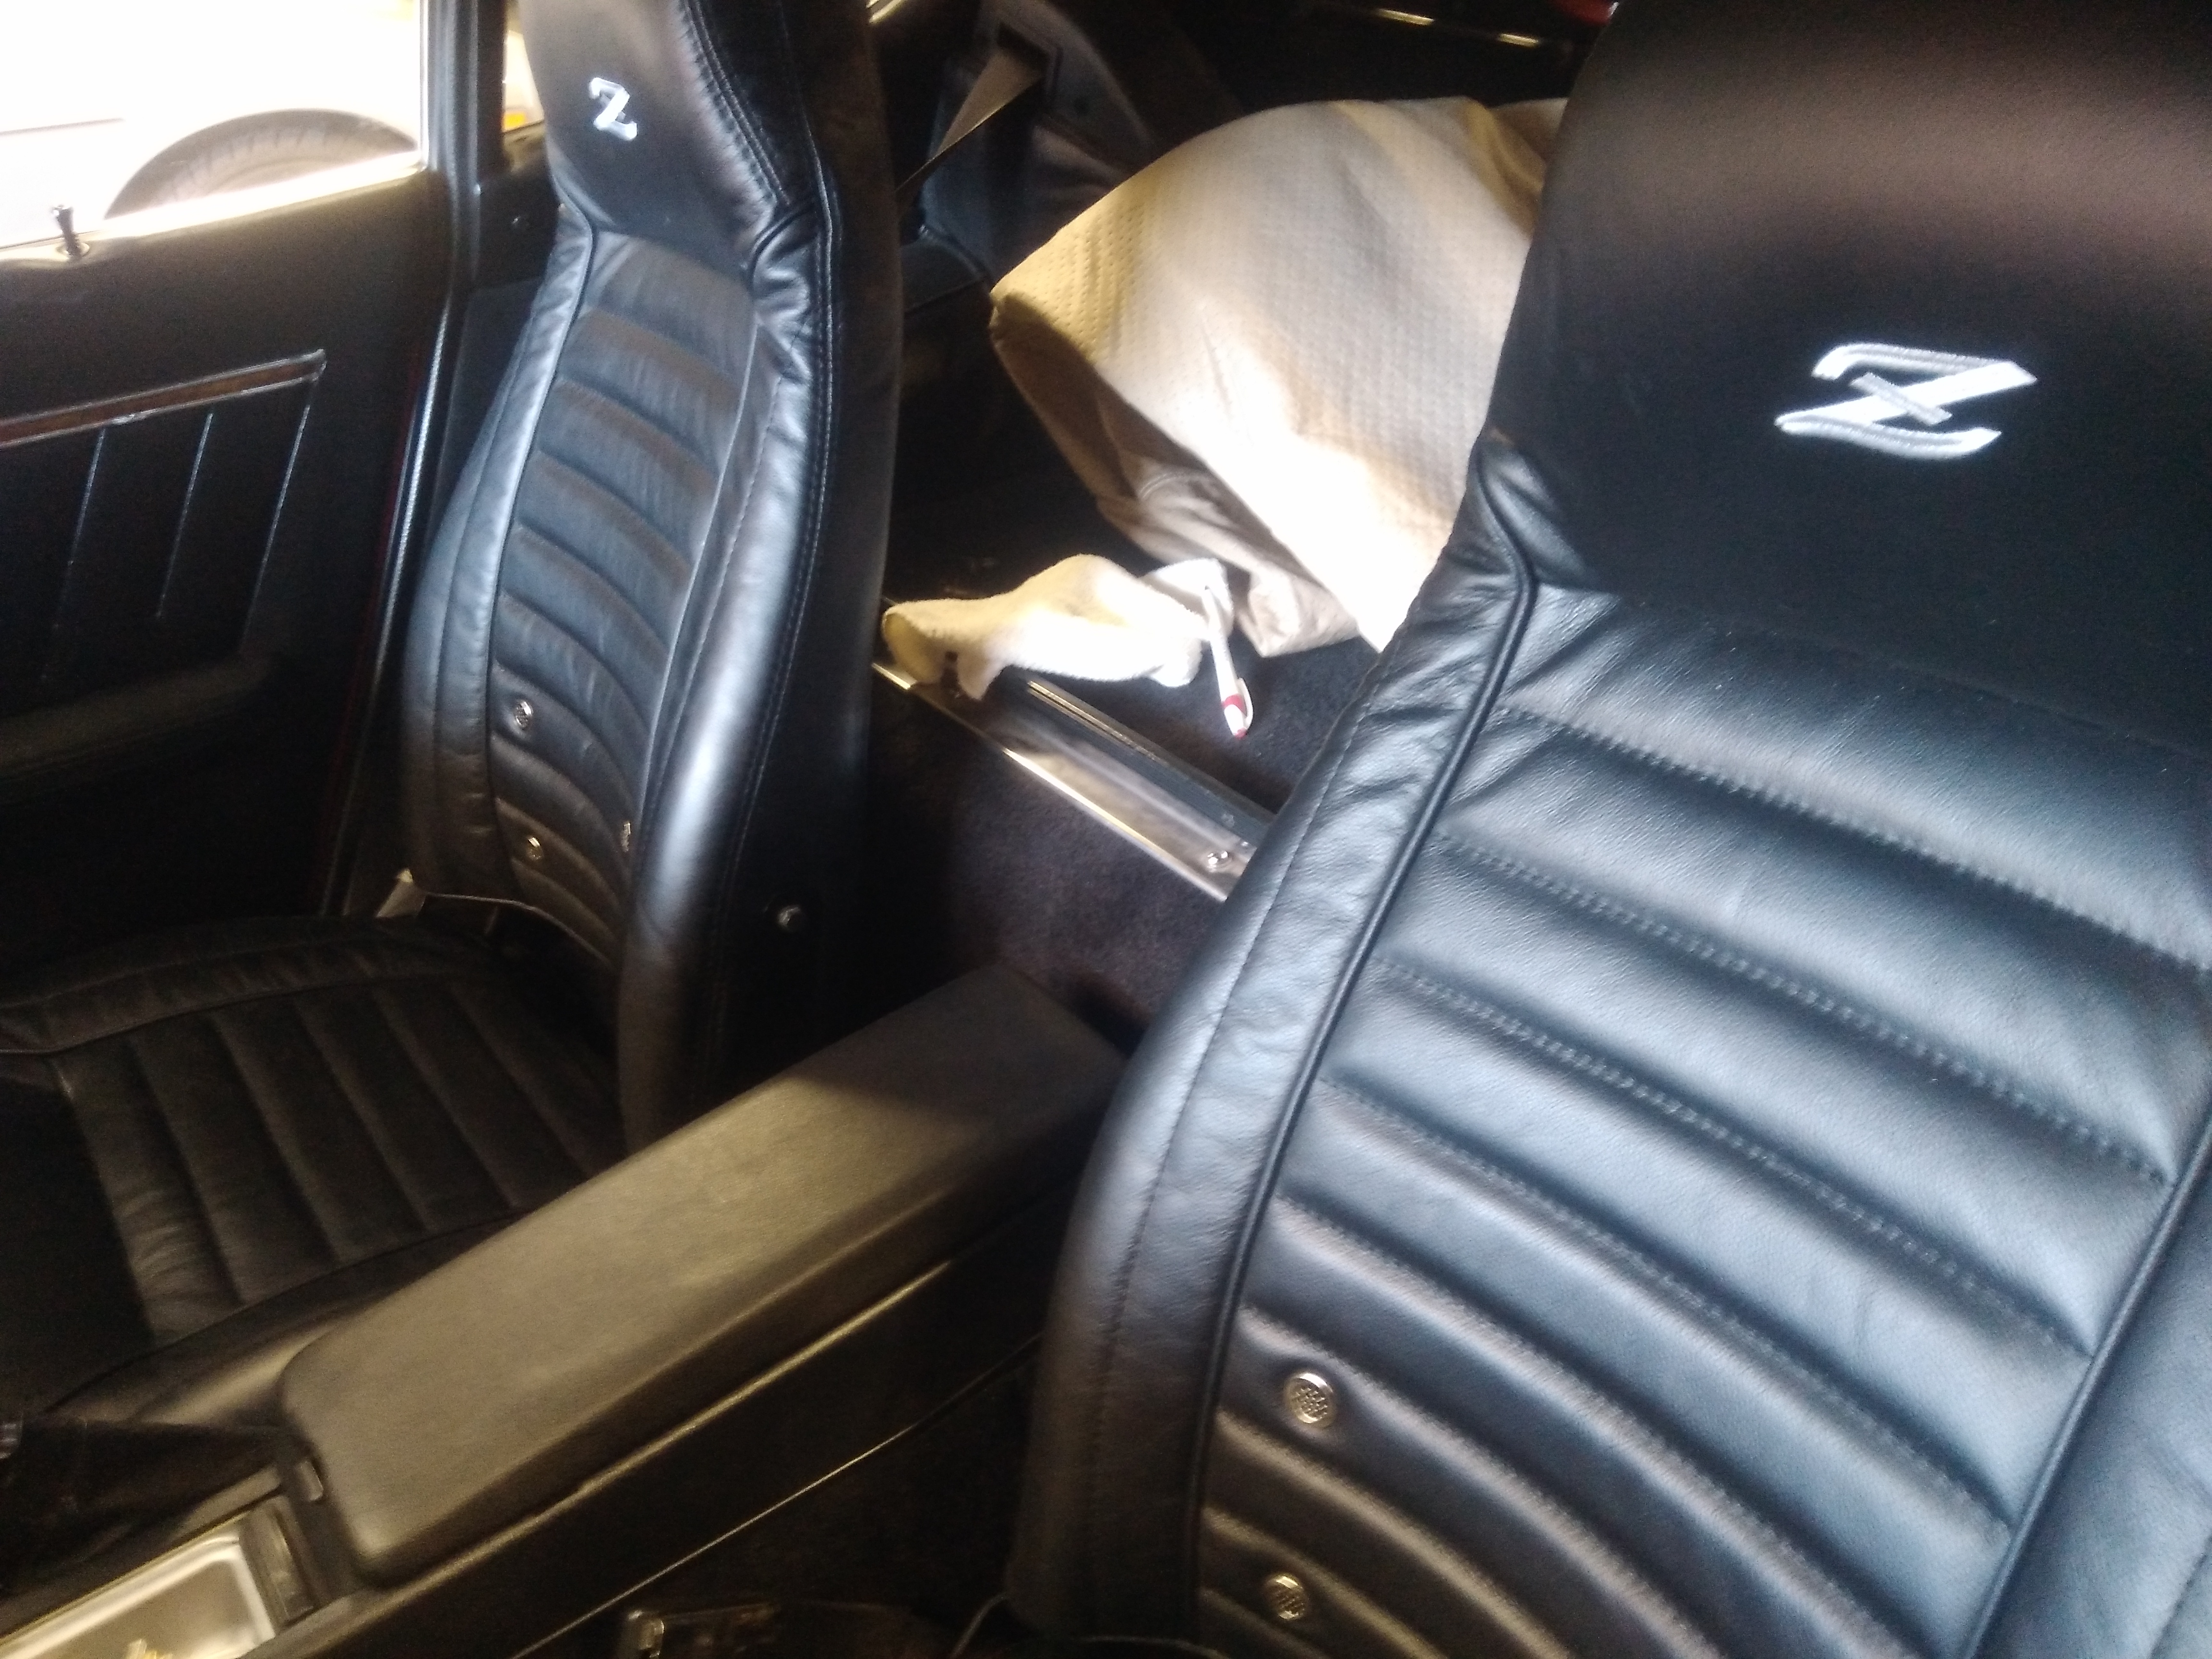
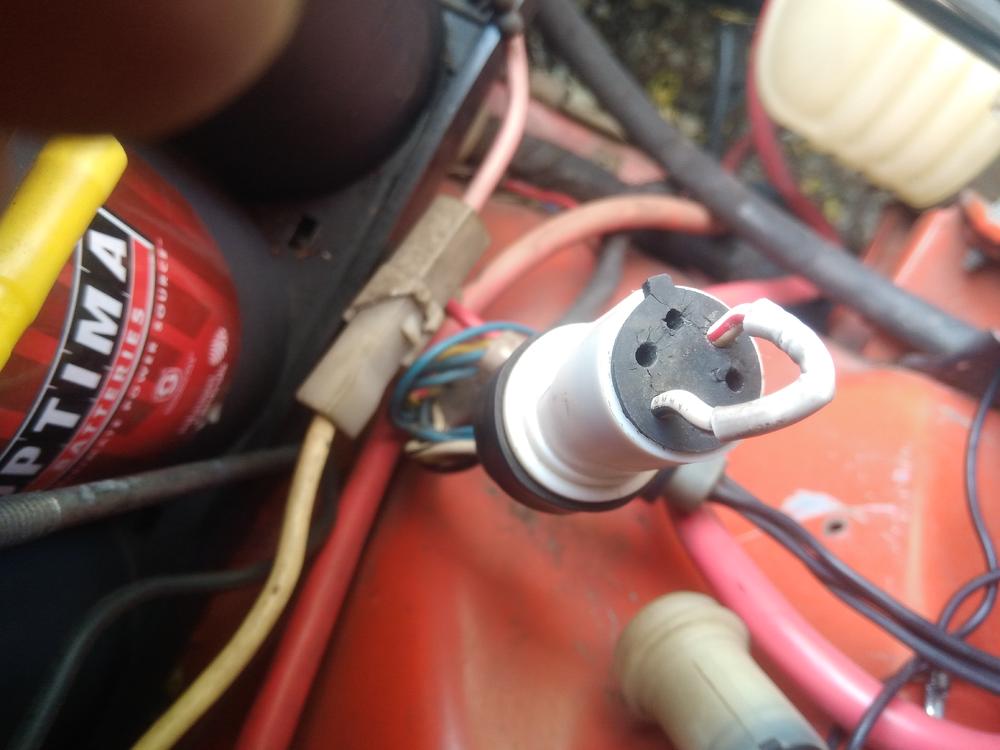
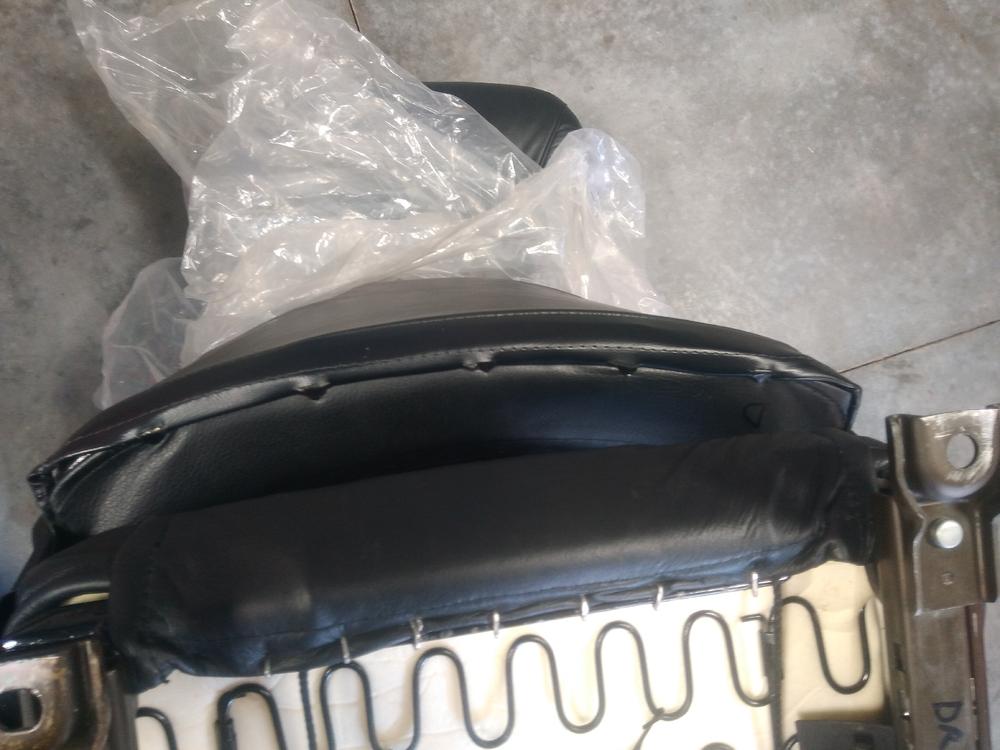
Delivered Scott's completed seats for his red 78 on Saturday, a nice 70 degree spring day. Zup came over in his 240 to assist & make sure the 73 model year was represented. (Thanks for the conversation and great burgers you made later Jim!) Seats look good in the red car, which may be the one he takes to Branson this year. A happy project ending.... Some shots of the seats in the car & 1 of the modification to extend the material for the closure of the problem area of the seat backs.

-
Nice! Wish I had one.
-
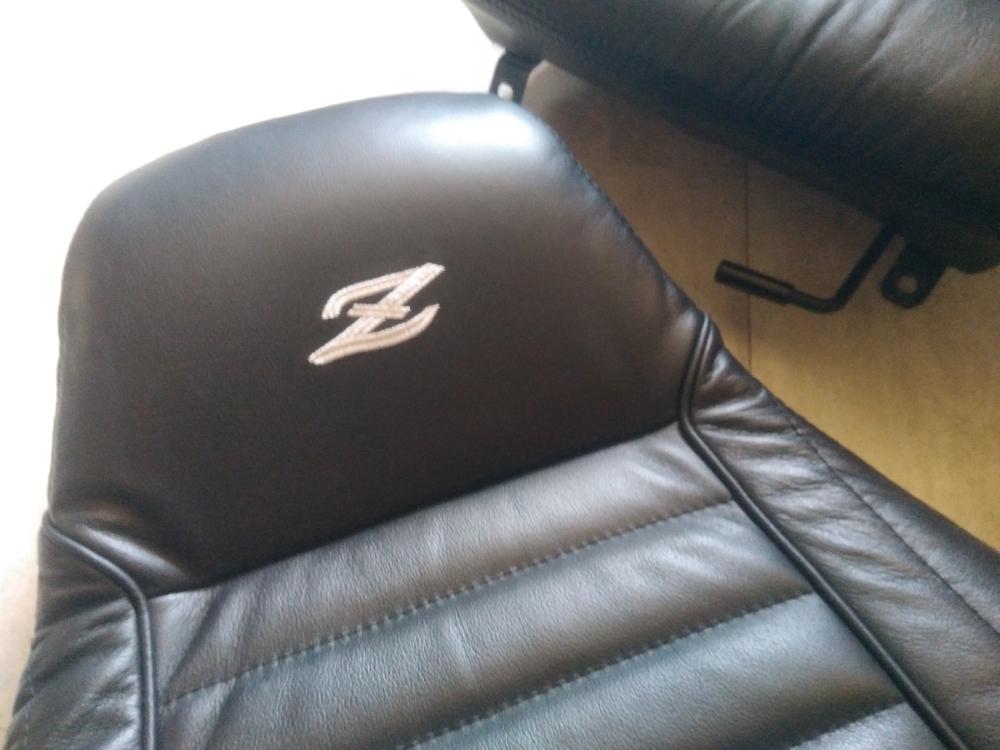
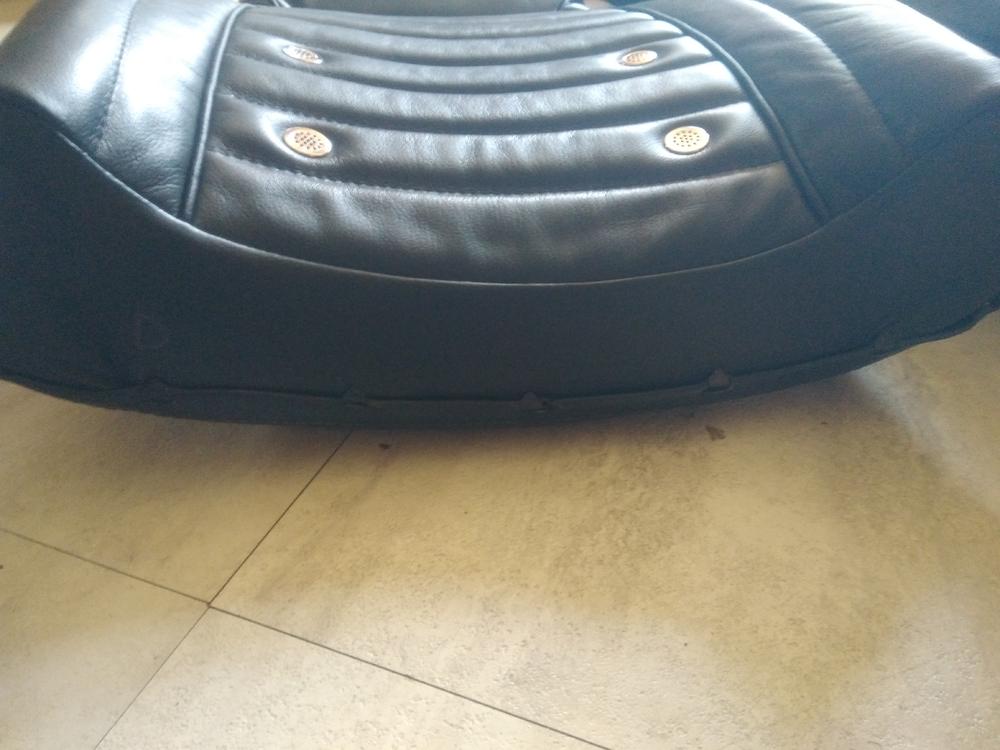
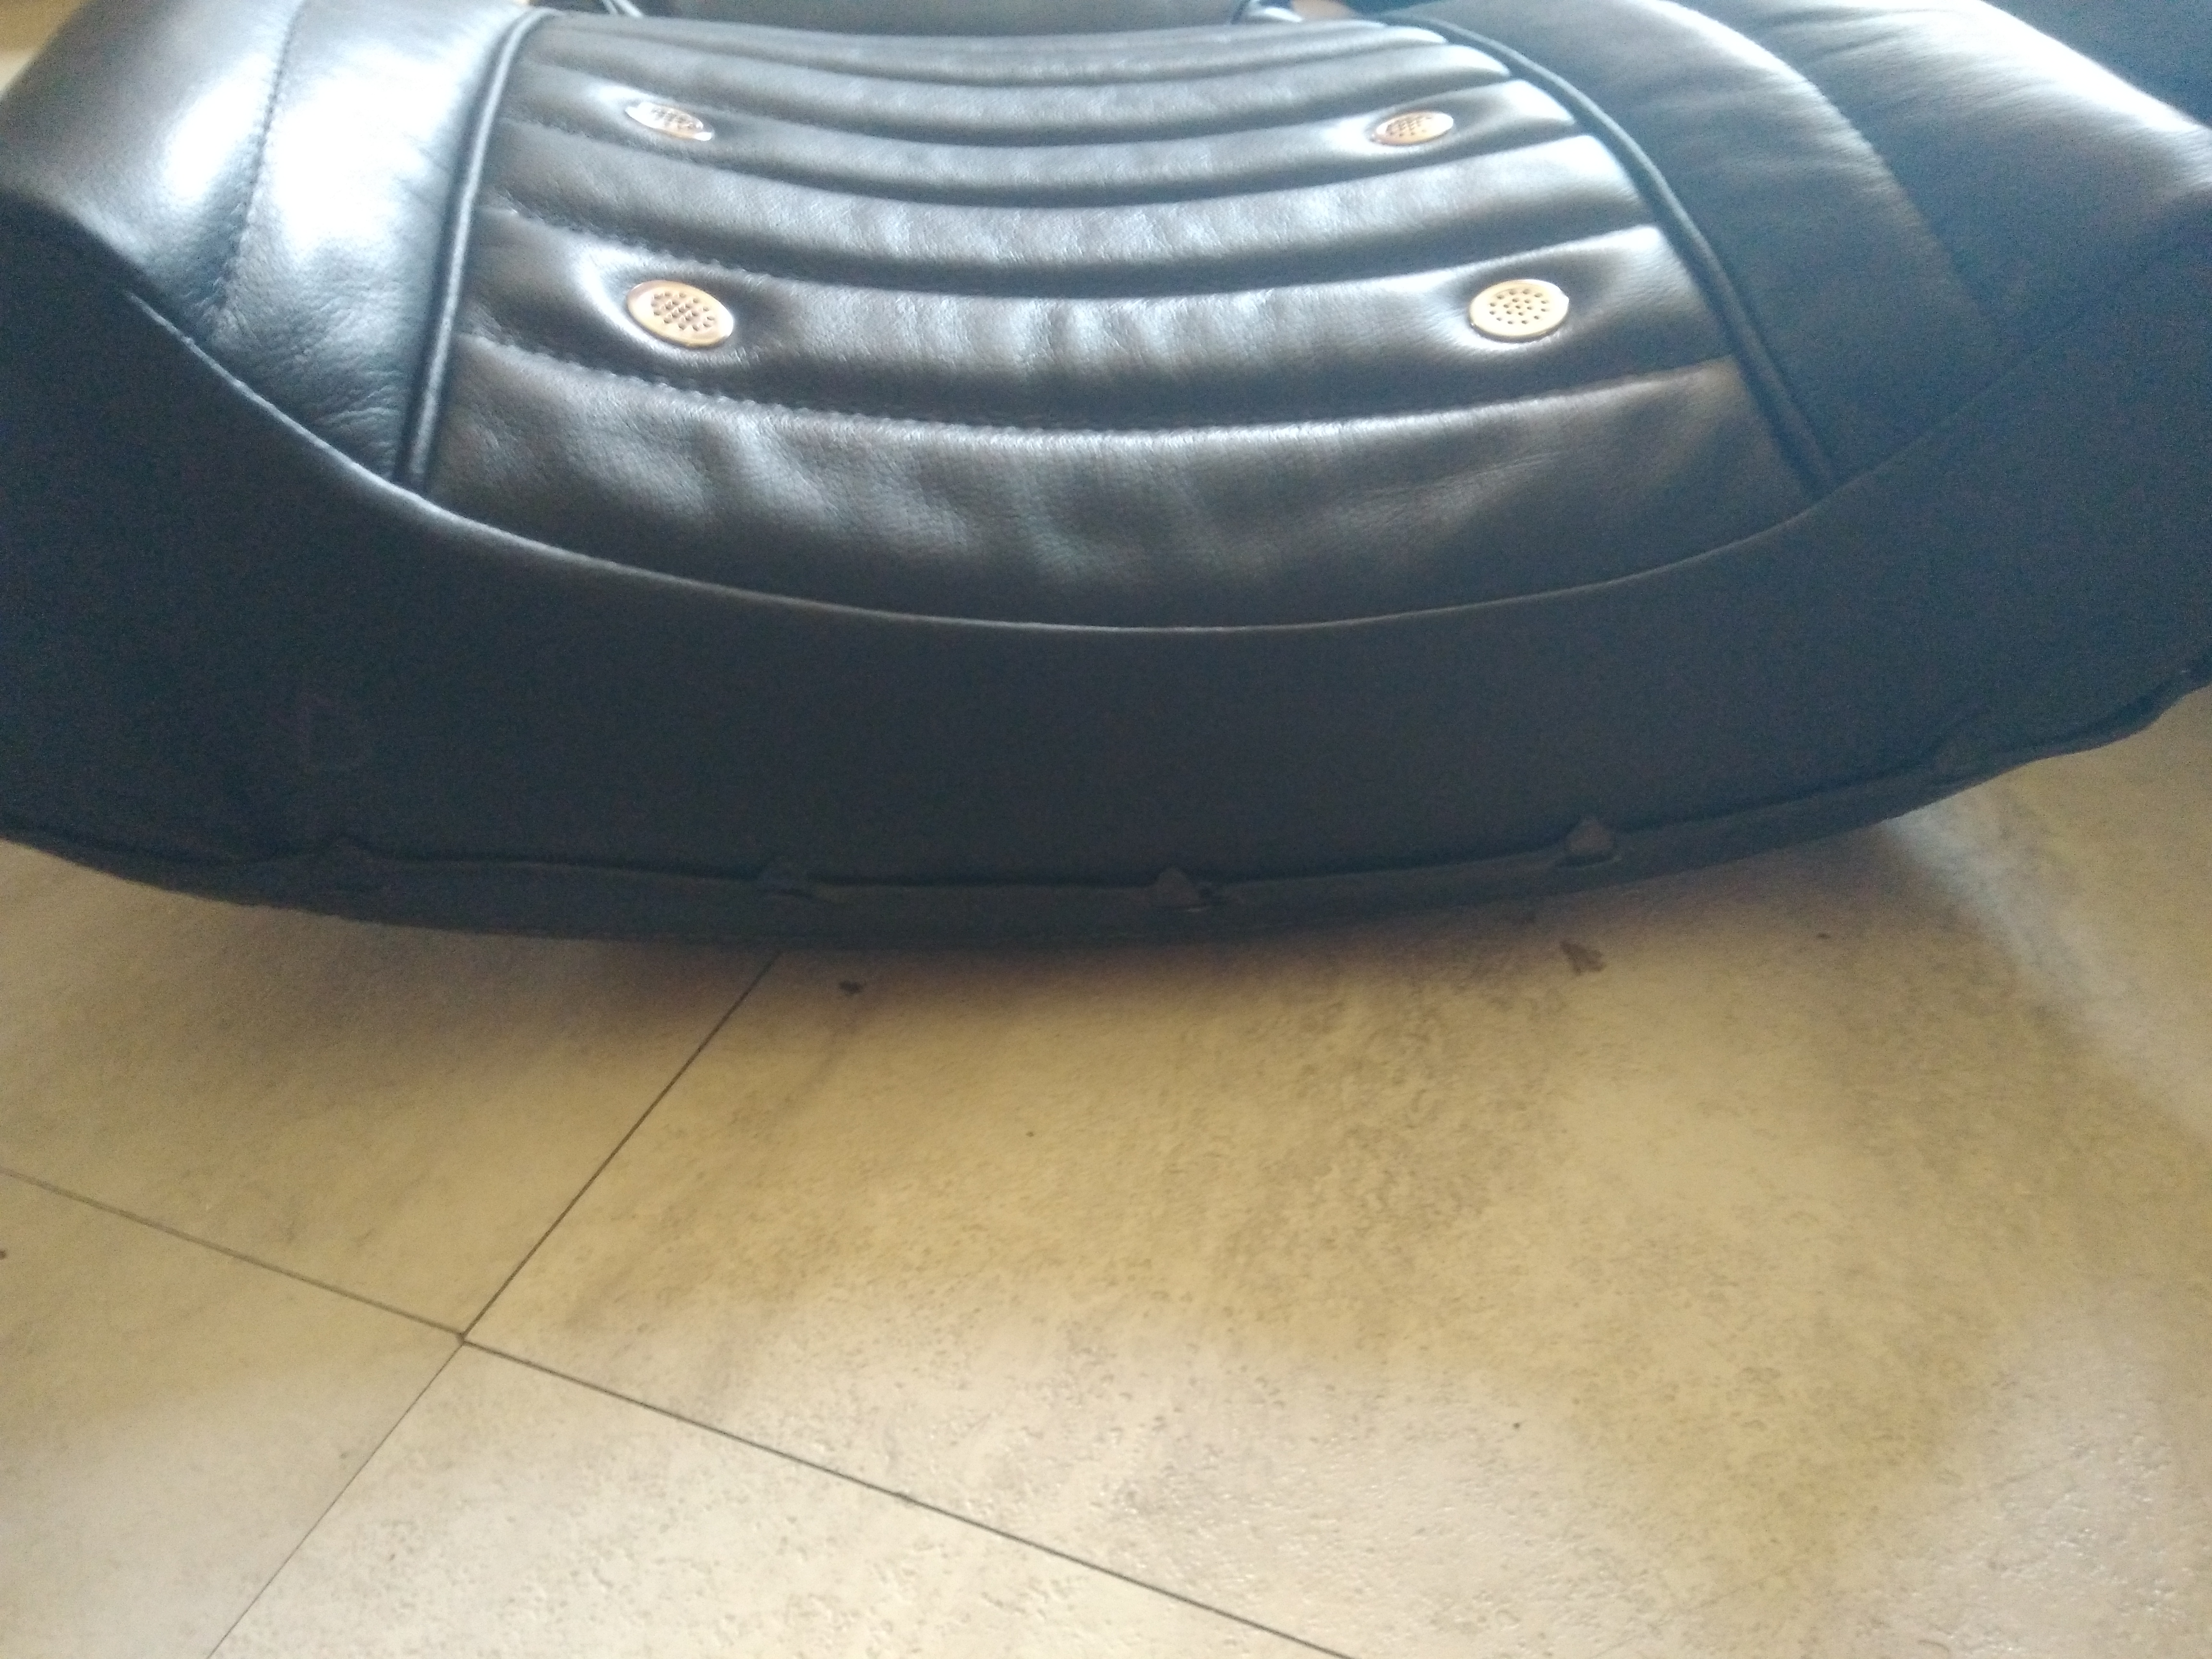
The foam was an issue with the seat bottoms. The final closure of the rear flap which gets hog ringed to the frame was very tight. After much analysis, I ended up cutting a small 1" pie shaped piece from the bottom of the back of the seat foam. The seat bottom foams did seem a bit too large at the back for the seat frames. Maybe one day I'll get to try a vinyl set. I'll bet they are easier to work with than the real leather. For the seat backs, I used a dry cleaners plastic bag to make the covers slide down easier.
-
Worked on rebuilding the 78 280z seats for local club member Scott M. on and off this winter. Finalized them today. Phew.... glad they are done. The leather covers are from Interior Innovations, new foams were from Classic Datsun. Ran into an issue with the closure of the seat backs... The material was about 1 1/2" too short to make it close properly over the tangs in the bottom of the seat backs. Either the manufacturer screwed up the length, or the 78 seat back frames grew and got longer. Tried every trick in the book to overcome the issue, finally had an upholstery shop sew in a extension to the leather at the seam where the reinforcement is. Worked out perfect, the fit is now tight without it trying to tear the seat material apart. This is the 2nd set of leather covers I have done from interior innovations. The first set that I did for my car 2 years ago was tight, but nothing like this. If I were to order any more covers, I would have them extent the problem area with the 1 1/2" of extra length. Overall, the leather covers are of great quality. The ones I did for my 77 z car are just coming up to 2 years and I will do a 2 year update on them very soon....