


Gary in NJ
Member
-
Joined
-
Last visited
Everything posted by Gary in NJ
-
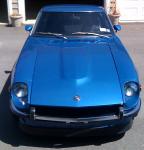
 That was once someones pride and joy. Now you can make it yours. Good luck.
 -
A local Hess station does not have the fume-capture hose on the nozzle. For that reason (and the dedicated Super pump) I only purchase from that station. I too only keep the car about 1/2 to 3/4 fuel. This way I know I always have fresh fuel.
-
I think you're being kind. From the limited view of the seats, they are aftermarket, I would suspect that there is a 2 or perhaps a 3 in front of the mileage, and there are just too many things not "right". Why-o-why do people try to advertise the mileage as sub-99,999.9 when they know it's higher. It really ticks me off.
-
Yes, it's mid-July but I'm already thinking about winter maintenance. Why? Because it sounds much better then "I don't want to do that now, so I'll put it off to later". The list continues to grow and then shrink. For example, I had on my list to build new speaker boxes with new speakers because I had a speaker that I knew wouldn't last too much longer. But my son changed my plans when he cranked up the volume on 30+ year-old speakers. Some of my items were just too annoying (and simple) to wait; like mirrors that would droop every time I closed a door. Things get added as they are discovered as long as they don't affect drivability. Upgrading my non-working clock to a Zclock unit is on the list as is a new inner shift boot and a few firewall grommets. Added to the list just today is an R/T diff mount. Doesn't need to be done, but I'd sure like a stable differential. But the true reason for the winter maintenance task list is this; it keeps in touch with the Z during those months when I just can't drive the car due to salt-n-sand on the road. And boy do they love to spread that stuff here in NJ. If I can get everything apart in January, get parts in February, and button it all up in March, I be ready for that first great day in April.
-
That's the religion I try to spread. I coat everything with Anti-Seize.
-
I'm in. I'd love to get rid of the movement in the rear.
-
A poor ground can chew through alternators.
-
Well, if you're gonna buy tools, make sure to get 6-point sockets and box ends. Your nuts and knuckles will thank you.
-
I bought a 1:18 collectable just the other day on eBay. It's on the fireplace mantle. I was thinking of getting another for my office. Funny, the box says "300ZX Turbo". I wonder what's in the 240Z box; an RX-7? What is the scale/size of that one (given that they got the car wrong, the scale might be wrong too)? Where there other colors?
-
The 205/50-15 are short. They have an overall height of 23 inches vs 24.75 for the stock 195/70-14. This will lower the car by 7/8". As I have mentioned in other threads, I do not believe that you have the correct springs in your car. In addition to the excessive gap in the wheel well, it doesn't sit at the correct attitude. Your best bet is to remove the springs and compare them to an OEM length first. From there you can determine if you want to go shorter.
-
Assuming that nothing else has changed, that's what I was thinking. Swap the rear tires and see if the noise moves to the left.
-
Ron, The manual that I have is the Service Manual (red cover) that is available for download. While the model year is noted, there is no revision date or number. I guess I'll add a float adjustment to my winter maintenance. The different values would explain why my mixture setting are different by more then a full turn.
-
Rich, that would be very cool.
-
I'm resurrecting an older thread here (and something that has been discussed)... I note above in TS73-10 (dated 2/9/73) posted by Geezer that it shows different float heights for the '72 model year (~ 16mm front & ~ 12mm rear) yet the FSM indicates 14-15mm in figure EF-46. Which is correct? Why the different heights? If it has to do with the emissions system, and I have it disabled, should I stick with 14mm?
-
There's a car that just screams "love me". Take a good look a the condition of the frame before you get too deep (time & money).
-
Carl, the box is so low profile that you don't even know it's there. There is no chance of the box interfering with the dead pedal. It sits a lot higher then you'd think, Bart, since these aren't the original kick panels, there isn't anything sacred about them. Besides, it's not as if you'd uninstall the speakers. You might upgrade though. Dave, I really wanted to give a spare-well sub a try, but the Bazooka powered tube was just too easy.
-
The boxes cost nothing to make, and it was fun. In all it took about an hour to build and install. I'm not a big fan of placing the HF behind me. With the speakers mounted that far back (and so close together), the sound stage is destroyed yielding poor stereo separation. With my installation, the tweeters are facing right at me, which is perfect. The mid-bass would work just behind the seats. I do have my sub mounted as far away from me as possible. That gives the the bass the most even distribution.
-
Air vent.
-
I often see the question "how do I mount speakers in my Z". I installed some new 5.25" co-ax speakers in my 240 today, so I though I'd chronicle the process. My design goal was to install modern speakers without encroaching on the foot well area. That requirement calls for cutting into the kick panel to use the area behind the panel. The space behind the kick panel is limited to about 1-1/2" (it's actually 1-3/4", but there is a bolt head for the door bracket that takes up some space - you'll see it in a photo below). Most 5.25" speakers sold today are 1-3/4" to 2-1/2: deep (when front mounting.) The speakers I purchased (Alpine SPS-500) are 2" deep. I could have built a spacer as thin as 1/2 inch, but I wanted some space between the speaker magnet and the body of the car, so I elected to build a 1" deep box (it's actually a spacer, but I'll cal it a box since it looks like a box when installed). I didn't have a 1" thick piece of wood, so I made one by gluing a piece of scrap 3/4 x 6-1/2 molding (pine) that I had laying around to a piece of 1/4" MDF I had left over from another project. I used Tite Bond III and placed it in wood clamps for a few hours. I then drew the box shape (6.25 x 6.25) and located the center of the box. These speakers require a 4-1/2" hole for mounting. Luckily, I happened to have that size hole cutter. It's a lot easier to cut those holes before trimming the board. Here is a photo of a speaker and grill sitting on two of the cut-out boxes. Note that the tweeter on these speakers swivel. That keeps the high frequencies from driving directly into your ankles. Here is the back-side of the box prior to the speaker being installed. I have marked the speaker and box for its location (right on this one) and its orientation. I did this to make sure I had the tweeter swiveled into the best position. Here is the kick panel cut-out. That hole is about 3-1/2 wide - too small for a speaker, but just right for the magnet. Here is a dry fit of the box. The four mounting screws were located and drilled in this step. I used a 3/16 bit on the box, and then used those holes as a guide to drill a 1/16 hole into the panel and the metal behind it. I used 3/16 x 1-1/2" sheet metal screws to attach the box to the panel. I notched the backside of the box for the speaker wires. This will keep the box as flush as possible to the panel and will keep the wires from getting pinched. Using 3M 77 spray adhesive, I attached some rat fur to the box and then relocated the 8 drilled holes (4 to attach the speaker and grill to the box, and 4 that attach the box to the kick panel) and opened up the 4-1/2 hole for the speaker. Here is the speaker and grill installed in the box. Time to mount it in the Z. Here is the completed unit installed. The box is completely unnoticeable when driving. It provides a low-profile installation, with high-profile sound. This is paired with a 6-1/2 powered 100W Bazooka (BTA6100) subwoofer in the hatch area. My Alpine head unit (CDE103BT) has a built-in cross over that I have set a 85Hz, the upper end of the sub and near the lower end of the 5.25 mid-bass/tweeters. It sounds great and all works well together.
-
The tell-tale sign of a bad ballast resistor is the car will start with the starter engaged, and then stop running as soon as you release the key from the start position. If that's not how your car is behaving, you're chasing the wrong problem.
-
Bad sensor or bad gauge. Put a meat thermometer on the rad to determine the actual temp.
-
That orange Z is a good looking car.
-
Thanks Jim. The local ACE Hardware has a great assortment.
-
Timely question. I too need the same information. My fan switch just rotates and I need to secure it.
-
Do it yourself because it's easy AND fun. Once you own the equipment, it's free. 1. Locate the timing mark on the harmonic balancer and mark it with paint, or white-out, or grease pen, or anything you have that will stick. This will make the job much easier. 2. Warm the engine up. Make sure the idle is correct. Shut down the engine. 3. Disconnect the vacuum advance at the distributor. Plug the line (I use orange golf tee's - this way it stands out and I don't forget to reconnect it). 4. Loosen the bolt on the shaft about one full turn; the bolt is about 1/2 way down the shaft on the right-hand side (as viewed from the left side of the car). 5. Connect your timing gun/light (inductive clip on the #1 ignition wire near the spark plug. It will also have a pos. & neg. that connect to the battery terminals). Get the gun and wires arranged so they can't get tangled into any moving parts. For that matter, wear a short sleeved shirt too. 6. Start the engine. Get the gun about 6 inches from the timing marks (keep you hands and wires away from the fan and belt). The strobe light will flash just as the painted timing mark passes to timing tab. While observing the light and marks, slowly rotate the distributor cap back and forth until your painted mark is across from the timing tab. 7. Once you are happy with the setting, shut down the engine. Tighten the bolt on the distributor shaft and reconnect the vacuum advance. 8. Reset your idle and make any and all final adjustments - then re-check the timing one last time.