Namerow
-
Posts
1,483 -
Joined
-
Last visited
-
Days Won
23
Content Type
Profiles
Knowledge Base
Zcar Wiki
Forums
Gallery
Events
Downloads
Store
Blogs
Collections
Classifieds
Everything posted by Namerow
-
Perforated interior soft trim finishes were one of the defining features of 1950's German autos (Porsche 356's, Benz SL's, etc). I don't think anybody else did this (Alfa Romeos, maybe?) and it eventually transitioned from being 'quirky' to full-blown 'iconic'. I always liked the fact that Nissan's interior stylists picked up on this when they were laying out the Z's interior design back in the late 1960's. Save those headliners!
-
I've got a few spare combo switches in my storage. PM me and let's see what we can work out.
-
AFAIK, the rear trim panel on the earliest S30's didn't have removable taillight access covers at all and, when those covers were eventually introduced, they were flat. I think that what you've got in your car is, as you say, taken from a 260Z. All of these interior trim panels are tricky to remove and replace without causing them damage. Also, the Z arrived just at the time when owners were being introduced to higher-quality home sound systems. Many (if not most) Z owners decided that they wanted an aftermarket sound system with stereo and a tape player, as well as something better than the single, small, lo-fi speaker. I expect that a lot of side trim panels got cracked in the process of getting access for wiring and speaker installations. I also think that a lot of rear trim panels got butchered when the owner or installer decided to get creative in order to make big speakers fit.
-
What determines whether you get a hard gasket or a soft one? Manufacturer? Number of years sitting on the shelf?
-
Will you shoot the colour coats, too, or will this be contracted out to a shop?
-
Now that's clean!
-

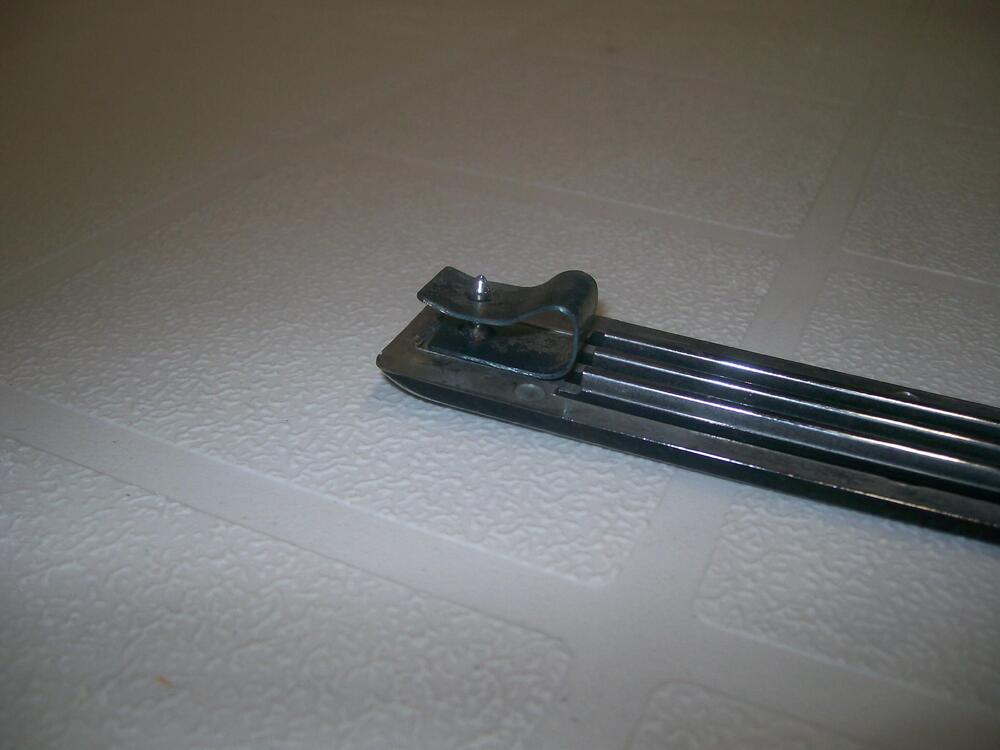
280Z 2+2 Rust damage on interior floor pans - how severe/bad is this?
Namerow replied to Paulytunes's topic in Body & Paint
I've never seen this type of bolt-on floor rail before. In terms of its contribution to structural reinforcement, the word 'optimistic' comes to mind! -
Video recommendation: "My Mechanics" restores a 240Z
Namerow replied to florian's topic in Open Discussions
Eastwood (USA specialty supplier) sells body solder. They says theirs is 30% tin / 70% lead. They also sell specially-shaped wood 'paddles' for its application. Check it out here... Eastwood Body Solder Stick -
Just ordinary wire. Most mild steels, no matter what form they take (wire, bar, rod, sheet), remain elastic (i.e. they stay springy) unless they're taken past their yield limit. If they go past their yield limit, they 'bend' (i.e. they take on a permanent deformation and don't return to their original shape). In the case of a hairpin spring like this one, you ensure that the wire stays under its yield limit by making it longer... which is done by adding coils. For the Z's ashtray or fuse box lid, two coils seems to be enough to get the job done. I just re-checked my work: I used 0.045" wire. According to my AWG chart, that's 17 gauge.
-
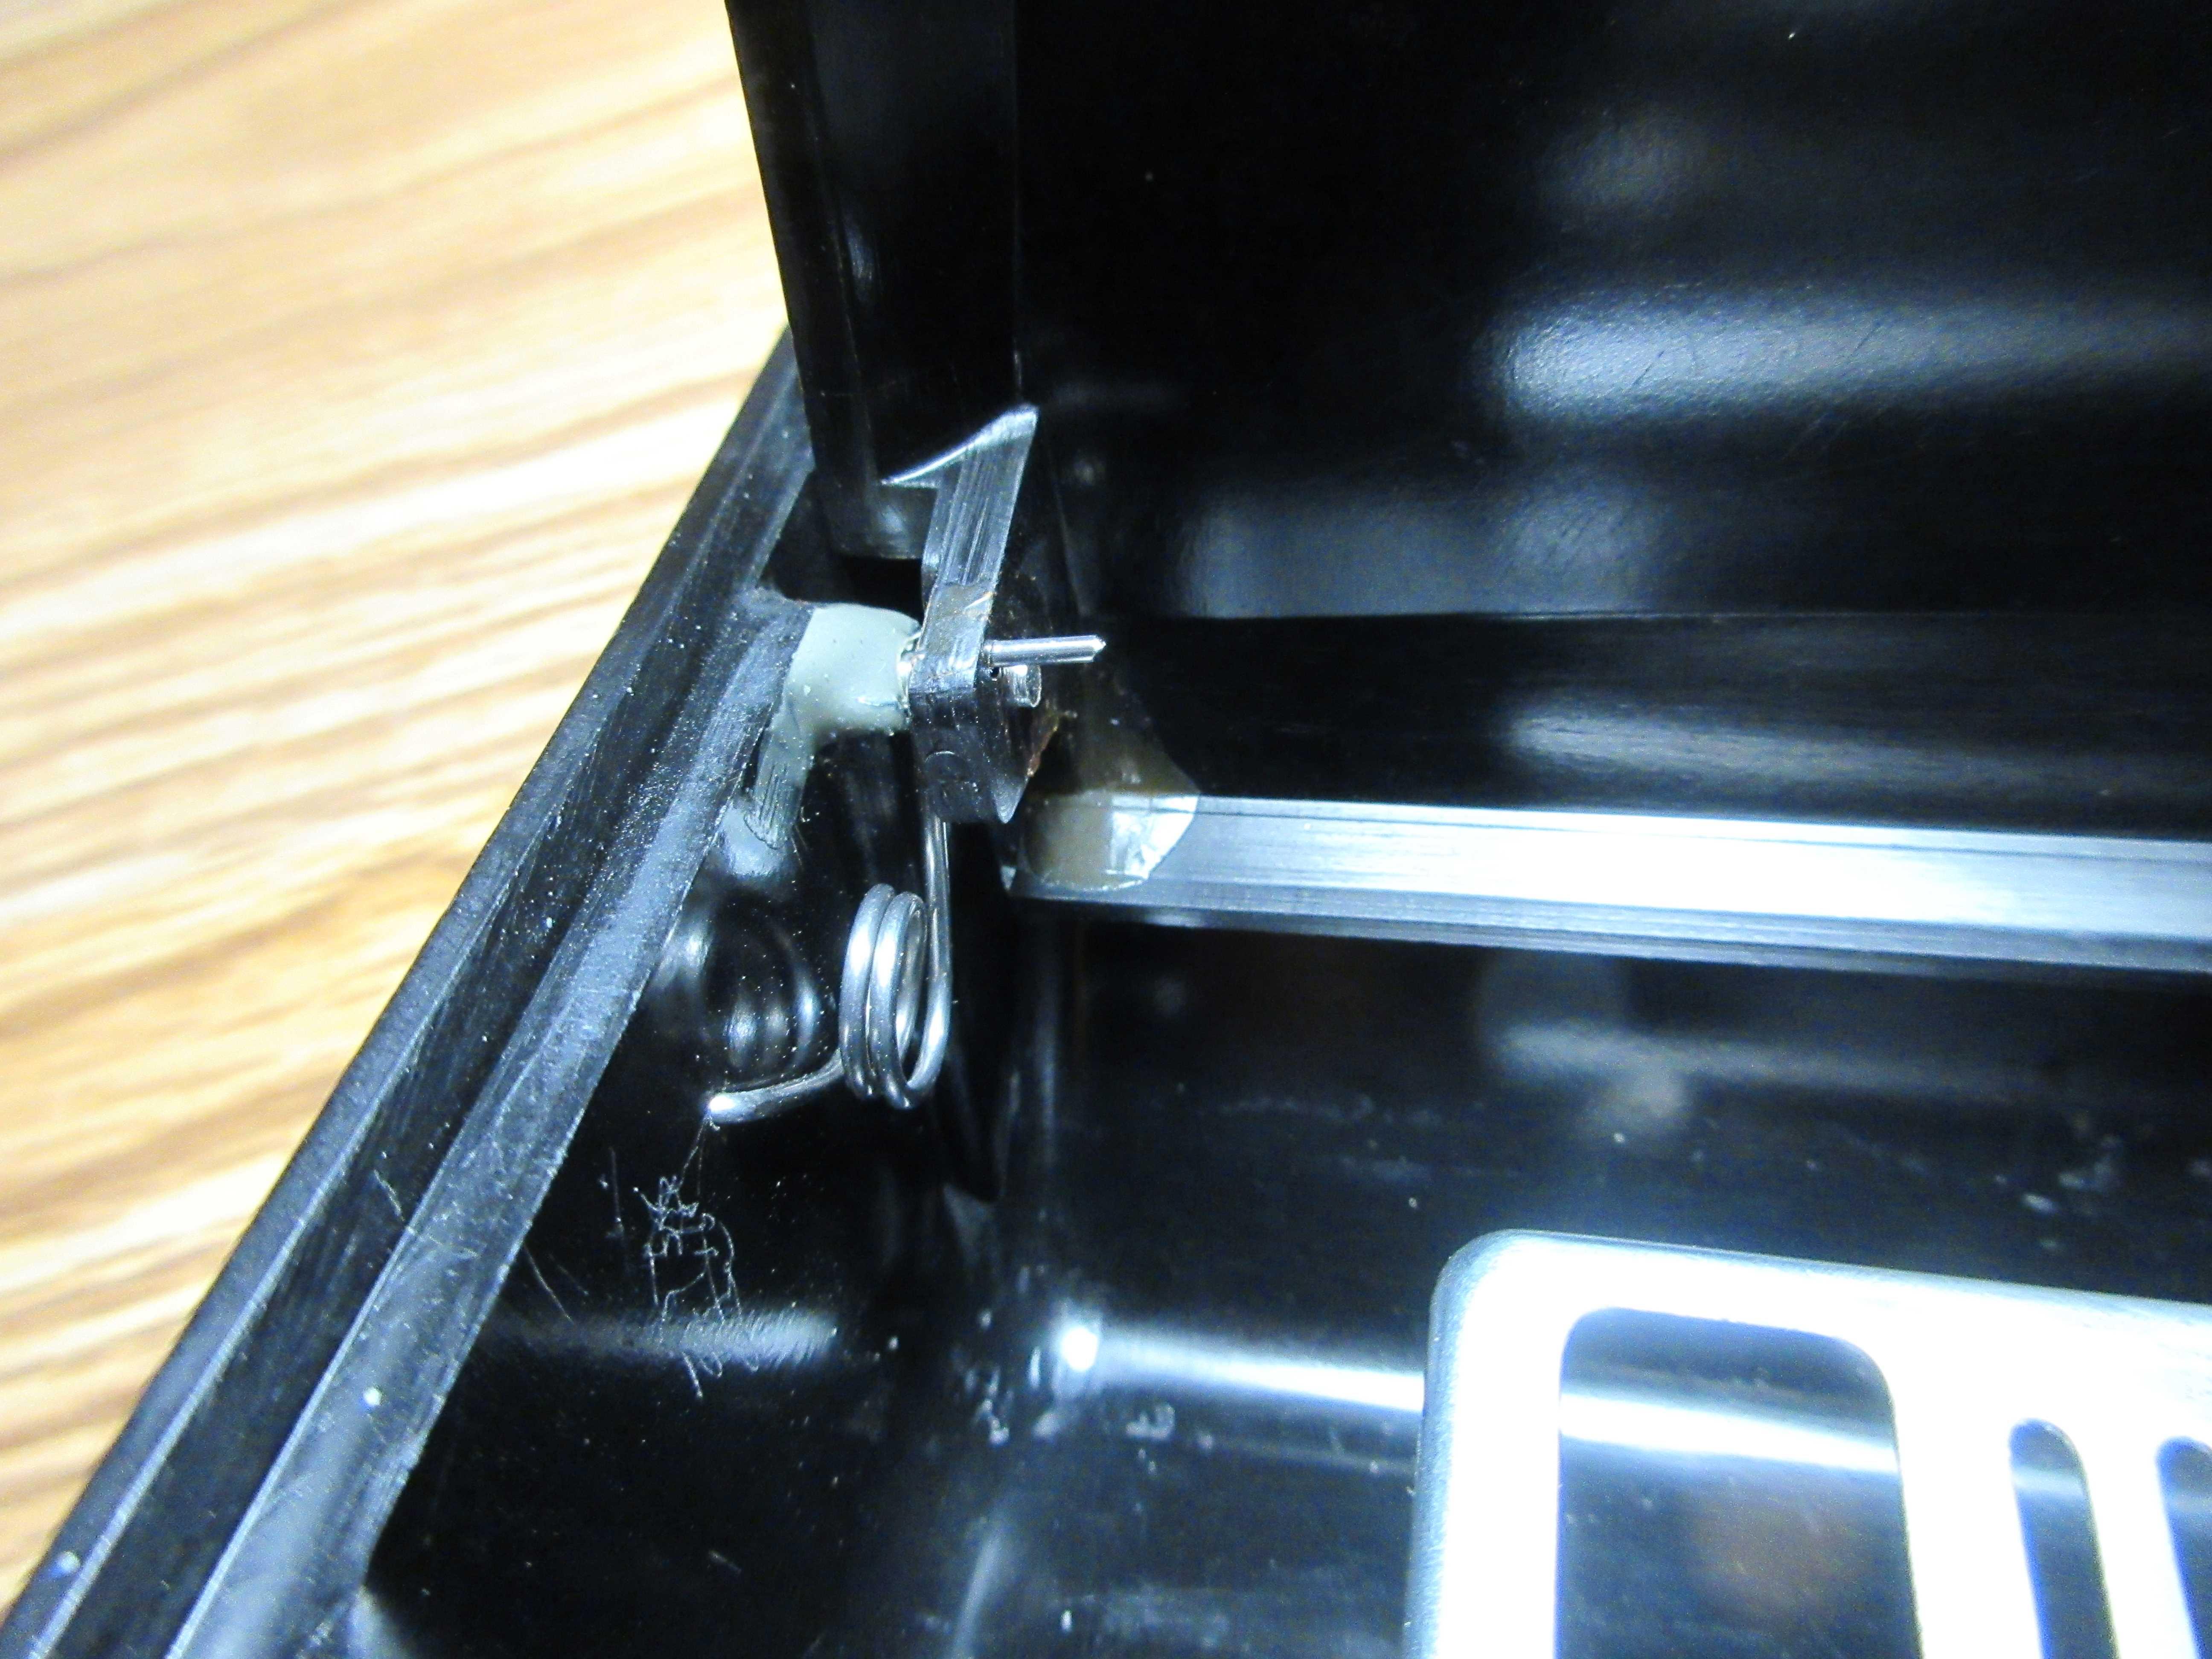
Here are a couple of photos of the spring that I made for the ashtray in my 70Z. It was made from plain hardware-store wire (16 gauge?). IIRC, I just clamped a Philips screwdriver in my bench vise and then wound the wire around the metal shaft. The 90-degree bends at the ends were formed afterwards over the jaws of the vise. The key, of course, is deciding how many winds you need in order to get the right tension in both open and closed positions. The spring needs to be lightly compressed when the lid is open. Also visible here is the epoxy repair that I did to restore the mounting boss for the lid's pivot pin (the original boss had cracked and splintered).


-
EFI In-Tank Pumps and Welding Stock Gas Tanks. A Volatile Discussion.
Namerow replied to zKars's topic in Fuel Injection
From the 'Smart Chemistry for a Better Environment' website, by D.W. Davies Co. RADIATOR CLEANER FOR RADIATOR REPAIR SHOP USE Davies “RADIATOR BOIL OUT #100” is a powdered alkaline detergent formulation used with water for heavy-duty immersion radiator cleaning, as well as in-place radiator cleaning. The product renders better cleaning due to better penetration, grease emulsification, better rinsing and powerful scale remover. This product also contains an inhibitor which prevents corrosion of metals by alkalies. For Cleaning Radiator with Immersion Tank: Prepare a solution of 2 lbs. per 20 gallons of water, increase or decrease usage based on soil load. Heat the water and maintain it at or neat boiler point. Immerse the radiator or other parts in the hot solution and inspect frequently for completeness of cleaning. Remove from vat, allow to drain and pressure rinse. For Cleaning Radiator In-Place: Use 2 lbs. per 3 gallons of water in system. Drain system, close drain and pour solution into radiator, replace cap, run motor 30-60 minutes - - drain radiator again and flush with water until water is clear. This agrees with my understanding that a rad (or fuel tank) 'boil out' is only partly related to the use of a near-boiling liquid and has just as much to do with the use of an alkali (such as powdered laundry lye) dissolved in that liquid. FWIW, I remember first reading about this process in a book* that I ordered from the UK back in the 1960's, when I was first getting interested in motorcycles (* 'Modern Motorcycle Maintenance'... where the definition of 'modern' seemed to be focused on somewhere around 1955). The hot lye strategy was recommended for 'de-carbonizing' exhaust systems. No reason why you wouldn't be able to use the same procedure with your Z's fuel tank, but you'd probably need to let the solution sit in the tank overnight, to compensate for the fact that it will only be near-boiling for the first 30 minutes. -
EFI In-Tank Pumps and Welding Stock Gas Tanks. A Volatile Discussion.
Namerow replied to zKars's topic in Fuel Injection
Nice work, for sure. Were any precautions* taken before you started cutting and welding? (*see Jim's list of possibilities in Post #2) -
Ditto for my 5/70.
-
Main driver and passenger door seal and window alignment
Namerow replied to MH77280Z's topic in Body & Paint
Second that. Patcon's warping strategy was the only way I could get my P-side door's trailing edge to line up. I made up a torque arm out of 1" square steel tubing to help with the job. I drilled holes in the tube so that I could use two of the existing holes* in the back of the door to bolt it to the structure's trailing edge (* the holes that are normally used to attach the window sash to the door -- I had the window sash removed for this job). When bolted in place, the torque arm projected ~ 2' above the top of the door and ~ 1' below the bottom of the door. Sorry - no photos available. Just put a yardstick against the back of the door. You'll get the picture. The quick-and-dirty way to do this job is the block the bottom (or top) of the rear of the door with a piece of 2X4 and then push on top (or bottom). Easy to damage the paint using his approach (unless the car hasn't been painted yet). -
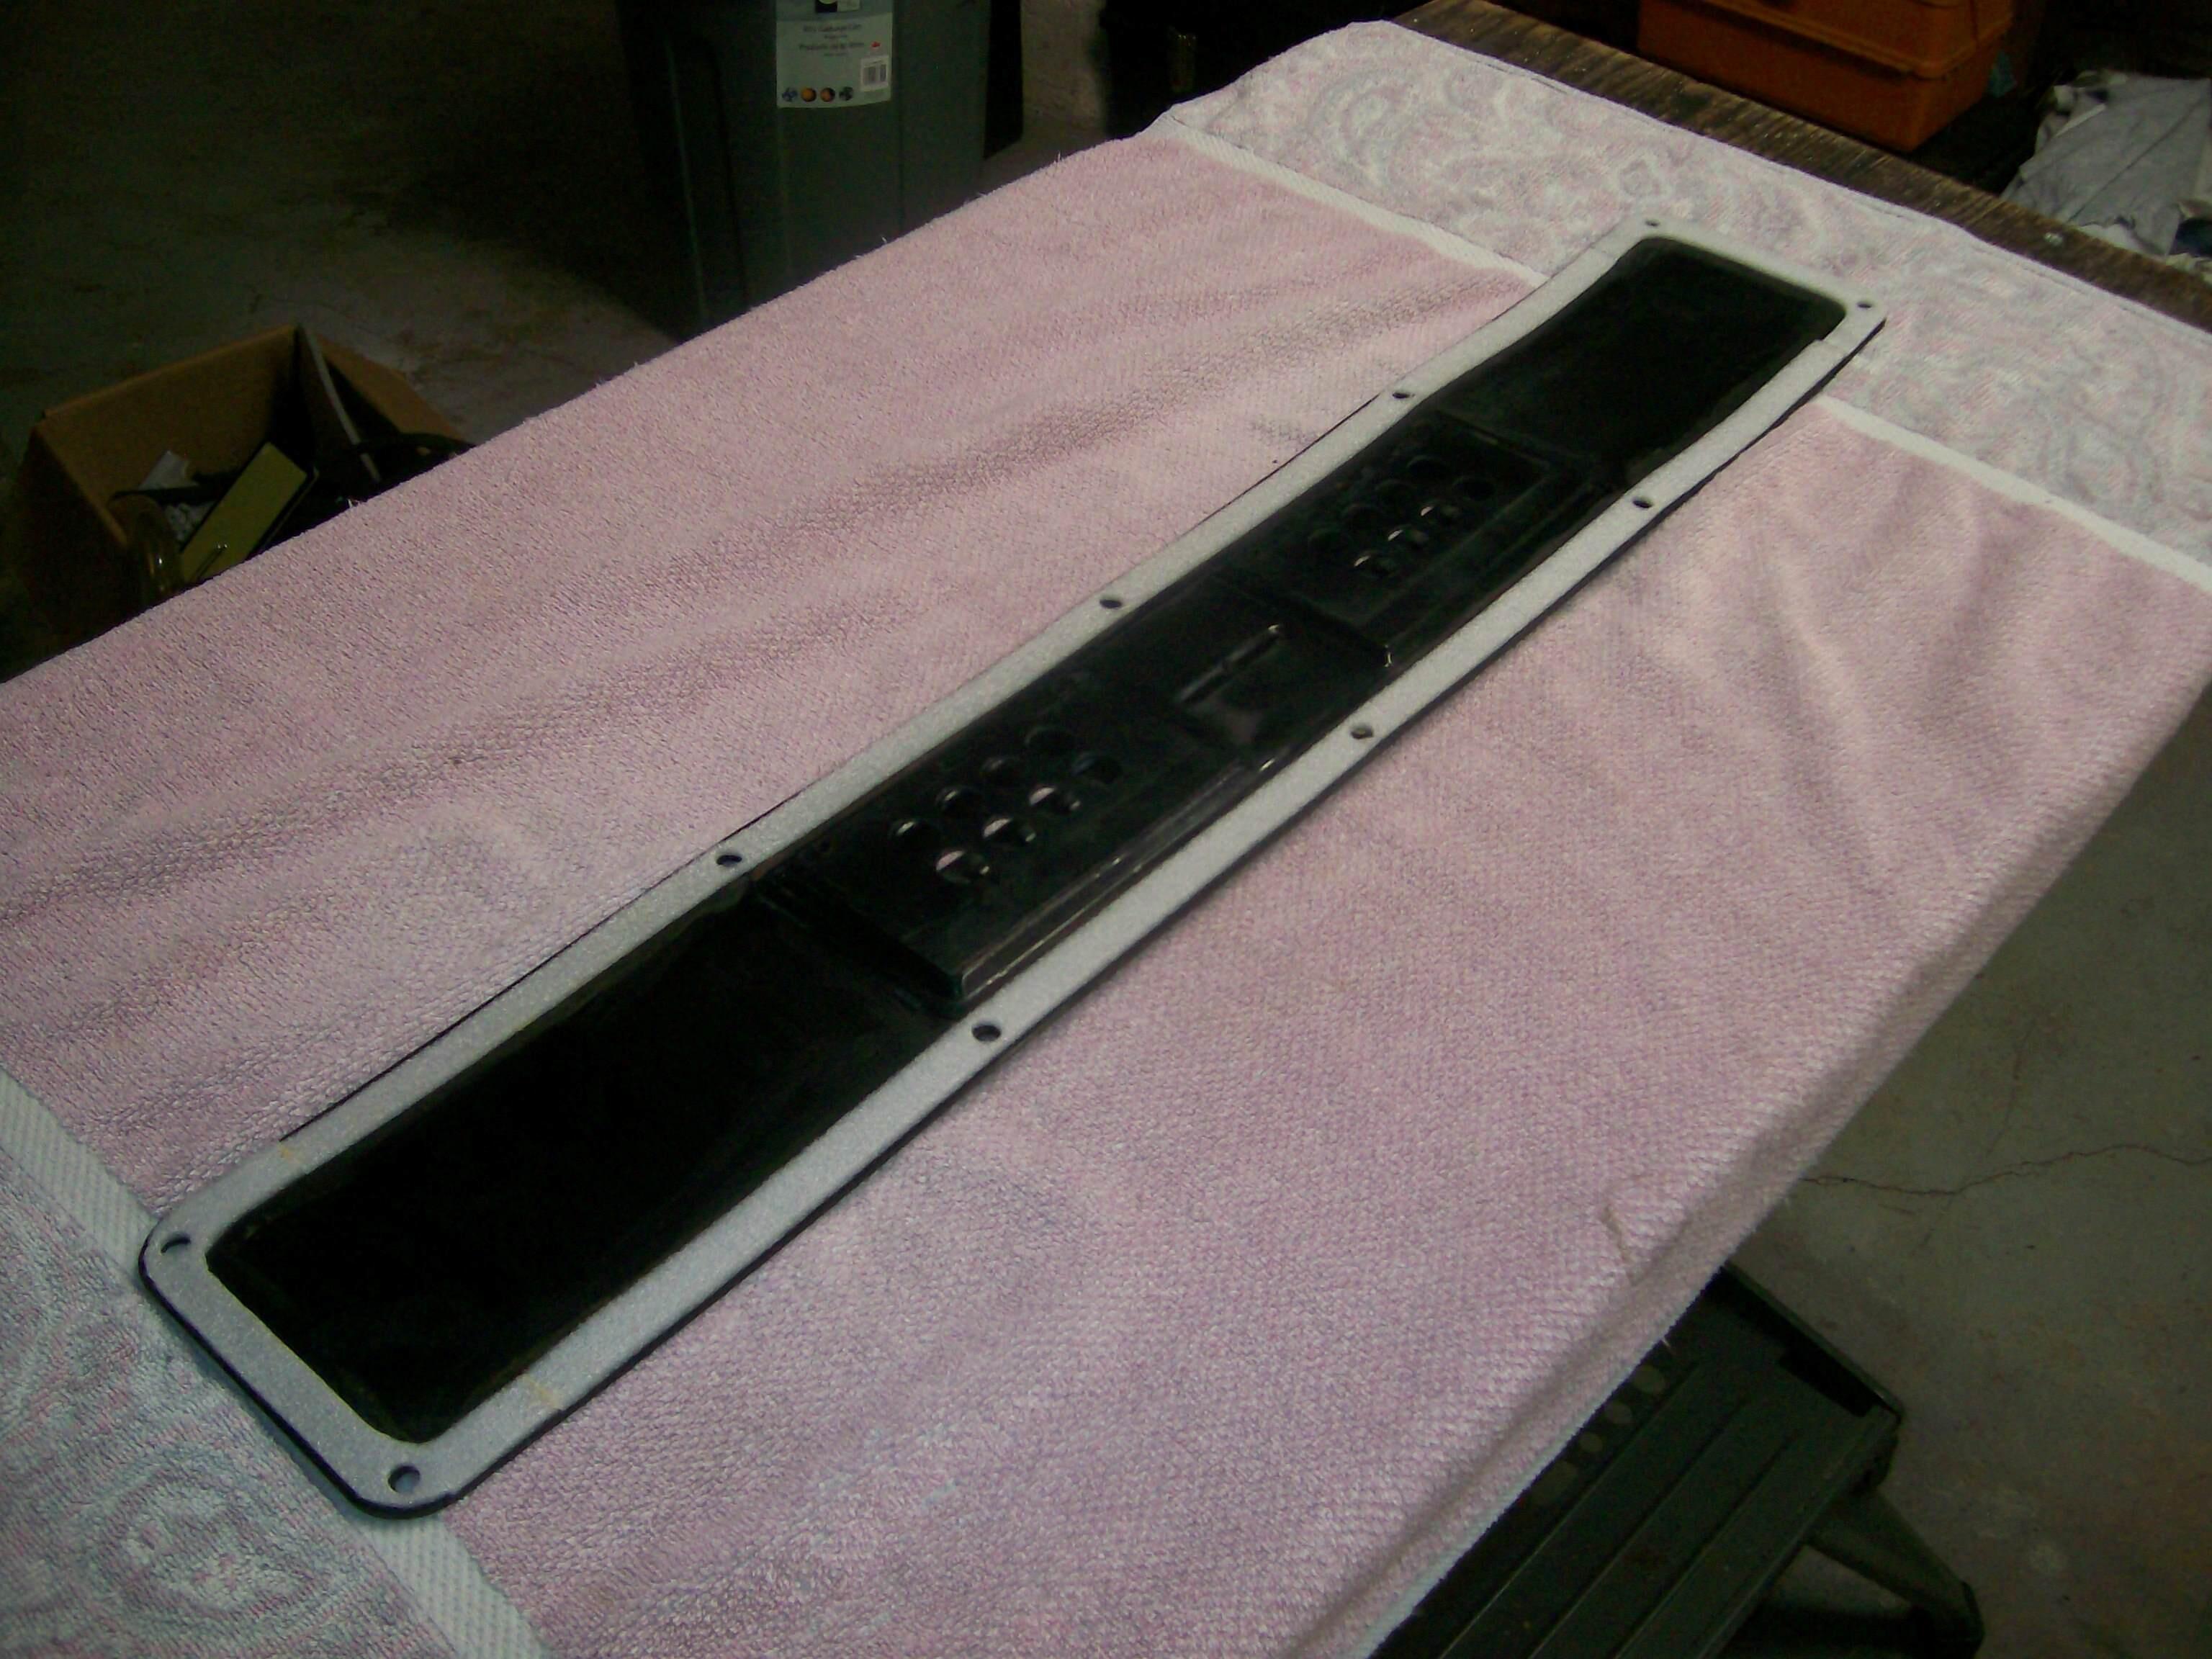
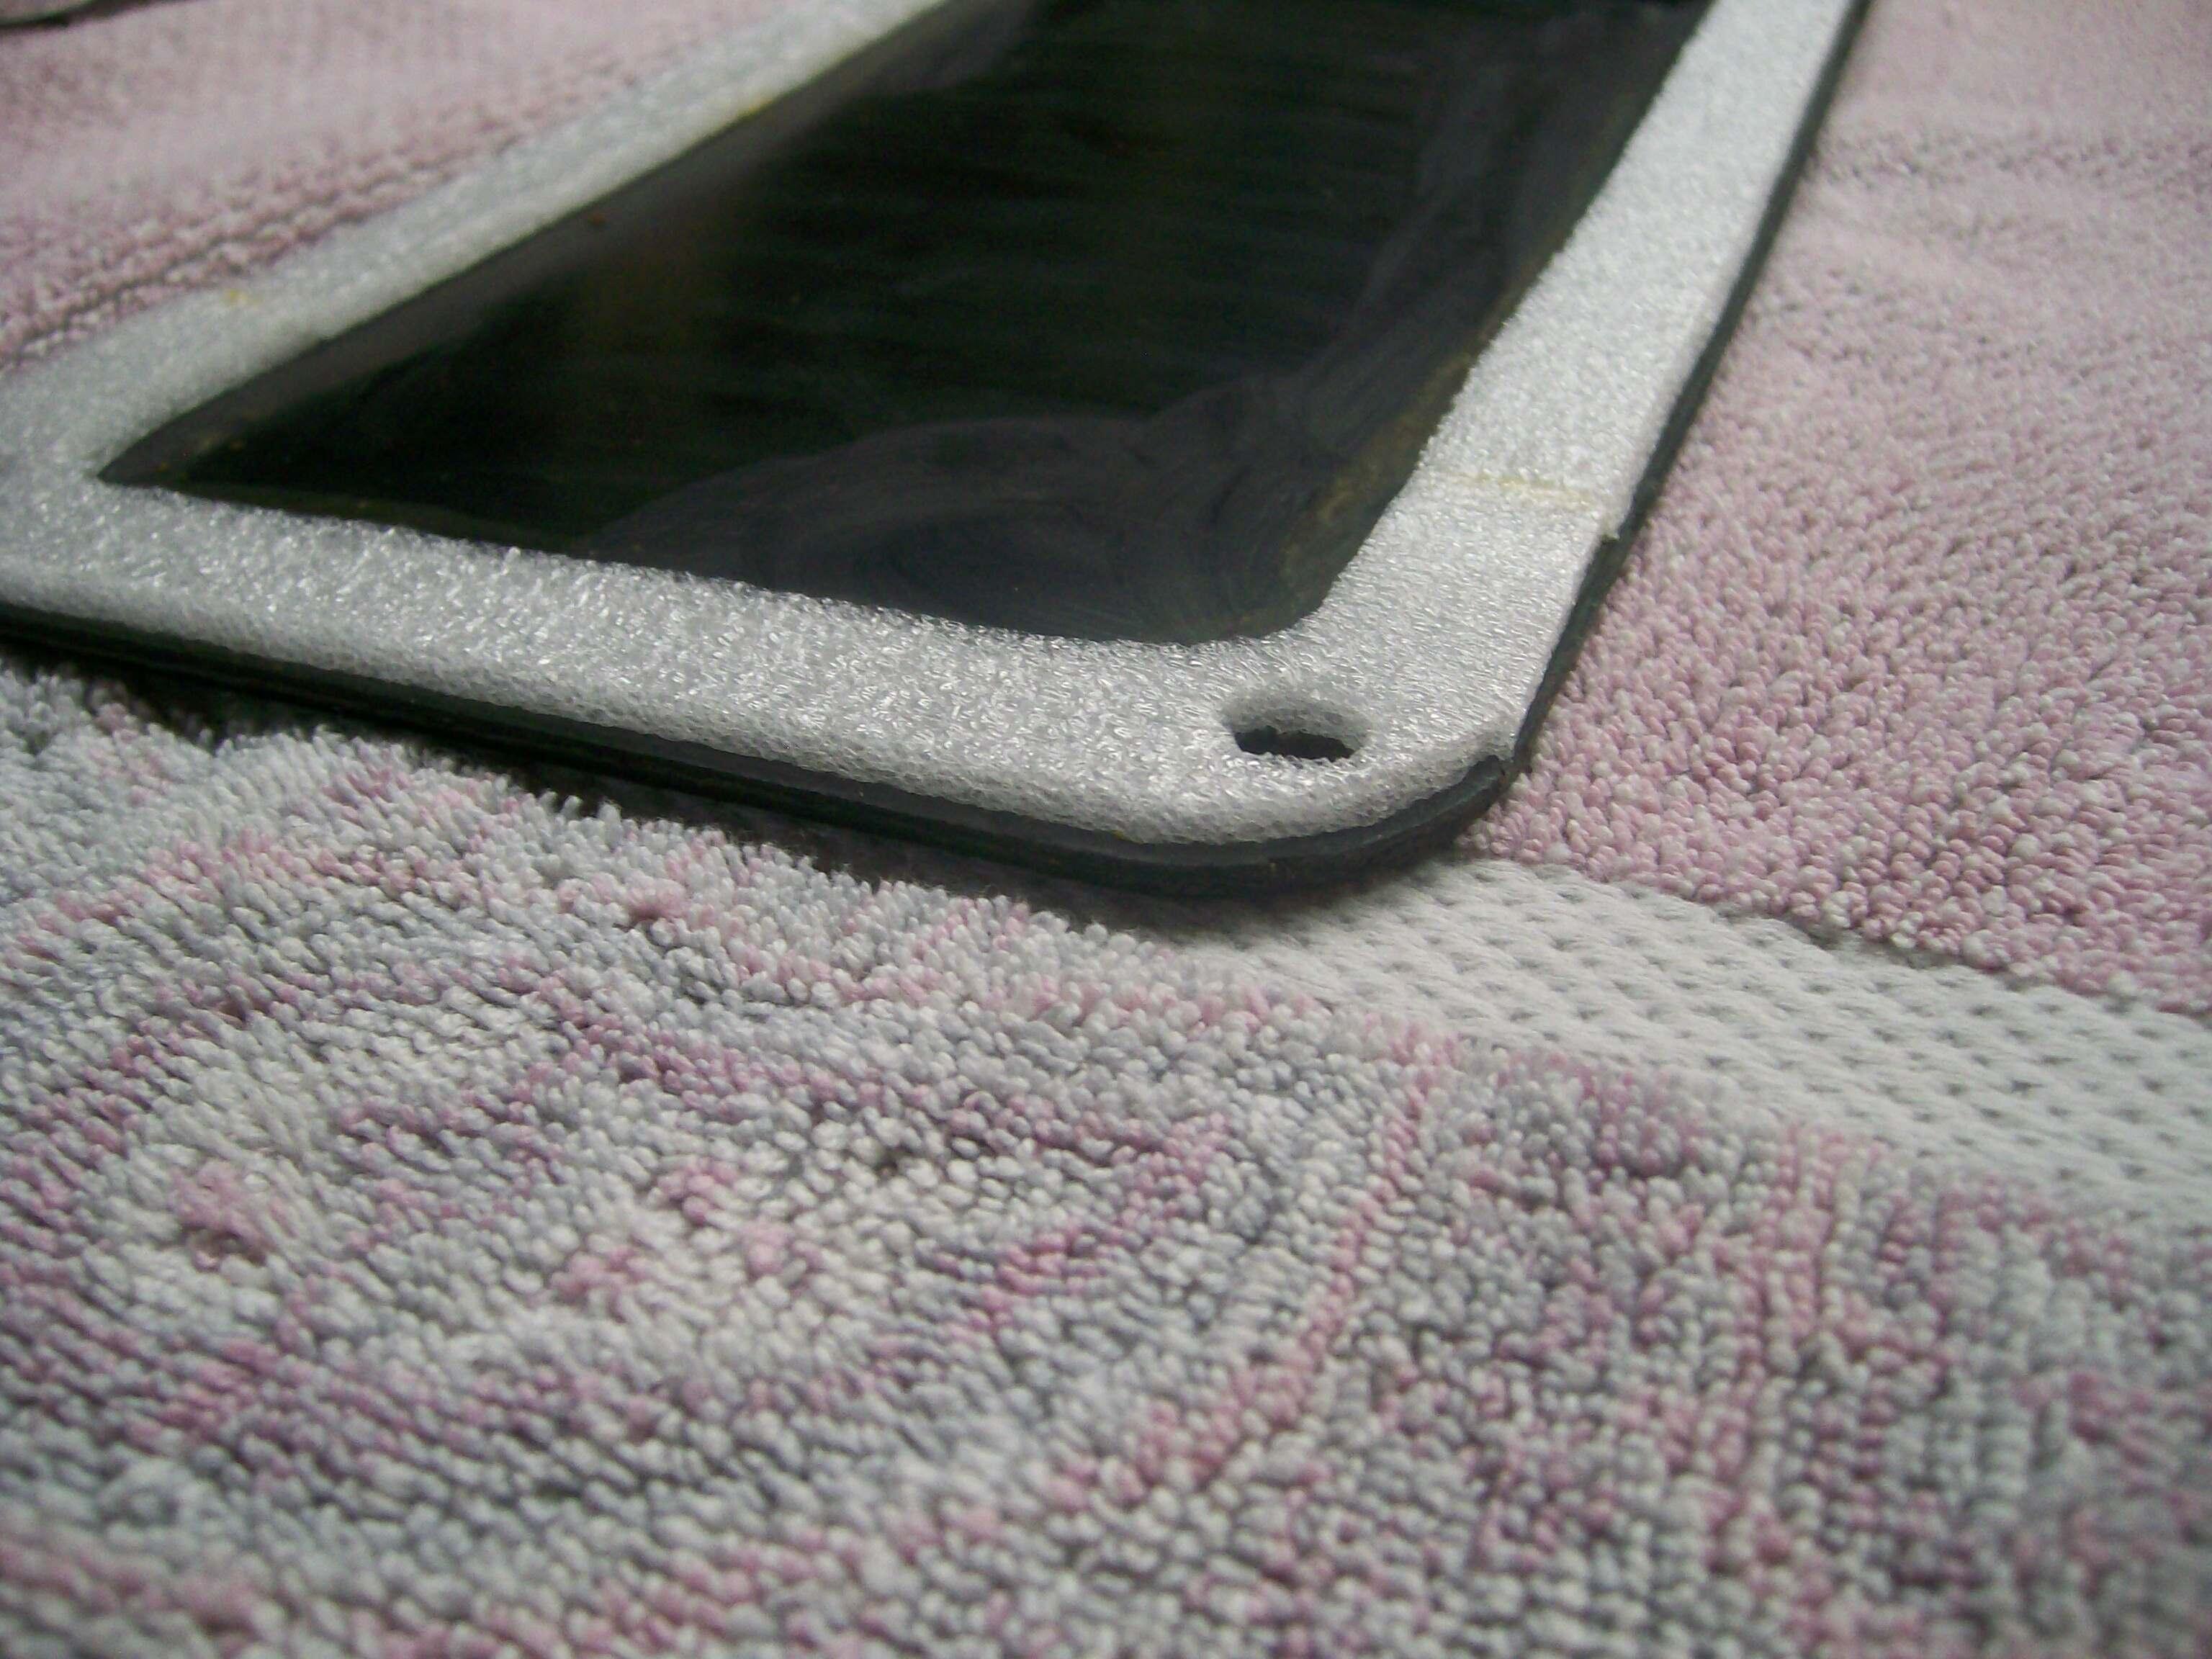
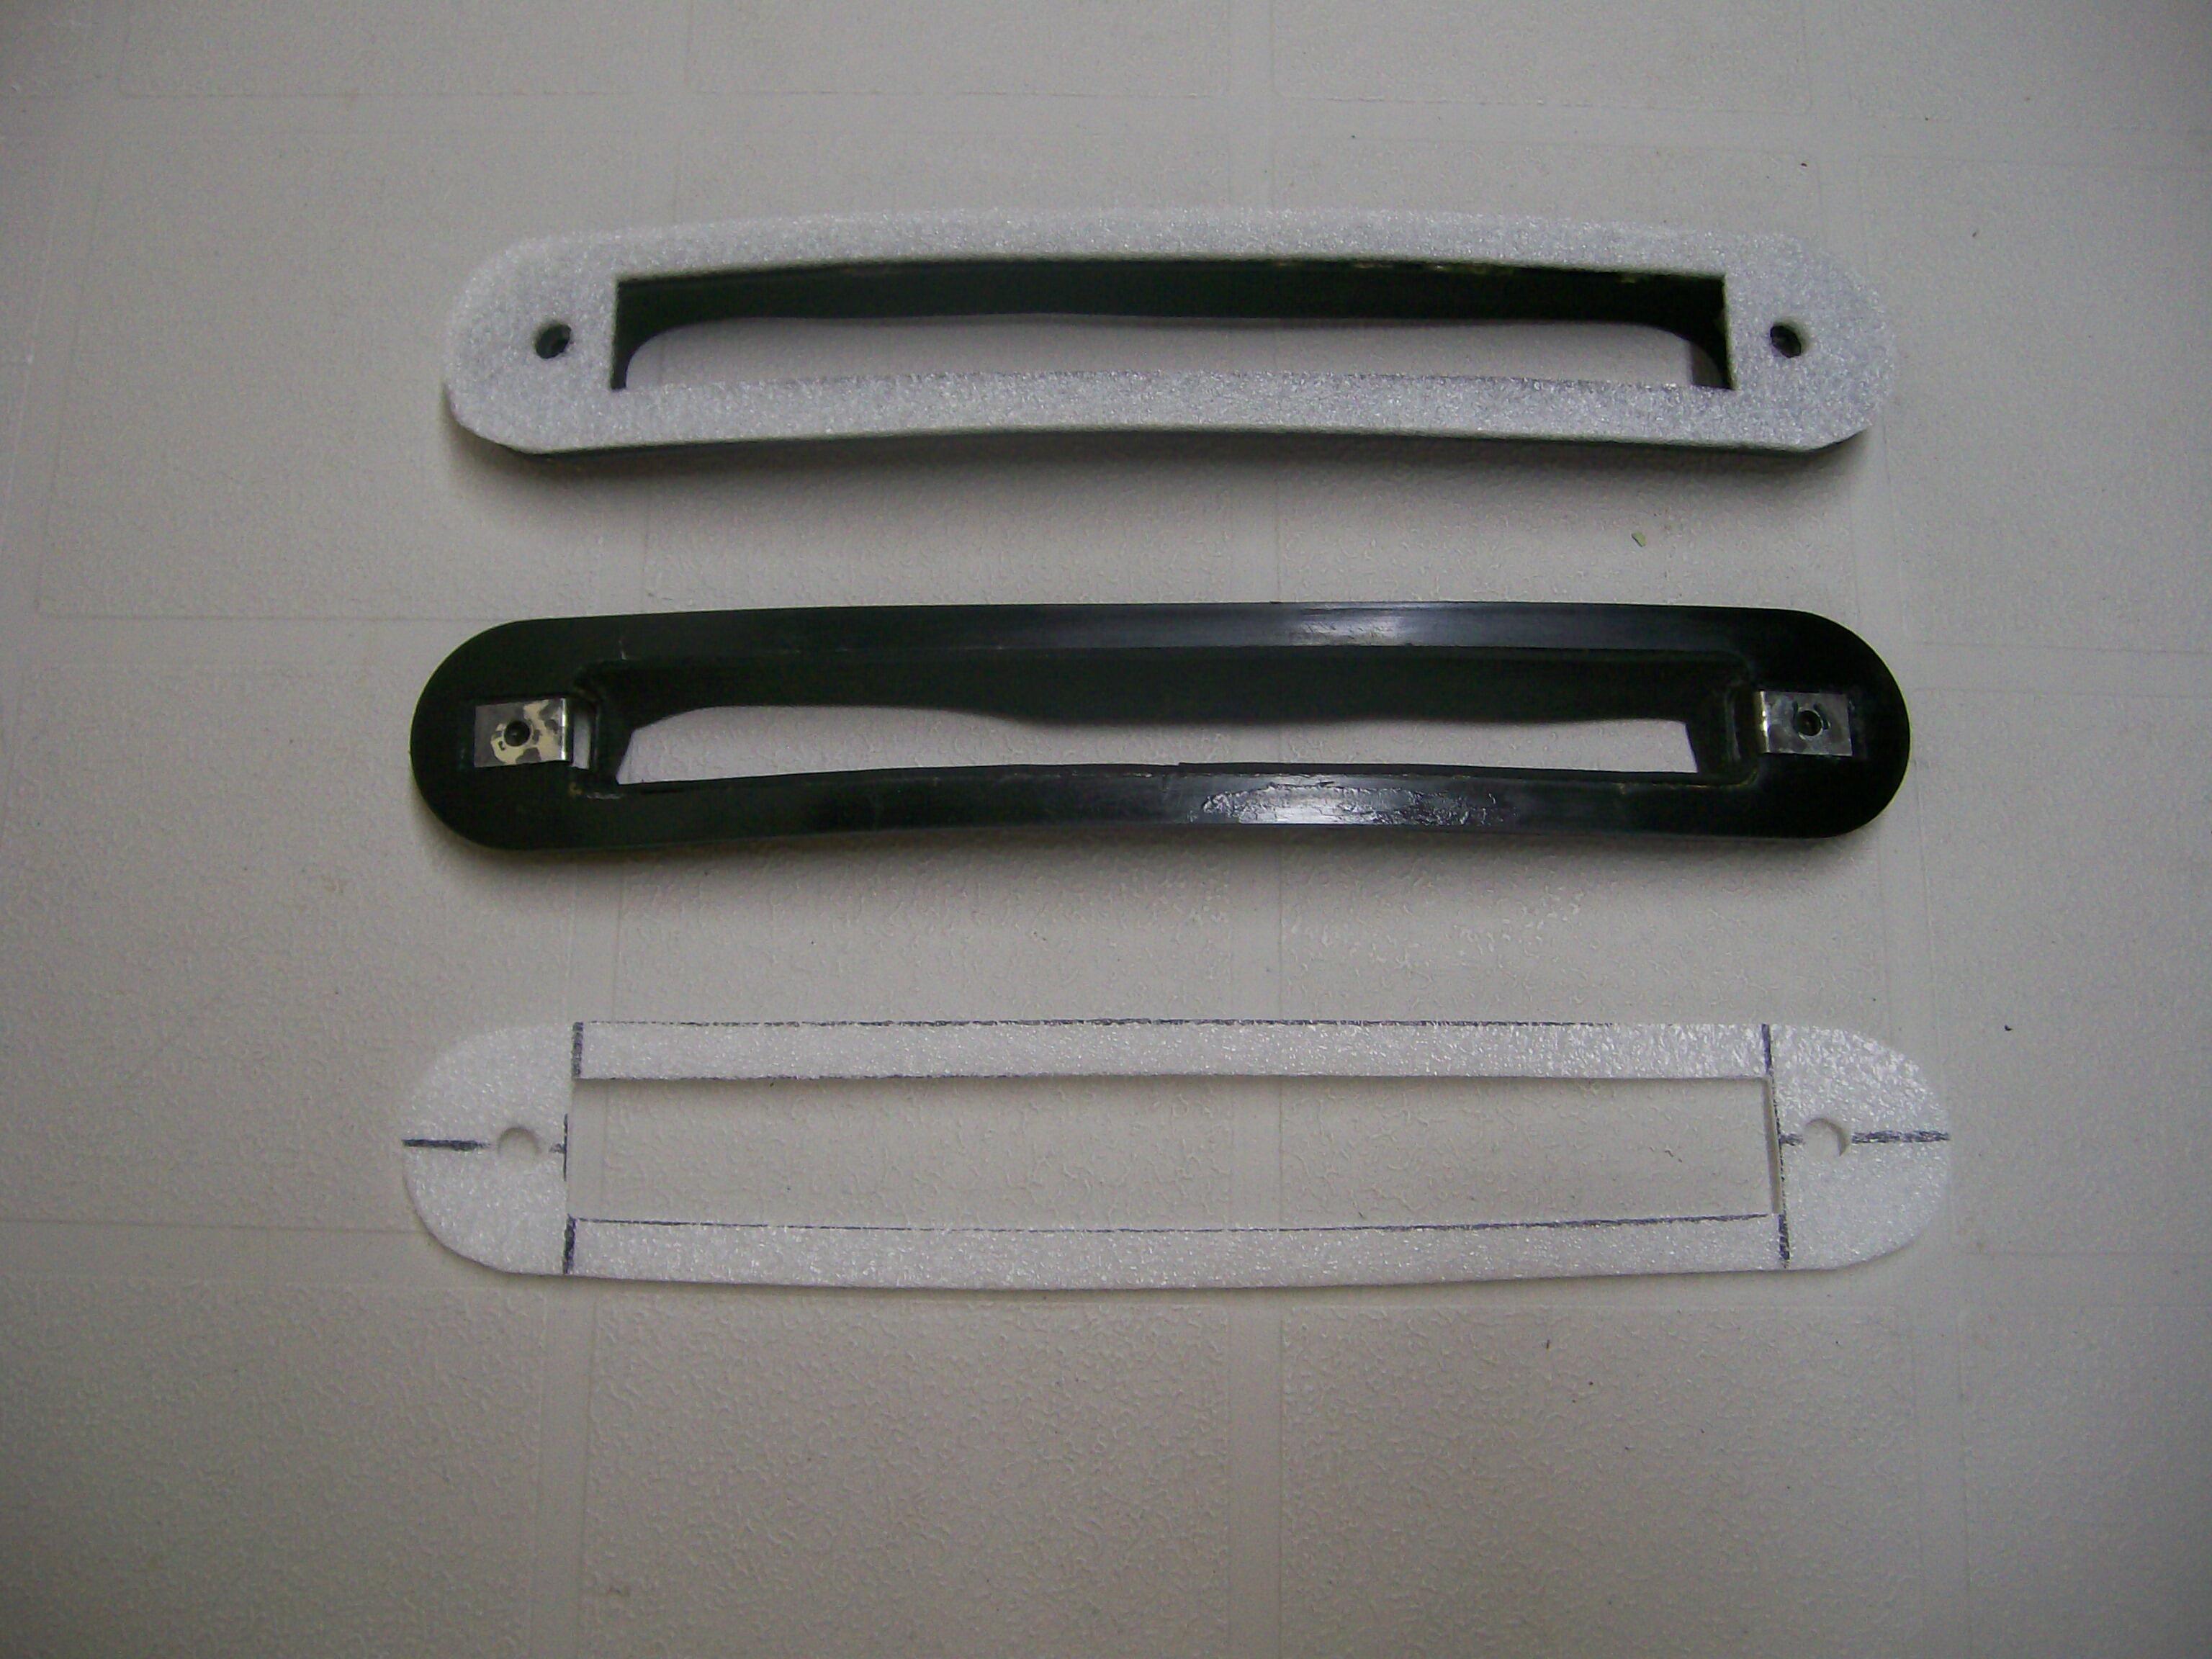
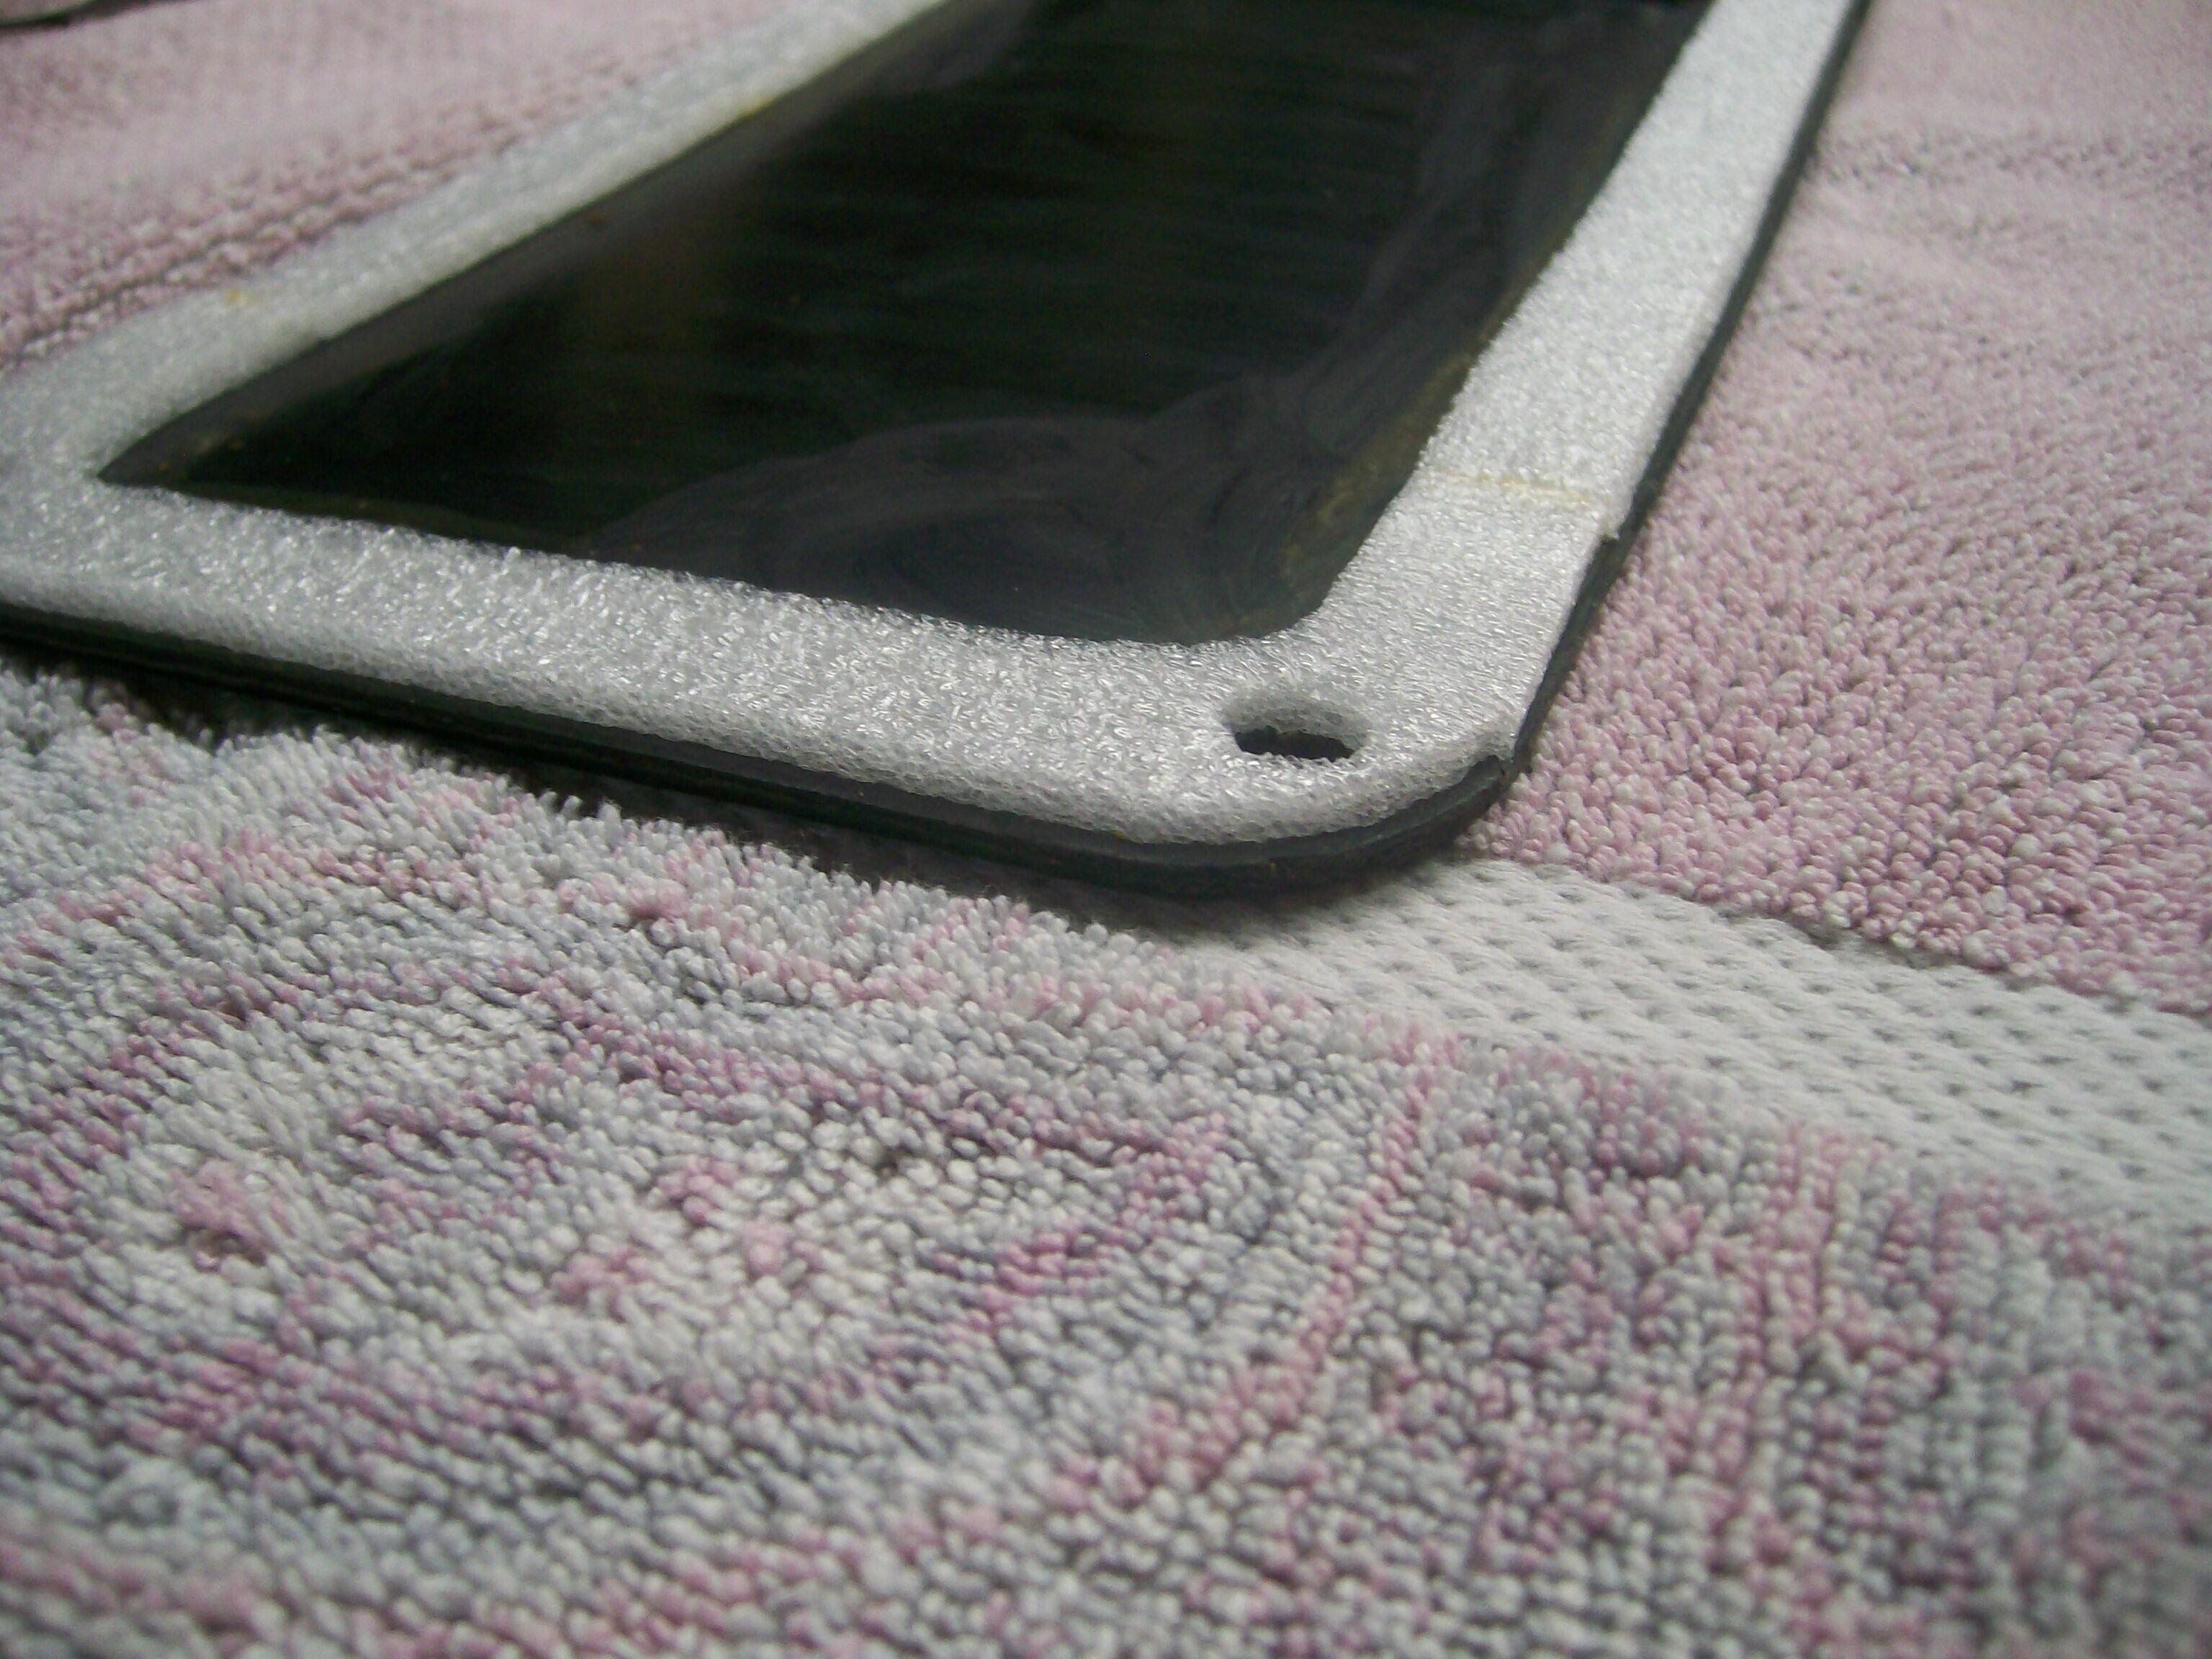
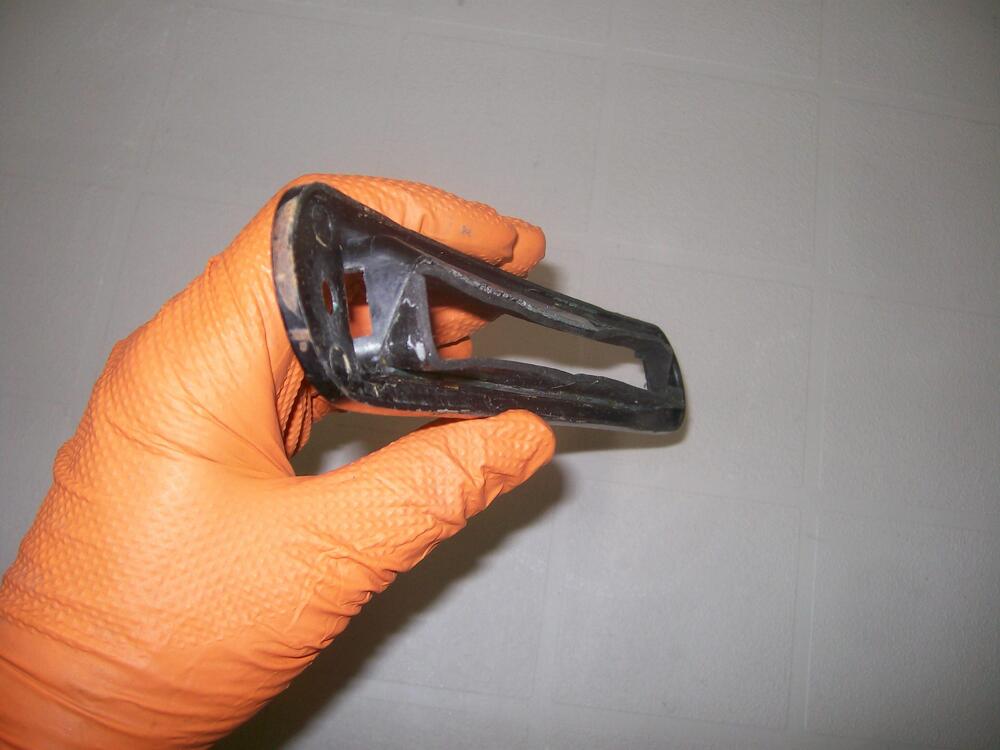
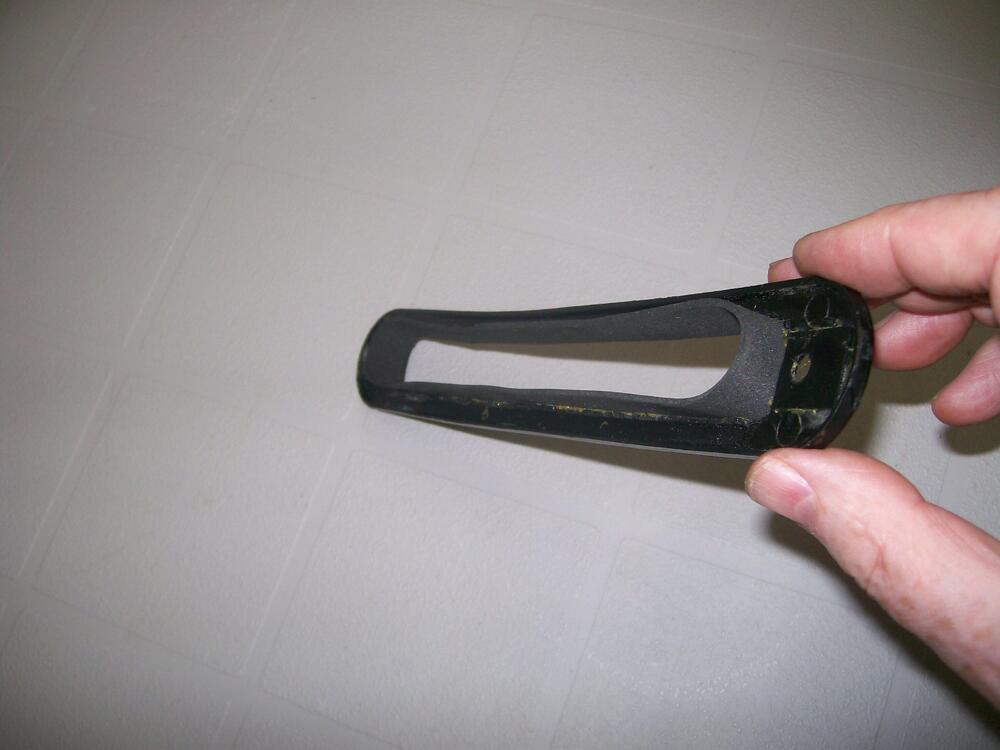
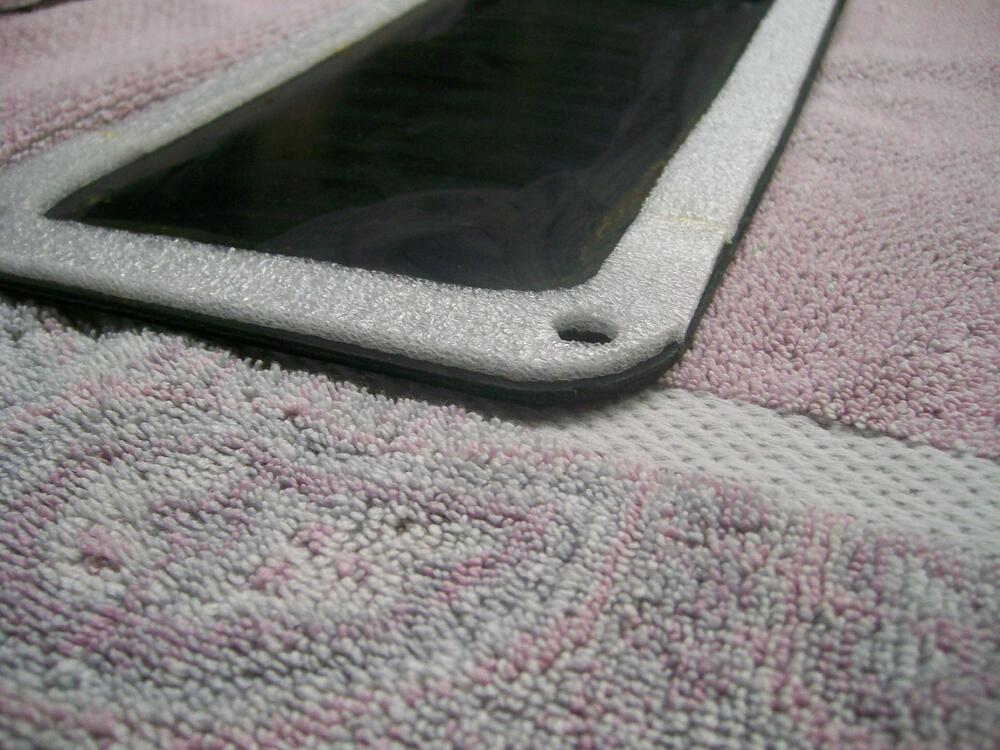
Here are a few more pix to help illustrate the lip on the 'bumper'. In its OE form, the lip -- looked at from end view -- is actually beveled... lip on the top, no lip on the bottom. When coming up with fix for the disintegrated/nonexistent lips on my bumpers, I ignored that little detail. My replacement lips were cut as strips from a sheet of 1/8", closed-cell foam. After a trial fit, I cut them to length and then glued them into each bumper. Not all that pretty, but functional (and completely out of sight after everything's assembled). I should mention that attention to detail will pay off in this part of your restoration. More specifically, lack of attention to detail will probably result in exhaust leaks into the cabin once you get the car out on the road again (this part of the early Zs' design was, to be charitable, not very successful -- too many parts, hard to assemble, didn't work that well). As others have mentioned, several of the pieces tend to warp with age. In the case of my car, the plenum moldings had both caved in at the top, meaning that they weren't going to seal well against bumpers without a little help. I just cut a piece of plastic to the right length and glued it into the plenum as a wedge so that the plenum flange became reasonably flat again. Another place to watch out for warping is the hatch trim panel. For my car, both ends were dished by a quarter inch or more (clearly visible in this photo). This panel has to achieve an airtight seal against the hatch sheet metal. Otherwise, the ventilation ductwork, with its one-way airflow control flaps, gets bypassed and air/exhaust gets sucked into the cabin by way of the hatch cavity*. Here, once again, I resorted to my 'squishy' sill wall foam tape to make a new gasket. Even that wasn't enough to overcome the warpage in the trim panel. I had to create some new holes on the inner hatch sheet metal to accept a pair of additional plastic trim plugs on each side of the panel. In hindsight, I probably should have spent the bucks for a new trim panel. All of this just underscores the fact that the entire airpath from the ventilator grill to cabin entry has to be airtight and the one-way airflow control flaps have to be in good condition. If your air control flaps have settled into a permanent droop (mine had), try turning them over before reinstalling.


-
That may very well be the case. Why not take a look and let us know what you find.
-
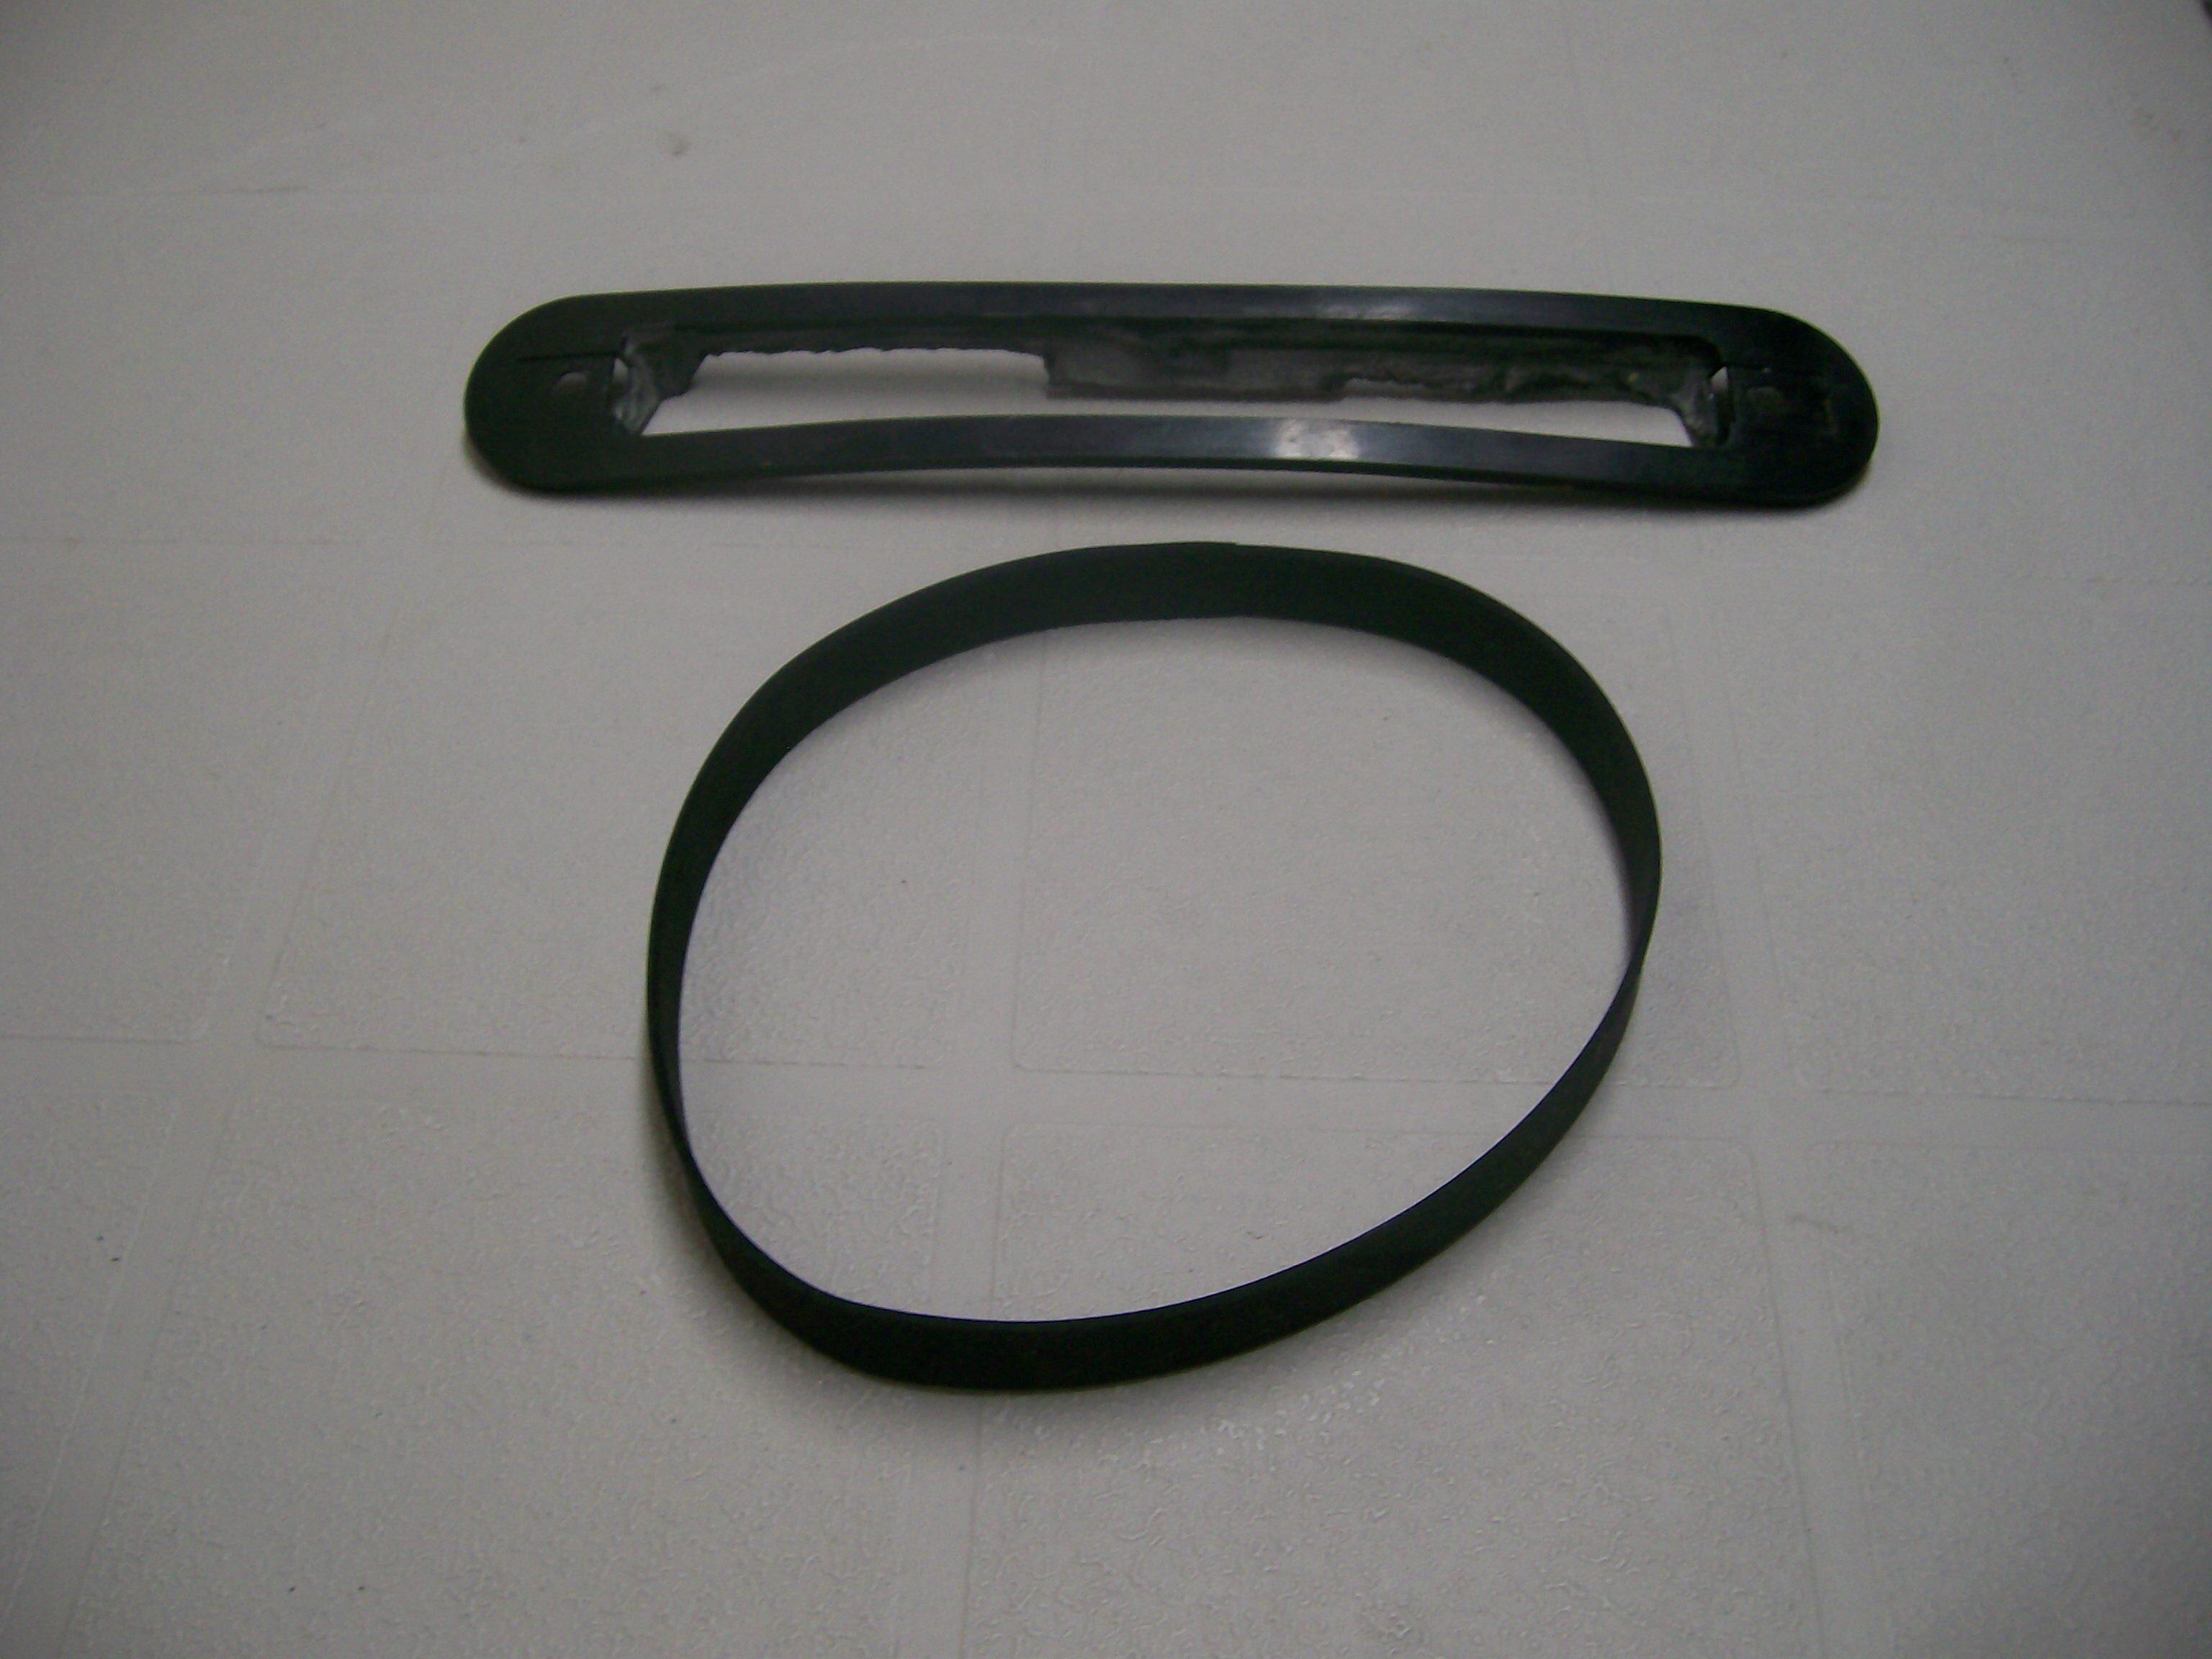
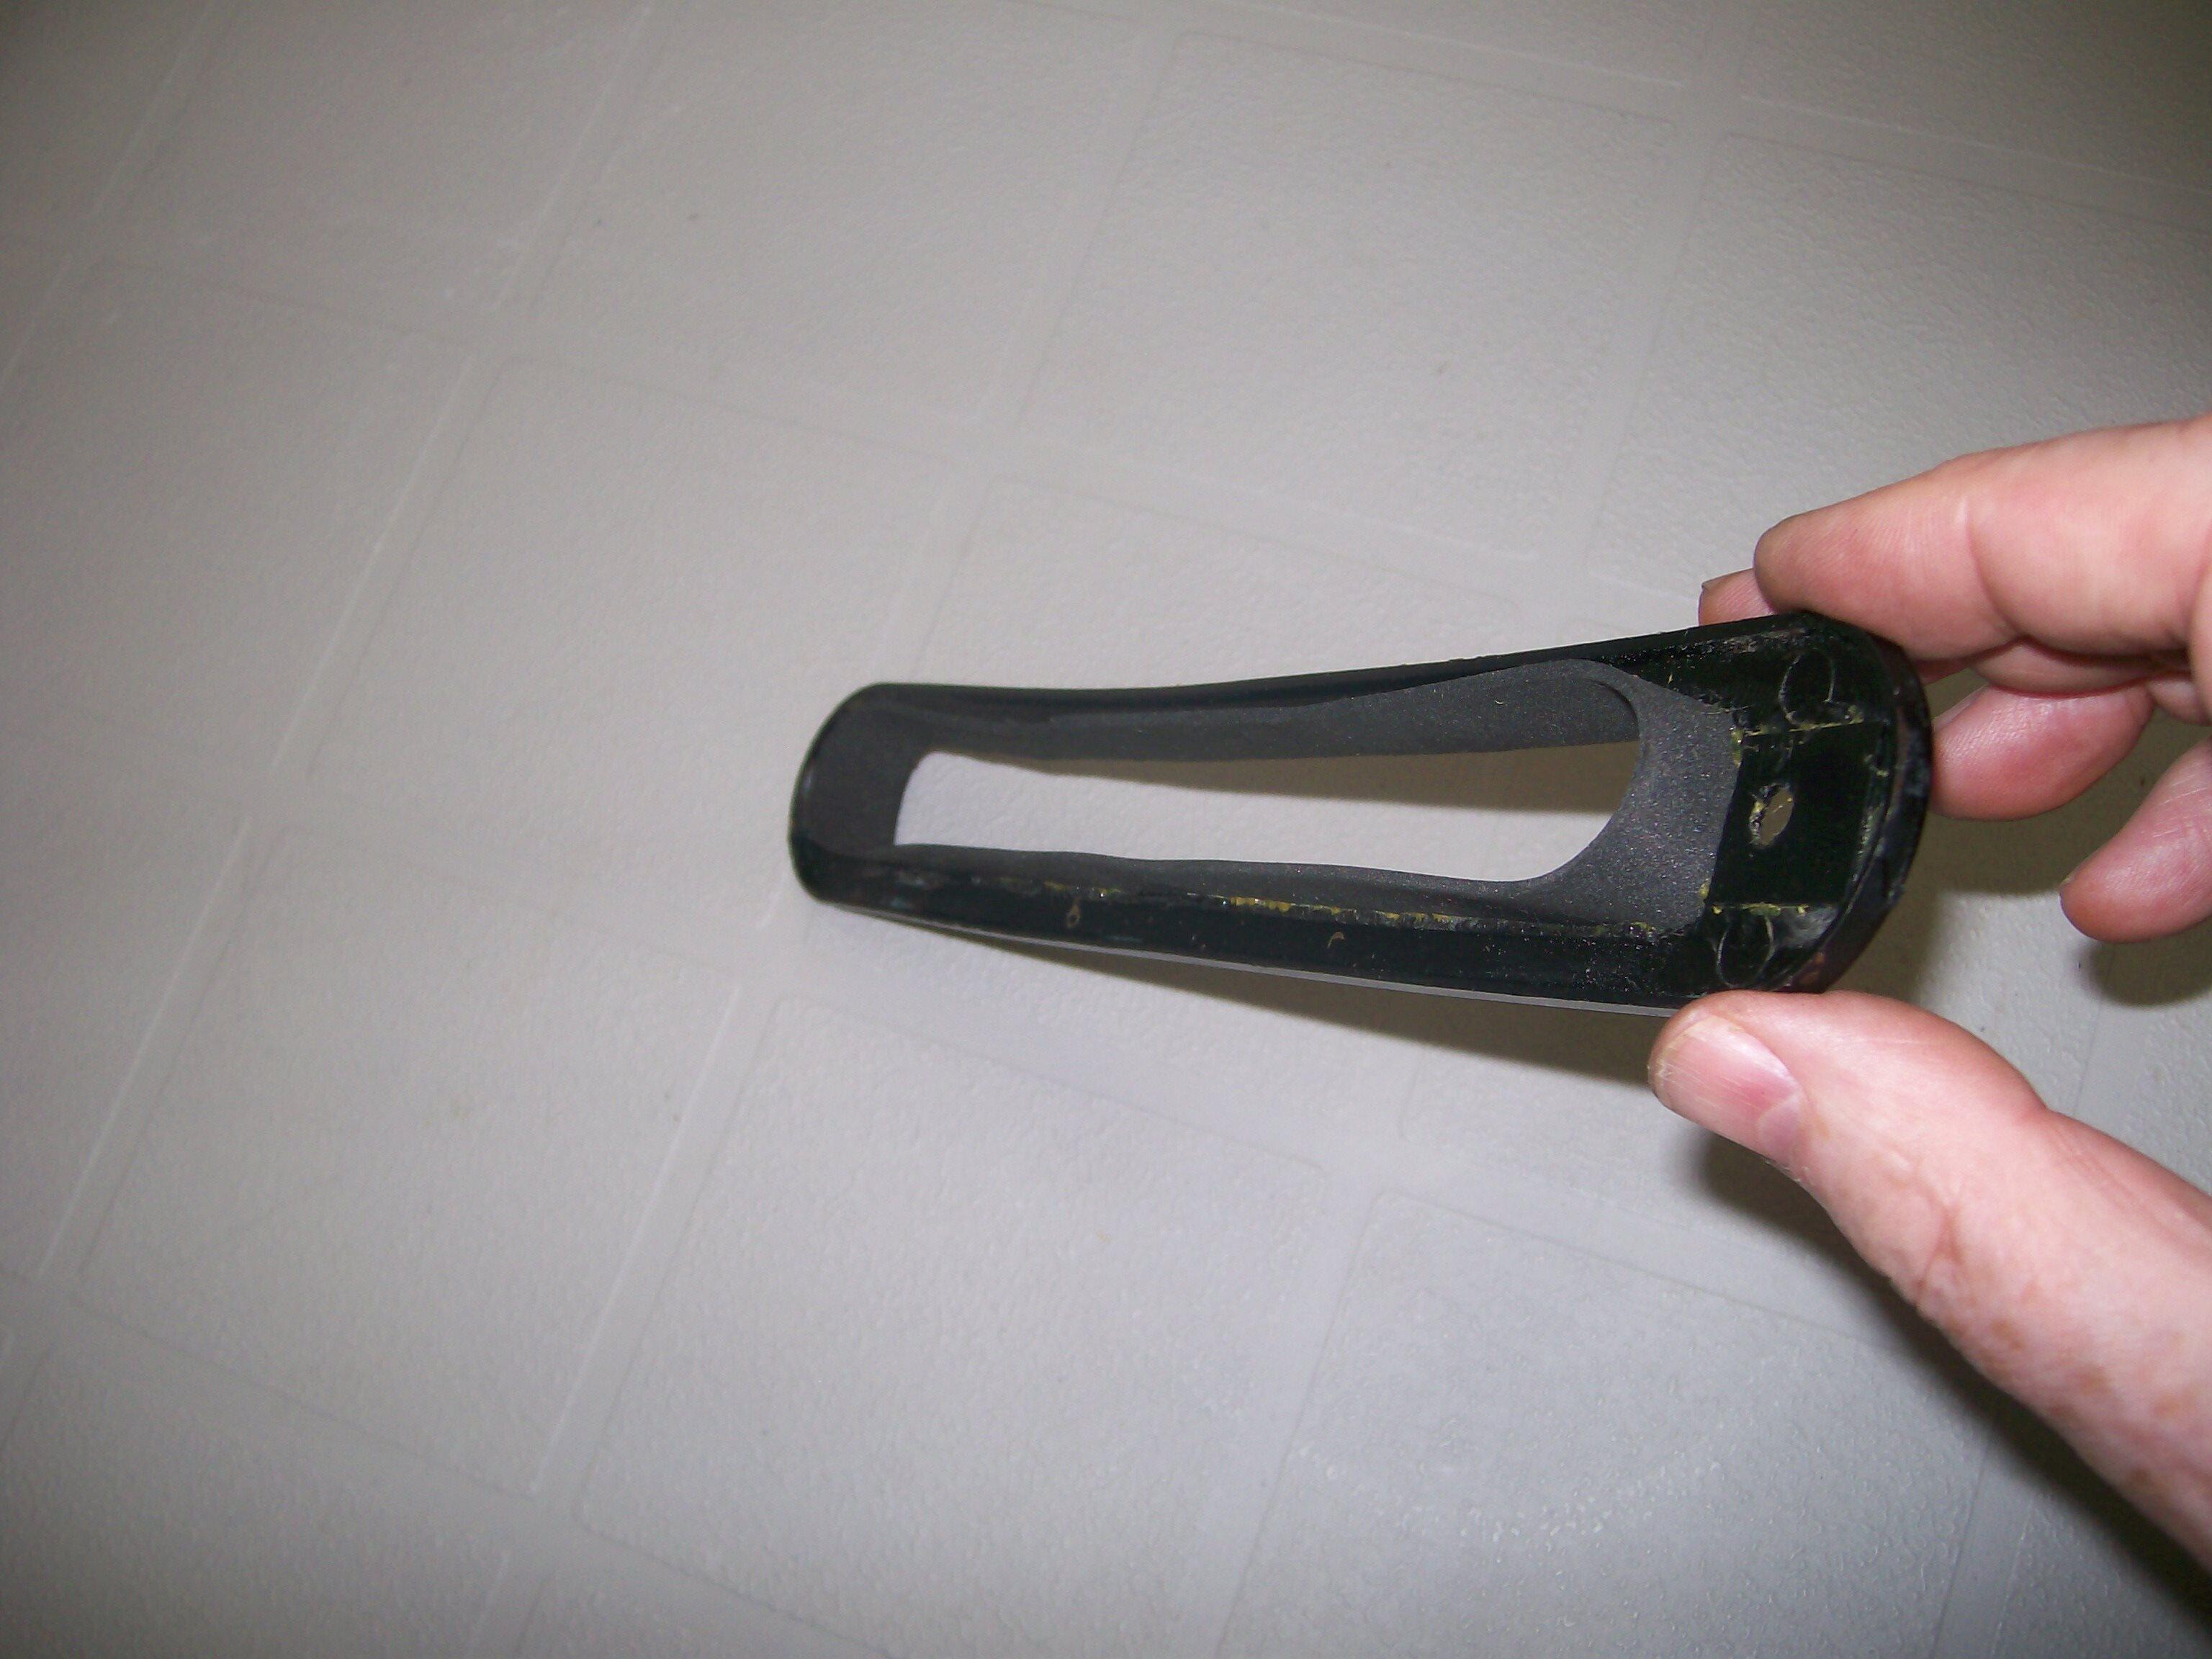
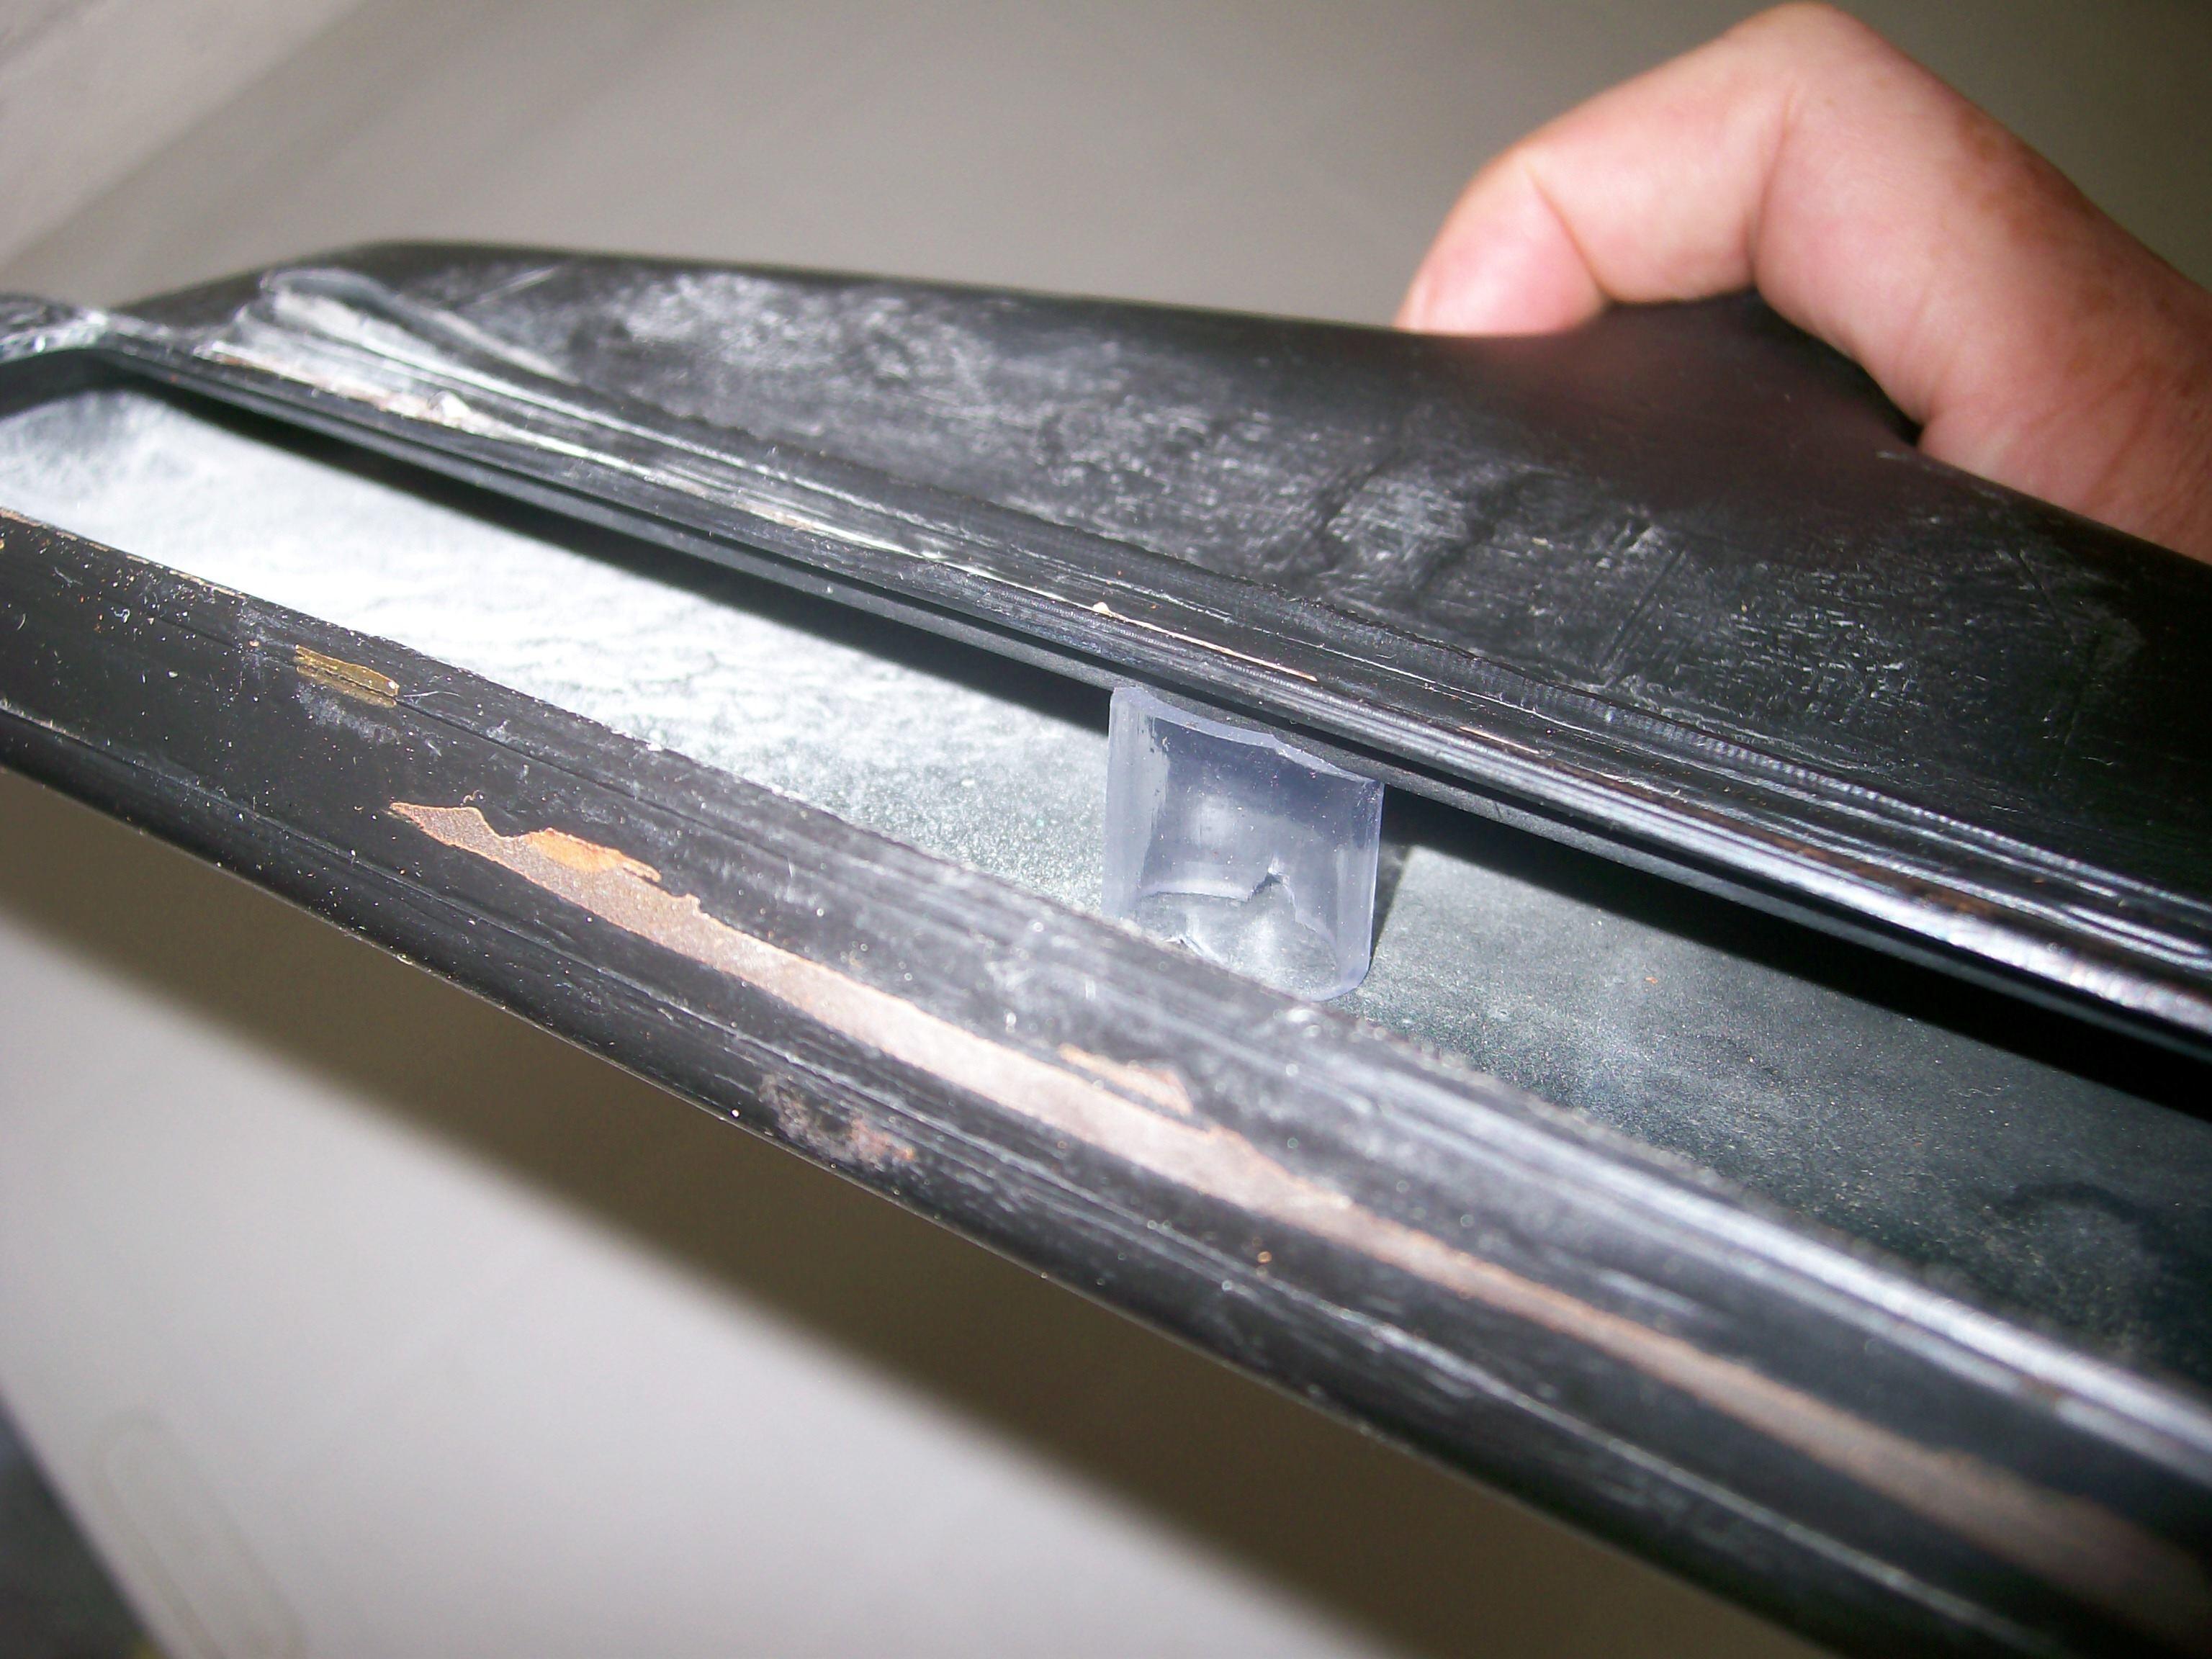
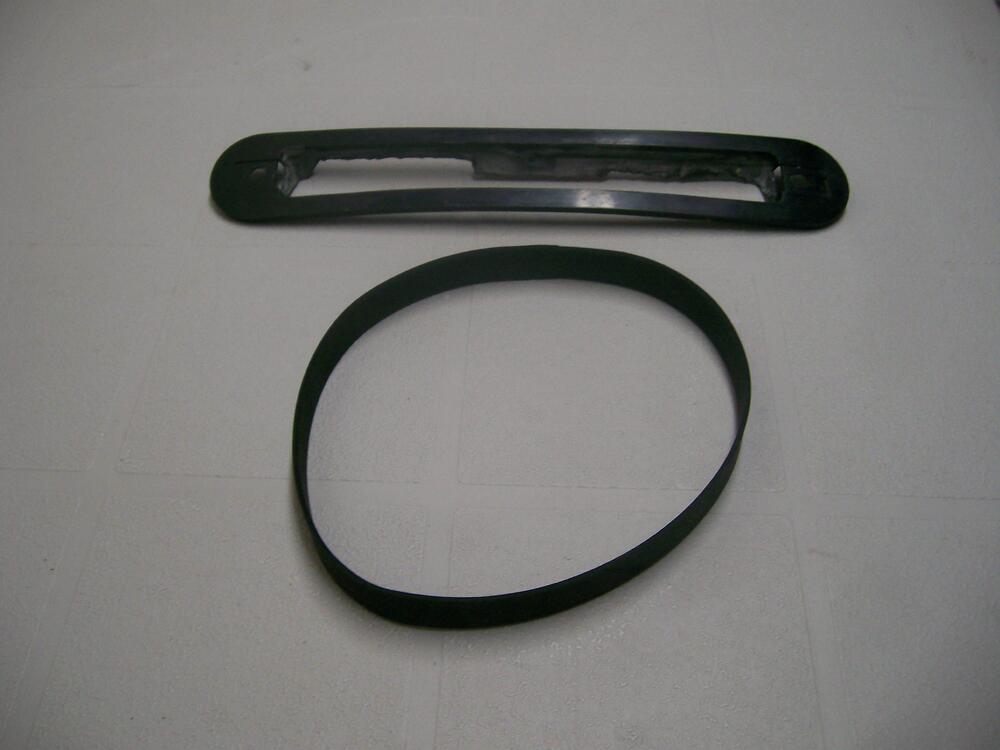
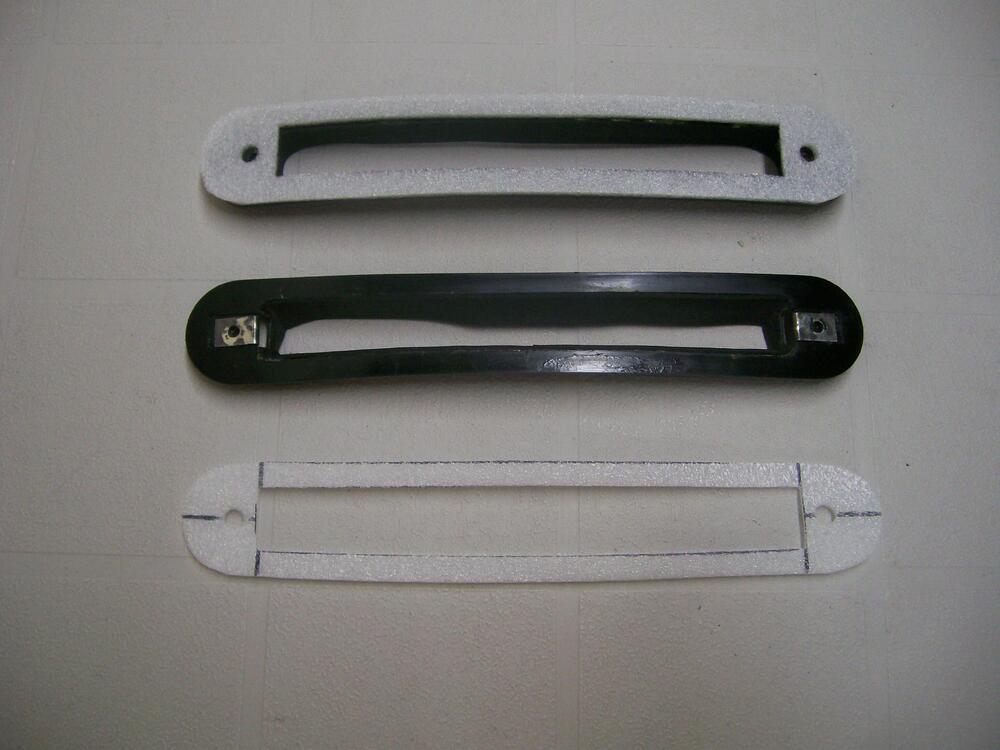
It looks to me like to aftermarket eBay pieces that you’ve bought have been incorrectly made. They appear to have been stamped out of some type of rubber or foam sheet material. That would make it easy to mistake them for gaskets. In fact, the real OE pieces (called ‘bumpers’) are molded from plastic. The plastic used has a bit of flexibility, but not much (probably made from PVC or Delrin, rather than from styrene). Each bumper's shapes consist of an internal lip and an external flange. The flange forms a shelf on which an actual gasket sits. That gasket can be cut from squishy, closed-cell foam tape. The purpose of the lip molded into the bumper is to make sure that all of the rain or wash water funnels down into the plenum chamber. Without the lip, some of the water could find its way into the hatch cavity as it drips down through the vent, leading to premature rusting around the periphery of the hatch and/or around the hatch window frame. The purpose of the gasket is to prevent rain/wash water from seeping into the seam between the top surface of the bumper flange and the unpainted underside of the outer hatch sheet metal. As for the retainer clips, I made mine from scratch (there were no replacement pieces available at the time). They may, then, look a bit different from the stainless clips that you bought. However, I sized the holes in them specifically to accept and grip on the plastic pins that are molded onto the bottom of the chromed-plastic vent trim pieces. There was/is no good way to use screws to hold the vent-gasket-bumper-plenum assembly together. Unfortunately, the pin-into-clip securement strategy means that it will probably prove impossible to remove the chrome vent trim piece after the fact without breaking off the pins. Here’s the correct assembly sequence: The plenum (#55) goes inside the hatch with the little accordion drains attached to the bottom of the hatch panel. Then the black plastic bumper piece sits on top of the plenum, with the lip pointed down into the plenum cavity. It looks like the factory used sealant in the join between the bumper flange and the plenum flange. Then the foam gasket (you’ll need to make this yourself) sits on the upper surface of the bumper’s flange, so that it will end up being sandwiched between the bumper and the underside of the hatch sheet metal. After all of the mounting holes are aligned, one of the stainless clips get snapped in place so that it sandwiches all four layers: hatch sheet metal, foam gasket, bumper flange, and plenum flange. Repeat at the other end of the vent cutout. The bent lower face of the clip fits inside the plenum. The flat upper face of the clip fits over the outside of the painted surface of the hatch. The compression of the spongey gasket provides some load within the layers, keeping things from rattling. The mounting pins molded into the back surface of decorative chrome-plastic vents are now pushed into place. No metal barrel clip is used. Instead, the edges of hole in the clip bite directly into the plastic pin. You may need to figure out a way to push on the internal tab of the clip so that it doesn't back away as the pin is pressed into place (i's been a while and I don't remember whether this was a problem or not). Note: I suppose that the lip around the inside of the bumper isn’t mandatory. However, I hope you can now see the logic in having it there. Making lips for your flat eBay bumpers won’t be too hard. You could even make them using an old inner tube (they don’t have to be stiff – they just need to form a funnel that's long enough to project into the top of the plenum). Once cut to shape, glue each lip into place and make sure the seam where the ends meet is positioned on the top (located at the front when the hatch is closed) of the opening, rather than the bottom. Note: I’m not sure how thick your eBay ‘bumpers’ are. If they’re too thick (relative to the OE plastic bumpers), you may not have enough room to fit a foam gasket. I suppose that you could use sealant, although assembly might get messy (and taking things apart at some later date would be a pain). Some 1/16”-thick closed-cell neoprene foam would probably work as a substitute (can be found a Michael’s craft centres). Not much give in compression. You may need to layer it to get the right thickness.
-
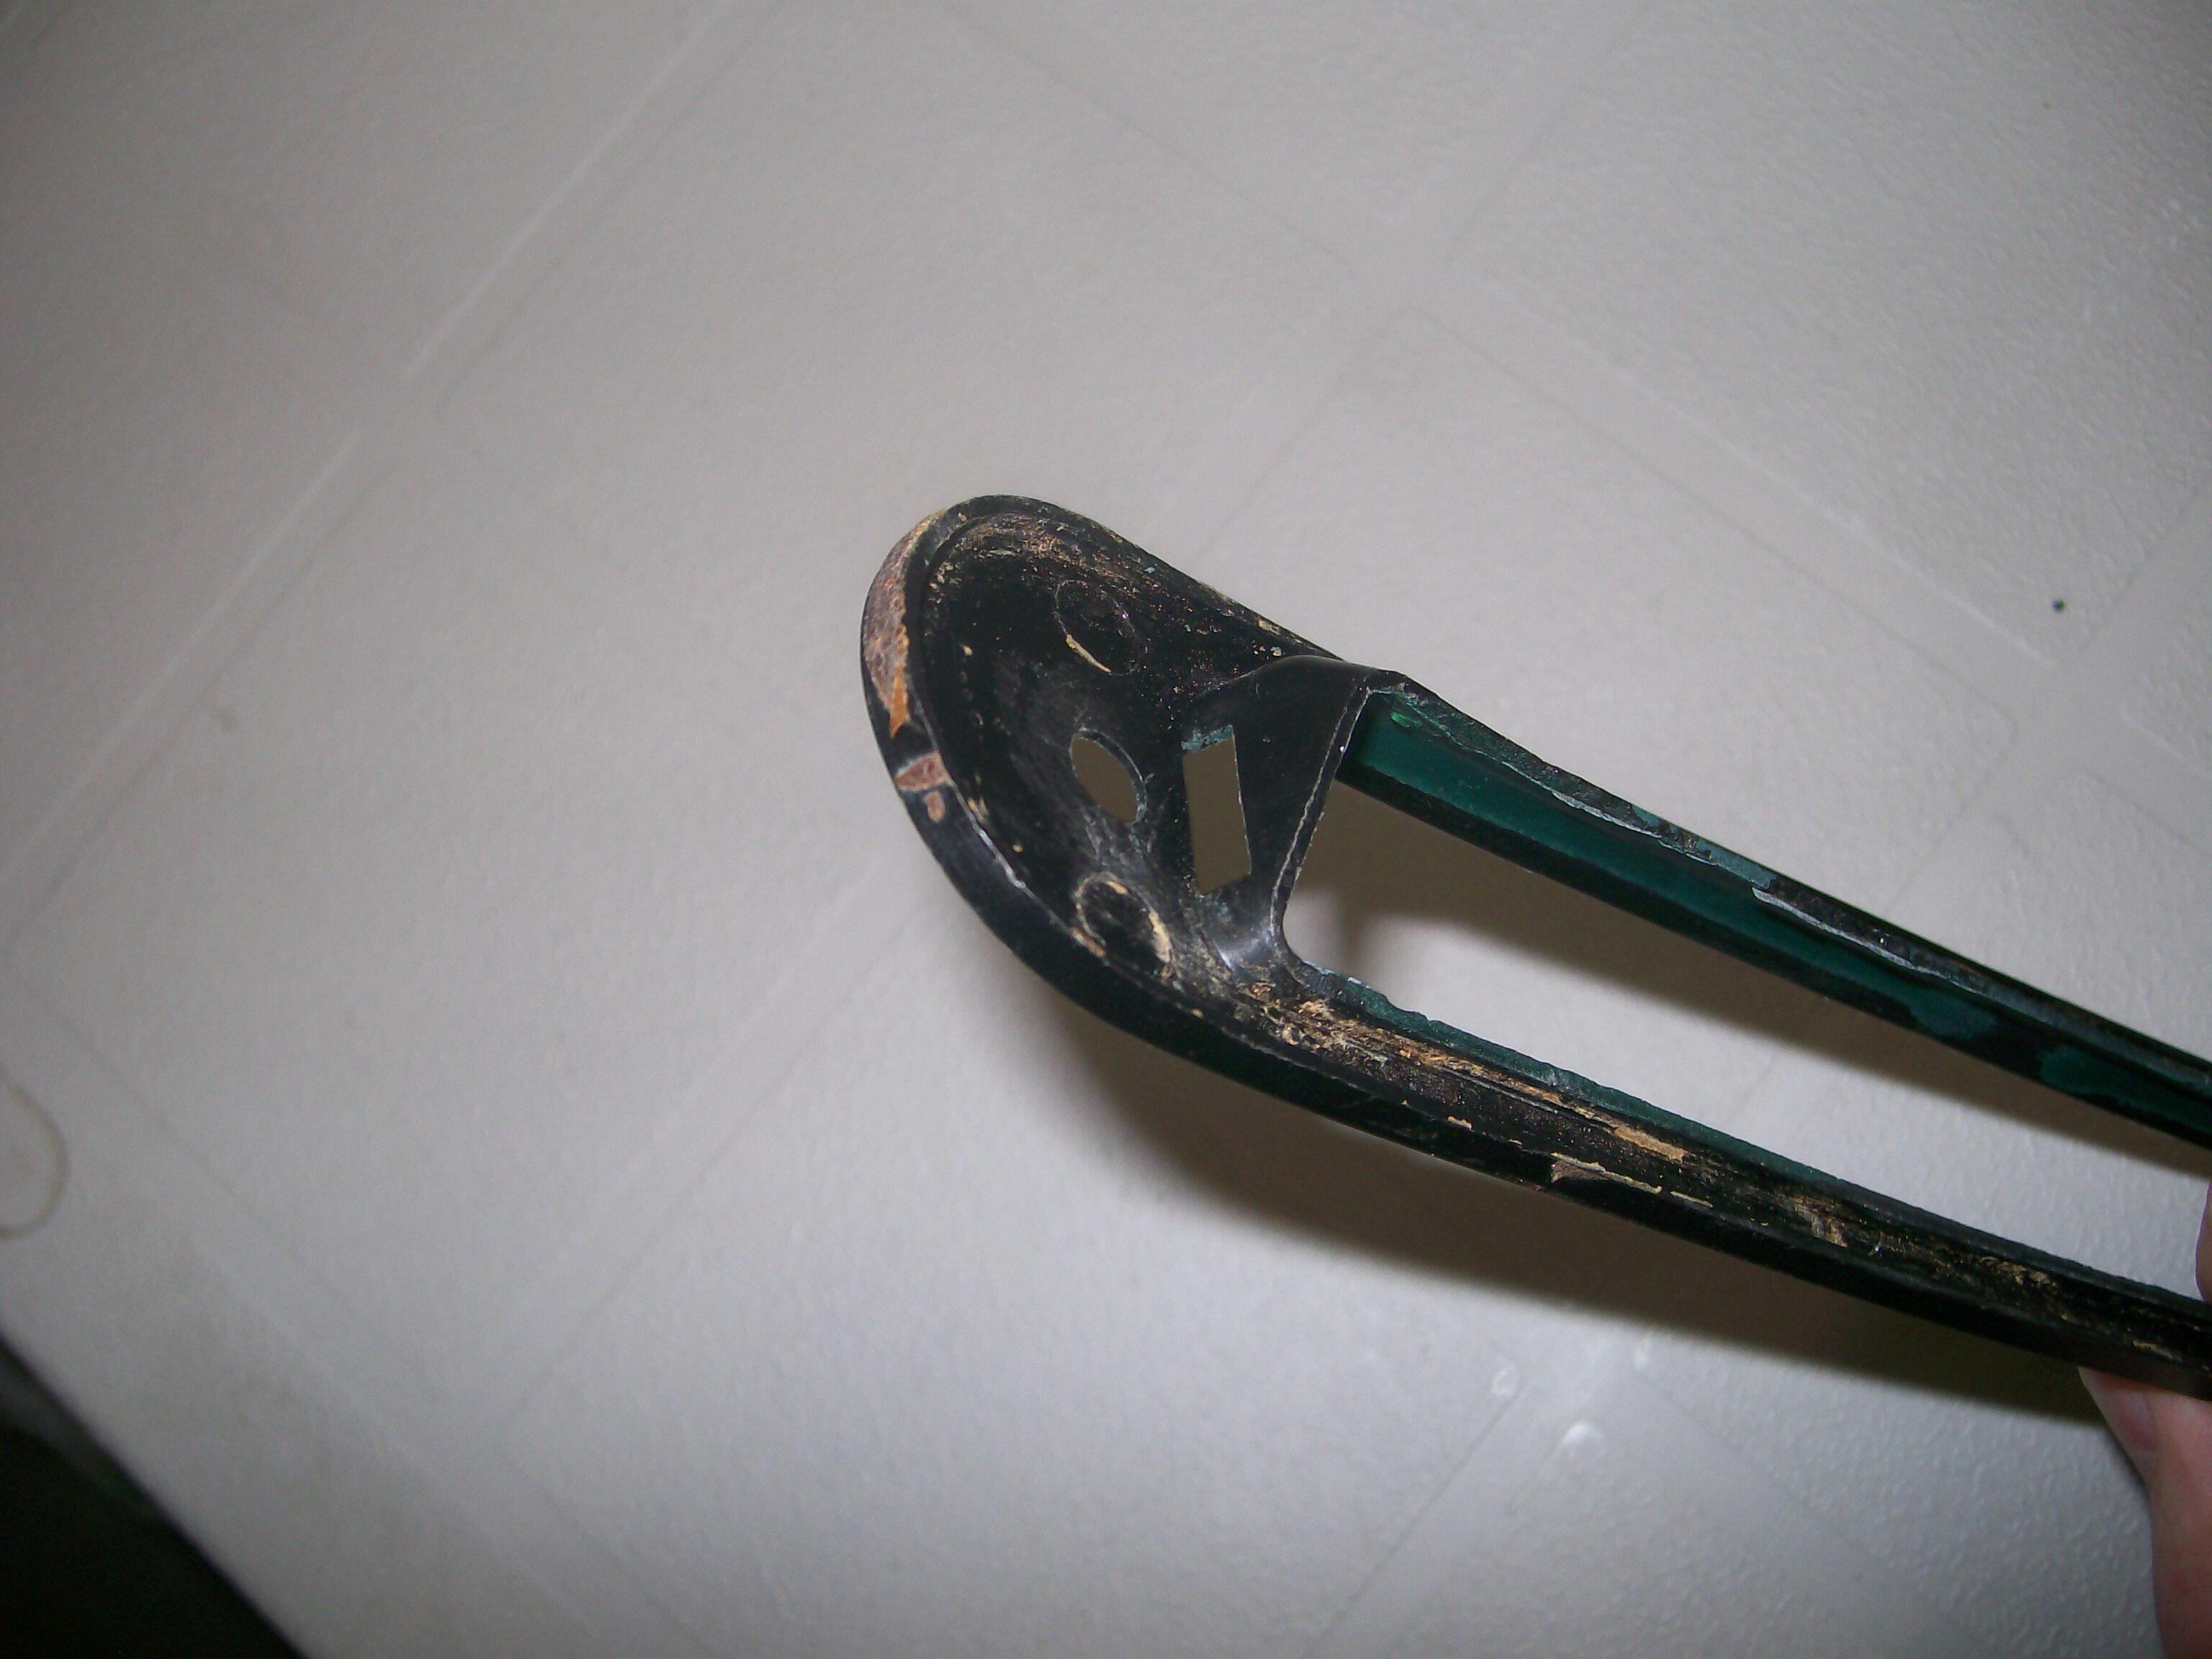
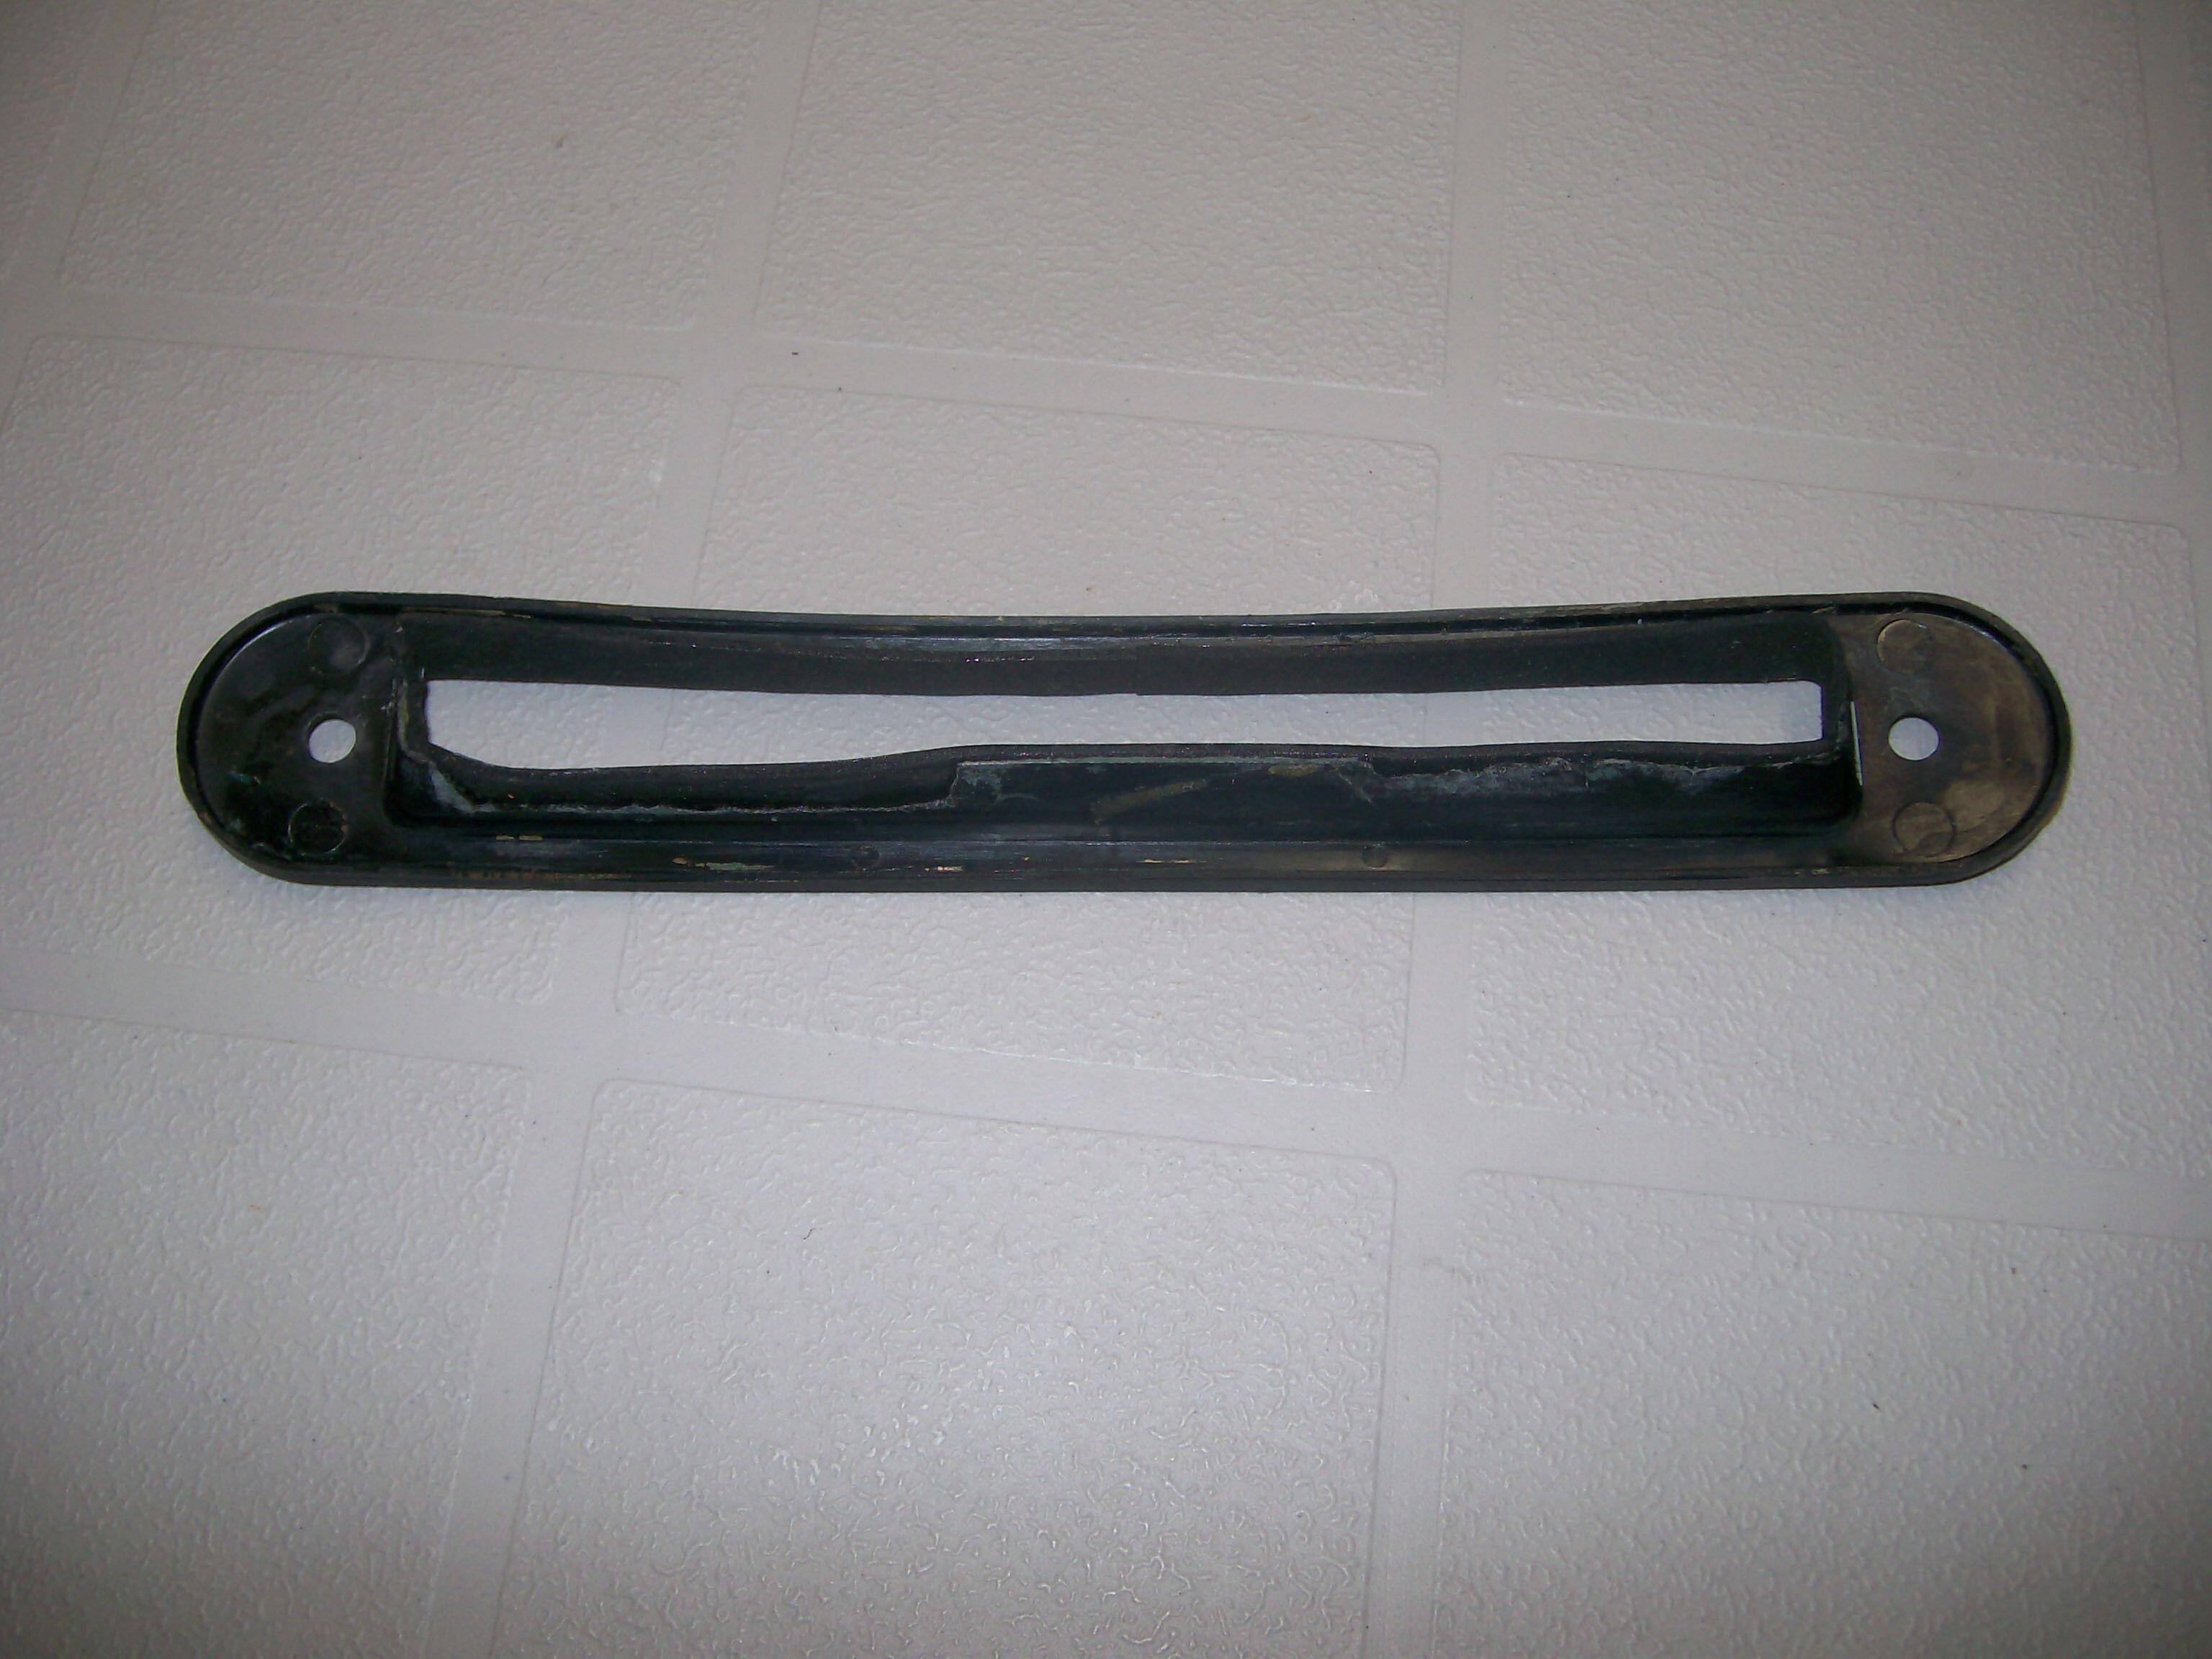
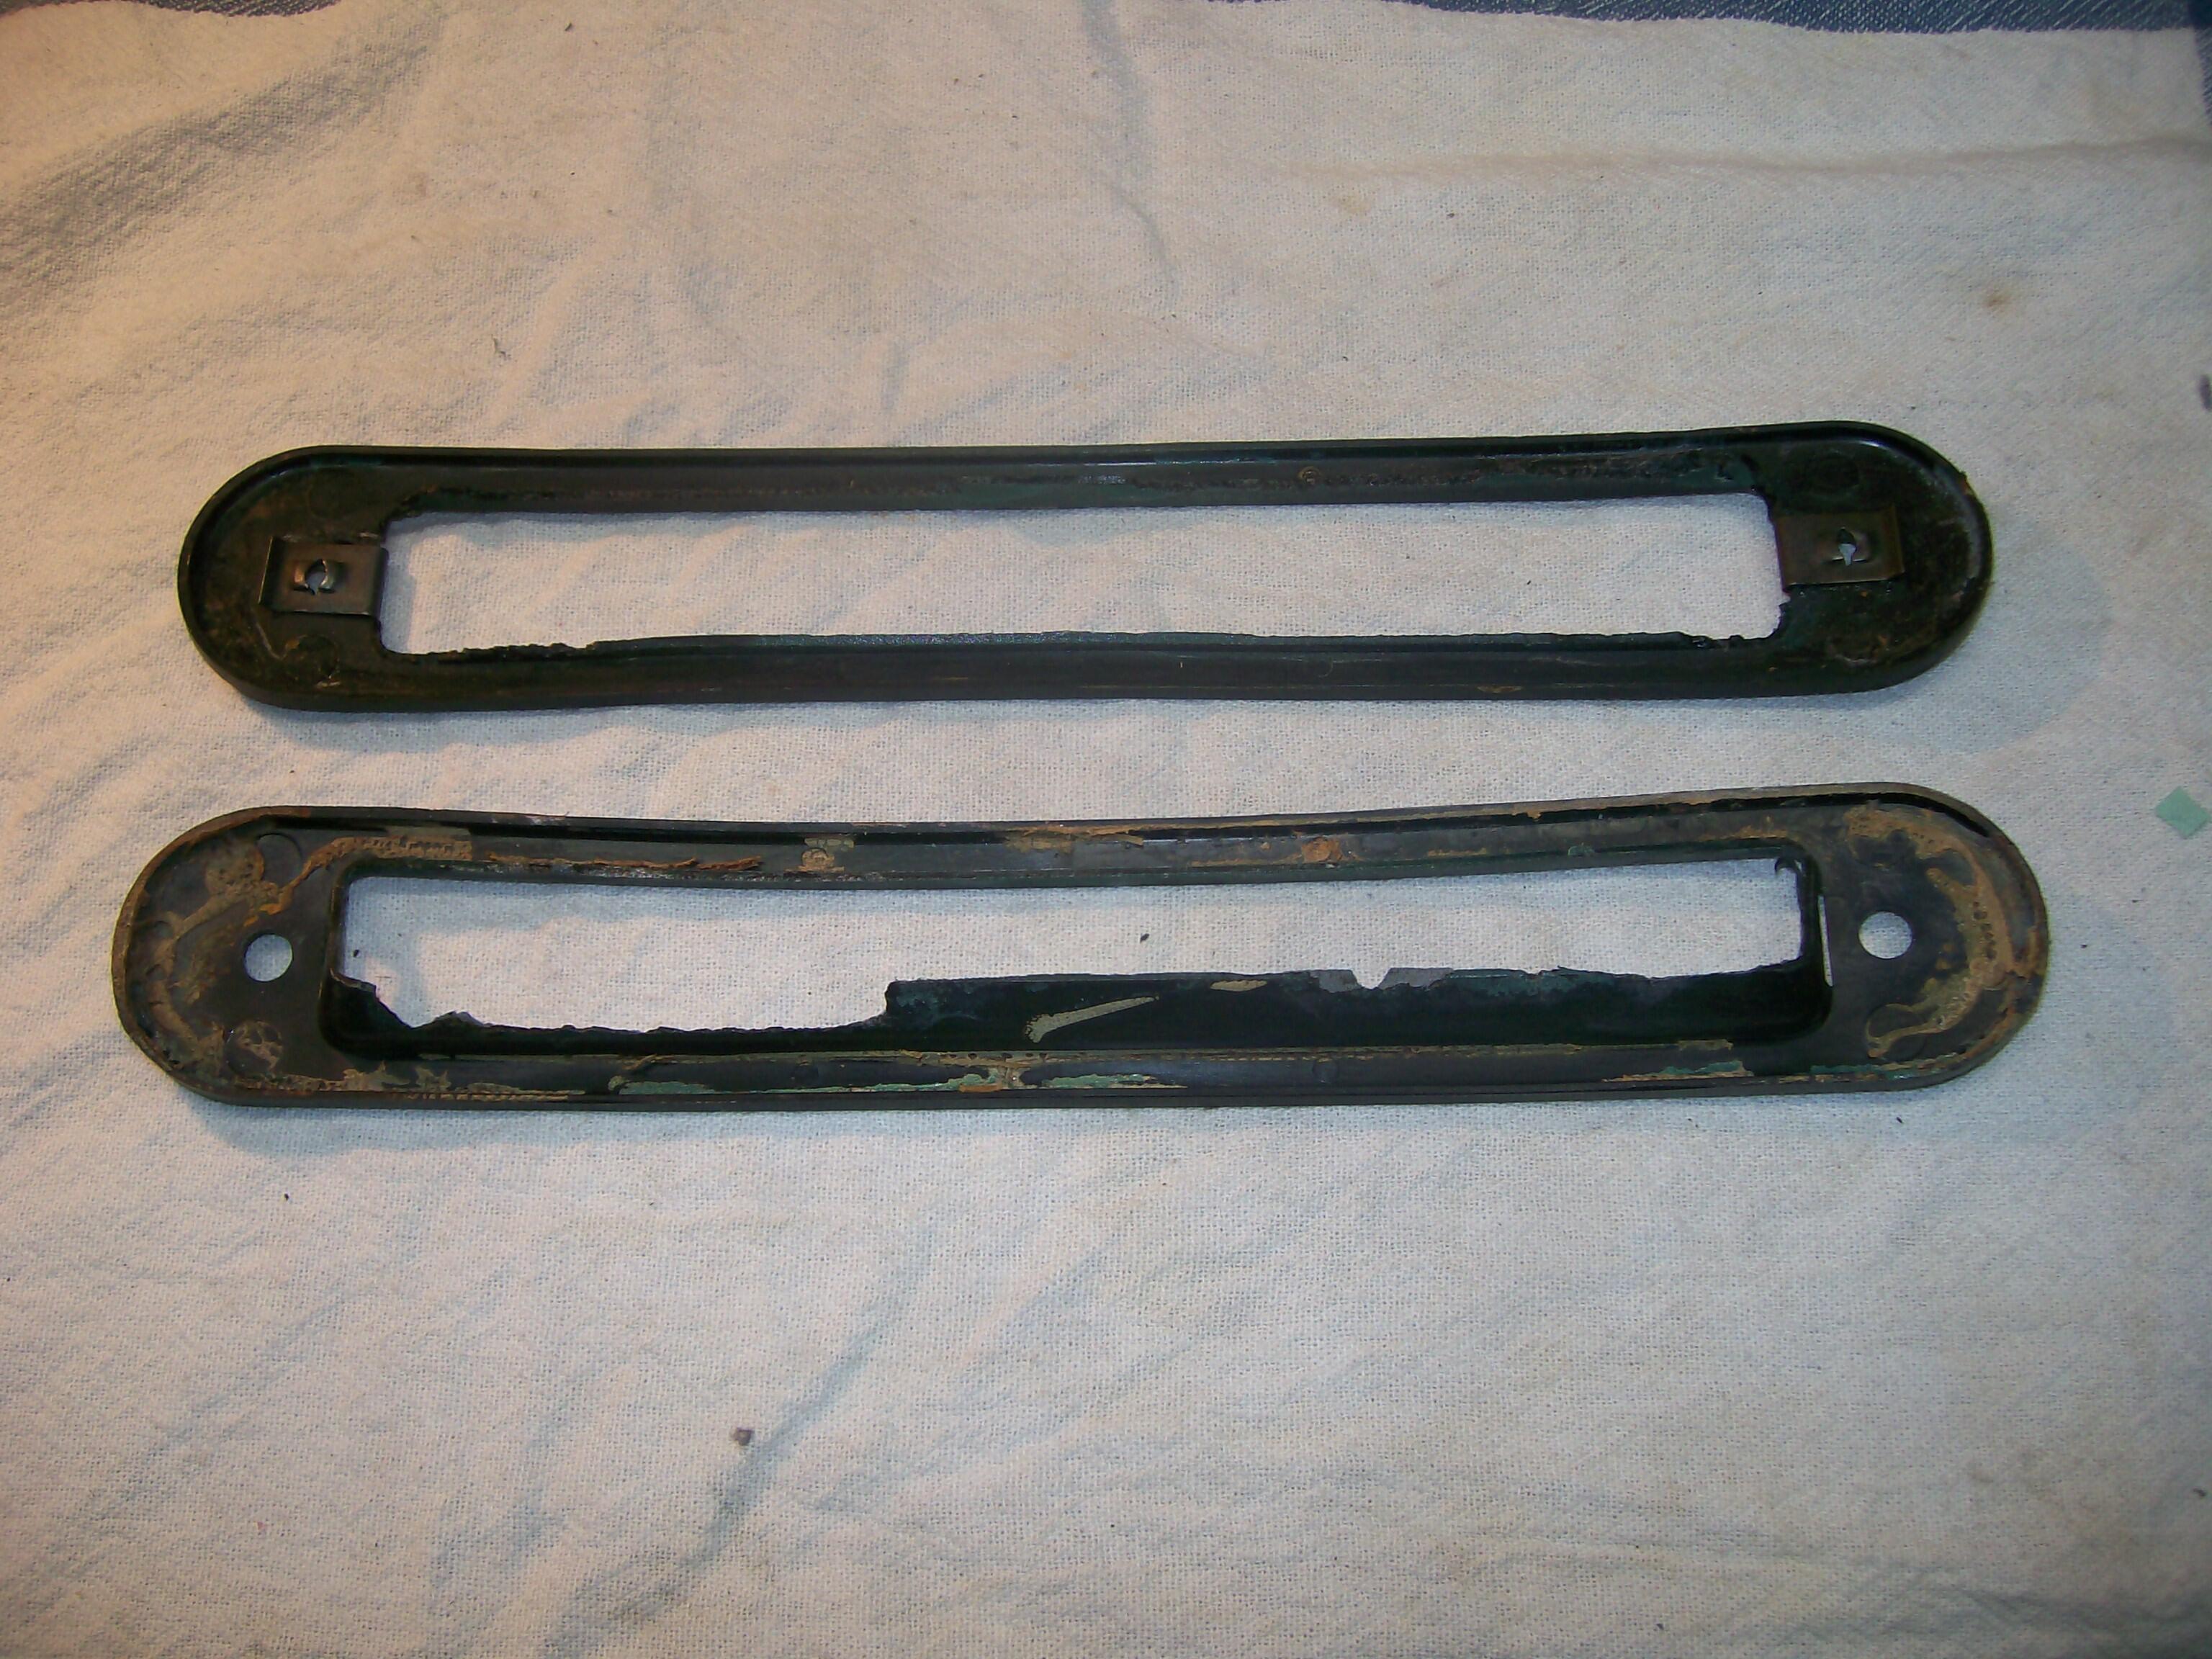
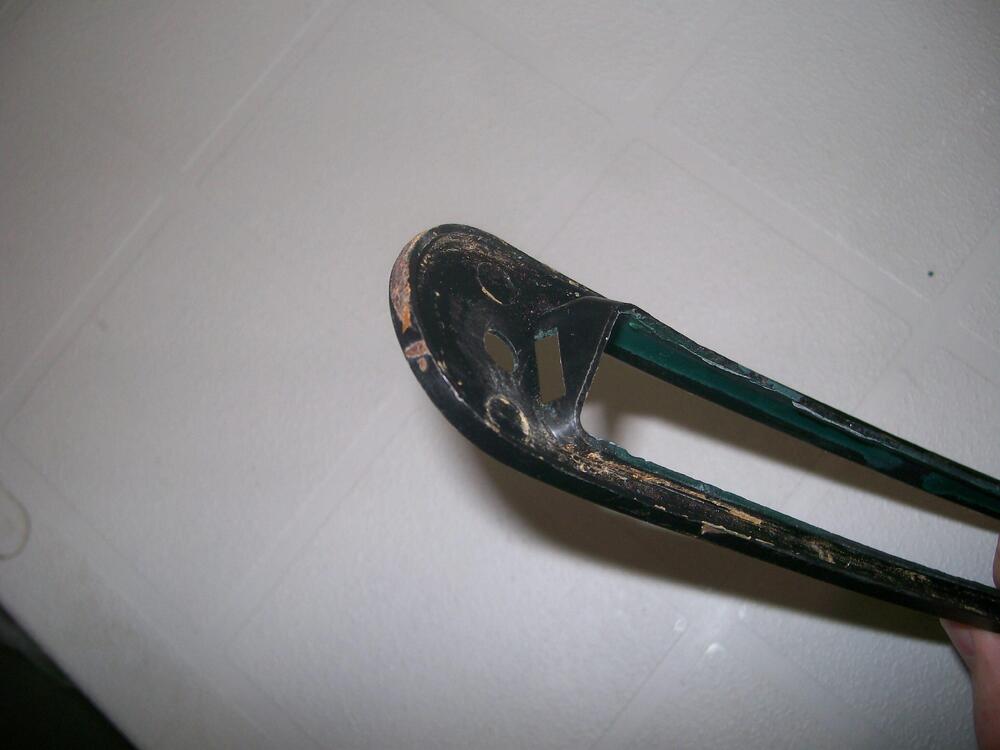
Yes. It's Part No. 64/65 in the online parts diagram, labeled as 'Rubber - Base Bumper'. It has a lip that fits into the top of what I call the plenum duct (Part 55 - 'Assy - Rear Duct Ventilator'). On both of my 'bumper' pieces, the lip had disintegrated with age. I had to fabricate a repair lip for each bumper, so they probably look a little 'non-stock'. You can just barely see the new lip in my #2 picture. Here's what they looked like before I made the repairs... Maybe these pieces were missing on your car?

-
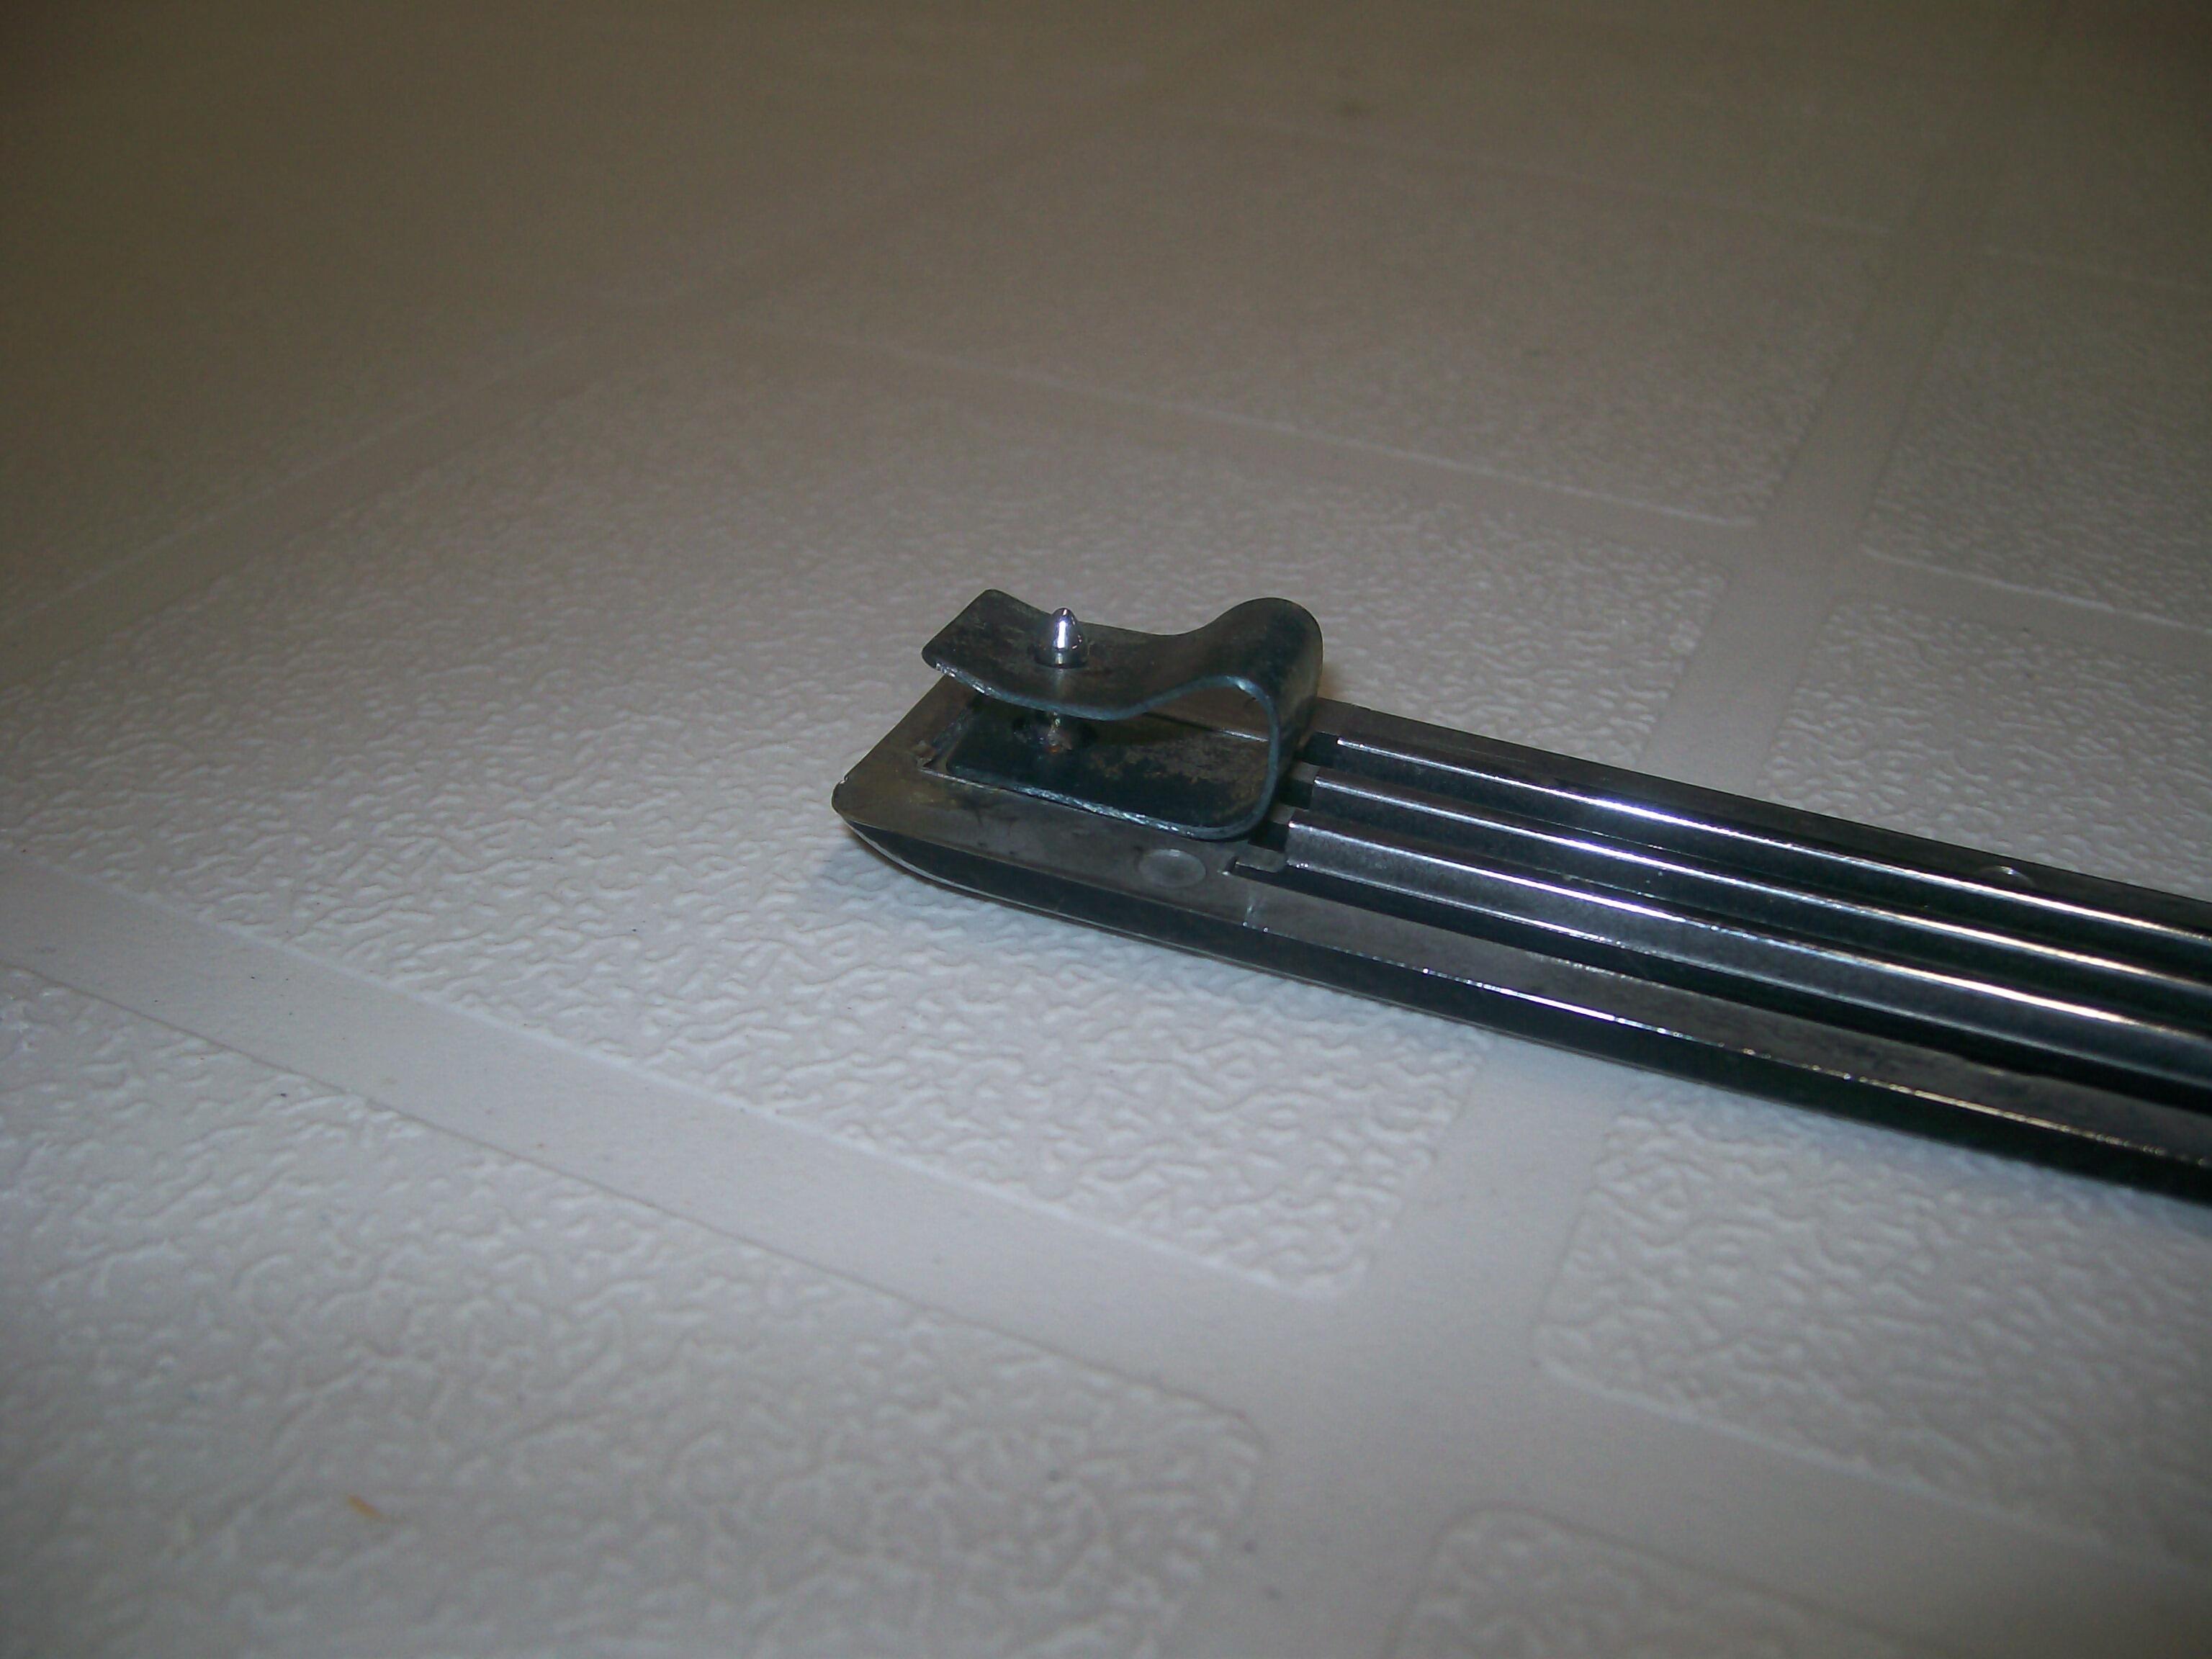
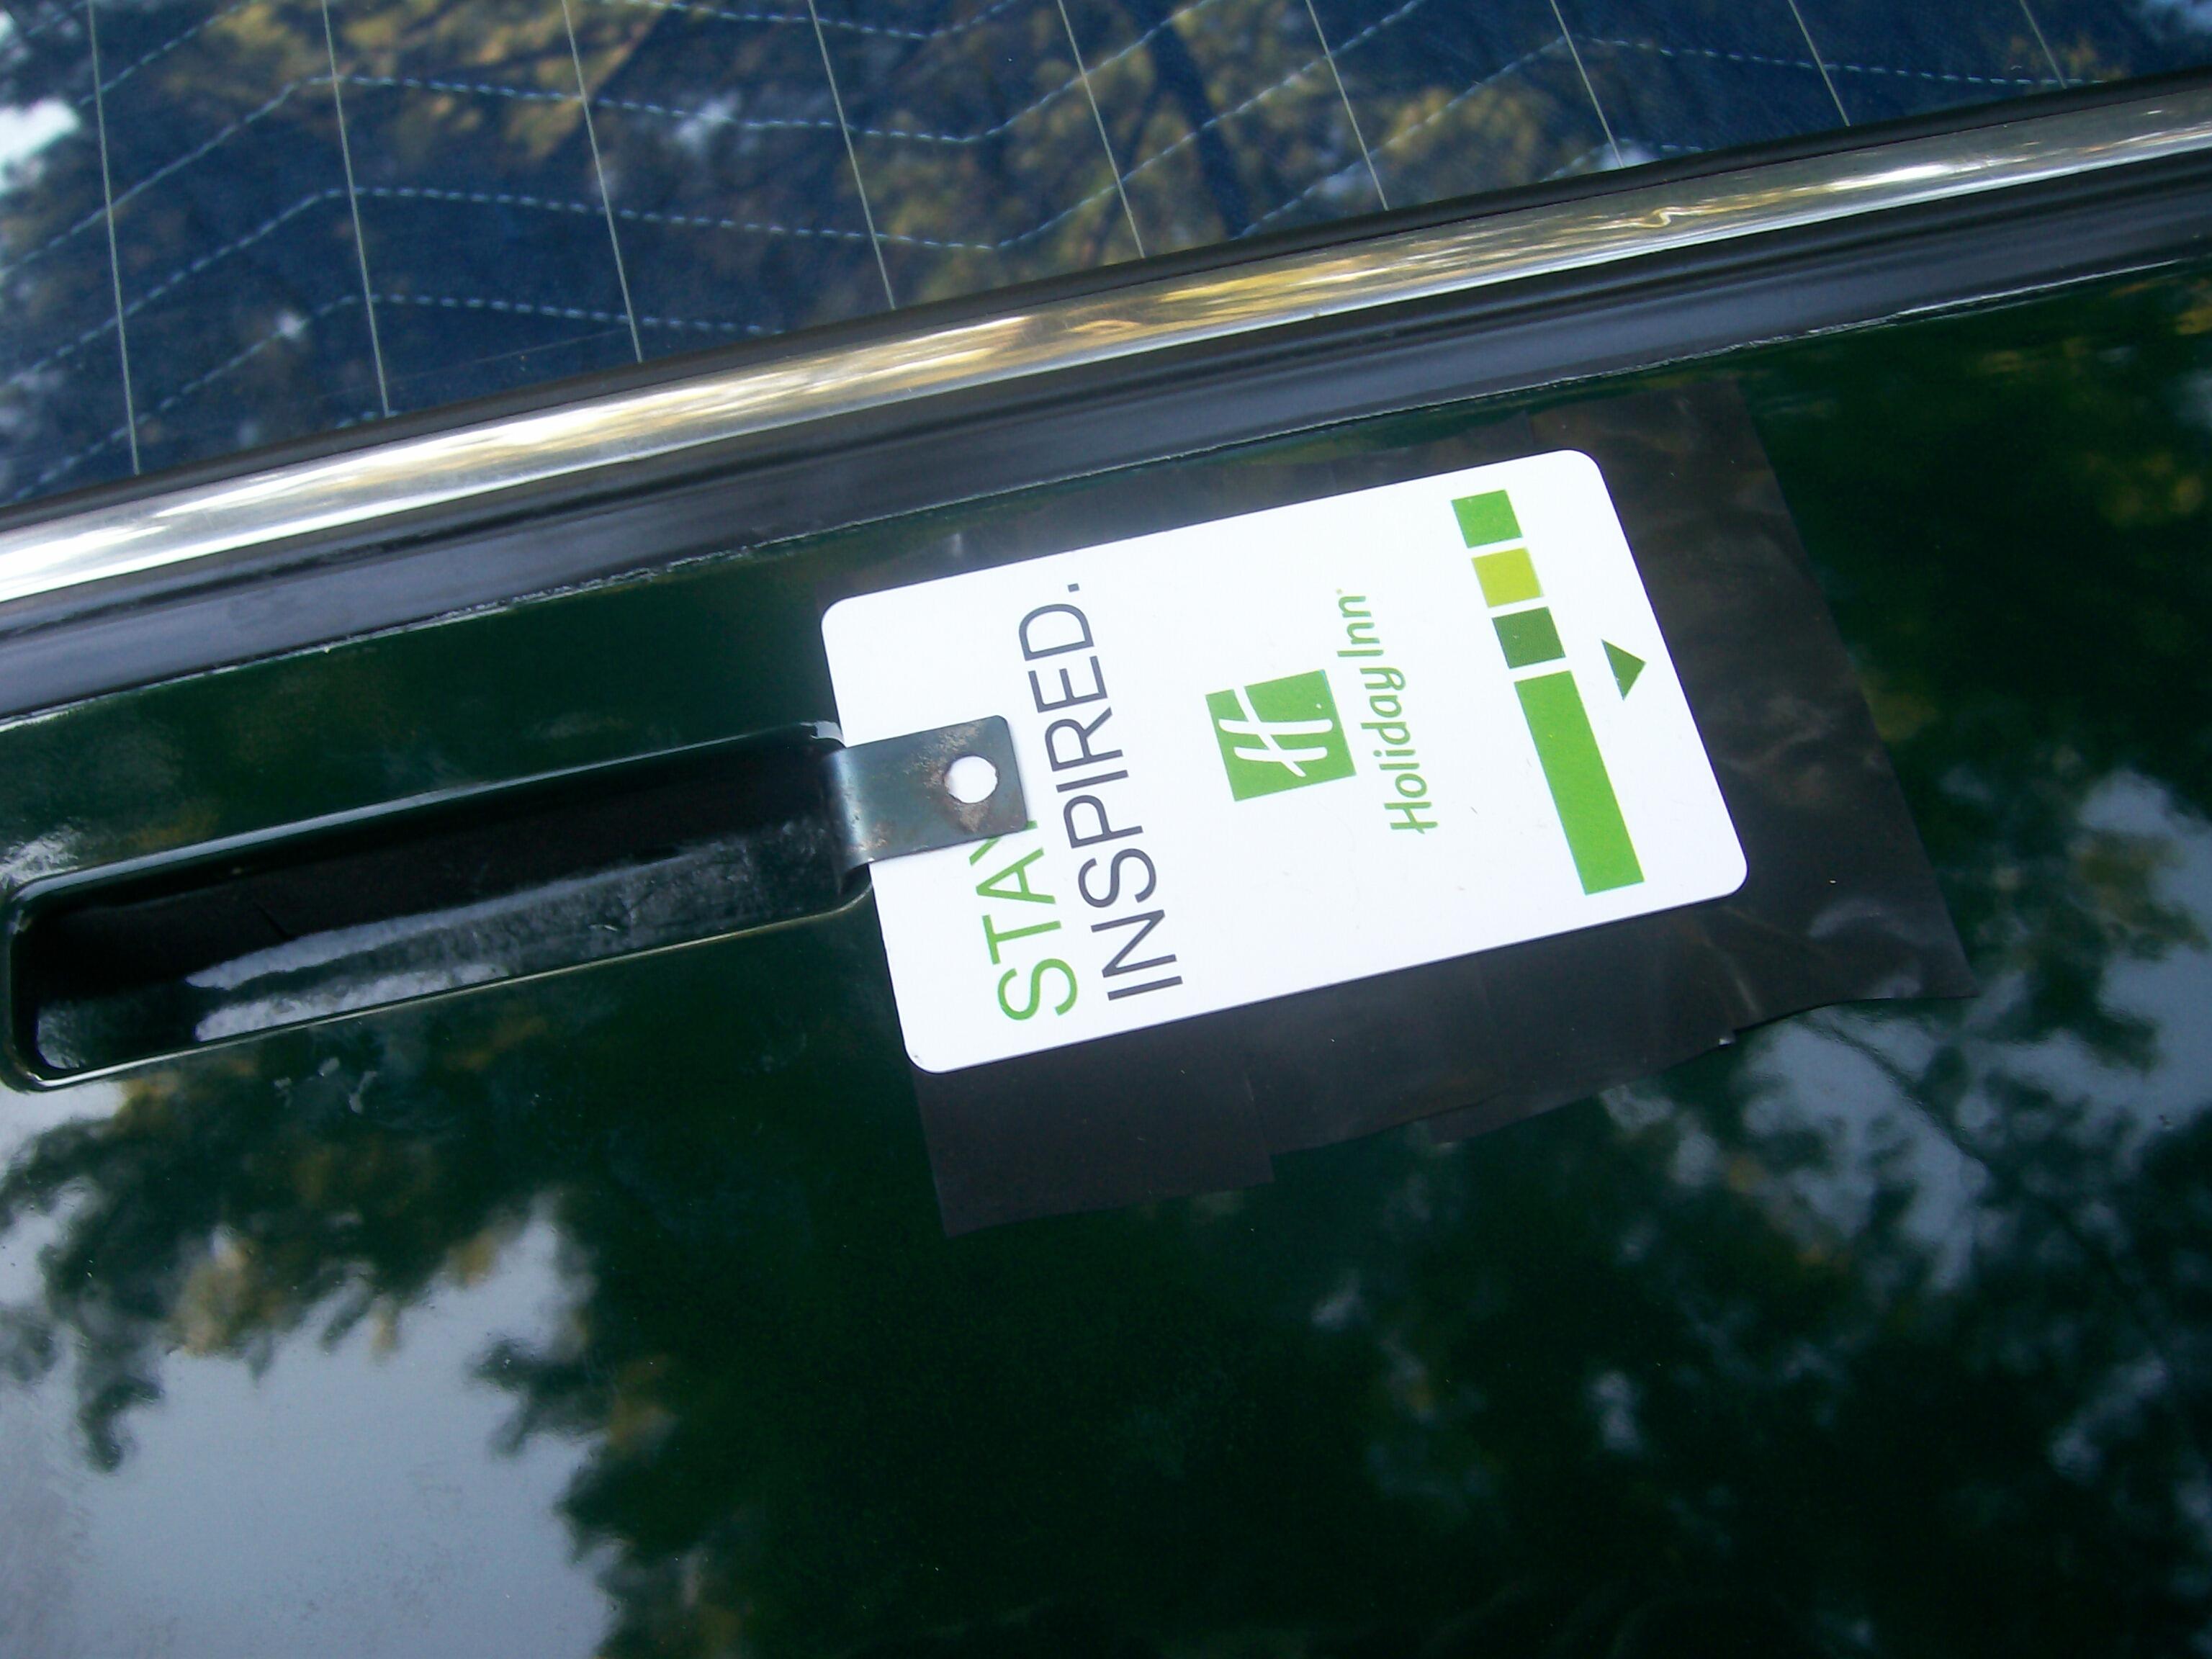
Here's a photo that I took when I was getting my hatch vents ready for installation. Self-explanatory, I hope... The factory gasketing for the plastic vent plenums was pooched, so I made replacements from soft, closed-cell foam (it's actually foam strip used for sill walls during building construction). You need to use something that's pretty compliant, because you'll need a lot of 'squishability' (technical term) to be able to push the clip into place... I used the same foam to create a new gasket for the interior trim panel... During final installation, I used strips of wiring loom tape (non-adhesive) overlaid by a hotel key card to protect the paint as I was sliding the clip into place. The key card is pulled free after the clip is in place. Then the tape is pulled away (the section of tape immediately under the clip can be left in place -- no one will see it and the plastic push-pin will penetrate easily when the chrome vent is pressed in place...


-
Nice set of photos, illustrating the logic of your metal-removal process. Too bad that one of the most complicated zones of the monocoque structure also happens to be the biggest rust pit.
-
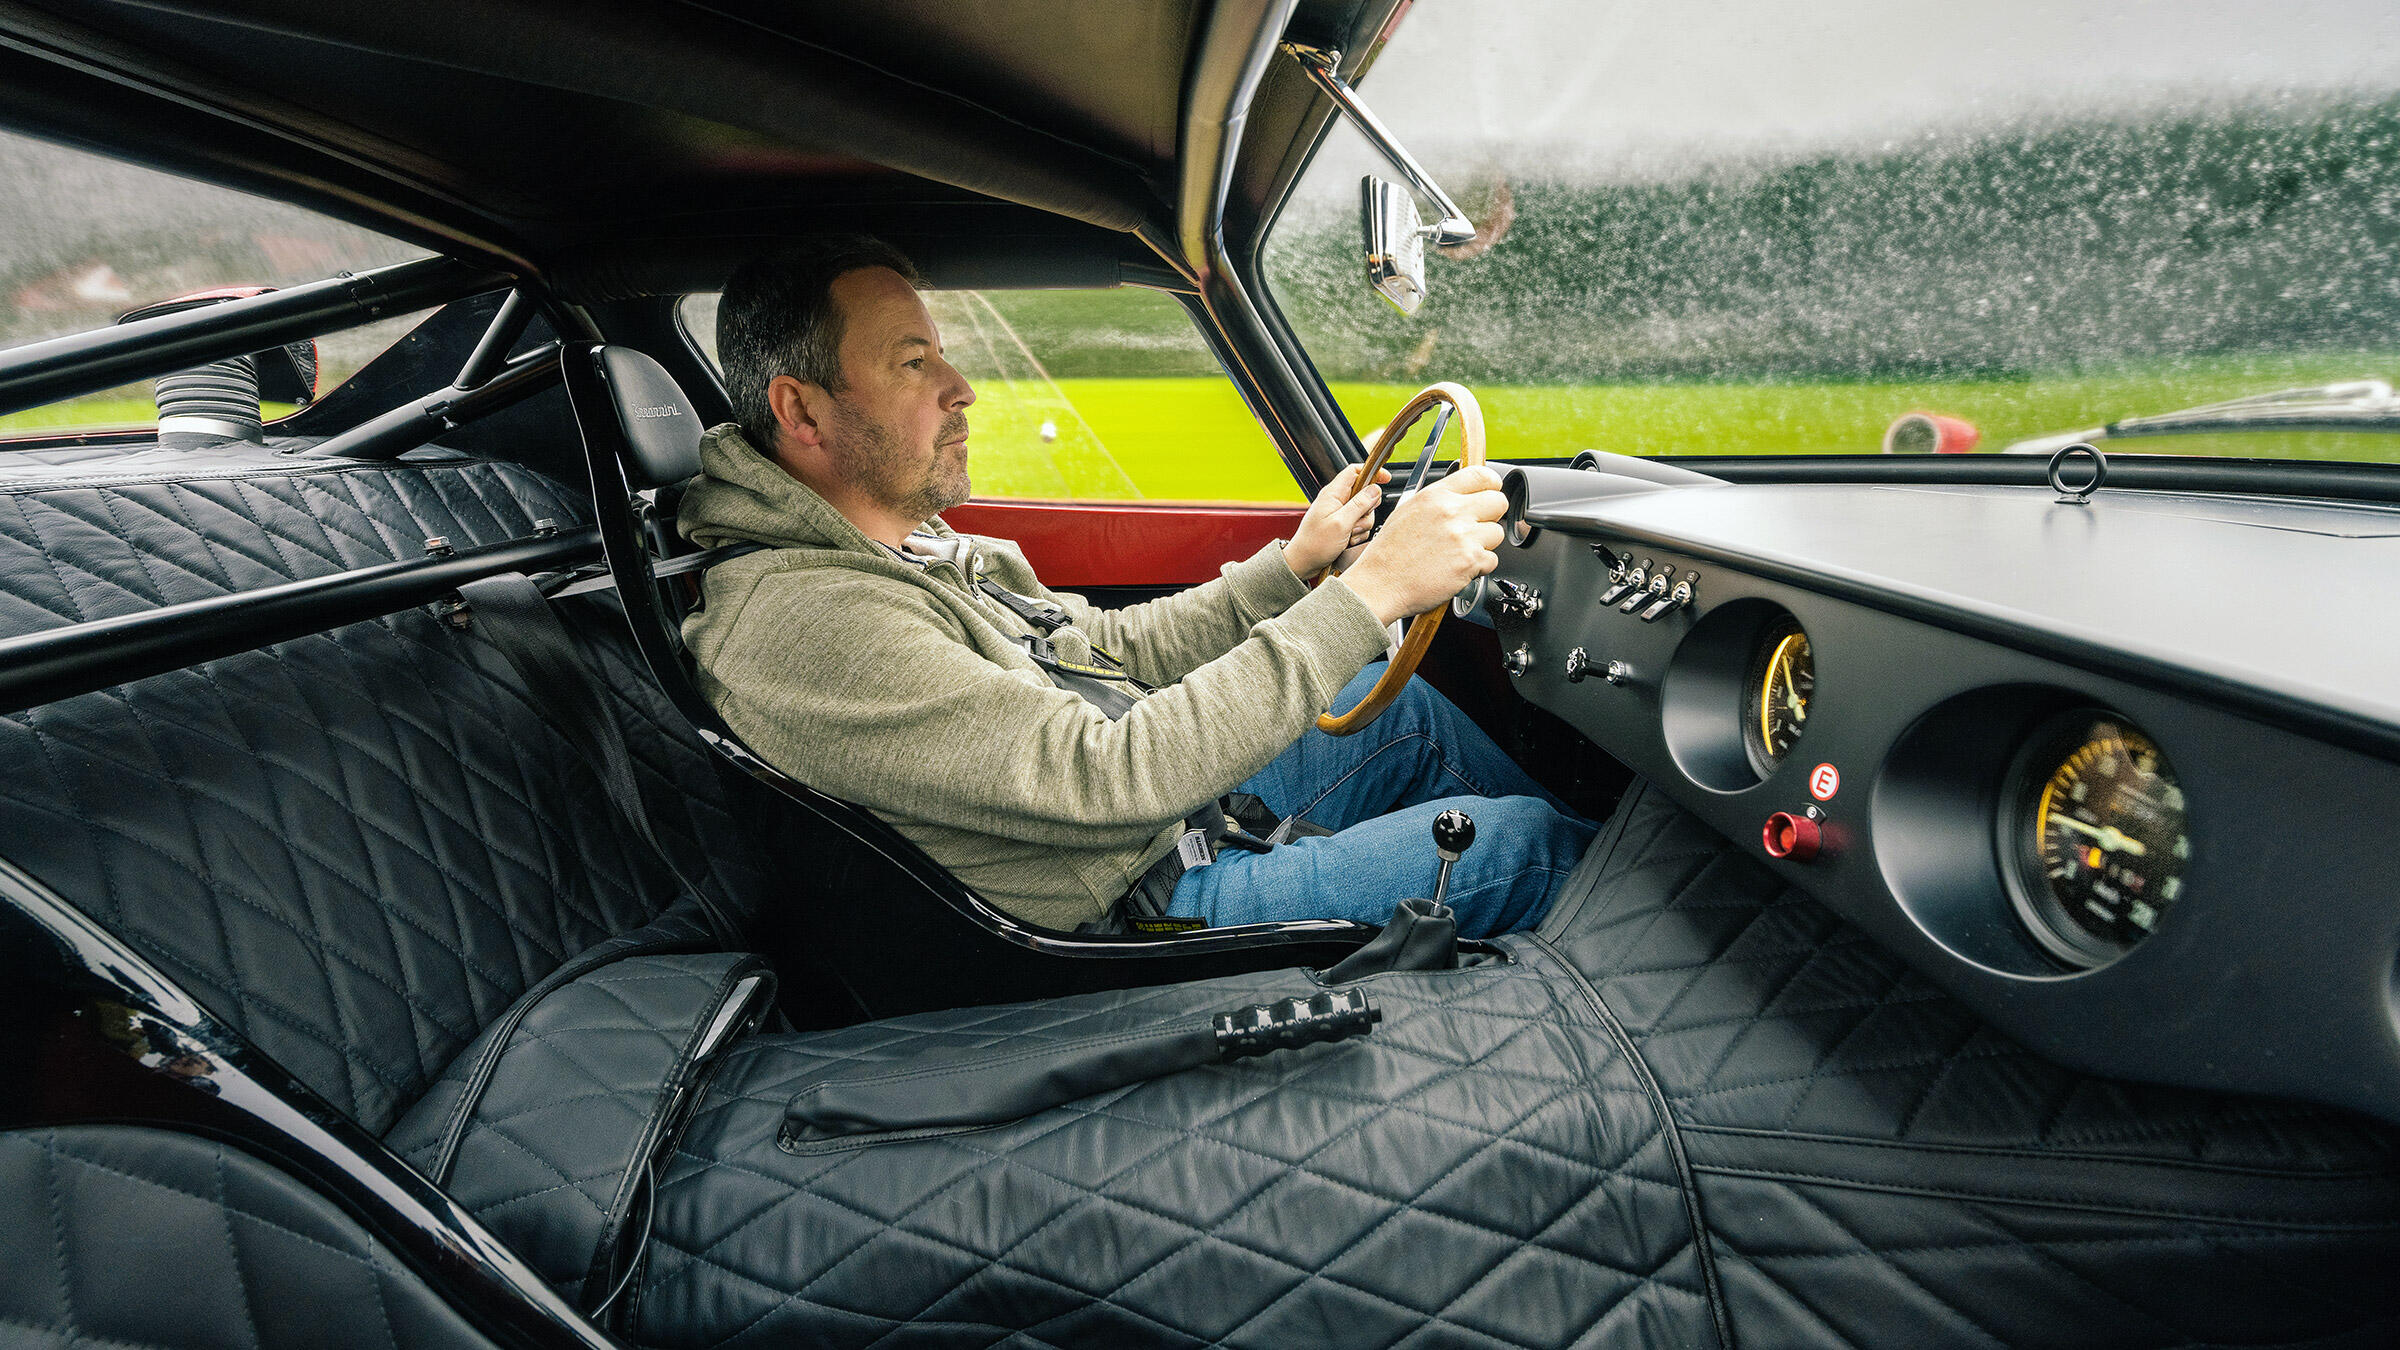
Nissan's interior design folks seem to have been inspired by the 1965 Bizzarrini's use of diamond-stitched leather when they chose the faux-stitched vinyl for the Z's interior, so I suppose this stitched-leather replacement is kind of poetic justice and the 'puffy' look is historically accurate...

-
Can you talk a bit a bout your 'chipping' technique. Did you use dry ice, for example? What's your approach for drilling out spot welds and peeling the layers part? Is that a corn cob that came out of the air vent?
-
I bought one of those 'legendary' Blaupunkt AM/FM cassette players for my Z back in the day ( ~ 1980). It was a top-end unit costing $$$ (c/o Kromer Radio in downtown Toronto). It worked like a champ for about 1 year (just out of warranty, of course), at which time a small, unreplaceable plastic drive gear split at the root of one of the teeth, leaving the tape drive useless. I was not amused.
-
To prevent those cracks from growing (esp. after the dash begins to see solar loads and high cabin temperatures during the summer), you might consider drilling a hole (at least 1/8" dia) at the peak of each crack. Not sure how the owner would feel about the aesthetics, though.
-
Wesco Performance sells seat belt extensions... www.wescoperformance.com Better yet, get them to supply full replacements for your OE belts. If you need extra length, they can probably work with you on that. FWIW, your 50-year-old OE belts will probably be worthless at collision speeds beyond 20 mph. The problem lies with edge fraying and material degradation (sunlight, sir pollution).