jfa.series1
 Subscriber
-
Joined
-
Last visited
Everything posted by jfa.series1
-
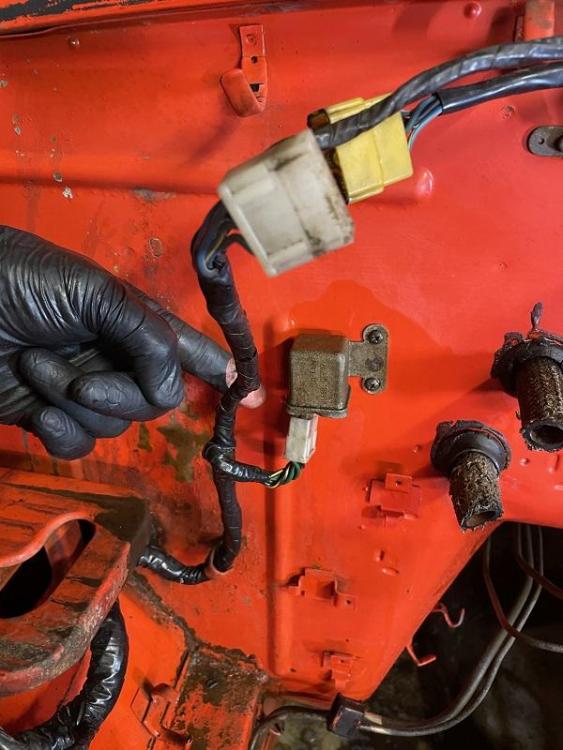
 The owner will be away from the car for a week but did have a closeup pic of the relay. I can get 25230-89918 and R3-11 visible #'s. I noted there are two black/yellow and two green wires visible. Beginning to look like the diagram in @SteveJ post #7.
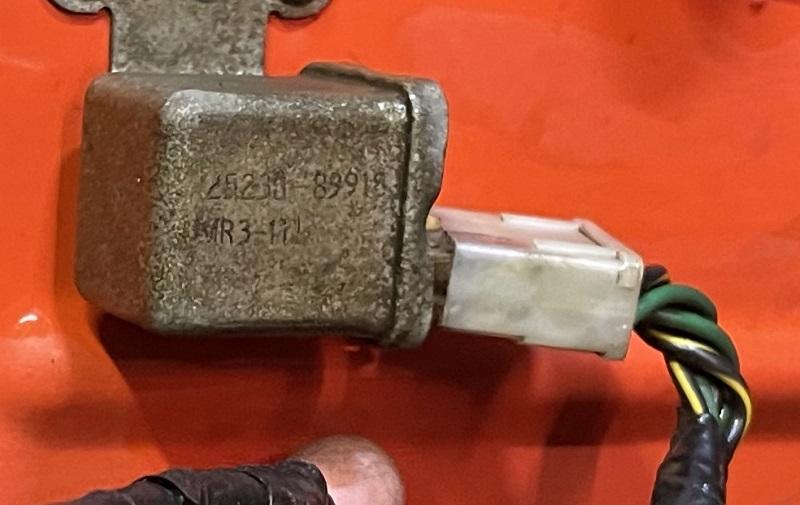
-
Thanks guys. A request for more details has been sent to the owner. Jim
-
Asking for a friend. The car is a '72 with automatic transmission. :Looking for an i.d. on the relay on the firewall. Thanks.
-
Great looking car! As to the brightness on the sidemarkers, yes they seem to be a bit bright but as always - your car, your choices. Dave's sidemarkers kit is not relays and will not affect the brightness. It merely adds the front markers to the turn signal circuit. I have it and consider it to be safety feature.
-
To clarify a bit, all of this trim is stainless steel - not chromed steel. The same goes for the drip rails. The only tool you should need for the windshield and hatch trim is a hard nylon tool for auto trim, usually found at most auto supply stores. The rubber seal has a shallow U-shaped channel for the trim. Place one edge of a trim piece into the channel and under the lip. Use the nylon tool to raise the opposite lip and allow the trim to fit into place. Run the tool along the length of trim and lip to complete the install. Be careful in handling the trim as it can easily bend. Don't force anything.
-
+1 on DOT 3 for the brakes and clutch.
-
View Advert 240Z/260Z Strut Tower Caps #2 Set #2 has visible wear marks – dings and light scratches. No cracks or cuts, the plastic is nice and flexible. These are good daily driver quality pieces. $30/set of two includes standard domestic shipping. Payment via PayPal, PM if interested. Thanks. Advertiser jfa.series1 Date 11/08/2020 Price $30.00 Category Parts for Sale
-
View Advert 240Z/260Z Strut Tower Caps #1 Set #1 has visible wear marks – dings and light scratches. No cracks or cuts, the plastic is nice and flexible. These are good daily driver quality pieces. $30/set of two includes standard domestic shipping. Payment via PayPal, PM if interested. Thanks. Advertiser jfa.series1 Date 11/08/2020 Price $30.00 Category Parts for Sale
-
Spray it with PB Blaster or similar, whack away!
-
It slides out.
-
Just force them out with a large screwdriver. Its an intentional snug fit.
-
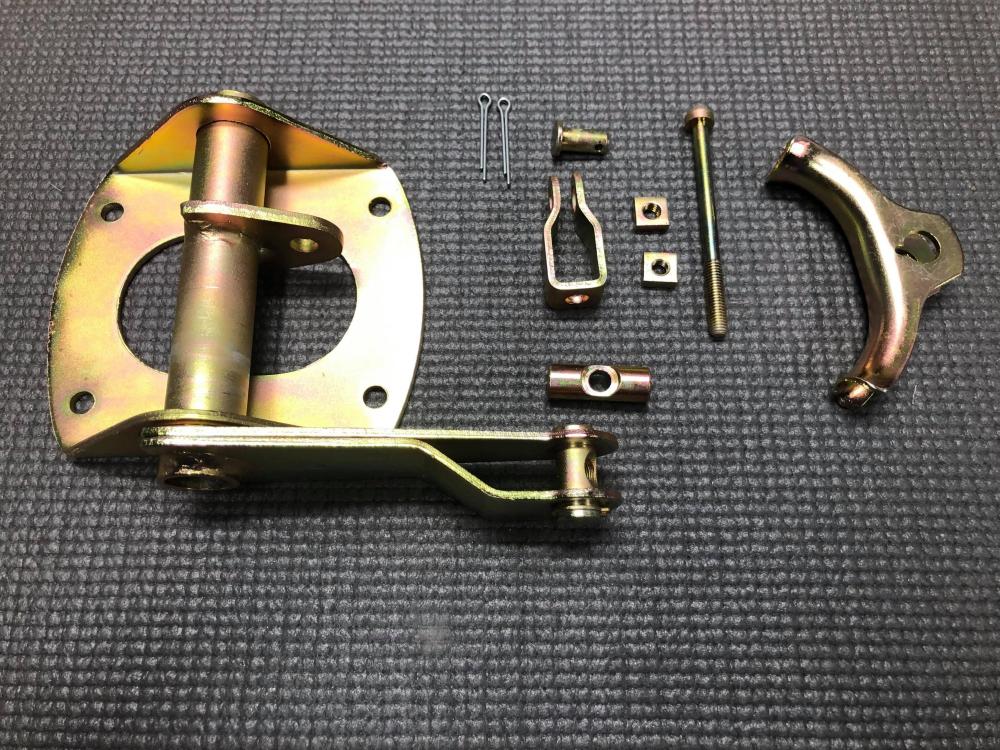
Oops, nix the cotter key answer. The pin is secured in place by the adjustment screw, it has a square nut on each side of the mounting bracket at the handle. Loosen the rear nut and unscrew the adjustment screw.

-
The "U"-shaped bracket is secured by a pin with cotter key if I recall correctly. You have to remove the pin to get the bracket to drop.
-
View Advert 240Z/260Z Strut Tower Caps Set #3 has very slight visible wear marks – tiny dings and faint scratches. No cracks or cuts, the plastic is nice and flexible. These might possibly earn a point off at ZCON, will easily pass muster at local shows. One mounting foot is broken but the piece still installs snugly. $35/set of two includes standard domestic shipping. Payment via PayPal, PM if interested. Thanks. Advertiser jfa.series1 Date 11/06/2020 Price $35.00 Category Parts for Sale
-
View Advert 240Z Horn Pad Excellent condition. No scratches, cuts, or abrasions. The circle and lettering on the badge have been refreshed with a chrome pen. The backside plastic ring has some cracks that the previous owner tried to repair with epoxy. I’ve cleaned up the ineffectual repairs and installed a wire collar to correct the fit. The pad now fits securely on my car. $100 includes standard domestic shipping, international shipping available at actual cost. Payment via PayPal, PM if interested. Thanks. Advertiser jfa.series1 Date 11/06/2020 Price $100.00 Category Parts for Sale
-
No matter how attractive the product, it it doesn't fit well and fully complement the car you'll always see the problem and have regrets. Better to get something that works well with the platform that you can always admire. You probably knew the answer to your question even as you posted.
-
There's no left or right to these brackets. I suggest you leave them a bit loose on the body during the install and make the final tighten after you have the bumper correctly positioned.
-
Oops, never mind.
-
So... now Trump is saying the doctors are profiteering with Covid-19 diagnosis, and Jr. is saying the docs are morons and the death count is nothing. I can't even begin to imagine the death count if it weren't for the medical professionals who are exhausting themselves and even dying for our care. But... at the current rates of increase in infections and hospitalizations we may soon come to understand the true impact on our medical professionals as they are potentially overwhelmed and unable to save lives. 😢
-
The carpet section and jute pad (if still there) should easily be removable from under the seat. Since you have the front nuts installed, rake the seat back forward and then slide the seat fully forward. That should get you enough room to install the rear nuts. Yeah, its snug but doable. I've had seats out and back in any number of time, never had to remove the seat back.
-
Just stop the testing and this all goes away!

-
There should be a long curved sheet metal piece that is vinyl covered to cover the inner rocker. It attaches with some small sheet metal screws. The piece has a smaller curved section on the top that secures the door weatherstrip along the pinch weld.
-
That's the drain for the aftermarket A/C, note how the floorboard metal is pushed out crudely. The cowl drain is hidden behind the fender just forward of the door hinges, is a large tube.
-
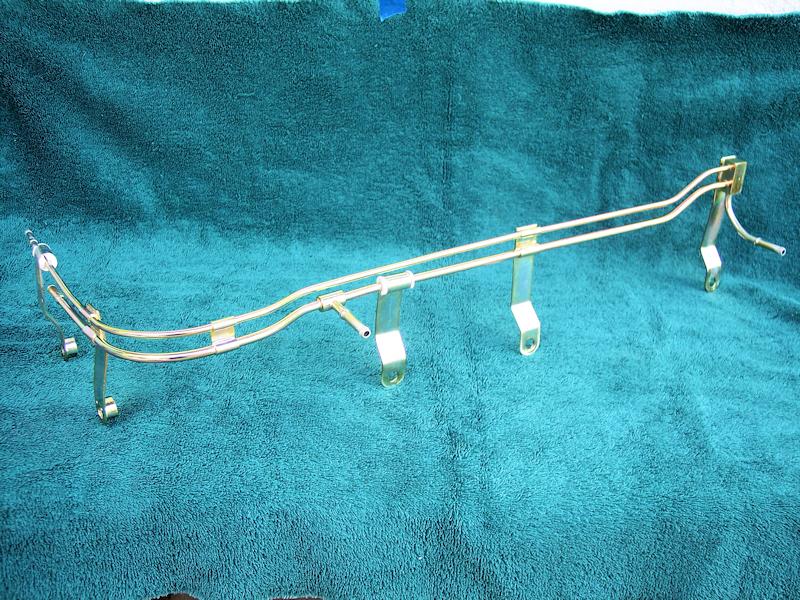
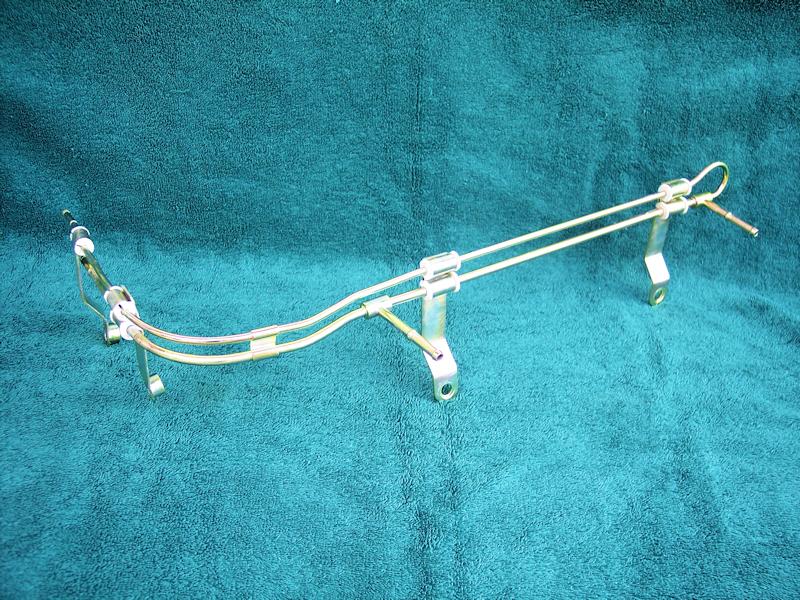
Restored '73 flat-top rail for comparison.
-
First, let me comment that those carbs and manifolds are true automotive jewelry - absolutely stunning! Your mention of the fuel rail caught my attention so here are a few observations. The supply nozzle positions for the flat-tops are substantially different than for round-tops so I recommend you get a fuel rail from a '70-72 model car - the pic is a Series 2 style from the later '71's and 72's. The rail is longer and correctly positions the nozzles for the feed to the floats. As @Patcon mentioned, the asbestos wrap is a big caution. They put it on the '72's and later, carbed and injected. It has an adhesive that will have melted around everything, expect to find significant corrosion under it. Also, the wrap contributes to deterioration of the nylon insulators for the mounting tangs. I've restored quite a few of these rails and faced all of these issues. Jim