Everything posted by jfa.series1
-
31K Miles Series I 240Z Up for Auction on BaT - Over $100k on First Day!
Just to aggravate another thread topic of past, I note the steering wheel is red/brown and not blond! 😉
-
engine compartment color
+1 on the return to body color option. You'll have a choice between single stage (like OE) and two stage processes, choose one to best match to current body finish. Going with body color will give the various engine bay bits the best opportunity to be seen.
-
KONI Sports for Classic Z's
No thoughts on the bump stops - it was 10 years ago when I got mine. Others may have some recommendations.
-
KONI Sports for Classic Z's
Yeah, you really should install bump stops with any spring that lowers the car. The bushing installs big end up and is designed to fit right up into the insulator. Also, have some anti-seize on hand for the threads on the shocks and the gland nuts. Tighten the nut on the shock shaft slowly to avoid any heat buildup.
-
Compatibility
First and foremost, welcome to the group. You won't find a more helpful or supporting bunch anywhere on the interweb. I recommend you go into your profile and add your VIN and build date to your signature area. This will be a big help to all of us when it comes to commenting on parts and processes - especially in your quest to keep the car stock wherever possible.
-
Bumper Fitment
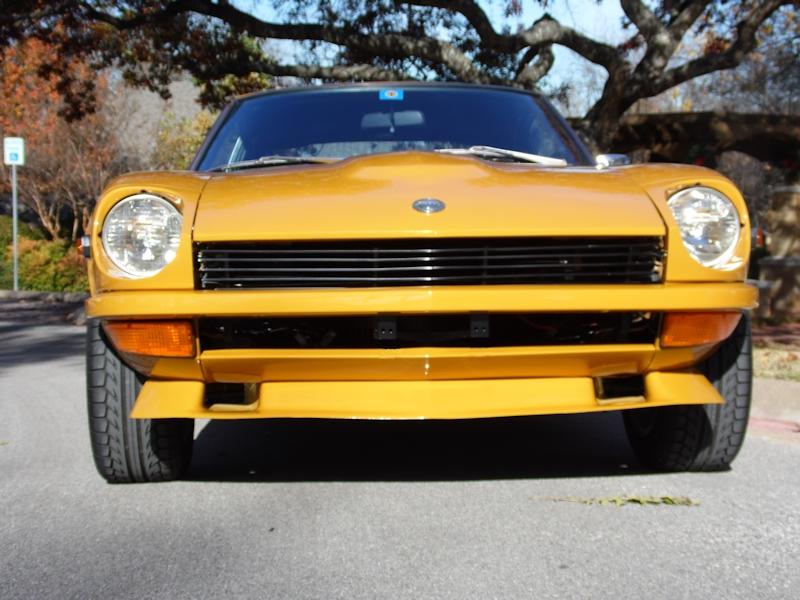
If it fit before, it should fit now. Without the mounting brackets in play, the ends of the bumper should tuck right in to the fender recesses and I suspect they did just that prior to the chrome replating. To me that suggests that something happened at the plating shop that has warped or distorted the bumper. If you have a buddy with a OE bumper perhaps you could lay yours on his to check the shape and identify where the change is located. You are right in expecting stress on the body panels if you attempt to pull it in on one side or both - it should not need to be pulled in with the bolts.
-
Bumper Fitment
Is this a replacement bumper?
-
Painting Undercoat
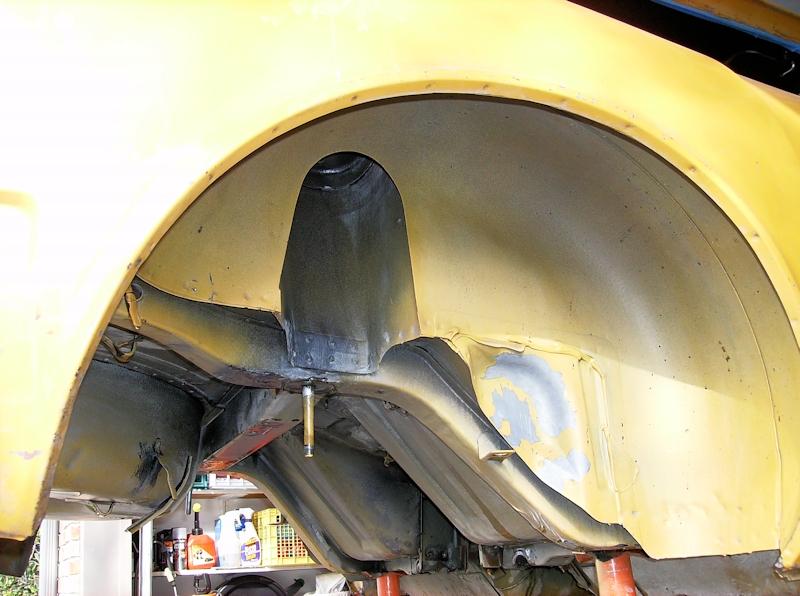
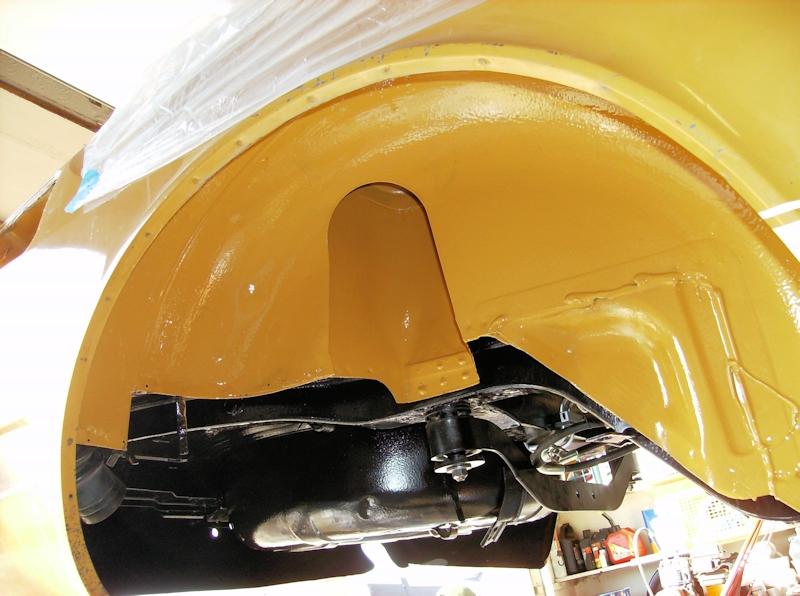
Here's another before and after, all in body color. I prepped and finished this area before my car went off to the painter.
-
Trouble Downshifting to First Gear?
FSM says 1.5L.
-
Trouble Downshifting to First Gear?
-
Surprised Nobody Brought Up The Z Proto Reveal
- 1972 240Z Molded Foam Insert
What grannyknot said. Another way to loosen them up is to get them out in the bright sun for a couple of hours. Another tip: turn the seat back cover inside out and roll it down over the foam and frame, don't pull it down.- Rear Brake Cylinder Question
These cylinders "float" or slide when the piston expands, its good to apply some grease to that area when installing.- Z Proto: The next z reveal
Overall the lines are very clean and Nissan certainly avoided the Supra's wretched excess of bulges, bends, and faux scoops and vents. If Nissan really wants to pay homage to the S30 line, the gaping maw of a grill has to go - it needs to be a substantially broader and flatter rectangle. To me the hood screams Chevy Camaro, nothing elegant about it. Expand the headlights to more resemble the sugar scoops (yes, keep then covered). Open up the quarter lights by eliminating the sharp break upwards and continuing the door line (ala S30). The rear end is a bit soft on the lines, could use a more crisp definition. Overall, too much 370Z carryover.- Rear Wheel Cylinder Question
Fortunately for me, when I did my resto 10 years ago I could still get the early versions. So... no I've not used them.- Rear Wheel Cylinder Question
Check these out on ebay: Dorman W96879 (R) & Dorman W96878 (L), say they fit the 72-73 models.- KONI Sports for Classic Z's
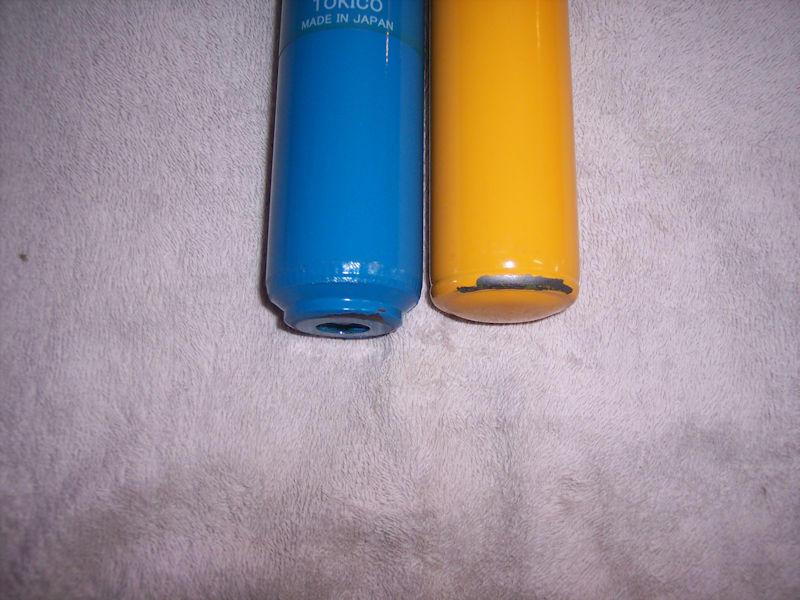
Here is a Tokico HP with the replacement KONI - noticeably different bottom configuration, looks somewhat similar to the one in madkaw's second pic. The chipped paint on the KONI is from interference with the strut bottom.- KONI Sports for Classic Z's
As the owner of a sailboat for over 20 years, one quickly learns how to correctly deal with stainless steel fasteners. From the book "Lessons Learned at Mother's Knee", not just any old lube will work with SS - it needs to be an anti-seize lube that resists the thread-to-thread pressure that will displace ordinary lubes. I have one container that has copper as a component. The SS fittings on our hydraulic lines will always benefit from some anti-seize. While installing my KONI's I noted a light colored lube on the threads, possibly a lithium type lube. And yes... slow and easy is the technique.- Parts for Sale: 240Z AM Signal Seeking Radio
Thanks for your interest. It was sold a few weeks ago.- 240ZBUILTBYME 1971 240z HS-001063 Project Georgia
Hey Ryan, Welcome to the group officially now that you have emerged from lurker status! That looks like a great project and it will be fun to see your progress. Your Dad's new shop looks to be well worth the wait. Sweet video, I wish I had some of your talent in this area - we'll all be watching for your future episodes. Your plan for the car is impressive and I think you'll find some like-minded 920 Safari Gold bigots (like me) on this site. A few years ago I sold a restored steering wheel to a chap in Perth. He commented it is the most isolated city in the world! Regards, Jim- Prep fore repaint
Glad all went well with the badges. Regarding the "original" look - you do know that side moldings were dealer add-ons, right? Not offered by Nissan from the factory. Anyway, installing pop-rivets should be pretty straightforward, probably go with aluminum rivets as opposed to steel. A pop-rivet tool should be available most anywhere, very inexpensive.- Prep fore repaint
Welcome to the group, lots of quality help here for all models. The fender badges can likely be pushed out from the backside and if you are really creative you can possibly do the same for the hatch badges by removing the inner panel. You seem to be on track with the side moldings and installing new pop-rivets after the paint job should not be difficult. This is a good time to consider whether you want to stick with the side moldings - if not, ideal time to get the painter to have the holes closed. The badges aft of the quarter windows will have to be pried off, just go slowly and don't try to do it with one bite. Look at some pics of badges on ebay to get a feel for what they look like on the back side and where the pins are located. The more you remove (such as door and hatch locks), the better quality potential for the paint job.- Drivers side front tire negative camber
The control arm bushing may be totally shot allowing the arm to move outboard under load.- KONI Sports for Classic Z's
After I swabbed out the oil I could see the shoulder with a flashlight and feel it with a long tool. No fiber optic tool so no pics. Now its all back together and on to the other side. Might or might not find the same situation.- KONI Sports for Classic Z's
A very big thanks for outstanding customer service from MSA and KONI! Like a few others, I could not get the gland nut to adequately thread into place because the shock was not seating properly. My struts are squeaky clean inside with no foreign debris. As recommended above, I contacted MSA about the issue. @Joseph@TheZStore quickly responded and identified a Nissan mfg. anomaly where the bottom cap on the strut has an internal shoulder. Chipped paint on the bottom of the new KONI shock confirmed the interference. MSA had modified gland nuts on hand for this problem and sent a pair to me at no cost. Note the machined internal relief shoulder on the gland nut on the right vs. stock on the left. The relief allowed the gland nut threads to fully engage and get the gap well under 4mm. One front strut down this morning, one to go for tomorrow and then on to the rears. Jim - 1972 240Z Molded Foam Insert
Important Information
By using this site, you agree to our Privacy Policy and Guidelines. We have placed cookies on your device to help make this website better. You can adjust your cookie settings, otherwise we'll assume you're okay to continue.


 Subscriber


