


jfa.series1
 Subscriber
-
Joined
-
Last visited
Everything posted by jfa.series1
-
 Cousins???
-
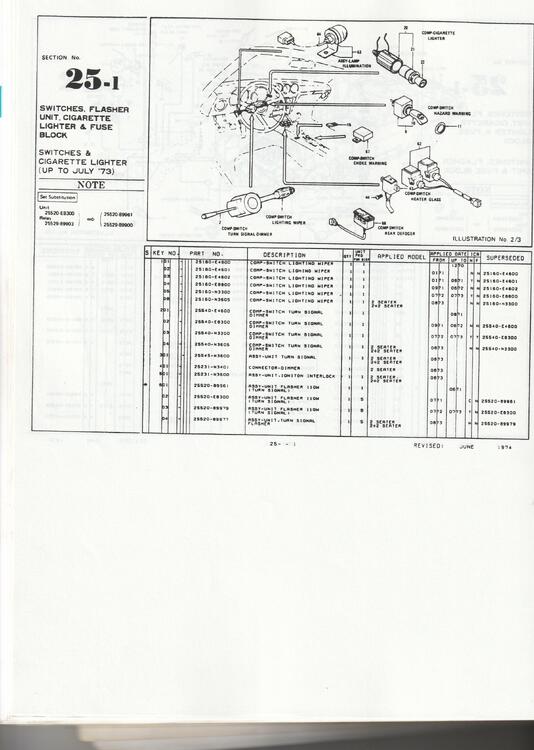
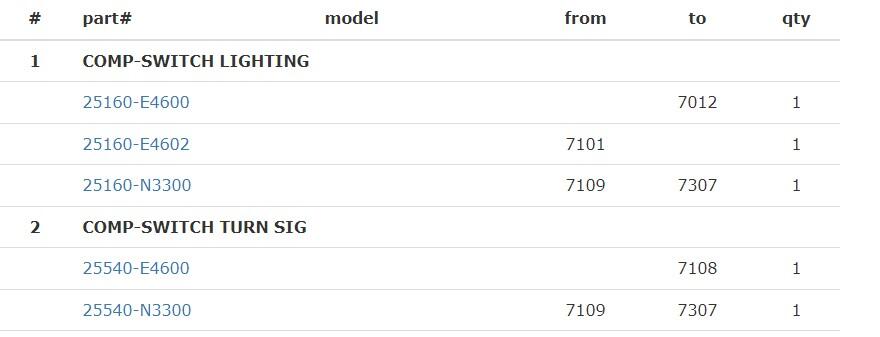
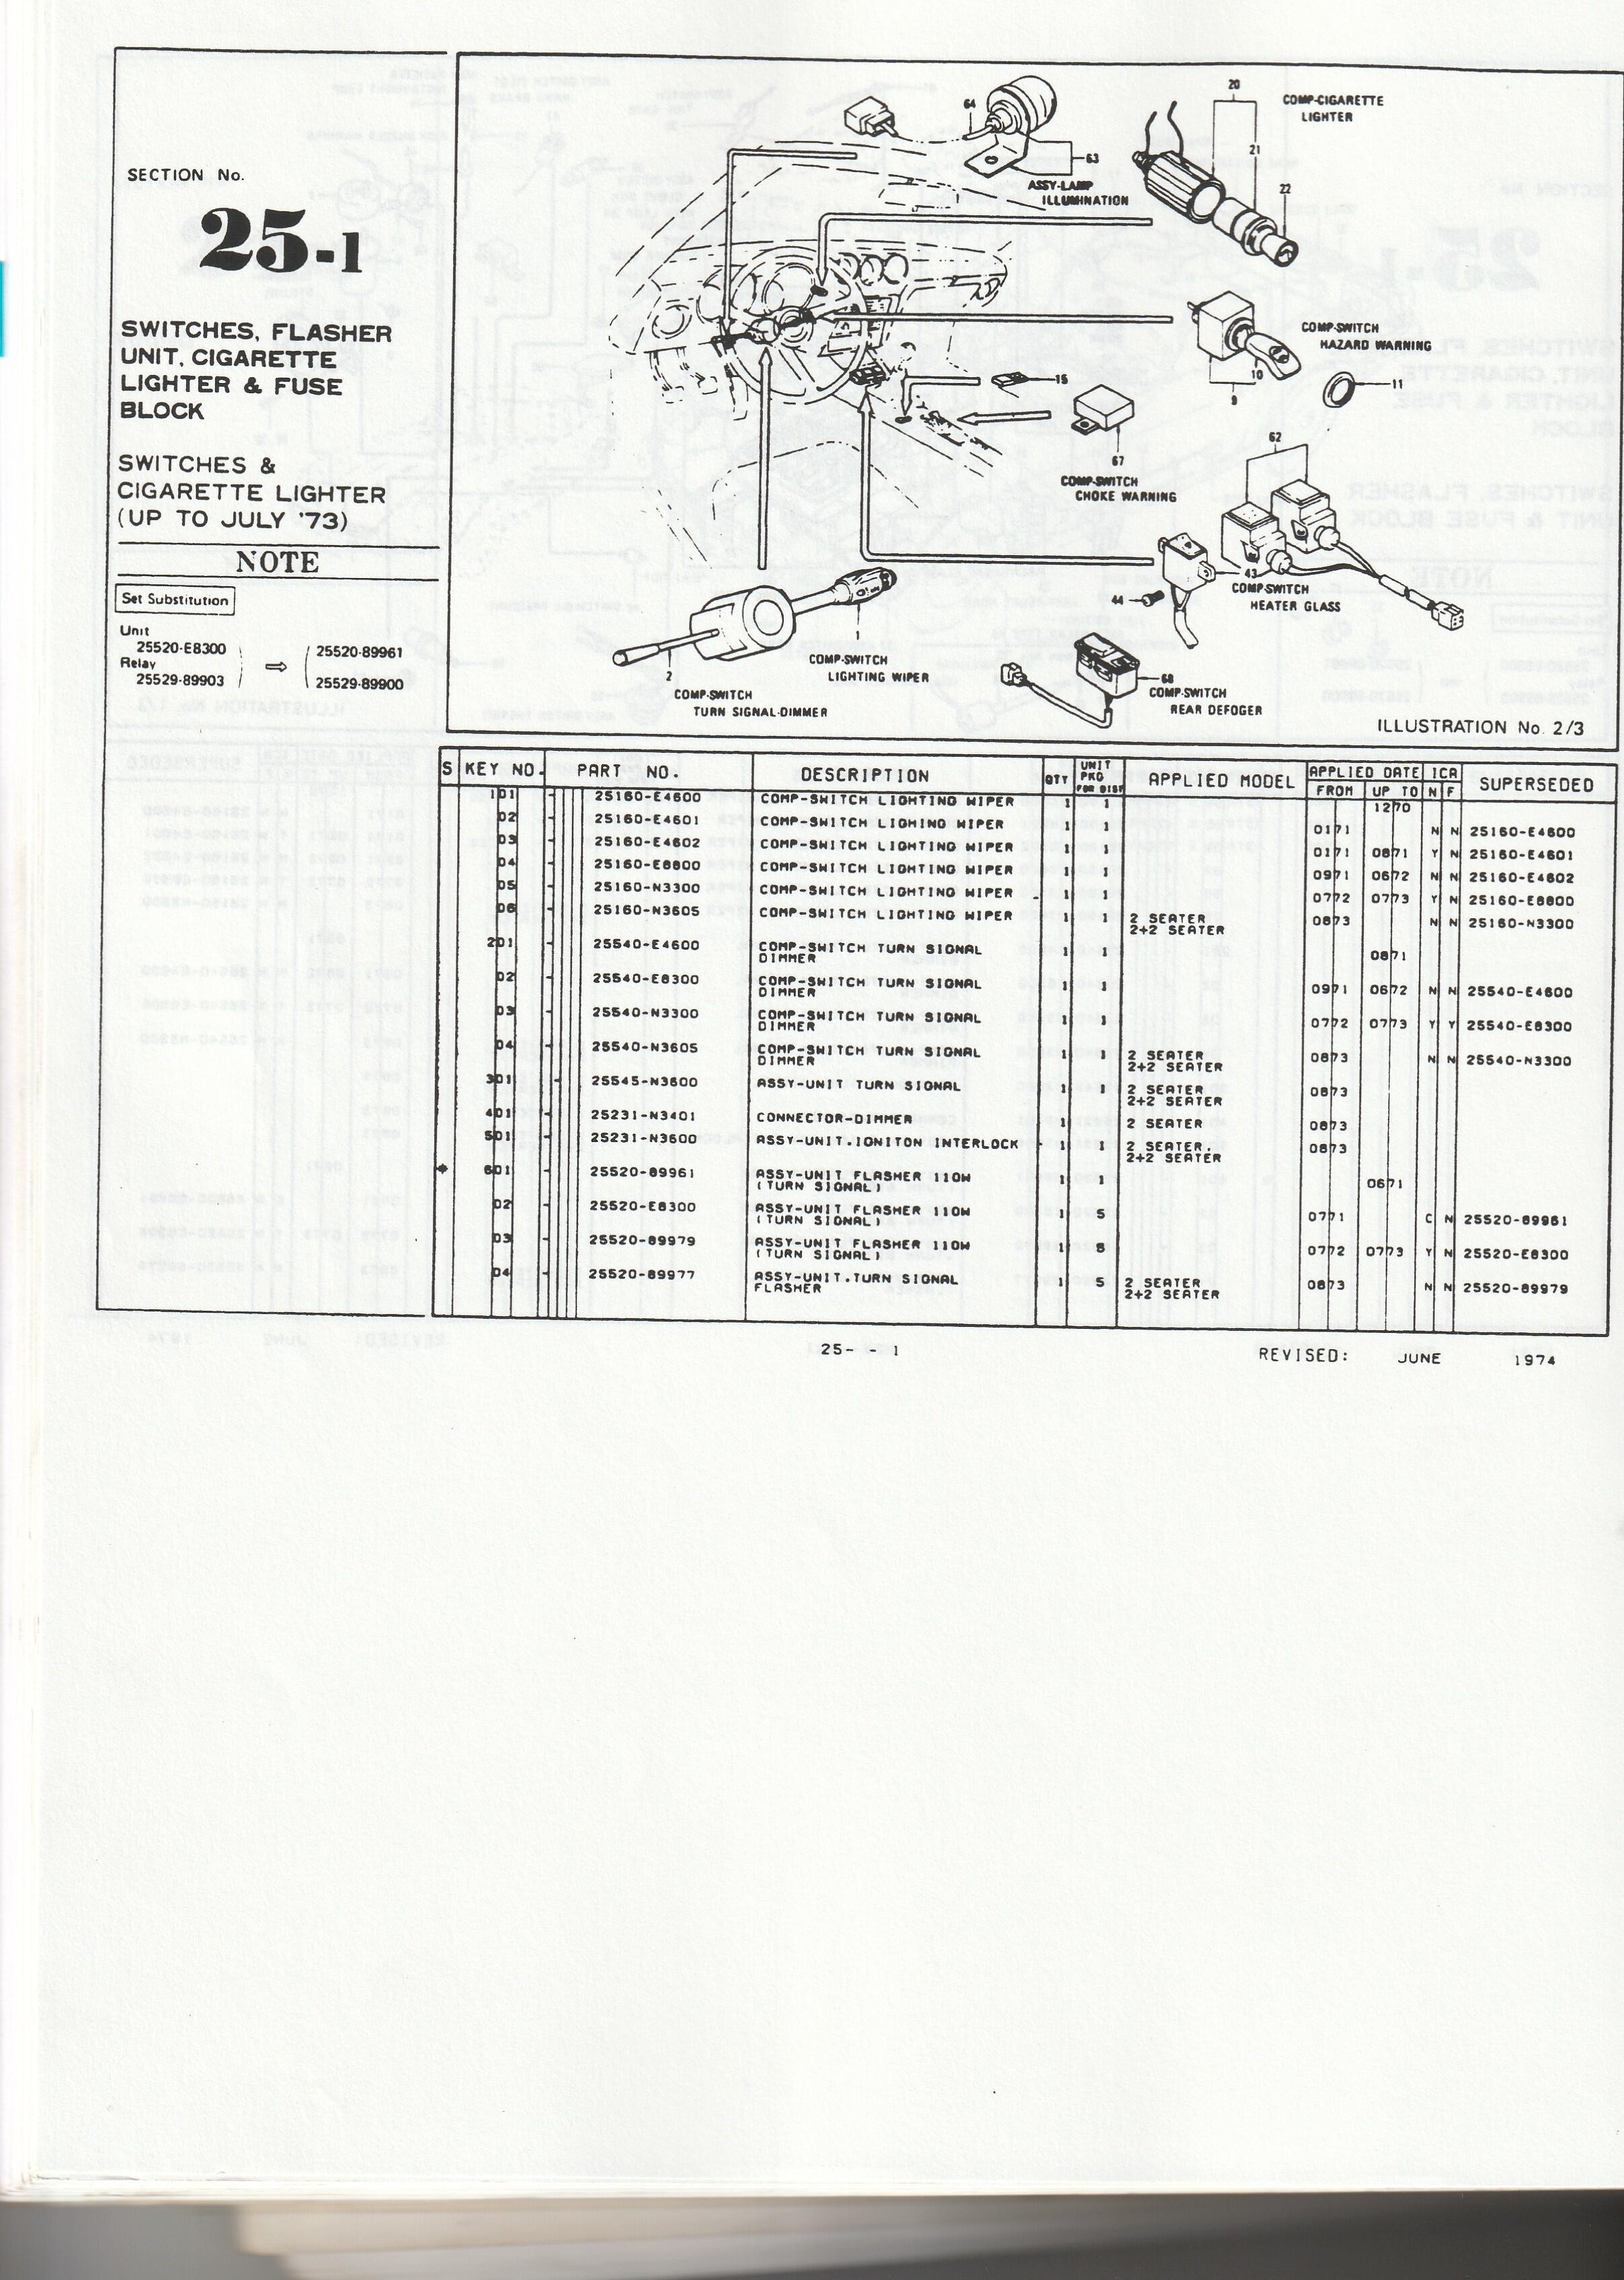
Someone has recently chaged the online parts catalog and not necessarily in a good way. Back in 1999 I purchased a hard copy of the factory parts catalog that someone had made from the Nissan fiches for the 1970-73 240Z's. This was long before we had these resources available online. Here is my scan of page 25-1 covering the combo switches and the online catalog had the same P/N's and effective dates until recently: The switch for the 1972 car was P/N 25160-E8800, effective dates 09/71 - 06/72. It's my understanding that the 1973 model introduced the 3-speed (intermittant) wiper control, P/N 25160-N3300, dates 07/72 - 07/73 This is what the online catalog looks like today and is incorrect in that it has the same P/N light switch for 1972 and 1973 models:
-
View Advert Combo Light Switch 1971 240Z (from 01/71) Completely refurbished! Light switch for a LHD 1971 240Z with a build date of 01/71 or later. Fully disassembled and cleaned, all elements of the plastic stalk polished to a high gloss, symbols refreshed. Electrical contacts inspected and polished. All functions of the lights and wipers have been checked and verified for proper operation with a ohm meter. The switch operates smoothly and crisply through all settings. $250 includes standard domestic shipping, foreign shipping available at actual cost. Payment via PayPal, PM if interested, thanks. Advertiser jfa.series1 Date 04/28/2024 Price $250 Category Parts for Sale
-
View Advert Turn Signal Switch 1977-78 280Z Completely refurbished! Dismantled and cleaned, electrical contacts polished, lever stripped and refinished in gloss black. All switch contact positions tested with a ohm meter to ensure proper function. $250 includes standard domestic shipping, foreign shipping available at actual cost. Payment via PayPal, PM if interested, thanks. Advertiser jfa.series1 Date 04/27/2024 Price $250 Category Parts for Sale
-
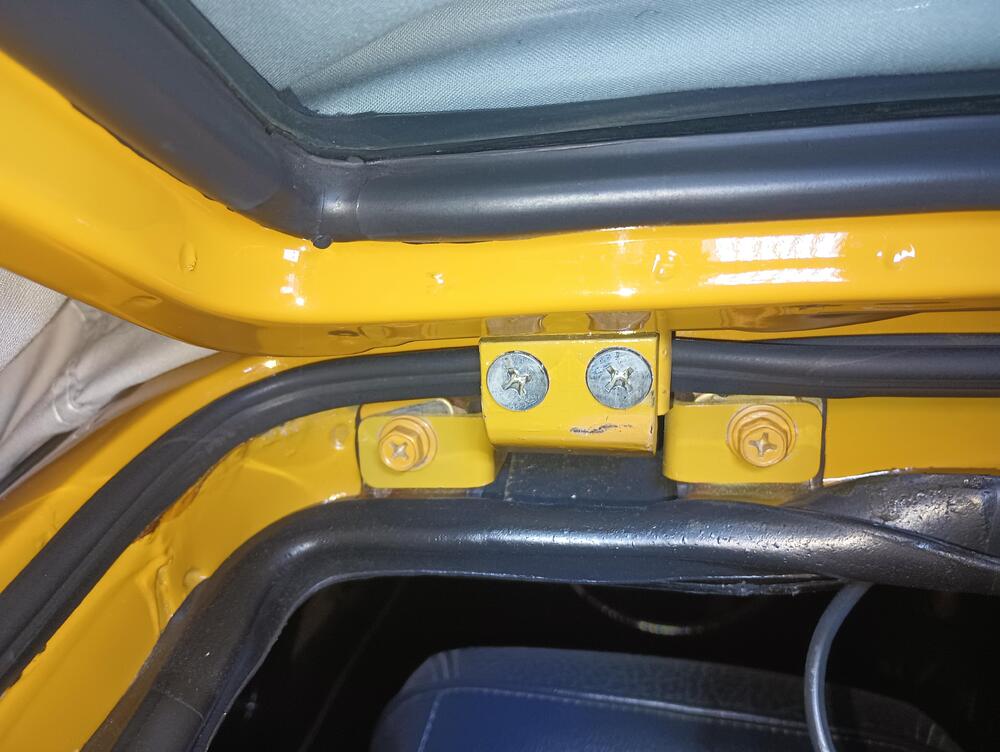
I think I spotted the problem on your last pic: the thin metal plate goes under the hinge.
-
Charles, When I tore down my car there was no sealant on or under the rubber hinge boots, just the thin metal plate holding the boot in shape under the hinge. Jim
-
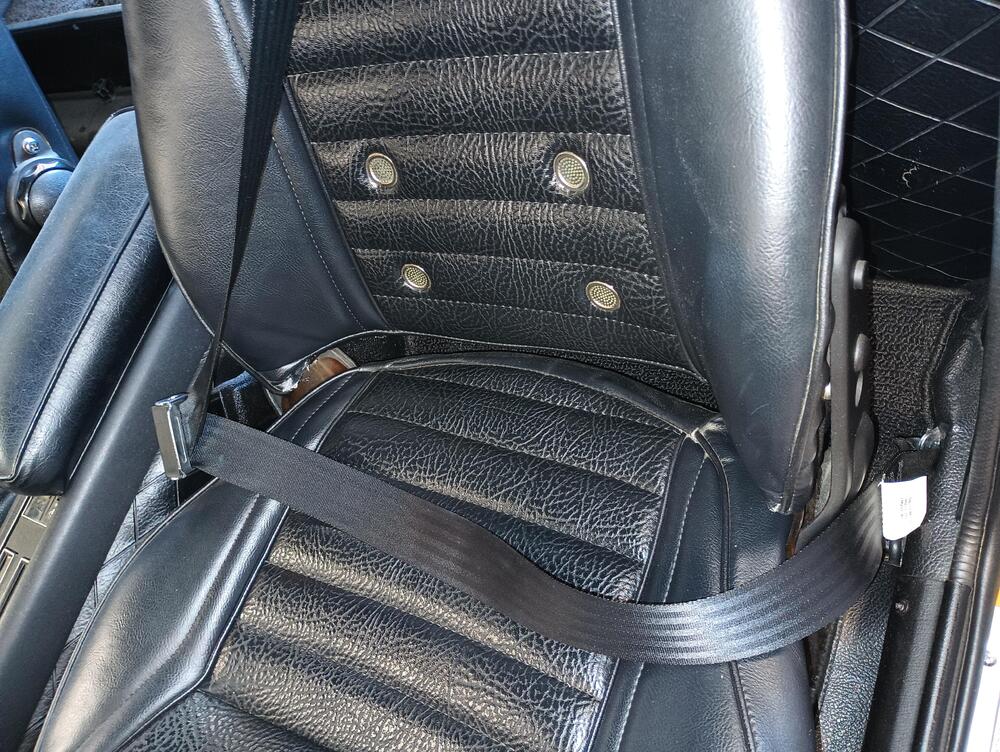
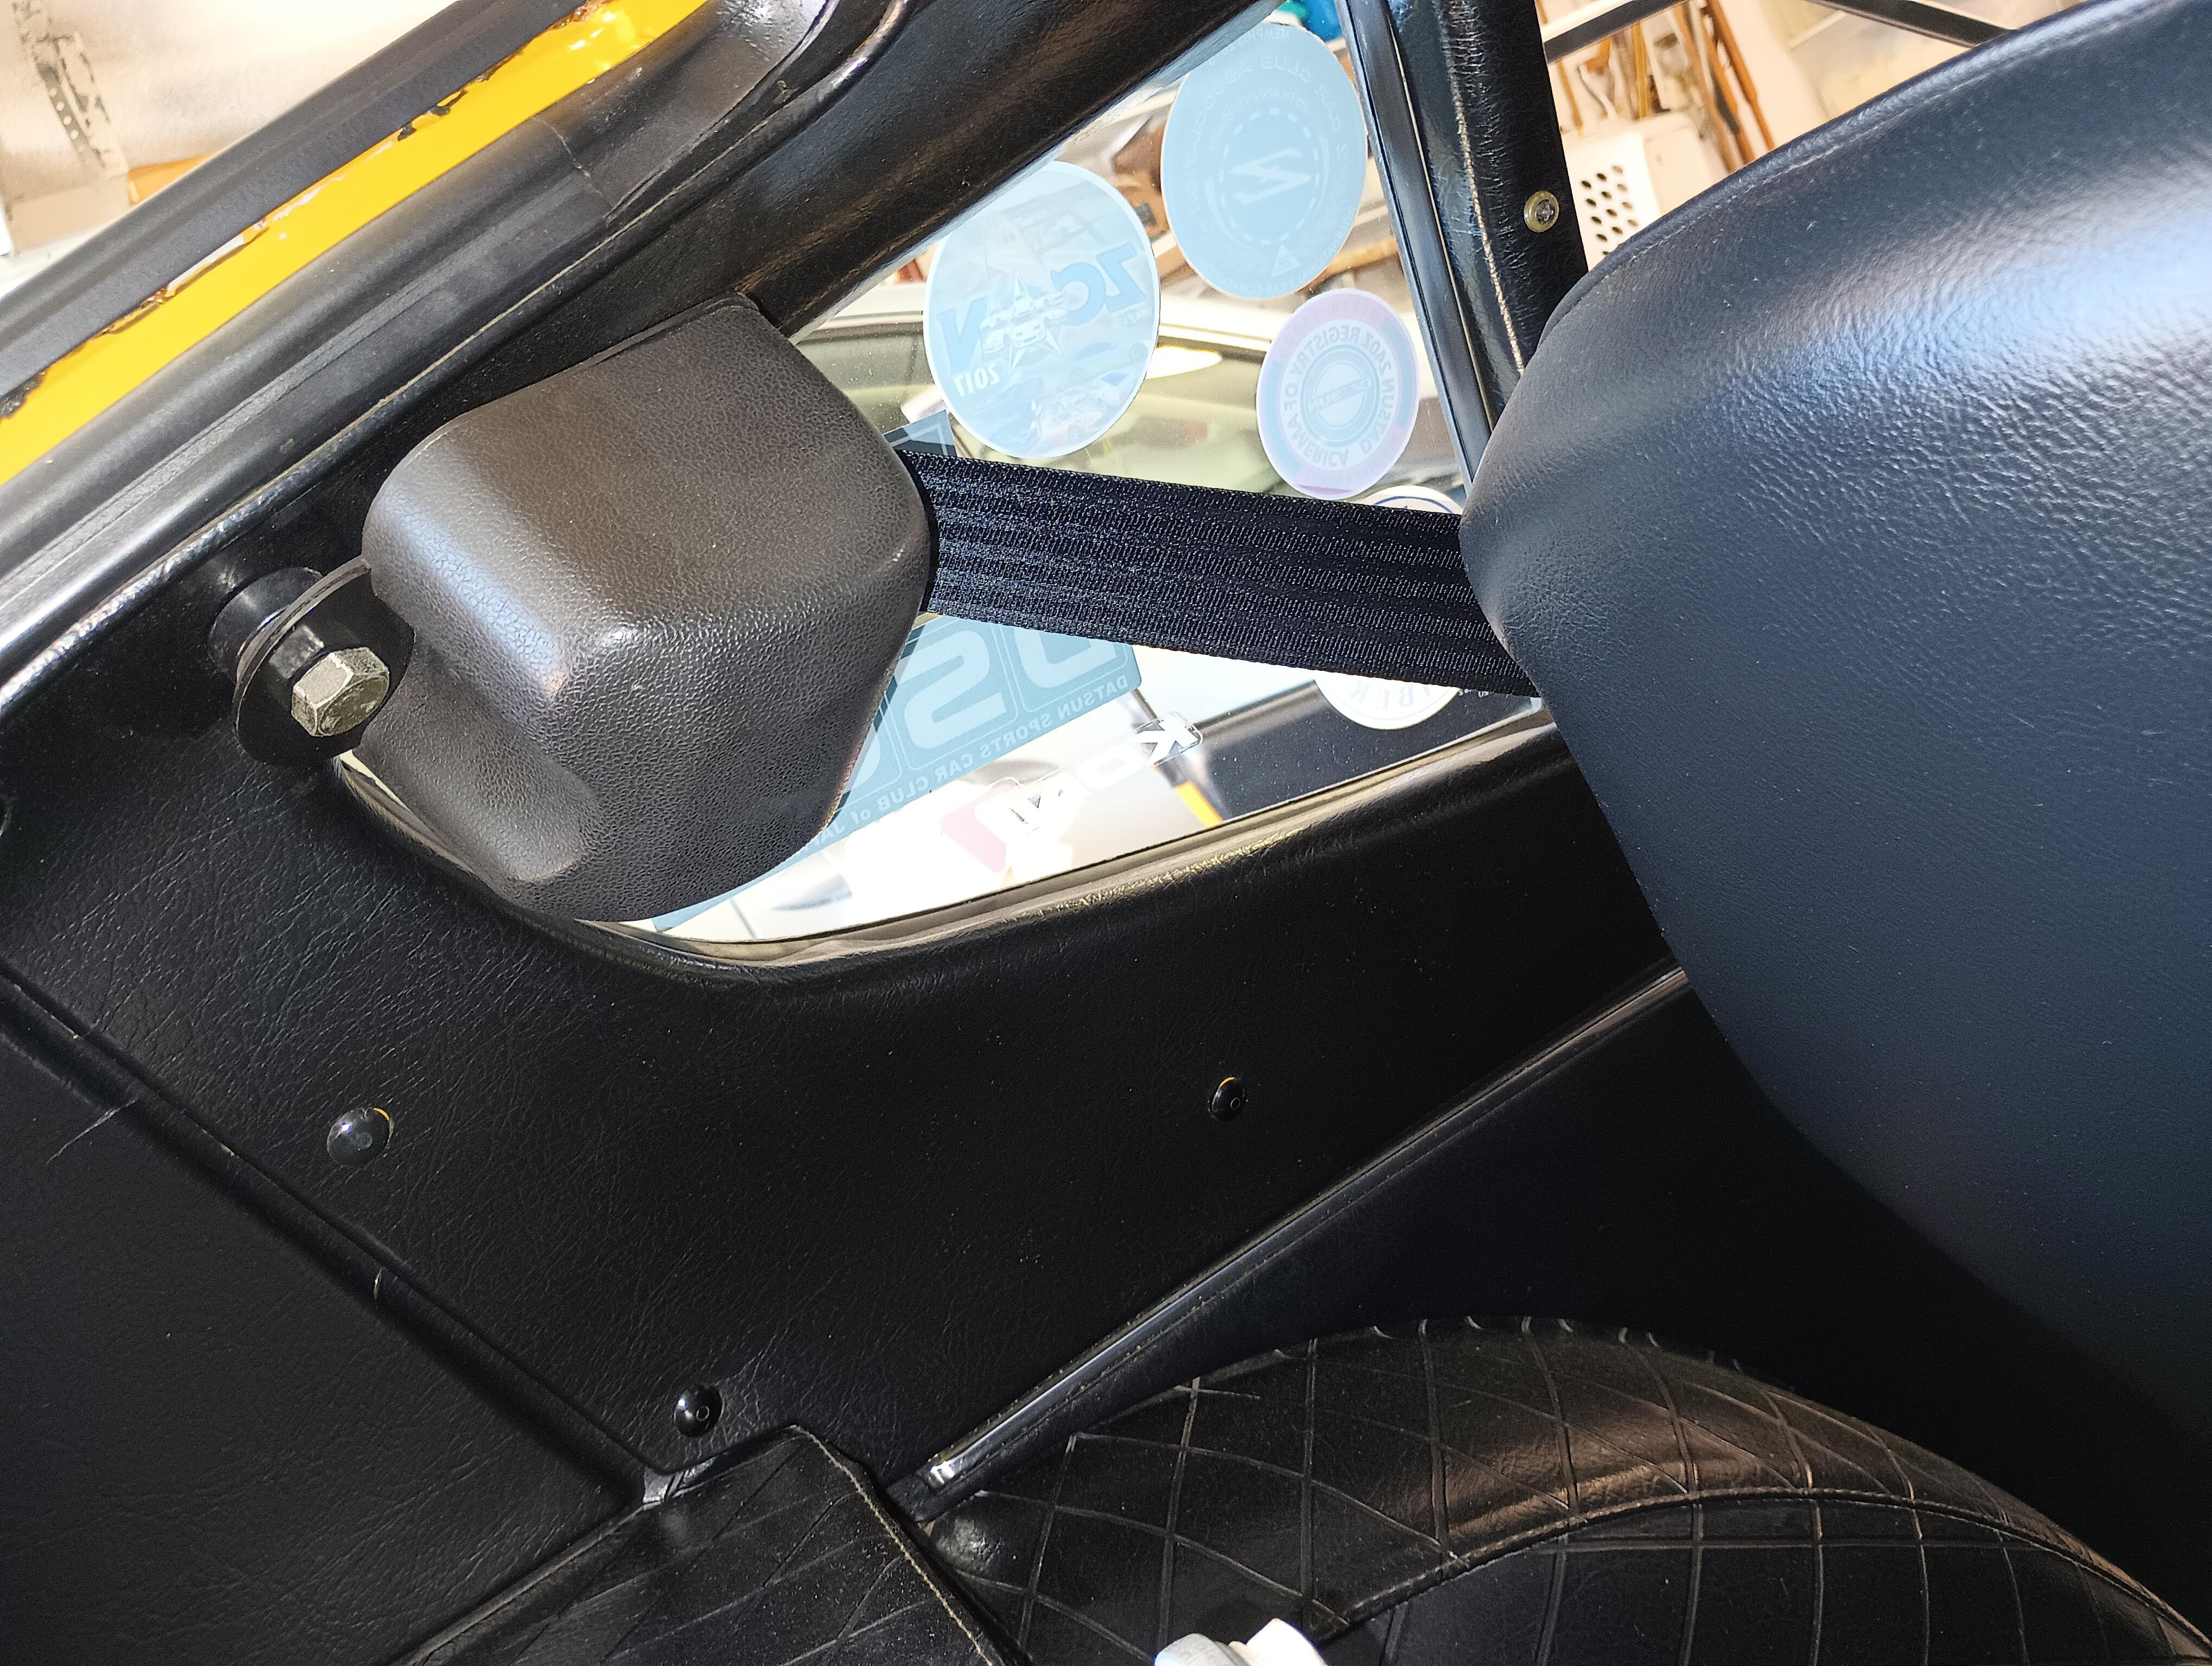
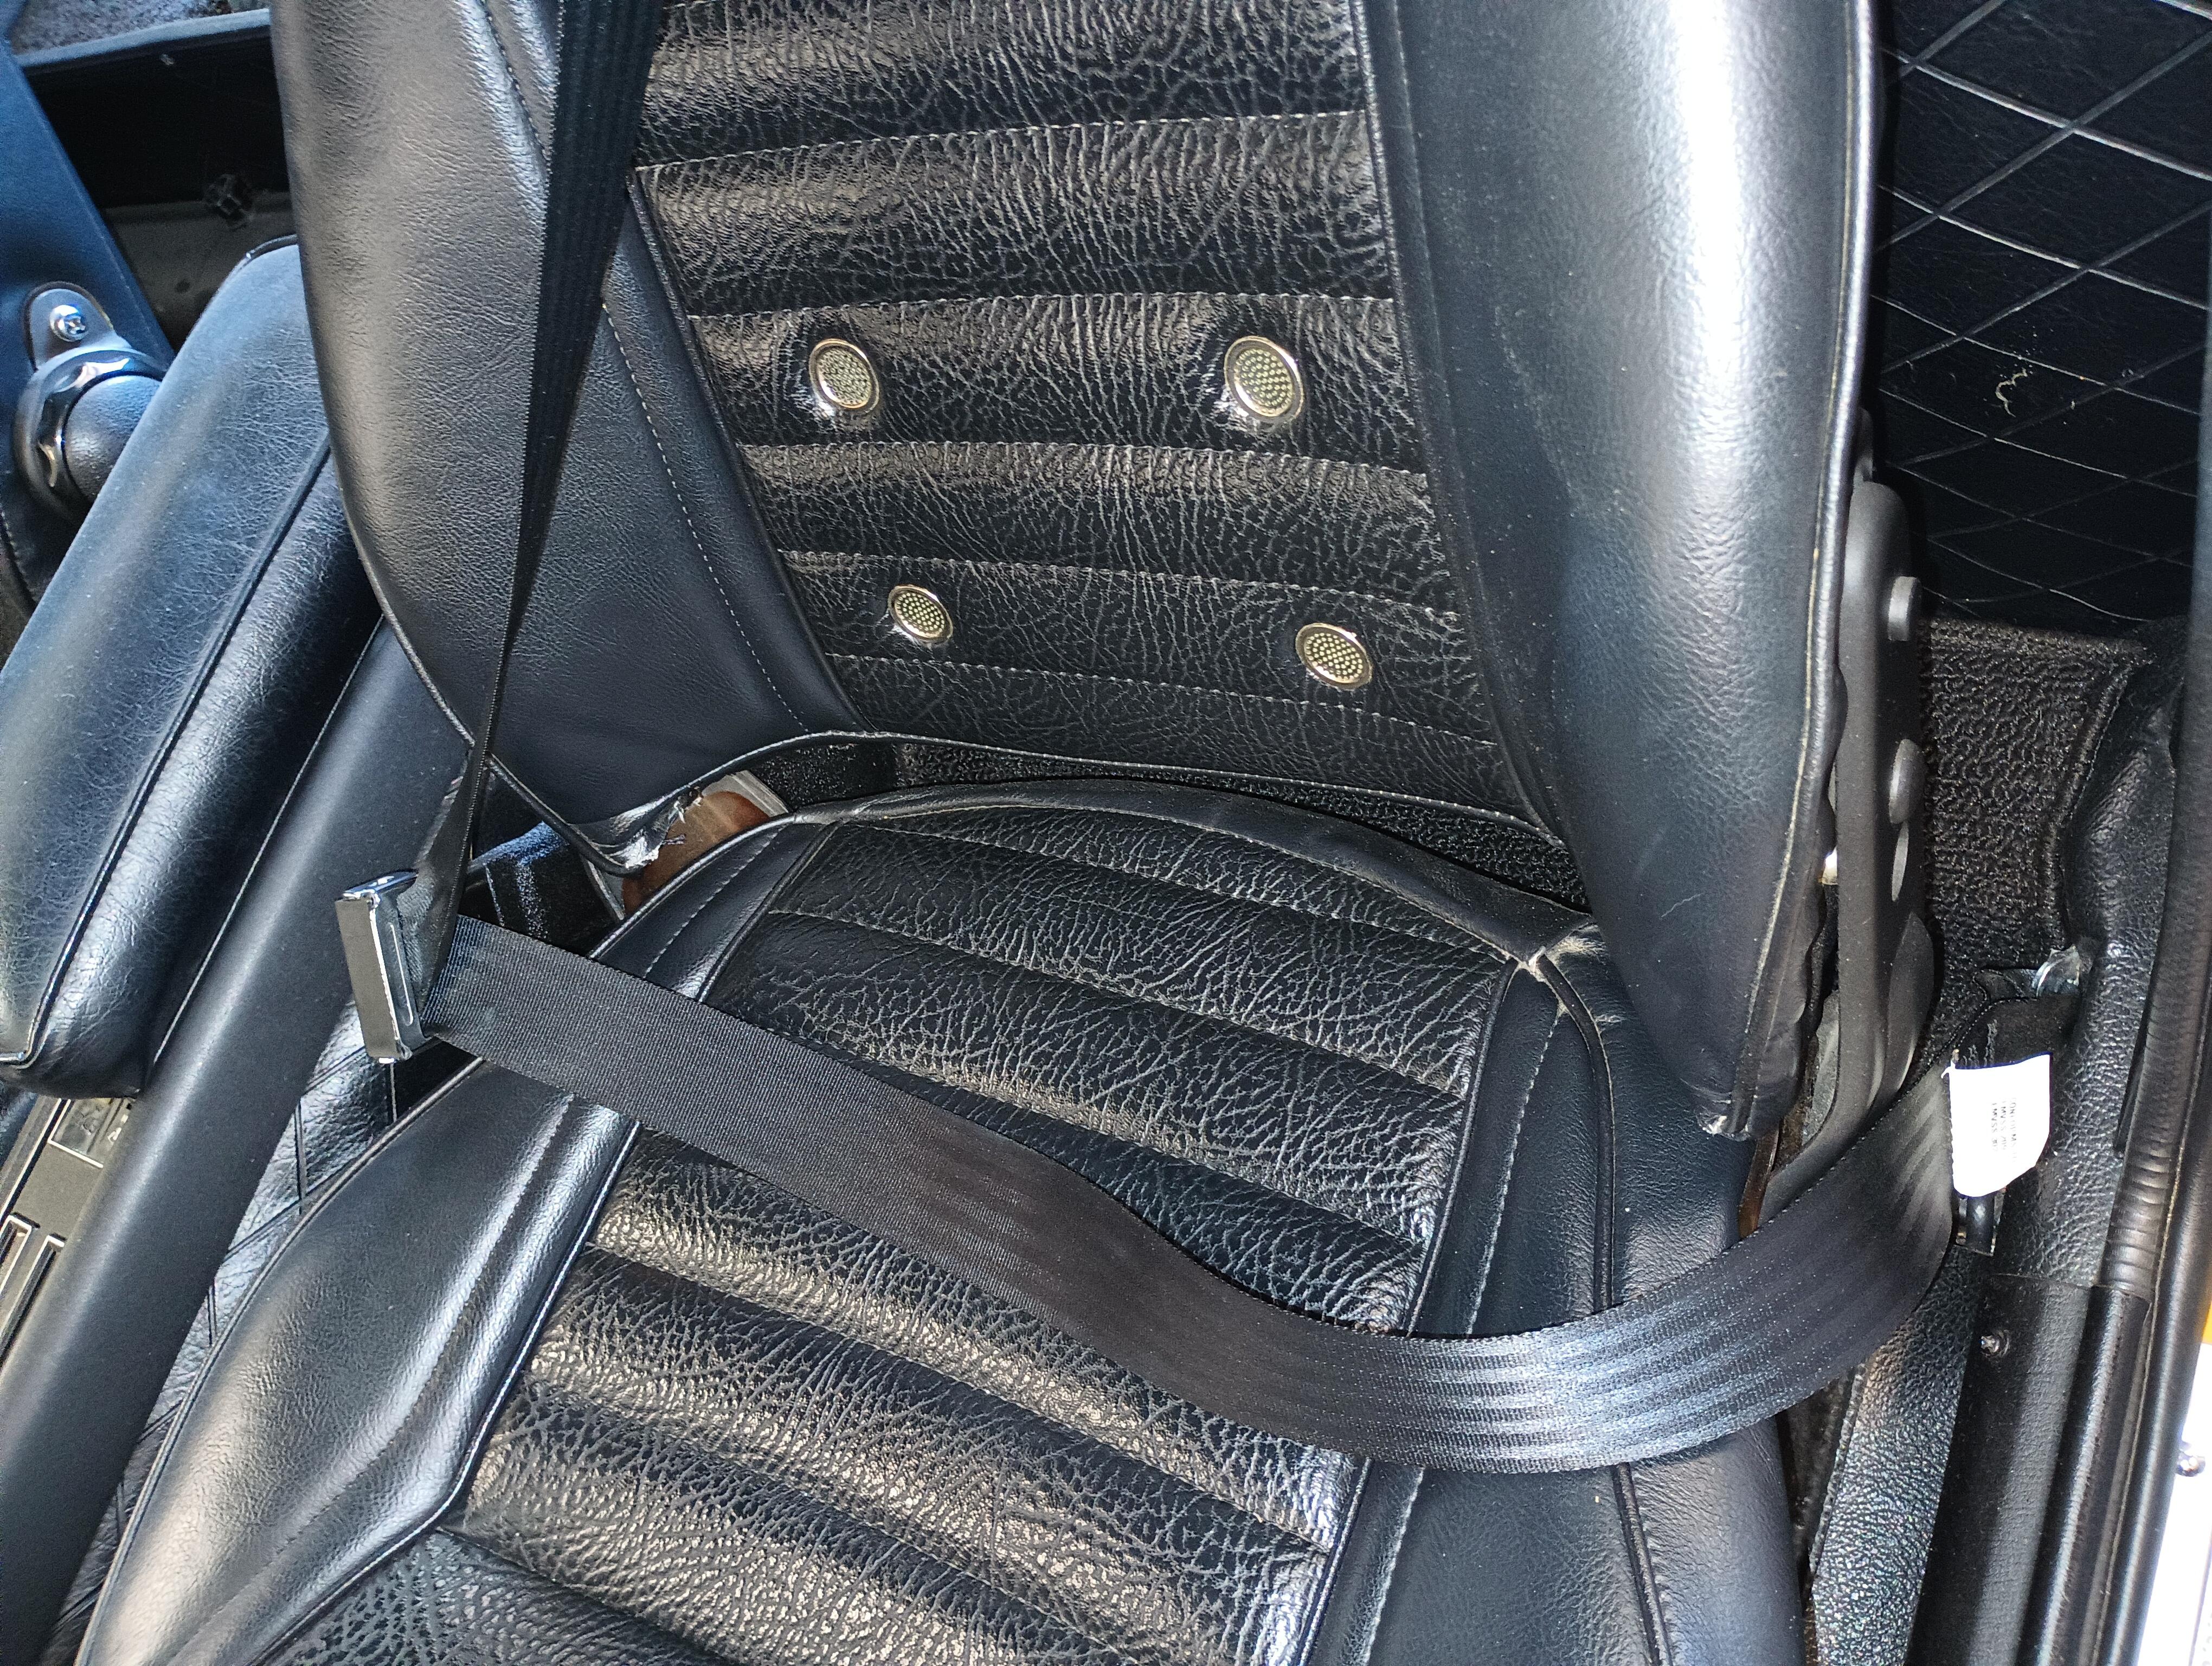
This is the Roadster Retractable 3-point belt from Wesco, a very comfortable belt. The retractor is mounted at the original shoulder belt location using the OE bolts. The lap belt also uses the OE bolts and locations. Here is the website and belt details. If you order, specify the 11" rigid sleeve. https://www.wescoperformance.com/noname.html

-
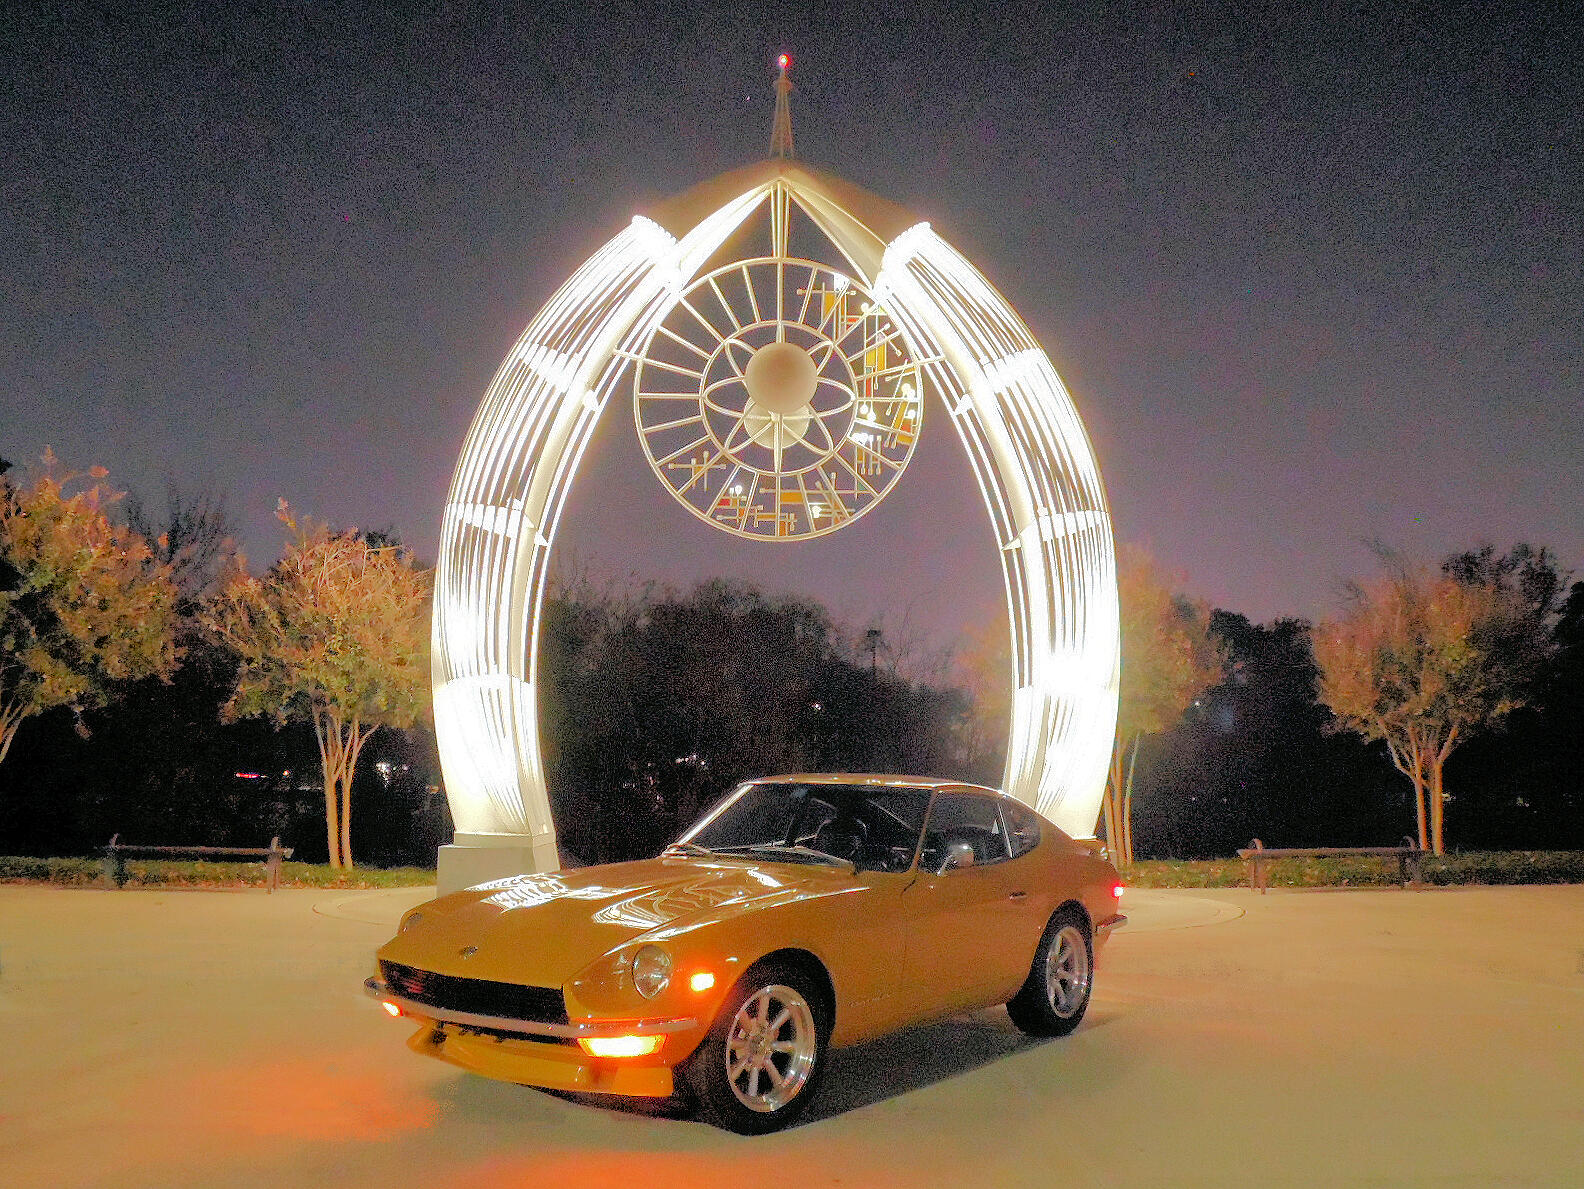
For your viewing pleasure, my car's 50th birthday portrait.
 Gotta luv the Safari Gold theme of this discussion!!!
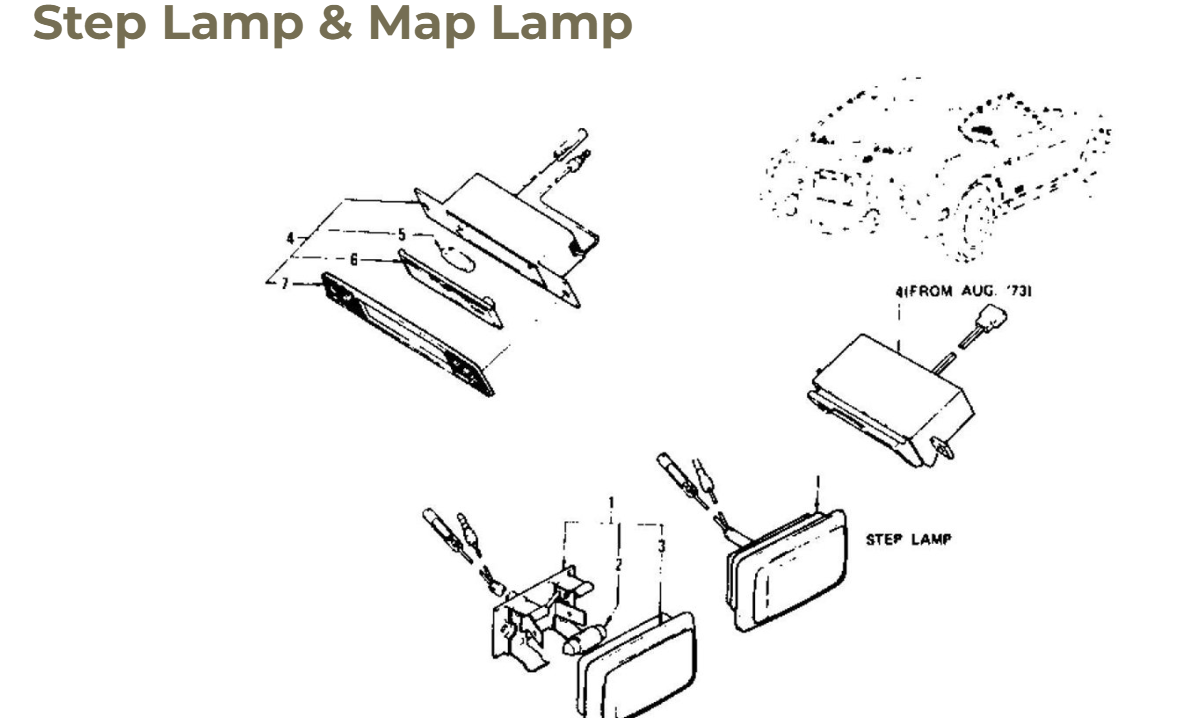
Interesting find, no grommets on my car. All of the wiring on my car was run across the front support, secured by the flexible tabs.
Gotta luv the Safari Gold theme of this discussion!!!
Interesting find, no grommets on my car. All of the wiring on my car was run across the front support, secured by the flexible tabs.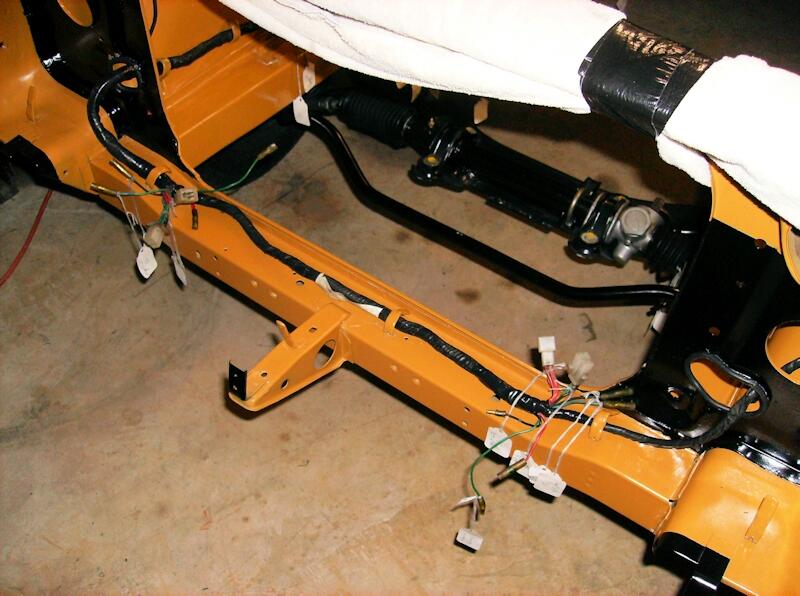 Have you tried seating the pipe with some encouragement with a rubber mallet? That is the usual process. I see some shiny area not painted, I presume there is not a shoulder ridge in the metal where the painted surface begins.
Interesting comments on the AA battery powered clocks. I have one purchased from MSA back in 2011 and I recall sending in my clock as a rebuildable core. It was my understanding that the units they were selling at that time came from your shop. Anyway, it continues to be an extremely reliable clock that does not eat batteries. My car is always garaged so it does not hit the high temps you mention.
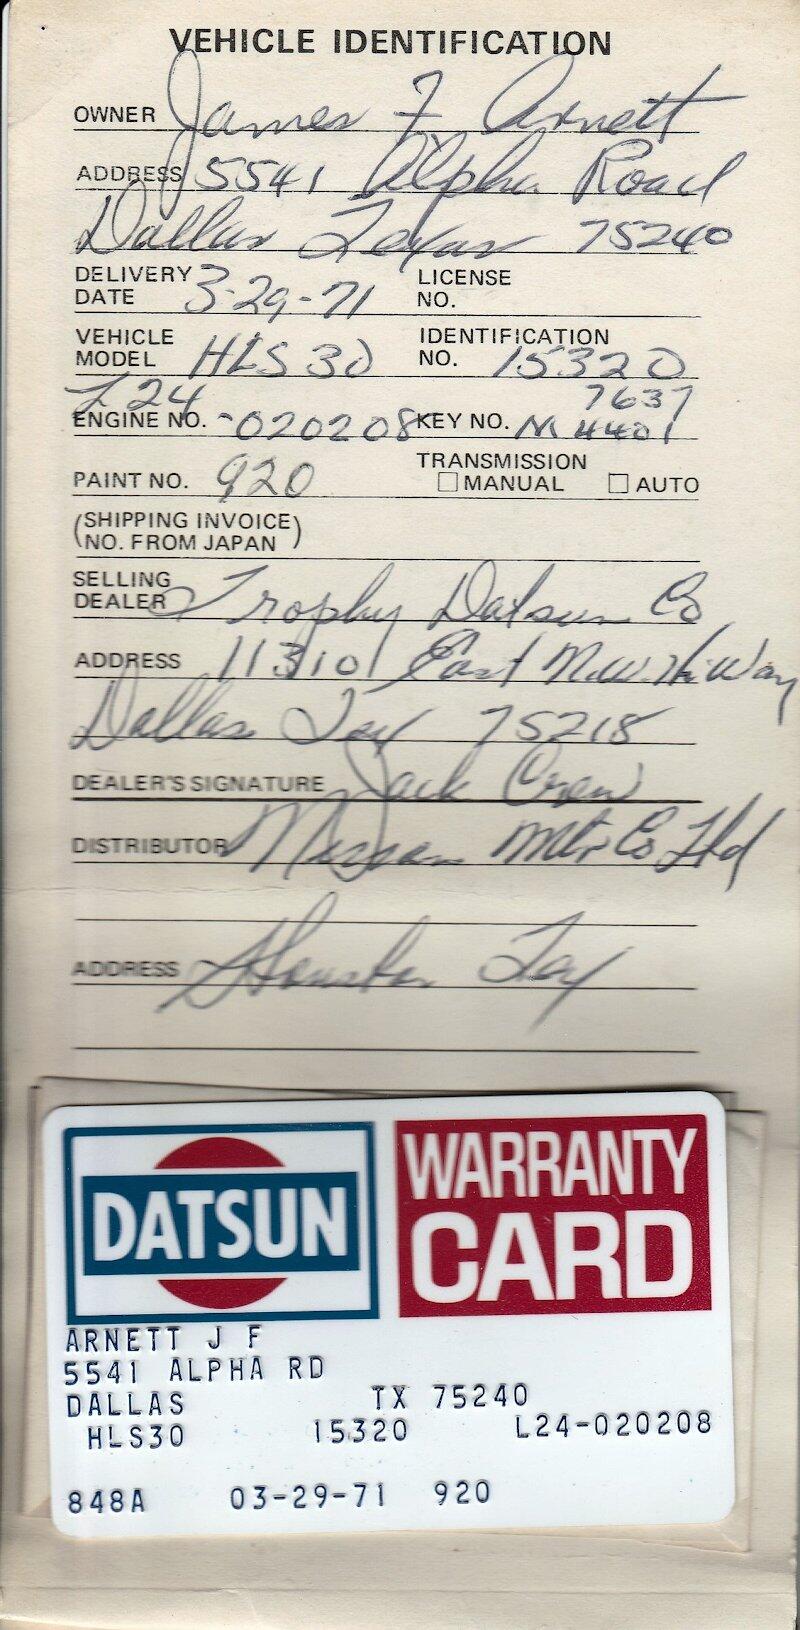
Guess I need to change my handle to jfa.15320! 😄
That would be late January, 1971. The second series beginning with VIN HLS30 21001 started in February, 1971.
View Advert S30 Sun Visors Matched pair of OE brown sun visors to fit any S30. These are the second series with the pockets on the back side of the driver’s visor. Excellent condition – no cracks, breaks or tears, very flat! $125 includes domestic shipping, foreign shipping available at actual cost. Payment via payPal. PM if interested, thanks. Advertiser jfa.series1 Date 02/16/2024 Price $125 Category Parts for Sale
I recall talking to Matsuo-san at the Memphis ZCON in 2015 about design elements of the 240Z. He recalled that the inspiration for the struts was the elegant but simple canopy mechanism for the French Mirage aircraft. He lobbied for a twin-strut configuration but the yen-counters decreed they would have to make do with only one. We can find his desire for two in the stamping of the inside panel of the hatch. The OE strut on my car surrendered some years ago but I rescued one from a salvage car that still works perfectly.
Be careful of what you ask for. With them comes the challenge of running power thru the wall of the A-pillar and into the front wall of the door, something that has to reliably deal with the flexing of the door opening and closing.
The ignition switch buzzer is controlled by the push-button switch on the driver's side A-pillar. It's possible your switch is not operating properly - the switch closes when the door is open to complete the circuit for the buzzer and overhead light. Pop the switch from the A-pillar and check it out.
View Advert SOLD - S30 Sun Visor Holder / Interior Mirror Base Plastic sun visor holder with metal interior mirror base and mounting screws. Fits all S30’s. Near perfect condition with no breaks, cracks, or scratches. Very small abrasion at top left edge where the mirror base fits. $65 includes domestic shipping, foreign shipping available at actual cost. Payment via PayPal. PM if interested, thanks! Advertiser jfa.series1 Date 02/09/2024 Price $65 Category Parts for Sale
All of the S30 headlight / parking light switches have this configuration on the switch posts, altho there may some slight differences in the wire color. The white/red wire is headlight power in and the red wire is headlight power out. The green wire is parking/tail/sidemarker power in and the green/white wire is power out. There is no ground in this setup.
Have you tried seating the pipe with some encouragement with a rubber mallet? That is the usual process. I see some shiny area not painted, I presume there is not a shoulder ridge in the metal where the painted surface begins.
Interesting comments on the AA battery powered clocks. I have one purchased from MSA back in 2011 and I recall sending in my clock as a rebuildable core. It was my understanding that the units they were selling at that time came from your shop. Anyway, it continues to be an extremely reliable clock that does not eat batteries. My car is always garaged so it does not hit the high temps you mention.
Guess I need to change my handle to jfa.15320! 😄
That would be late January, 1971. The second series beginning with VIN HLS30 21001 started in February, 1971.
View Advert S30 Sun Visors Matched pair of OE brown sun visors to fit any S30. These are the second series with the pockets on the back side of the driver’s visor. Excellent condition – no cracks, breaks or tears, very flat! $125 includes domestic shipping, foreign shipping available at actual cost. Payment via payPal. PM if interested, thanks. Advertiser jfa.series1 Date 02/16/2024 Price $125 Category Parts for Sale
I recall talking to Matsuo-san at the Memphis ZCON in 2015 about design elements of the 240Z. He recalled that the inspiration for the struts was the elegant but simple canopy mechanism for the French Mirage aircraft. He lobbied for a twin-strut configuration but the yen-counters decreed they would have to make do with only one. We can find his desire for two in the stamping of the inside panel of the hatch. The OE strut on my car surrendered some years ago but I rescued one from a salvage car that still works perfectly.
Be careful of what you ask for. With them comes the challenge of running power thru the wall of the A-pillar and into the front wall of the door, something that has to reliably deal with the flexing of the door opening and closing.
The ignition switch buzzer is controlled by the push-button switch on the driver's side A-pillar. It's possible your switch is not operating properly - the switch closes when the door is open to complete the circuit for the buzzer and overhead light. Pop the switch from the A-pillar and check it out.
View Advert SOLD - S30 Sun Visor Holder / Interior Mirror Base Plastic sun visor holder with metal interior mirror base and mounting screws. Fits all S30’s. Near perfect condition with no breaks, cracks, or scratches. Very small abrasion at top left edge where the mirror base fits. $65 includes domestic shipping, foreign shipping available at actual cost. Payment via PayPal. PM if interested, thanks! Advertiser jfa.series1 Date 02/09/2024 Price $65 Category Parts for Sale
All of the S30 headlight / parking light switches have this configuration on the switch posts, altho there may some slight differences in the wire color. The white/red wire is headlight power in and the red wire is headlight power out. The green wire is parking/tail/sidemarker power in and the green/white wire is power out. There is no ground in this setup. View Advert SOLD - S30 Sun Visor Set Matched pair of OE black sun visors to fit any S30. These are the second series with the pockets on the back side of the driver’s visor. Excellent condition – no breaks or tears, very flat! The plastic mounting bases are installed, mounting screws are included. $175 includes domestic shipping, foreign shipping available at actual cost. Payment via payPal. PM if interested, thanks. Advertiser jfa.series1 Date 02/08/2024 Price $175 Category Parts for Sale
On the outer hatch seal, that is the OE configuration. MSA also sells a modified vesion with a full bulb seal all around. I made my own version years ago before MSA offered one.
I believe the board material is called phenolic.
View Advert SOLD - S30 Sun Visor Set Matched pair of OE black sun visors to fit any S30. These are the second series with the pockets on the back side of the driver’s visor. Excellent condition – no breaks or tears, very flat! The plastic mounting bases are installed, mounting screws are included. $175 includes domestic shipping, foreign shipping available at actual cost. Payment via payPal. PM if interested, thanks. Advertiser jfa.series1 Date 02/08/2024 Price $175 Category Parts for Sale
On the outer hatch seal, that is the OE configuration. MSA also sells a modified vesion with a full bulb seal all around. I made my own version years ago before MSA offered one.
I believe the board material is called phenolic.


Important Information
By using this site, you agree to our Privacy Policy and Guidelines. We have placed cookies on your device to help make this website better. You can adjust your cookie settings, otherwise we'll assume you're okay to continue.