


jfa.series1
 Subscriber
-
Joined
-
Last visited
Everything posted by jfa.series1
-
 Courtesy Parts Online is alive and well... just moving to a different address. I stopped by this morning to check on our friends, had a nice visit with David House. With a decline in online orders over the past year, the old site managed by a 3rd party was no longer cost effective. It is business as usual at this Nissan-managed site: https://parts.courtesynissan.com/ And... Courtesy is no longer a part of Group 1 Auto, ownership has changed to Clay Cooley.
 -
Courtesy is probably like most dealerships in that they do not keep seldom ordered parts in their inventory but rely on a warehouse for those items. I think everything I've puchased in the last few years have been warehouse supplied and I use store pickup to avoid shipping charges.
-
I'm close by, will try to swing by there and see what is happening. A very good friend for all of us - David House, has worked there for years, hope all is well for him. I heard a story that the dealership has changed owners to the Clay Cooley group.
-
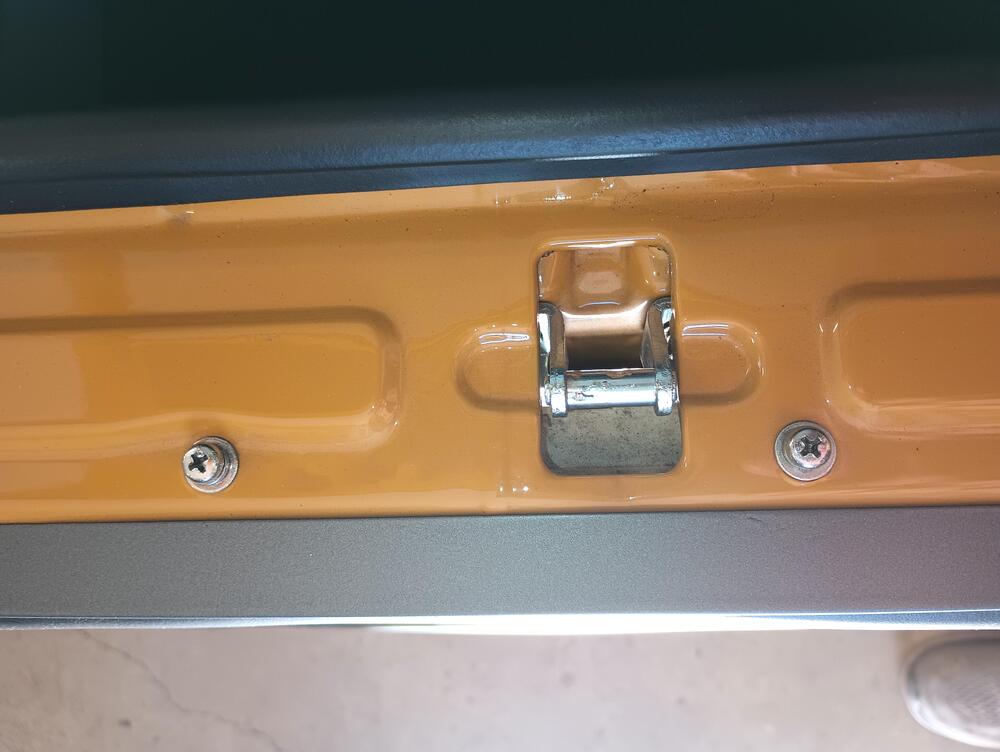
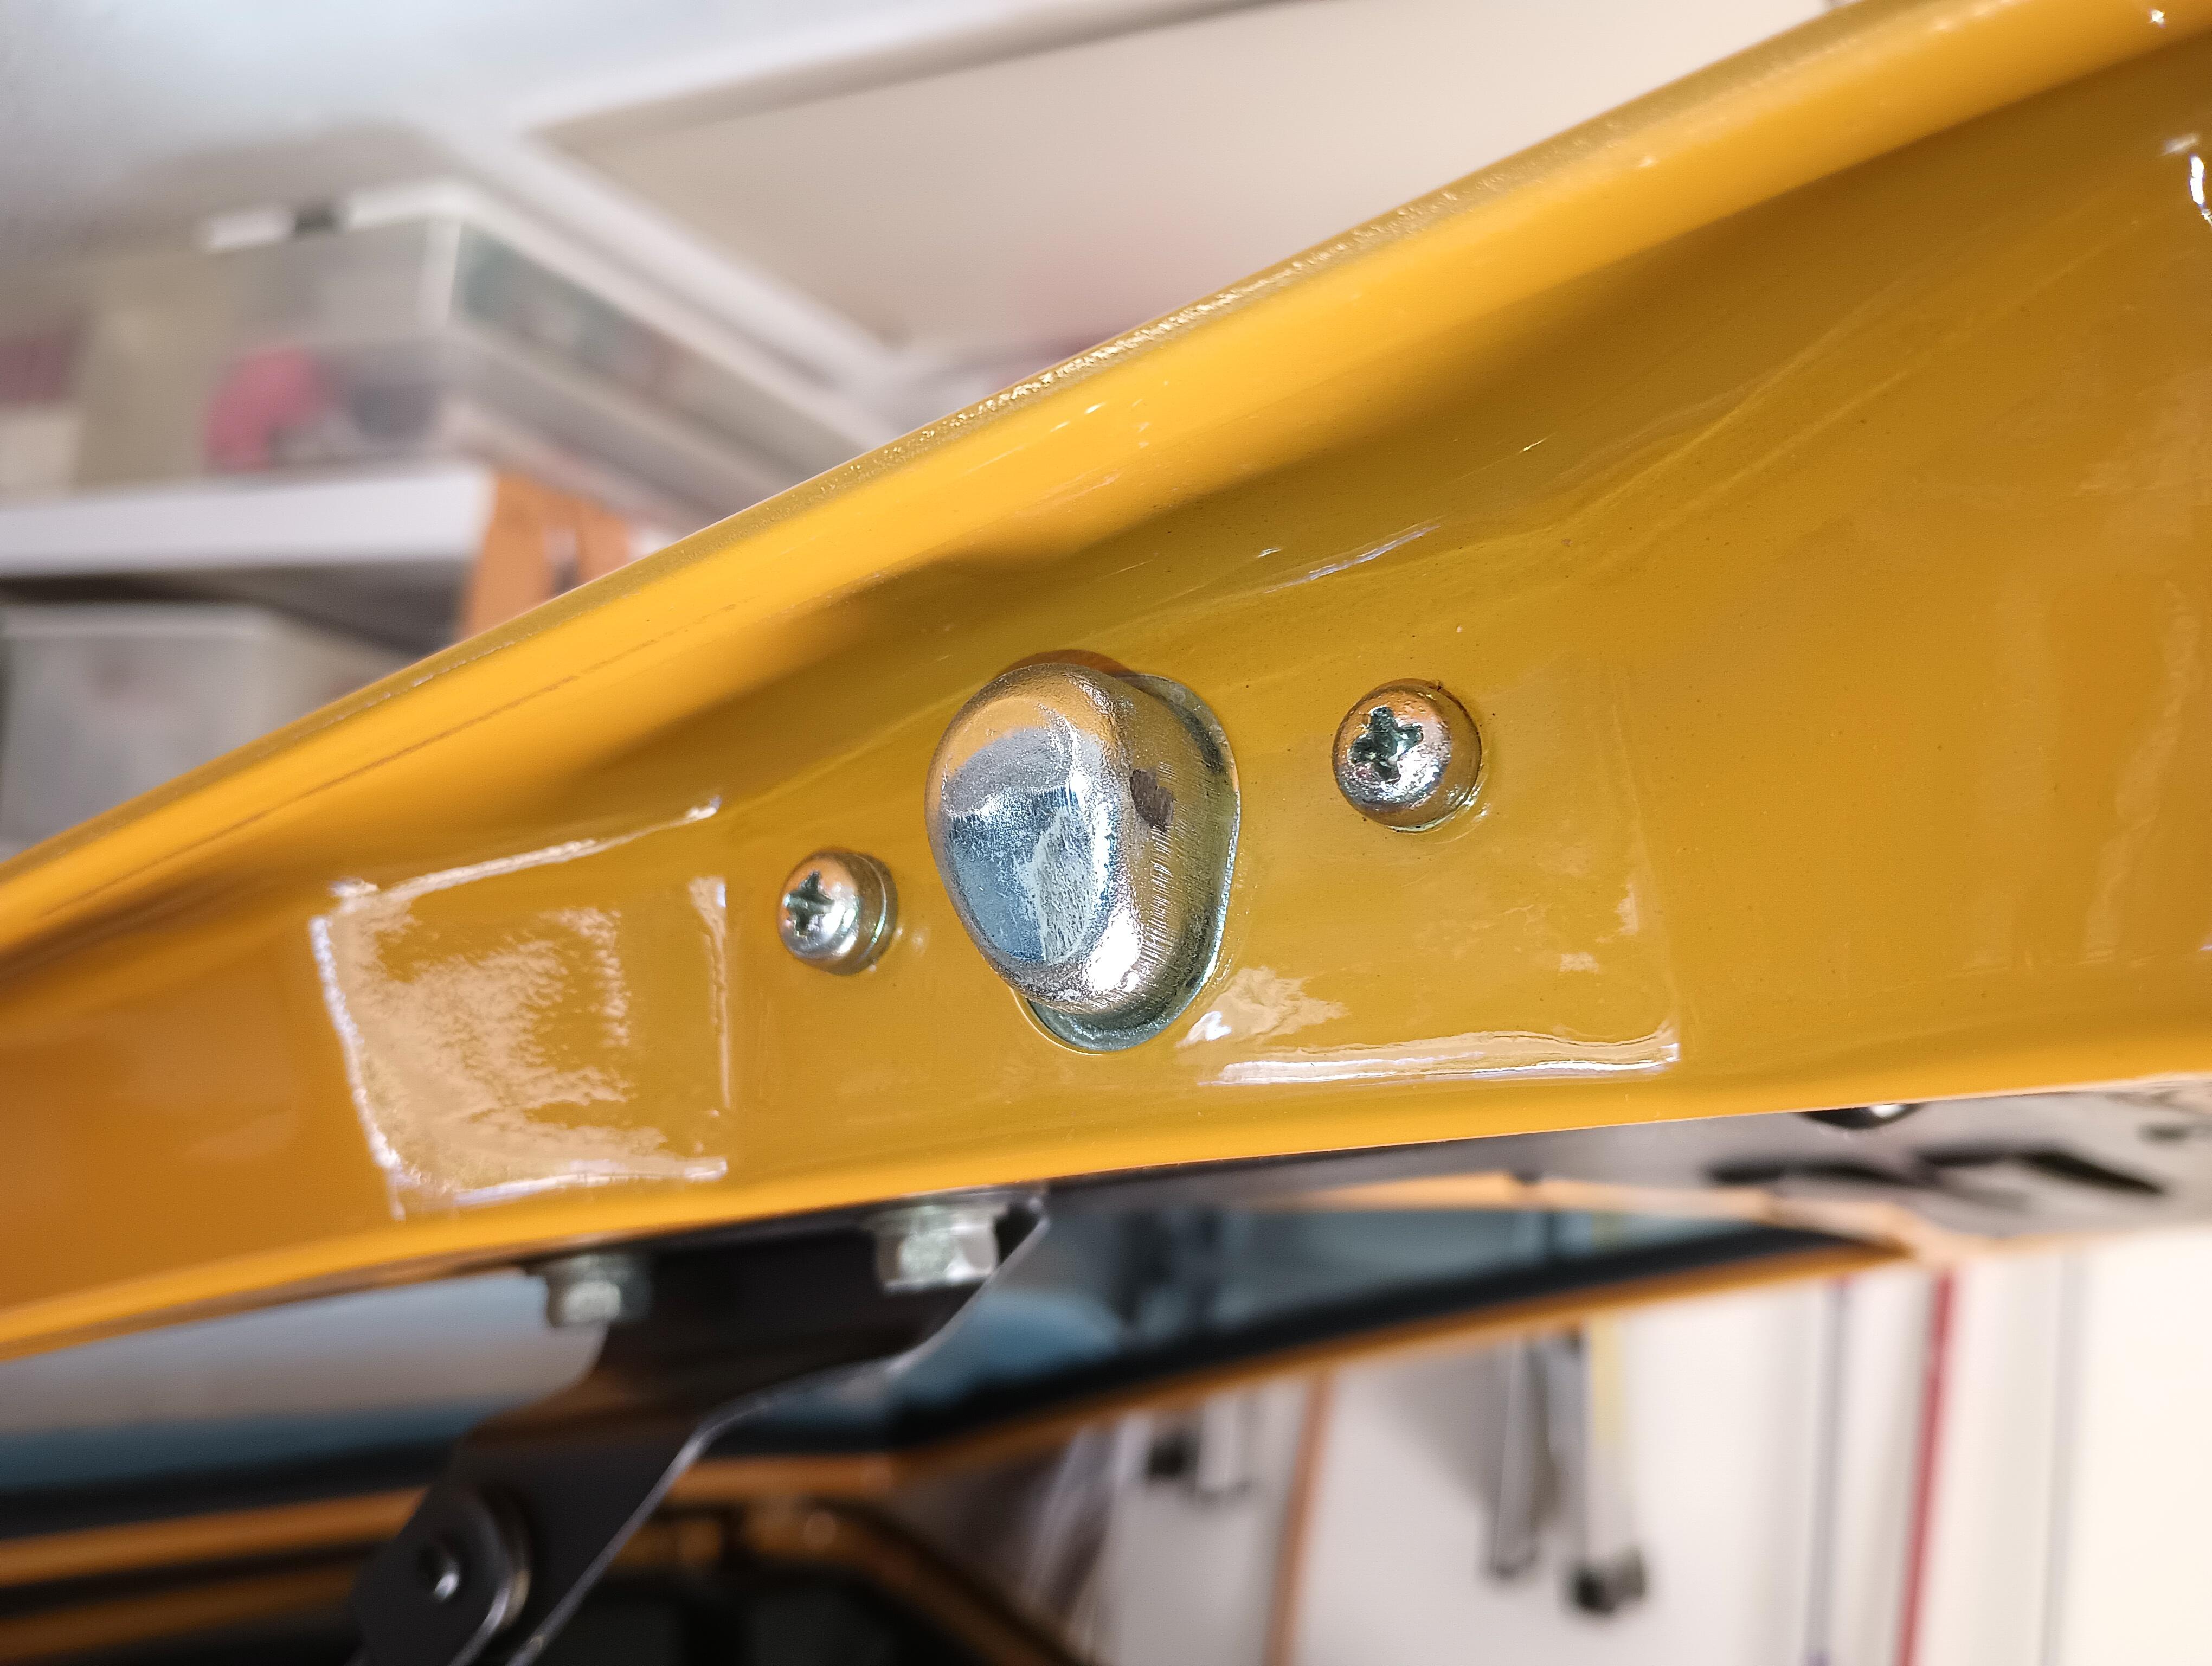
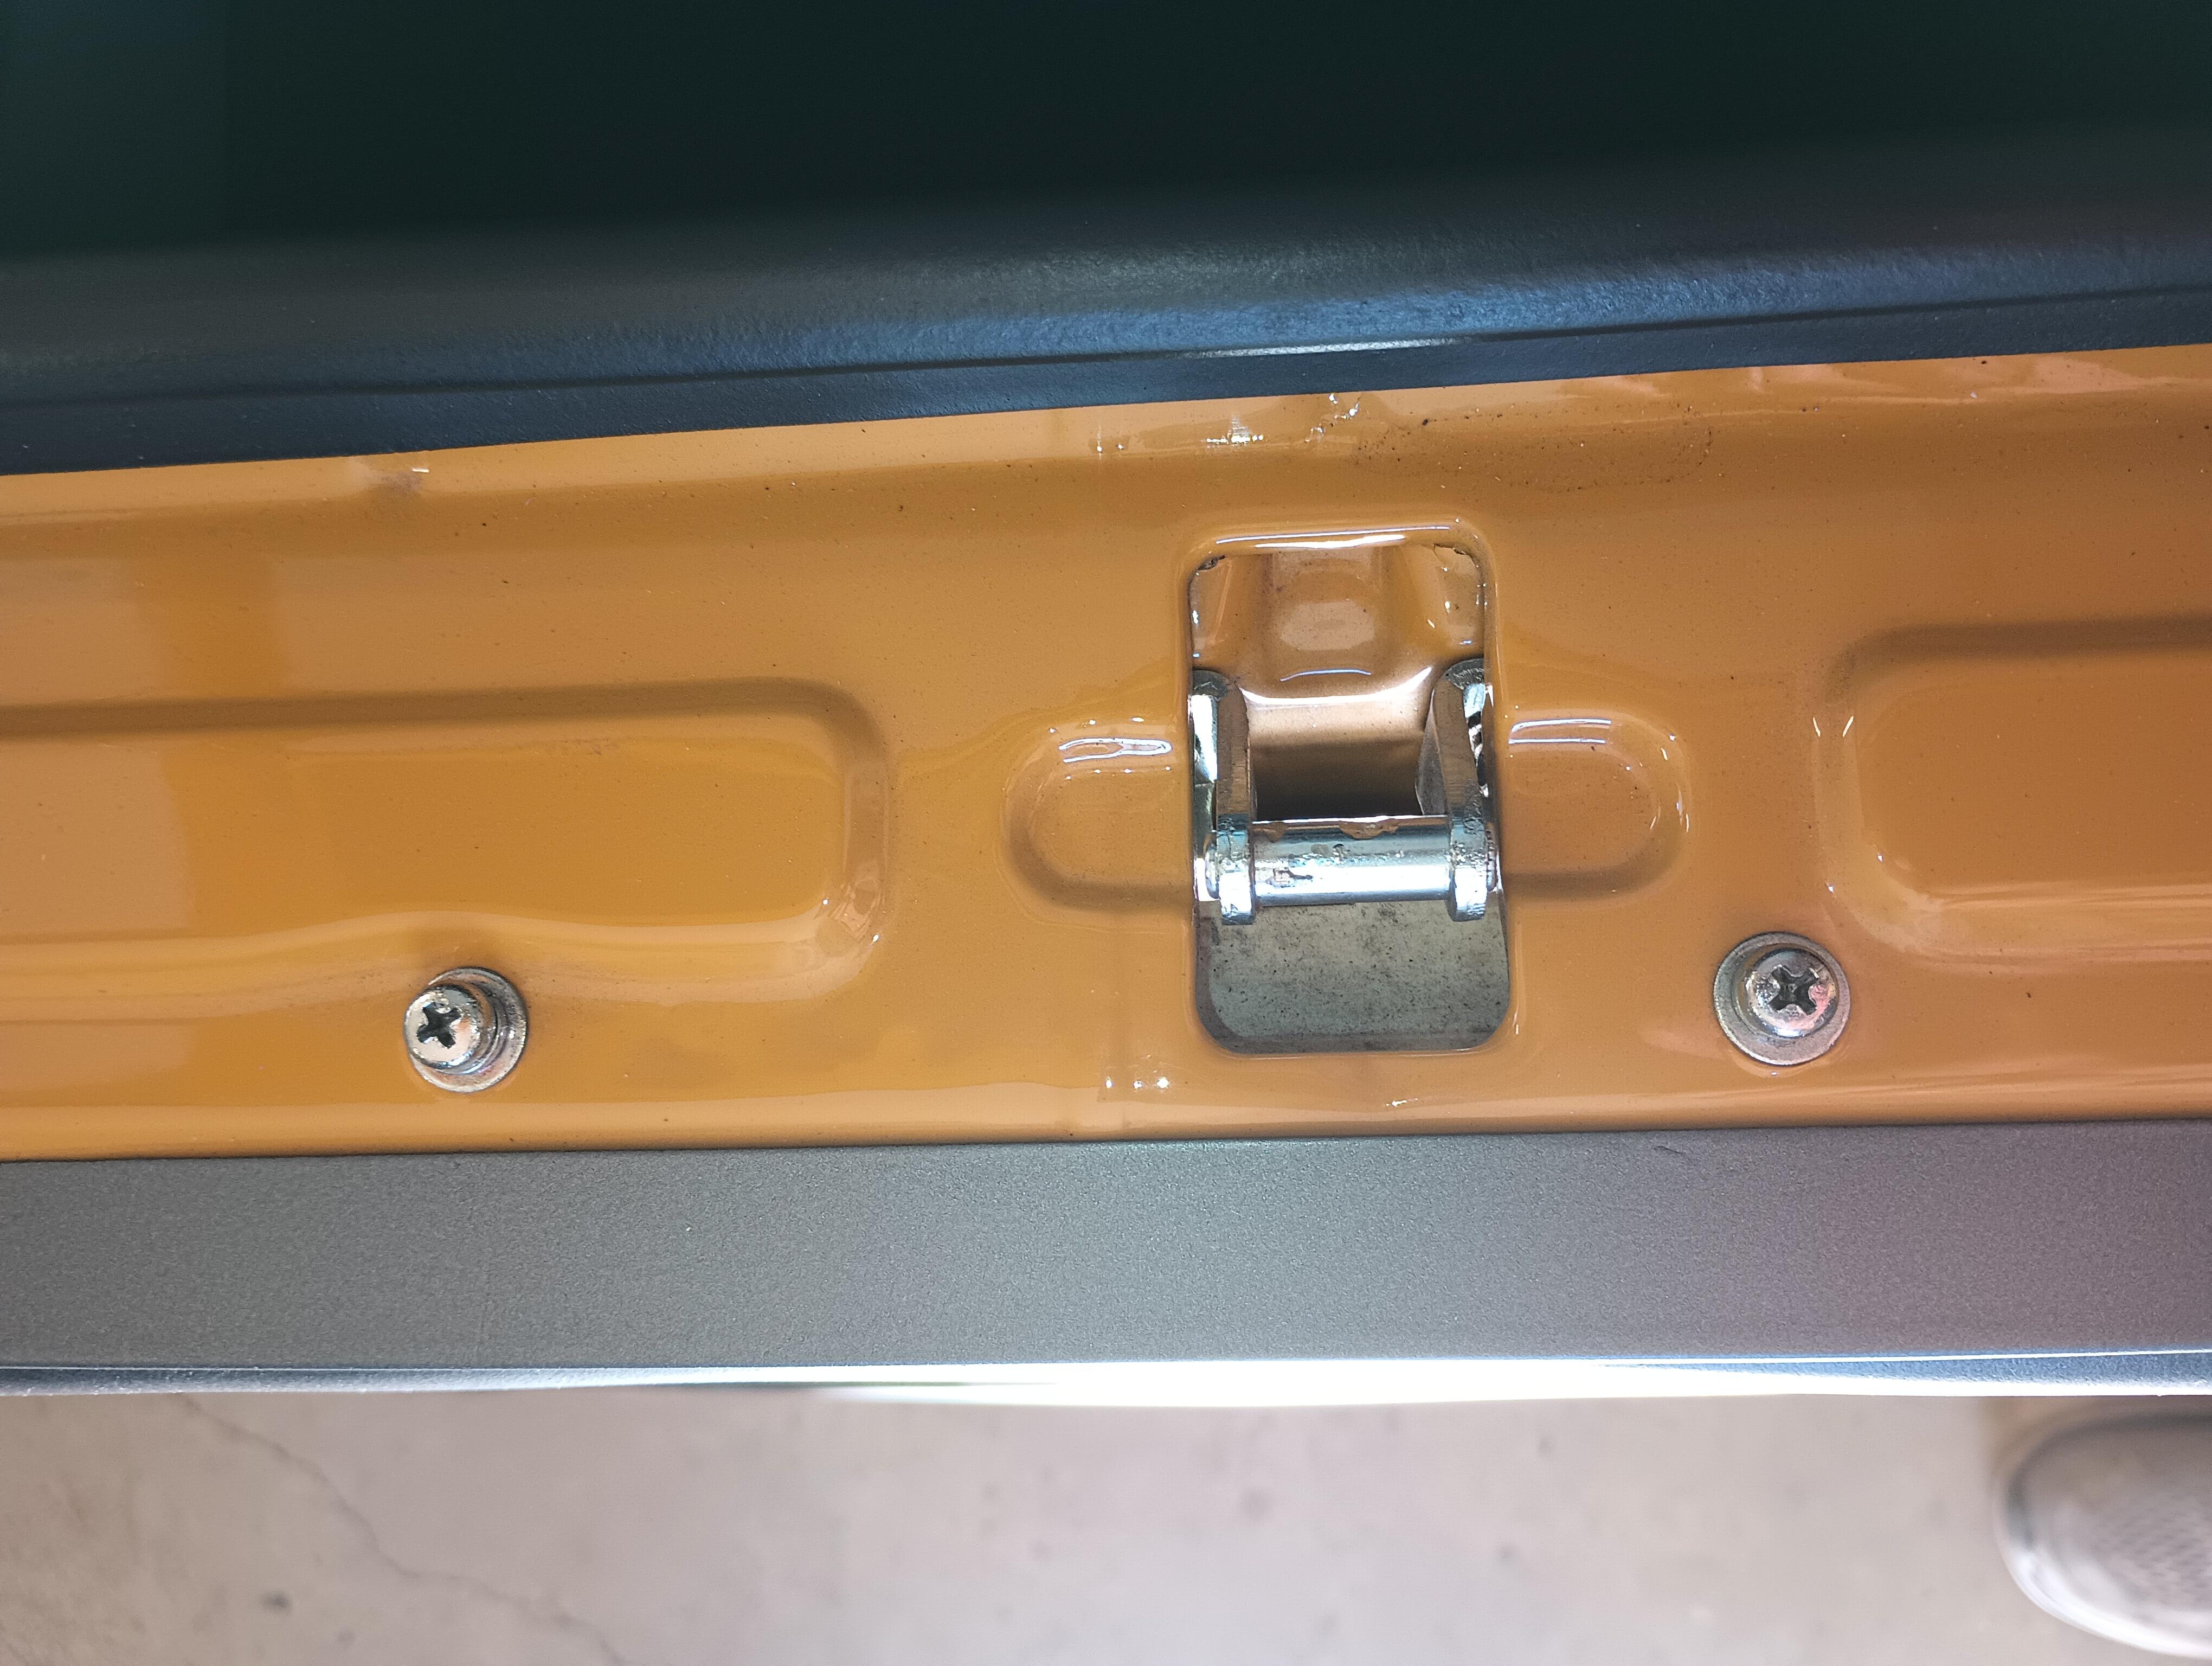
Charles - Some additional hatch area pics.


-
A couple of reassembly tips: Place a tiny dab of lube in each hole for the nubbin springs - that will keep them in place during the process. Position the switch in the Parking Light setting - this will place the nubbins in the middle of the rockers and avoid lateral pressure that might pop one loose. Place a tiny dab of lube on the middle of the rocker for the nubbin contact.
The Walmart Group 24F I purchased in 2011 held up for 10 years! But... that was then and this is now, no telling who is making them at this time. Watch the warranty period on your candidates, I think the Duracell is only 24 months.
The wire colors changed over the years but the internal switch post positions and functions did not. This diagram is correct for all S30 headlight switch functions.
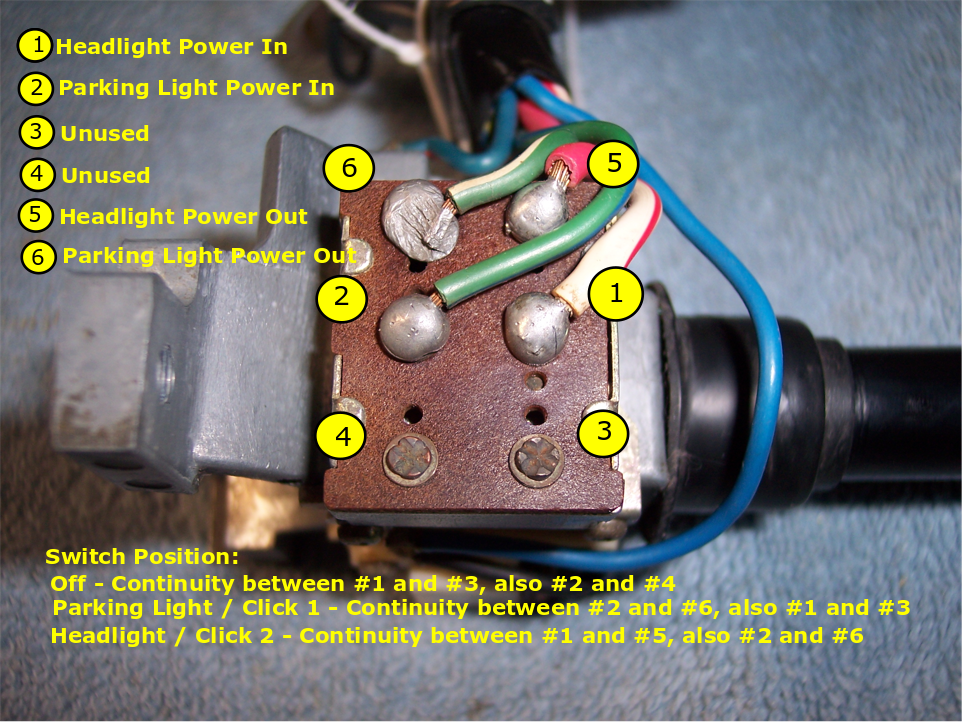 Power is supplied by two wires - one for the headlights and one for the parking lights, both power sources enter via the center posts. The white/red wire is power in for the headlights, the green wire is power in for the parking lights. When the switch is off, you will have continuity between the white/red wire and the unused post in front of it, the same is true for the green wire and the unsed post in front of it. The first click on the switch activates the parking light circuit, continuity moves to the green wire and green/white wire, no change on the white/red wire. The second click adds in the headlight circuit and continuity shifts between the white/red wire and the red wire. I hope my explanation is clear and this helps a bit. Sorry, no spare nubbins.
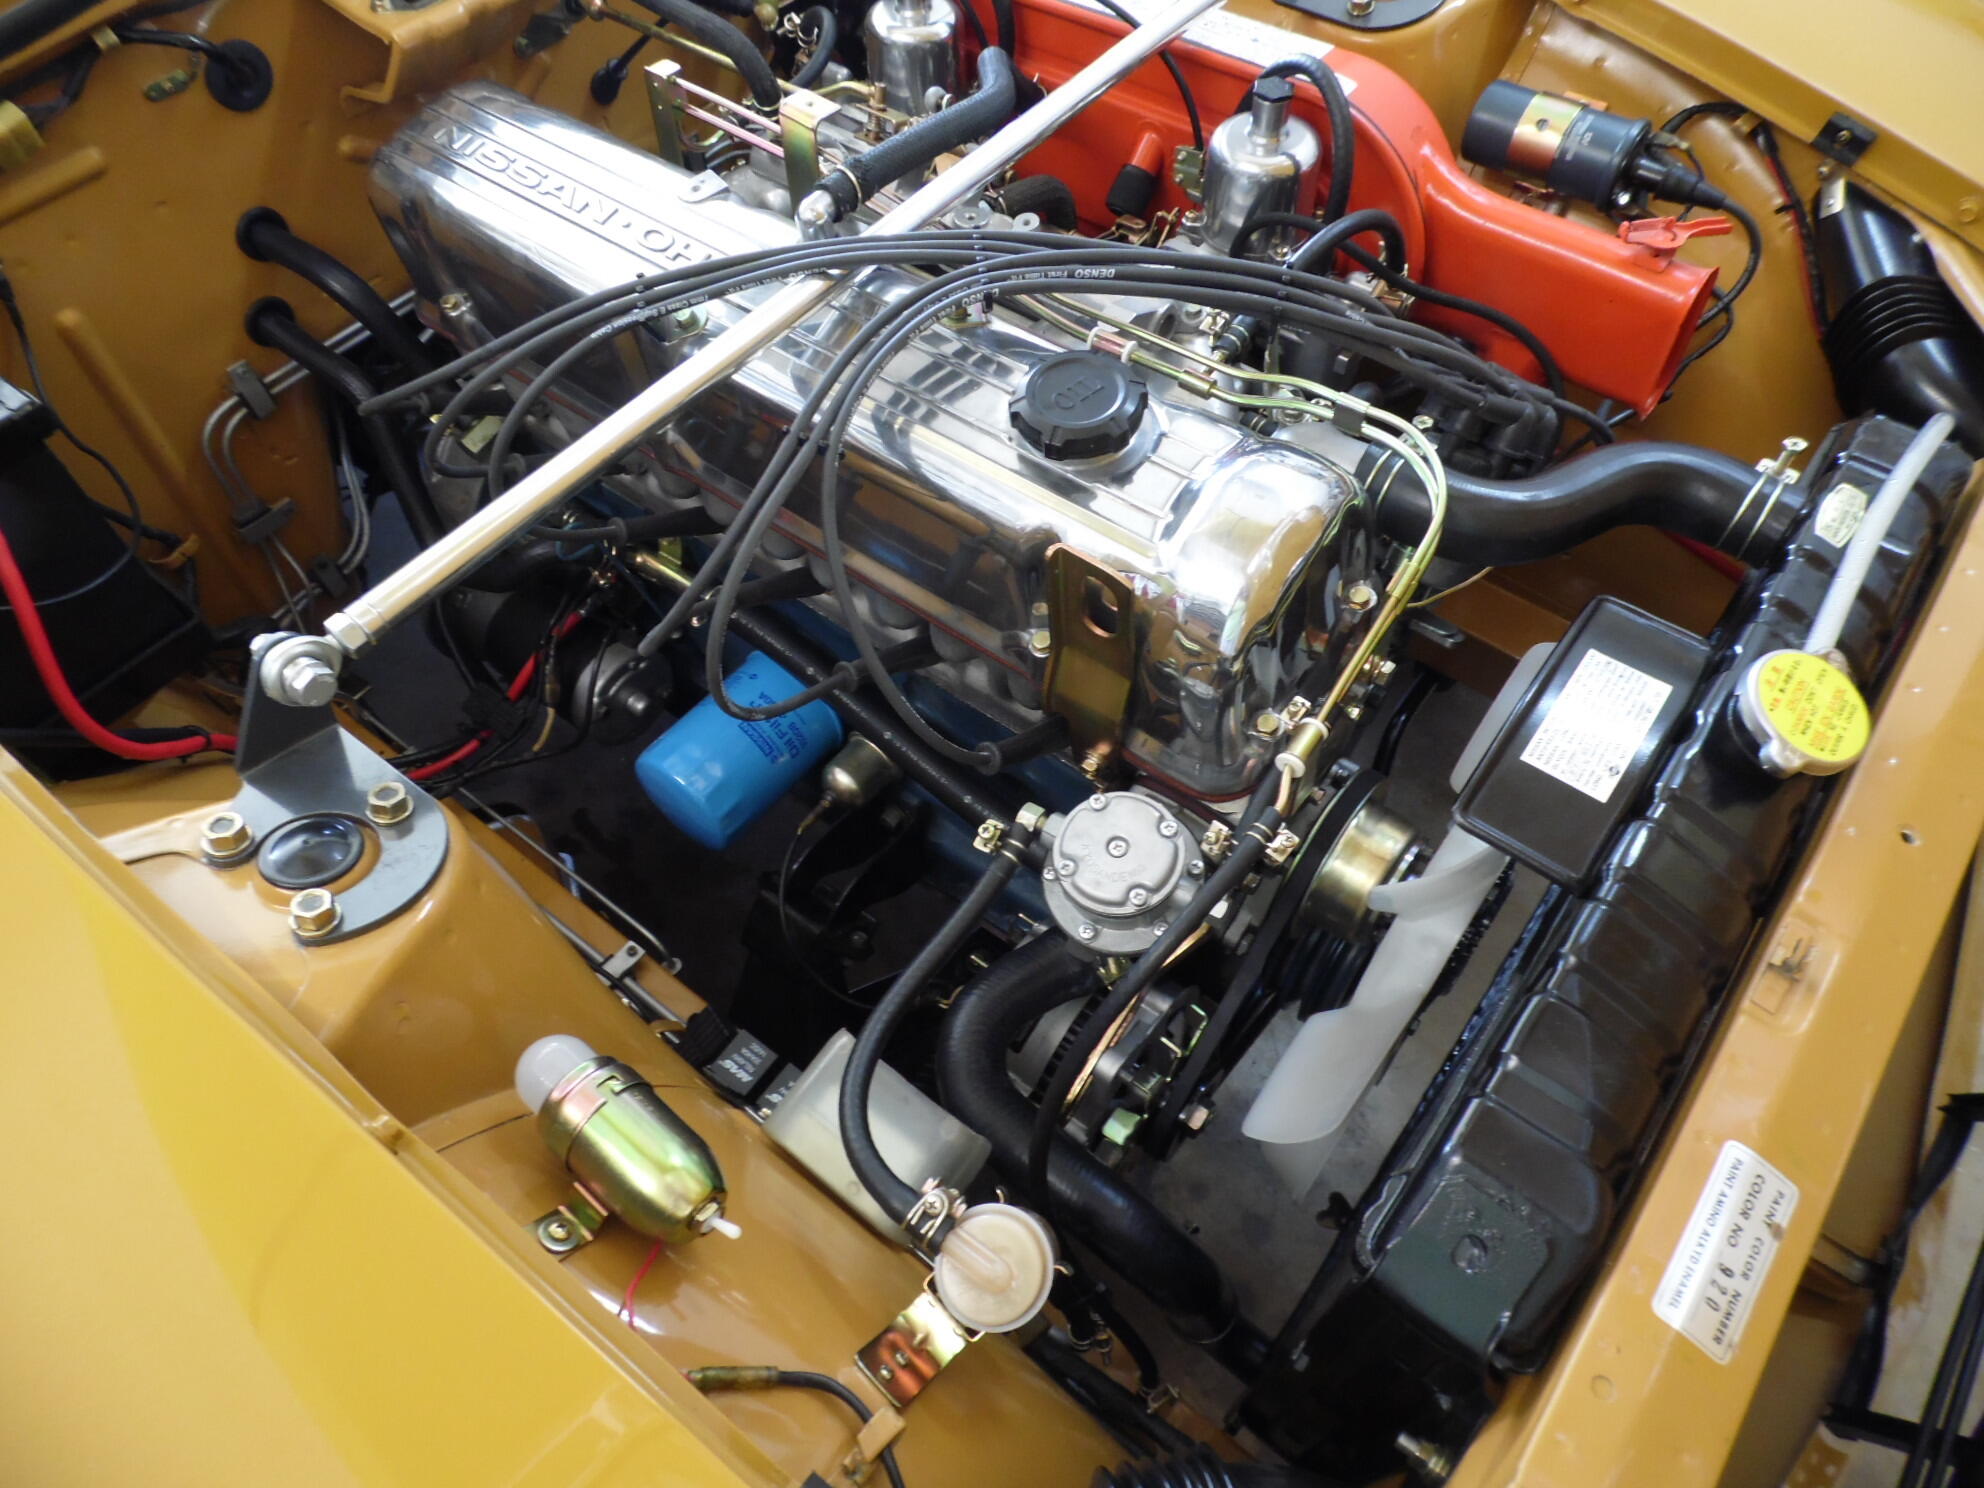
Here's a couple of reference pics for you. This is the PCV - Crankcase breather hose in place and the valve cover - air filter hose hanging loose at the top. In this pic the valve cover - air filter hose is connected. Look just to the left of the front carb and you will see a port on the back of the air filter with a black cover. That port is for a hose to the smog pump. When the pump is deleted, the air filter port needs to be blocked. That is the 1" chair leg cover that @siteunseen referred to.
Power is supplied by two wires - one for the headlights and one for the parking lights, both power sources enter via the center posts. The white/red wire is power in for the headlights, the green wire is power in for the parking lights. When the switch is off, you will have continuity between the white/red wire and the unused post in front of it, the same is true for the green wire and the unsed post in front of it. The first click on the switch activates the parking light circuit, continuity moves to the green wire and green/white wire, no change on the white/red wire. The second click adds in the headlight circuit and continuity shifts between the white/red wire and the red wire. I hope my explanation is clear and this helps a bit. Sorry, no spare nubbins.
Here's a couple of reference pics for you. This is the PCV - Crankcase breather hose in place and the valve cover - air filter hose hanging loose at the top. In this pic the valve cover - air filter hose is connected. Look just to the left of the front carb and you will see a port on the back of the air filter with a black cover. That port is for a hose to the smog pump. When the pump is deleted, the air filter port needs to be blocked. That is the 1" chair leg cover that @siteunseen referred to.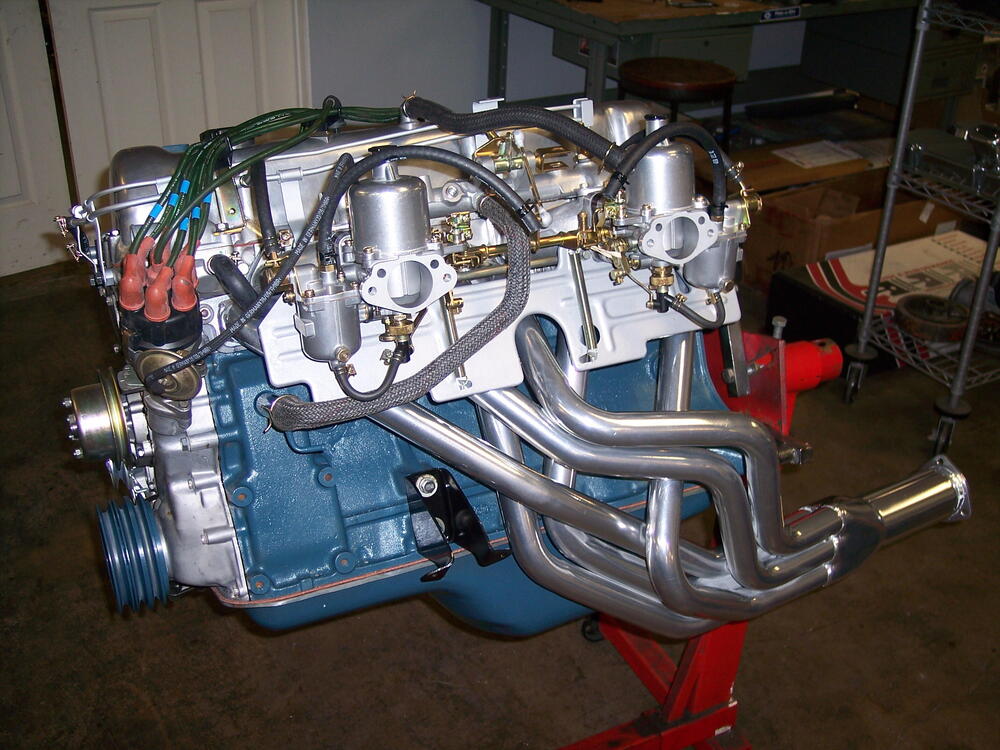
 Try furnishing your local automotive paint store with one or more of these paint codes: https://paintref.com/cgi-bin/colorcodedisplay.cgi?year=1970&con=y&make=Datsun&rows=50
Beautiful car! Congratulations on your most excallent work.
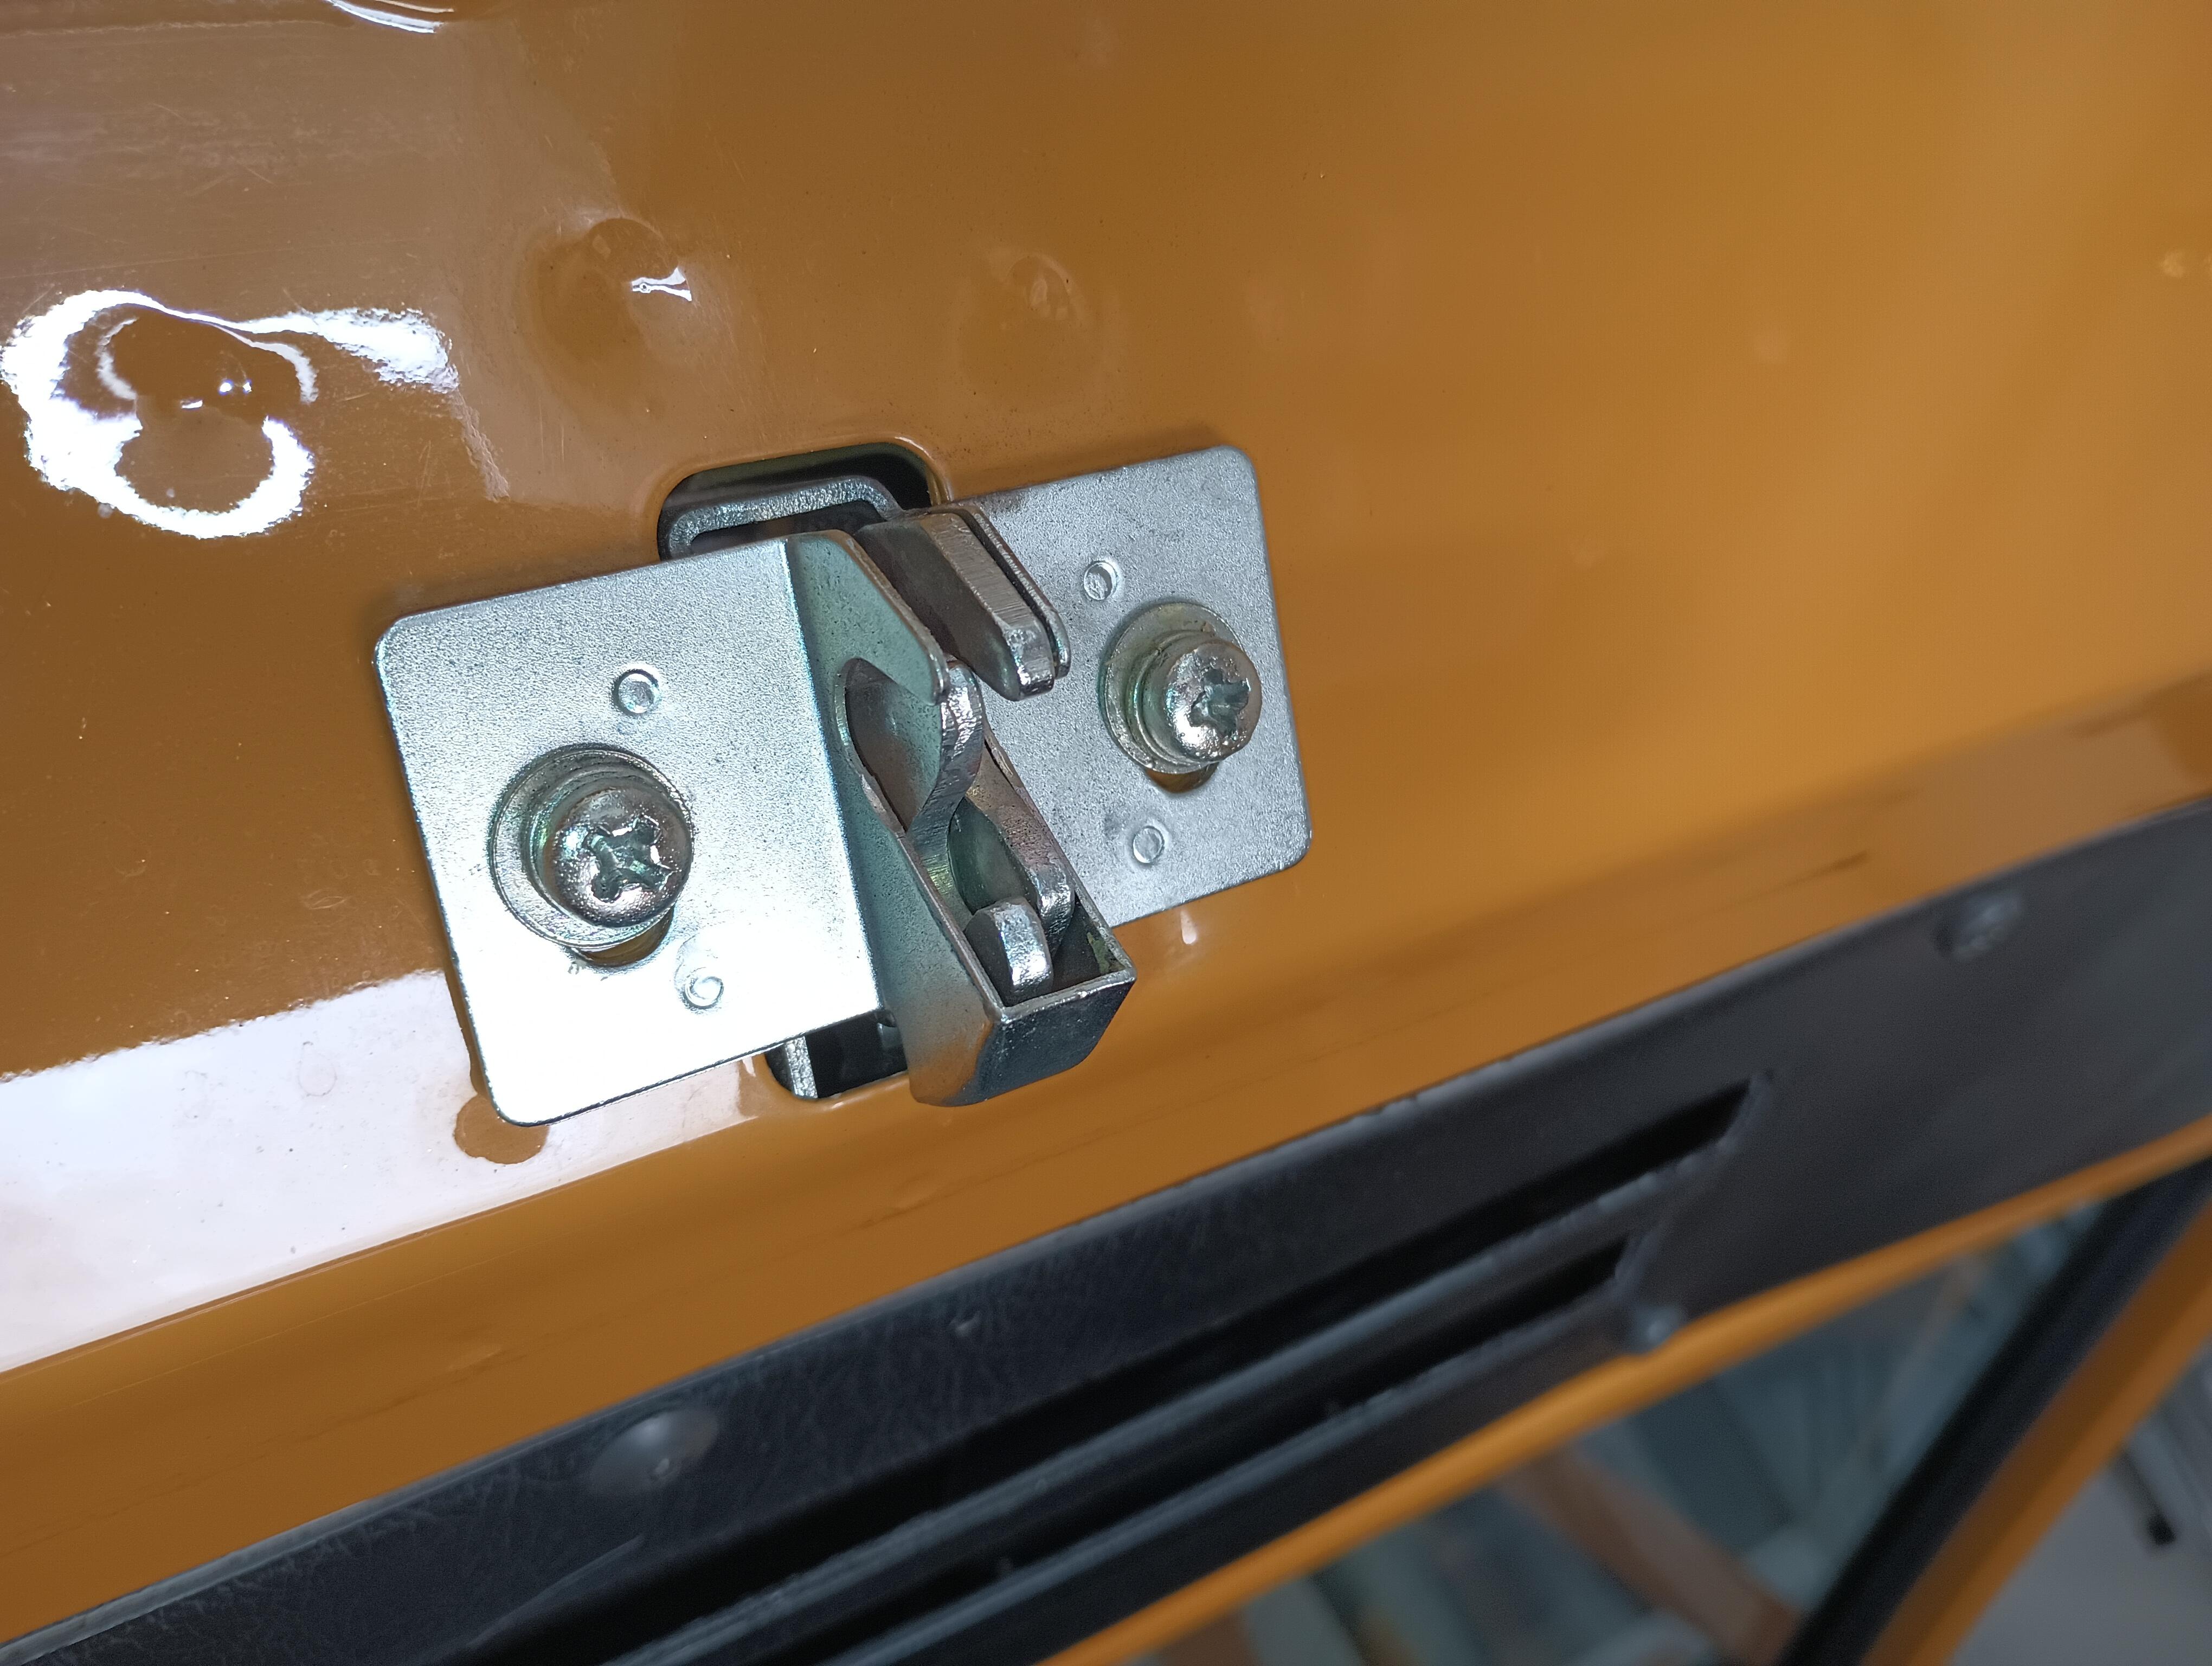
The hood latch male and female parts did change one time as of 05/72 and was the same for all following years S30's, the female receiver change is at the safety latch catch location. The male portion of the safety latch received a second spring at that time. The spacing on my car with the early latch receiver matches that of your 05/71 car. I'm still thinking through why your latch is binding when you pull the release.
Try furnishing your local automotive paint store with one or more of these paint codes: https://paintref.com/cgi-bin/colorcodedisplay.cgi?year=1970&con=y&make=Datsun&rows=50
Beautiful car! Congratulations on your most excallent work.
The hood latch male and female parts did change one time as of 05/72 and was the same for all following years S30's, the female receiver change is at the safety latch catch location. The male portion of the safety latch received a second spring at that time. The spacing on my car with the early latch receiver matches that of your 05/71 car. I'm still thinking through why your latch is binding when you pull the release.
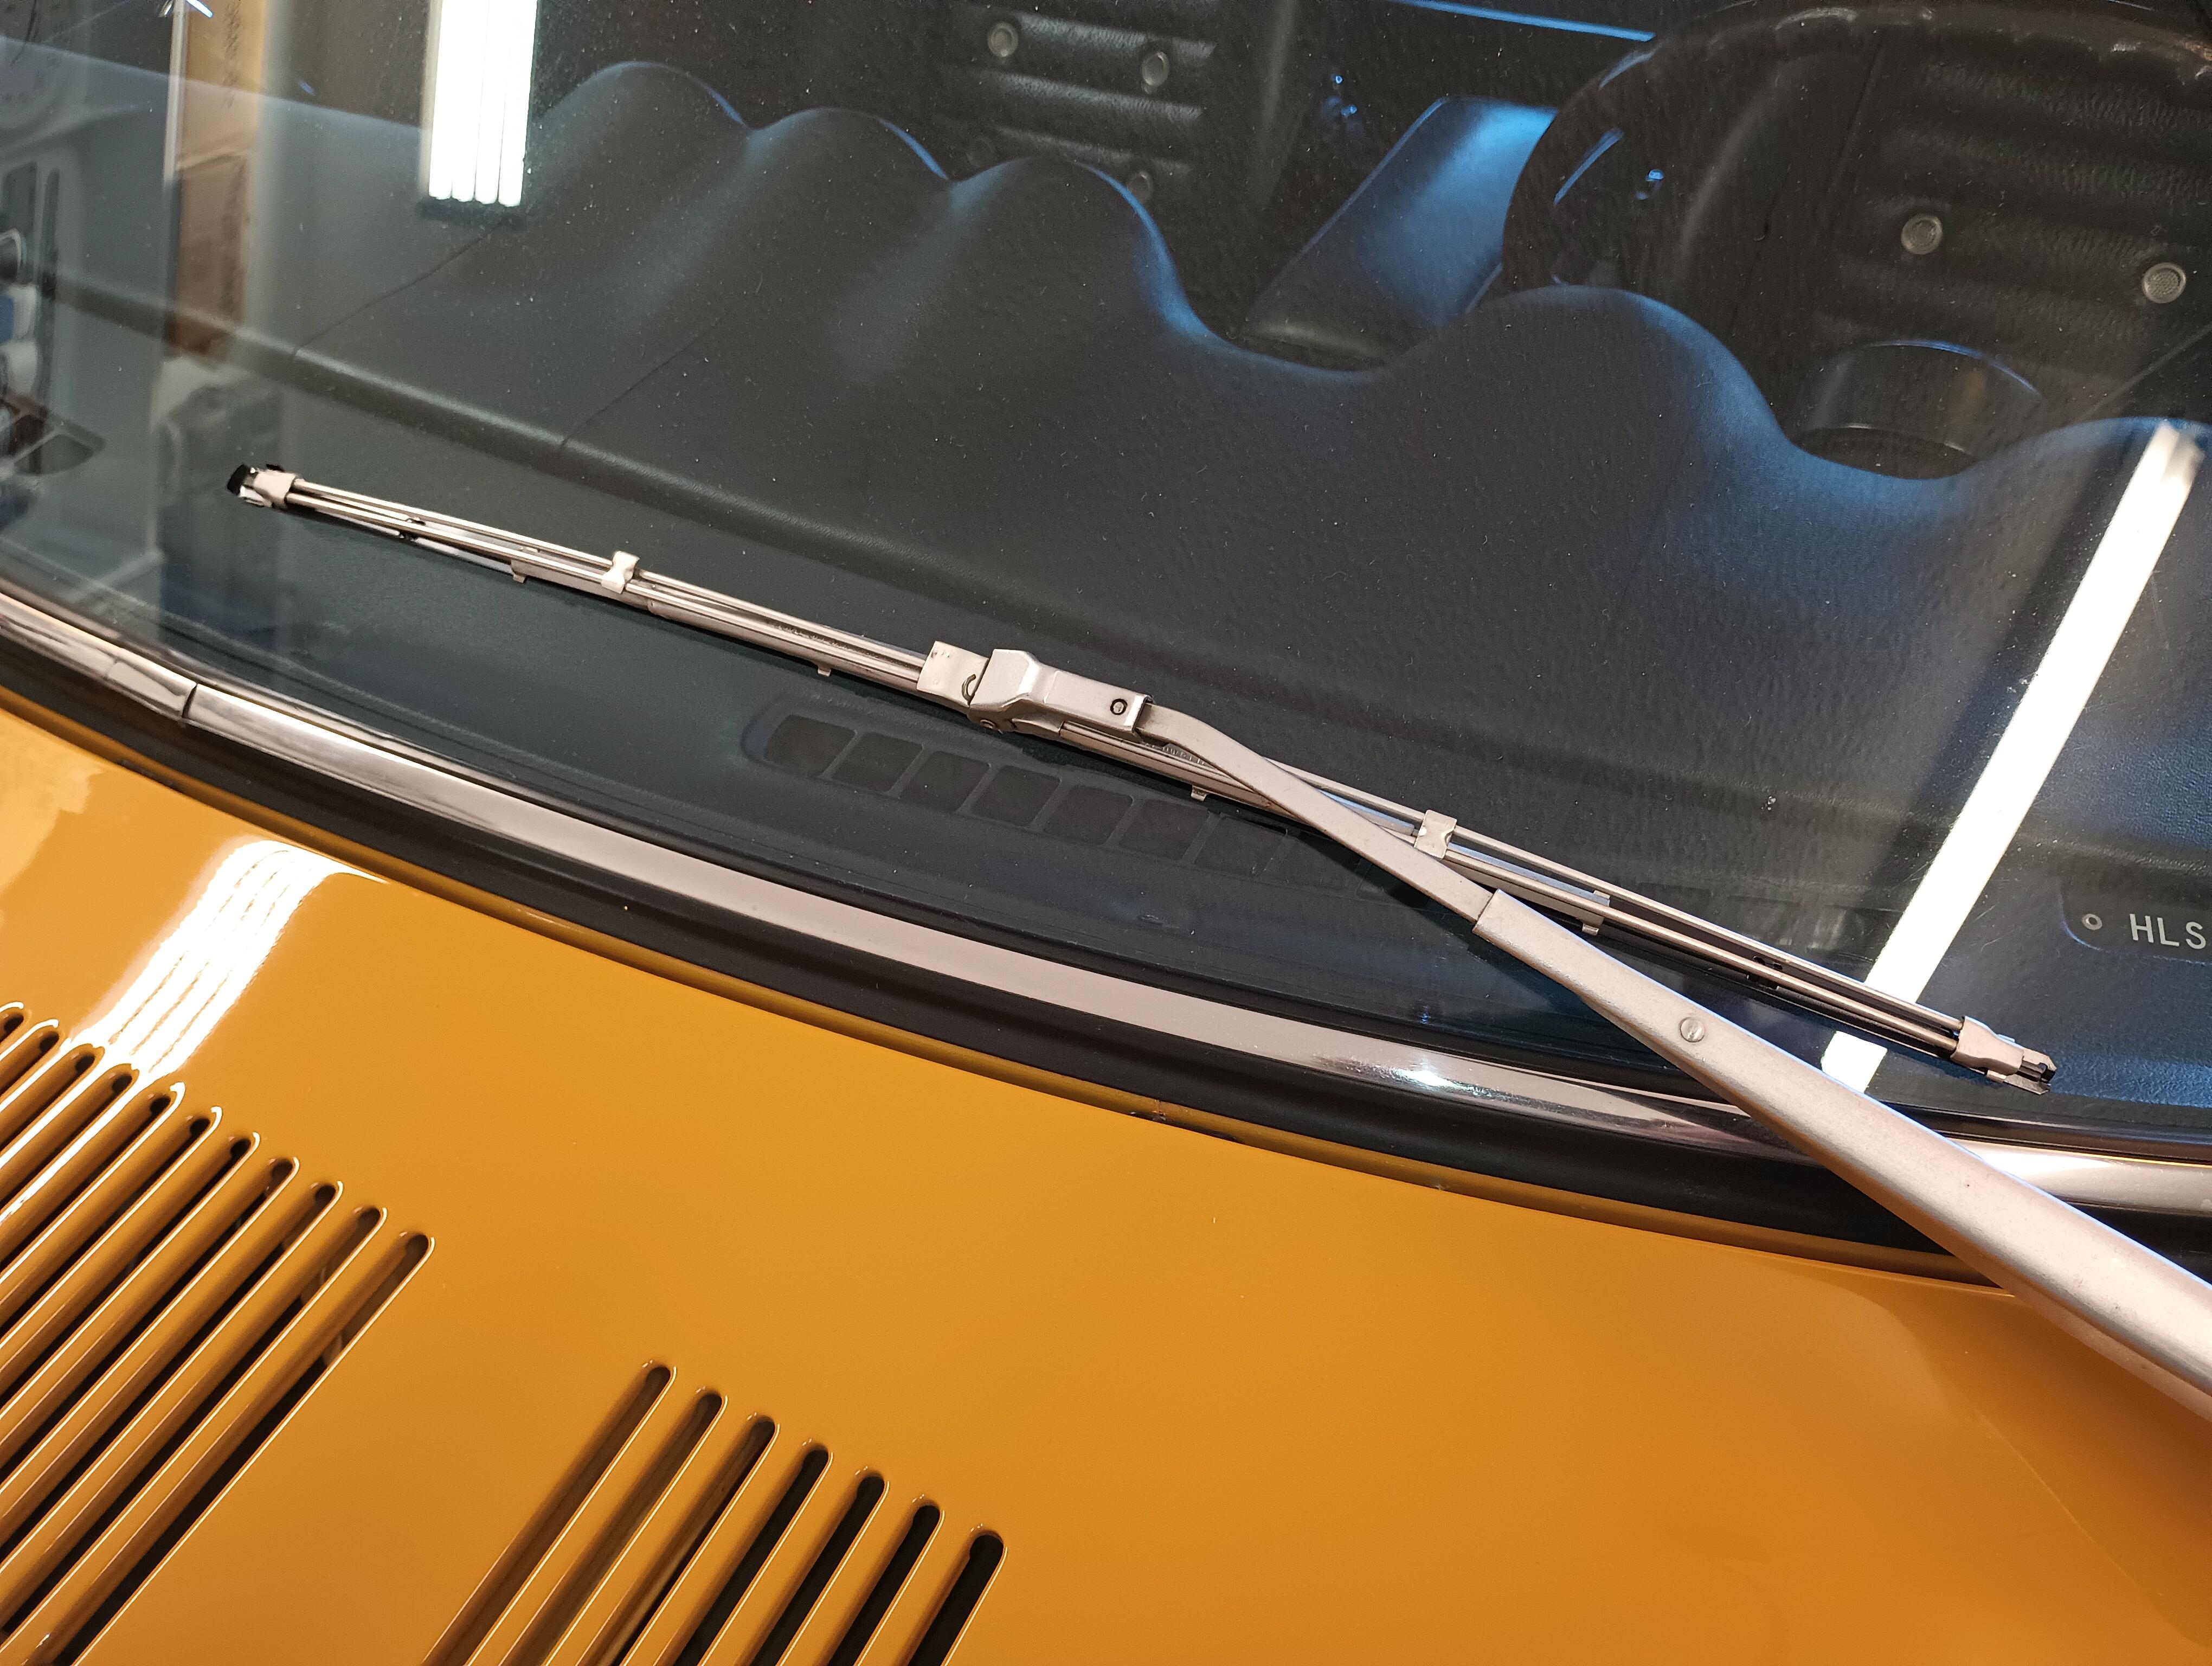
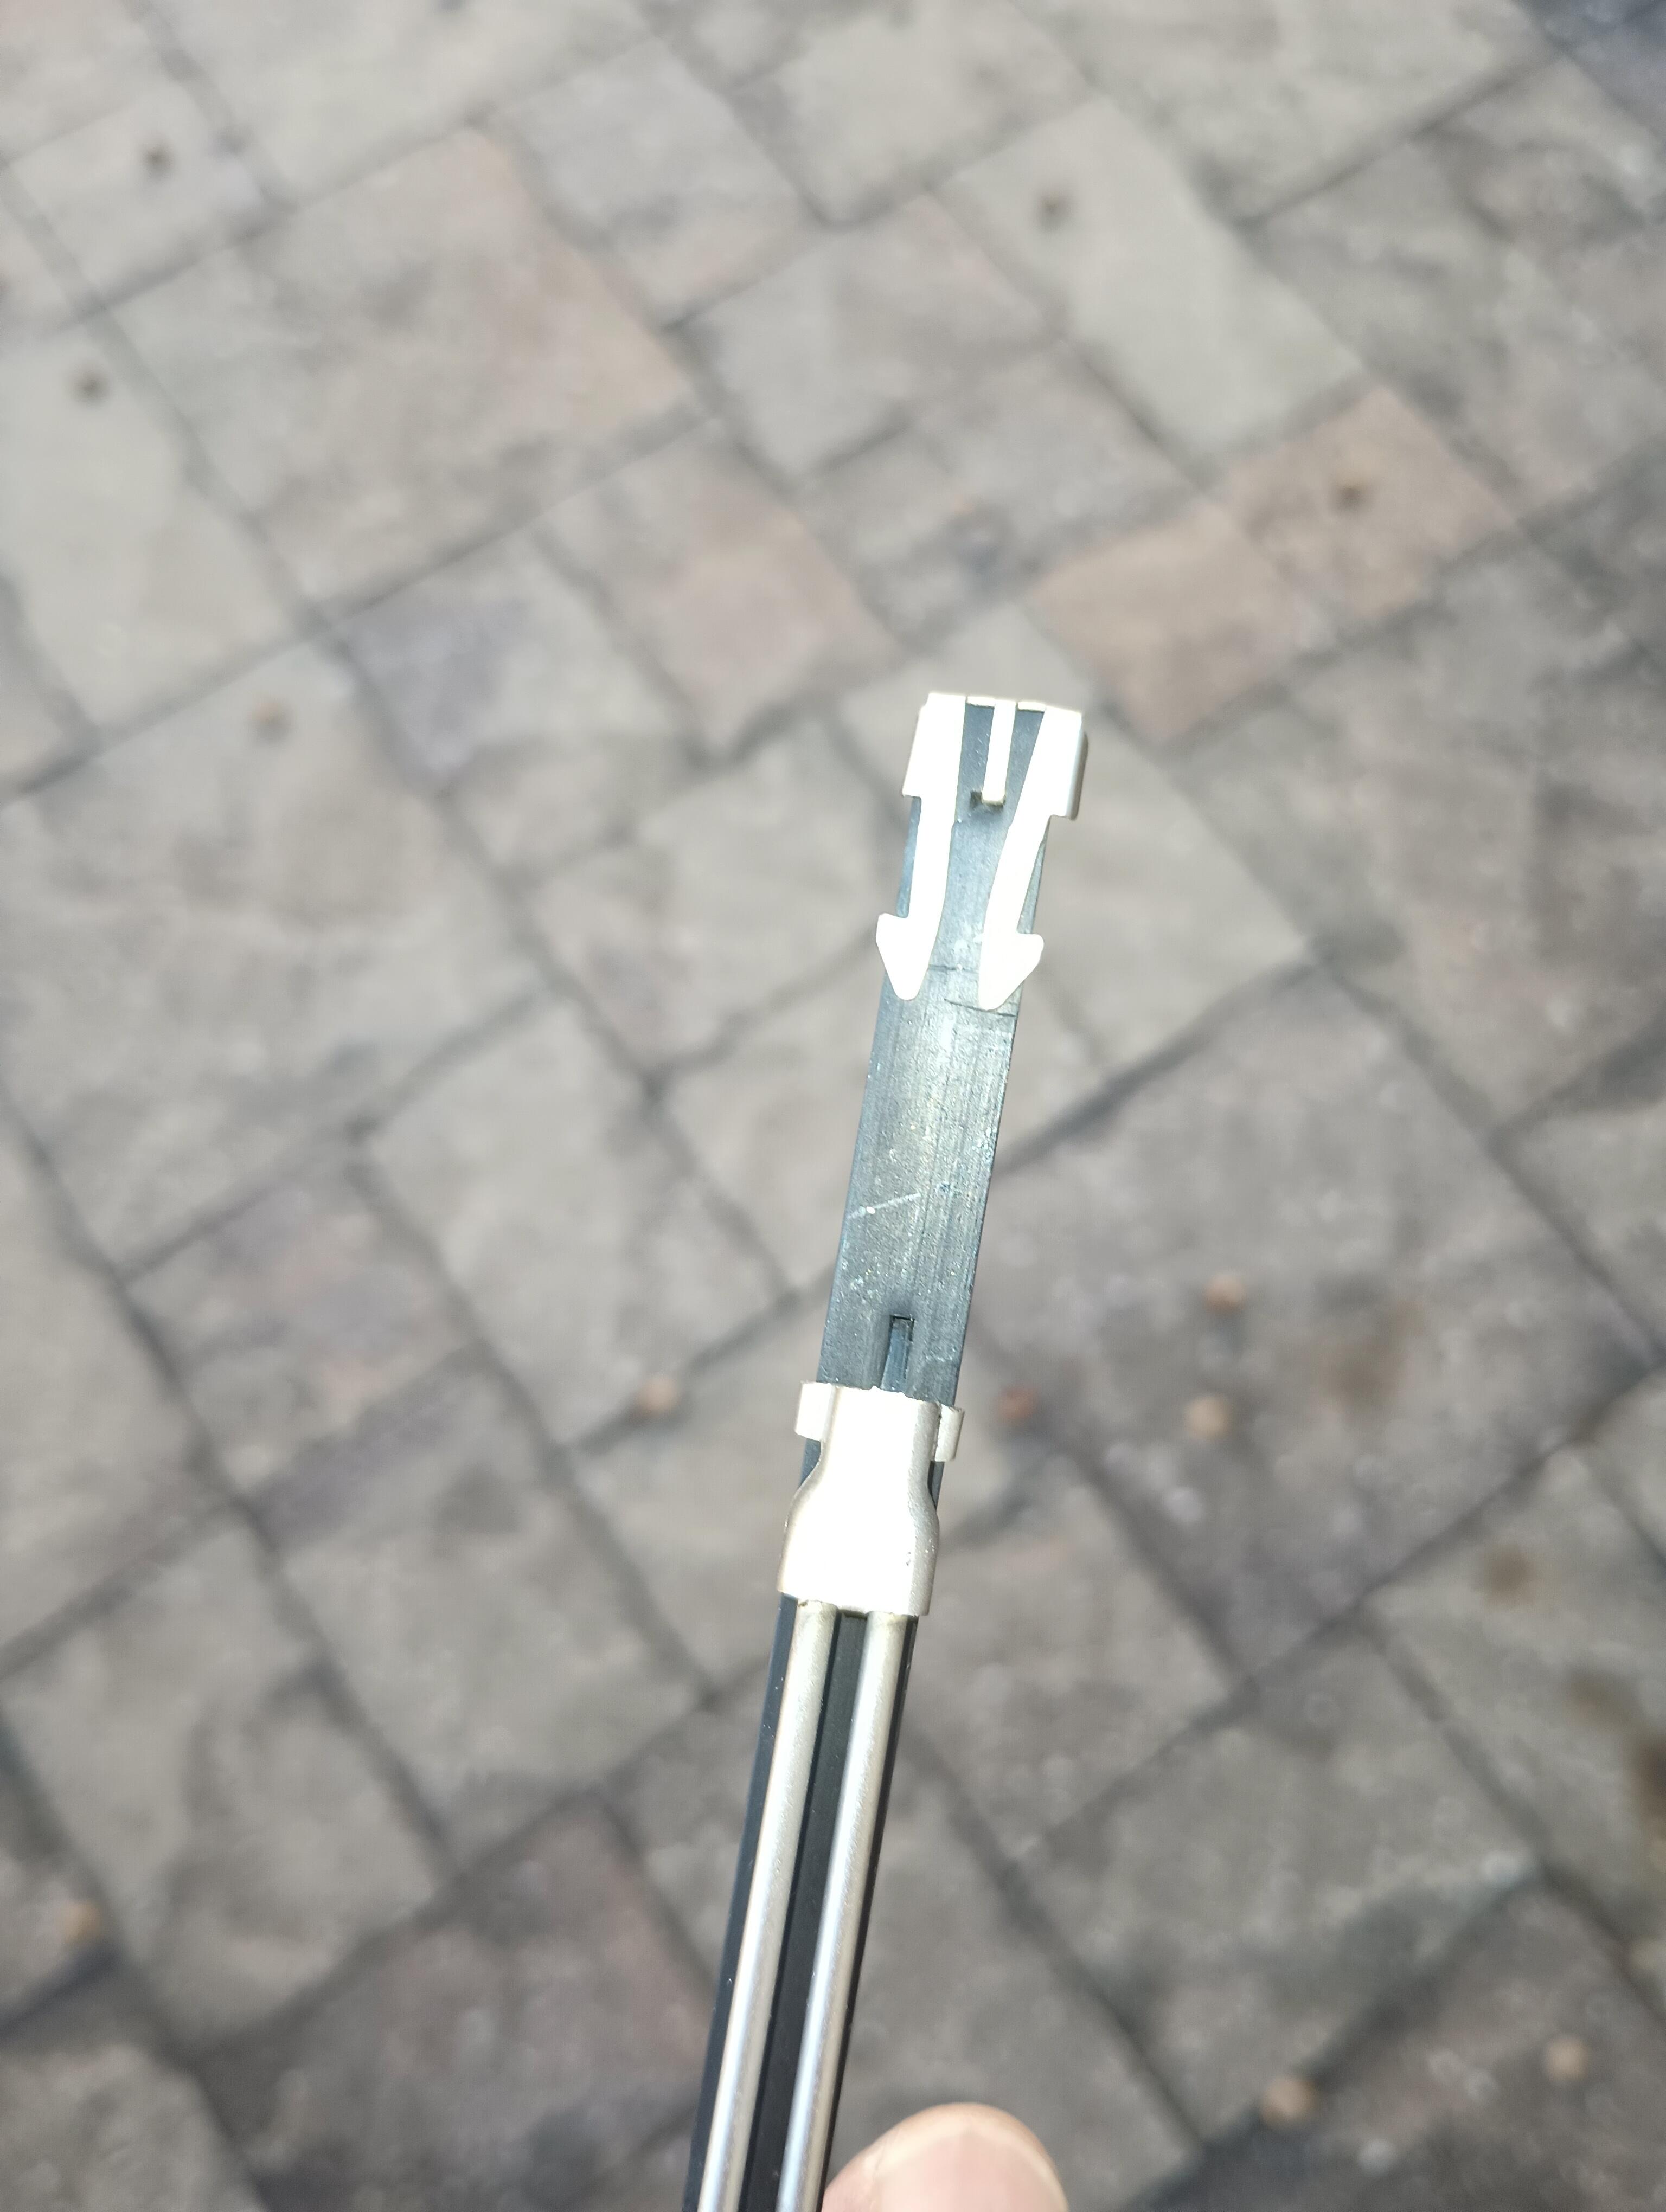
 We have a winner! The OER F390 is a perfect fit. It has a full length black metal backbone that slides nicely into the claws on the frame and the retaining clip locks it. Thanks to @SteveJ and @w3wilkes for the referrals.
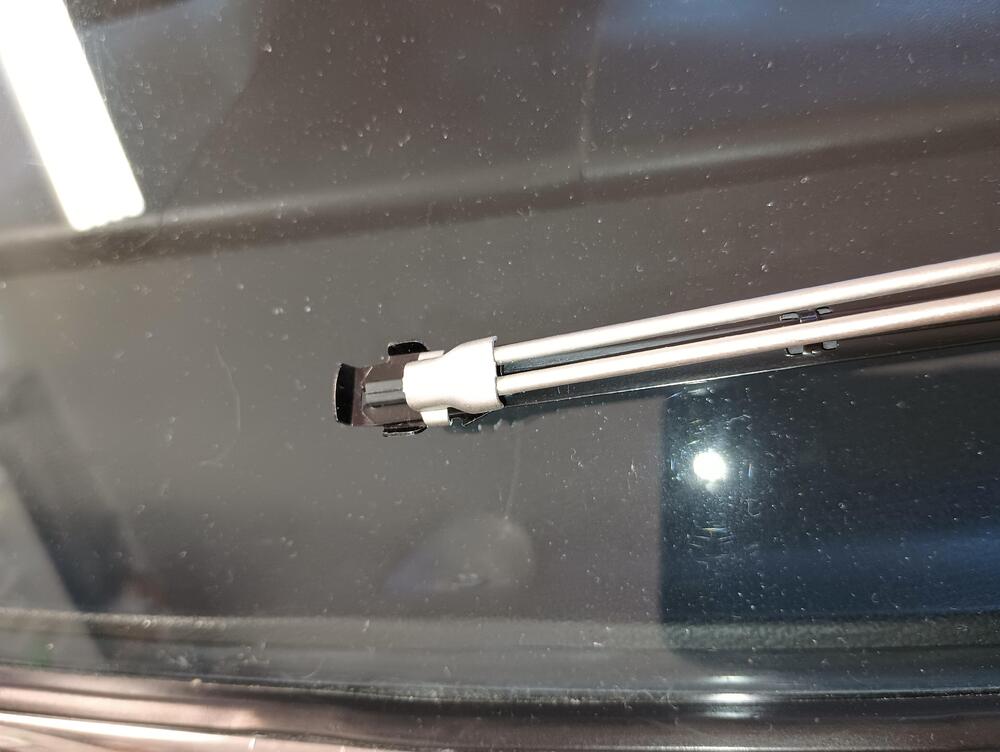 I initially tried a set of those, the metal reinforcing ribs were too wide to fit my wiper frames.
Thanks for the links. Checking them both shows them to be 6mm width, mine are 3/8" - ~8.5mm. I'm going to look closely at the OER F309. It has a SS reinforcing rib but still might be narrow enough to work. As you commented on the Trico 44-180, no joy on multiple searches.
Yup, I found the same comments on Amazon. Look closely at the pic and you can see the stainless steel reinforcments along the backbone, common on most new blades. These SS ribs are typically too wide to fit the OE frame.
For those of us running the OE wiper blade frames, what are you doing for blade refills??? None of my area parts stores carry refills other than a Trico break-to-fit length that doesn't work. I've crawled Amazon and ebay, thought I had found a match with some NOS ANCO blades but no joy.
I initially tried a set of those, the metal reinforcing ribs were too wide to fit my wiper frames.
Thanks for the links. Checking them both shows them to be 6mm width, mine are 3/8" - ~8.5mm. I'm going to look closely at the OER F309. It has a SS reinforcing rib but still might be narrow enough to work. As you commented on the Trico 44-180, no joy on multiple searches.
Yup, I found the same comments on Amazon. Look closely at the pic and you can see the stainless steel reinforcments along the backbone, common on most new blades. These SS ribs are typically too wide to fit the OE frame.
For those of us running the OE wiper blade frames, what are you doing for blade refills??? None of my area parts stores carry refills other than a Trico break-to-fit length that doesn't work. I've crawled Amazon and ebay, thought I had found a match with some NOS ANCO blades but no joy.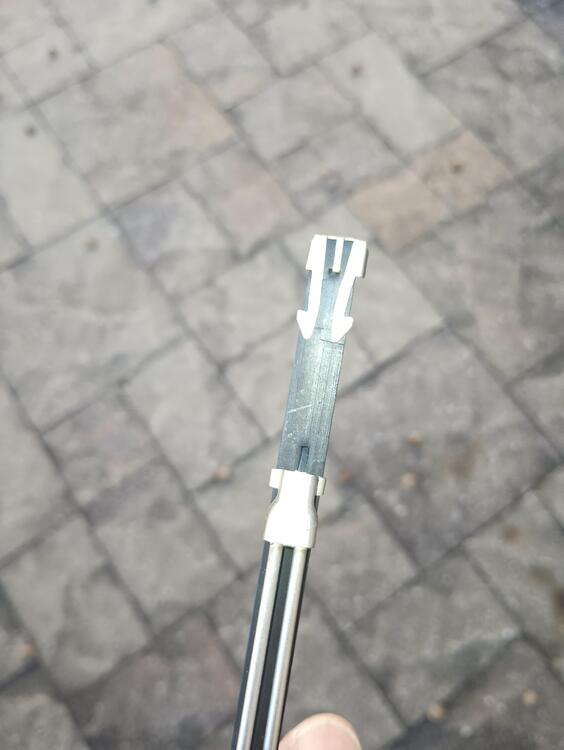 Consider warming it with a hair dryer or heat gun. It should get pliable enough to work into the proper position.
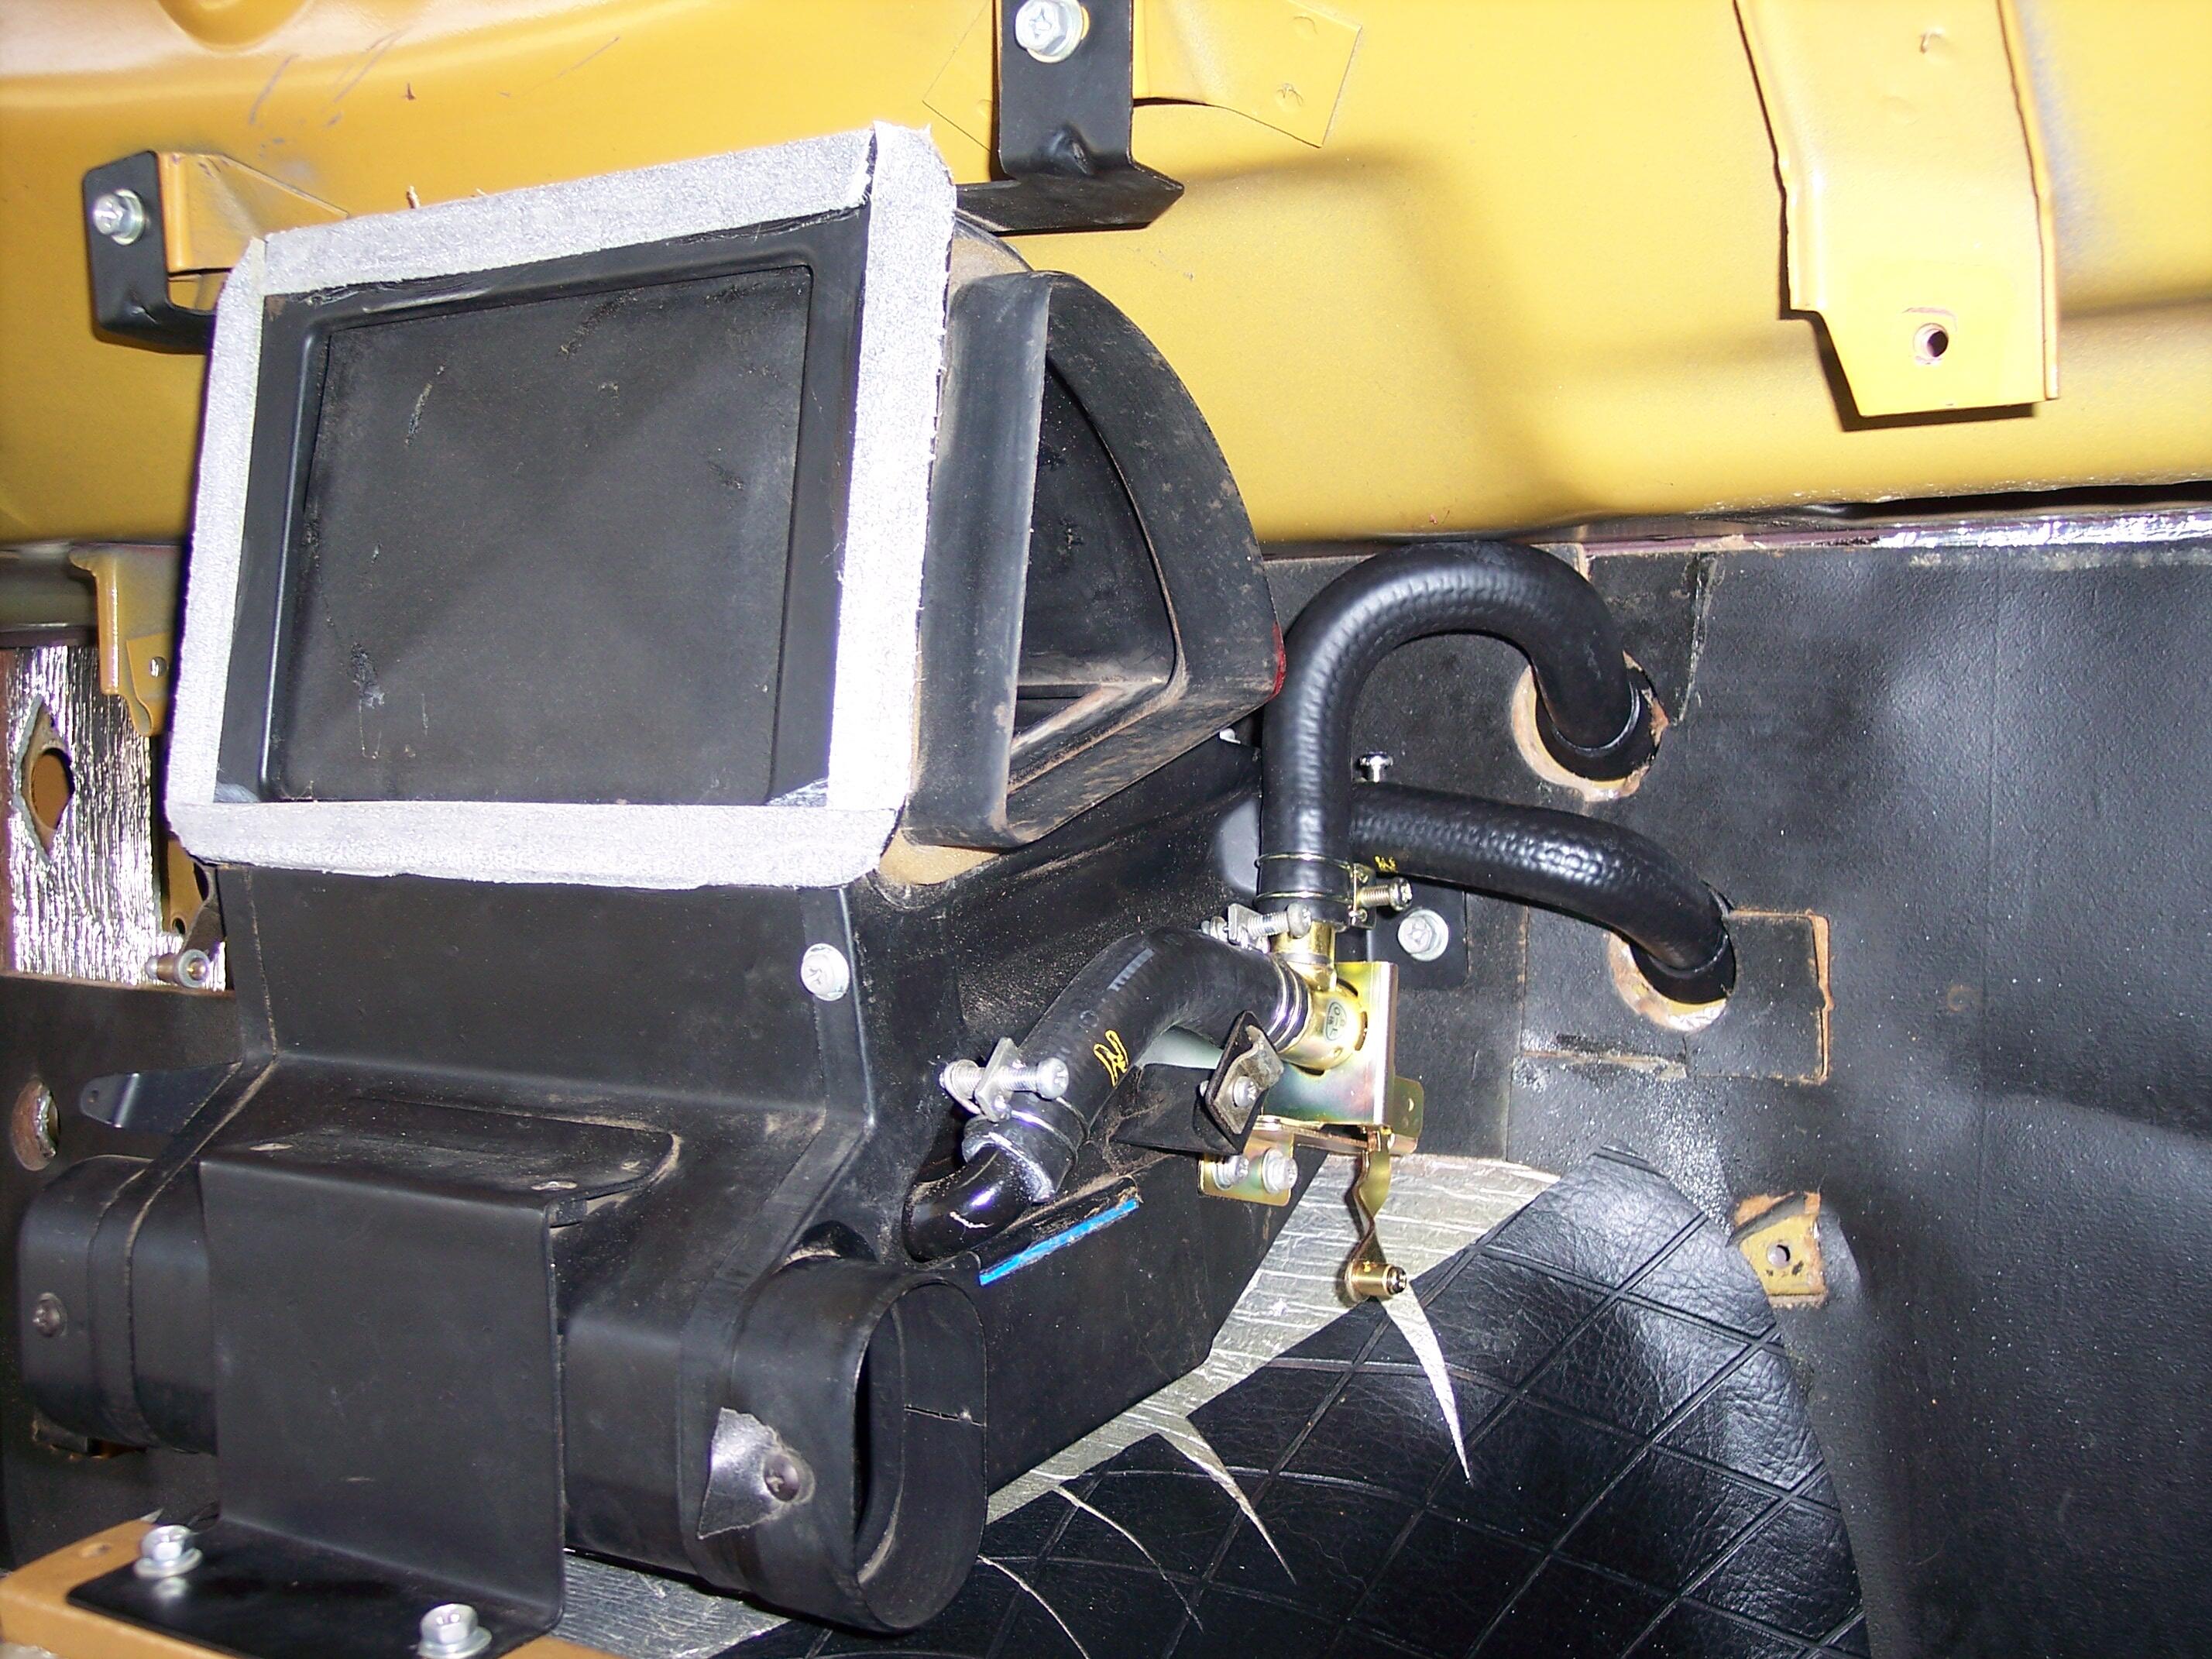
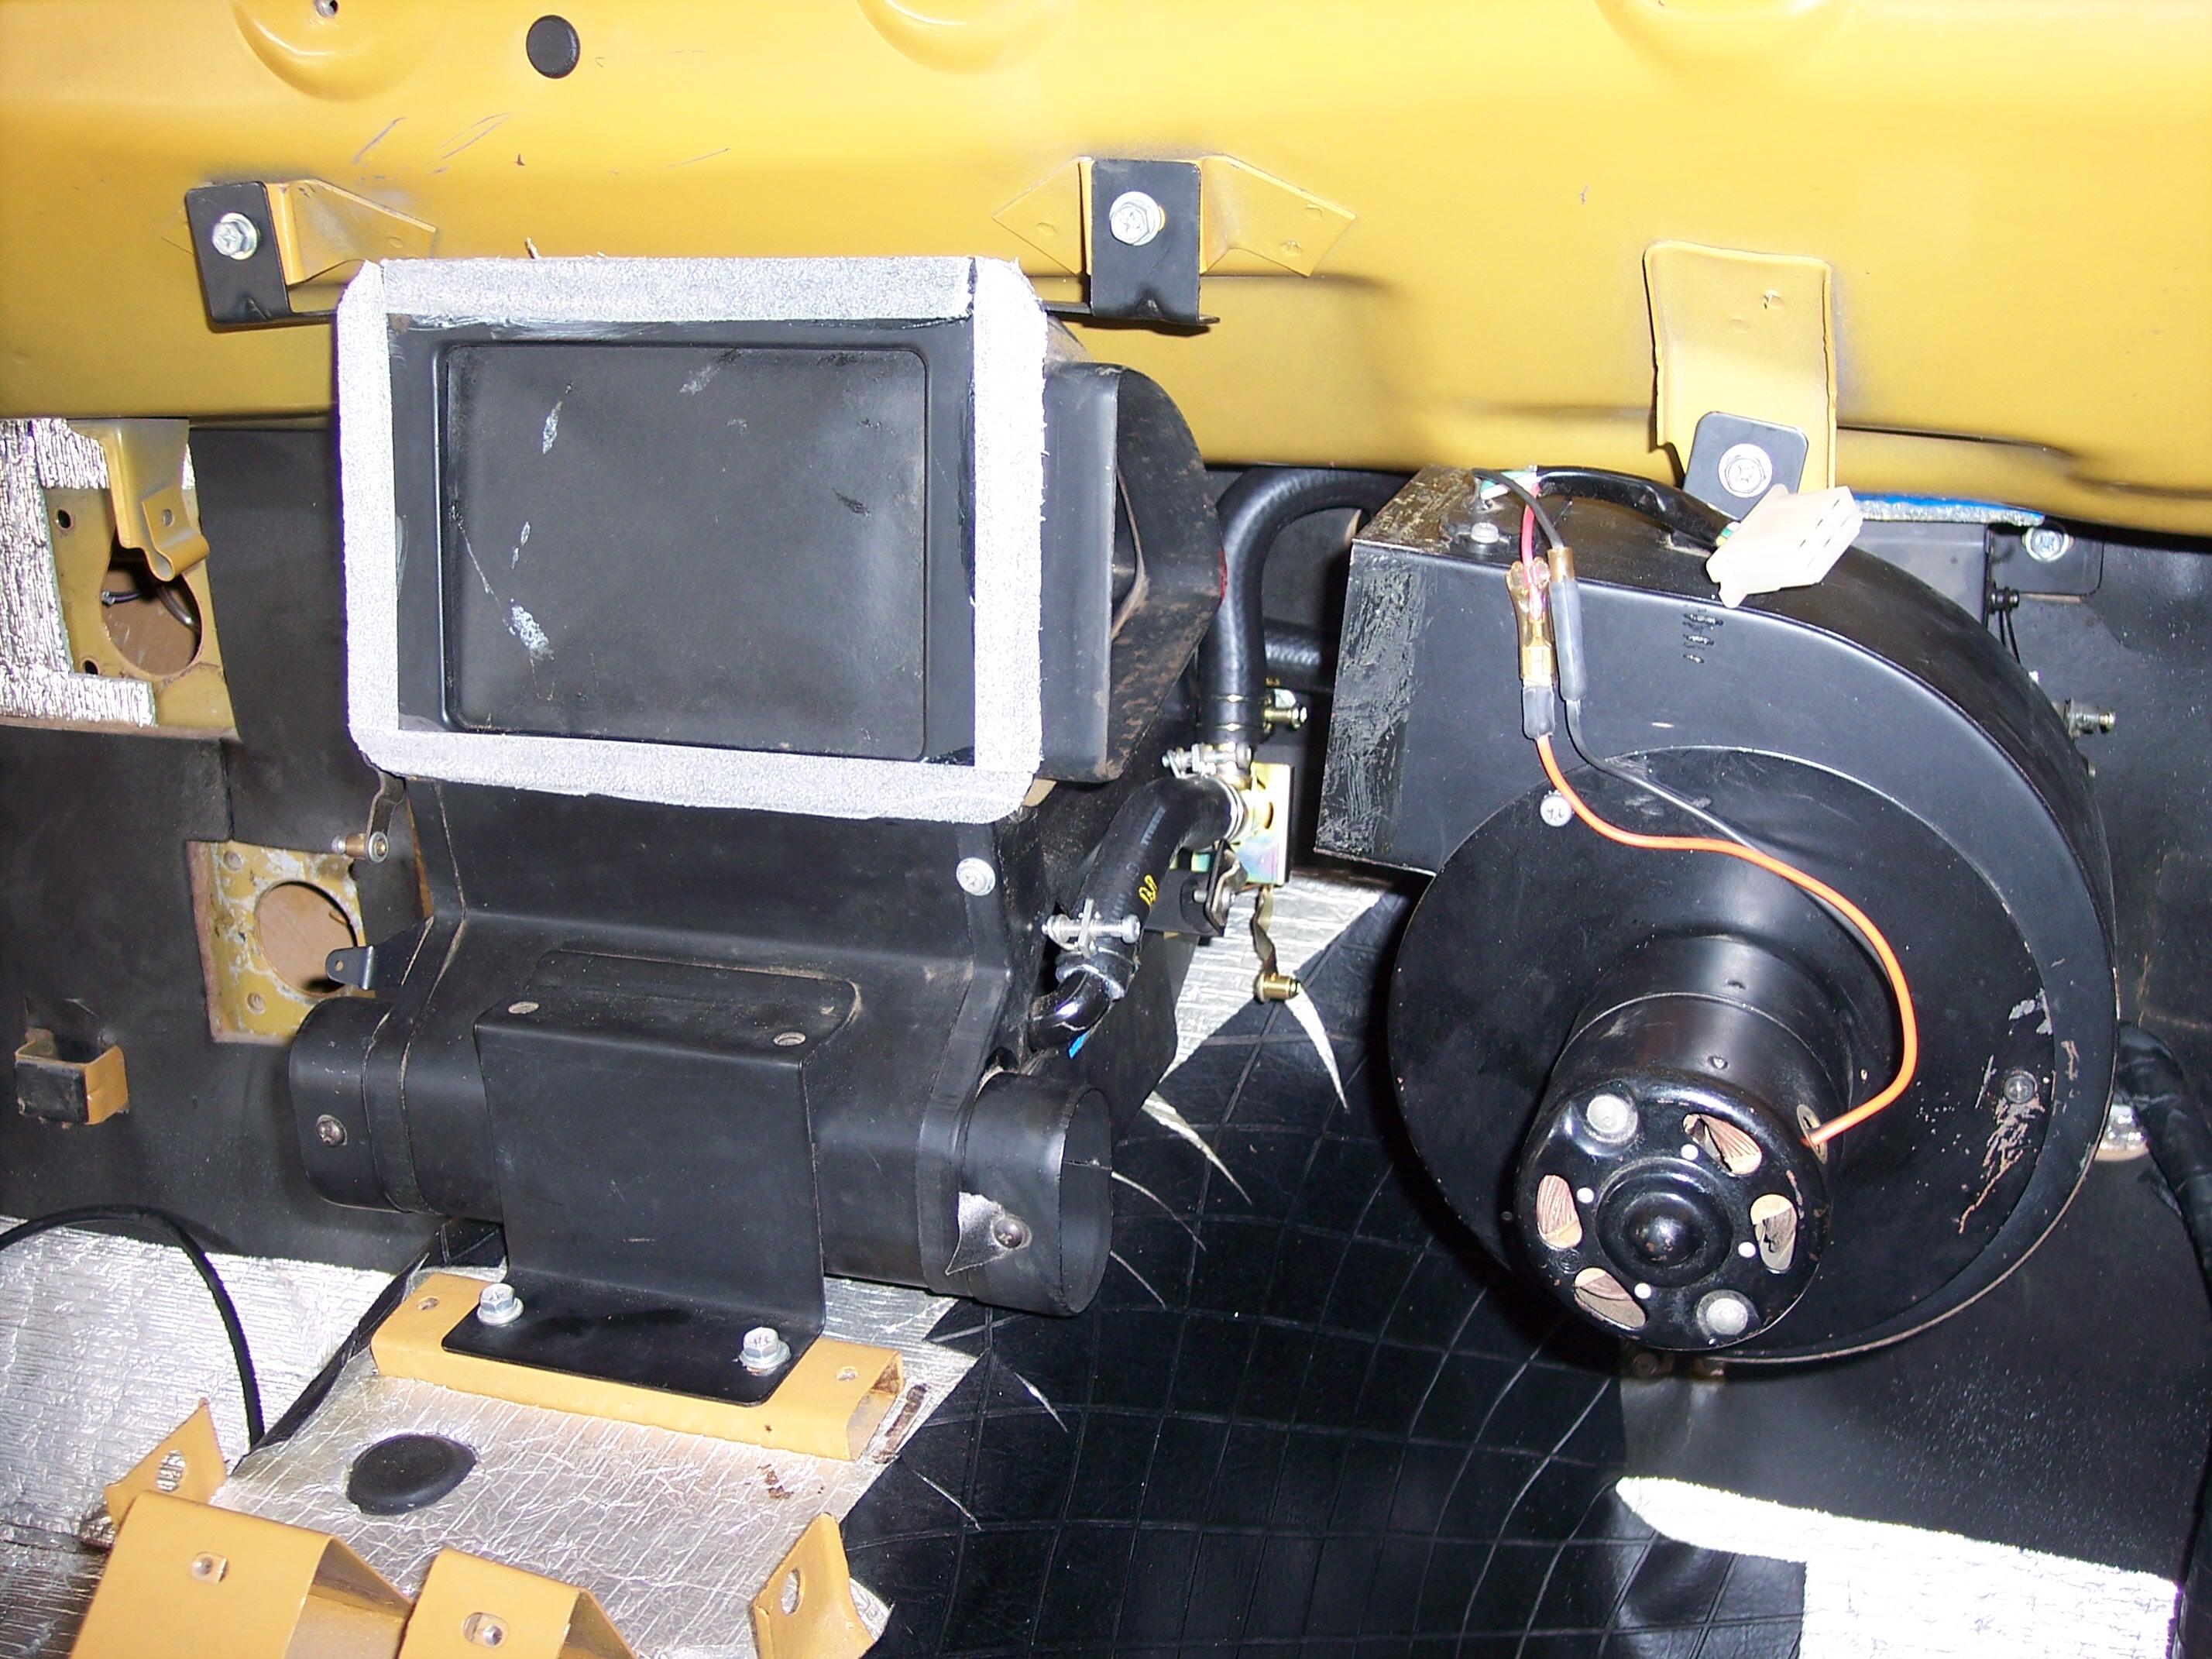
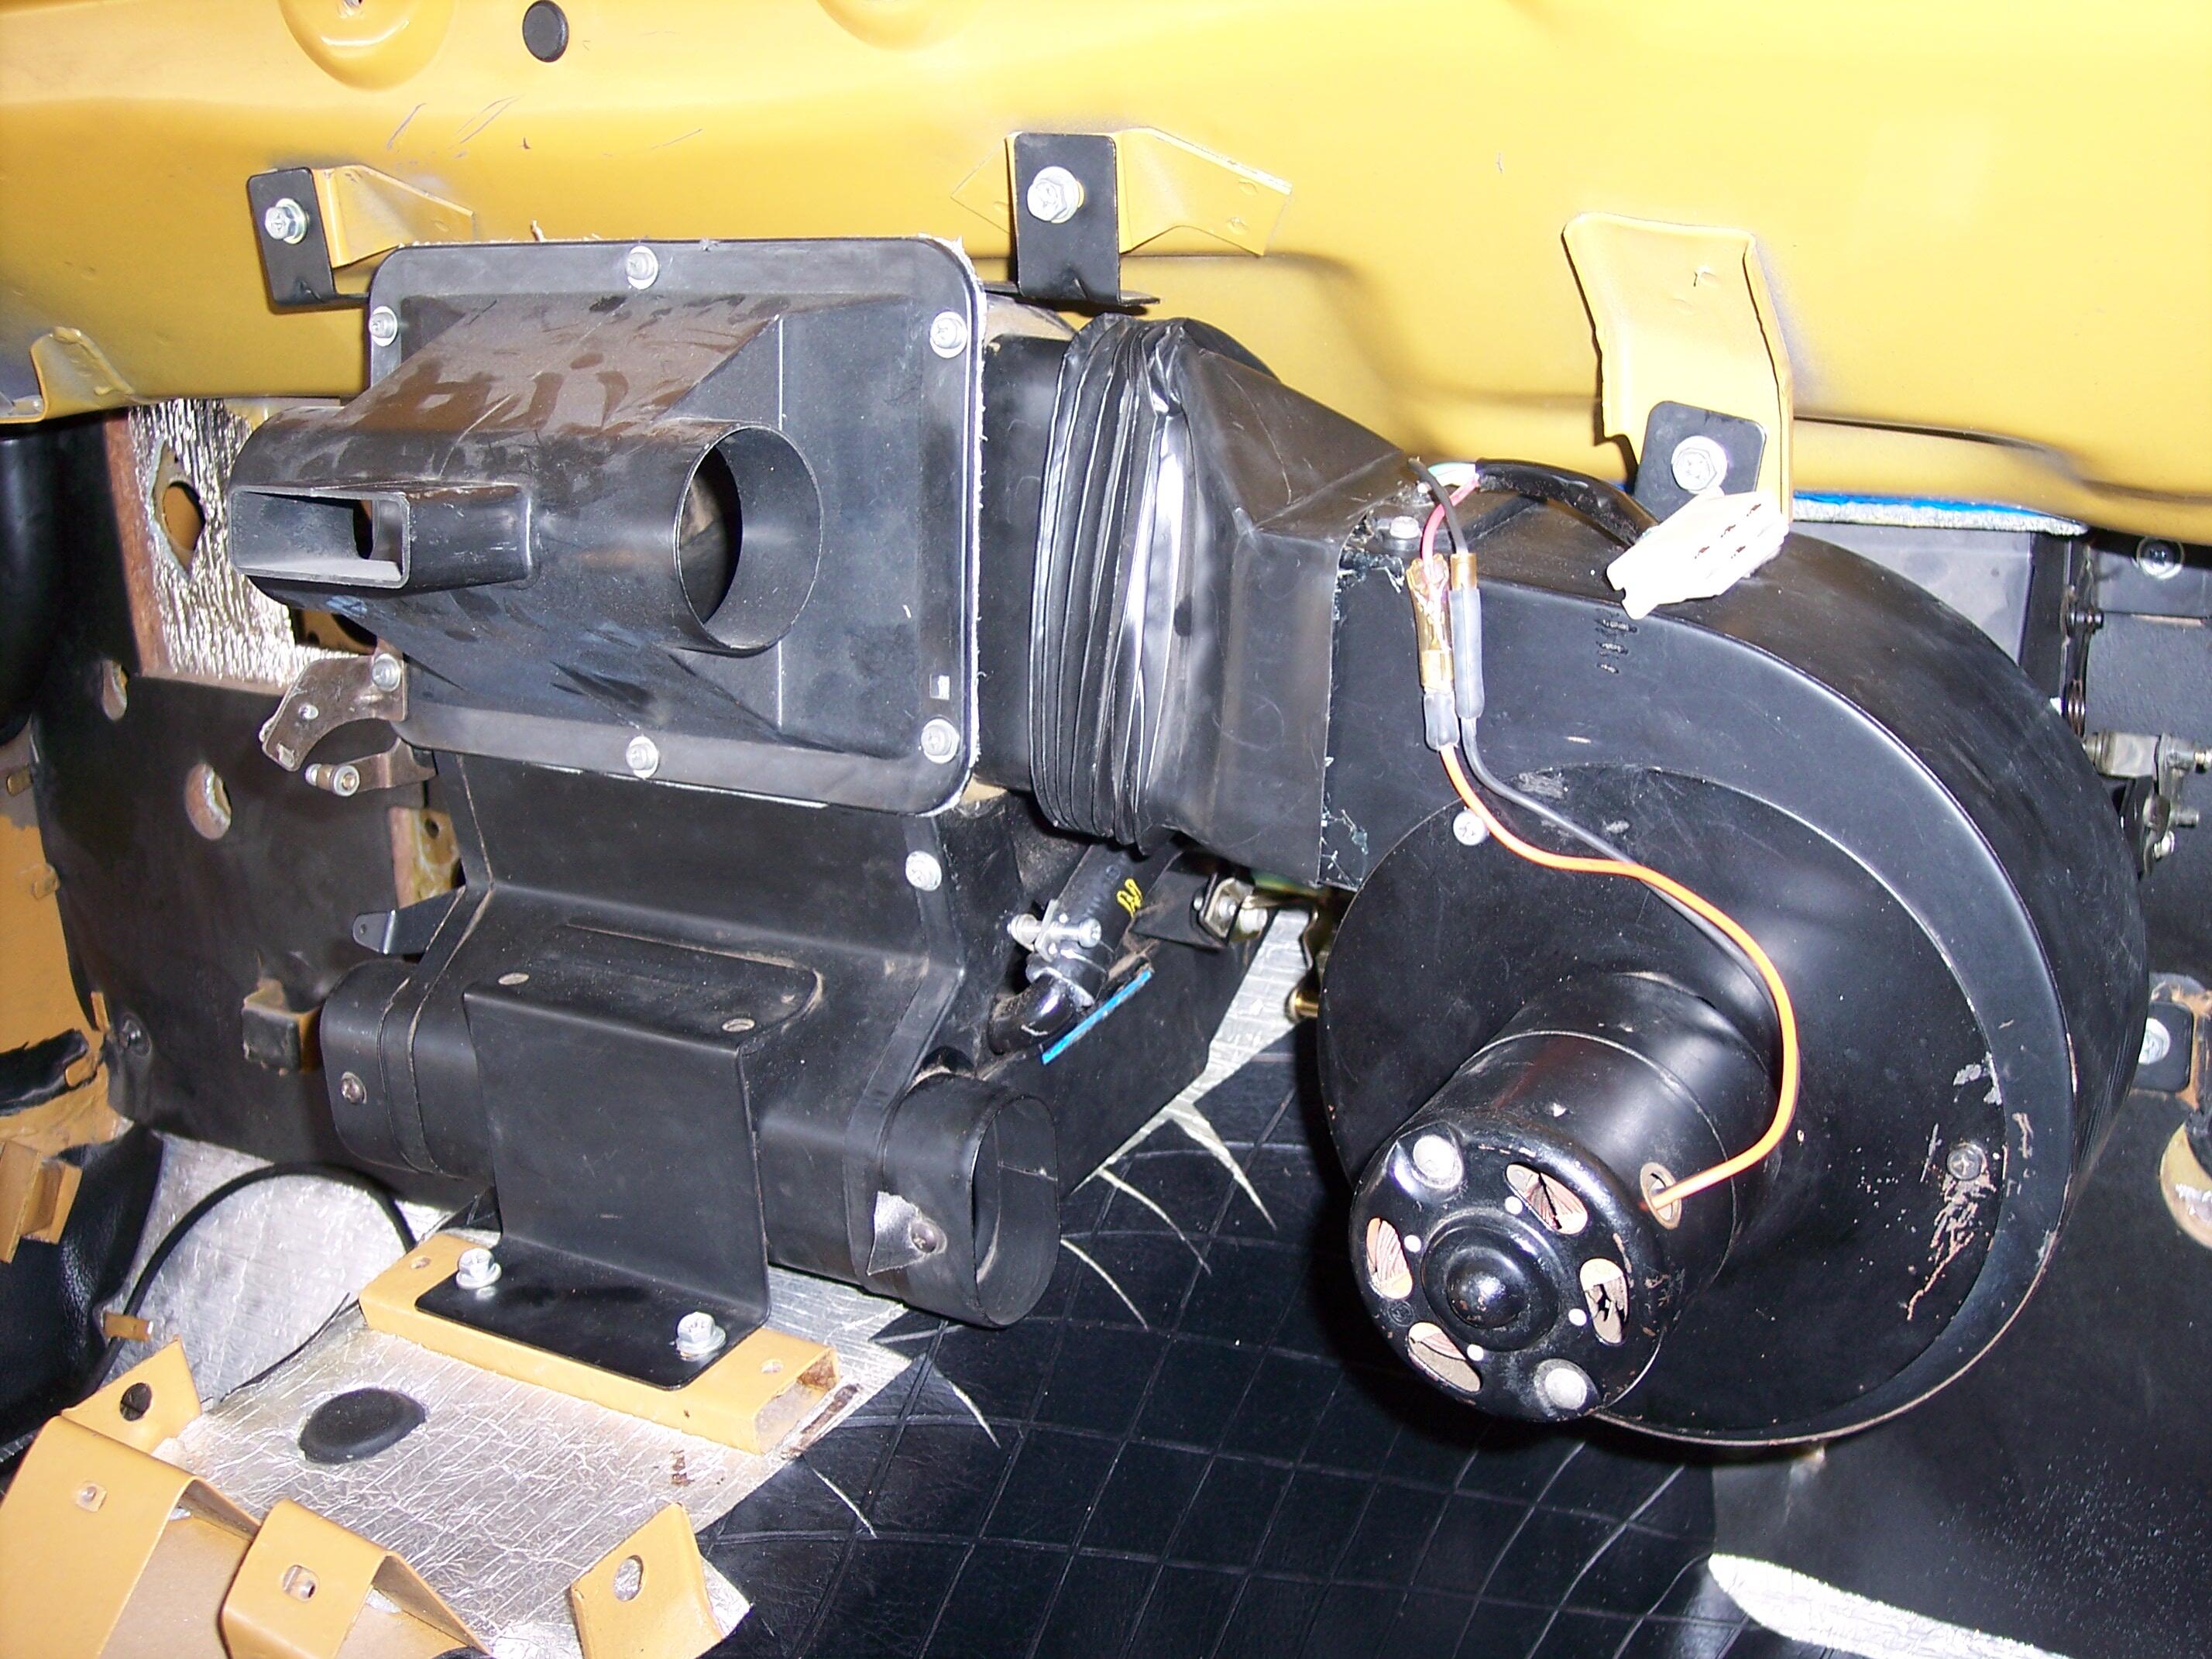
Whenever I see pics like these and others far worse I am reminded of how fortunate I've been to have a salt-free, garage-kept car all these years. The only rust on my car was some surface rust on the interior floor courtesy of the dealer-installed A/C unit. I am in awe of the skills and knowledge I see in making repairs like this.
If we look at the young people today - teens and twenty-somthings, it is pretty easy to see why this is a direction in which we are heading. Many of them do not know how to drive and don't want to. The total cost of ownership for a car is often beyond their means or not where they want to place a significant part of their income. They have found that a e-scooter or e-bike can meet a lot of neighborhood needs and they are comfortable with the economics of occasional ride-share services for longer distance needs. Long distance travel by car is boring when a cheap, off-peak airfare willl suffice and is much faster. Where enthusiasts see vehicles as inspirational, challenging, and enjoyable objects, we are seeing a new generation that sees them only for their utility value as a means of transport.
Nice job on the hatch trim! I went thru all of this years ago with all of the windshield and hatch trim, drip rails, door glass frames, and the quarter glass frames. In the absence of air tools I used an old high speed drill motor, 4" buffing wheel and jeweler's rouge. I ended up holding each piece flat on the bench with one hand and polishing with the other. Not always the easiest to handle but at least I didn't have parts flying around the garage. I also polished the aluminum door sill plates. I used small screws in the existing holes to fasten them to the front edge of the bench to hold securely in place.
There are two wires coming from the motor that are connected to the harness going to the switch. Disconnect the harness wires from the motor wires. Ground one of the motor wires and apply a 12V power source to the other wire. Listen for the blower motor to respond. If it works then your problem is elsewhere.
Rockers and nubs, note the burnt/worn nub at the top right that needs replacing. Buildup on the rockers that needs to be polished out.
Consider warming it with a hair dryer or heat gun. It should get pliable enough to work into the proper position.
Whenever I see pics like these and others far worse I am reminded of how fortunate I've been to have a salt-free, garage-kept car all these years. The only rust on my car was some surface rust on the interior floor courtesy of the dealer-installed A/C unit. I am in awe of the skills and knowledge I see in making repairs like this.
If we look at the young people today - teens and twenty-somthings, it is pretty easy to see why this is a direction in which we are heading. Many of them do not know how to drive and don't want to. The total cost of ownership for a car is often beyond their means or not where they want to place a significant part of their income. They have found that a e-scooter or e-bike can meet a lot of neighborhood needs and they are comfortable with the economics of occasional ride-share services for longer distance needs. Long distance travel by car is boring when a cheap, off-peak airfare willl suffice and is much faster. Where enthusiasts see vehicles as inspirational, challenging, and enjoyable objects, we are seeing a new generation that sees them only for their utility value as a means of transport.
Nice job on the hatch trim! I went thru all of this years ago with all of the windshield and hatch trim, drip rails, door glass frames, and the quarter glass frames. In the absence of air tools I used an old high speed drill motor, 4" buffing wheel and jeweler's rouge. I ended up holding each piece flat on the bench with one hand and polishing with the other. Not always the easiest to handle but at least I didn't have parts flying around the garage. I also polished the aluminum door sill plates. I used small screws in the existing holes to fasten them to the front edge of the bench to hold securely in place.
There are two wires coming from the motor that are connected to the harness going to the switch. Disconnect the harness wires from the motor wires. Ground one of the motor wires and apply a 12V power source to the other wire. Listen for the blower motor to respond. If it works then your problem is elsewhere.
Rockers and nubs, note the burnt/worn nub at the top right that needs replacing. Buildup on the rockers that needs to be polished out.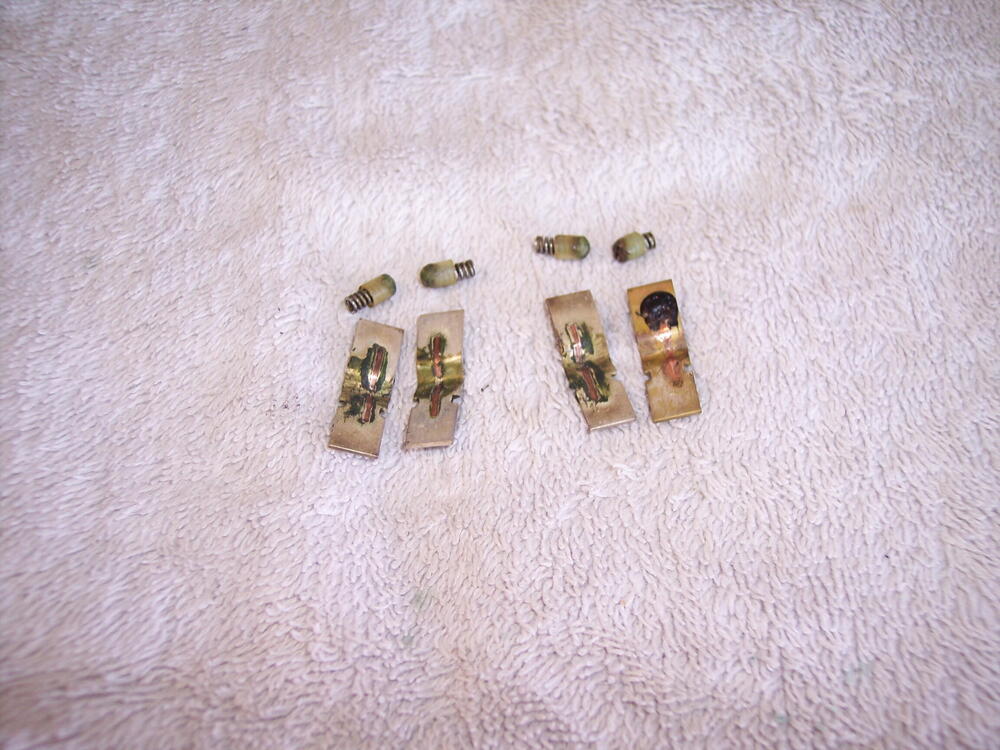 The factory had shims that installed at the hinge mount points to correct the alignment when needed, sounds like it is time for one on your ride. I'll look to see if I have one in my collection of bits and pieces.


Important Information
By using this site, you agree to our Privacy Policy and Guidelines. We have placed cookies on your device to help make this website better. You can adjust your cookie settings, otherwise we'll assume you're okay to continue.