jfa.series1
 Subscriber
-
Joined
-
Last visited
-
Currently
Viewing Topic: SOLD - Refurbished S30 Antenna - Bullet Tip
Everything posted by jfa.series1
-
 Dan's comments are spot on! Don't overlook the fact that your original color sample has 42+ years of ageing and would not look like it did when the car rolled out of the factory. Its time to relax and get your head into the fun and therapy of completing the project.
 -
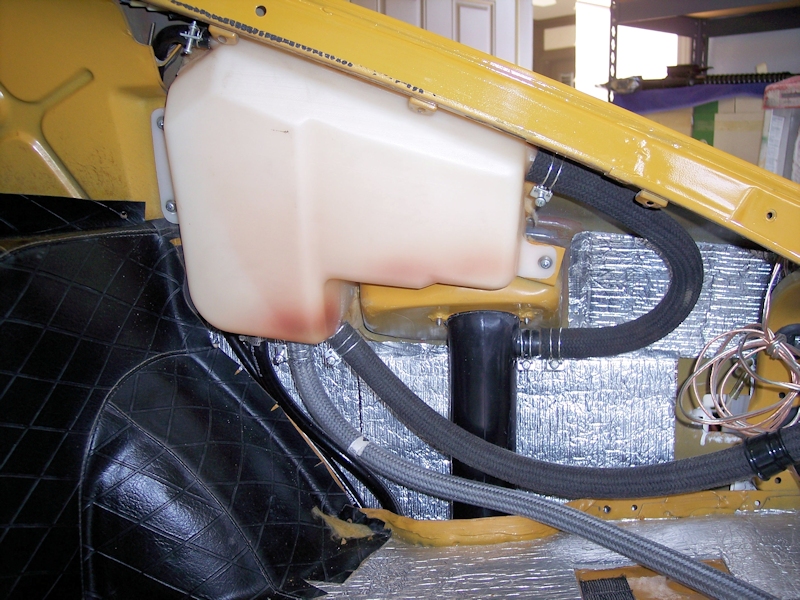
Here is a pic of the tank and plumbing on my '71 as I was re-installing it. I think the "T" you are talking about is at the bottom of the short hose at the filler tube. Hope this pic helps.

-
Very nice job - especially creative with the aluminum tape. If you want an even higher polish on the lenses, hit them with a buffing wheel and a bit of jeweler's rouge or similar polish.
-
Check out the Brewster Ford at HVA: Hershey's Coolest Car: 1934 Brewster
-
Look below your brake master cylinder on the inner fender wall and spot a junction block for all the brake hydraulic lines. On top in the middle should be a electrical post - your wire goes there. As I recall, this is a low fluid/pressure sensor and will cause the e-brake light on your dash to light.
-
Welcome to the group! As an original owner, you are eligible for membership in the unofficial "Old Men and Old Cars" club. If you are not already registered with Carl Beck on Z Home, be sure to get on his original owner's registry at the Z Car Home Page . Some very good advice on shocks, springs, and bushings above. Most, if not all of the stock rubber bushings are still available at Nissan. You can locate your P/N's in the online catalog at Datsun 240Z/260Z/280Z Parts Manual . Nissan rubber steering rack bushings are NLA but you might be able to locate the OE-style made by Beck-Arnley, but they are scarce. The same goes for the steering rod coupler, but no aftermarket was made other than poly. One of your biggest challenges (read major PITA) will be the rear control arm spindles. Search the forum threads on this topic. Hint: one of my control arms was badly damaged in the removal process! +1 on the request for pictures, we all want to see the other guy's and gal's rides. Keep us posted on your progress.
-
Here is the link to the CT club (of which I am a proud member), the thread is in the General Discussion forum. Connecticut Z Car Club: Welcome
-
A single stage paint will be closer to factory original in general terms. Remember, original was an acrylic enamel and not the same as today's urethane. If you want a bit more gloss, add the clearcoat layer. It will also give you more protection over the years. Your call as to the type of finish you want to live with.
-
Your Nissan P/N is 22472-E8000, it comes up in stock/available at Courtesy for $4.36. Check with your local dealer to see if they can get it.
-
-
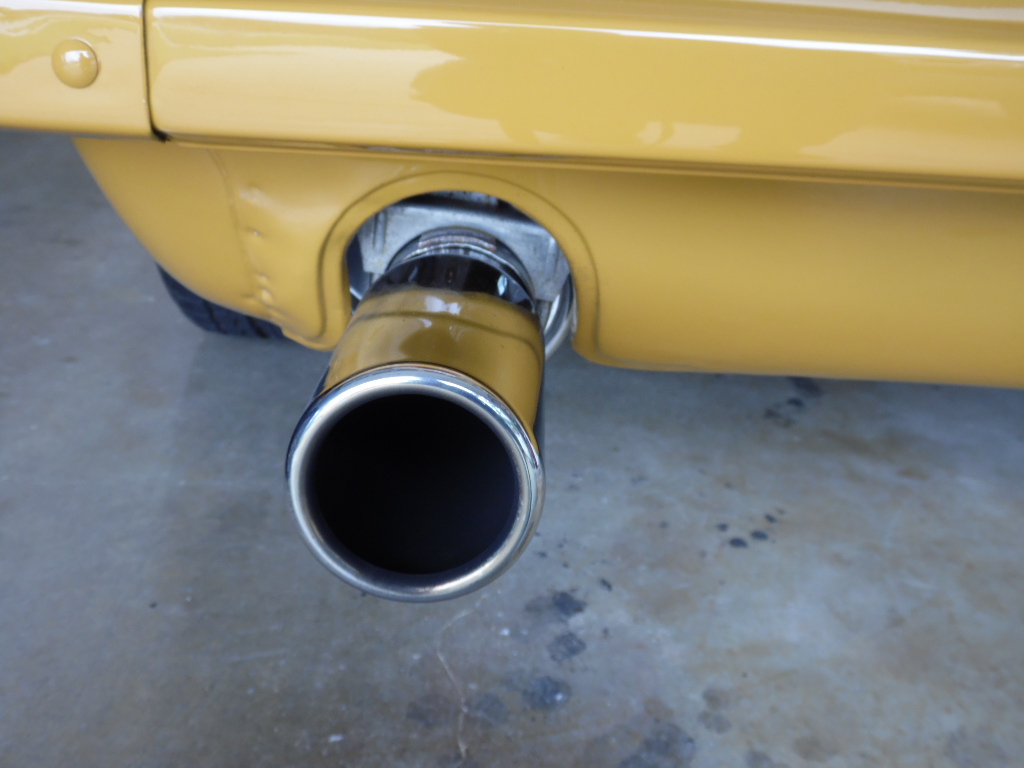
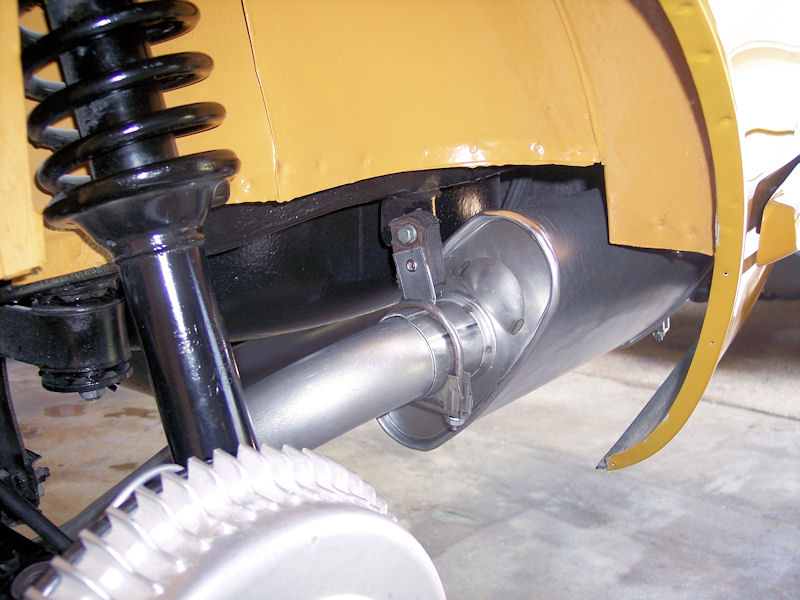
I've got the same system and install method, haven't noticed any heat problems (maybe I'm not looking hard enough ). It looks like you have all of it pulled up pretty tight against the body, thus your clearance comment. Work with the hangers to drop the muffler a bit - this will give better clearance around the valance and possibly improve air circulation. And... yes it is a noisy muffler. Many have added a 2" glass-pak upstream.


-
Have you made a speedo cable firewall grommet? They are NLA and typically are not furnished with replacement cables. I still have my original cable but the grommet has gone the way of most old rubber!
-
A Z club in CT posted the VIN obtained from the MA police: HLS30-52858
-
I have the sales brochure from 2/70, the gearshift knob appears to have the shift pattern on it and there is no sign of a pattern plate anywhere on the console.
-
One more thing you might try before reassembling everything: soak the threads around the gland nut in a good penetrant at least overnight. Apply some heat to the strut tube all around the gland nut, after getting it nice and hot tap that same area with a hammer, and try that big ol' pipe wrench one more time.
-
That's a Series 2 hatch on the car. A VIN check could confirm the model year.
-
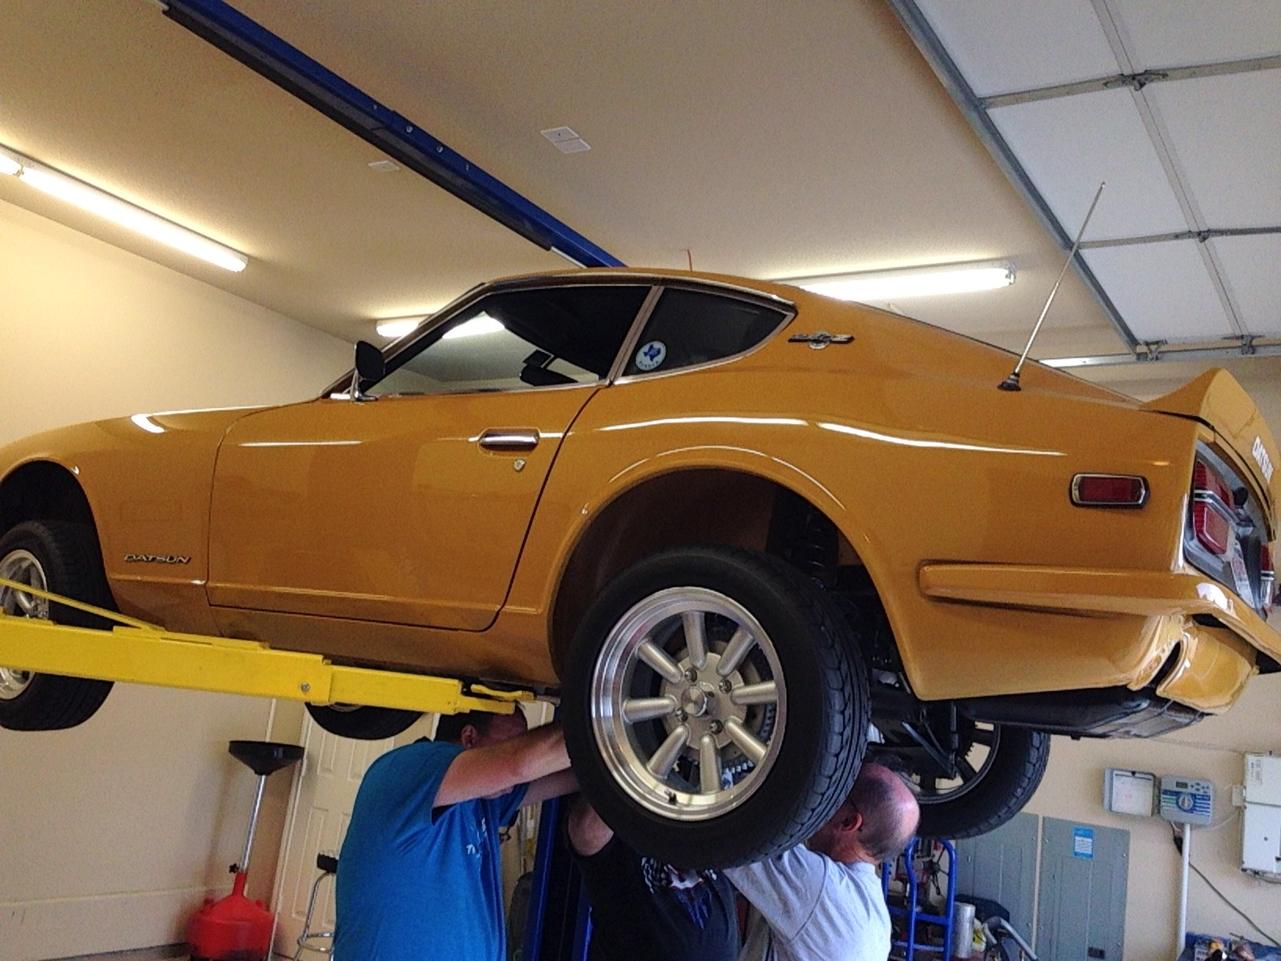
The OE steering rod coupler went back in today and that wraps up this set of changes. Tomorrow is Cars & Coffee for the Dallas area and some of our Z Club of Texas group will be making a back roads lunch run up to Dennison for some BBQ. This will give me a good opportunity to get some butt feel for the recent bushing swaps. A trip report will be forthcoming.
-
Now you tell me! Just kidding. As one of our members said at the tech session, swapping out the steering rack bushings is not going to make up for the solid eccentric bushings in the control arms - some harshness is still going to get directly transmitted to the subframe. With just a few miles on the car since the changes, I can tell that the T/C rod bushing swap has improved front end ride quality. With the rack and coupler changes I'm looking to reduce snap that feeds up to the steering wheel.
-
I didn't. I'm going to re-use my original which is still in excellent condition.
-
Page ST-15 on the '72 FSM shows a location to install a zerk fitting at the pinion housing - it looks to be on the underside. This model also had the grease reservoir on the right side, easily replaced with a zerk fitting. This all may have changed by the time the '76 models came out.
-
Definitely an oldie AND goodie, same as the one on my car and I know it is original. Get a yellow zinc replate job and it will really look sharp. Re. the comment on the missing chain, on this model the chain is inside the filler tube when the cap is in place.
-
Gawd, I luv it when you guys talk dirty! (Thanks)
-
On the lift at a club tech session yesterday to get more poly bushings swapped out for rubber. The inner rear control arms were changed as was the steering rack. With eccentric bushings on the front control arms I won't get a lot of improvement up front but at least some of the snap in the steering wheel goes away. I can tell the difference already with the T/C rods and rear control arms now changed. The steering rod will also get swapped back to rubber in the next few days.

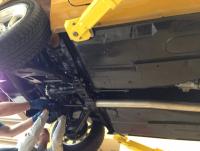
-
I was able to negotiate a reduced price on a wheel and tire pkg. at Discount 2 yrs. ago and used my own credit card. At the time they were also running a sales tax "holiday" promotion and BFG was running a rebate. So I hit three markdowns/saves in one deal.
-
In picture 1, that is commonly referred to as a moustache bar, Nissan refers to it as a compression member - differential. Picture 2 is just a half-shaft U-joint. The moustache bar has a big rubber bushing pressed in at each end, yours may be well worn from track stresses. Swapping them out is a bit of a PITA. There should be no play in any U-joint - driveshaft or half-shaft.