Torby
Free Member
-
Joined
-
Last visited
-
Don't be fooled by the photo, they're far from perfect. I'll break down the procedure: 1. Remove clear coat with paint stripper, careful with this, as some paint strippers can damage the aluminium. 2. Wet sand with 1500 grit (could go with more coarse paper, but I didn't have any). This takes a lot of time. 3. Polish. I used Autosol and Swissvax Metal Polish, combined with a battery drill. You don't need to use a lot of polish, so one or two packs of Autosol would be enough for 4 wheels. You can also use car polishes on bare alloy. Not the standard all-in-one bottles you buy at a gas station, but professional polishes like 3M, Megs MG-series etc. Hope this helps :classic:
-
George_Zed: Thanks! :classic: The wheels have been painted with clear coat at some point, so I removed the clear, wet sanded the wheels and polished them with metal polish. The picture shows wet sanded on the left and polished on the right, I just used a piece of masking tape to show the difference it makes. :classic:
-
Gentlemen, thanks for your insight! I have a center console with the sliding ashtray cover, so I'll try that one. I prefer the looks of the other one though. :classic:
-
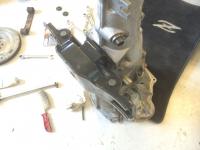
Sorry for breathing life into an old thread, but better keep the info in once place, right? I've recently bought and installed a 5 speed in my car, and encountered problems with the shifter hitting the center console. From a lot of searching and reading, I now believe I have a Maxima gearbox, can anyone help me confirm this? (I bought it believing it came from a 280Z). My car is a 2/71. I had to remove a bit of metal in the front of the hole in the tunnel, as well as use the older style mount (not the one in the picture) to make room for my exhaust, as the newer style mount in the picture made the gear box sit too high. Still, the shifter hits the center console (right behind the fuse box), so I actually had to break off some of the fiberglass to make room for the shifter. Now the interesting part is that I have two Z's, both 71 models. However, one has the old gearbox mount and the other (9/71) has the newer type. The 5 speed I bought came with a prop shaft, so I have 3 in total, all which are different lengths. The cars have different center consoles (one with the ashtray behind the shifter), but none of these will fit properly with the 5 speed. Is the only solution to bend or cut/weld the shifter? Thanks for your help! :classic:
-
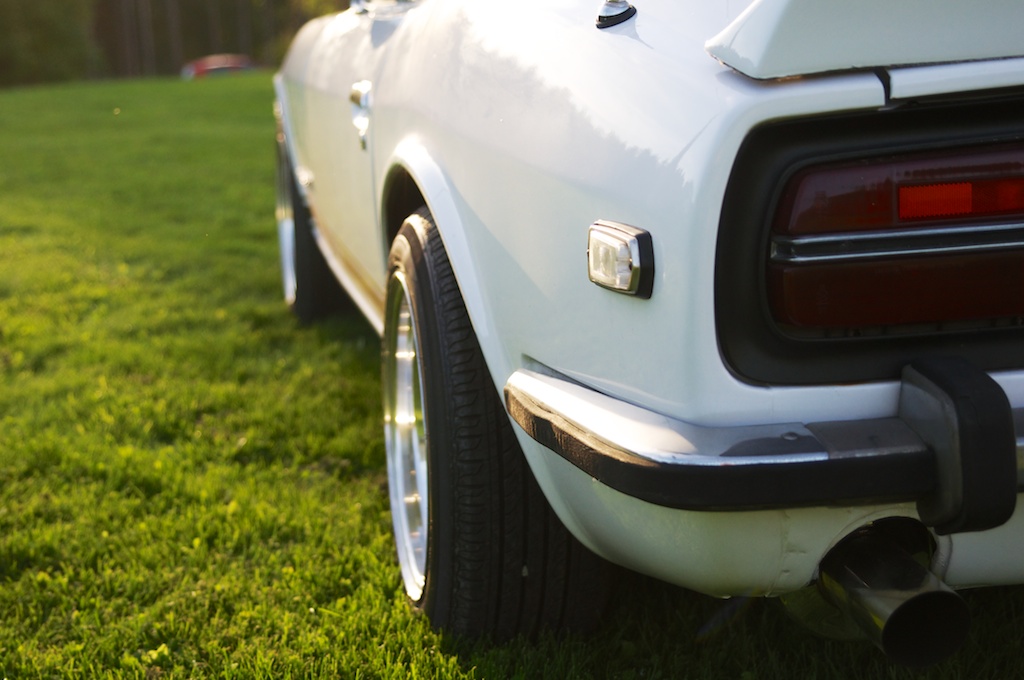
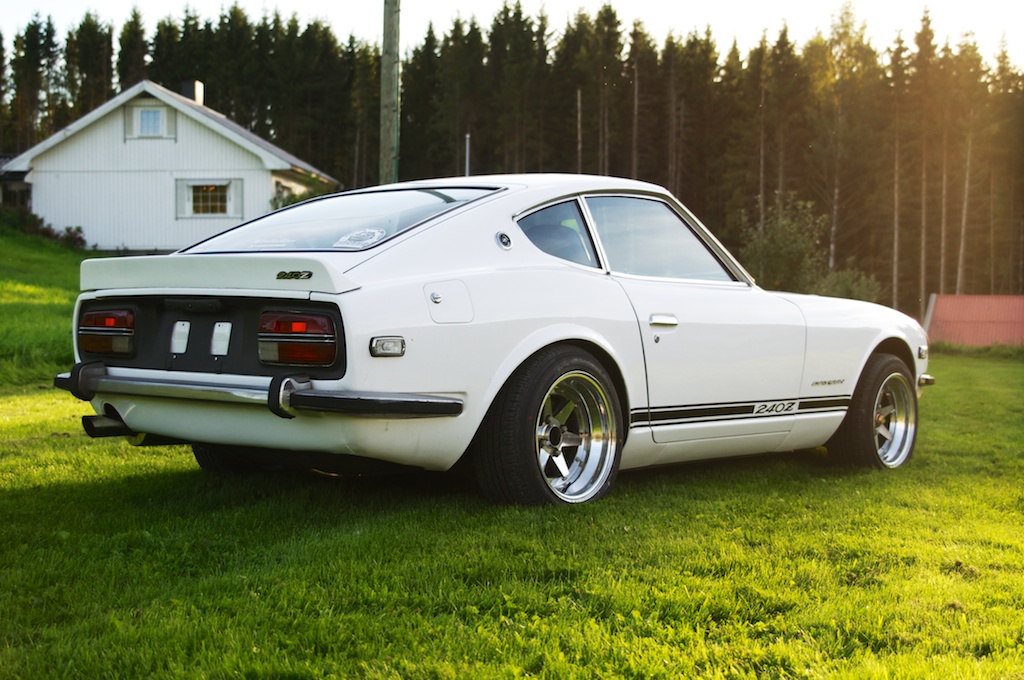
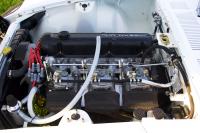
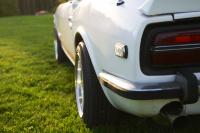
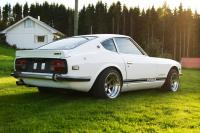
Well, after a couple of weeks struggle, the car is back on it's feet again, and running. Still needs a bit of tuning, but very happy so far. Now I have only the exterior and the interior left. Oh, and the rear suspension. Sigh... The front wheel gap is a little large, due to my lawn not being 100% flat.. And don't mind the panel gaps, they will be sorted. Thanks for looking!
-
This sounds like a great project! Looking forward to updates on this! I went the Rebello route myself, but bought all the parts and built it myself. But my goals are similar to yours, ~200 hp and a responsive engine. Good luck! :classic:
-
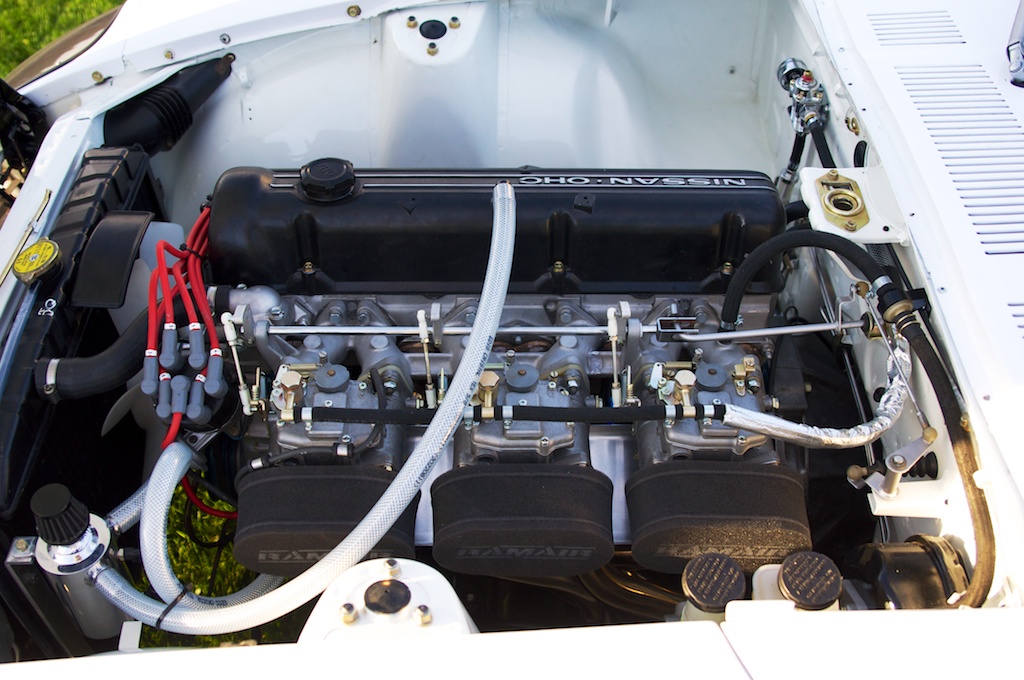
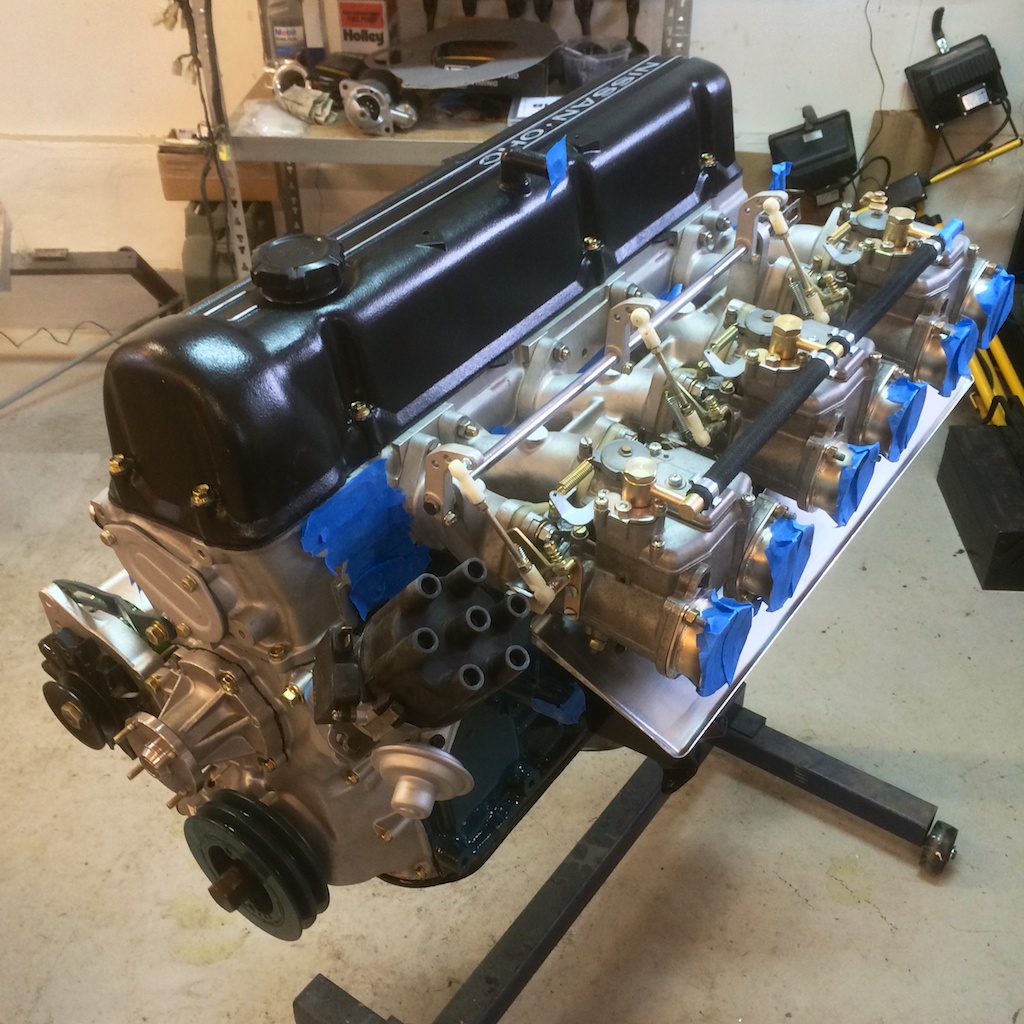
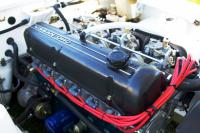
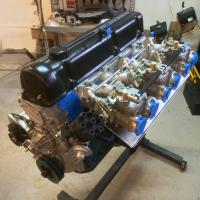
Woa. Thread ressurection. Work has been slow, but I've managed to finish the engine, and been gathering parts. Bolts and hardware has been acid dipped and treated to look like OEM. Distributor has been cleaned up, new rotor and cap, new turbo oil pump, new water pump, new timing chain etc. Also started cleaning up the wheels that are going on the car... Thanks for looking! :classic:


-
Looks like you're off to a great start, and the car looks tidy as well! Keep us updated!
-
Ok, thanks for the answer! I have some Prothane bushes to go there, but they didn't come with new washers. My old ones are, well, old and dirty. I'll have a look around ebay, so far I haven't been able to find just the washers themselves. Keep up the good work, looking forward to more updates! :classic:
-
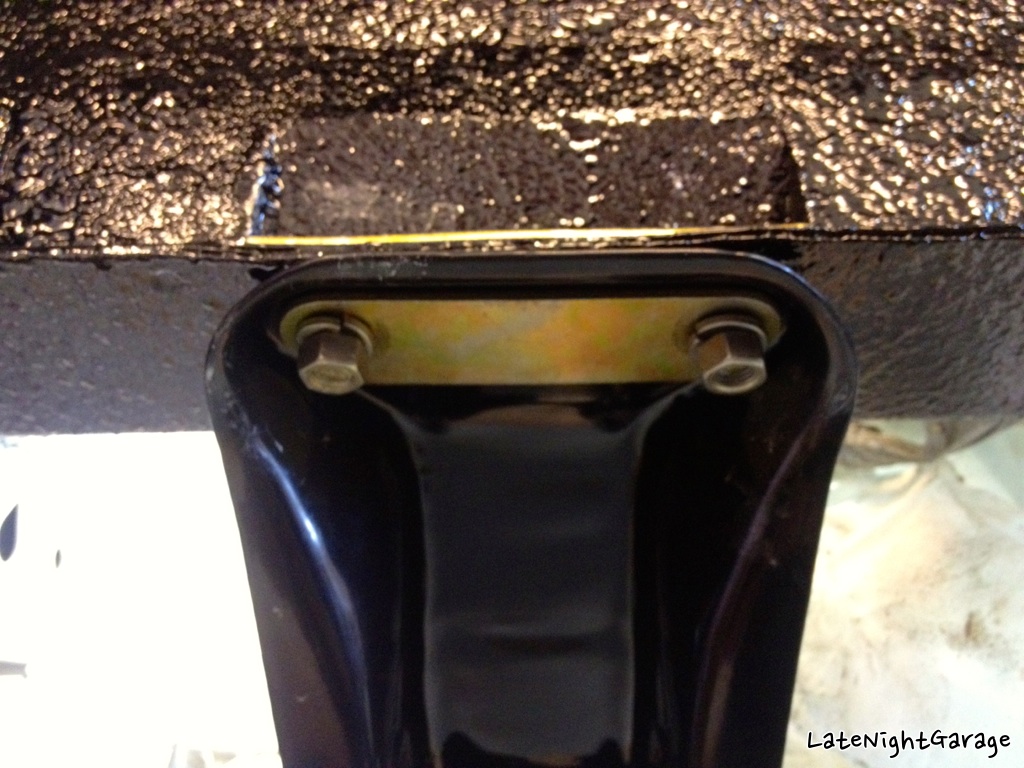
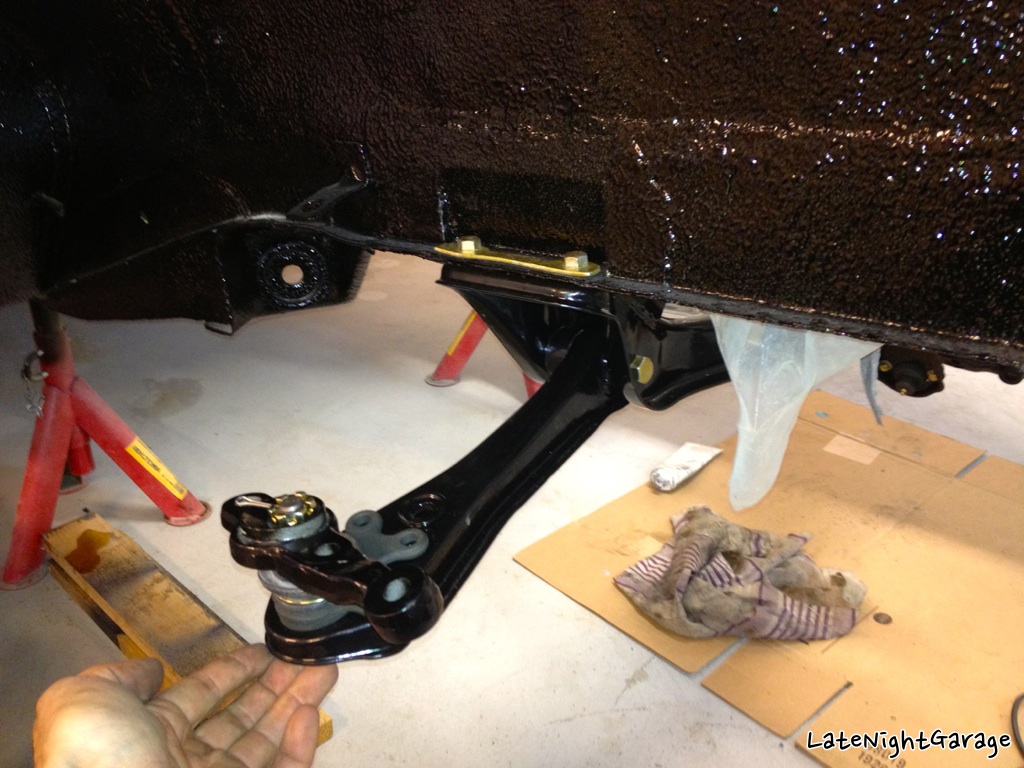
Between gardening and servicing the daily driver, I managed to squeeze in a little work on the Z this weekend. My other Z (now parts car) came with a lot of goodies, among them a full set of Prothane bushes and a lot of refurbished (zinc plated) bolts and hardware. A little while ago, I gathered all the extra suspension parts, and had them sandblasted and powder coated. So, time to start mounting stuff up. It's a bit of a puzzle, though, because none of the refurbed bolts are cataloged, only put in plastic bags according to sizes. Please note that this is only losely mounted at the moment, nothing is torqued down yet. Using the supplied grease to lubricate the Prothane bushings for front control arms. Removing powder coat from the front crossmember, to make room for the bolts. New ball joints as well. Thanks for looking, more later (when I can locate some of the parts I'm missing..) :classic:


-
Loving this project, great attention to detail! A question - where did you find the large washers for the front tension rods? I need some new ones..
-
You can get inserts, so the wheel centers on the hub. Anyway, you could ask the shop to do a test on the wheels themselves before mounting the tires. Good luck, and hope you get it sorted. :classic:
-
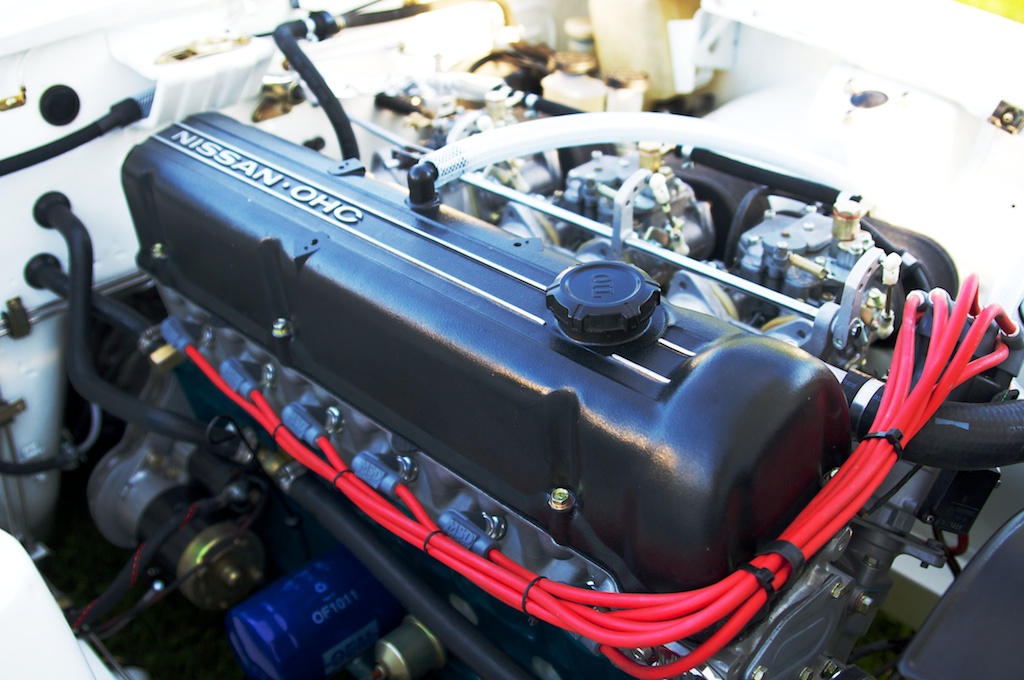
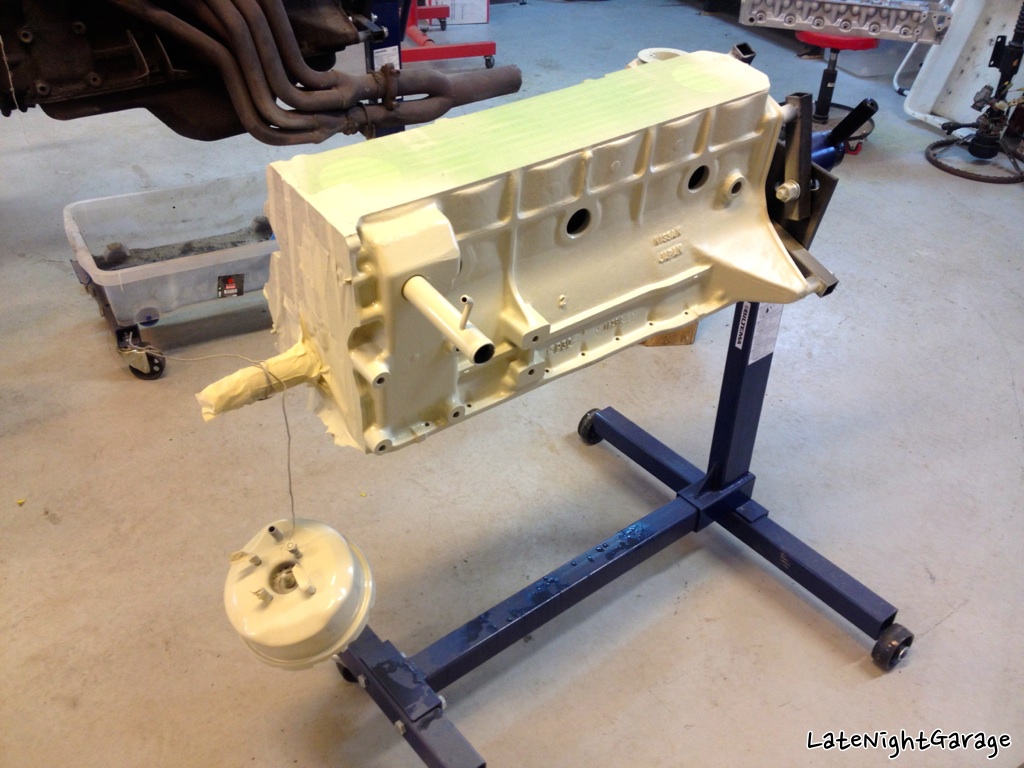
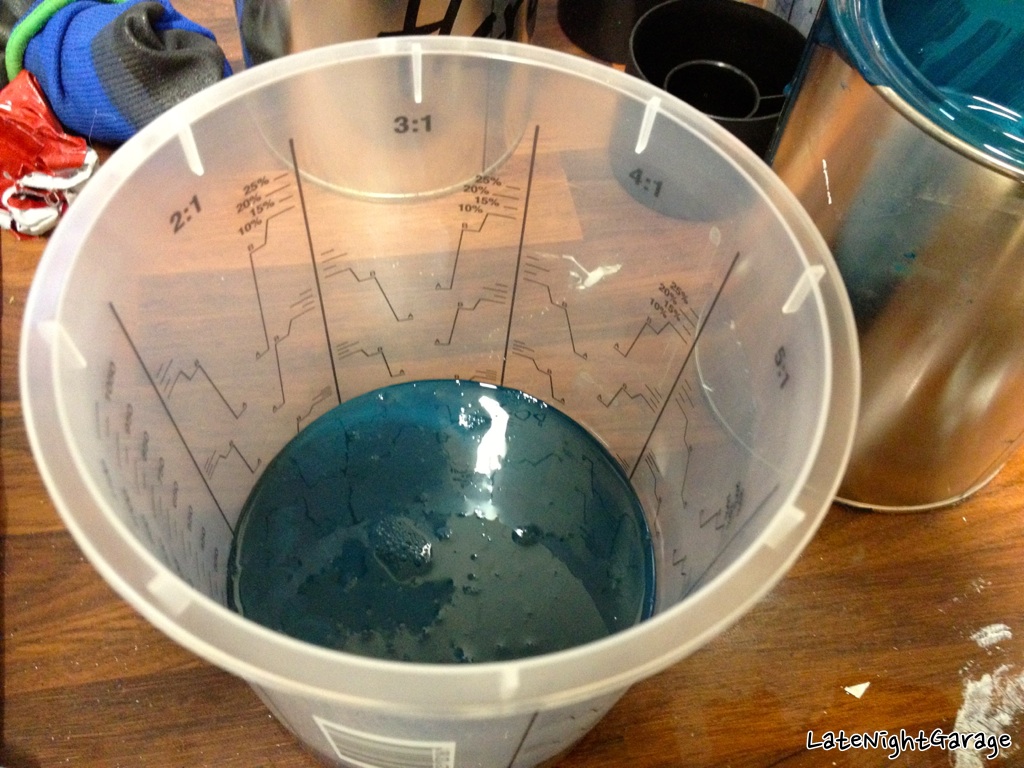
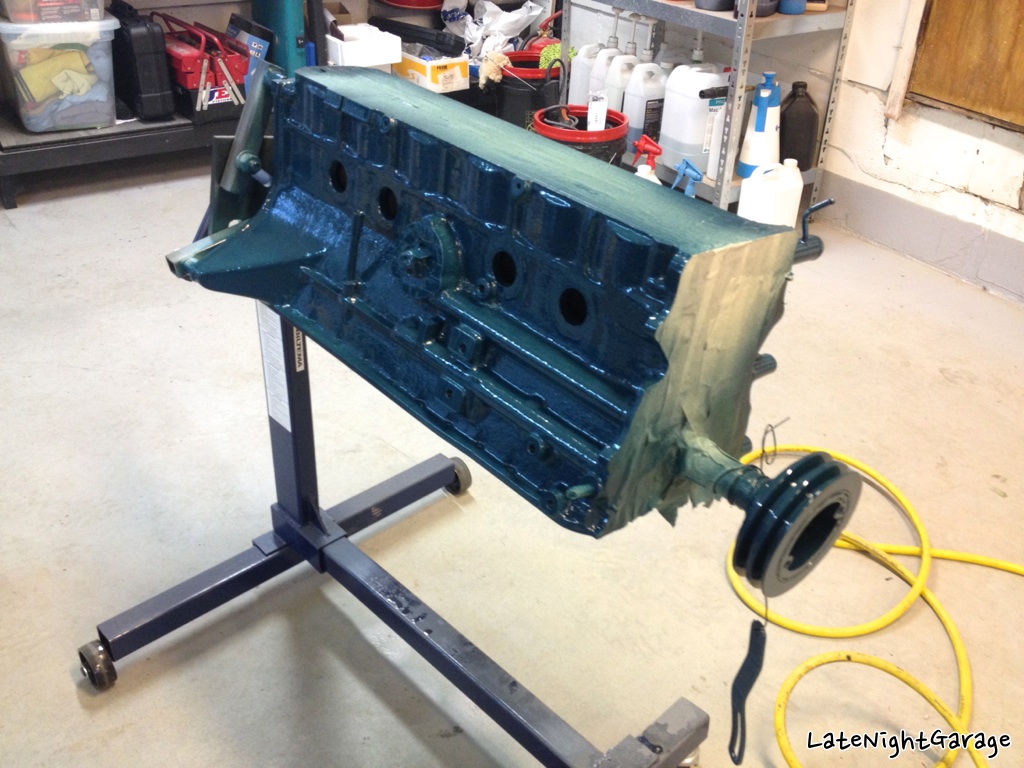
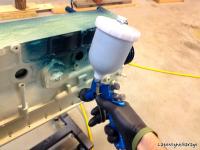
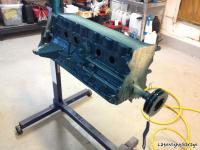
Thanks for the kind comment, really appreciate it! :classic: Added two stickers to the Z, from my favorite Japanese tuners. Their cars are huge sources of inspiration. Got the block primed with 2K primer. Also rubbed down the the brake booster, as this will need some paint later. Did the crank pulley and alternator bracket, too, which I believe are the two parts except the block that are supposed to be blue. I've sprayed a couple of times before, but never mixed paint, hardener etc myself. Was a bit nervous about getting it right. Followed the recipe, but added a little more base, as the paint became a little thin (or at least I think it did). Started spraying at low pressure, and turned it up it as I sprayed along and saw how the paint flowed. Didn't turn out too bad I think.. :classic: The paint looks a little on the dark side to me. It was mixed to match the engine color on one of my brother's Zs. Will see tomorrow when it's dry. Thanks for looking, more later! :classic:


-
Kleen Flo? Never seen that over here, what is it? Looks like it works great, though! I usually just soak parts in diesel to clean off oil and dirt. Your valves must seal good, though, that's good news! Keep up the good work, following this with interest!
-
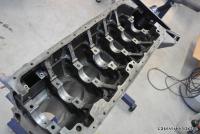
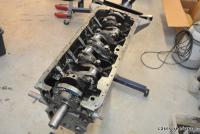
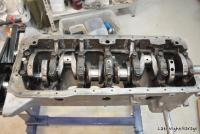
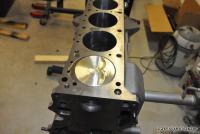
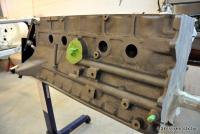
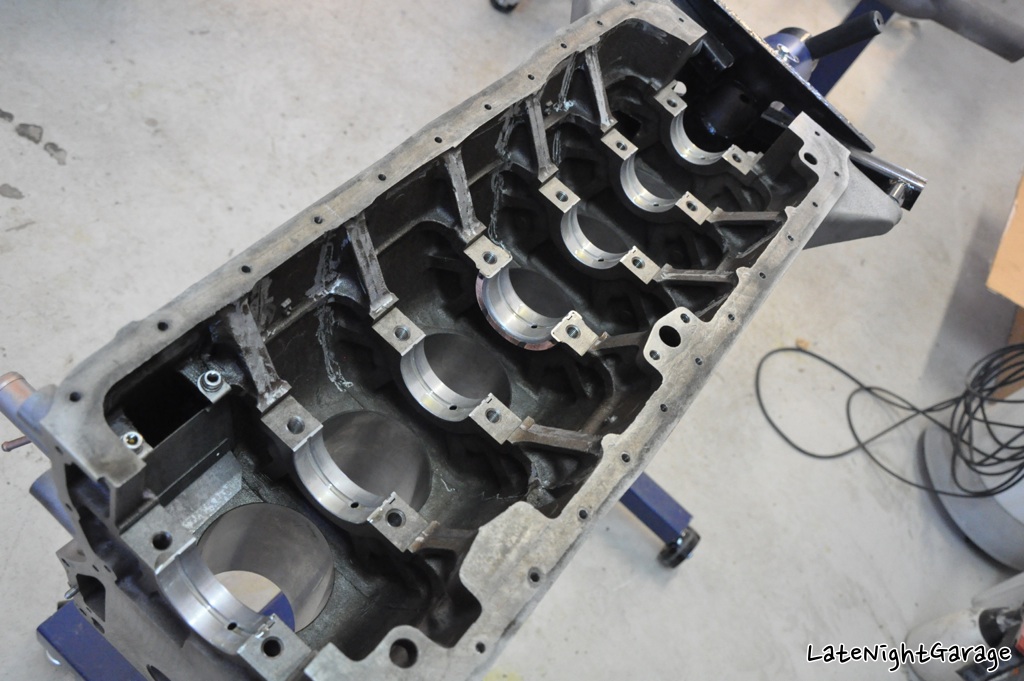
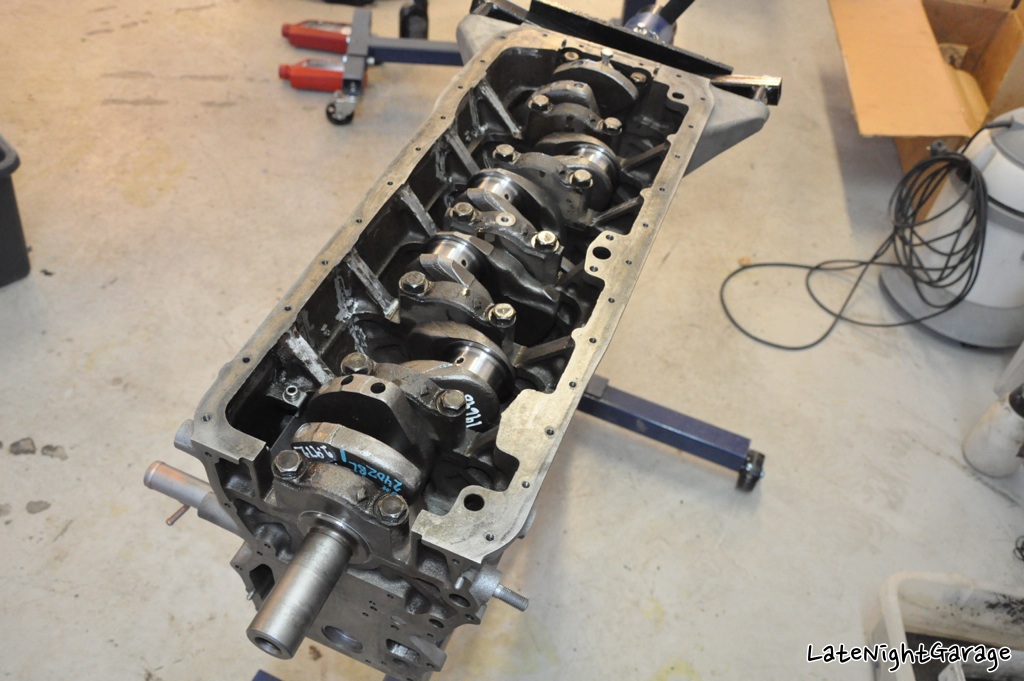
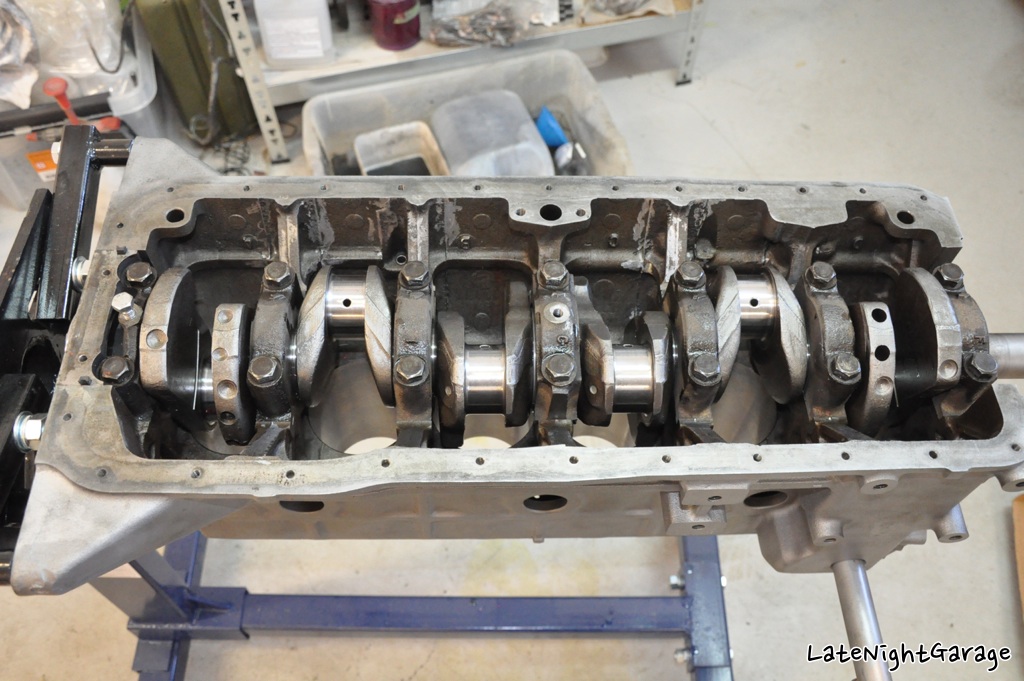
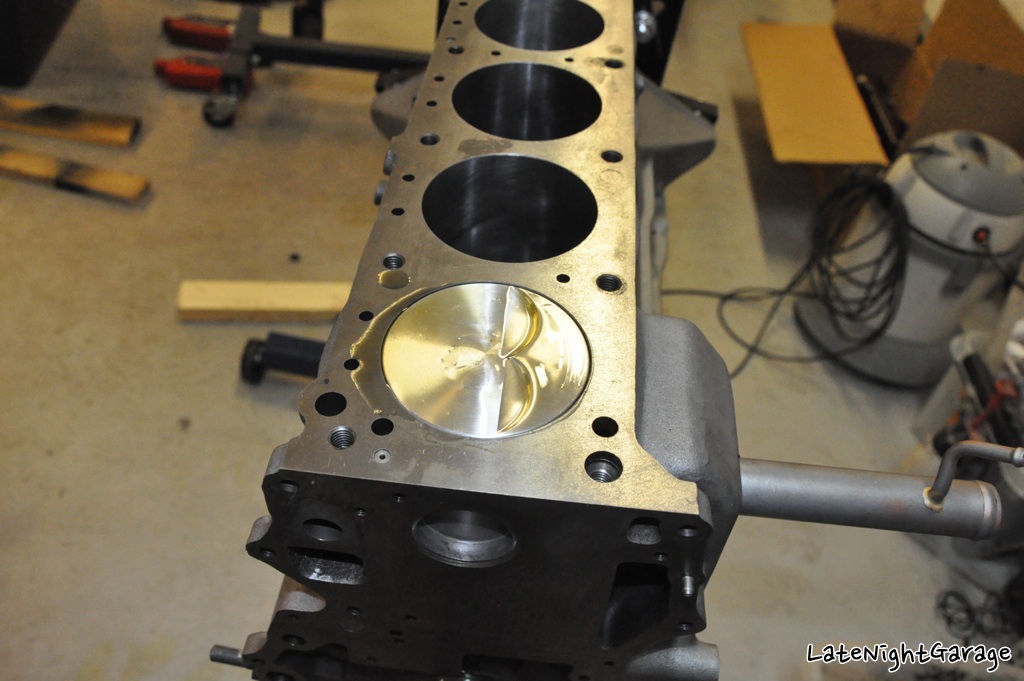
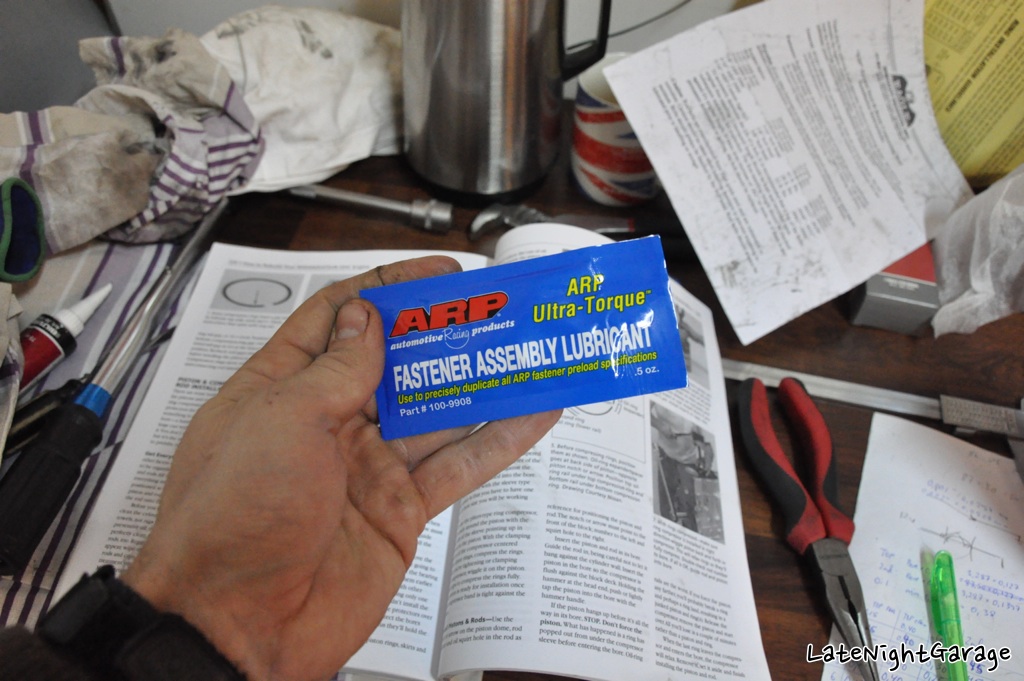
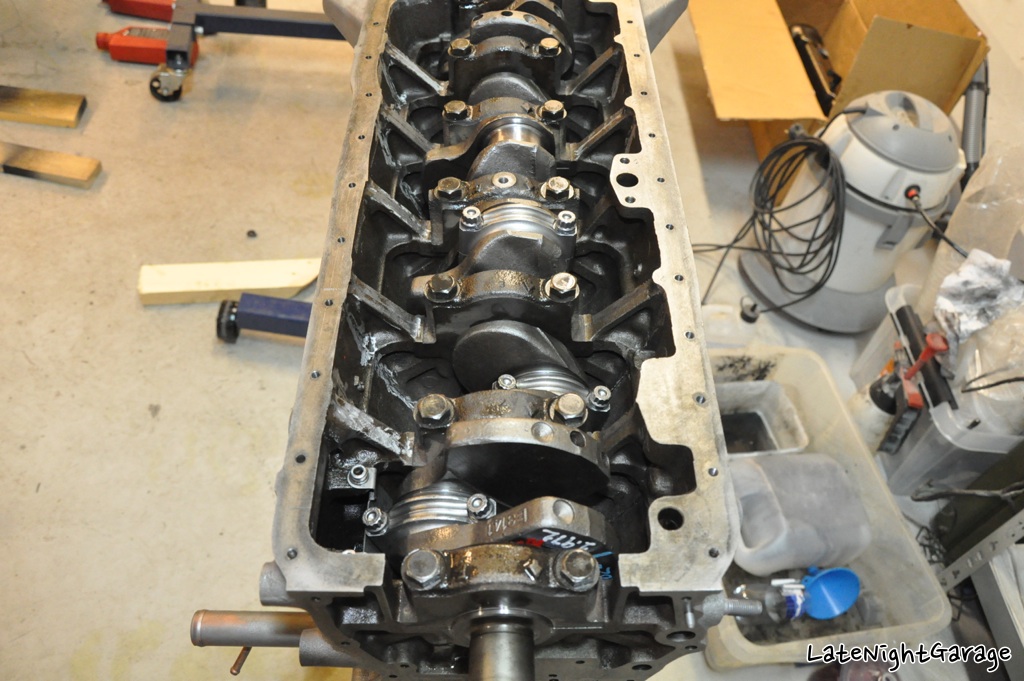
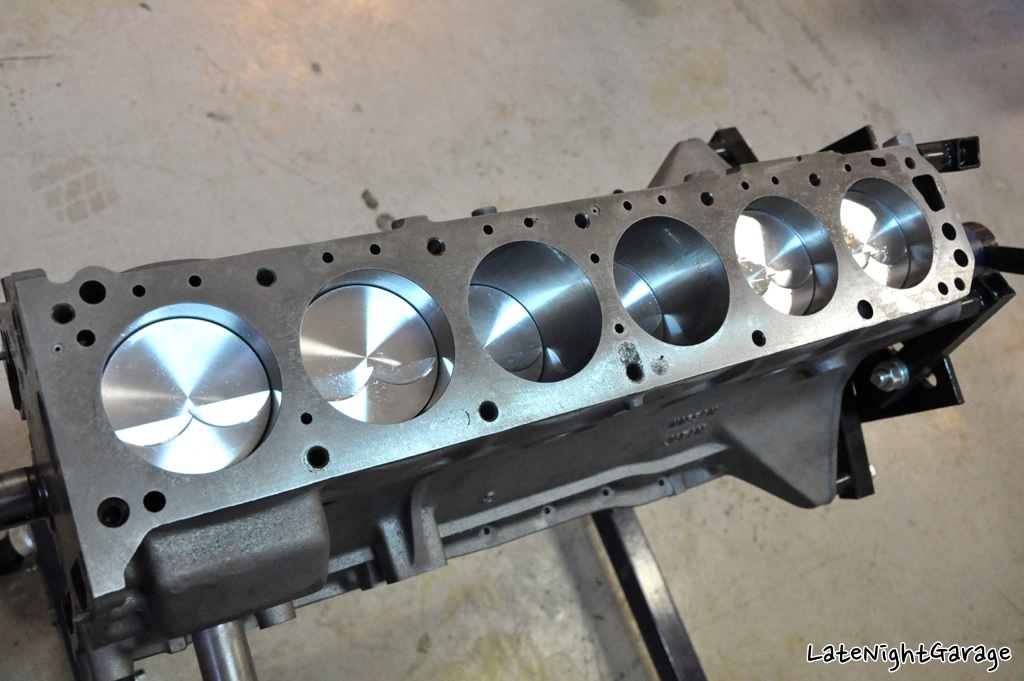
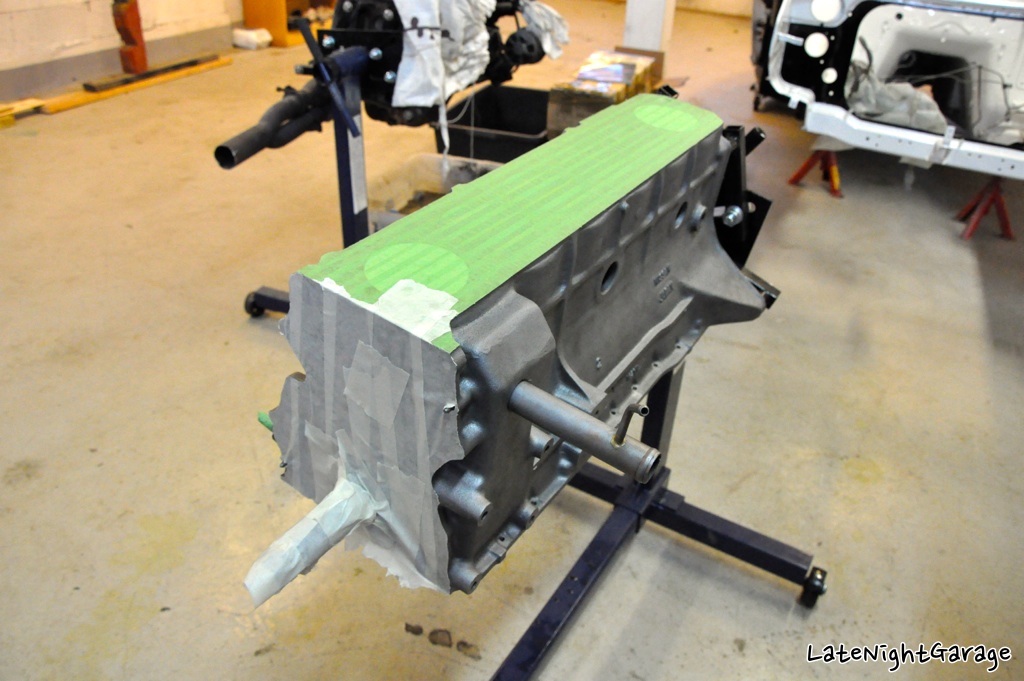
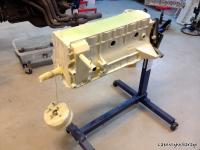
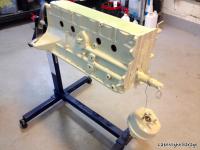
Time to get the crankshaft in. I carefully installed the seal. This is supposed to be done with the crank installed, but I did it before installing the crank. All bearings in place. I applied lots of oil (15W40 mineral) to all bearings before torquing. All torqued down. I forgot to take some more pictures here, but you can barely see the side seals for the rear main cap. Time to get the pistons in. Lots of oil to keep everything lubricated. ARP rod bolts require special lube. All pistons installed and rod bolts torqued to Eagle's specifications. Next I cleaned the block properly, and started masking it up for paint. I wanted to finish the "dirty work" before painting. When masking machined surfaces like this, just knock the tape along the edge with a hammer, and you can easily tear the tape off, leaving a clean cut along the machined edge. Now I just need to get some 2k primer before I can continue with the paint. :classic: Thanks for looking, more later!