Patcon
 Subscriber
-
Joined
-
Last visited
Everything posted by Patcon
-
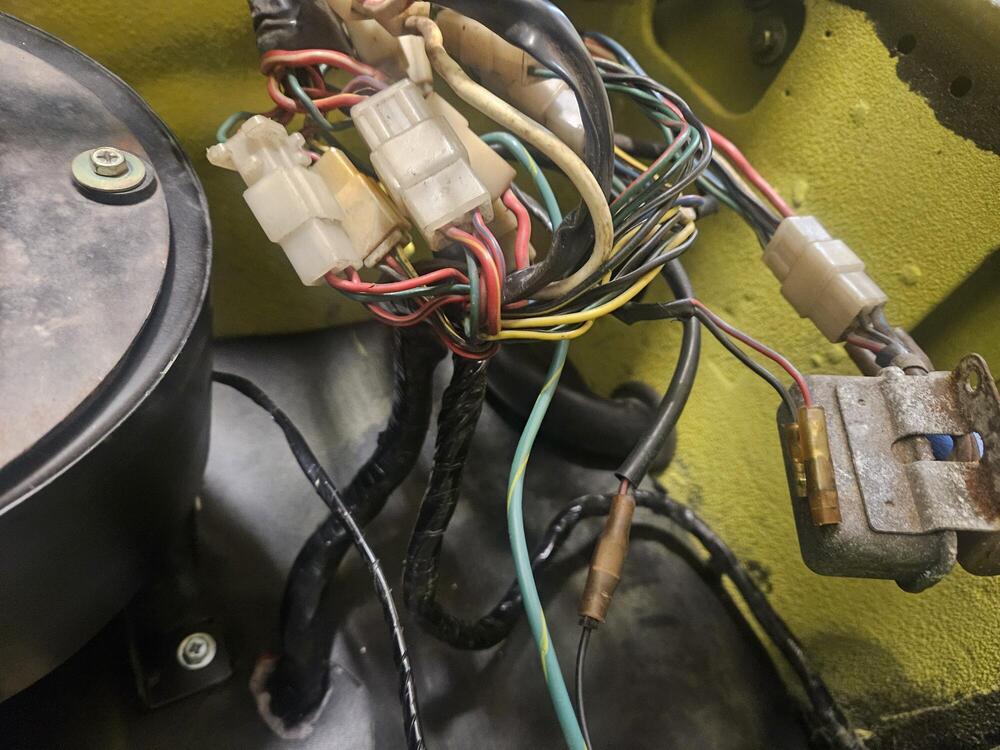
 Can somebody provide a photo of this area up under the passenger side of the dash so I can see how this bundle of stuff is supposed to look?
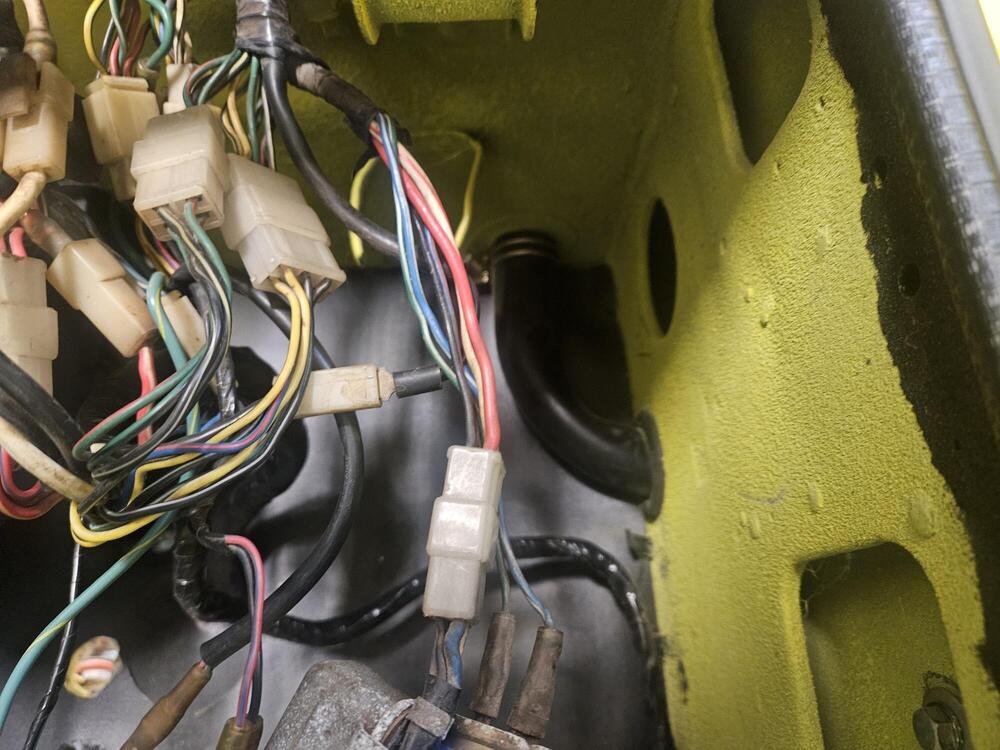
-
You might have to use some sealant on the inside. I believe "Seal-all" would be my first choice https://www.amazon.com/Seal-All-380113-Adhesive-2-Ounce/dp/B0015AE0AU/ref=asc_df_B0015AE0AU?mcid=73fbe515071334428dde54fff0cb8519&hvocijid=2708339363523471354-B0015AE0AU-&hvexpln=73&tag=hyprod-20&linkCode=df0&hvadid=721245378154&hvpos=&hvnetw=g&hvrand=2708339363523471354&hvpone=&hvptwo=&hvqmt=&hvdev=c&hvdvcmdl=&hvlocint=&hvlocphy=9010452&hvtargid=pla-2281435177578&psc=1
-
Can you elaborate on this process you did? Maybe a few more pictures?
-
The antenna alone paid for the car!
-
I think I would richen that mildly with the mixture nuts. I wouldn't really want to be on the lean side of 14.7 except on deceleration
-
Looks great Jim!
-
I have done mine although my door hardware is not complete yet. But they are very nice and soft and latch like factory weatherstrips
-
Obvious questions of course! ;)
-
I have a bookmark set to show me unread content with my preferences. I also agree, traffic seems down. I know there is an S30 forum on Facebook and I have seen members posting there. Maybe that is slowing traffic on CZC? I would rather be here than Facebook!
-
Thank you, yes that is what I was looking for
-
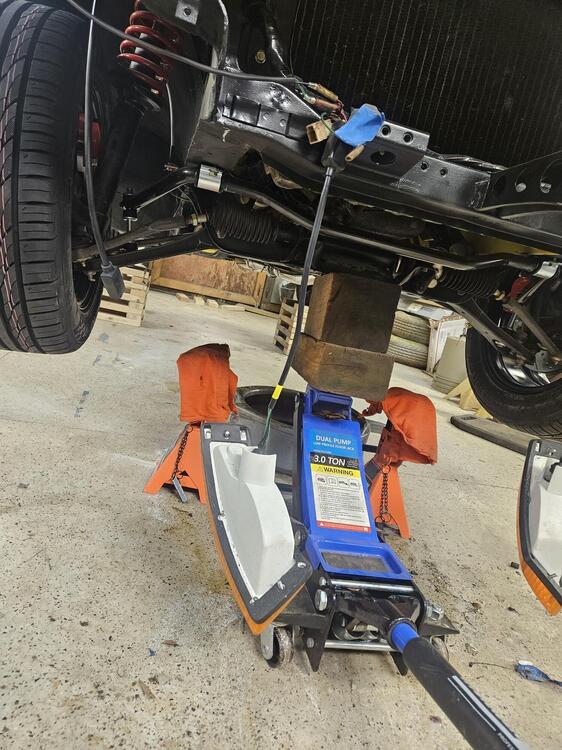
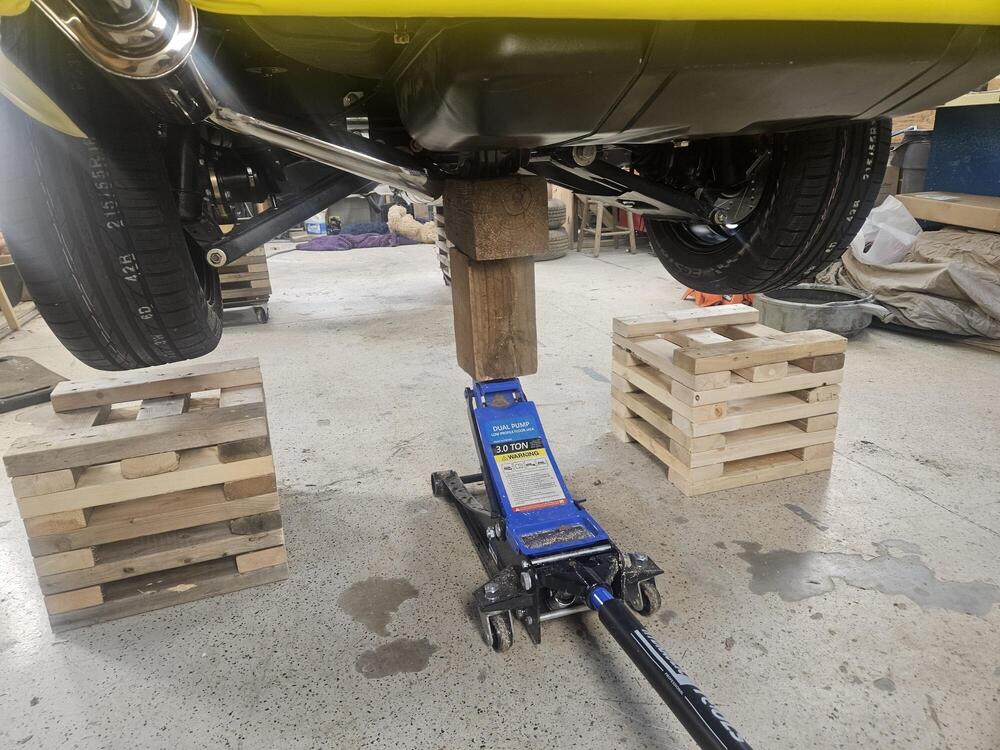
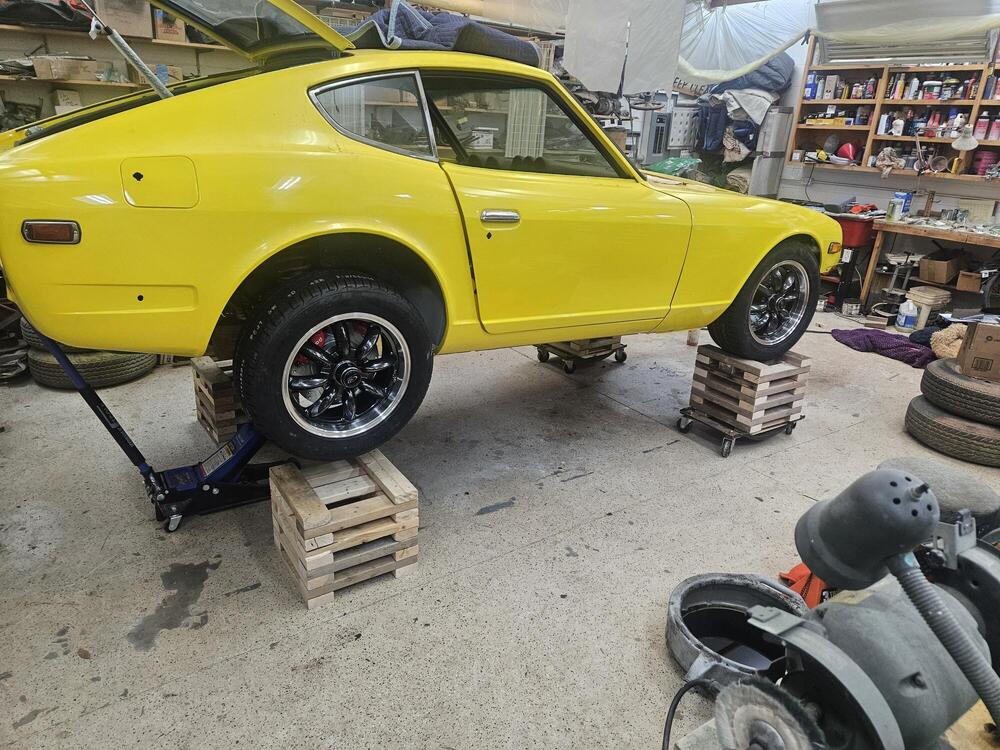
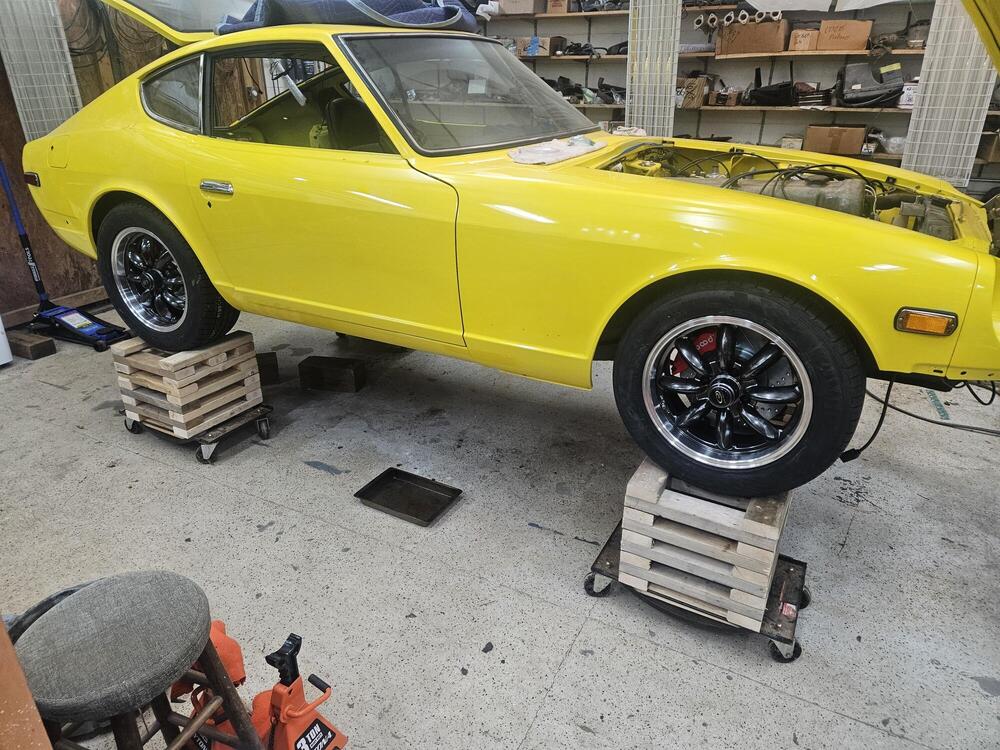
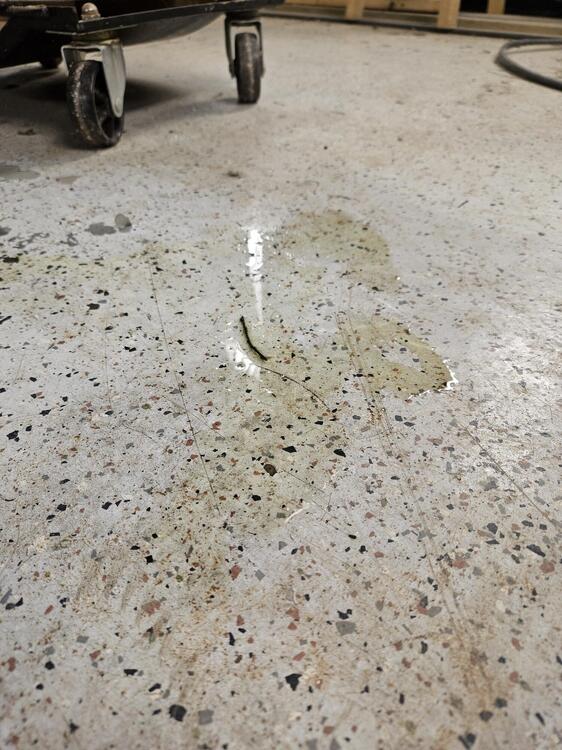
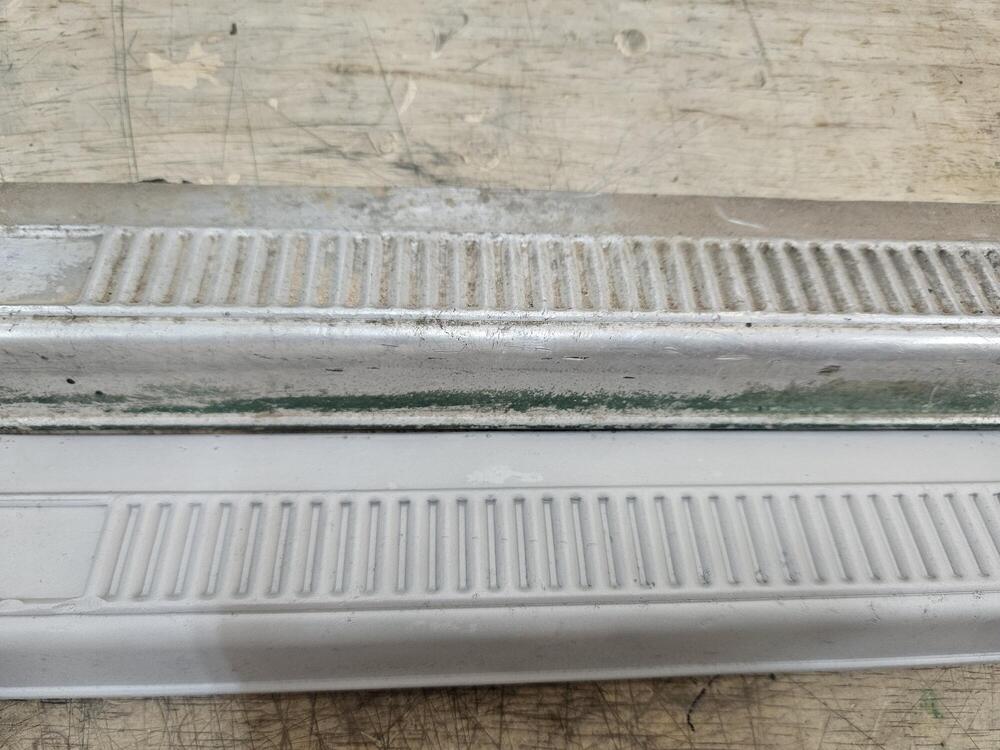
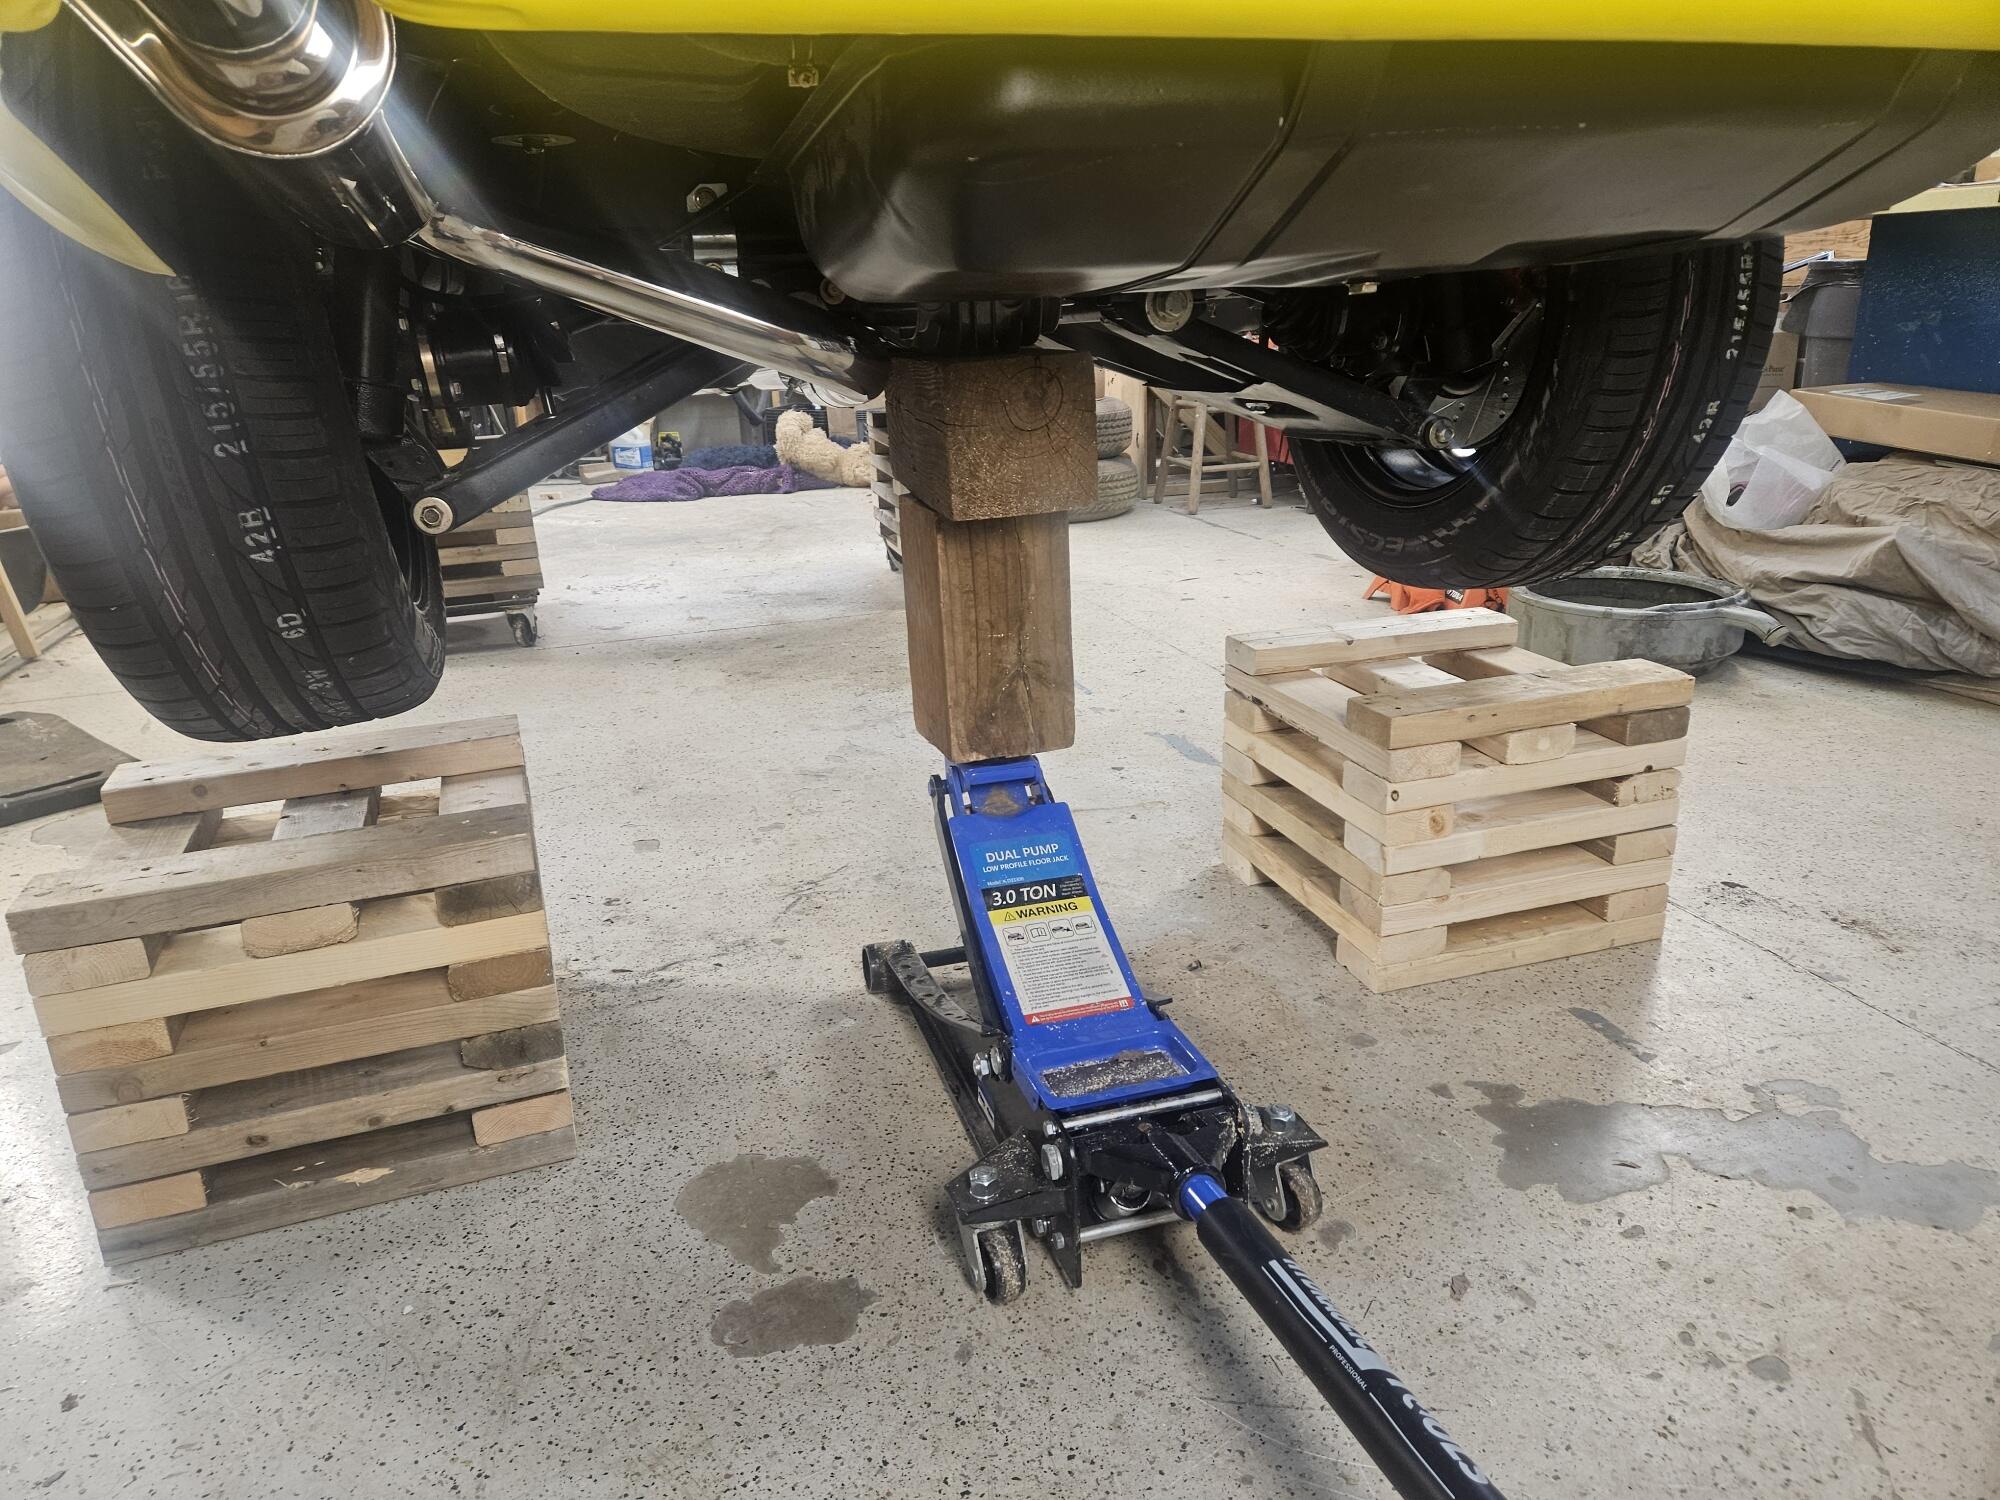
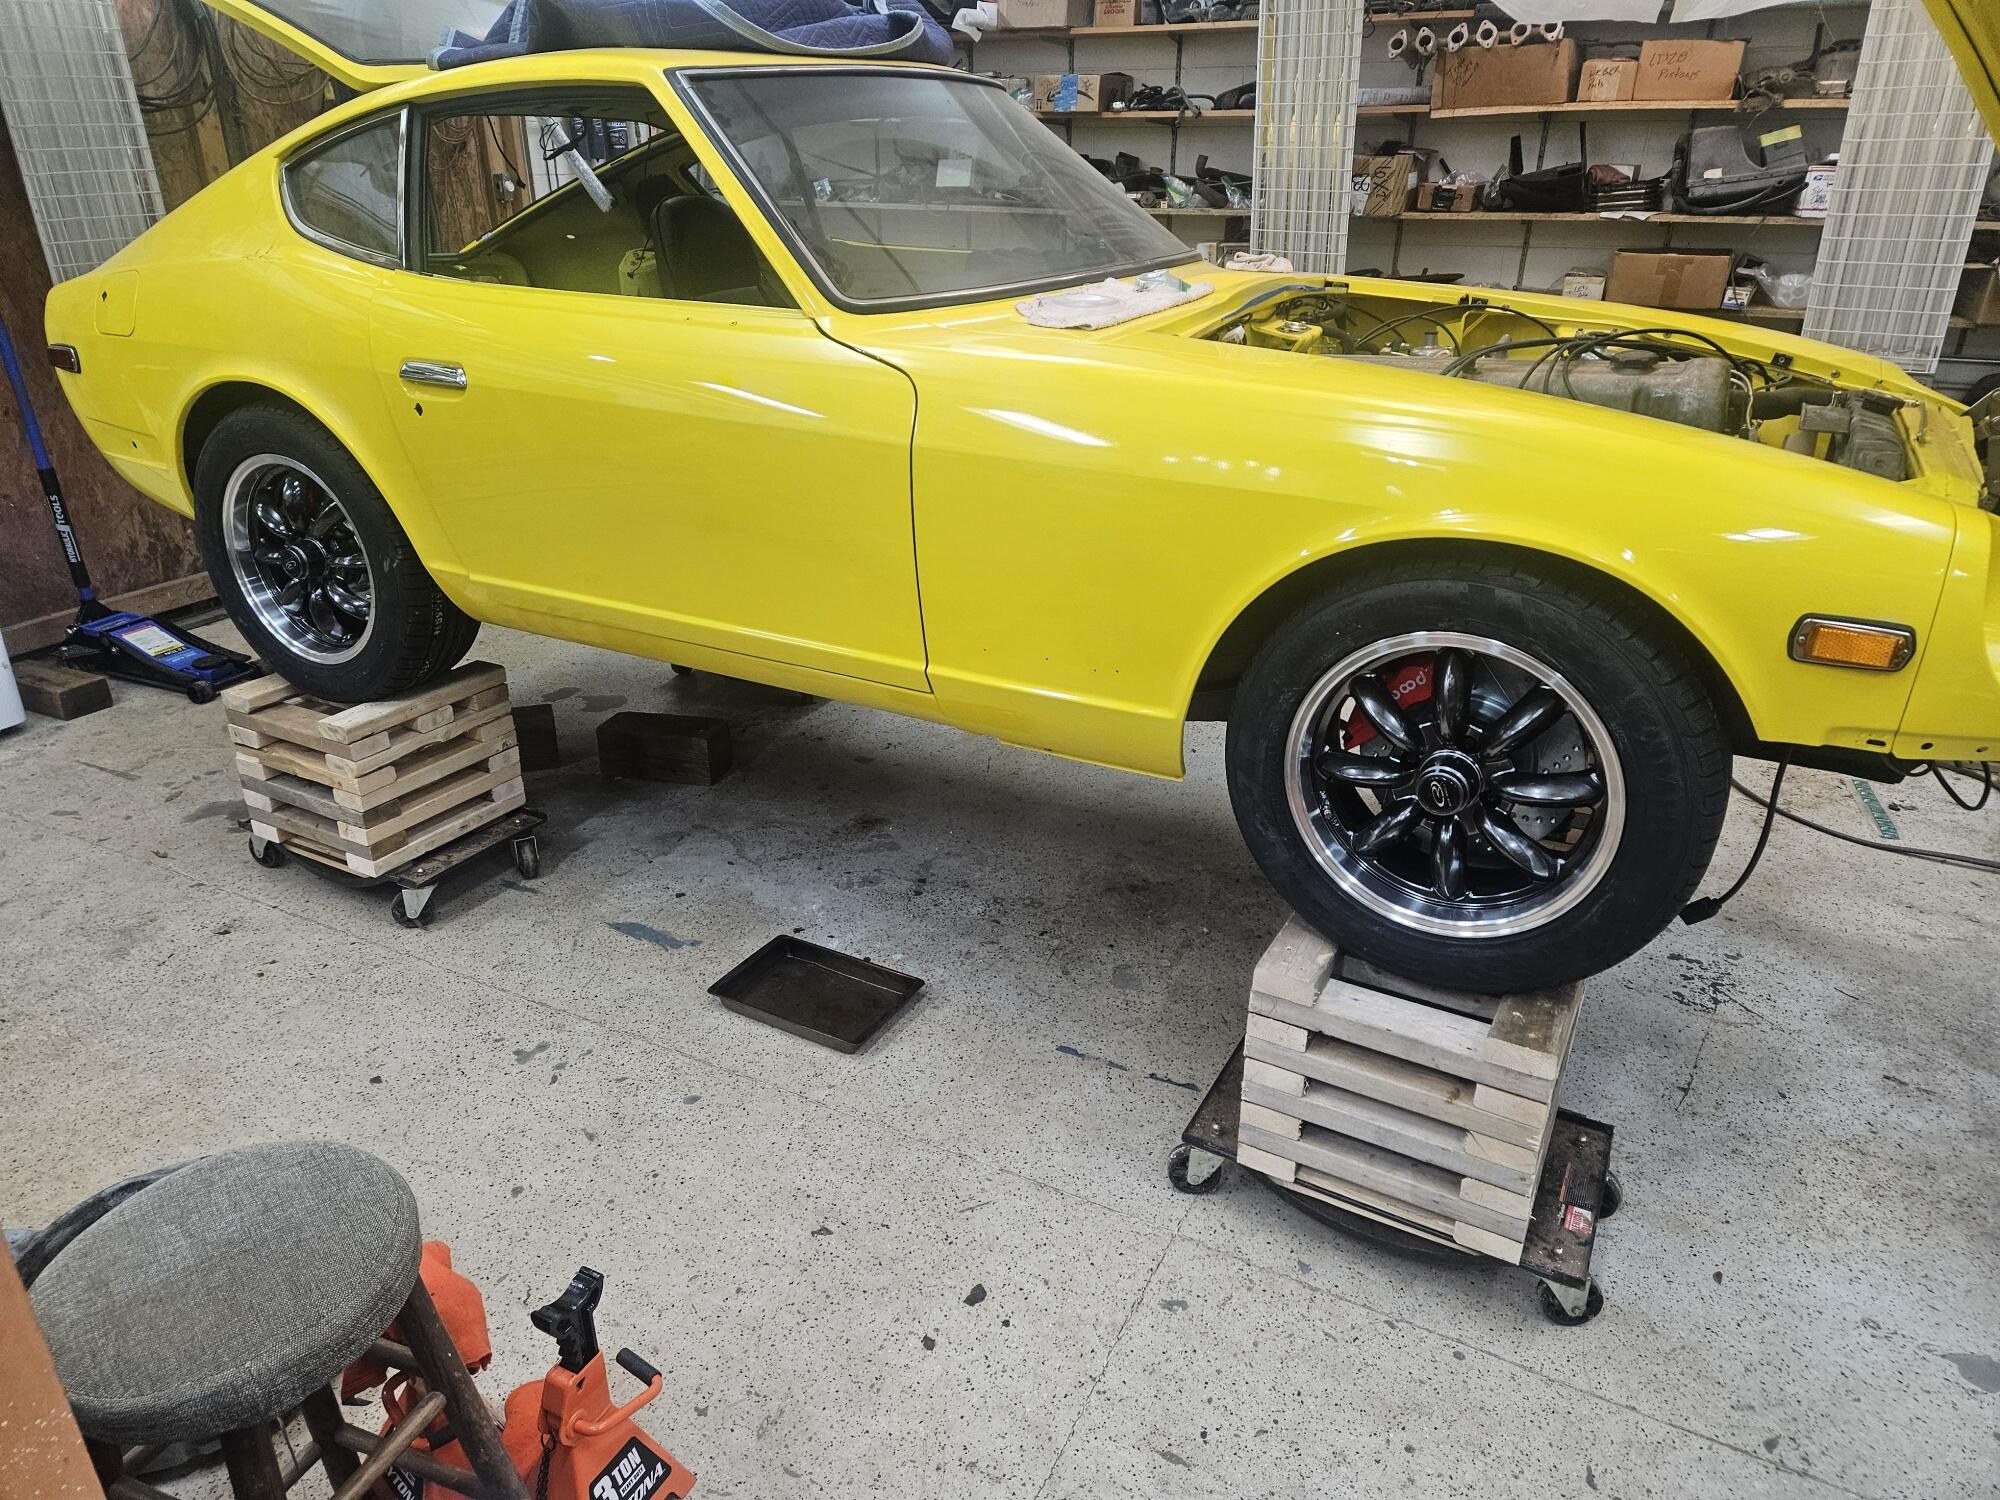
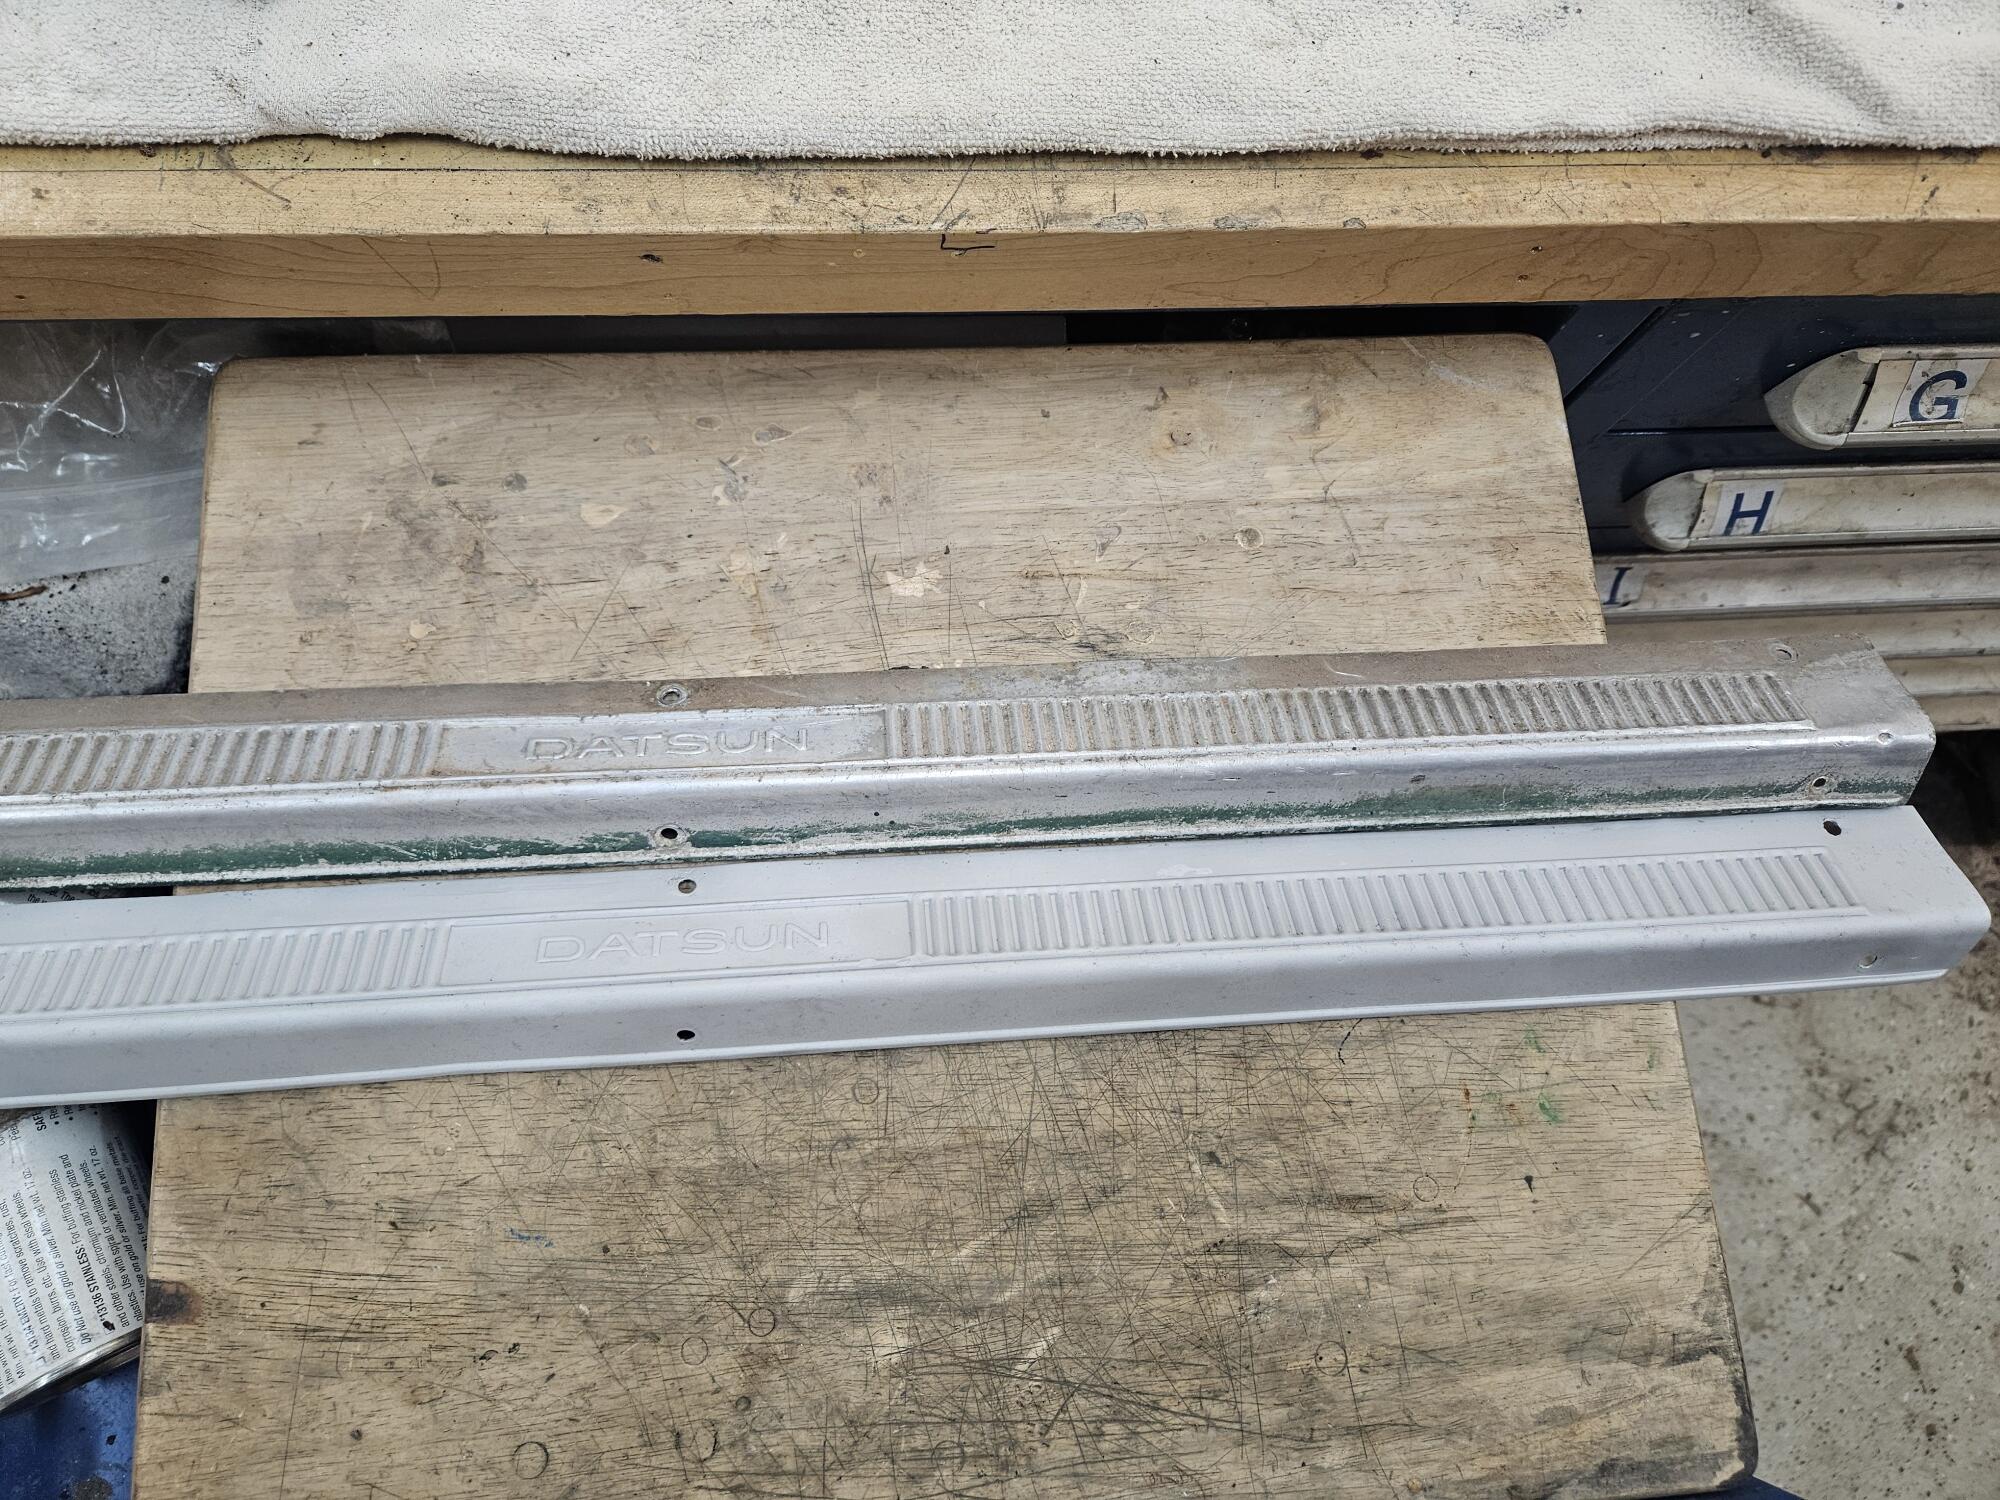
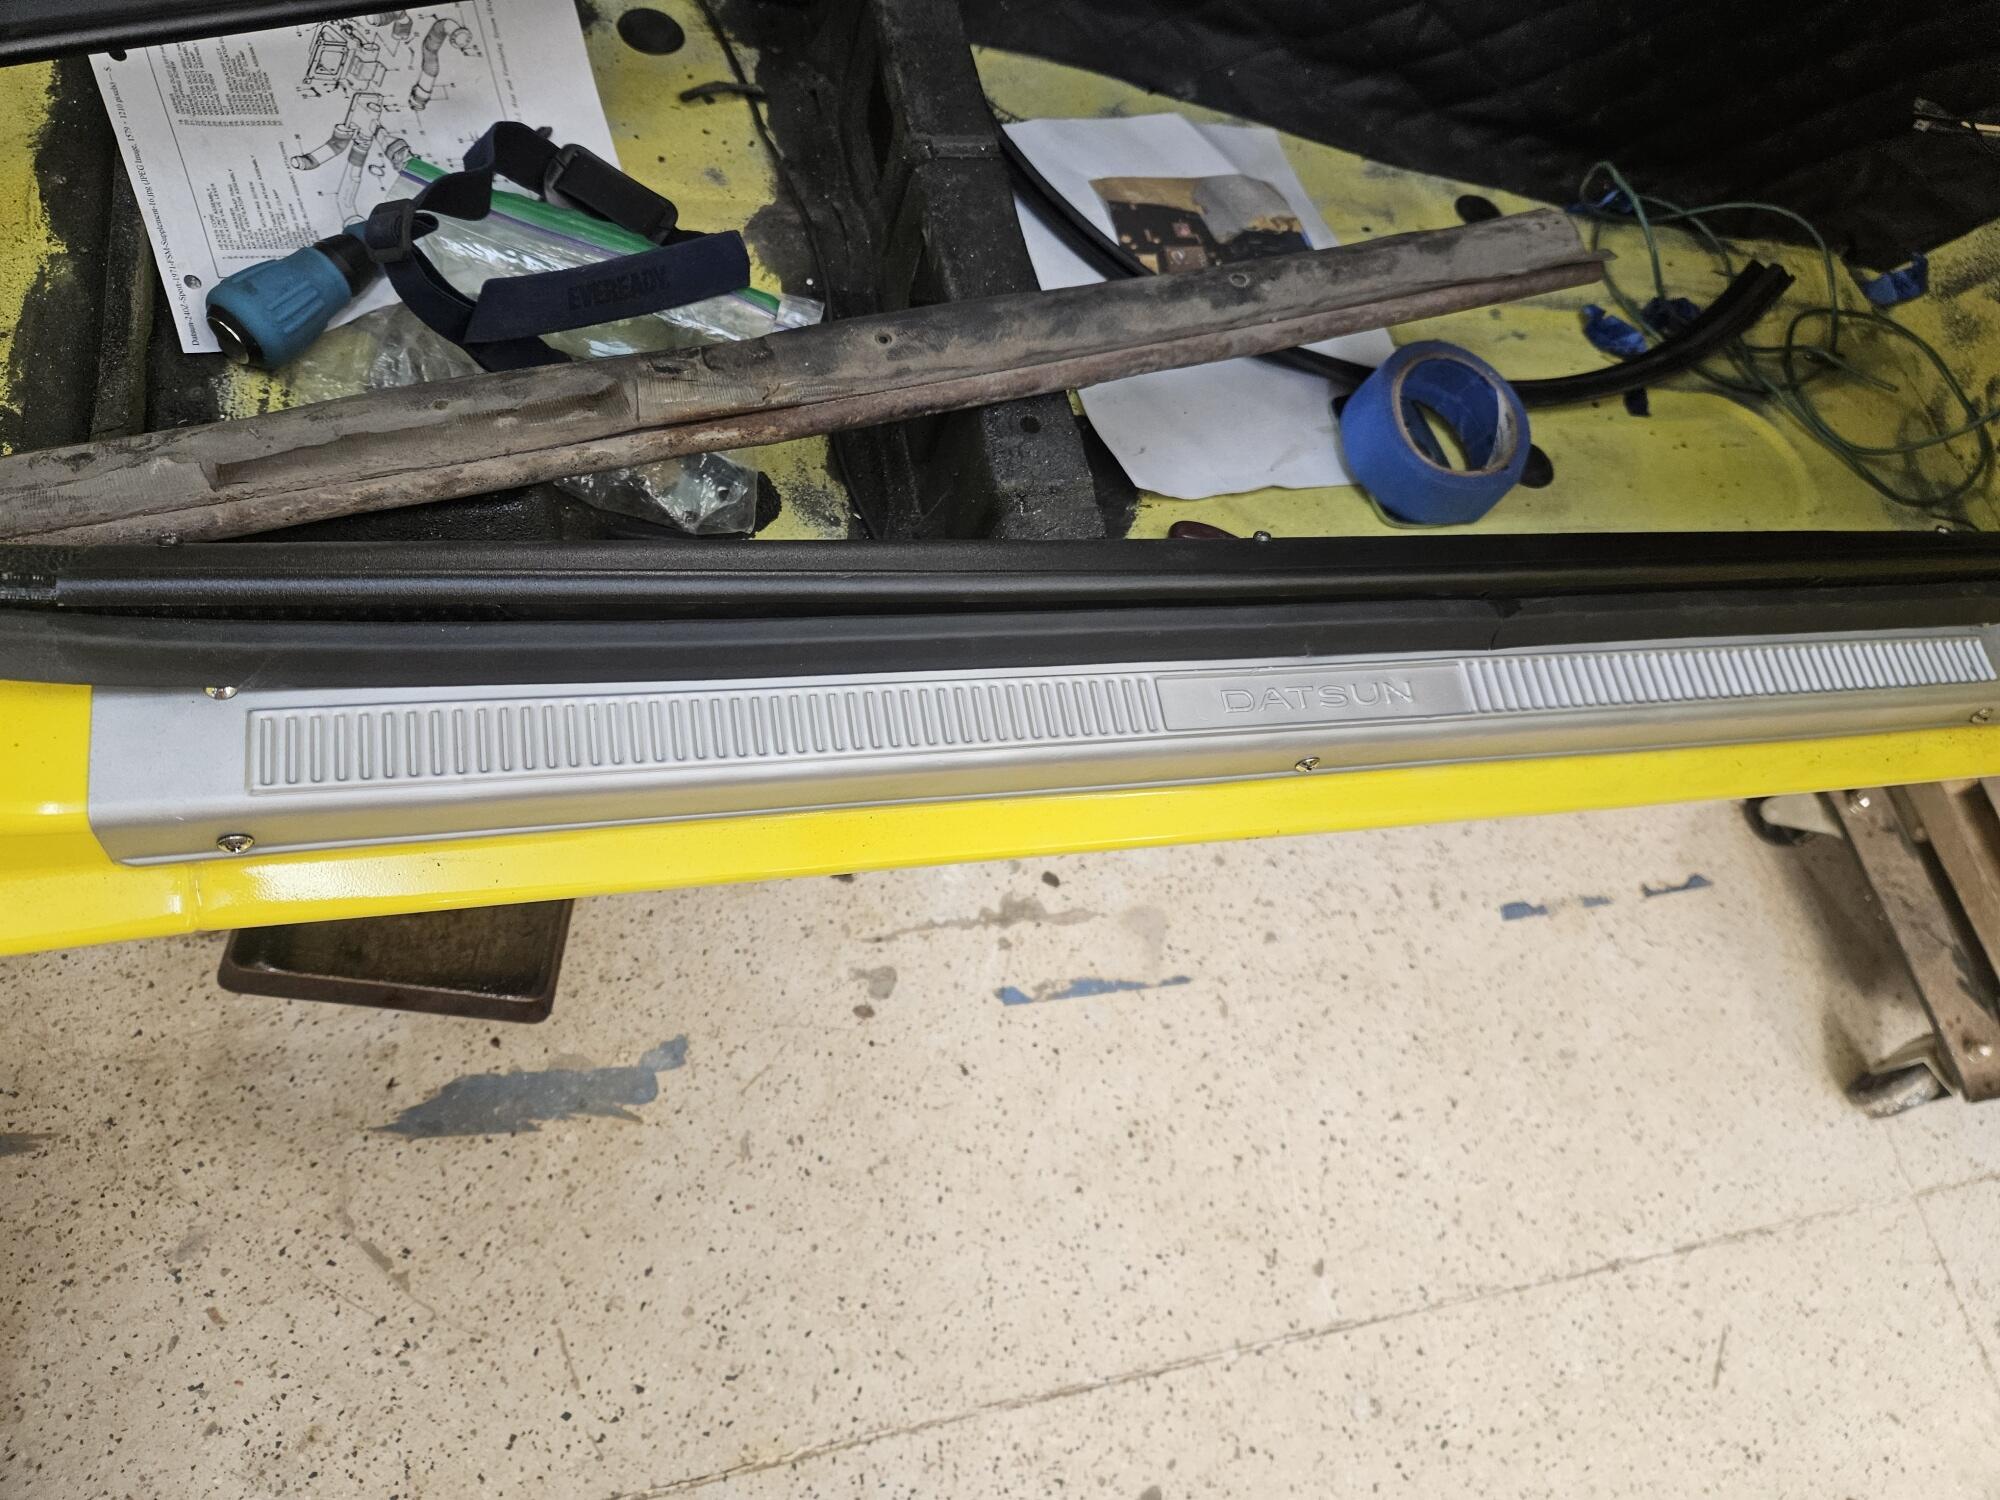
Thanks for the offer Cliff! I actually already bought a new set. I finally got the car up on the cubes on some dollies. It was a little sketchy but I got it up without dropping it Evidently the water pump on this engine is bad... :( I worked on the original door sills some today. They were pretty rough. I used the bead blasting cabinet with low air pressure and some crushed glass After that I used some glass beads on really low pressure to shine them up a little more. I found the location of the inner black sill cover by using a pick and locating the original screw holes. The new black covers only have three holes; the originals had five but I think I'll leave it this way for now. The screws are stainless and I polished them up before putting them in I also bought the speedo seals from Zcardepot and put those in yesterday. We'll see if that fixes it...


-
I need some reference dimensions for where the door sills go on the rocker panel. Mainly the interior black one. Maybe use the rocker seam as a reference?
-
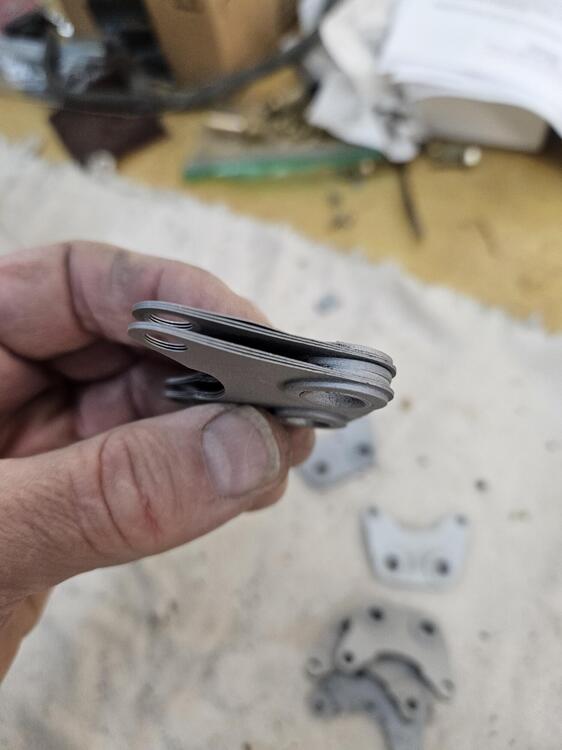
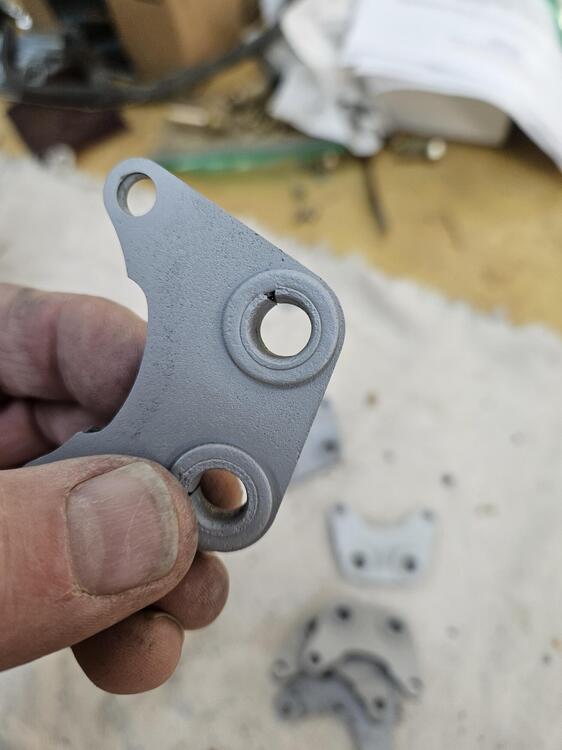
Thanks Alan, that was one of my suspicions for the reason but they changed the horn mounting to a steel bracket but mounted on a center rear stud in later years. So I wasn't sure... I have looked at them pretty closely. It is one of the parts I have considered reproducing. Because of the construction they are difficult to coat properly and they corrode badly because of the spaces between the plates. Not a complicated part to reproduce but they would probably be sort of costly because I would have to have someone cut me all the plates
-
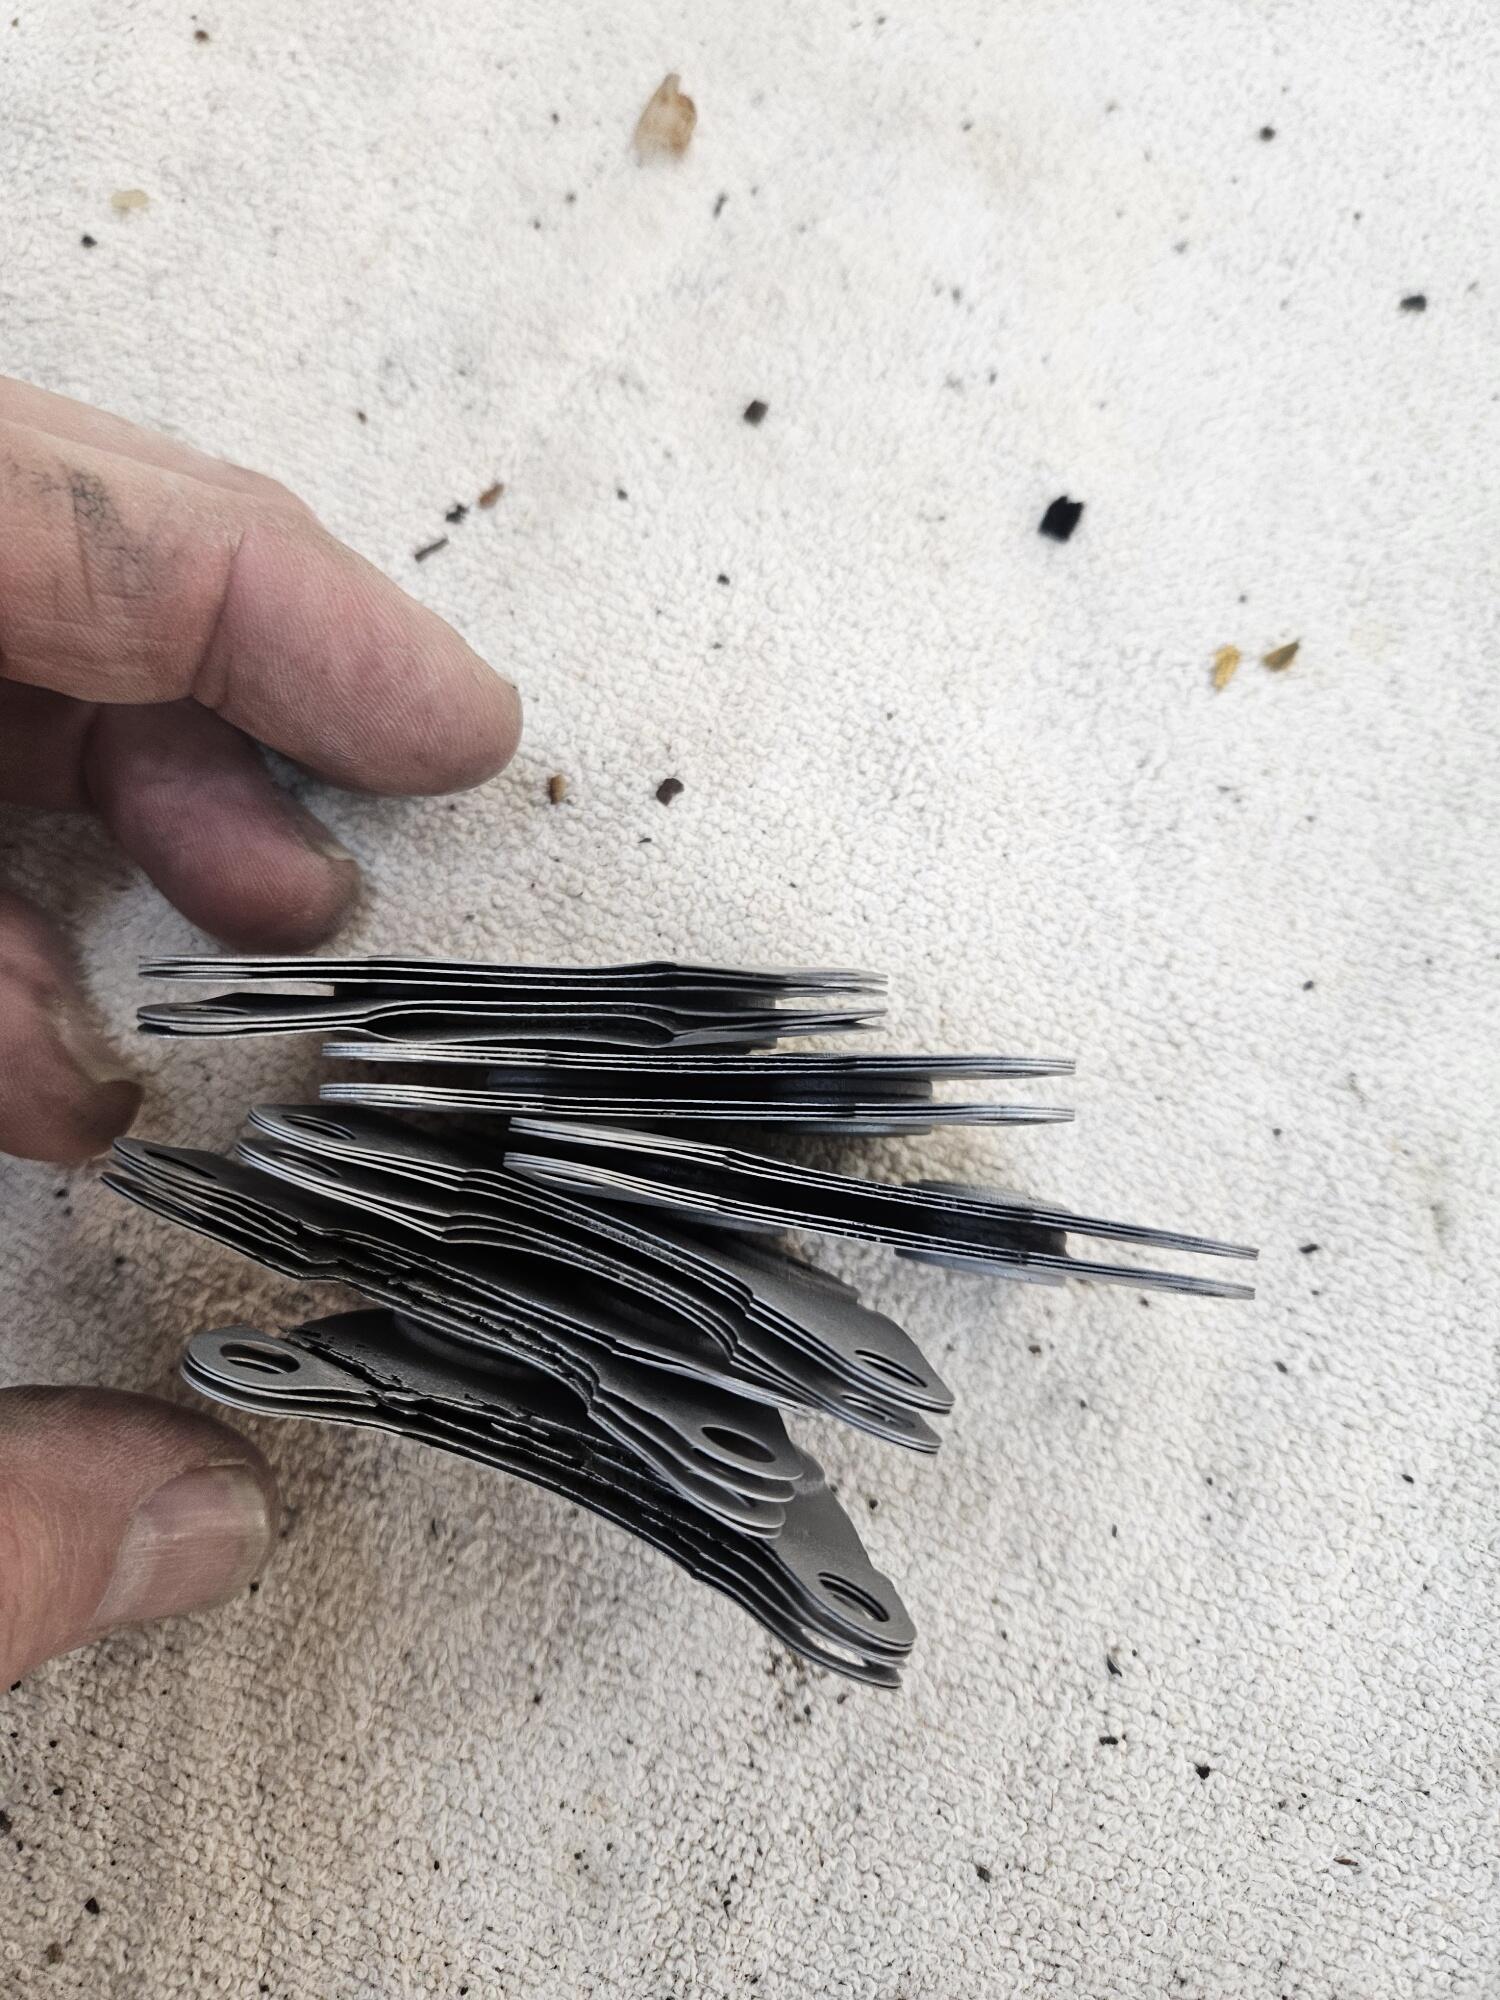
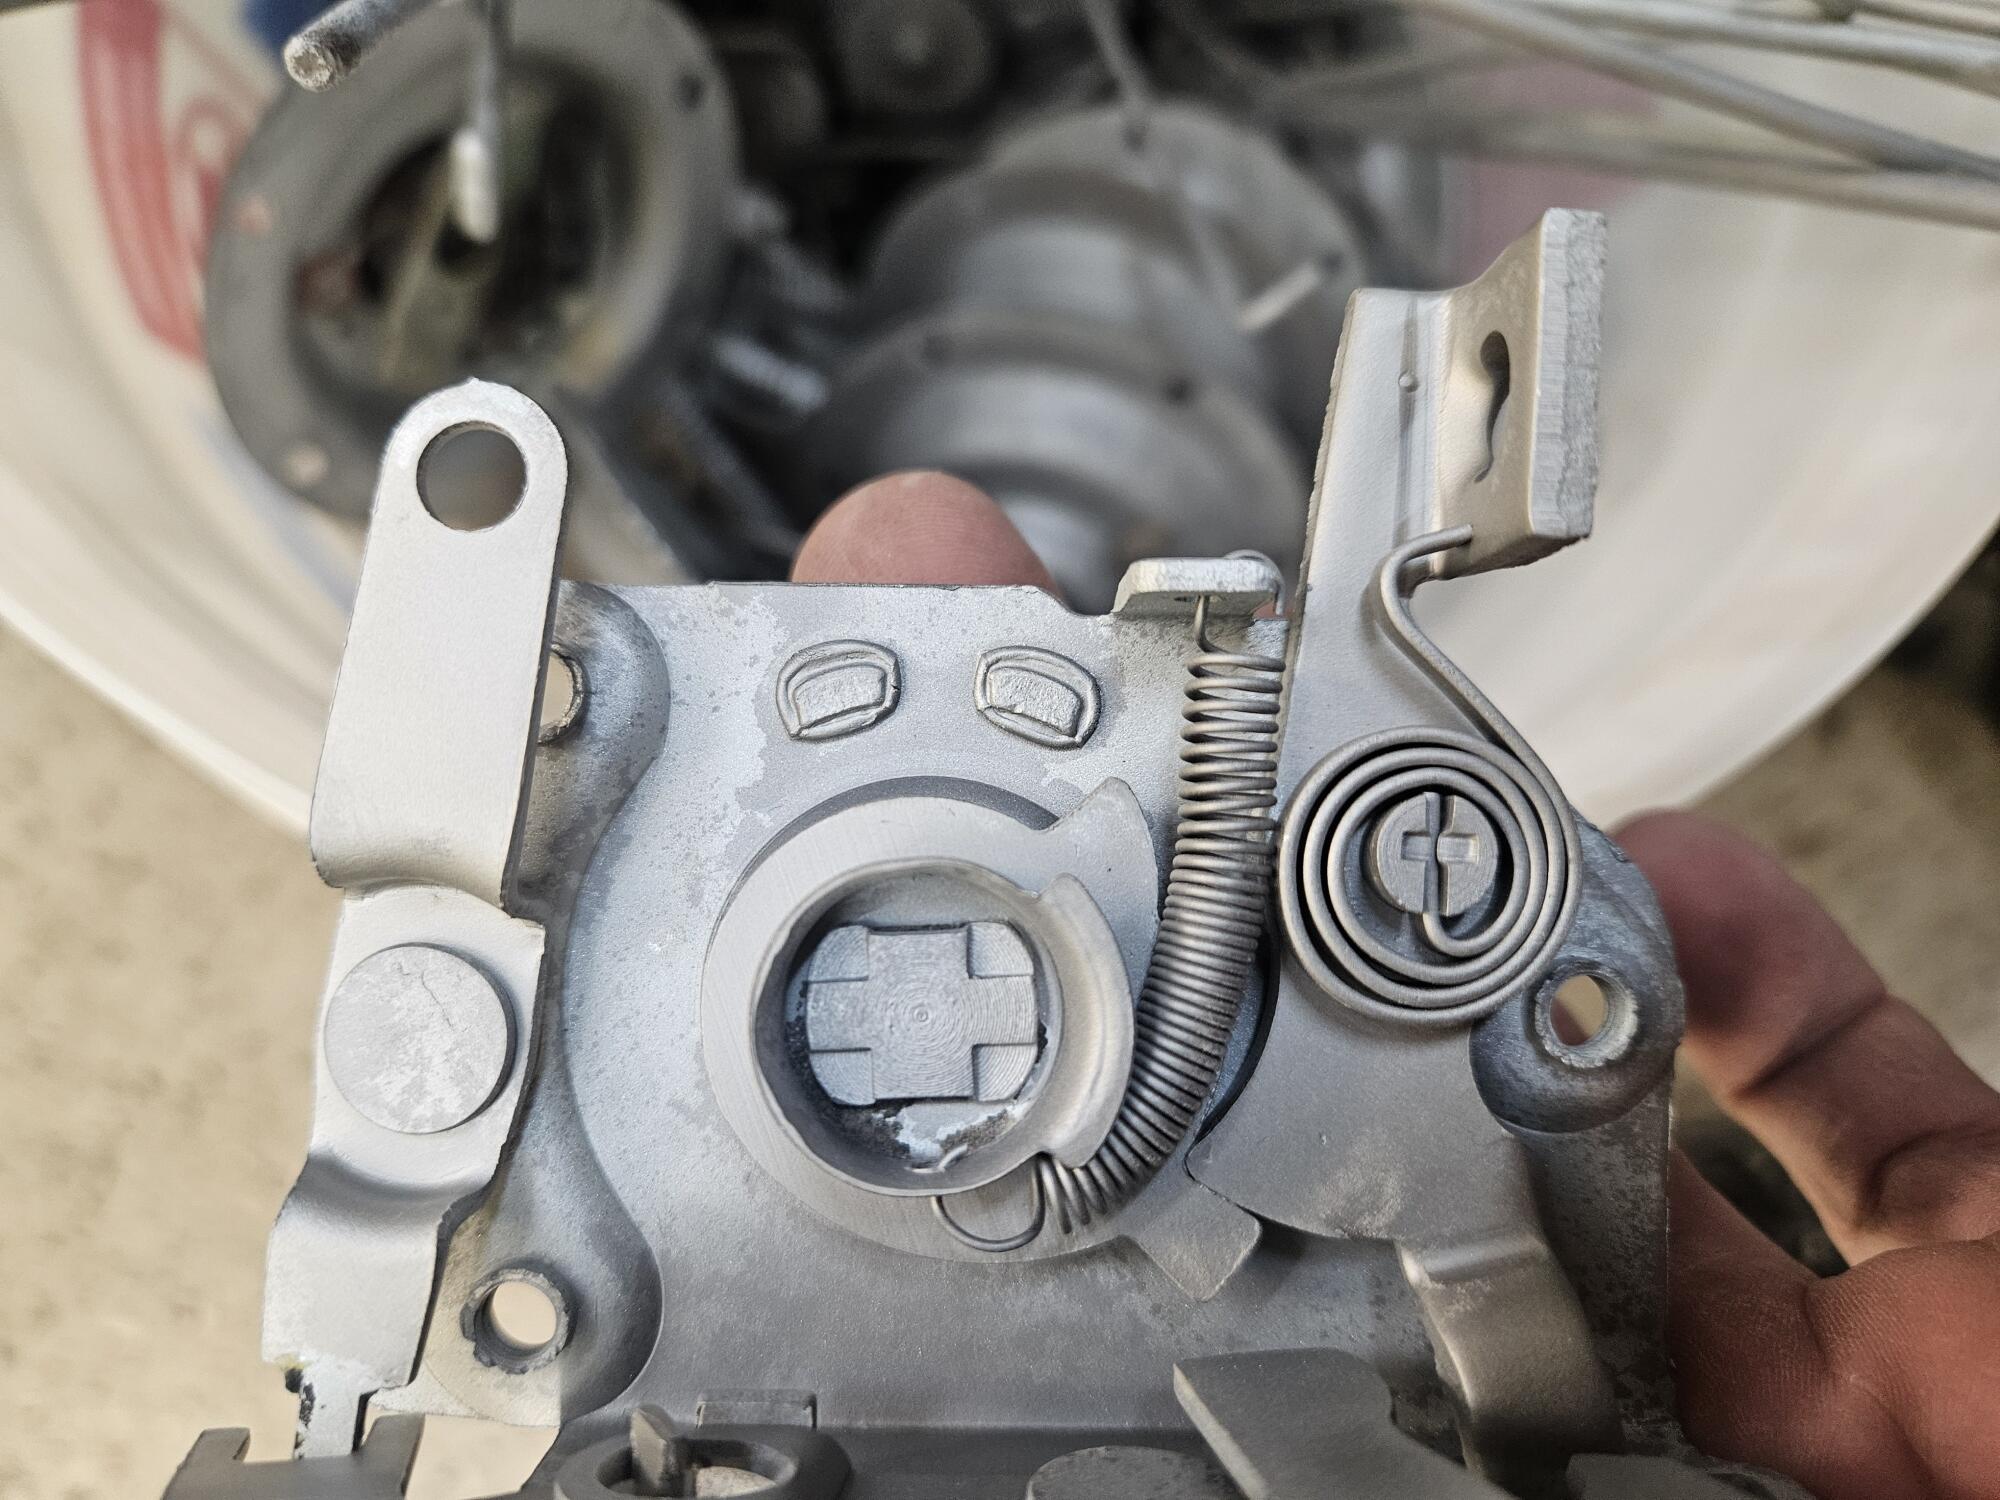
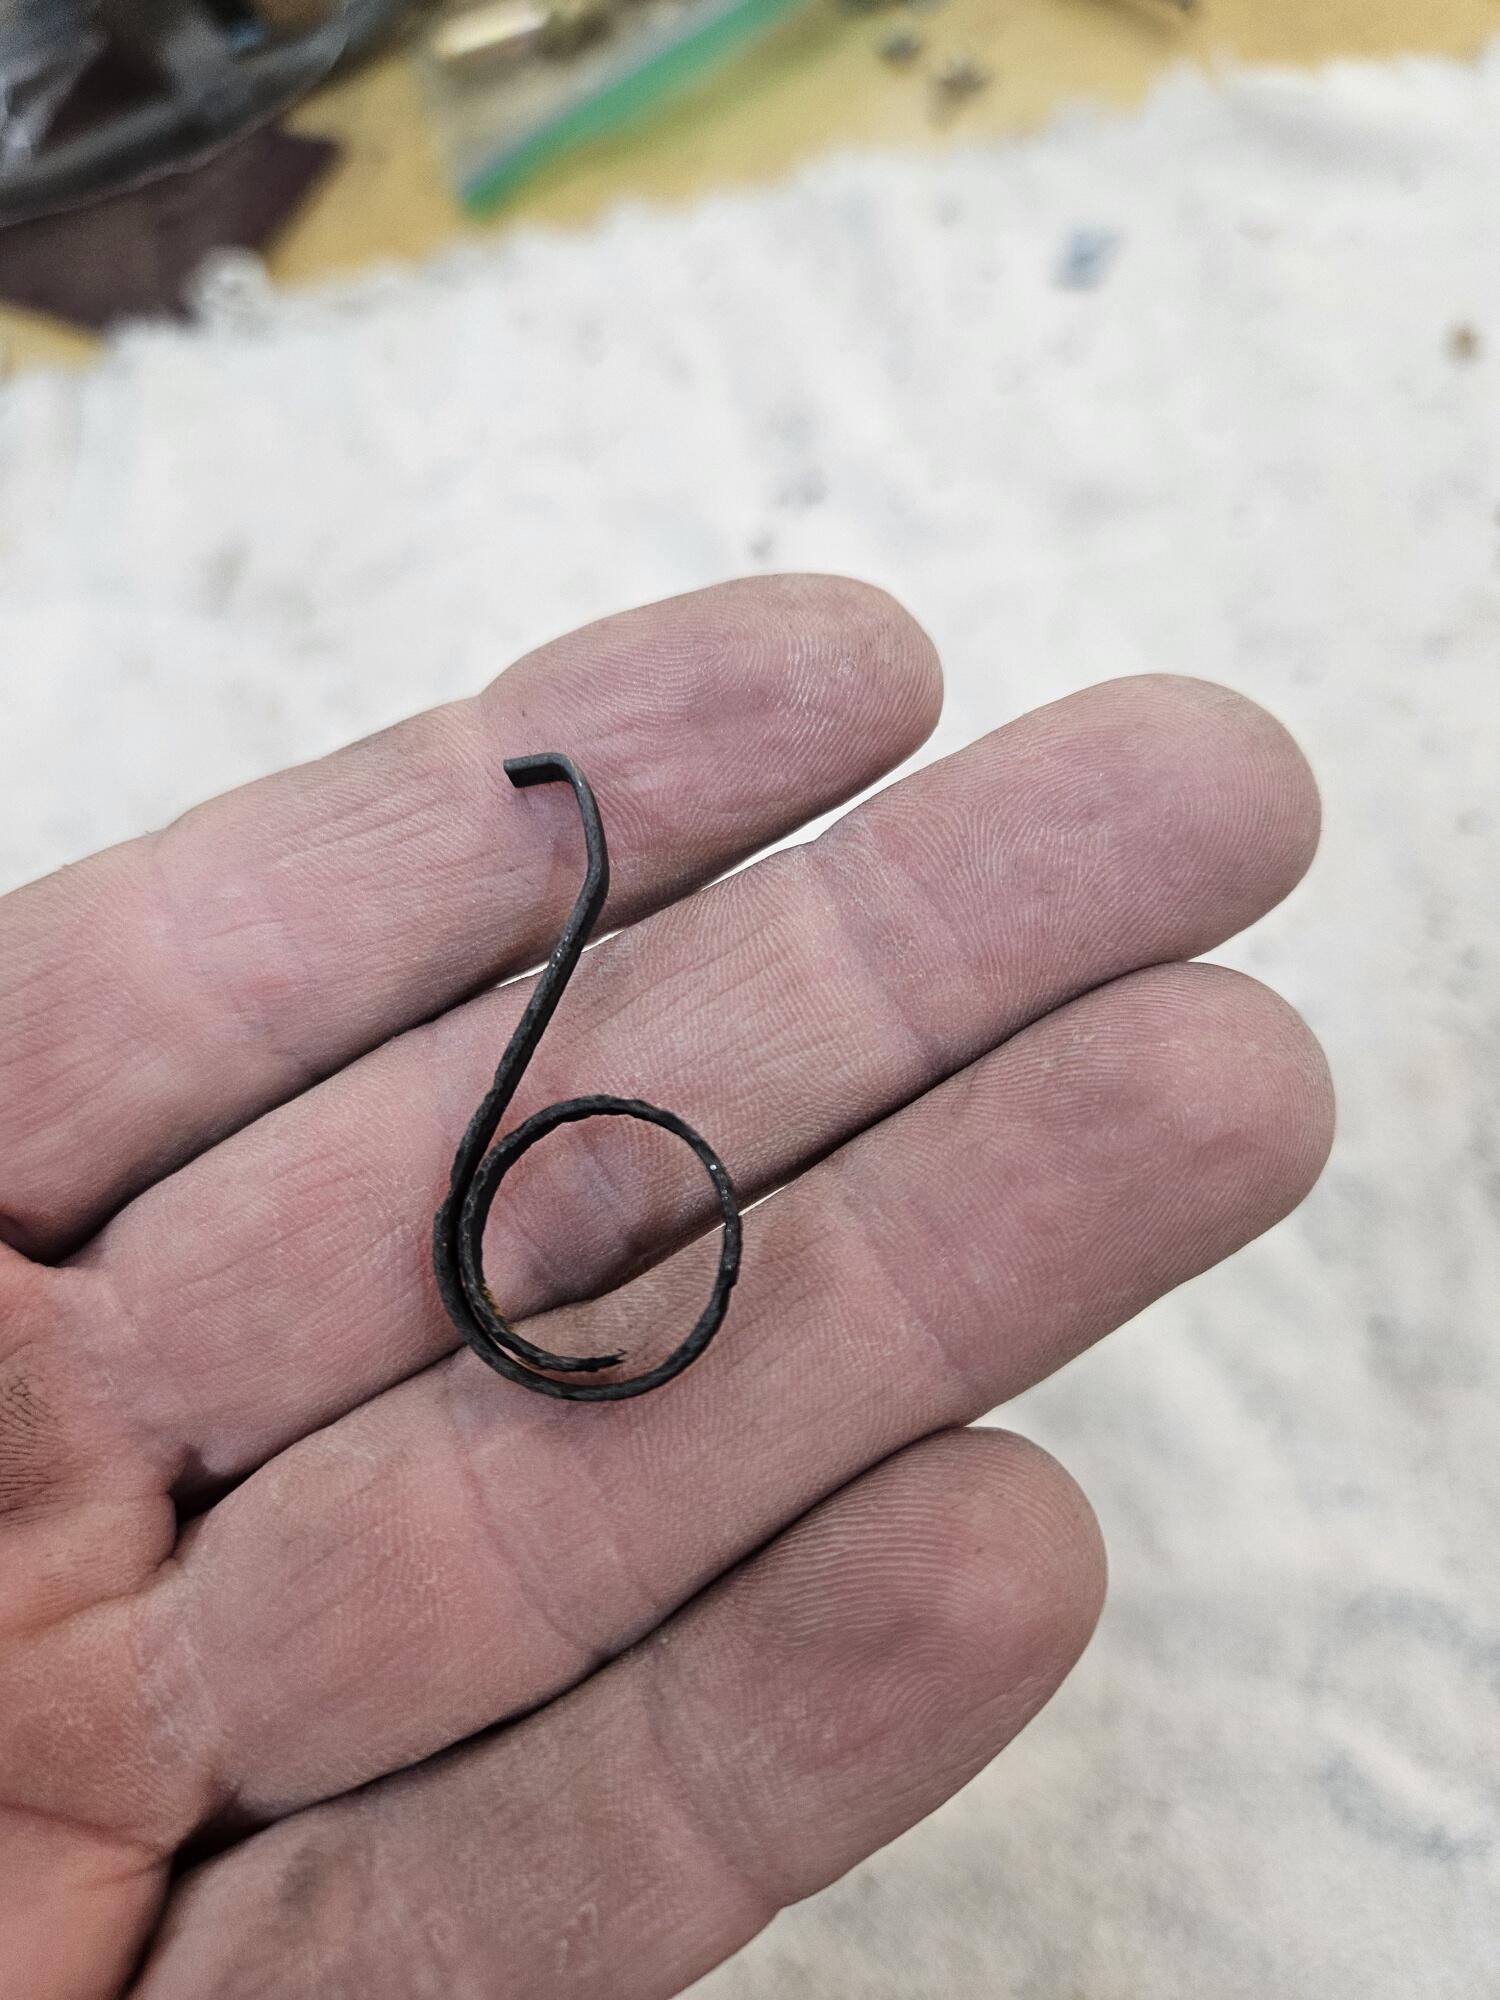
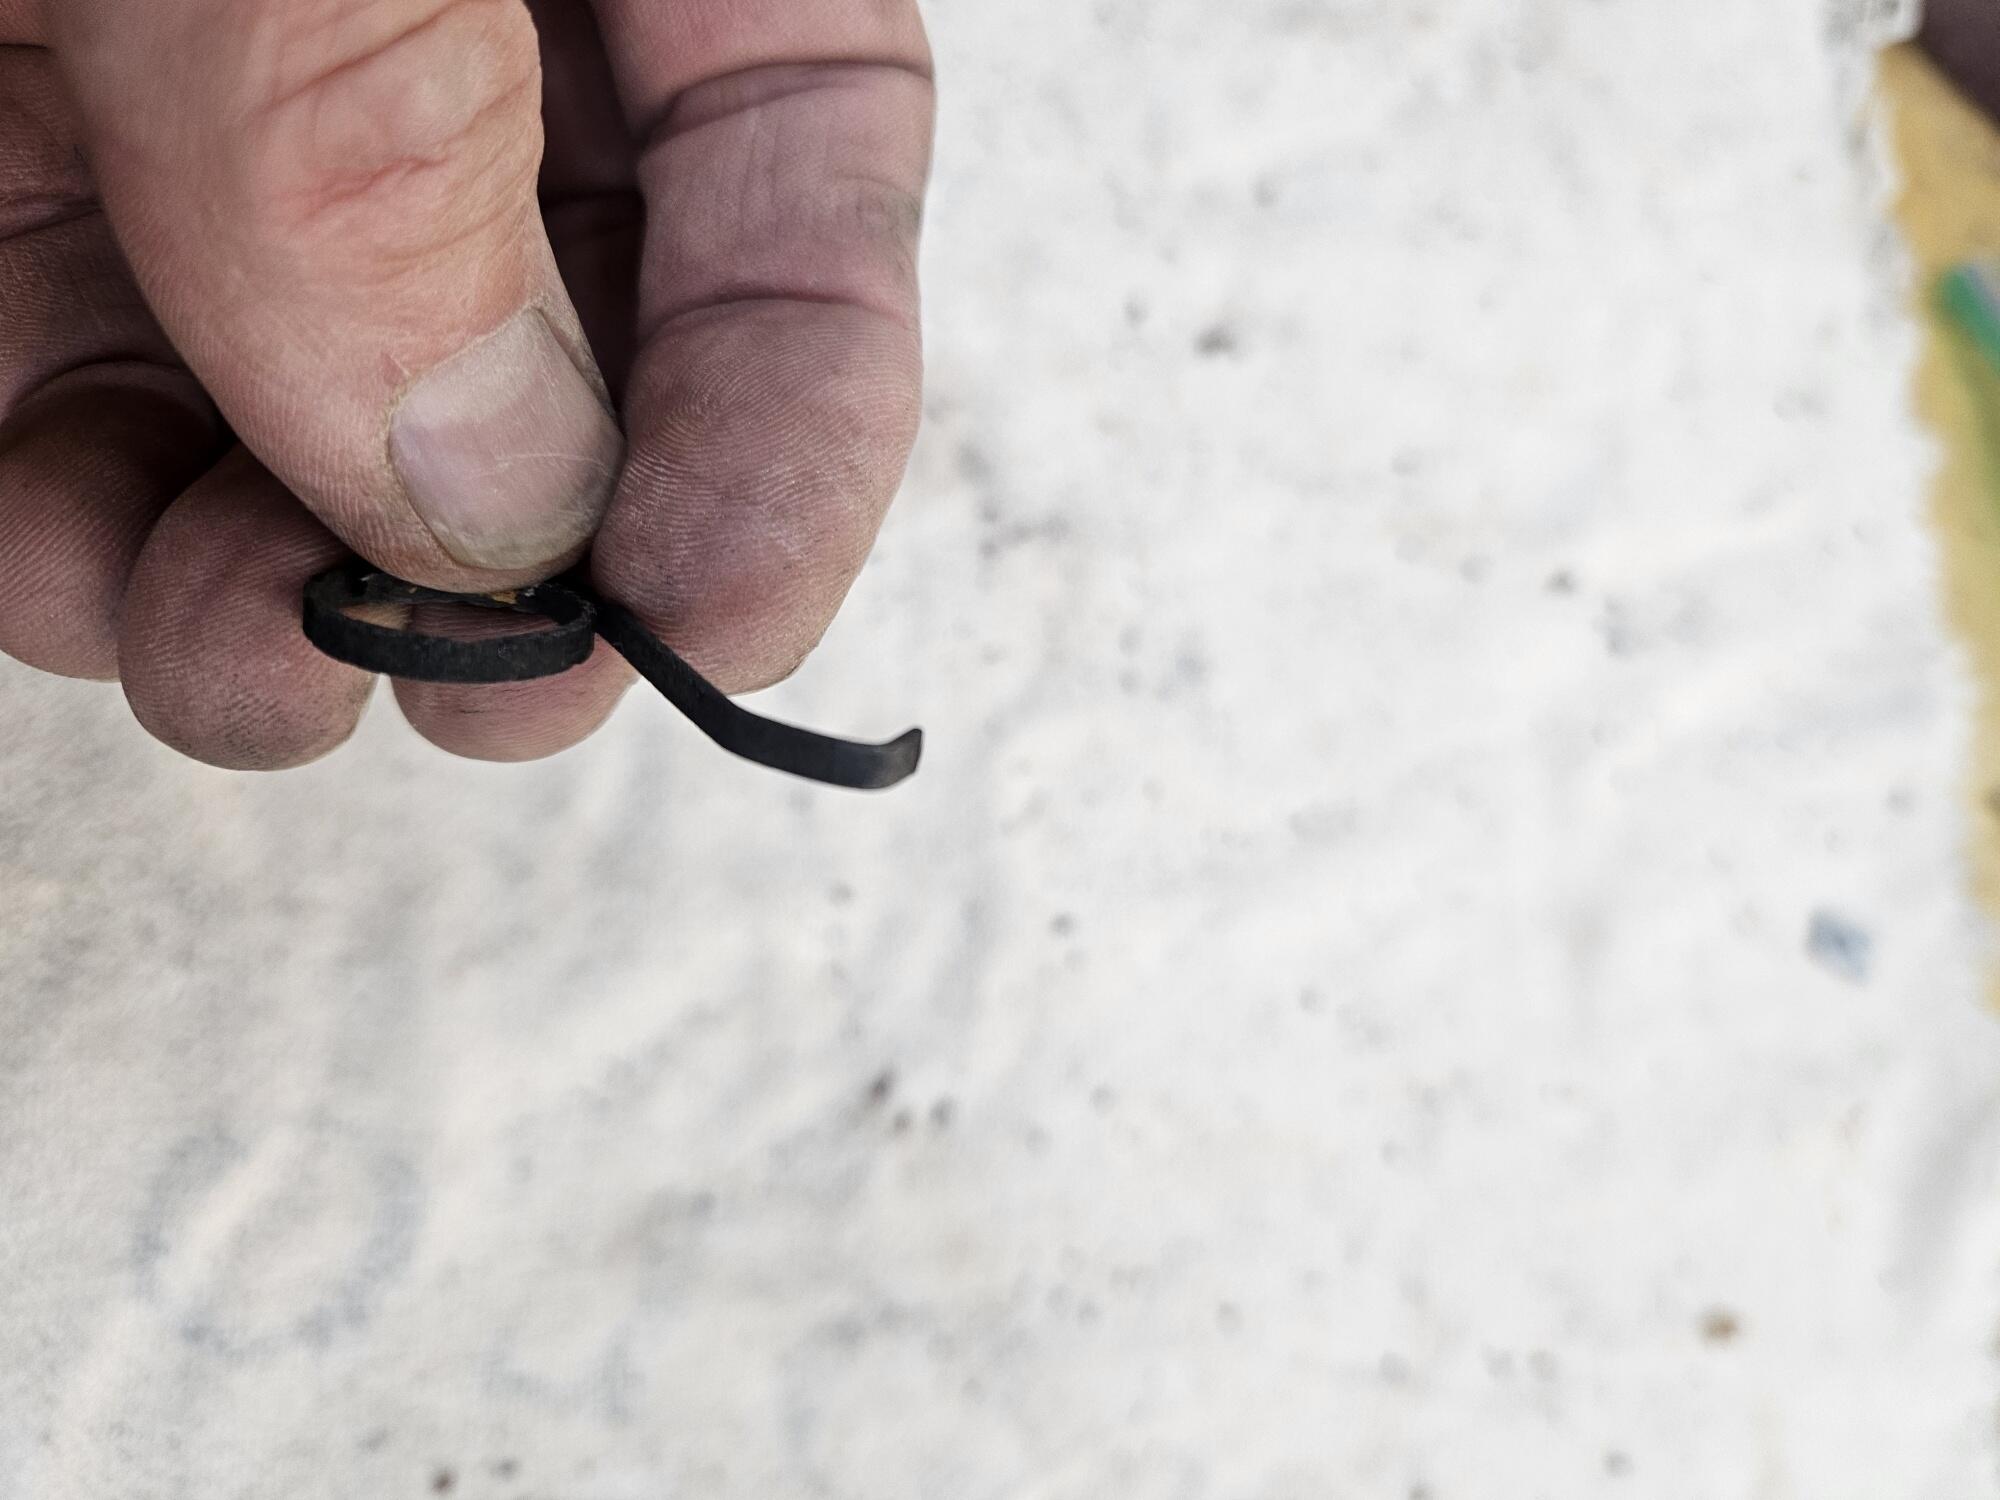
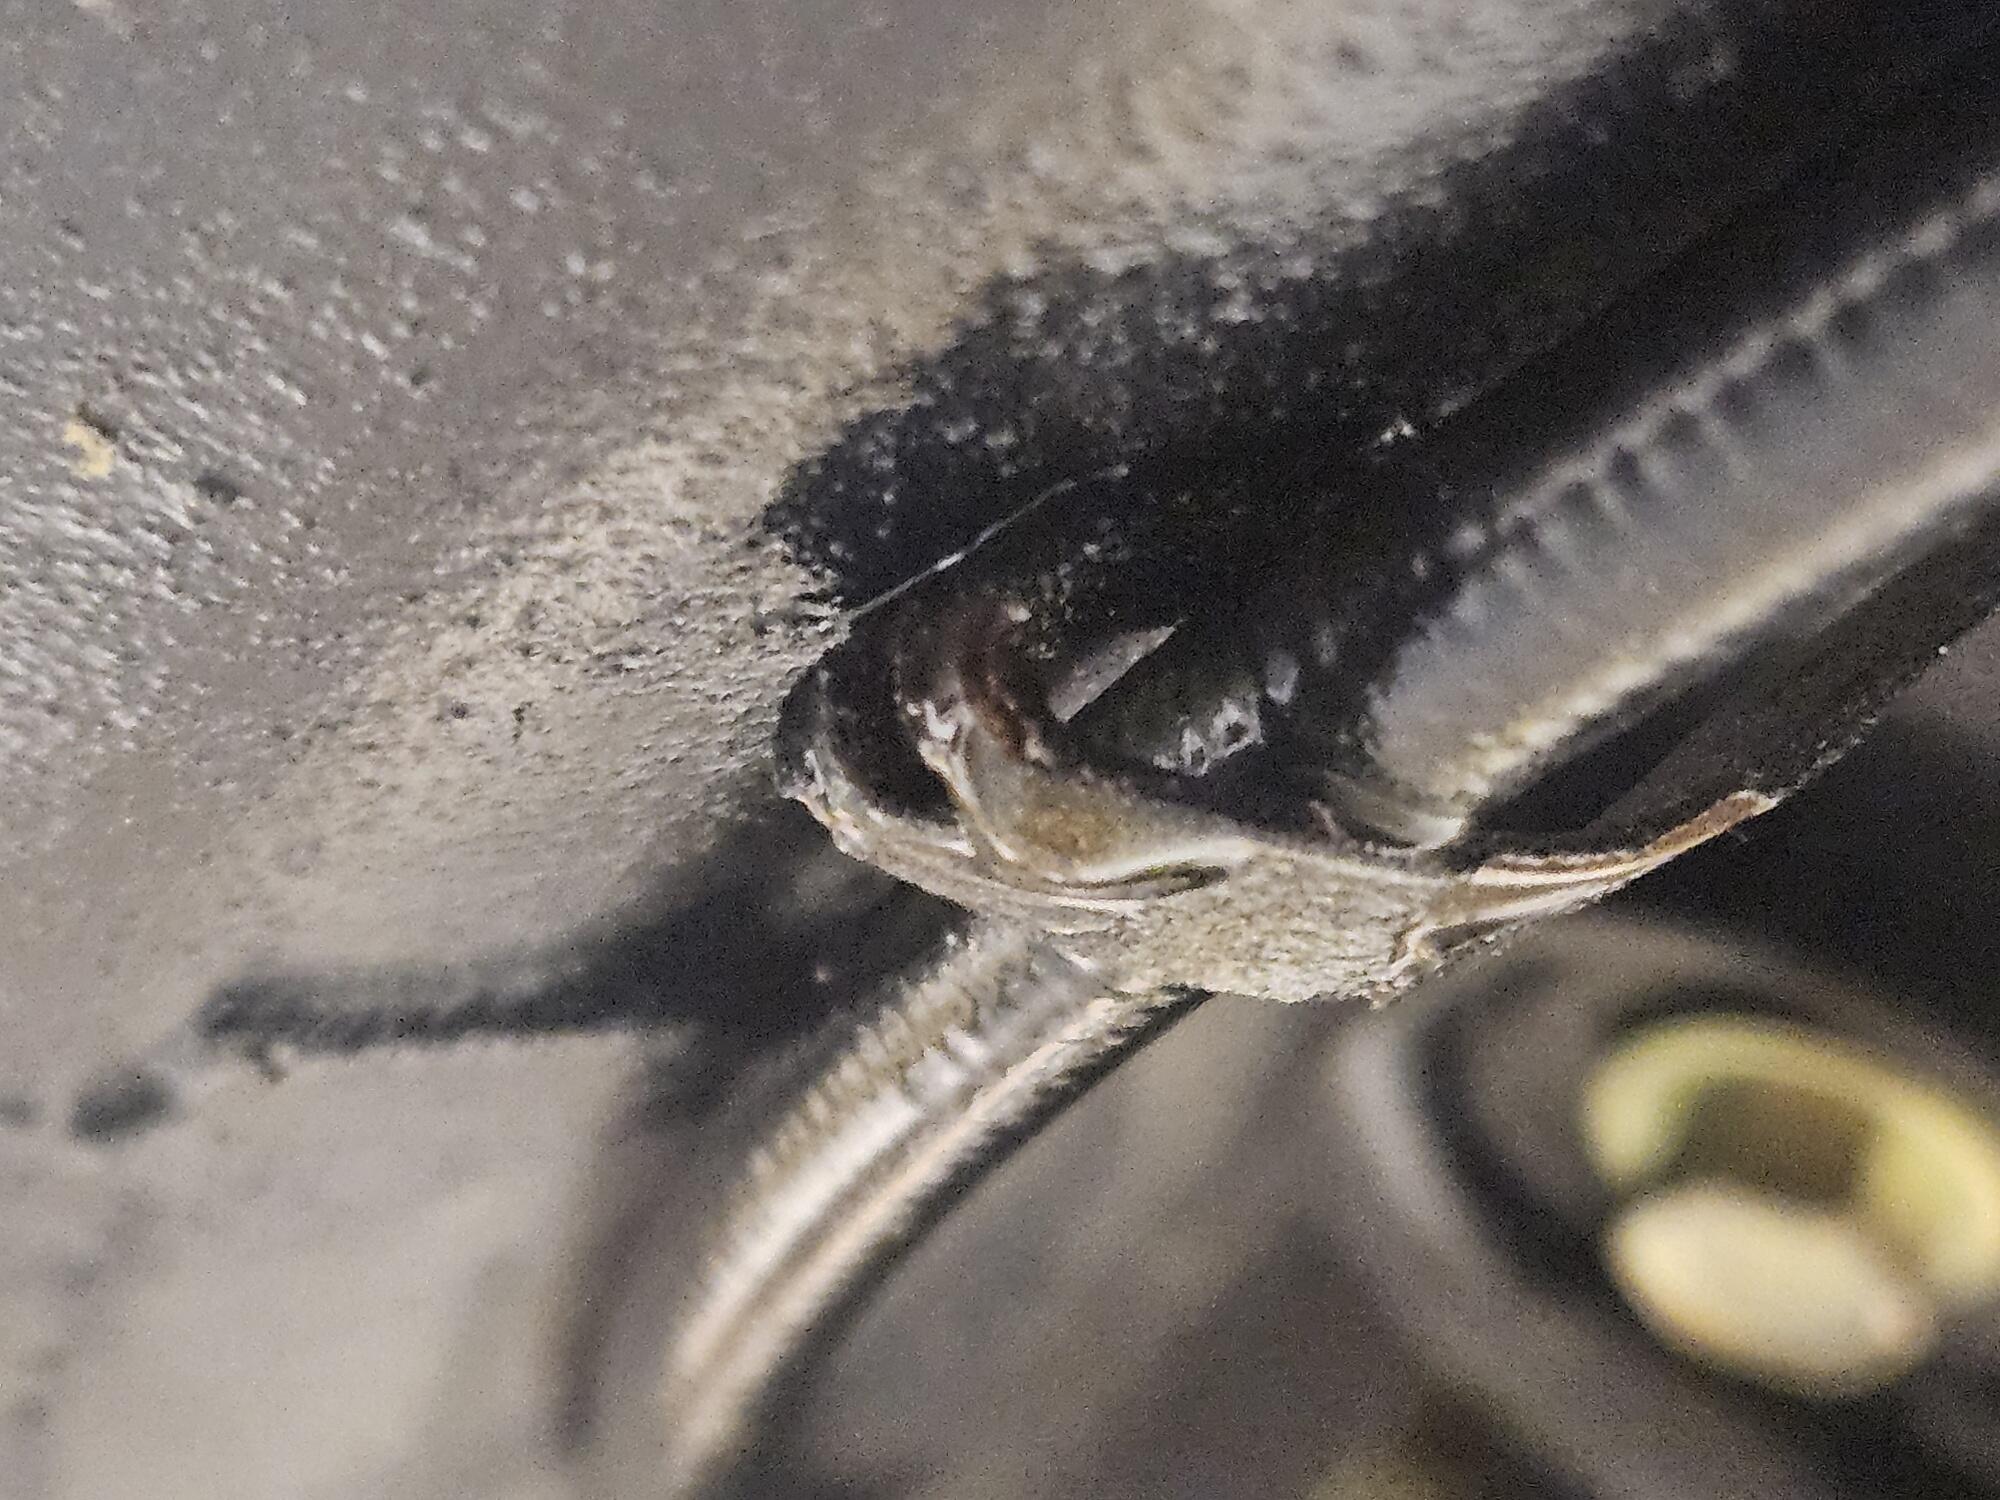
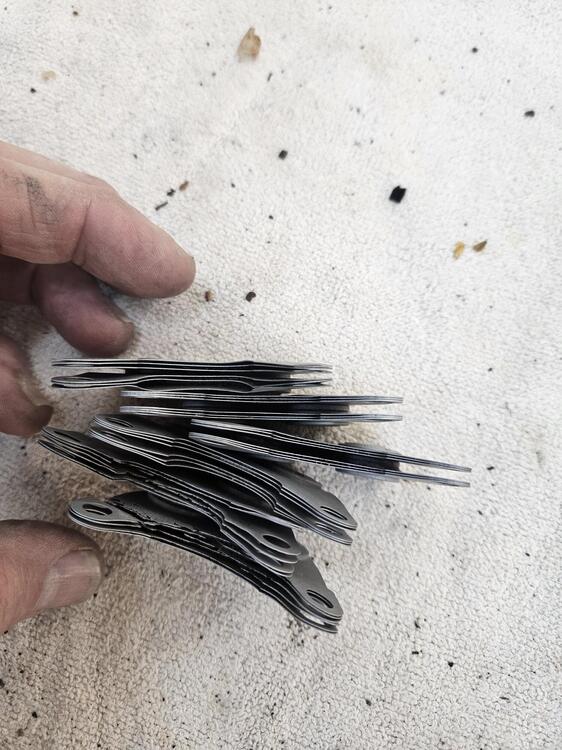
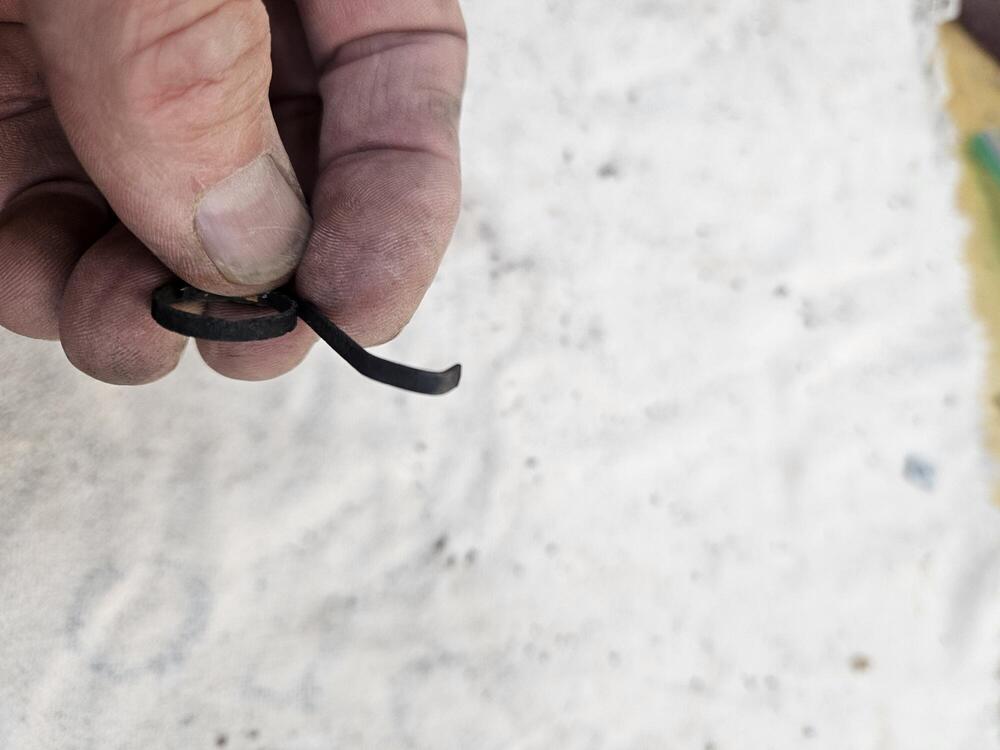
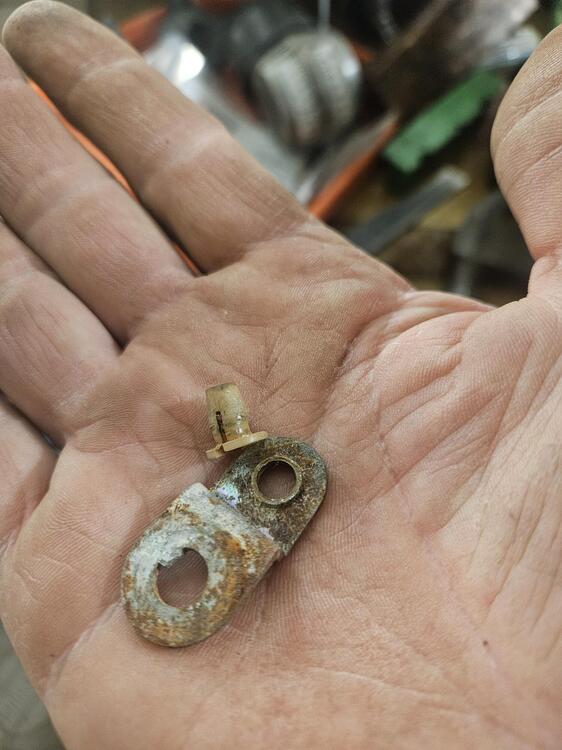
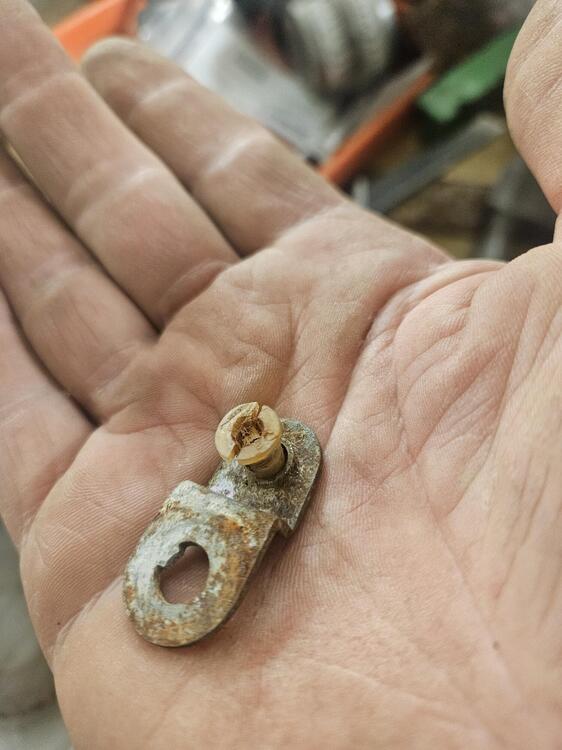
So the last few weeks I have been working on cleaning up some hardware for plating. I am pulling together hardware that all needs to be clear zinc. I haven't been able to use my Caswell system to get good results on some of these larger pieces so I am going to ship a lot of clear zinc to them for barrel plating... Question for those who know, why are the horn standoffs made this way with the six layers of really thin metal? Does anyone know? @Zed Head @HS30-H On another item does anyone know how to reproduce this spring? It cause the door handle lever to return. It's 1mmx2mm flat stock turned into a spring. Is there a source for this stock that I could bend my own spring? One of my locks had very little of this spring left
_resized.thumb.jpg.d07c1449c9ef326538935507b8dae6d5.jpg)


-
Who did you source these parts from? Did you do your own coilover strut welding?
-
Do you like them? Is it a noticeable upgrade?
-
I tried to find one on Google images but couldn't. The insulation is yellow fiberglass batt. Maybe ¾" thick, roughly the shape of the tank
-
It use to have a piece of fiberglass batt insulation glued to it to prevent heat gain from the car body
-
Ok, I solved the second one https://www.amazon.com/OAUTOO-165pcs-Assortment-Chrysler-Toyota/dp/B0C5VB83XN/ref=asc_df_B0C5VB83XN?mcid=52195ebd89f3349f9f7232da7174862d&hvocijid=13820313418102357919-B0C5VB83XN-&hvexpln=73&tag=hyprod-20&linkCode=df0&hvadid=721245378154&hvpos=&hvnetw=g&hvrand=13820313418102357919&hvpone=&hvptwo=&hvqmt=&hvdev=c&hvdvcmdl=&hvlocint=&hvlocphy=9010452&hvtargid=pla-2281435179258&psc=1 Any ideas on the first problem??
-
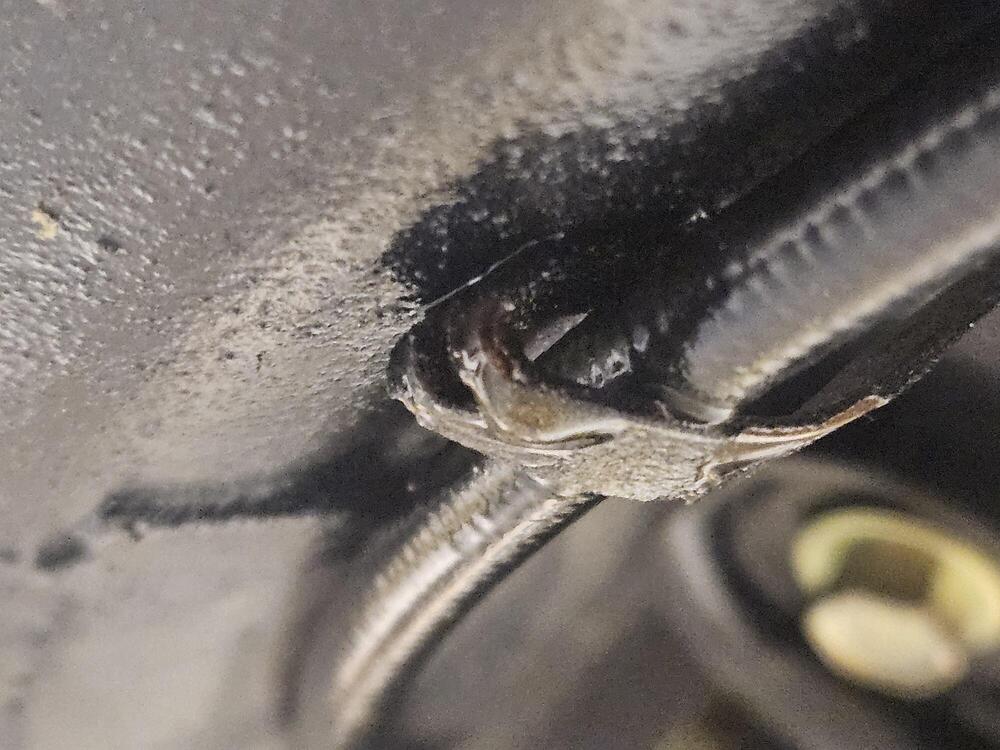
I have two problems I need help with: The first is a leaking speedo cable. When I filled the transmission it took more than a quart and a half to overflow the fill plug hole. The speedo cable was leaking a few weeks ago right at the large cable nut. So I wrapped the junction with Teflon tape. That worked for a while but now I believe it is leaking out my heat shrink seals at the end of the cable. One concern I have is not having the oil travel up the cable and leak out from under the dash like somebody was posting about in the past. I don't recall how that got resolved. Any suggestions for dealing with this leak? The second issue, is where to source the little plastic pieces that lock the various bars into the door lock mechanisms?


-
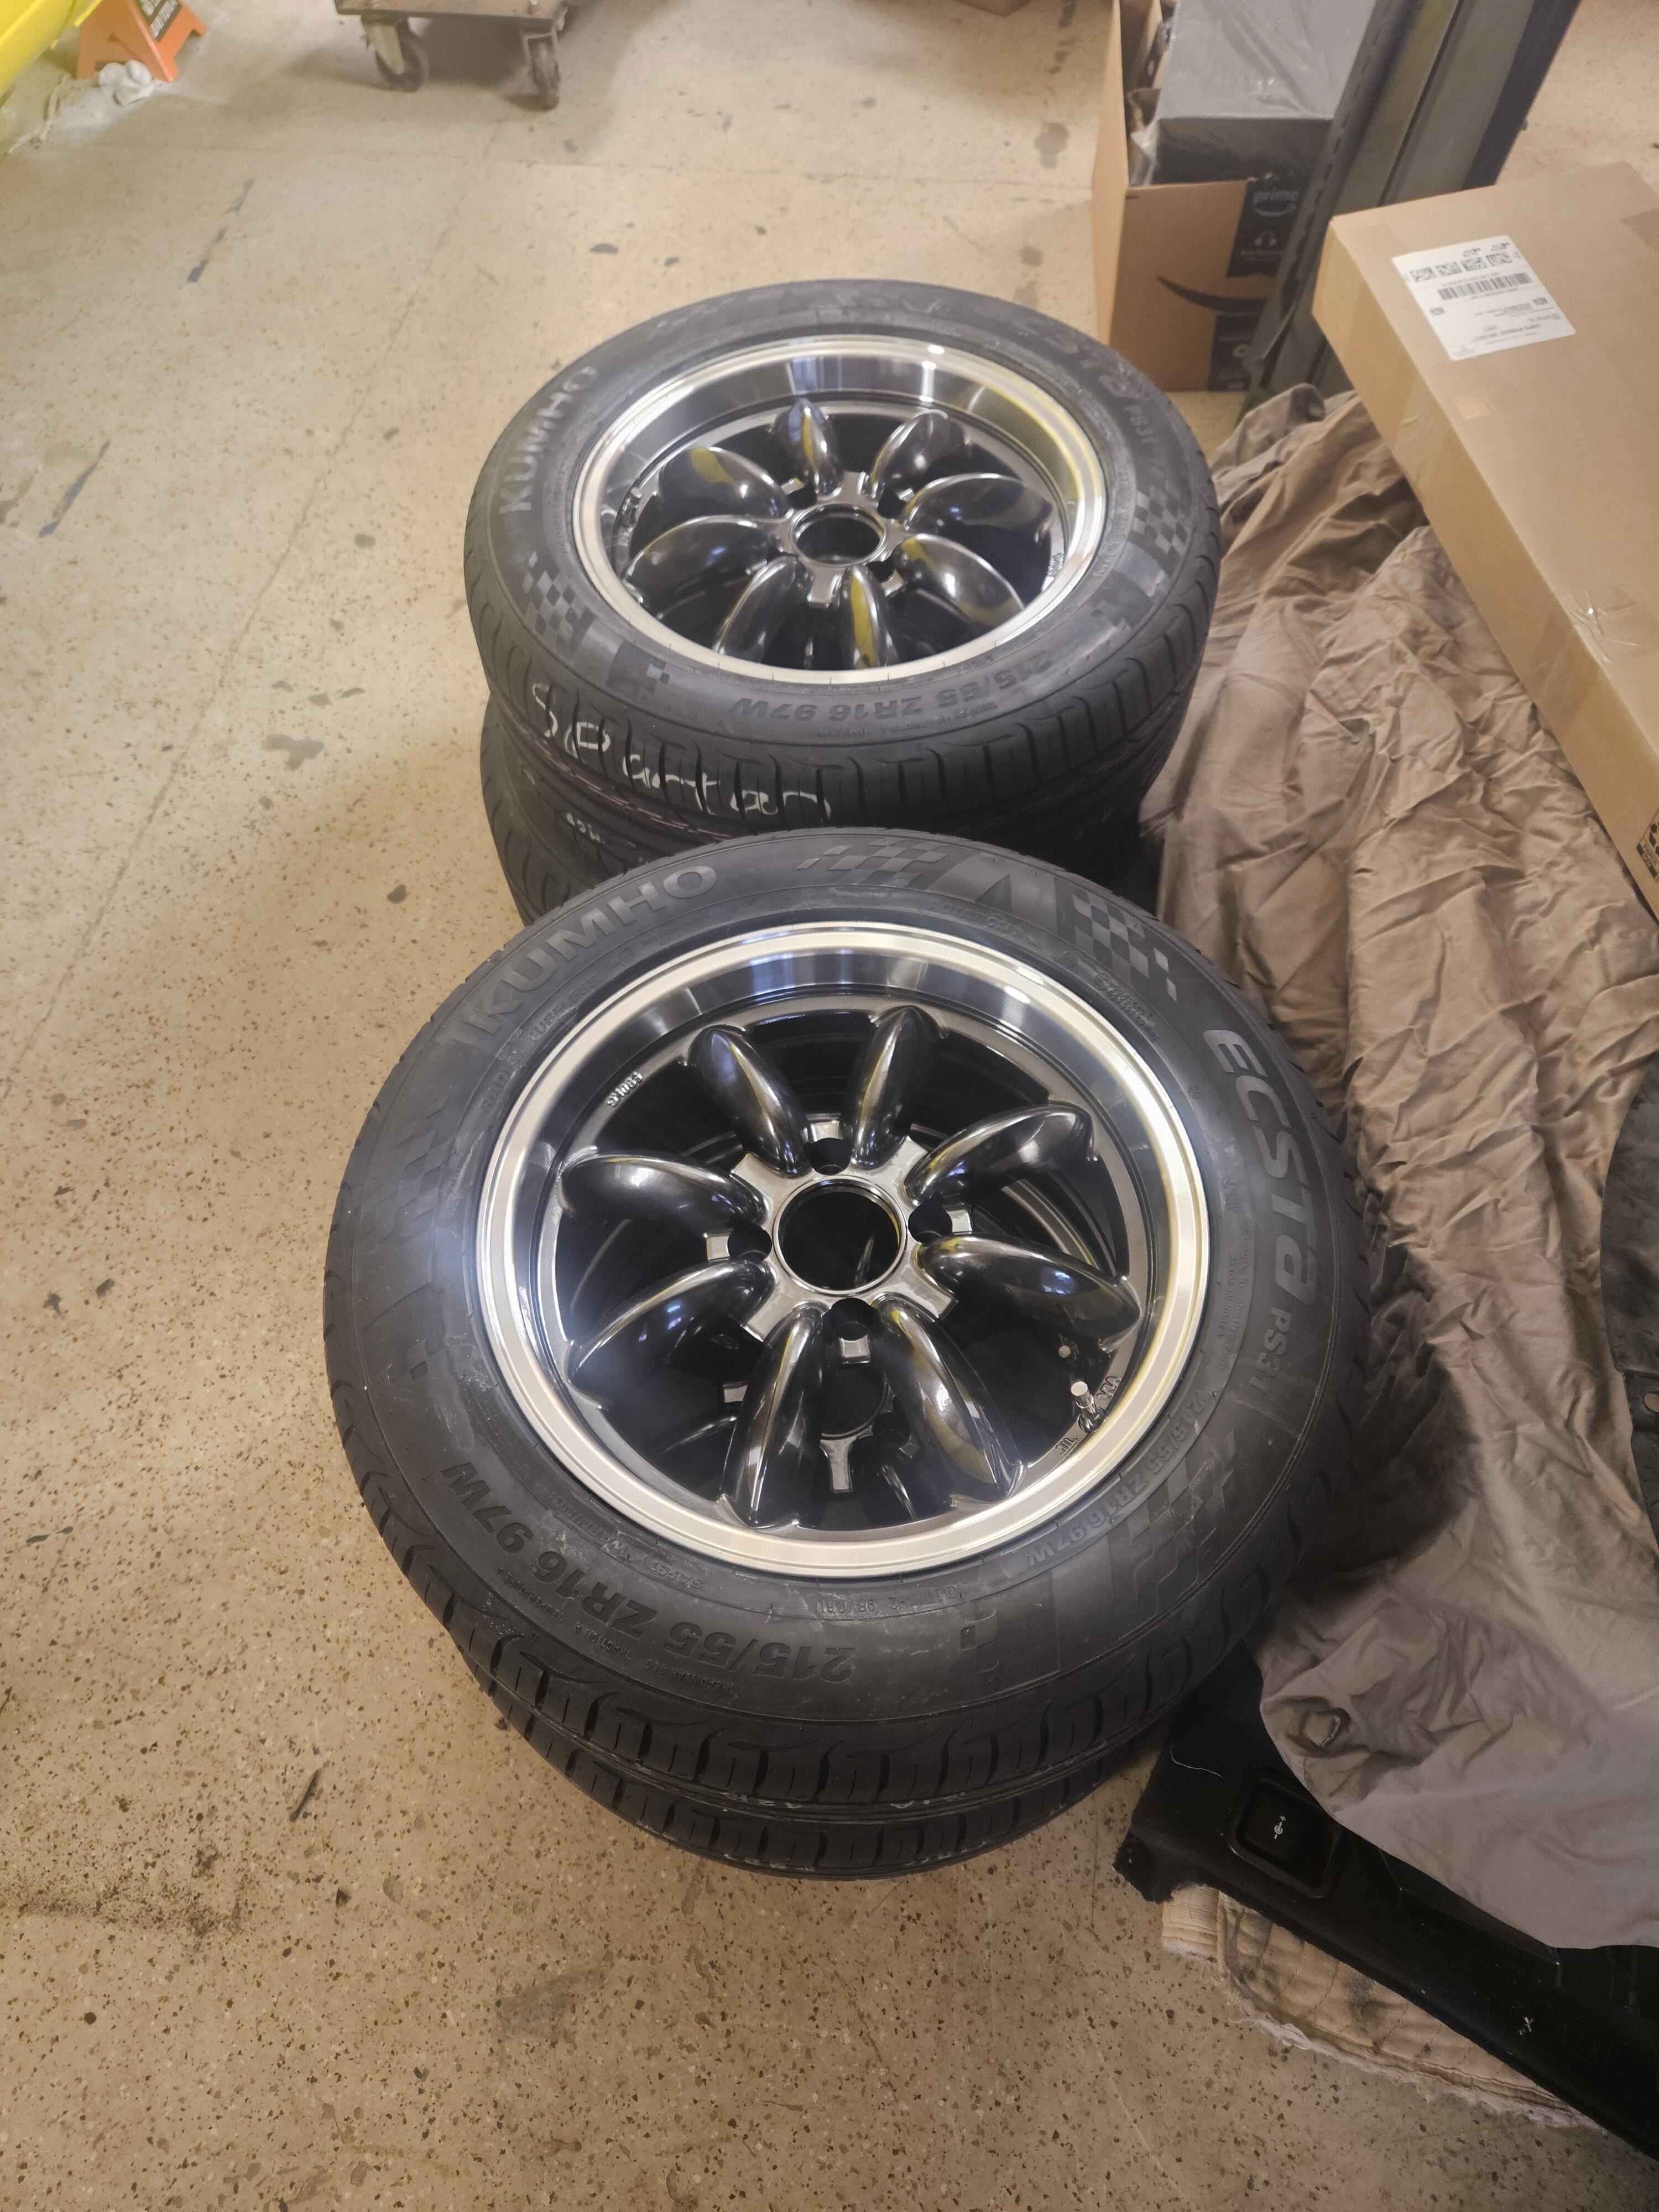
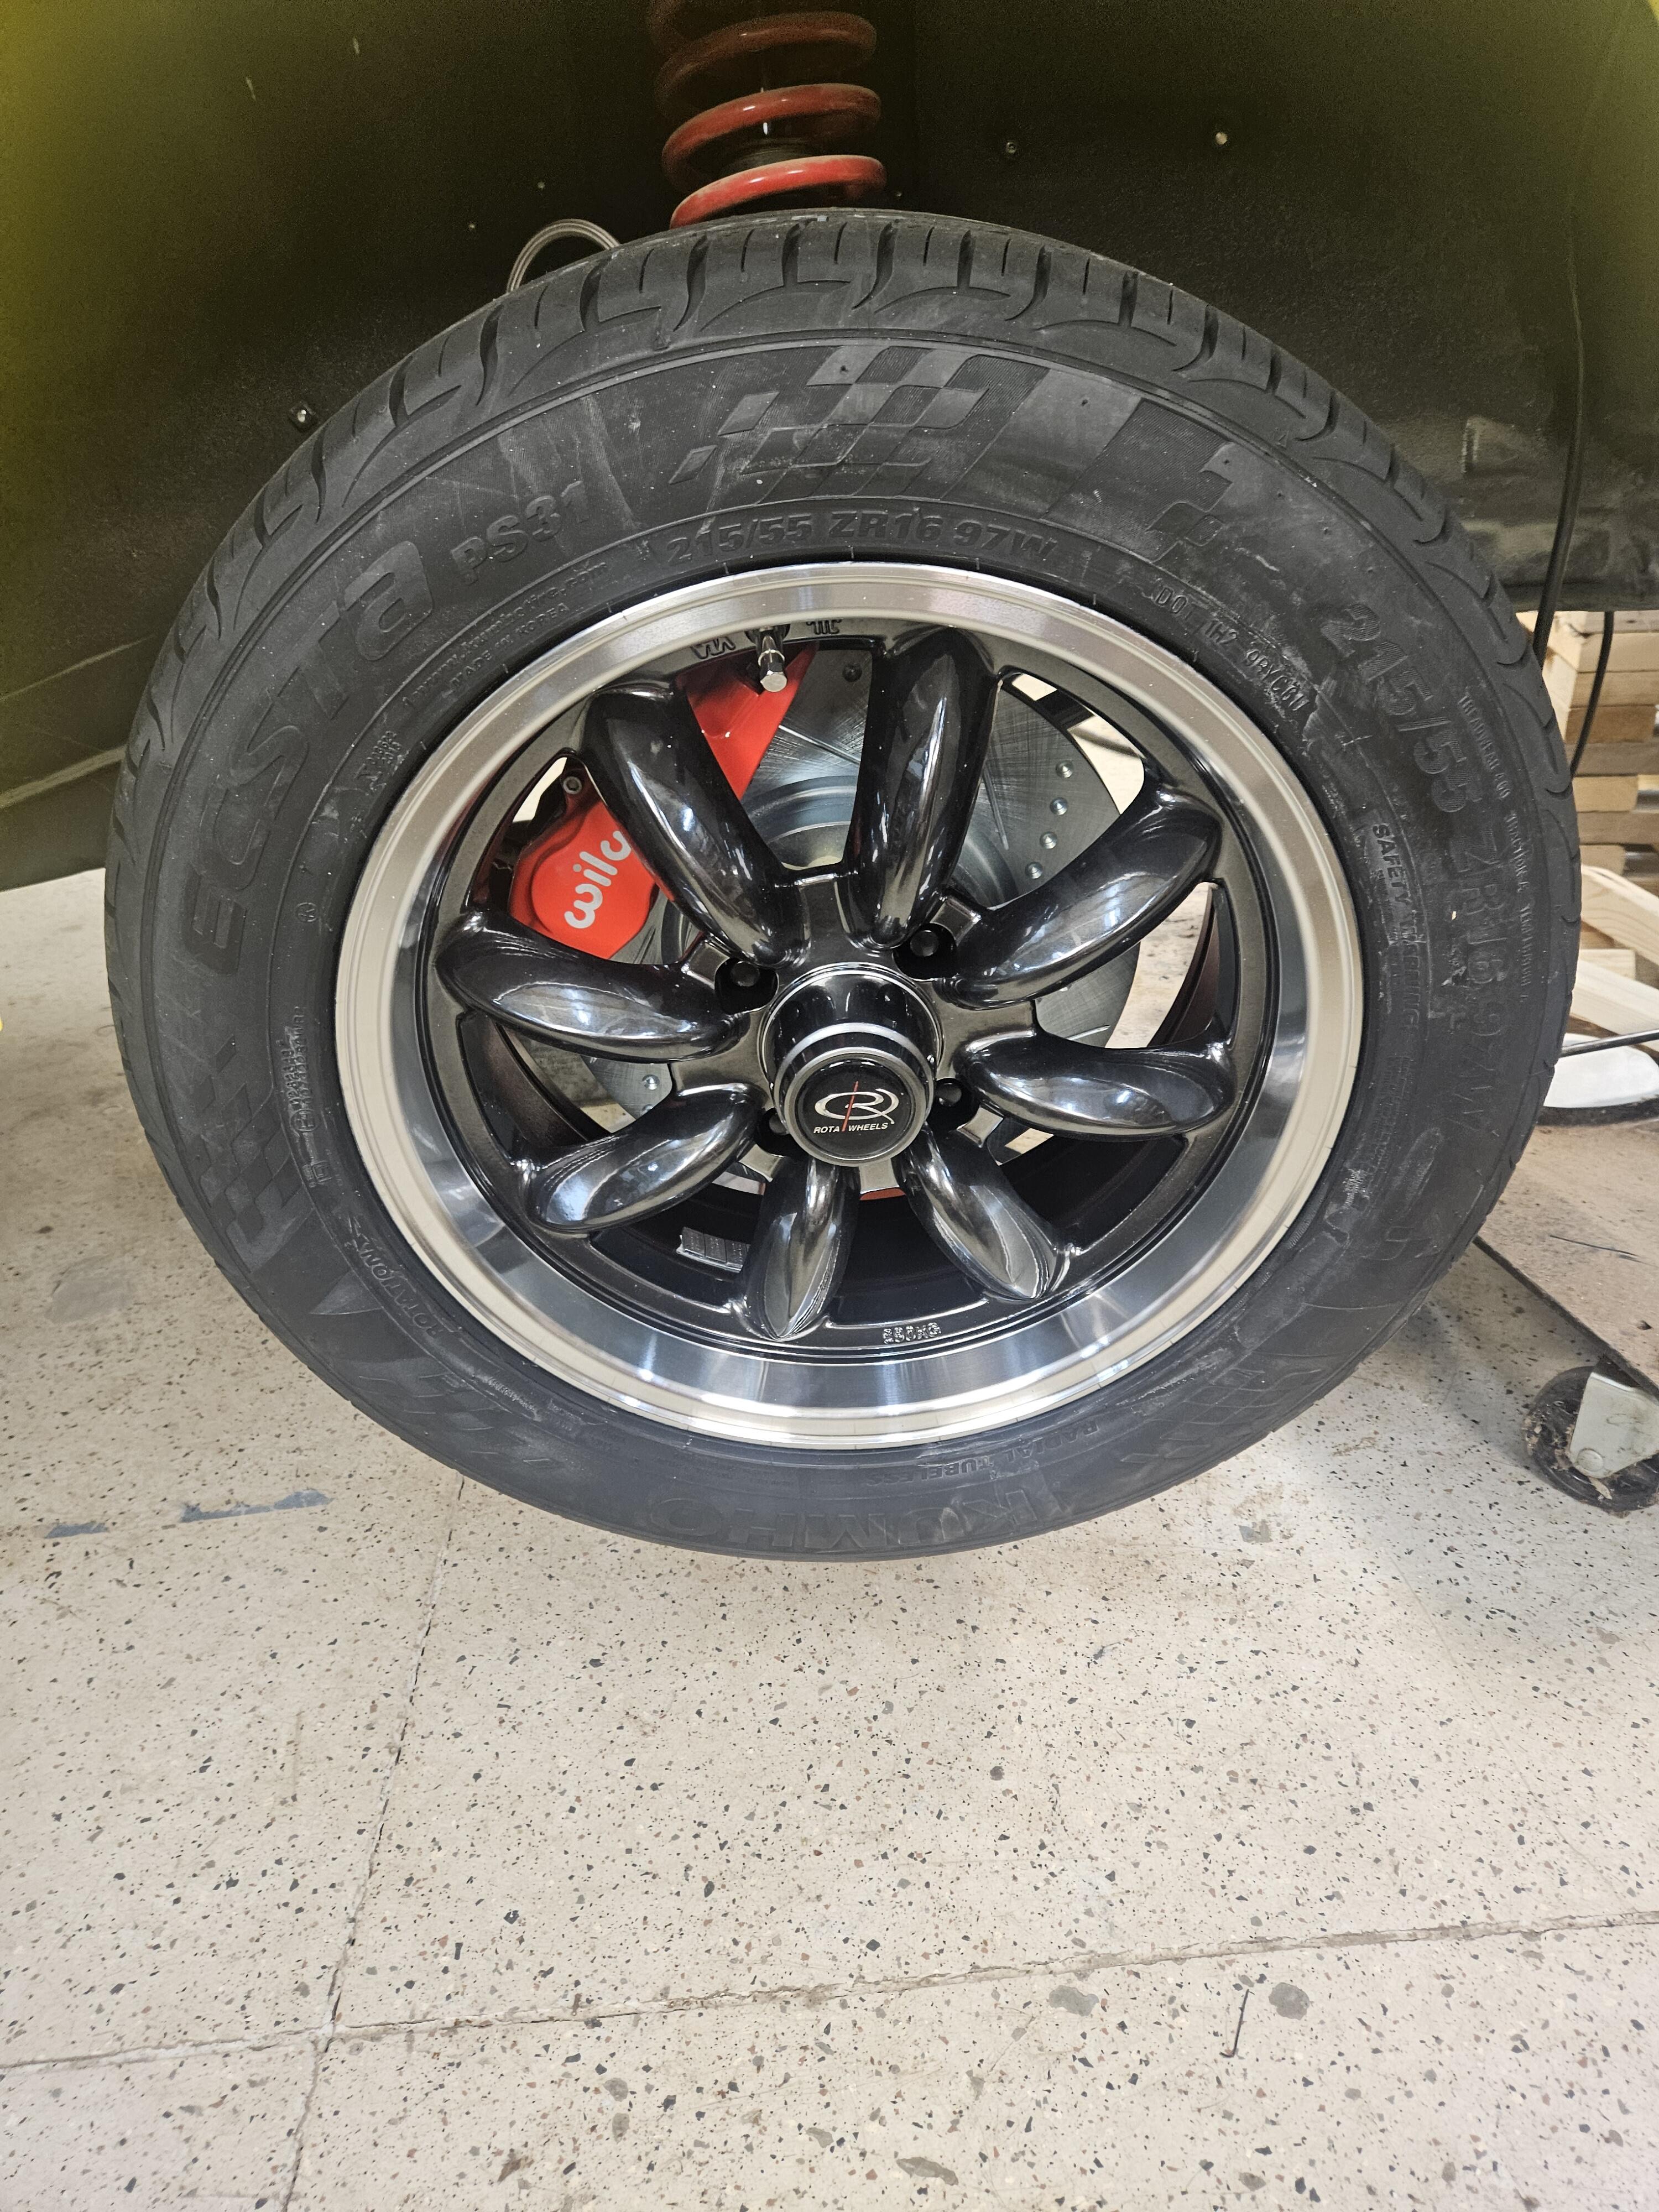
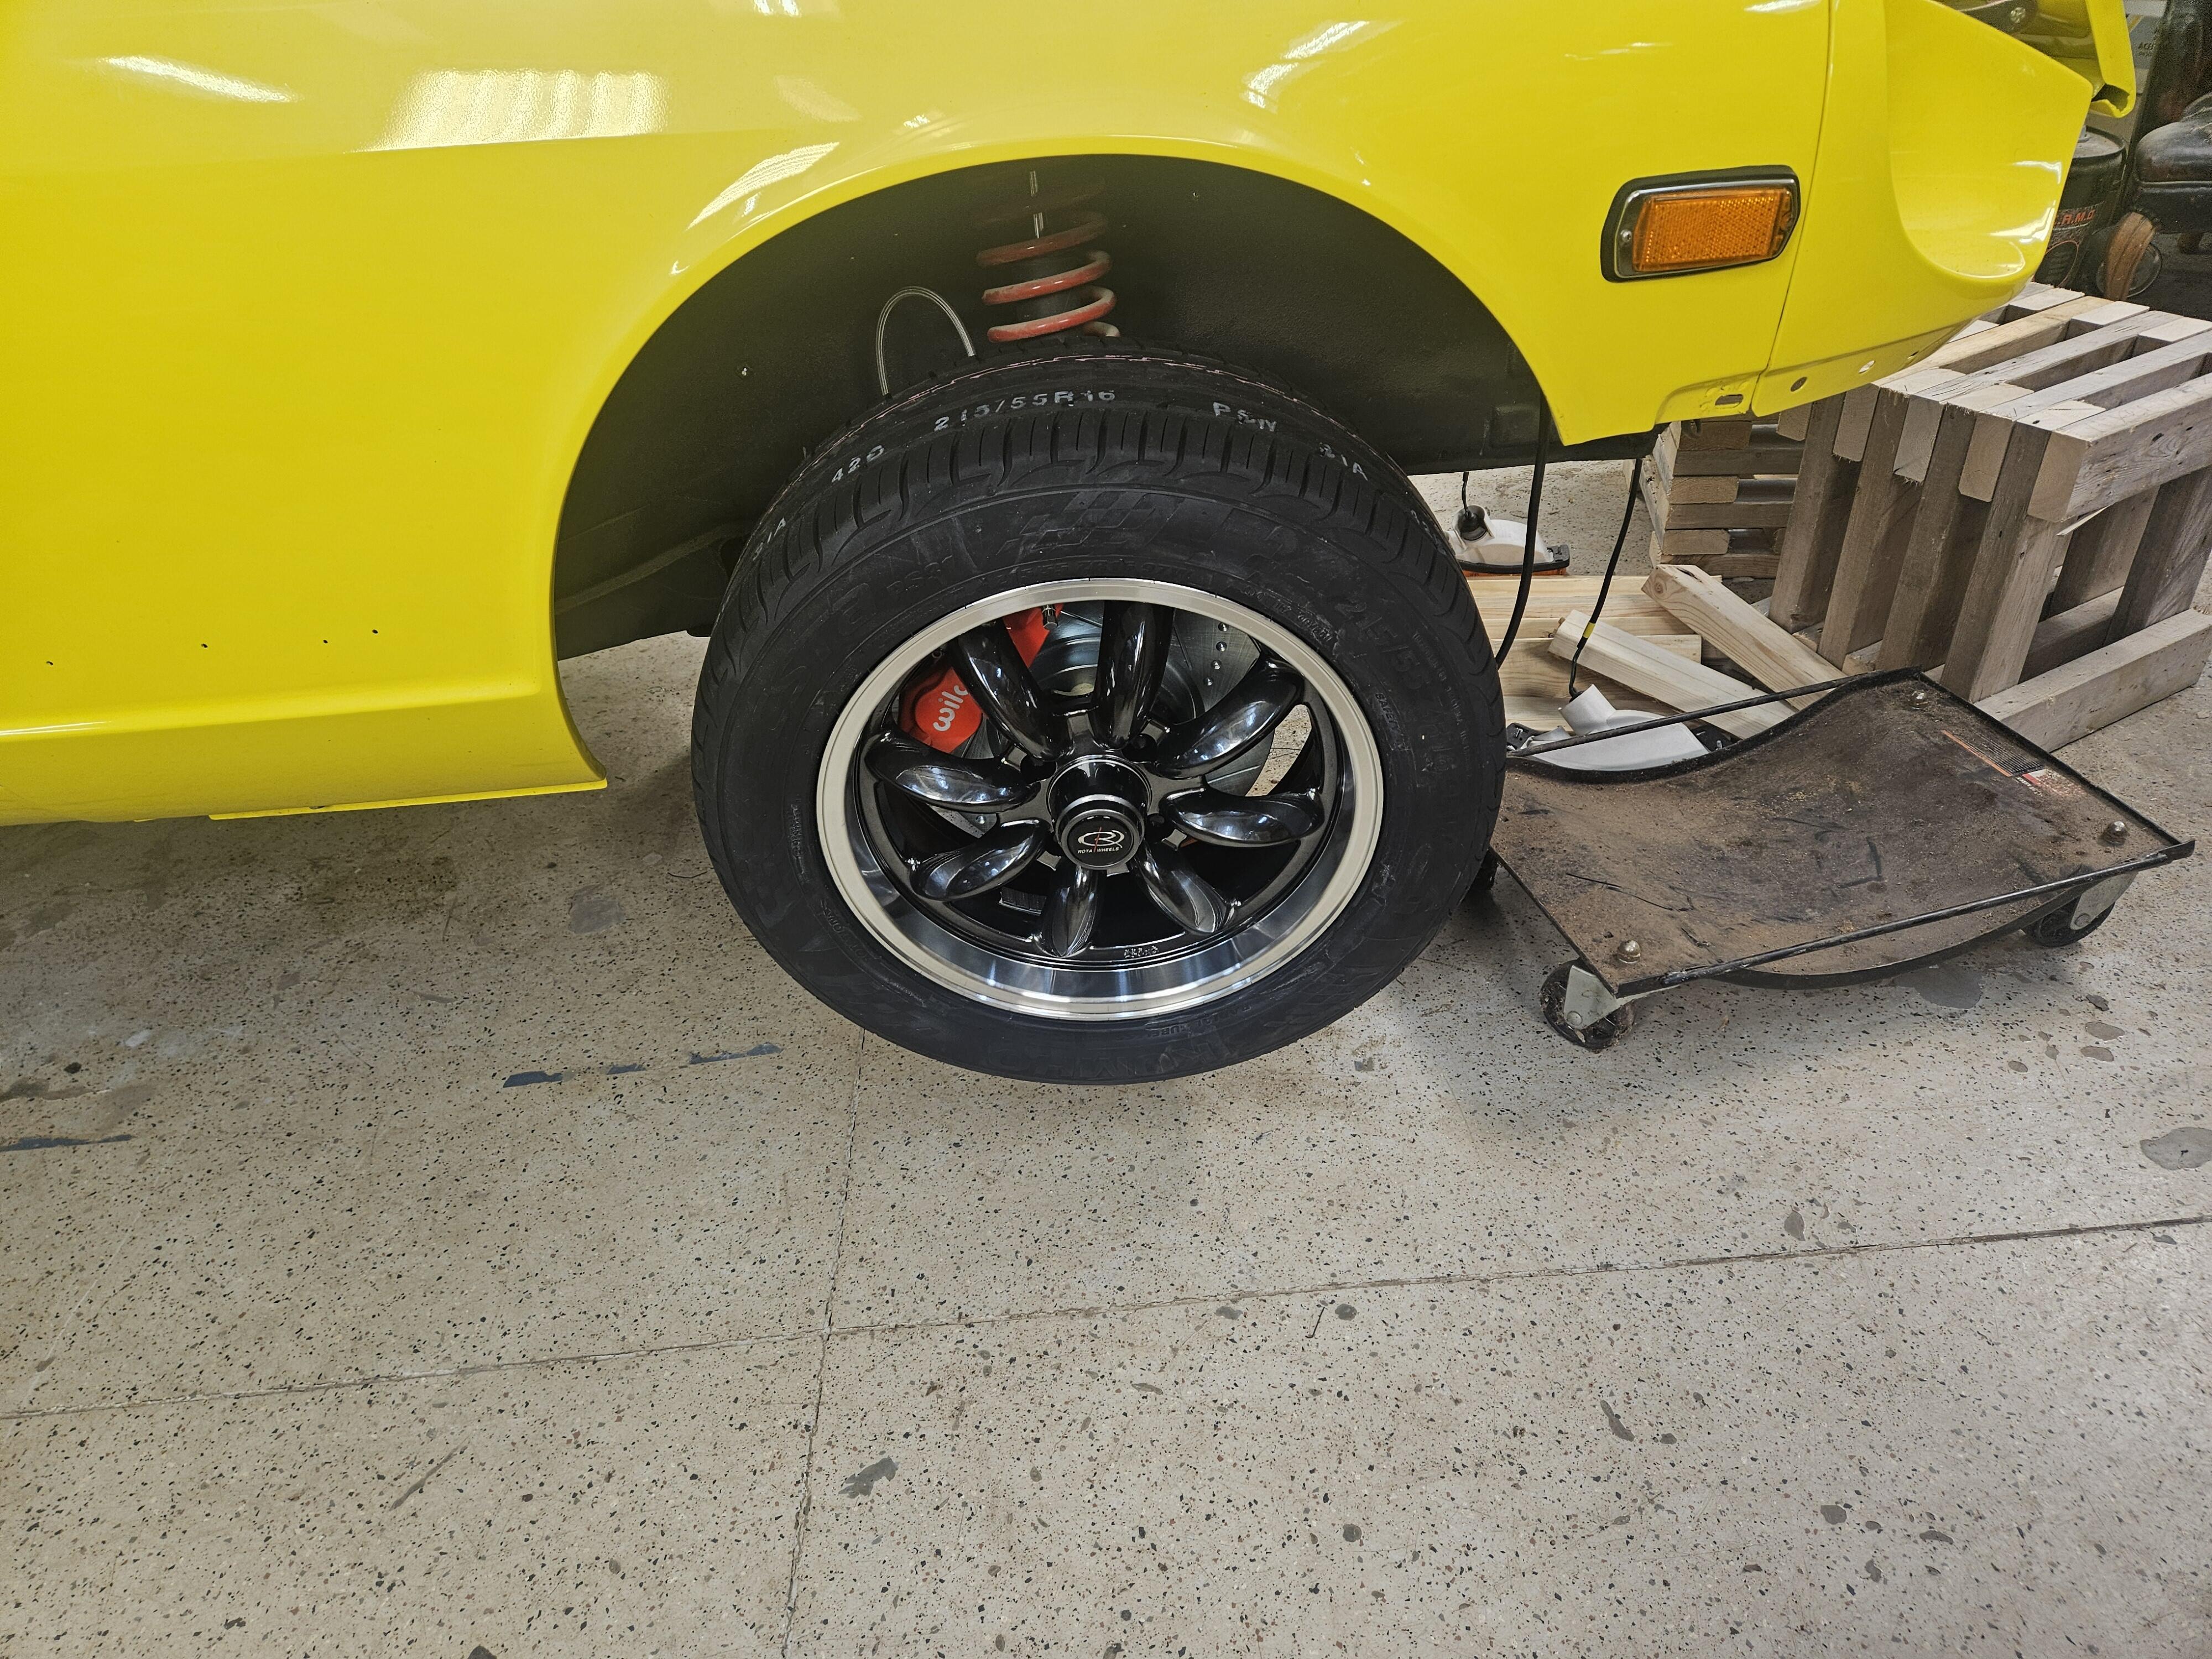
Got tires this week


-
I've never heard of those batteries before! Pricy but for a classic car it might be the last one you need...
-
So a quick update... I finally got the doors seals last week. They have to be signed for and nobody was ever around and I was having a hard time getting a re-delivery lined up. Anyway, I got them and put them on last Saturday. They are really nice!!! I had the precision seals and you really have to slam the doors. The new seals are nice and very soft. The door closes really nicely now. You do have to be careful when tucking the seal into the windlace that you use a dull enough tool as they will rip if you're not careful. Also one of my upper corners is coming apart but I will reglue it. It is much easier to do if you have some help. The seal wants to come back out of the windlace if you don't have someone there to hold it for you. Overall, really pleased and well worth the money!
-
@motorman7 I think I paid about $150 for mine on Amazon
-
I would "vacuum " that out with an electric fuel pump. Then analyze what you take out for a diagnosis...


_resized.jpg.84d7f3d21ecf6322b09e44df4527f464.jpg)