Patcon
 Subscriber
-
Joined
-
Last visited
Everything posted by Patcon
-
 And you as well!
 -
Beautiful work as always!
-
One of the aspects for coating the tank are the complexities of the inside of the EFI tank. Inside the tall tank baffle is a small cylinder with a brass screen. It also has that thin line coming up towards the top of the tank. I think John is thinking of coating the inside of the two halves of the tank with a brush to deal with all the complexities that probably won't coat all the way by sloshing sealant around. That means what ever you use needs to adhere to the cured coating once the halves are rewelded and the belt area needs to be sealed as the last step.
-
Post a picture of down in the well where the little tube connects and the venturi
-
Finished at $7000. A decent price for a southwest car.
-
On the flip side, it's amazing how much my spelling skills and mapping skills have changed in just a few years!
-
If it only need to last a few years it will be fine either way. The counter flashing at the siding will be the only critical area
-
Tar paper won't hold up long term. Over time it gets very brittle. The foam closure at the top is probably a good idea to keep insects out. The one at the bottom isn't really doing anything since the under side of the roof is open "Drip cap"? As in a metal drip edge flashing or a small piece of running trim to force water off the fascia board?
-
I have been using fire fox and Thunderbird for a long time now. Maybe 5-10 years. I avoid Google if I can...
-
Vintage connections might sell the mate to that plug
-
He is strapping the top of the 2x4s w 1x's so that will tie them all together. Hangers wont hurt anything. Im not totally sure they're necessary but they're fairly cheap in the overall scheme. The most susceptible location is actually the top of the rafters that have kickers. The portion of the rafter that hangs out past the kicker will want to pivot down when loaded. The kicker will act as a hinge point putting a lot of load on the top connection At the wall to roof transition, no j channel. Your flashing needs to preferably go under the siding and must turn out on top of the roofing. If not it will funnel water under the roof. They should offer a rubber weatherstripping for sealing the corrugation. You could use that under the counter flashing at the top if it needs closing up. If you cant get under the siding with the counter flashing You could seal it to the siding with some good sealant. Maybe a urethane with some 3d or 4d nails to hold it down
-
That's a really clean tank!!
-
We dont ever bevel them. We set the outside edge flush with the roof deck. Like your second sketch
-
Who welded it? Mig or Tig? Any leaks or post weld sealer?
-
Maybe they're using really hot water? That would explain the work description
-
If you're going to gutter it, you might want to be on the 3" side. You could also counter flash from under the roof panels to down inside the gutter to protect the sub fascia a little better
-
No I dont think the 2x6 or 2x8 weight would be an issue. I would prefer spruce, pine or fur. Not yellow pine or treated. It loghter and straighter and nearly as strong. Just let the panels extend 2-4 inches to keep water off the sub fascia. I wouldn't put the pieces in the window. I think that might cause other problems and obstructs the window. You're not spanning too far and it has very little weight on it. The tributory load is half on the building side and half on the fascia side. Maybe 8 sq ft total on the fascia side. A deadload of 5# a foot which is probably high would be 40#s. The subfascia is very strong in the vertical orientation. Even with snow load it might be a couple of hundred pounds. Still not a problem I don't believe
-
I would go original or California style. Wouldn't want to try to design a new system
-
Or buy one from a forum member
-
If it were me, I am a builder, I would run a sub fascia across the end of all the rafters. A 2x6 at a minimum or maybe a 2x8. I would add rafters at the window and door with out the braces. Fastened well on the building side and the sub fascia. I would then strap the top with 1x4's a 16"OC or maybe even 12"OC. Then I would run the panel on top of the 1x4s with flutes aligned with the slope. The sub fascia should help span the gap that's not braced and the 1x4's will also help. Rain is not the issue, snow load might be... I would use screws like GRK's for assembly versus nails to try to lock it all together
-
I don't believe that is a 280z radio. I believe its for a 240z. Btw if it works, its quite valuable! It even has value if it doesn't work. Look on Ebay to see what I mean
-
He evidently used a paintless dent repair guy to pull the dents out. A good idea but would be fairly expensive where I live.
-
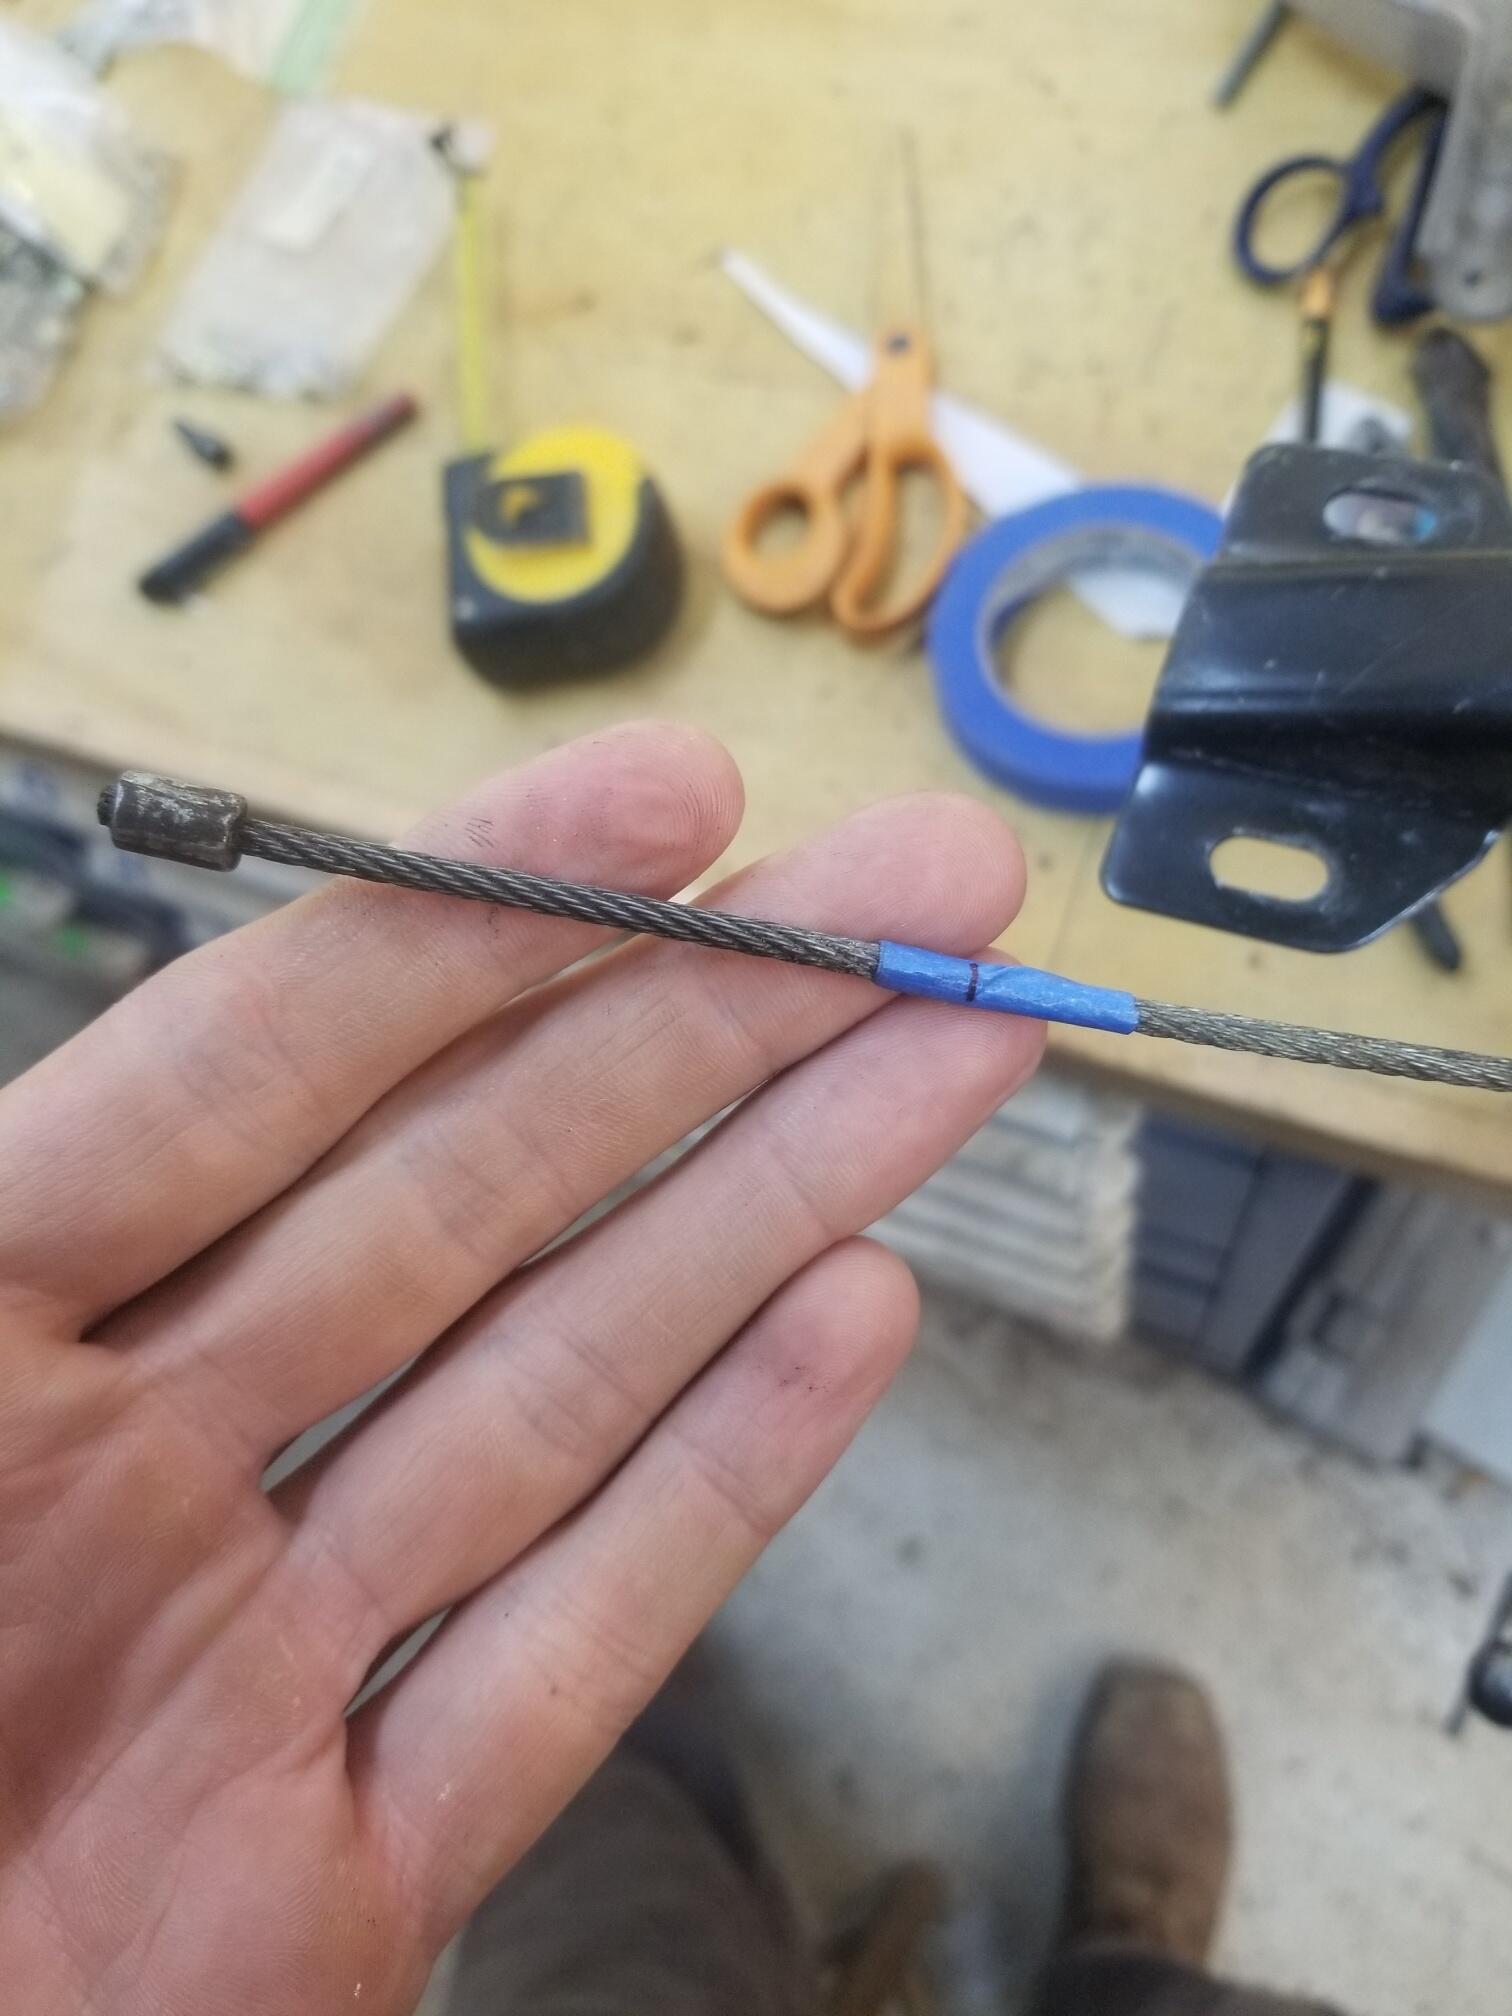
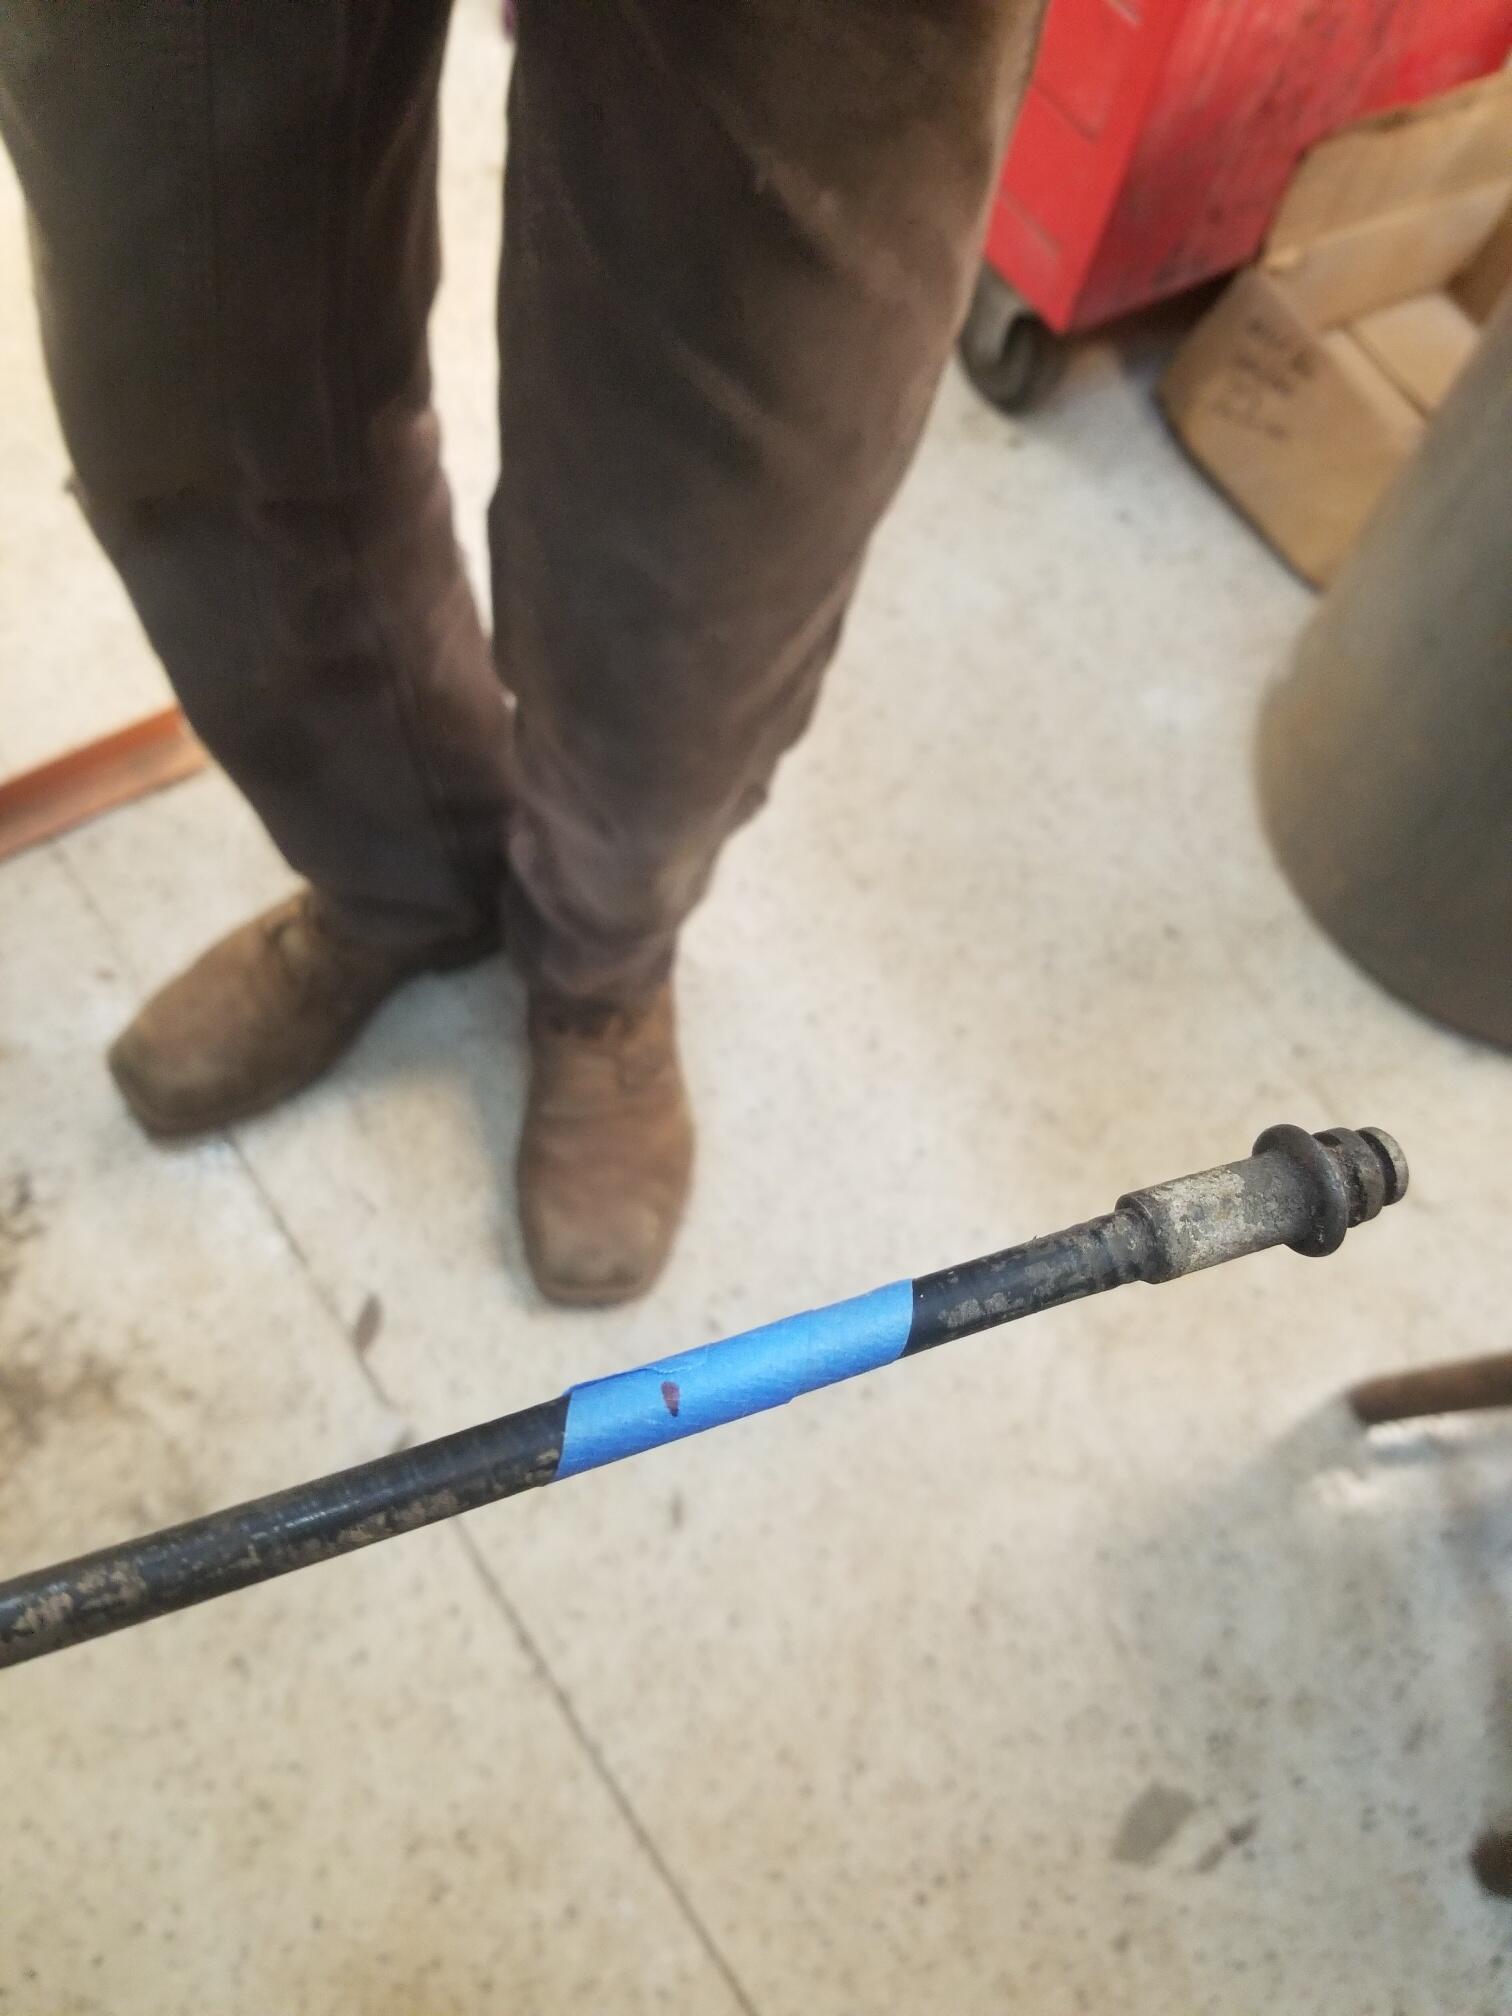
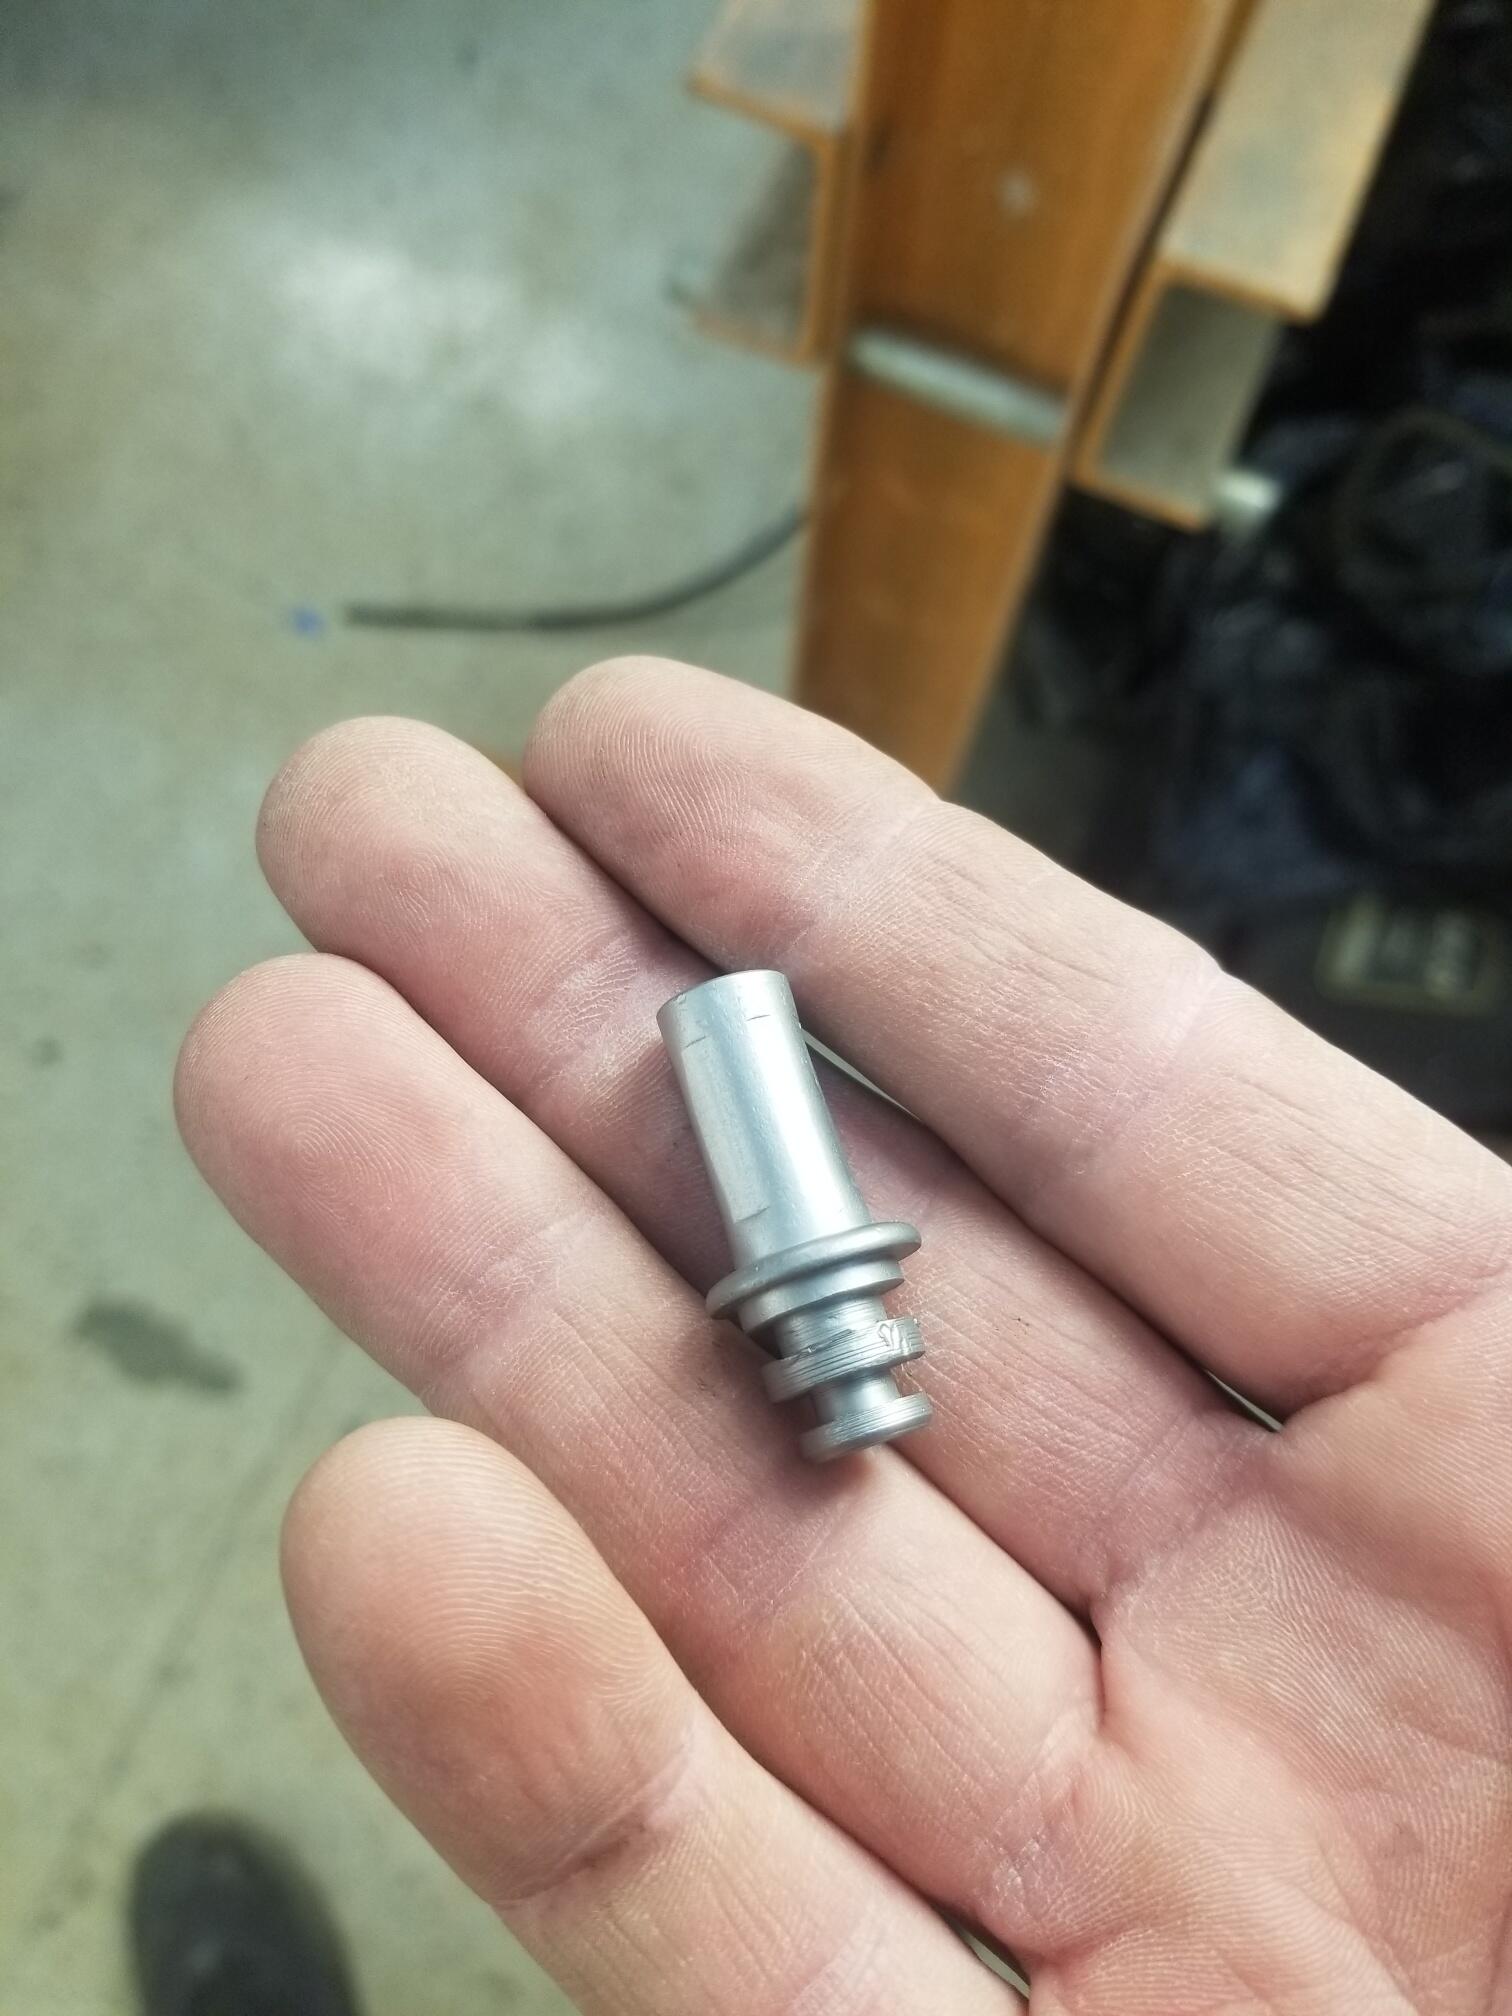
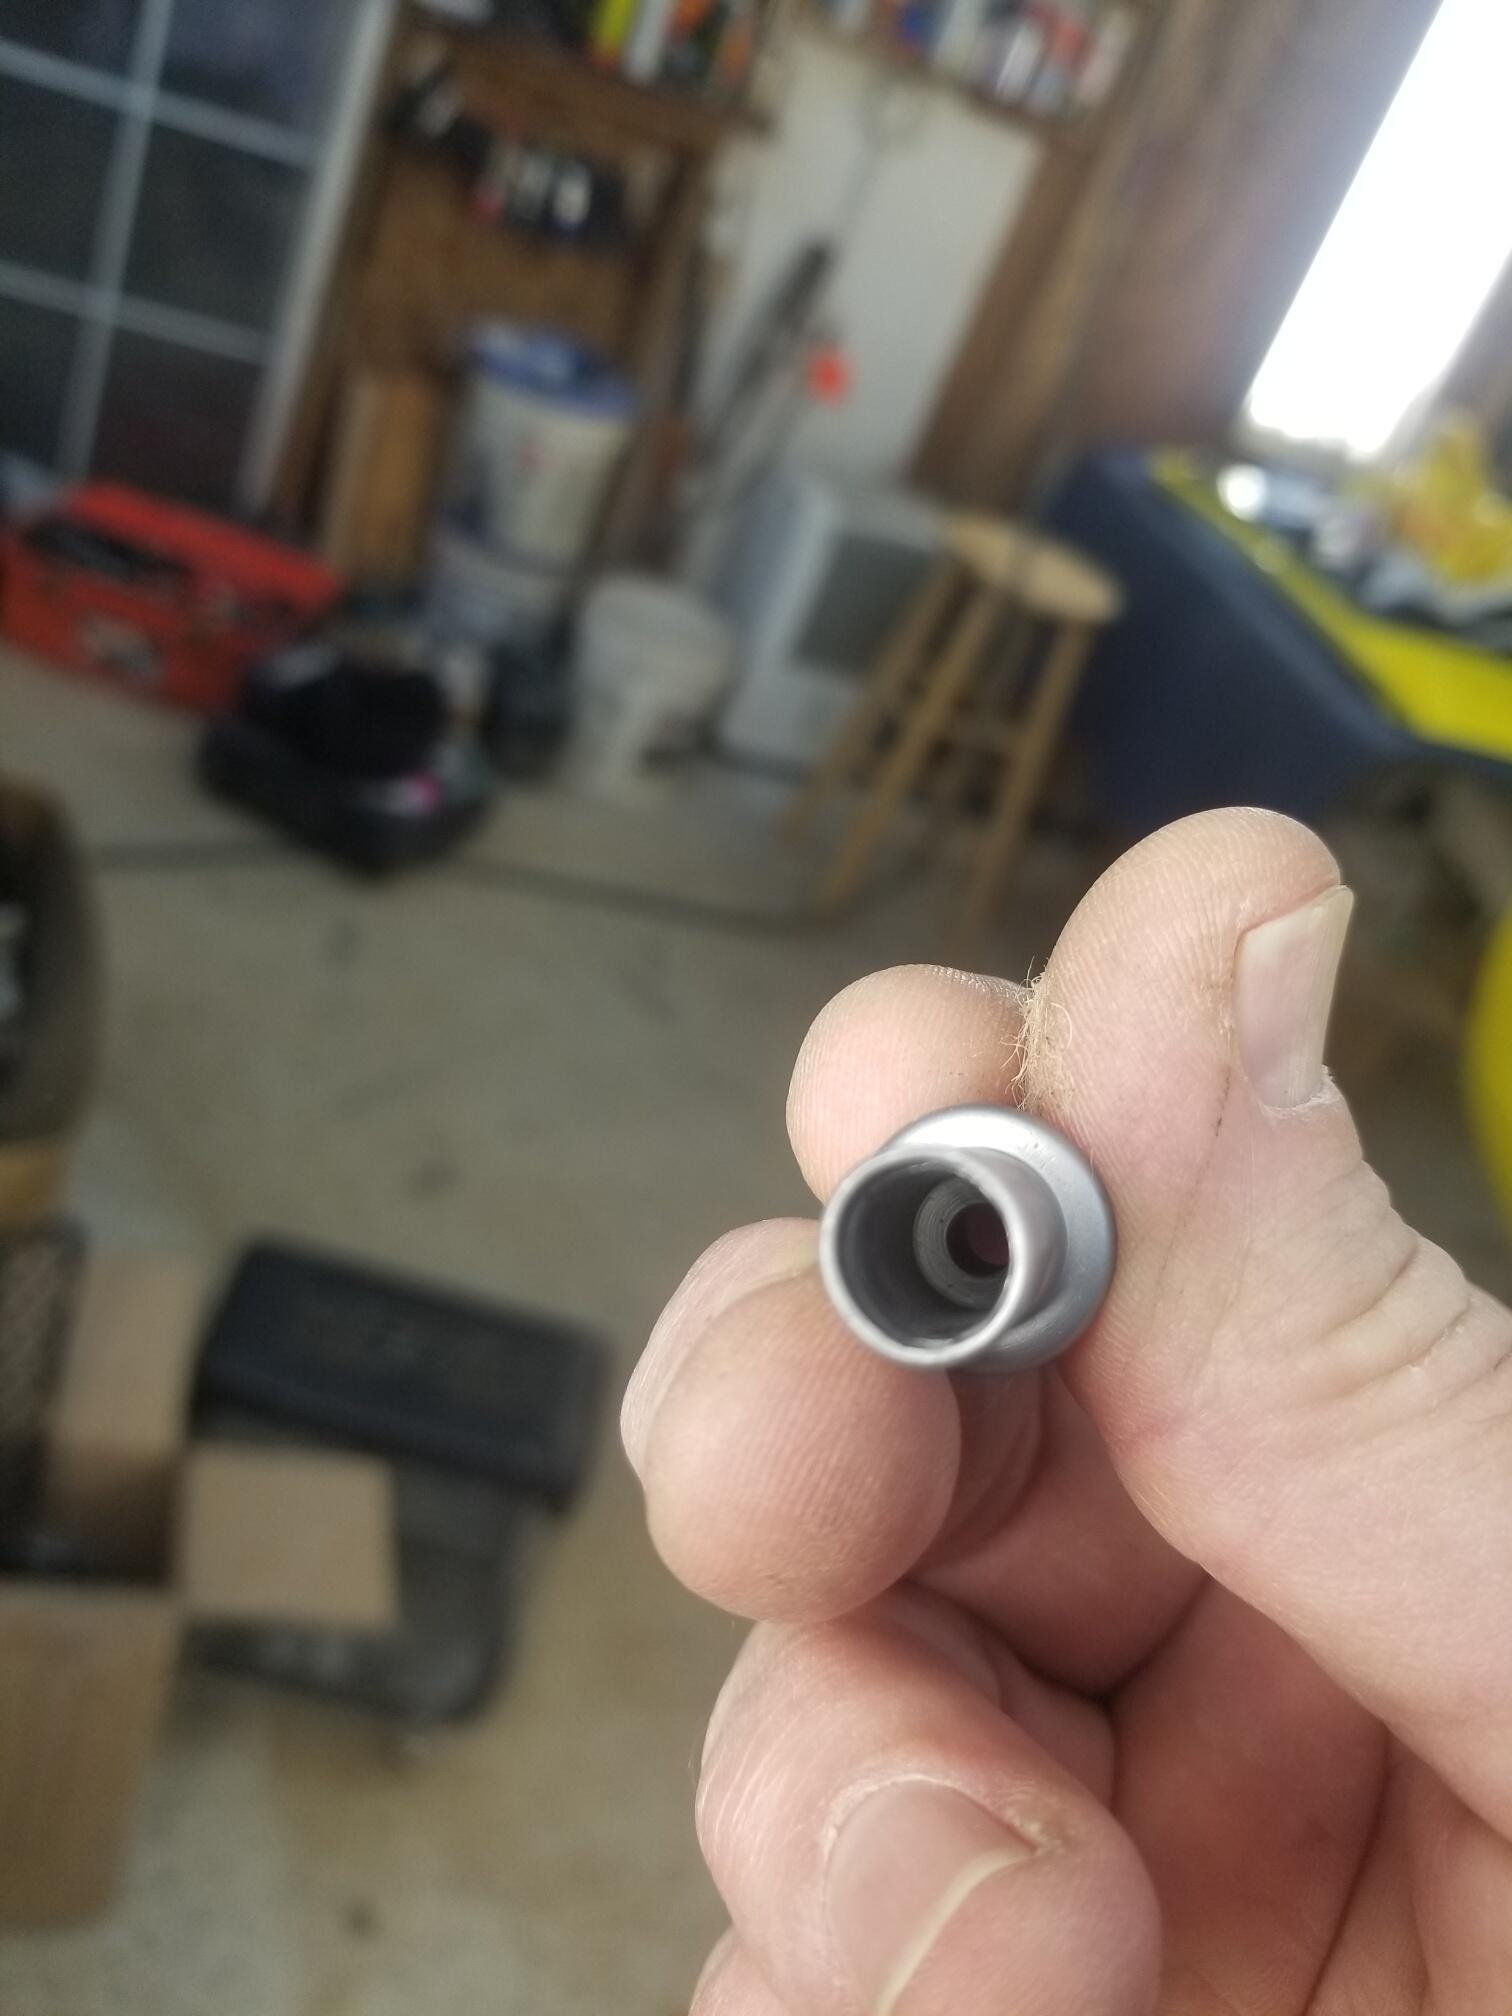
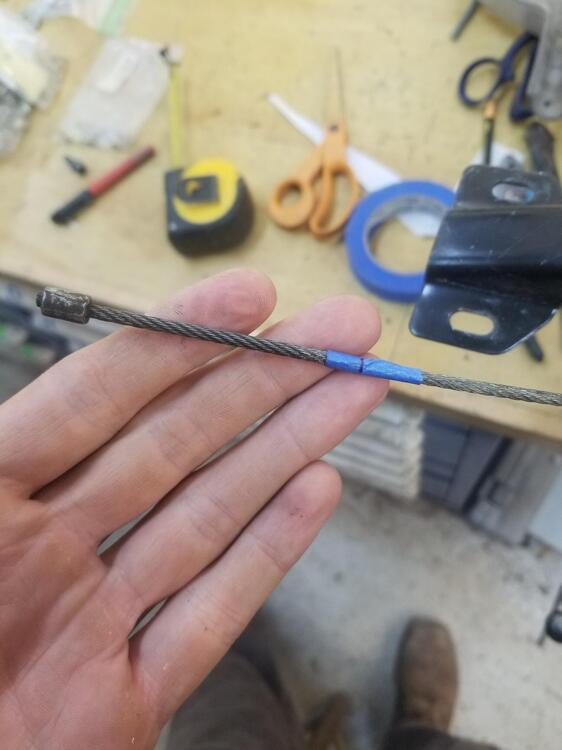
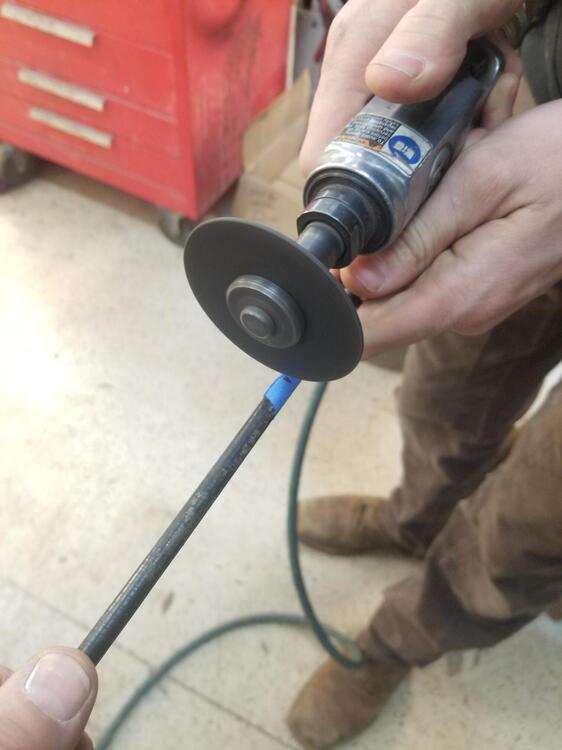
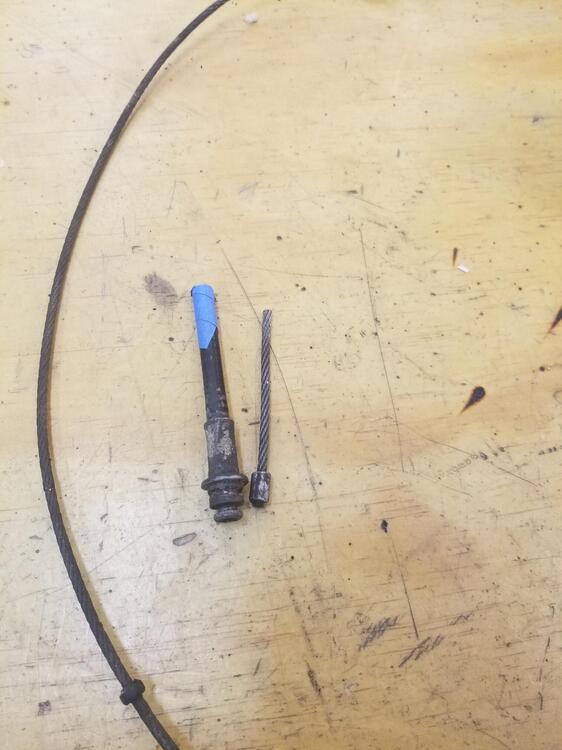
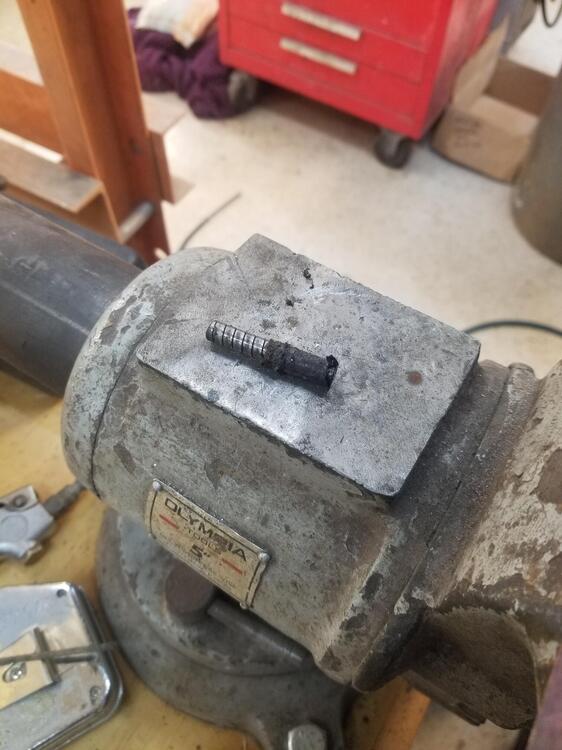
So we marked the swaged end of the parking brake cable @ 3"s Cut it off. Then we marked this end of the parking brake cable 3"s from the mounting flange Cut it off To get the end clean Cody heated it up some and pulled out the remnant Then we bead blasted the end I will try to plate it this weekend


-
That's a nice sized compressor! BTW I am so glad you're here posting. Otherwise I would run out of stuff to read and that would be bad!
-
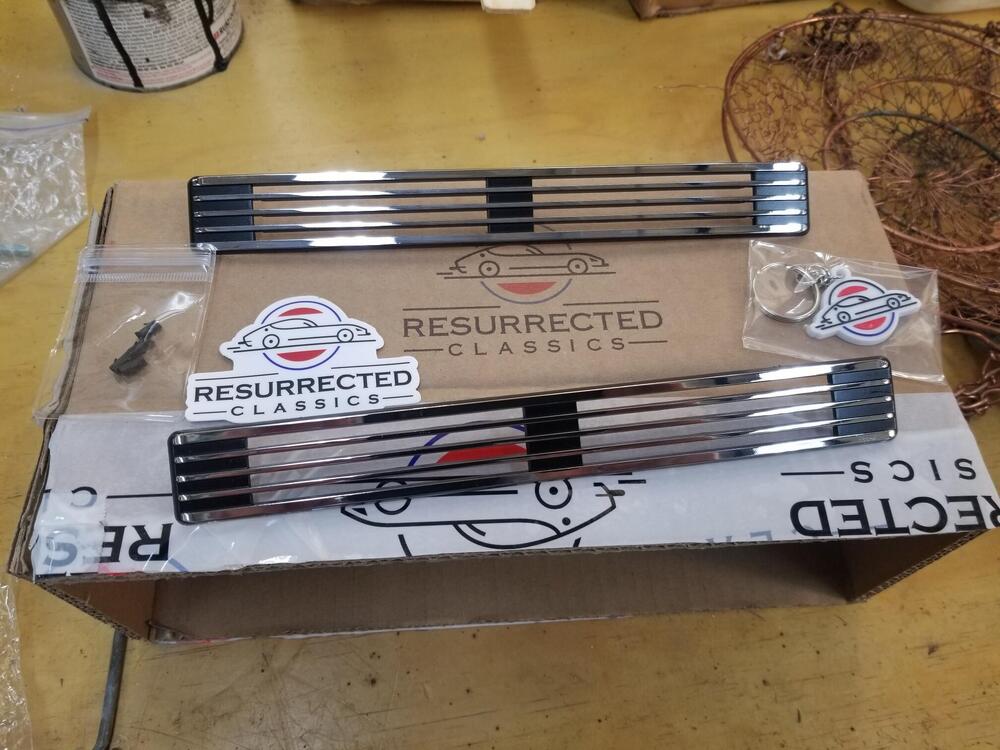
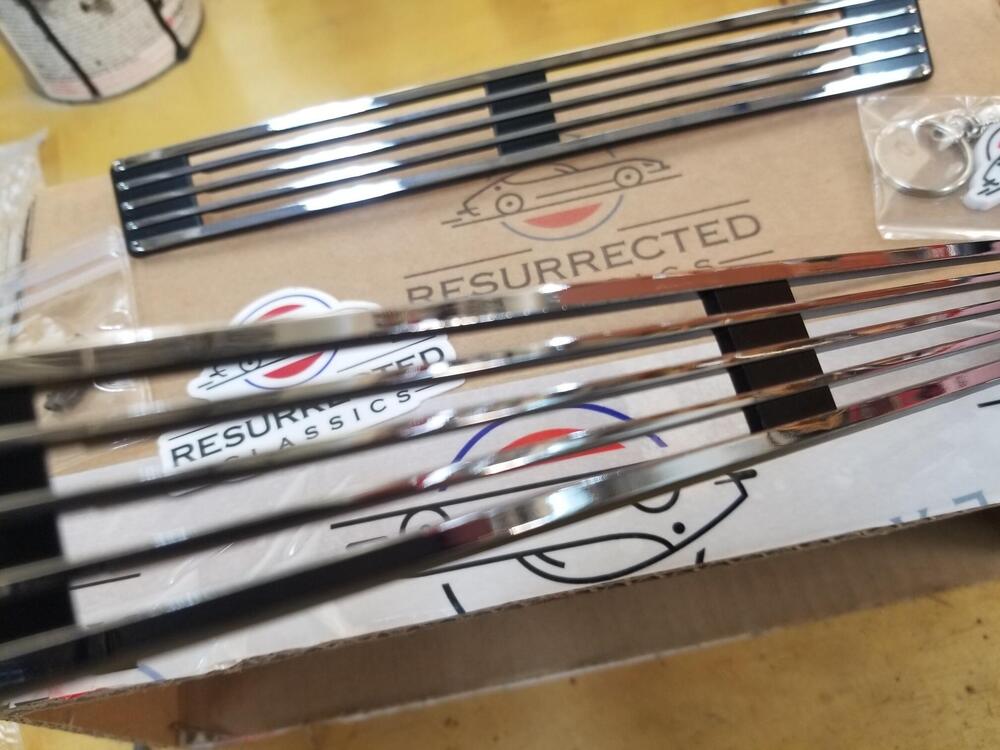
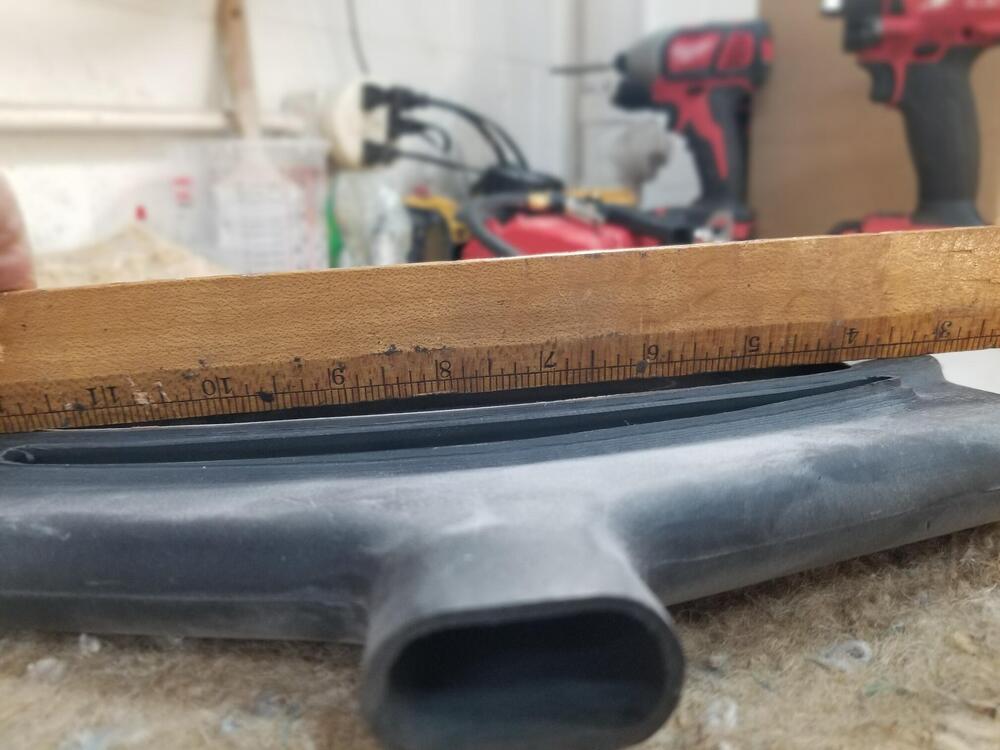
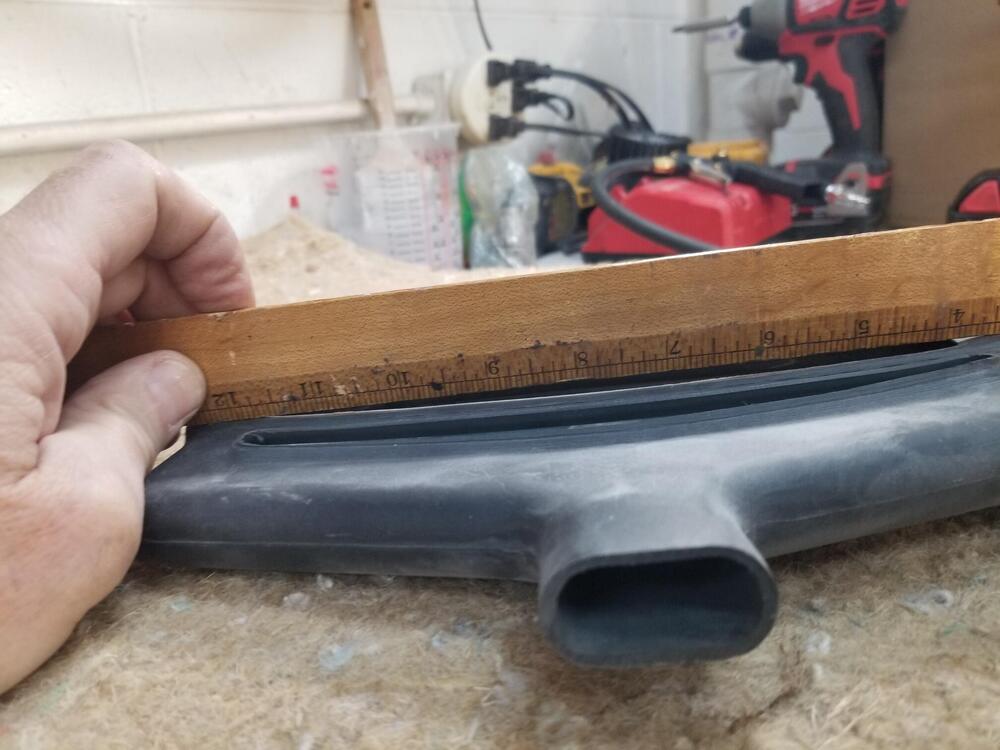
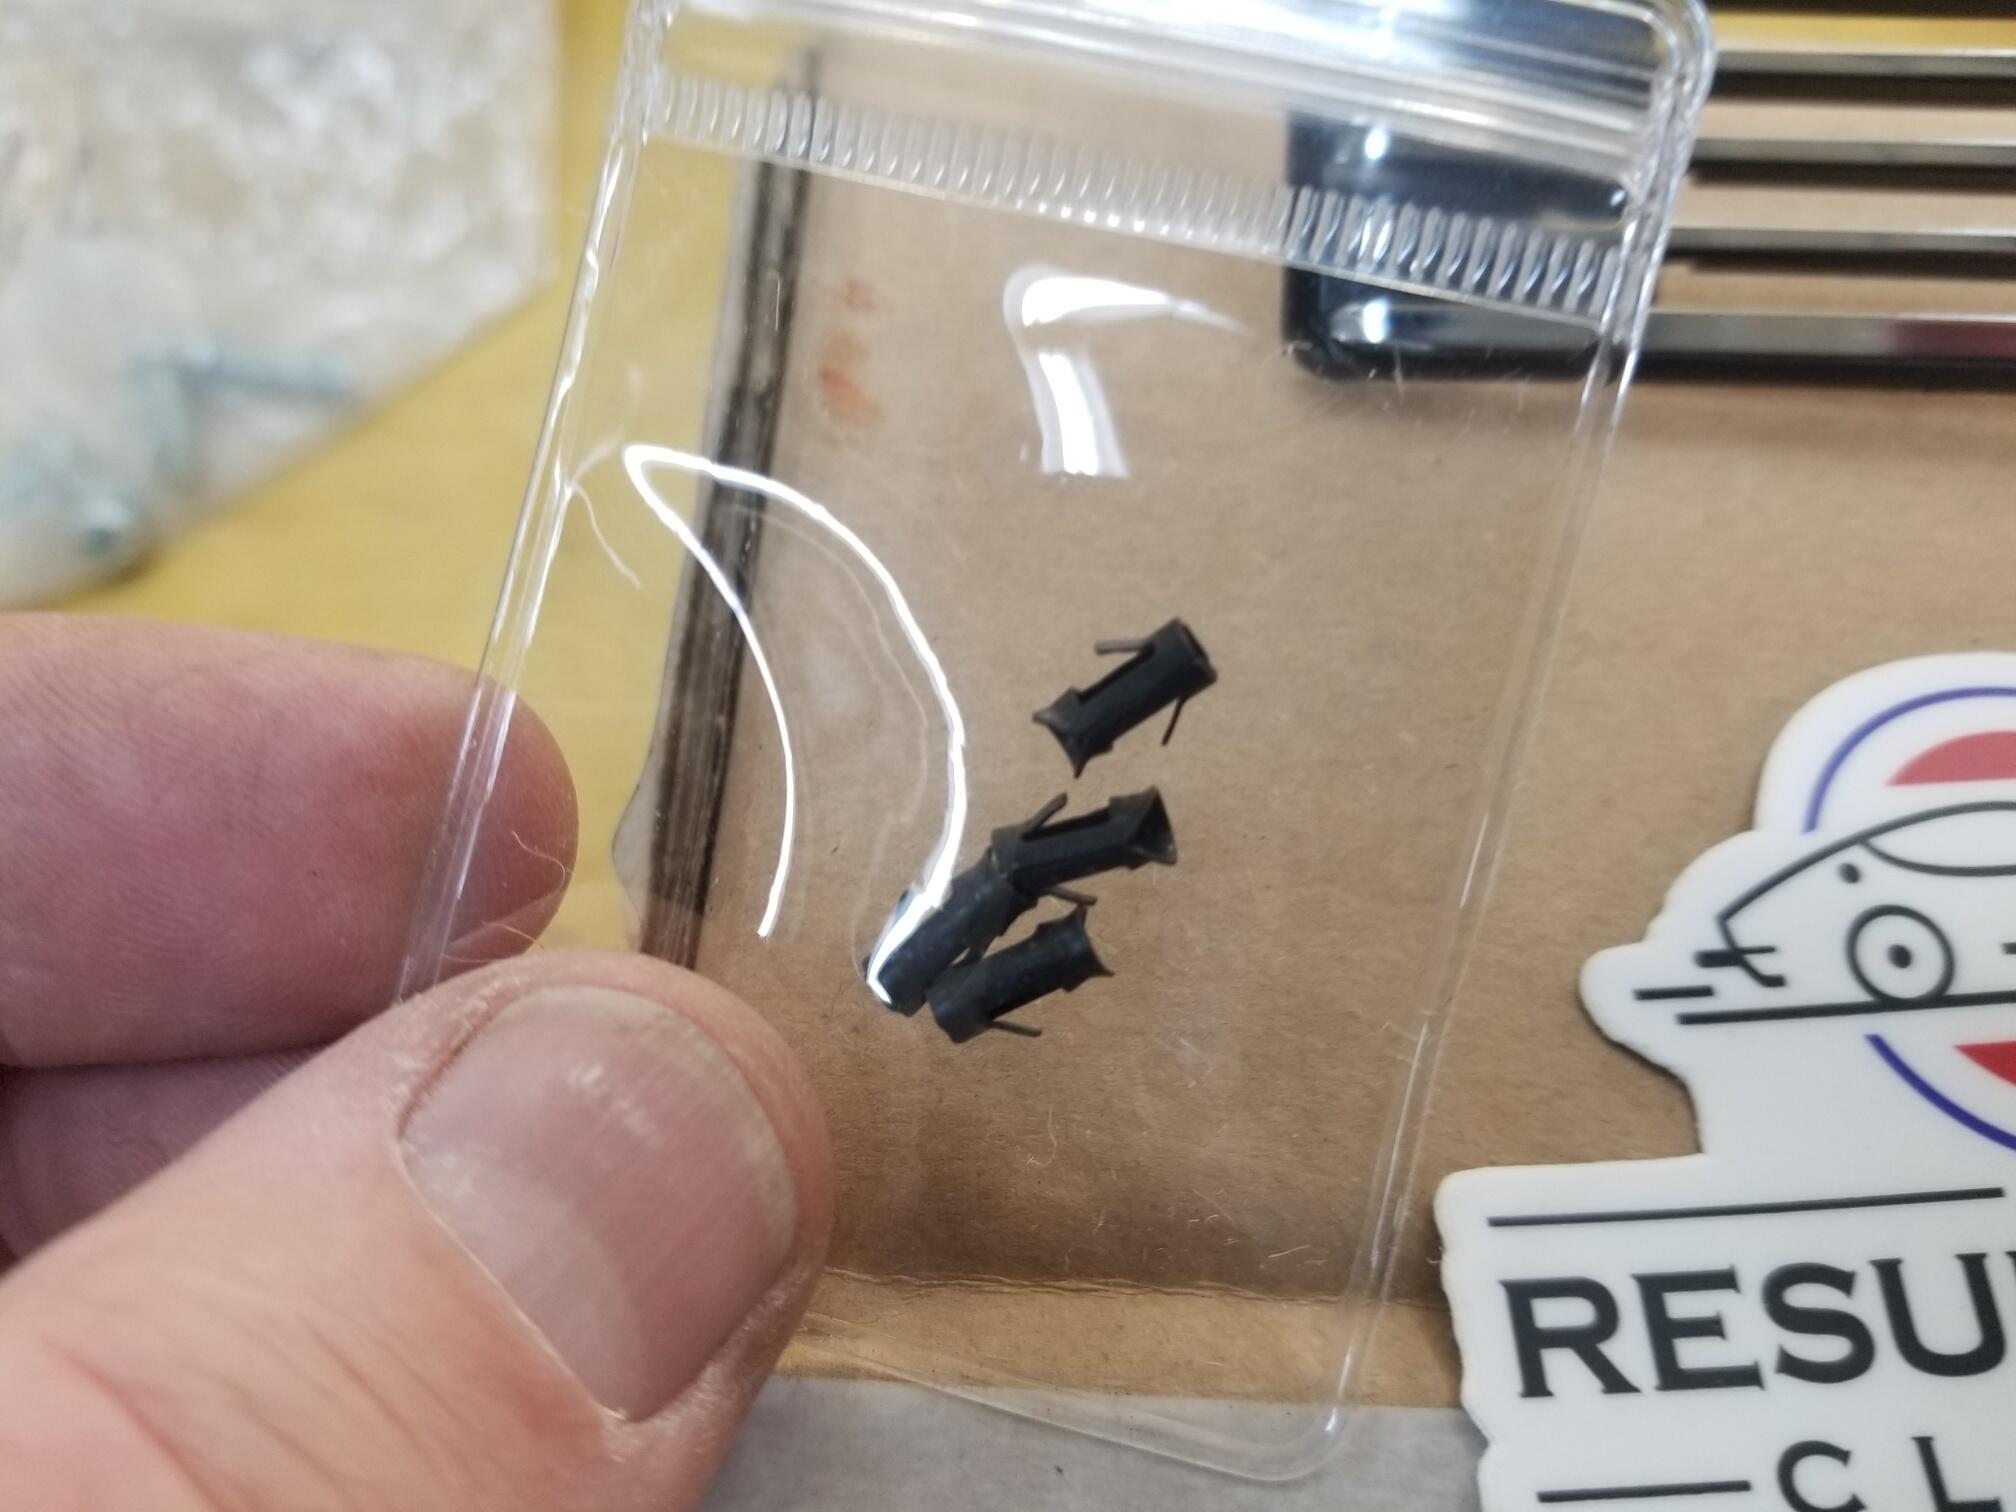
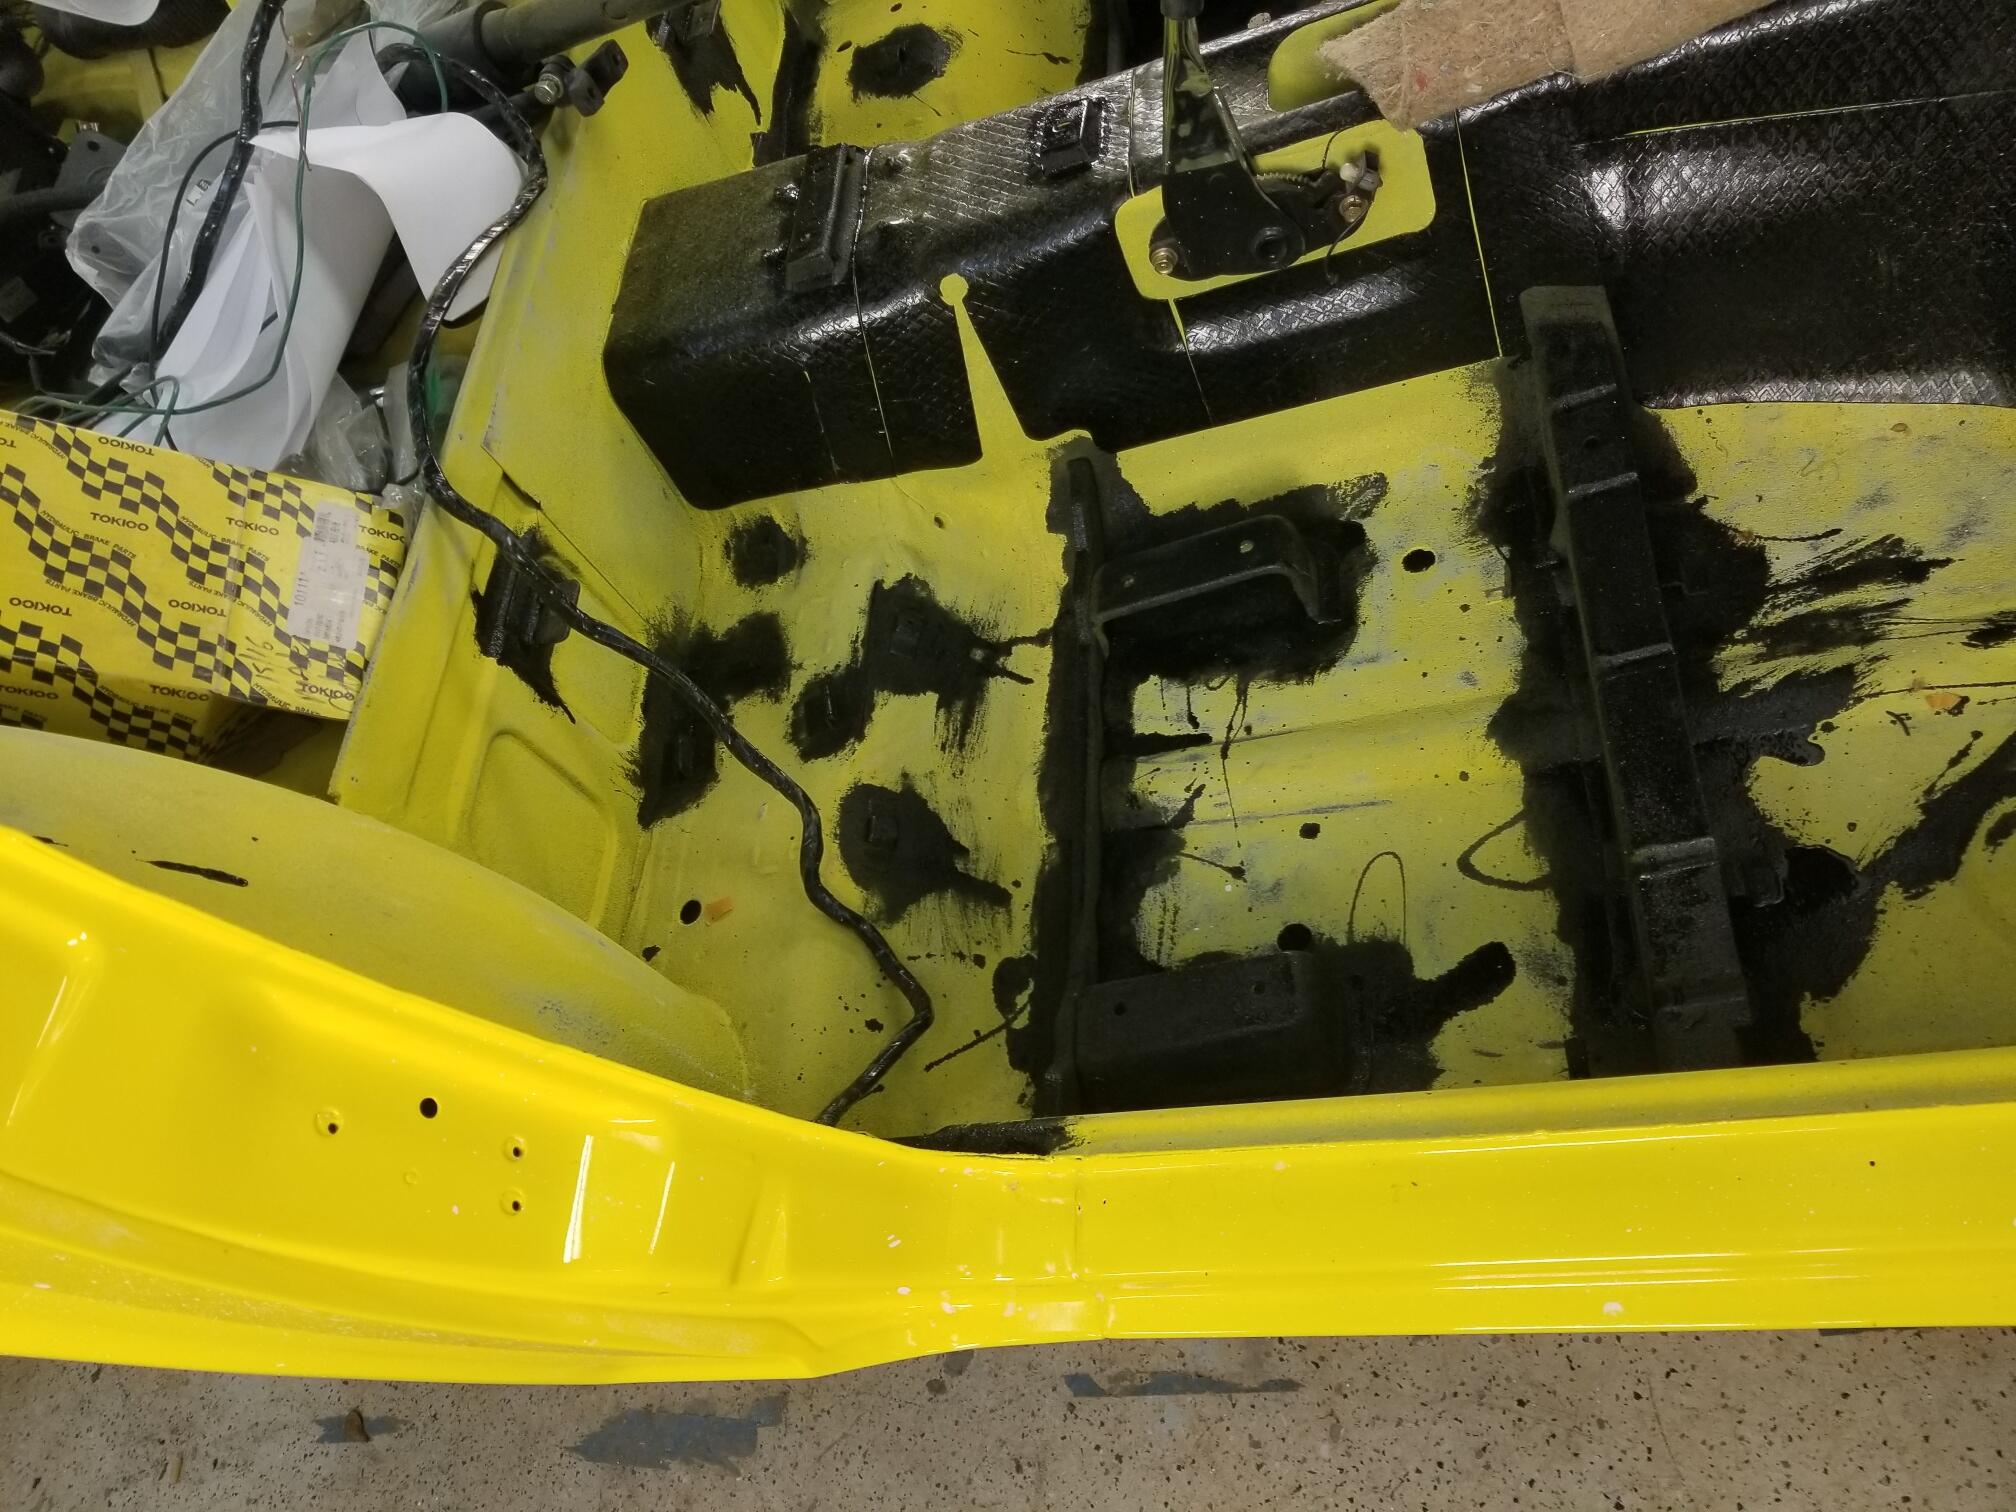
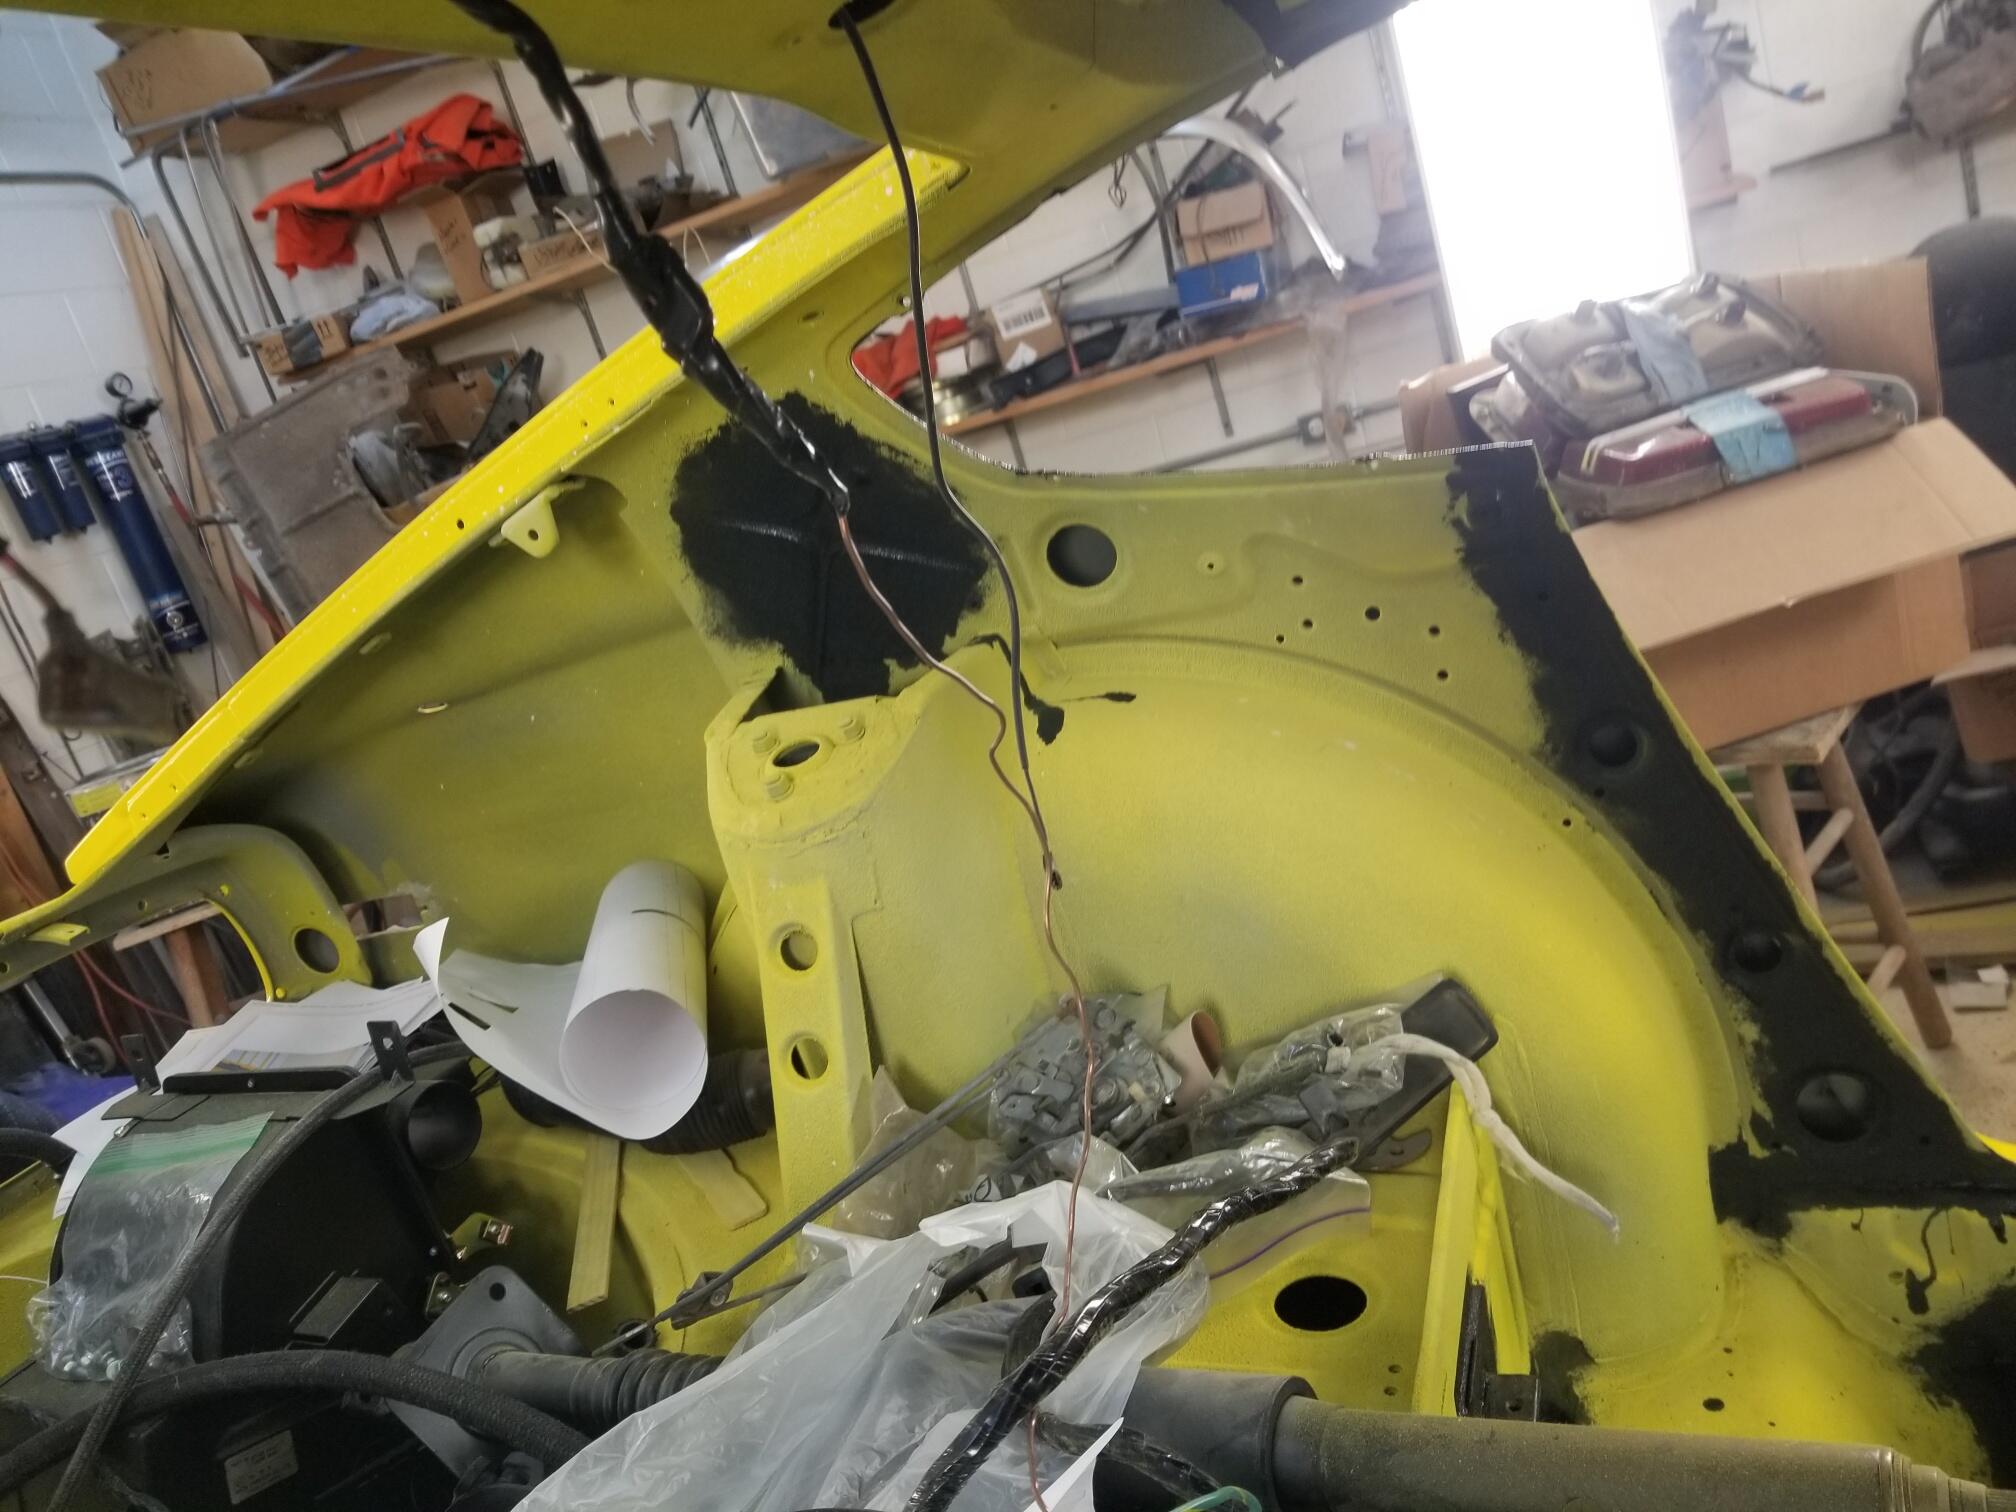
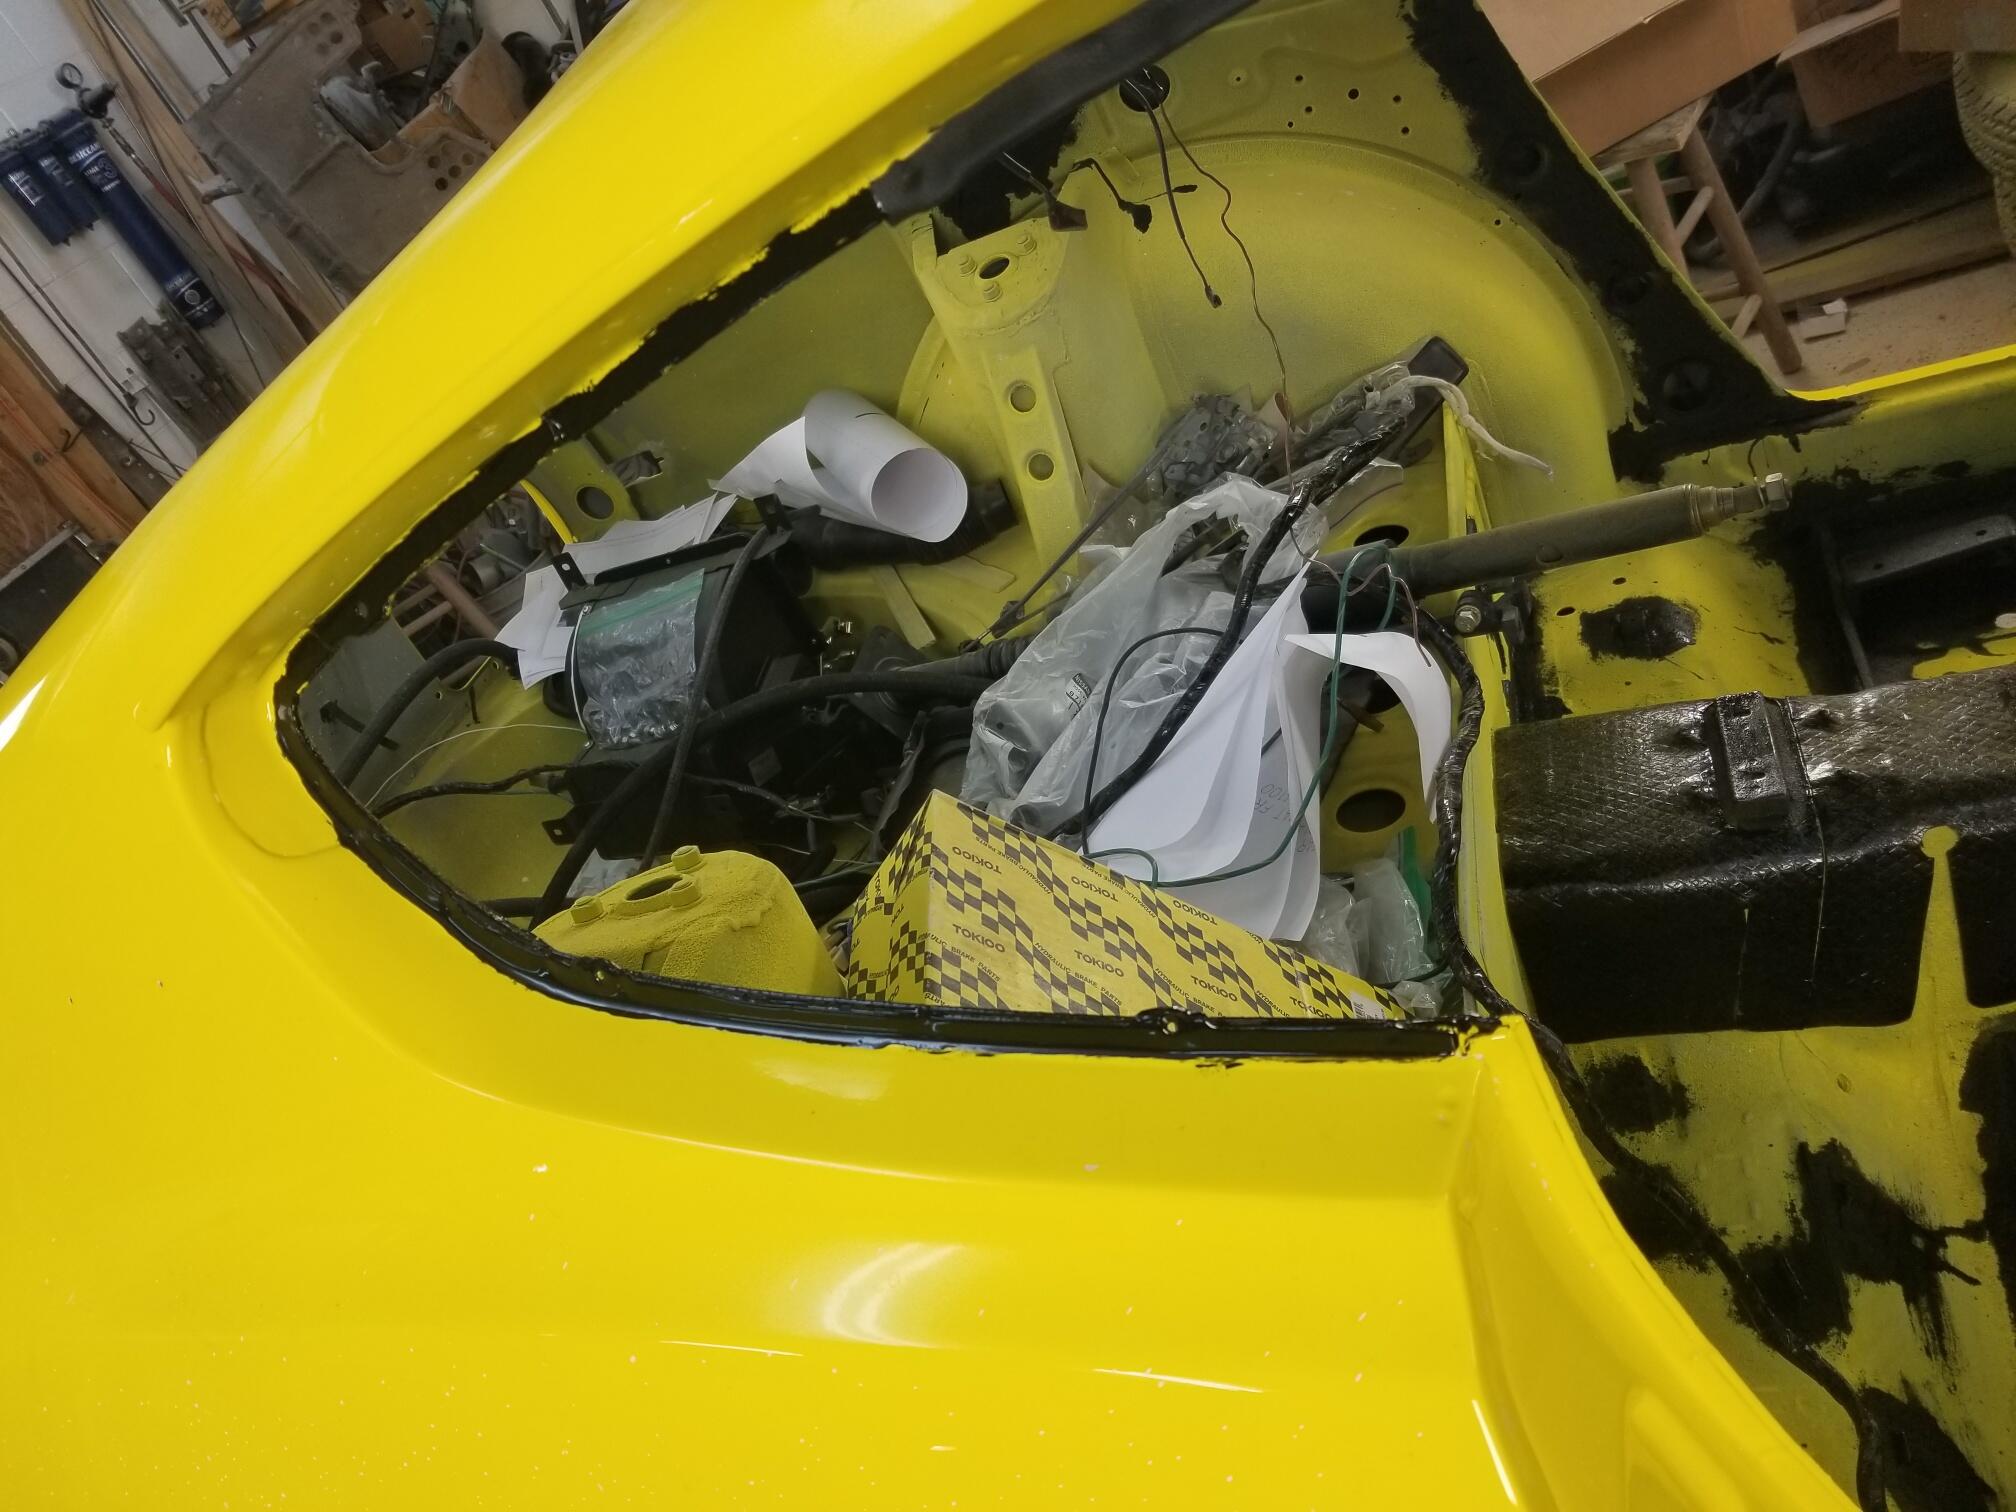
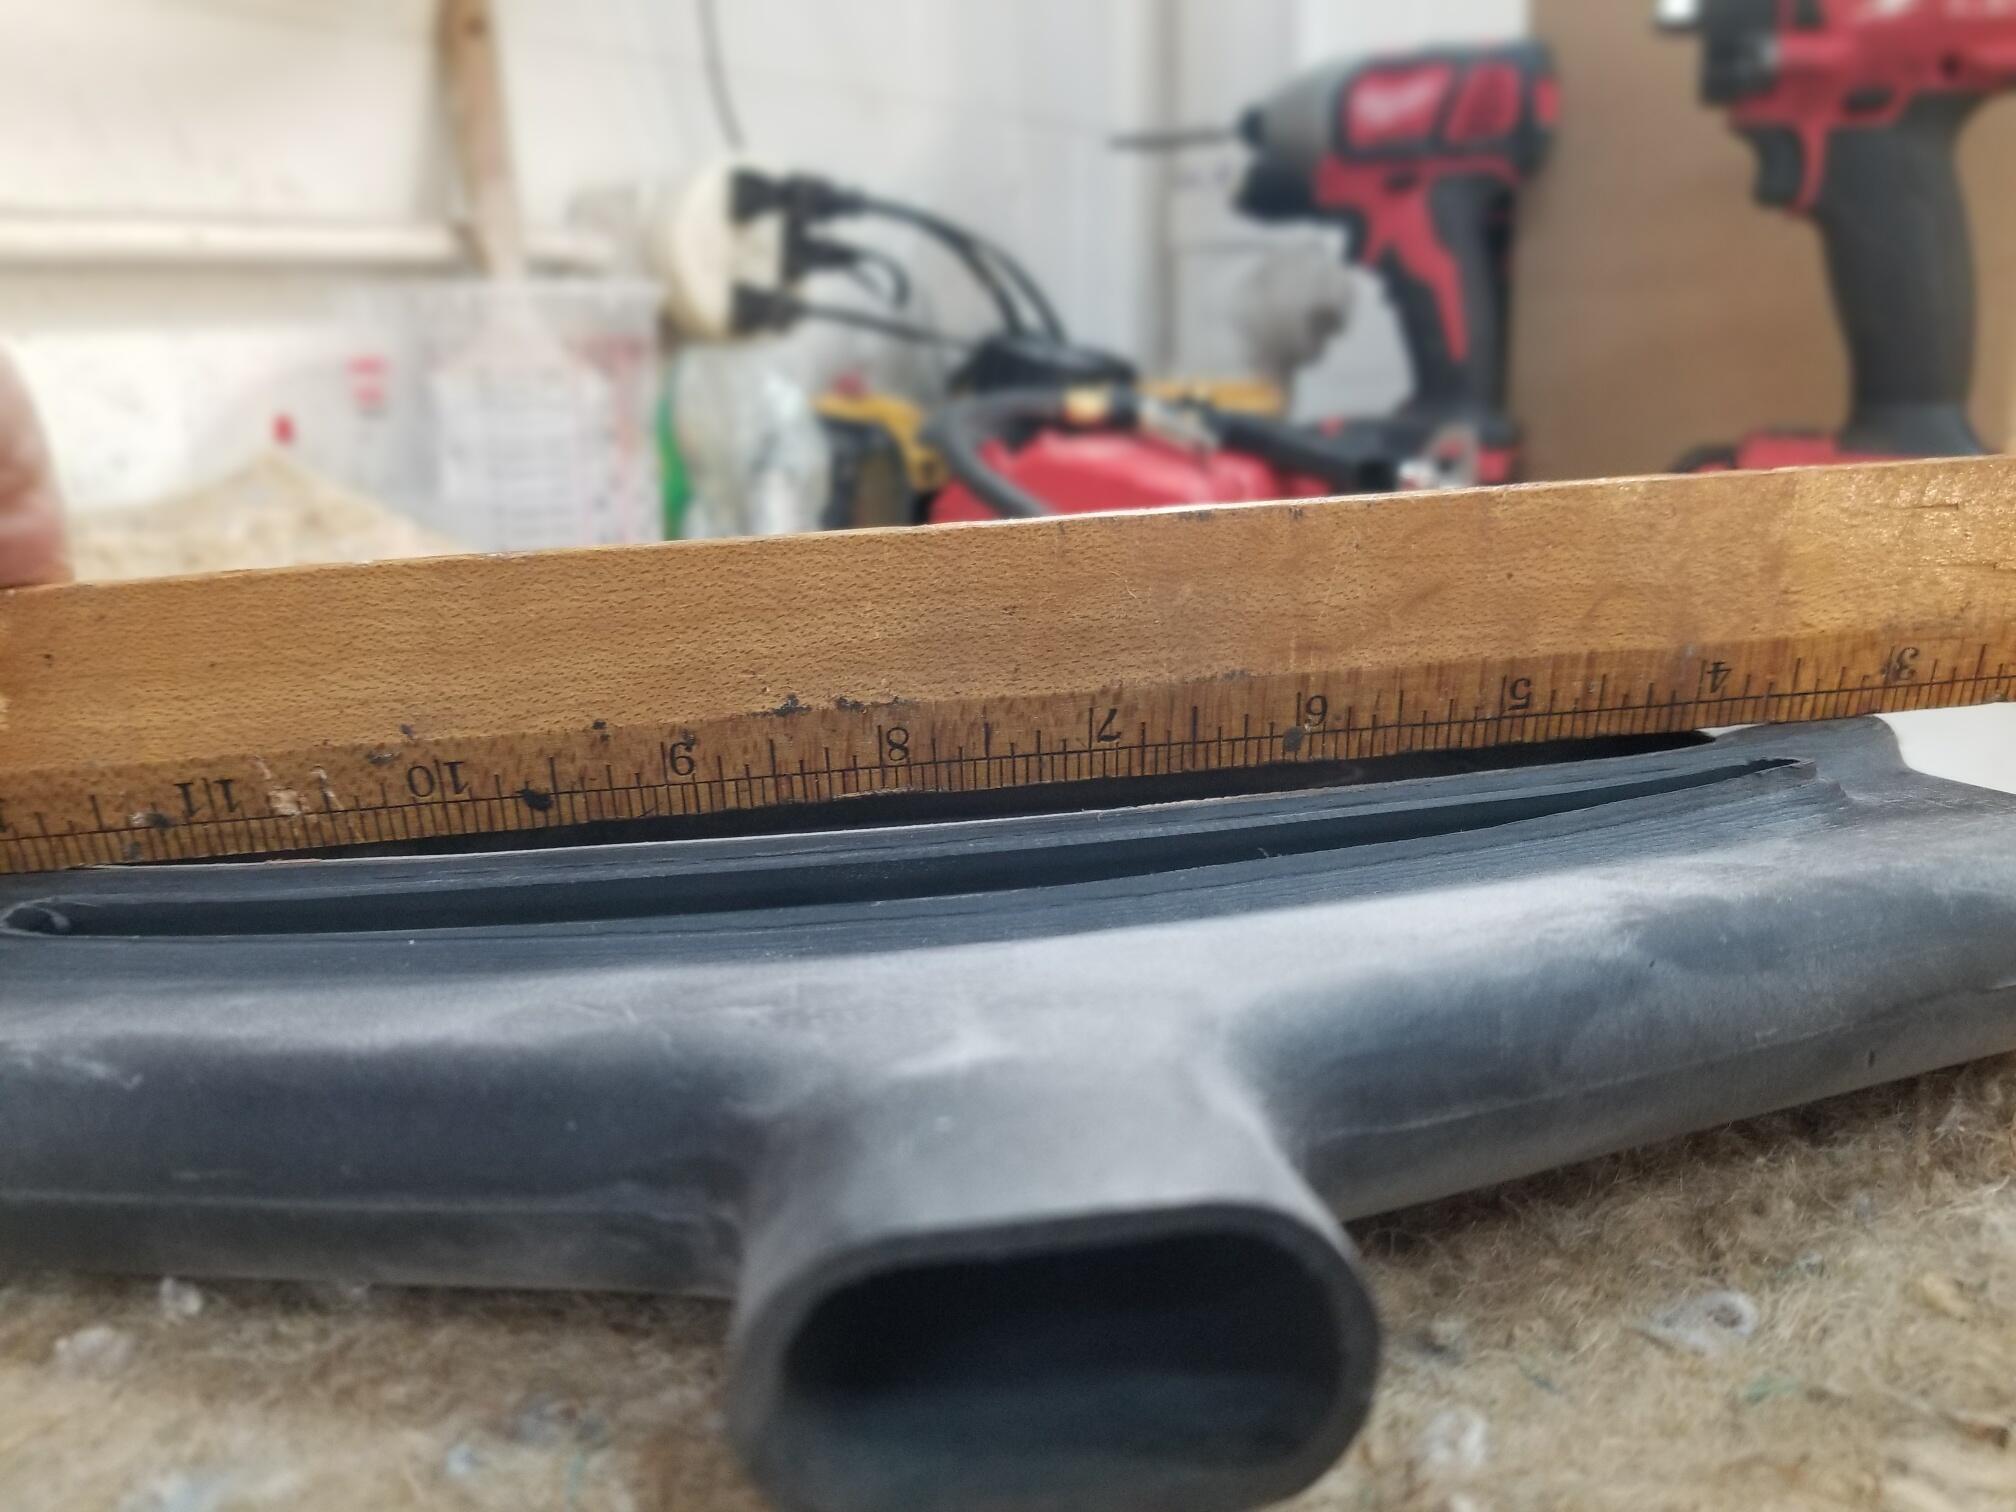
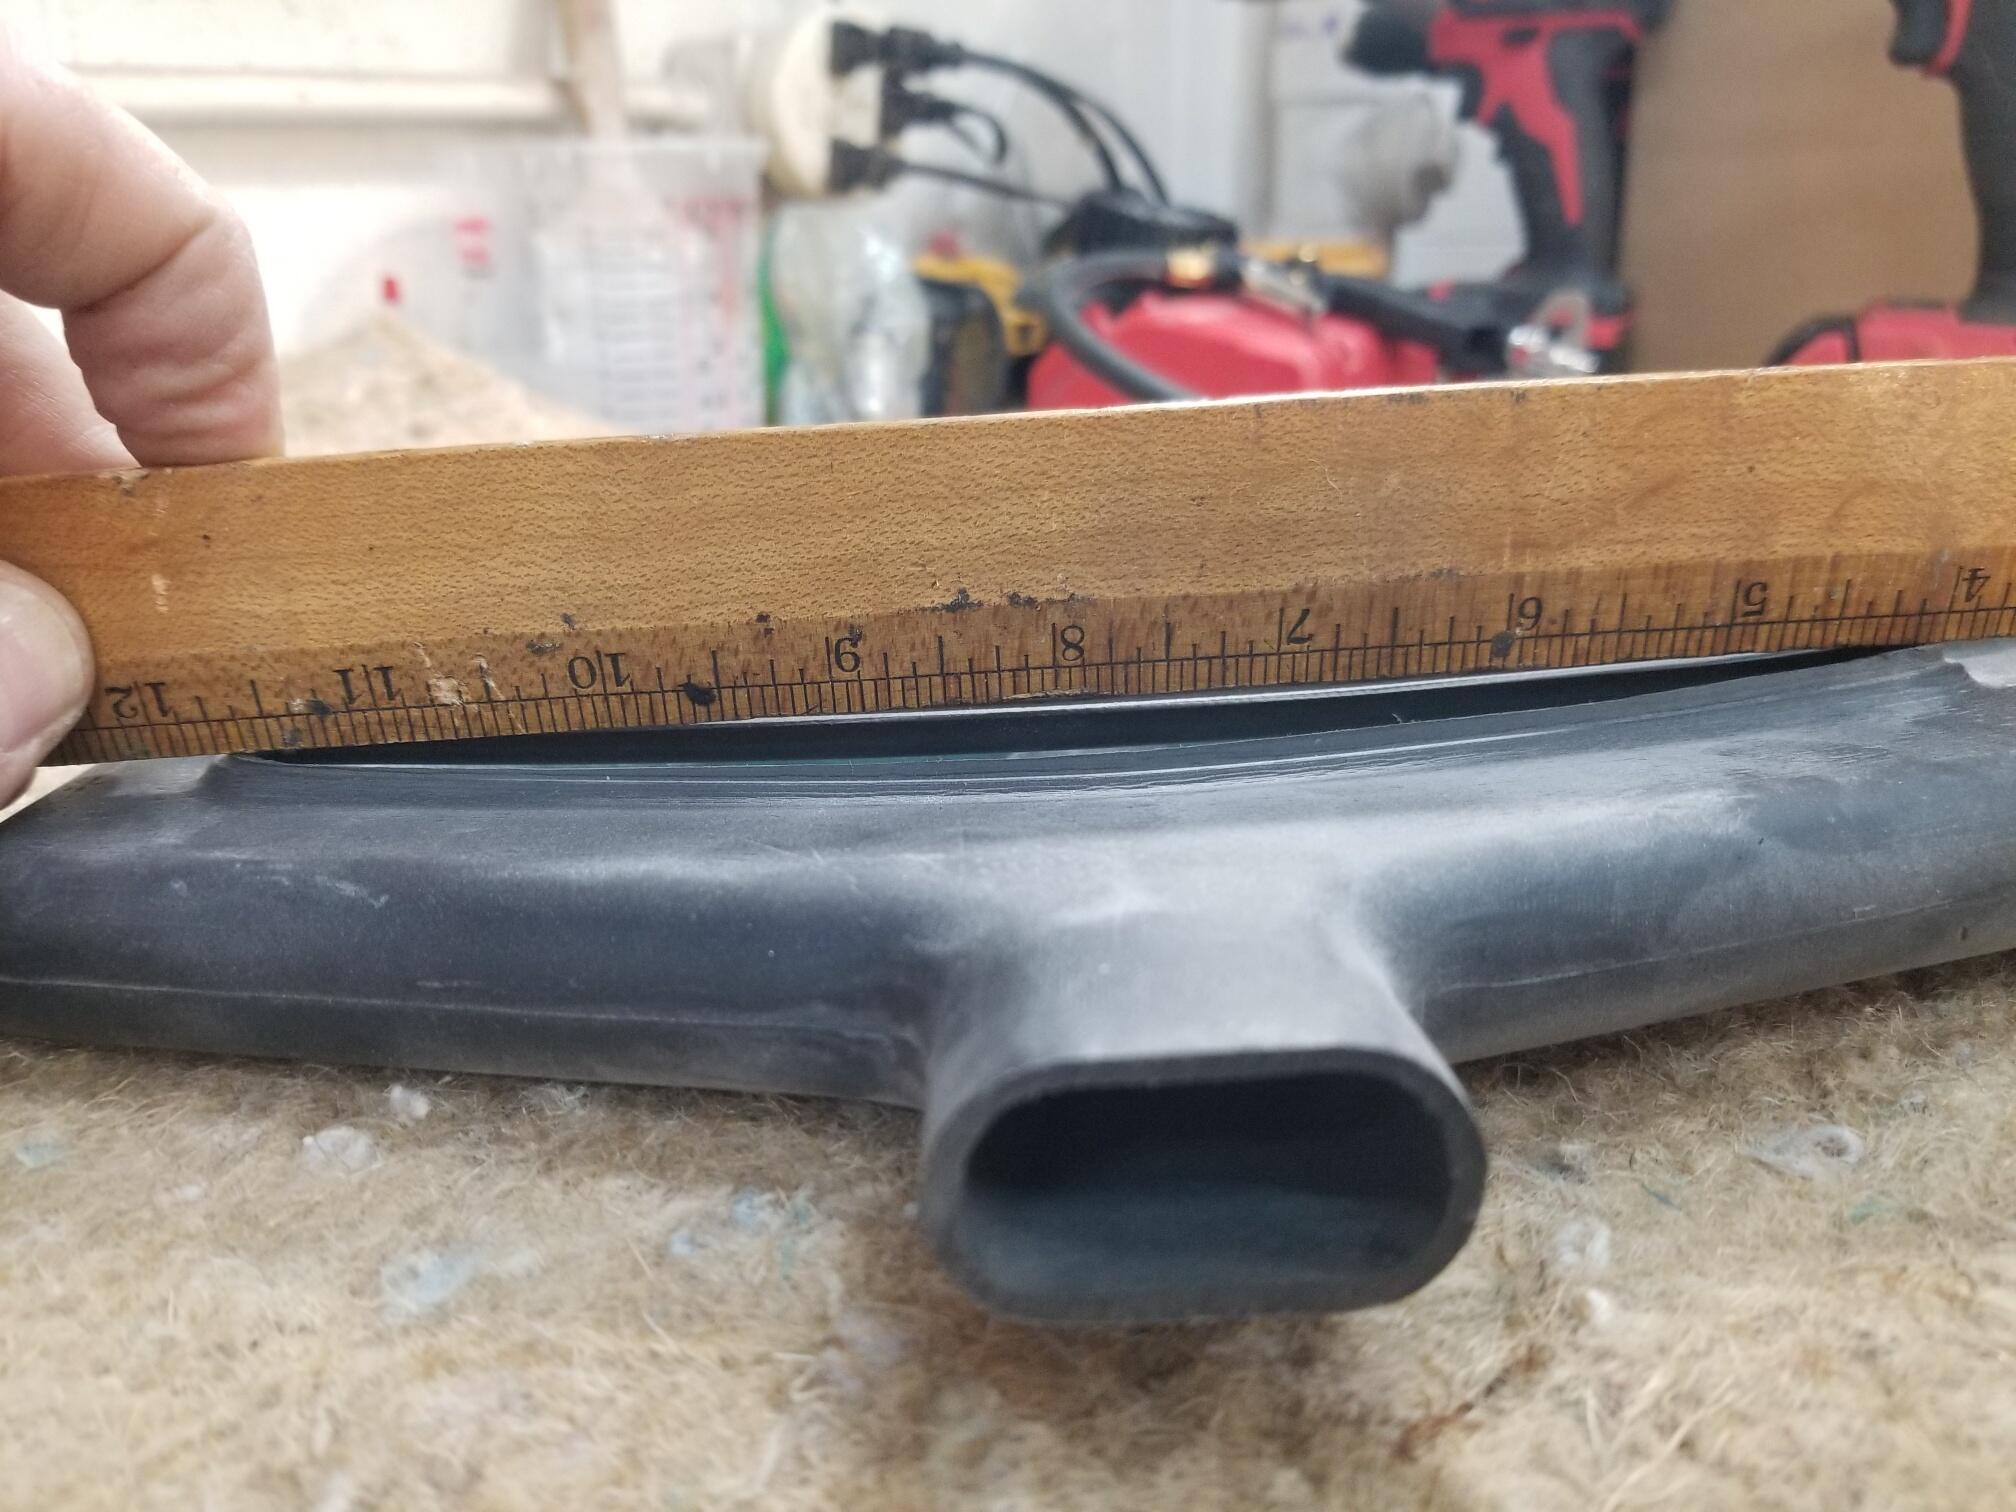
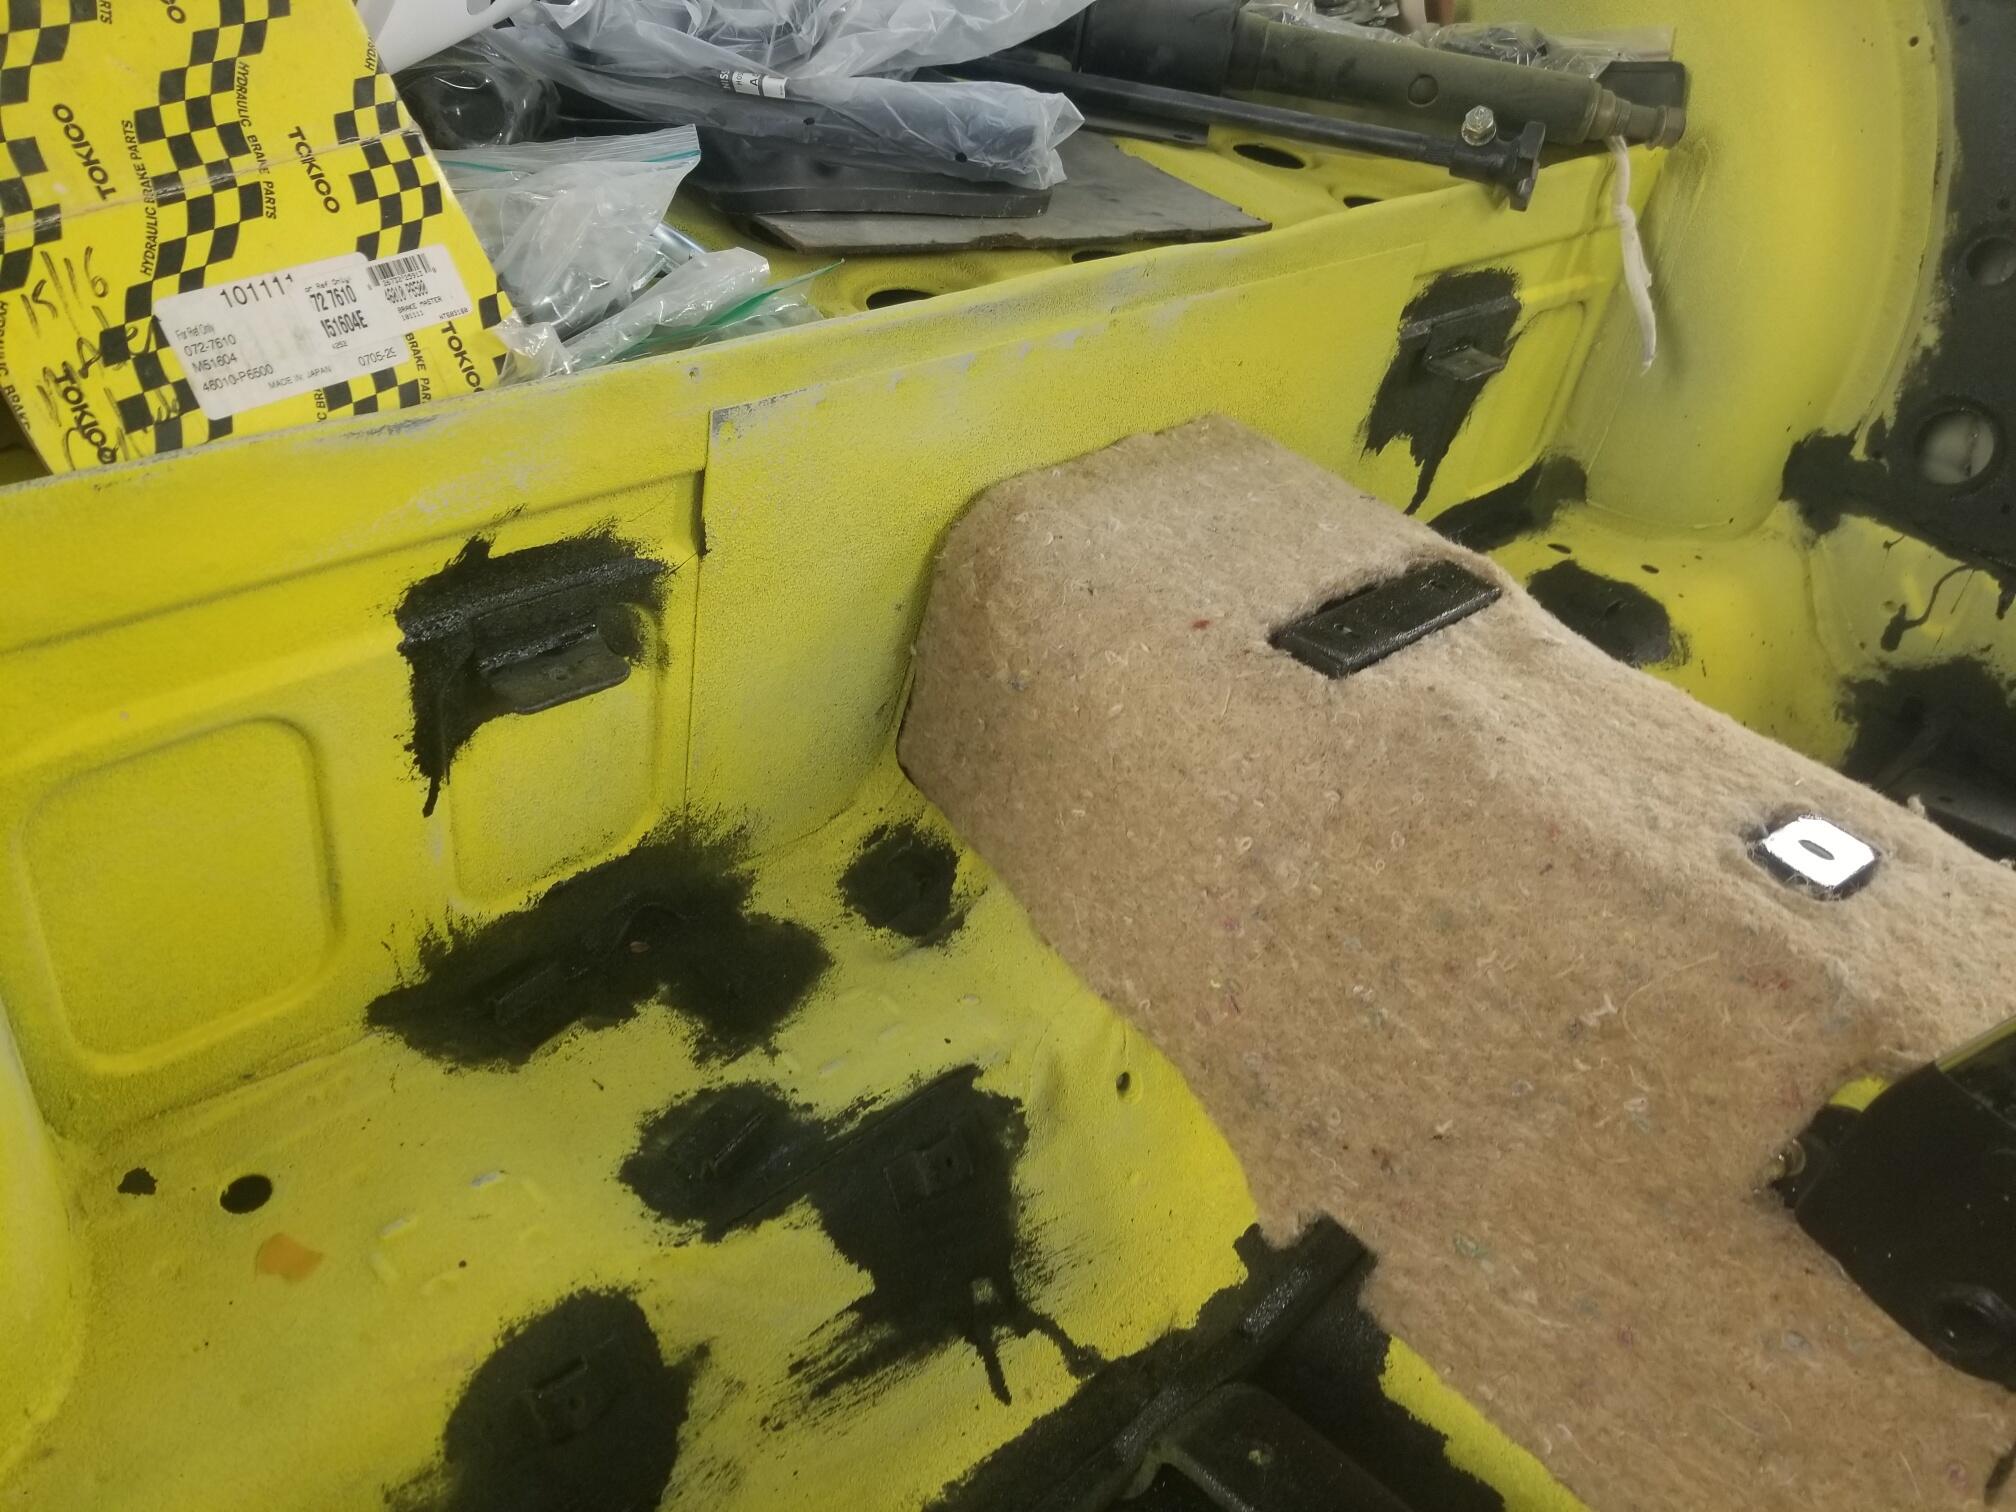
Here are the new grills They included barrel clips This would match what I found on disassembly. I believe this was the original method for mounting the vents. I think it was revised later to use a spring nut in the vent to hold the emblem stud I blacked out some areas. I didn't try to be neat and I blacked more than the factory did. The hatch vents definitely have some warpage. I gently heated them tonight and propped them up with paper. Haven't made any pictures yet What do you think this slot is for? Also do you just glue the interior trim to this vertical panel? Do you use jute here?