Patcon
 Subscriber
-
Joined
-
Last visited
Everything posted by Patcon
-
 Knowing the right search terms is the real trick. I did a first search and turned up the correct description and then searched with that. Some of those pieces look like plastic. Some look like rubber. I would prefer rubber if I could get it
 -
Looks like it could be a good basis if it's not rusty. At that discount it might be a scam though
-
https://www.amazon.com/s?k=Power+Window+Door+Jamb+Wiring+Boots+Accordion+Style&crid=1SAUDNSLHJ5M7&sprefix=power+window+door+jamb+wiring+boots+accordion+style%2Caps%2C112&ref=nb_sb_noss https://www.amazon.com/SSN-Compatible-Street-Truck-Black/dp/B0CR68XQ6L/ref=sr_1_3?crid=2G81U9YU0FNI5&dib=eyJ2IjoiMSJ9.8fpATH9944czeb9MYItu1Le0STj2Skzrehs8O3ylkQlZWG_8mc2ITQMmIb3fVHnHydfL7yFYnJmvy08Eco2PZXf669mG9374bVw_ofqceG9s3ZxYqdQxoZ-UCOcU4h8C4V9_u25Lu67HEwluoO79kBFg37vMRXXb56L57UyorLEvzo9JwnDlrzKbUIQeGv2leVvJ_gruMz0fNGYBk_-vWQeiHE8fkAWWU2wv2hZOZ-M.n15BblK1JXL0OfrkJ43UCjifE9qWW9-FI0qXMdVCFDw&dib_tag=se&keywords=wire%2Bloom%2Bfor%2Bautomotive%2Bdoors&qid=1758401923&sprefix=wire%2Bloom%2Bfor%2Bautomotive%2Bdoors%2Caps%2C126&sr=8-3&th=1 https://www.amazon.com/Power-Window-Wiring-Boots-Accordion/dp/B0BN1QMKMZ/ref=sr_1_5?crid=2G81U9YU0FNI5&dib=eyJ2IjoiMSJ9.8fpATH9944czeb9MYItu1Le0STj2Skzrehs8O3ylkQlZWG_8mc2ITQMmIb3fVHnHydfL7yFYnJmvy08Eco2PZXf669mG9374bVw_ofqceG9s3ZxYqdQxoZ-UCOcU4h8C4V9_u25Lu67HEwluoO79kBFg37vMRXXb56L57UyorLEvzo9JwnDlrzKbUIQeGv2leVvJ_gruMz0fNGYBk_-vWQeiHE8fkAWWU2wv2hZOZ-M.n15BblK1JXL0OfrkJ43UCjifE9qWW9-FI0qXMdVCFDw&dib_tag=se&keywords=wire+loom+for+automotive+doors&qid=1758401923&sprefix=wire+loom+for+automotive+doors%2Caps%2C126&sr=8-5
-
I'm going to want power windows at some point, but would like a fairly invisible system. Atleast on the door card... I'll keep an eye out for your thread
-
what did you use for power windows?
-
I suspect the pump was fouled by crystalized fuel. Could be rust but I doubt it. Unless it's a cheap pump. Most internals in fuel pumps are aluminum or coated in some fashion.
-
Modern fuel goes bad quickly, by design... You could: Drain it Dilute it or get it running and run it out, then add fresh
-
Did you get home ok?
-
That's great! Wish I could have made it. Where is zcon 2026?
-
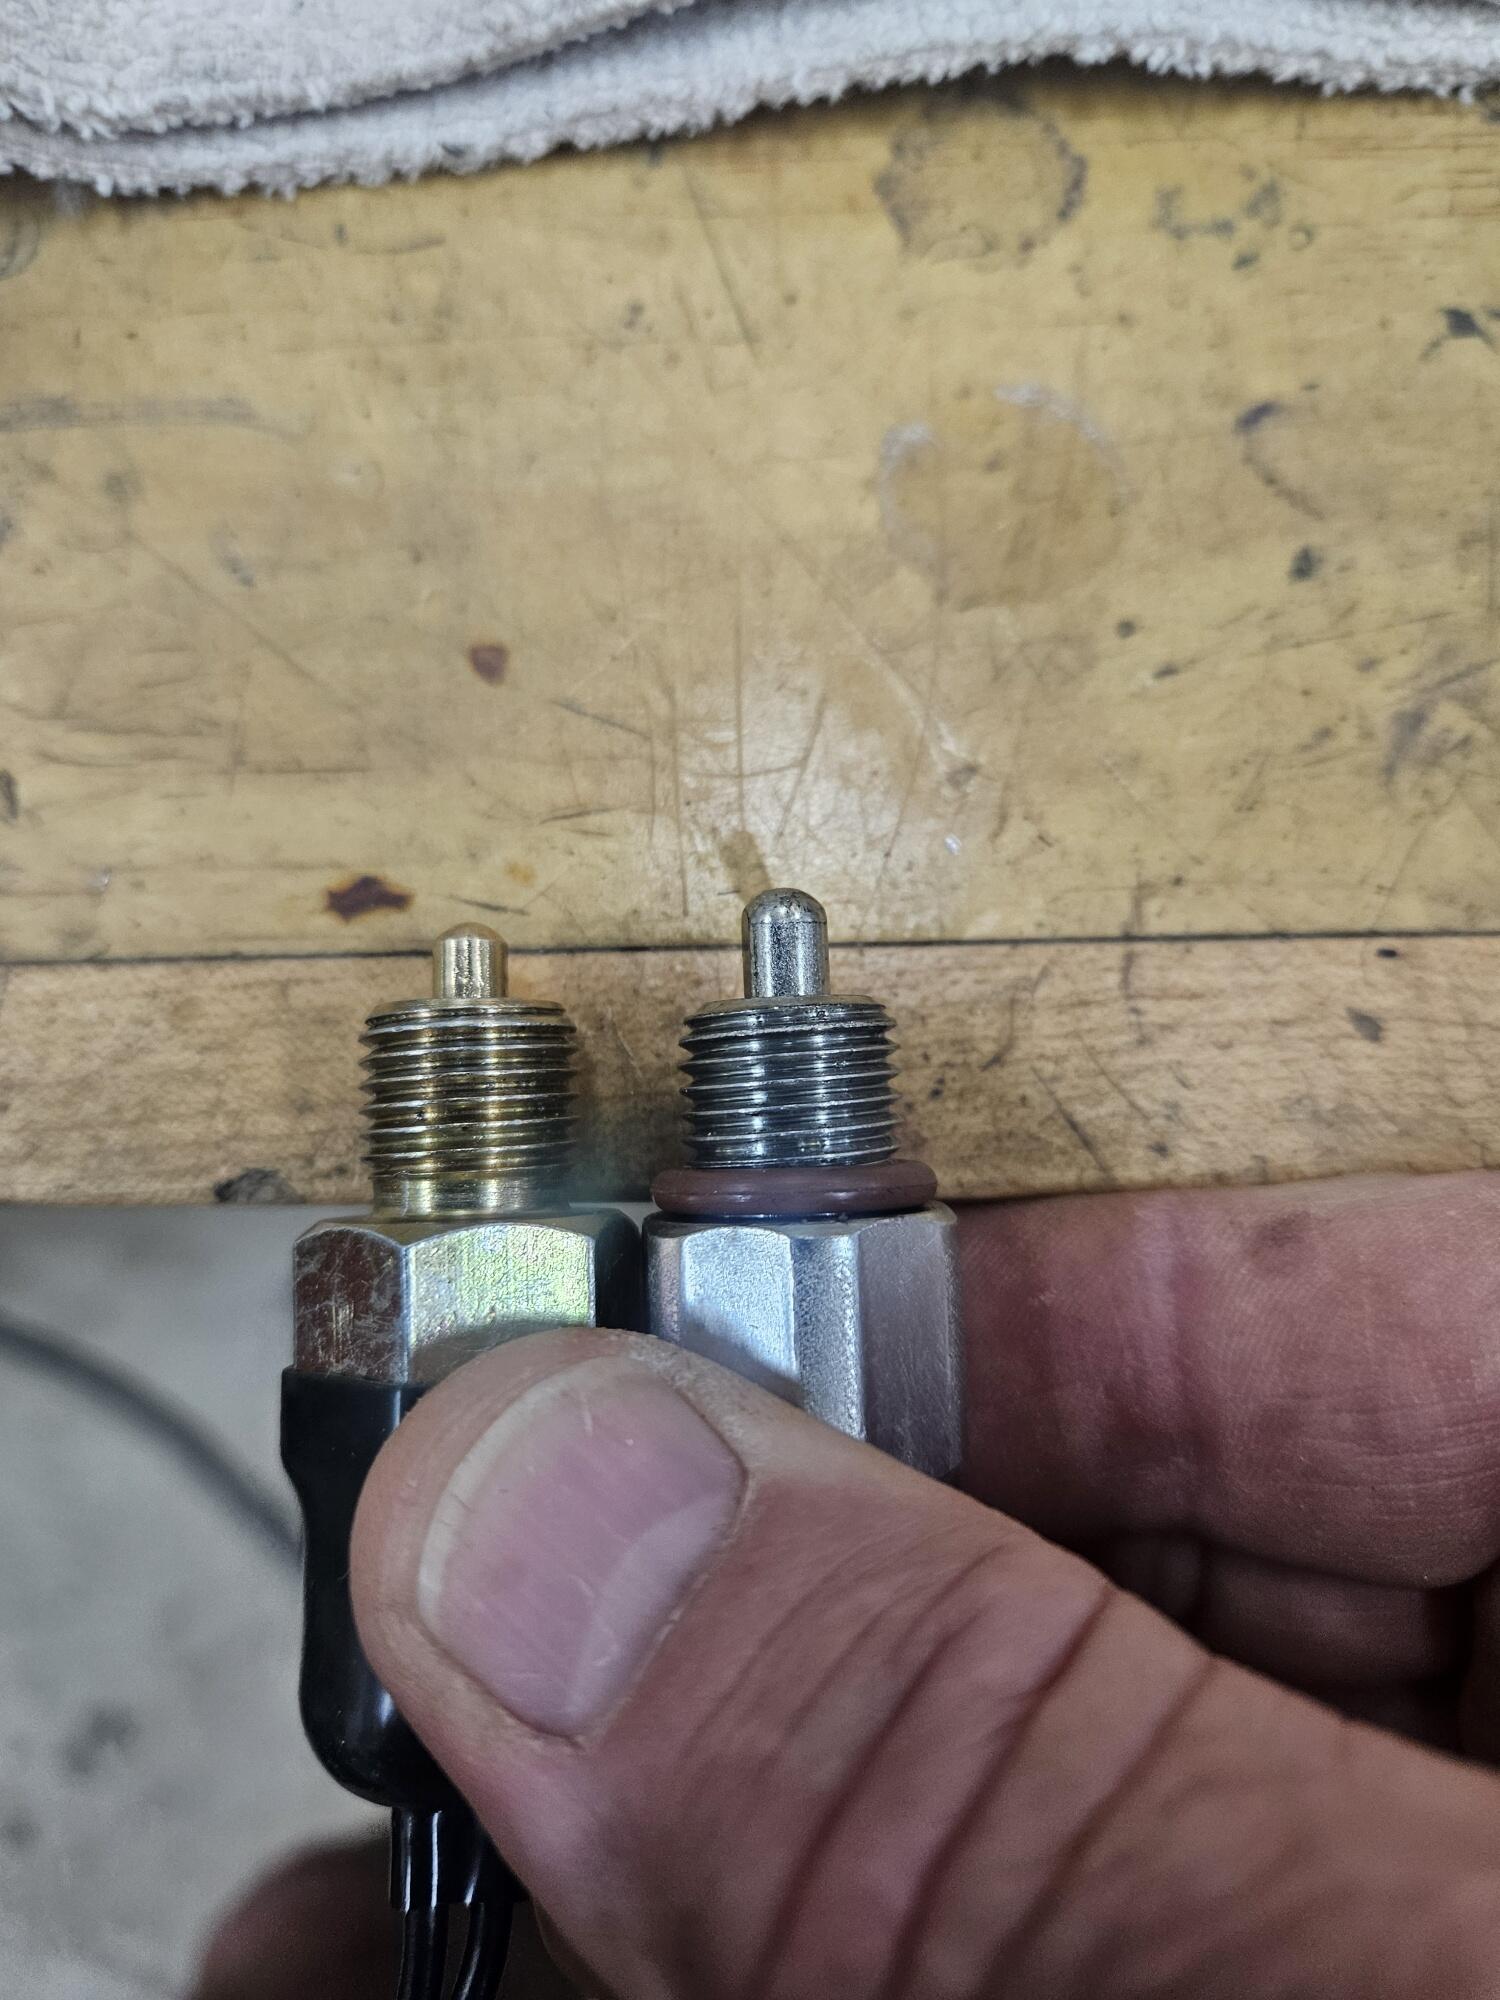
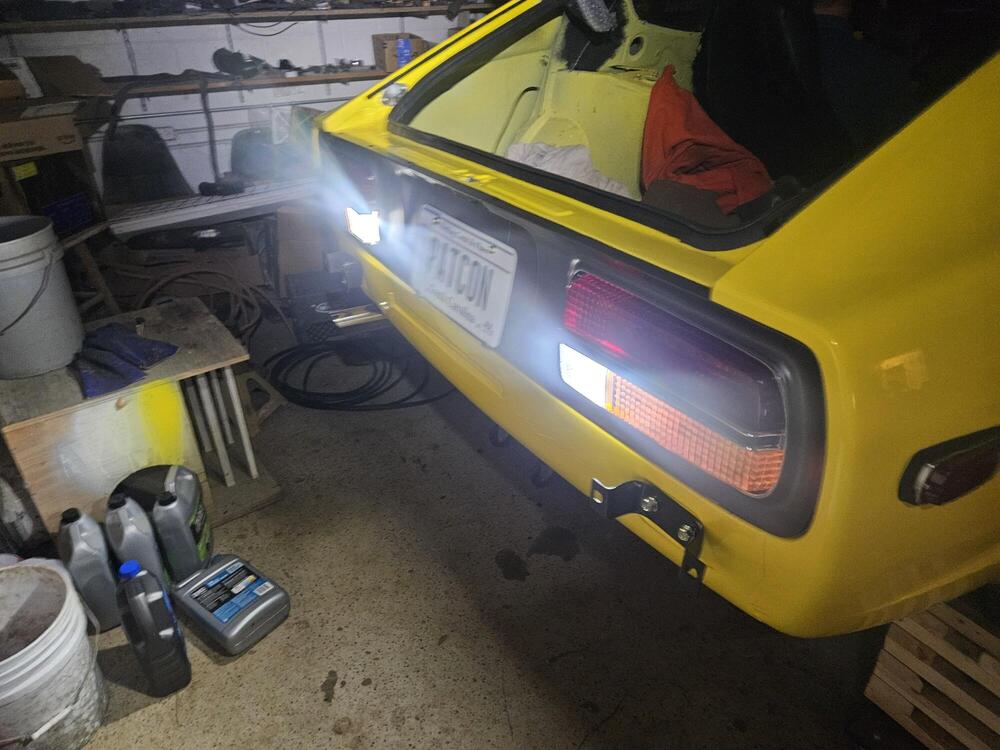
@Yarb Made a little progress today. I got the reverse lights fixed with the help of Yarb and my little helper was in town too. Yarb sent me a new switch he had. It's longer than the one I ordered Yarb, do you know the part number for that switch?


-
It's tough to order things from overseas due to the recent tariff changes. Many postal services will not post to the US currently. As solution is being worked on...
-
-
I agree with Namerow that there will be extensive welding required. To answer the original question: If the doors seem to fit well with decent gaps, i would weld a tube on the inside of the car down low on the door opening. Remove all the drivetrain and any other dead weight. Then replace the rockers first. Inners and outers as needed. Be sure to use the doors to ckeck fit and door gaps before welding it all up. Then do the floors next. After the rockers are done, your temporary door brace can be removed. If the doors don't fit well, the body will need to be manipulated or jacked up until they do and then weld in your temporary bracing
-
I love that beetle too. I've got one that I hope looks like that one day...
-
Yes, silver is a tough color
-
Was curious because I'm gonna try my hand at that at some point.
-
Tempter!! I would have to drag it...
-
I wondered that too but don't really want to be the one to check it out
-
Very nice! Did you cover them?
-
So I tinkered with the flasher relays some more. I had a 3 prong one that required a ground. I couldn't get it to work no matter how I wired it at the bench. The two prong works fine with an LED bulb at the bench off the jump box. So I tried it in the car on both the turns and the hazards. With no relay in place I basically have battery voltage coming to the relay. When I plug it up and try to use it the voltage across (? I don't believe this was to ground...) the relay drops to less than 8 volts in both locations. So I am assuming neither the LED's or the electronic flasher will work at the low voltage??? Where to from here? @SteveJ others?
-
I agree, that seems cheap...
-
Harmon brakes in GA can probably handle your booster... The reaction disc is the little rubber disc on the end of the chrome pushrod. Im not sure the ZX's had it?
-
Where are you located? It can be difficult to find someone to paint an old datsun. Better now that the values have risen but tough to avoid paint jail. Where your car is stuck in a shop for a year or more. If I were looking for a painter, I would ask my local automotive paint shop. The jobbers who supply paint shops with materials. Ask when there aren't other customers around! I ended up painting my own because I couldn't find anybody reasonable to paint. It's been a long road with mixed results... I have no idea what current prices are for full paint. The rust needs to be dealt with for sure! I'm sure there is more there than the little bubbles. Take the glass out for the respray and strip as much as possible for improved results.
-
-
I have run into this too. Was trying to buy two BMW fuel injectors out of Latvia. Couldn't because of all the unknowns. Looking to buy something out of the UK and sent them an email to see if they'll ship to the US. We'll see what they say...