Patcon
 Subscriber
-
Joined
-
Last visited
Everything posted by Patcon
-
 https://m.facebook.com/ZeddFindings/ Im not sure Charlie is still selling pans
 -
I'm glad you've got a solution going. I know a half dozen or so people that have had knee replacement in the last couple of years. All of them much better off shortly after surgery. Here's to a quick recovery!
-
What are the differences in the gas door lids?
-
Timely though. I need to do this on a driveshaft for Lily
-
Progress on the rear brakes is here in this thread...
-
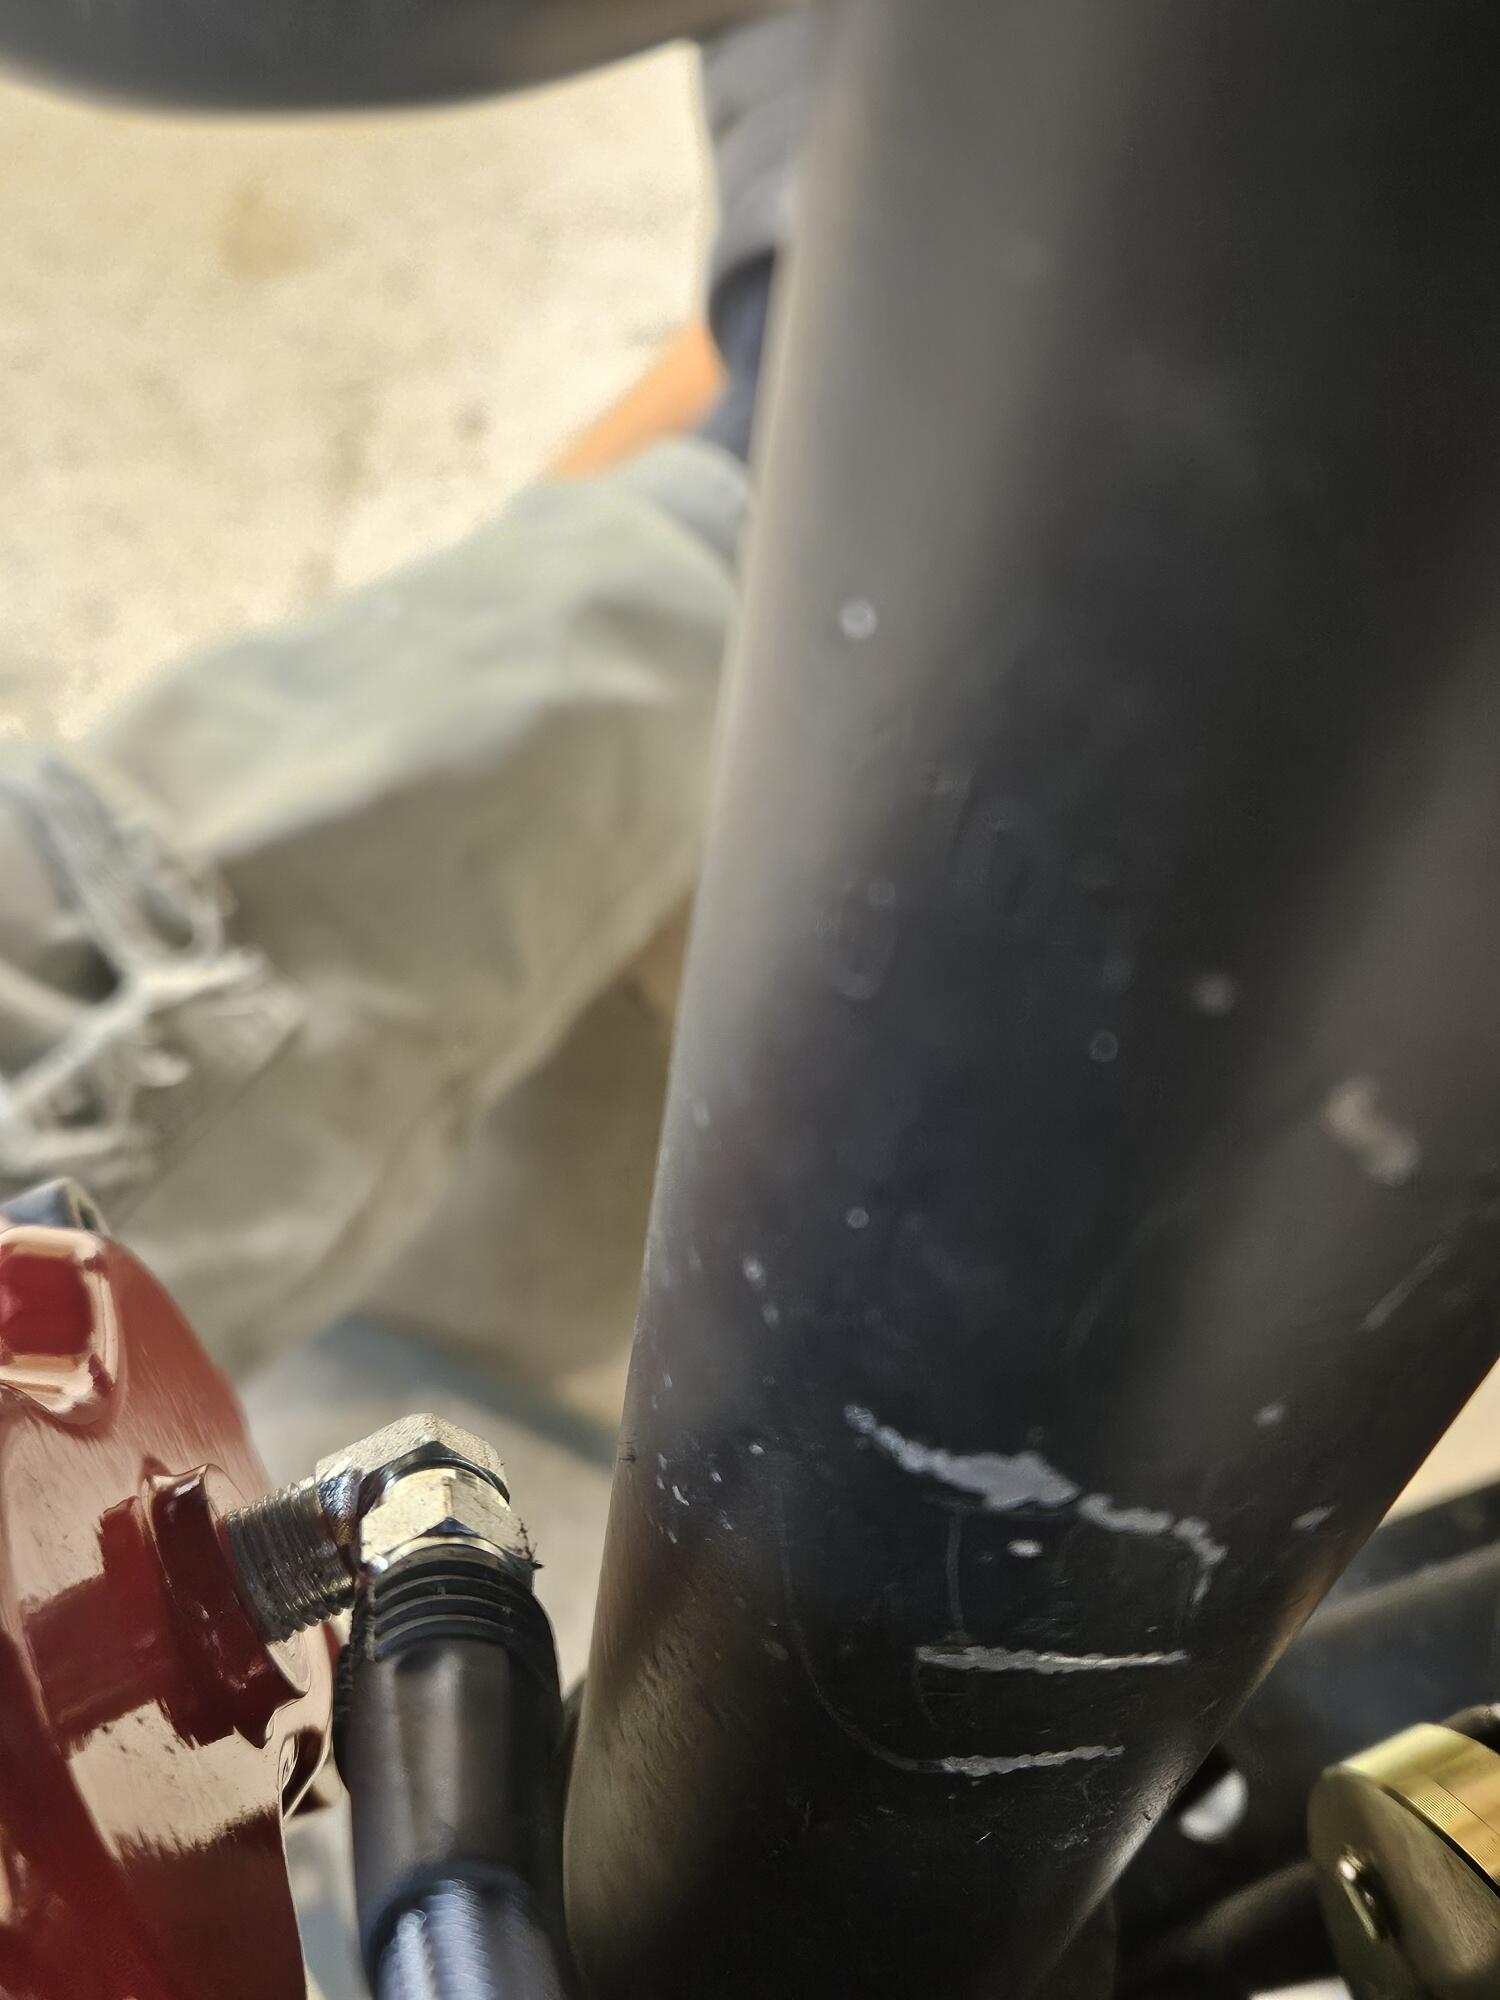
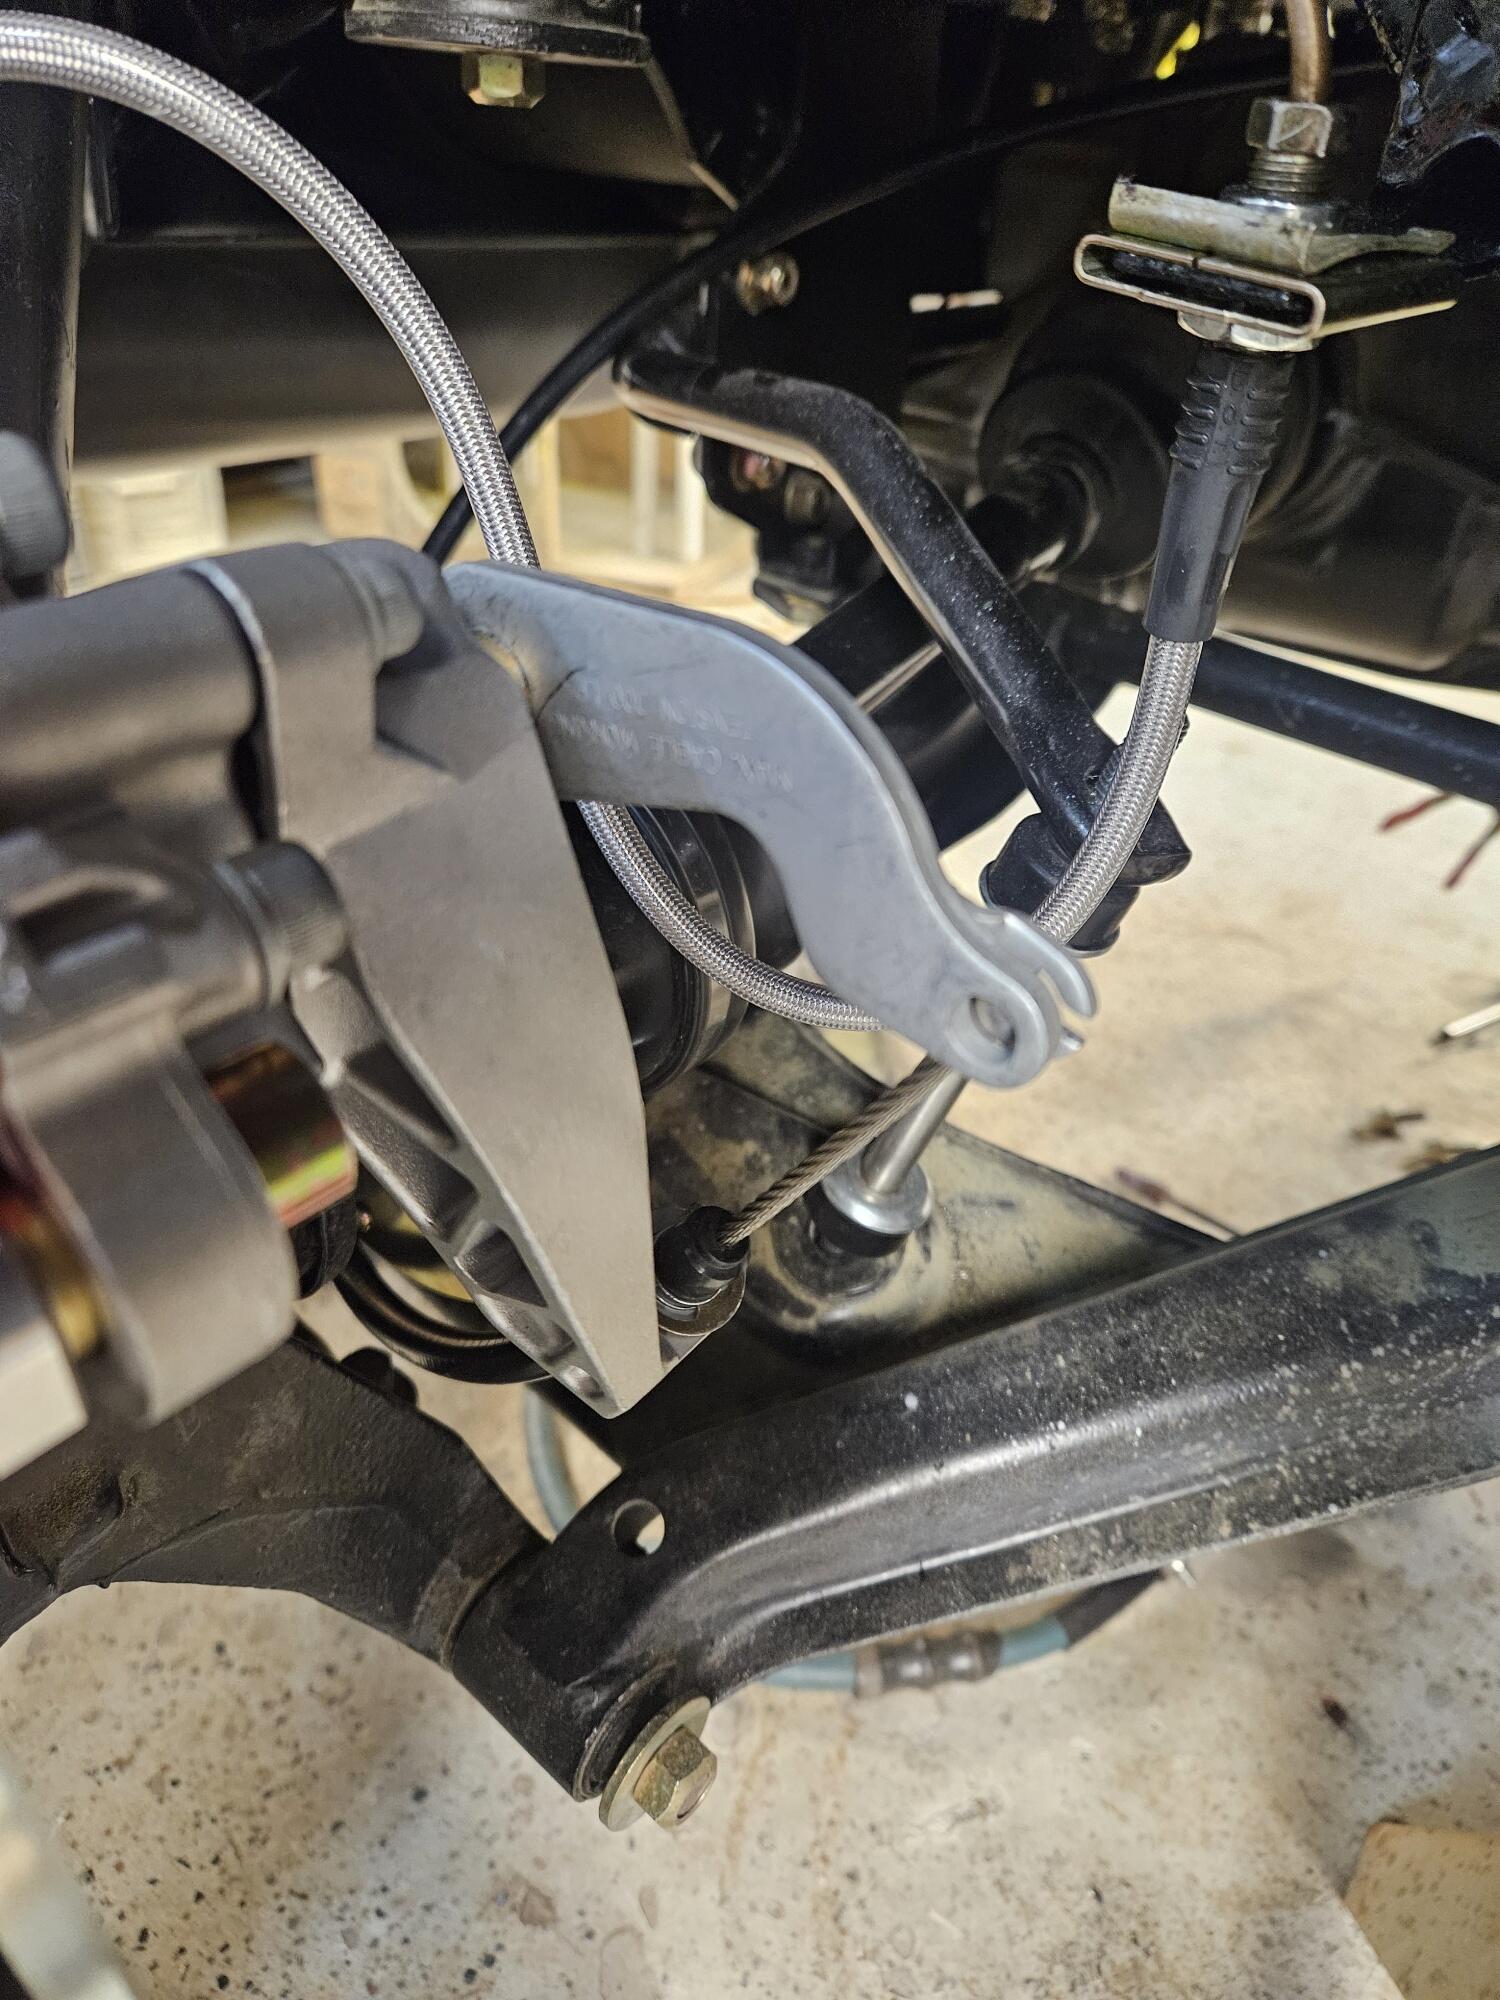
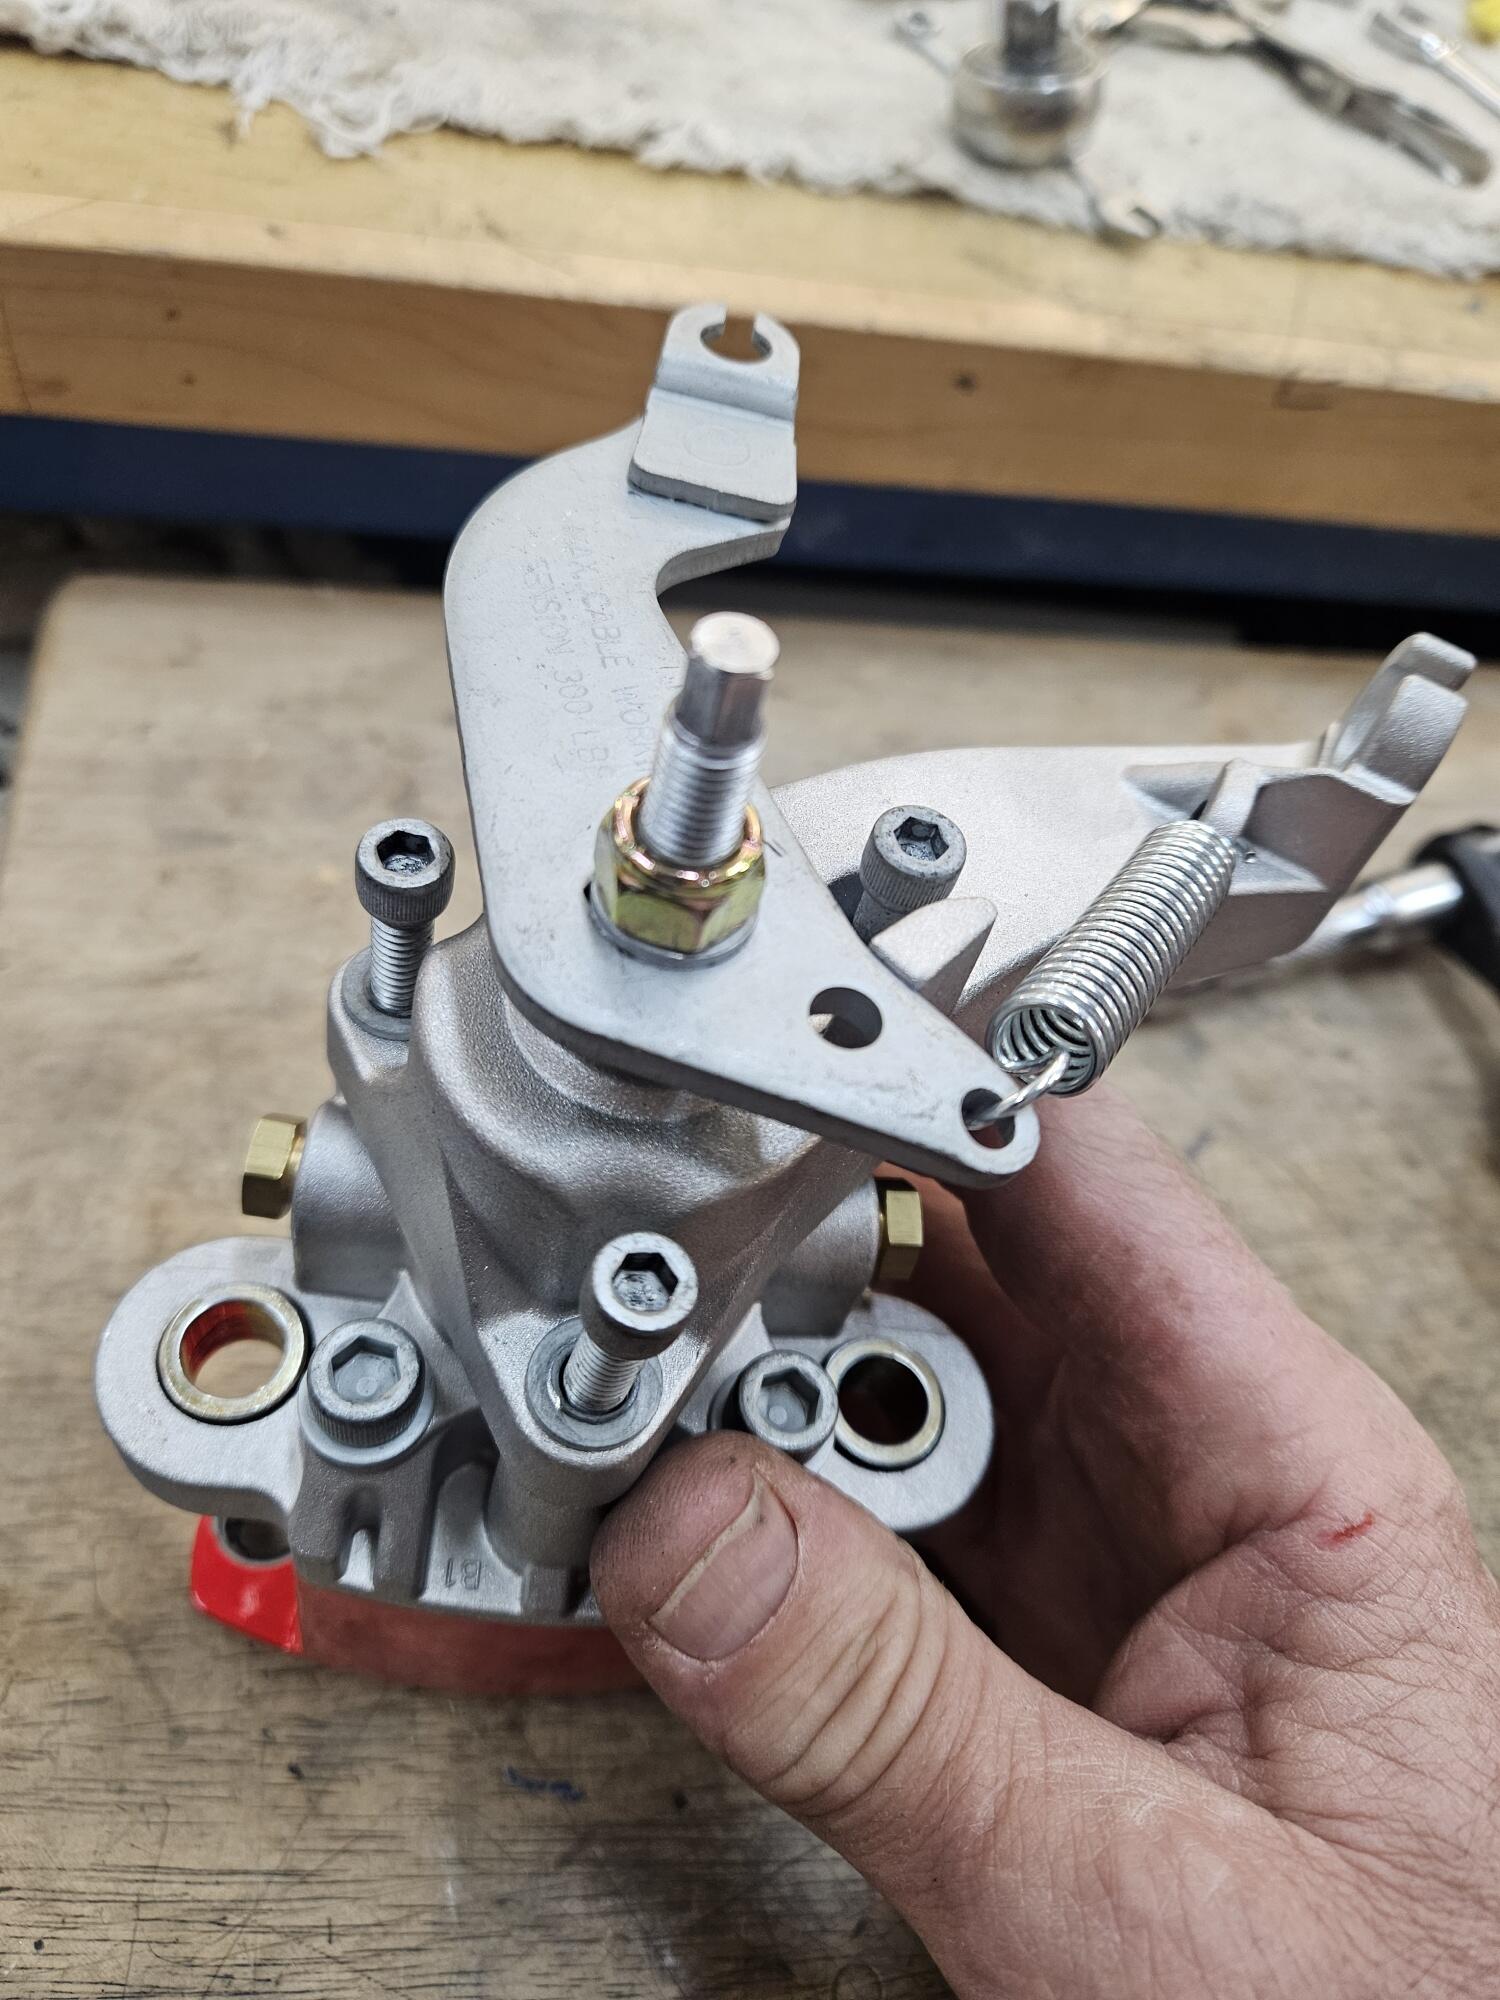
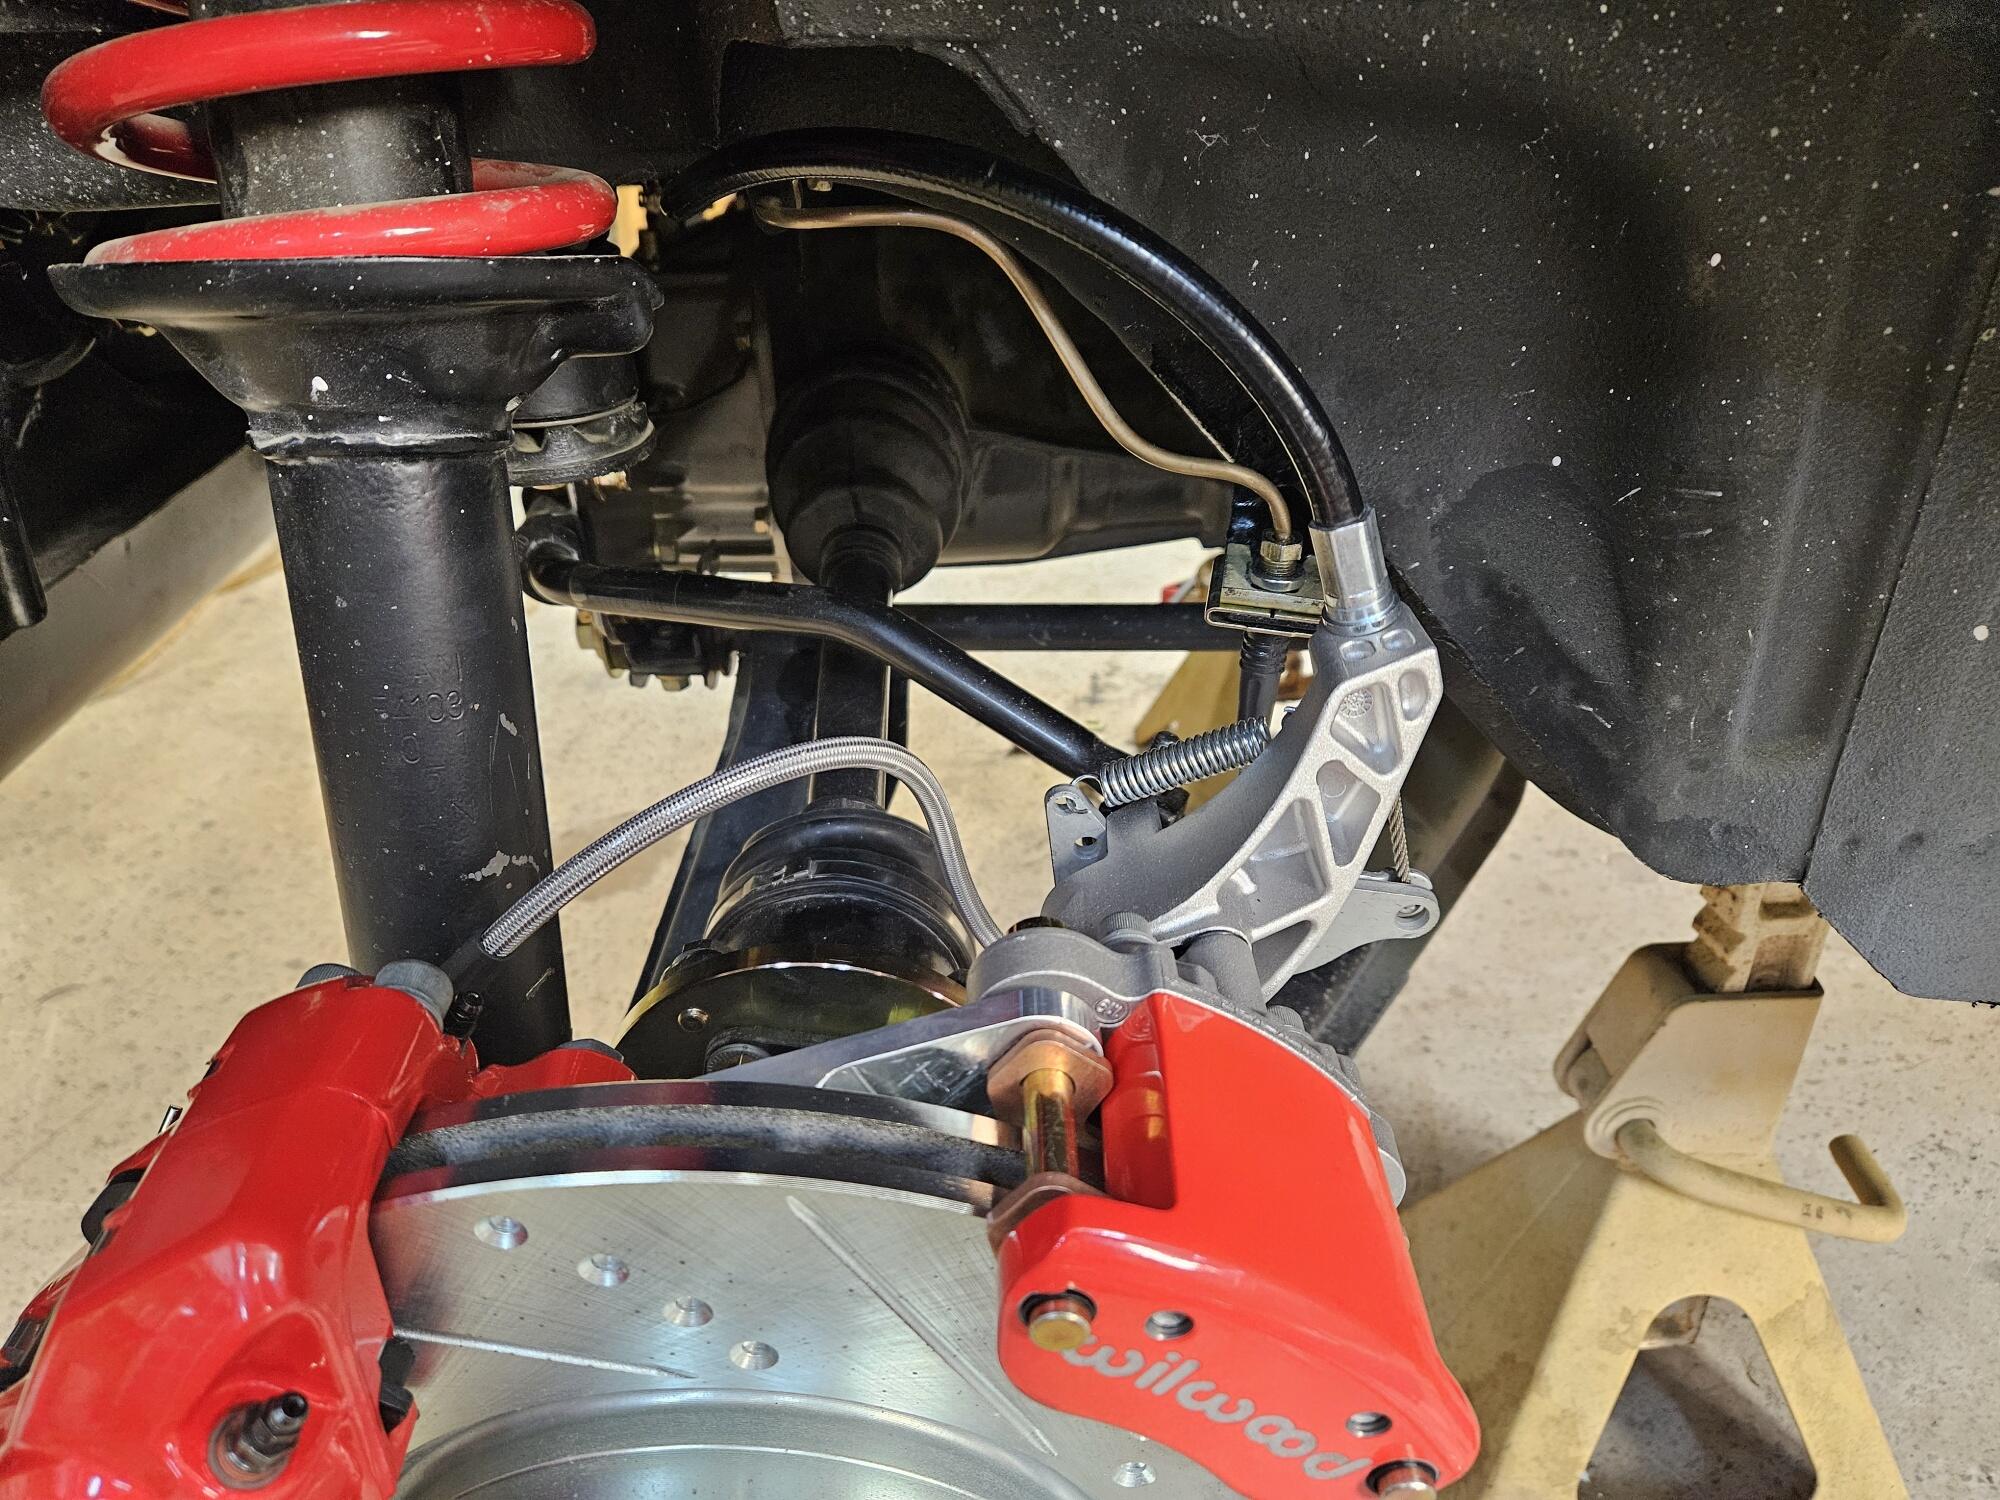
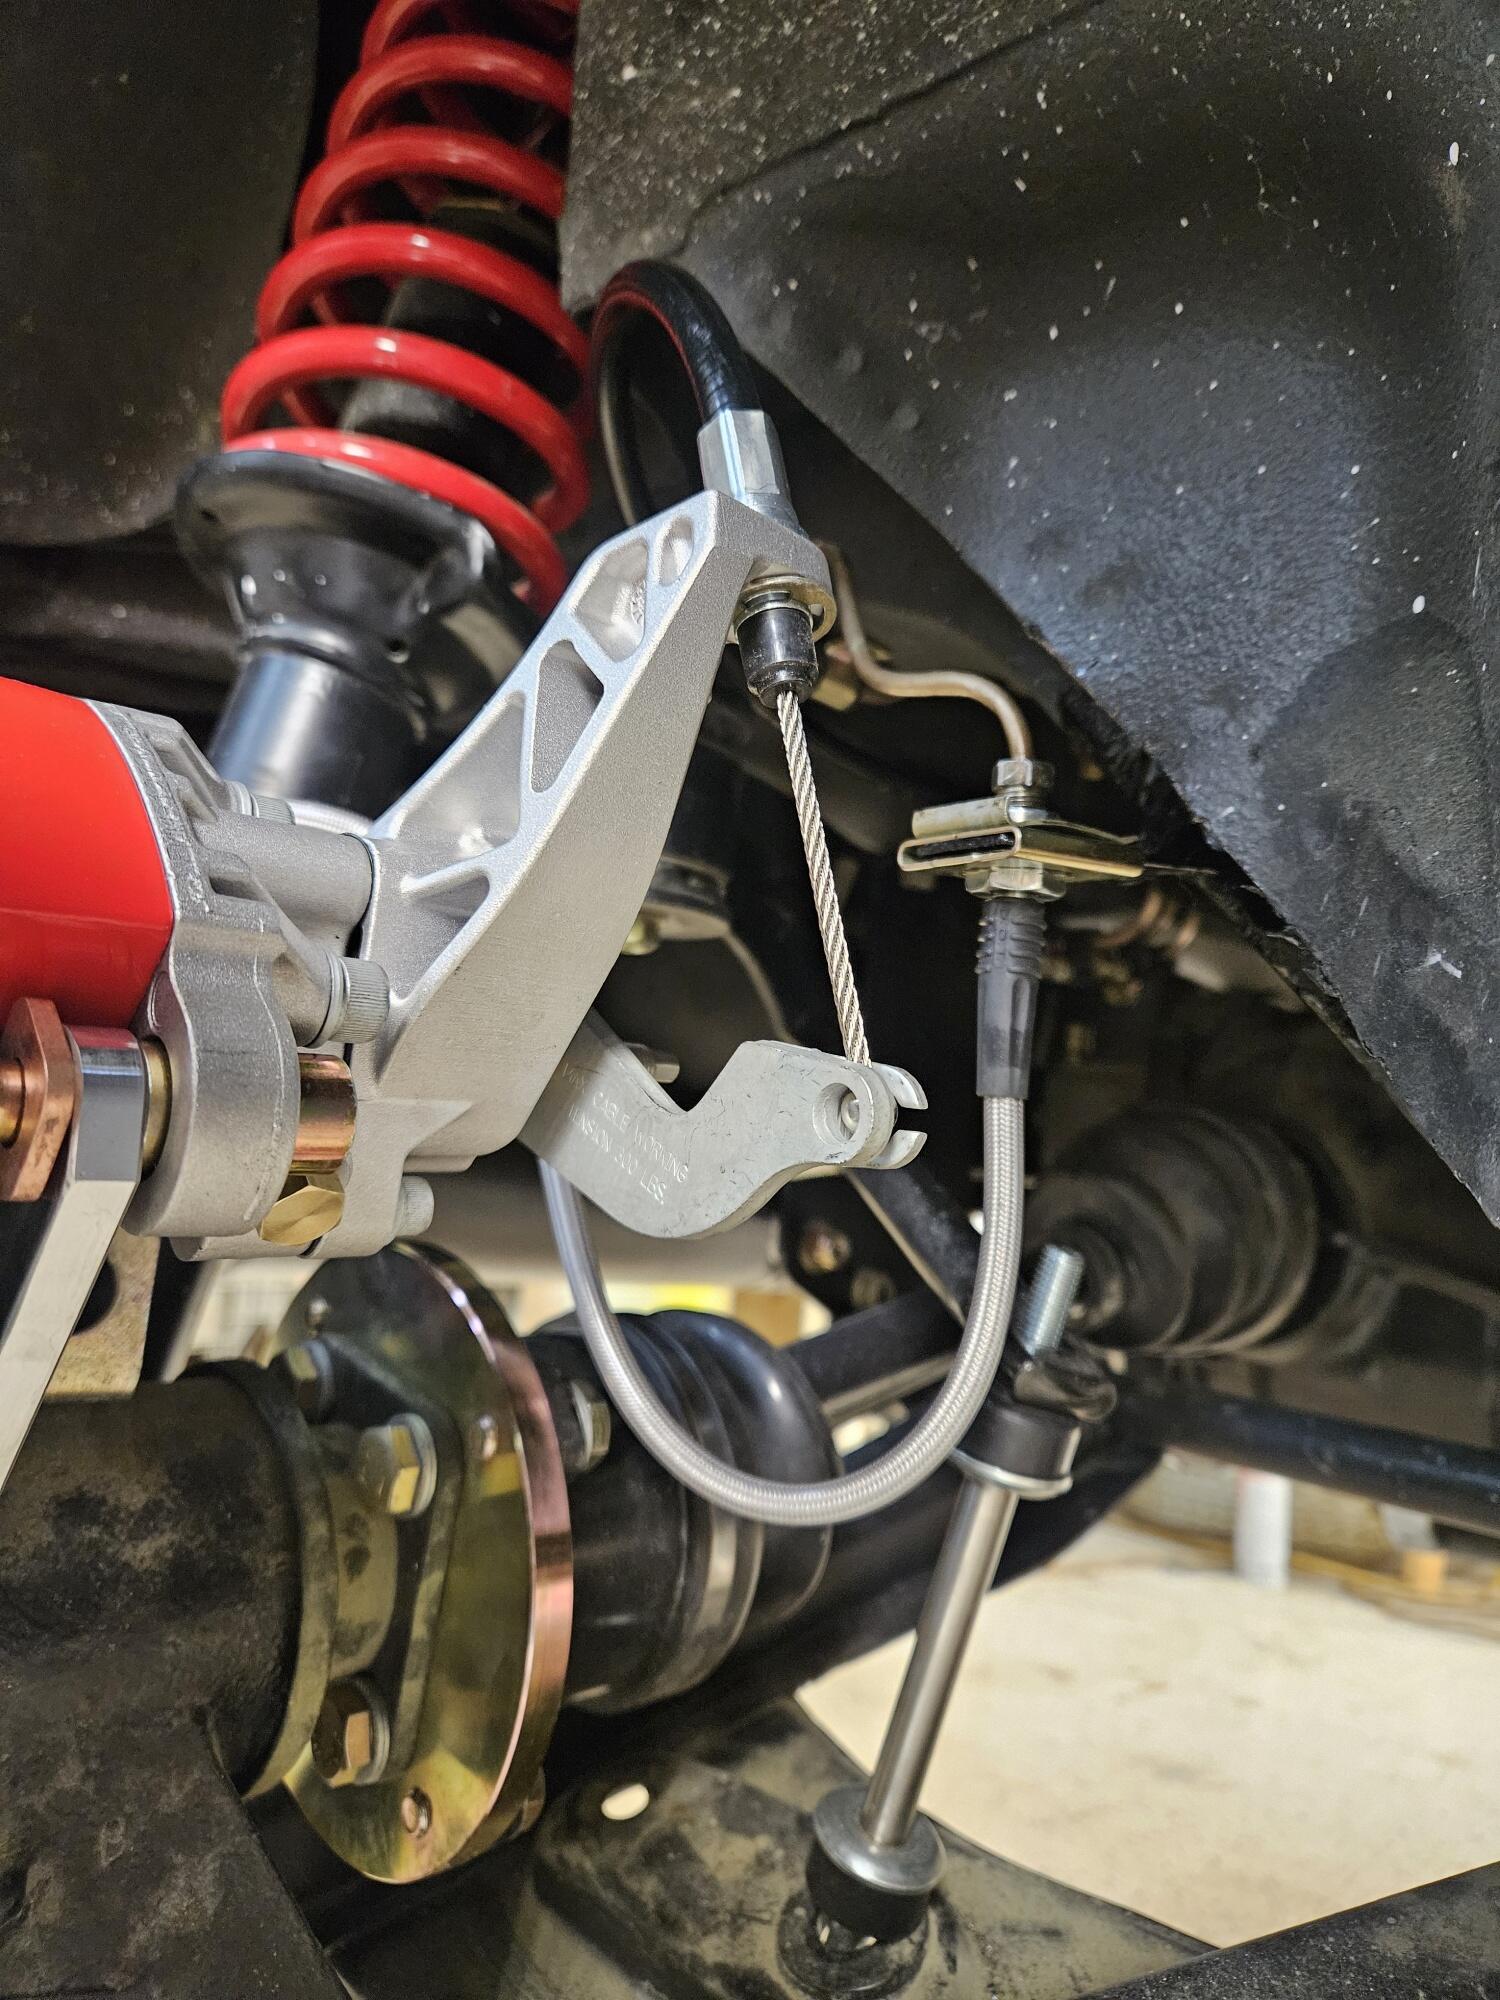
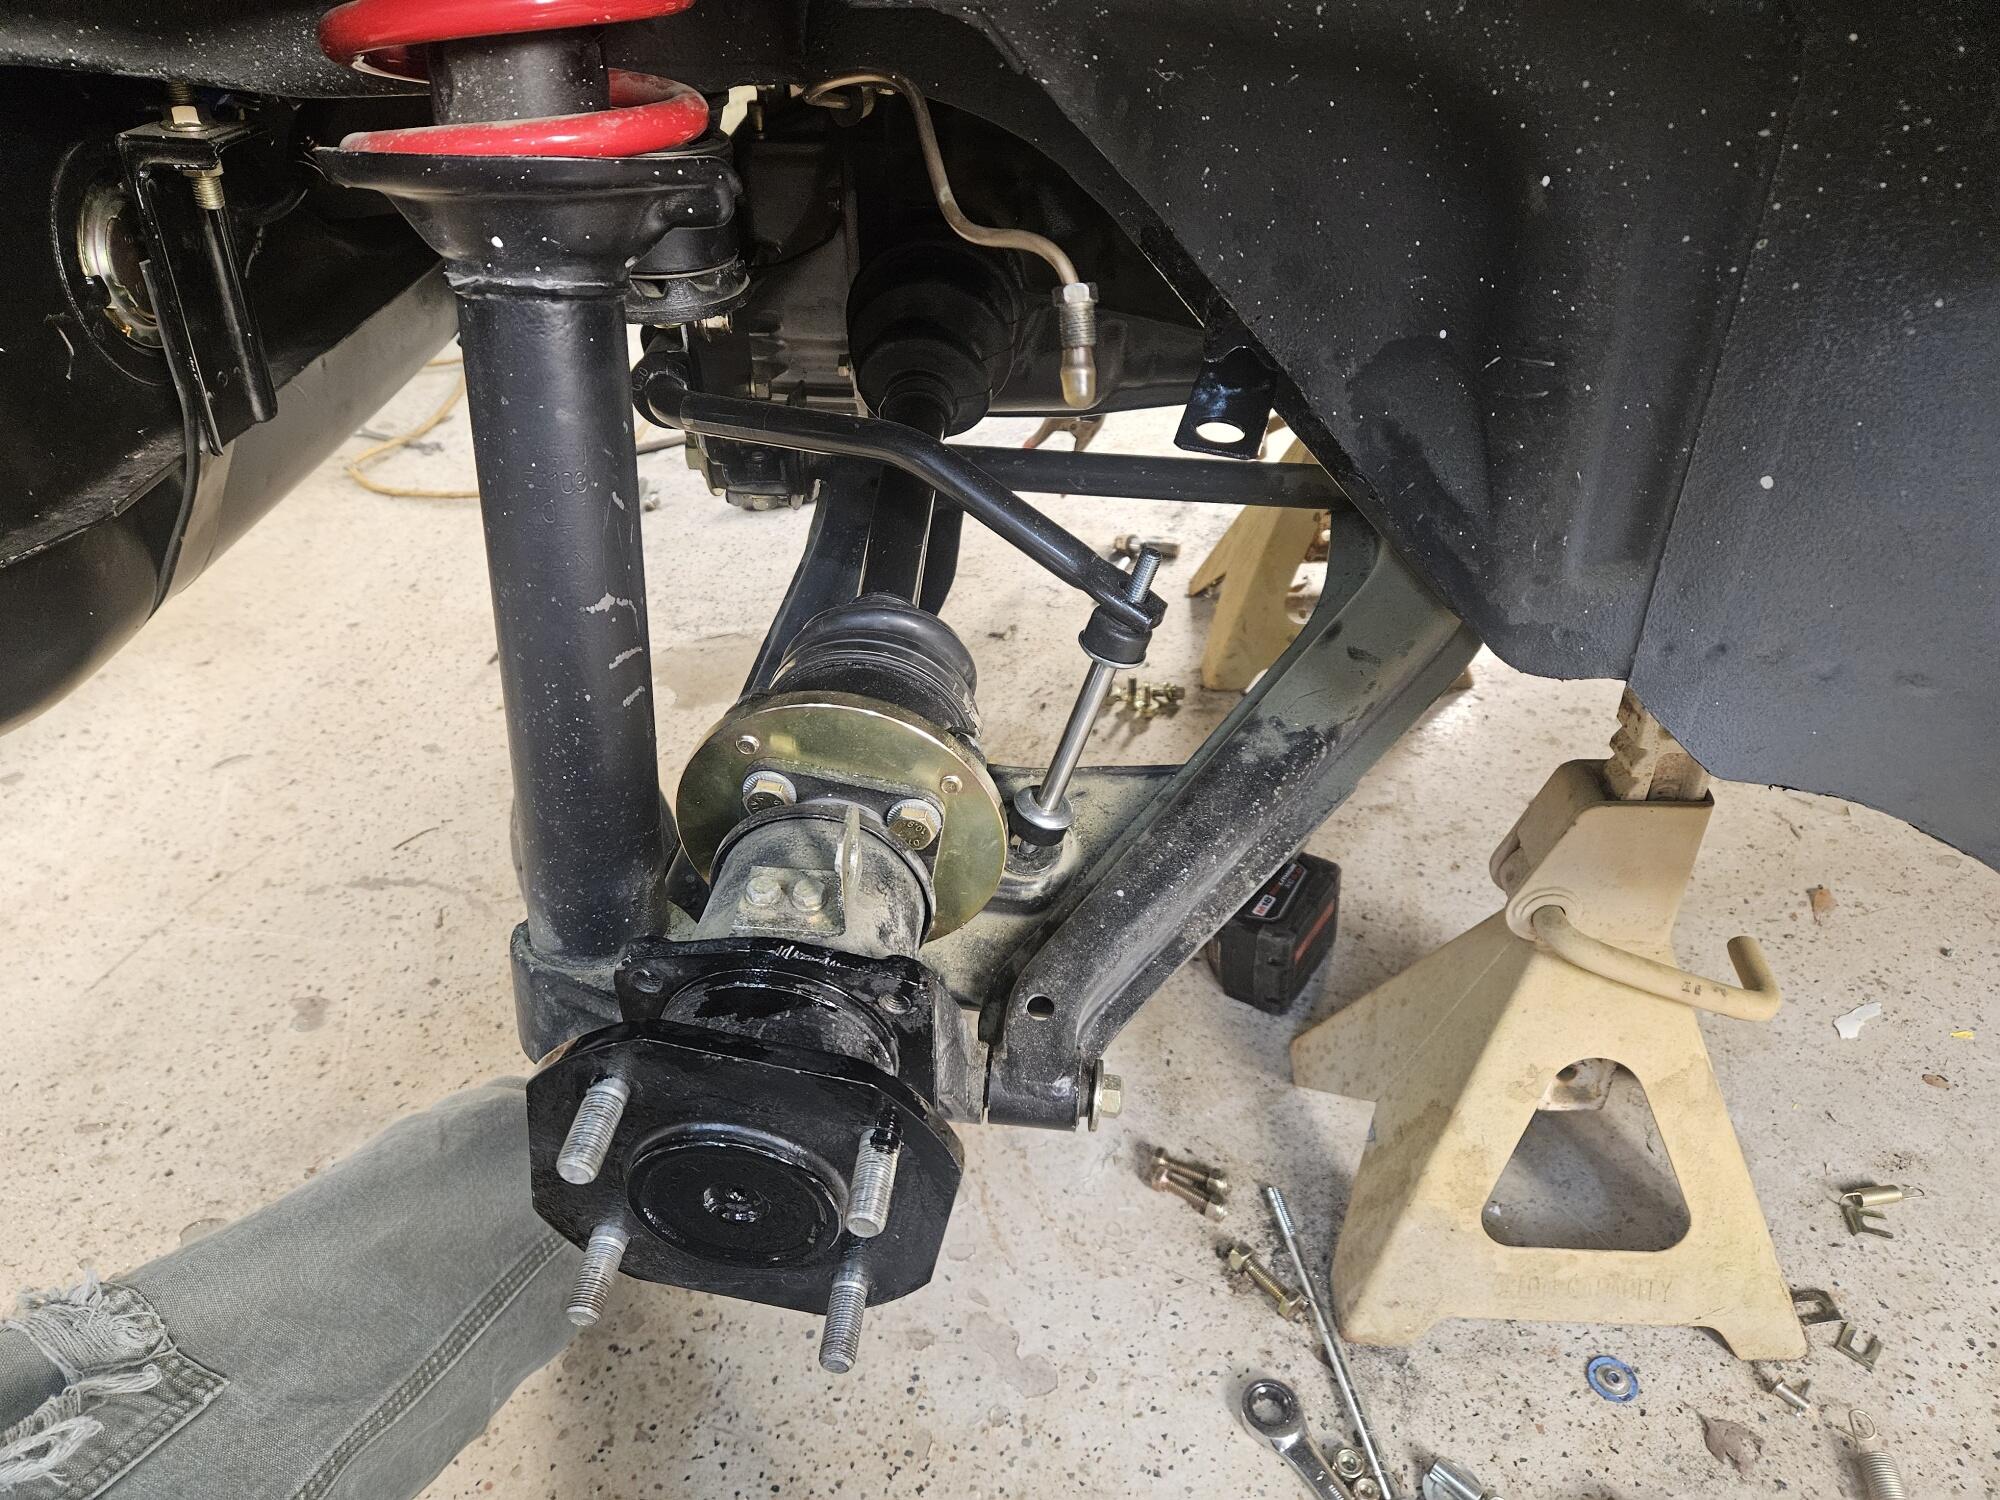
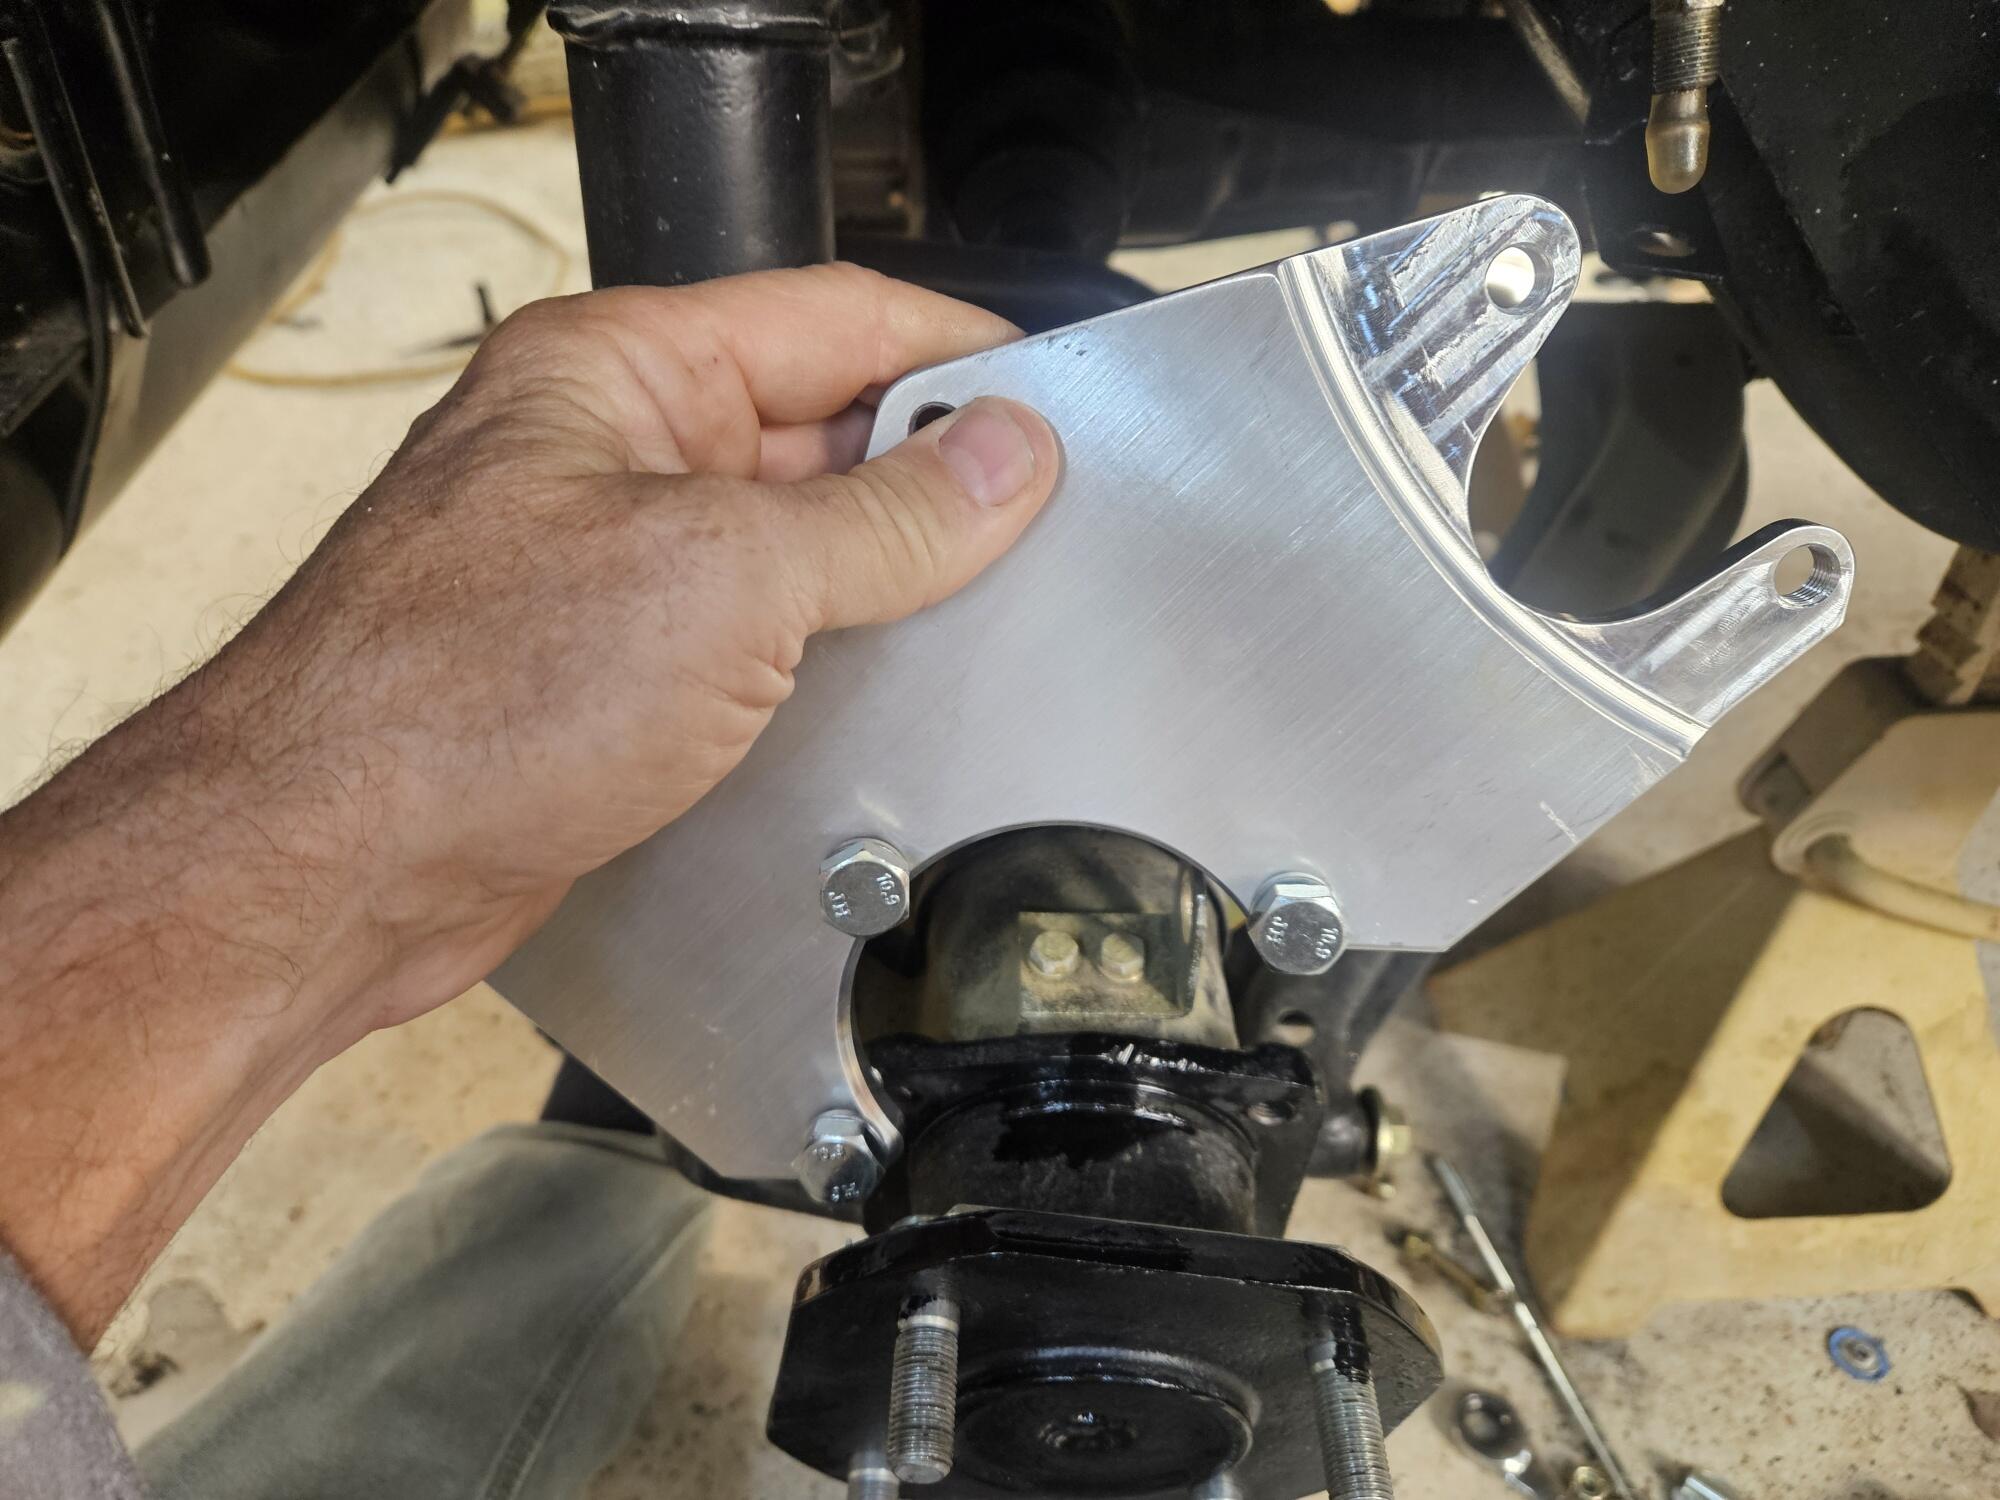
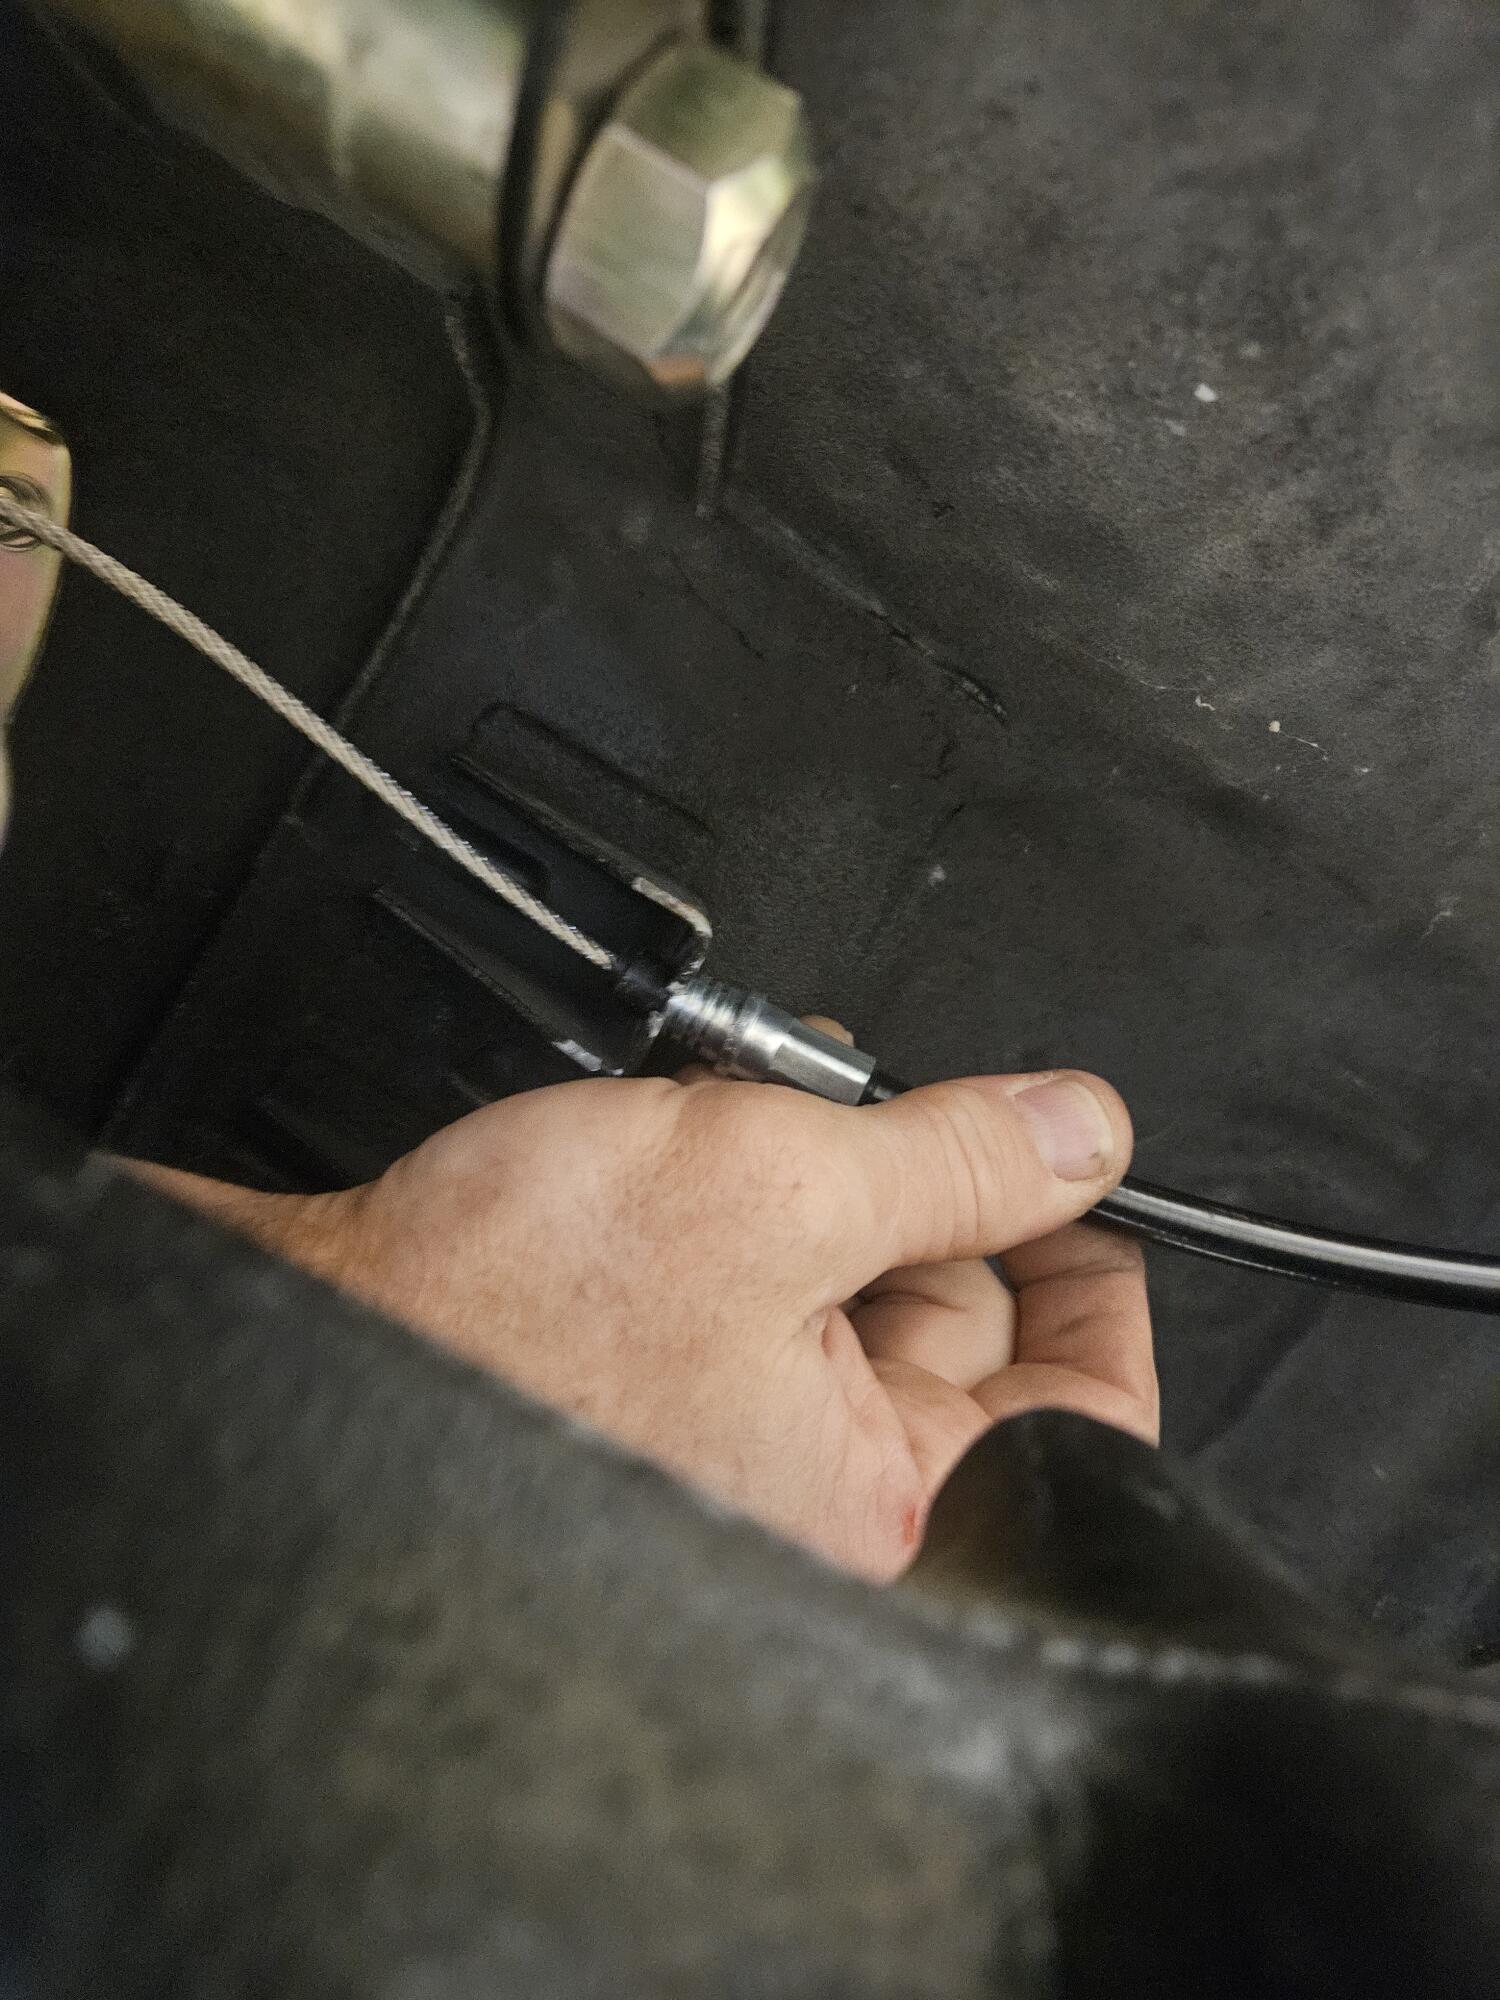
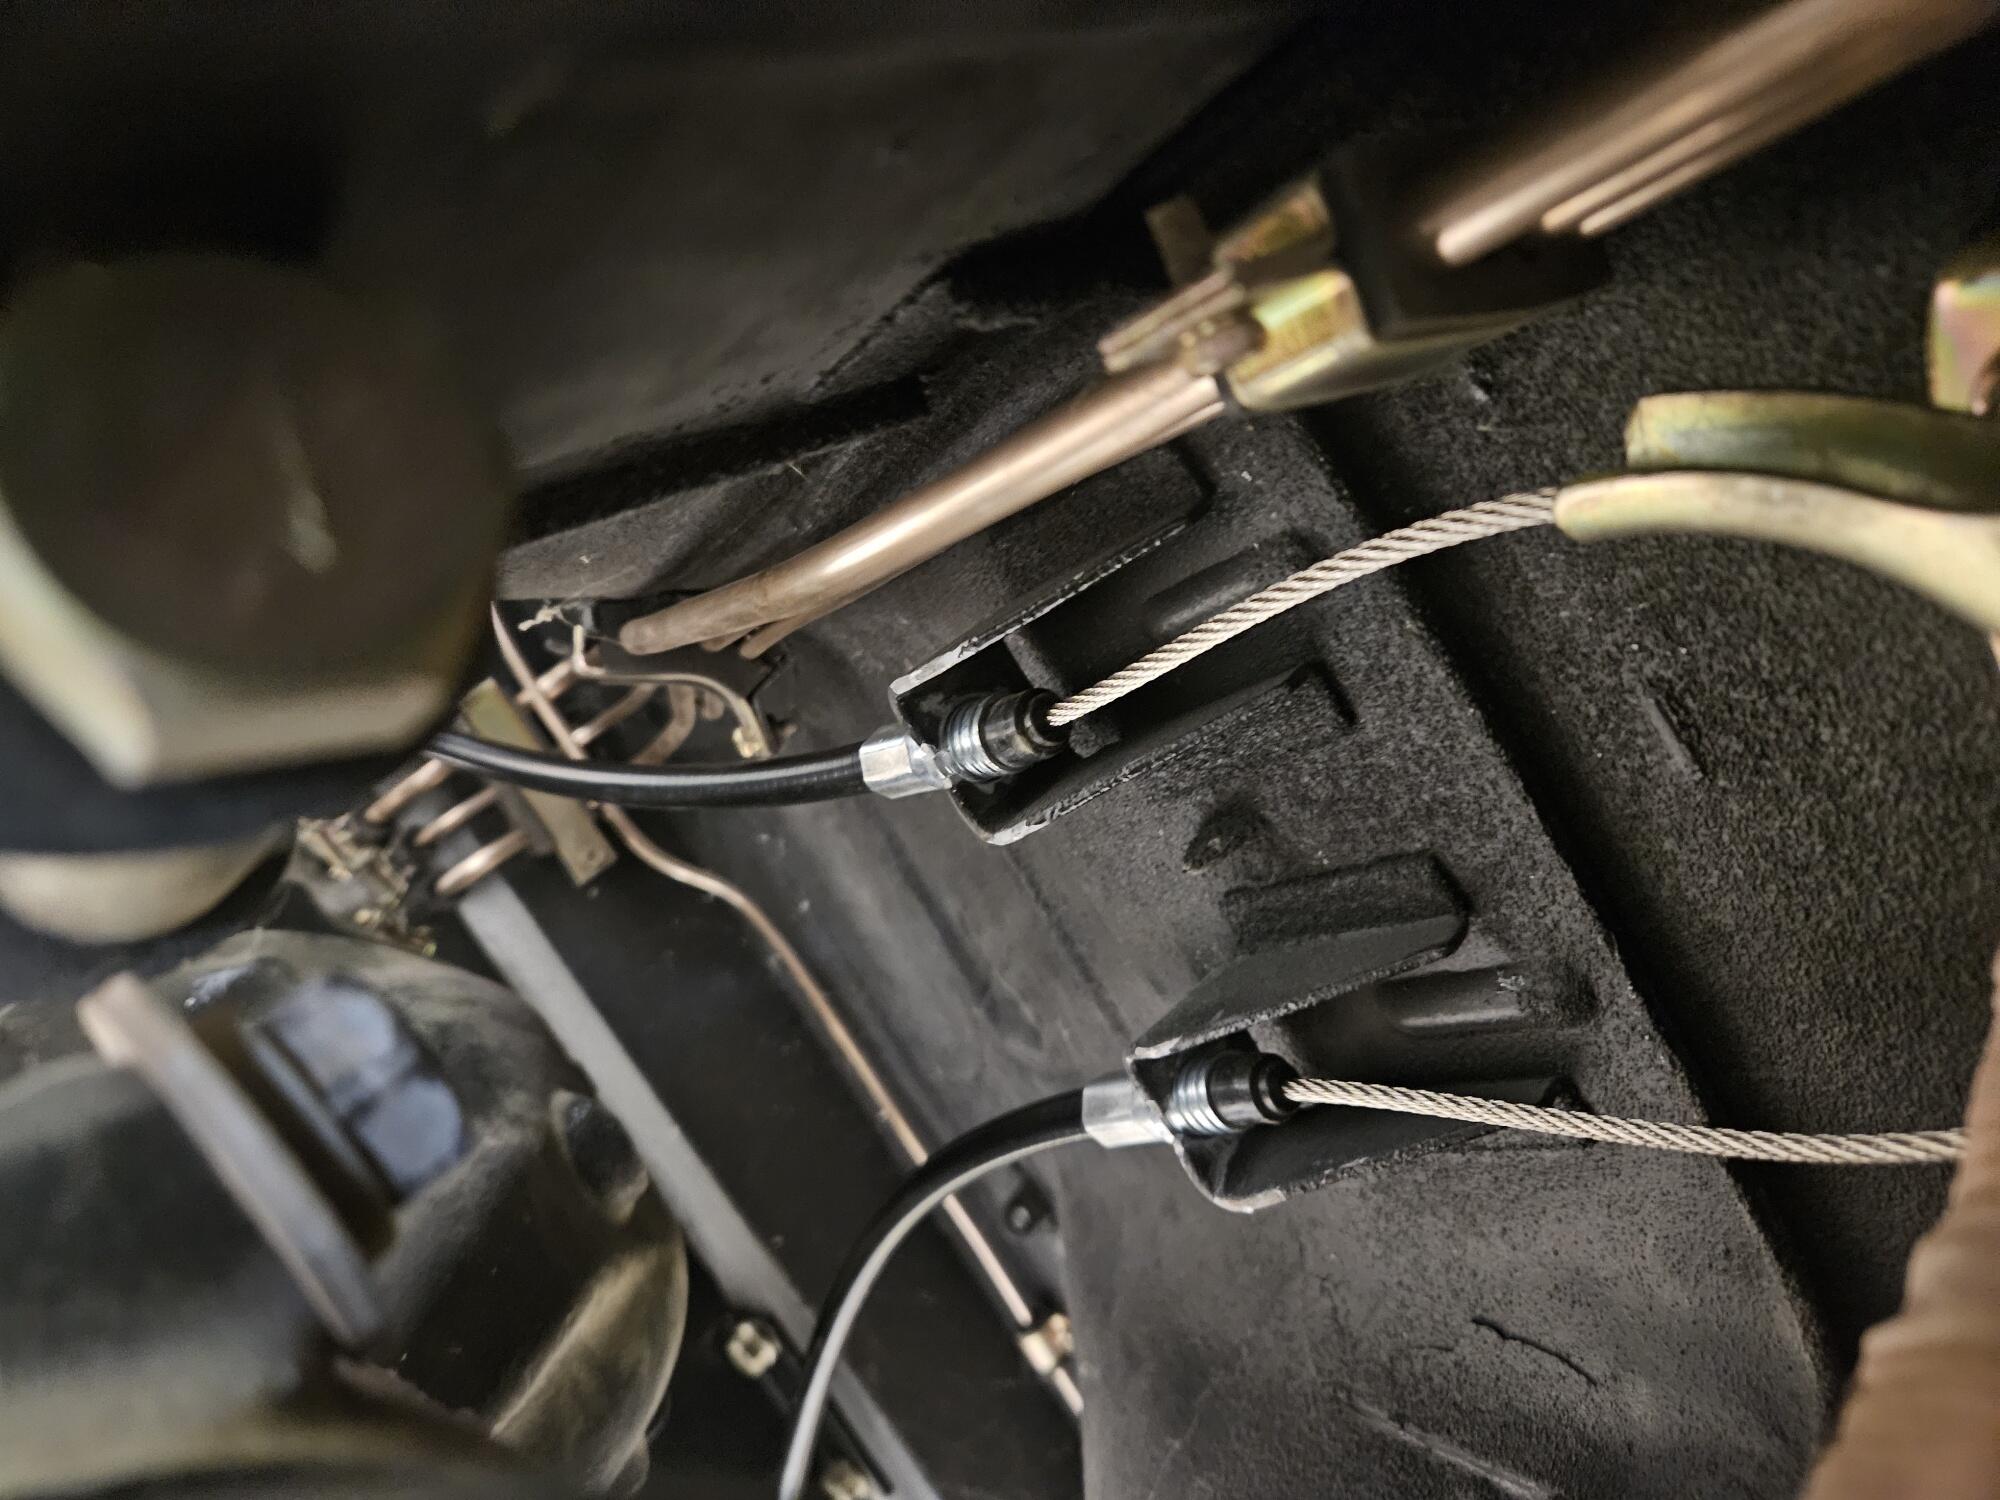
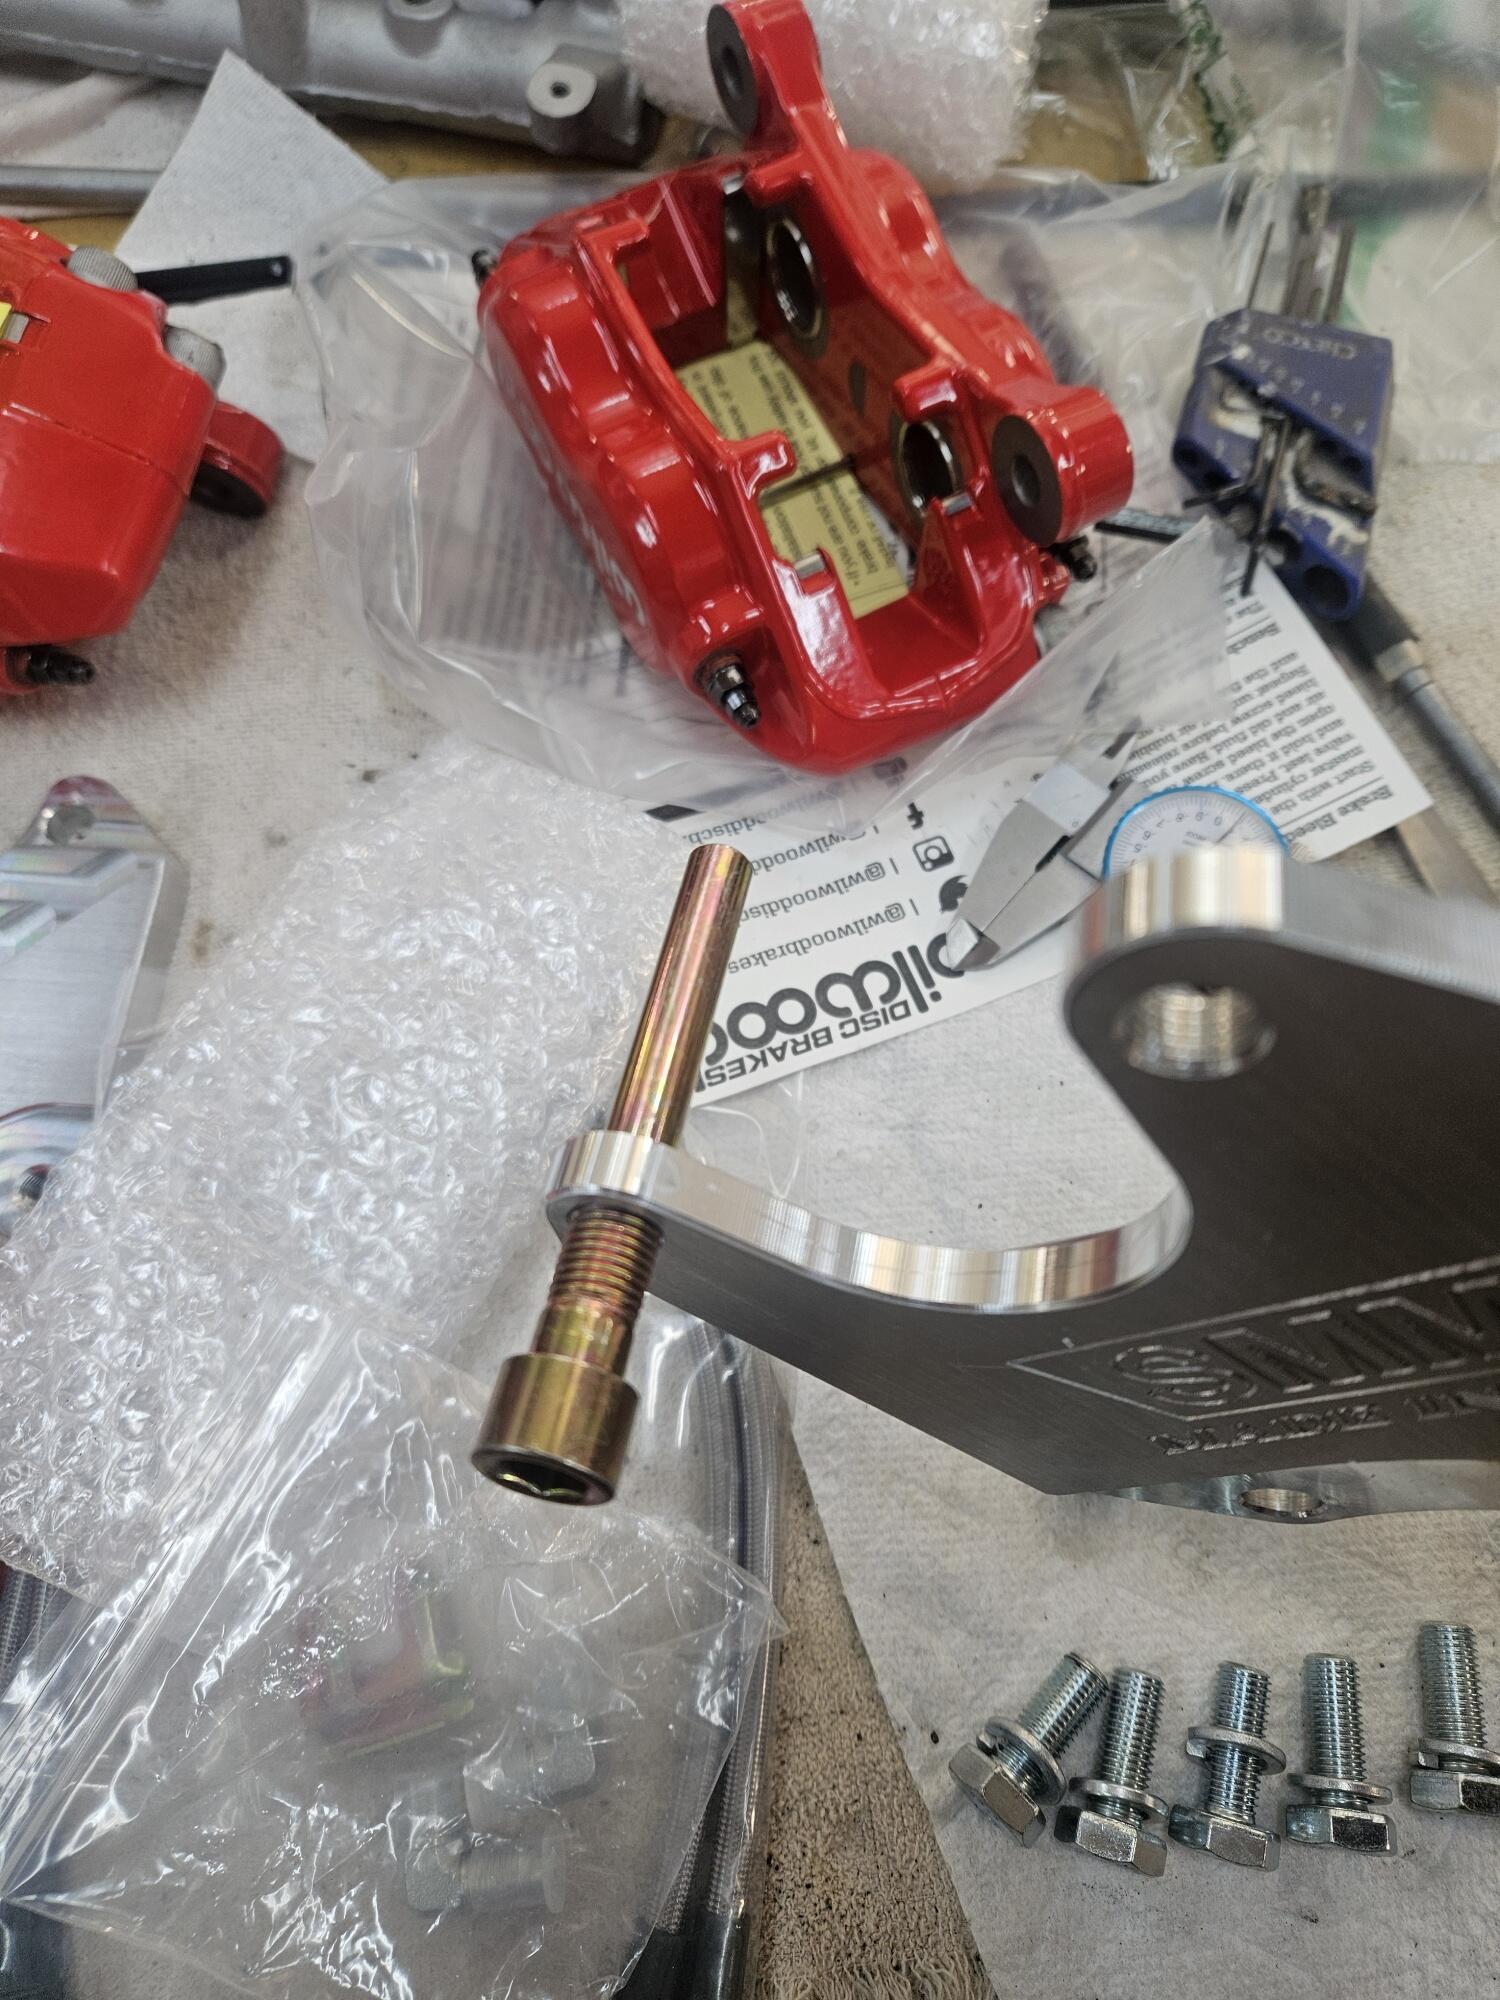
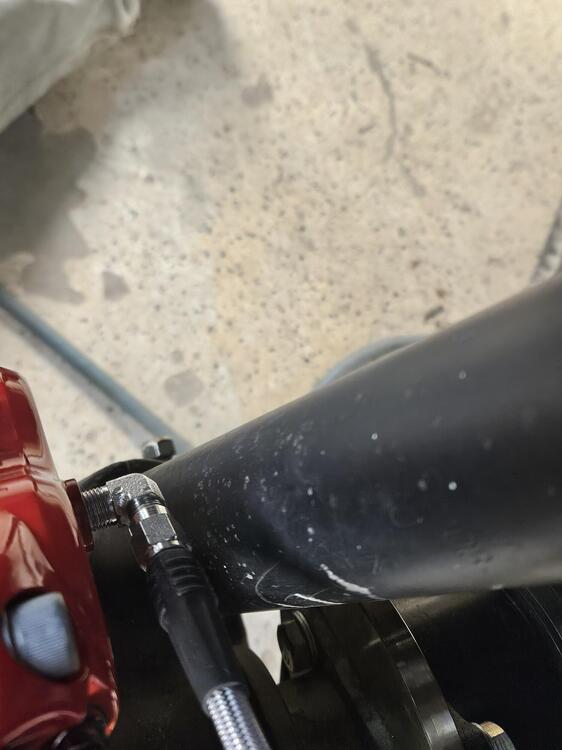
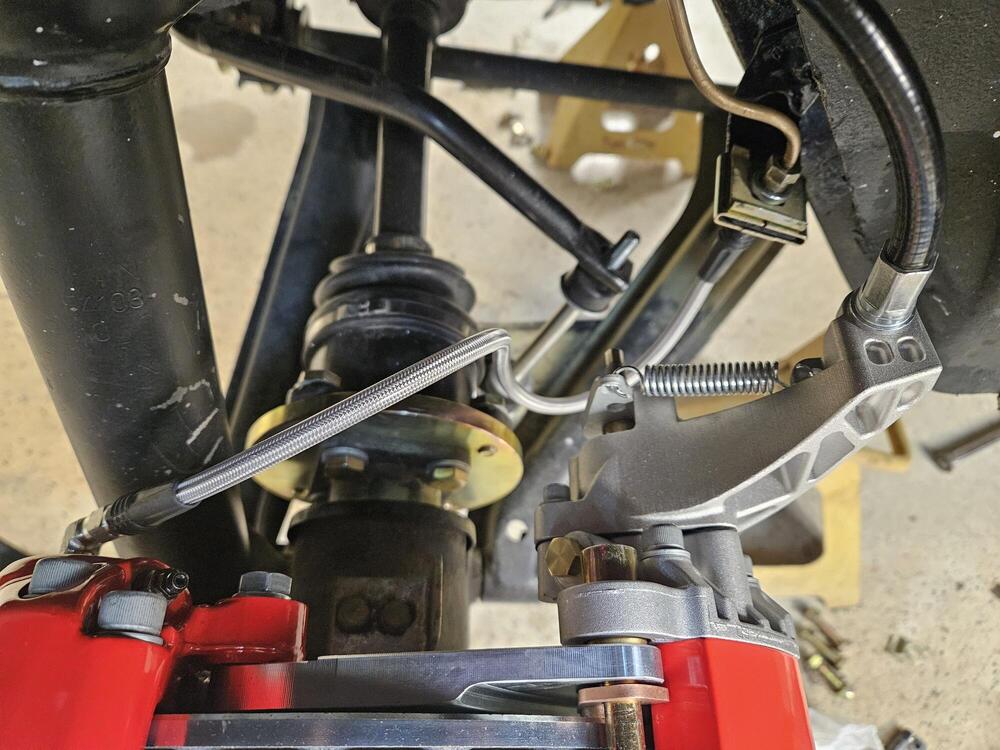
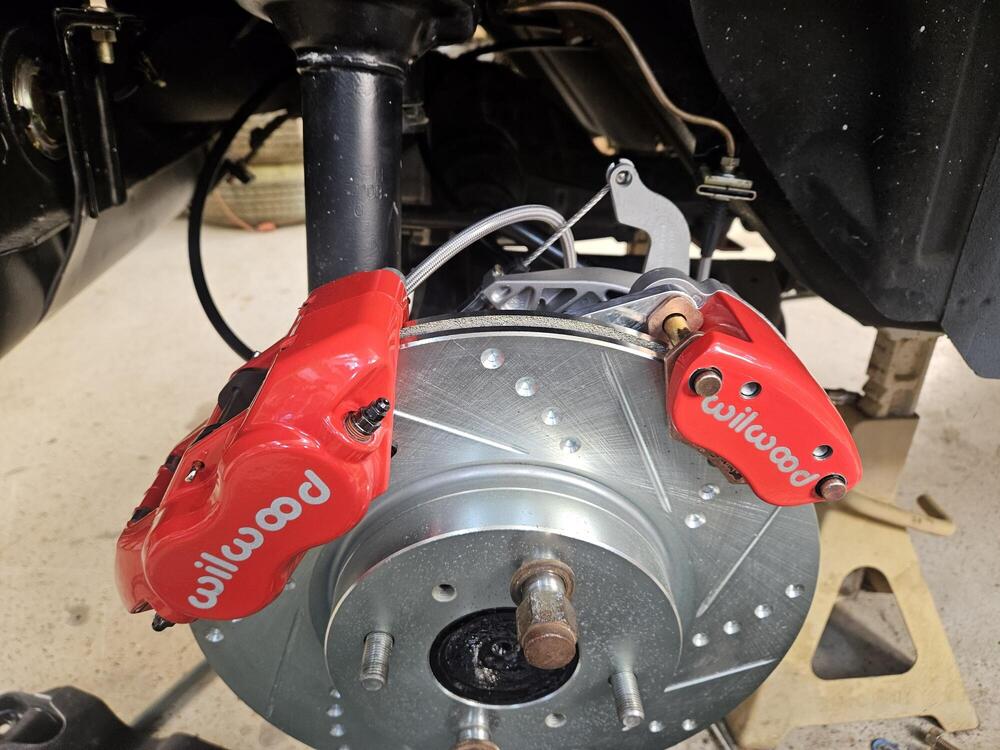
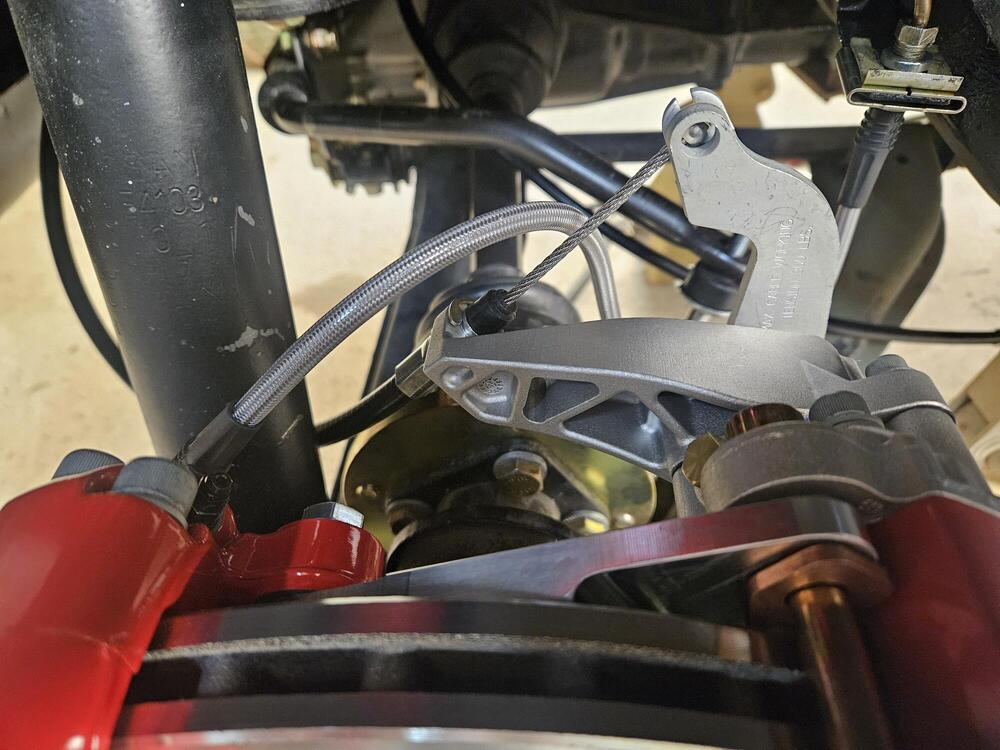
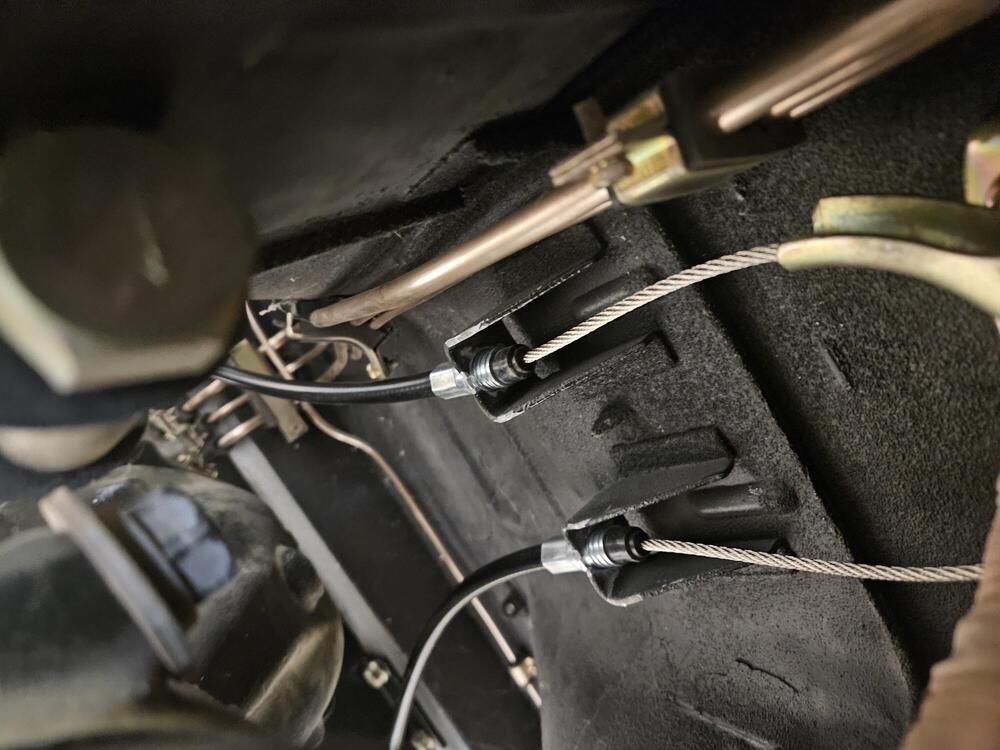
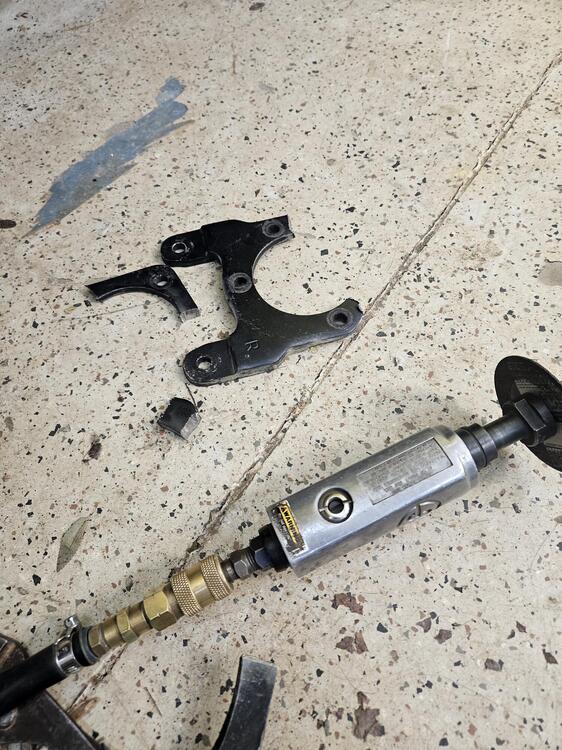
When the caliper is installed, it is very close to the strut. I didn't remember that Wheee had used a very similar setup or I would have cribbed off of what he did. He mentions in his build thread that attaching the lines to the calipers before mounting them would be best because of lack of space. The hardest part of the whole job is finding the right orientation for the parking brakes and routing the cable I started with this orientation But the cable was touching my CV axle adapter plates. It might work with the factory halfshafts... So the MC4 is indexable at 120 degree intervals If you loosen these three screws the back can be turned to another position. Be careful to get the thin rubber seal back in the right place before reattaching it. So each caliper had 3 position and the calipers are handed. So there are six possible orientations available. So then I tried this orientation I liked it pretty well until I realized this is at full droop and when the suspension gets loaded the cable is going to get pinched by the underside of the car. The cable really needs to be more horizontal... So then I set it up like this... The strut is minimally in the way, but it seems to work and disengage properly. I believe this is the same orientation that Wheee used. It is easier to get the cable into the caliper first before mounting it to the adapter plate. I am going to work on some brake line brackets to make sure the hydraulic line doesn't rub on anything. I crossed the cables under the car with the left feeding the right side, and the right feeding the left. I ran them above the differential and through the mustache bar to loop around from the rear. Hope this helps...


-
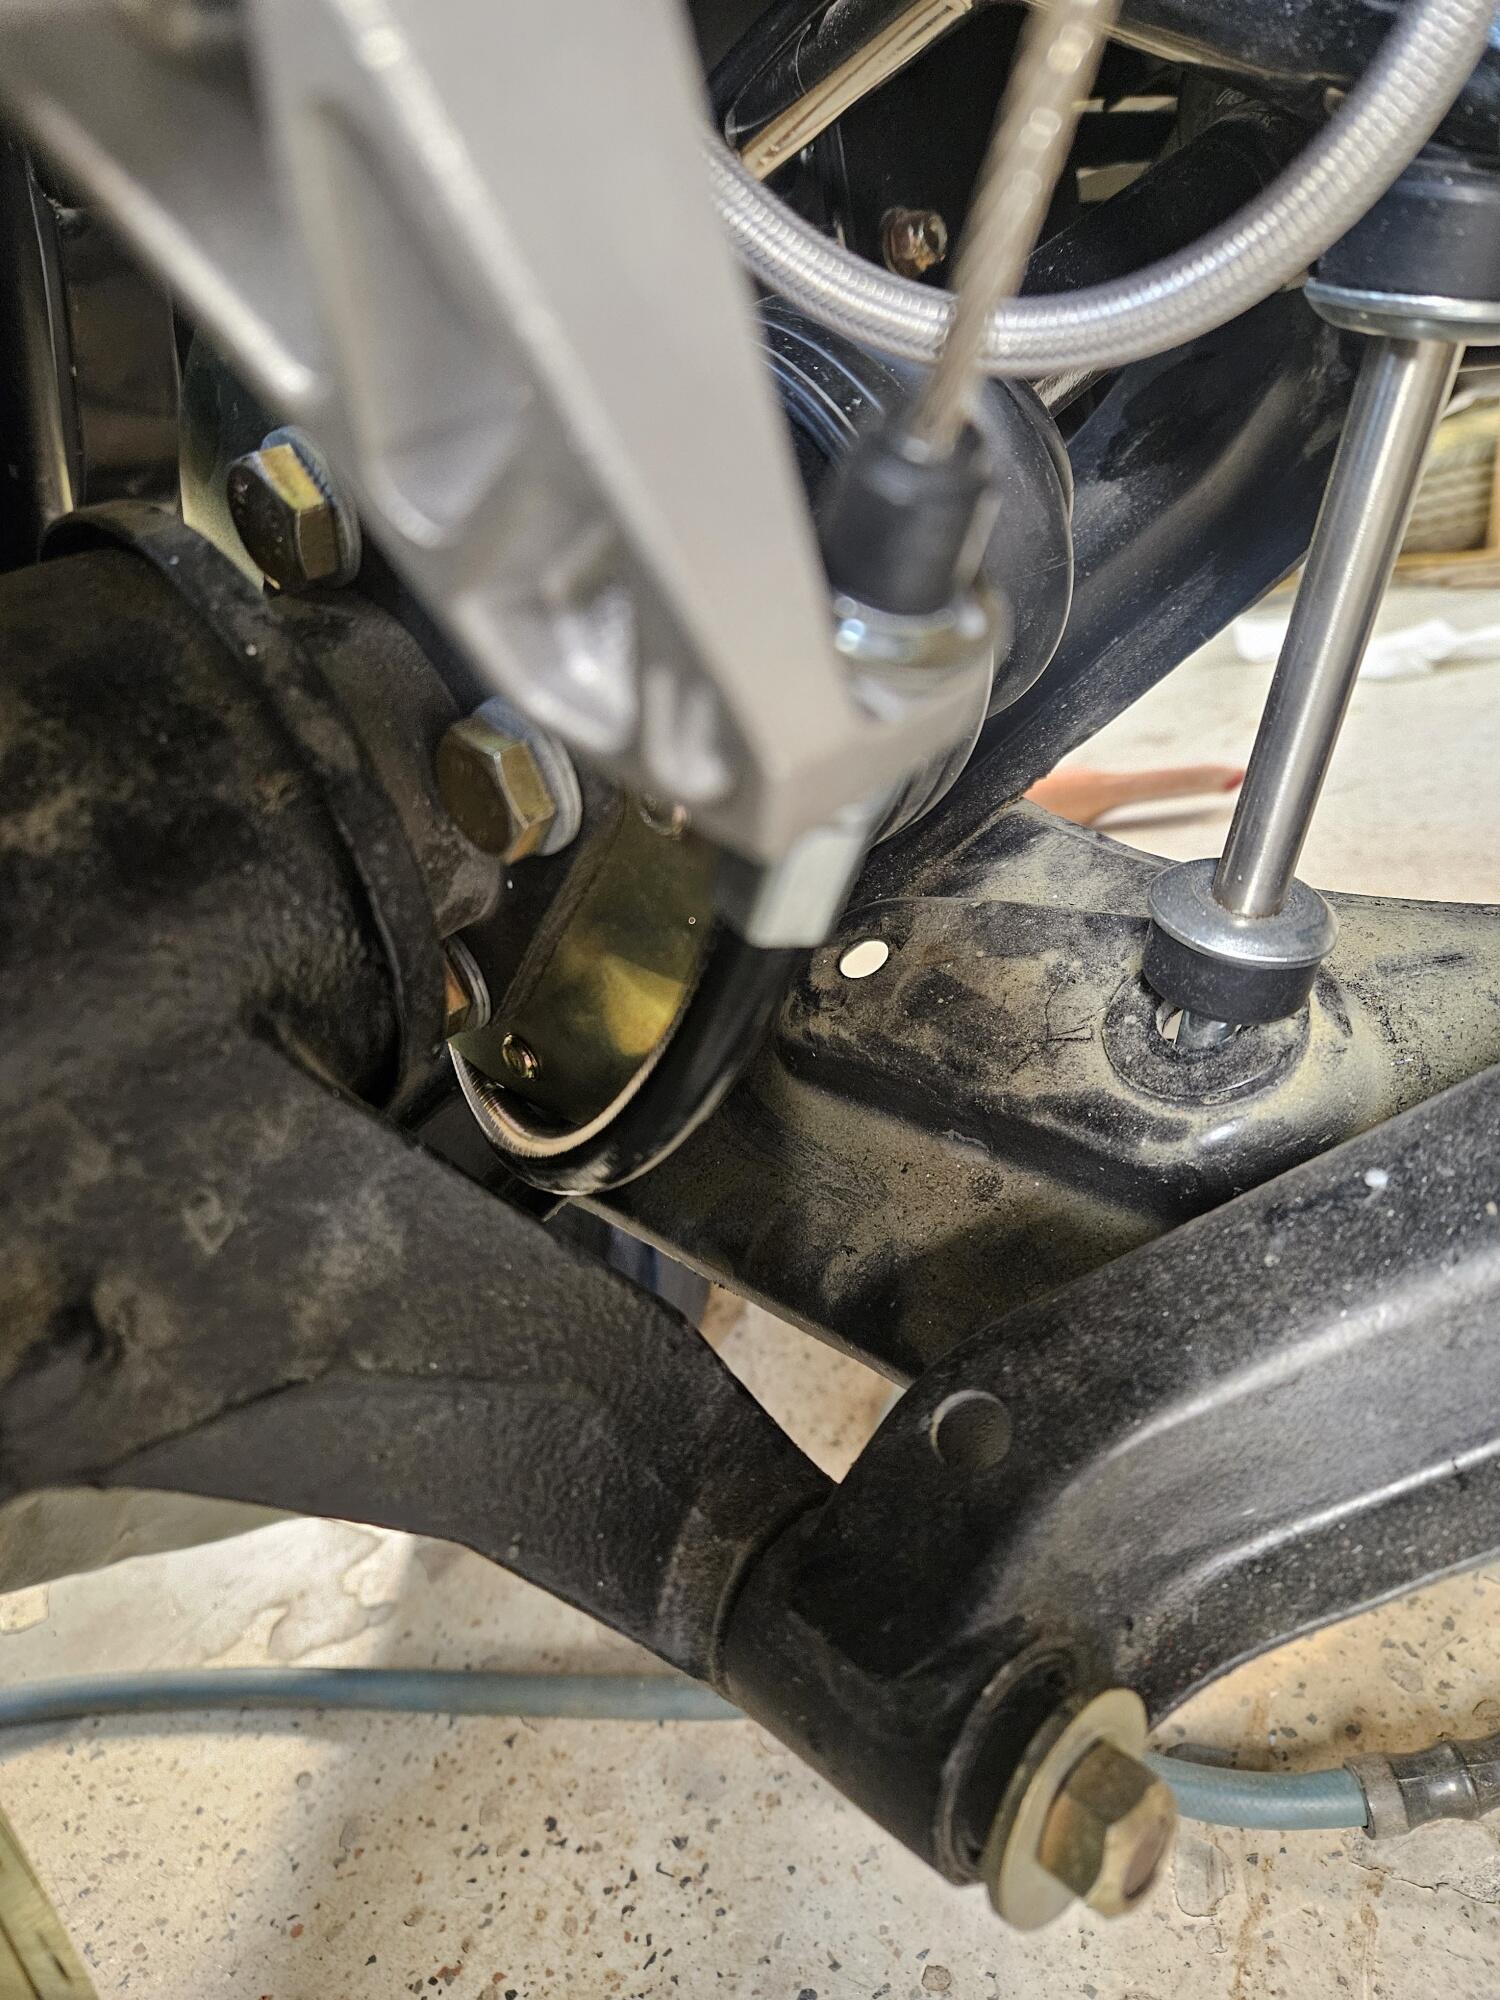
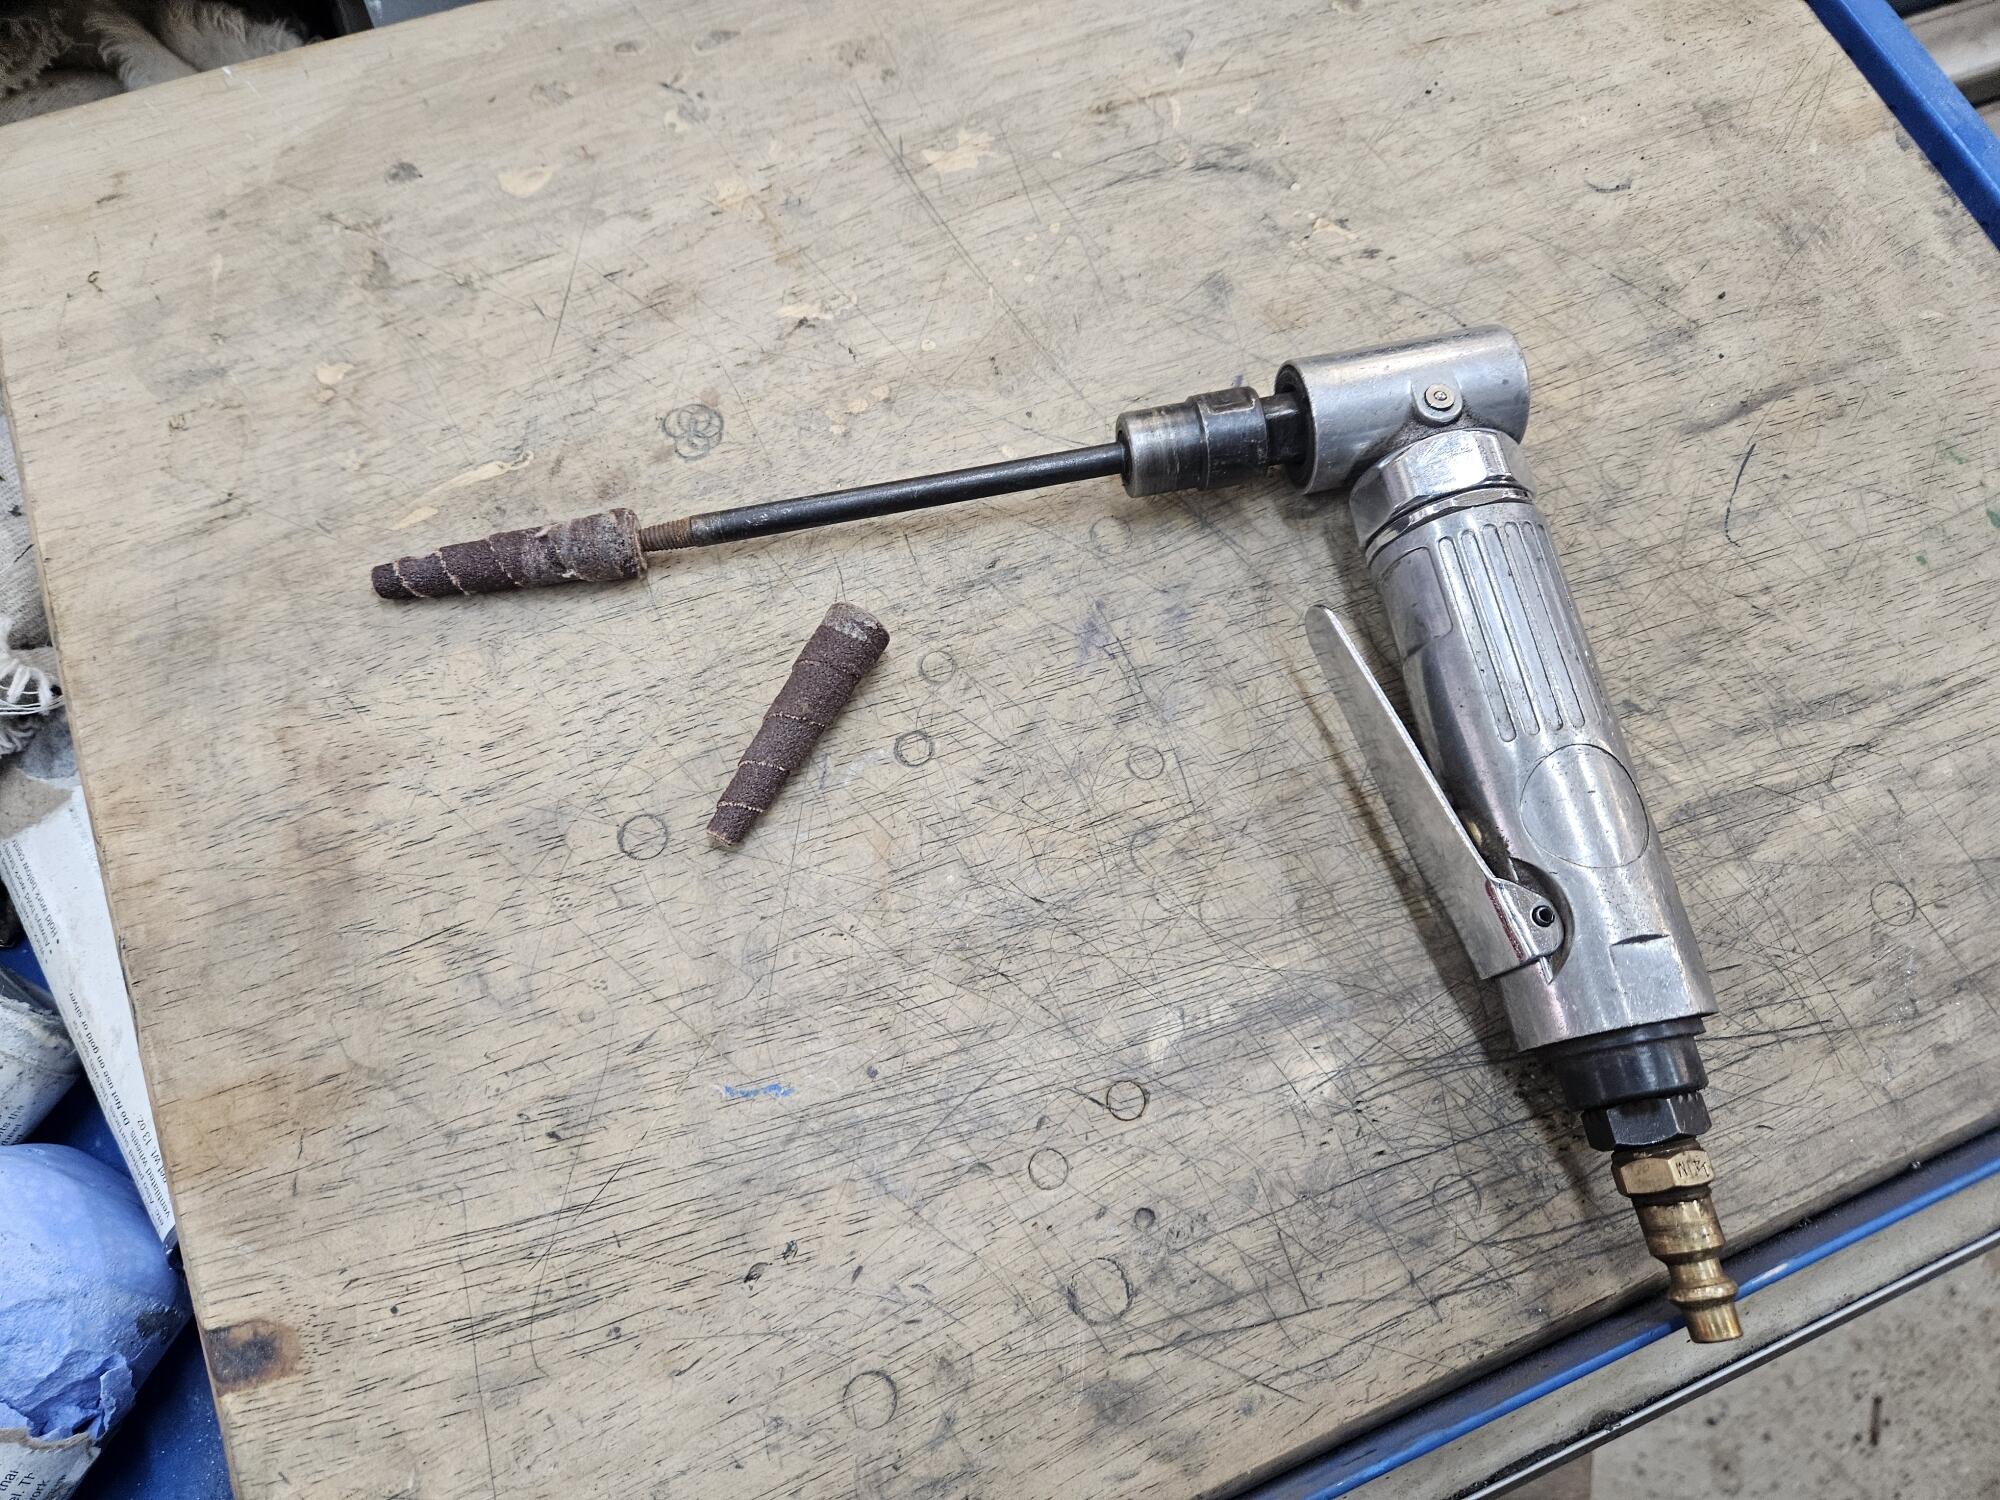
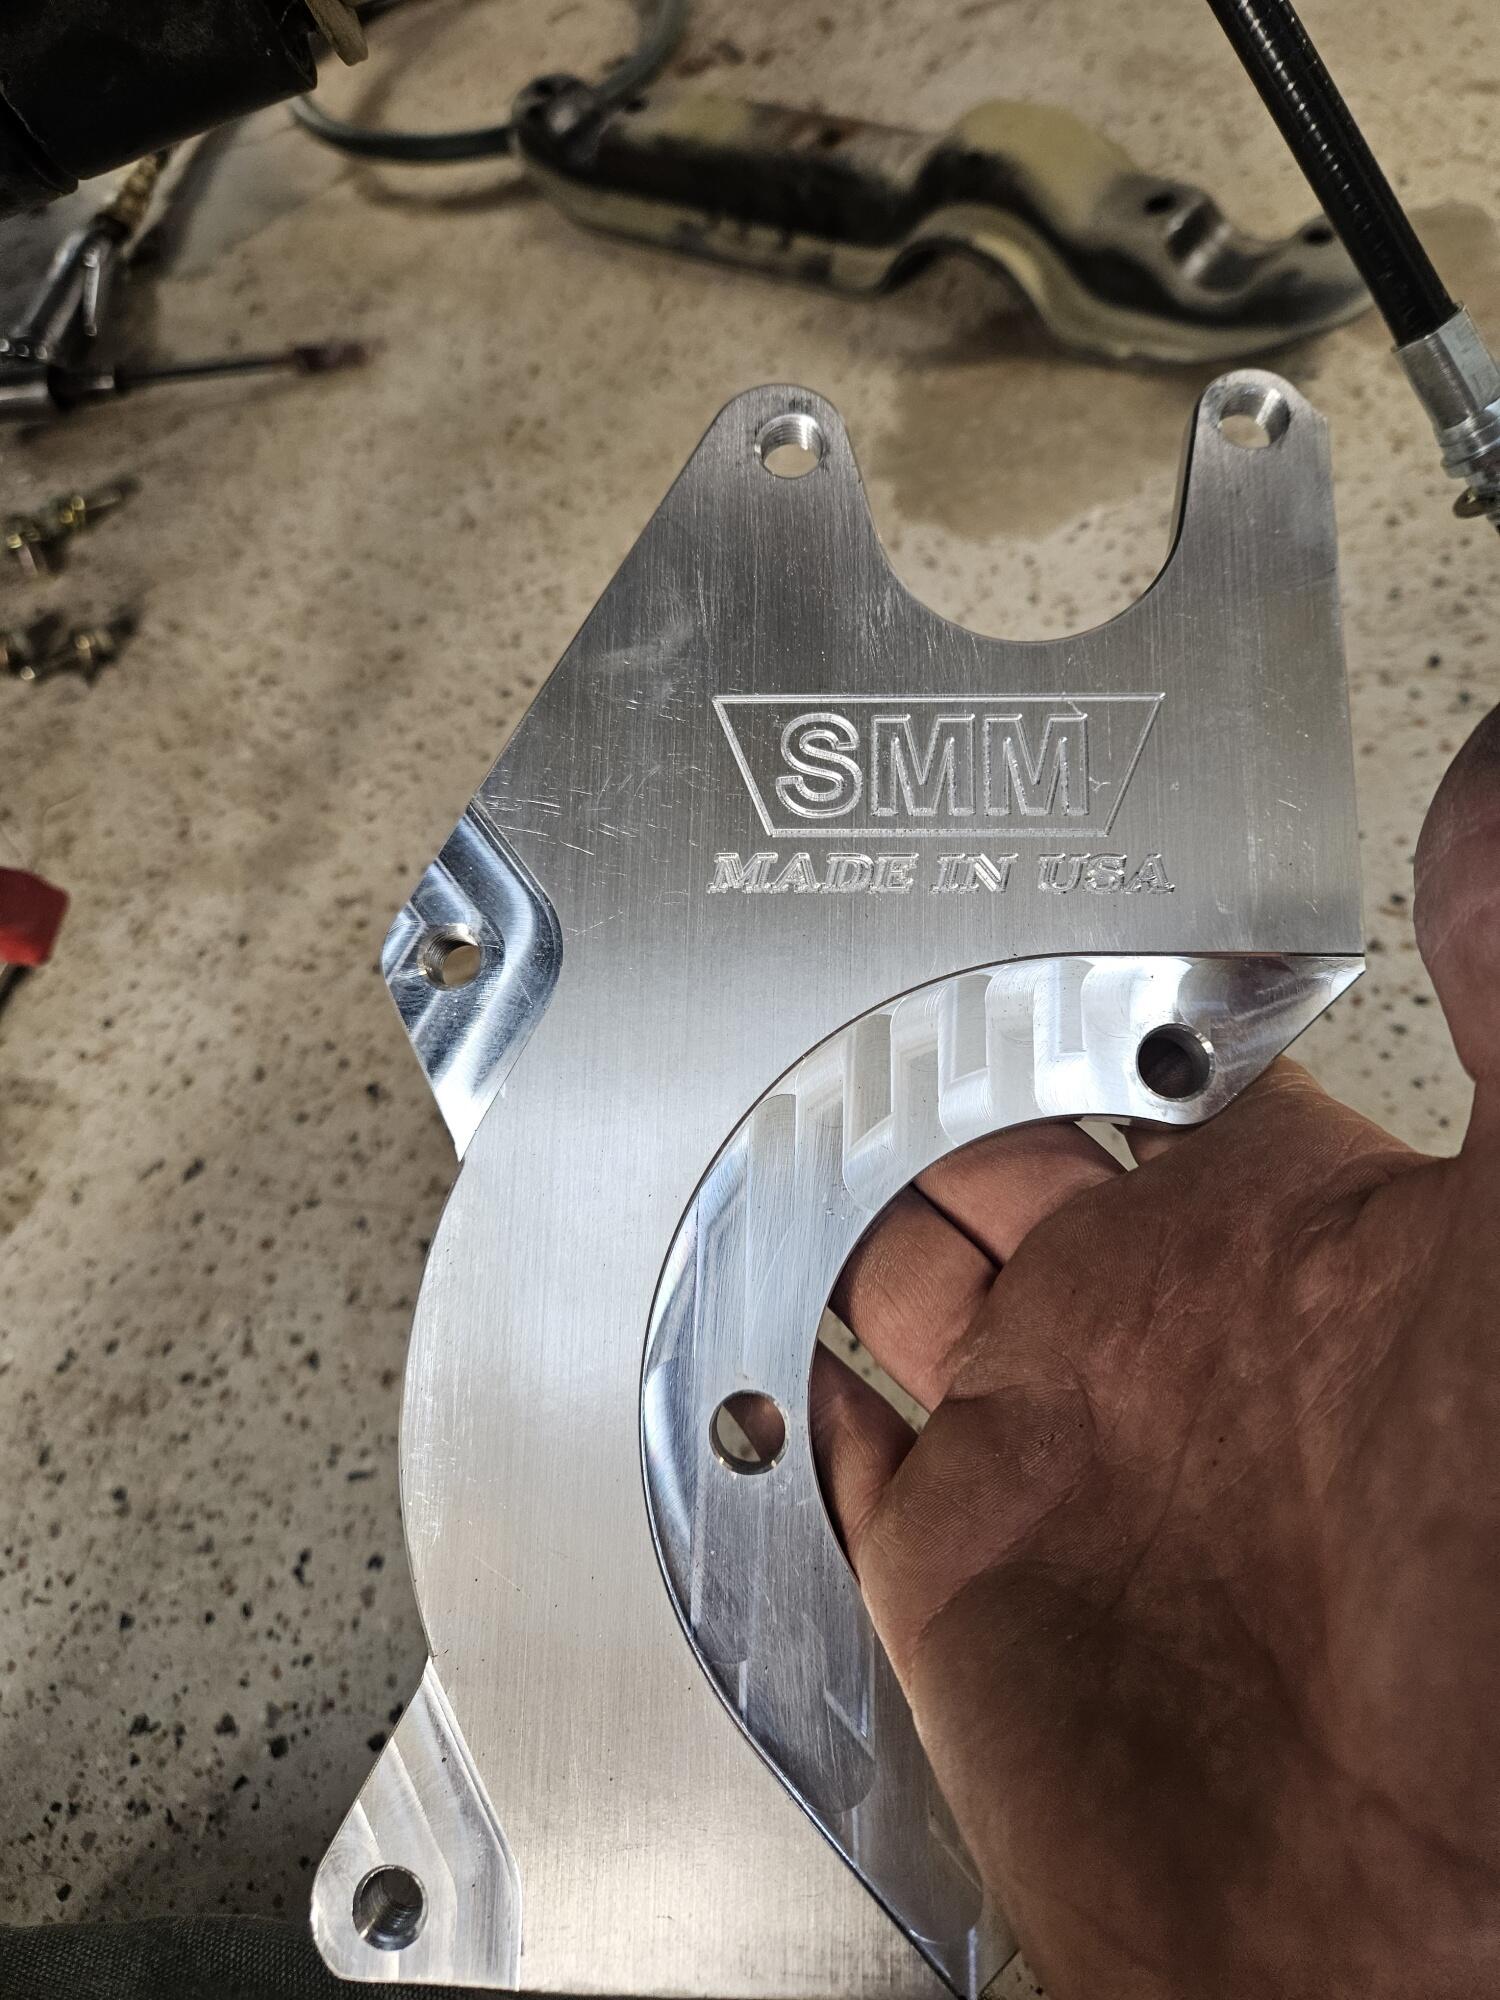
So here is the starting point The adapter bracket goes on like this The SSM logo goes facing the underside of the car. I mocked it up to make sure everything was going to center The new parking brake cable wouldn't fit in the brackets at the parking brake. I tried spreading the ears some but that wasn't going to work. There was 1 1/2mm different in diameter. So I used this with a sand paper roll About 10 minutes and all was better Threaded the elbow into the caliper


-
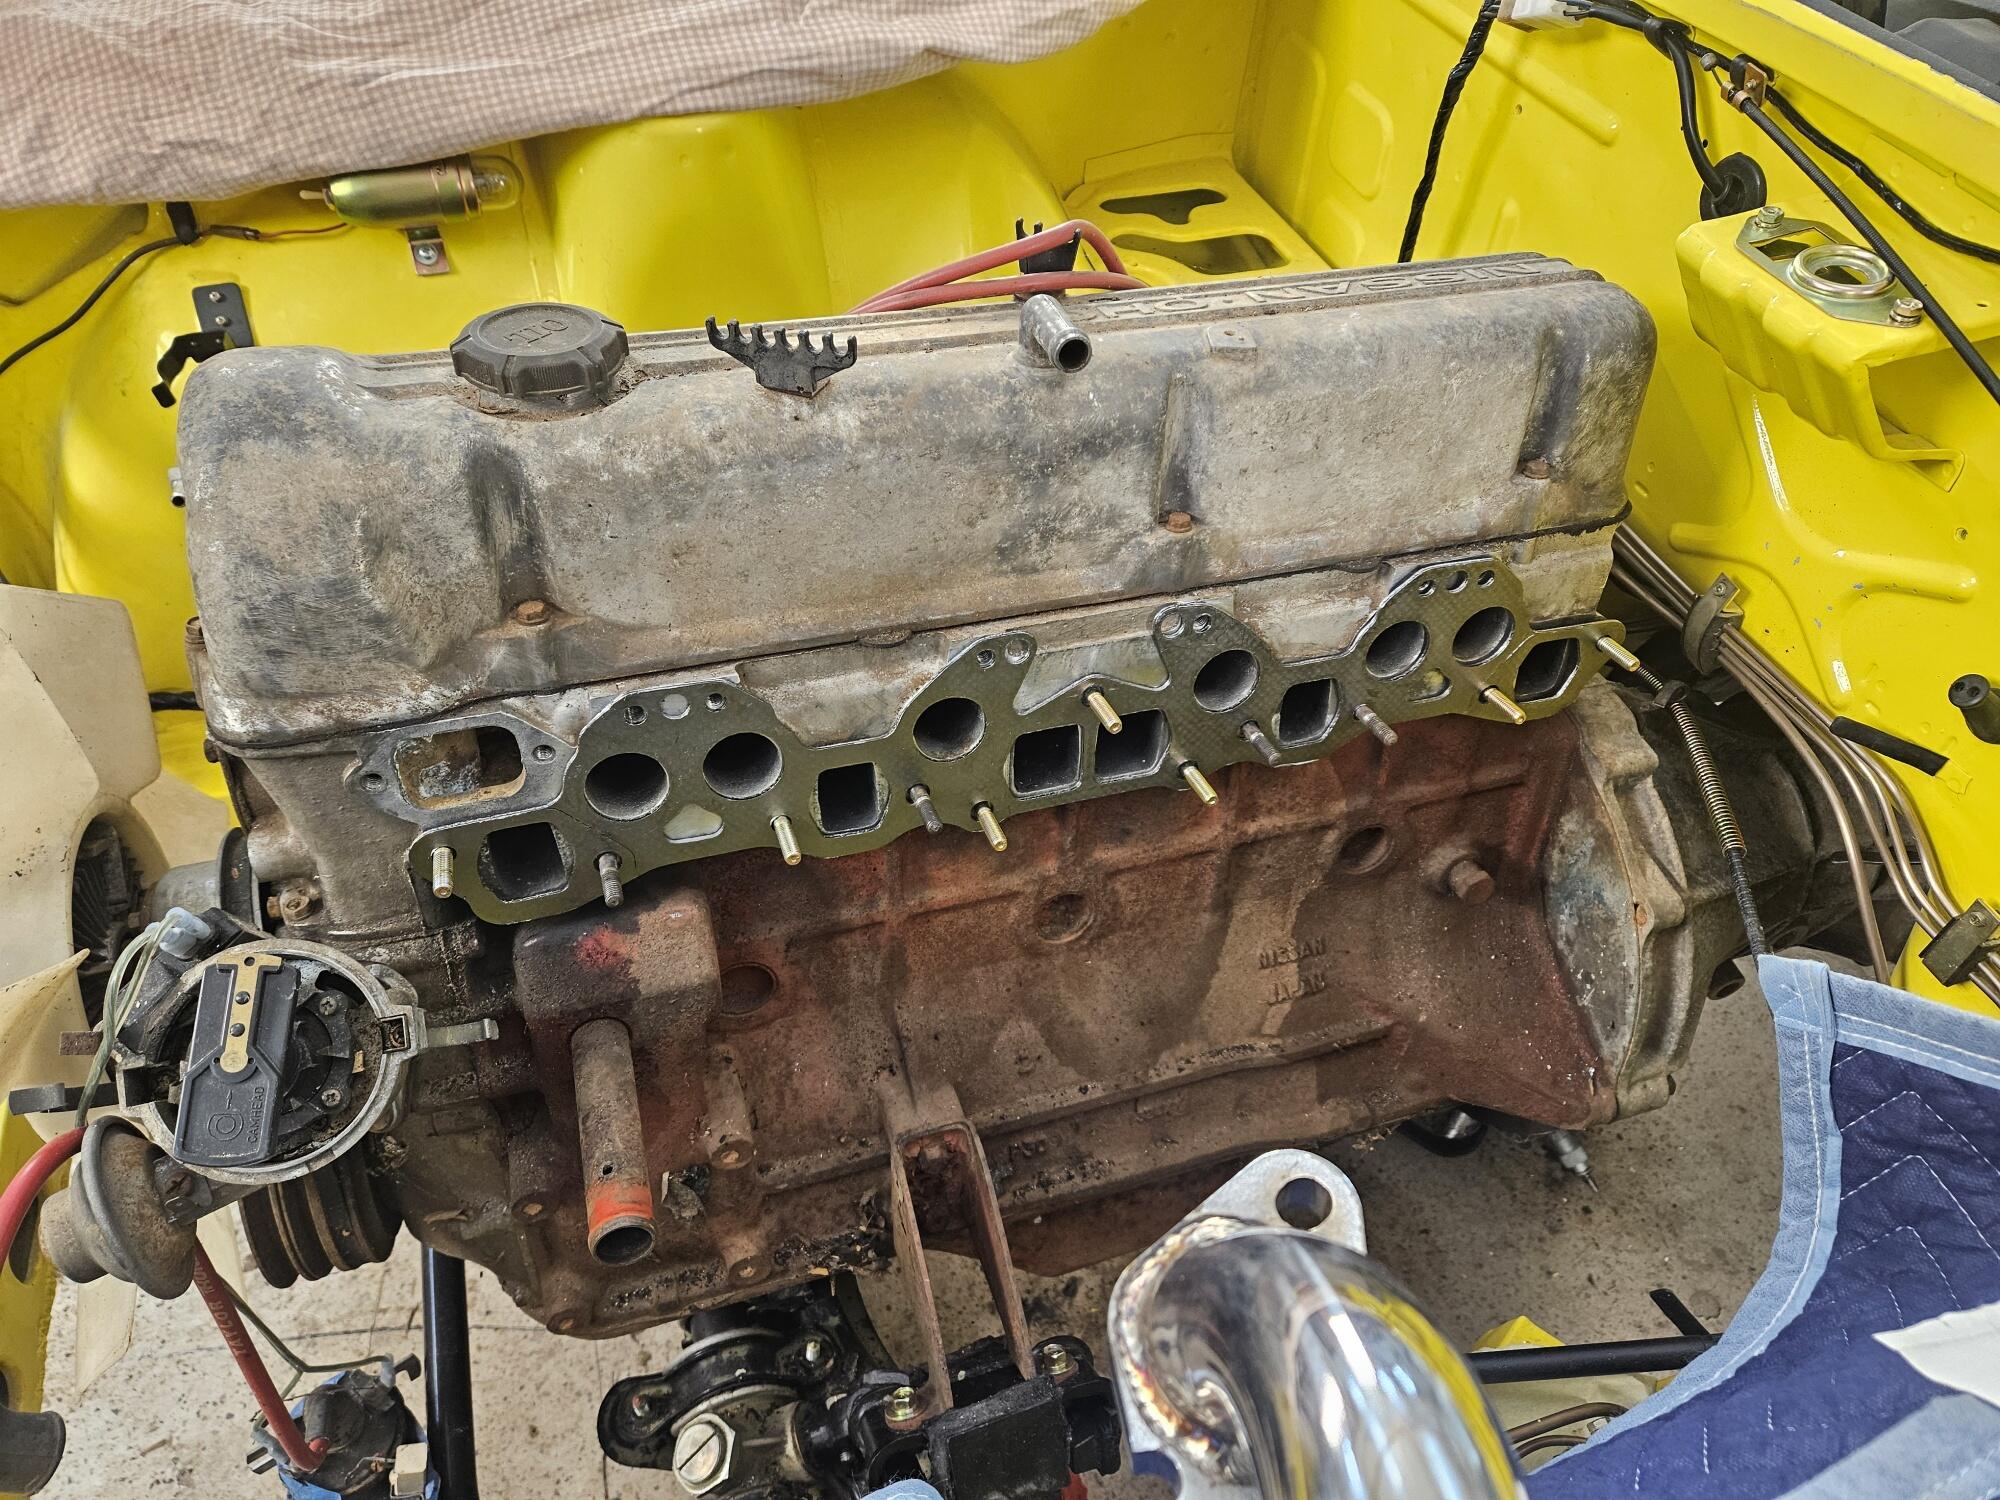
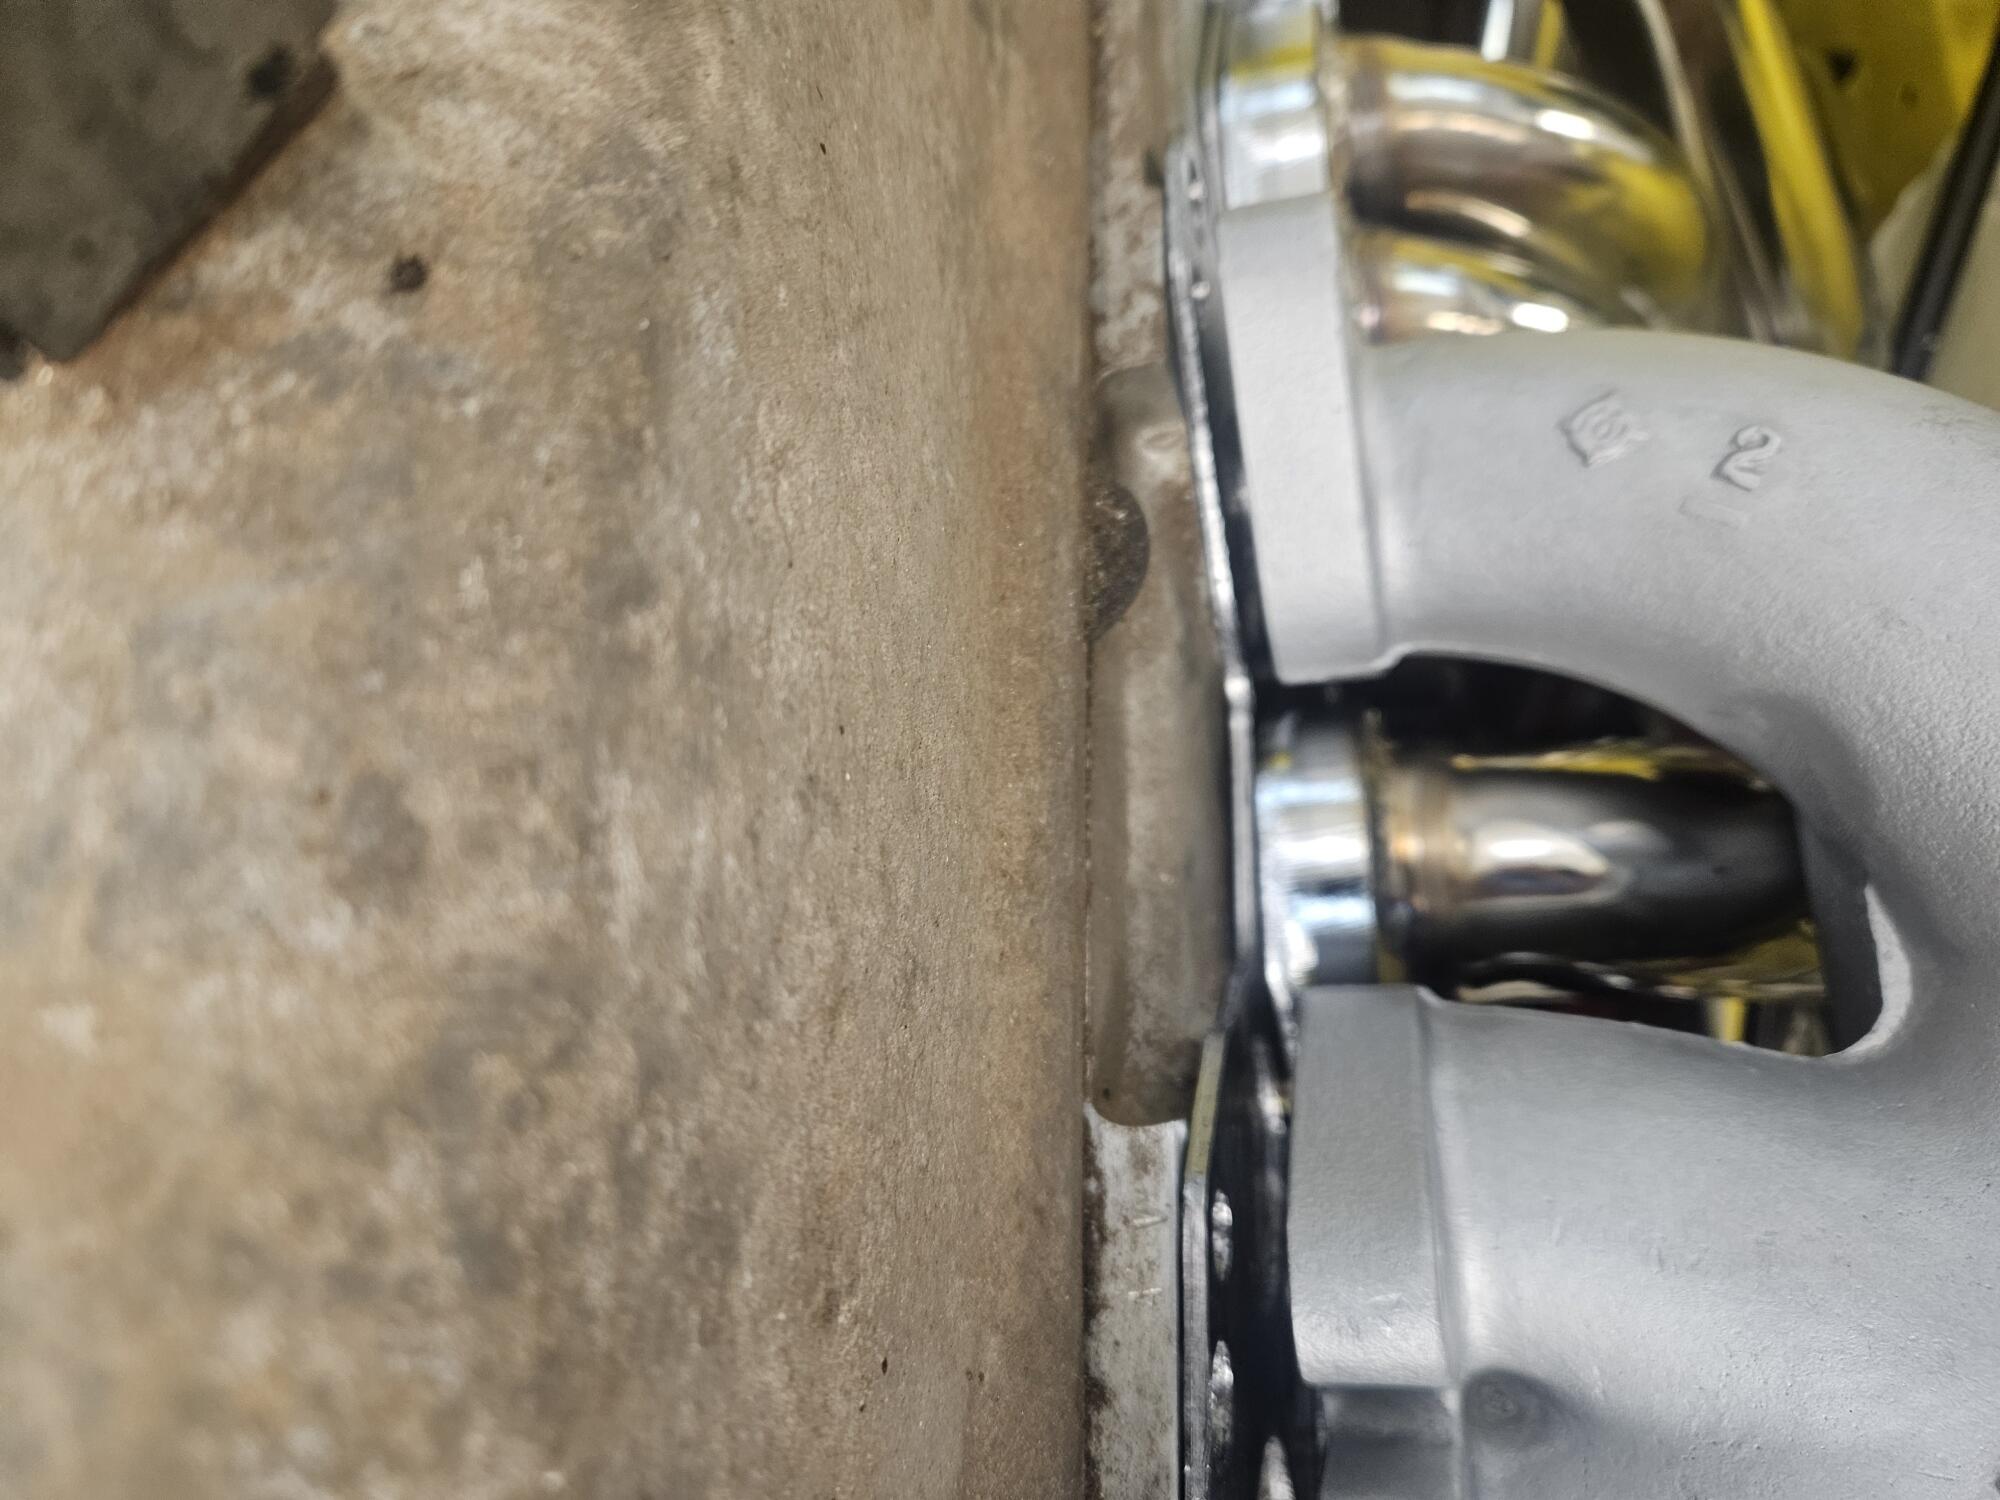
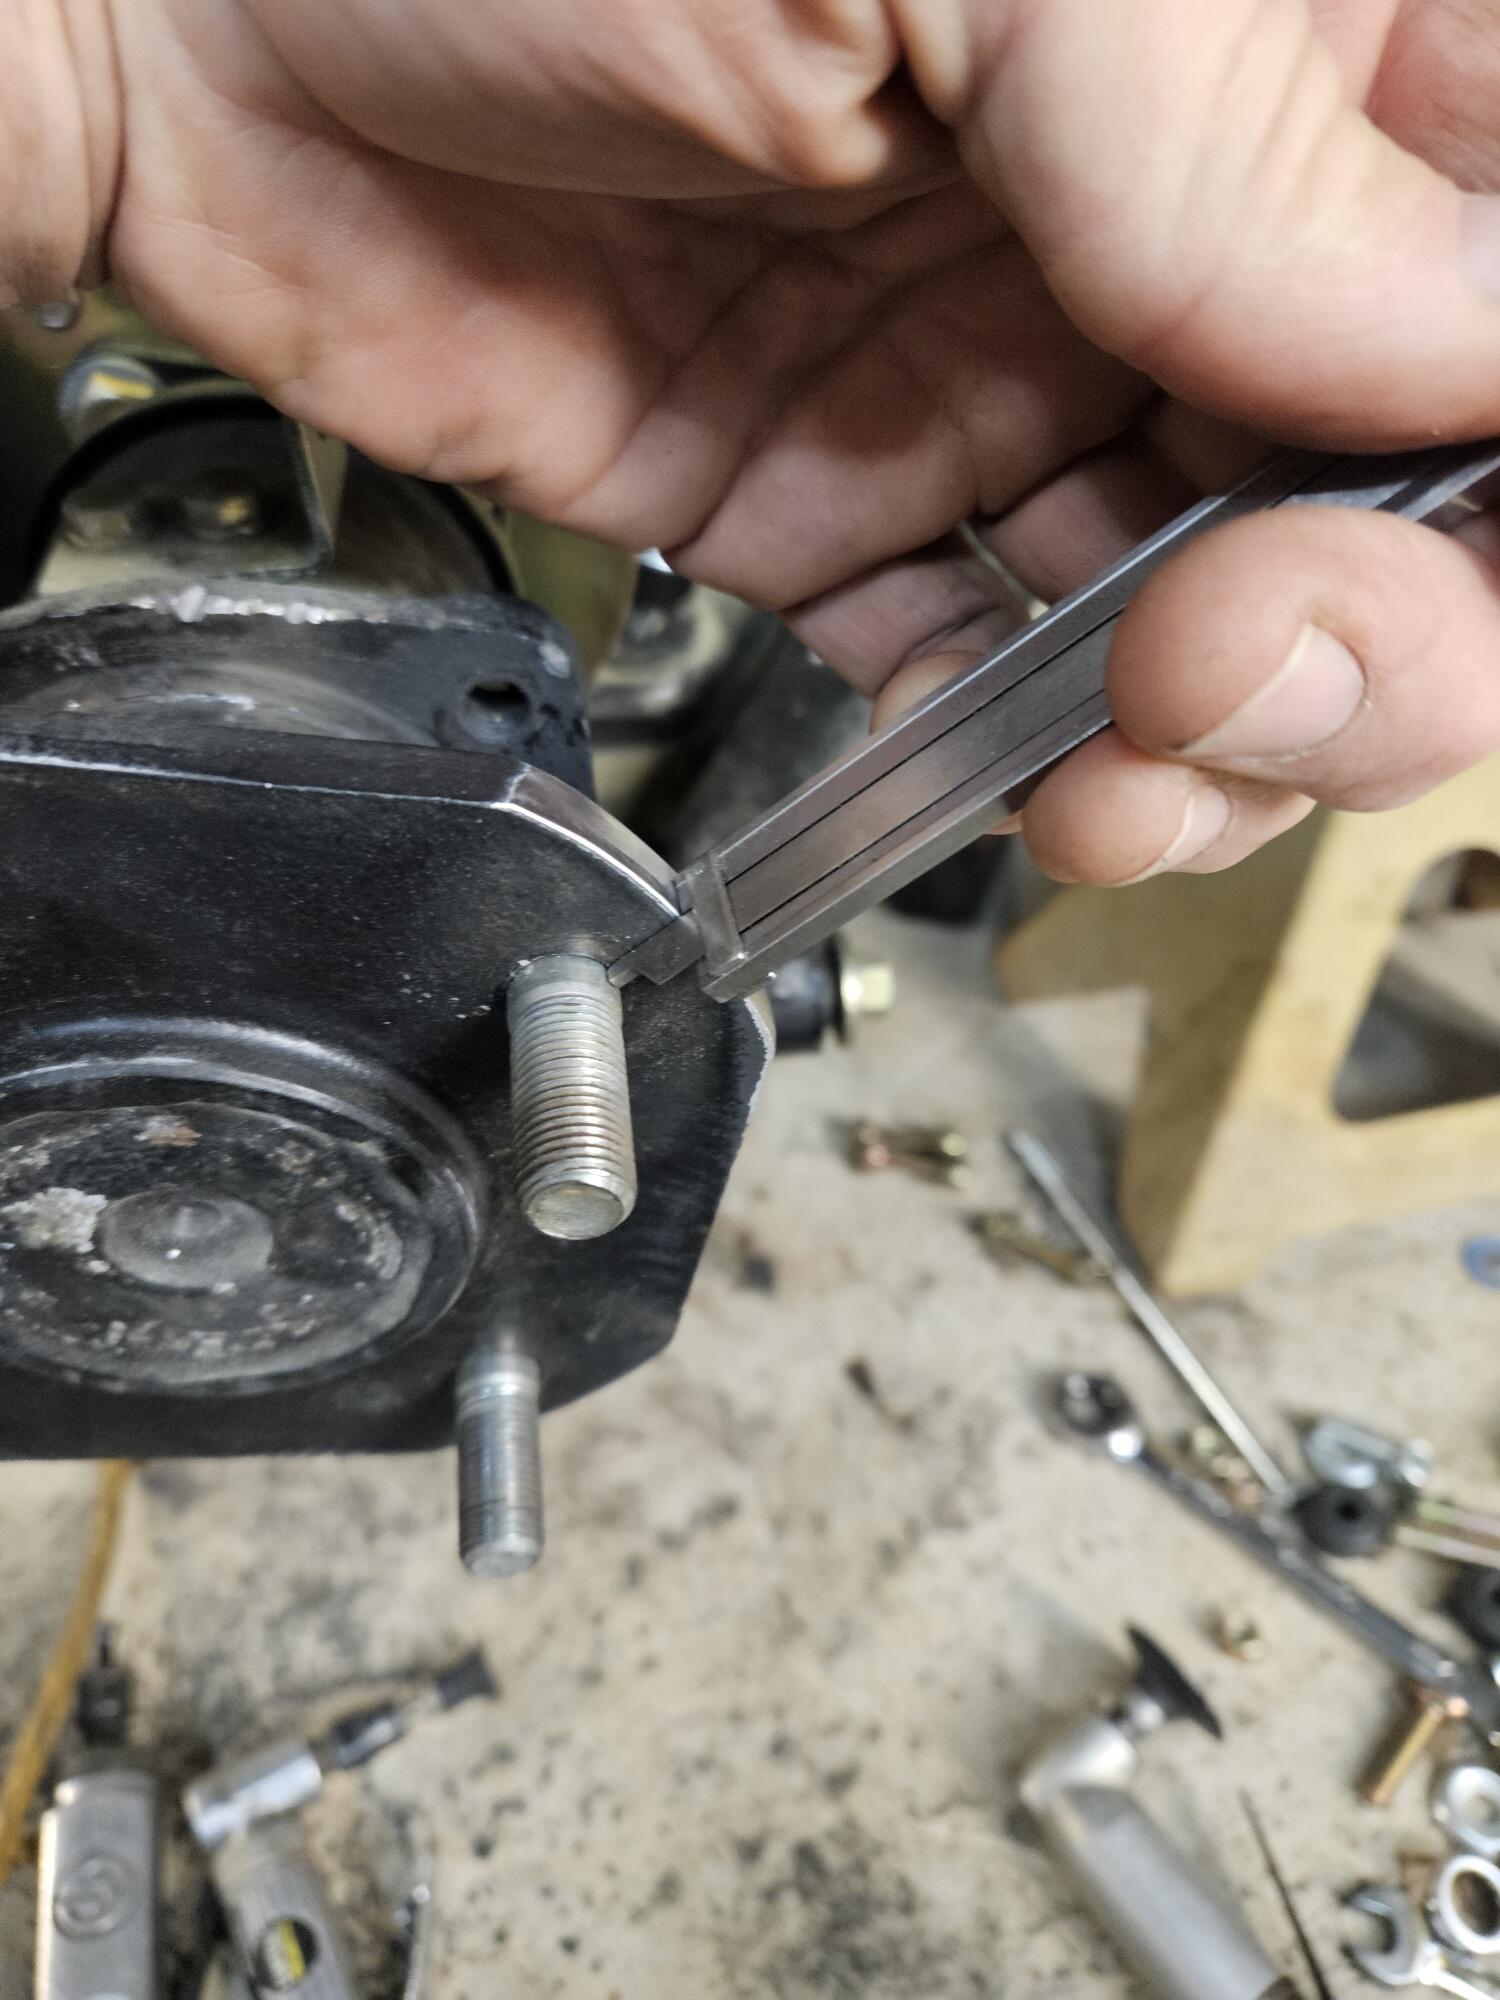
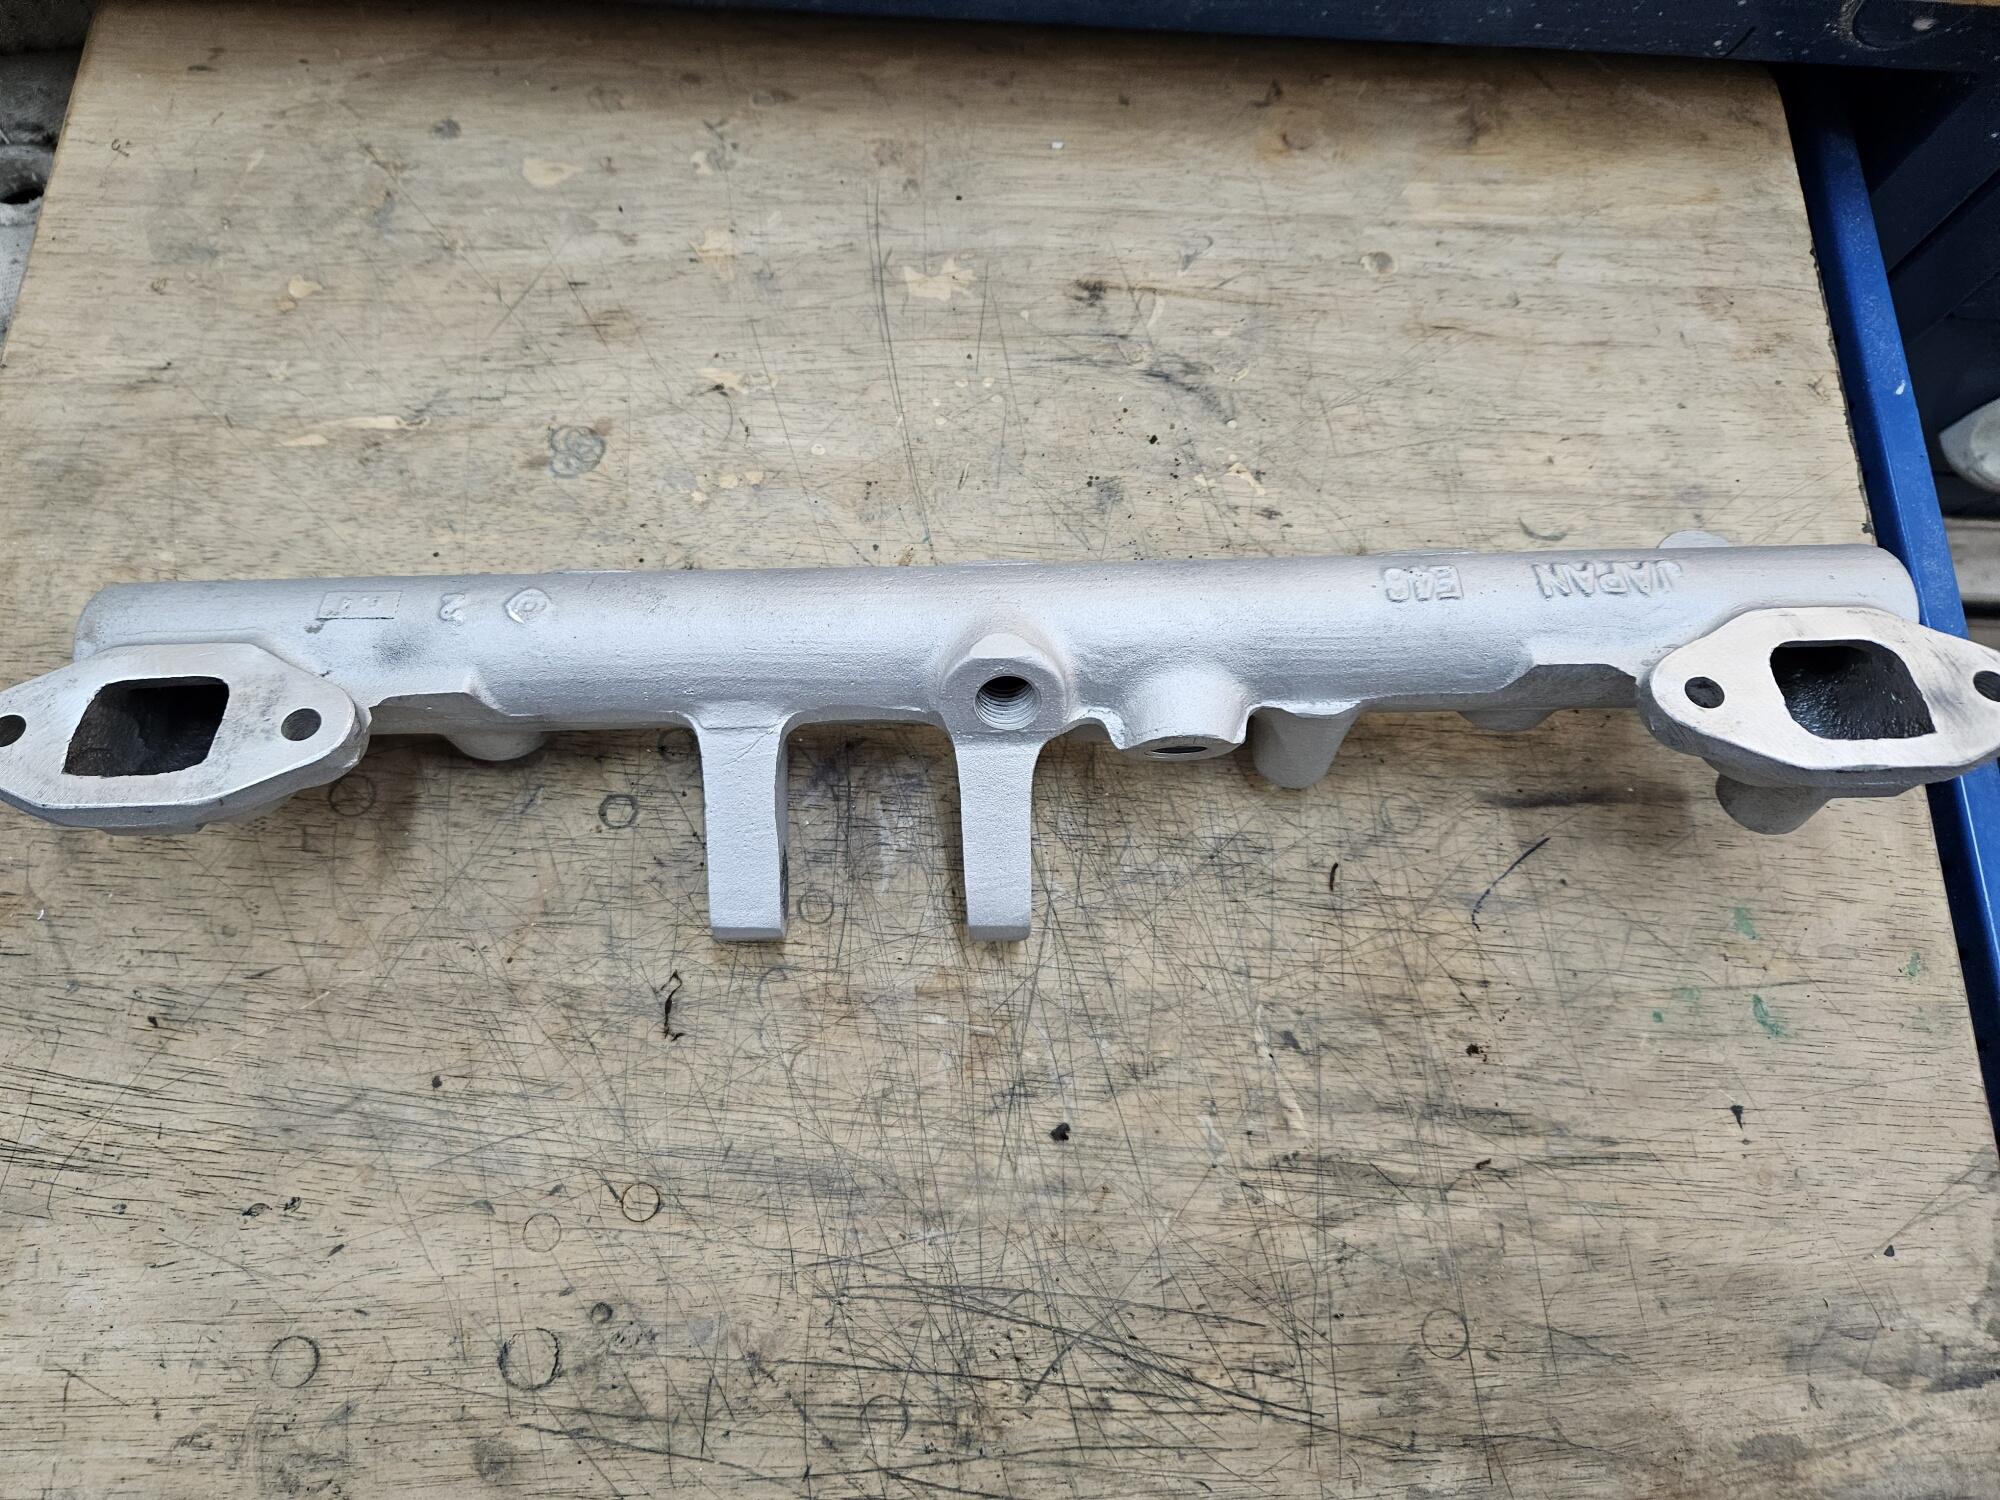
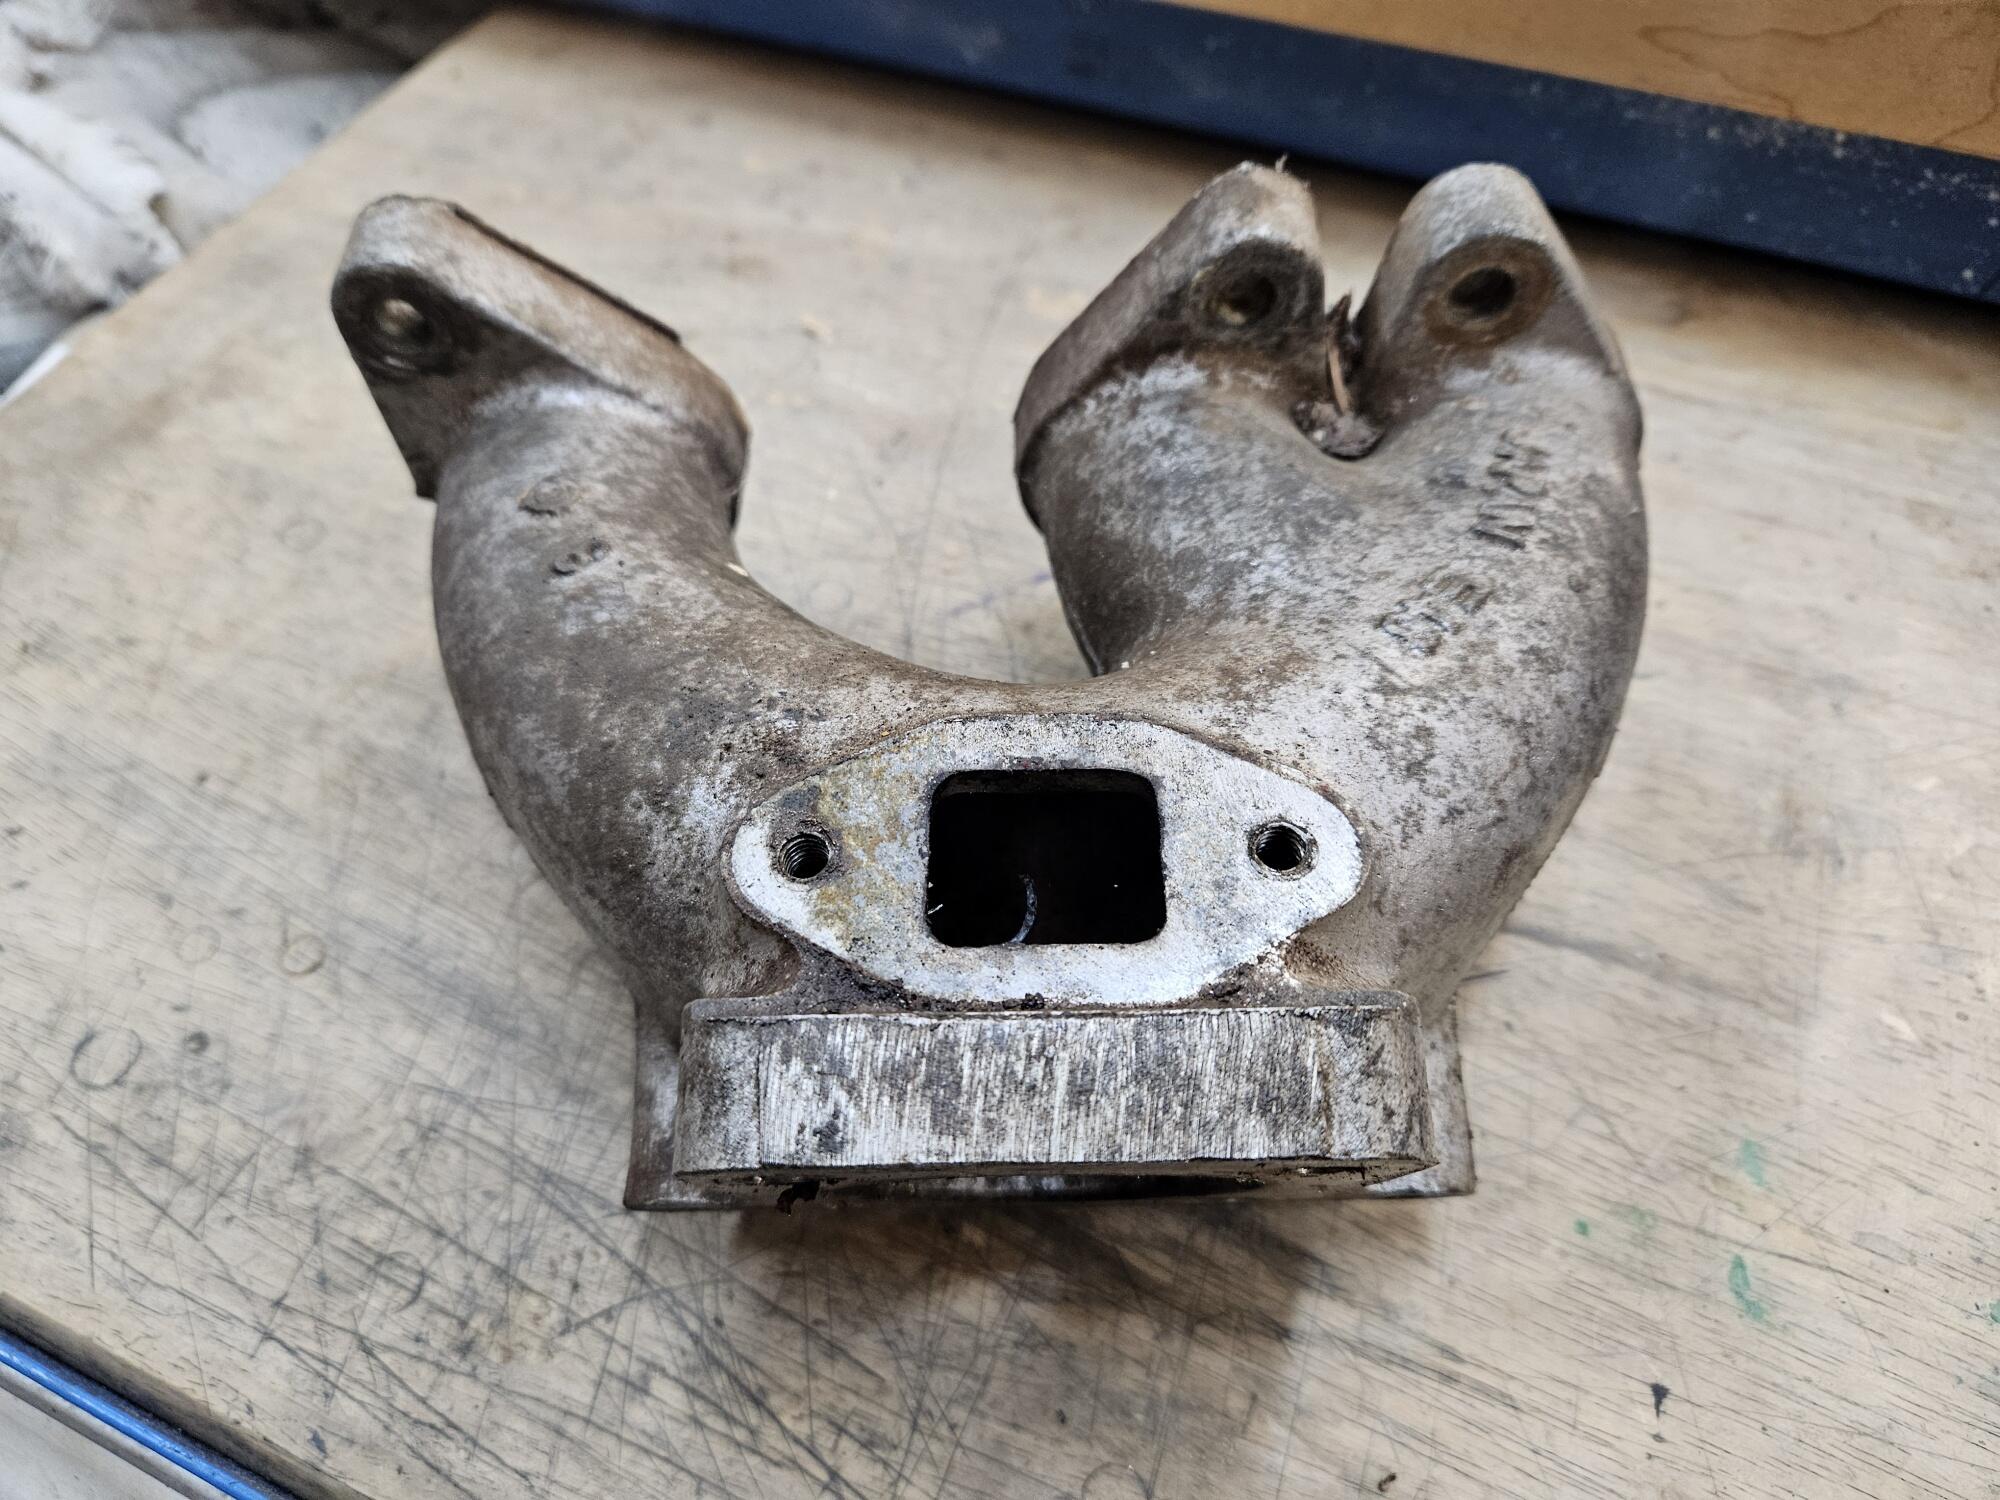
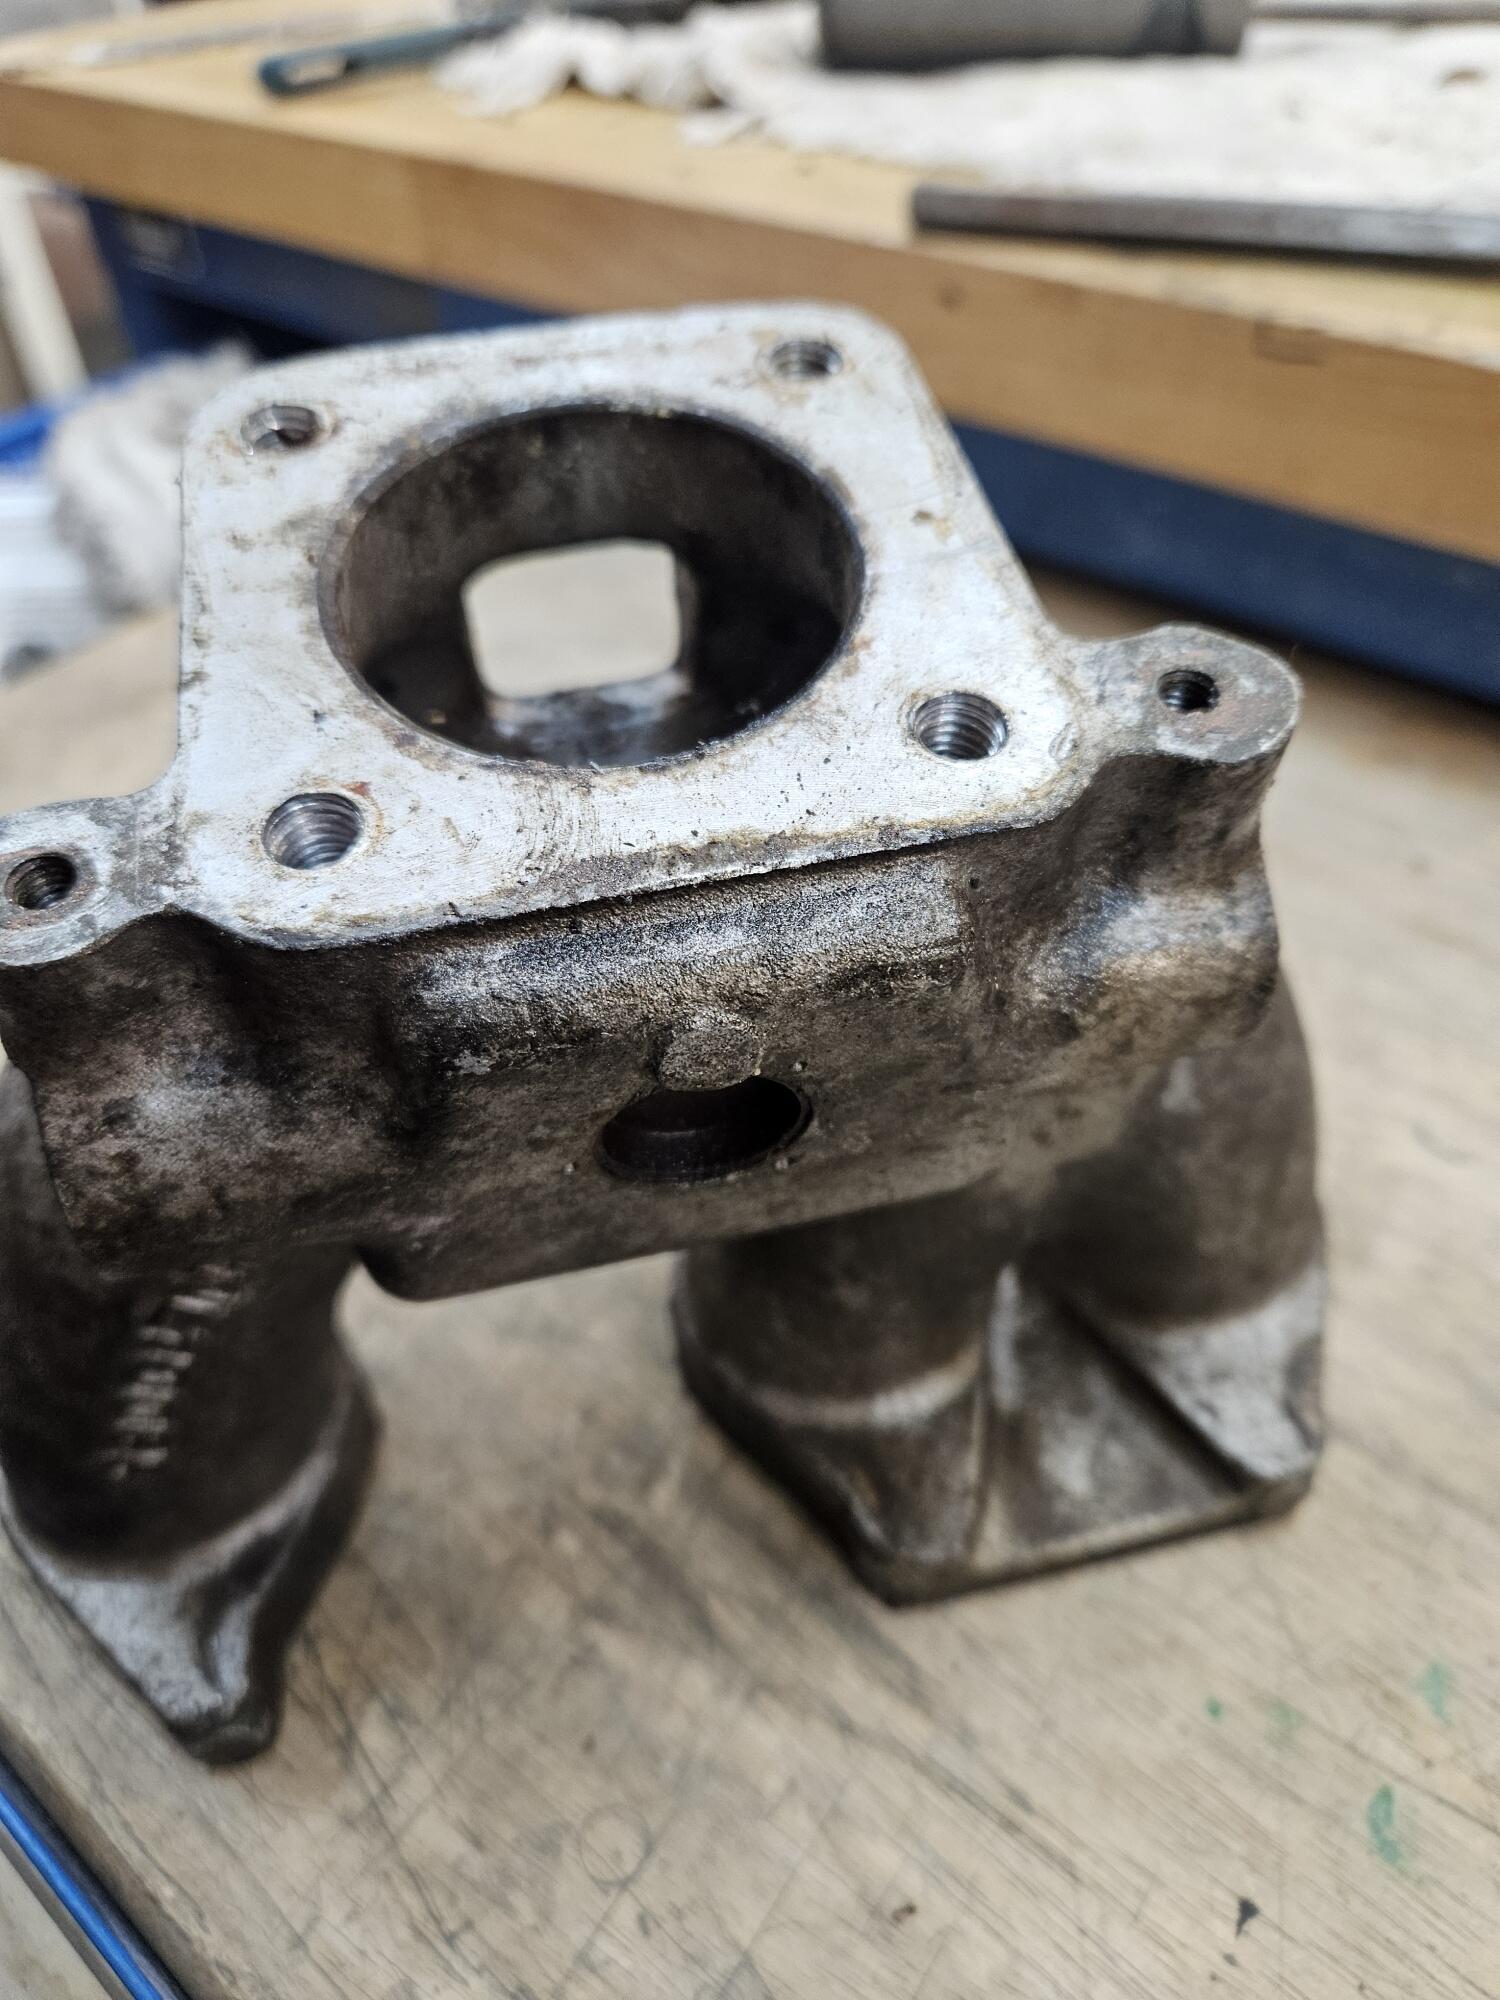
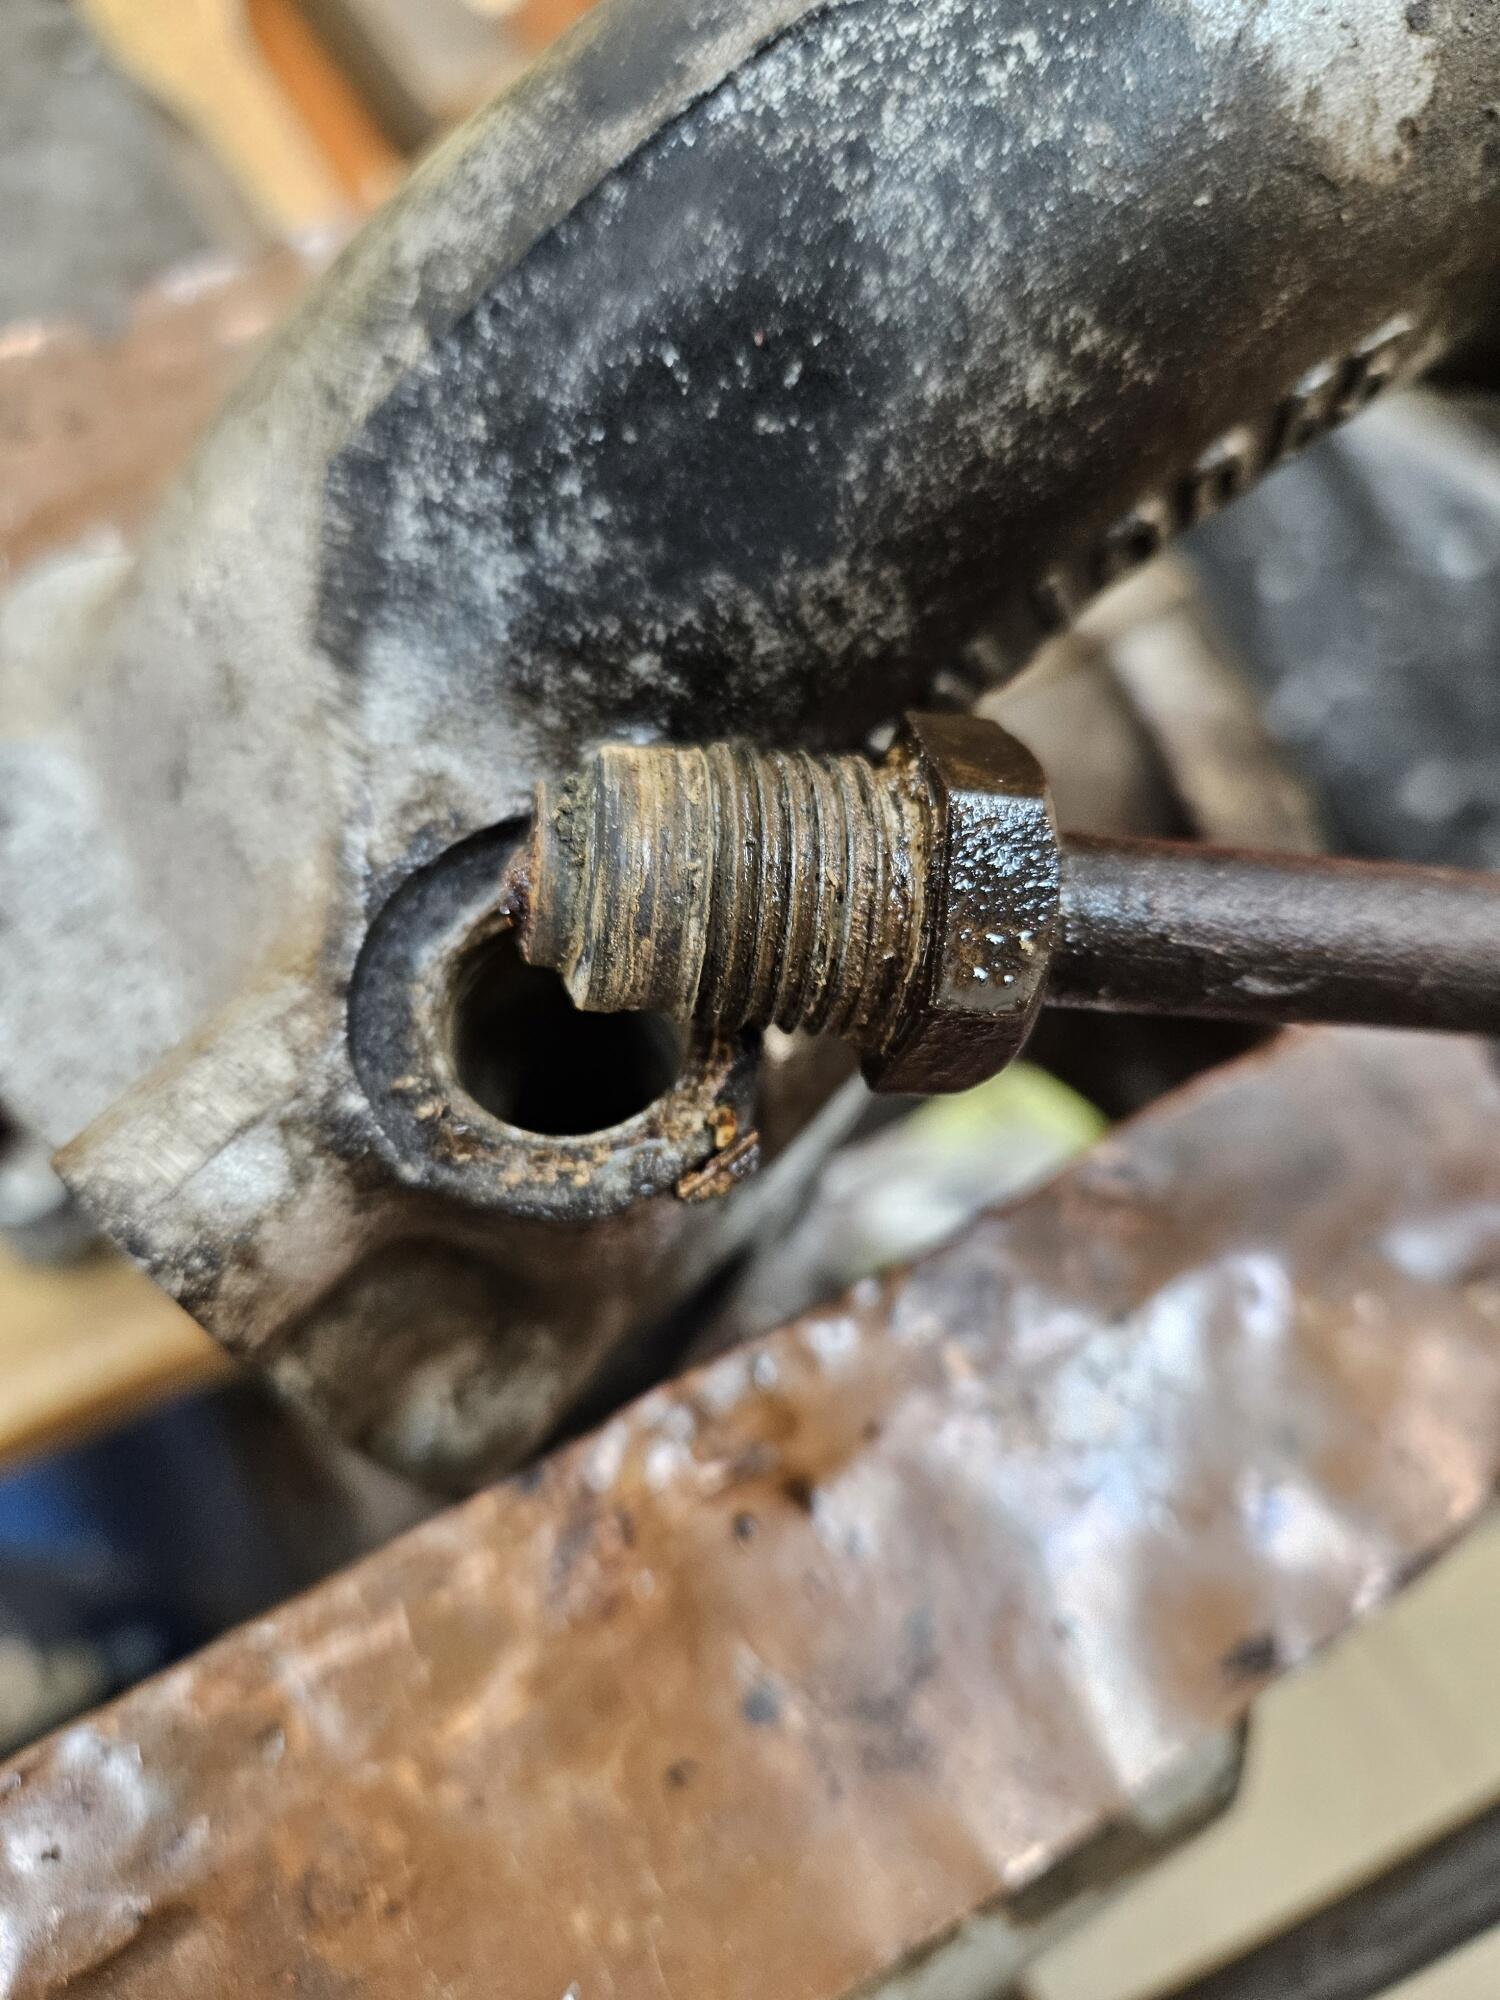
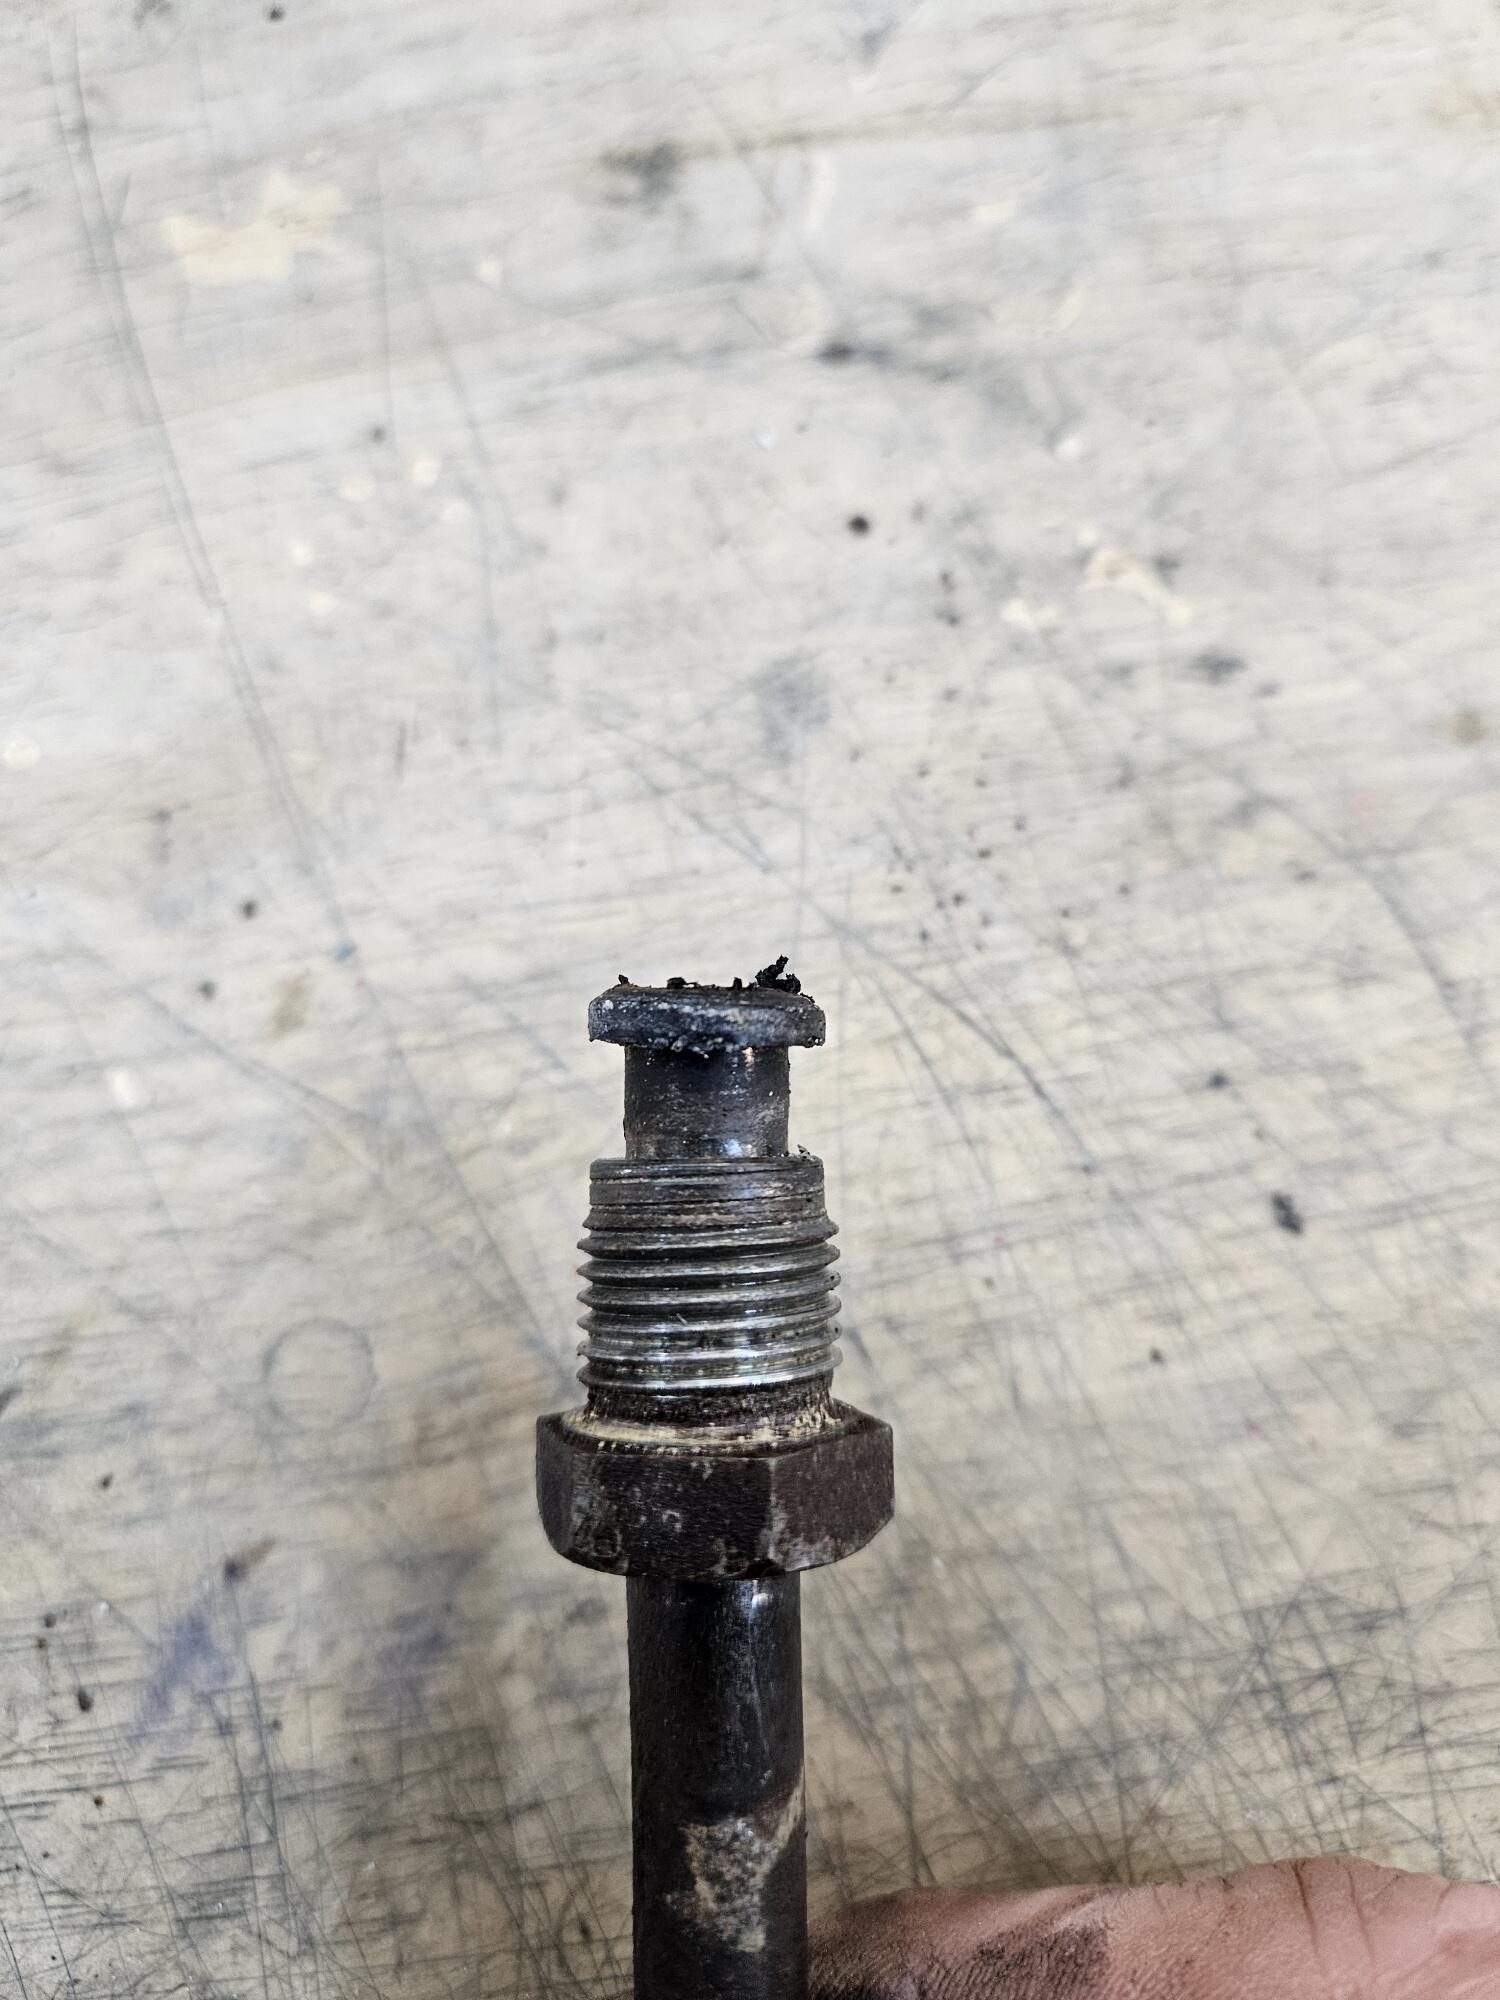
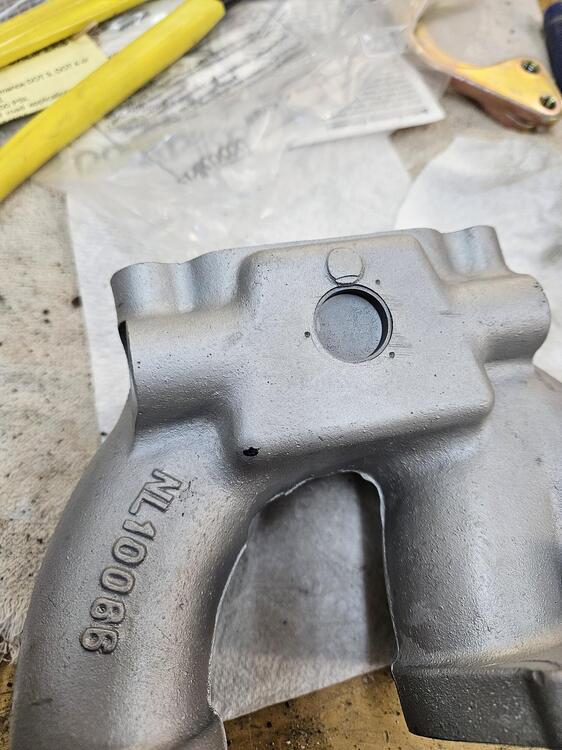
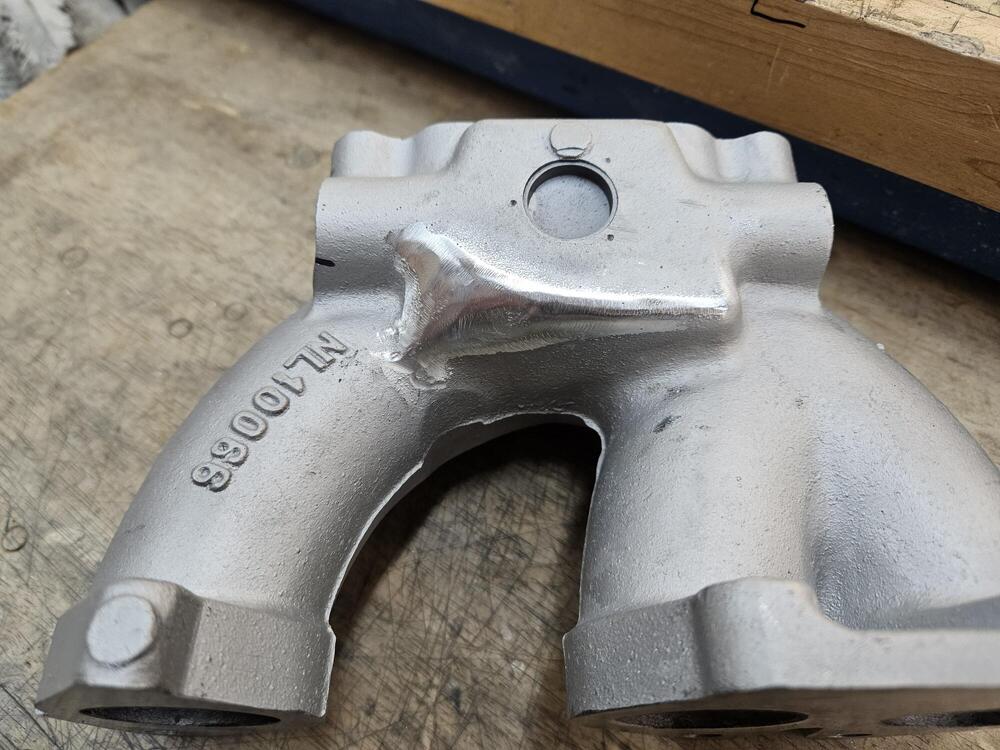
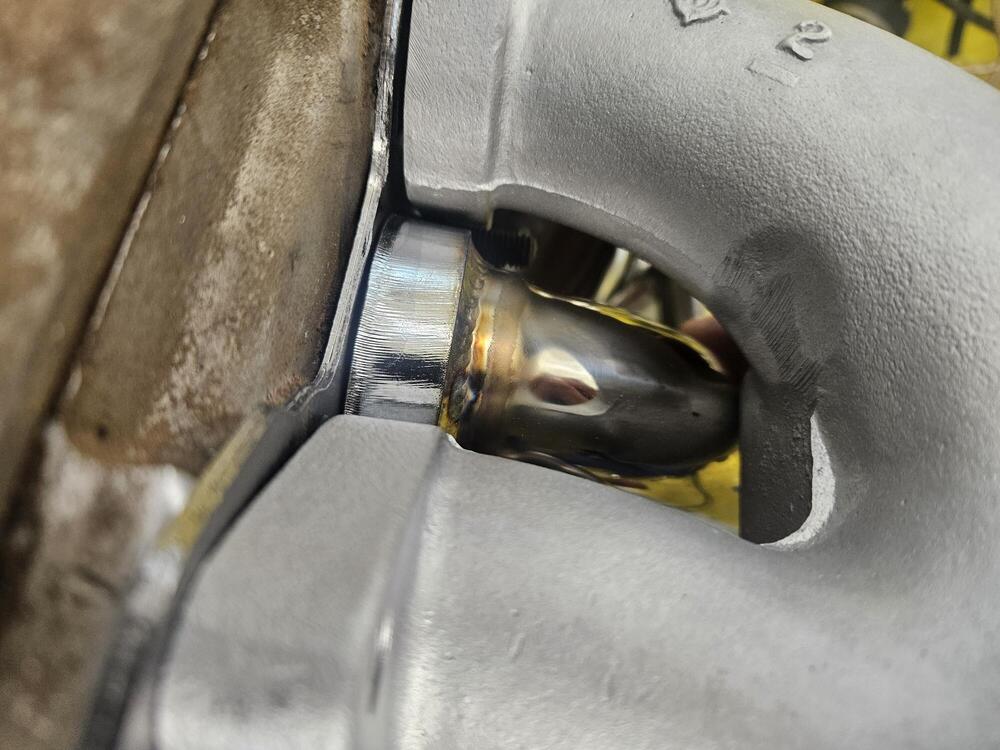
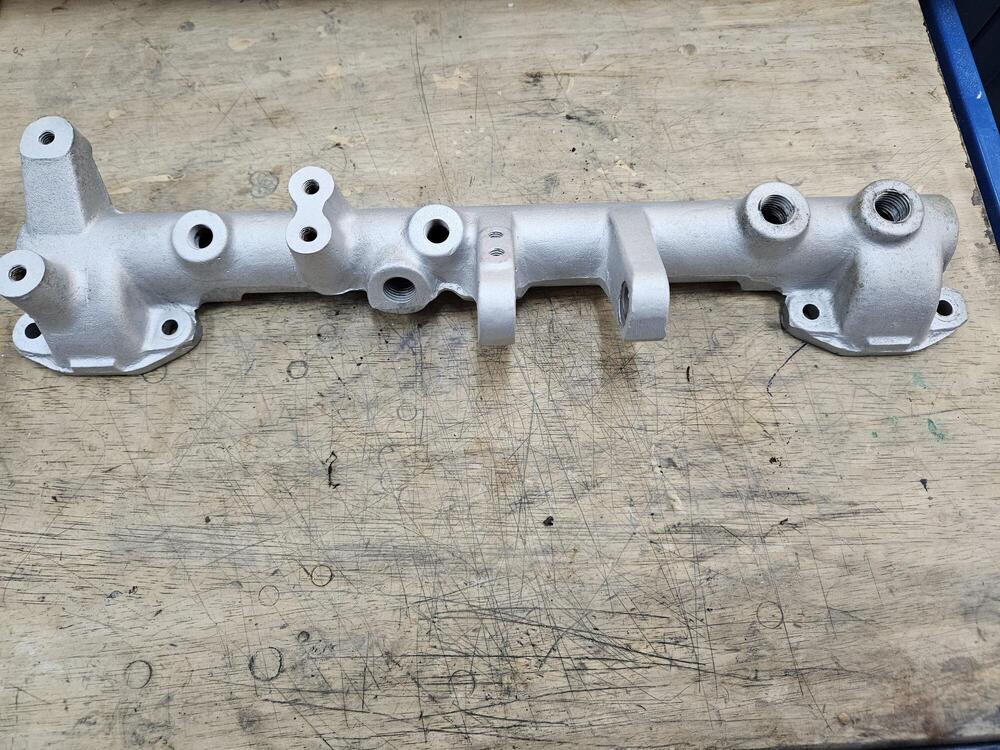
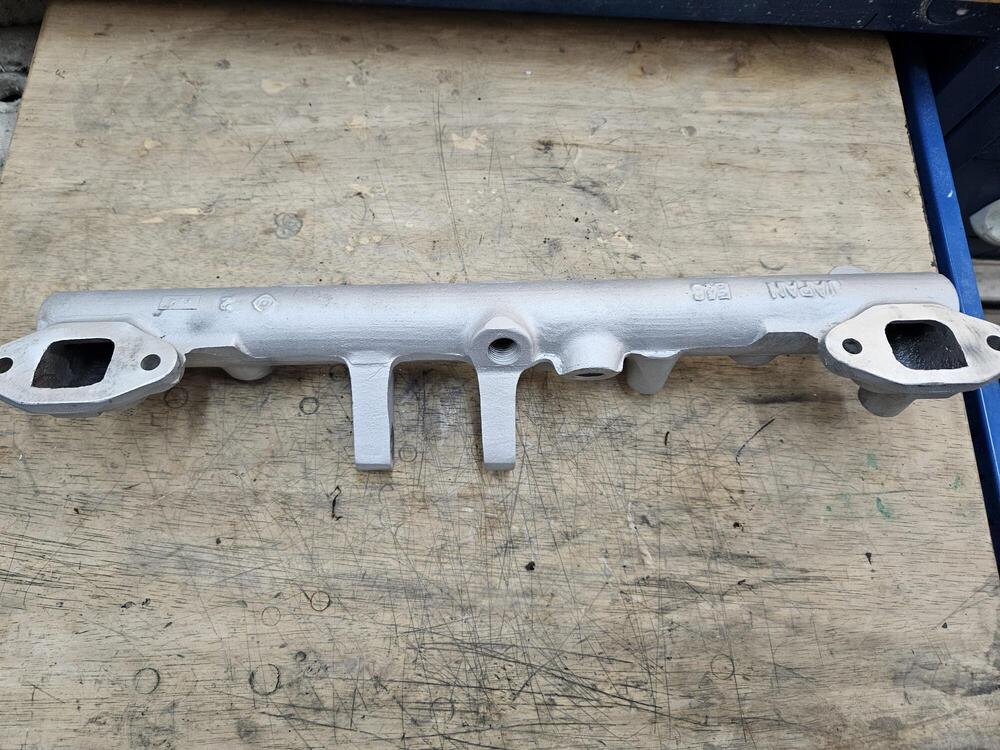
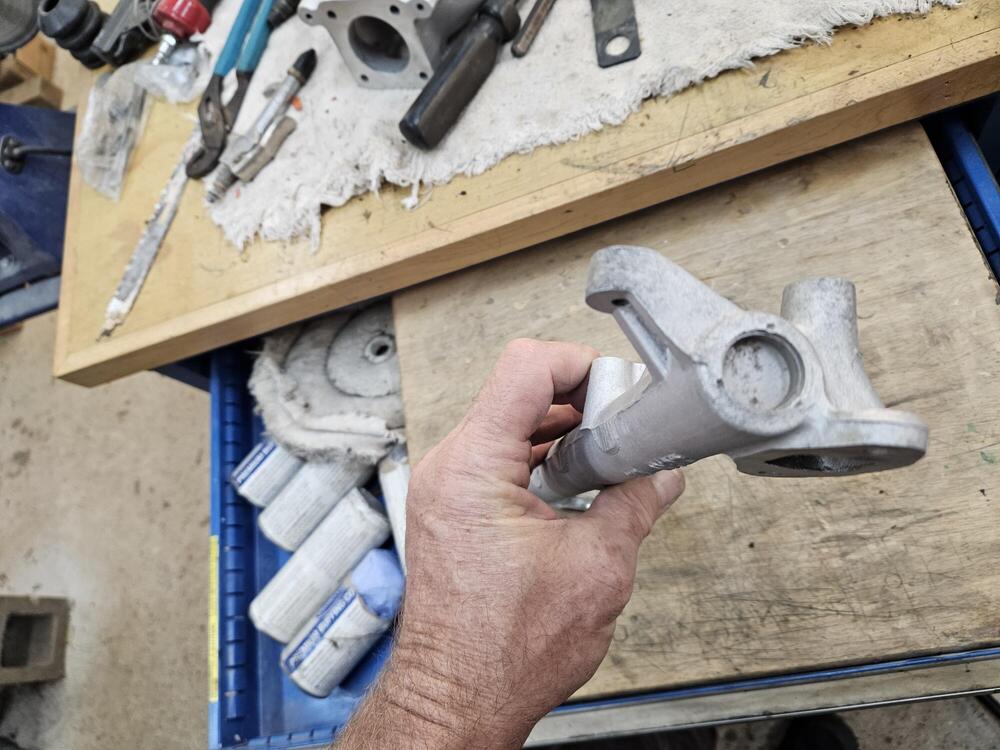
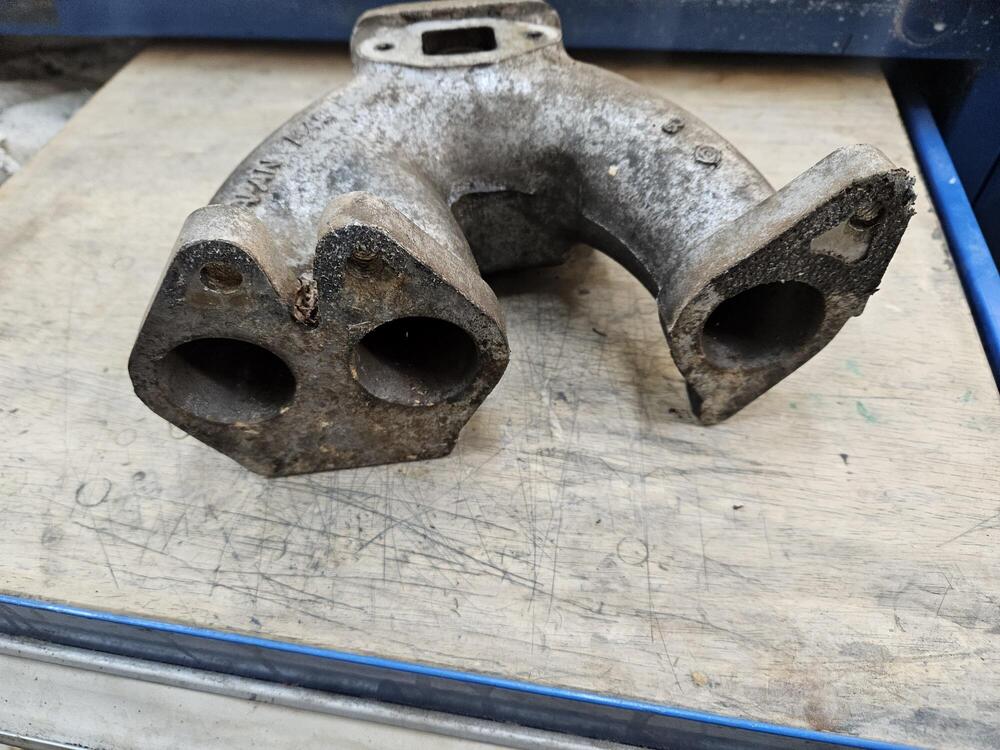
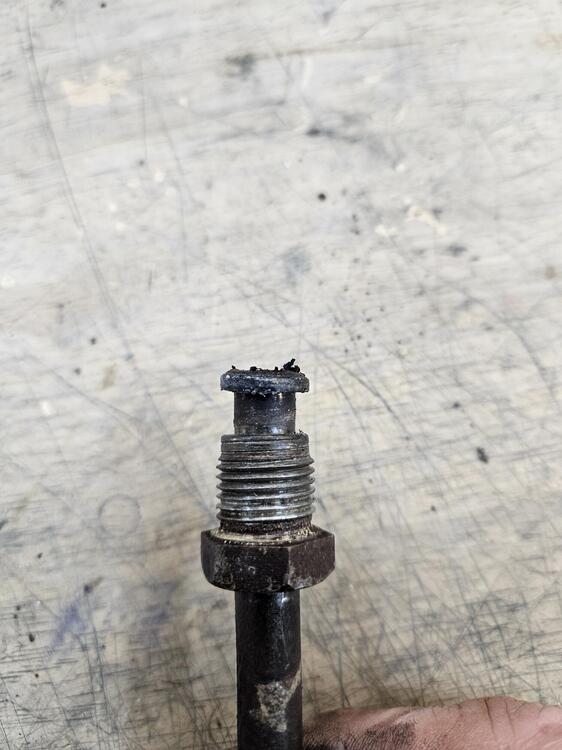
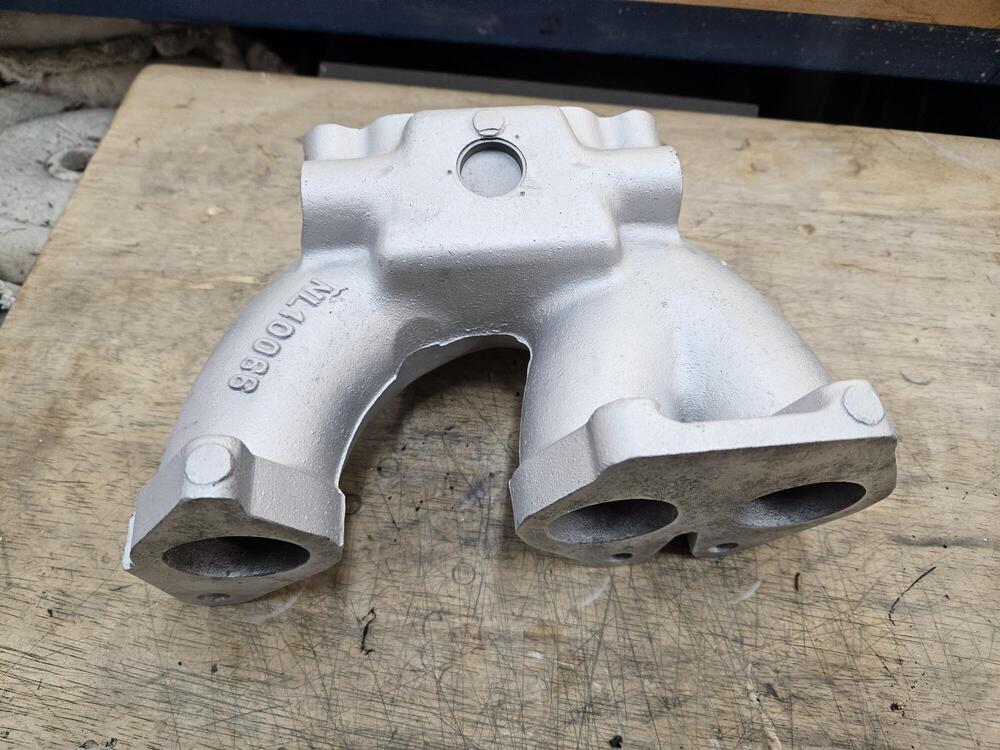
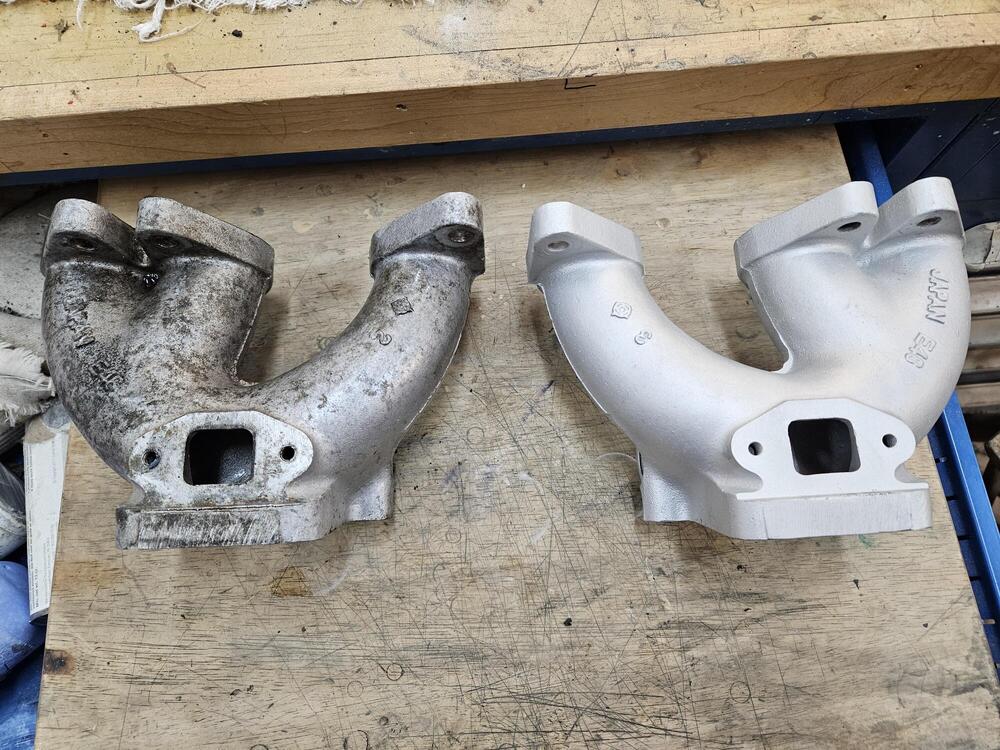
I worked on clearancing the manifolds. Contact at the sharpie mark After grinding with a burr in a die grinder and some light polishing work Then I put them back in the bead blasting cabinet to even out the finish. I didn't cut through into the water passage. Although I don't know how thick the remaining material is... Also I tried to run a copper exhaust nut on to the #6 stud and wrung it off. Since Cody was home, I enlisted him to get the stud out. There was some incidental damage to the threads, so I helicoiled it

-
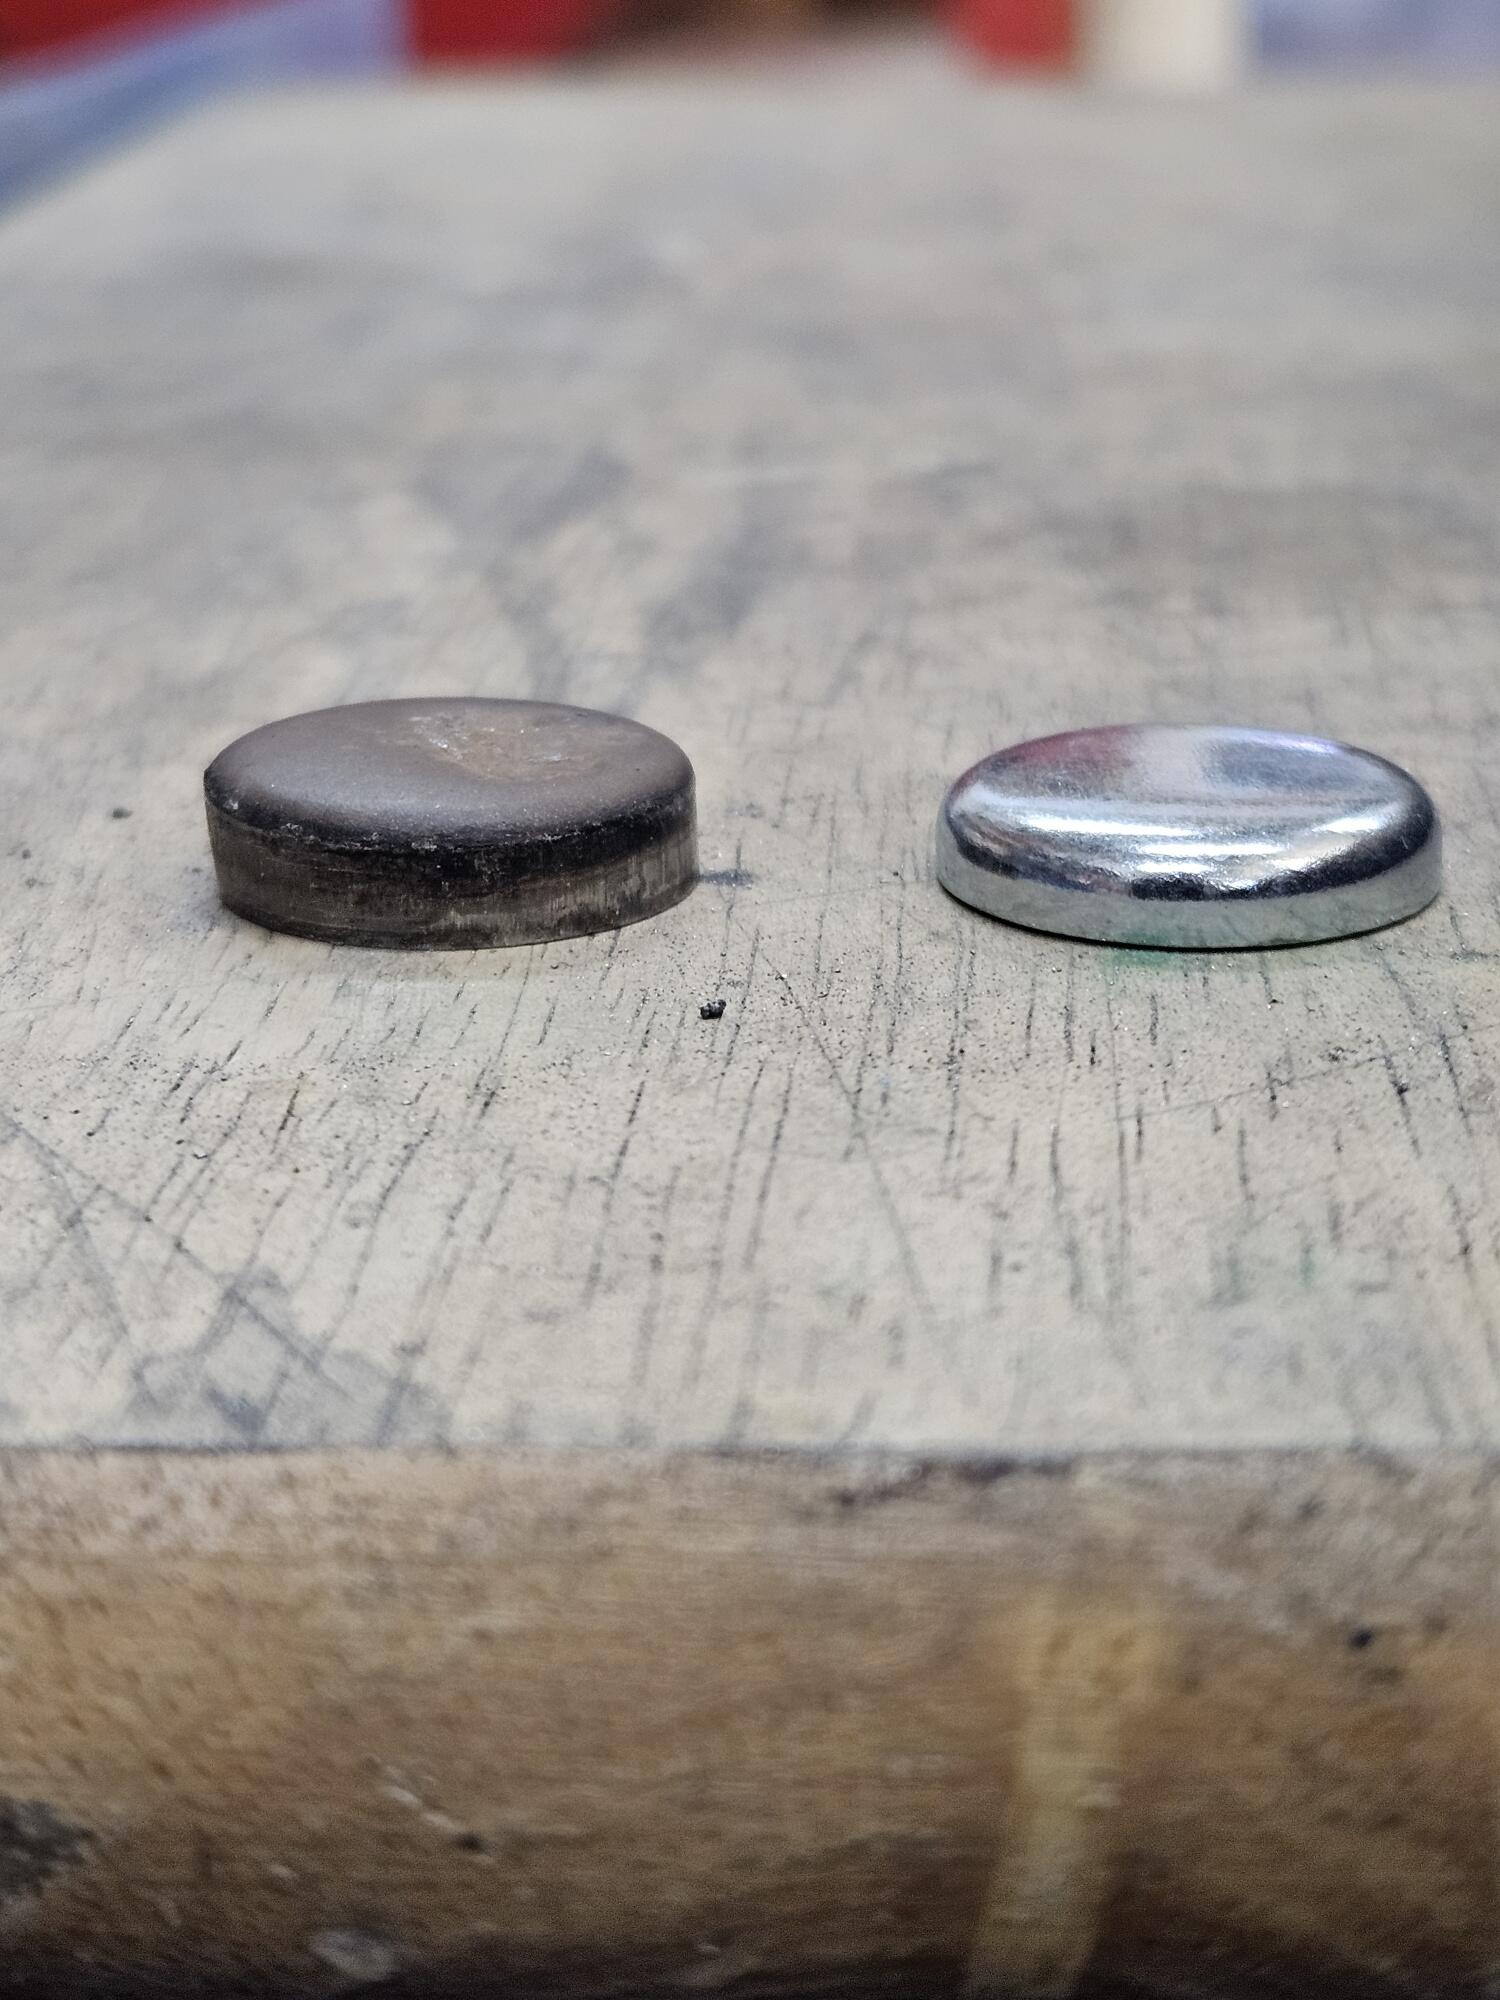
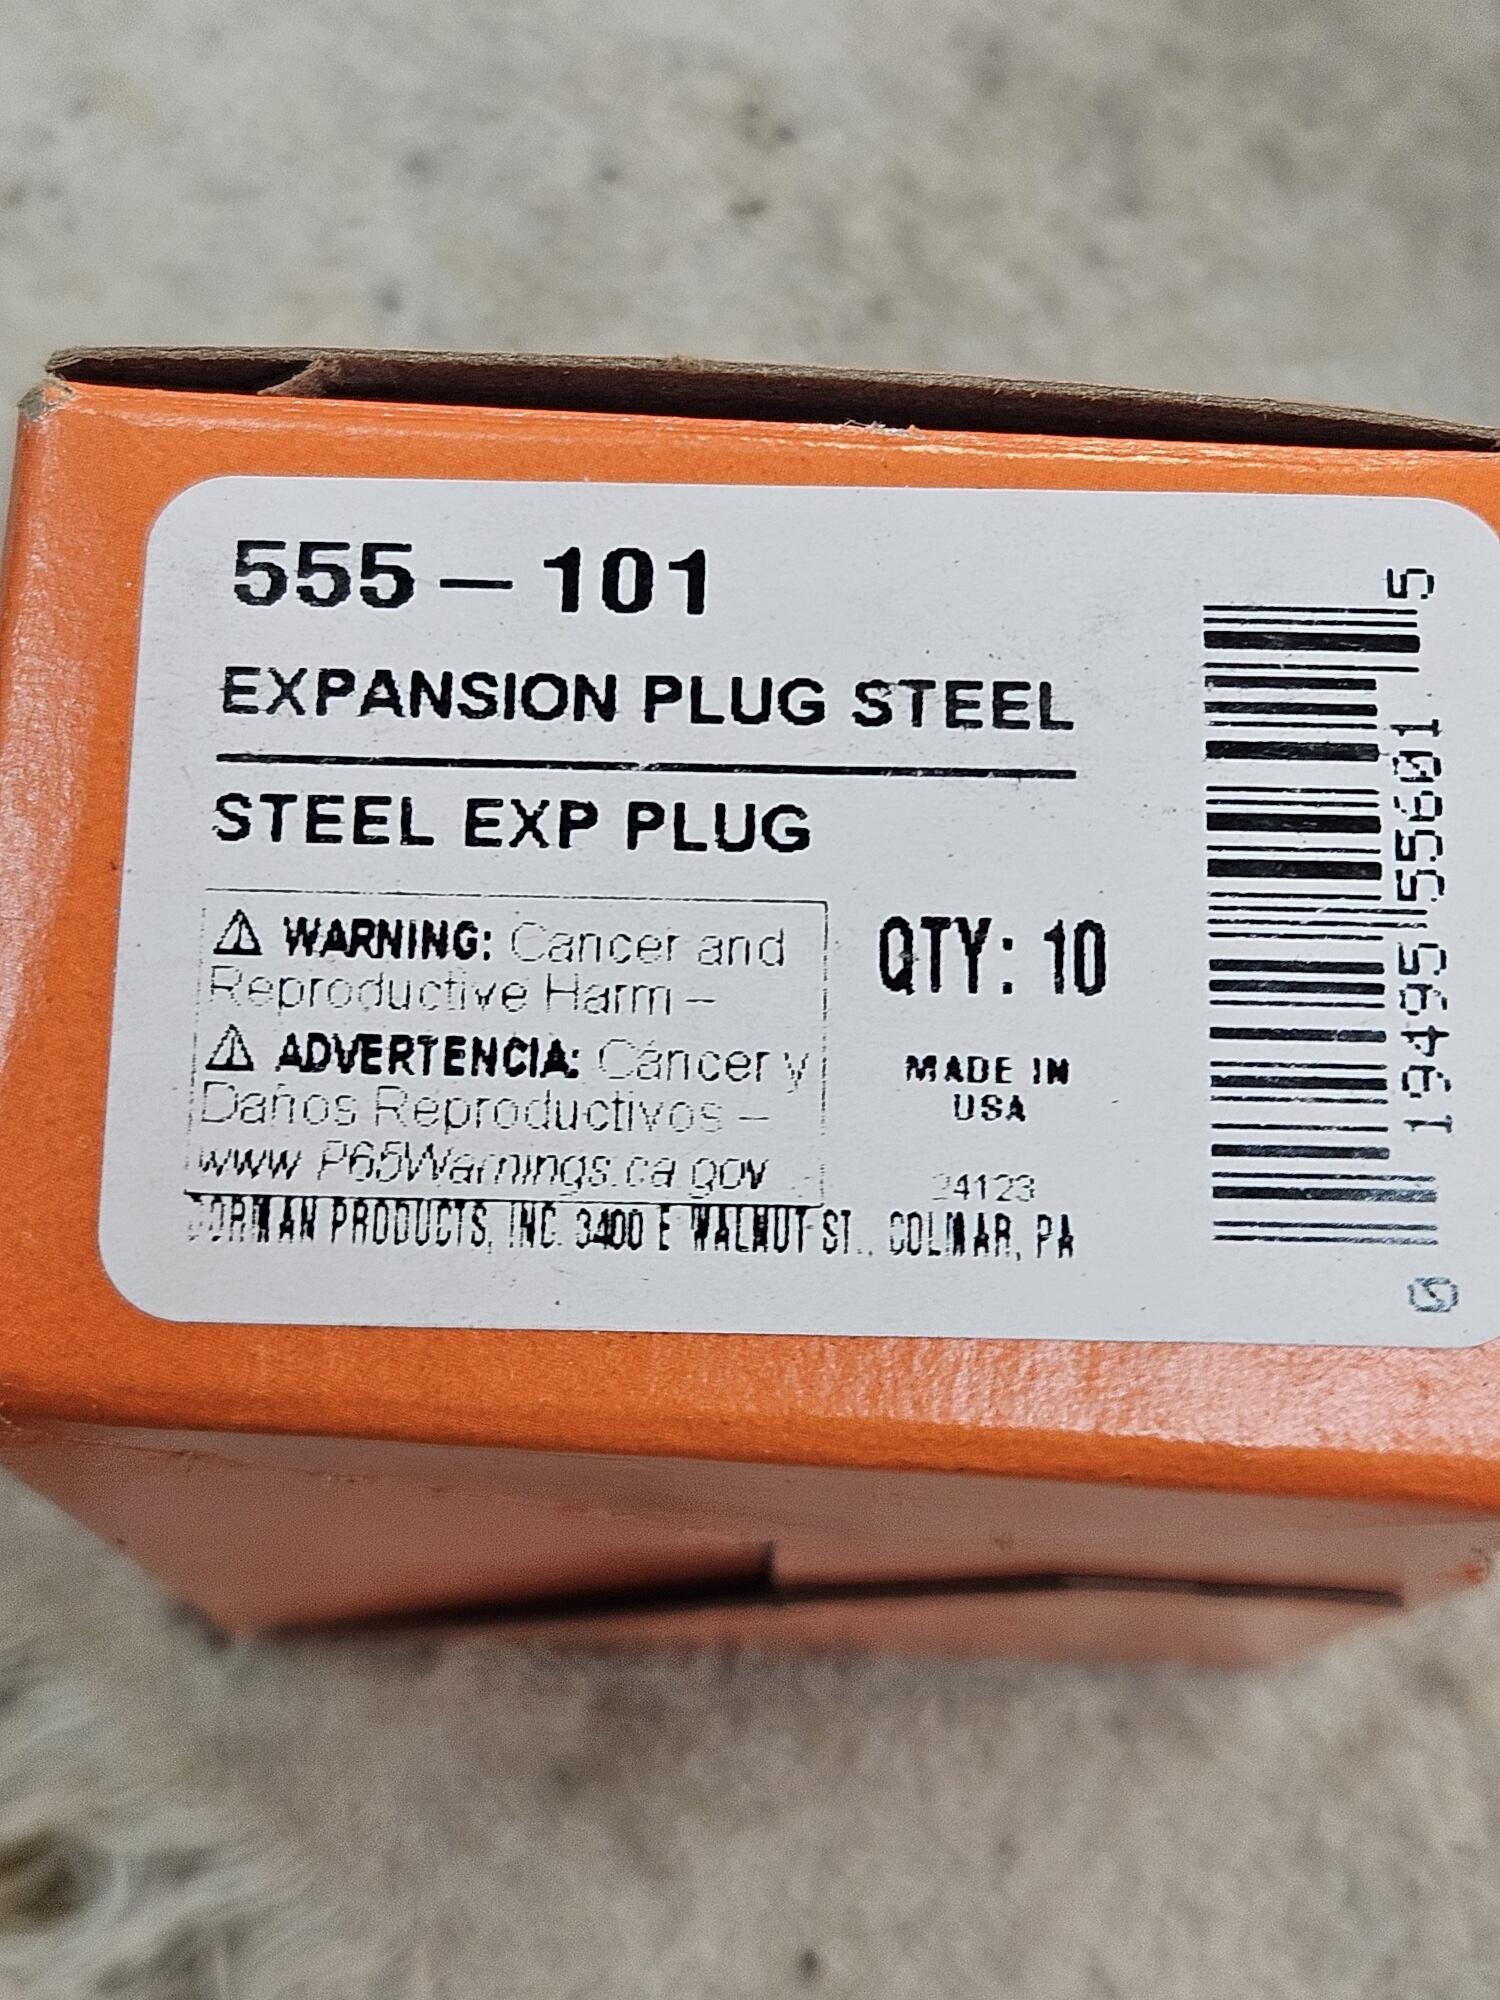
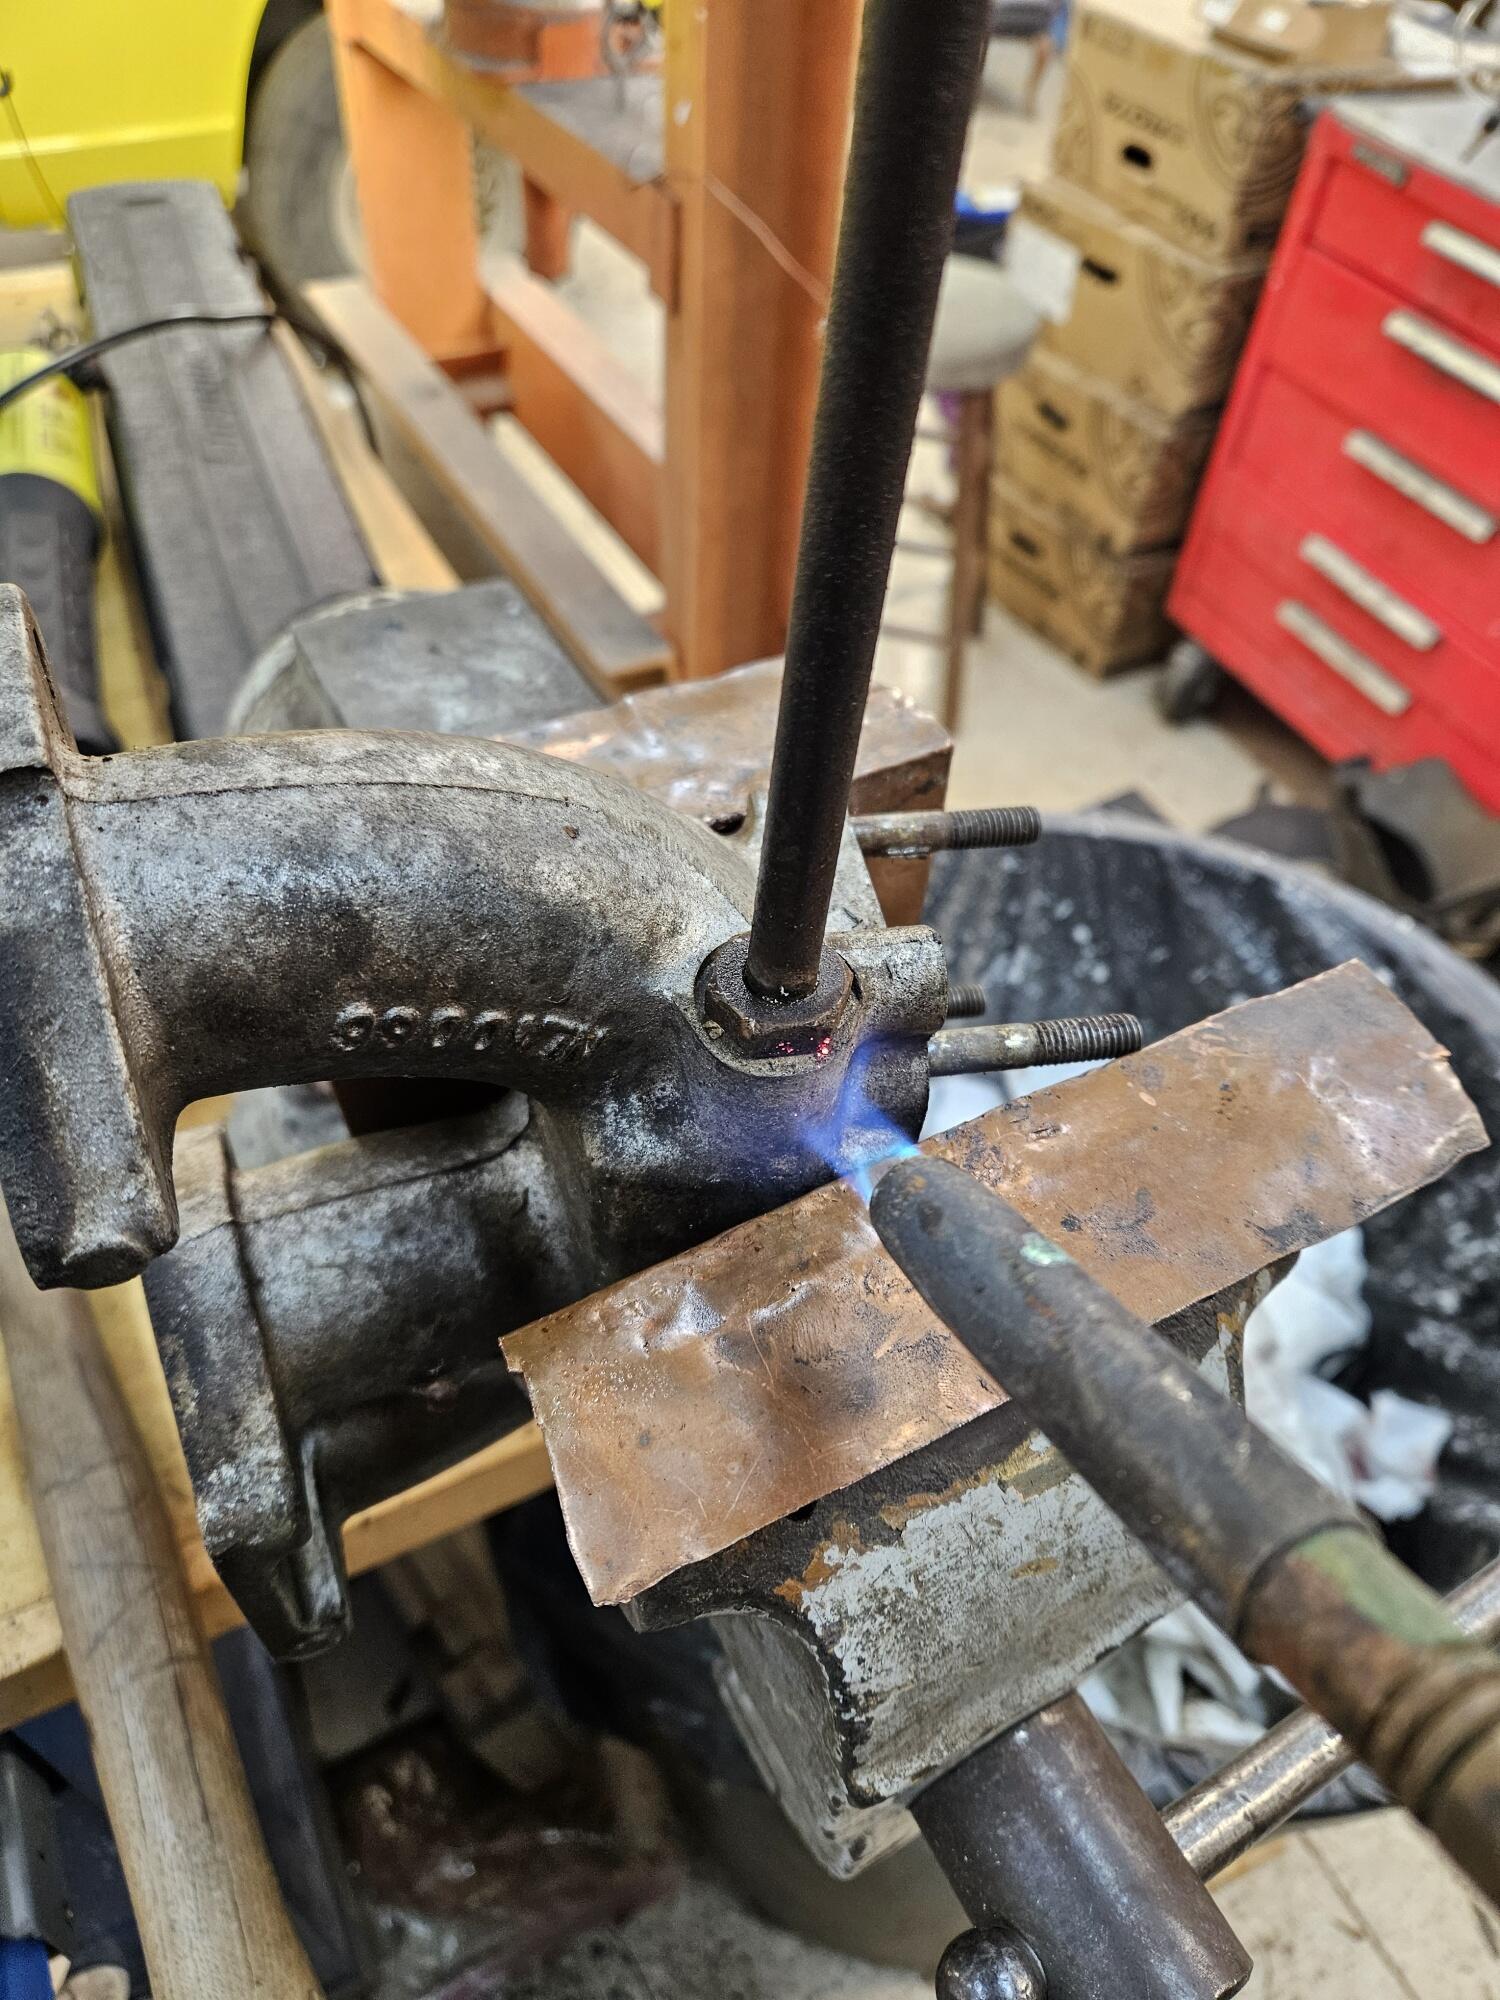
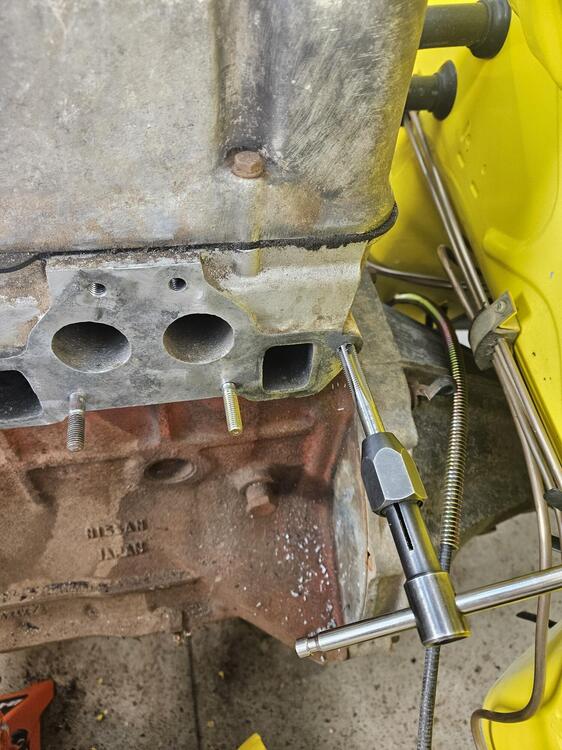
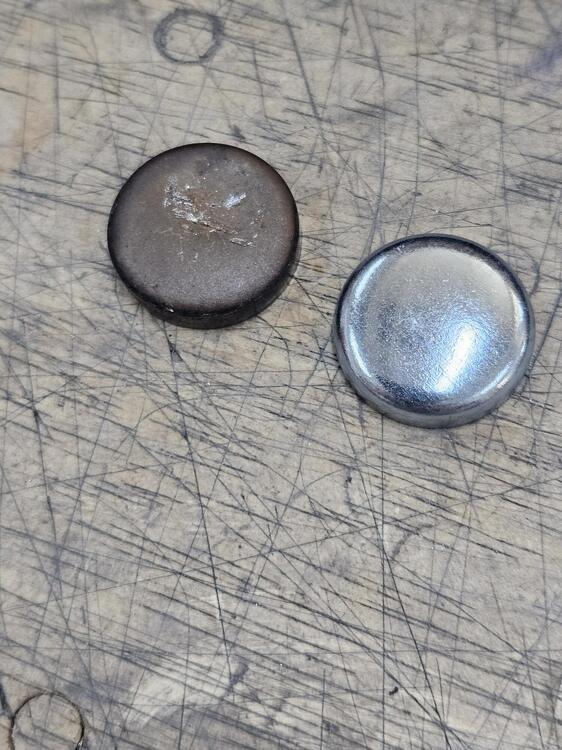
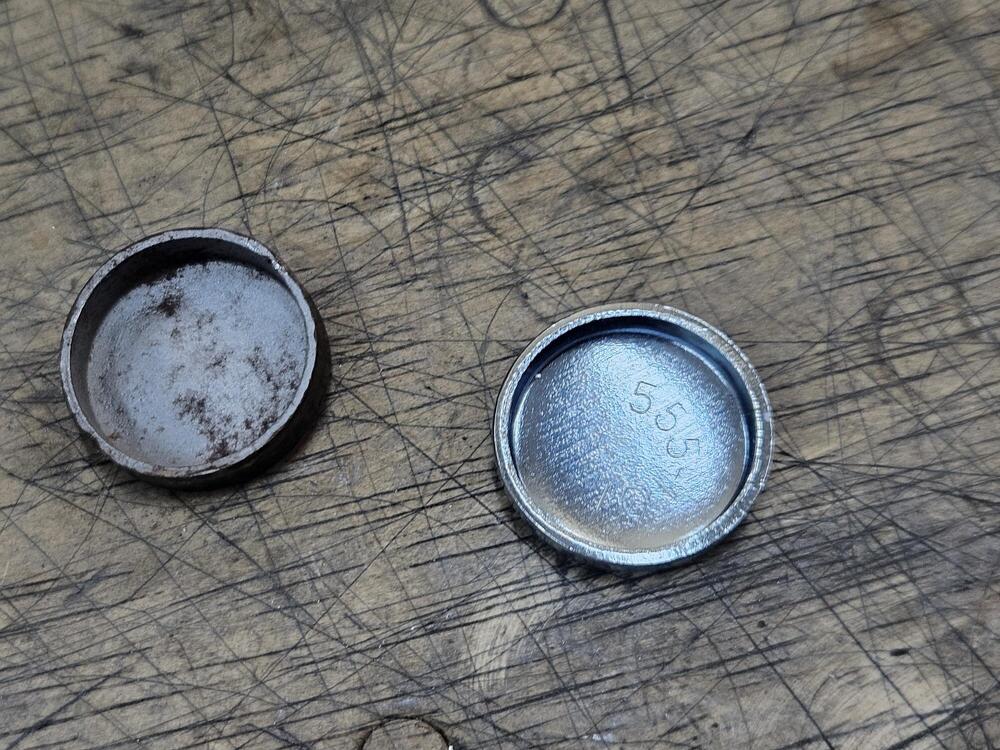
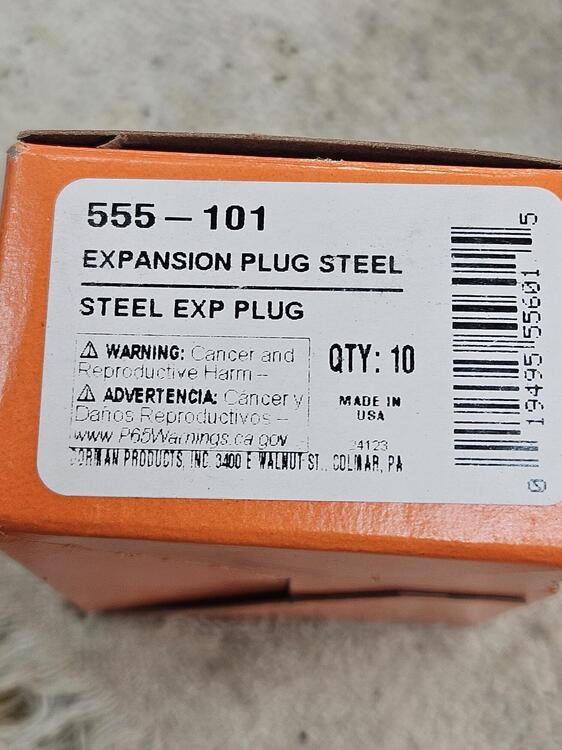
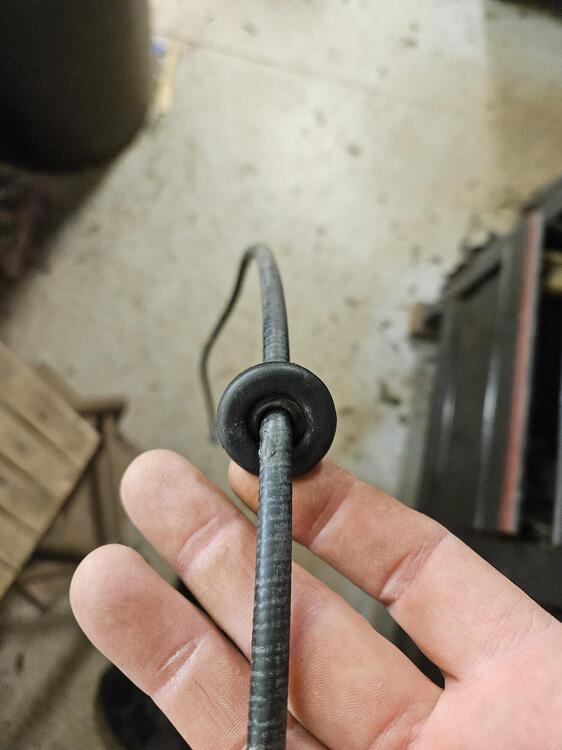
So I took a #3 rebar (3/8") and had to smooth it out some as a long punch. Then I knocked out the end plug. I bought a box of 20mm plugs to replace it with. Although I believe that plug is still available from Nissan The Id of the tube is about 3/4" So I will make up a piece of copper to use as a backer for the TIG welder. Next step is trimming the lumps off the tube...


-
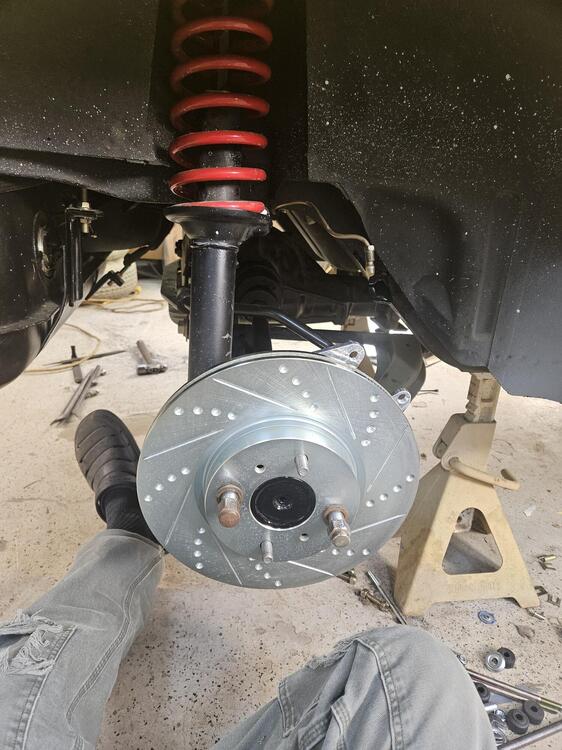
I am sure I will build a motor at some point and may go turbo at some point. It will probably have 300-350HP at some point in the future. We have some great mountain roads near us and the stock brakes don't like those long twisty downhill sections. They would always get hot and smell. These should stay nice and cool no matter how hard I push! 😉
-
I agree, he should take them back. They're not close to being salvageable.. Too bad
-
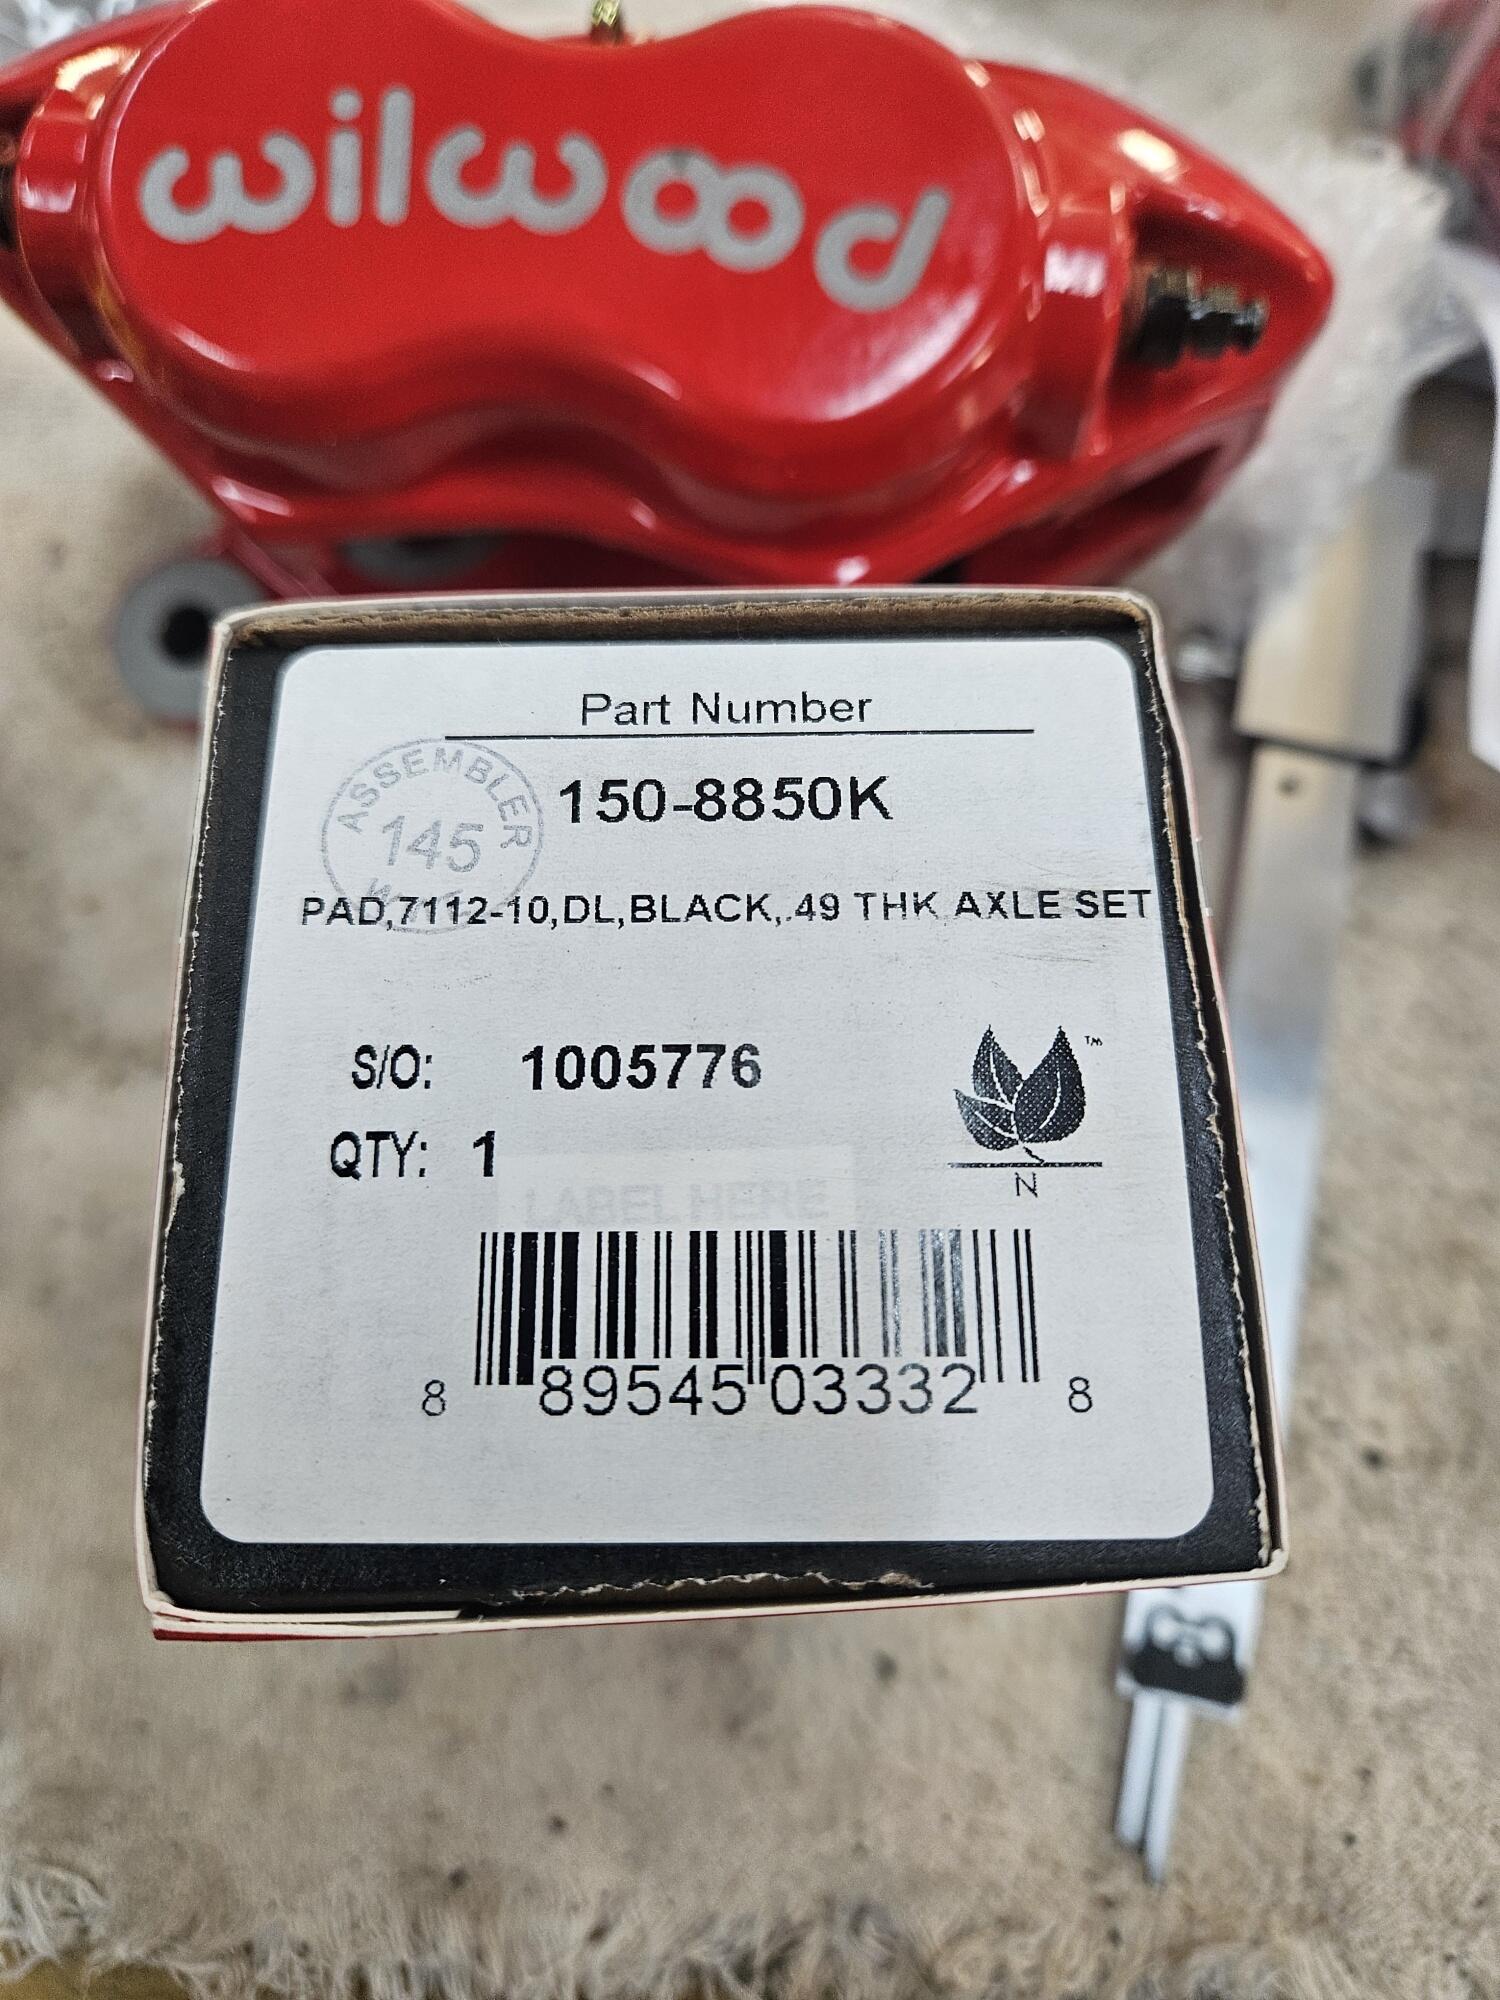
I am replacing the fronts with larger Wilwood's too. If necessary I will add a proportioning valve to get the bias right. They don't really provide any instructions. So I decided Id make a thread
-
Differences?
-
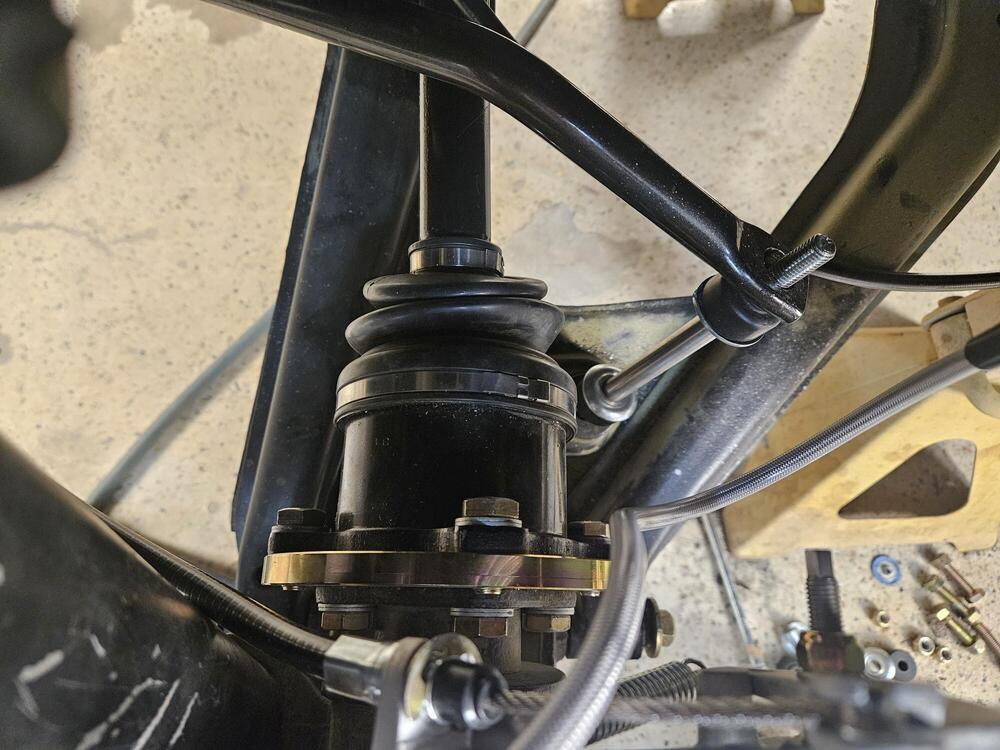
Also if you're starting from drums you will need to remove the all the drum brakes, shoes, hardware and the drum backing plate. To remove it whole, requires pulling the stub axle. The medieval method is to cut it in half. I had to cut off my old adapter plates.They were an old design that I installed when I had the stub axles out. All the new designs only use 3 of the four backer plate holes
-
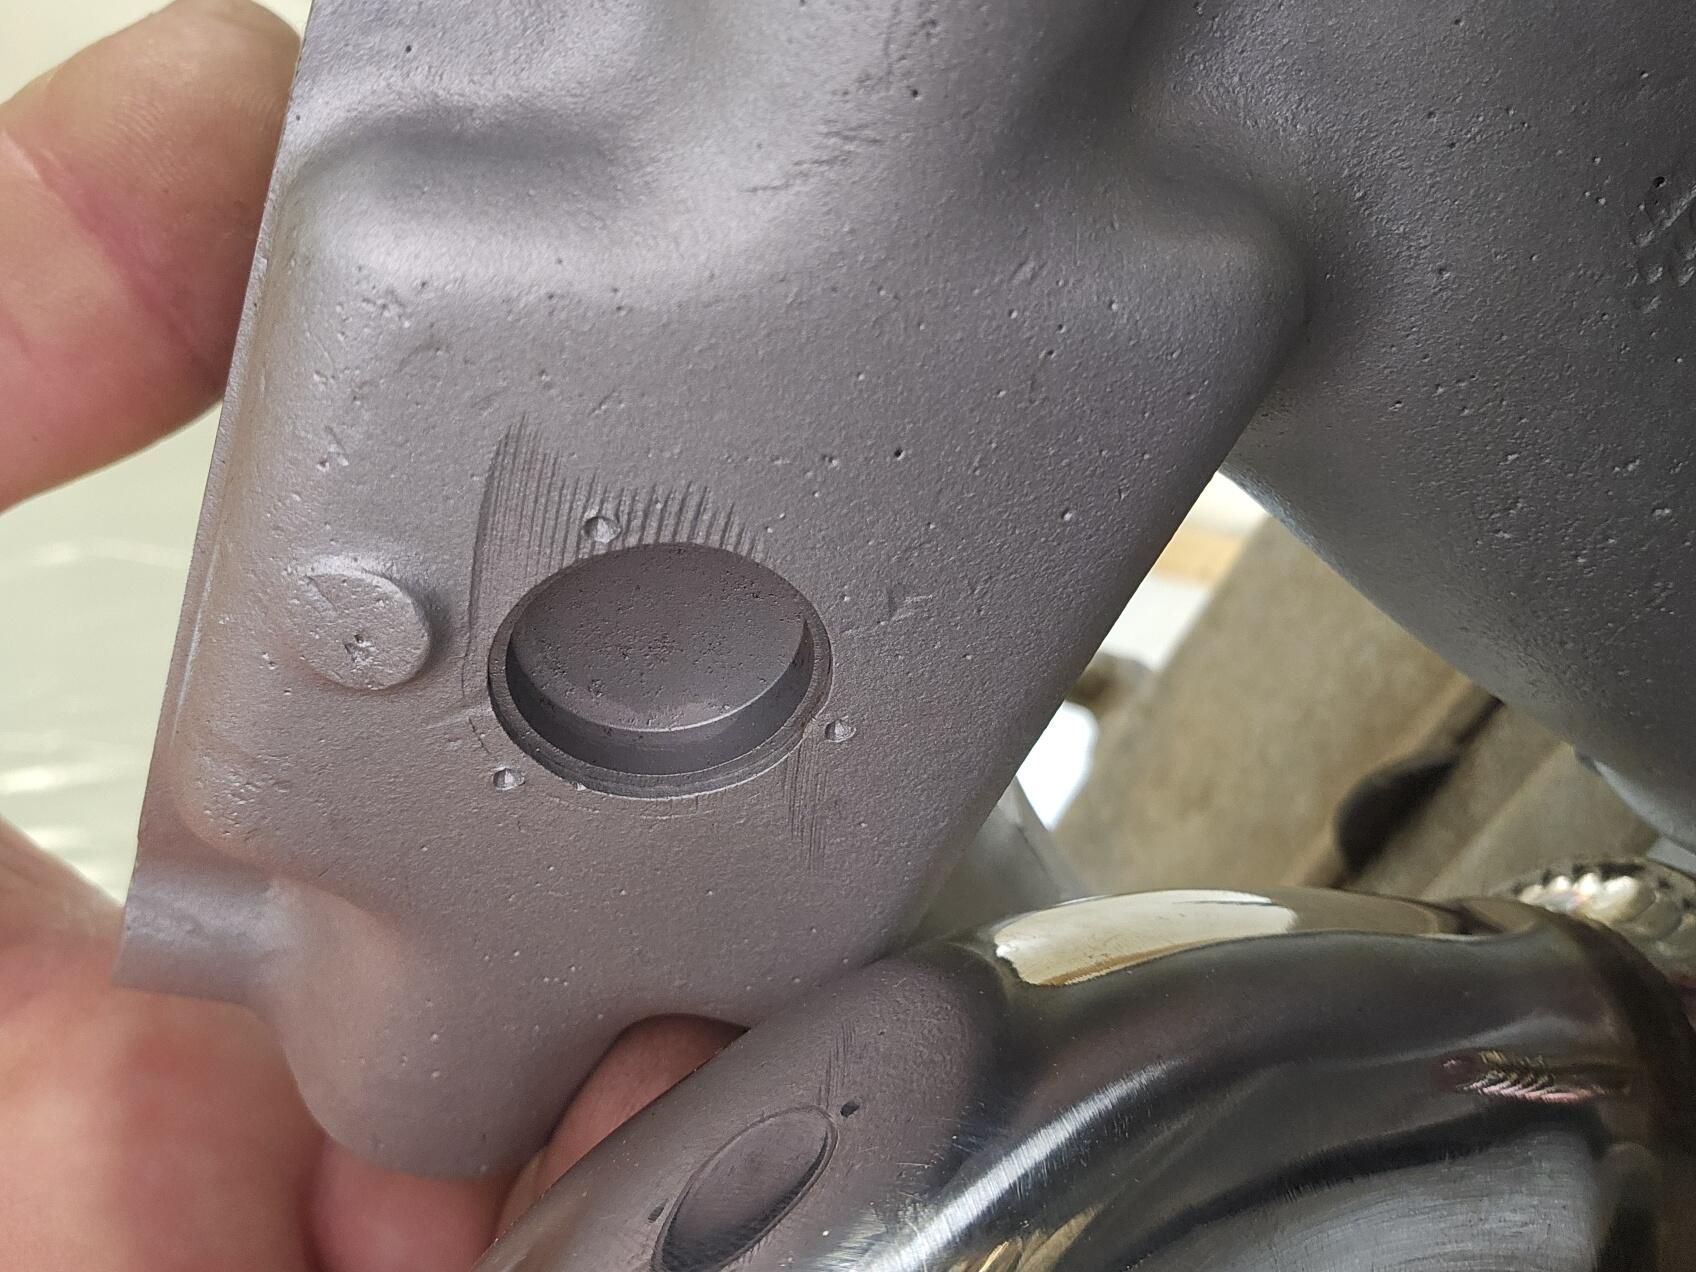
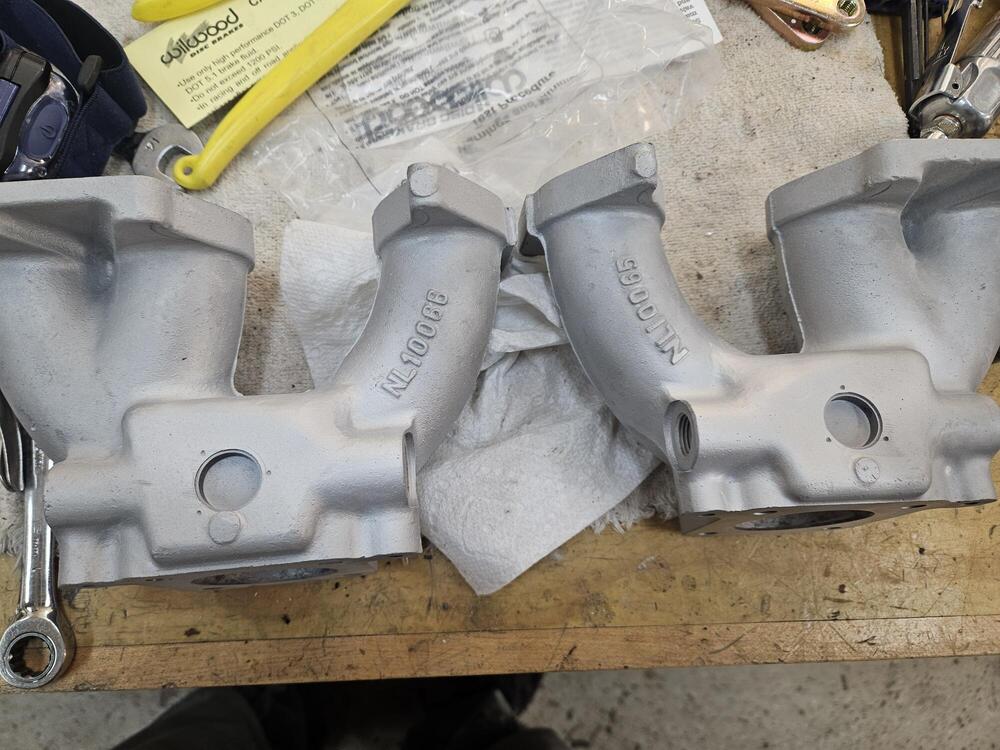
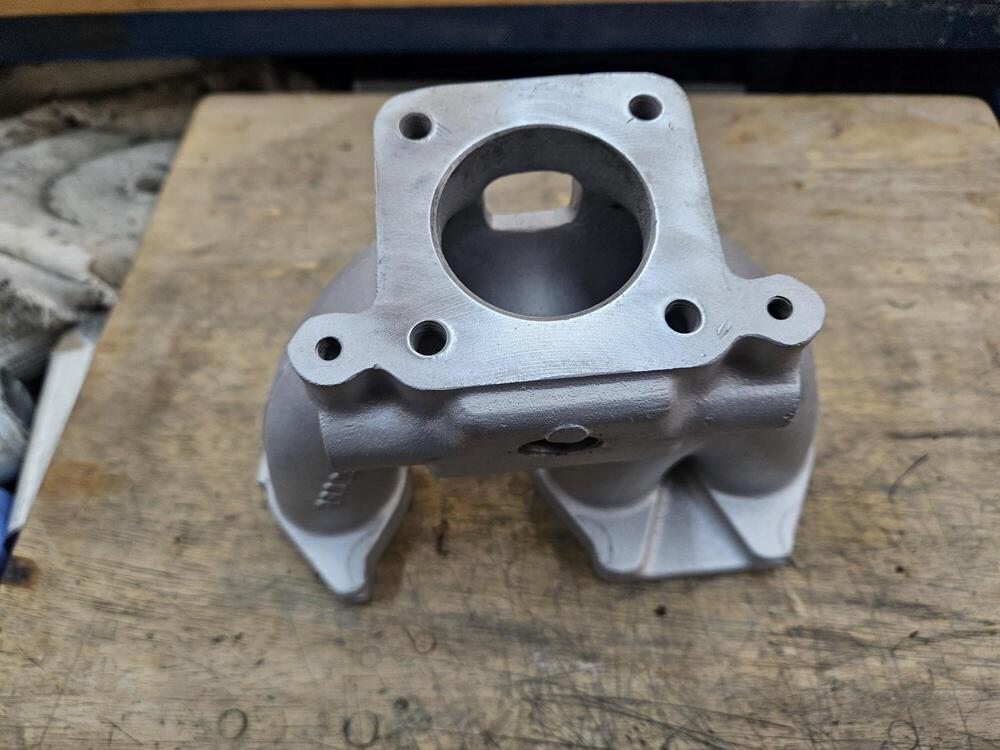
I have a small interference with my new headers and the intake manifolds. Has anyone else run into this? Here's my new shop helper! Already found the tools and the shiny exhaust. 😉


-
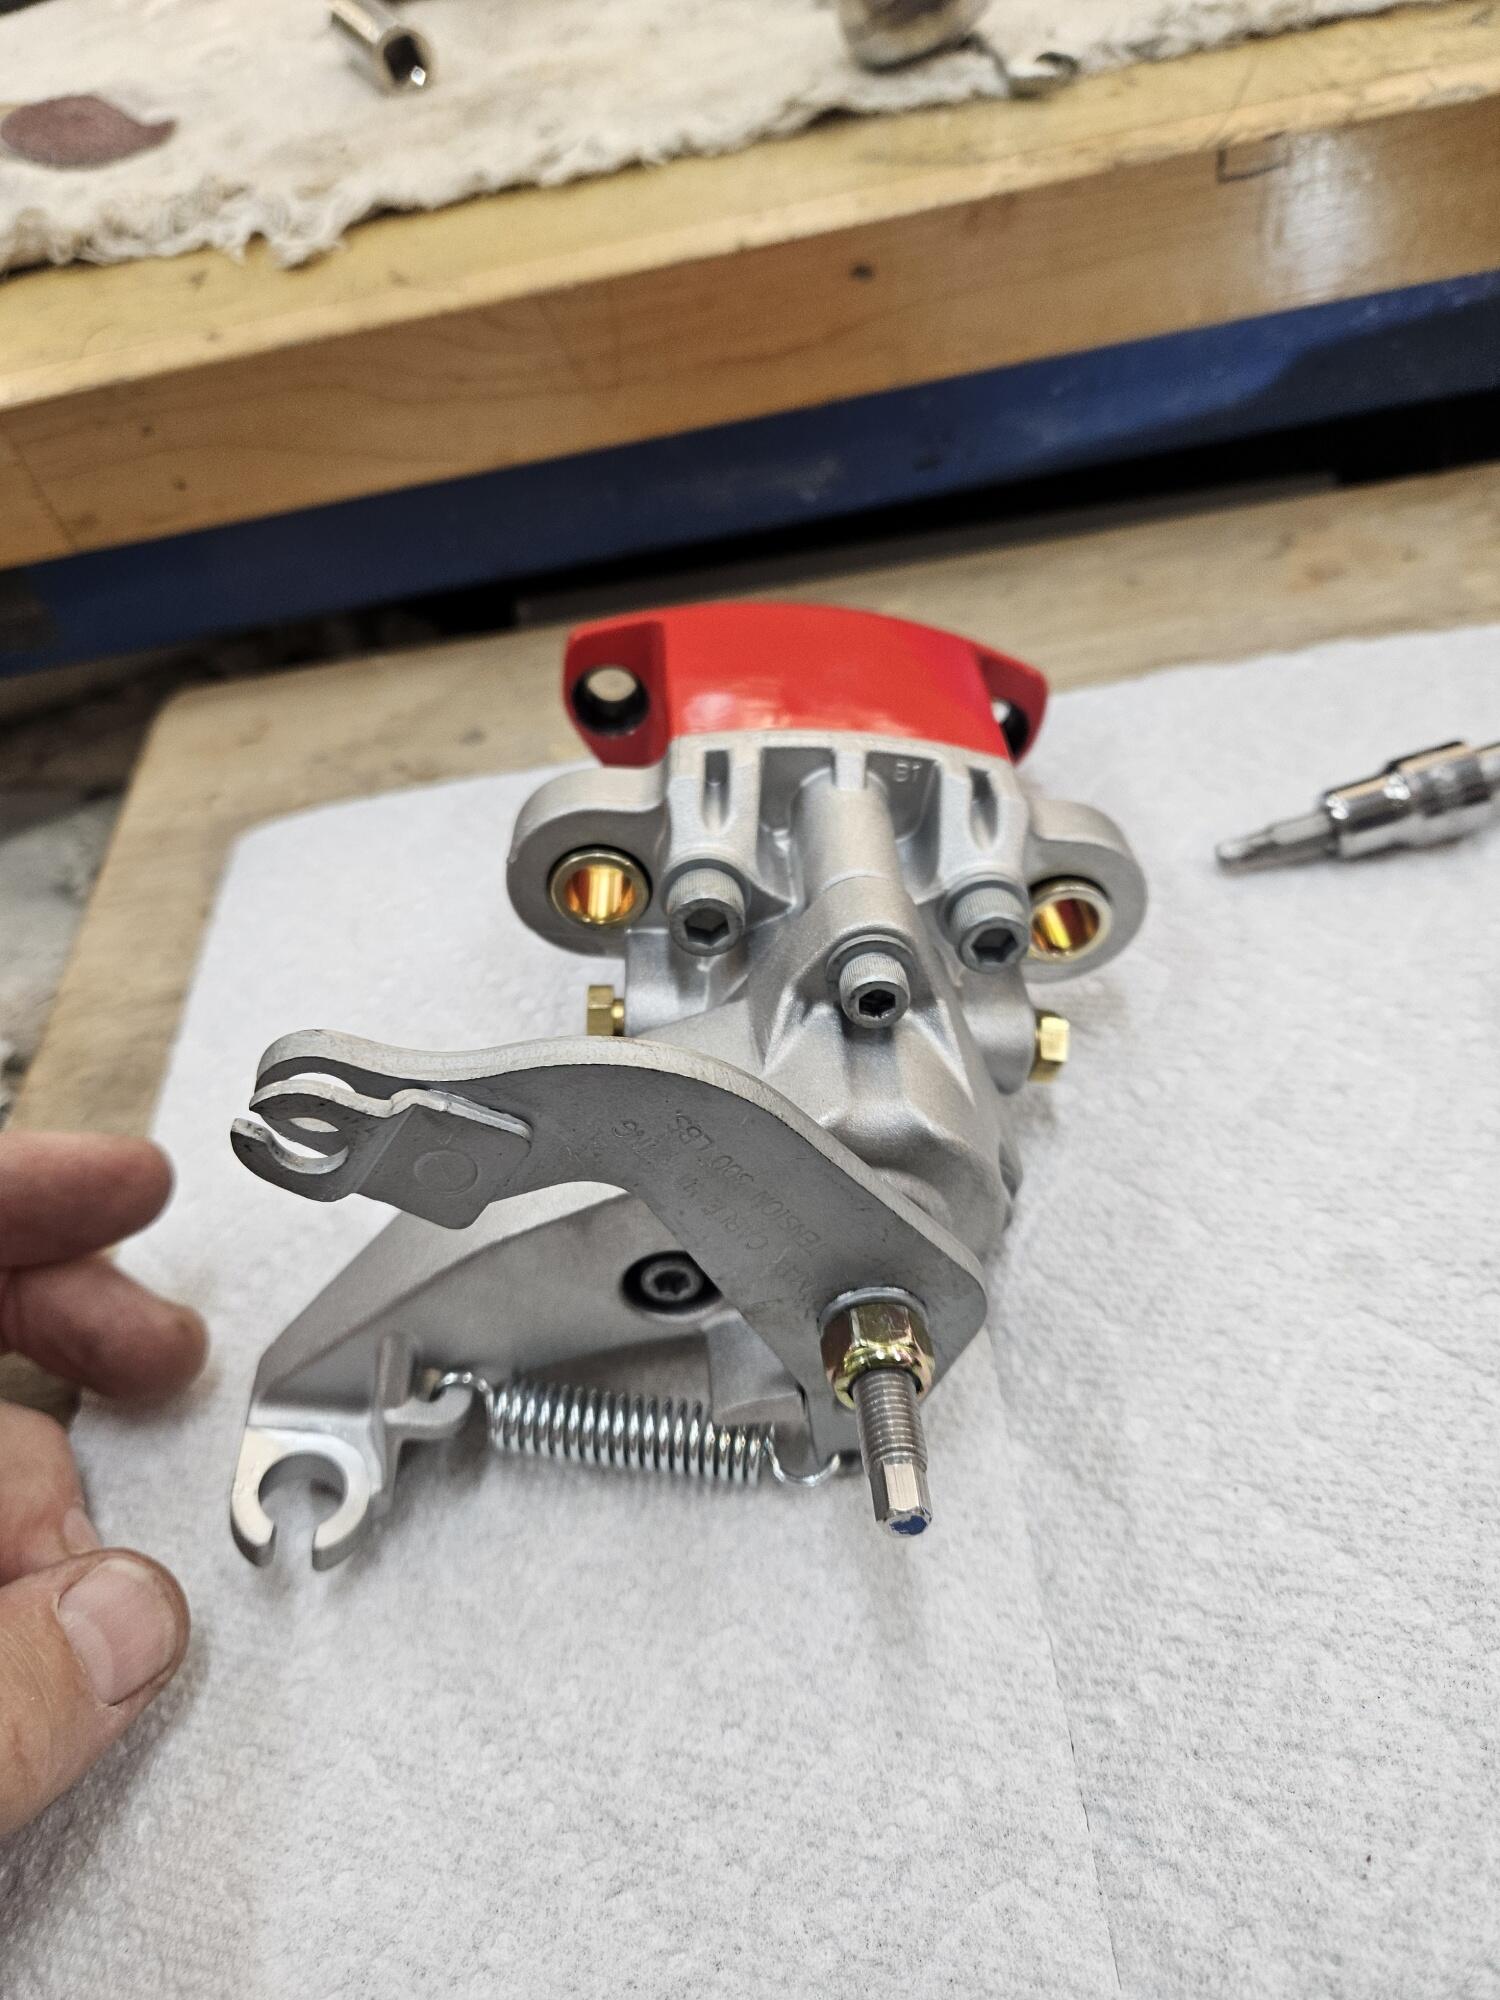
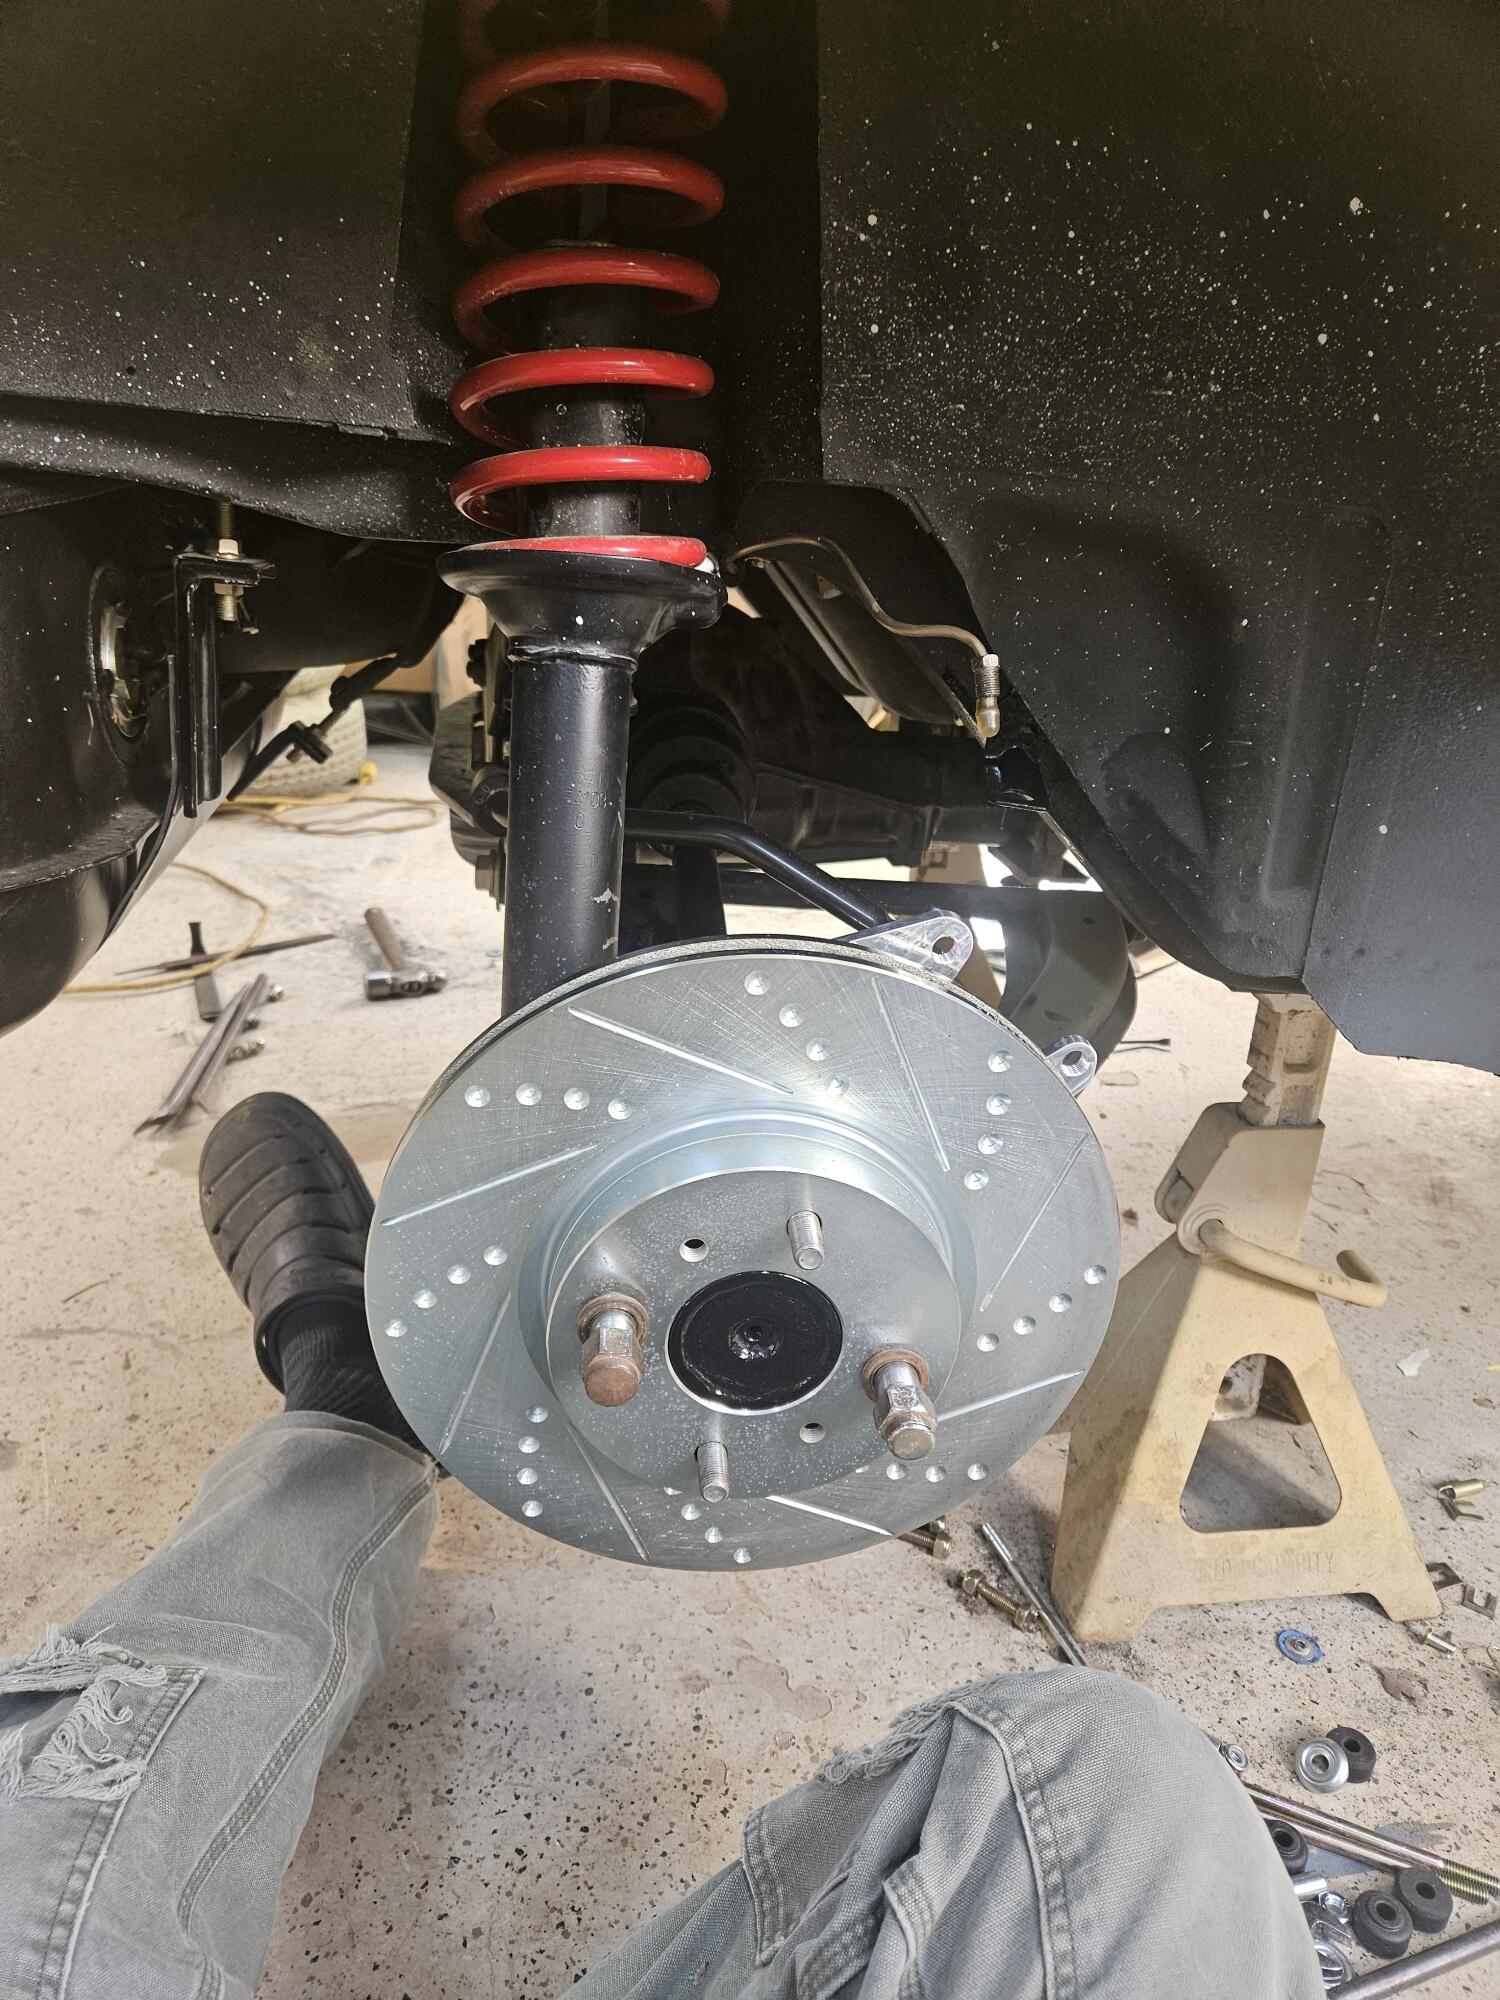
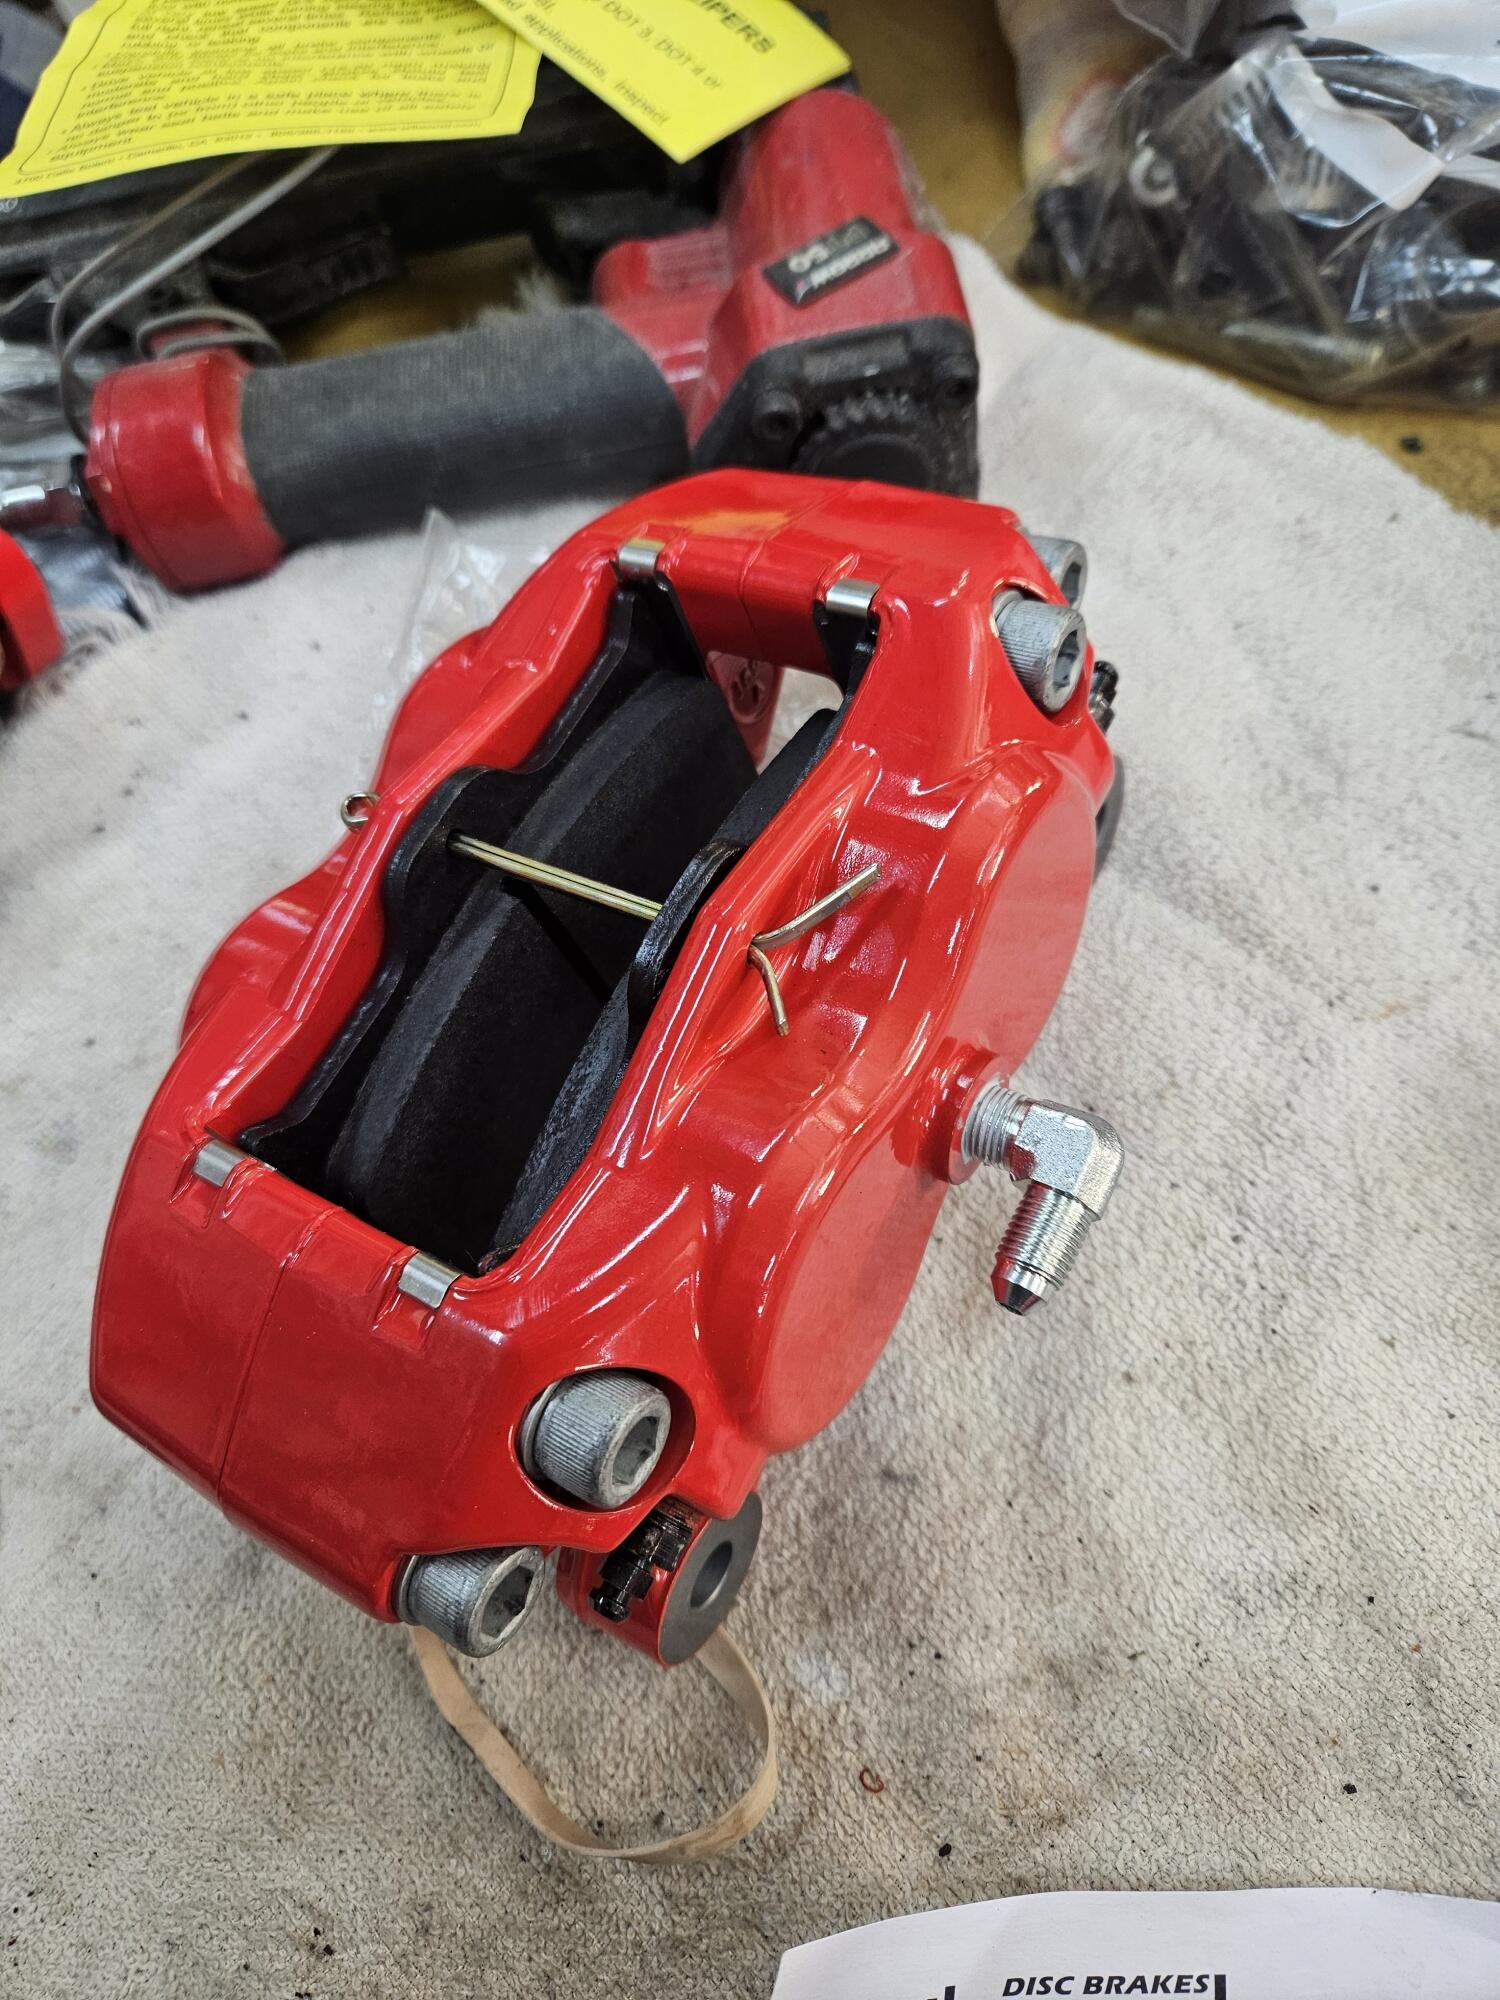
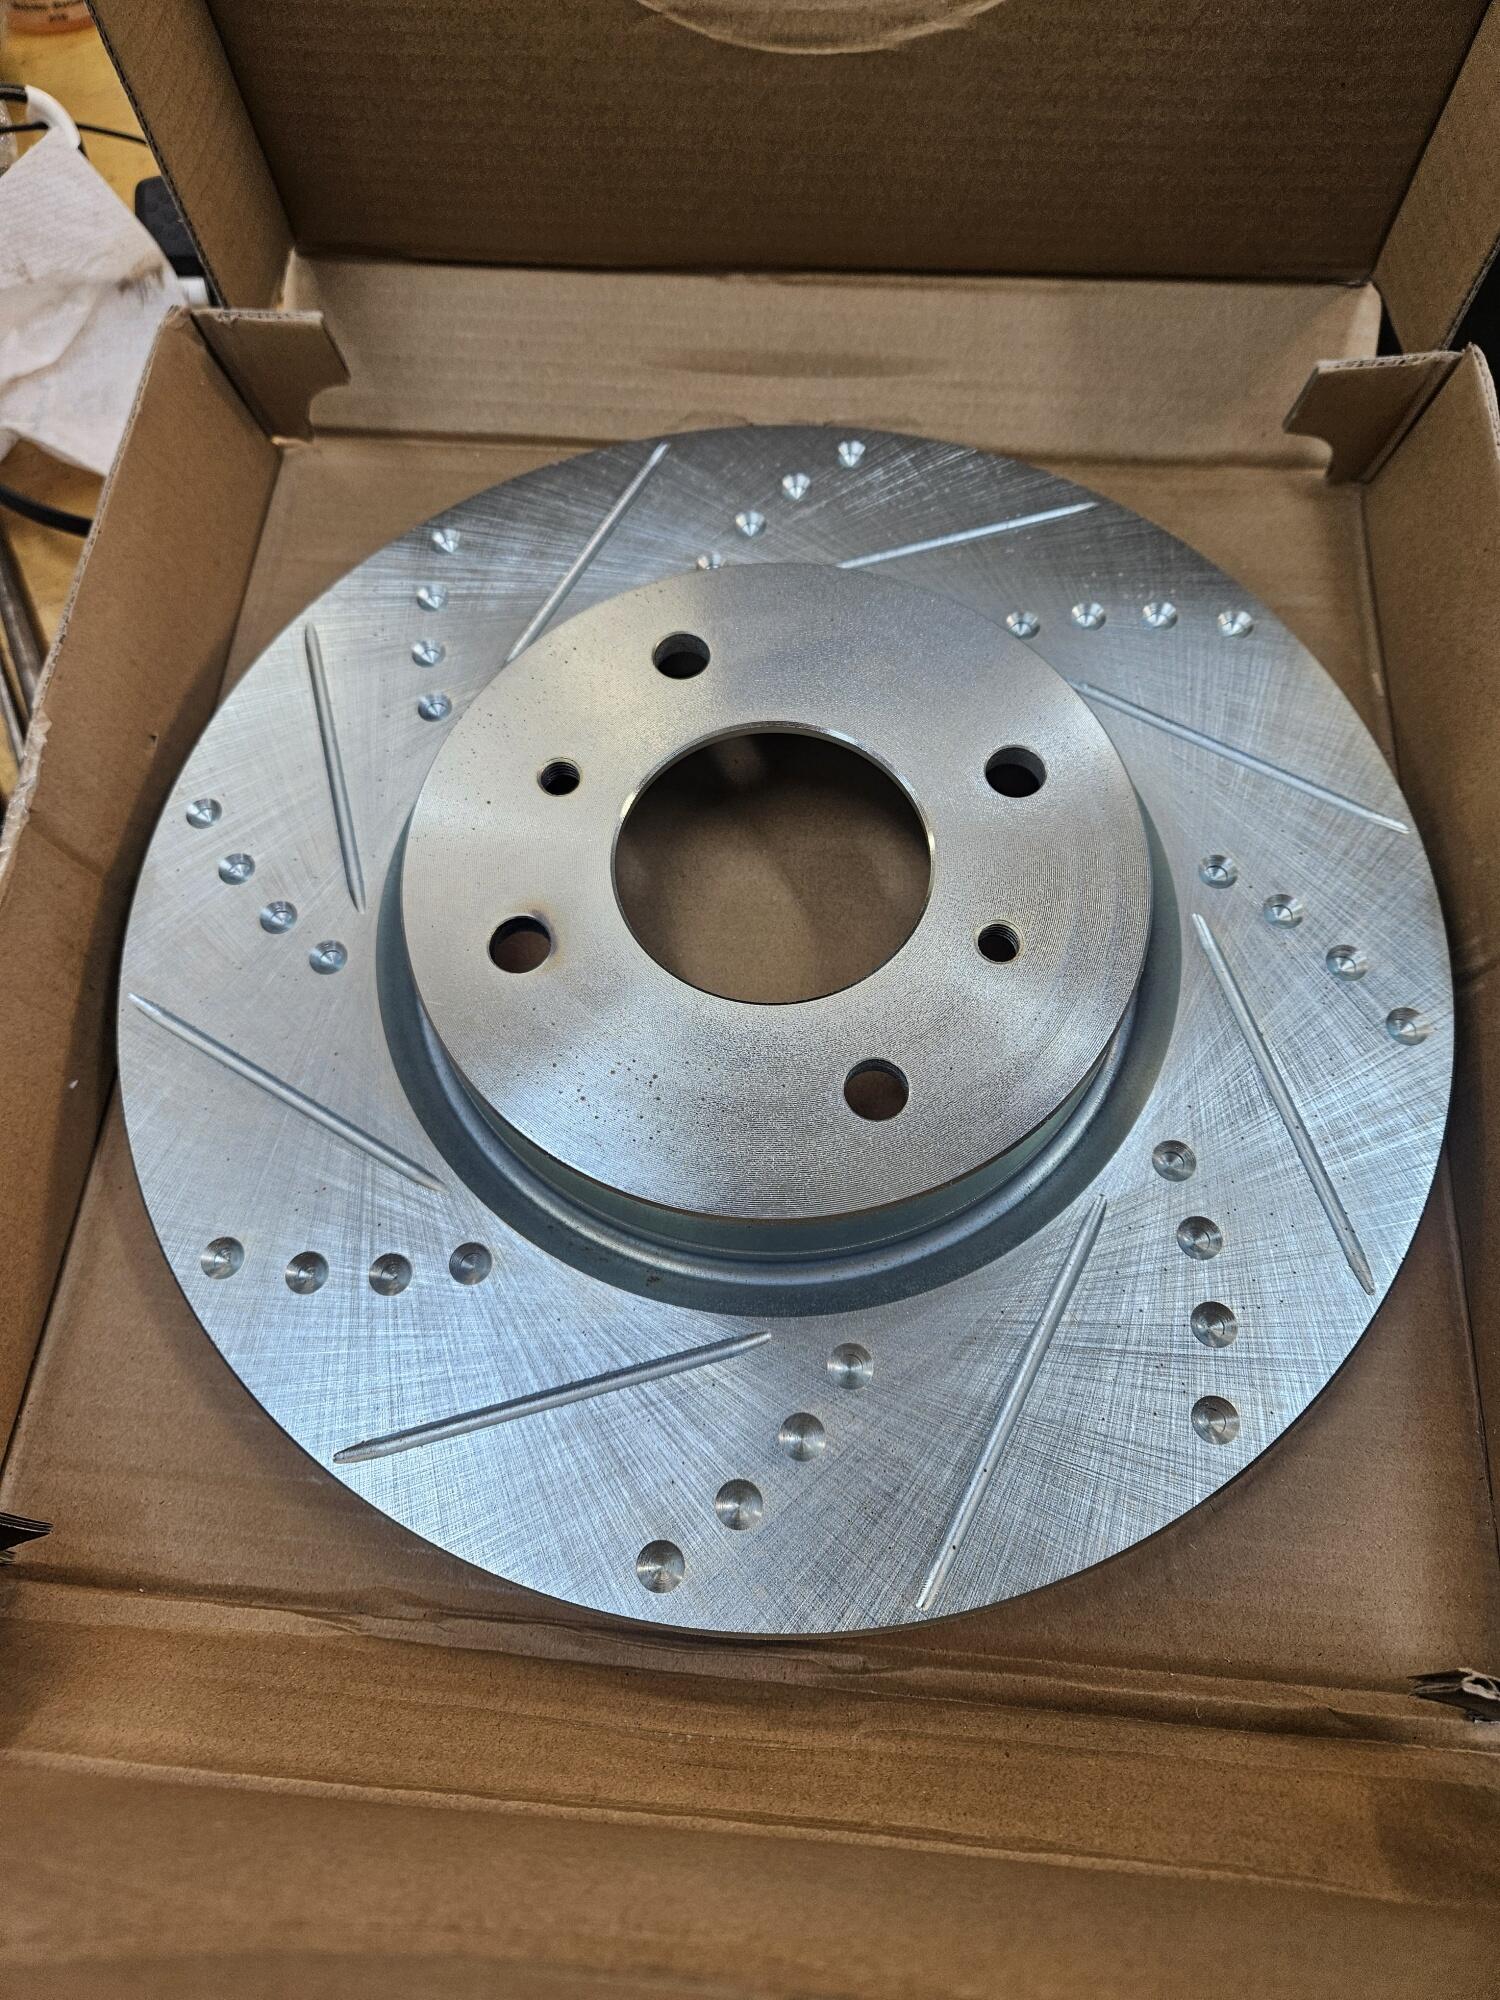
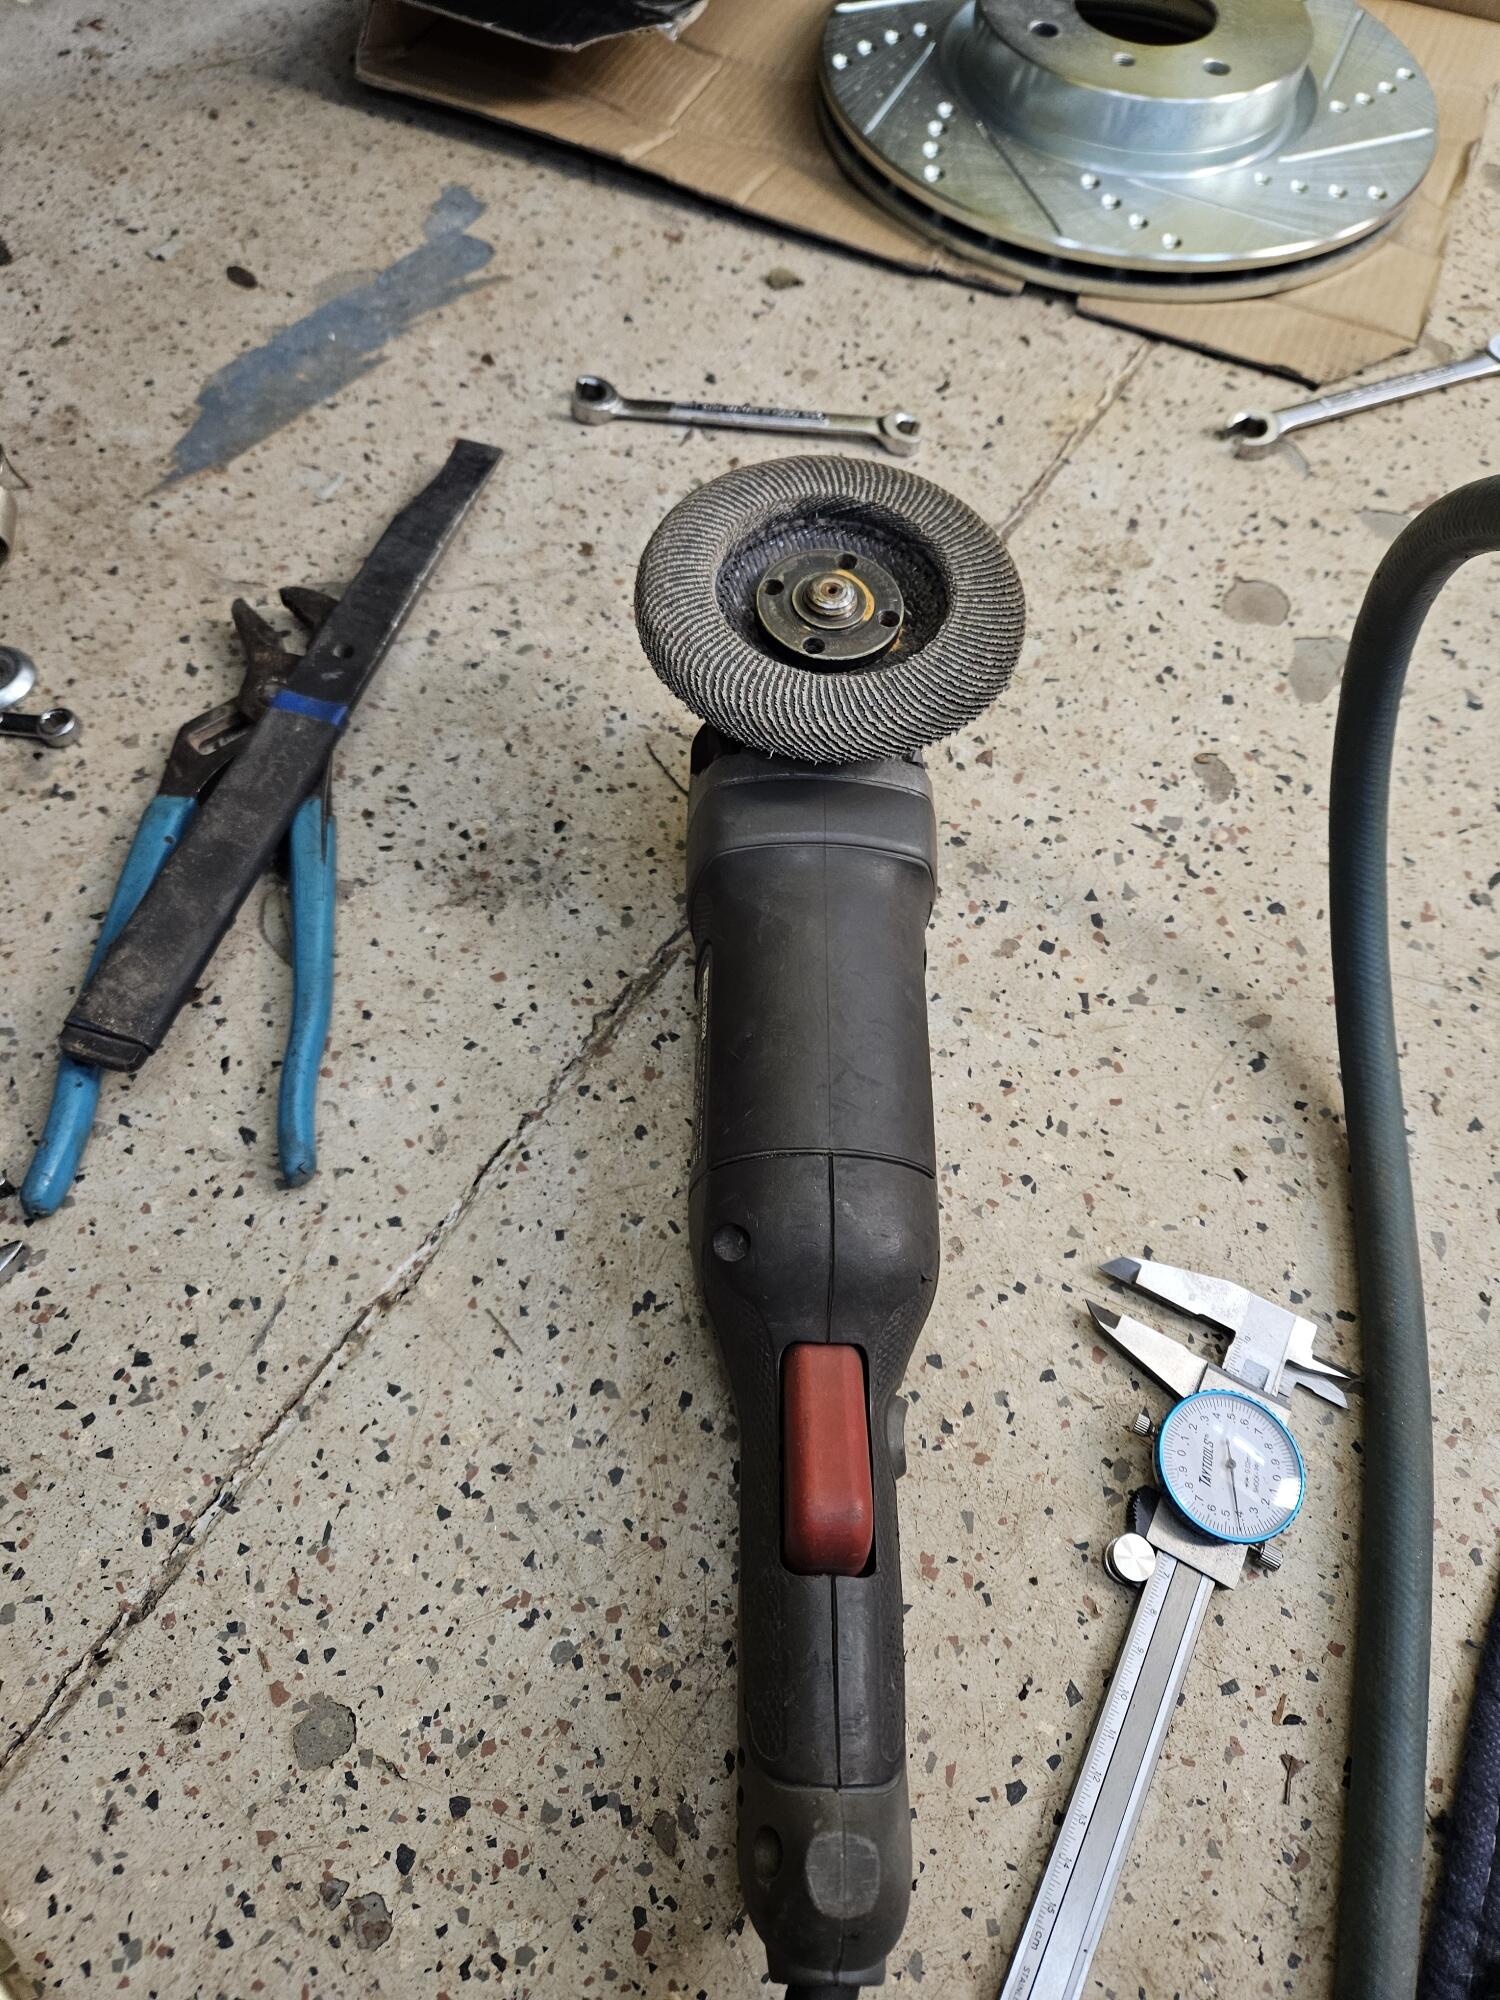
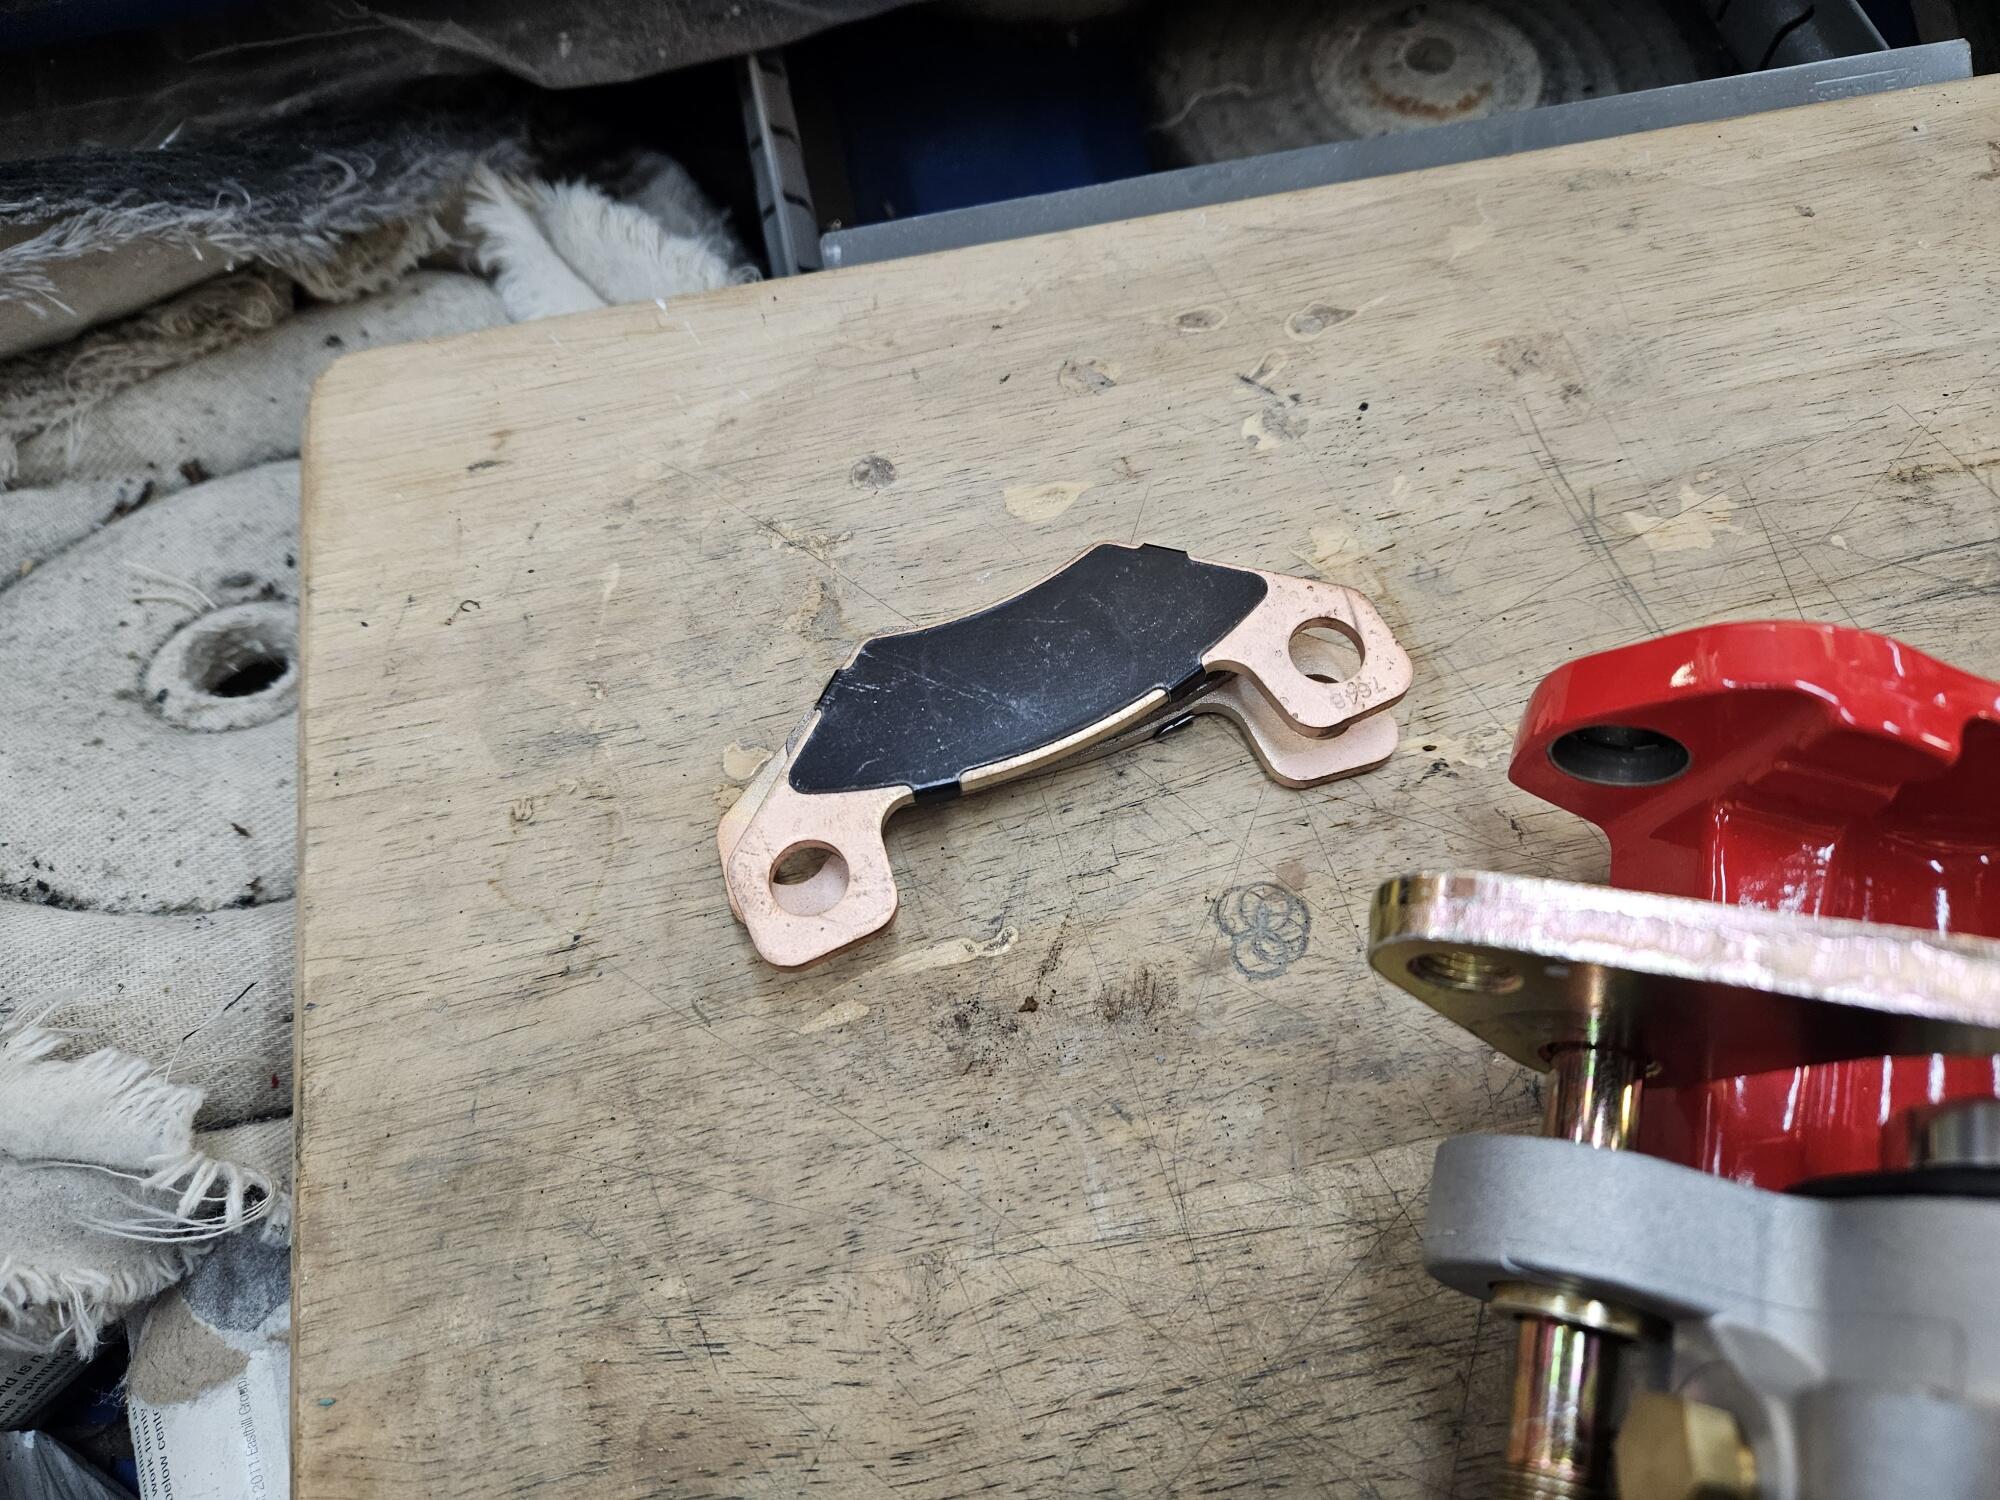
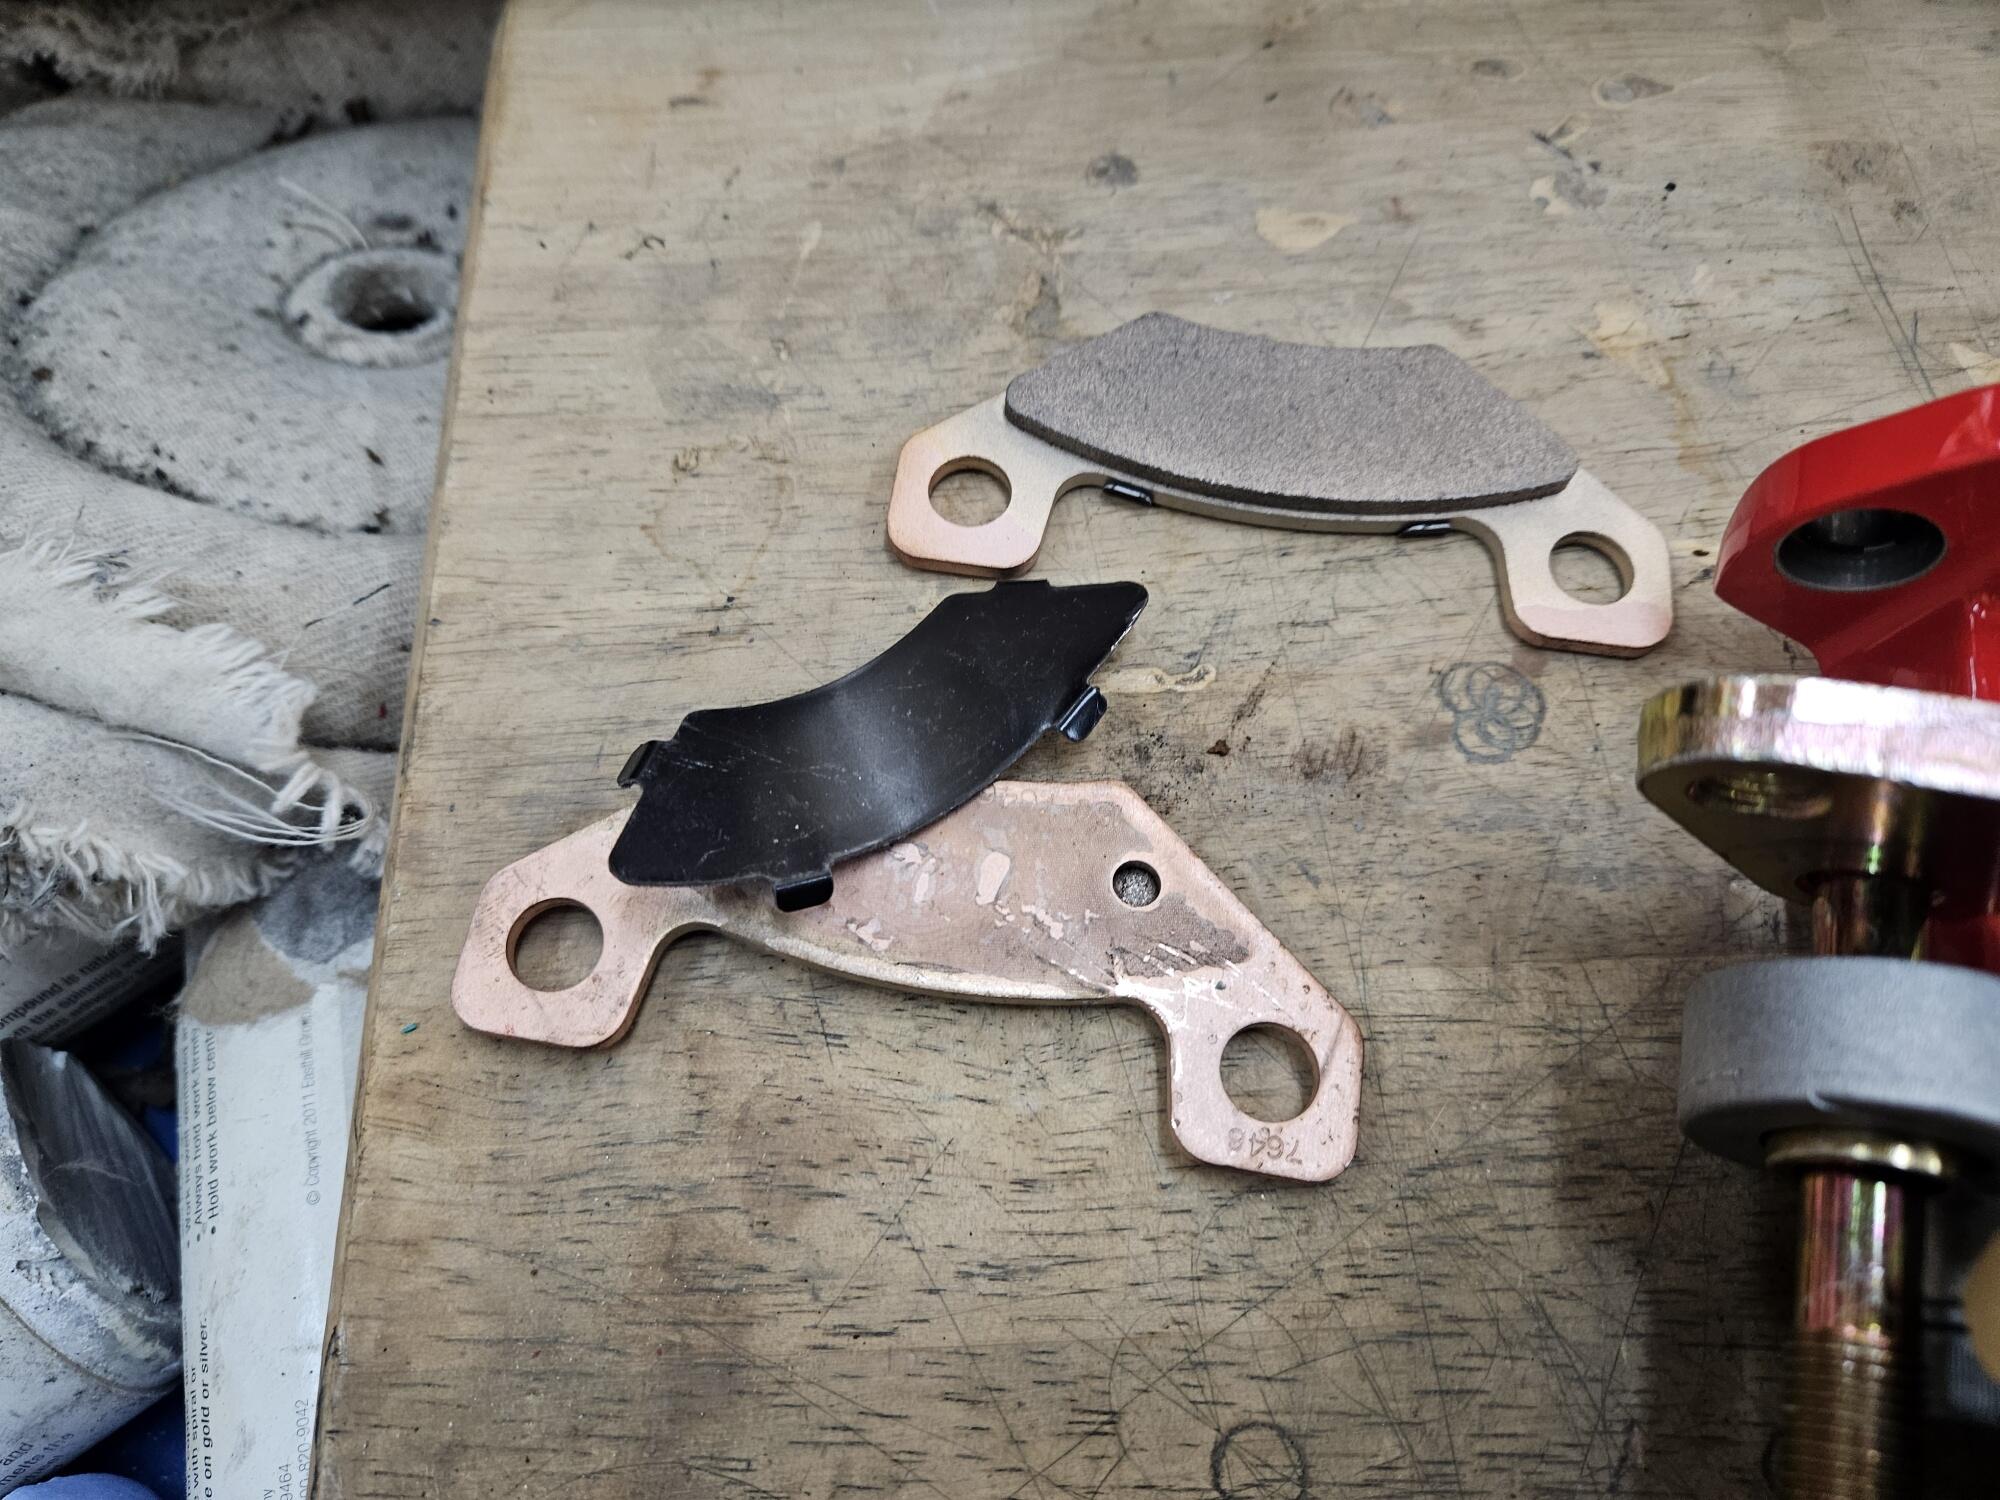
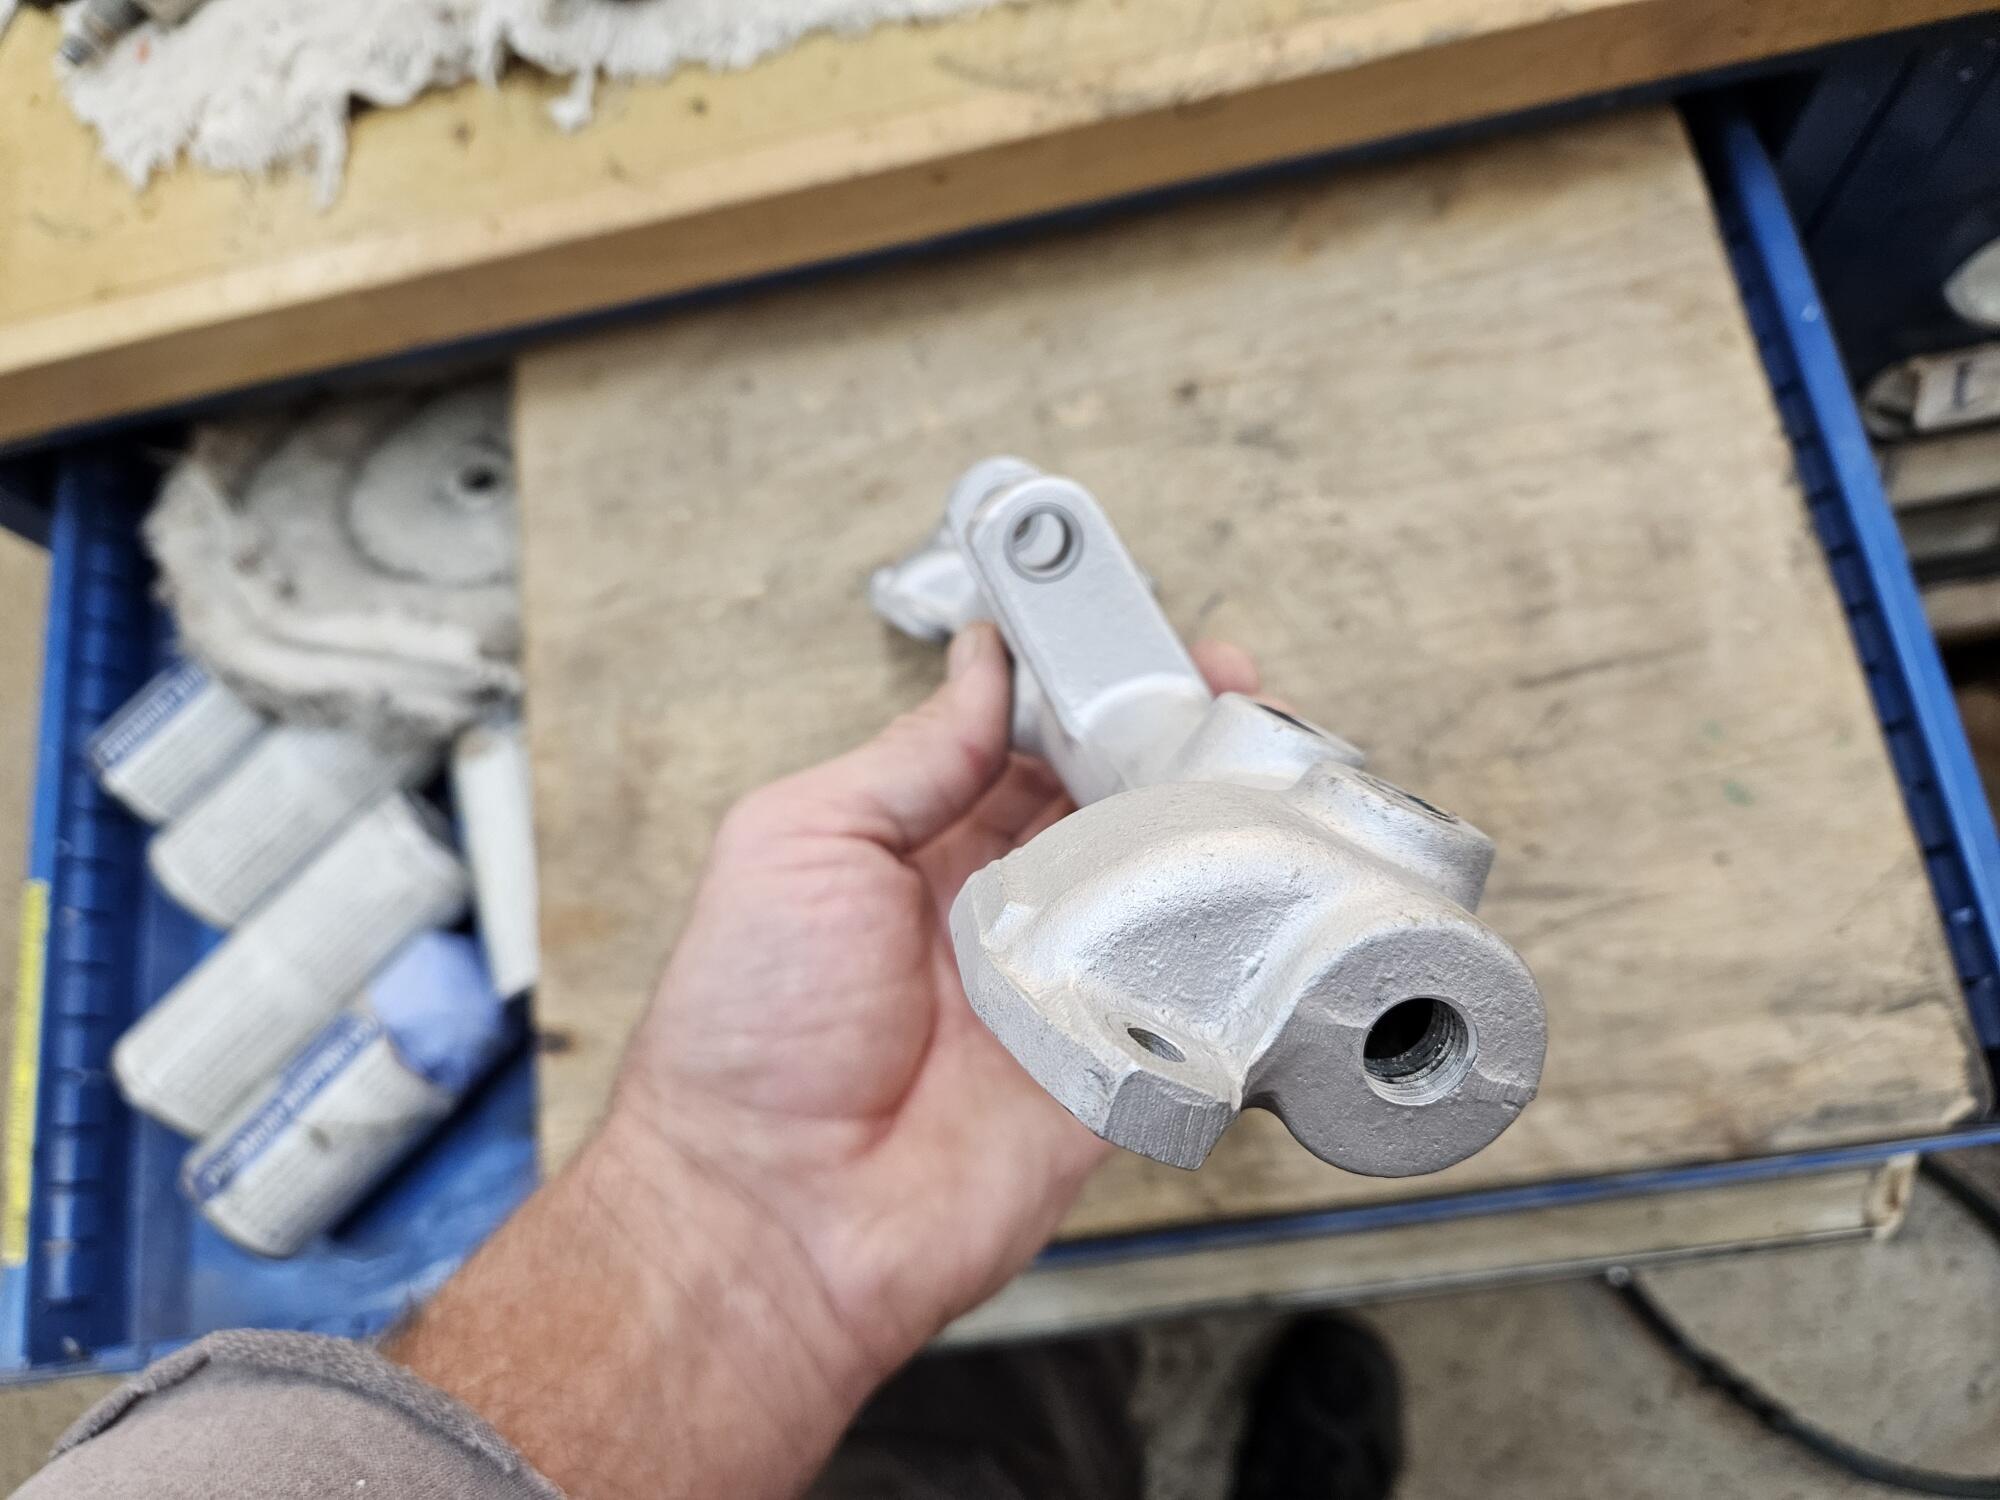
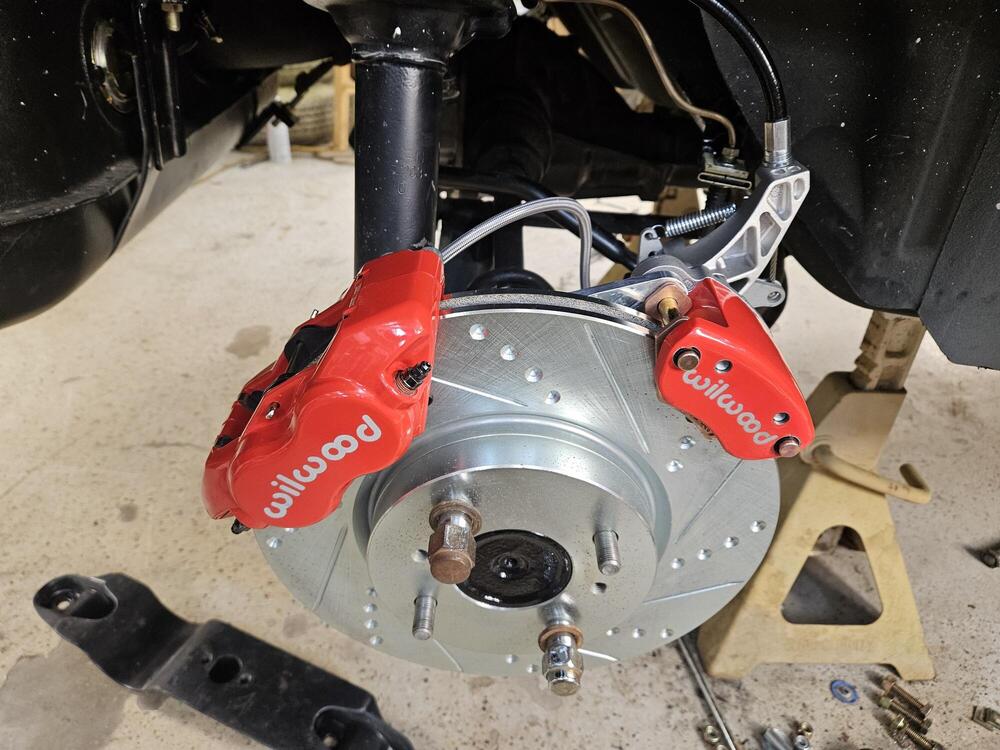
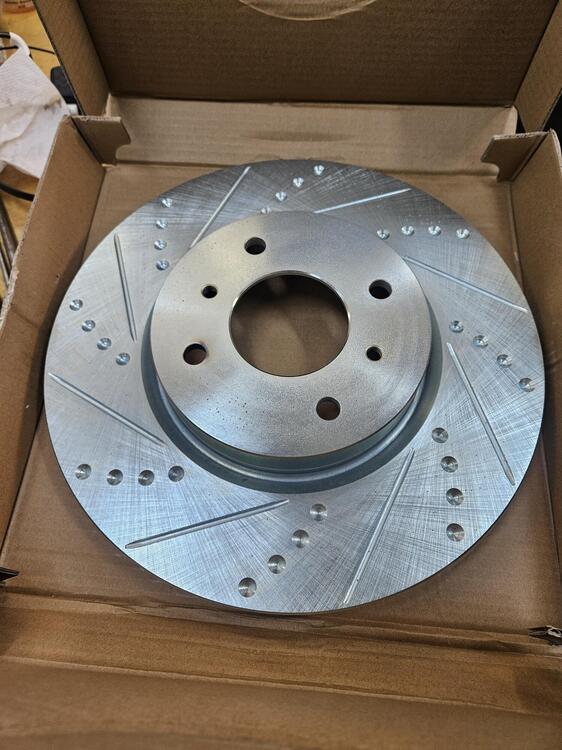
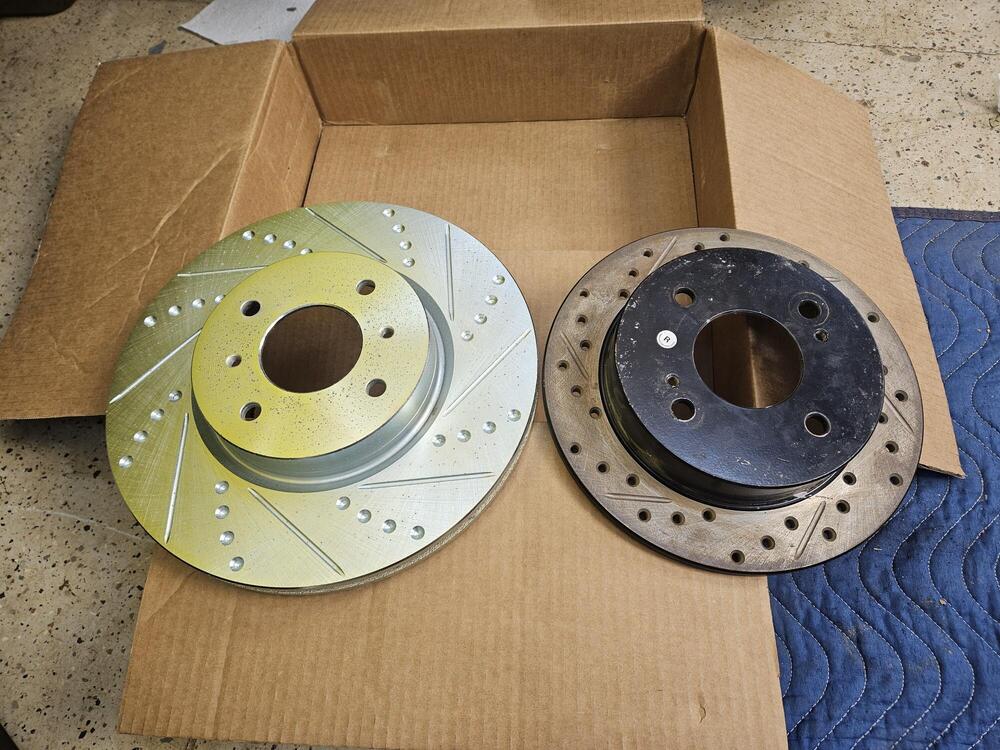
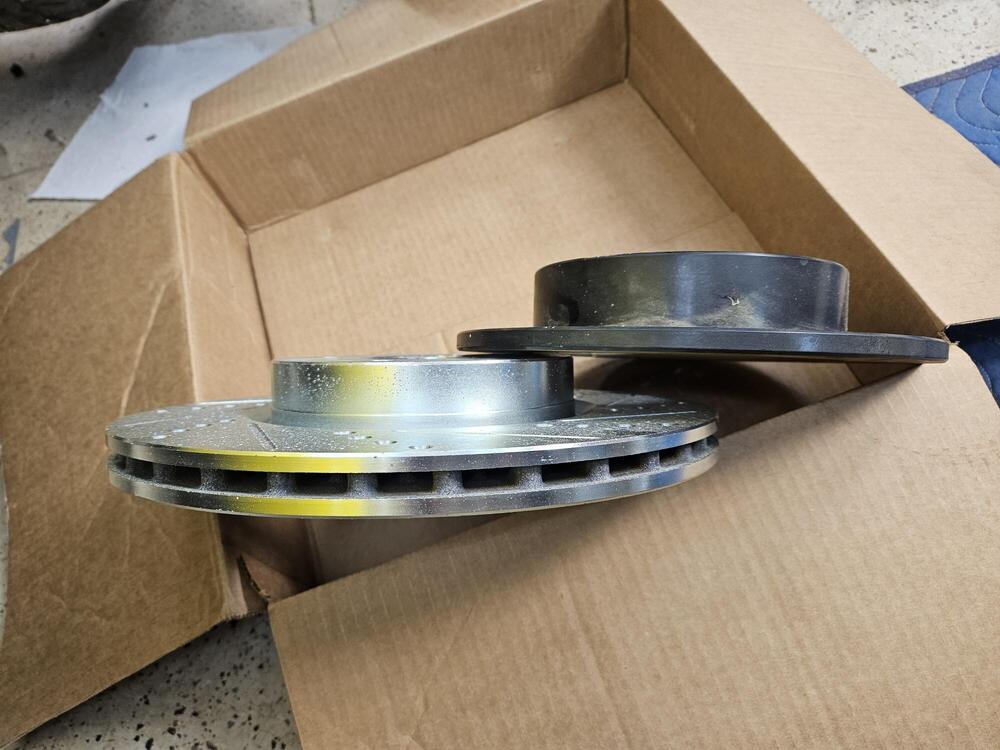
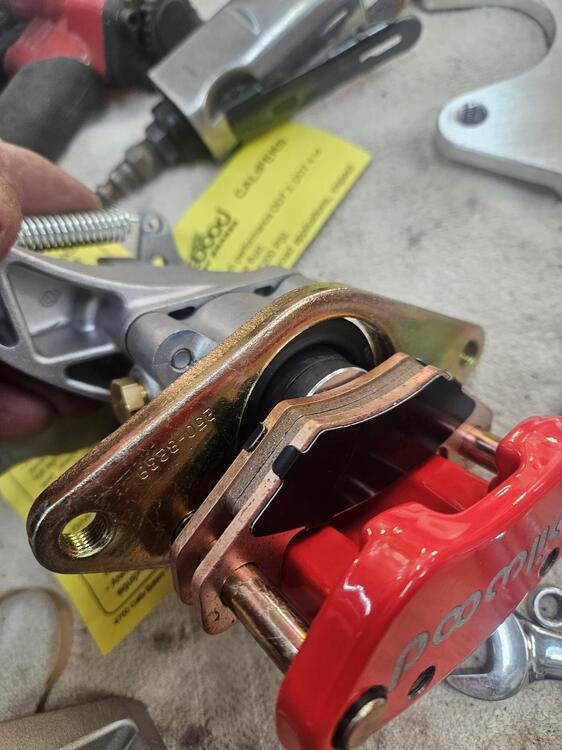
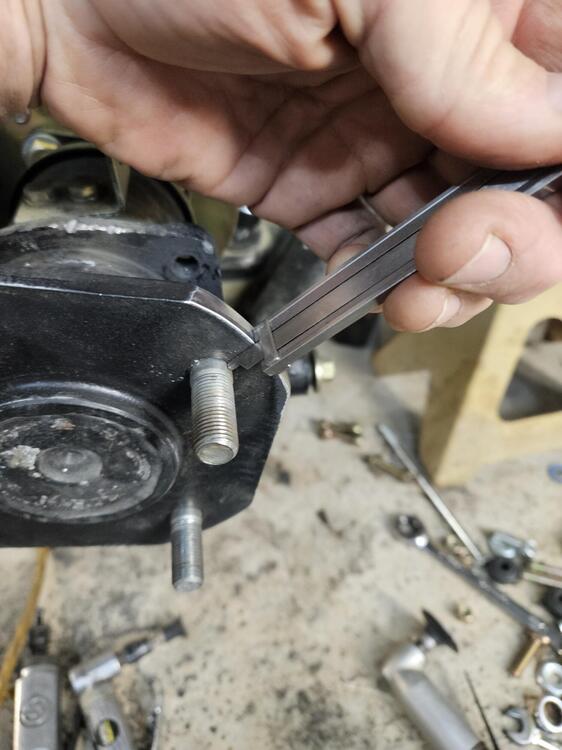
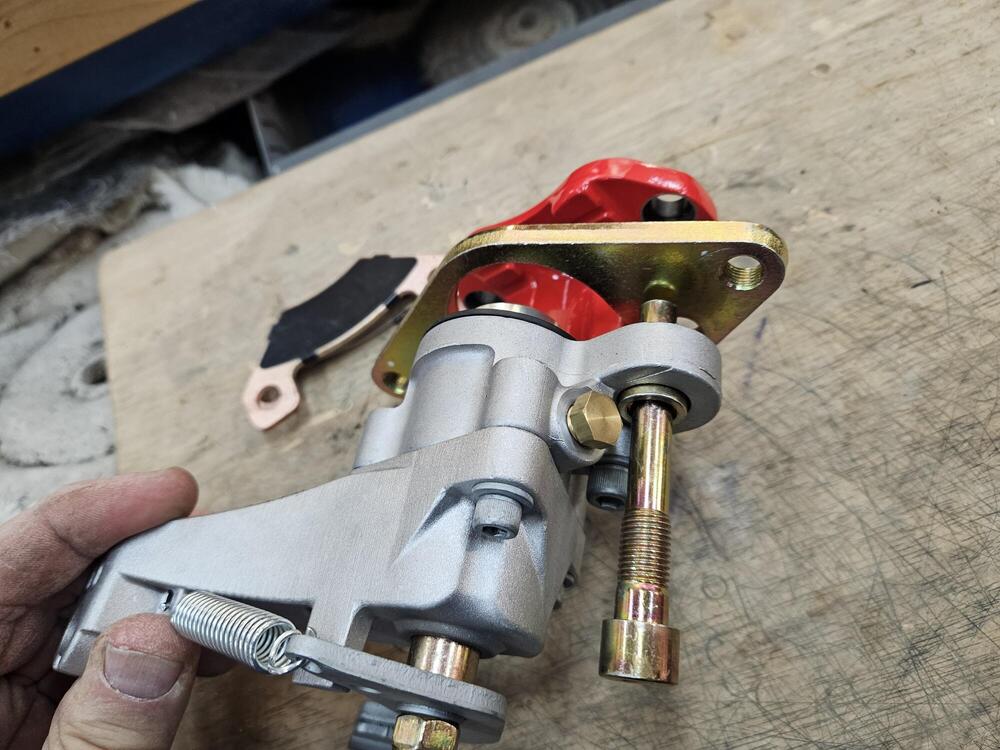
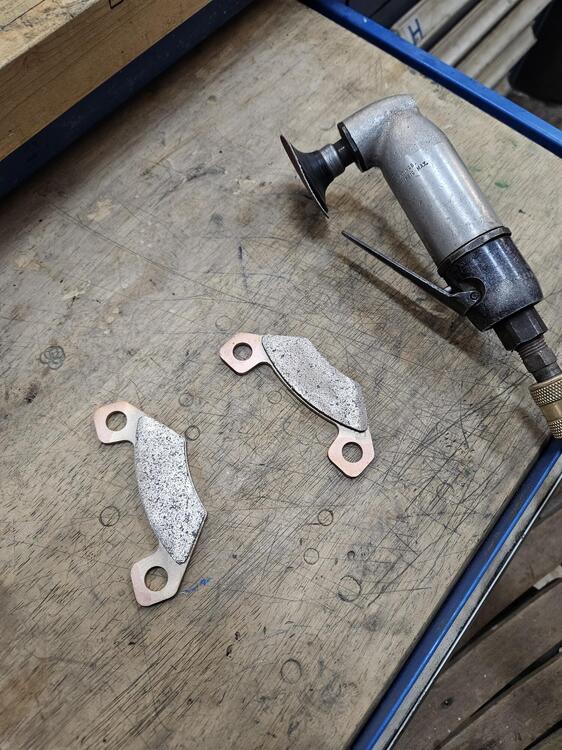
So I picked a direction for my rear disc brakes on my 240z project. After talking with Cody we decided the best long term fit would be to just upgrade to Wilwoods all the way around. The rear Wilwood upgrade offered by Silvermine has a separate mechanical handbrake caliper along with a four piston hydraulic caliper. New vented disc BP10 street pads New rotor versus the old rotor To install the the parking brake caliper this yellow zinc plate needs to be removed. The caliper will then bolt to the aluminum adapter plate that is is supplied by Silvermine. The antisqueal shims on the rear of the parking brake pads have to be removed also. They are still a very tight fit over the rotor. So I took a 2" Rolok and dressed the pads down a hair. They just fit over the rotors now There's a YouTube video I watched that shows slight reduced the diameter of the stub axle for clearance for the Rotor ID. I'm not sure I needed to but I did it anyway. I used a caliper to try to make them even all the way around.


-
I am exploring making a Euro balance tube out of this balance tube I got some new plugs for the end of the tube and I have a piece of 3/8" rebar to try to knock the plug out. Then I will trim off the extra lumps and take it to the welding shop that just recently TIG'd up Cody's exhaust. More to come...

-
Not surprising on Shawn's workload. I'm glad you found a solution!
-
I believe to go to the L28 crank you will need a crankshaft, block and front timing cover. Another option for the L24 crank is to buy one reconditioned out of the US market. Shipping would be the only real issue.
-
It's a pretty car, but that's a lot of money for a 280zx! Even a low mileage one. Especially without a turbo...
-
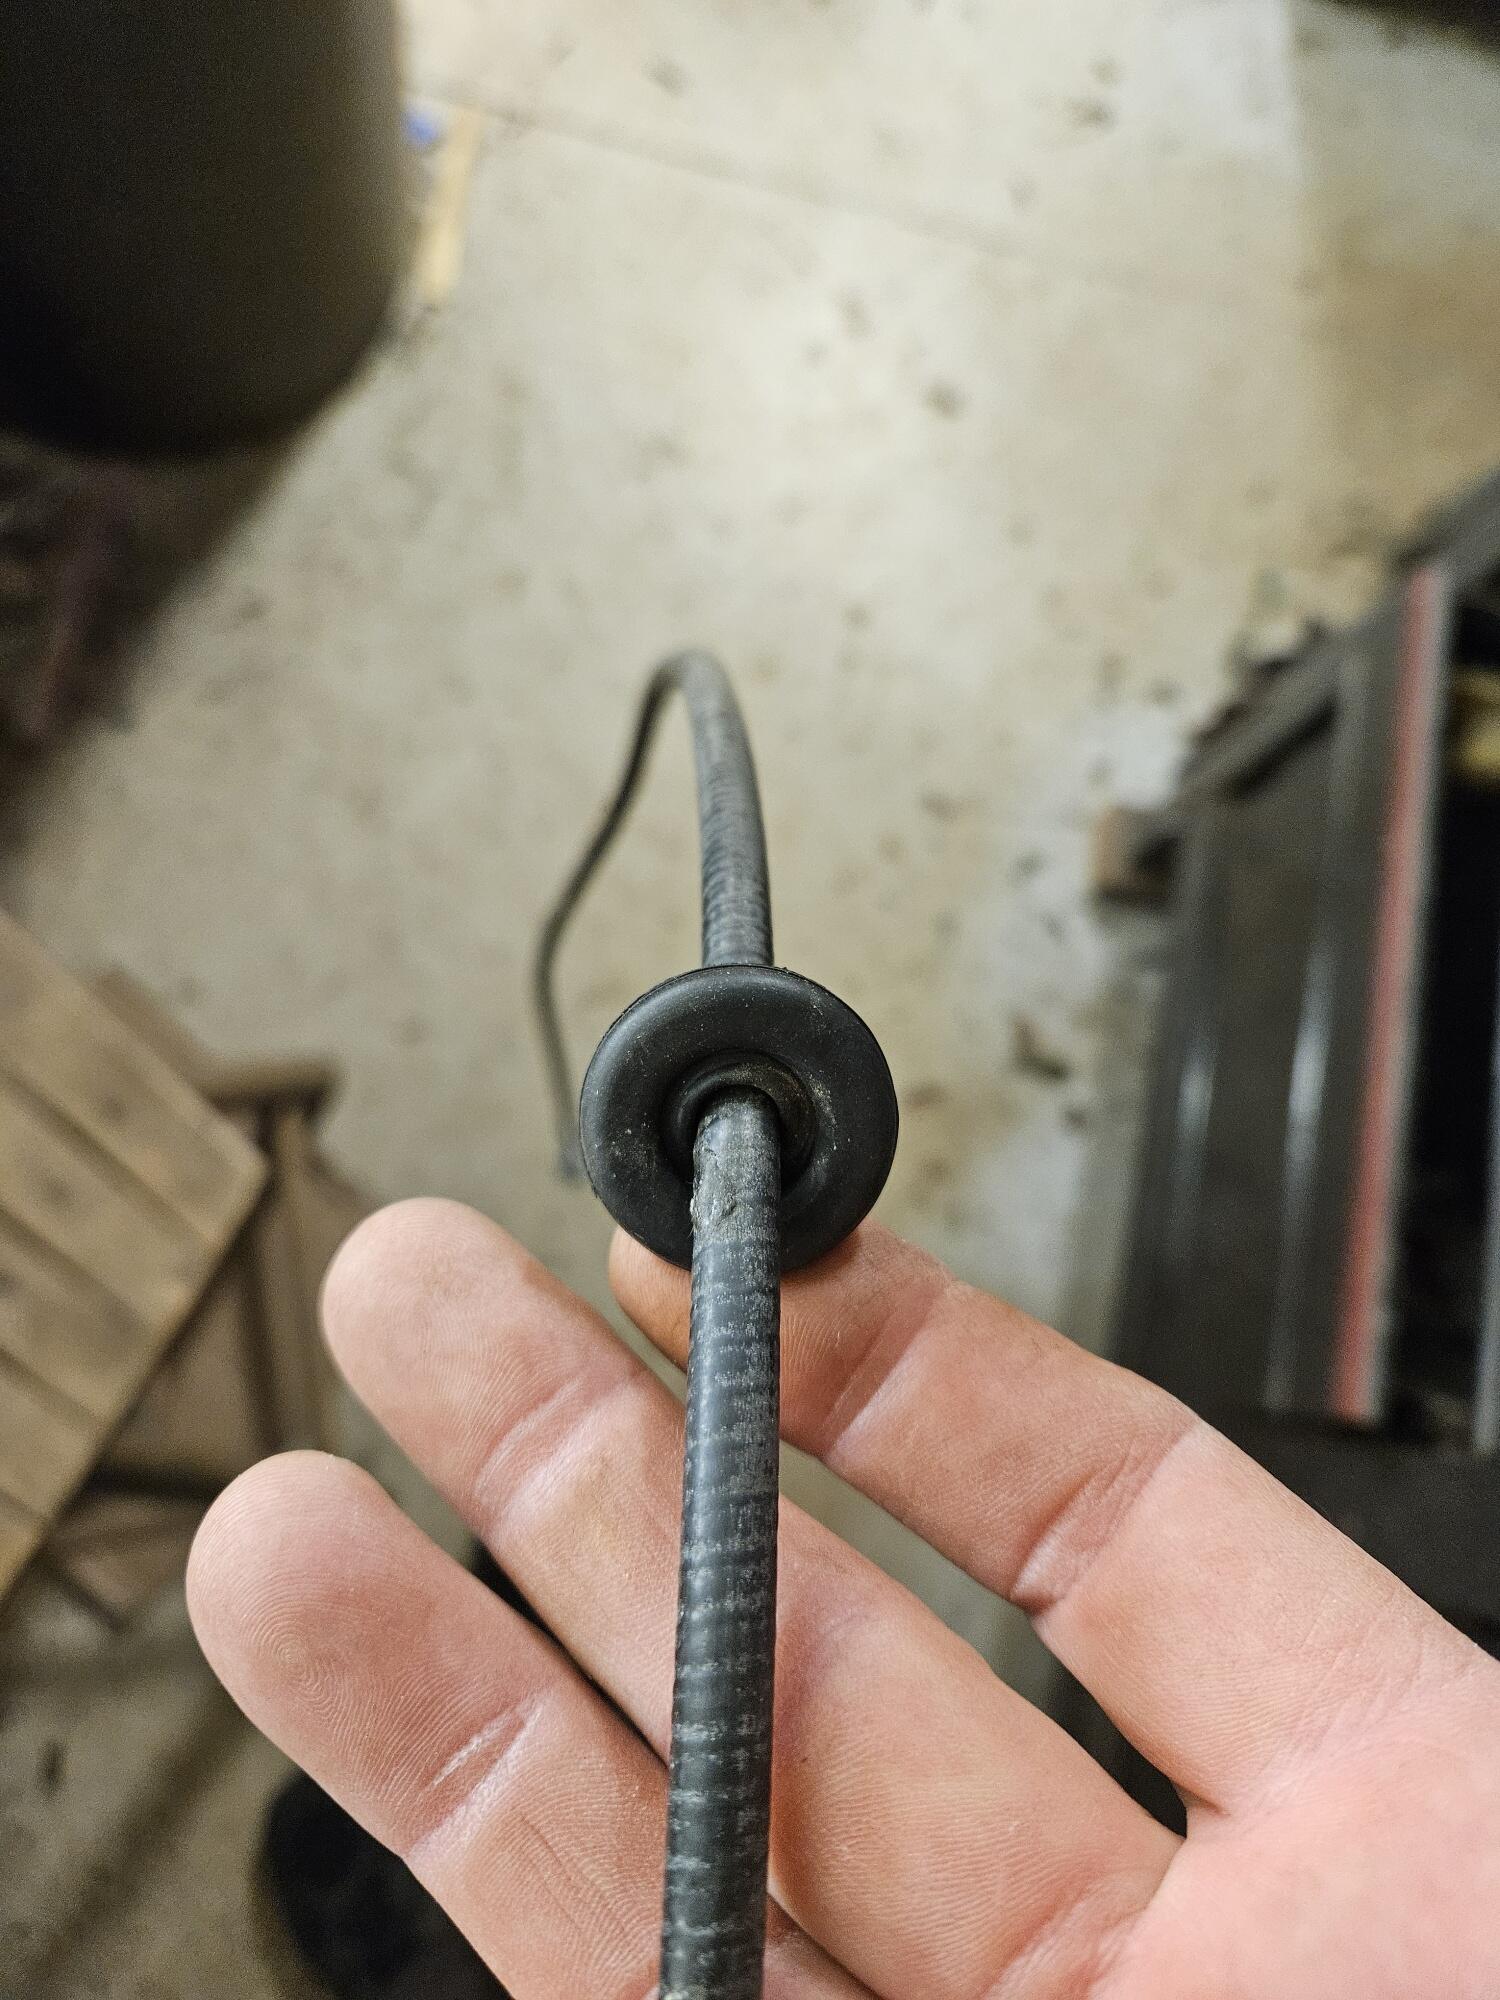
BTW if someone does decide to disassemble the speedo cable, don't be an idiot like me and forget to put the firewall grommet on before reassembly! Thankfully, the grommet will stretch over the speedo end of the cable. Although just barely
-
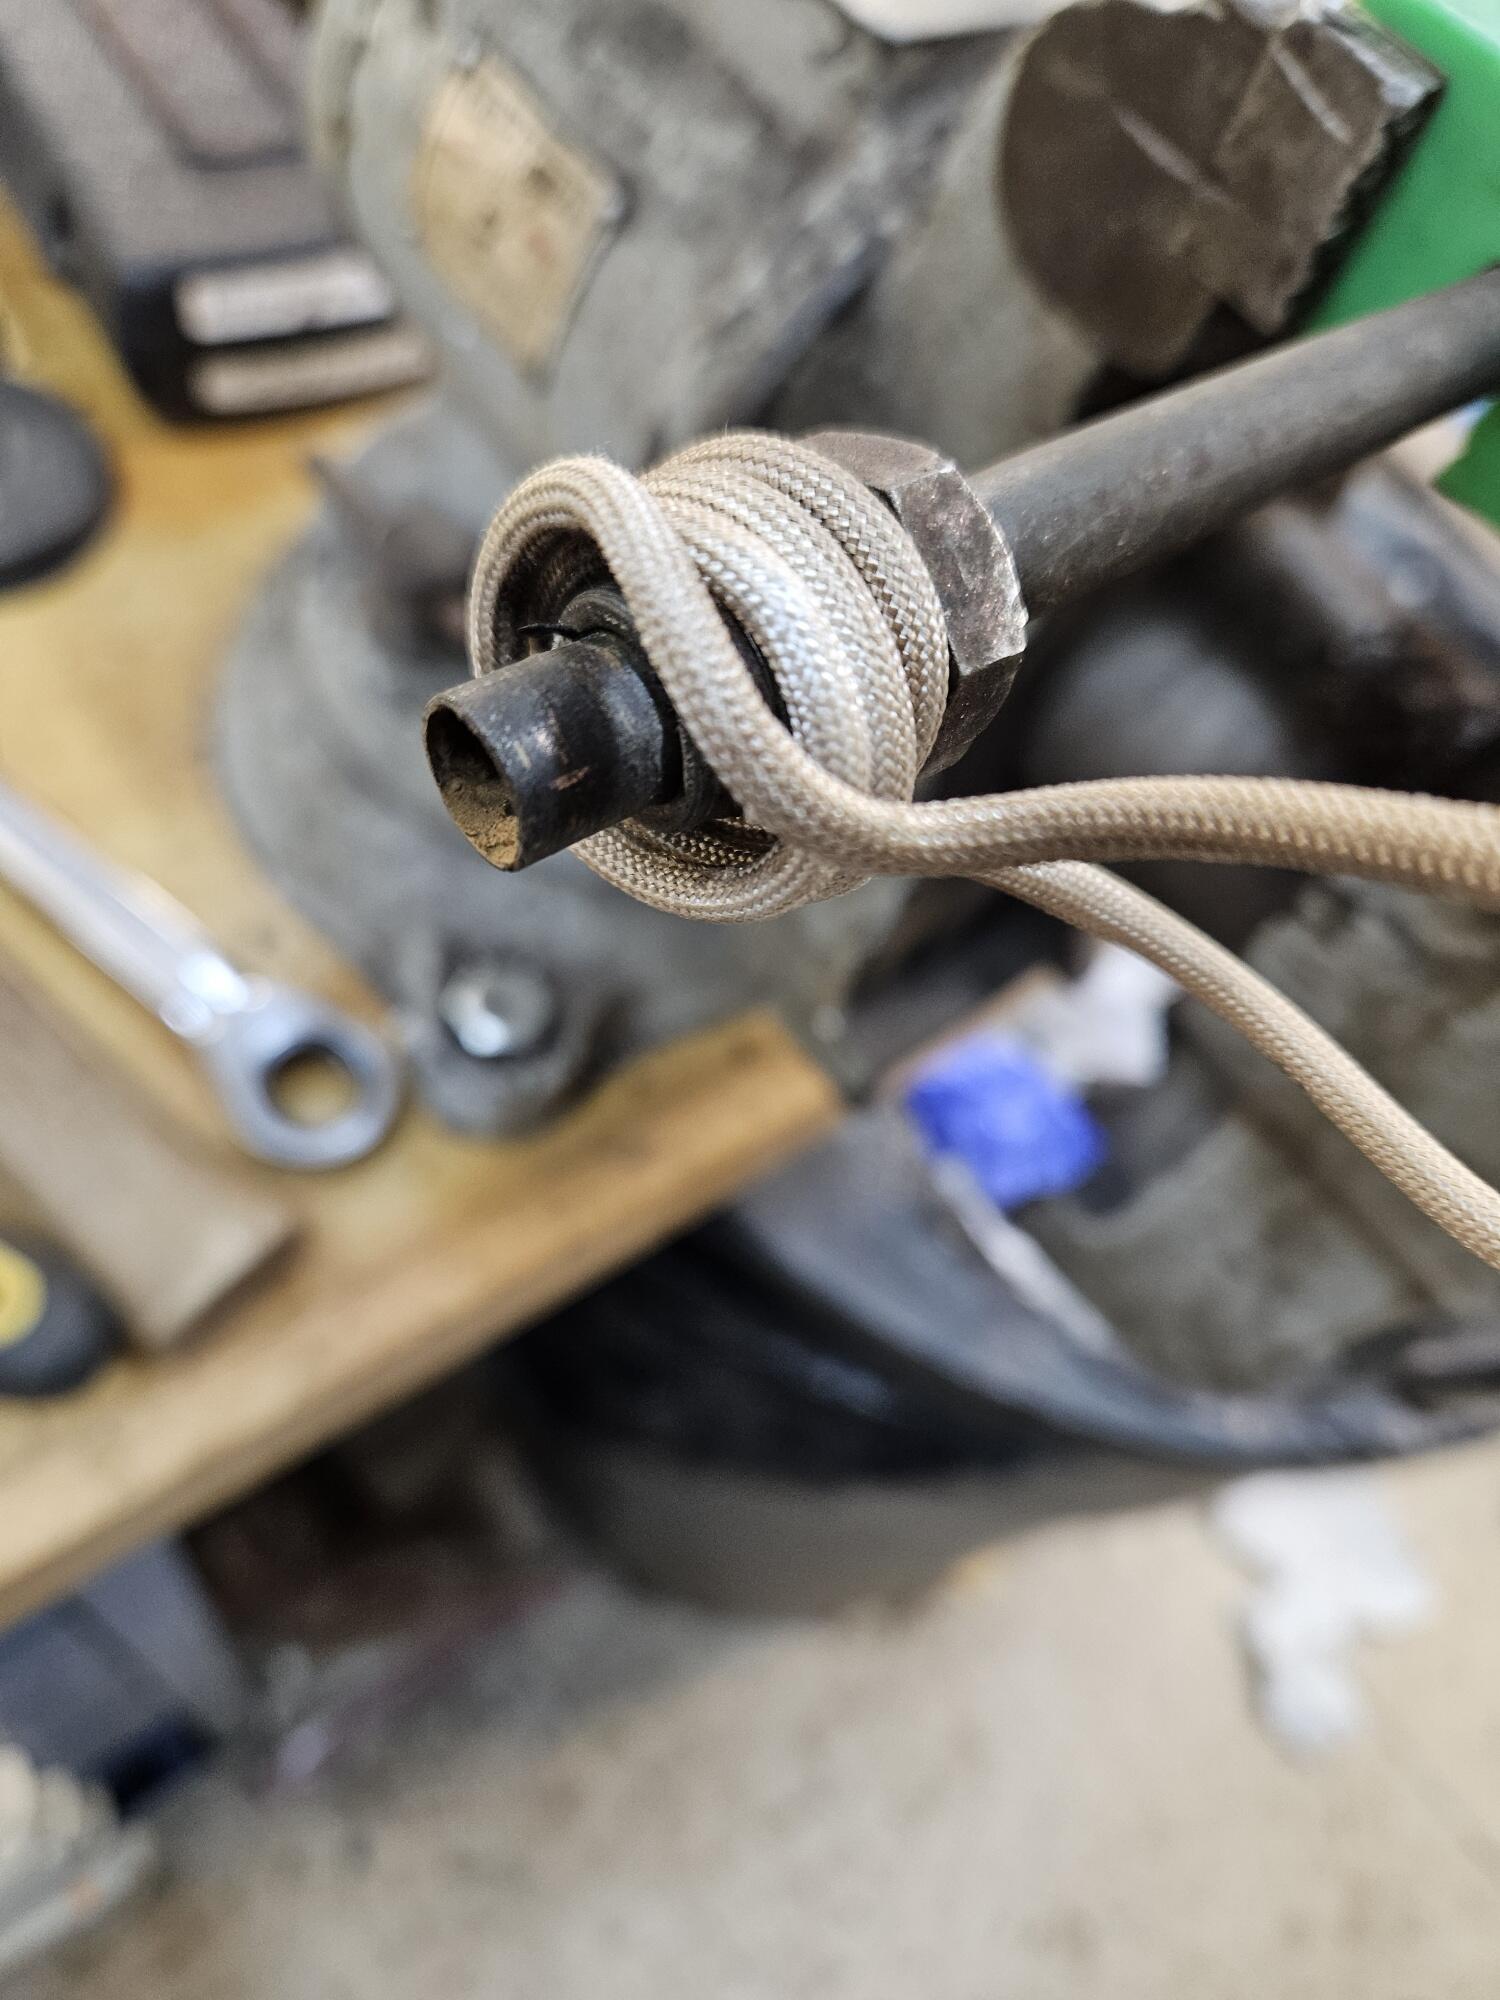
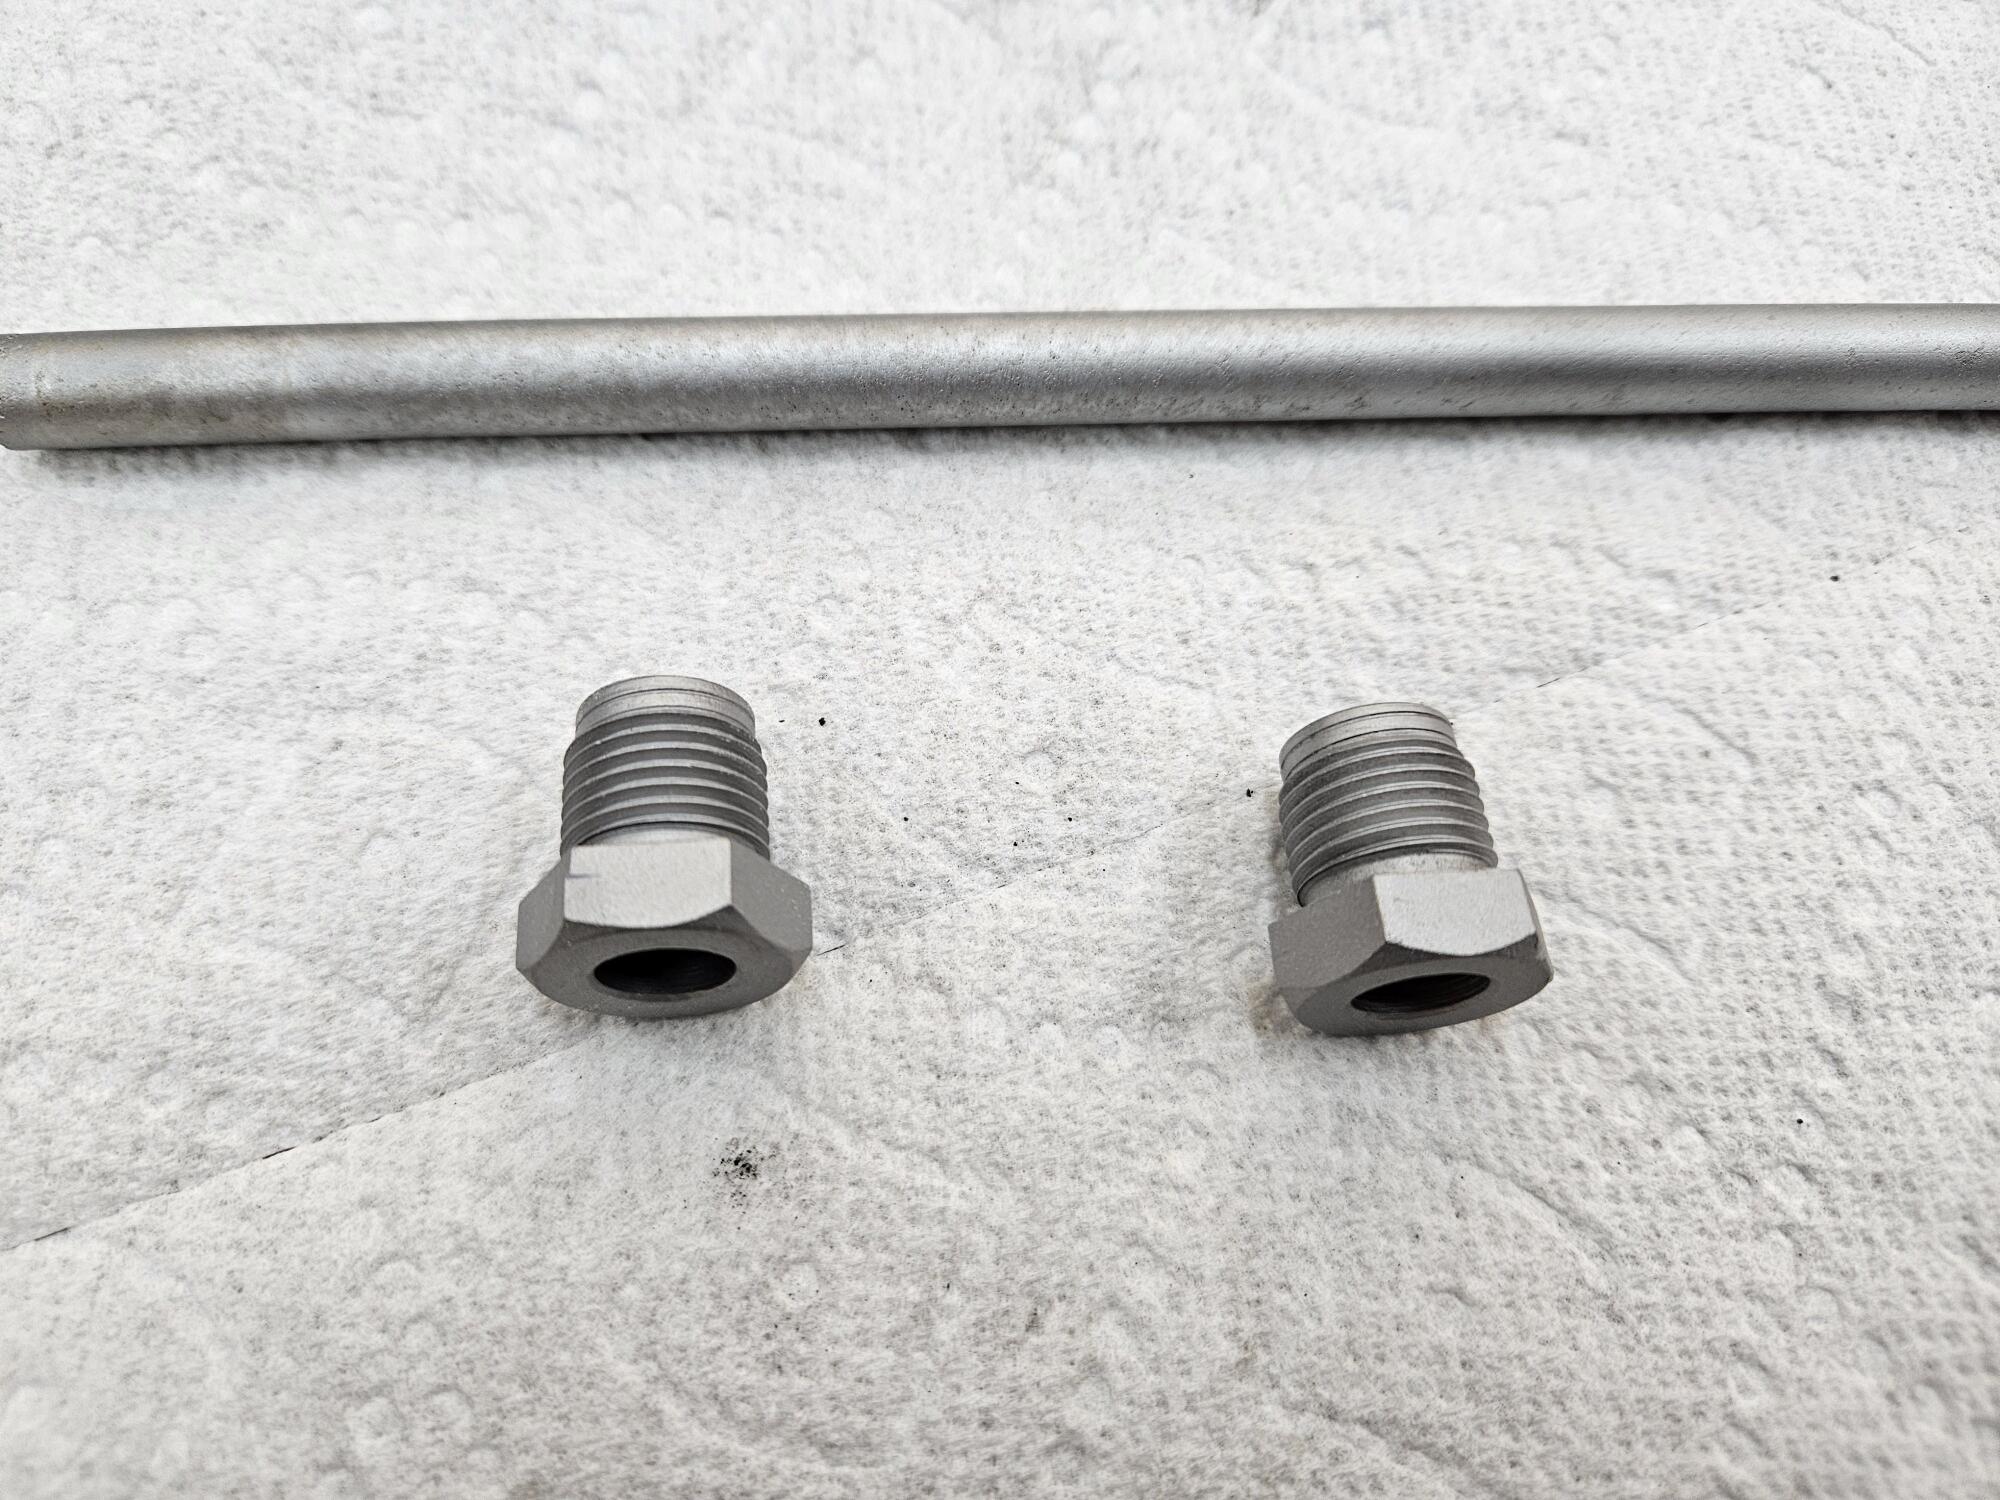
The manifold I just took apart had a different fitting at location #20 but I don't think it would be a problem to use that same Zcardepot part in all three locations. The part I had was a straight tube, threaded on one end with two notches on the other end like a straight head screw would have. I was planning to use the same nipple in all three locations. That was my plan at least.
-
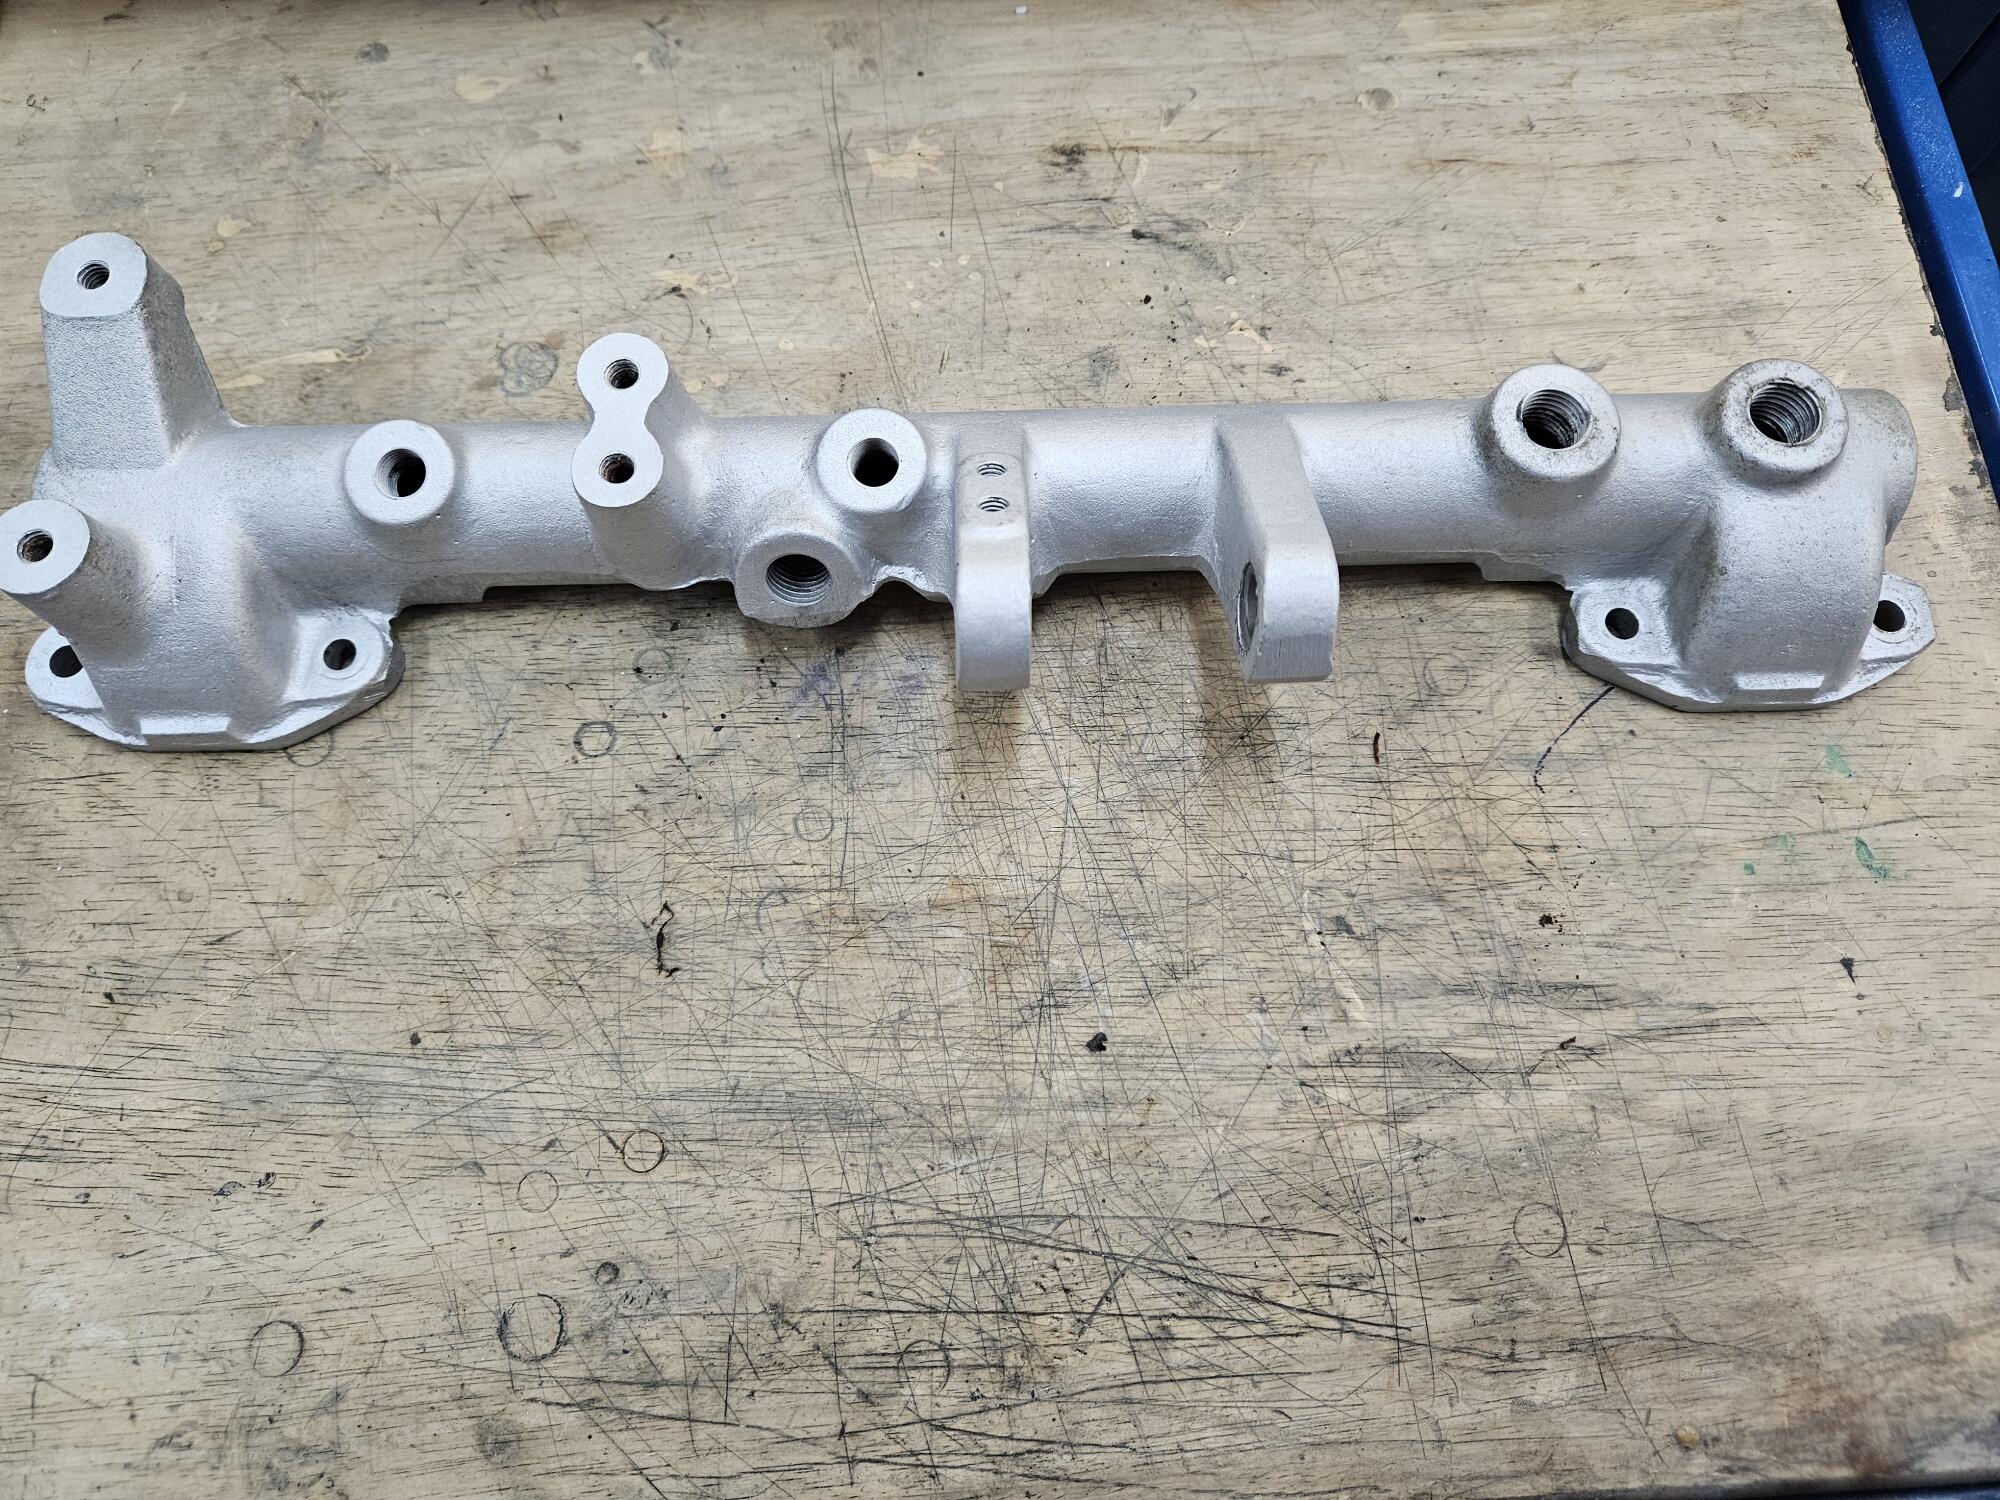
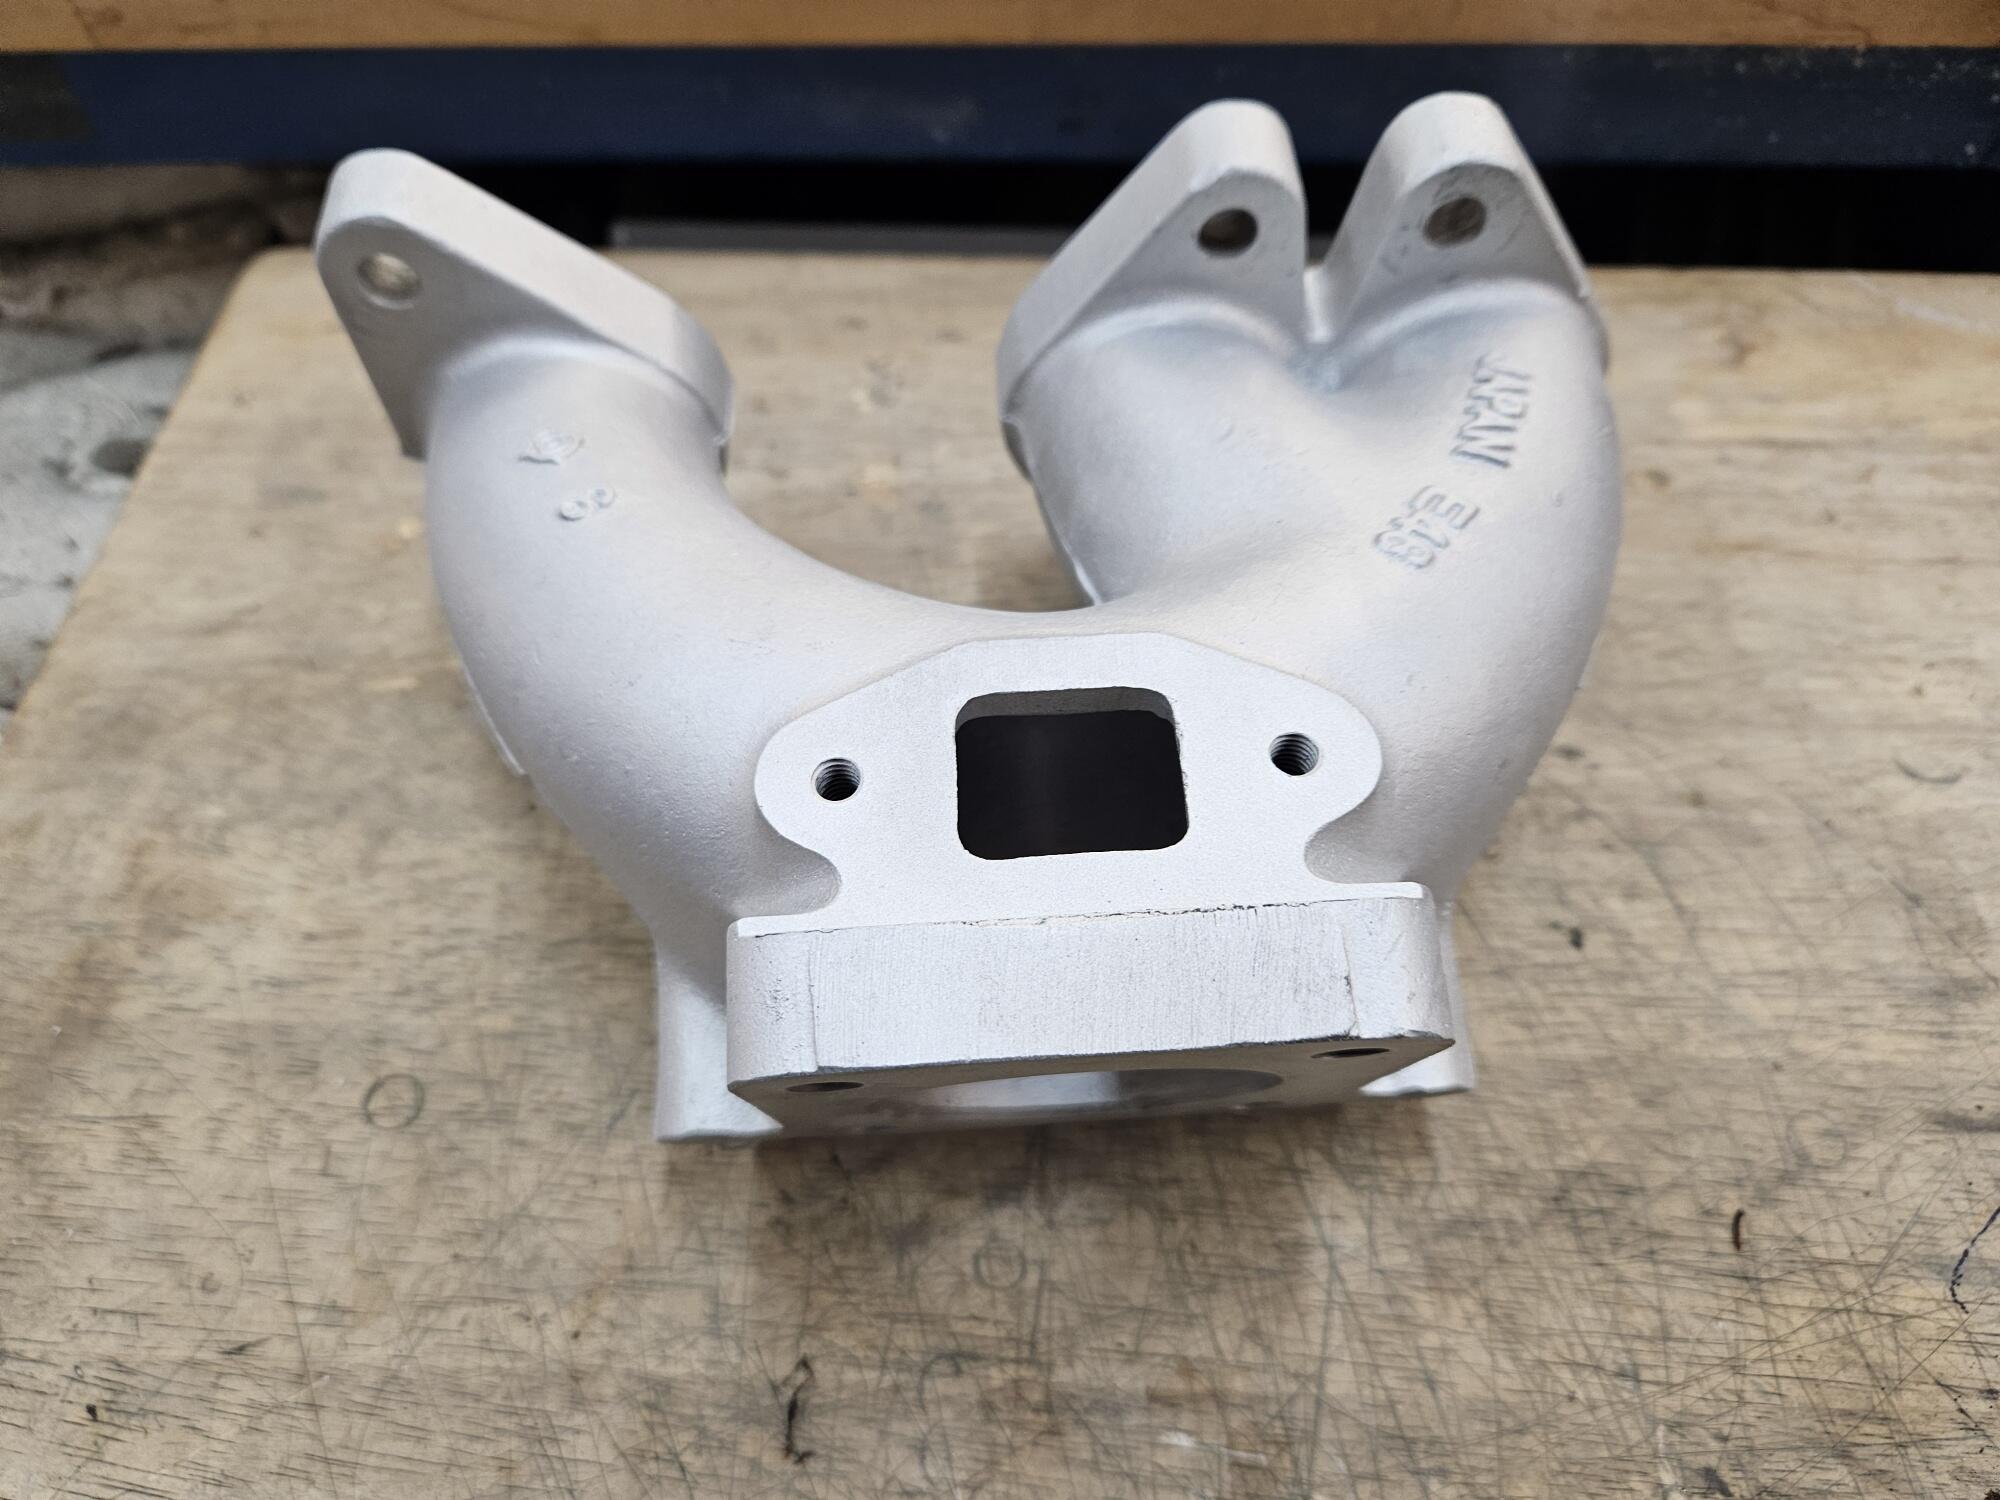
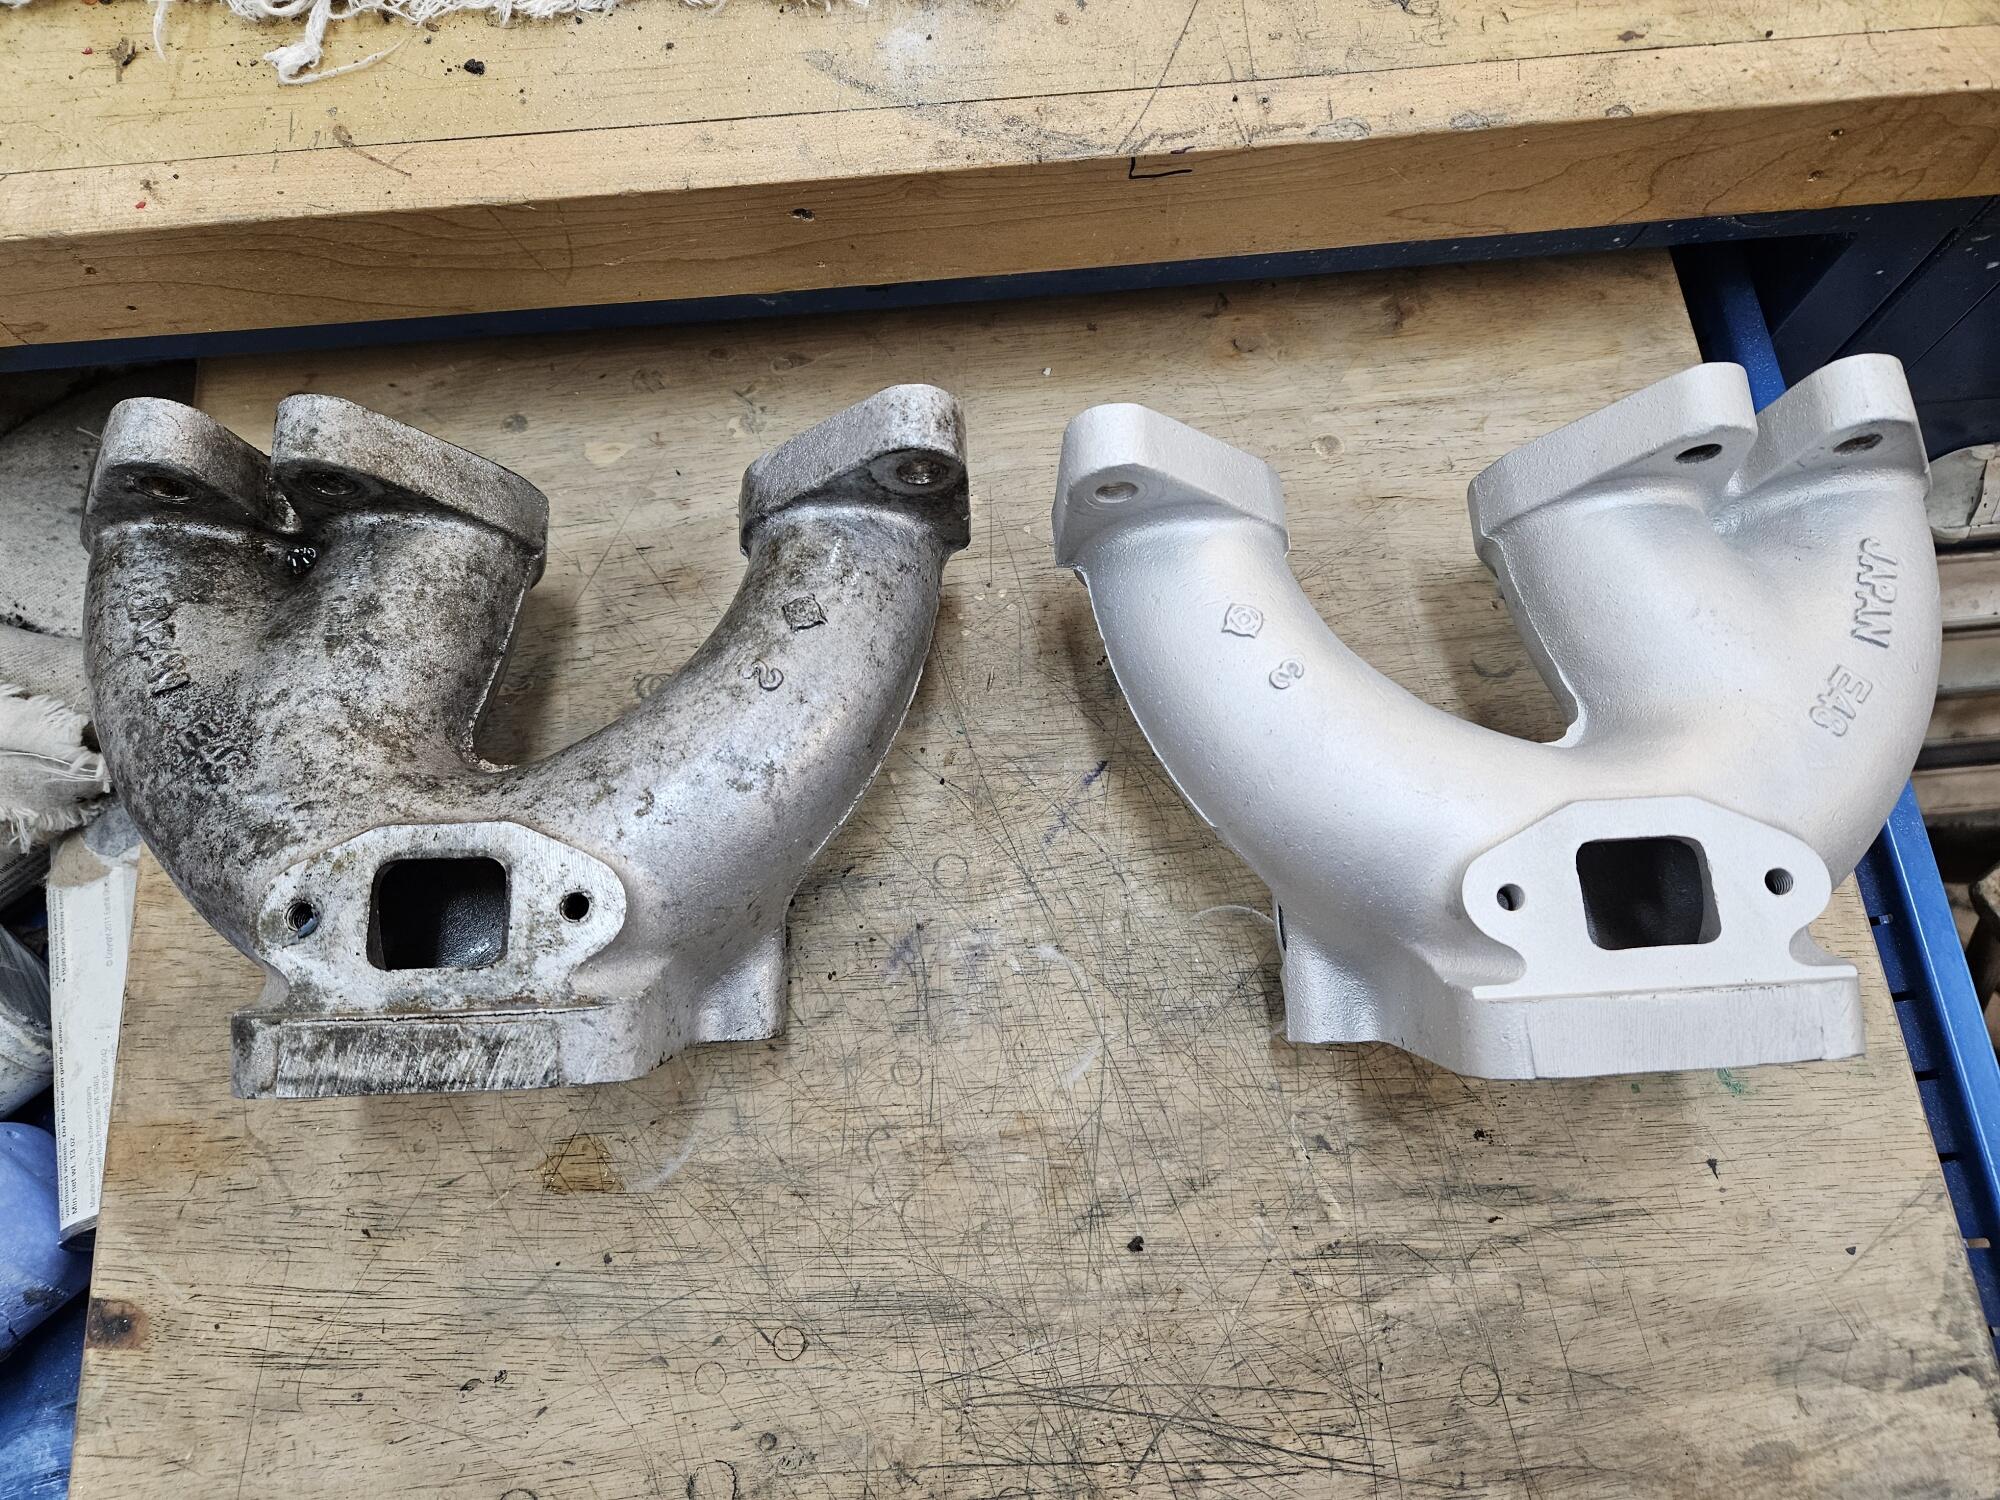
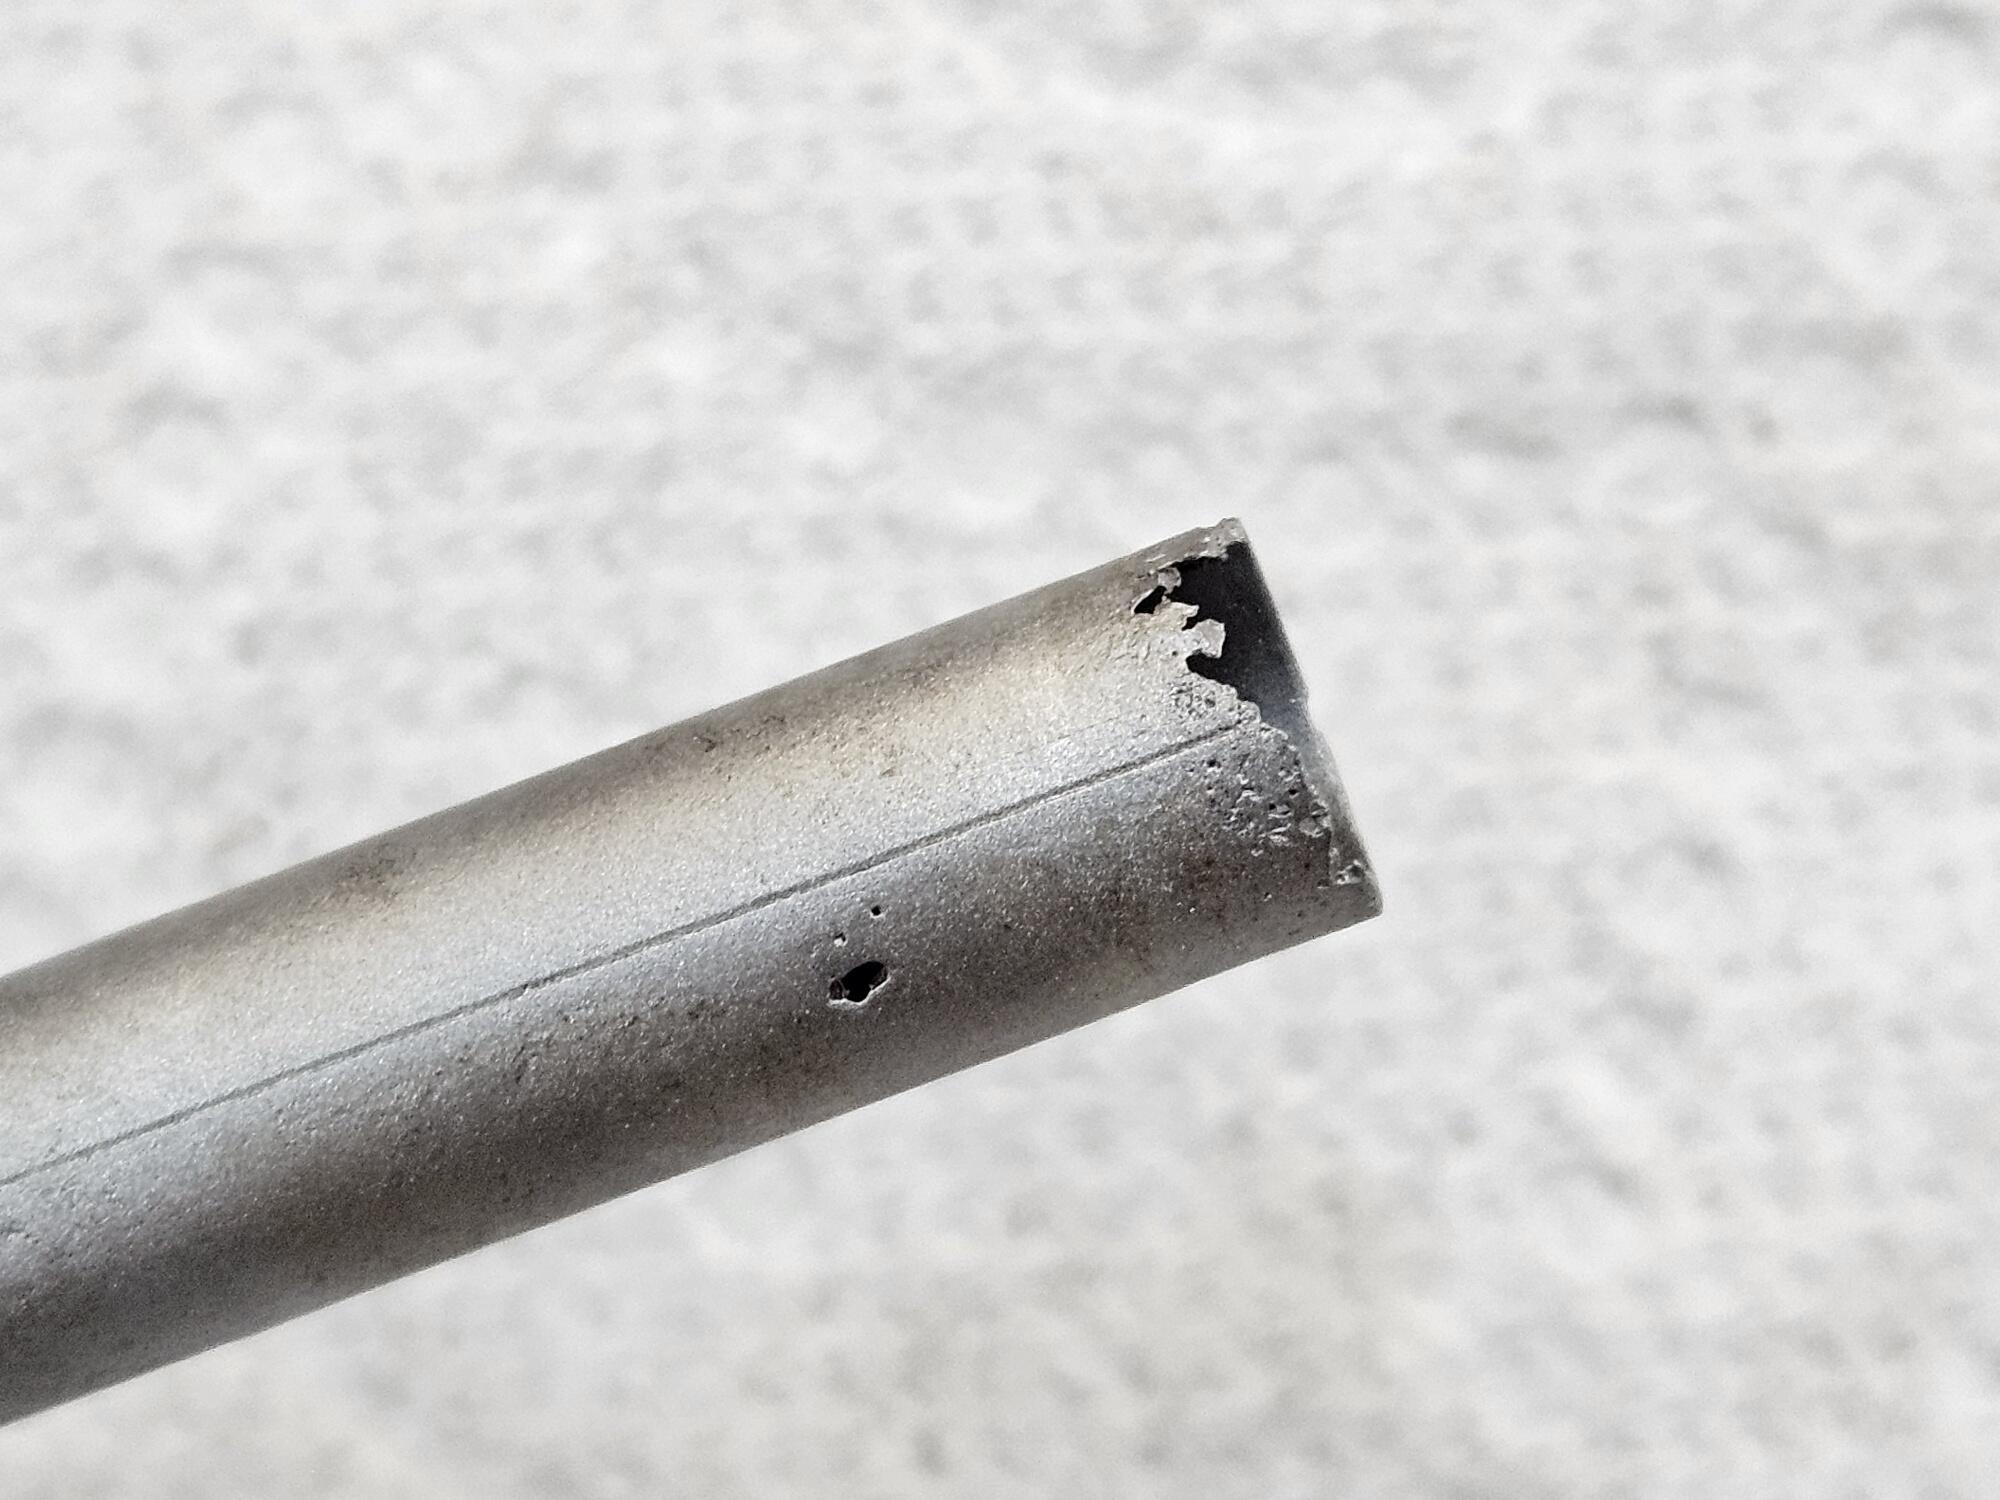
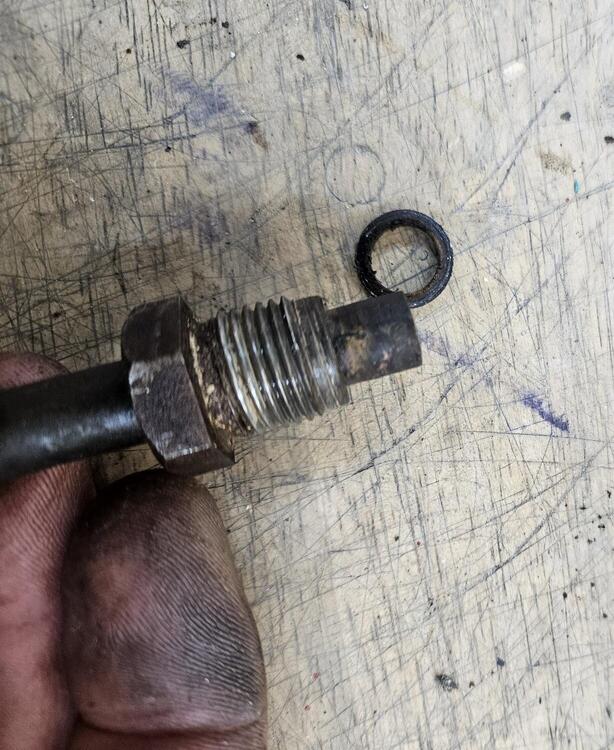
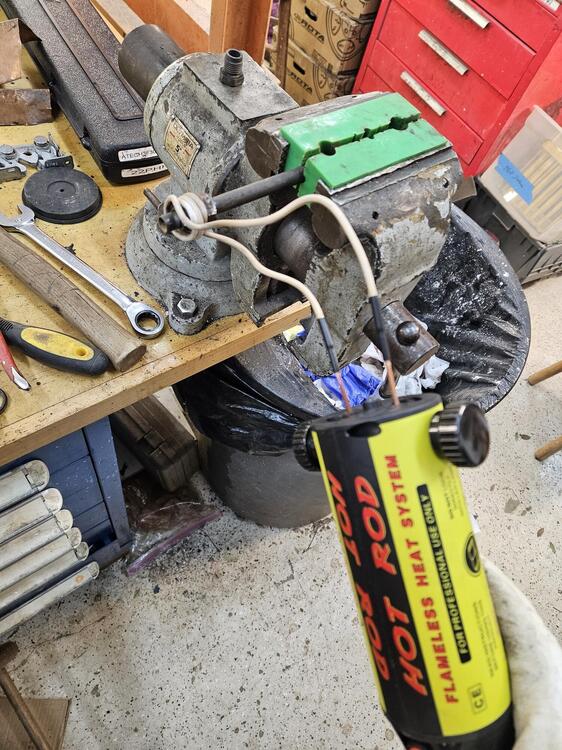
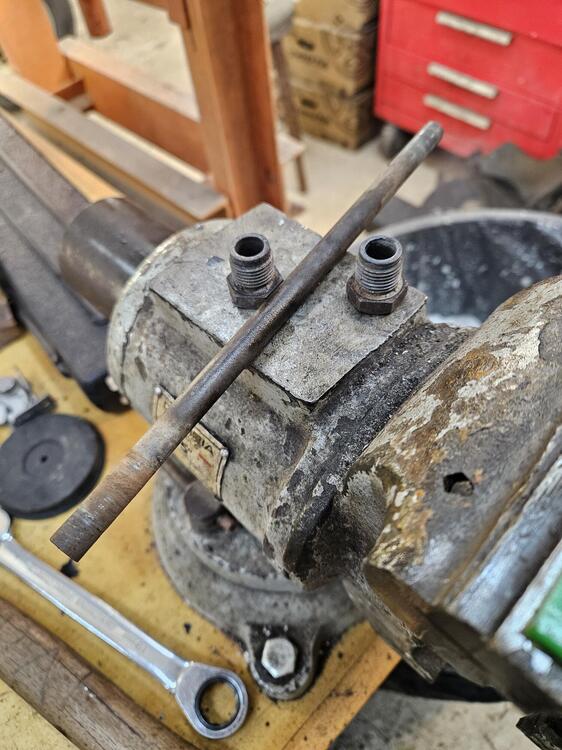
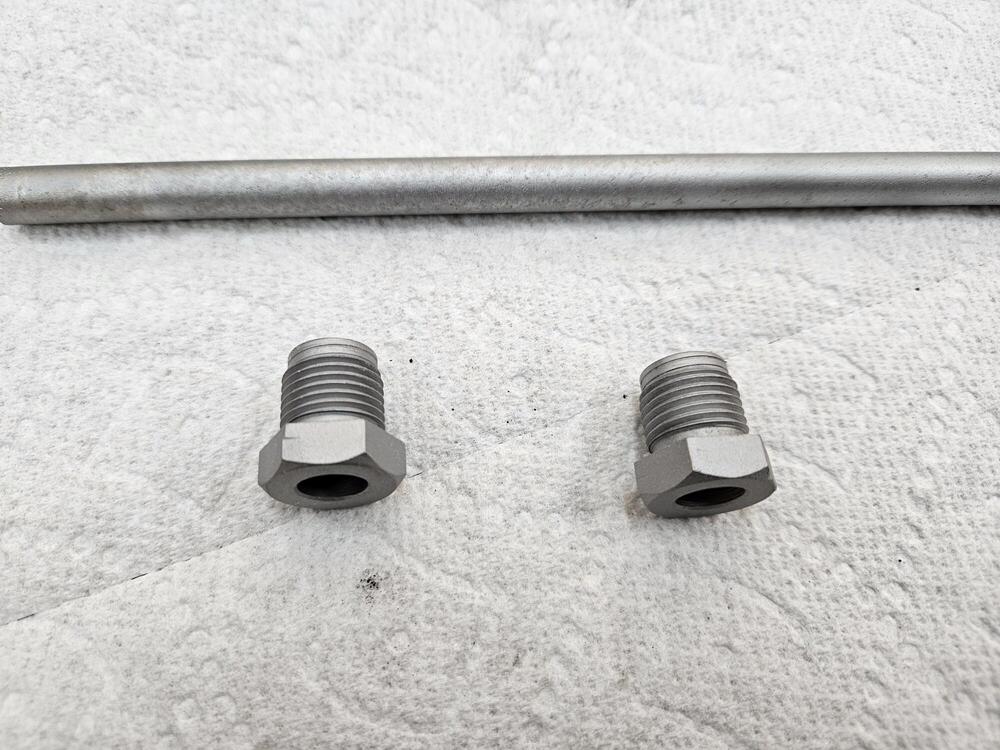
So I debated trying this or not. I'm glad I did though So the water tubes in the intake manifolds have been there for 50 years; steel in aluminum. They are 19mm (3/4") I don't have a flare nut wrench that large. But I took the propane torch to it and they came out! This is the end of the water tube. There is a rubber o ring that goes against a conical seat at the bottom of the hole. Then I used the induction heater to try to get the nuts off the pipe They came off which was great! That tool is really impressive in what you can get apart. Then I bead blasted these parts I'm glad that I did because the tube has a pin hole. I believe this would leak because the seal is a the bottom of the nut at the seat. This pinhole would be inside the nut. So I found a piece of tubing. I couldn't find anything on Amazon but I found some 10mm OD 8mm ID tubing on Ebay. So I have 20" of that coming. I will try to replate all of this in the next few weeks I pulled the studs out of the manifolds too. And this is what I had I degreased then and put them into the bead blasting cabinet. After the first pass, I turned the air pressure down to about 60psi and blasted them again. This is how they came out. I'm really pleased they look this good! Then I treated them with Sharkhide. Before and after


-
Dooohhh! The info is good though
-
That's a good looking little car!