Patcon
 Subscriber
-
Joined
-
Last visited
Everything posted by Patcon
-

-
There are other ways for moisture to get in. One being condensate Another being really humid parts of the world. I do like the shielding idea
-
I would think a good quarter would be worth more than a door but both are becoming rare
-
Jist remember going to the 6AL isn't going to gain you a lot. It will also make you car less stock which makes it harder to diagnose. If I wanted to make power, reworking the ignition would be pretty far down the list. Provided I wasn't running points...
-
Wall art my butt!! If the quarter is good, its a donor!!
-
You need to be willing to travel! Use search tempest and search craigslist nationwide. I suspect your budget is too low but who knows. I think your no rust priority is the right one
-
Pictures might help
-
Squishy can be a few things Spongie flexible hoses Air in the system Shoes out of adjustment Questionable master cylinder Pedals or firewall flexing Others?
-
So did someone move data tags to a 280 chassis?
-
That's really amazing, I assume all hand made...
-
There's a lot of daylight on that one!! 😳😳😳
-
Evidently one sold a while back at $2.47m. It was supposedly unique... We'll see
-
$1.6m w 6 days to go
-
Tempting...
-
Heat is your friend! Don't make it any worse. Big breaker bar. I probably wouldnt ever resort to LH drill bits. The problem would be getting whats left out of the case without damaging the soft aluminum. Might weld to it as a last resort. I have used a monkey wrench as a nuclear option in the past but that pretty much destroys the fill plug
-
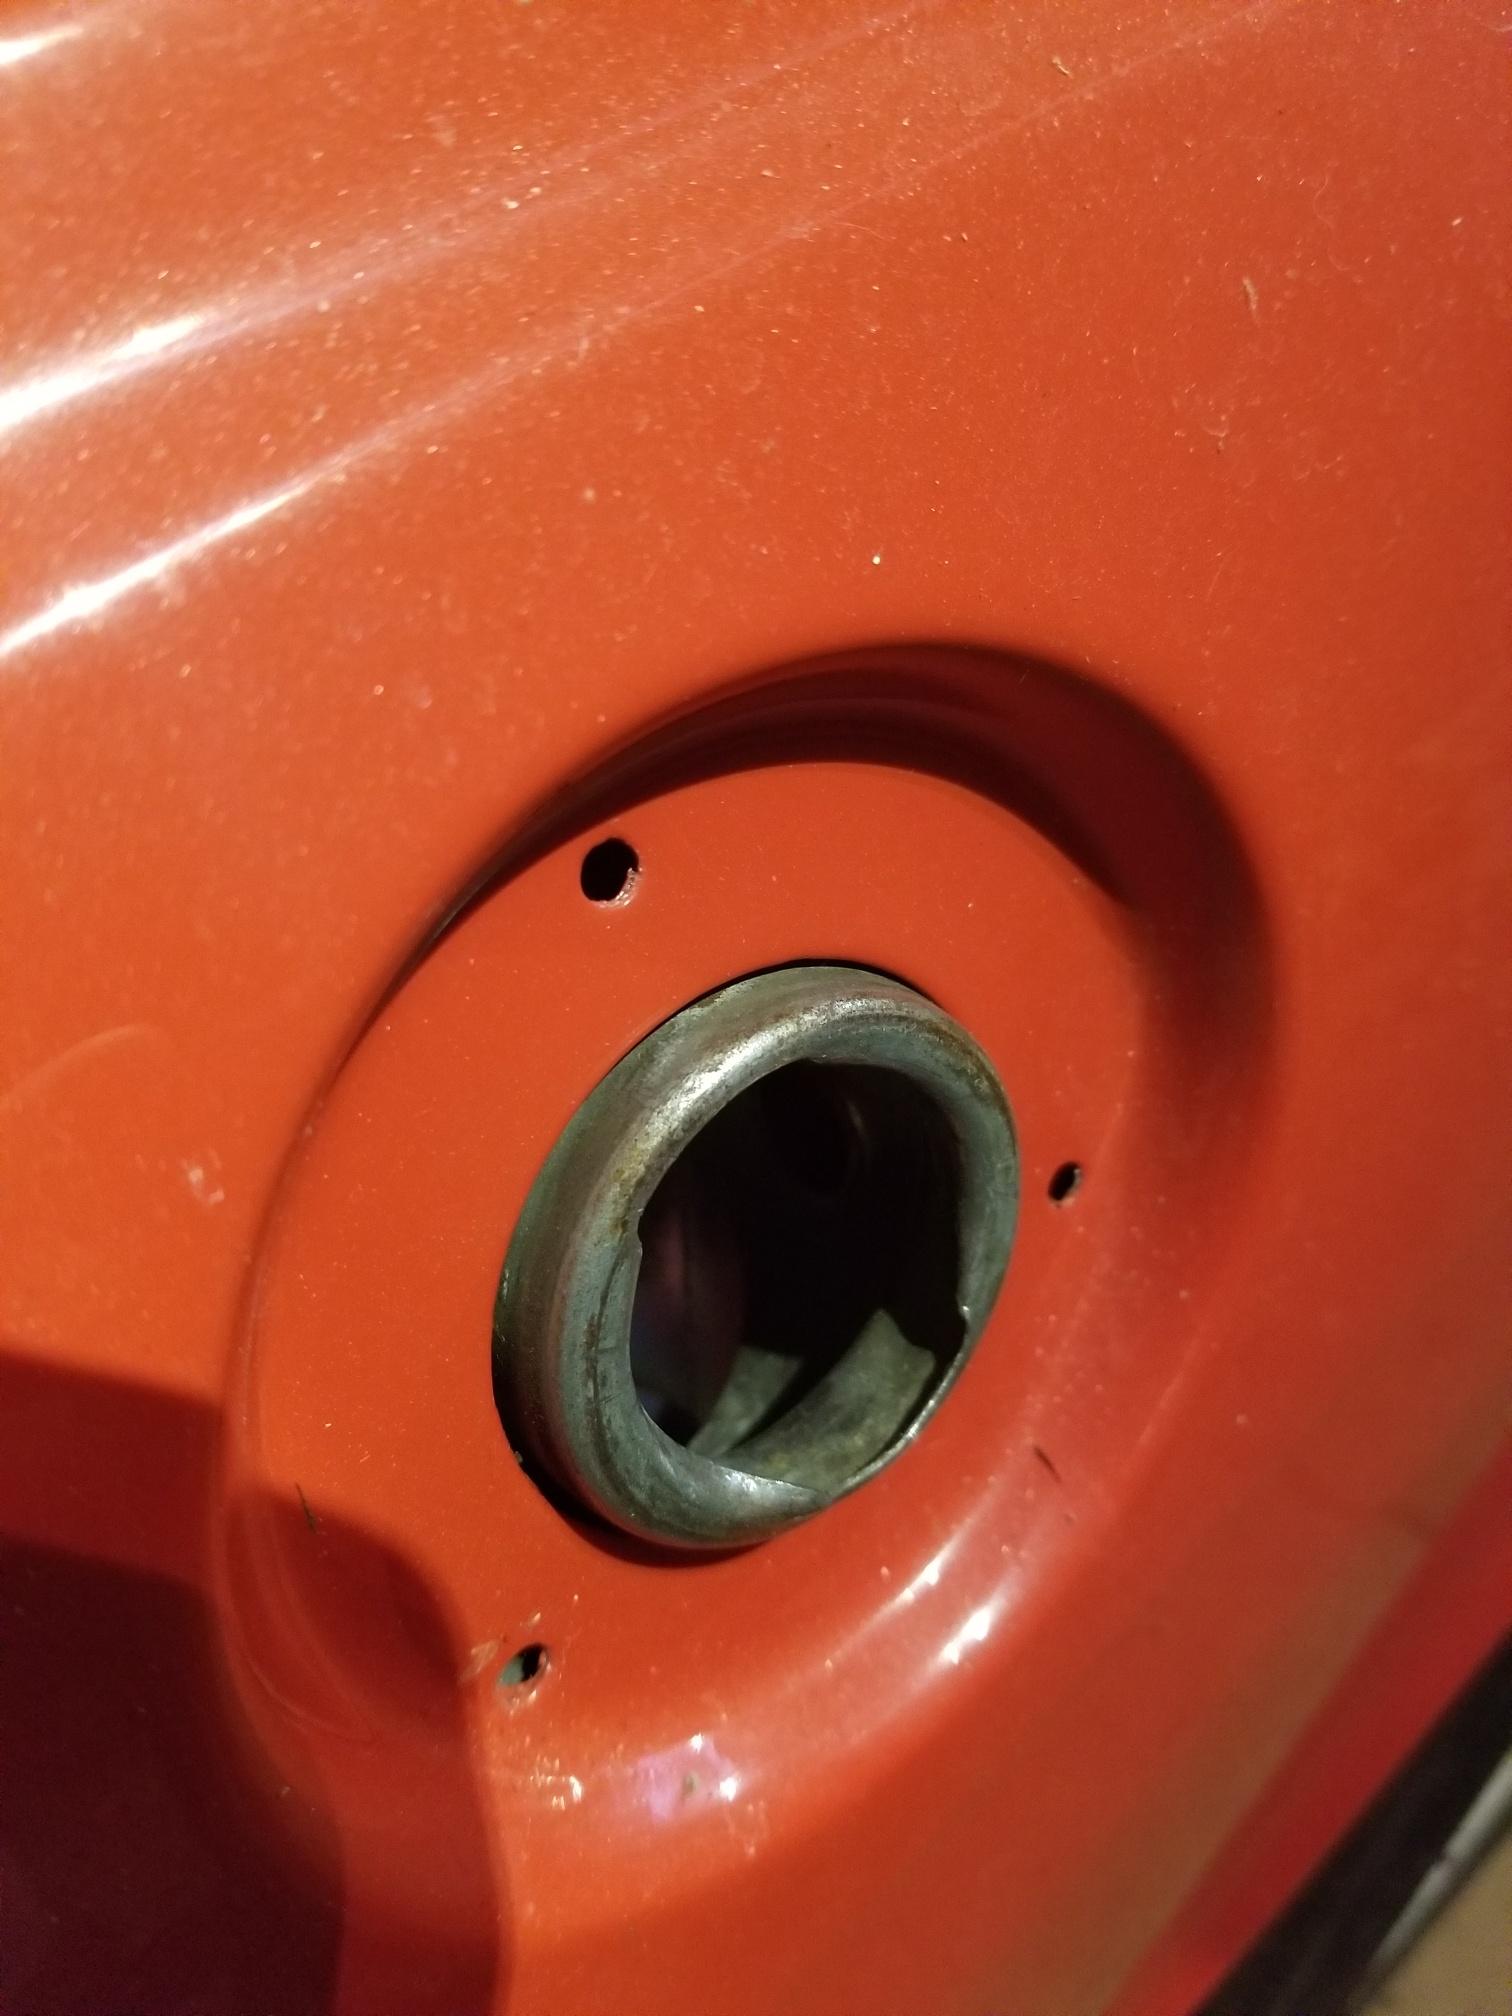
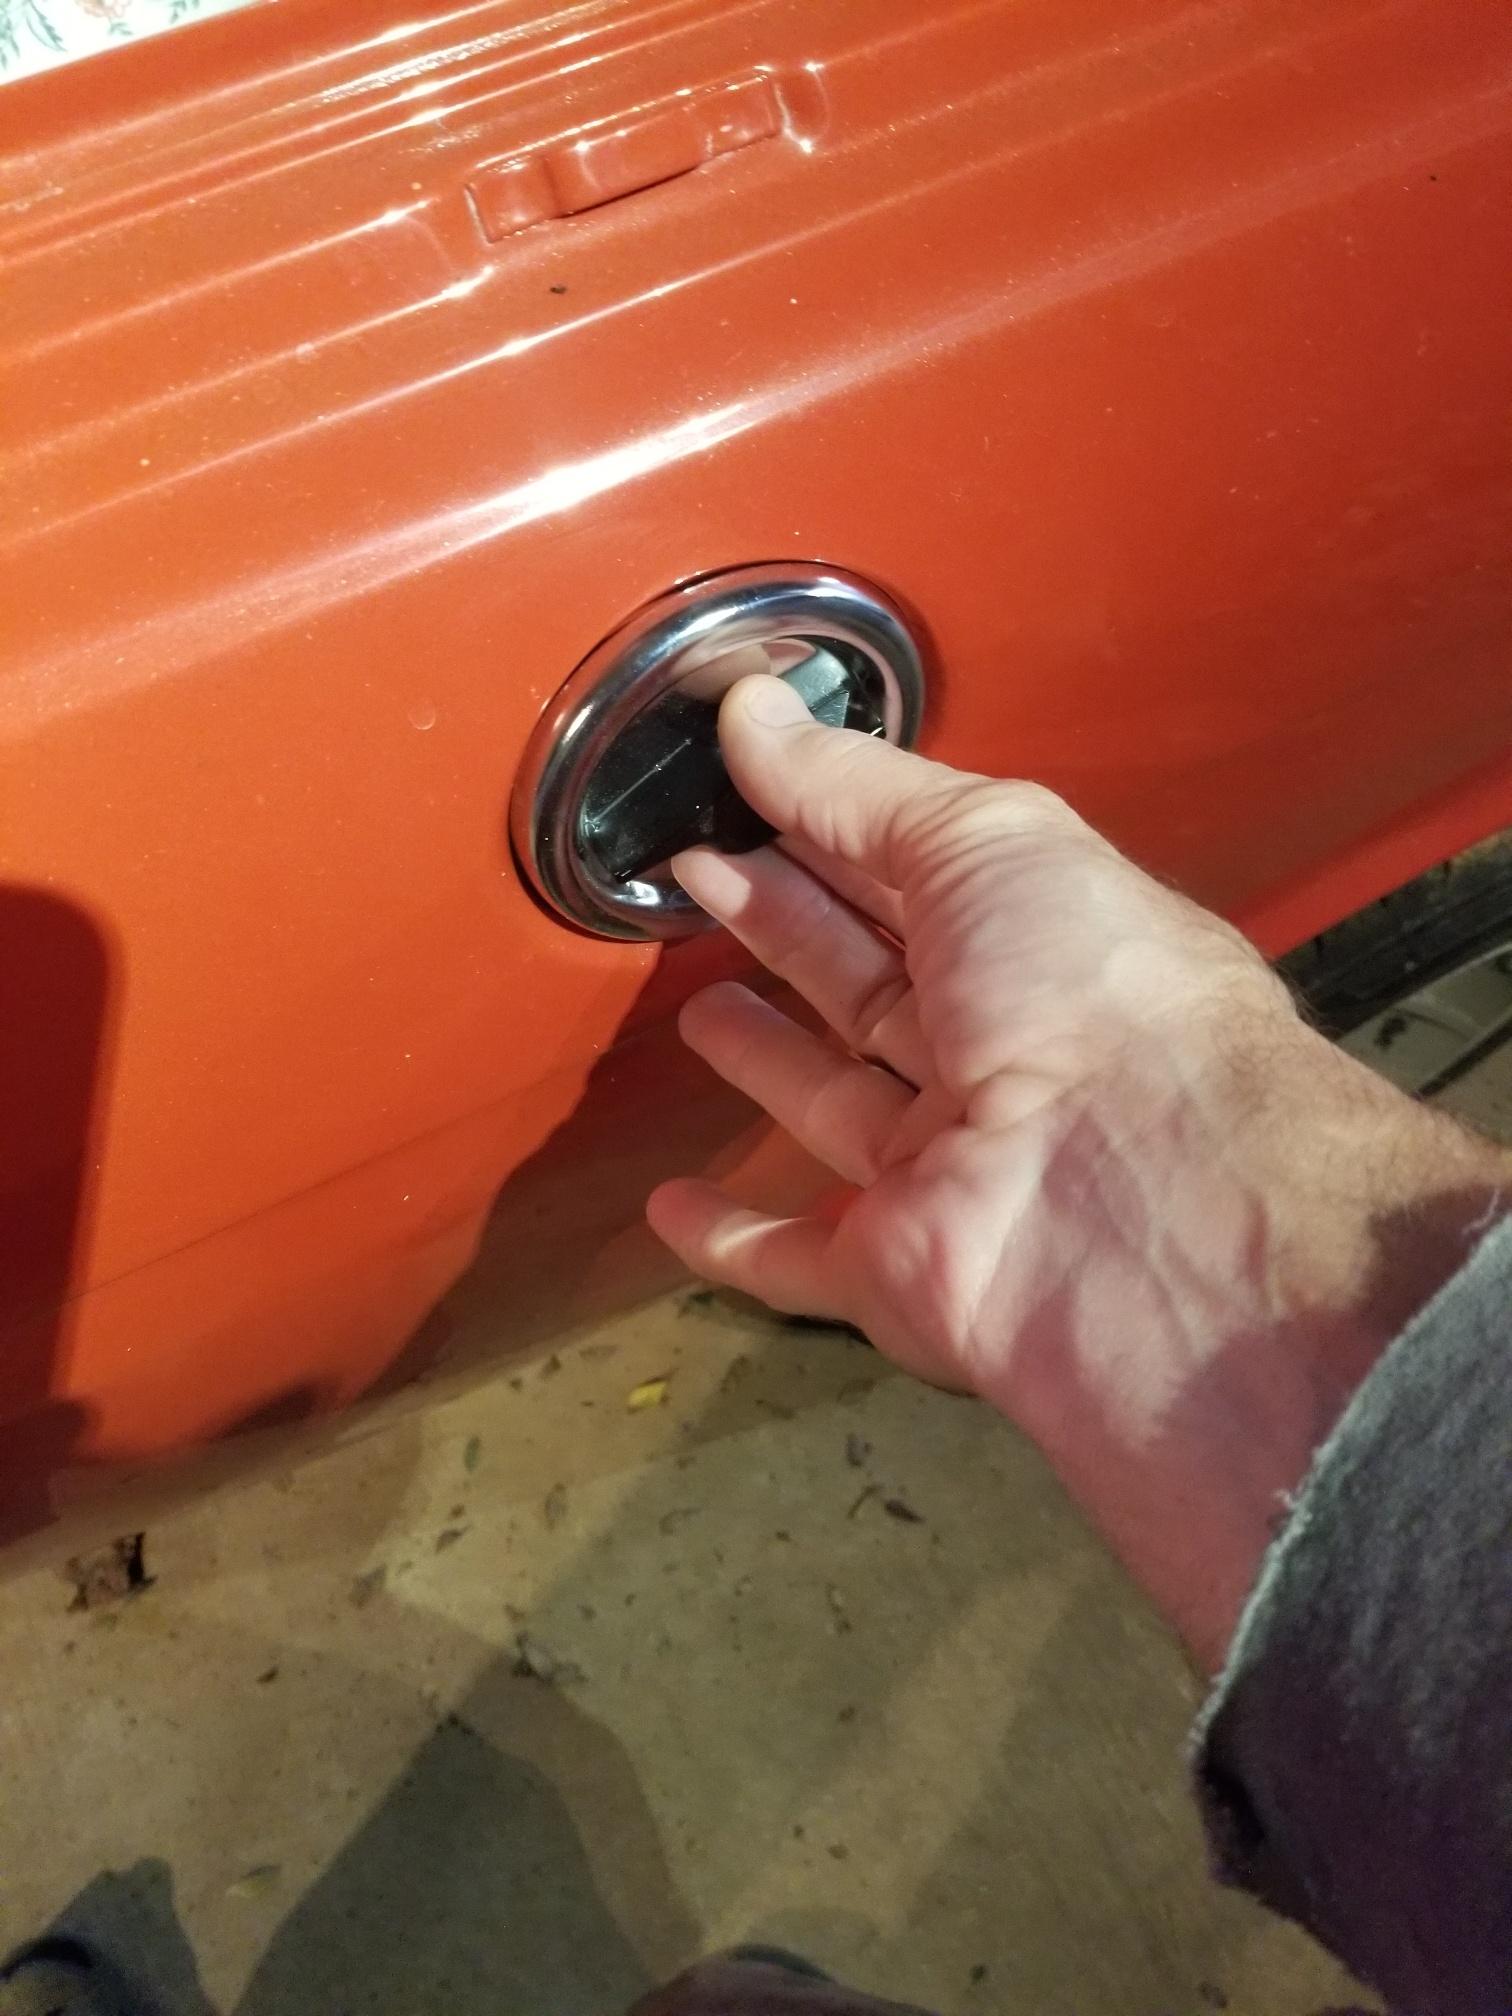
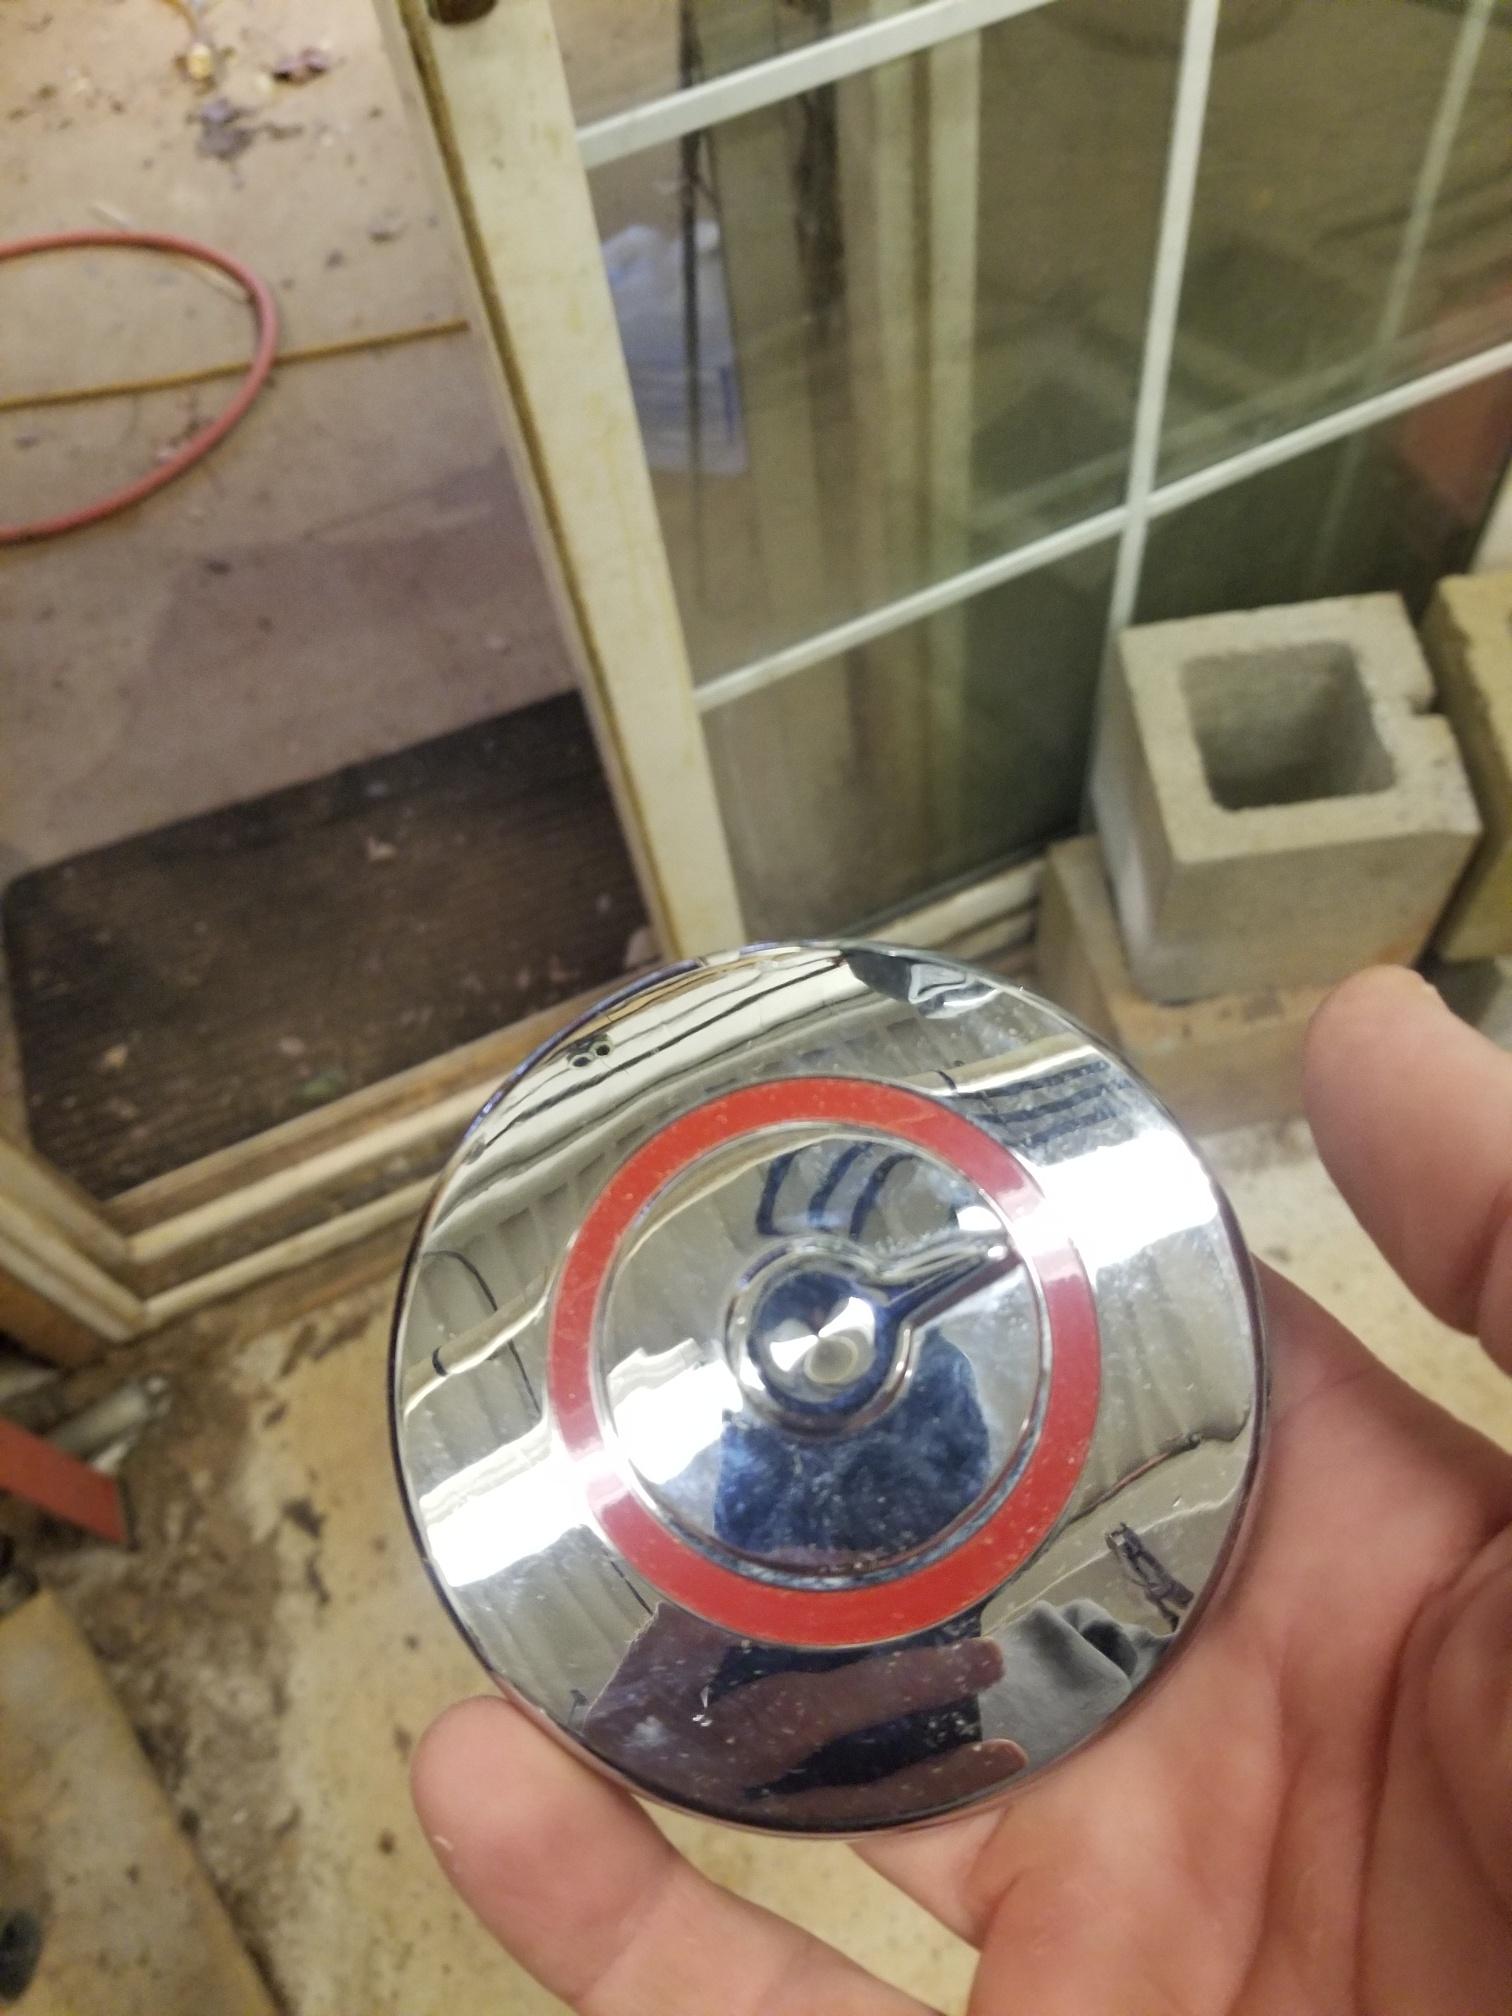
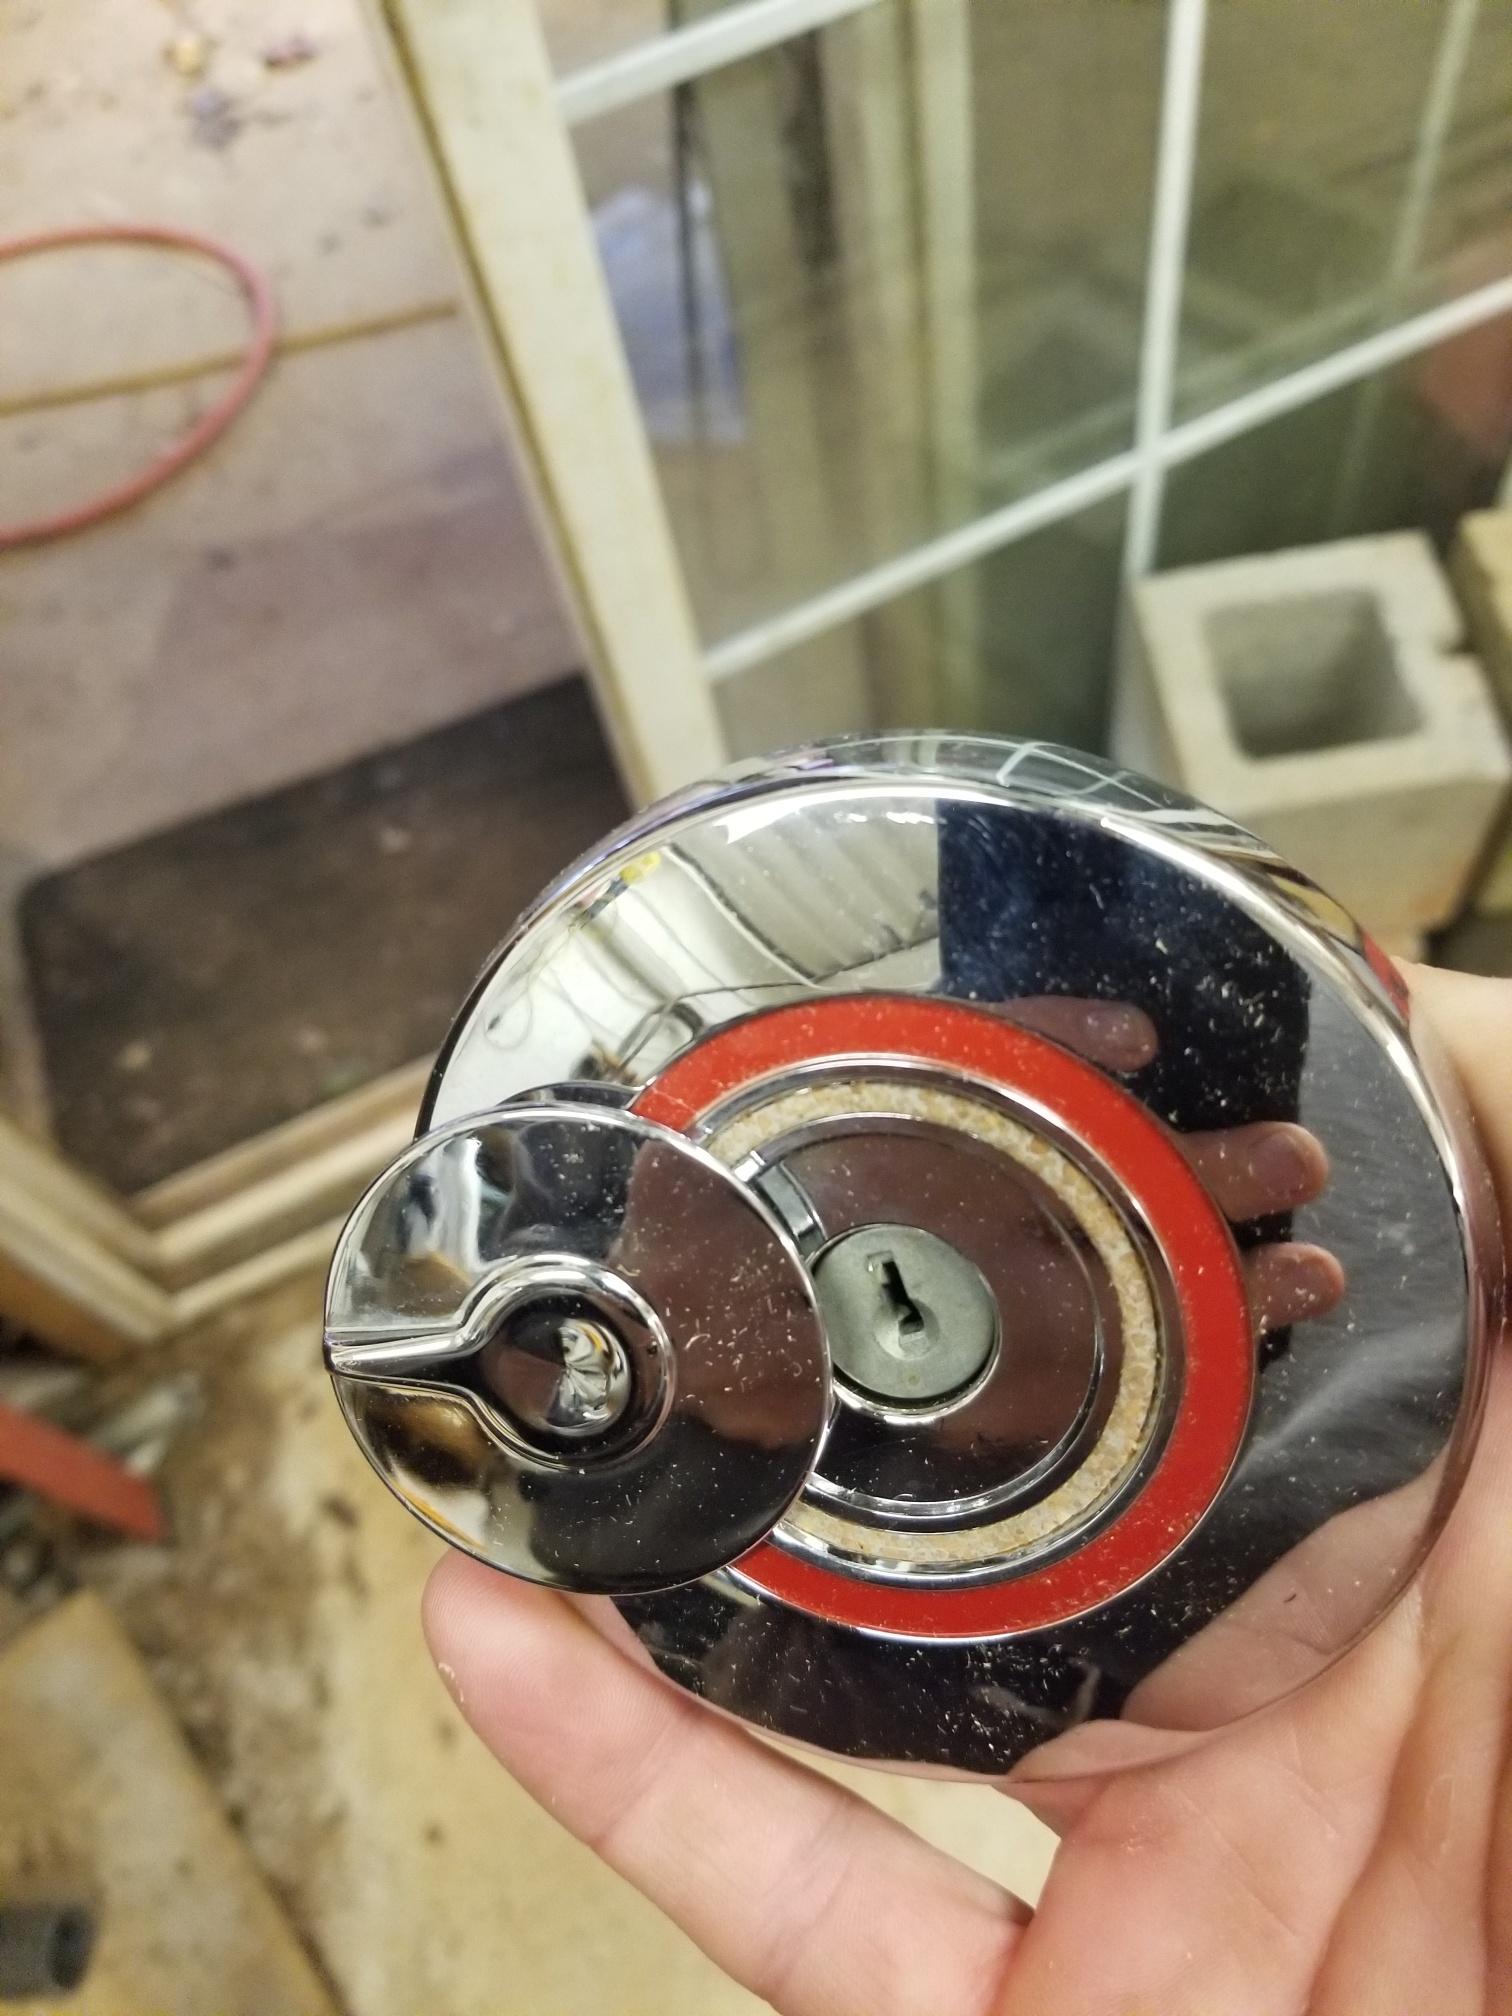
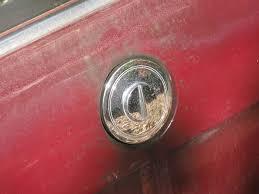
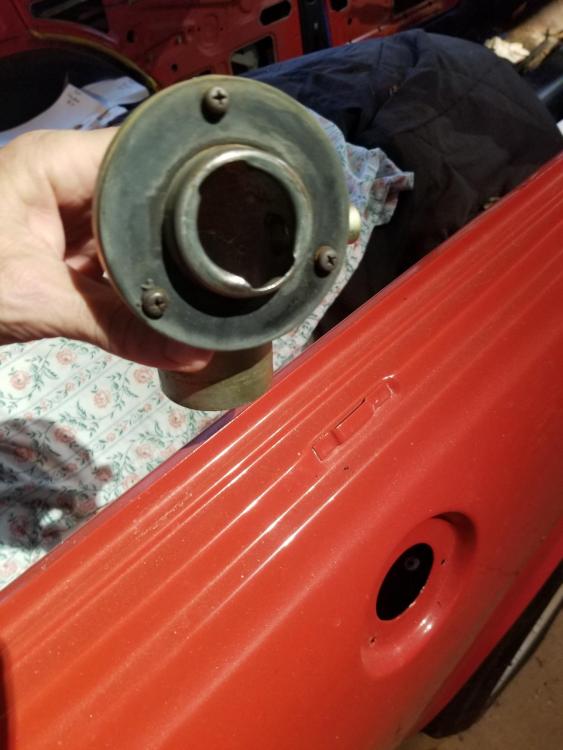
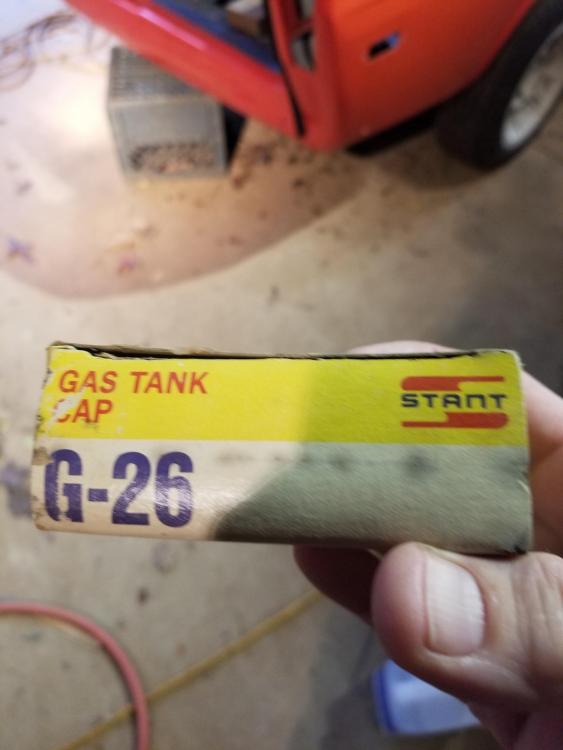
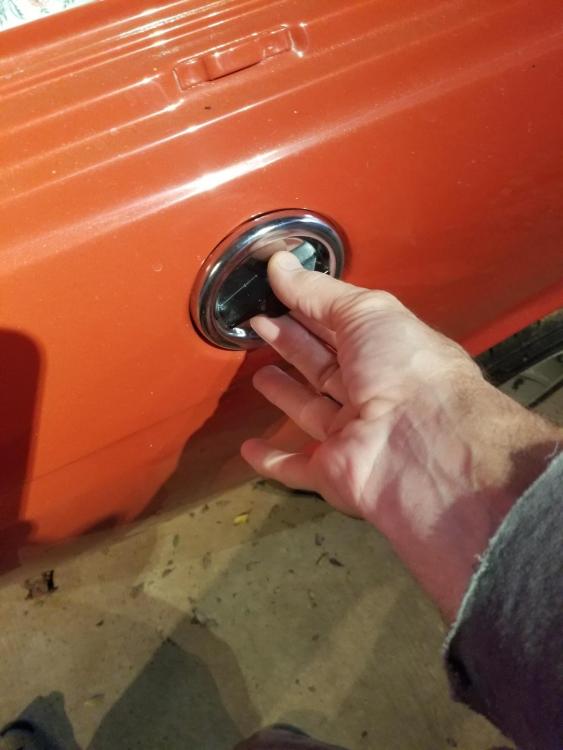
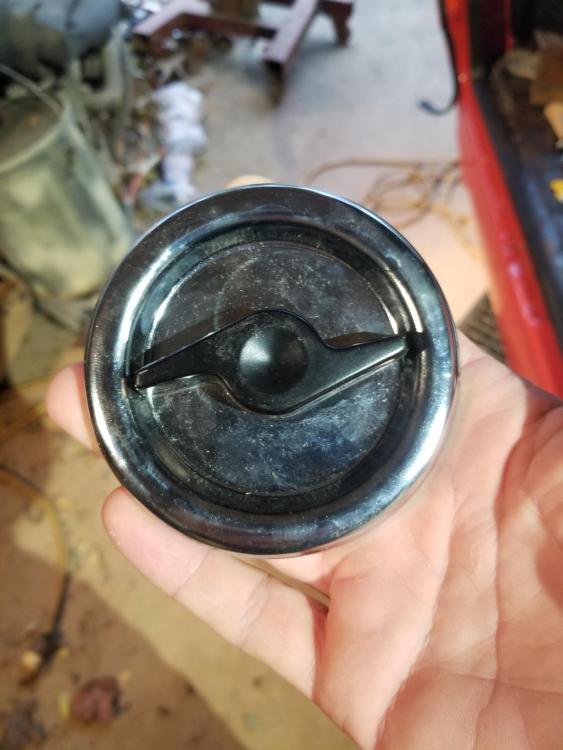
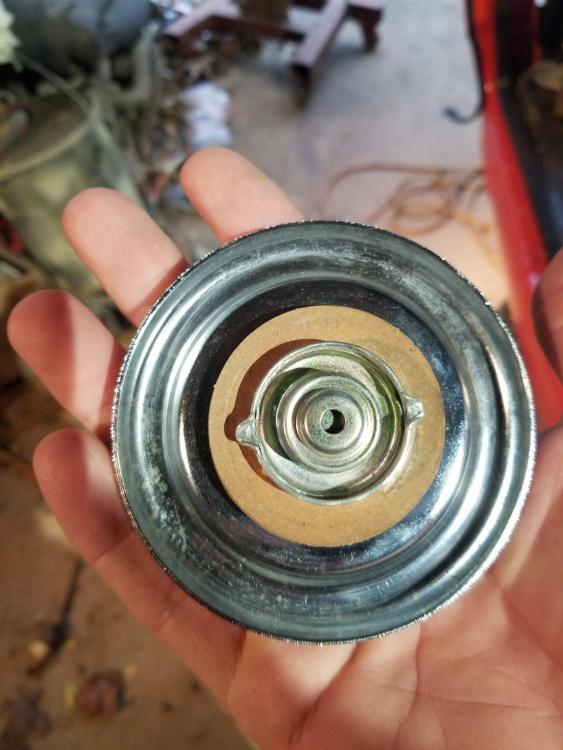
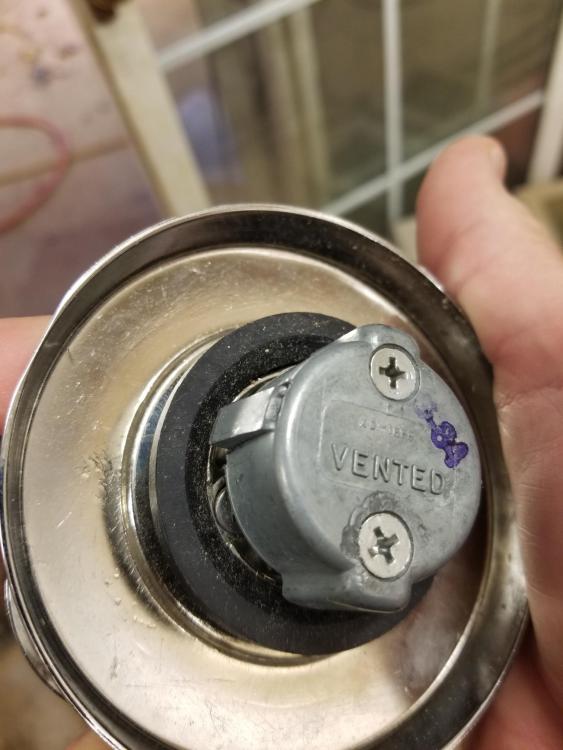
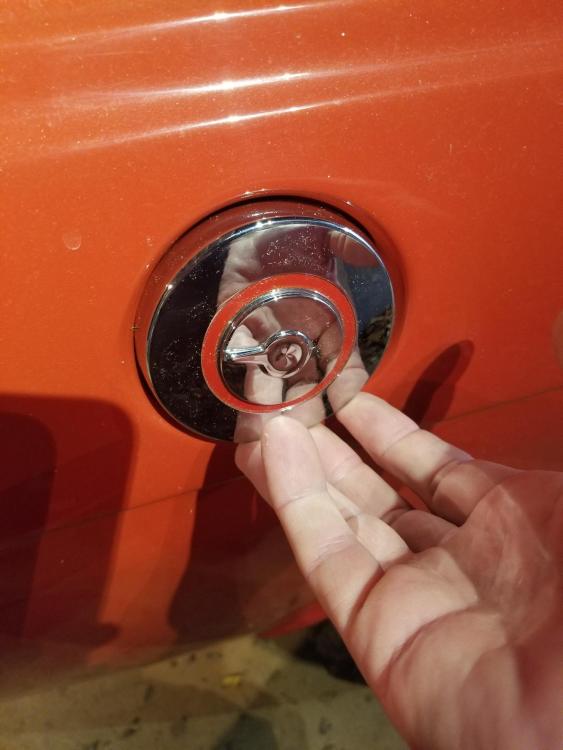
Ok, so I have a little nugget for any other wagon owner out there... So this is the factory gas cap. Pretty much unobtanium. The last one I saw a year or two ago in Japan for $350 or so So this is what I'm working with The cap is obviously very visible and it would be nice if It pretty much filled the space. So I was googling around and I found a thread, I think it was on "The Realm" that mentioned a Stant gas cap. A G26...so off to Ebay It fits the filler neck fine and appears to seal Once I had the G26 you can find the vehicles it is supposed to fit. 57'-61' Chrysler, Dodge, DeSoto, Plymouth station wagons. Bingo!!! Then started looking for locking gas caps for those Marques We have a WINNER!! Merry Xmas to Cody... It has that factory applied red paint ring on it. It doesn't match and I may try to strip it off and polish it. We'll see after he gets it...


-
-
Beautiful car. Always one of my favorites! Thats a lot of money though. I wouldn't enjoy driving it with todays distracted drivers. It would be too hard to relax and enjoy the drive
-
Even a trashed transmission usually has a $100 worth of useable parts. Like Zed said they are amazingly robust
-
$23.5k With 50 minutes to go
-
$100 is cheap for any 5 spd these days
-
My vote would be option #3
-
1.6cc Thats pretty substantial
-
I will see if I have a section I can test
-
The car is freshly painted so that side is nice and clean