Patcon
 Subscriber
-
Joined
-
Last visited
Everything posted by Patcon
-
 Yeah, those are close. I've never measured the stock ones. Half the battle is knowing what search terms to use...
 -
What window kit did you use?
-
I have most of those caps but haven't seen a source for replacements. Would like to find a source if possible, just in case...
-
Did you figure out which end of the headlight harness gets the tape marker? Do you have the caps that go over the headlight screw inserts?
-
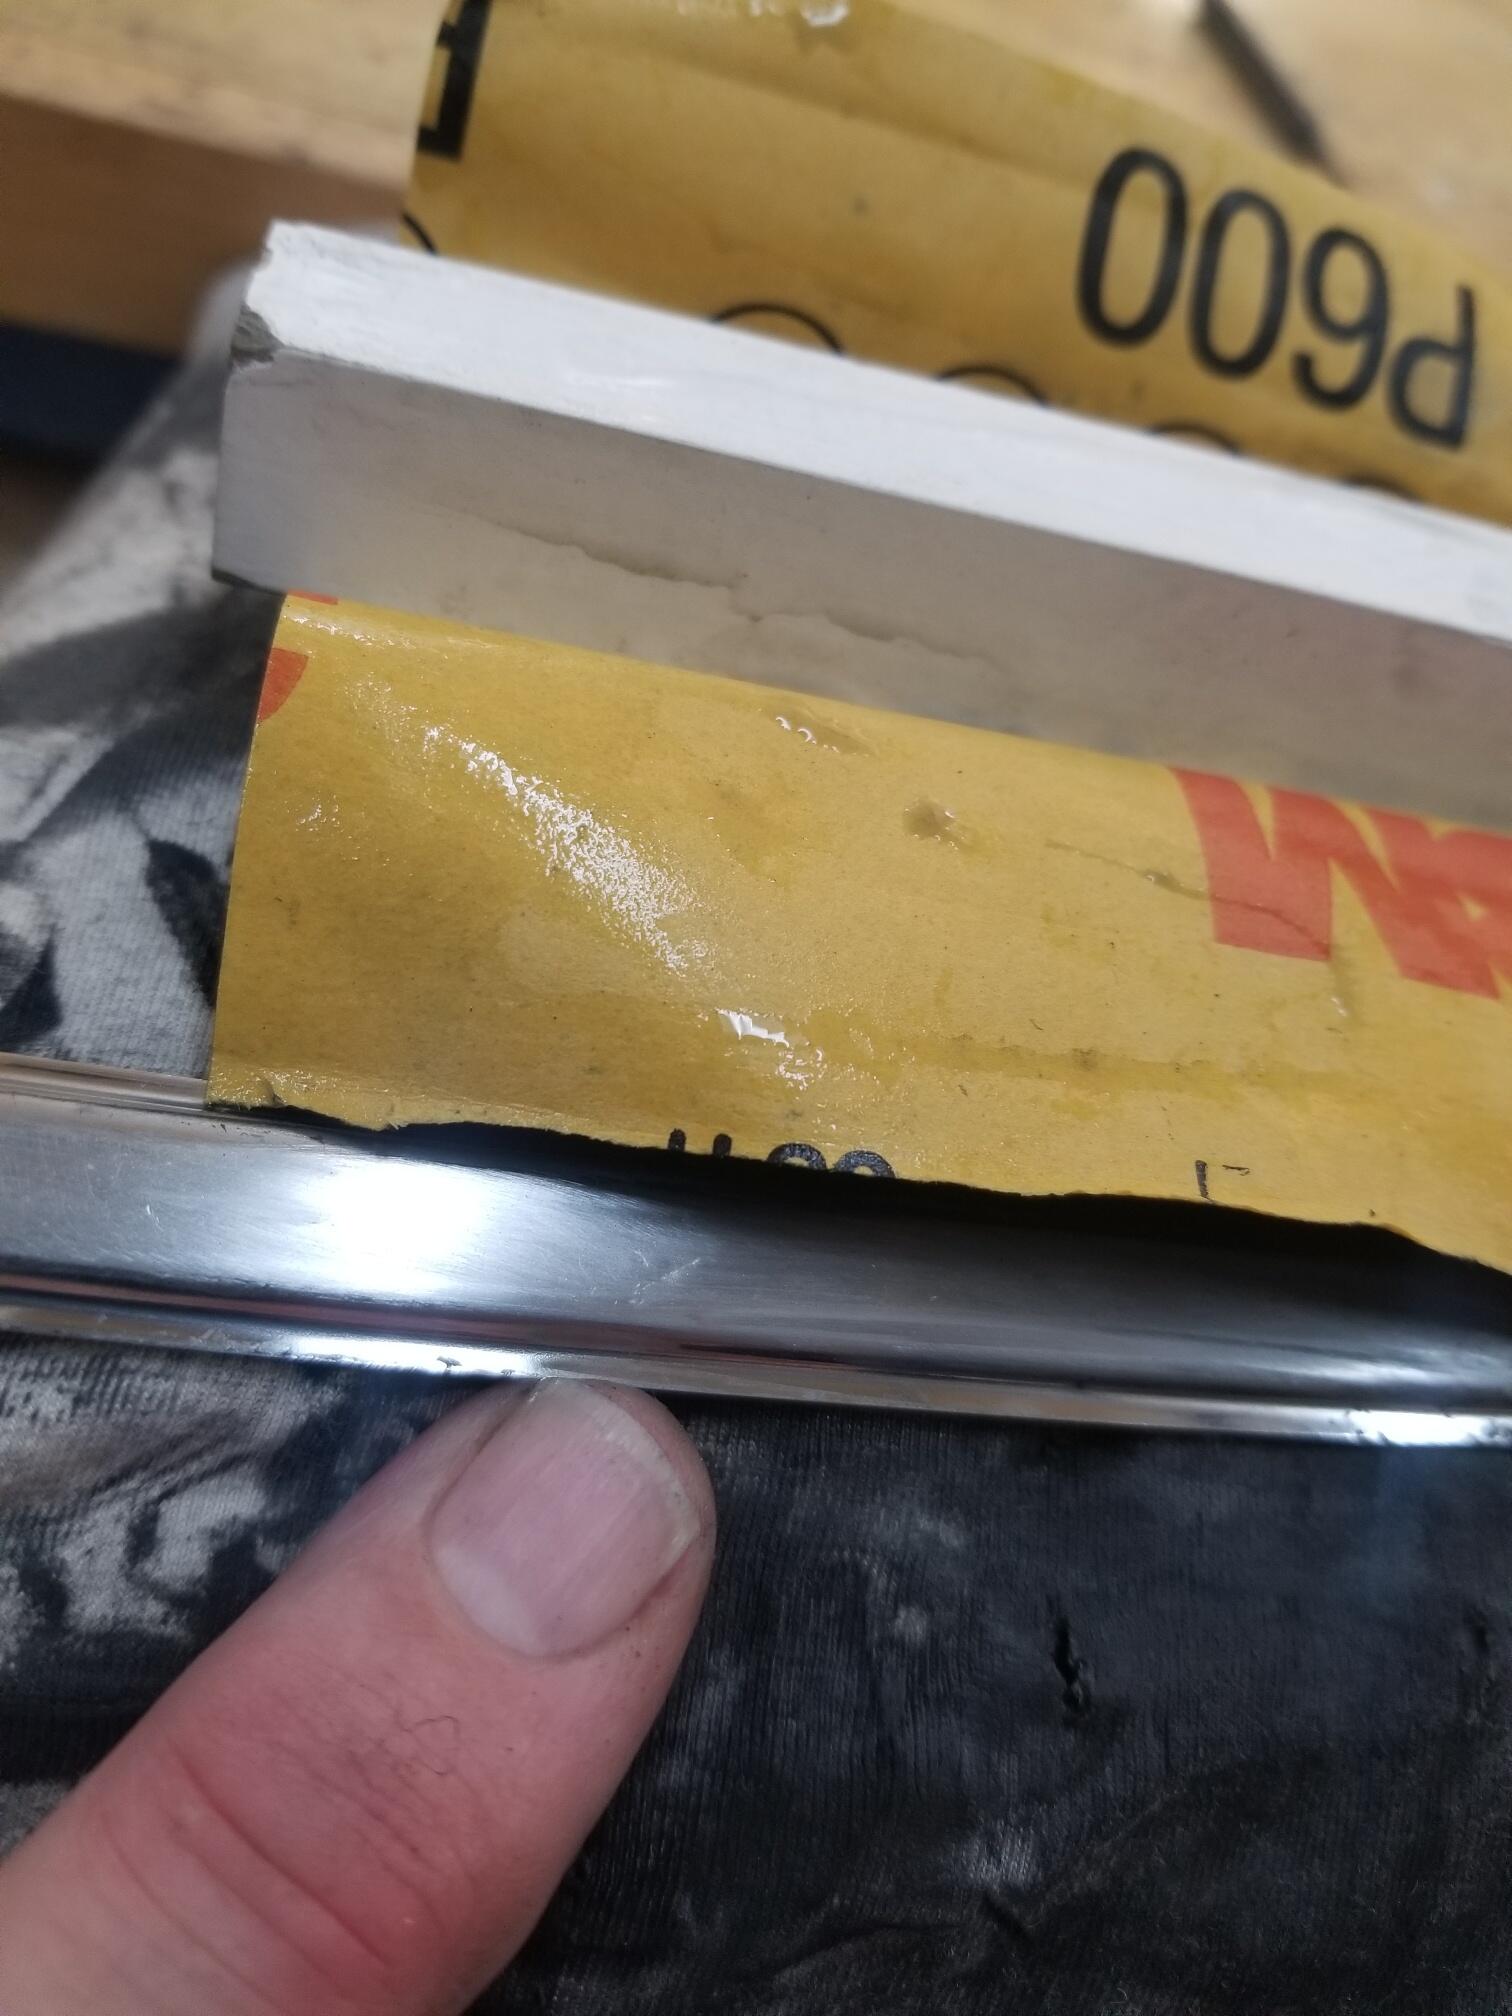
Also remember this trim is exceedingly thin! So the closer you can dolly it the better. It's not some thick trim off a 70s Detroit beast. There are limits to how much you can sand with the course stuff! You'll know you're getting really thin if it turns blue easily when buffing
-
Bear in mind. The paper dulls reall really fast because the trim is so hard! Especially the finer grits
-
Yes, it probably wont happen this weekend though
-
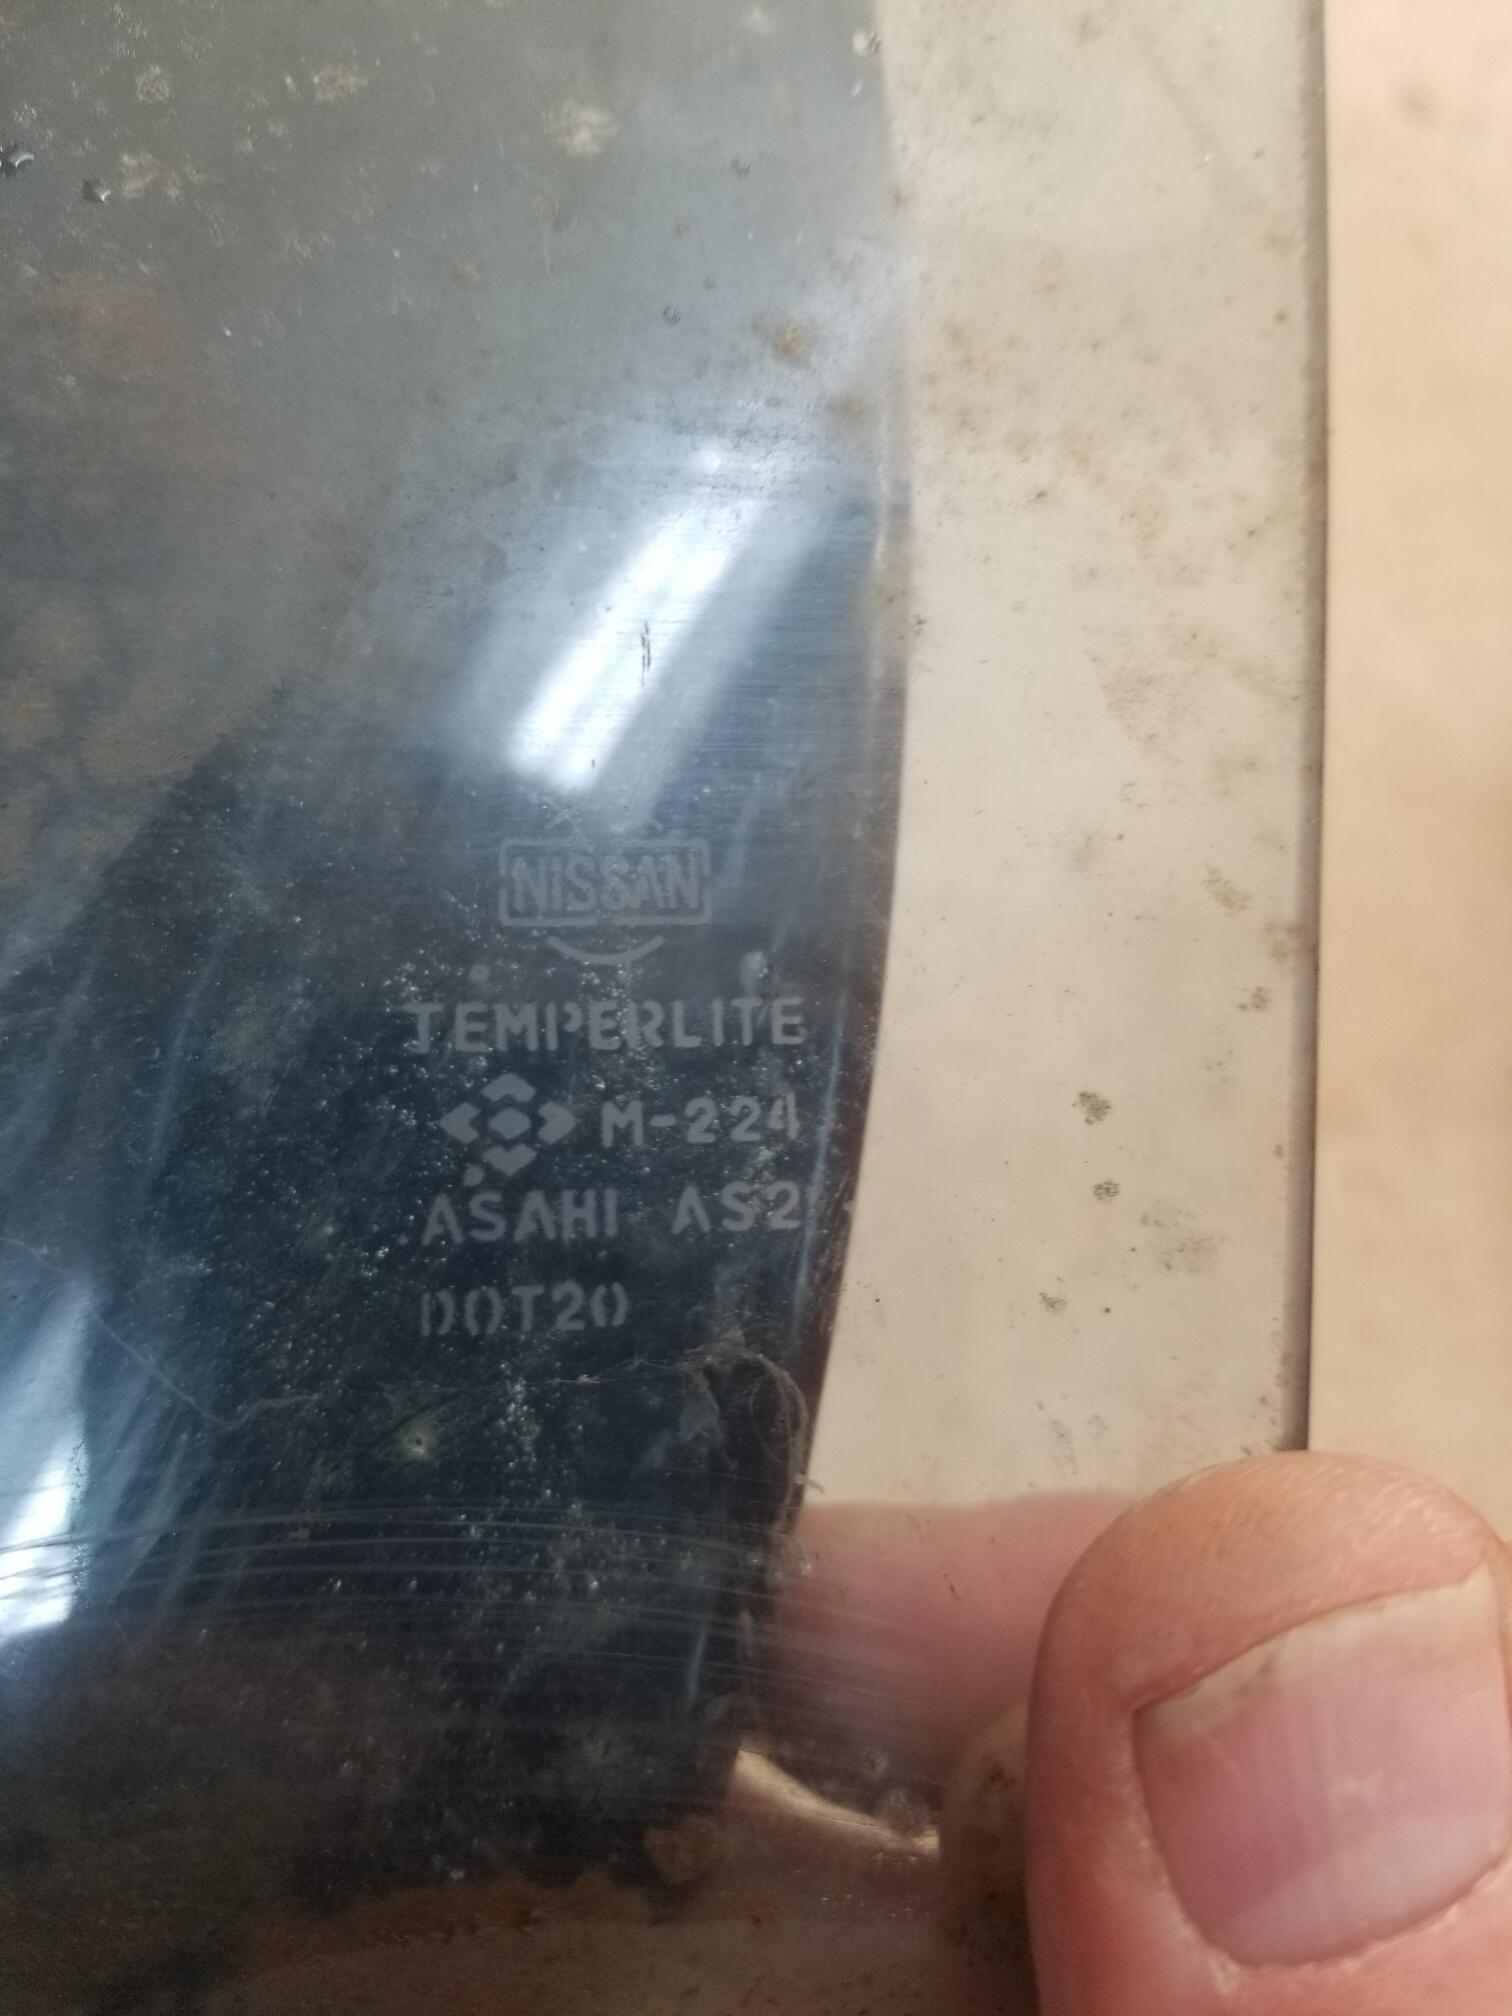
Does this match your glass? Drivers side? It does have some light scratches. I don't know how well it will polish up or if it will come up to the standard of your build...

-
I might have one
-
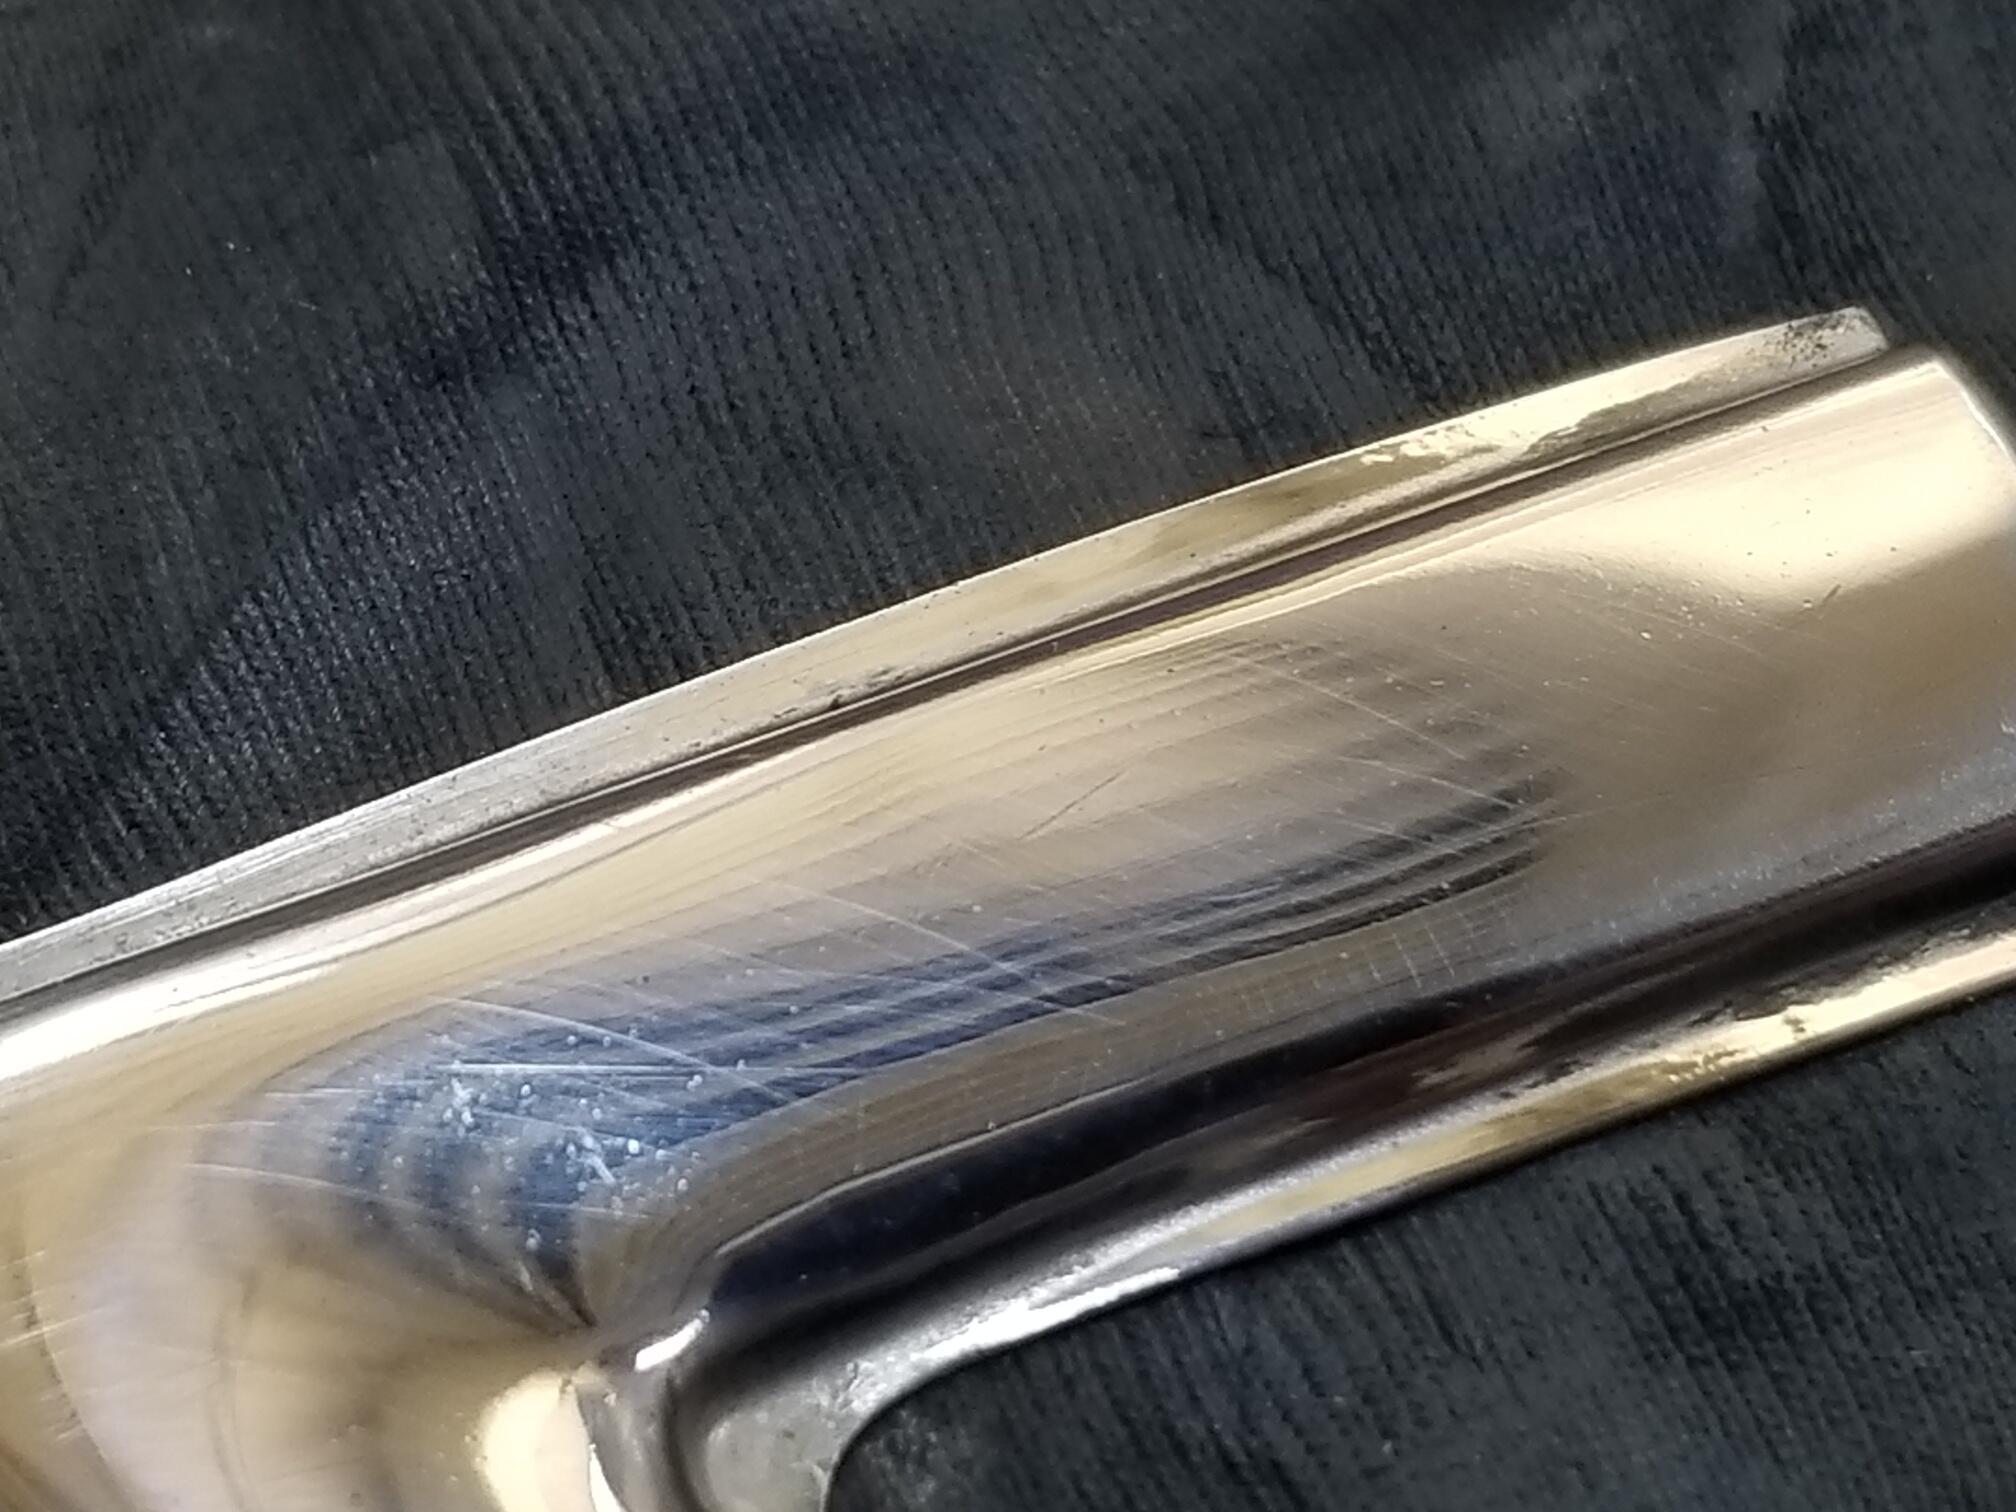
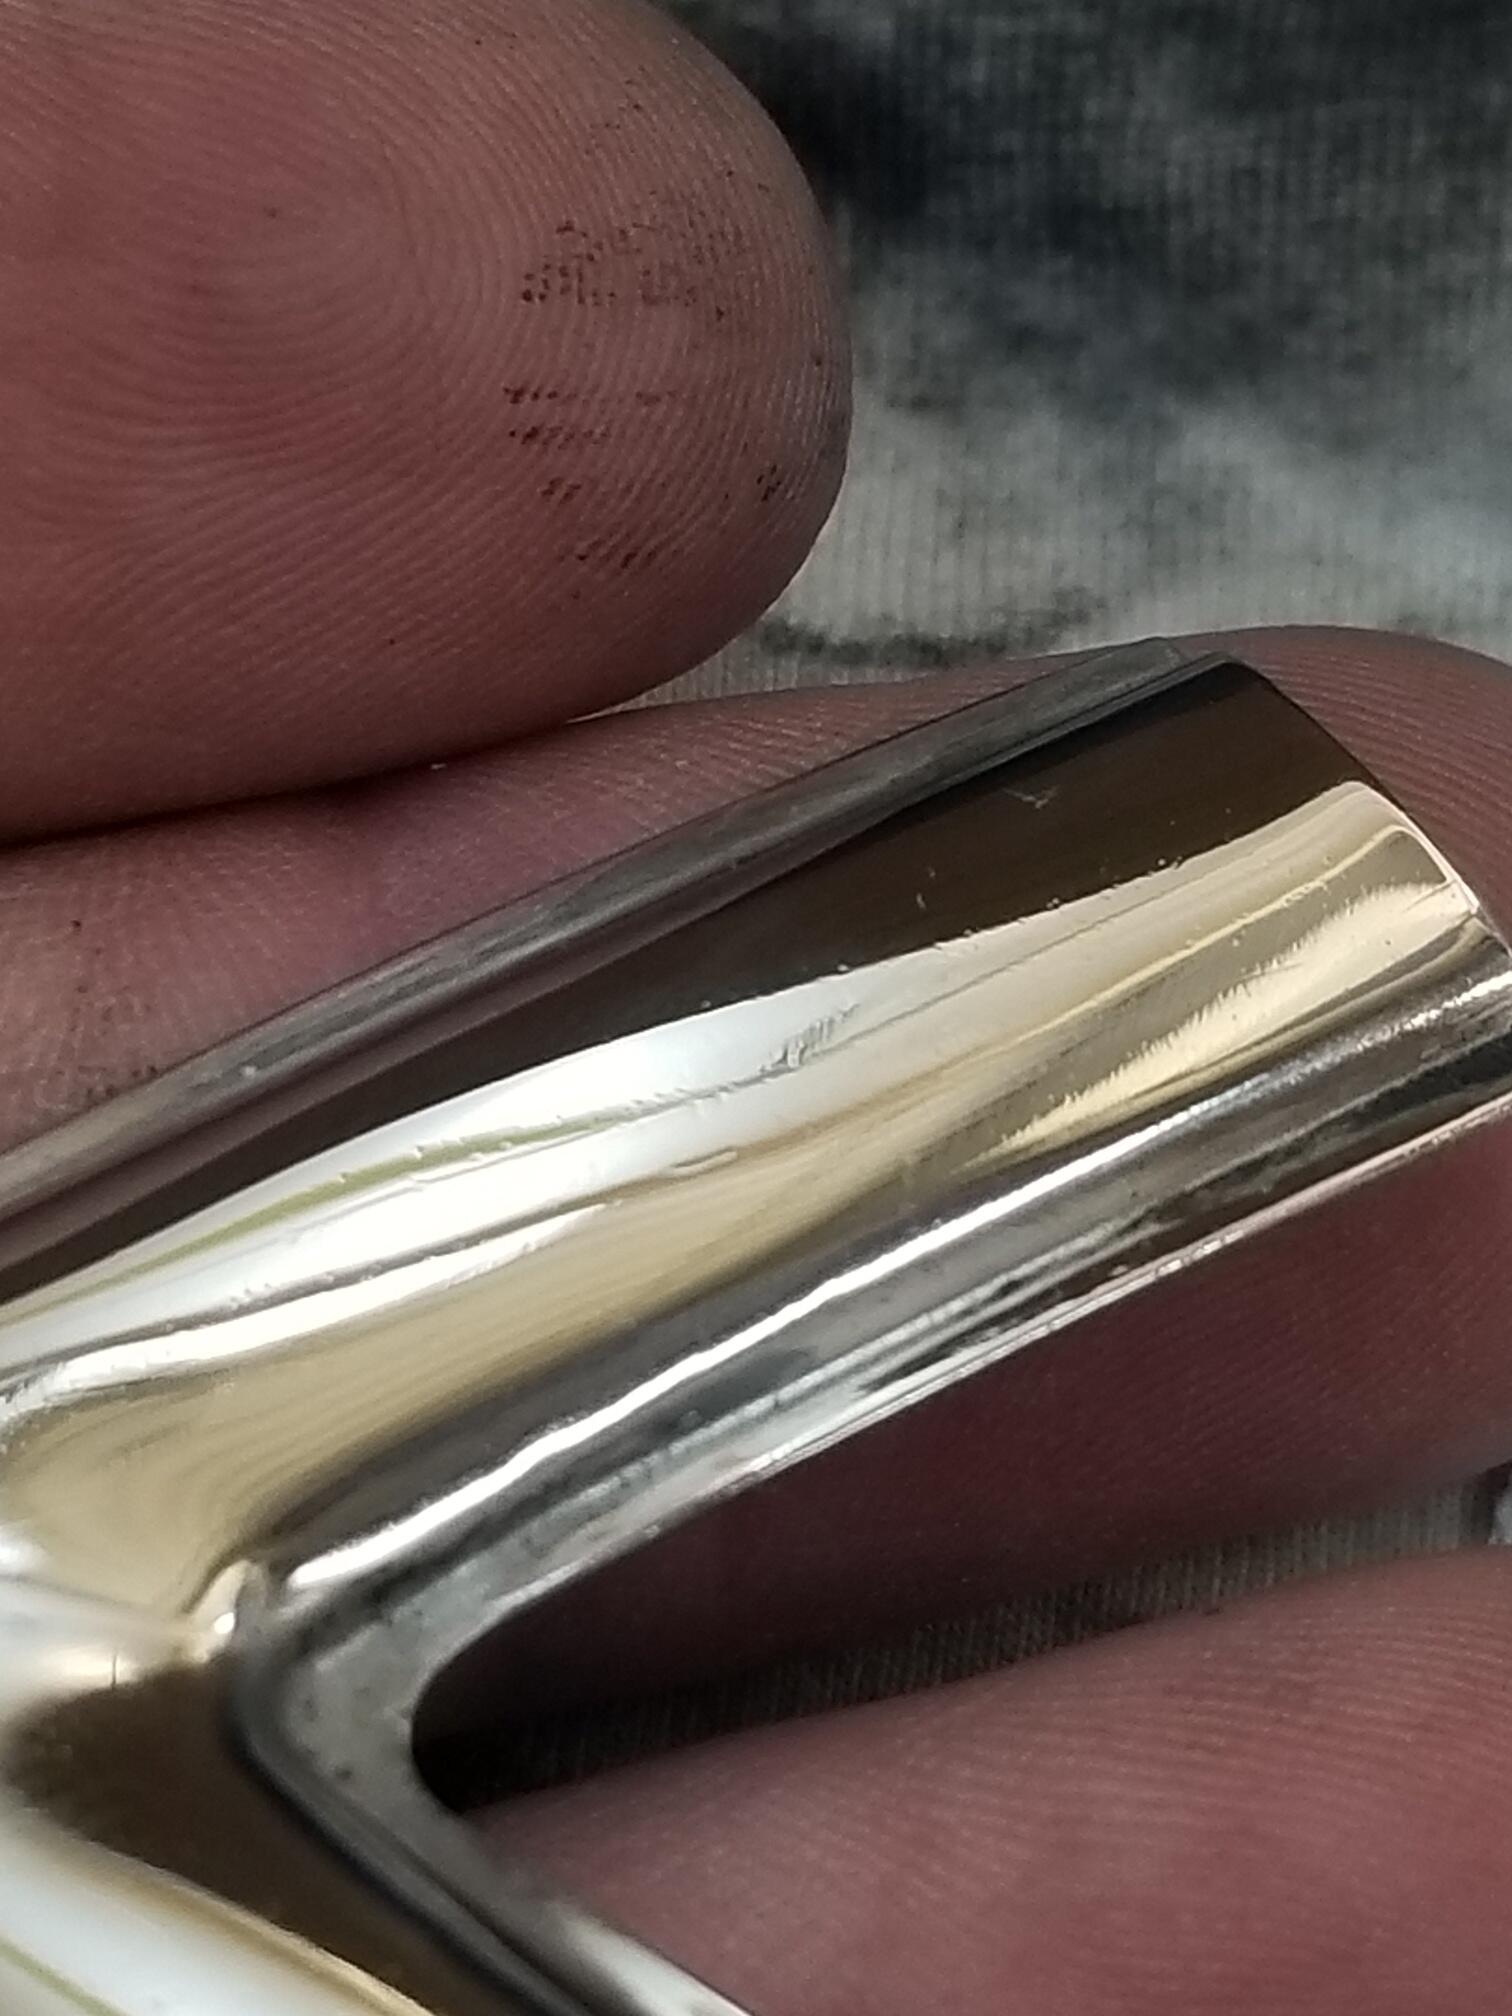
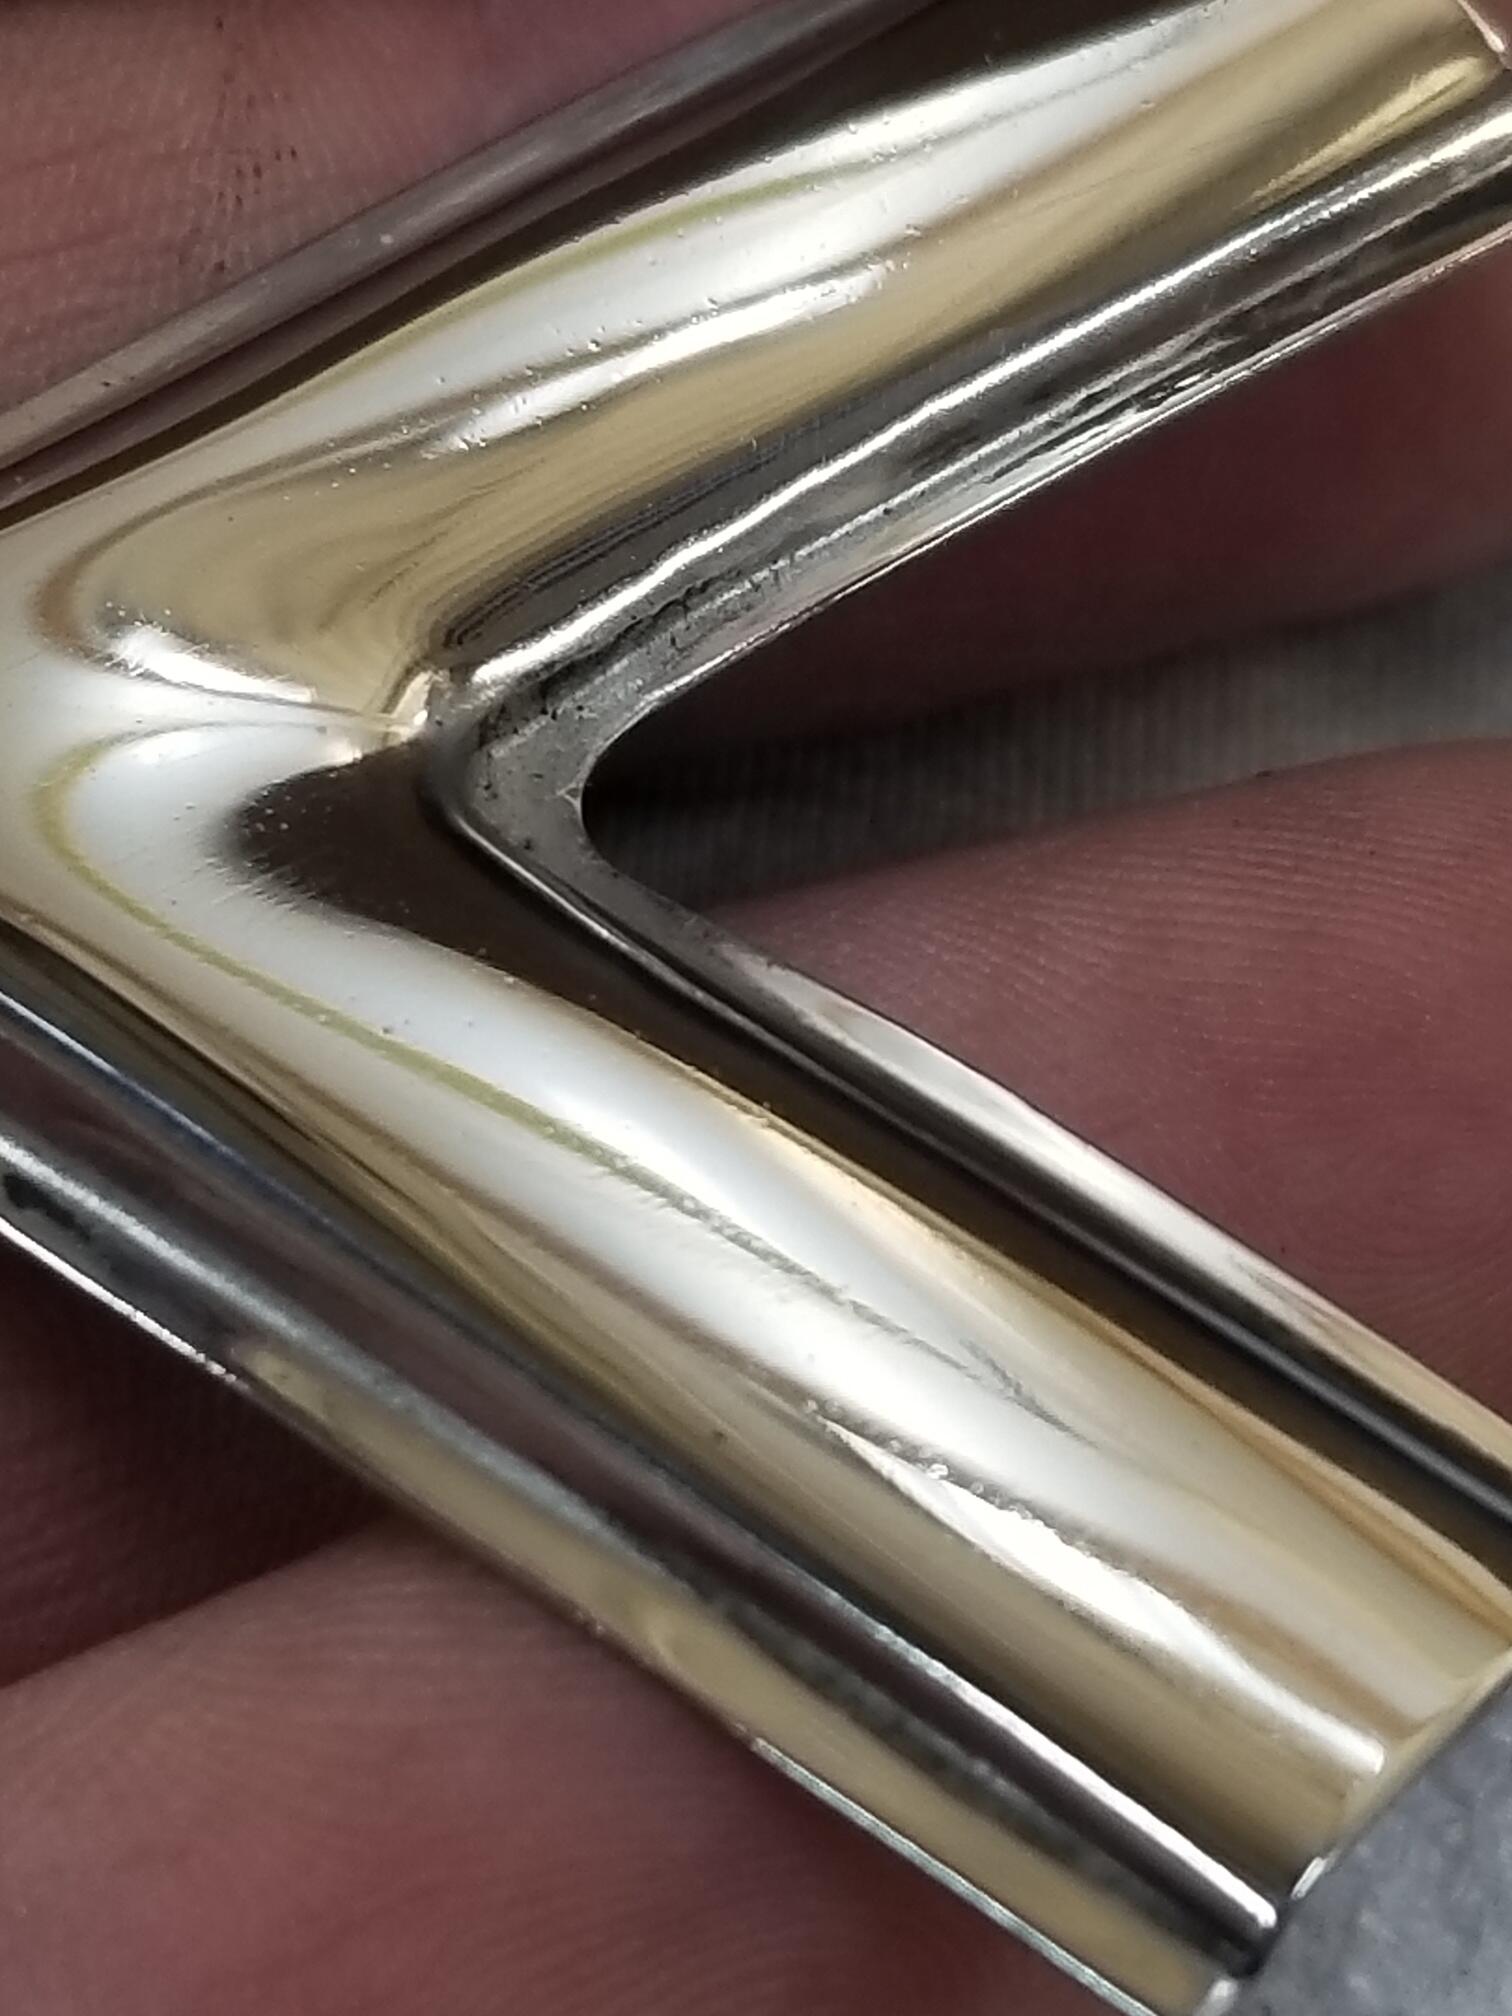
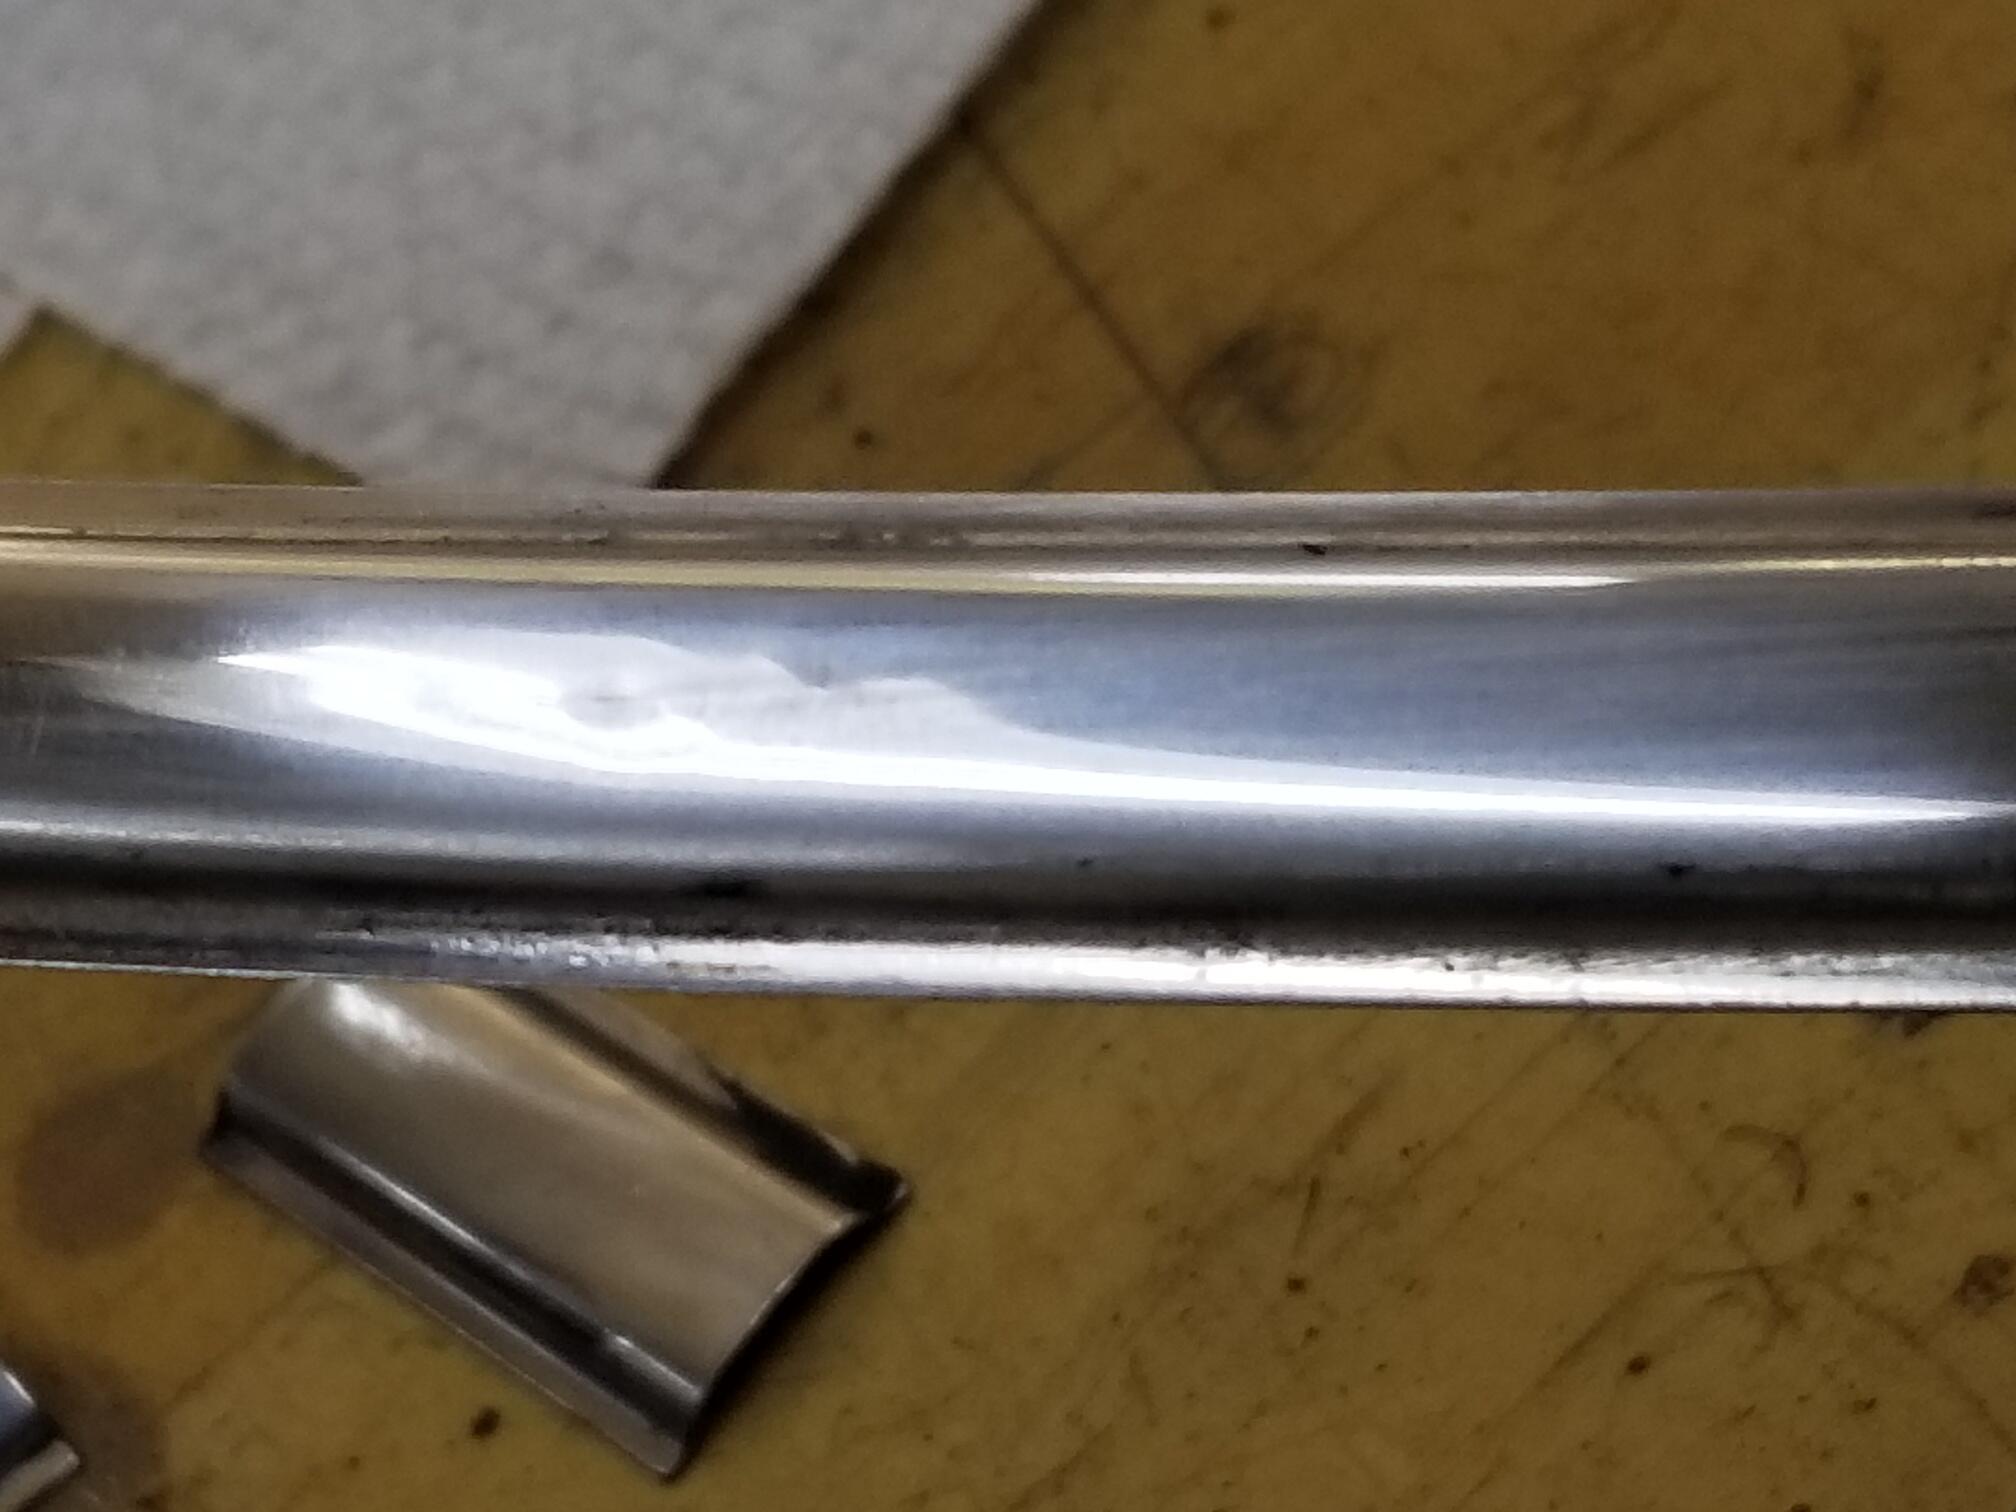
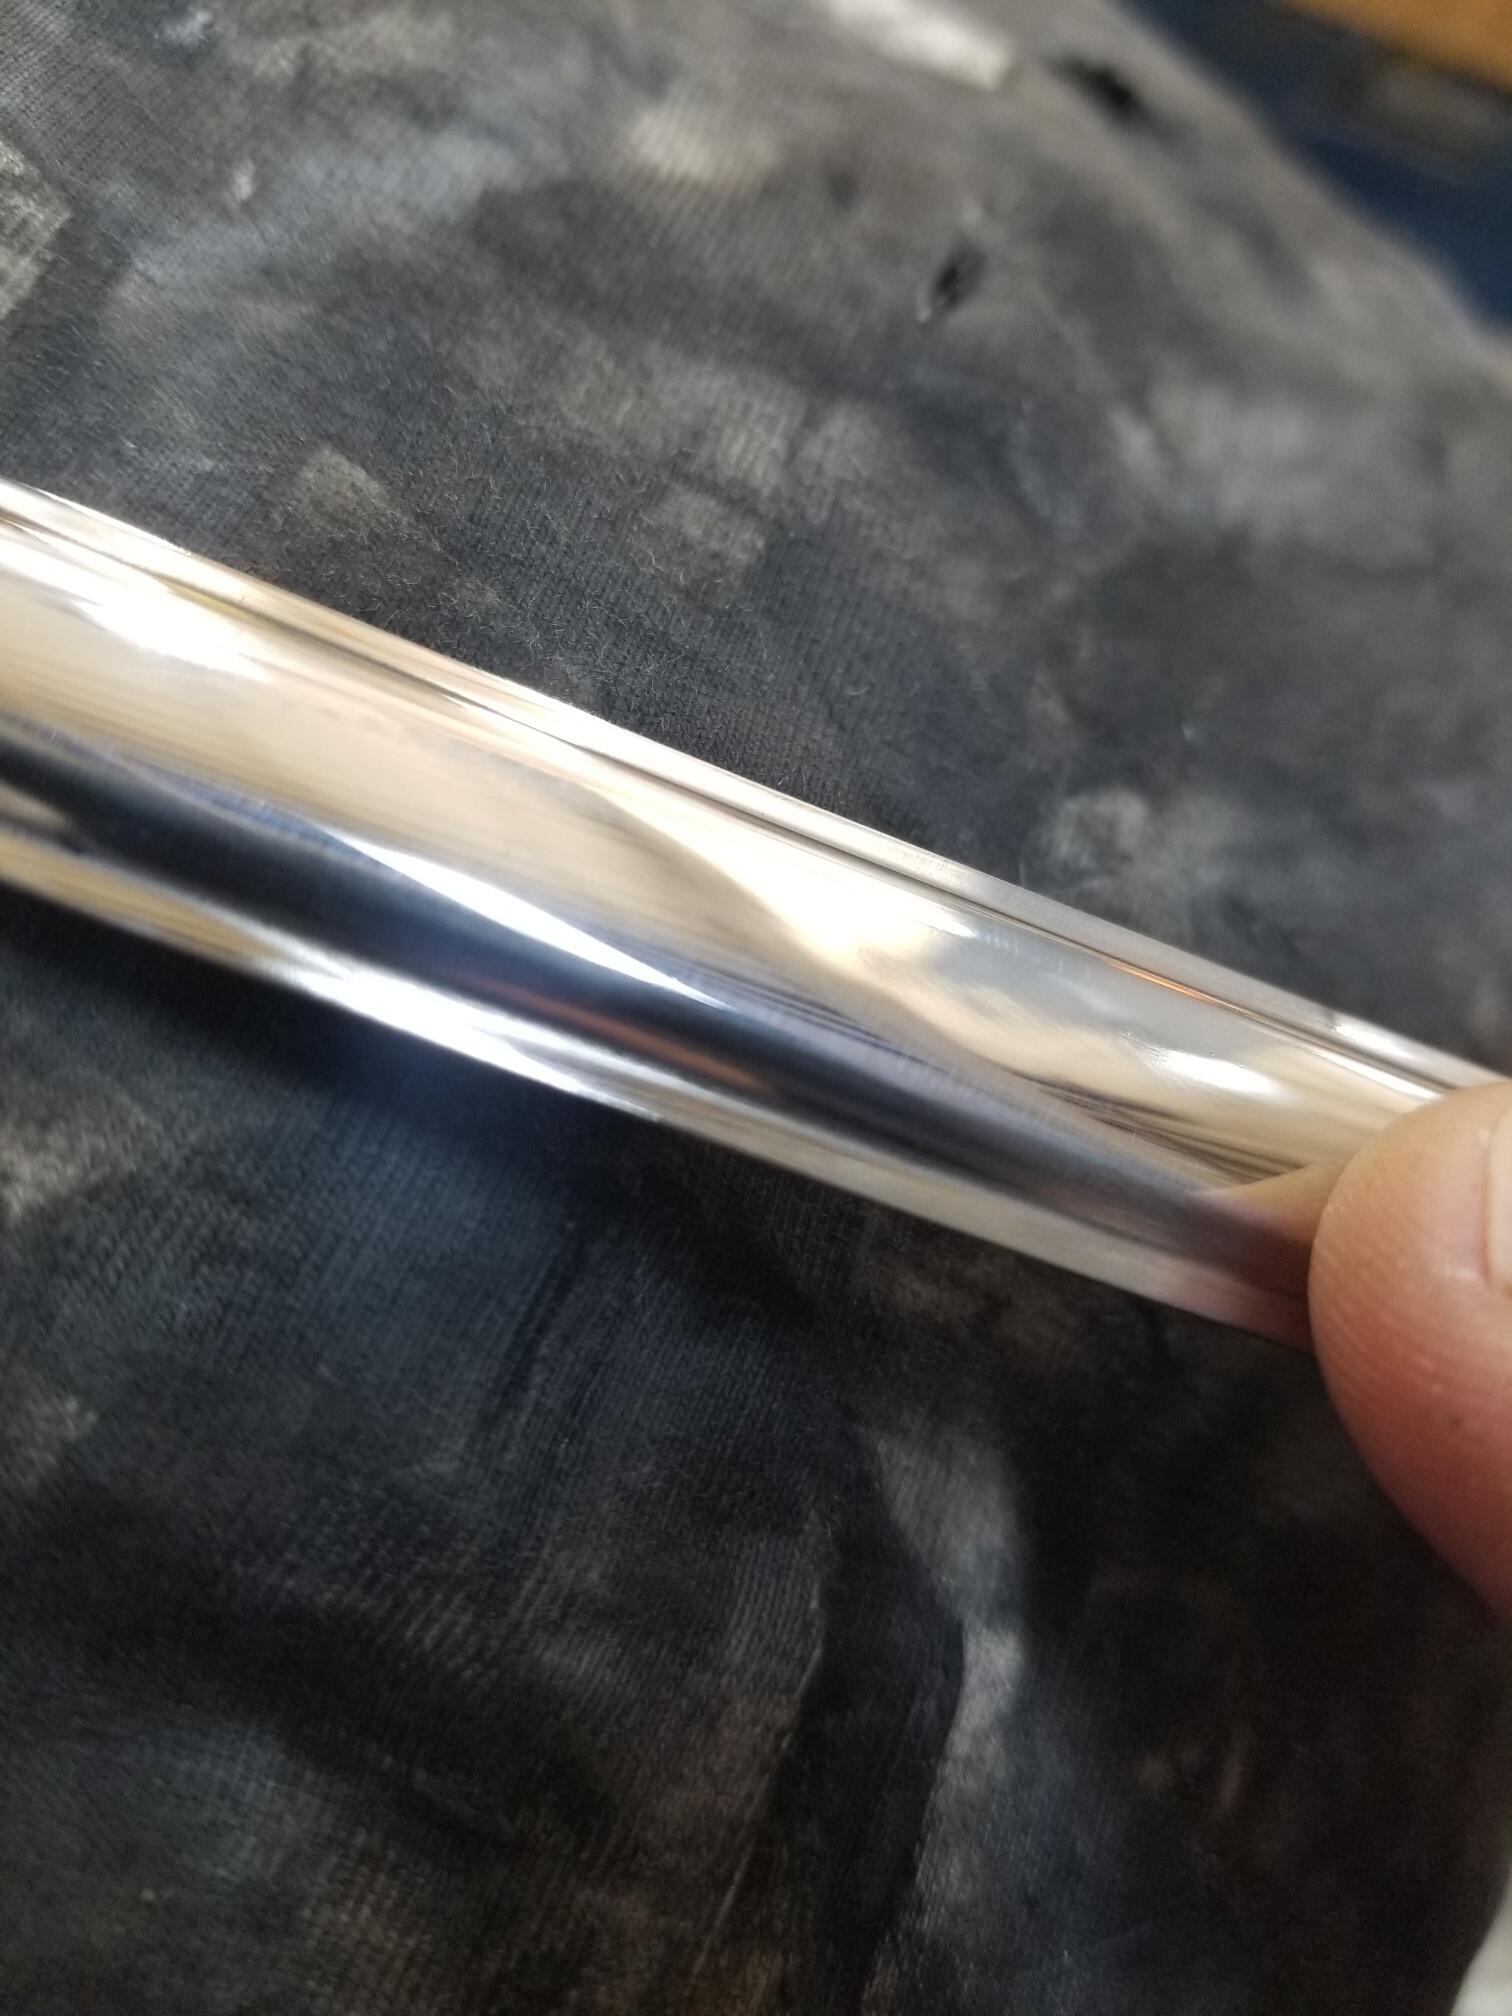
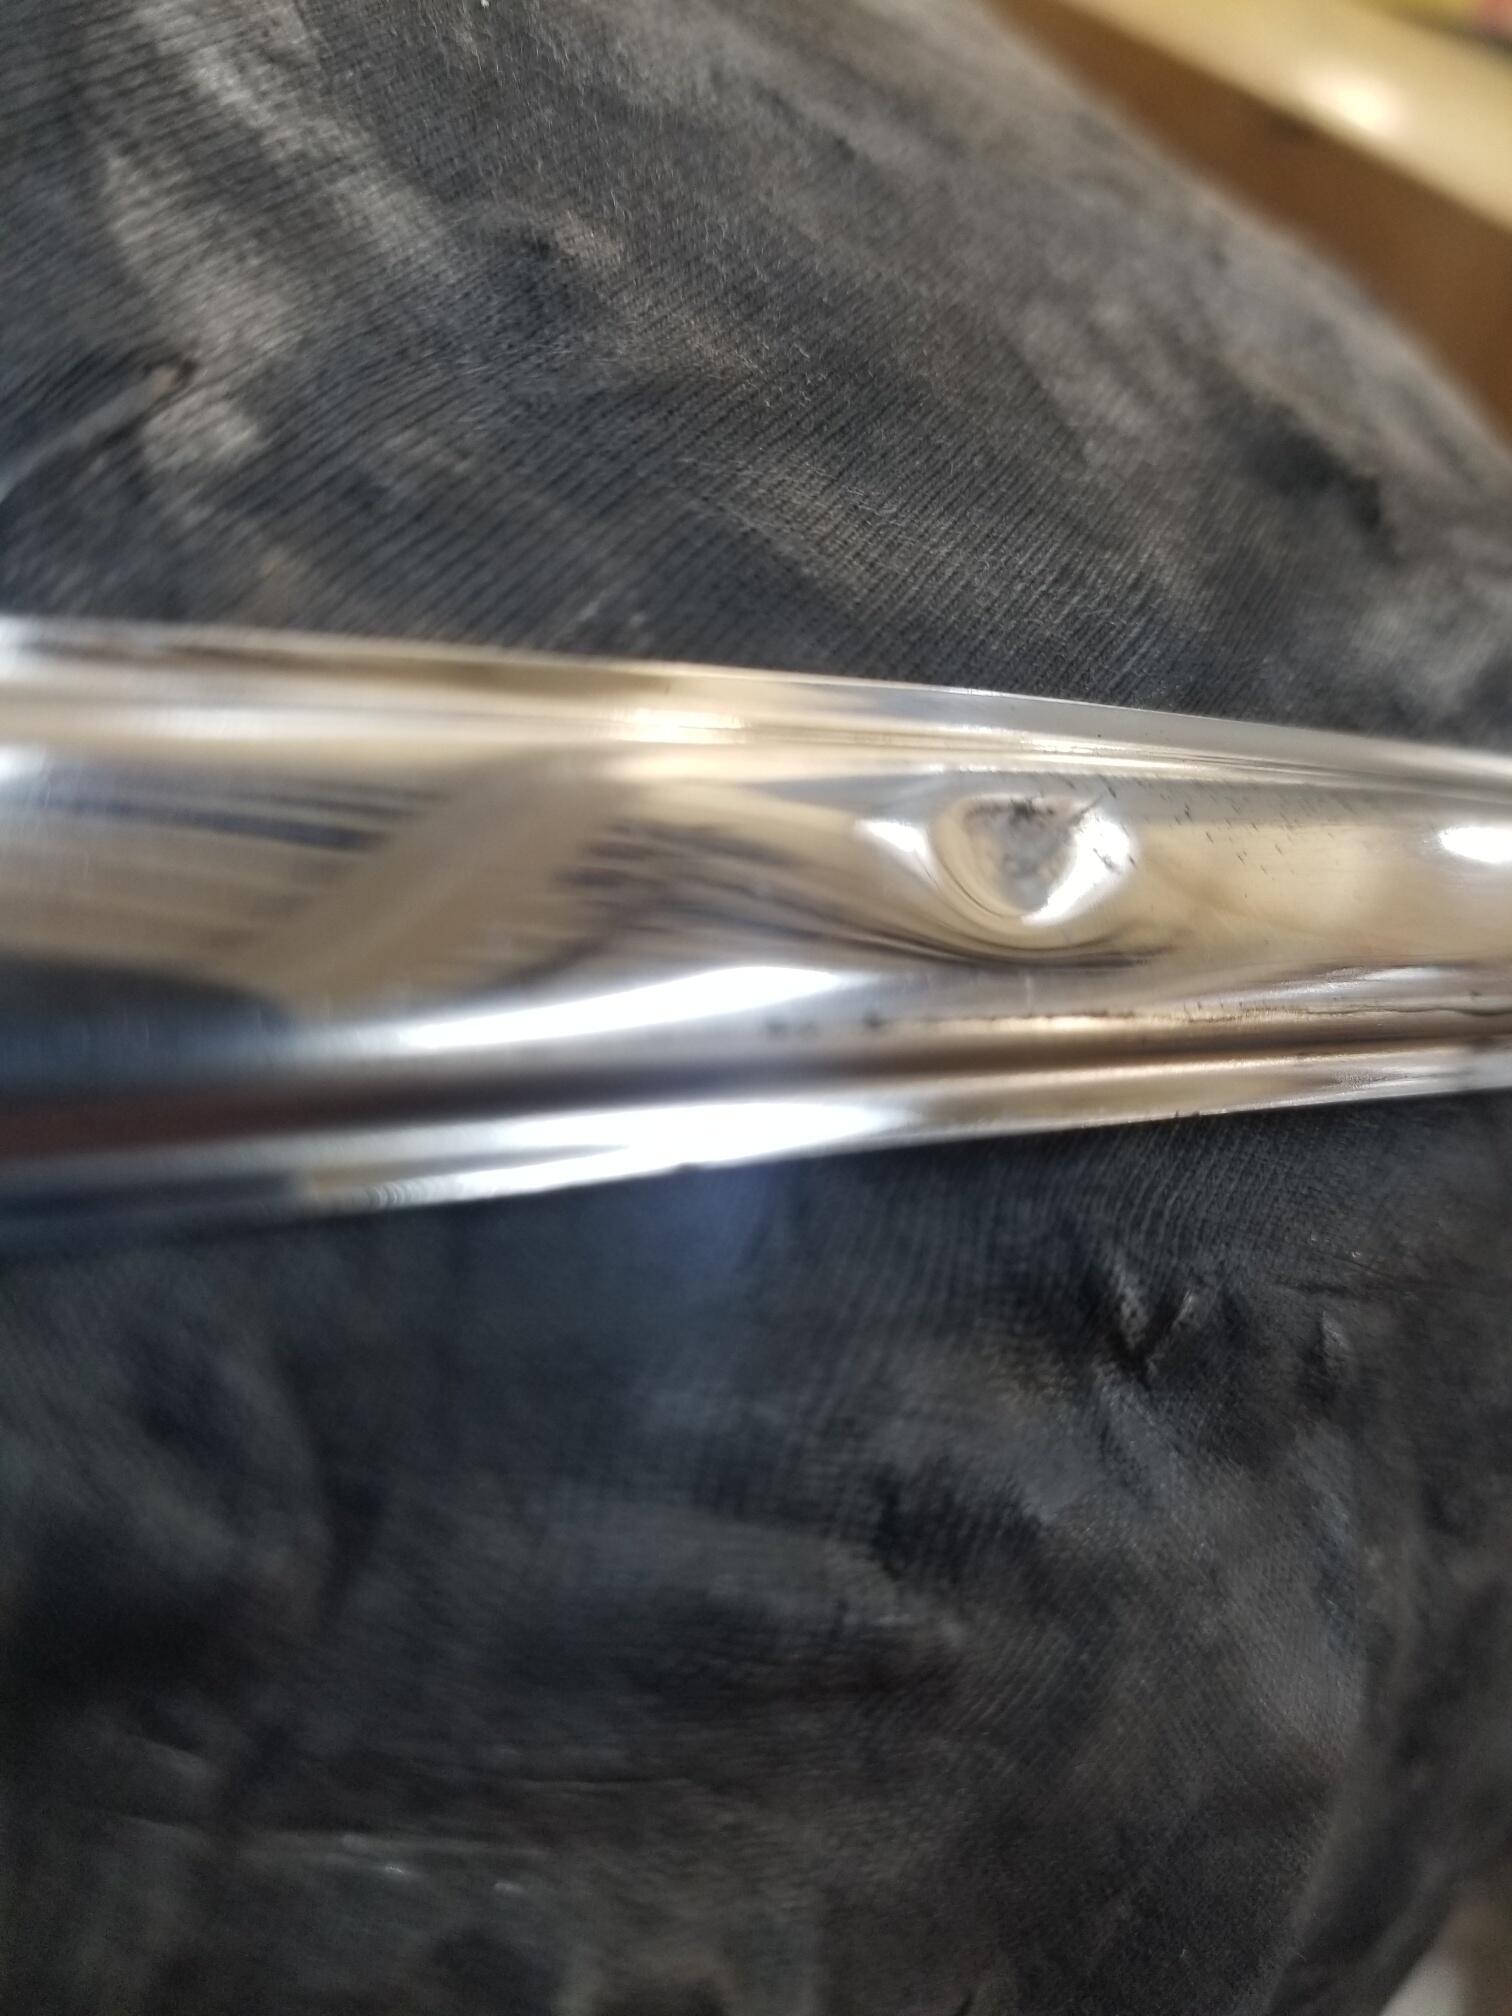
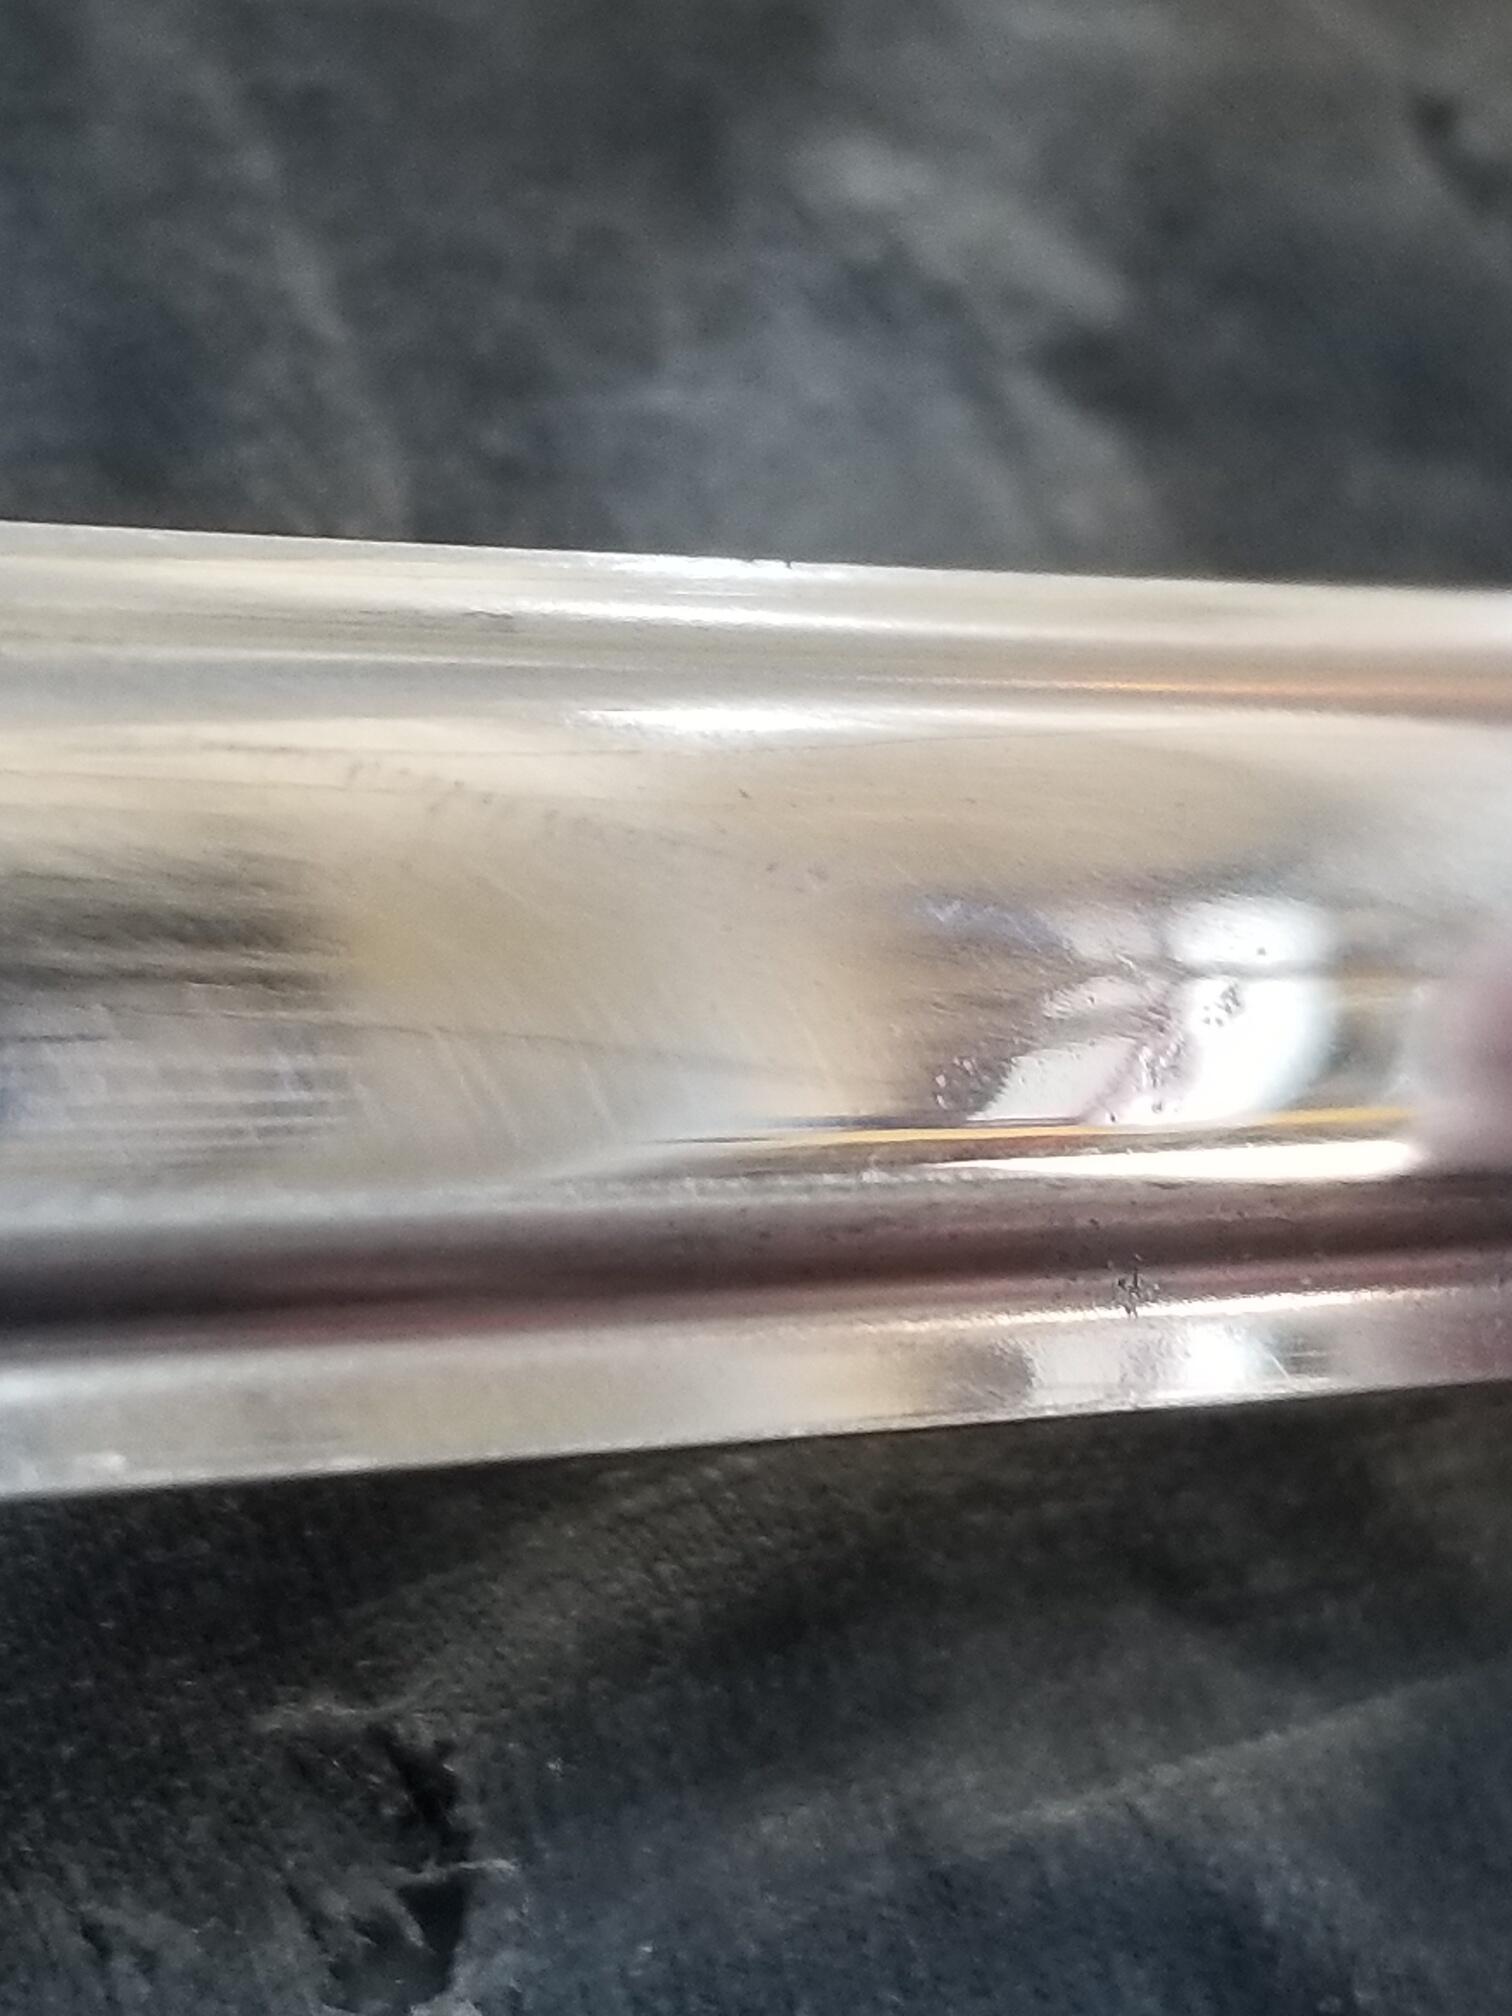
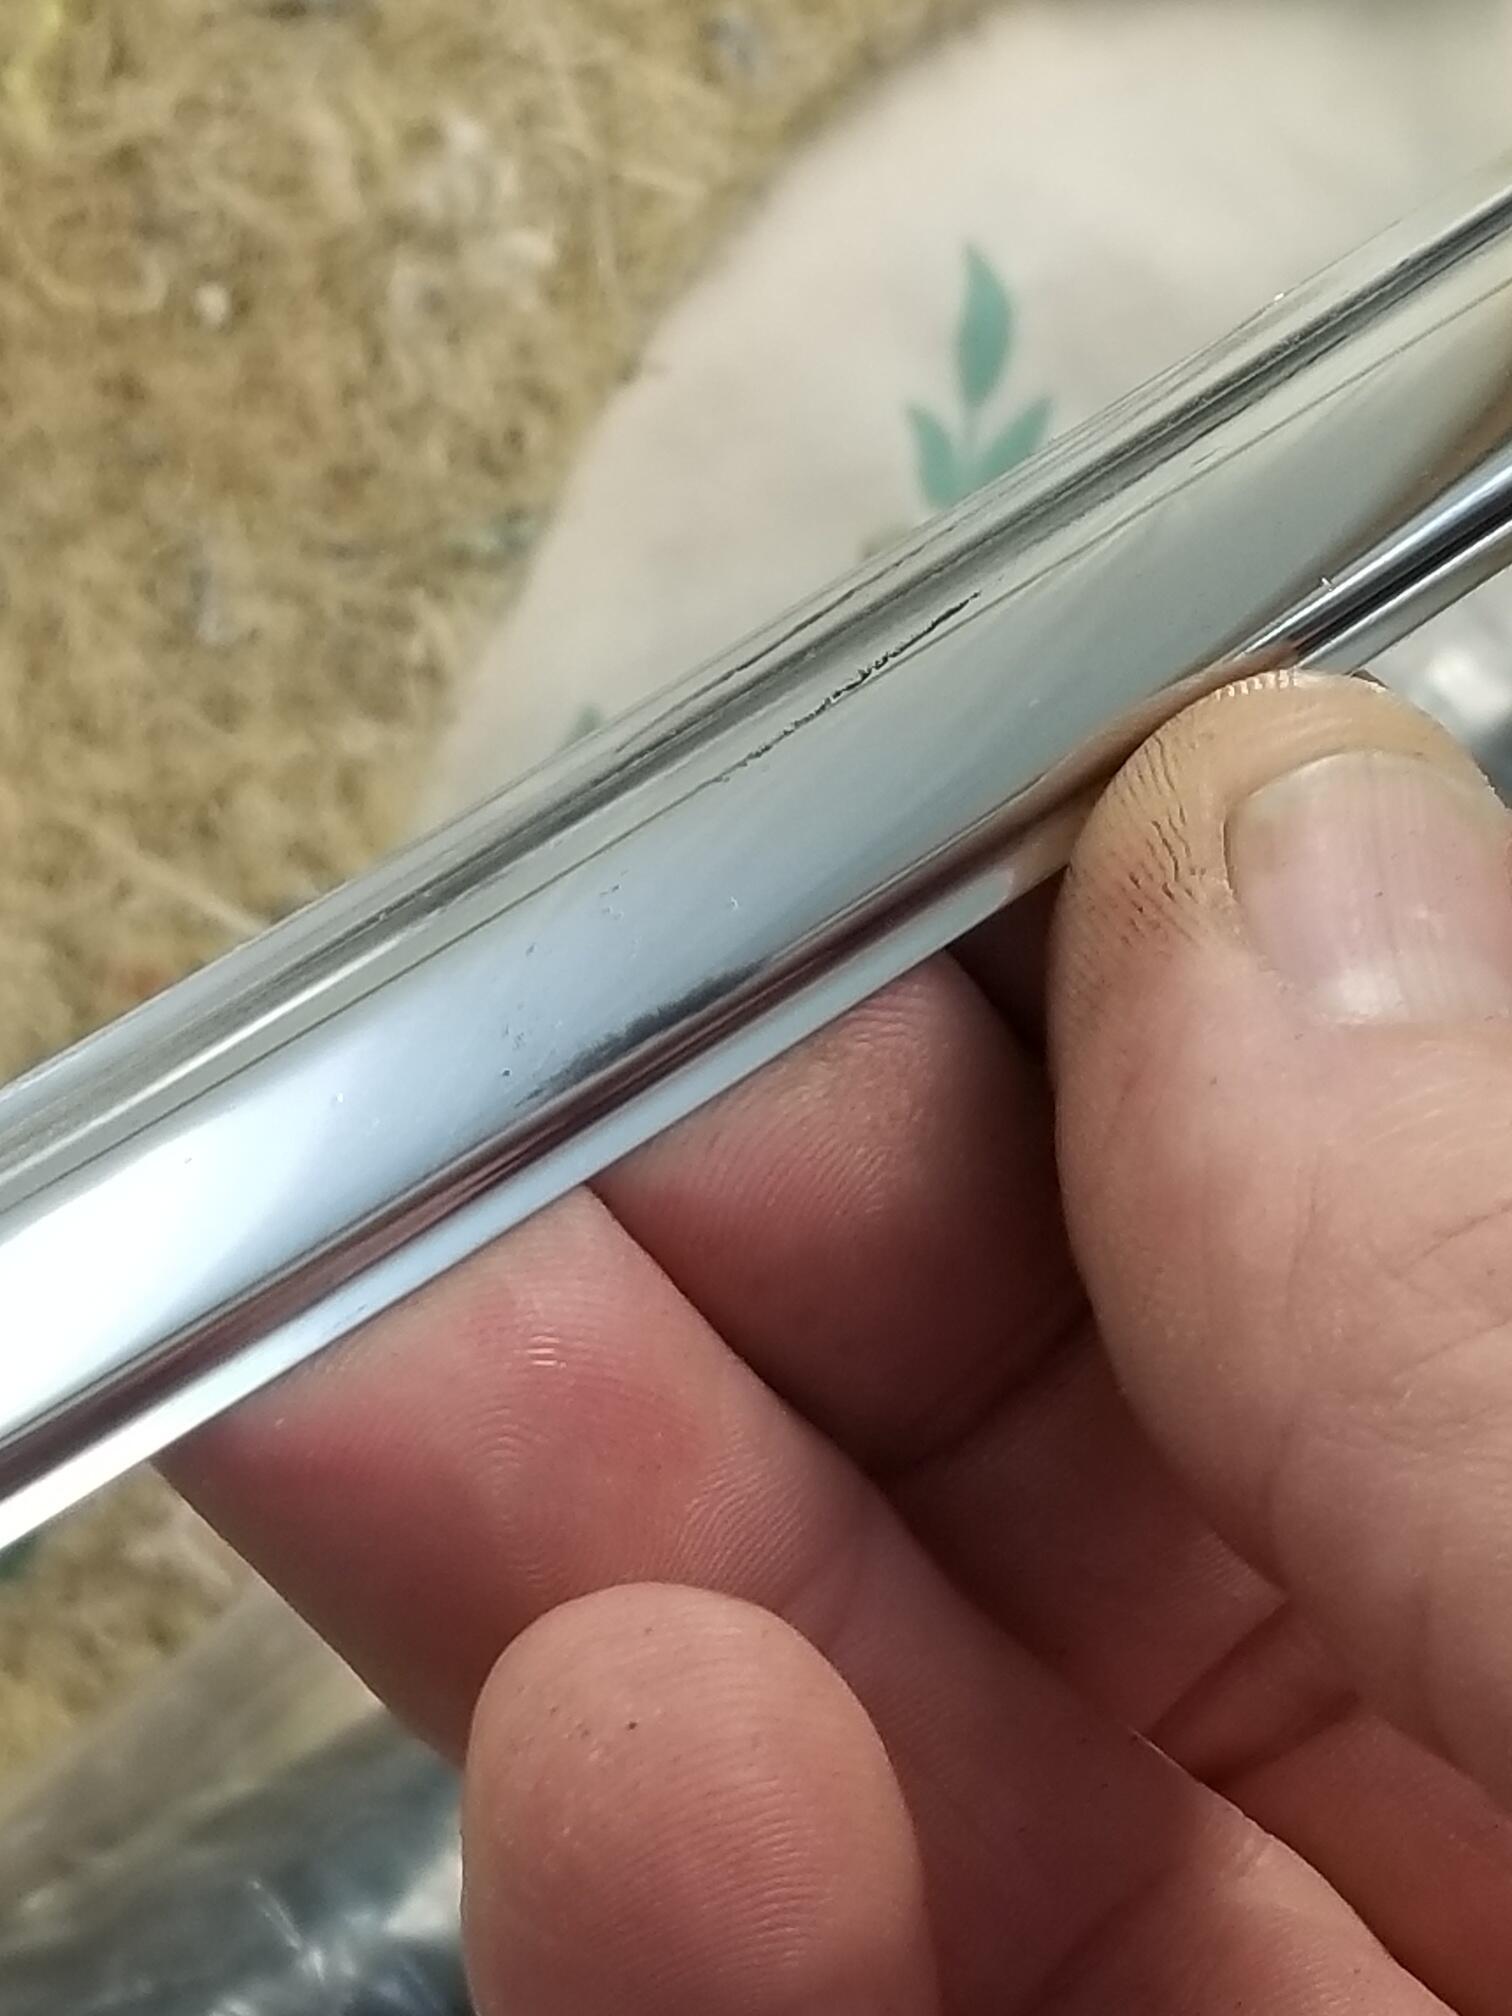
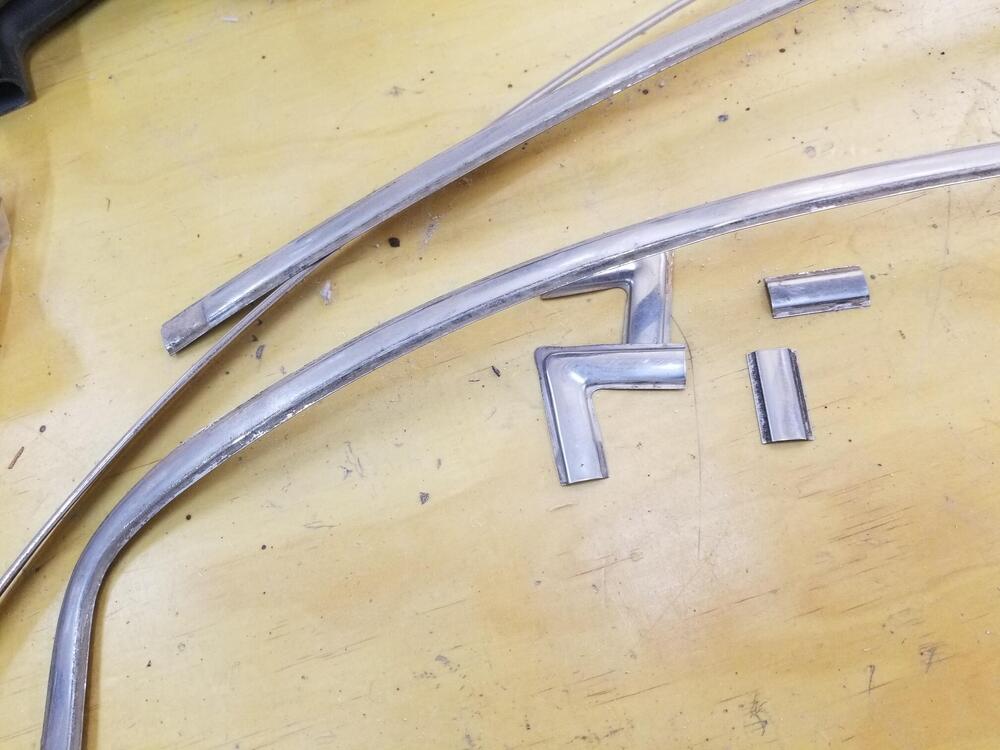
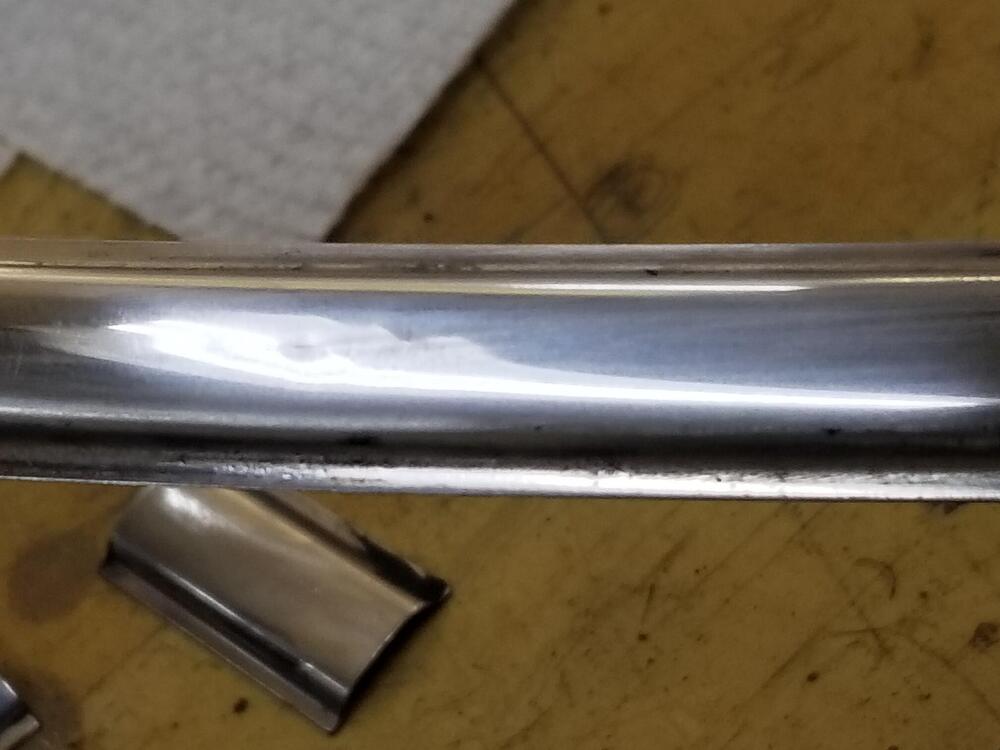
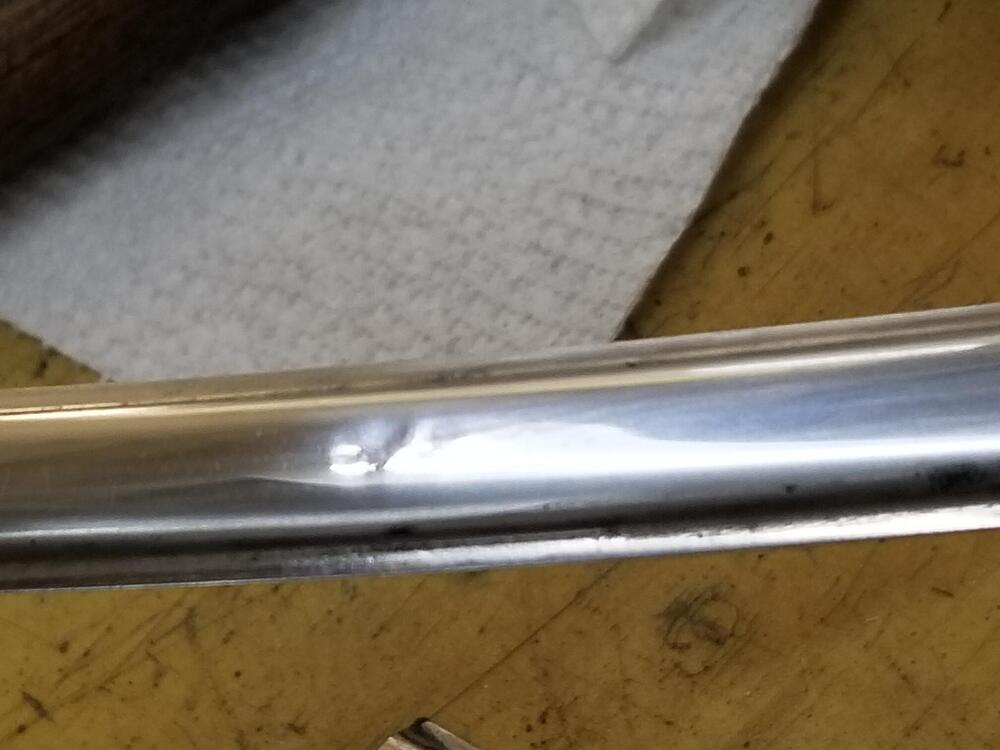
So a couple of weeks ago, I worked on the trim for the windshield. I had a couple of sets to choose from, but not all of them were perfect So I buffed this corner but you can still see some light scratching in it. So I sanded at 1000 grit and rebuffed Now they look like this Original condition, I first cleaned with lacquer thinner I had this damage from disassembly. It got distorted trying to pull it out of the old seal So some light dolly, hammer and punch work. Then block sand and buff After my first try, I went back and used a little courser grit, worked my way up and rebuffed So I had this dent to deal with. Started with dollies and punches Gets you to here Then block sanding. A little piece of wood square block. I started with 600 grit. Then 800, 1000, 1200, 1500 Then jeweler's rouge This is where I ended up. It all looks good unless you get really close


-
-
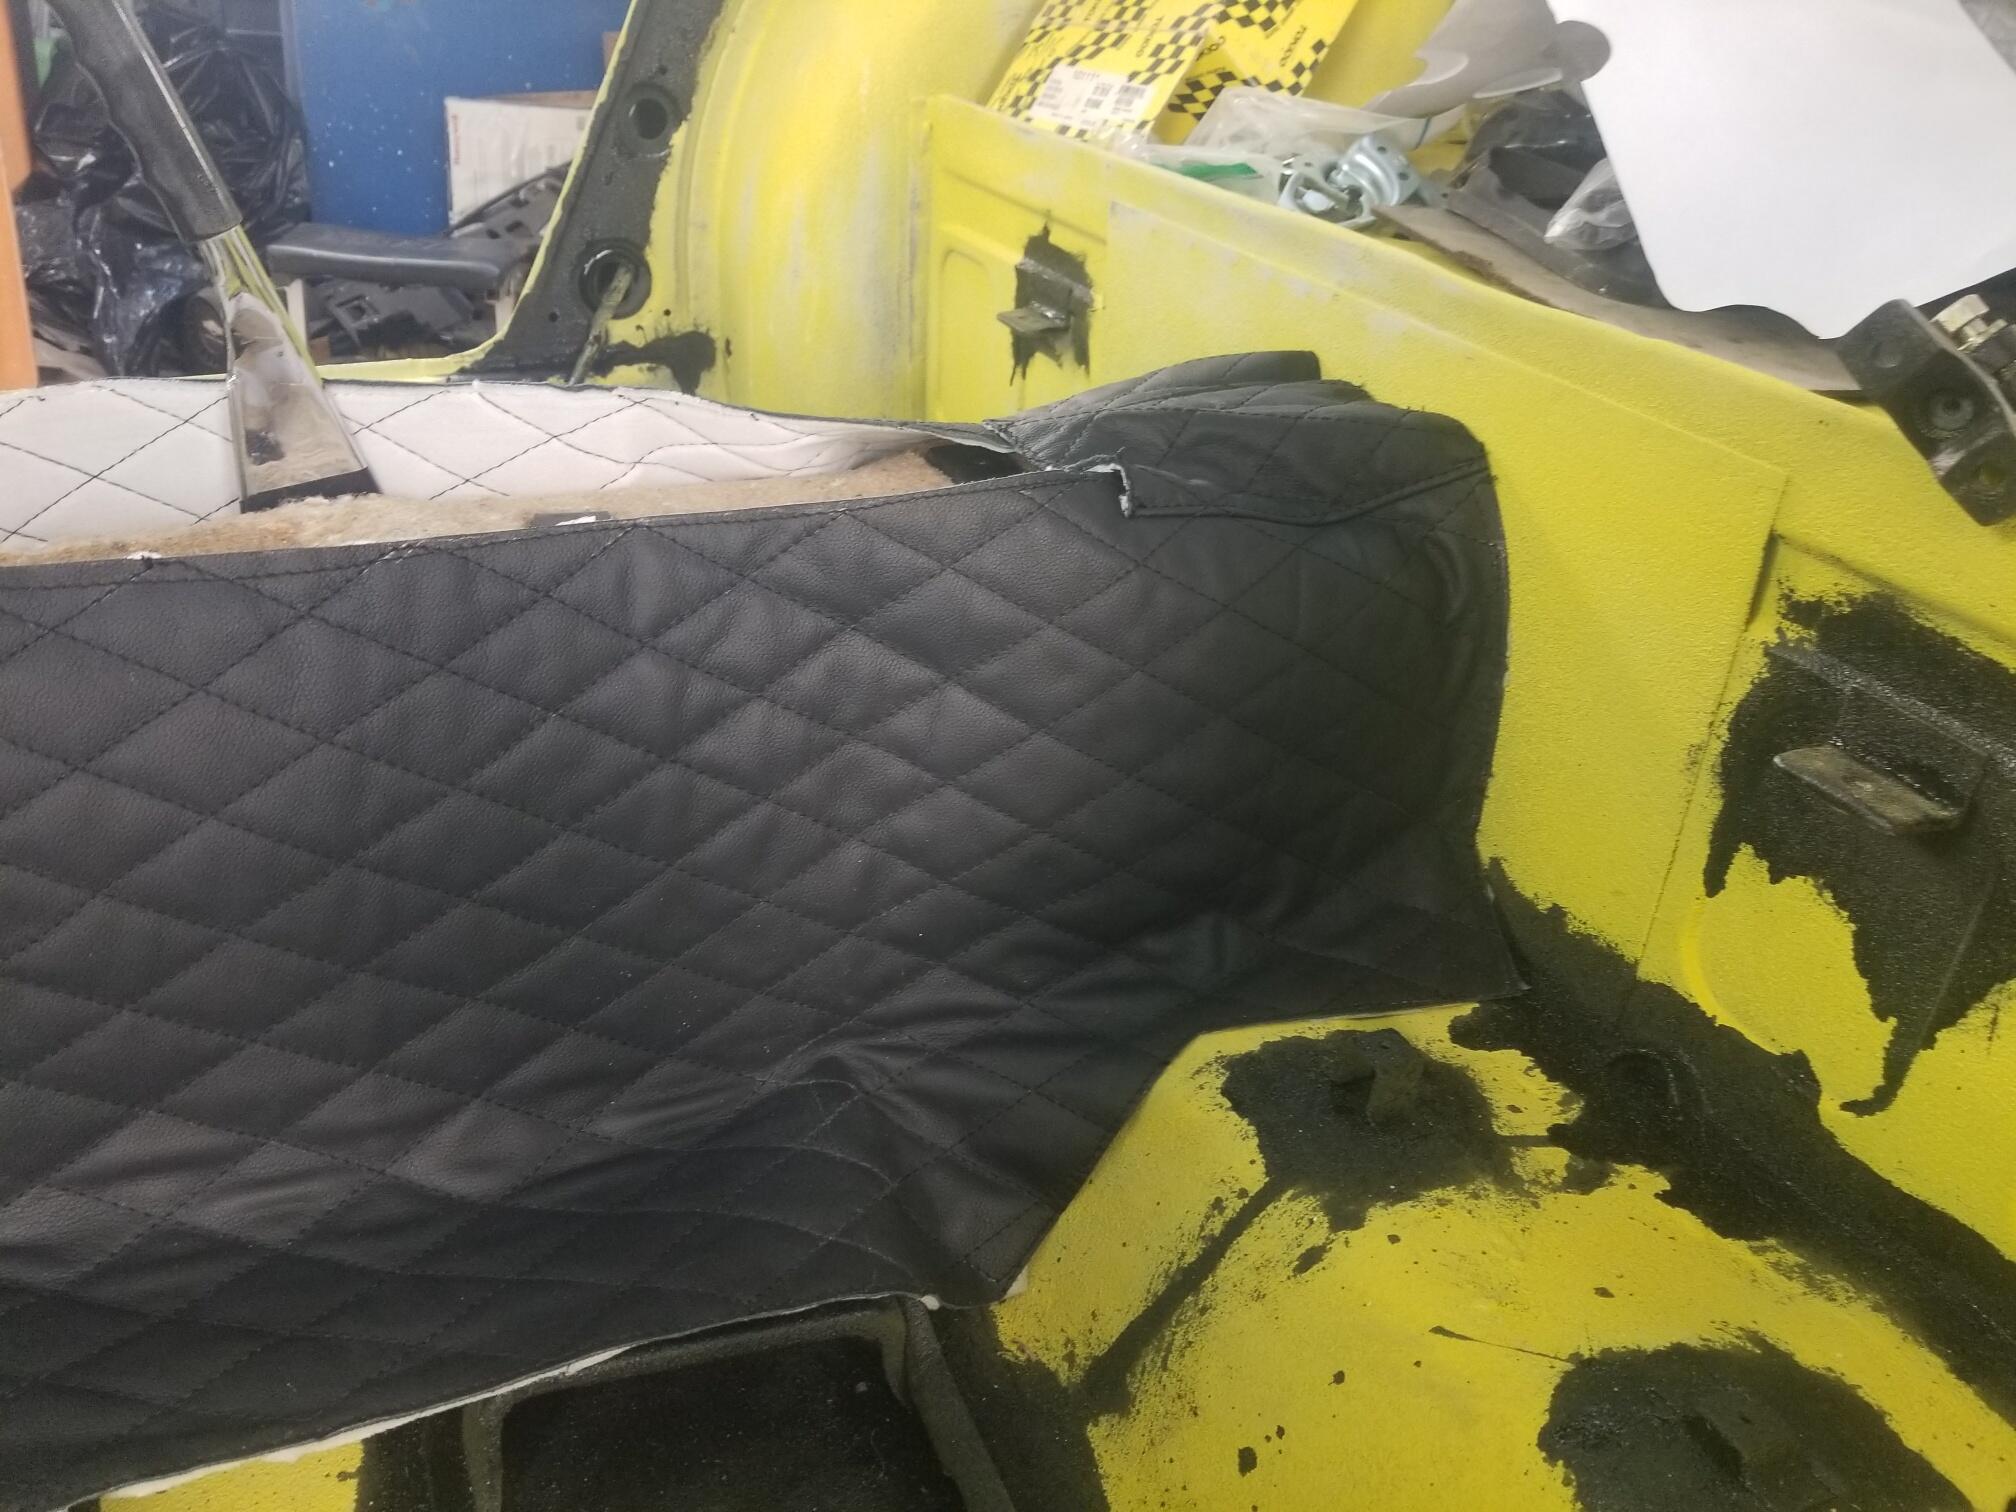
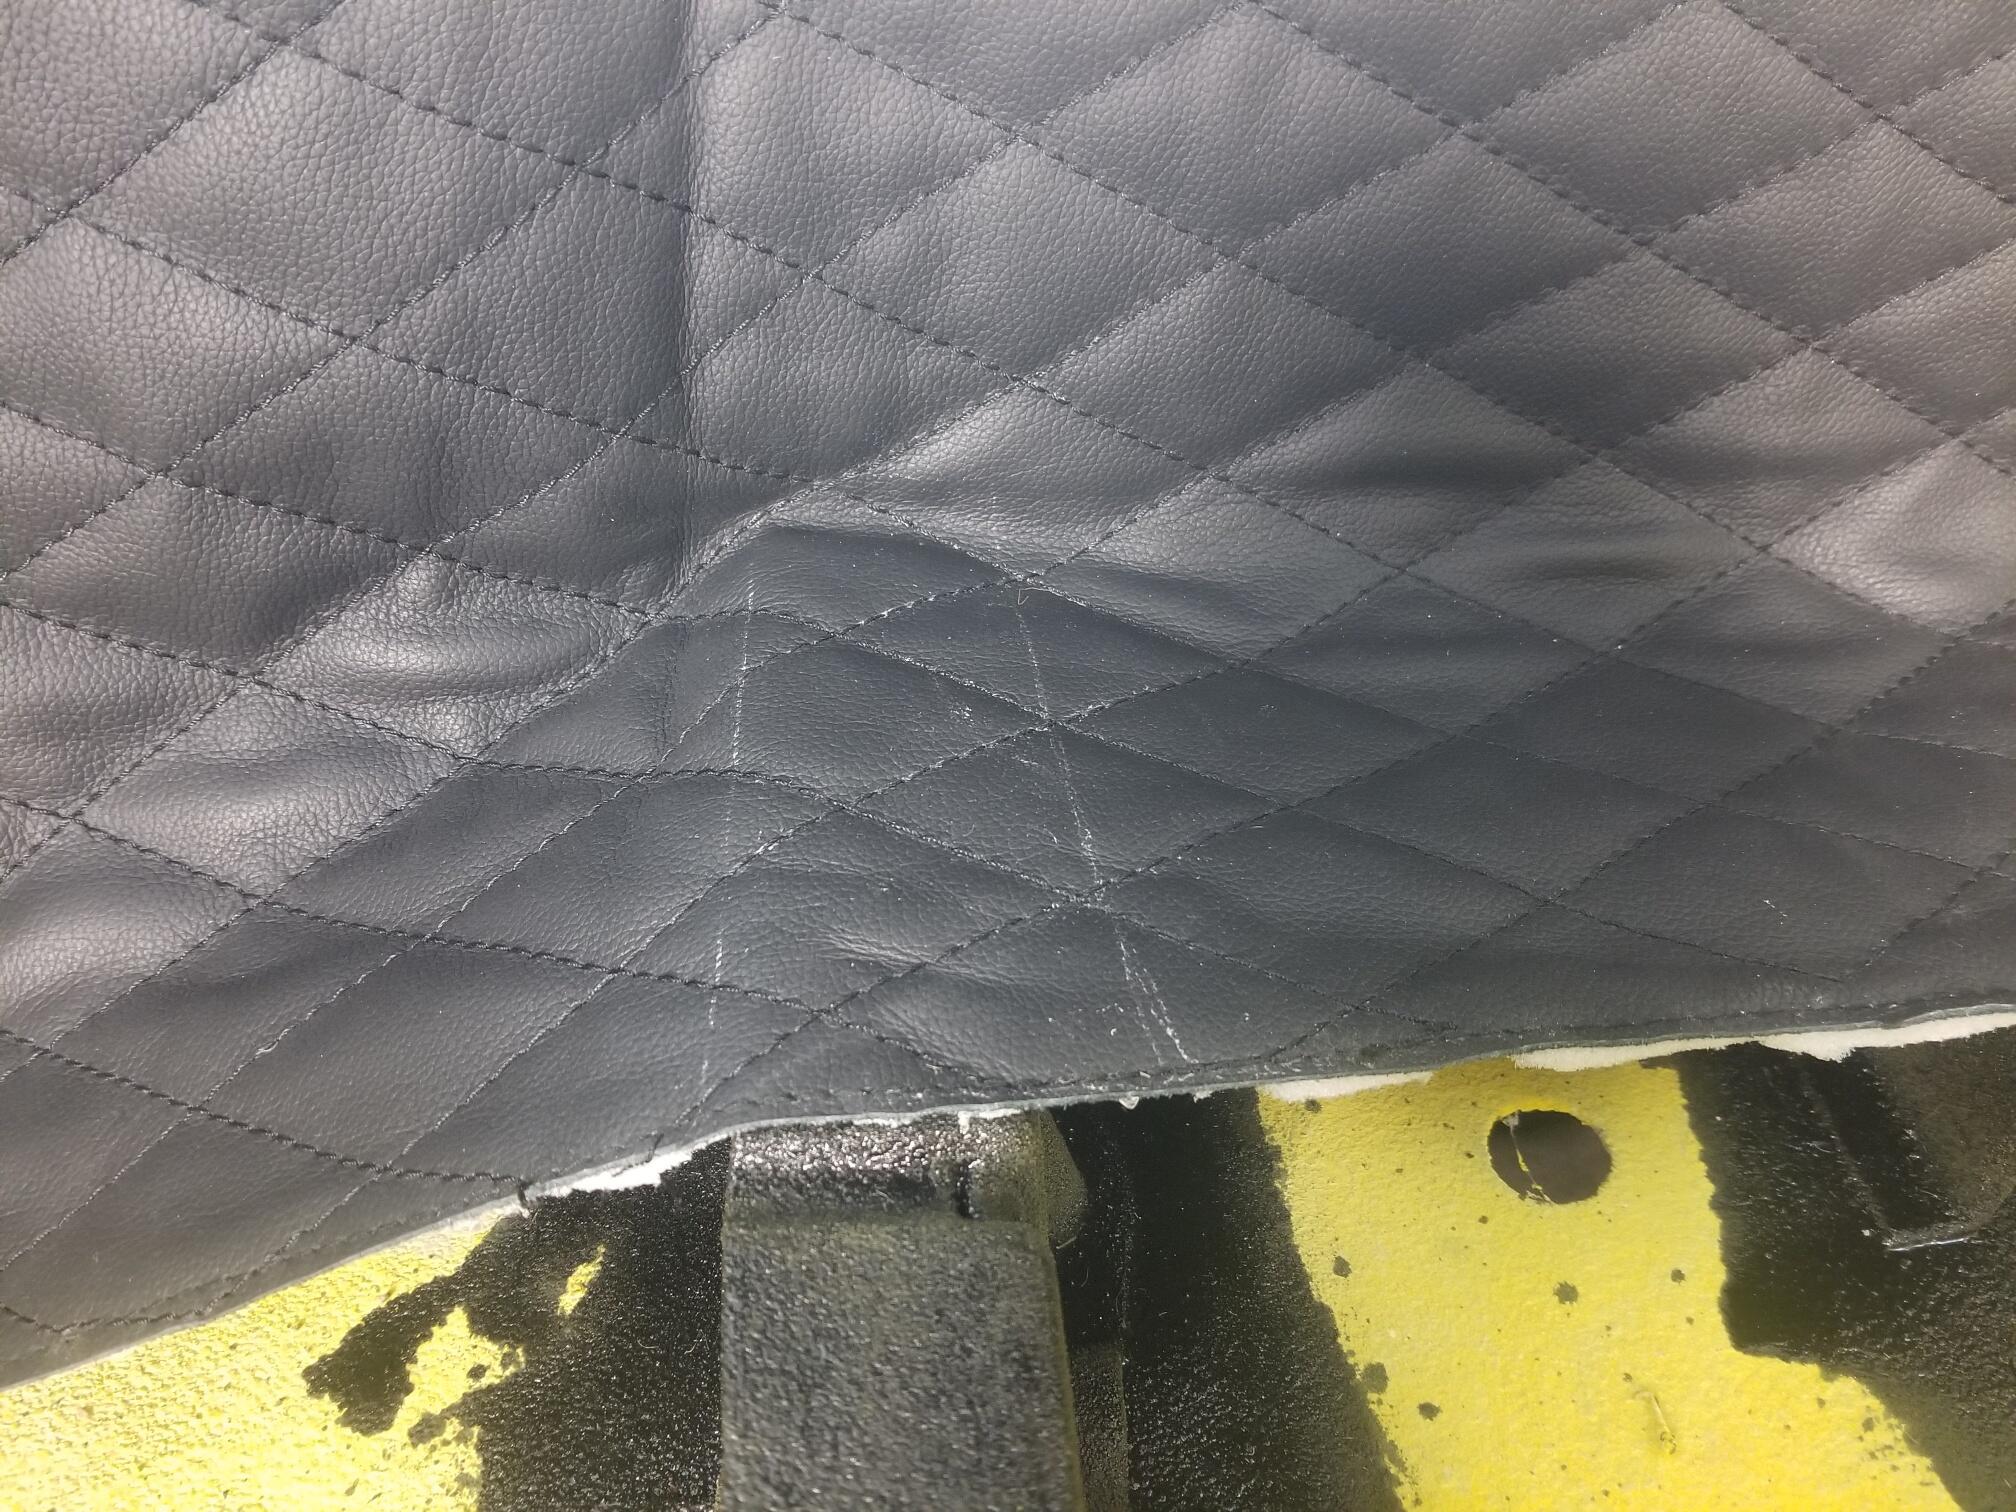
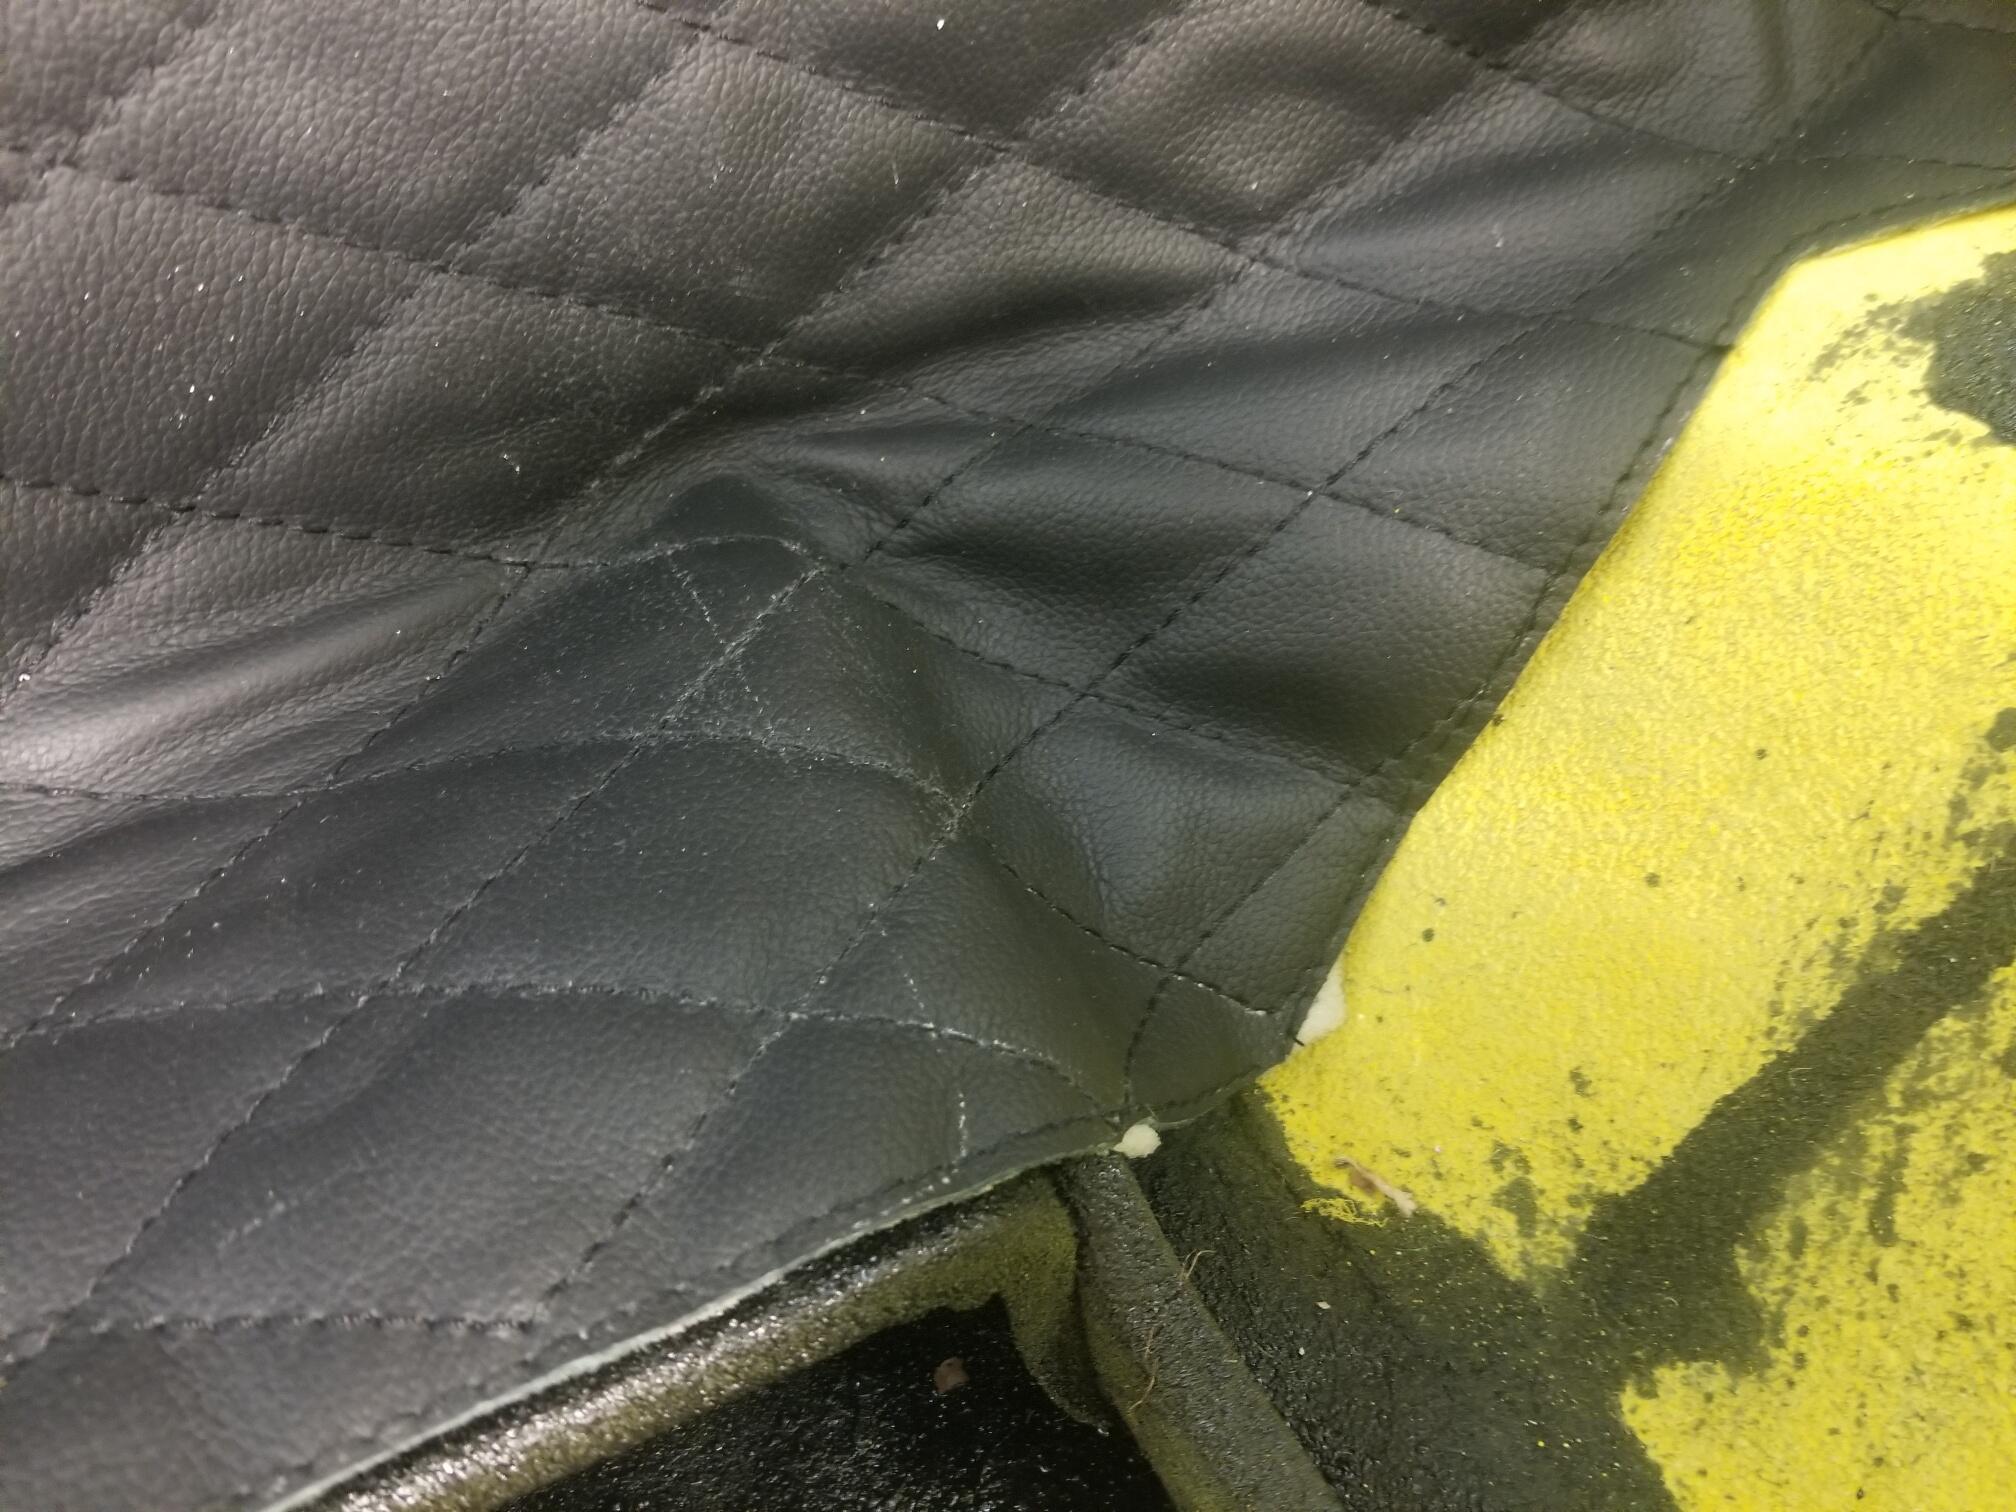
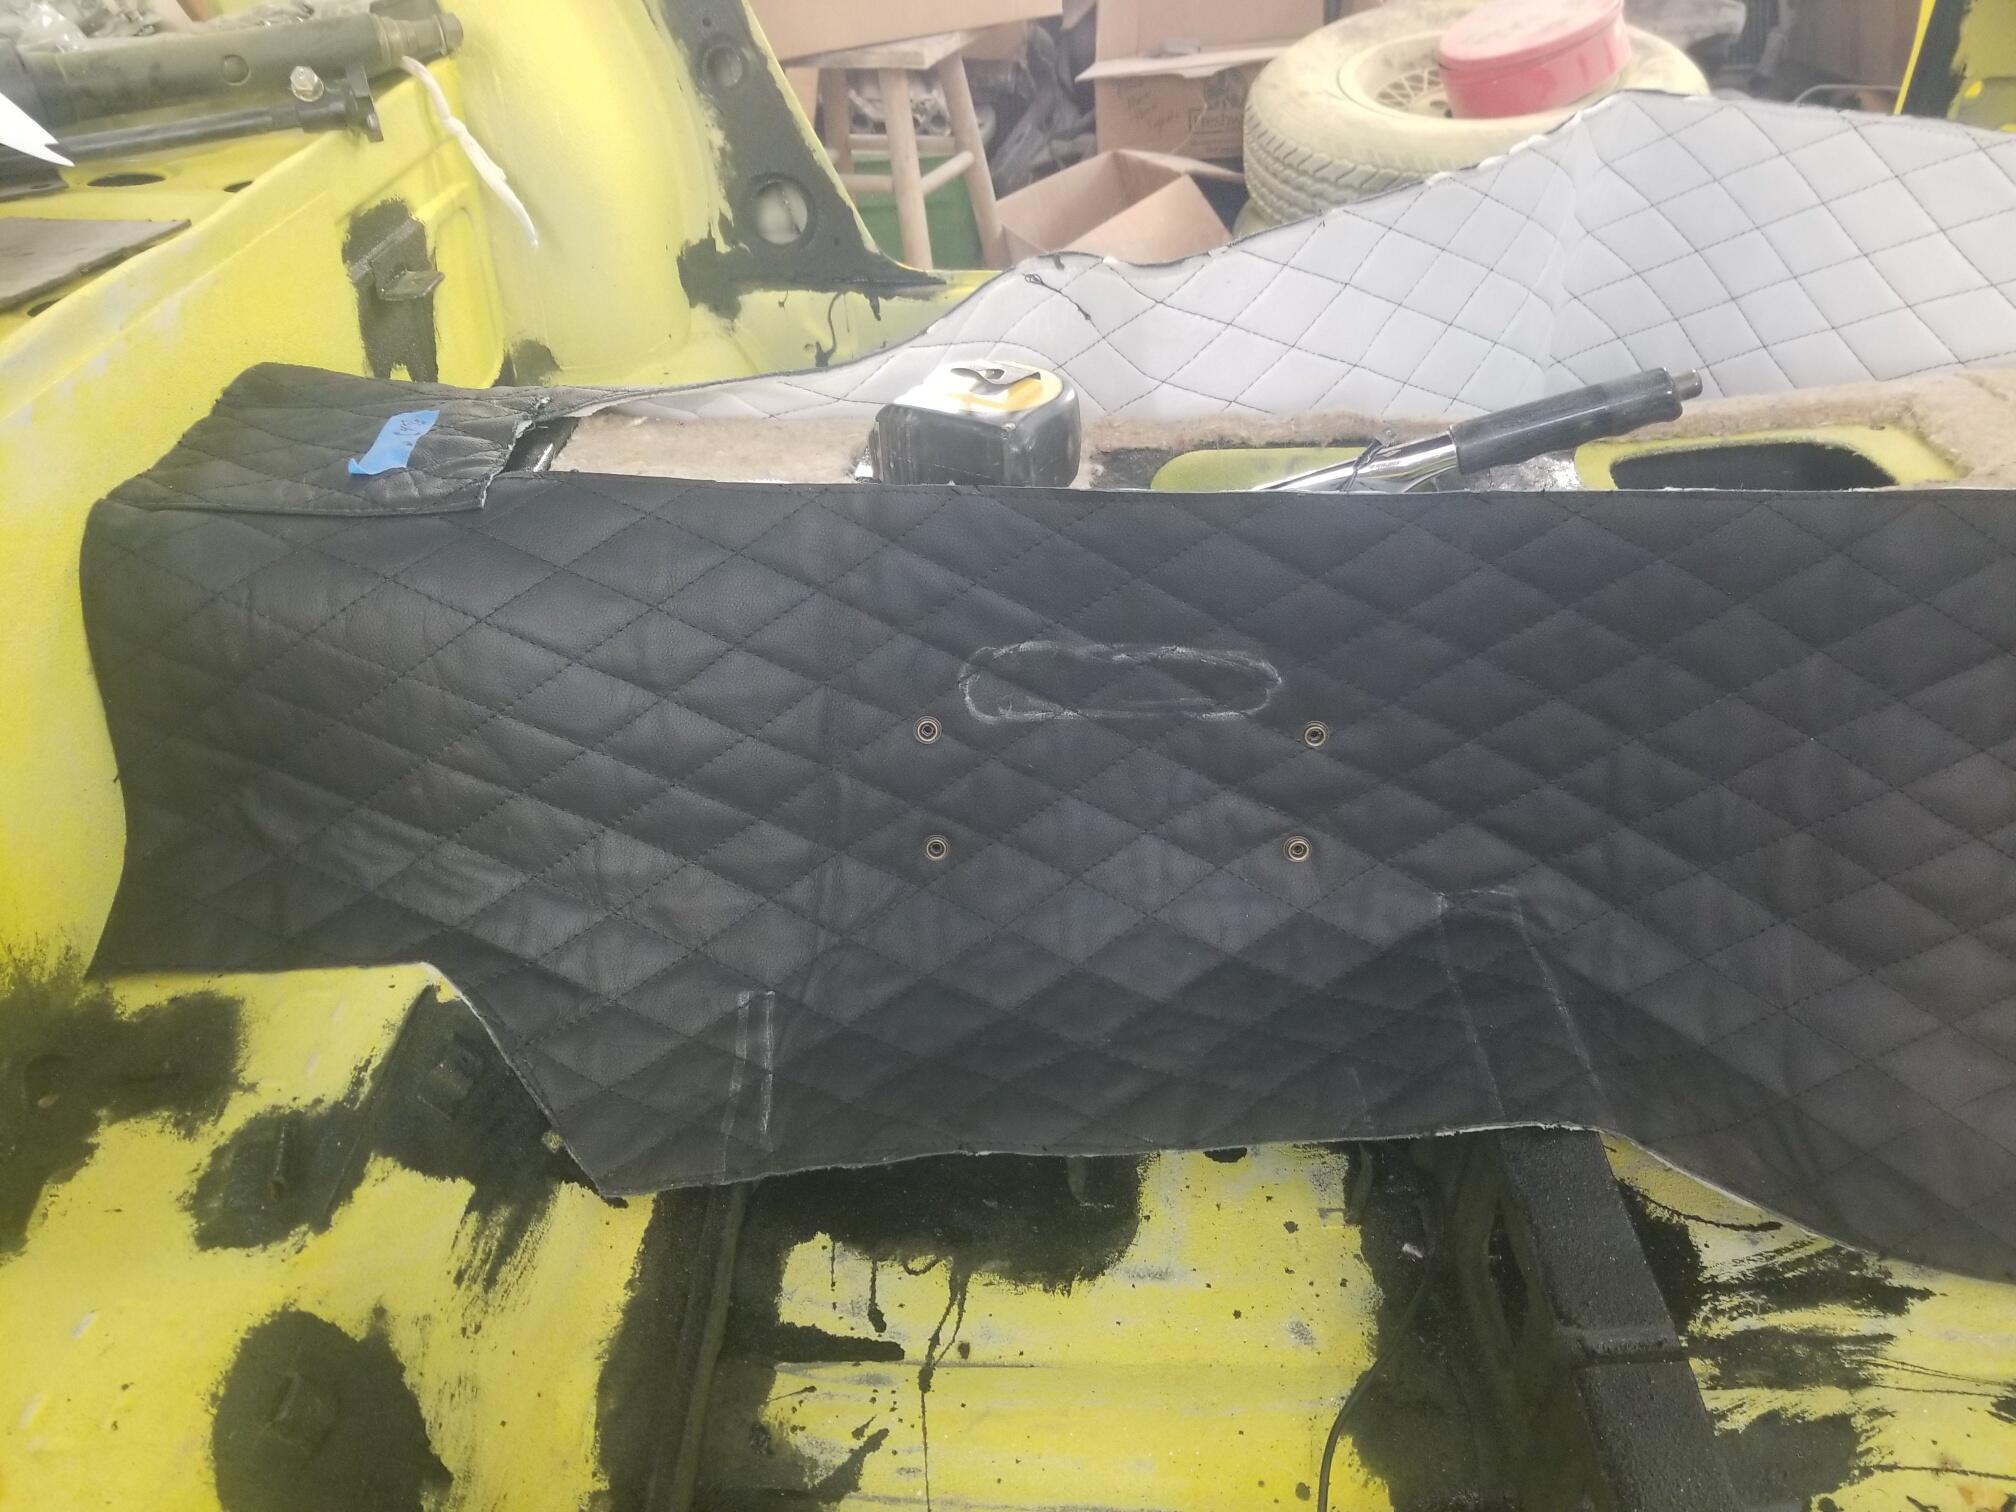
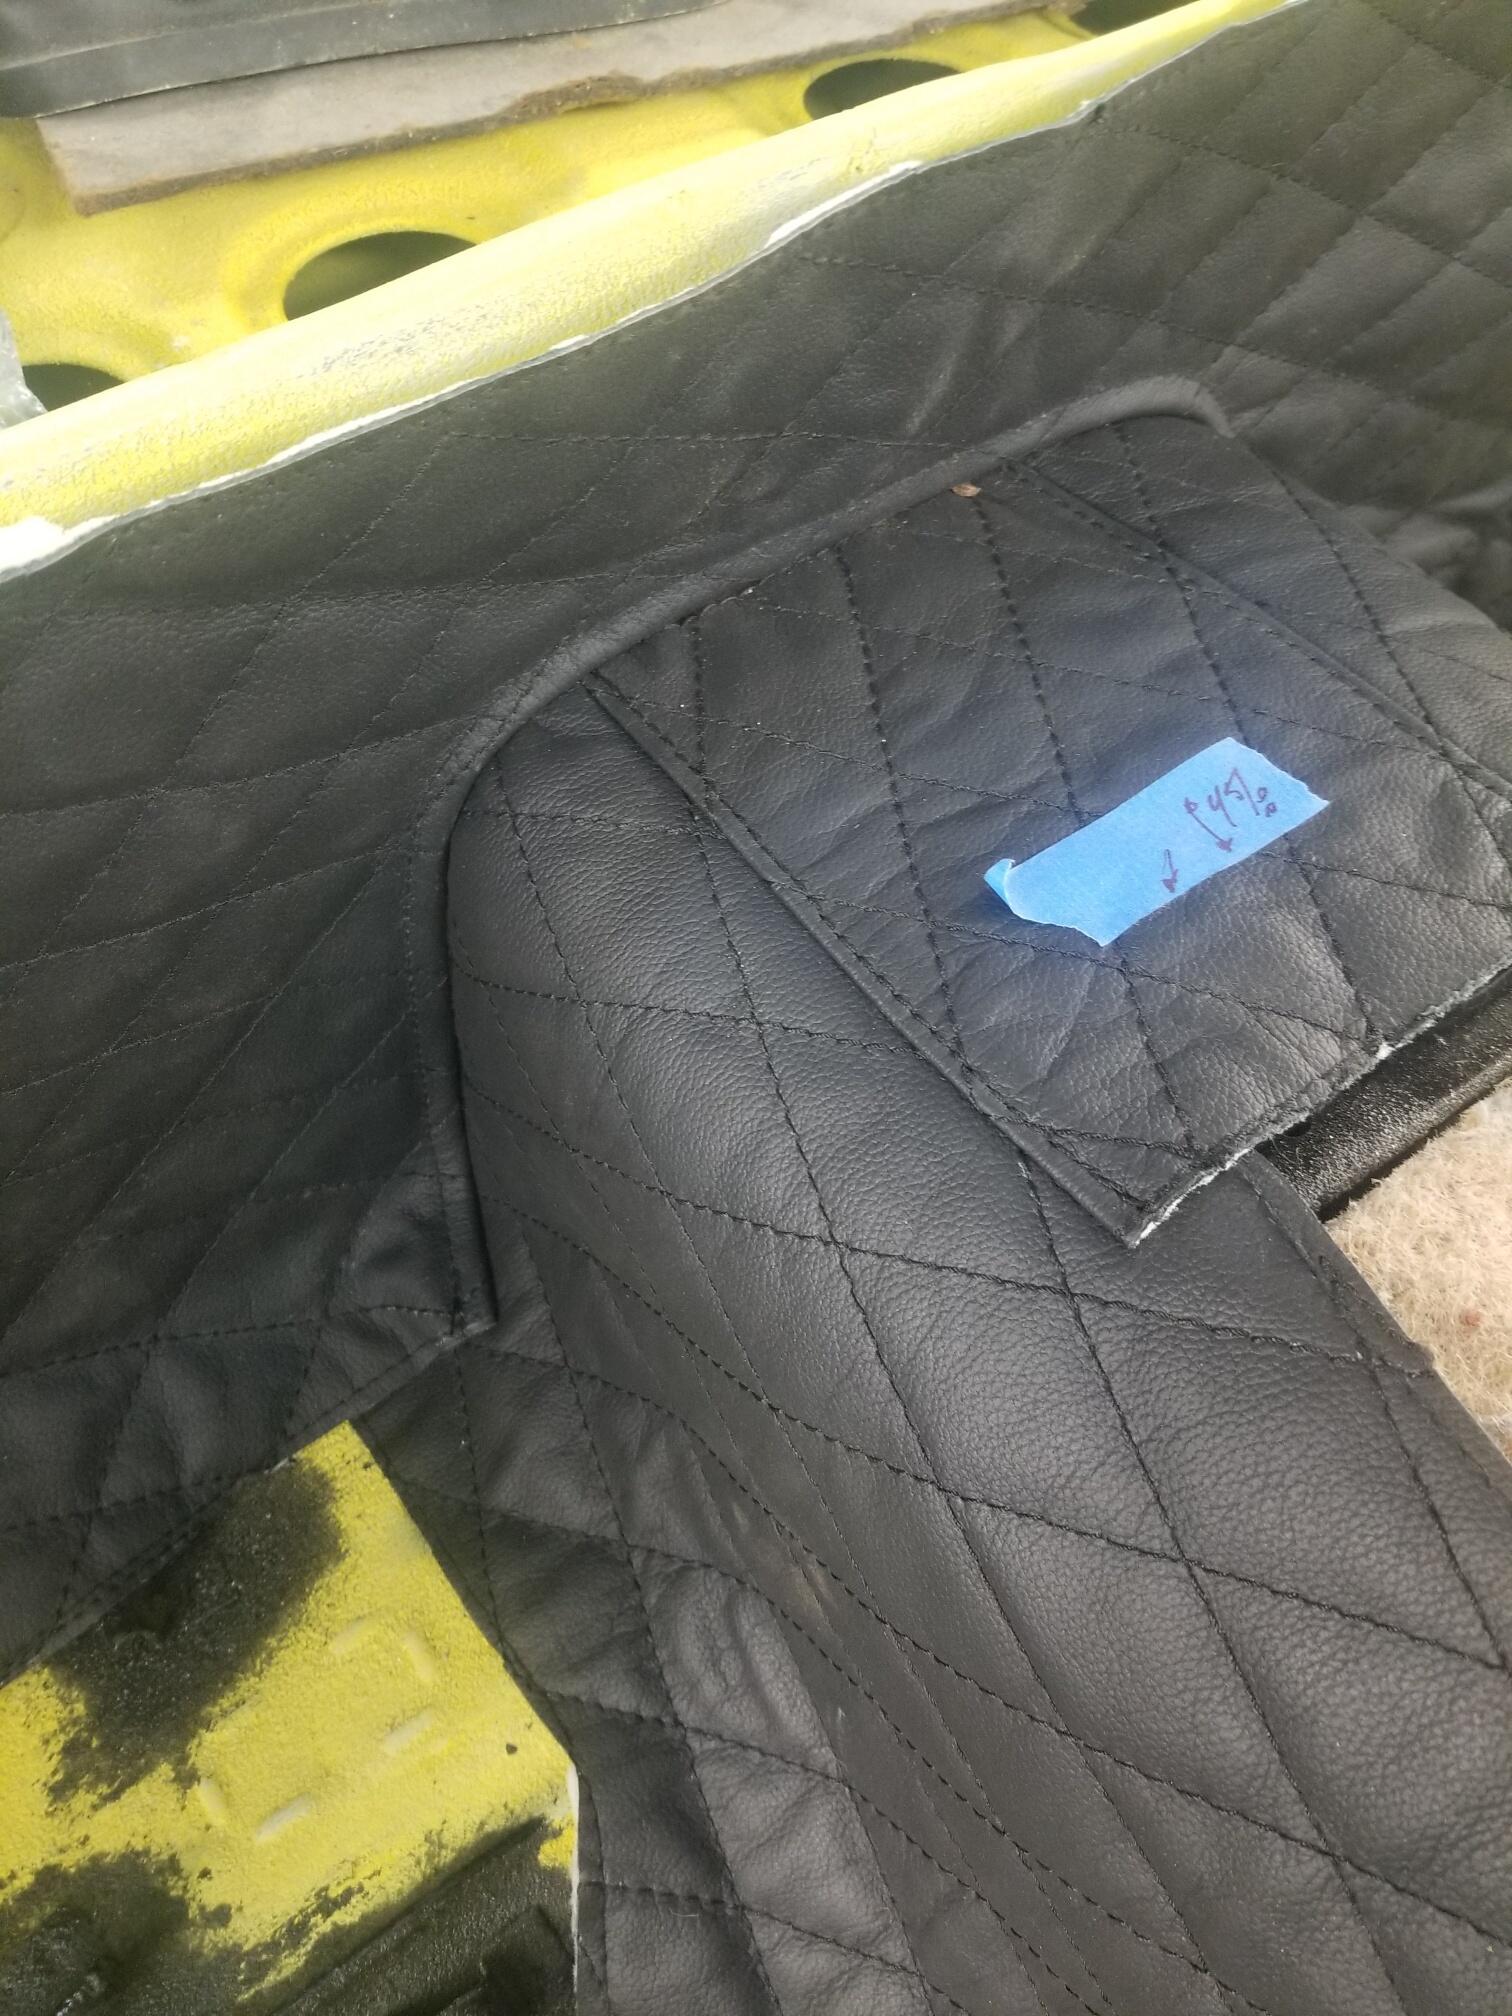
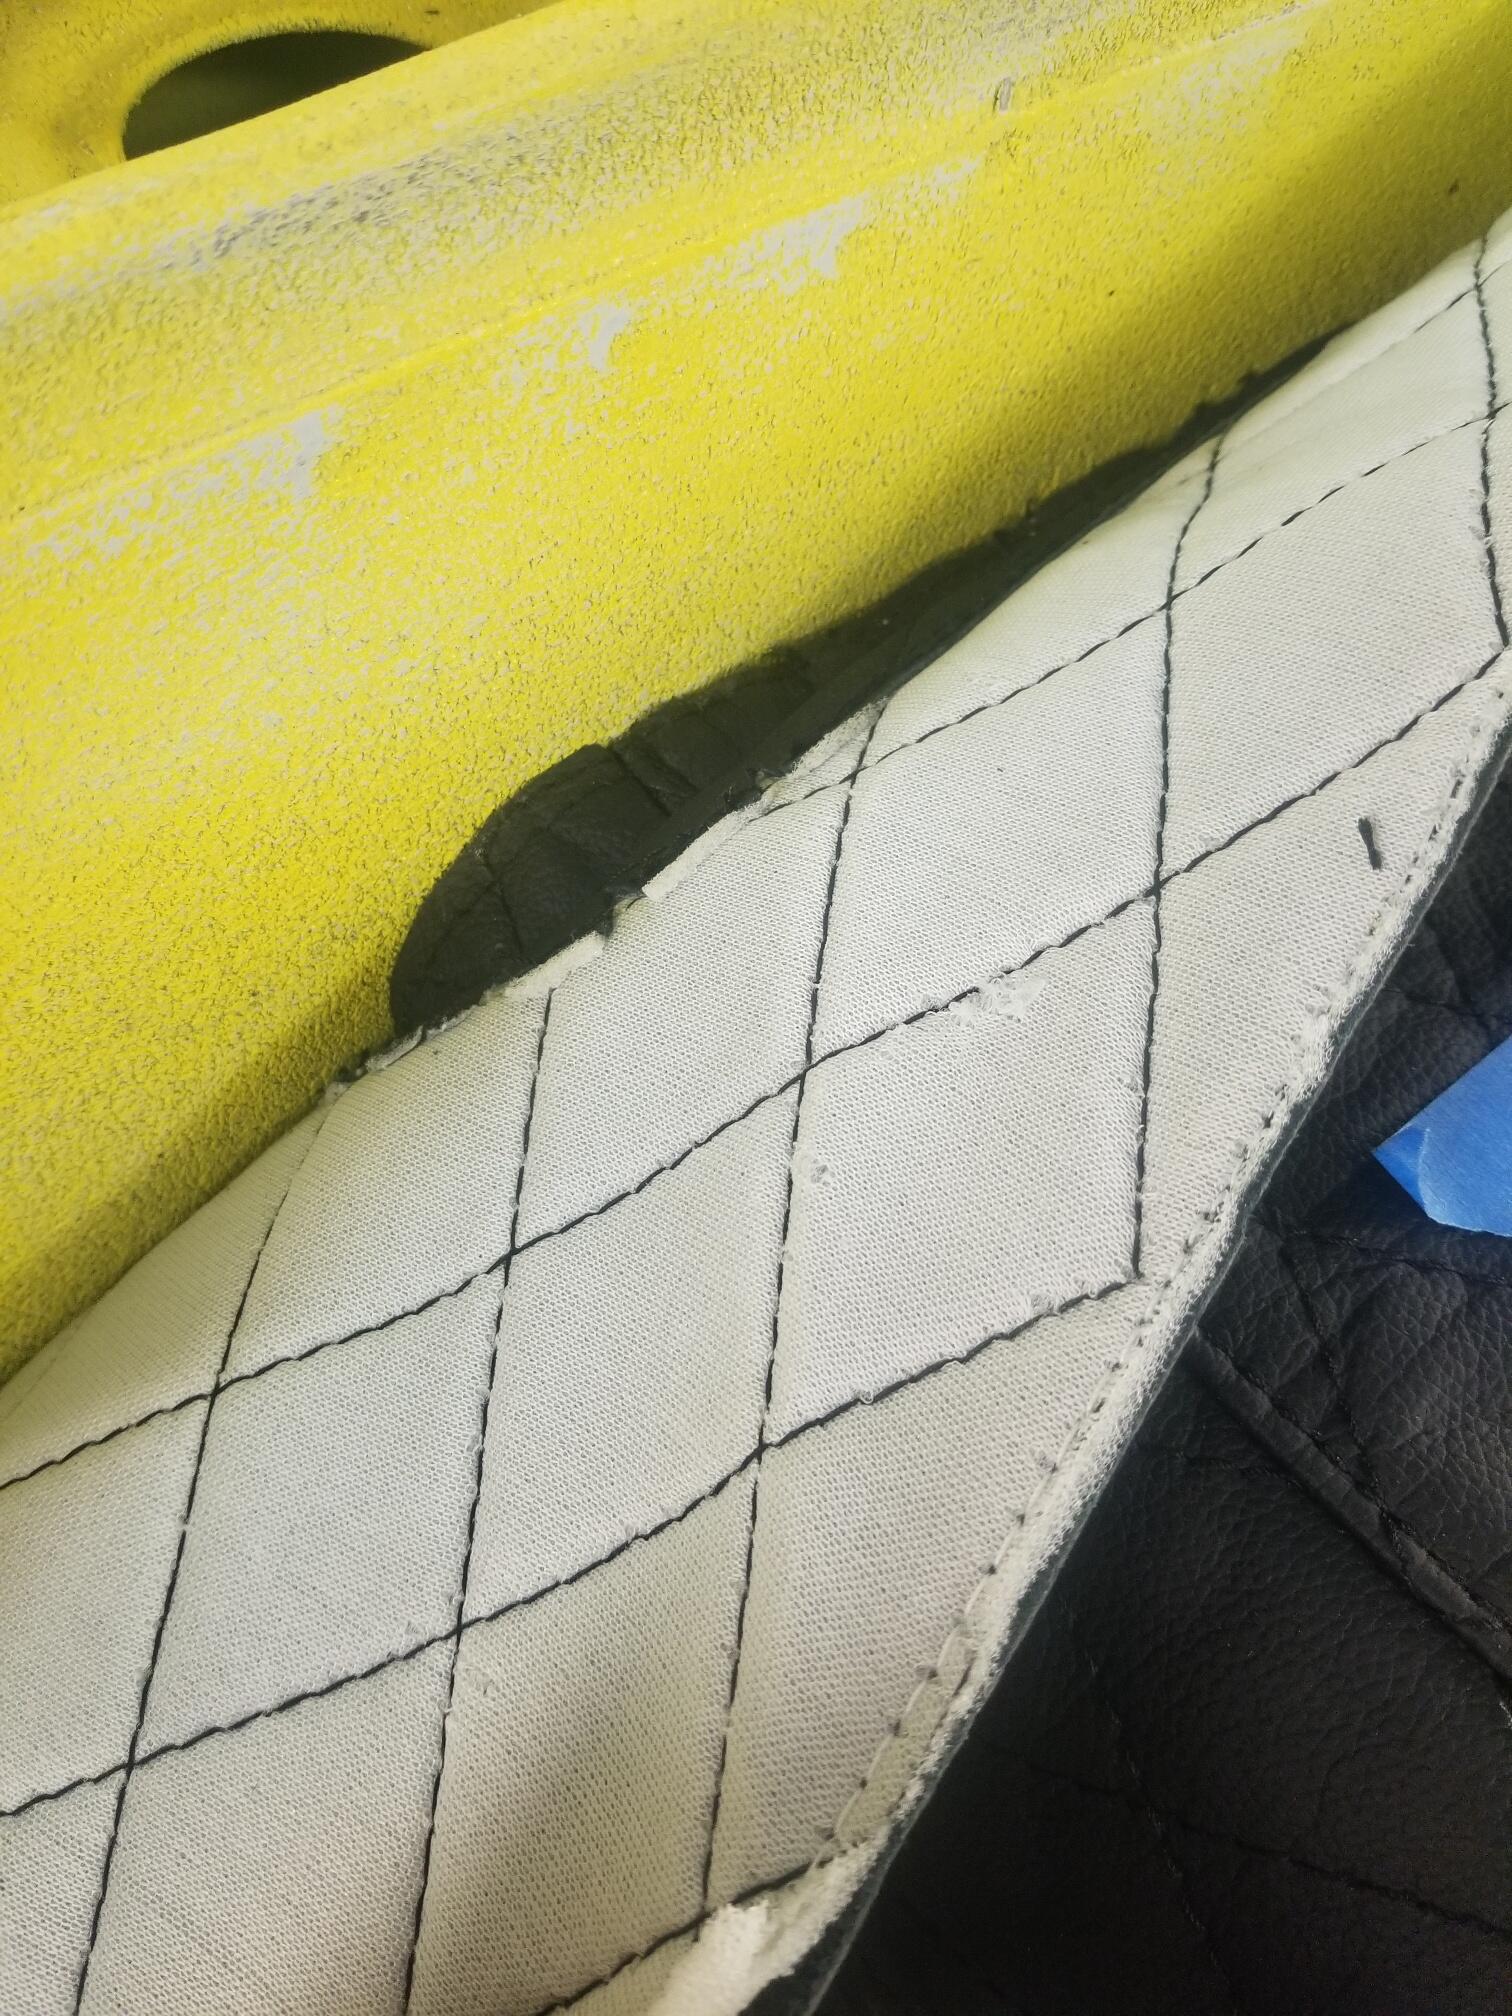
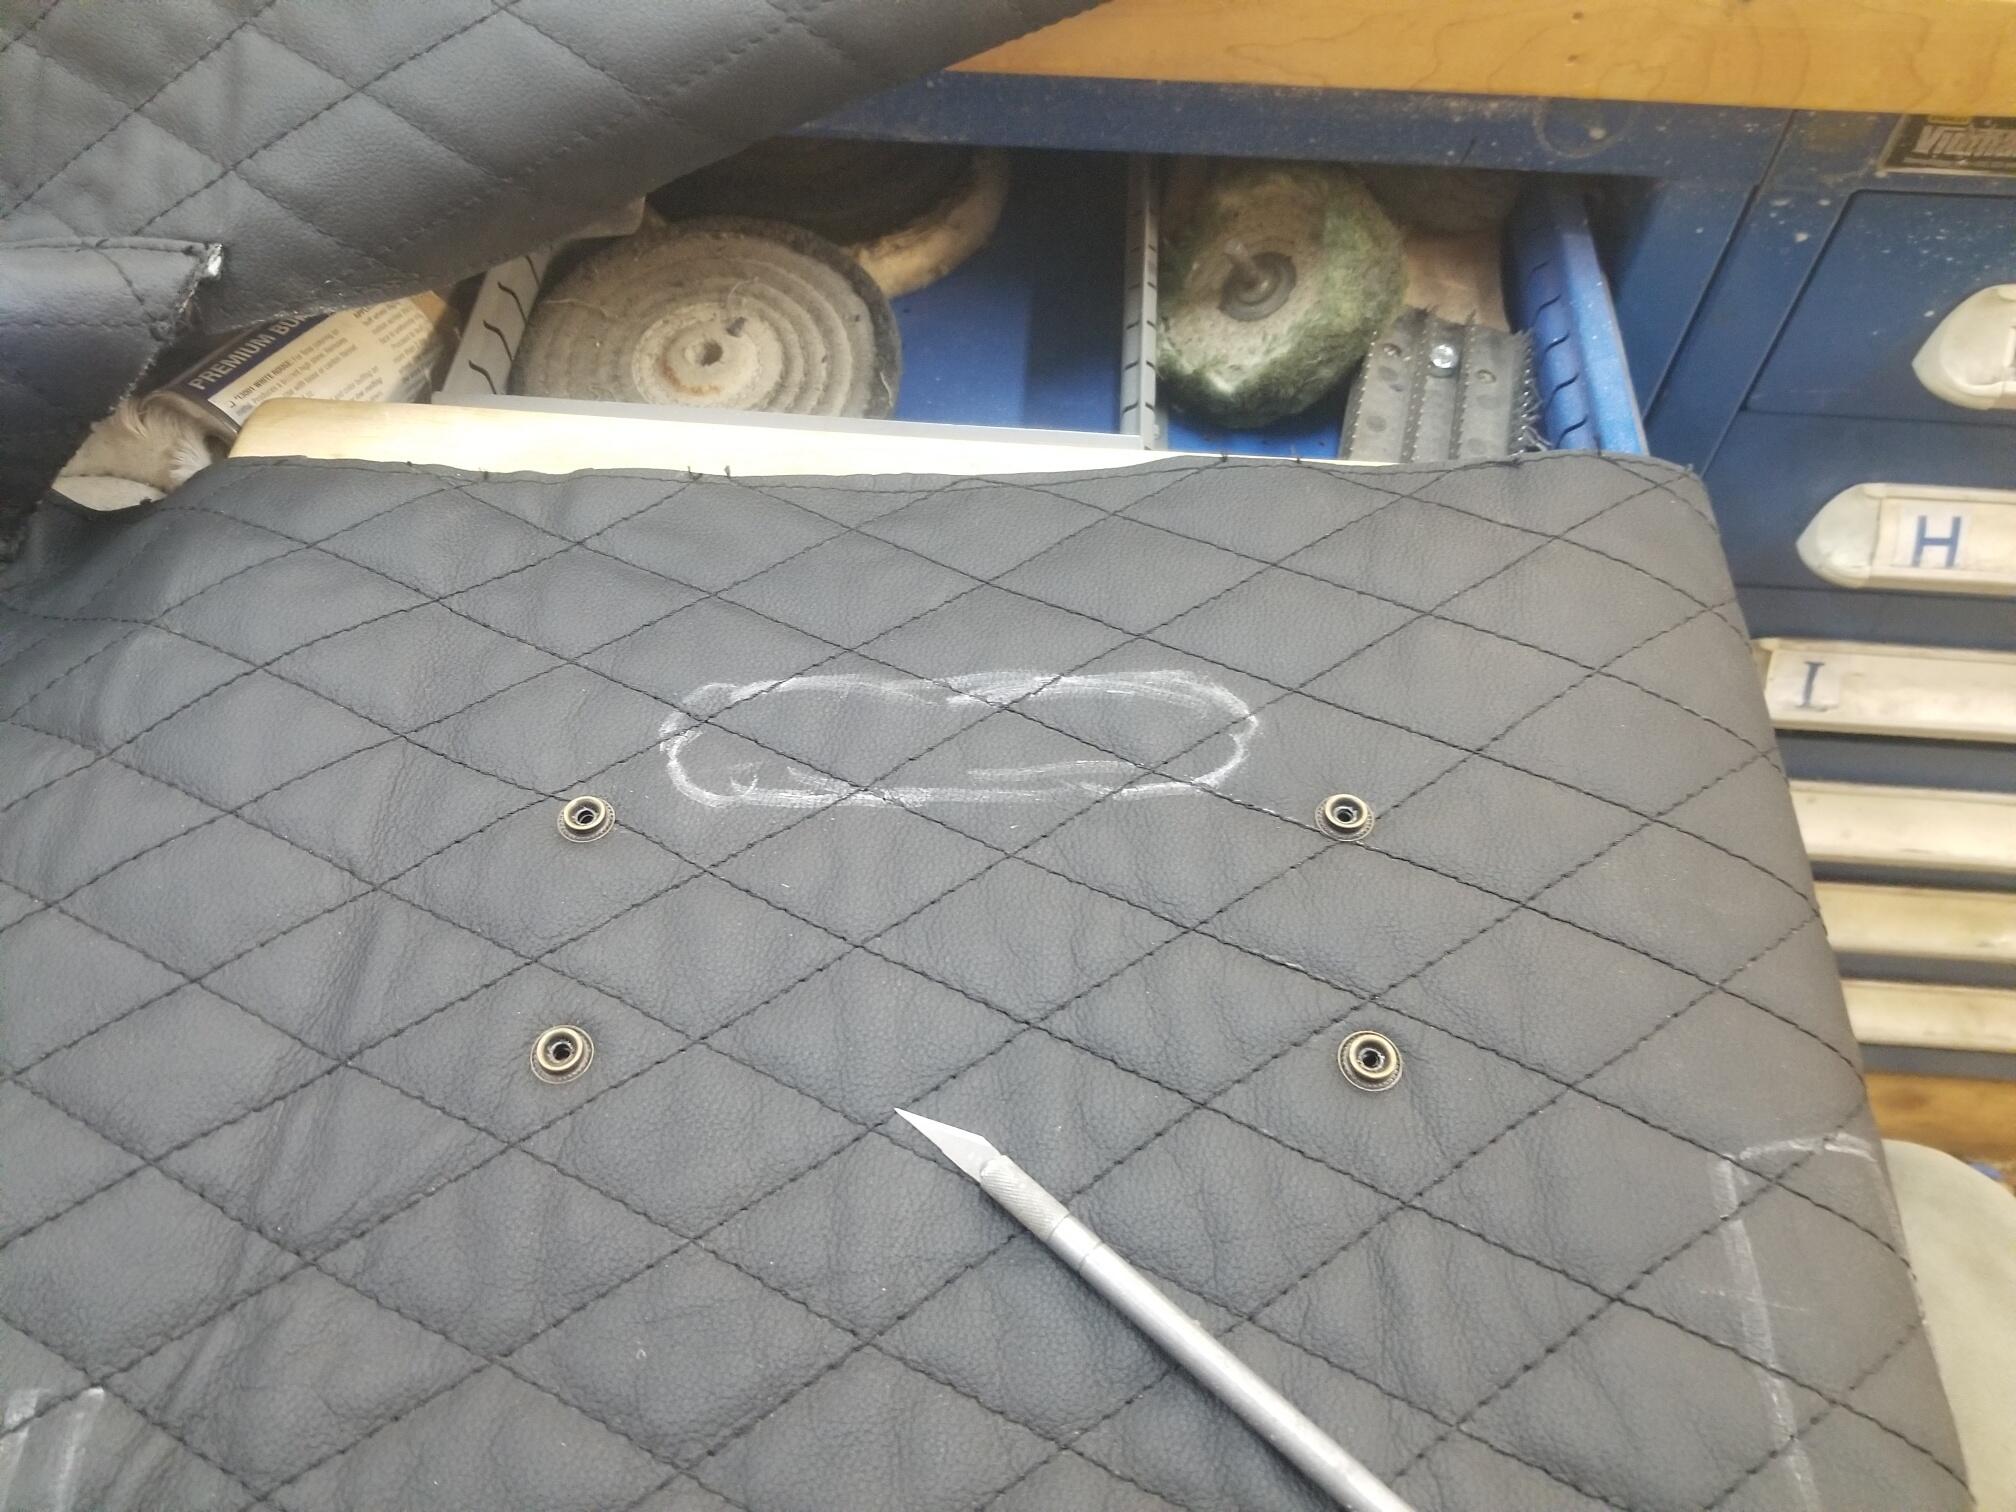
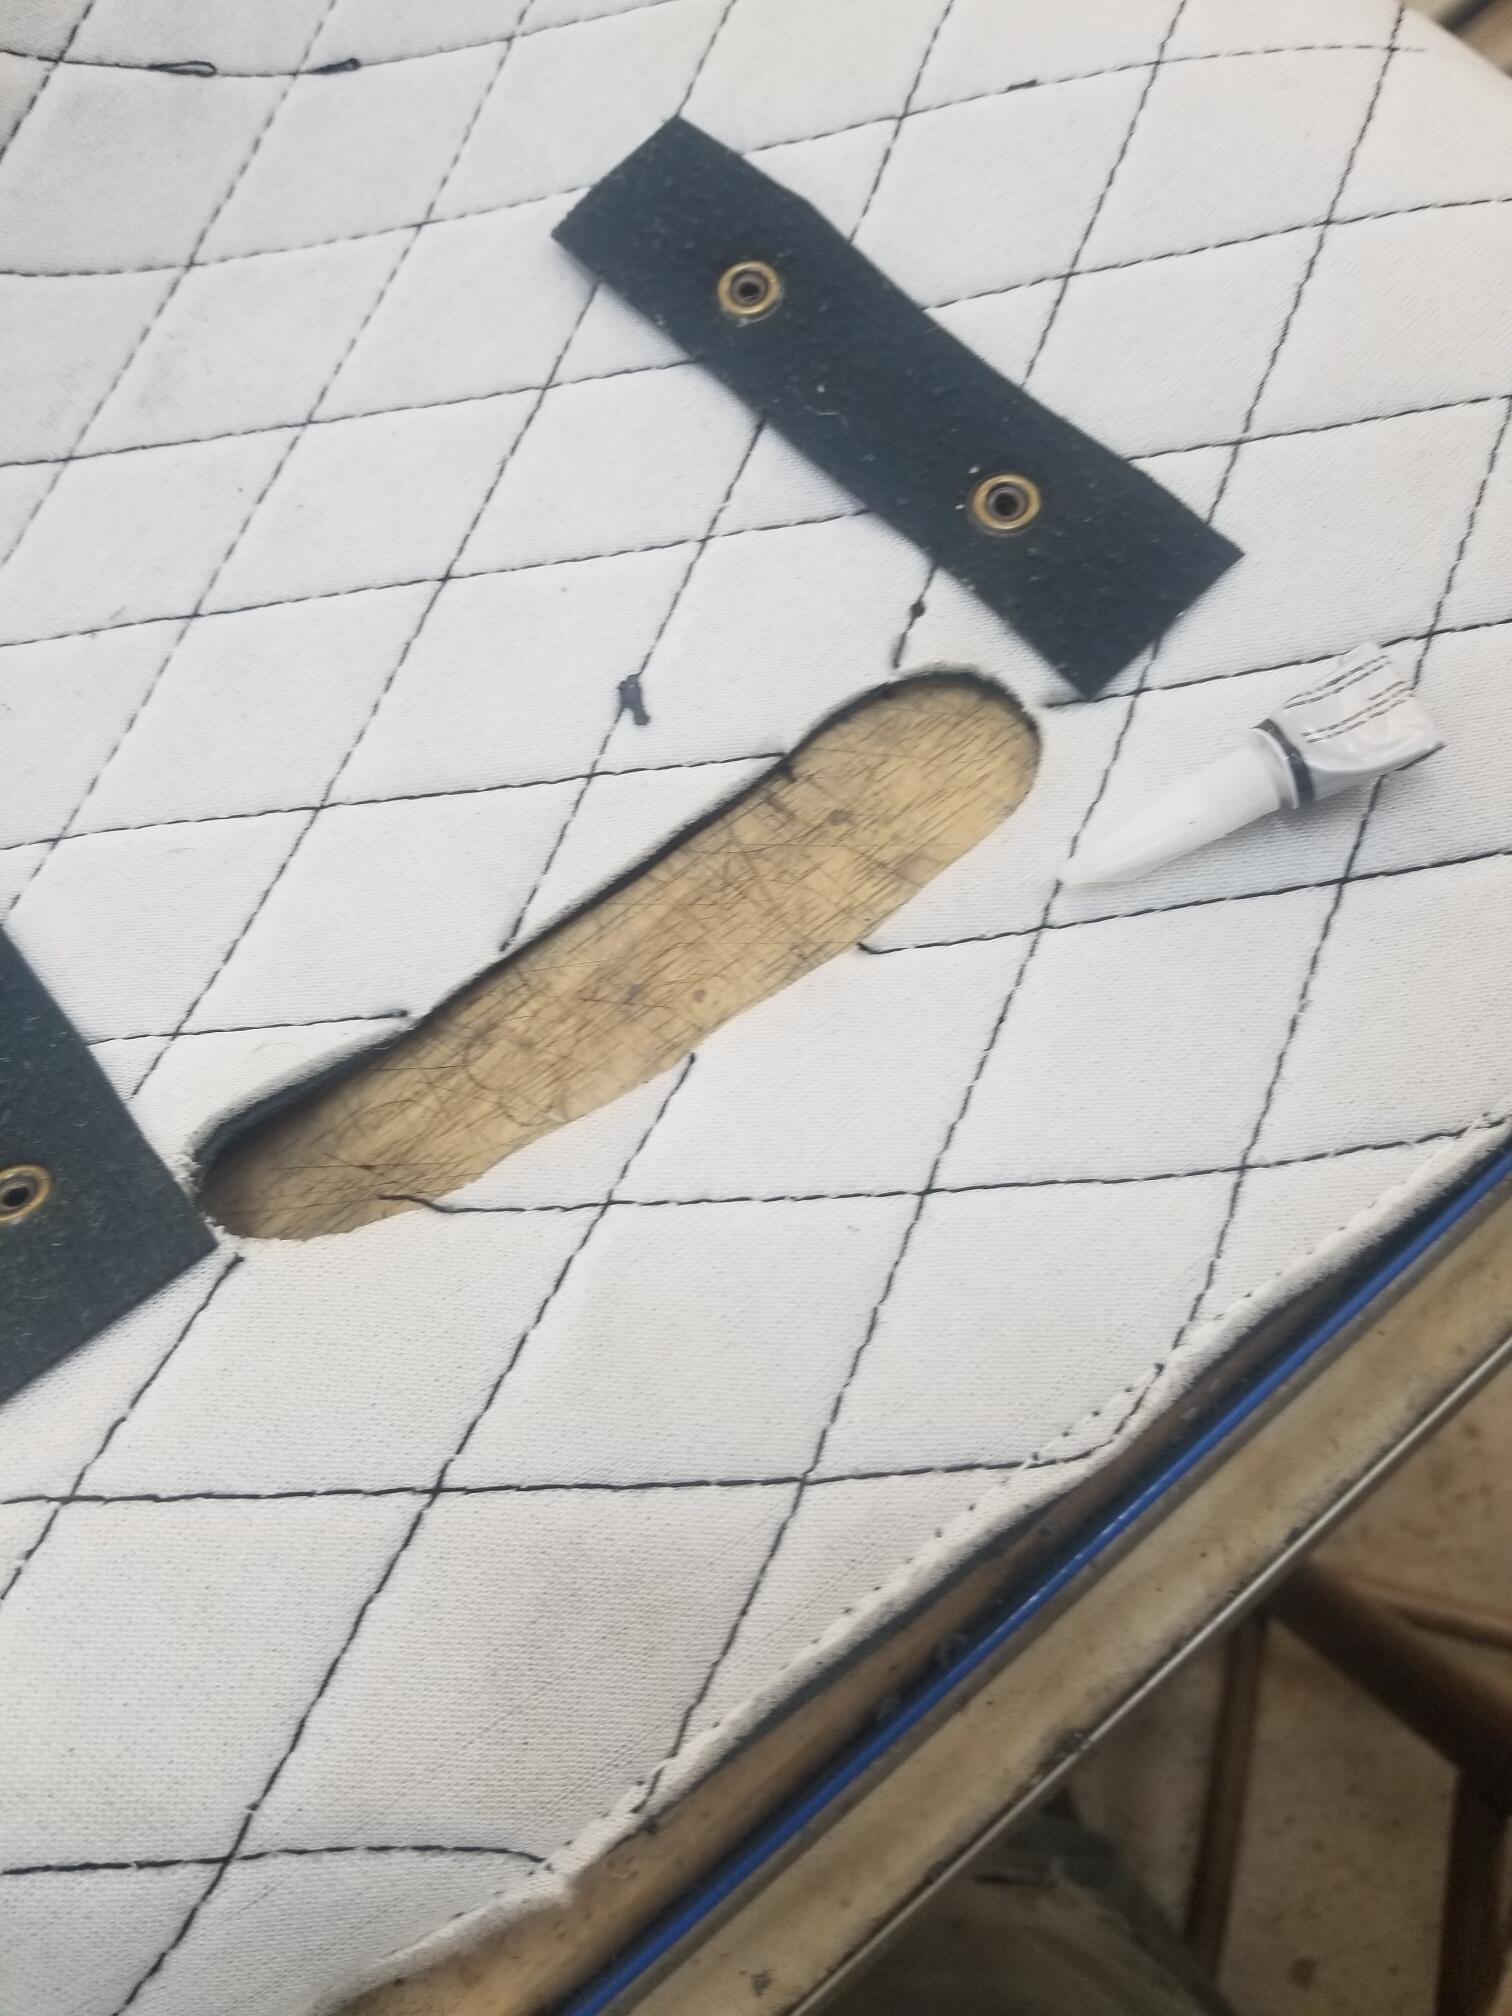
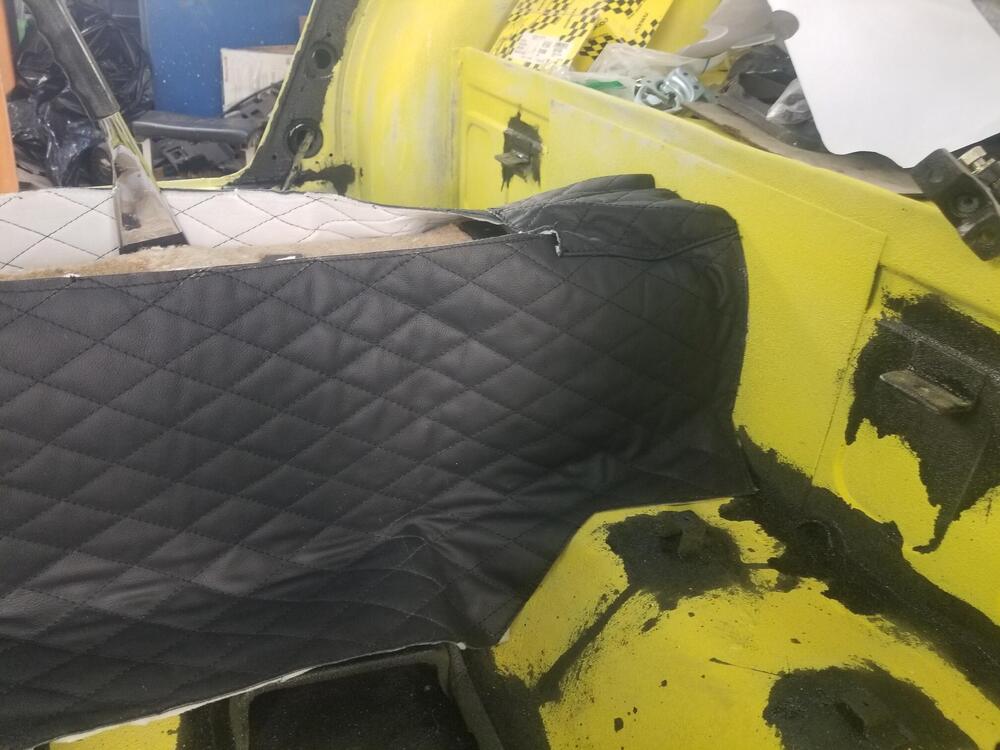
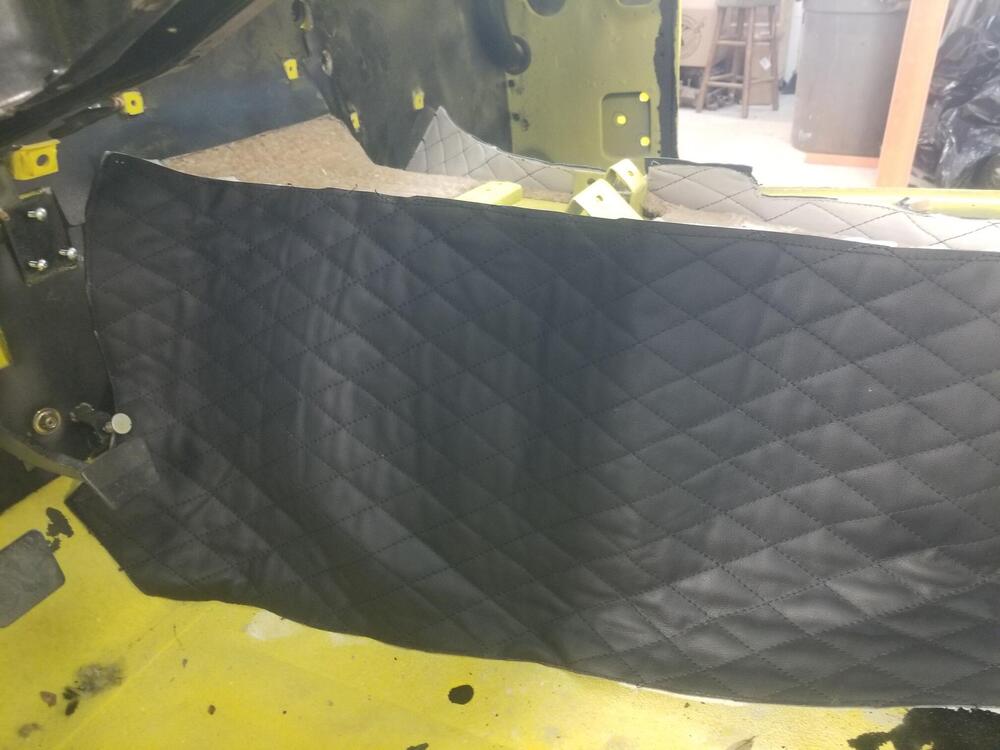
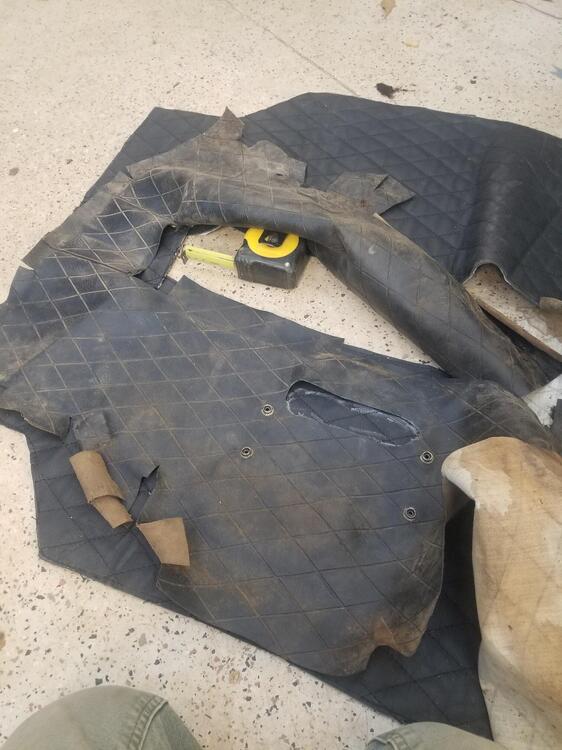
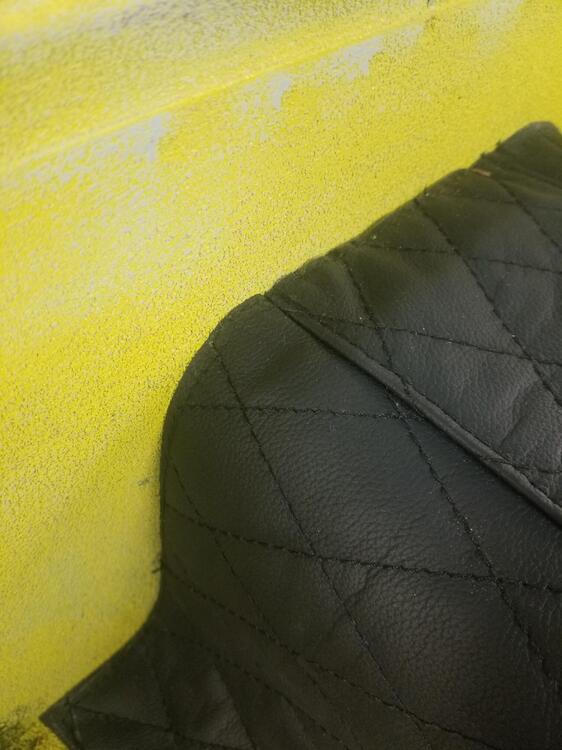
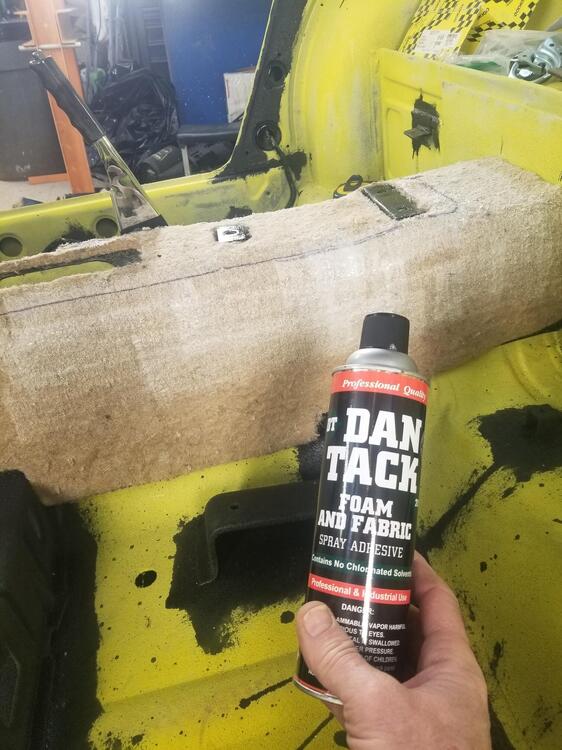
So I am going to start a leather interior trim thread. I bought the pieces from Interior Innovations and thought it might be helpful to document how I went about the install So I've been procrastinating on this a little bit. The factory vinyl laps up onto the luggage panel a little bit, I believe. I thought that would be hard to do with the leather thickness. Also it really needed to be shifted as far forward as possible to line up well with the parking brake and get under the fire wall mat. There was one set of marks for the seat rib. I will cut these nice and close later I put the original console in the car. It won't be the one I use long term but it shows whats covered up Outline it with sharpie I needed to layout the hole for the parking brake. It didn't come pre-cut. So I laid the old one over the new one, snap to snap, and marked it out with a soap stone I'm thinking this will all cover up very nicely when done. The thick hem on the firewall leather will help conceal everything. So I set the tunnel piece all the way to the fire wall but no extra It does lap over some of the center console brackets. So it will probably have to be trimmed there when I get to console install I didn't like this part. Taking the knife to your leather that came half way around the world!! I was going to trace some of the areas with the sewing machine to prevent the diamond stitching from raveling in the areas that I have to cut but I opted for a little super glue on each end instead I sprayed the rear top of the tunnel with Dan Tack. I also sprayed the corresponding area on the leather. I let it tack down pretty good. It sticks like mad! I tried to adjust it behind that brake leather but it was just tearing the jute all up with it. If I had not let it tack so much it would probably be a little more adjustable.


-
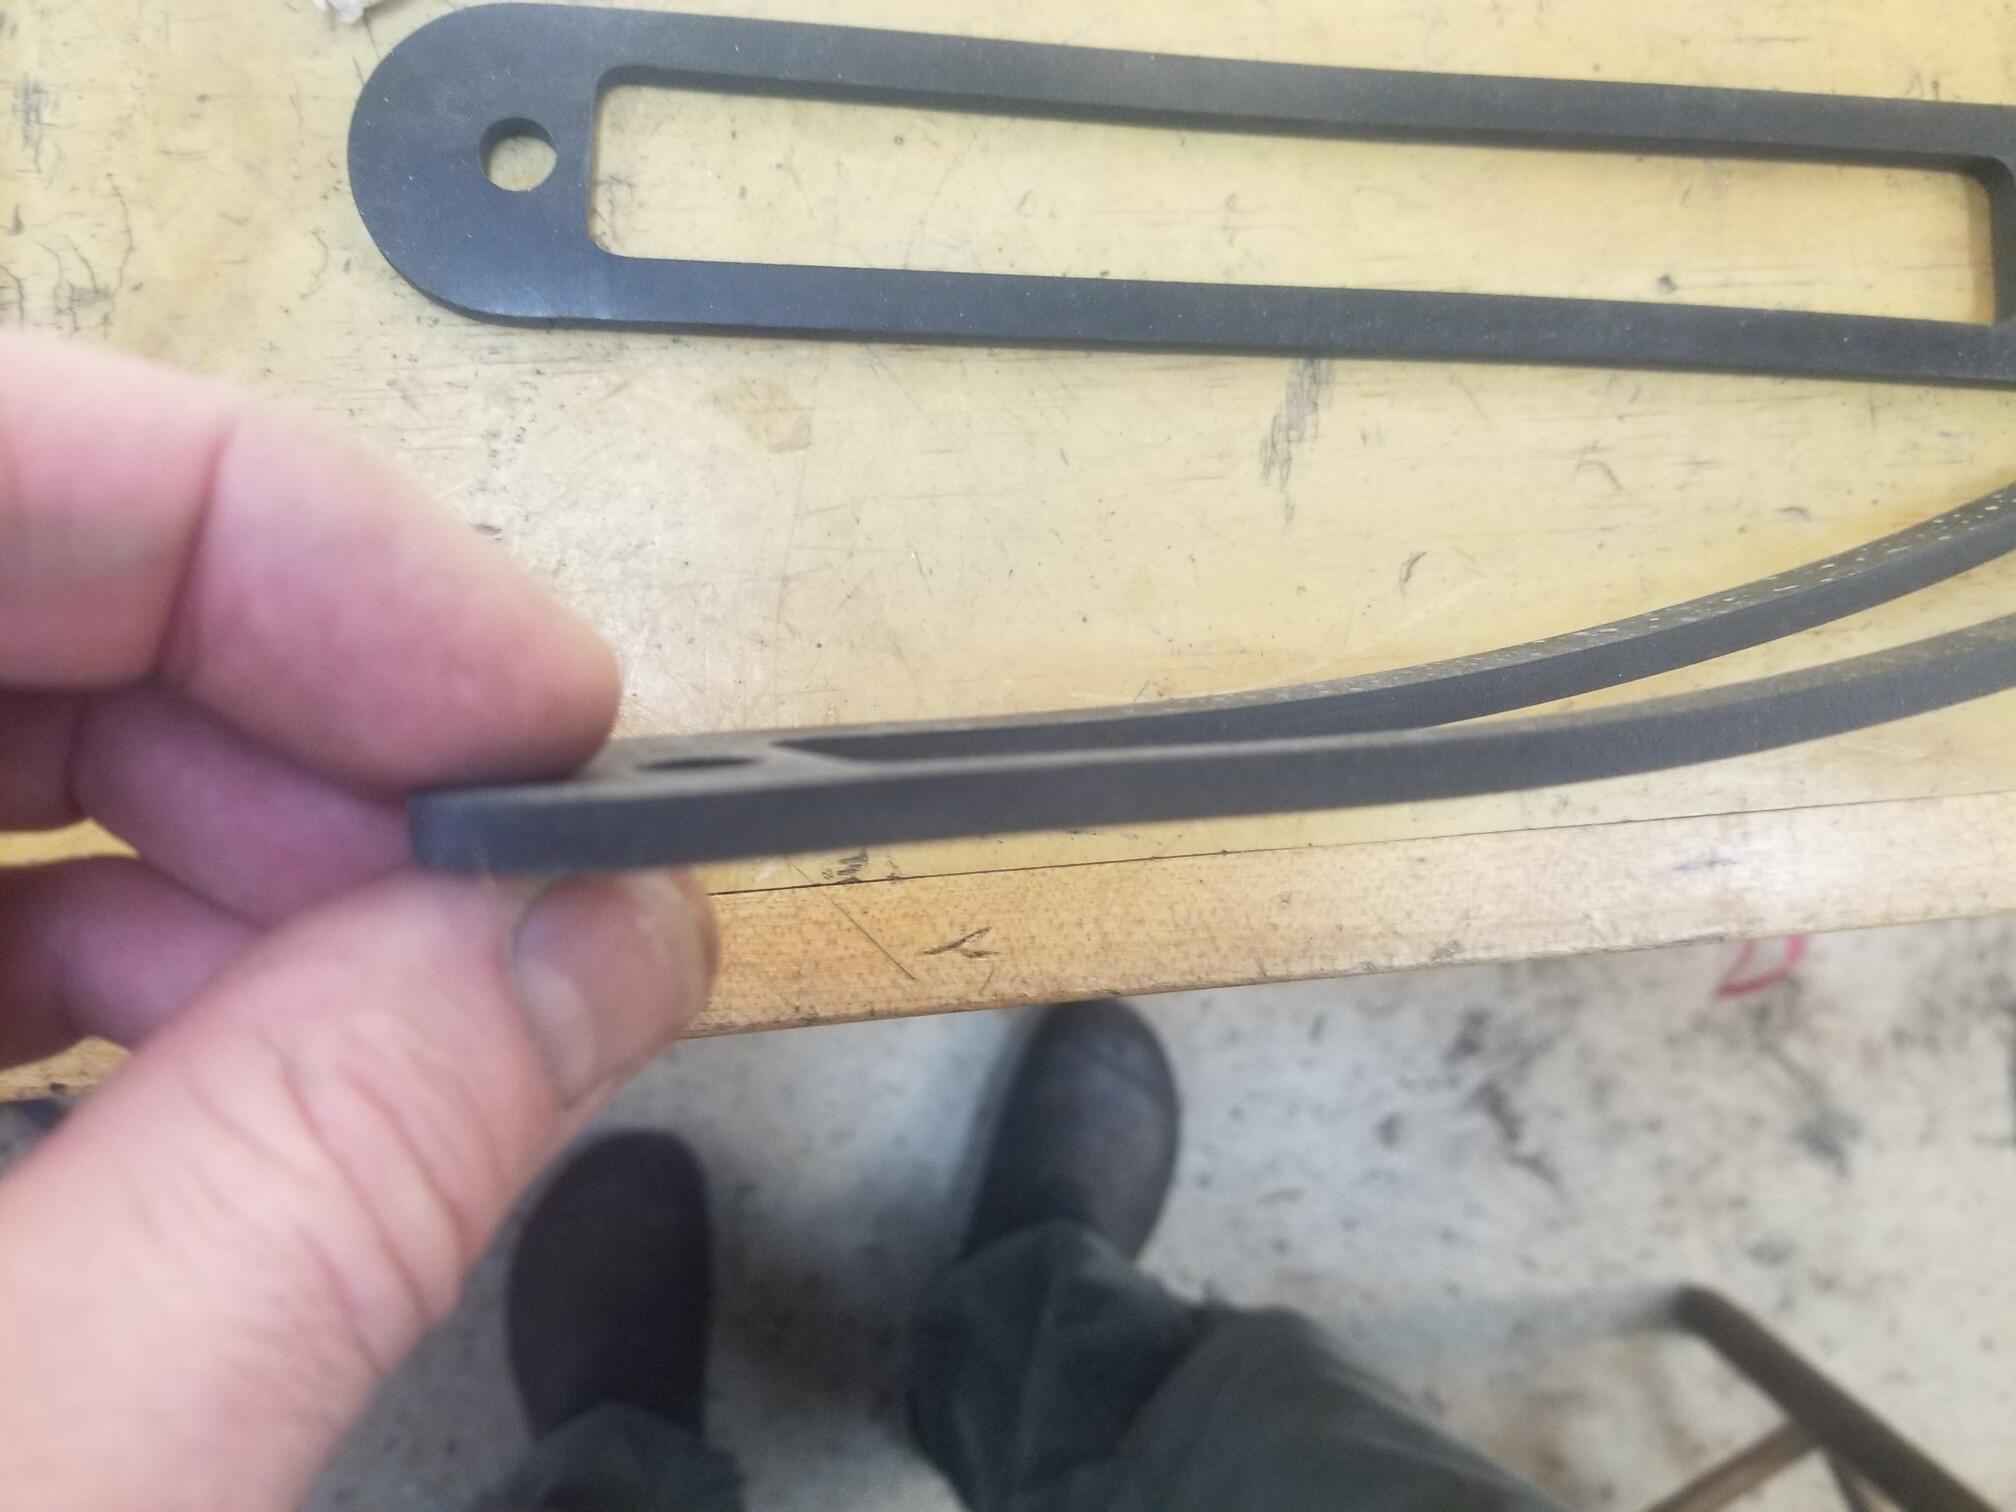
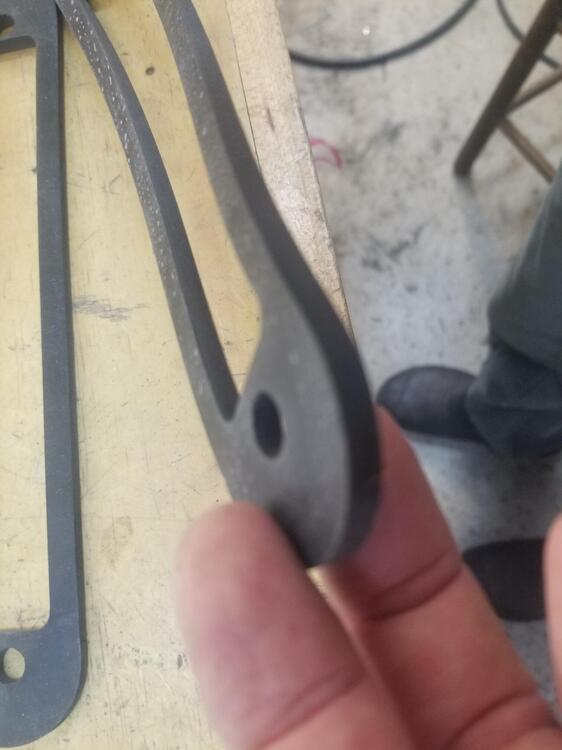
Update on the pieces I ordered off Ebay. So what I received are two pieces of rubber maybe a 1/4" thick. They are not very compressible. I don't think I will be using them. I am planning on getting some reproductions from 240zrubber


-
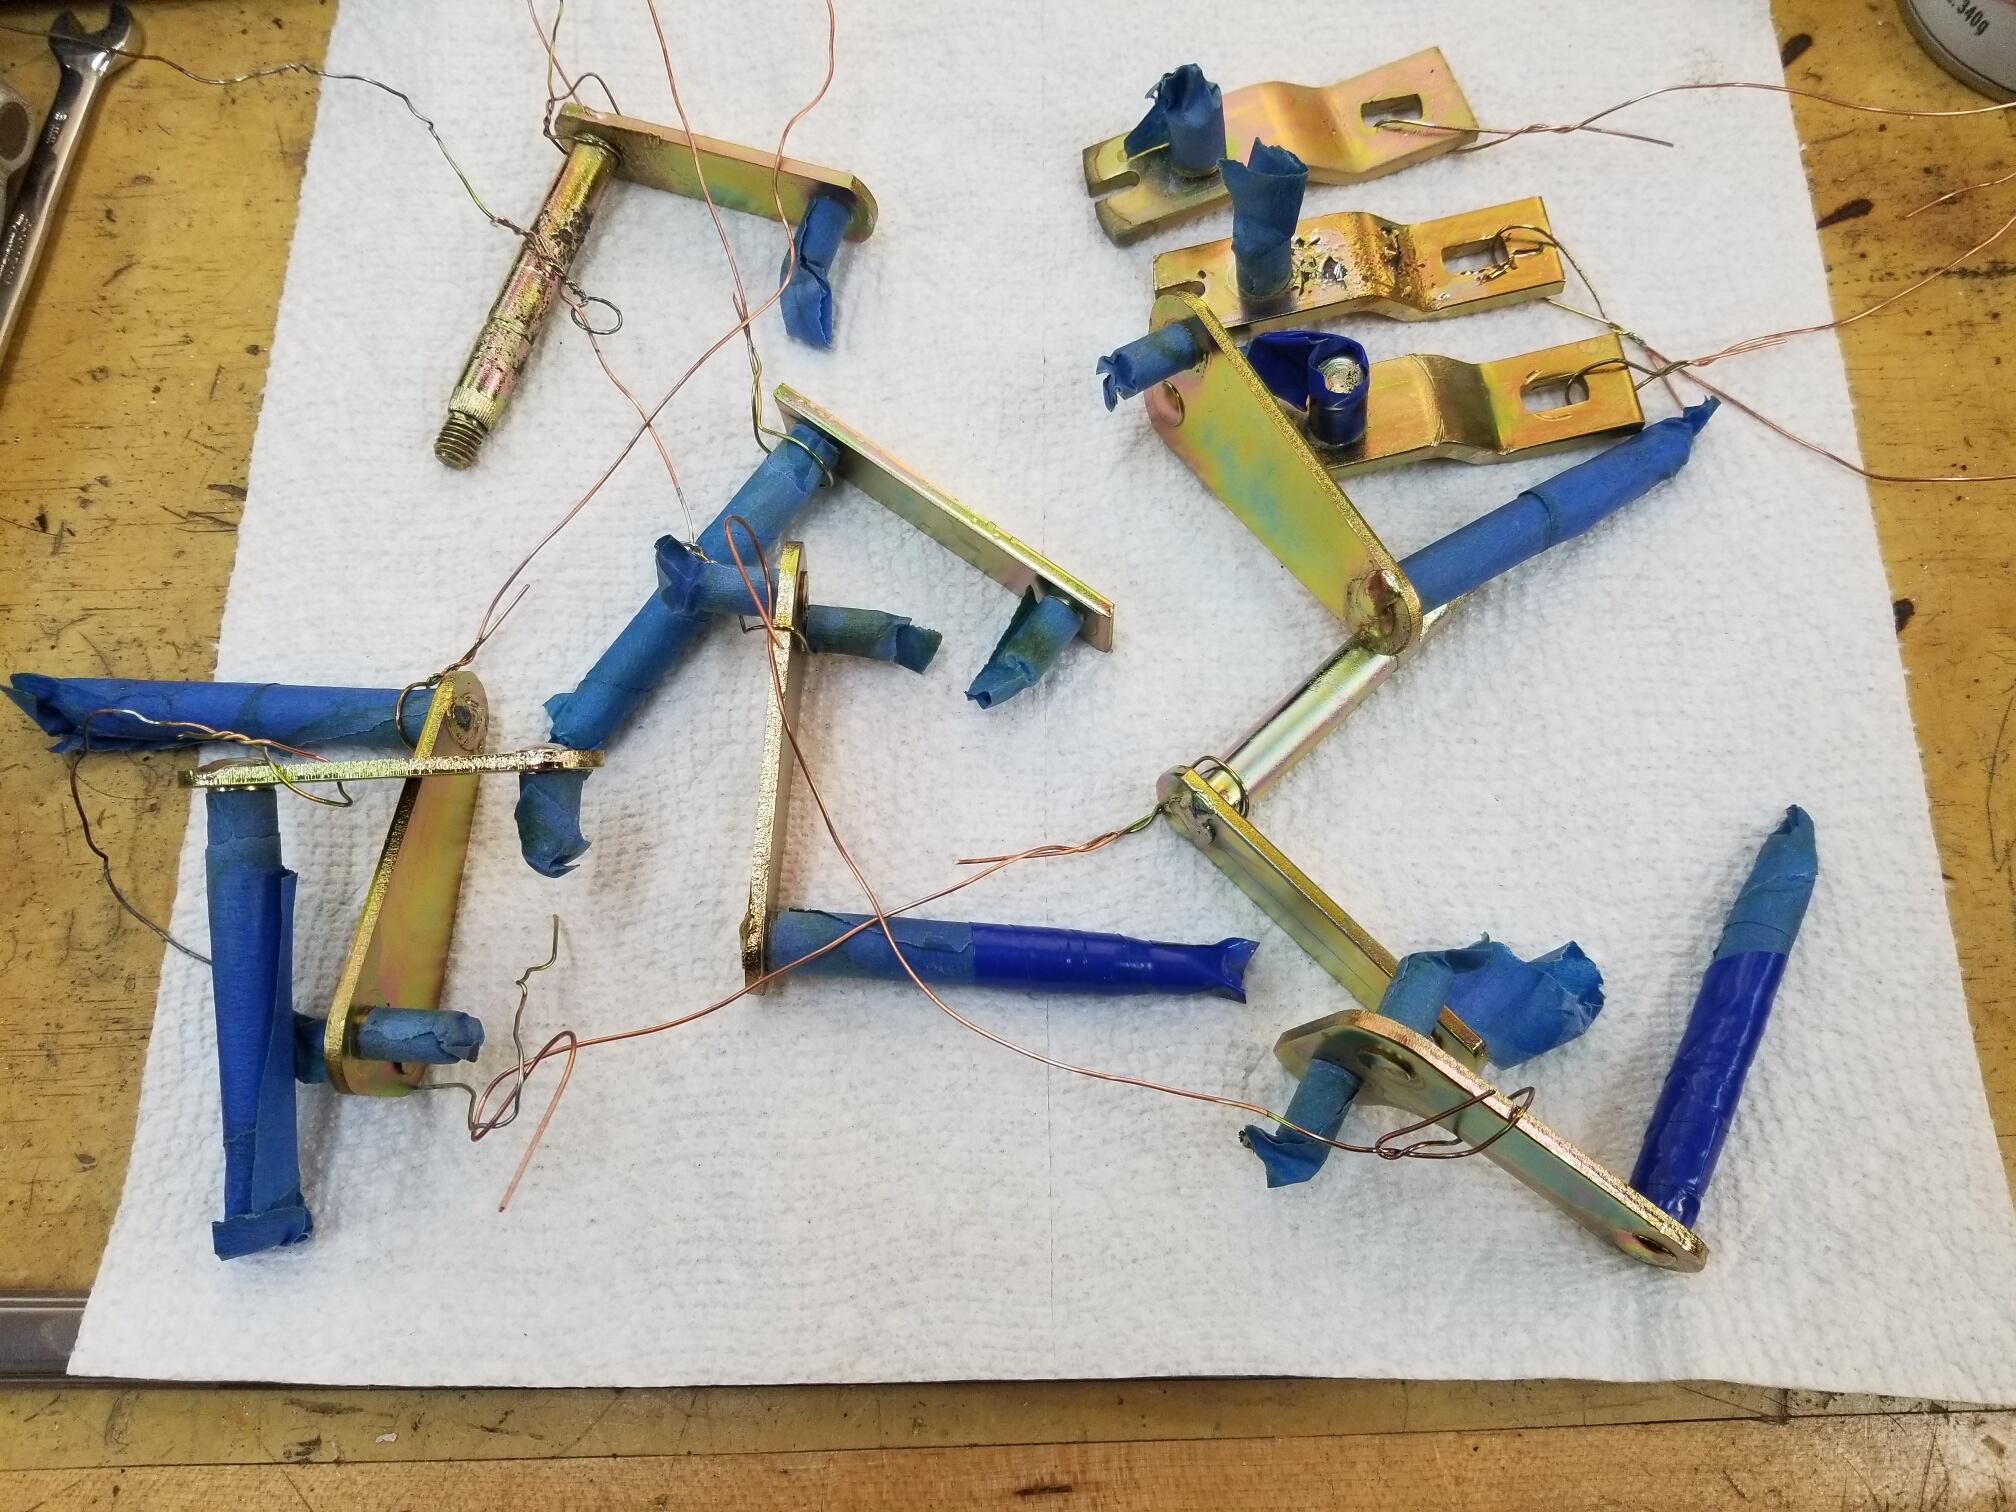
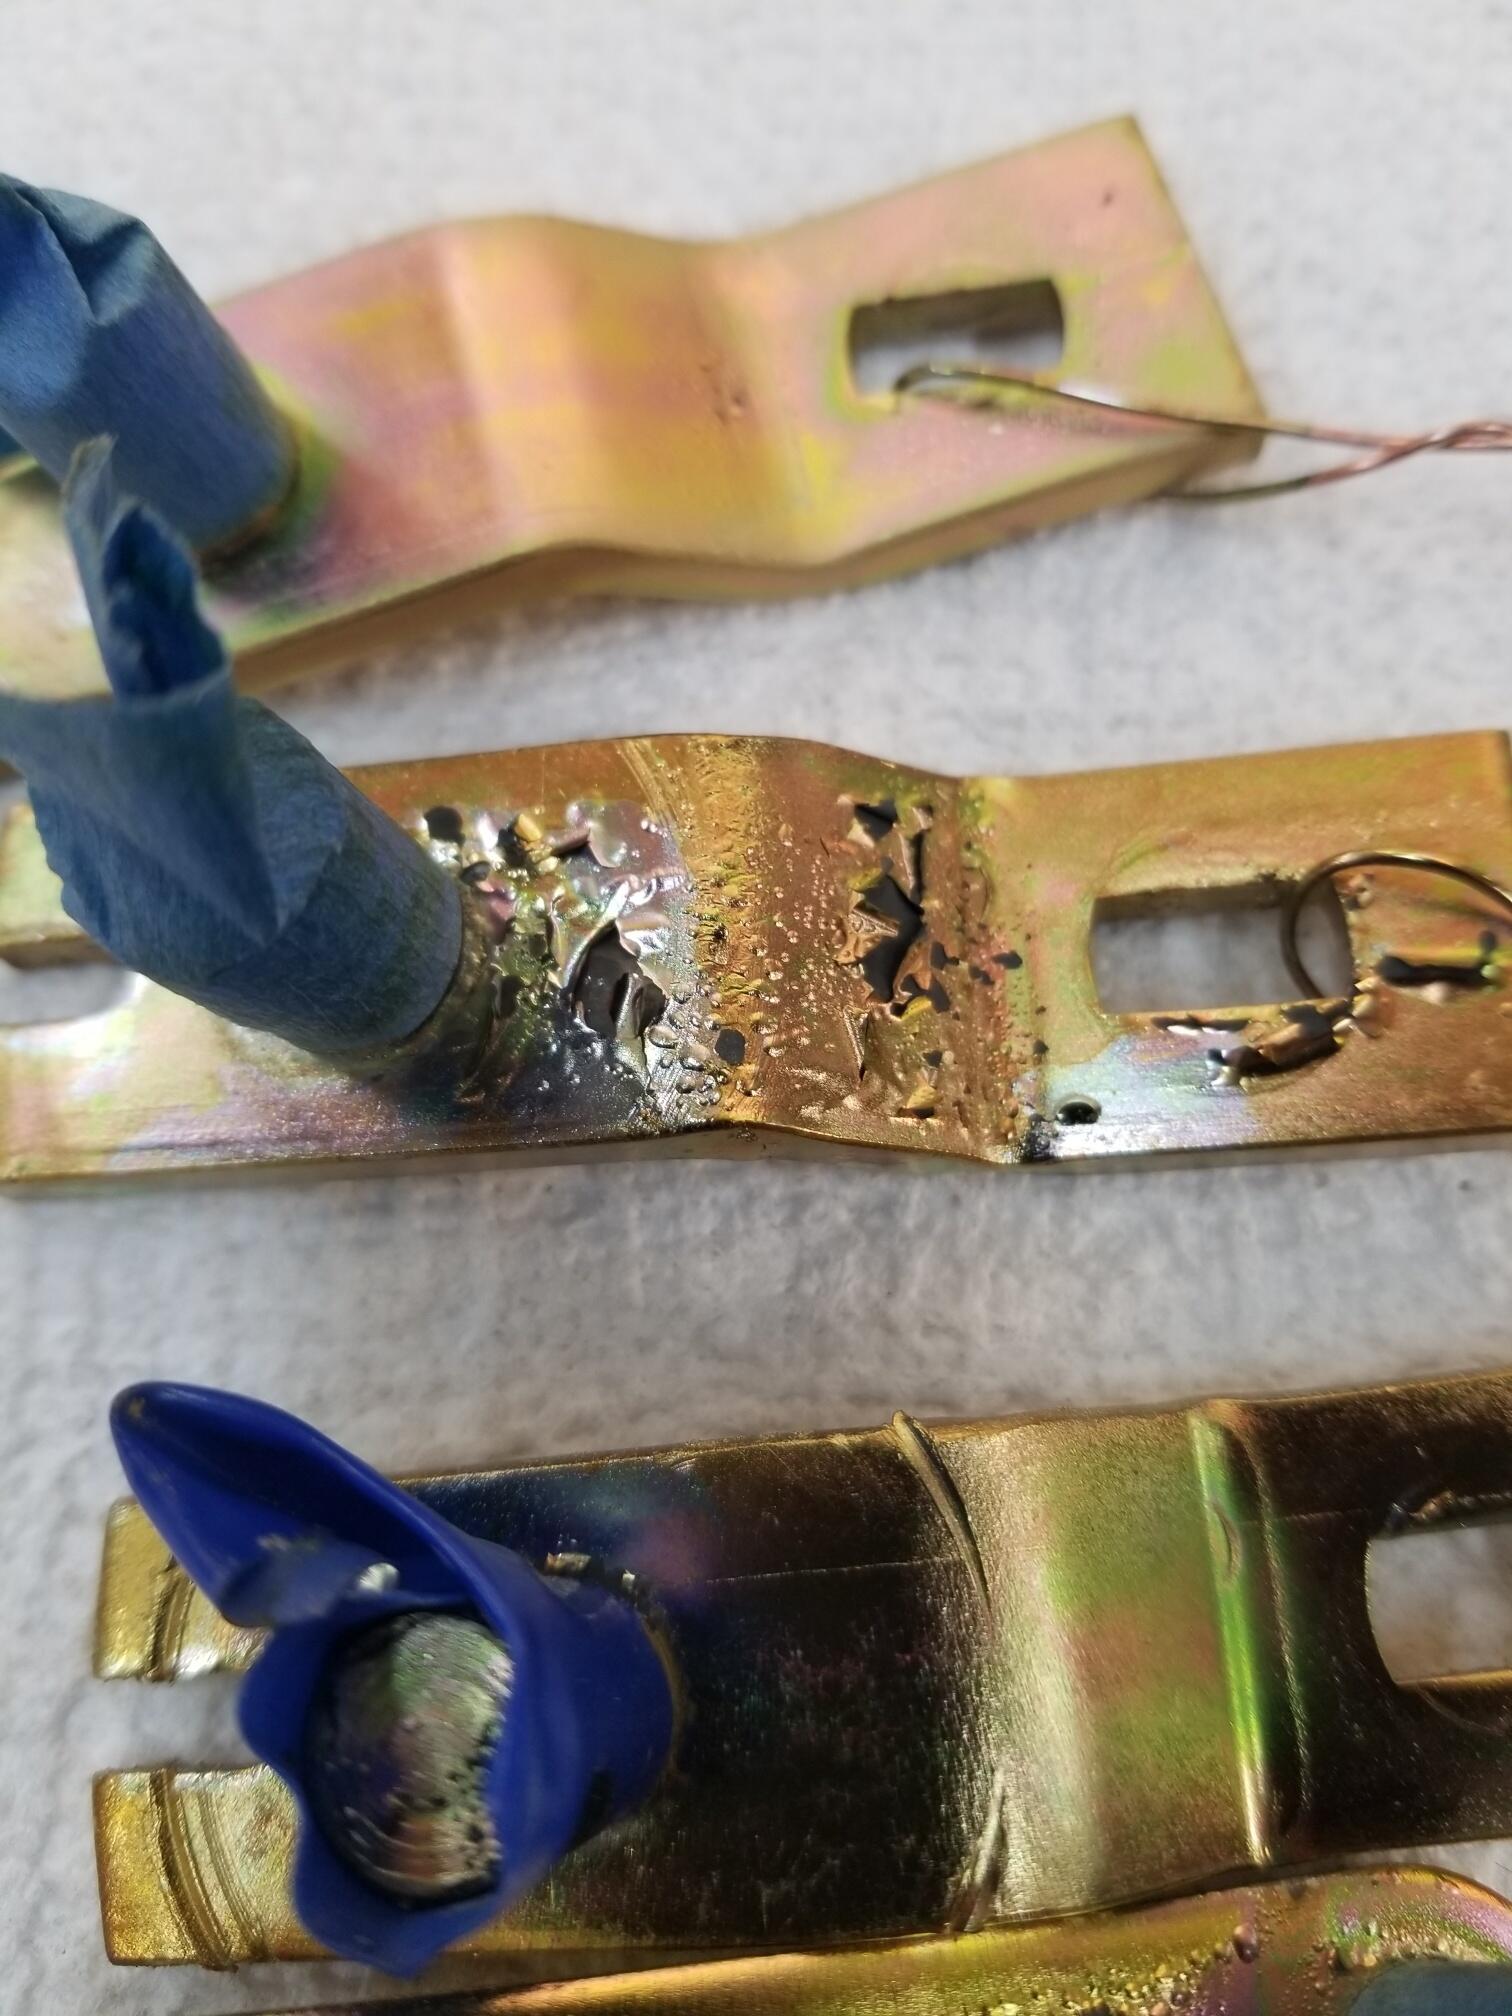
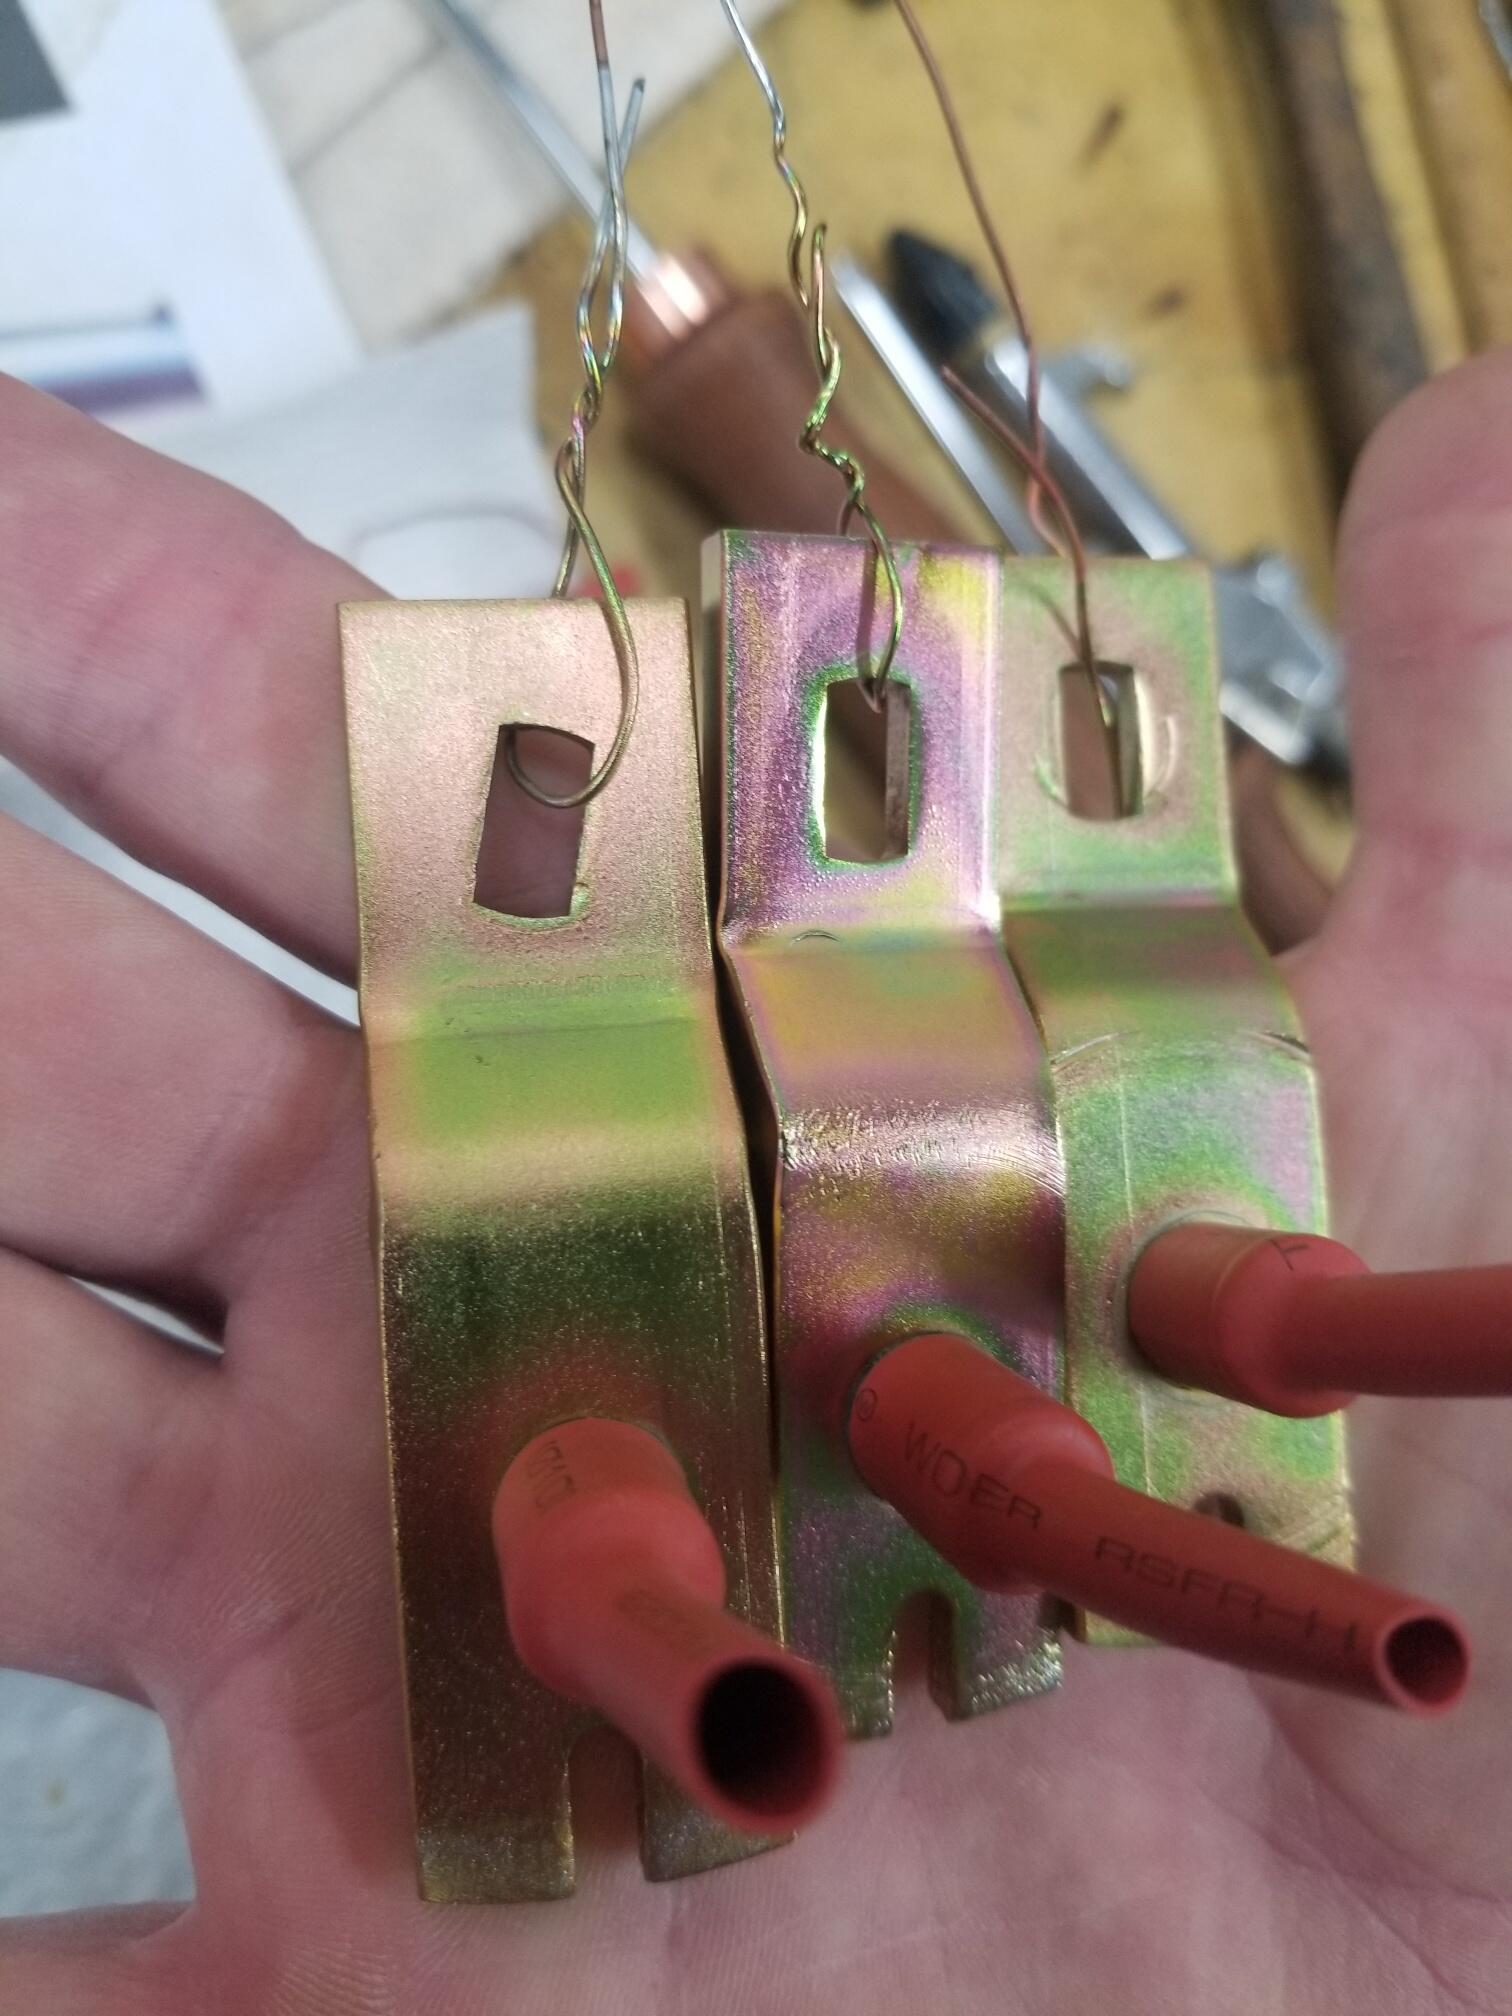
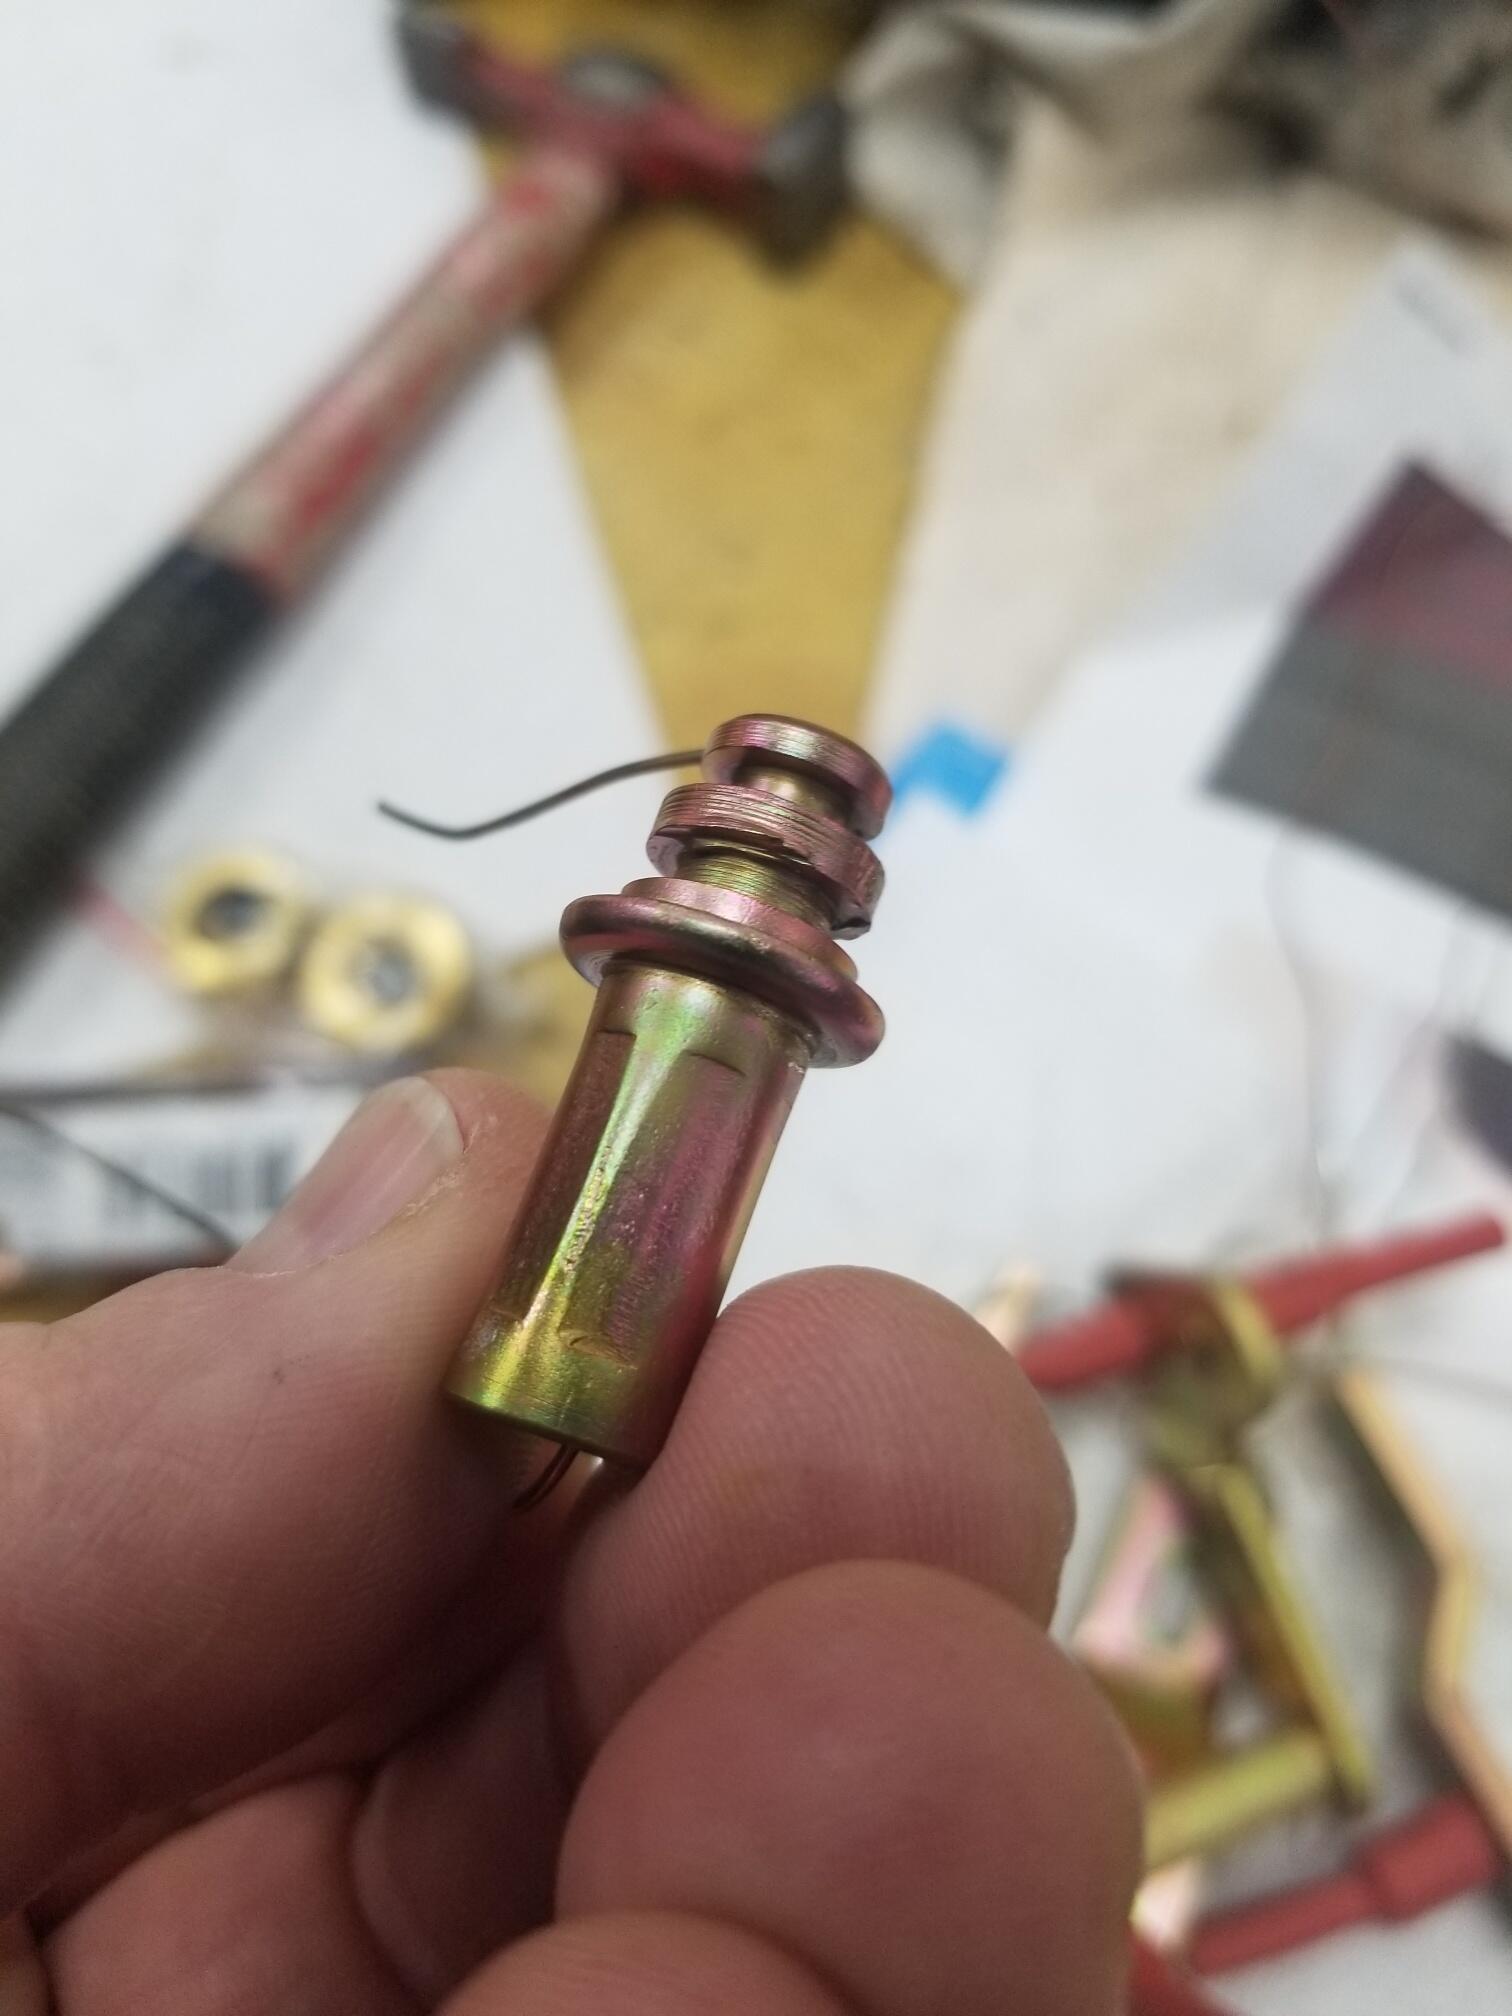
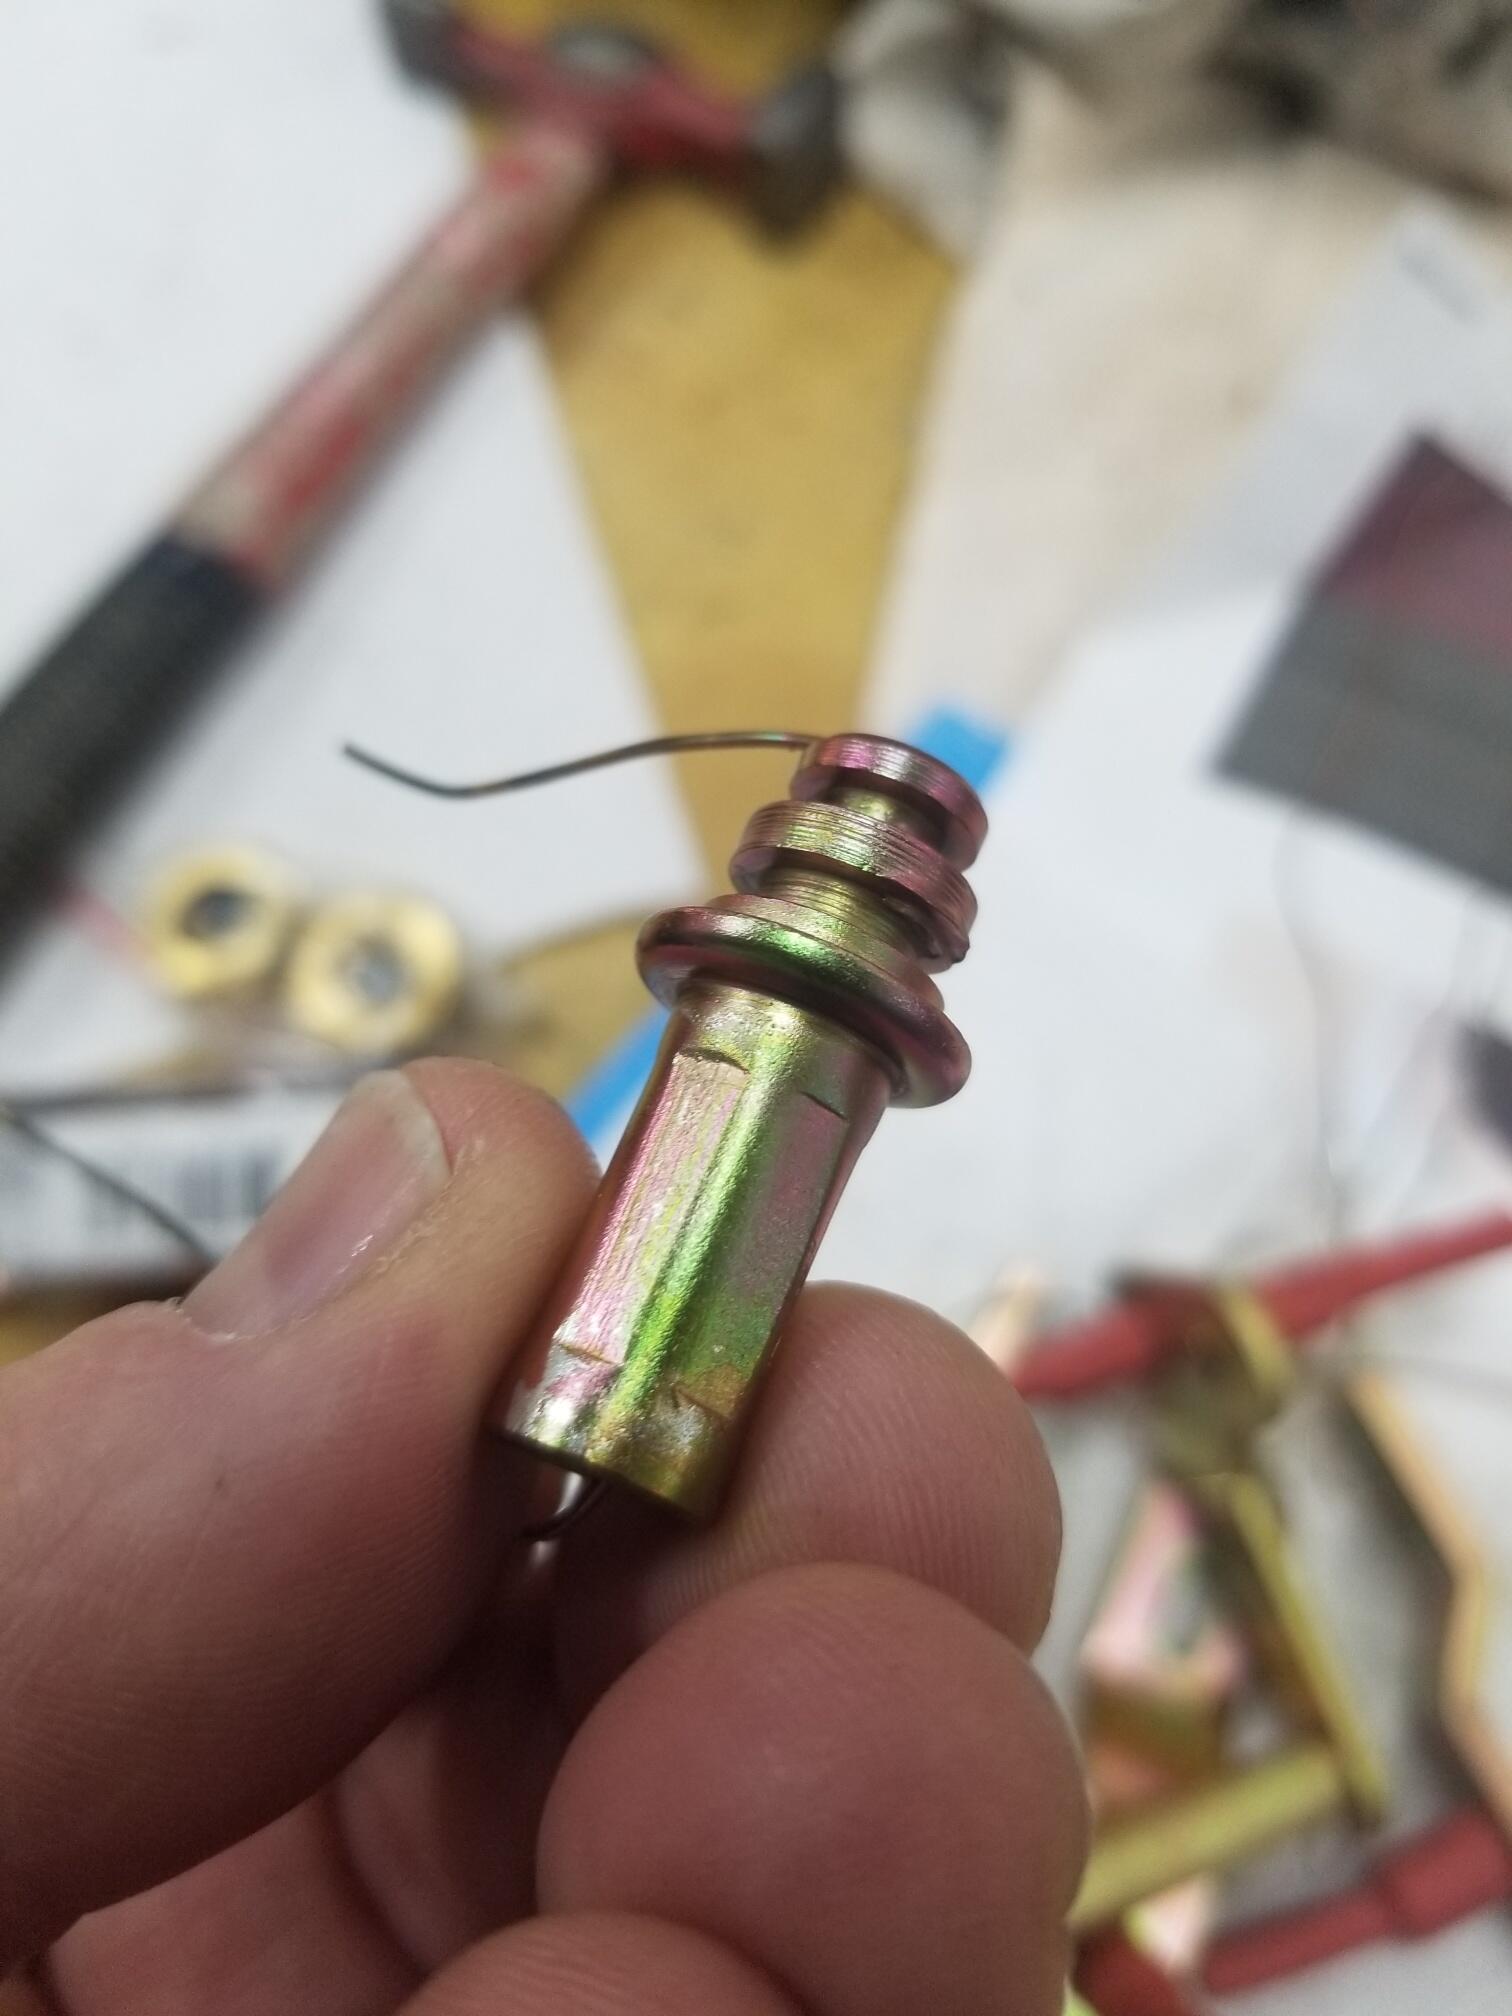
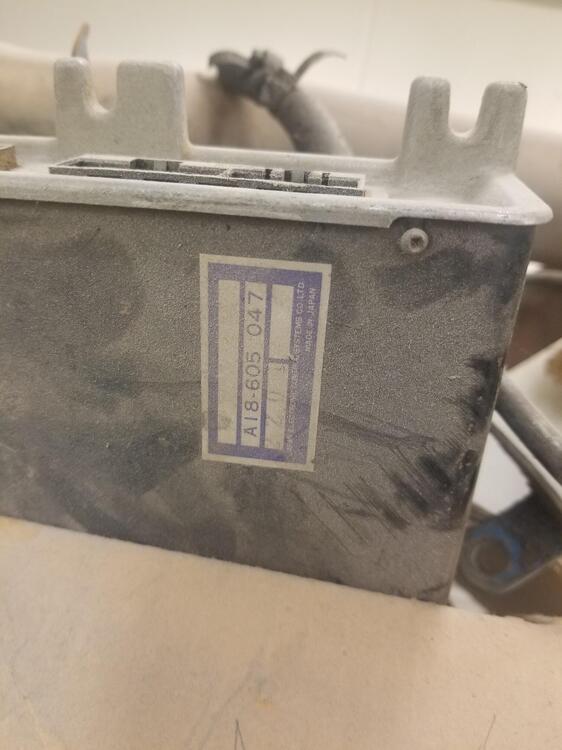
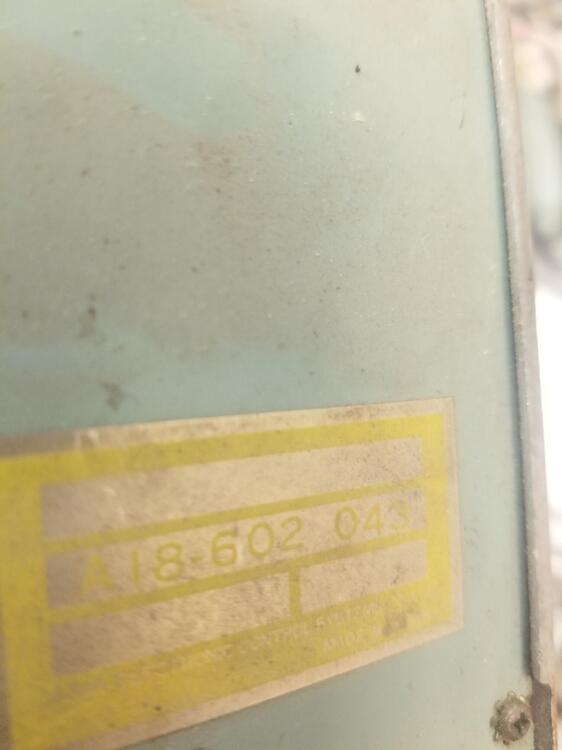
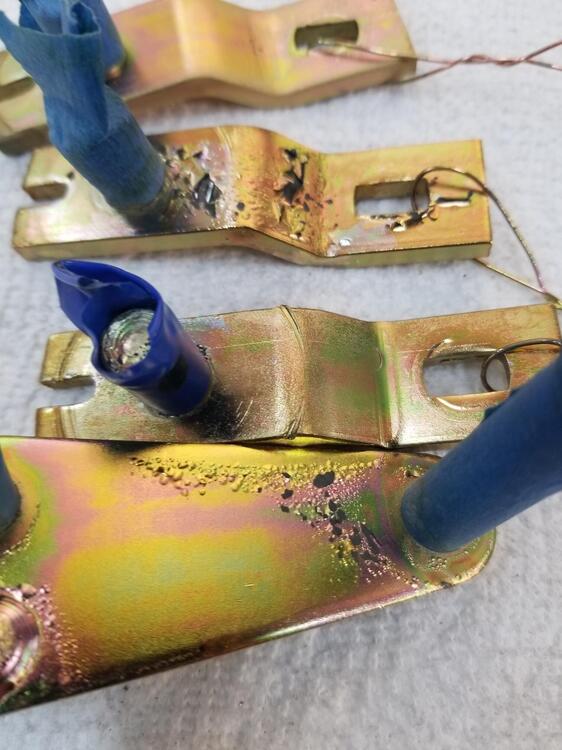
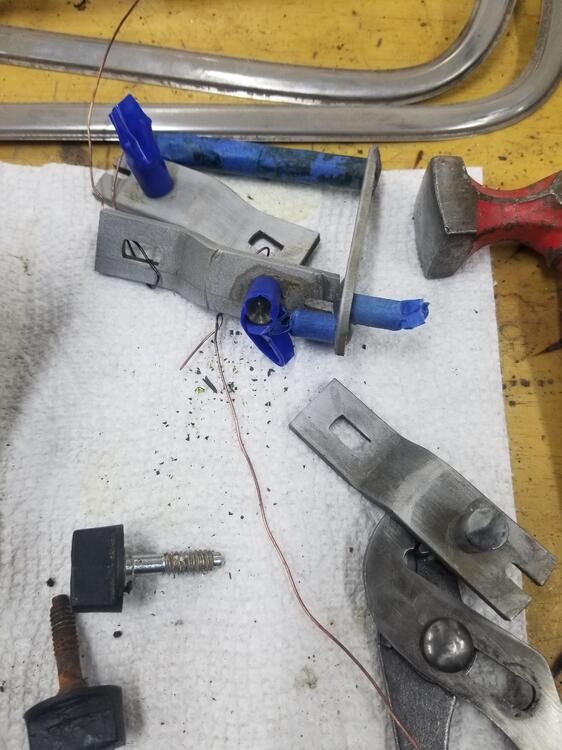
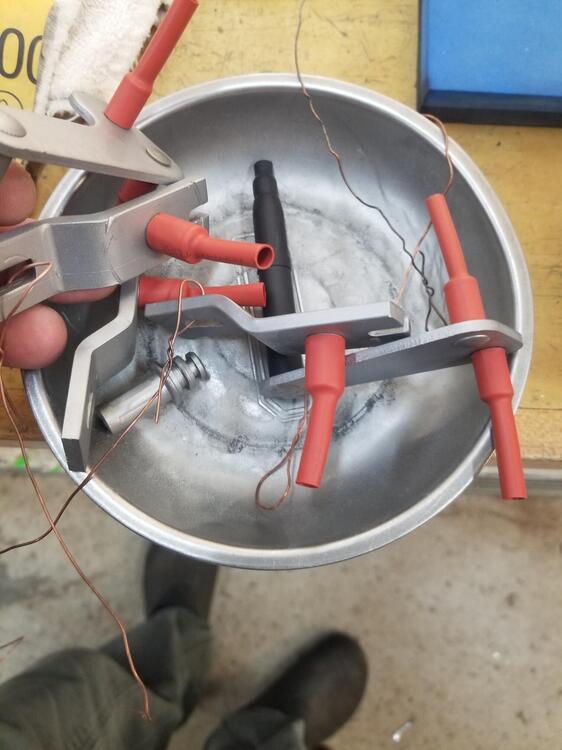
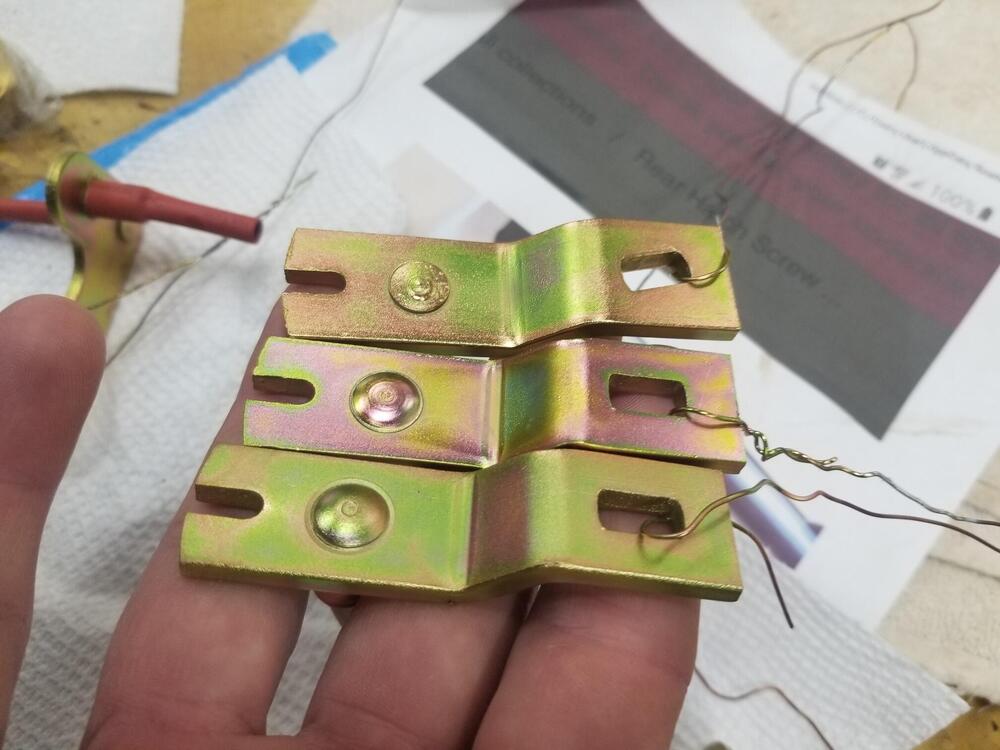
So I will update this thread so it's all here too. I did some plating a few weeks ago and it blistered badly. I'm not sure why. I could have been my plating tank was heating properly or too much brightener. In any event, I stripped it all down in citric acid and reprepped them for plating. This time instead of using tape to protect the chromed shafts, I used heat shrink. They did ok this time but some of it came out really pink. I left them in my blue chromate a little longer and only left them in the yellow for about 20 seconds. I was using a heat gun to dry and cure them. The last one I let air dry to see if the heat was causing the blushing. I believe the one on the bottom is the one I allowed to air dry The one on the far right is the air dry one. I do believe it changed when I allowed it to air dry but I was changing my chromate time too so it's hard to know the cause definitively. One point is, if you use heat shrink or even tape, it needs to be cut off ASAP. I had one that had some liquid still in it and it corroded the fresh plating where it leaked out later. Since all of this is concealed in the cowl, I'm not going to worry about it.


-
-
-
Did those contacts come that clean with just the contact cleaner spray??
-
A shrinking disc works really good on high spots. Then dolly the lows up
-
A shaker siphon is a better idea!
-
Do you do all of the inside hood stripping with a heat gun?
-
Yup, assembled and driving. Probably not "finished" but more enjoyable!
-
At the height of the market, I think it would have done close to double that. That might be a good guess these days but it wouldn't surprise me if it exceeded that. One owner, low number, low mileage, all original, documentation. A very unique rare car. Probably one of a handful that are in this type of survivor condition
-
You could take the fan belt off. It can run for a minute or so without any damage. That will make it easier to hear
-
I would take off the valve cover and pour some oil or put some prelube on the second cylinder valves. Set the valve cover on and start it up. If it taps, repeat on cylinder 3. If i make it go away, I would look at oil delivery. External spray bar or through cam? Possibly replace the oil pump or go to the turbo pump. Heavier oil might help overall but will delay oil delivery when cold.
-
Public Service Announcement