ksechler
Free Member
-
Joined
-
Last visited
Everything posted by ksechler
-
 Yes, actually I think you hit the nail on the head. A little more amperage seems to be the trick when using the weldable primer. I tried that today and had very good results.
 -
Be careful with the weldable primer. It isn't as weldable as bare metal. You will get a lot more spatter and it's harder to get the initial bead (when you strike the weld) to penetrate. I'm not sure what Jason's issue with lap welding is. When replacing floors you would find the fitment for seam welding almost impossible. I lap, plug and seam welded my floor pans in.
-
He won't. This car has been posted on ebay multiple times.
-
-
-
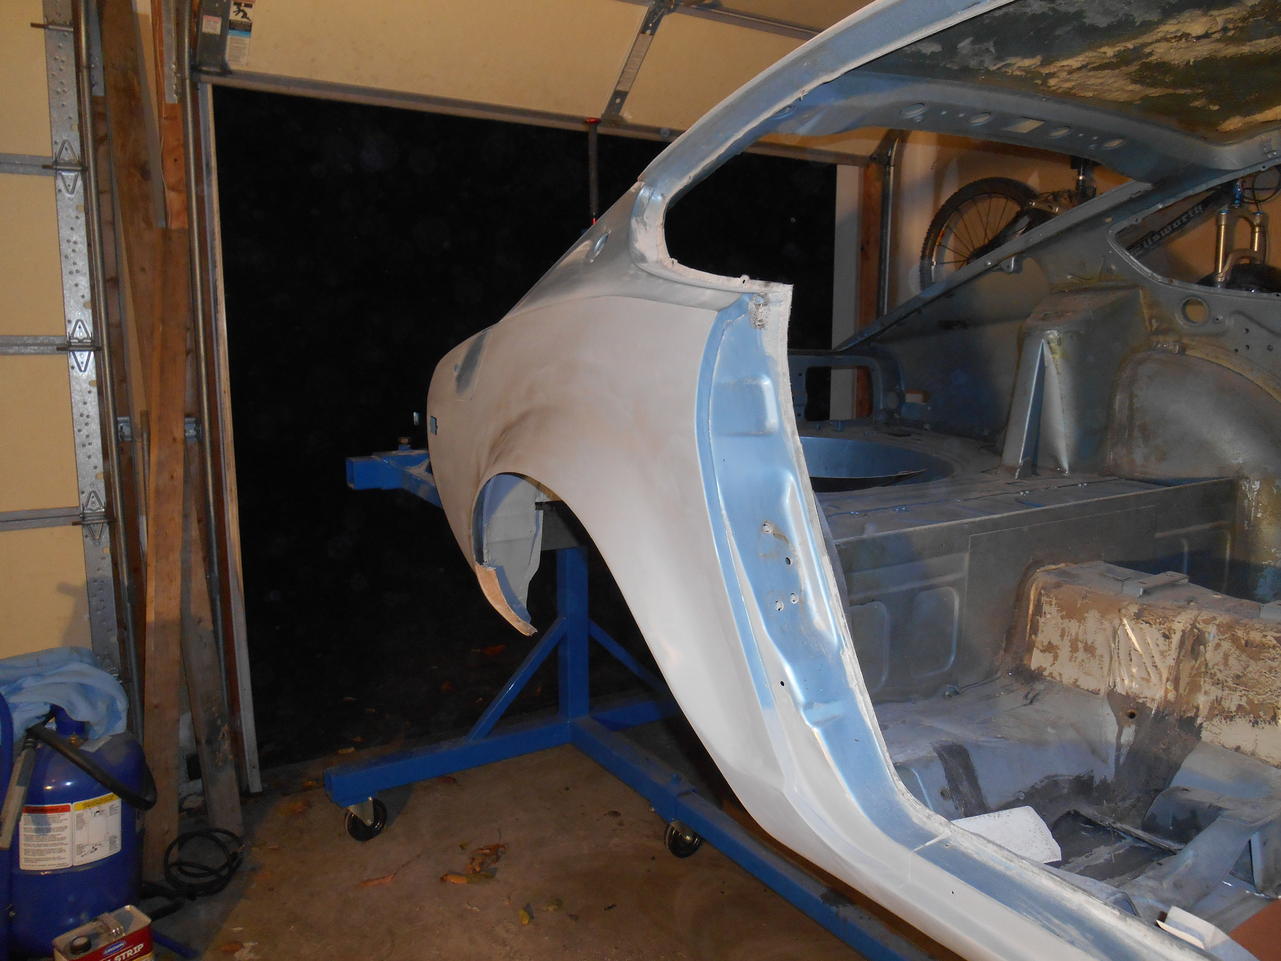
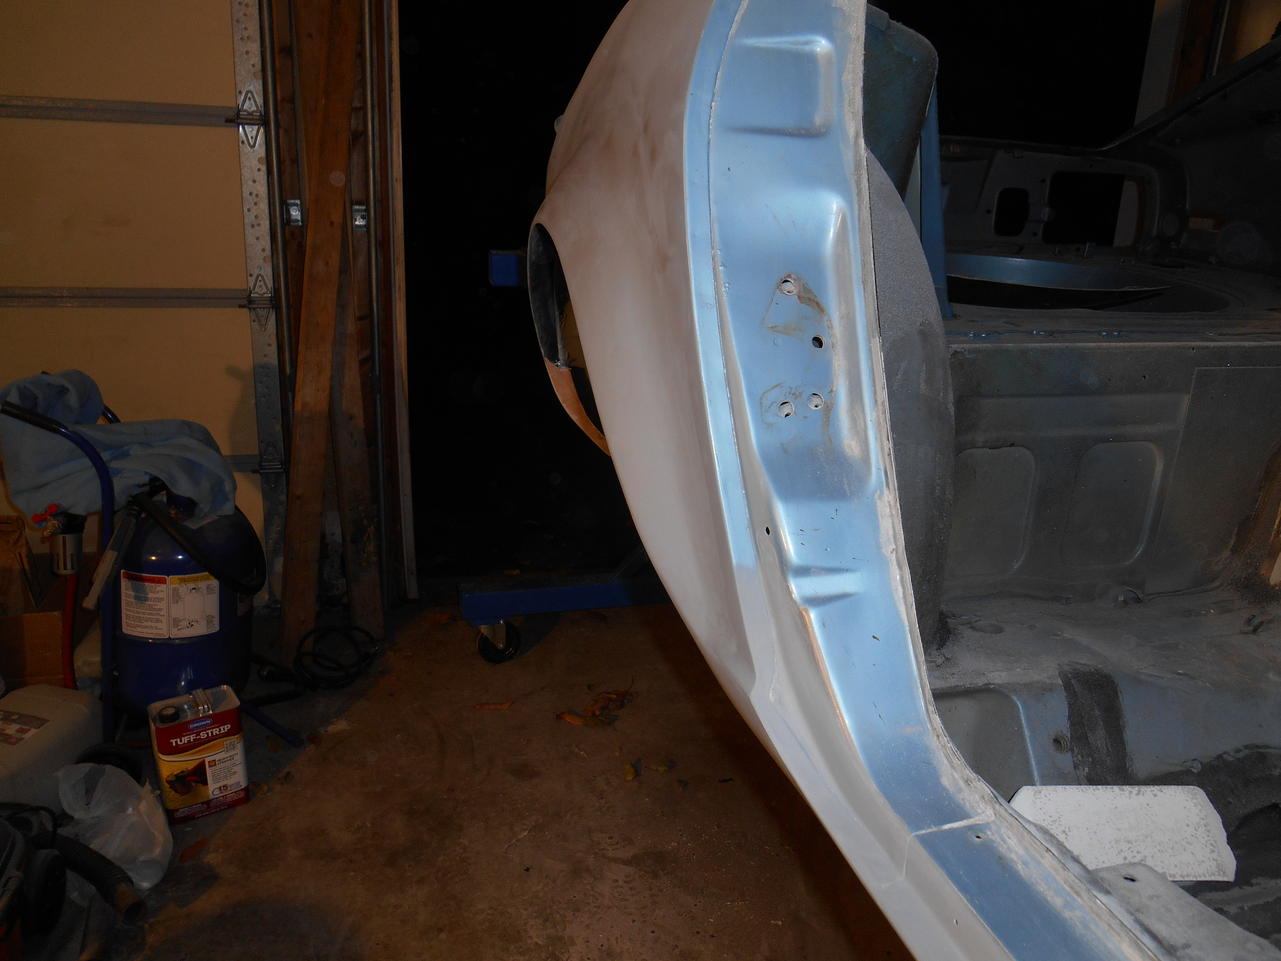
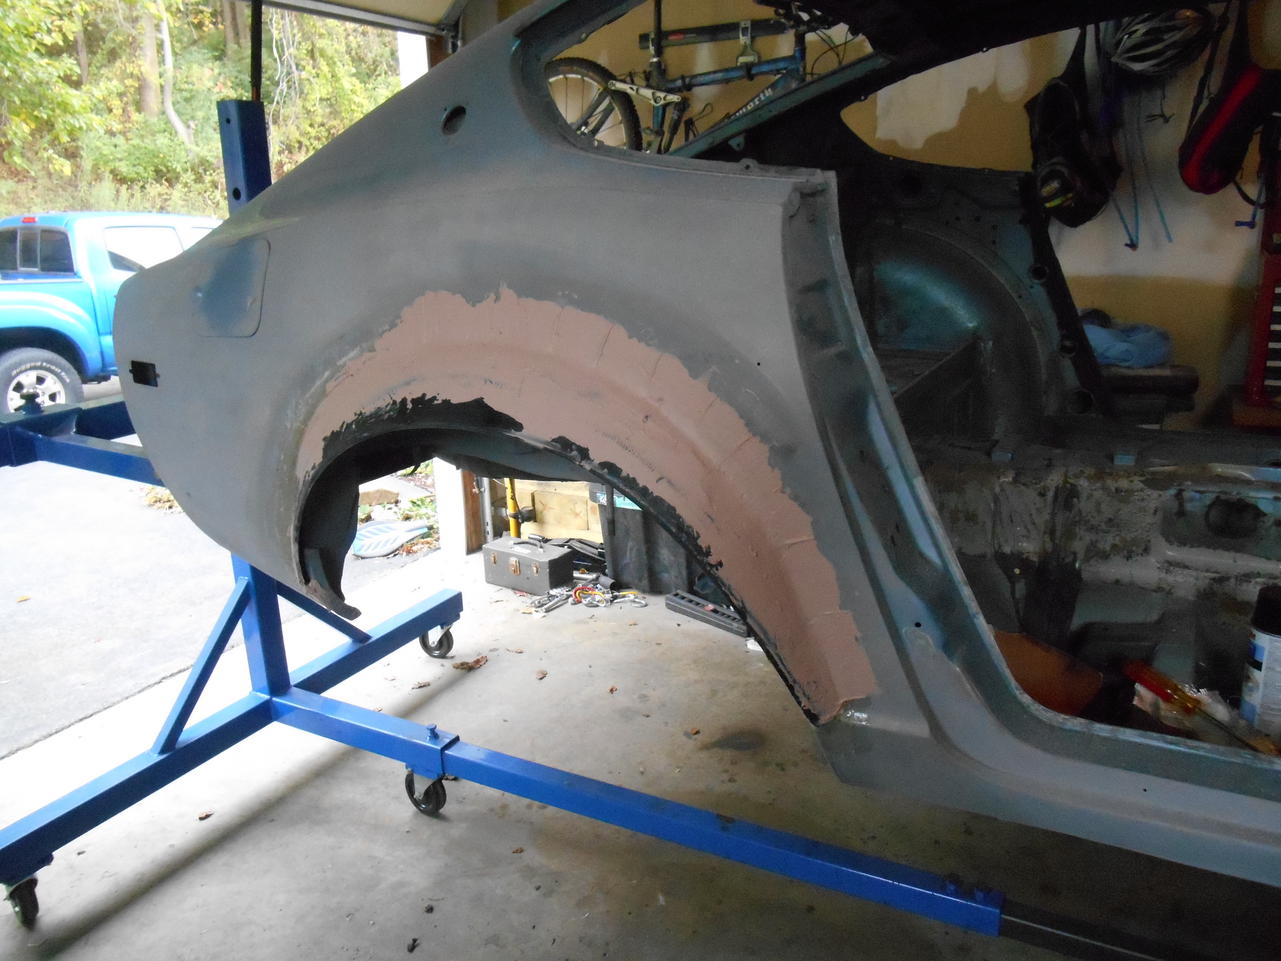
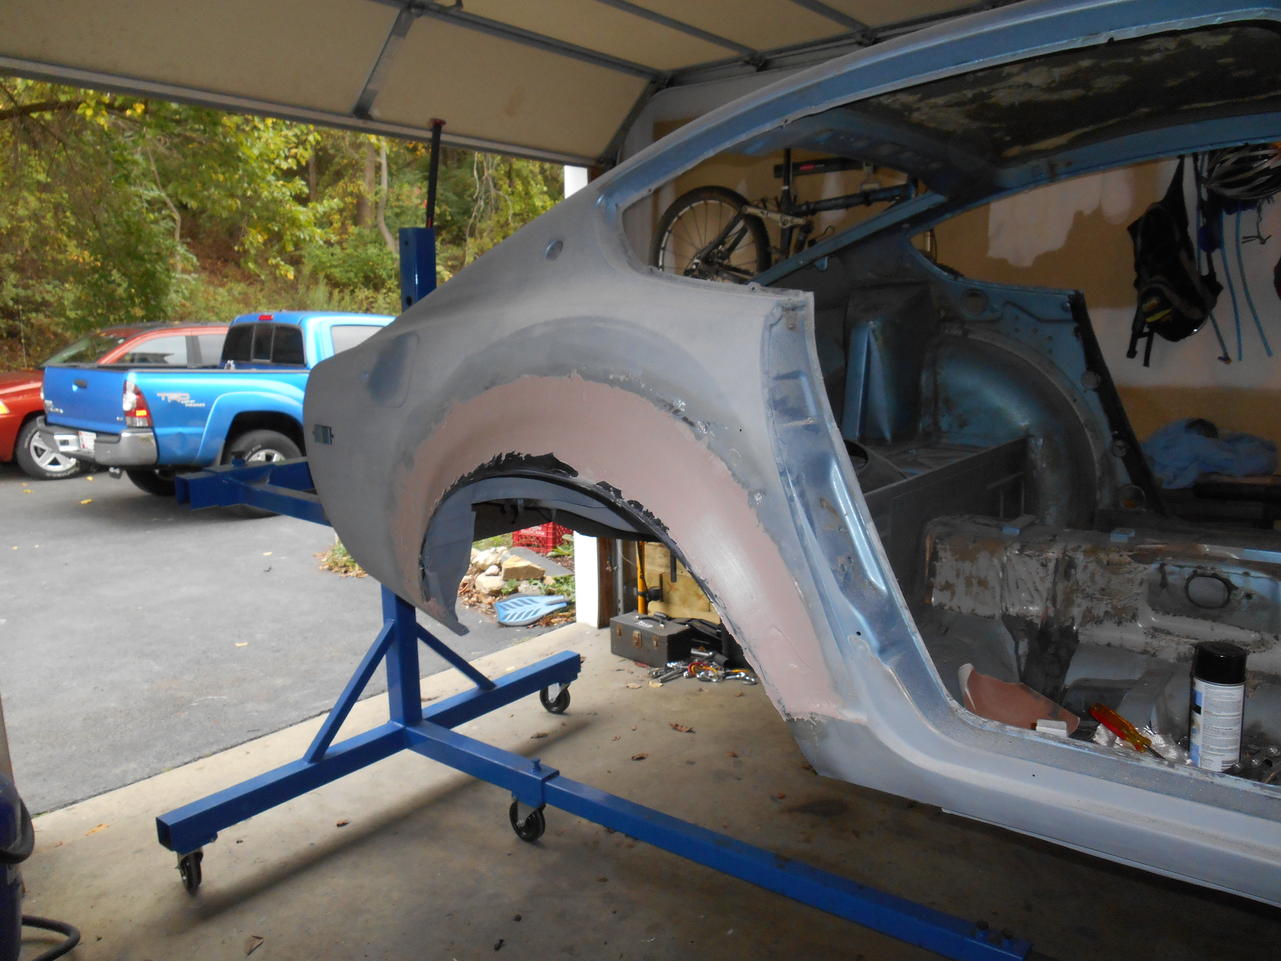
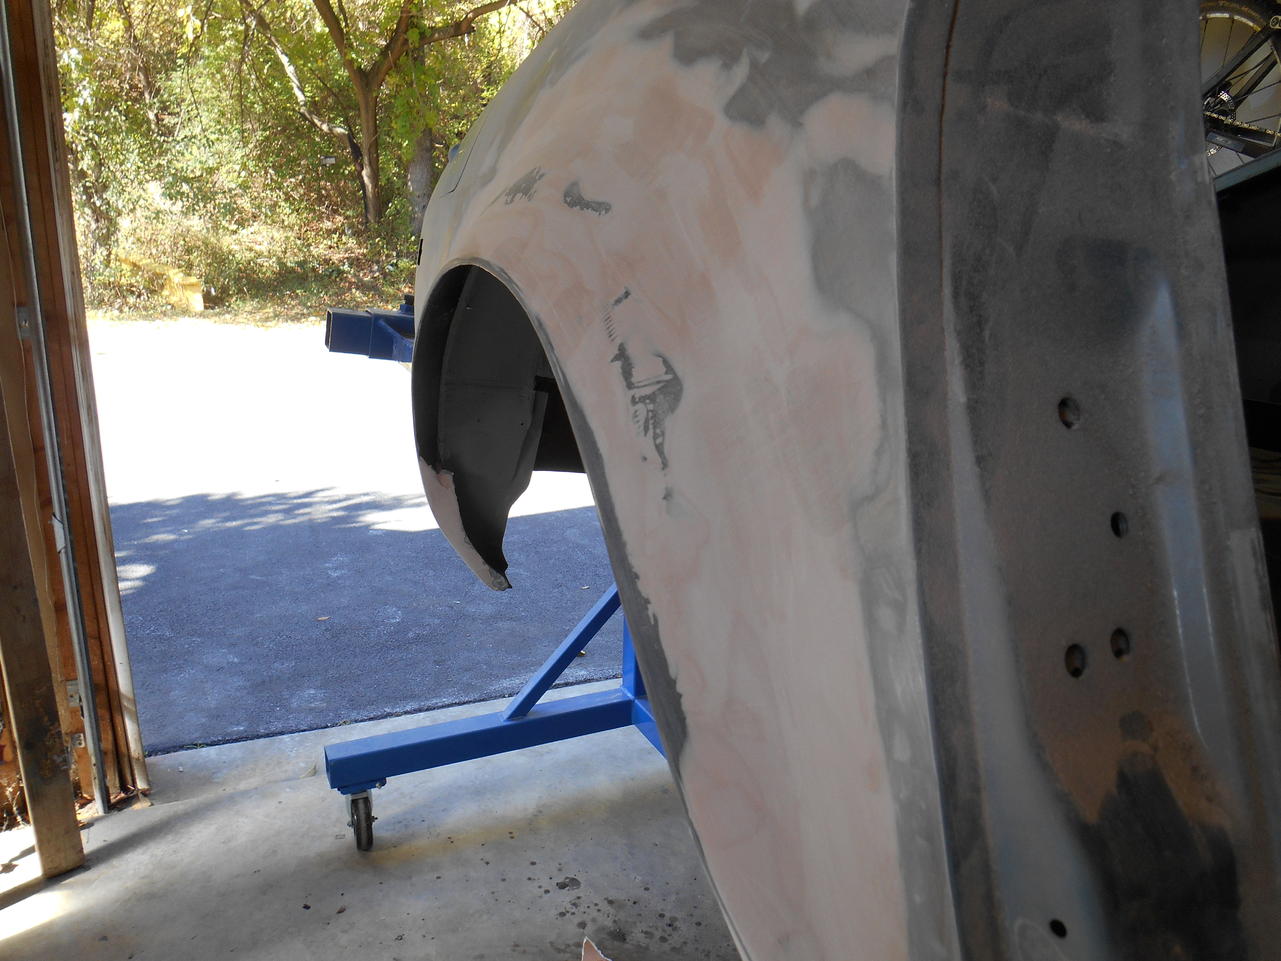
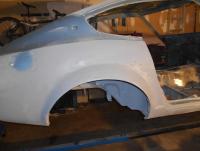
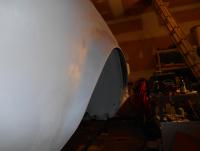
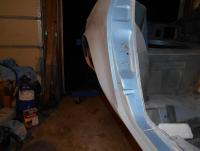
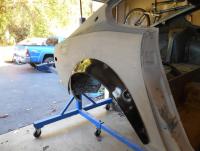
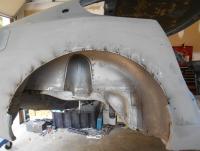
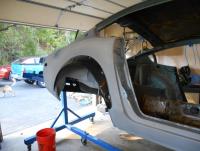
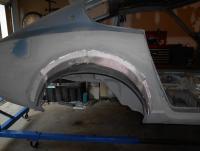
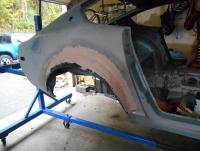
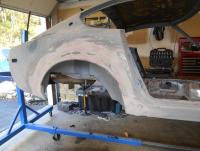
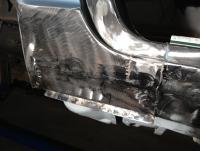
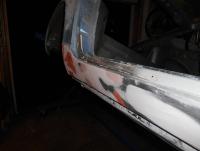
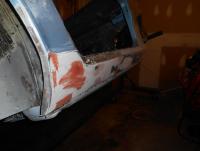
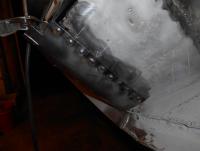
I'm not quite done. I sprayed it as a flaw detector. There is a little more filling and sanding needed at the back of the flare. I'm not quite satisfied with the contour. Thanks for viewing!

-
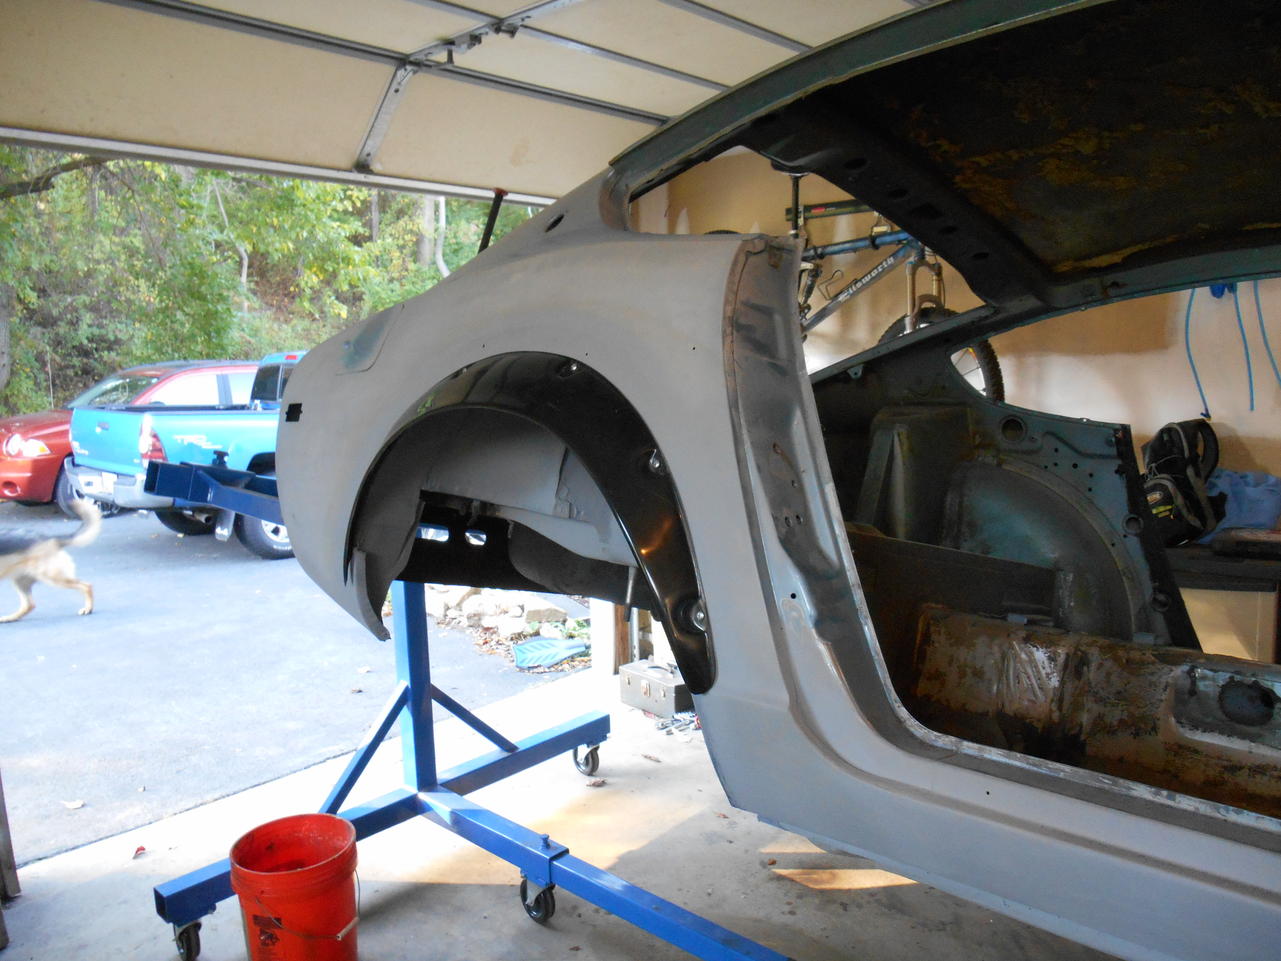
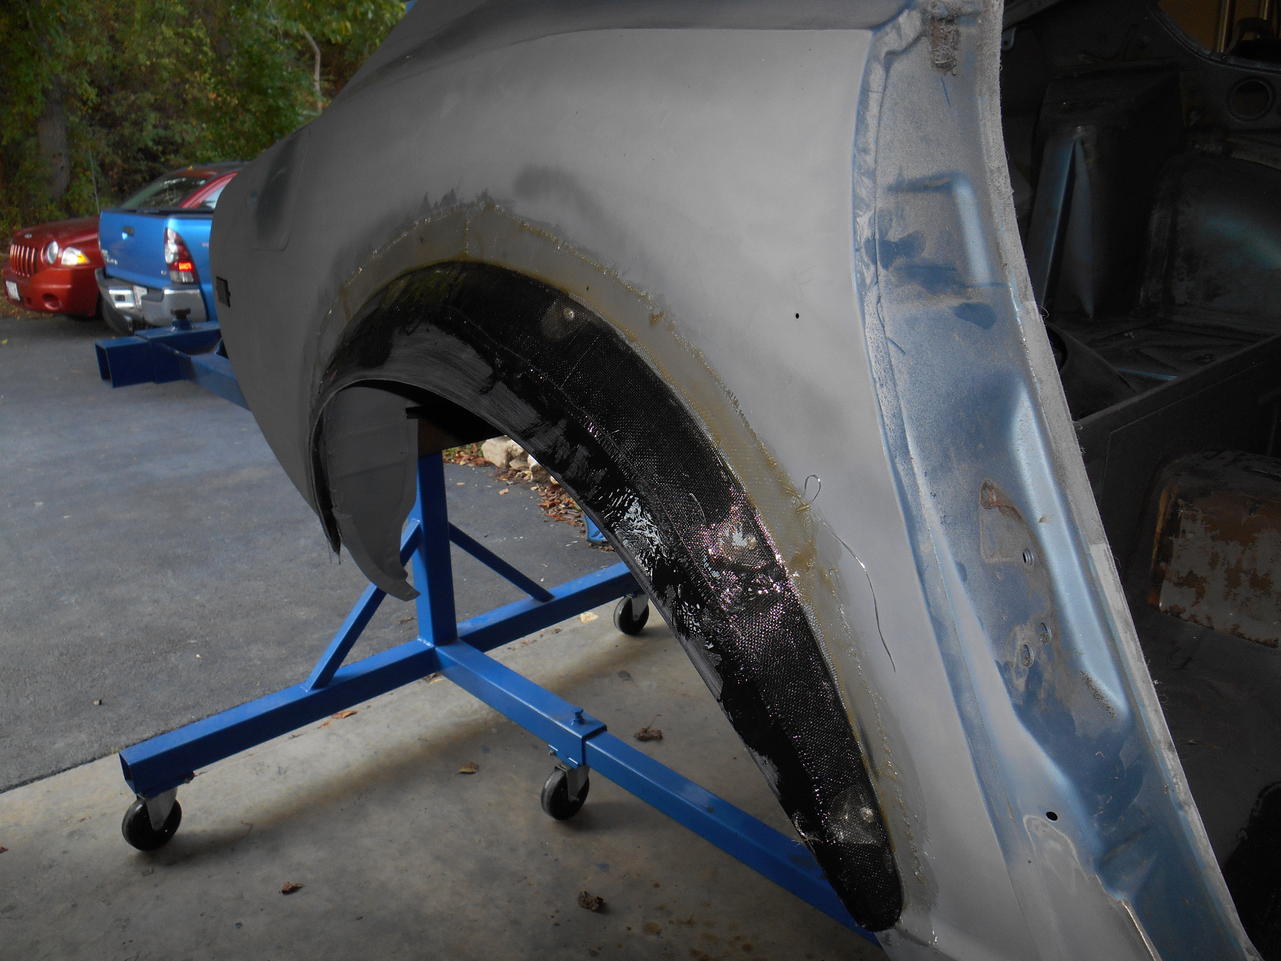
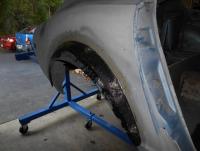
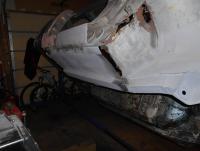
More pictures. I am flaring the fenders. The 225's I'm using rub. Might as well fix it now. I cut away some of the fender lip. Added a flare, but I don't want the bolt on look. Since this is a full restoration this is the perfect time to do this work.


-
Yes, thanks for bringing that up. I bought a wand and have the rust inhibitor. I have removed all of the rust I could reach and sealed those areas. I will drill and treat the rockers once I get all of the blasting media out of there. It would be a shame to go through this just to have it rust out again. Thanks all for the comments.
-
I hate to say it, but about 6 months. It's gonna be awhile before this one sees the road again.
-
Broke my heart that you had to sell the car since we are on similar paths. I admired your work and hope you can rejoin us someday.
-
Hope you guys like this.
-
last post.


-
more!


-
and more!


-
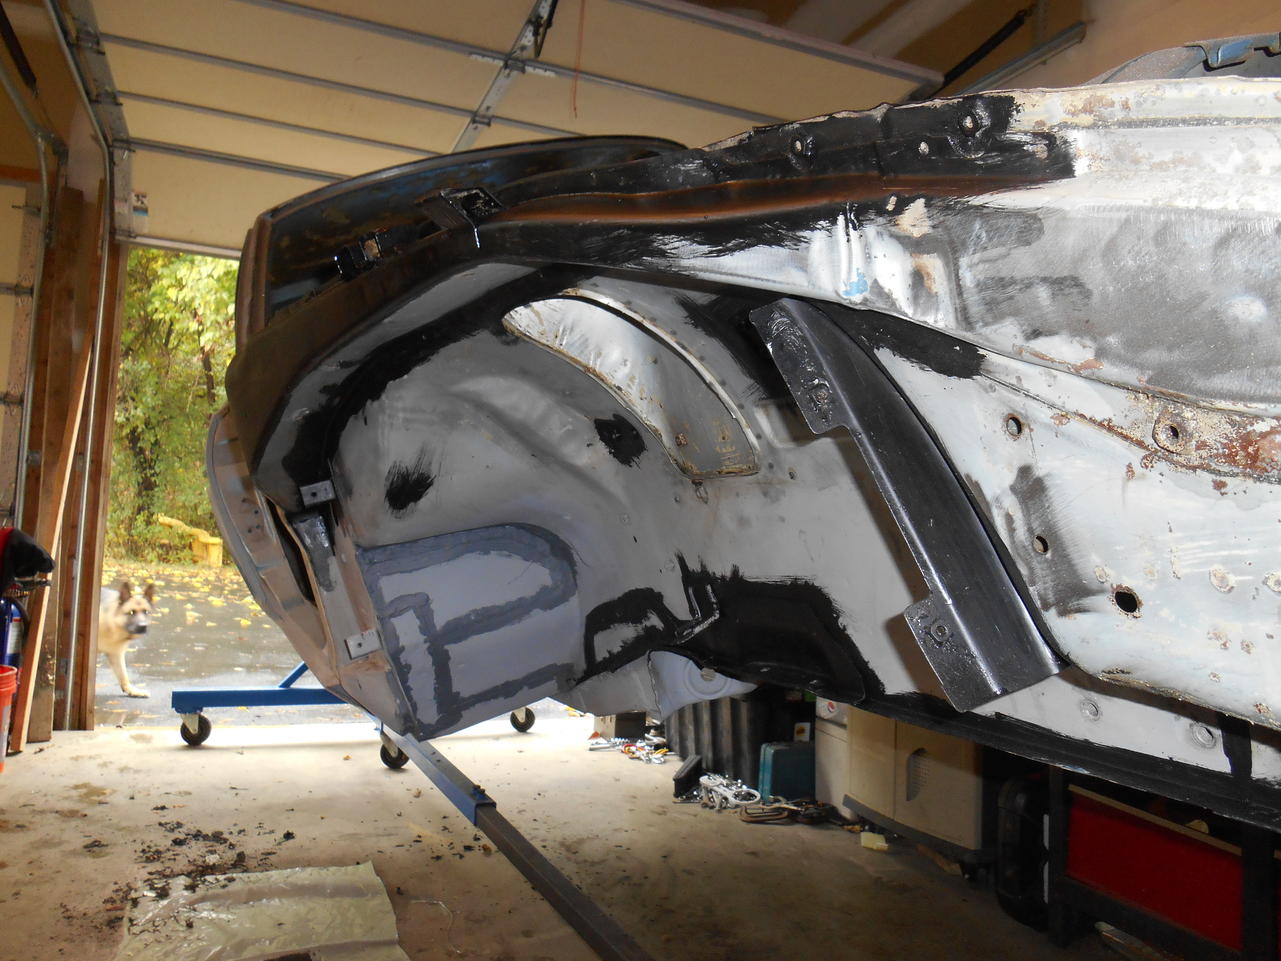
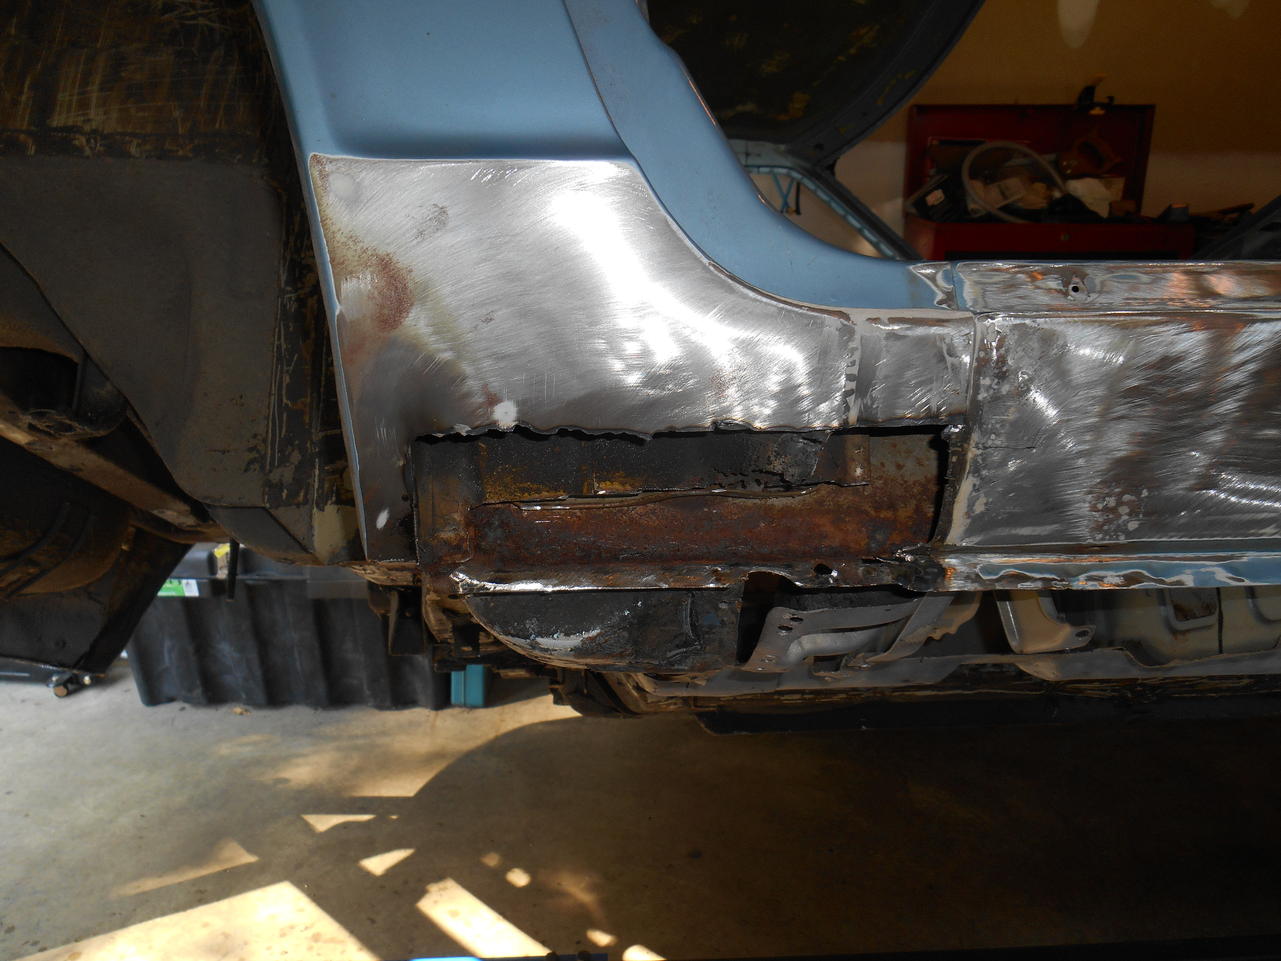
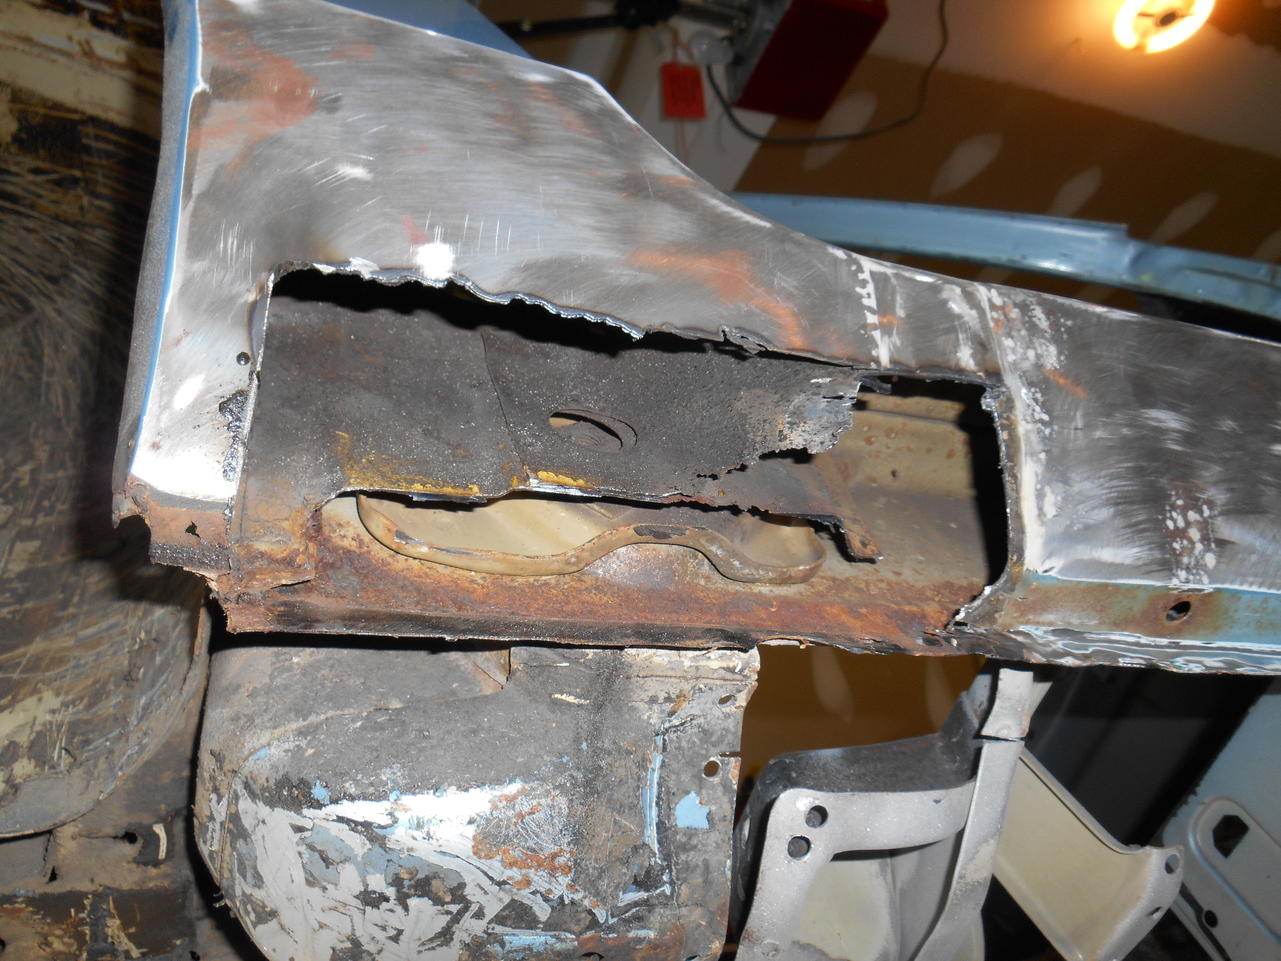
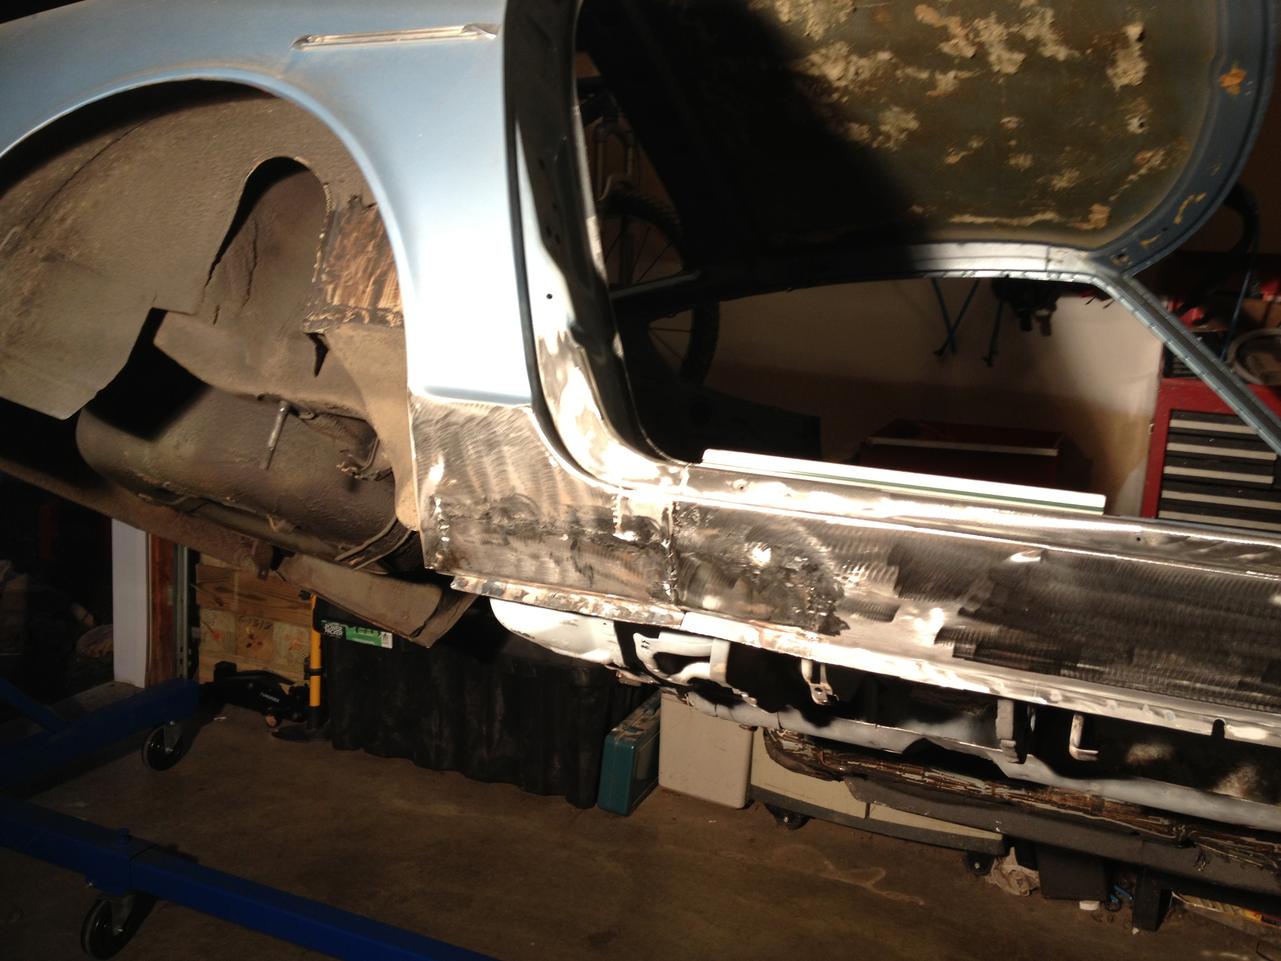
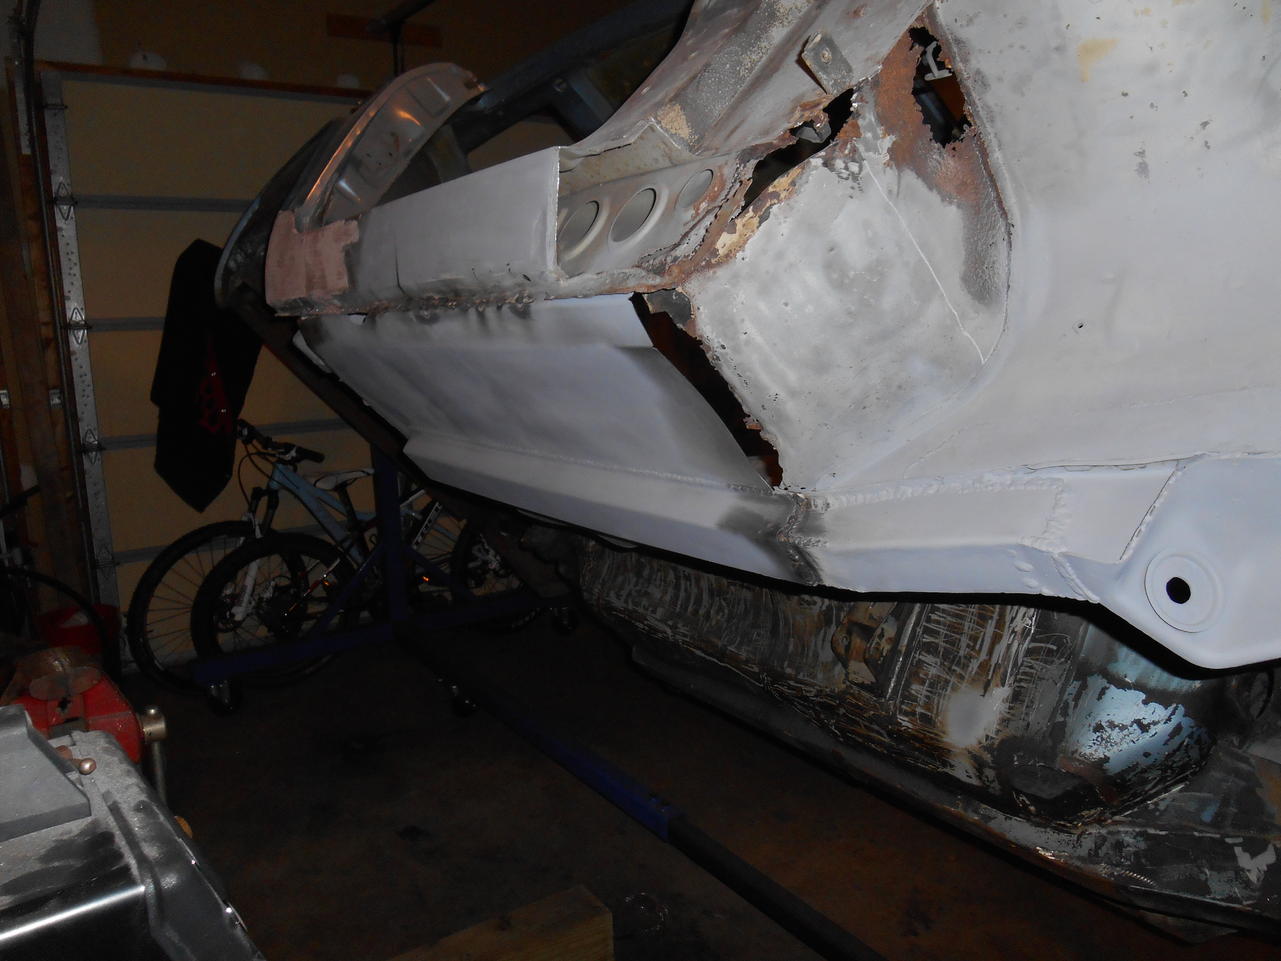
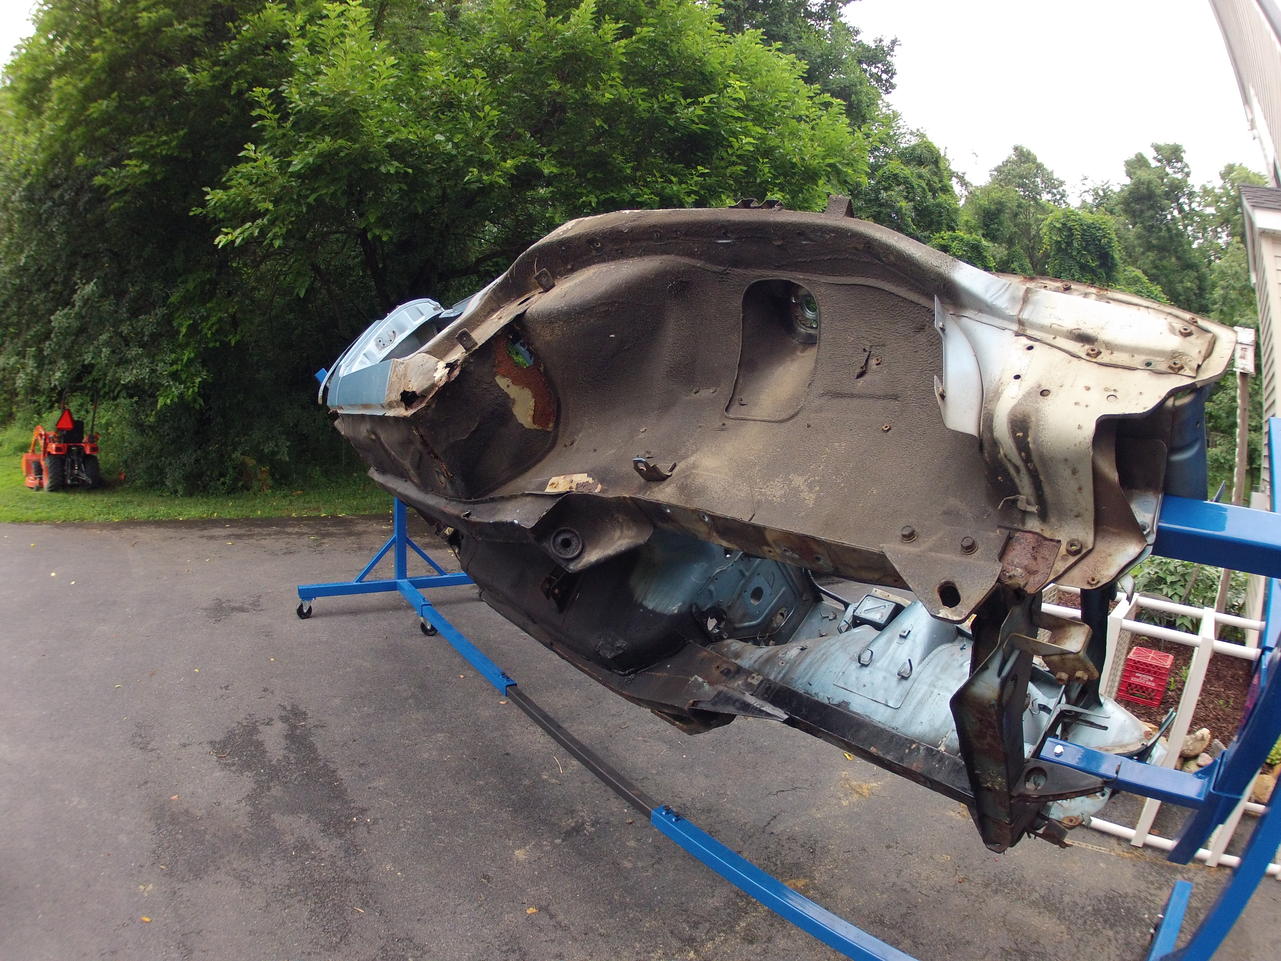
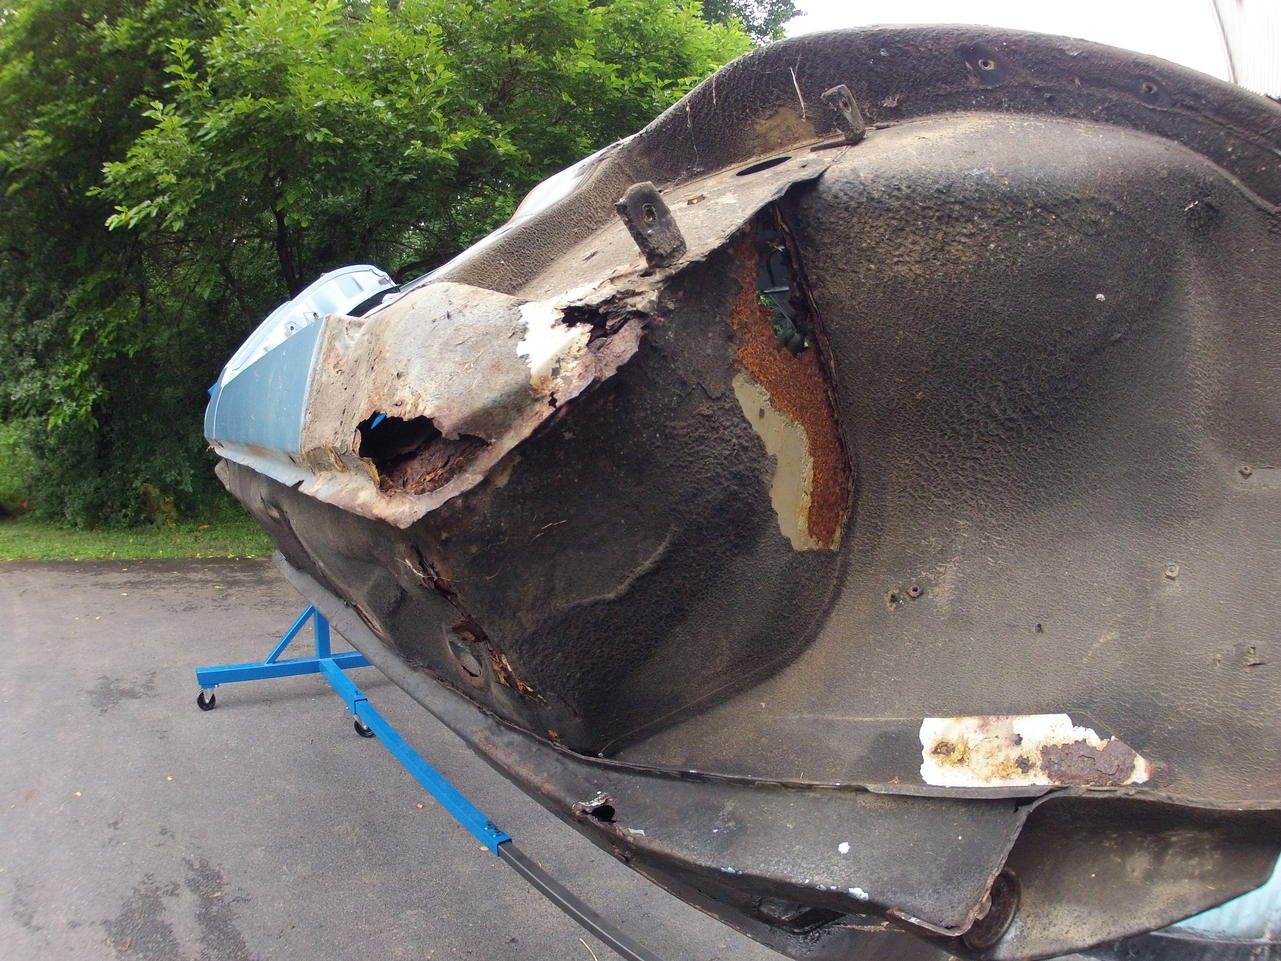
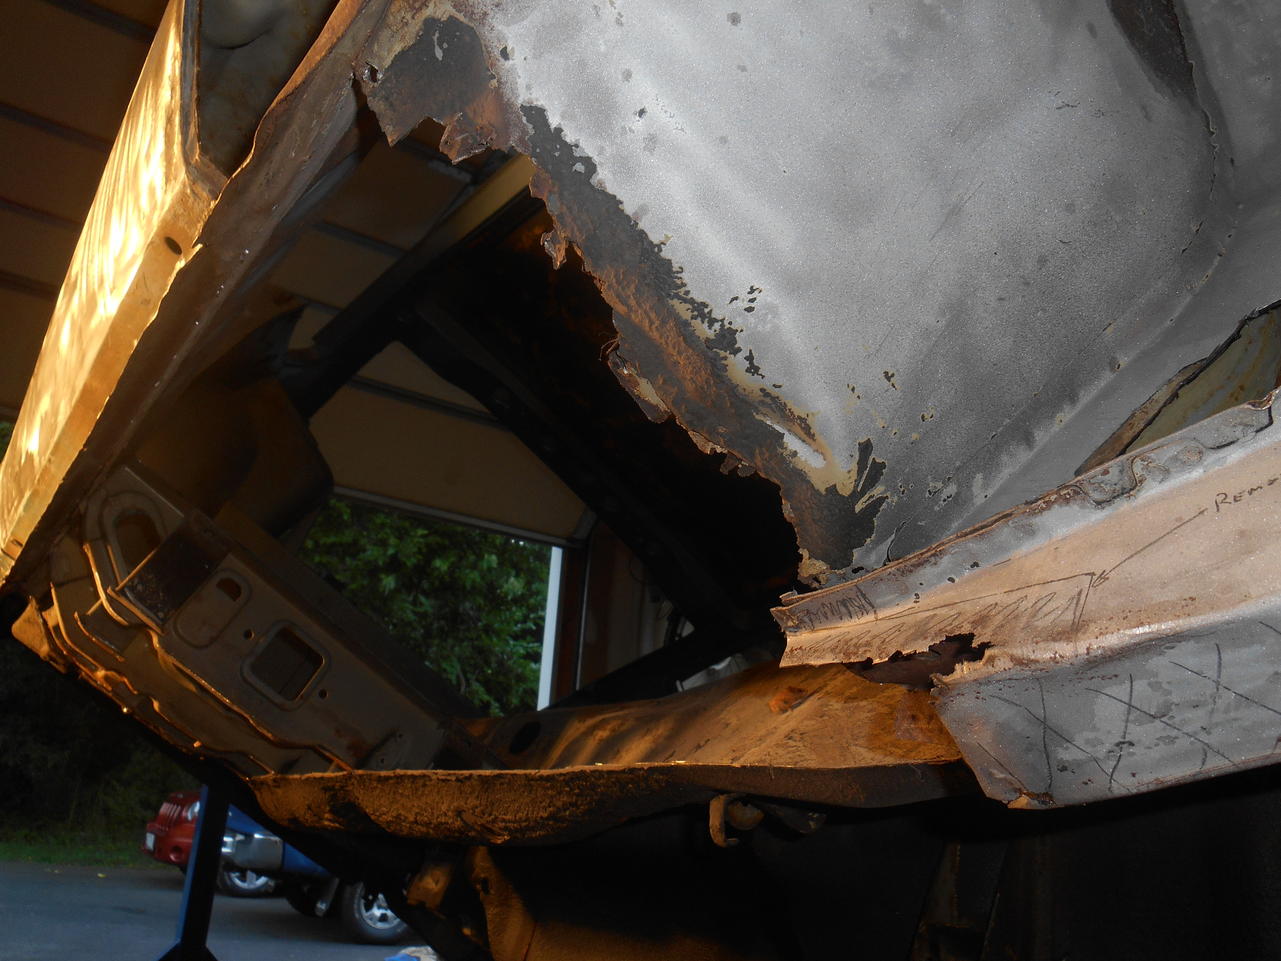
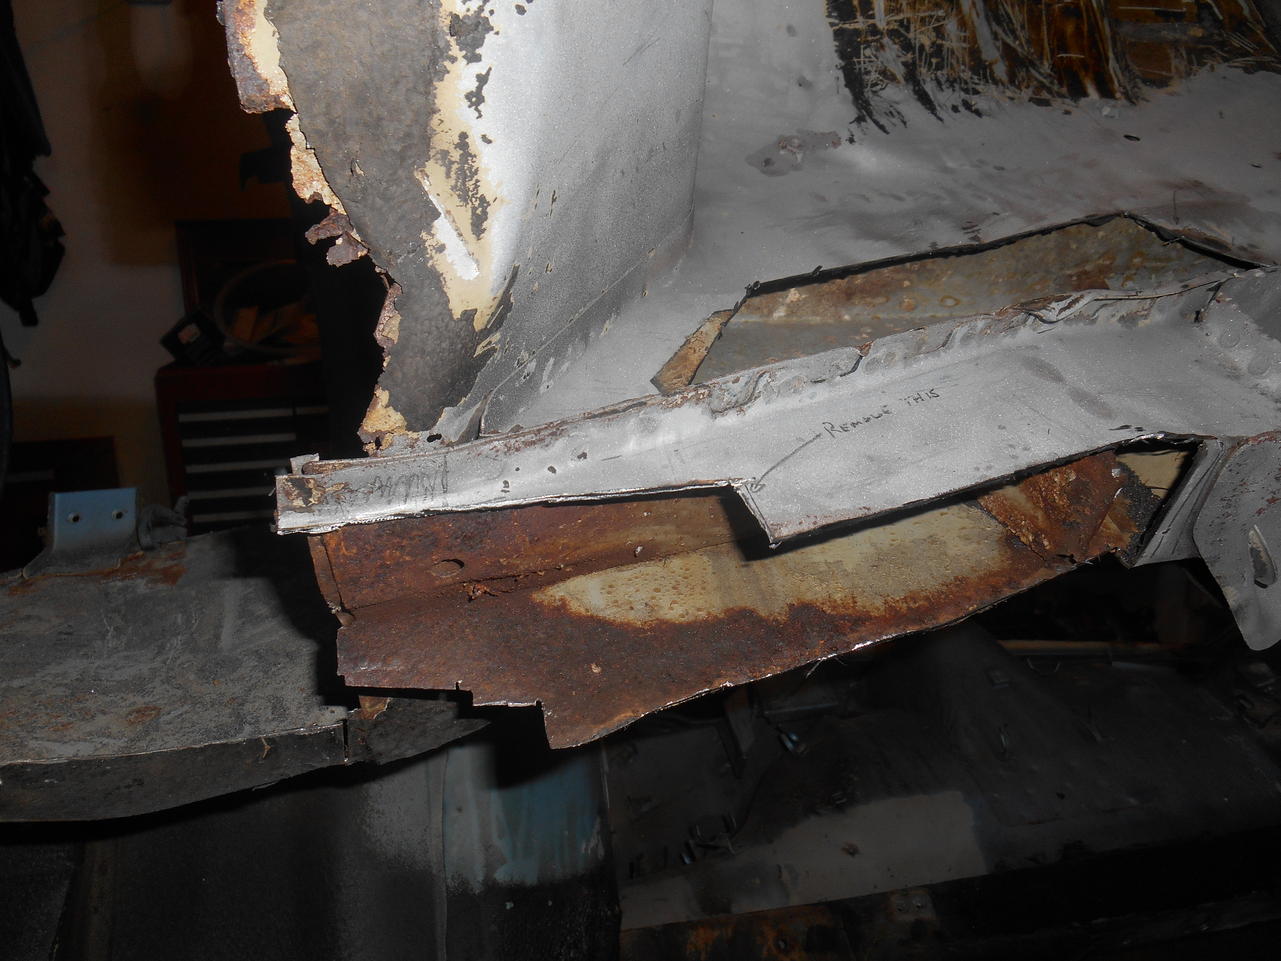
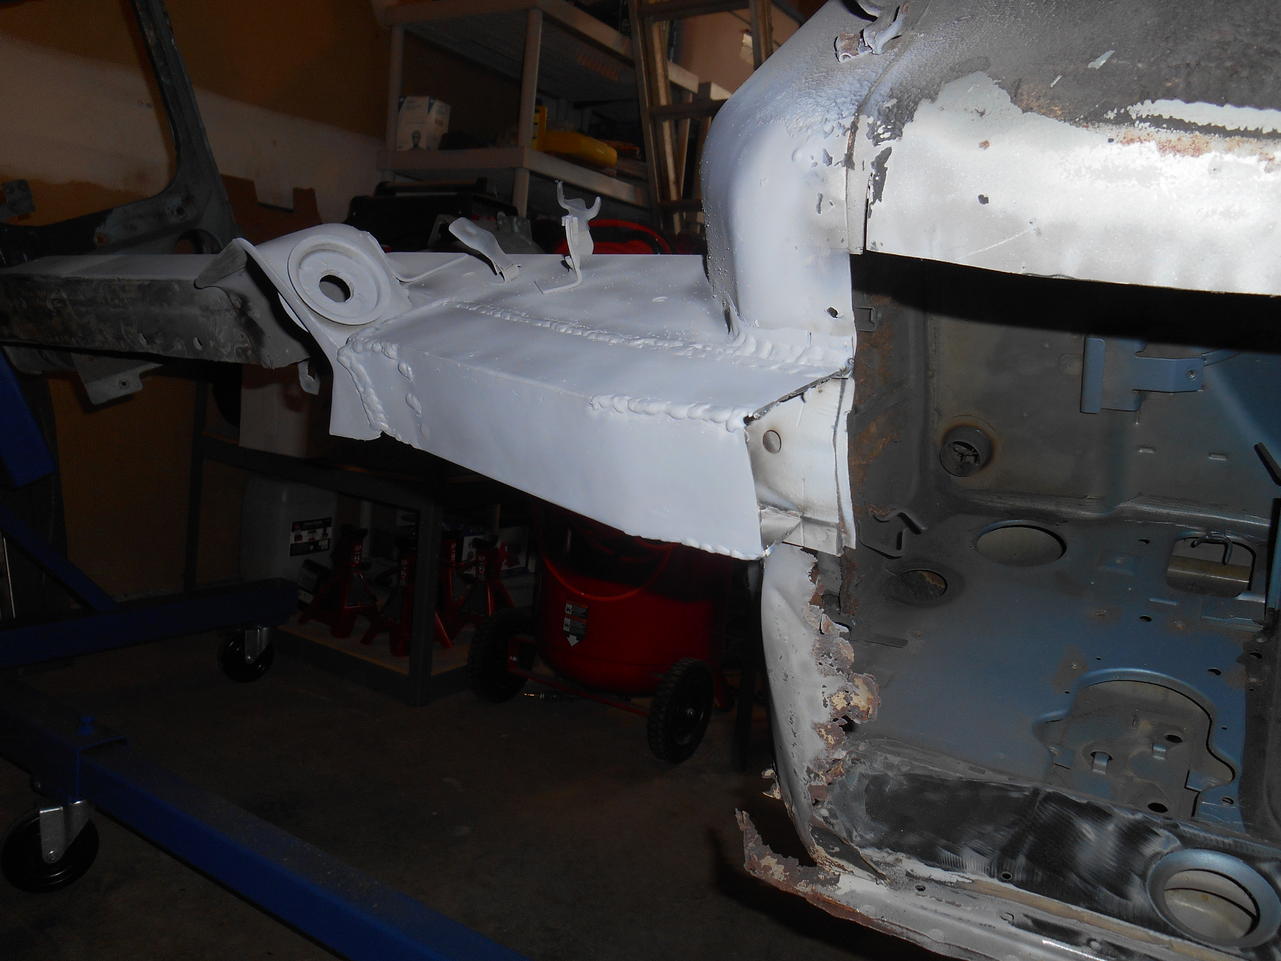
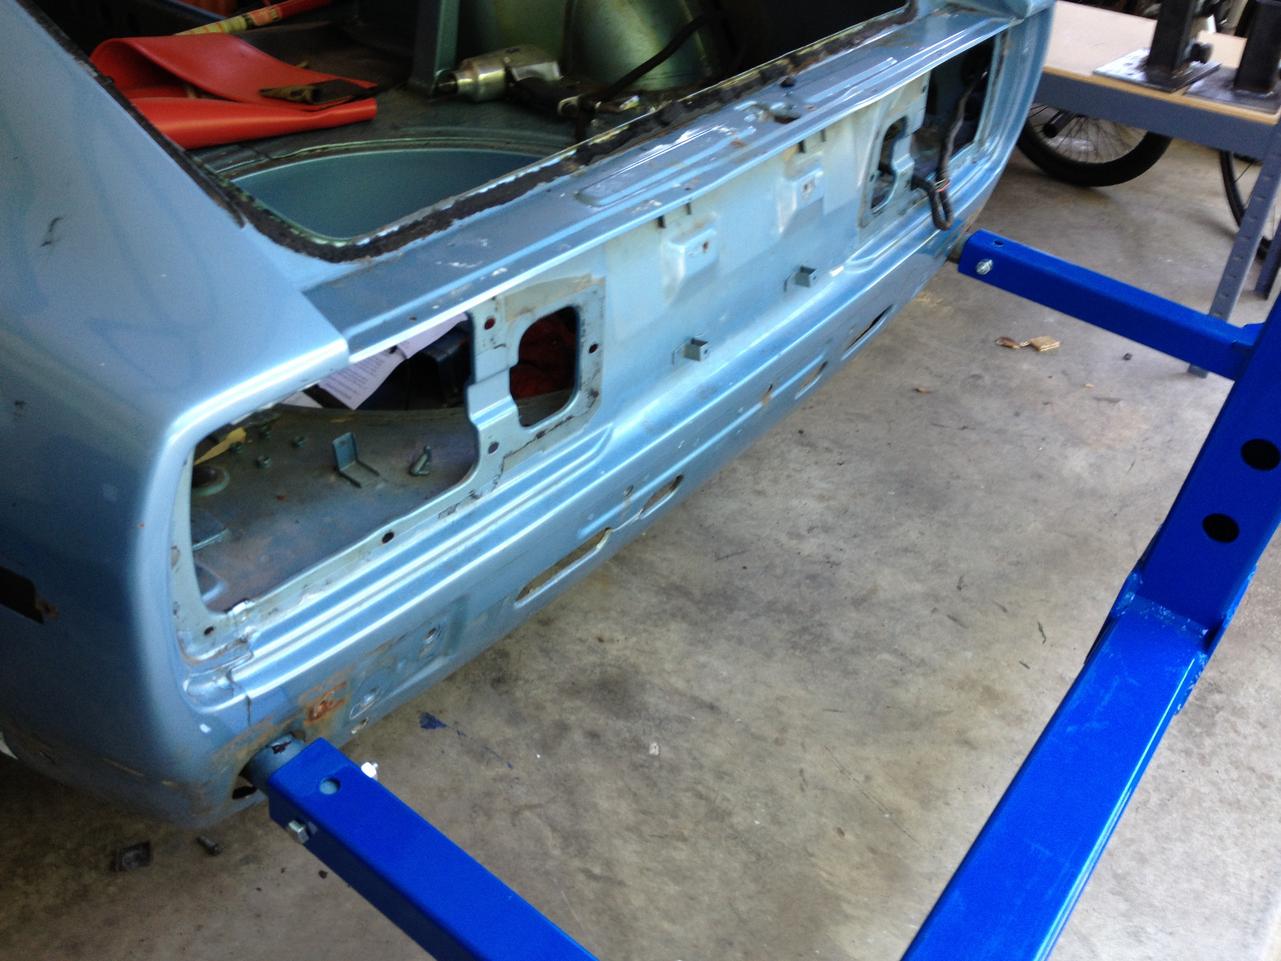
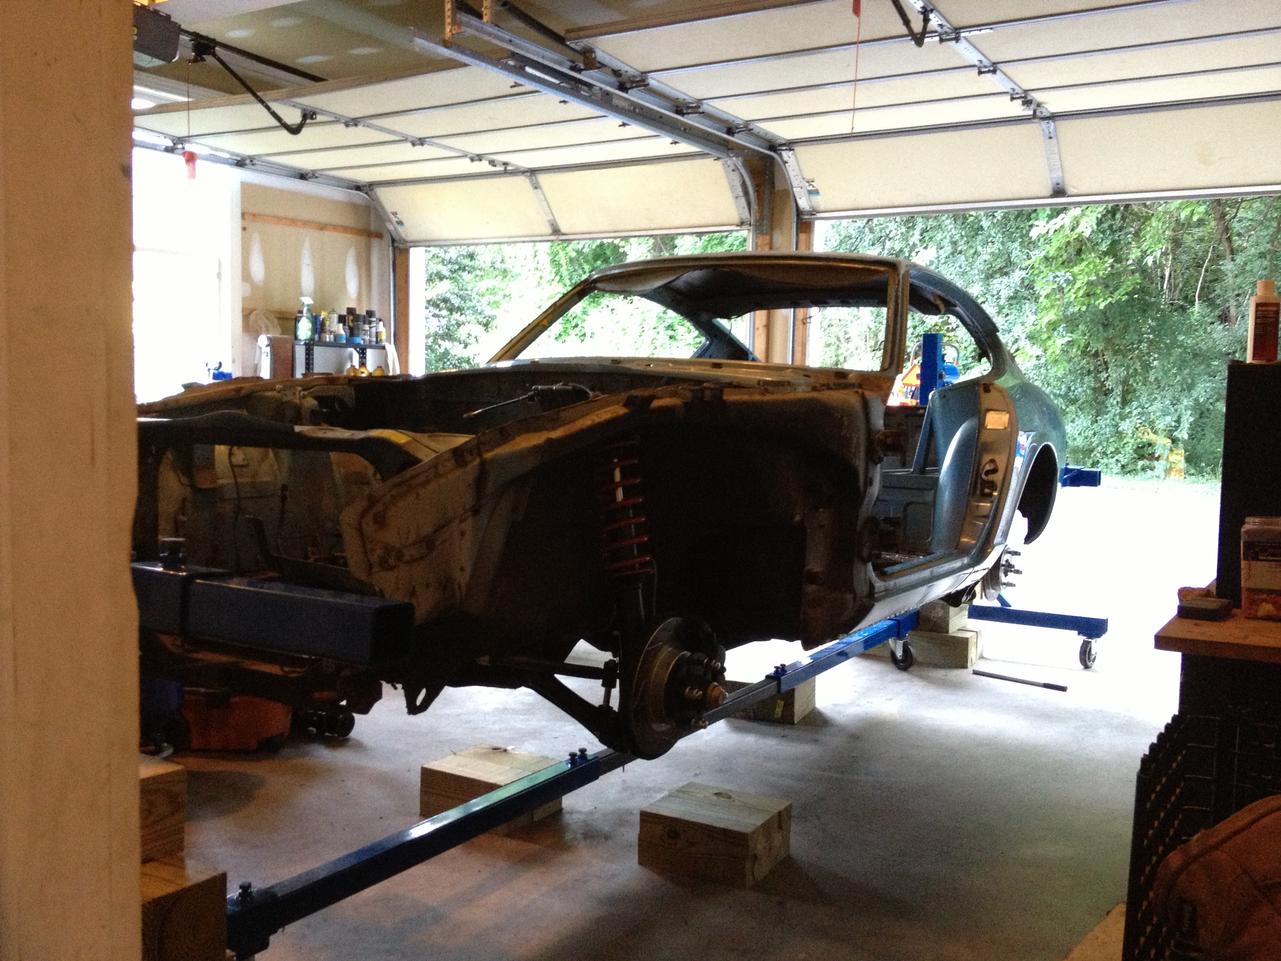
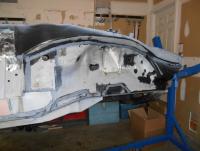
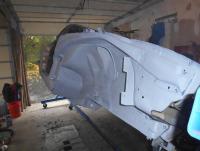
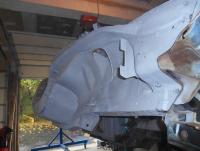
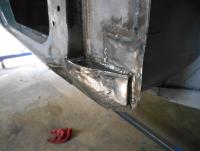
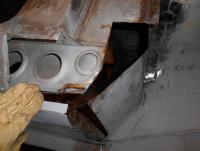
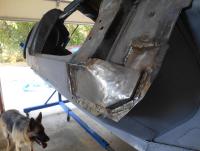
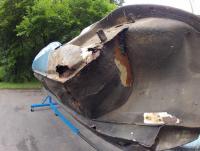
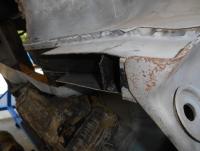
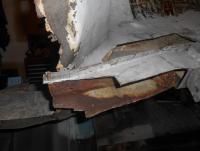
Hi all! I have been underground for a while working on my '76 280z. I decided to hold off posting until I had something worth showing. My 280z was a bit of a whore in a prom dress. As I disassembled it and mounted it in the rotisserie it became obvious that I had a bit of a basket case. I had a serious rust problem that started at the battery box. Acid from the battery had leaked causing damage to the wheel well, firewall, floor and frame. Some time in the past the car had been restored and the frame wrapped, then someone had run over something that caused further frame and floor pan damage. The pictures tell the story...


-
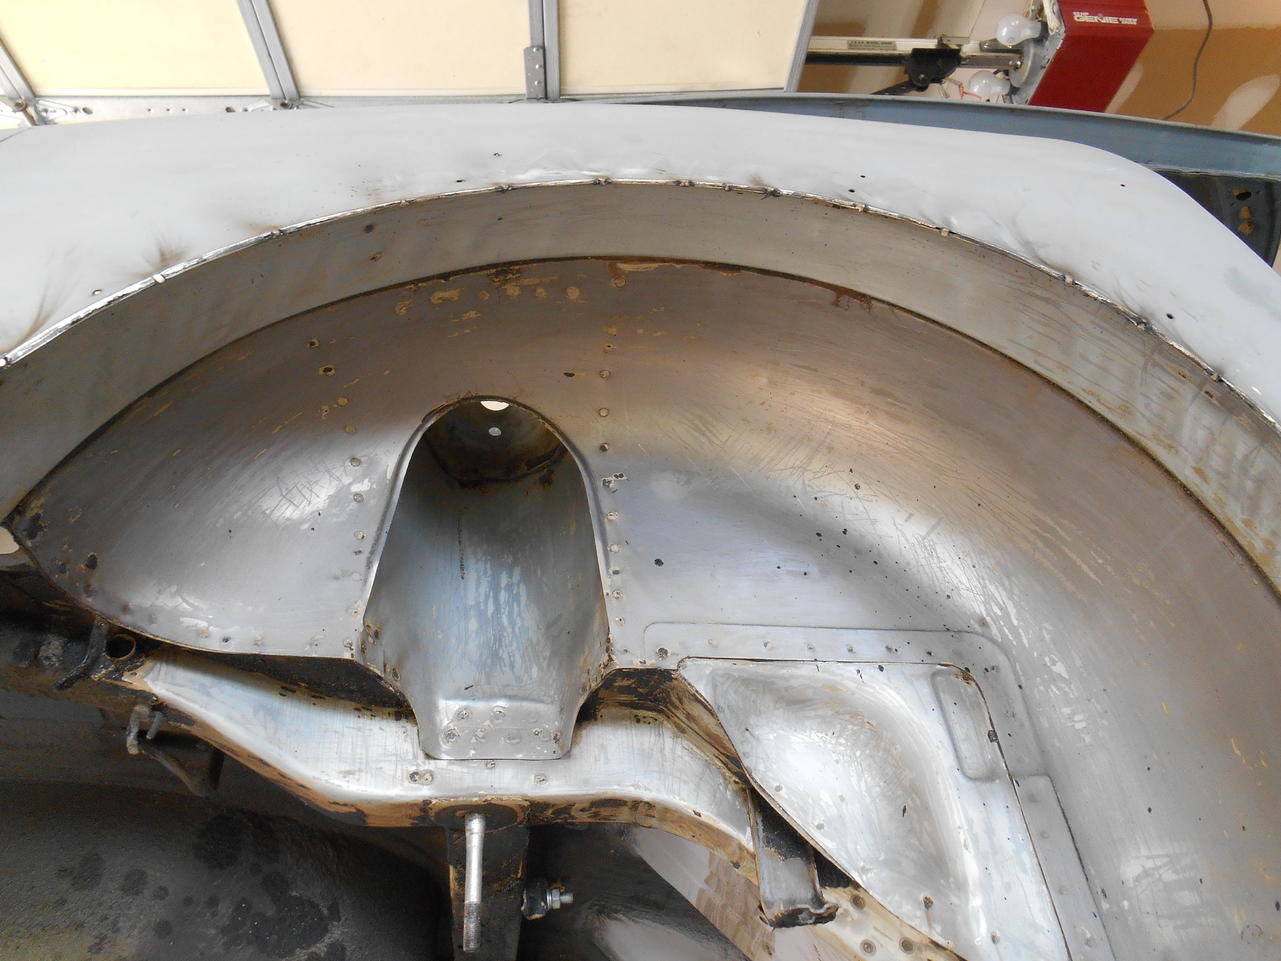
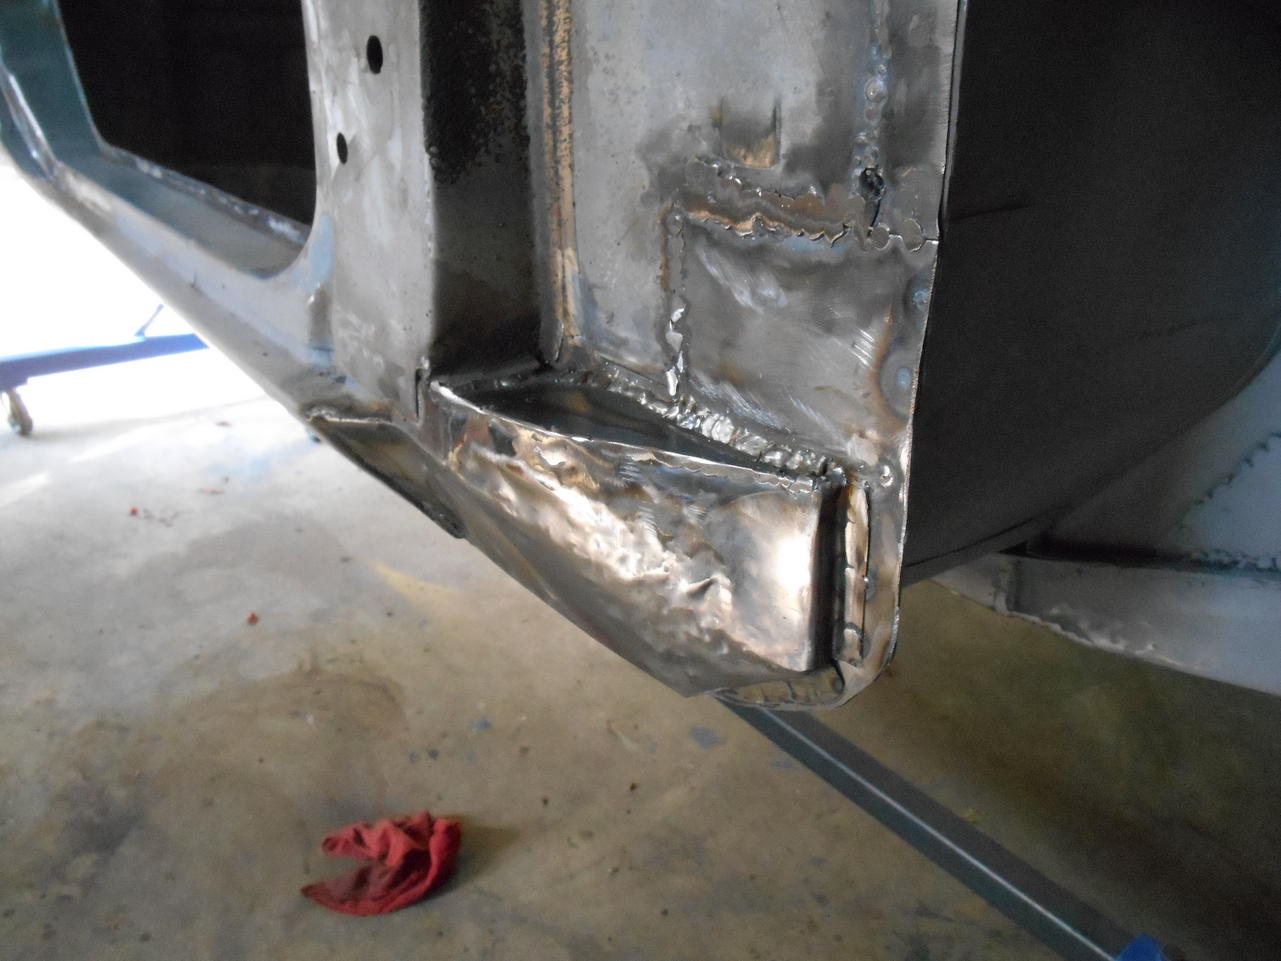
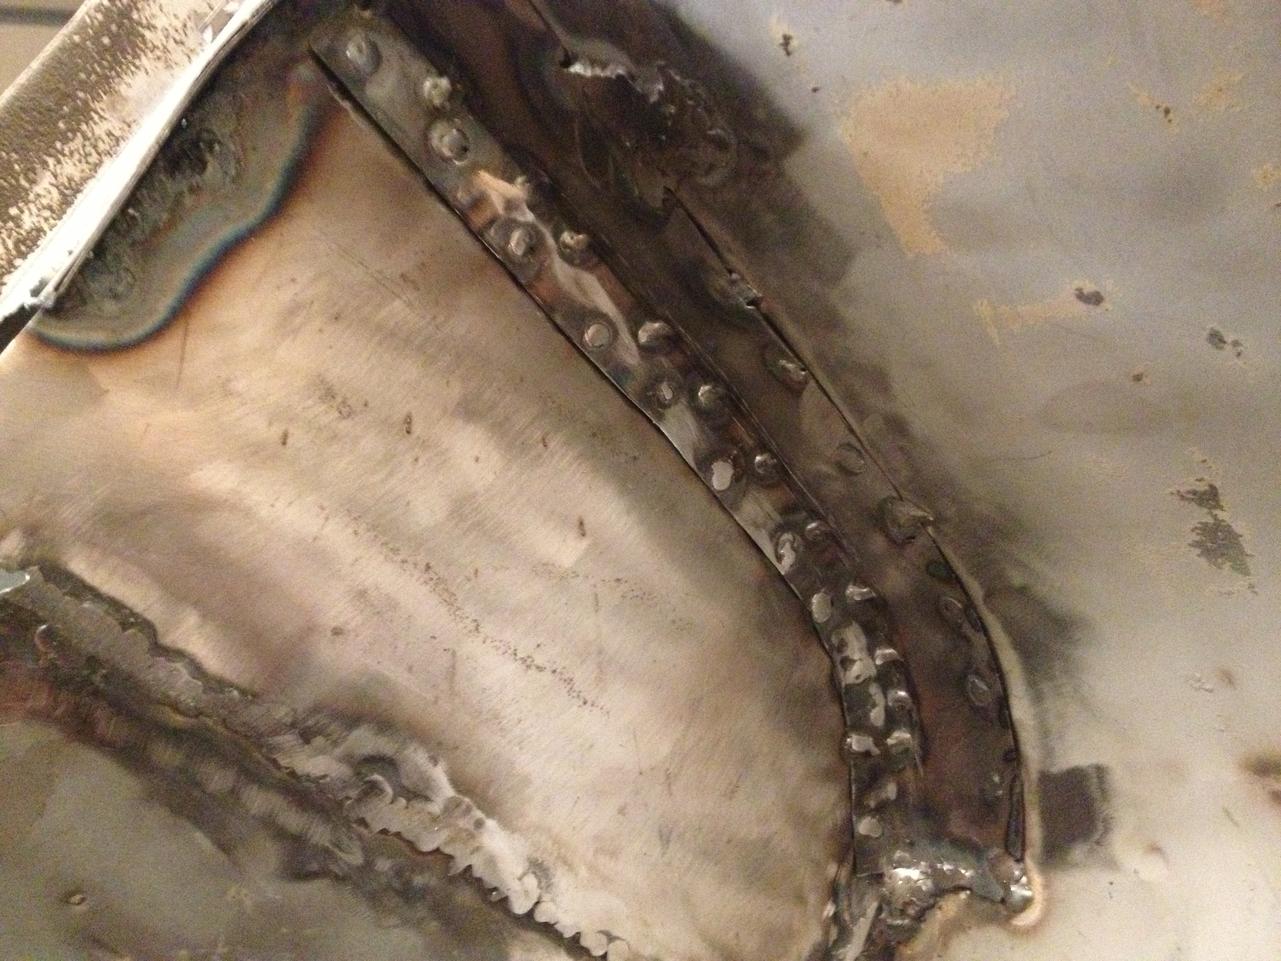
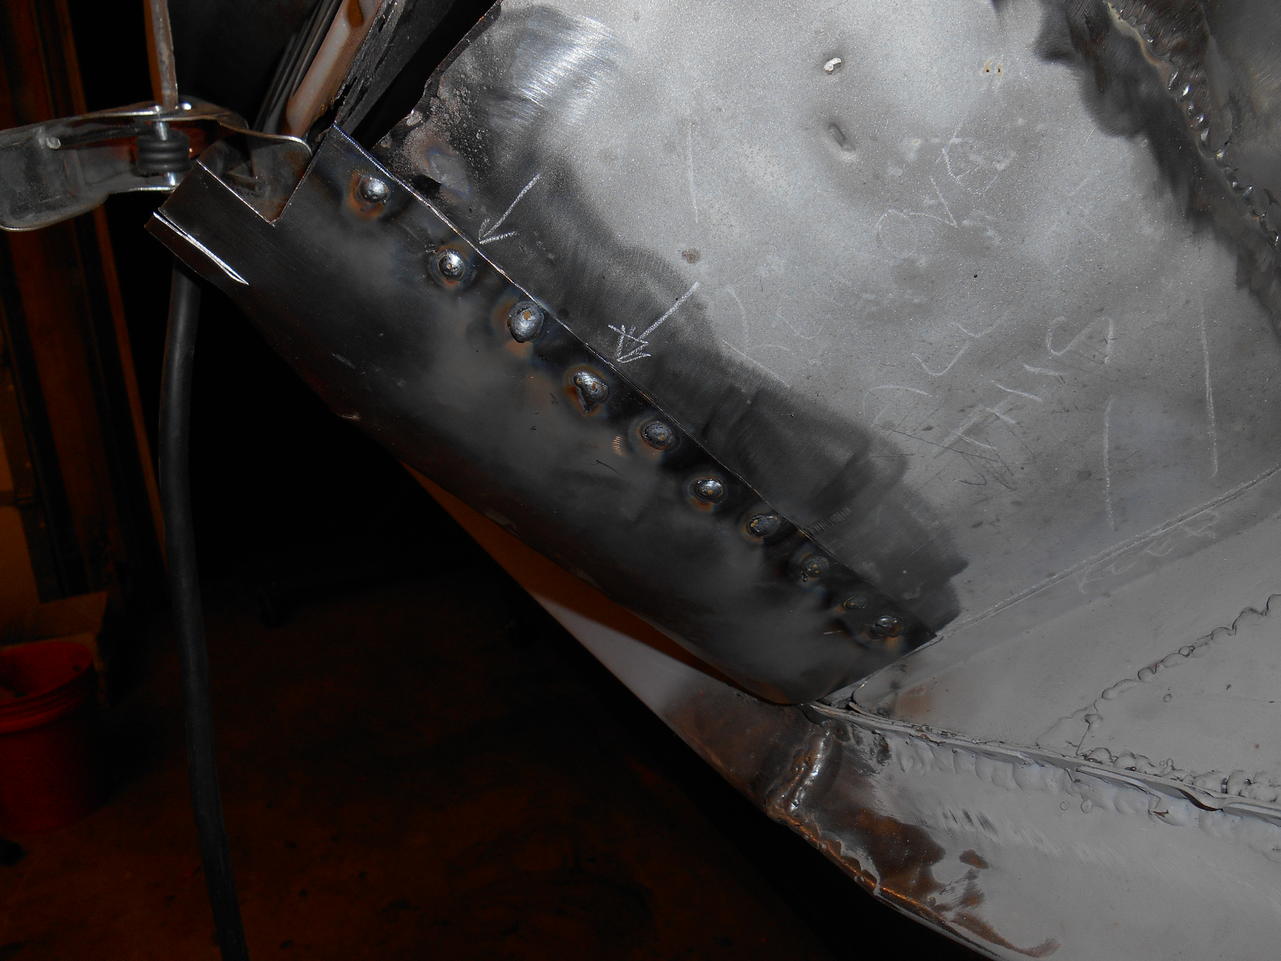
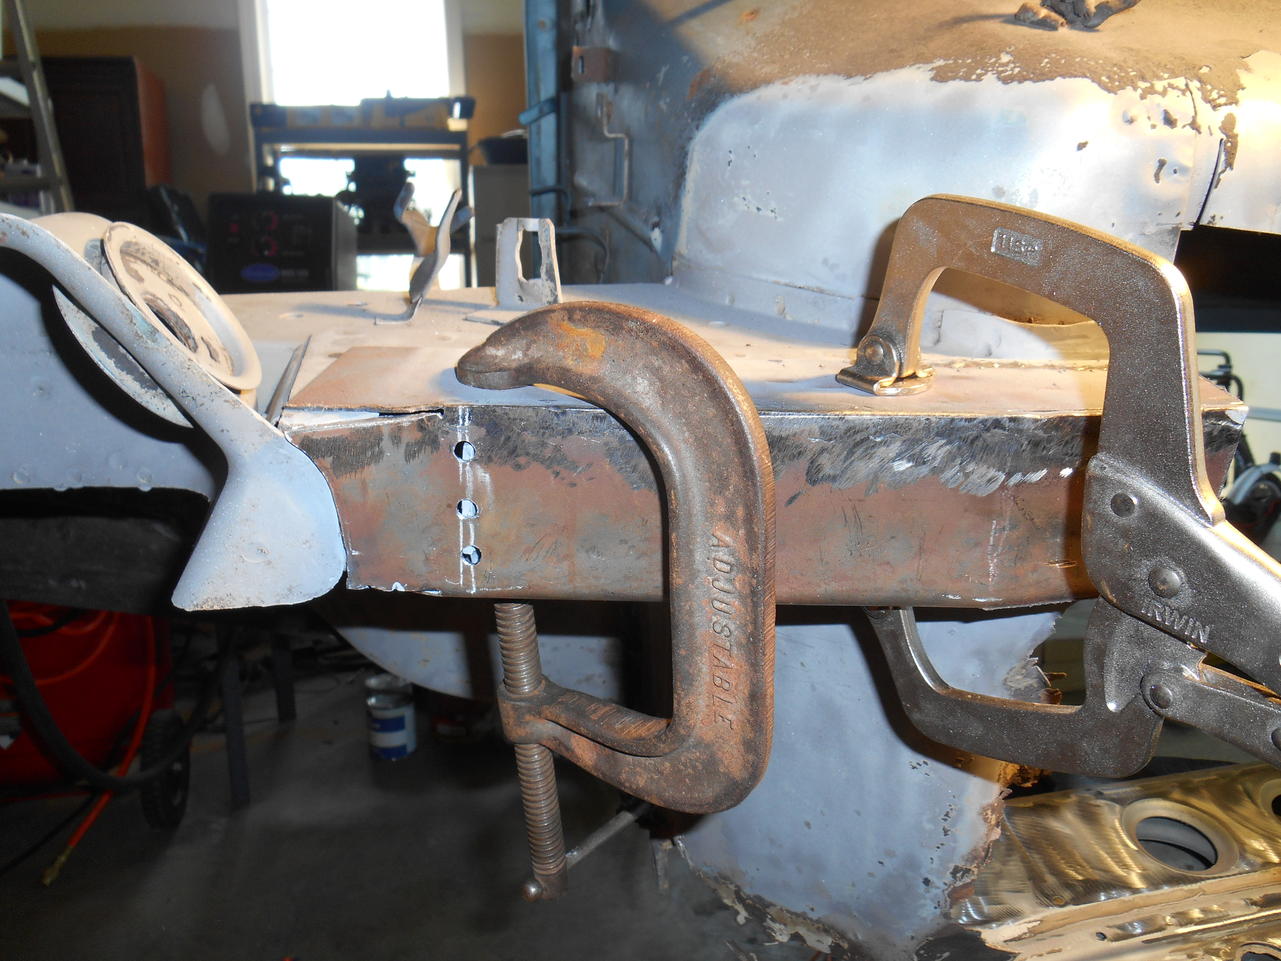
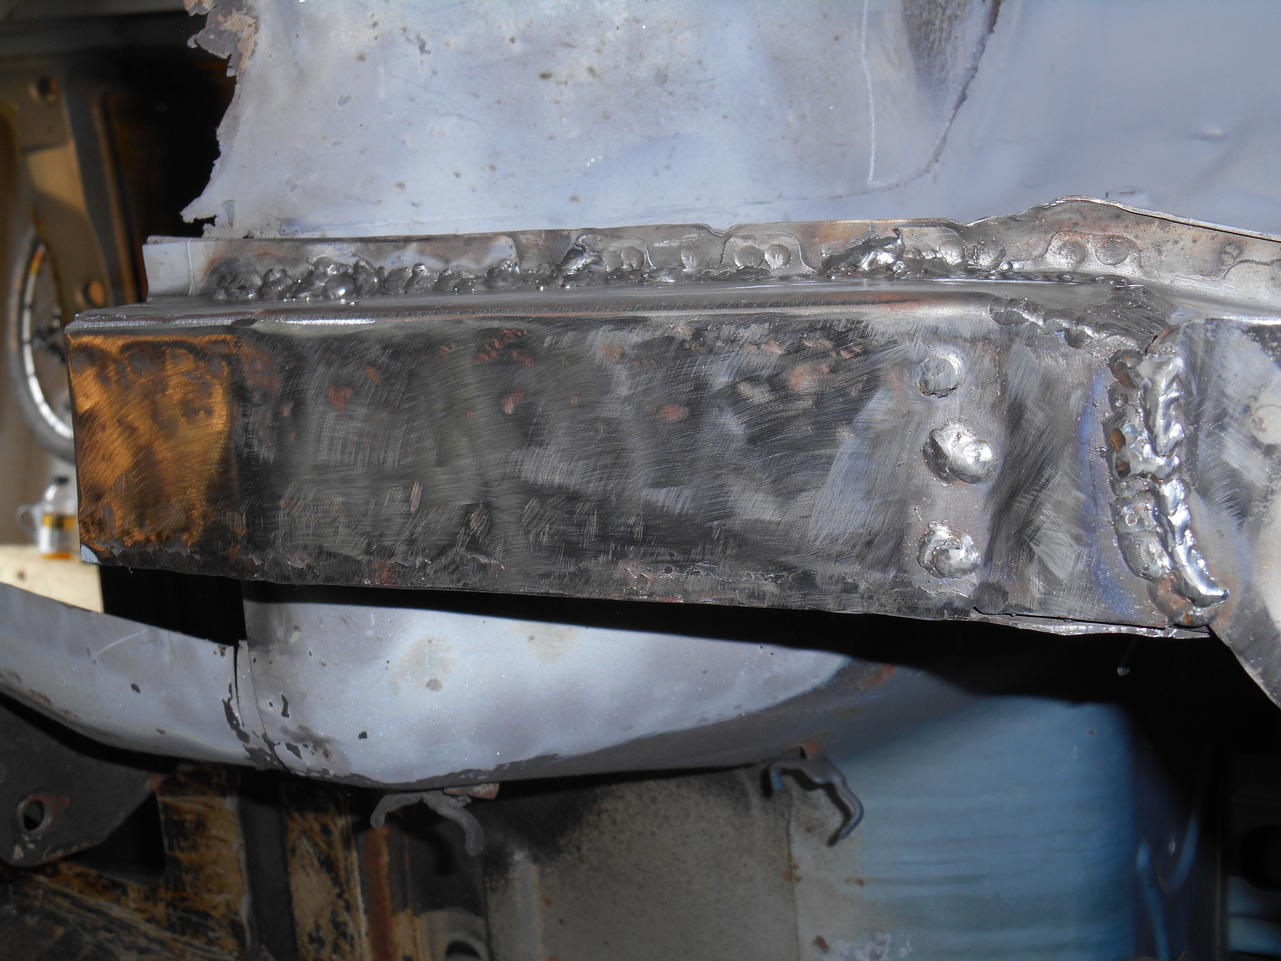
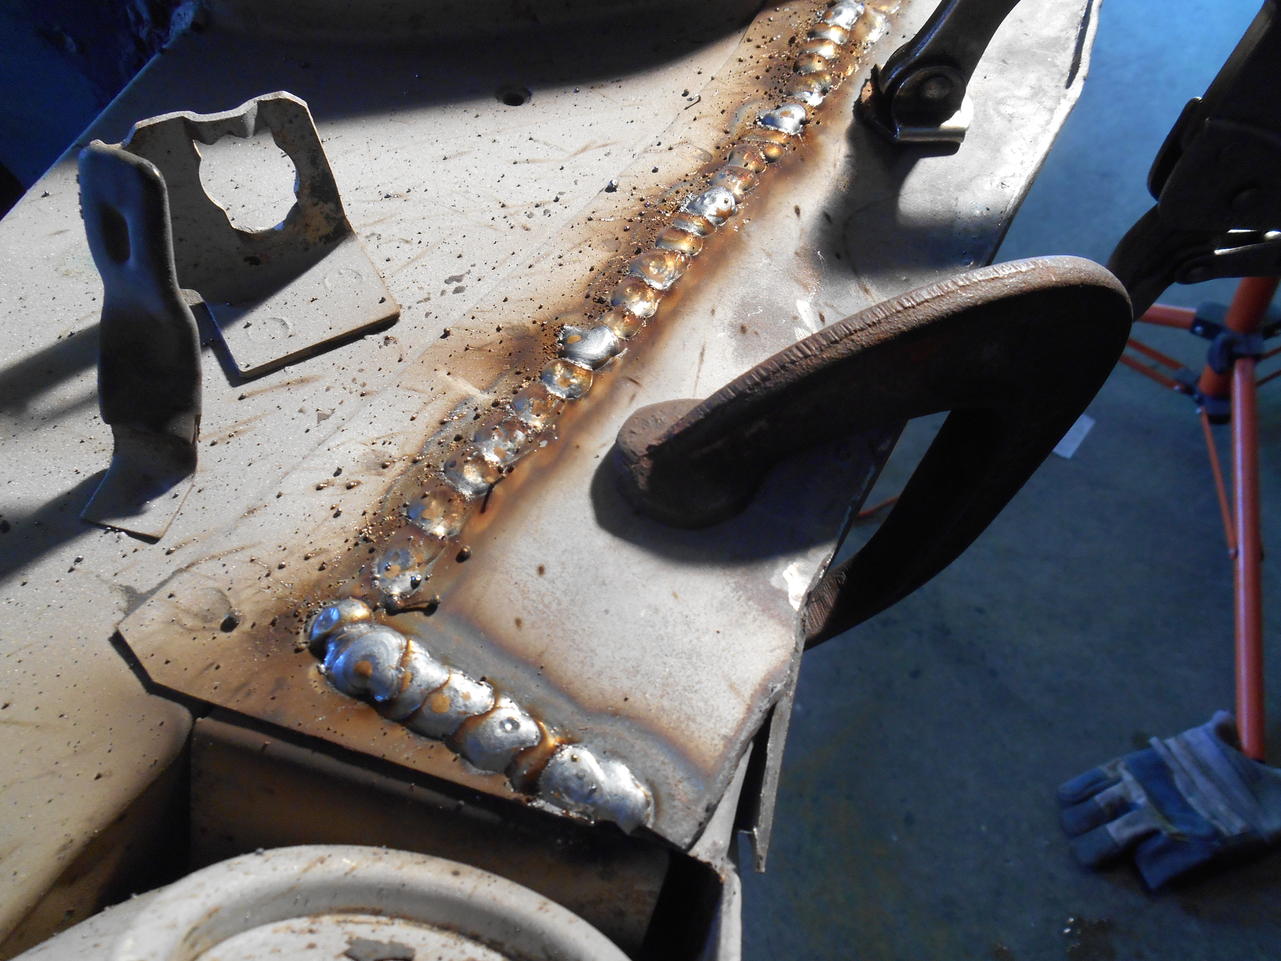
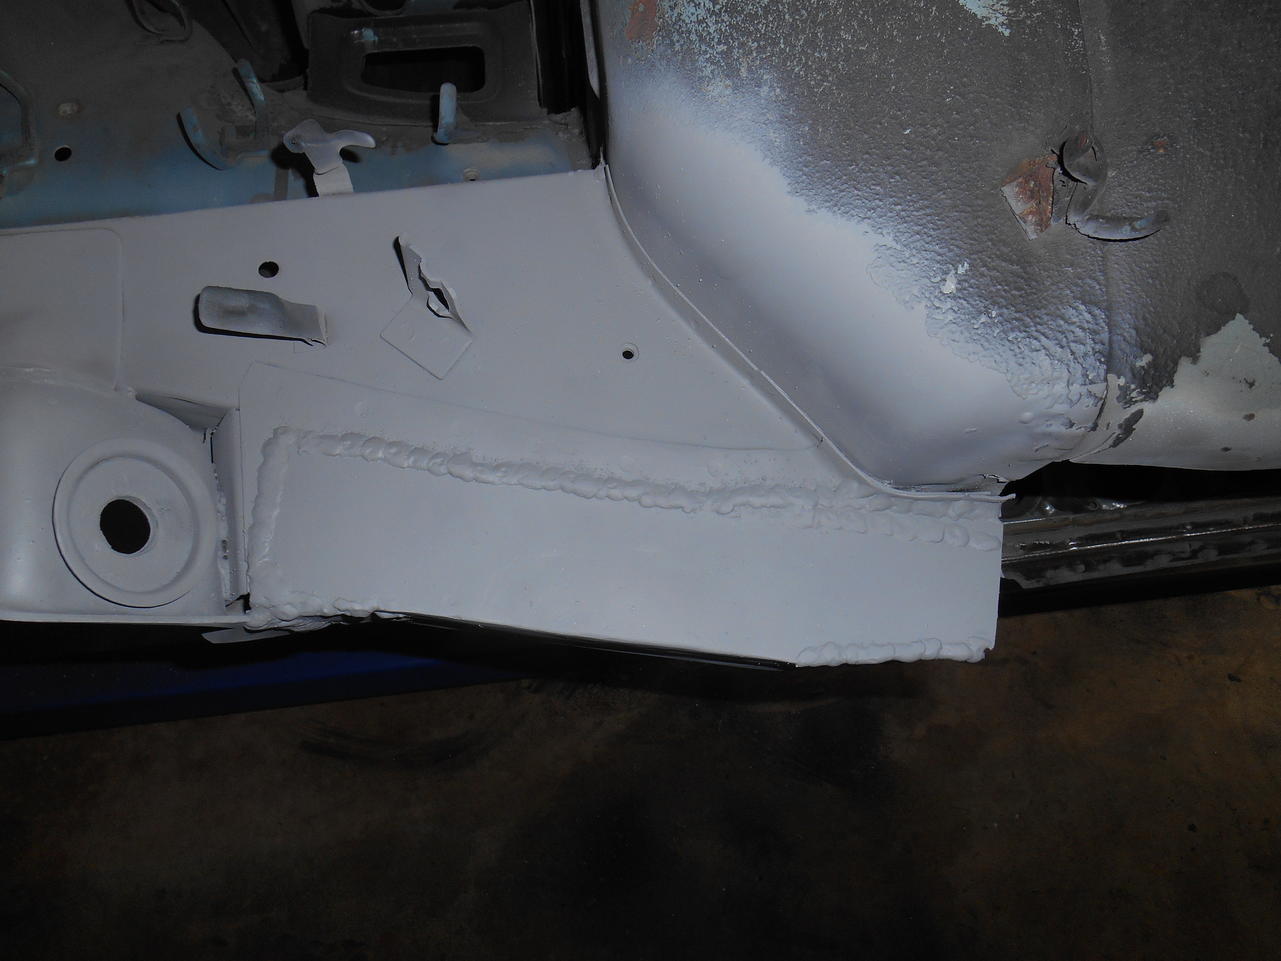
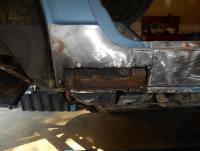
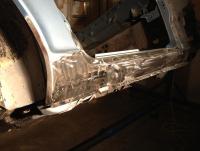
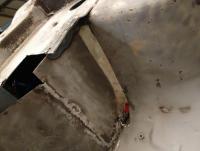
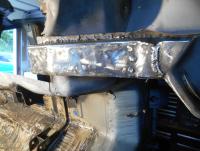
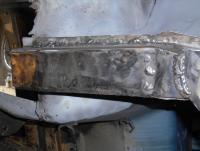
Yes, I actually used three plug welds here: There are three reasons I didn't plug weld elsewhere: 1). The original frame member is rust thinned in several areas. Sandblasting removed the rust and thinned it even more. It's too easy to burn through. 2). Perimeter welding allowed me to attach to repair piece where the original spot welds were in several places. I felt that this gave adequate strength. 3). I flat didn't think of it. I have been working to prep the floor pan today. As part of the prep I drilled a lot of holes. I will make extensive use of plug welds there. Thanks for the suggestion.

-
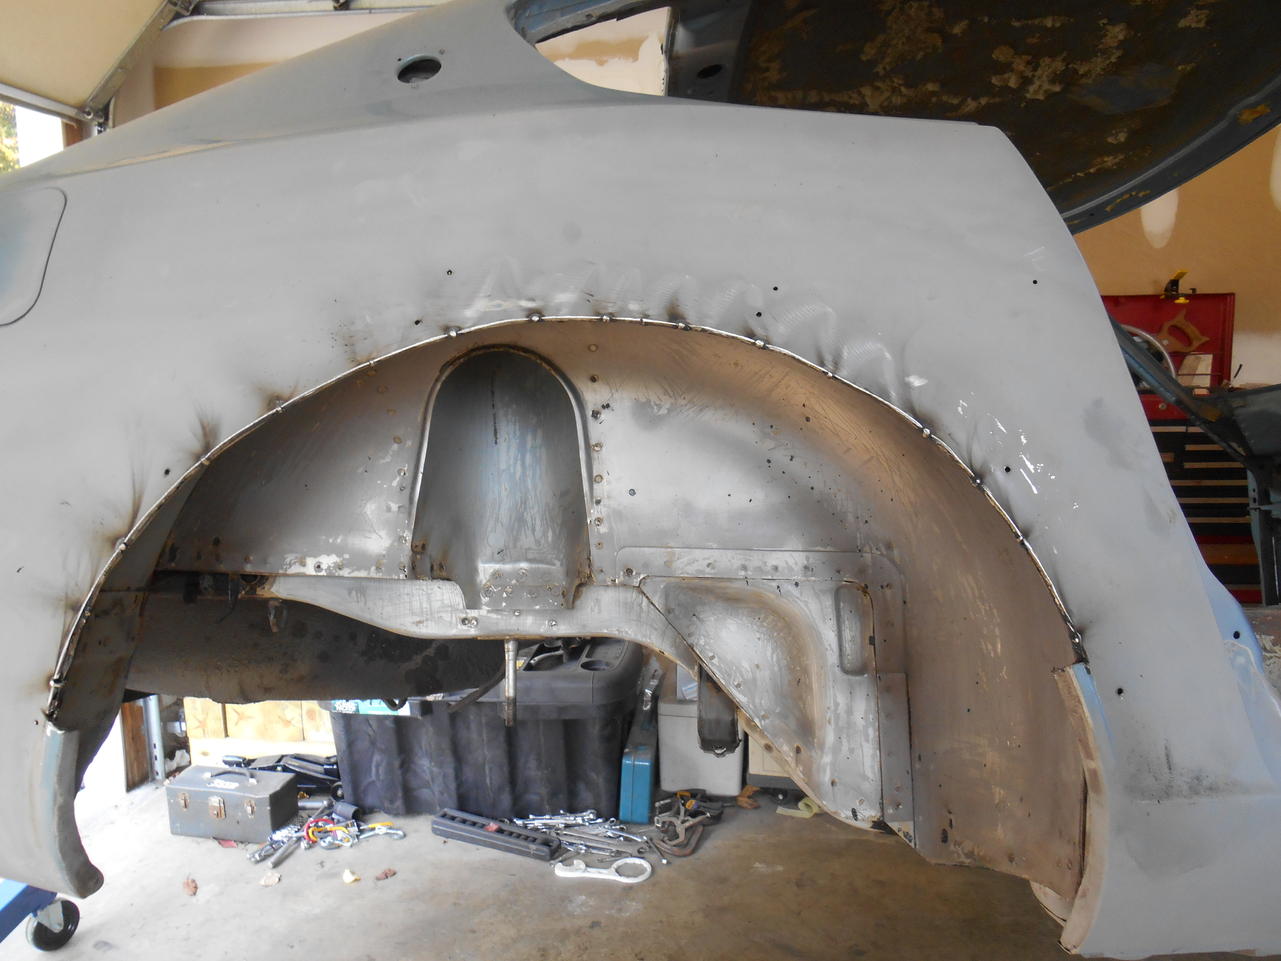
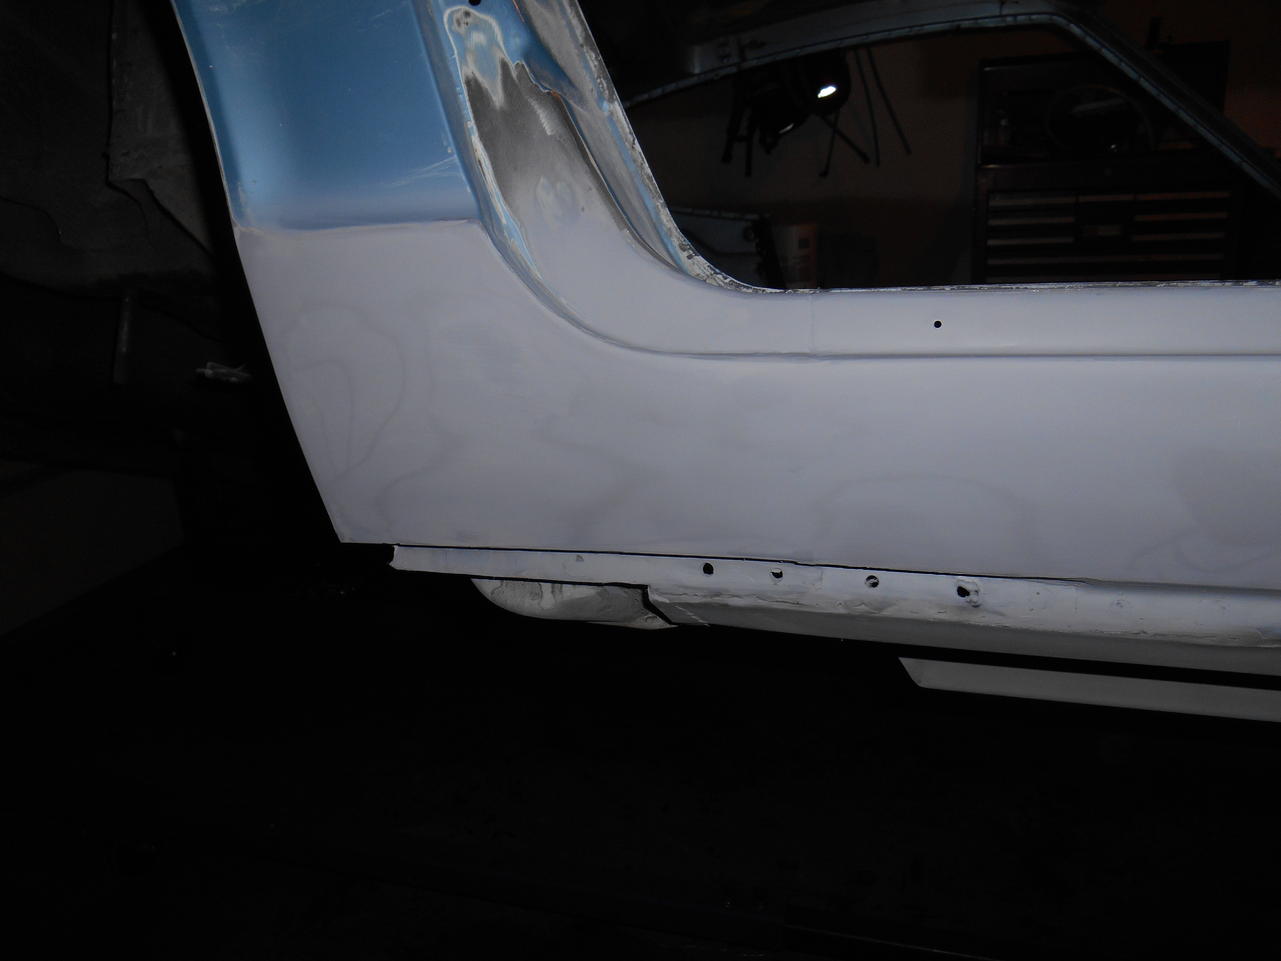
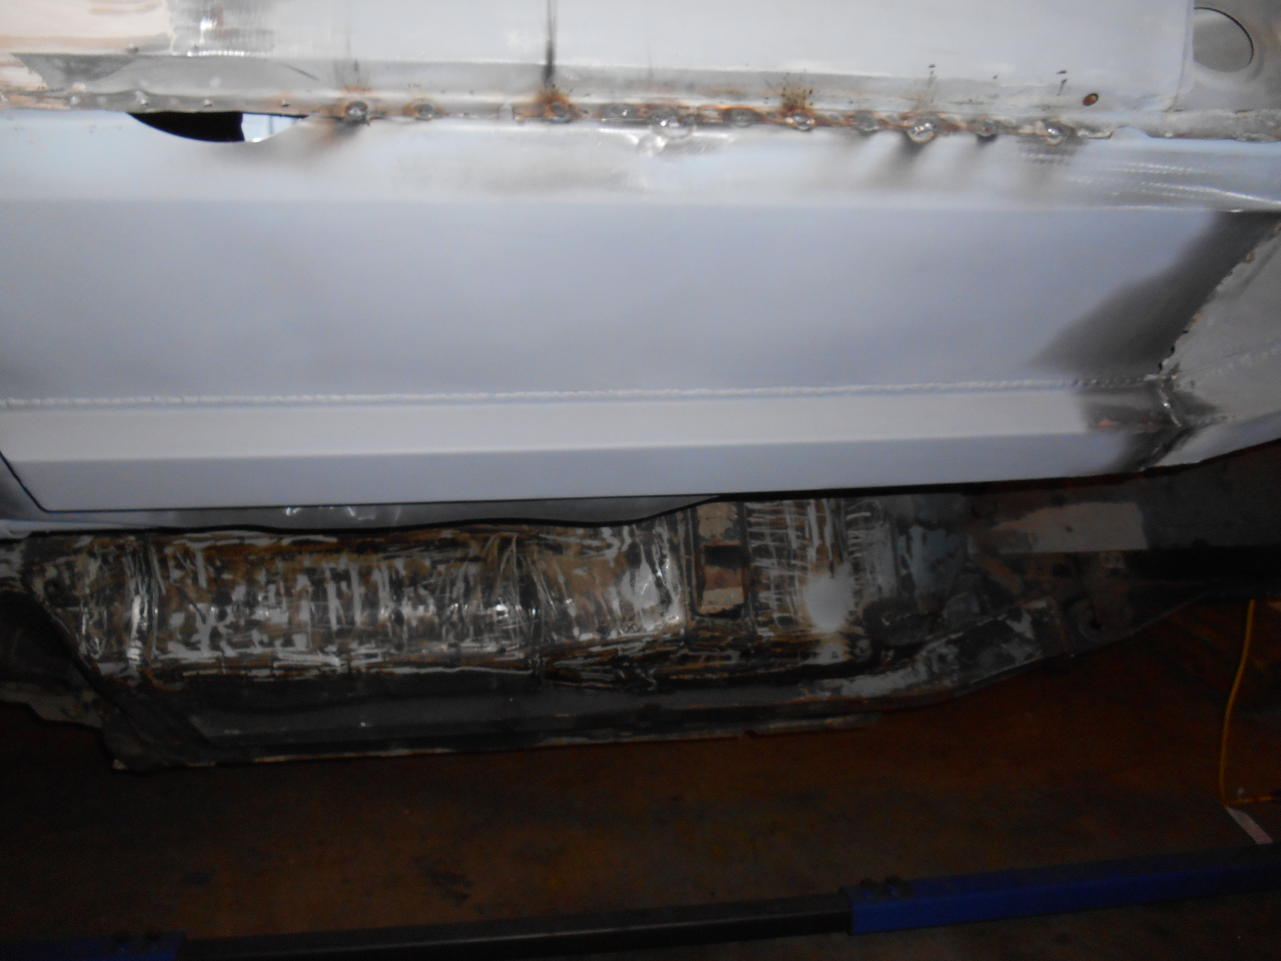
Thanks. No, I'm not planning to dress them. IMHO it is an area of diminishing returns. I plan to sputter paint the bottom with linex or something similar. This area doesn't need to be pretty. It will be covered more or less. The other reason is a little hard to explain. This isn't a museum piece. It's a resto-mod. I don't mind putting a properly (IMHO) executed repair out there. It's kind of like, "Hey I did this!"
-
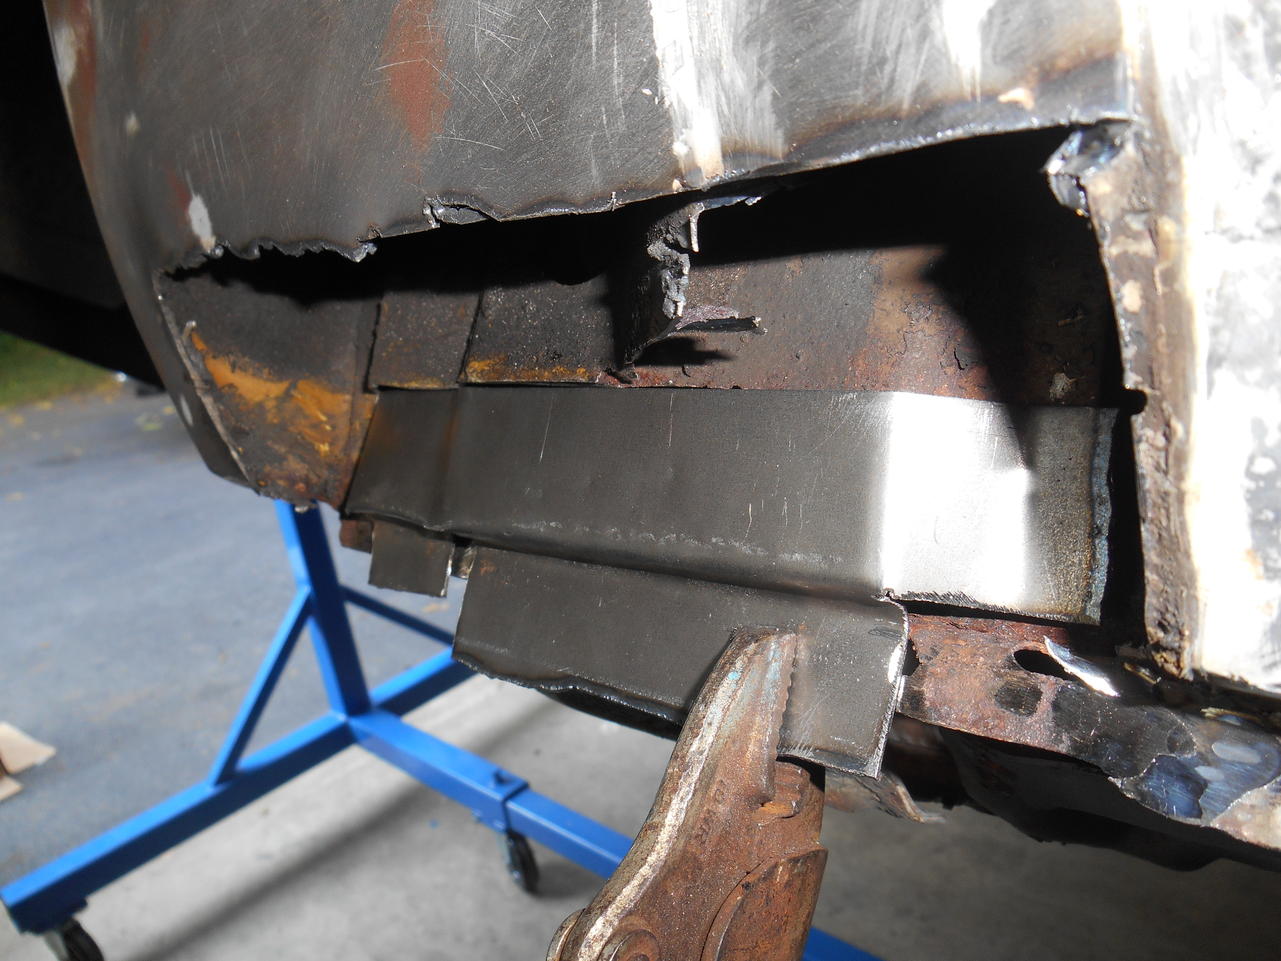
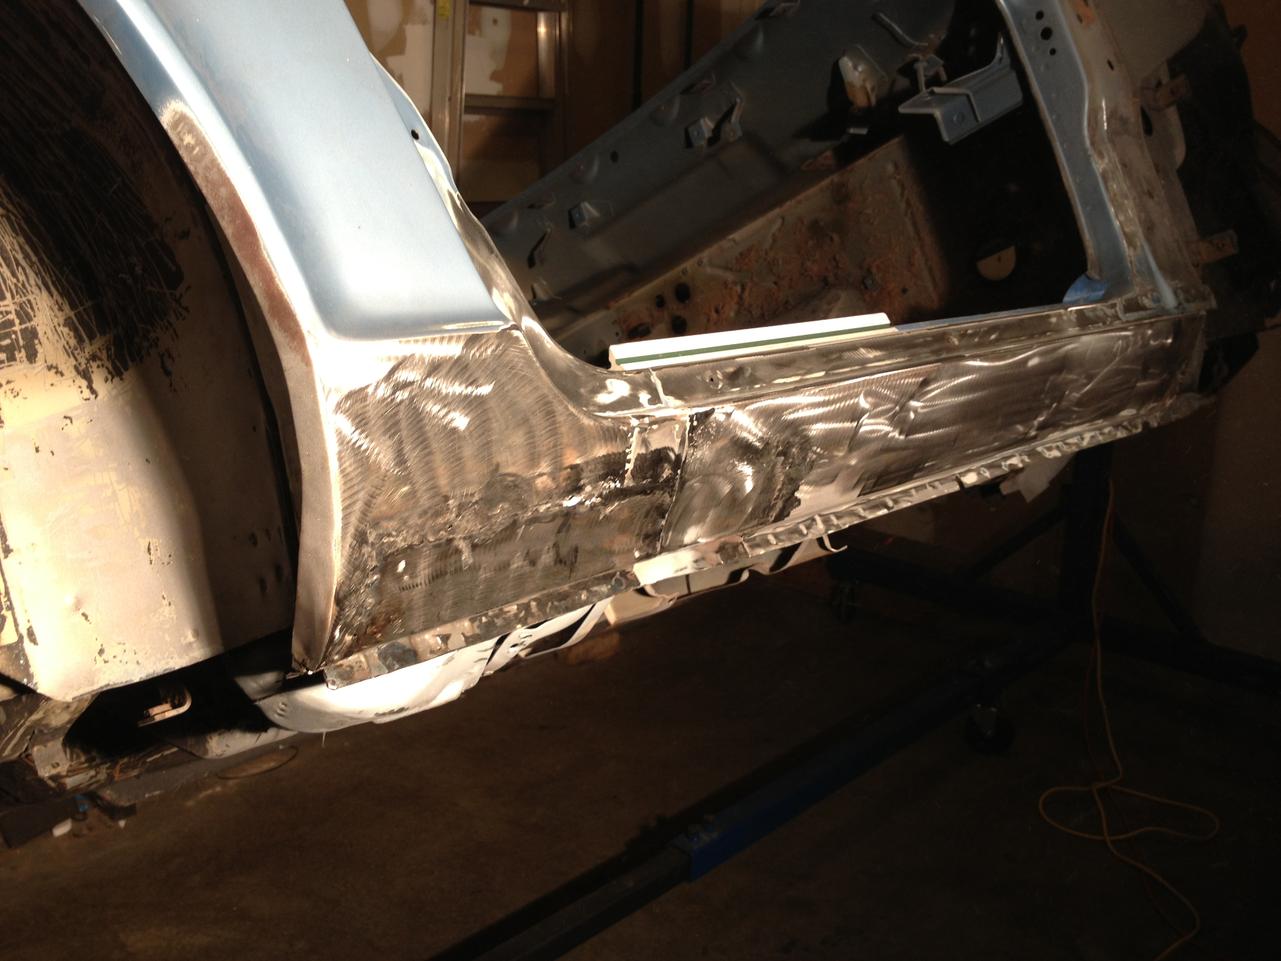
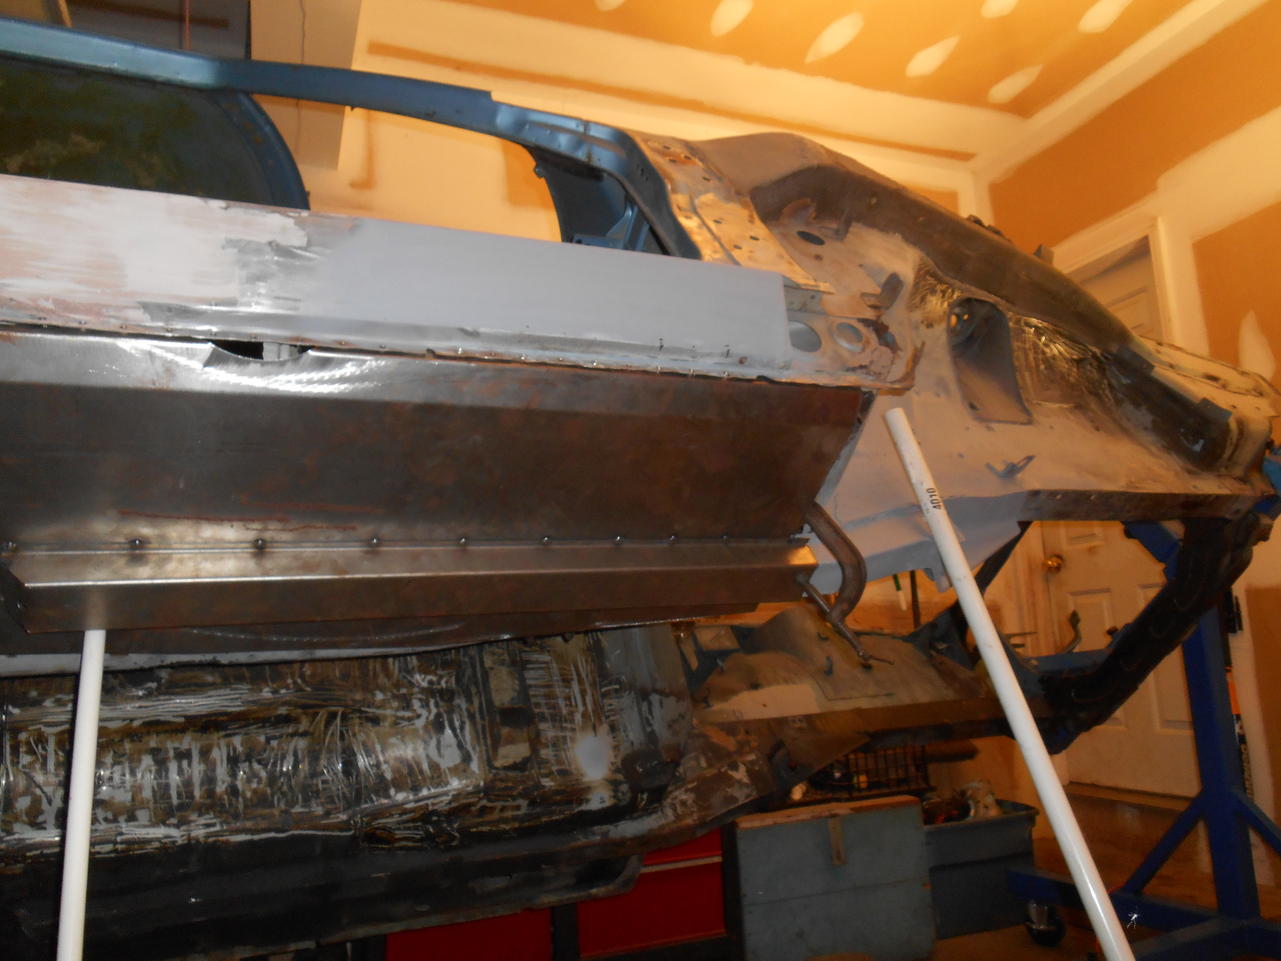
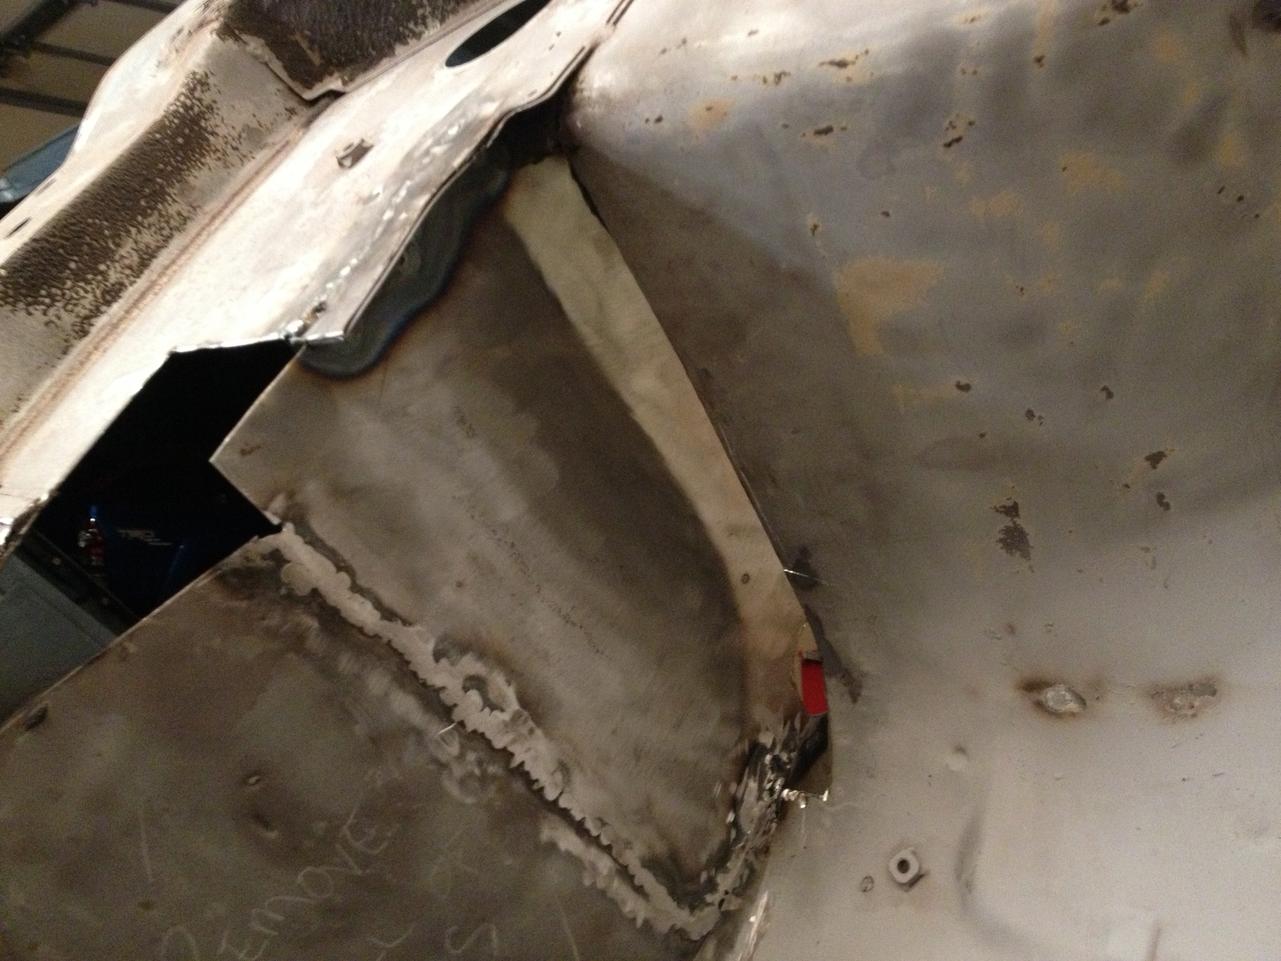
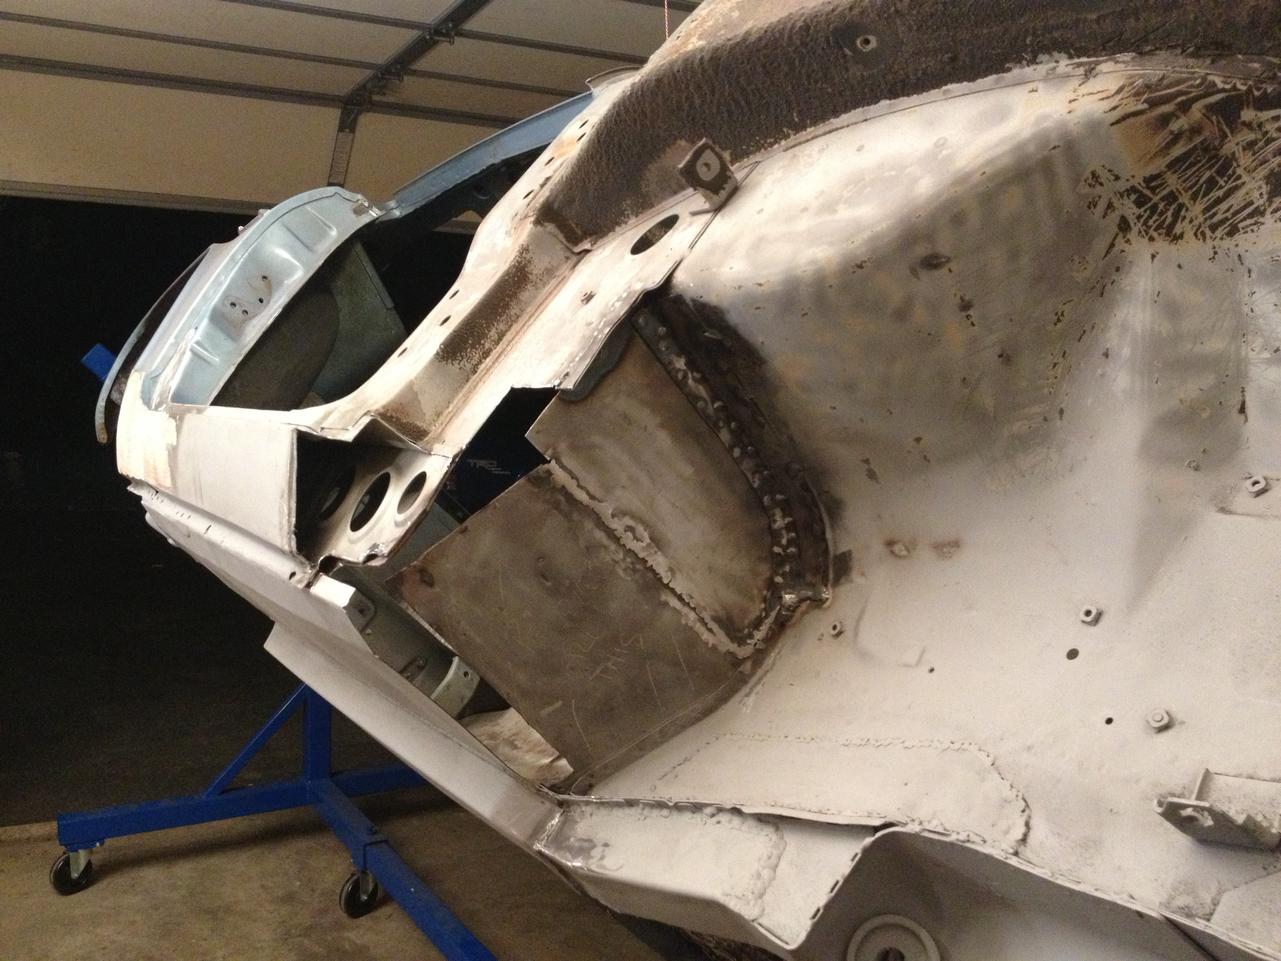
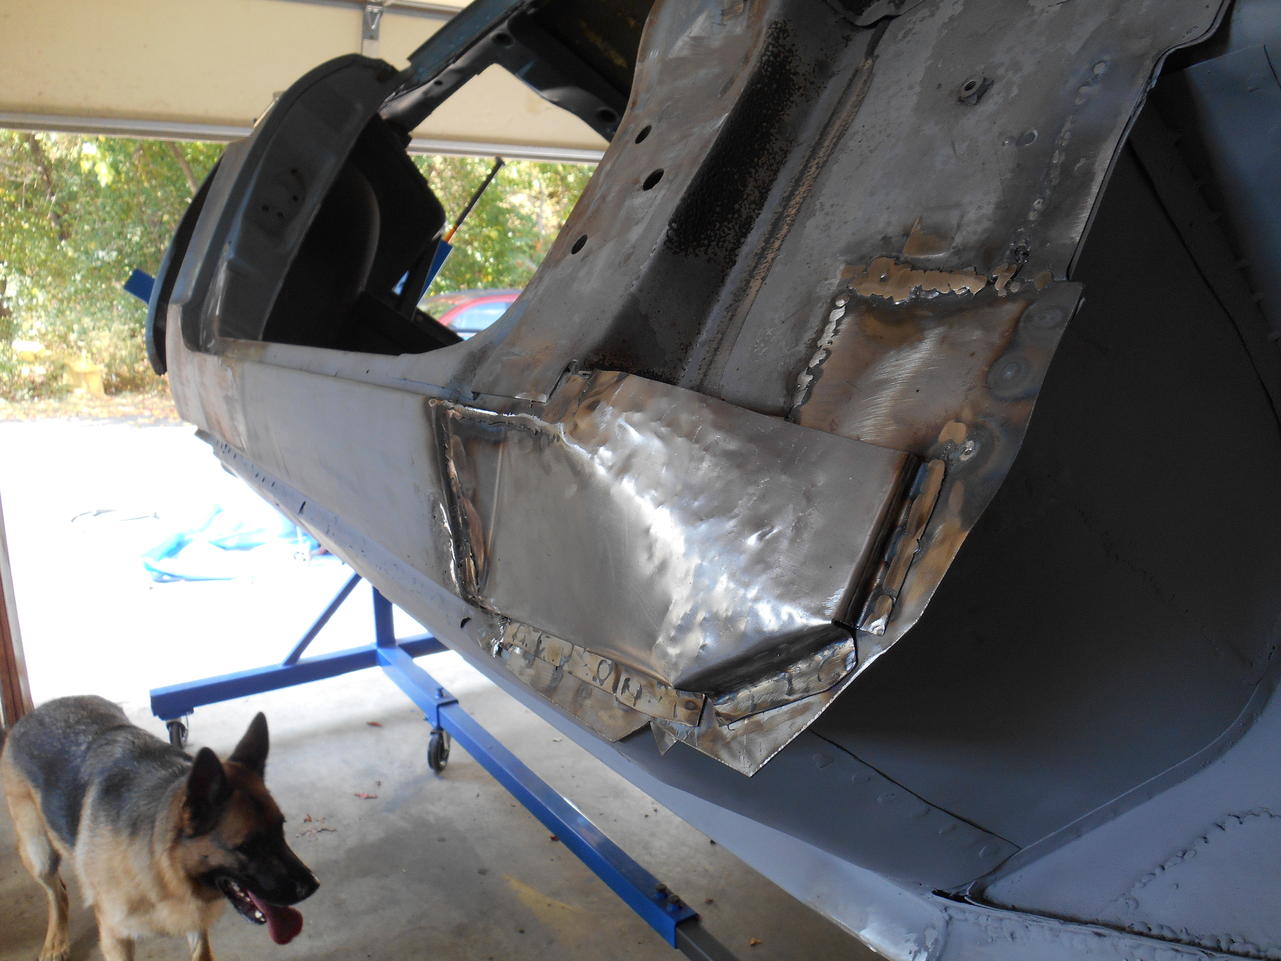
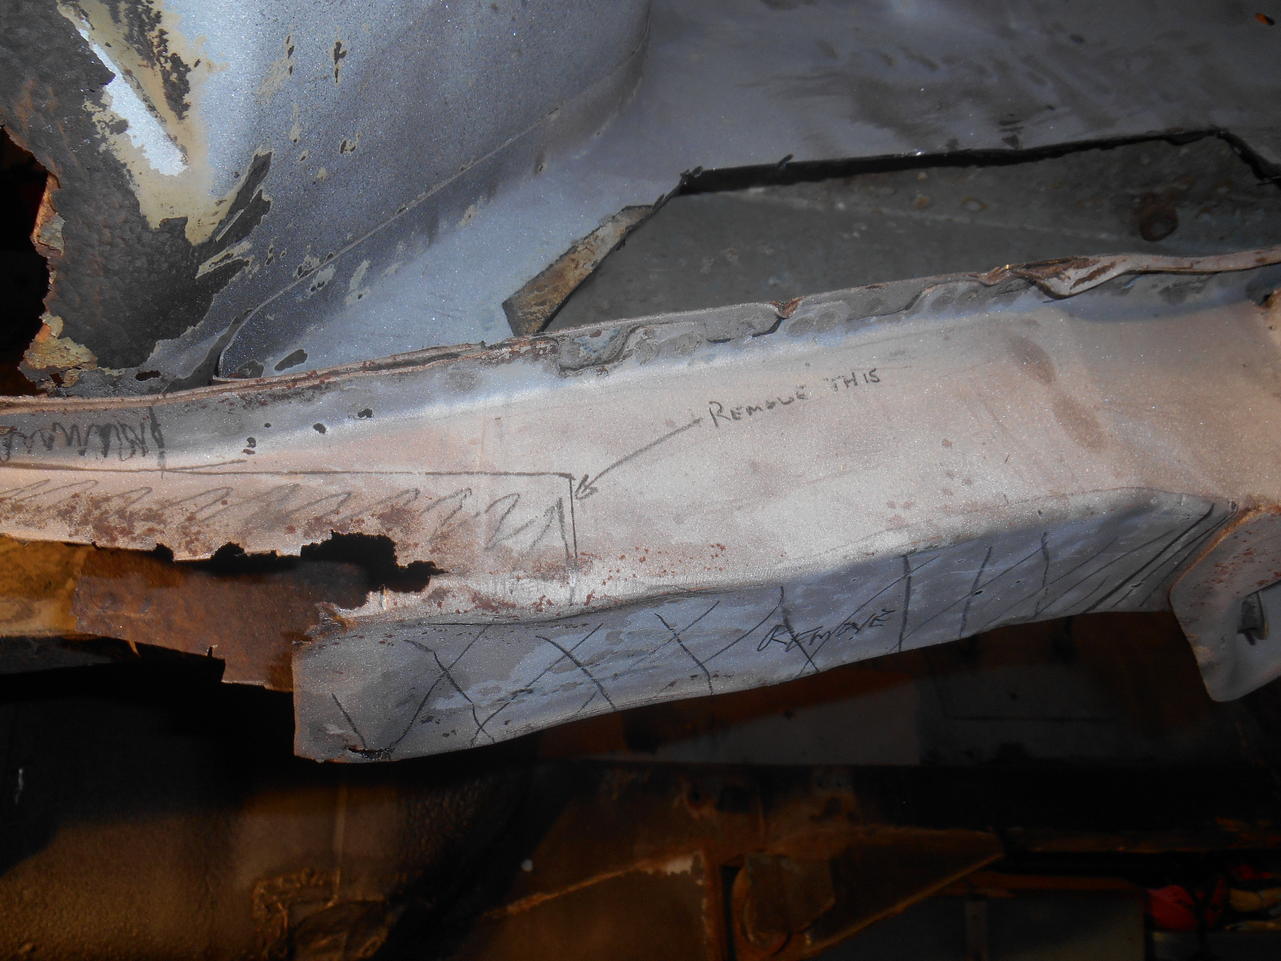
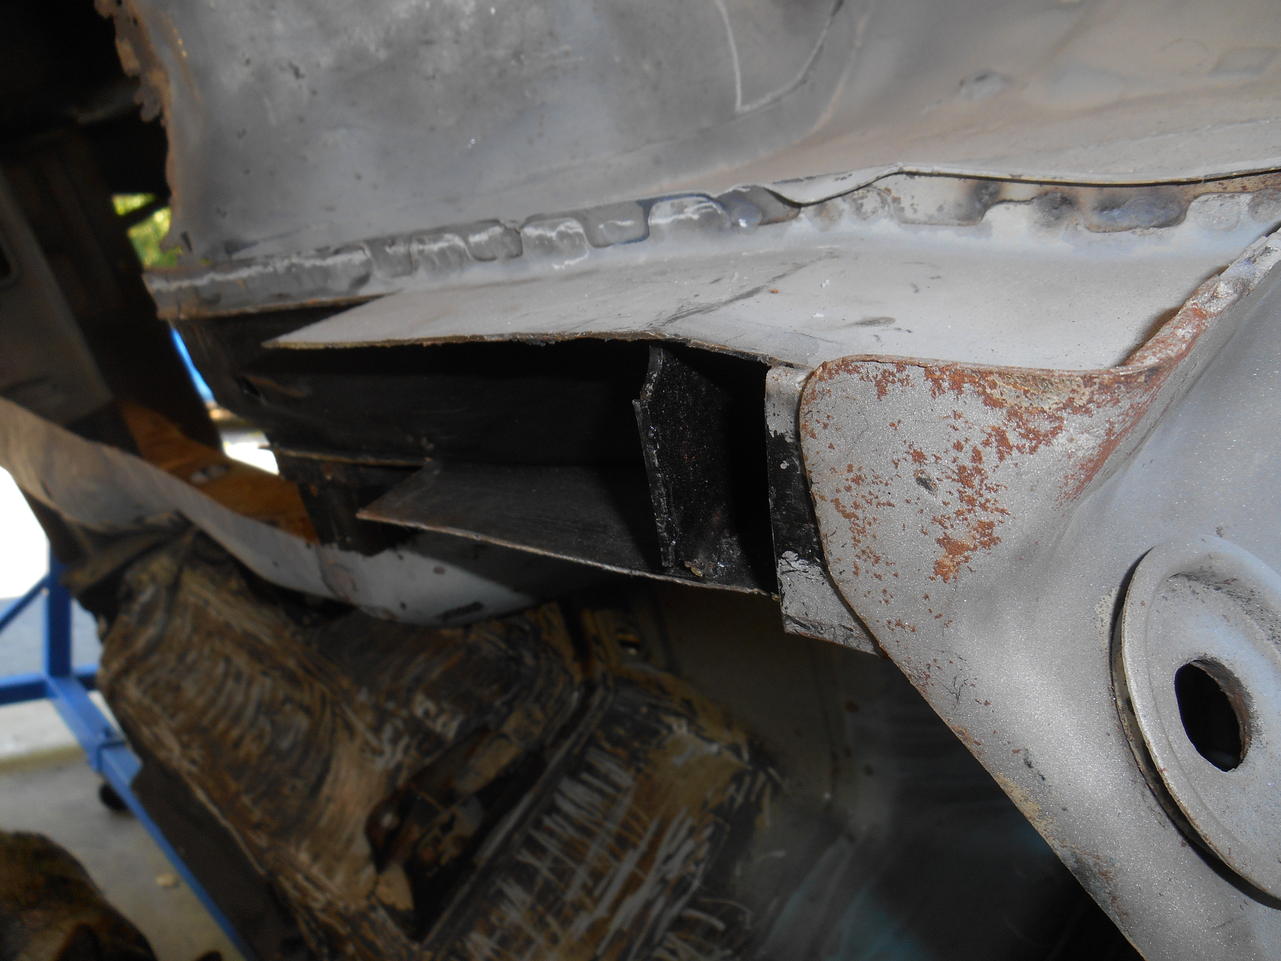
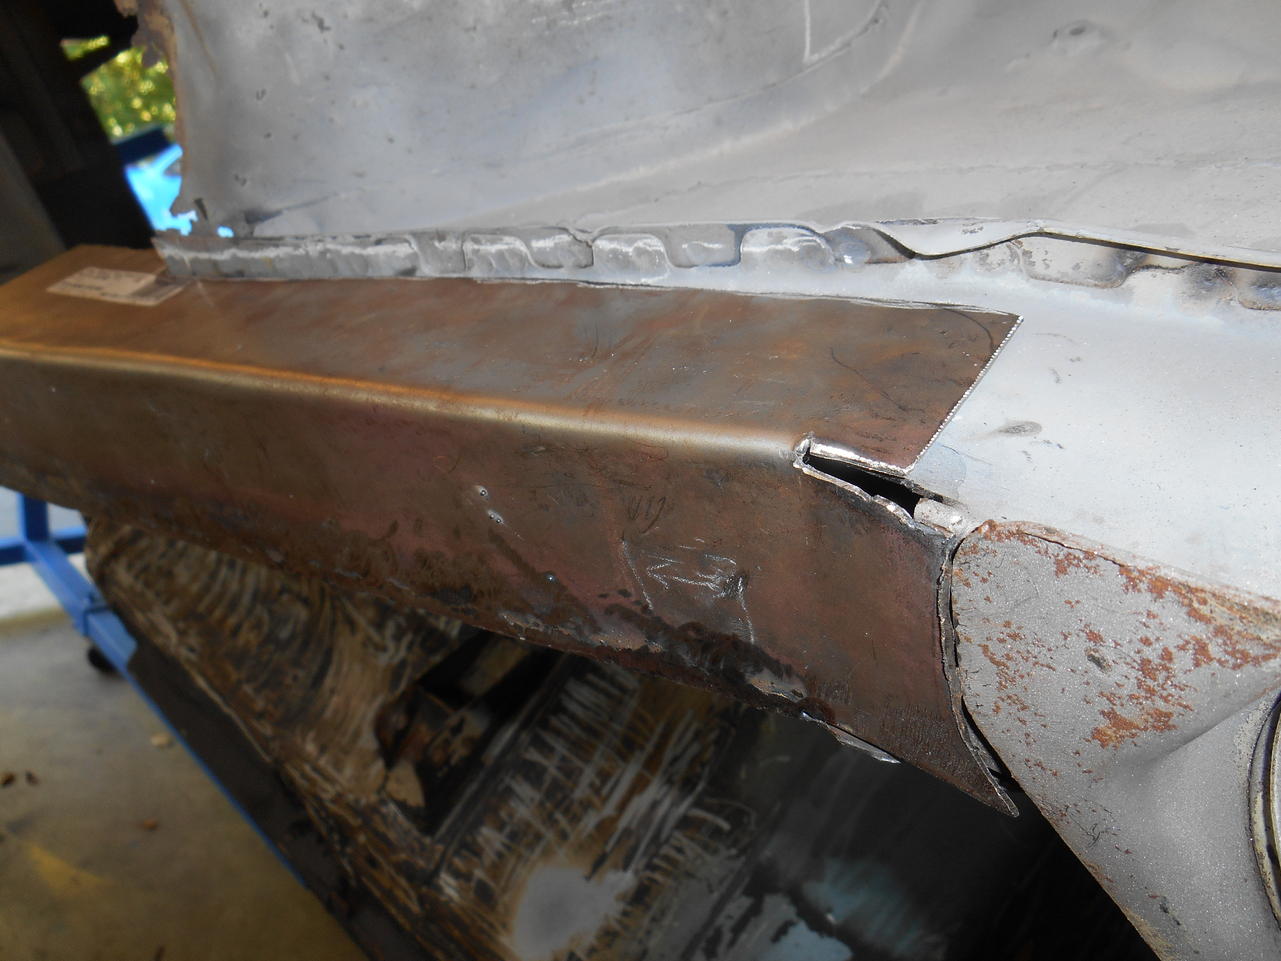
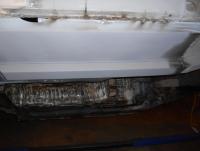
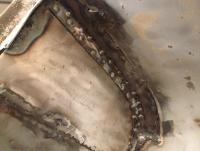
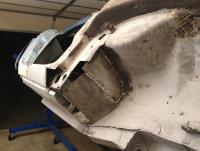
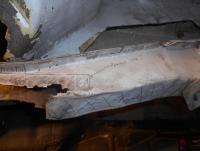
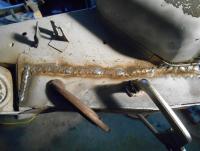
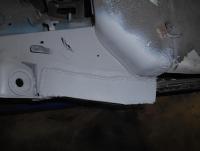
I'm saving these up for a resto thread, but I made some real progress this weekend and wanted to share. The first photo shows the mess I started with. There was a lot of rust and I had to cut out a lot of the frame. Then I sandblasted and rustproofed what was left. I fabricated a replacement that wraps around the remnants of the original frame. The final photo shows the new floor pan in place. I still have some figuring and fit up to do, but I hope to start welding it in tomorrow. Disclaimer: If you're inclined to be critical, please don't. I am not a professional. I know my welds are ugly so you don't need to tell me!


-
Is there an accepted way for rust proofing hidden areas like the inside of frame rails, etc? To give an example, I am replacing my floor pans and the associated frame rails. The rails came tack welded to the floor pan. I don't want to take them off to paint the insides, besides welding them back on would burn the paint off. I know you can get weldable primer, but I'm not sure how much I like it. In my limited experience bare metal welds better (go figure). Anyway the frame rails are bare metal inside and I just can't bear the thought of doing all this work just to have it rust away again in 10 years.
-
I saw an orange 240 sitting next to a 370 NISMO in someone's driveway near Wolftrap, VA.
-
Bumper to the shocks. Thanks for the reply. The deed is done!

-
I had to scroll through the beginning of this thread just to convince myself this was the same car. I can't believe how quickly you completed your project. By way of comparison, I started about the same time you did. I decided to do a staged resto-mod. I did the front and rear suspension and the brakes. Drove it a few times and then decided to just tear it down and finish the job. I am only just getting ready to put mine up on the rotisserie. On a side note, which air dam are you using? I like it.
-
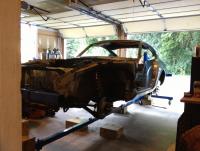
I'm trying to get my mostly stripped 1976 280z up on my rotisserie. The front was easy but the back not as much. Is it ok to use the shock absorbing rear bumper mounts as a hard point to marry up with the rotisserie. I really don't want to custom fabricate something at this point. My skills aren't up to it (yet) and I don't want my project to get bogged down.
-
I saw a beautiful metallic green resto-modded 240z today on market st. in Frederick MD today. I rare treat since I think there are about 3 z's in frederick and I own one of them.
-
Galban: That's a nice looking setup. Is your motor out? The front looks a little high. What did you do with the flairs? The front certainly isn't stock with the integrated mud flap. I really like it.