


ksechler
Free Member
-
Joined
-
Last visited
Everything posted by ksechler
-
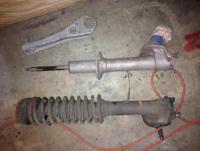
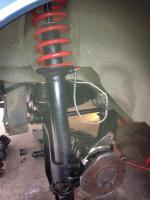
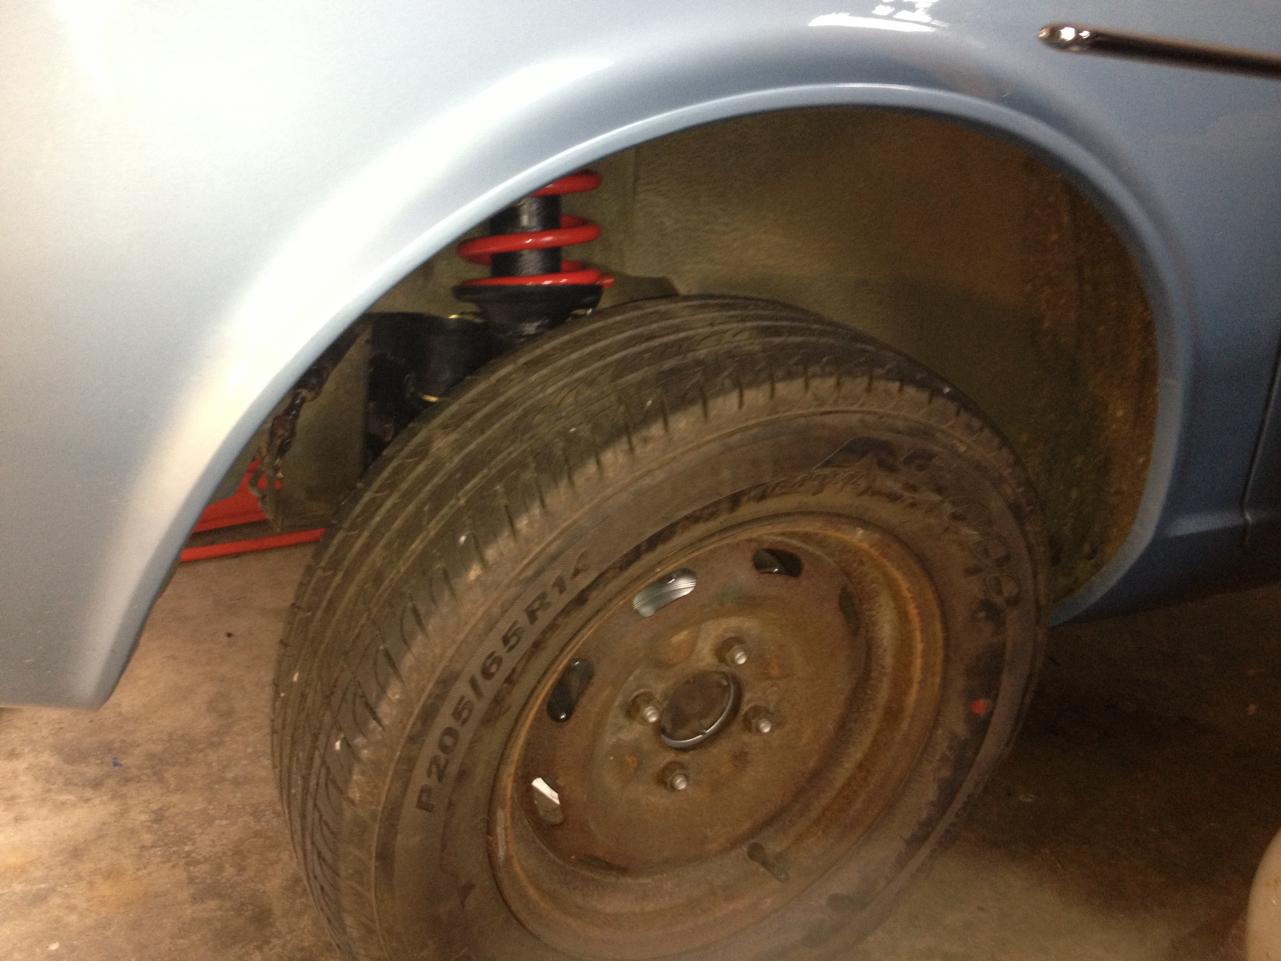
 The old shock is frozen. The new springs are actually 1" lower than stock. The new cap is the MSA camber adjusting one which also lowers the car a little.
 -
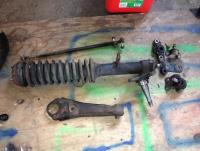
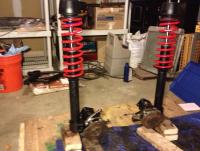
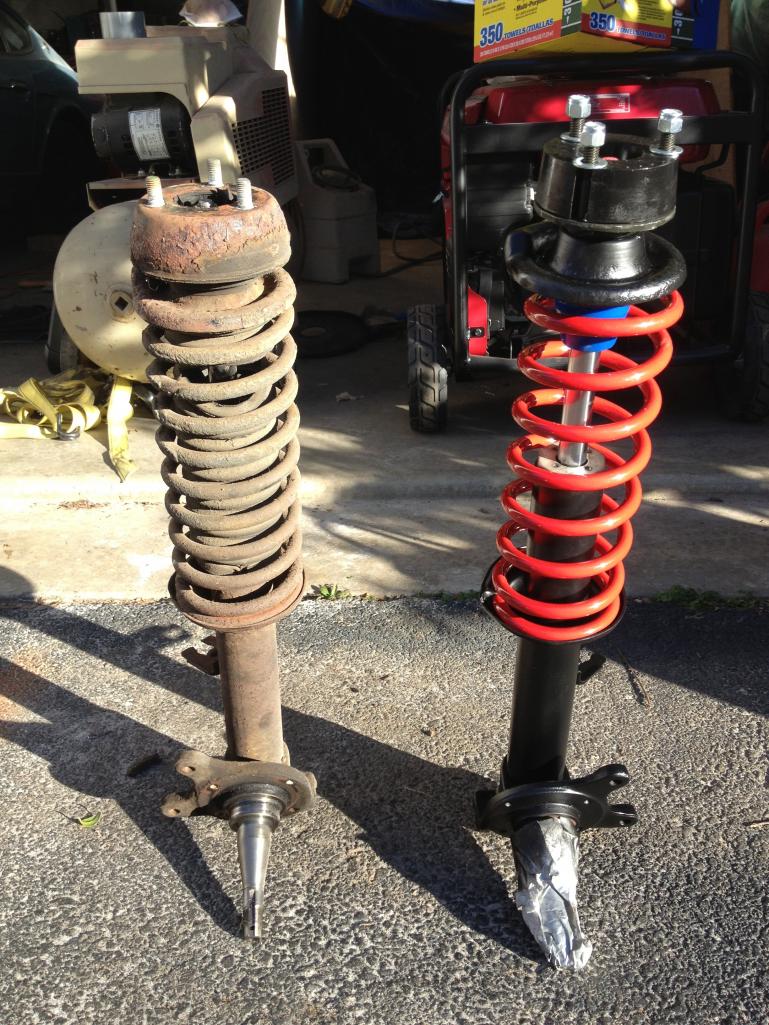
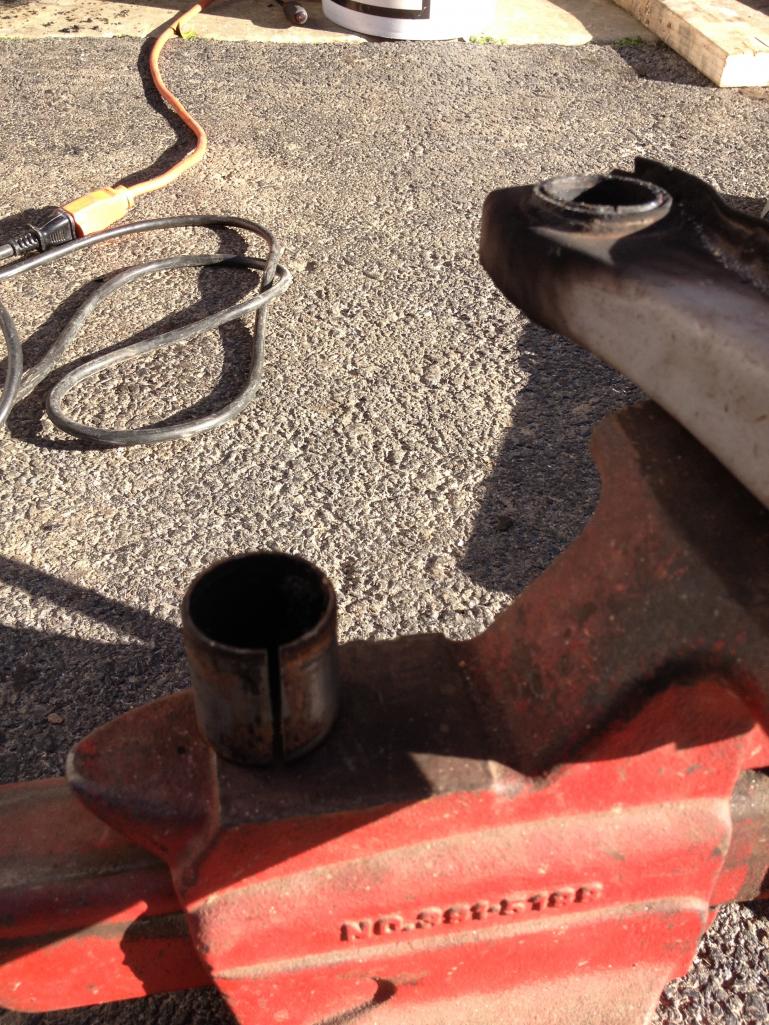
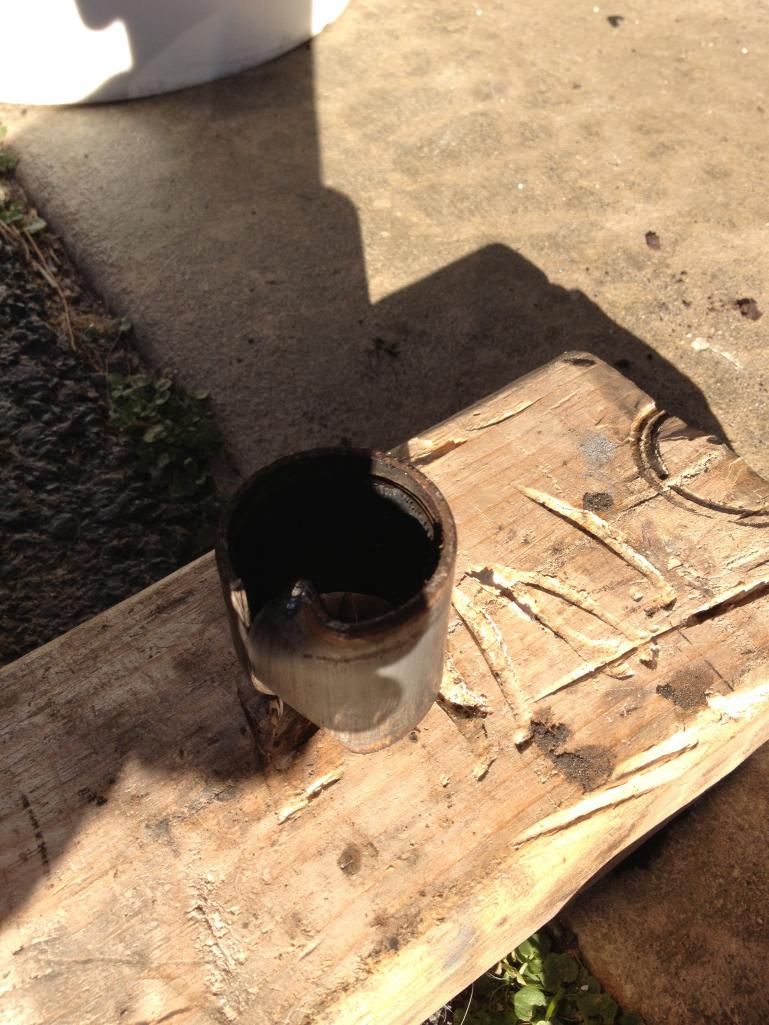
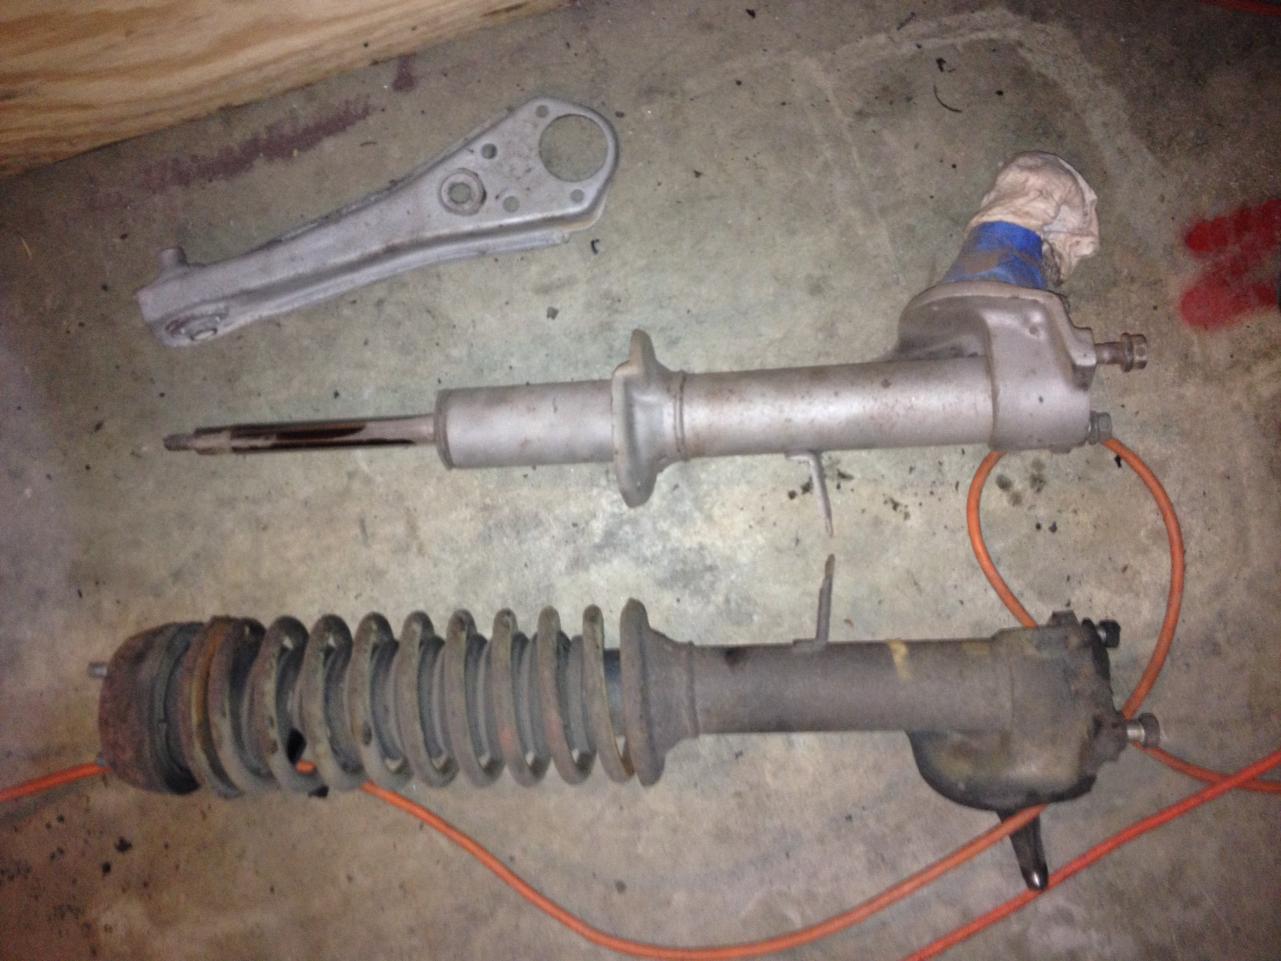
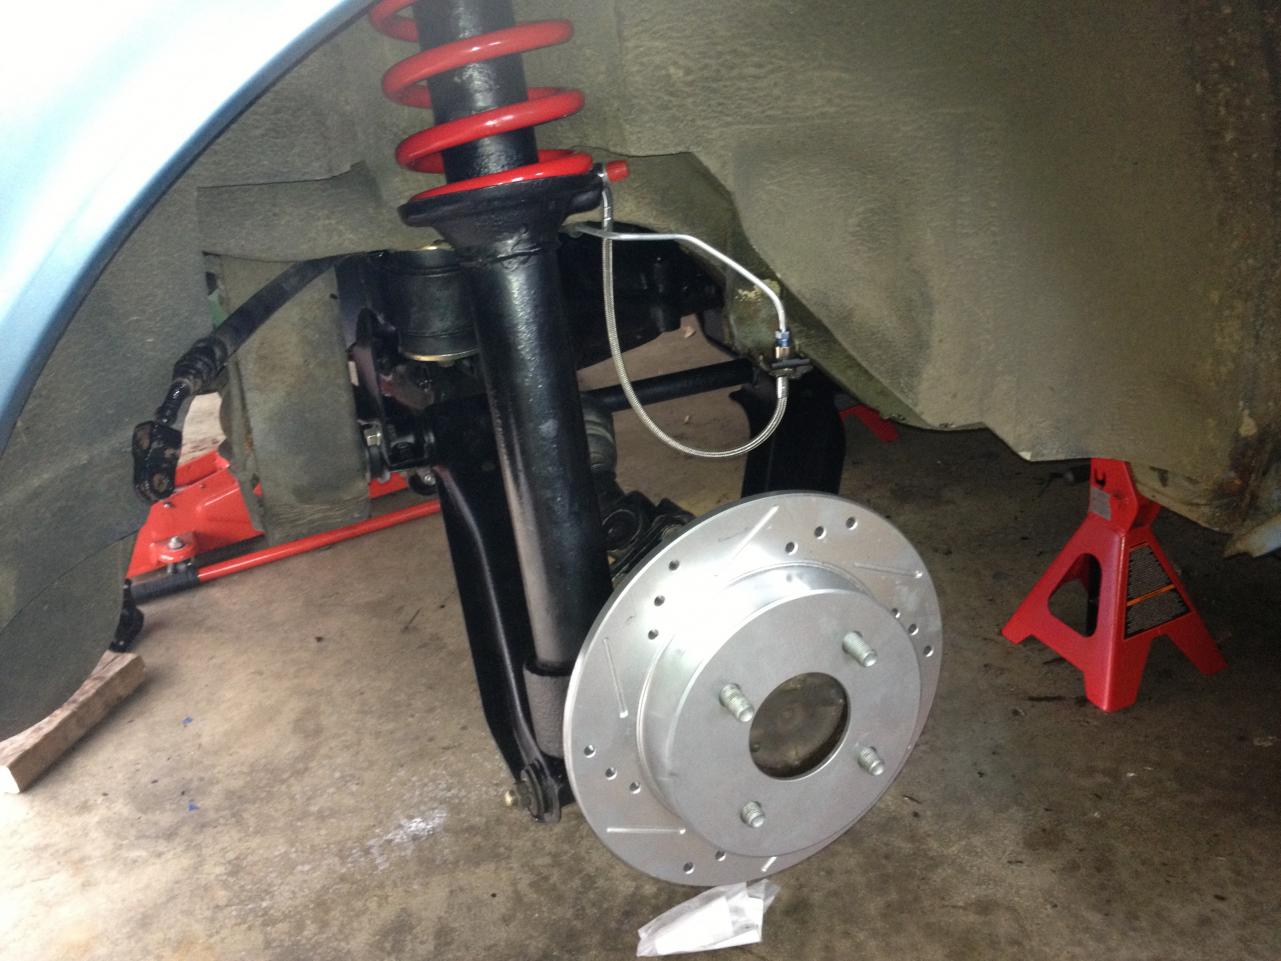
I didn't have much time to work on the car this weekend, but I did make some progress. I finished cleaning and painting the left strut assembly and installed the strut and springs. Here is a before/after comparison of the two front struts: I also removed the bushings and am ready to install the new ones. One of the old ones put up a little bit of a fight but not nearly as bad as the rear ones did:


-
John: When I did the back struts the inside of the strut tubes were clean. Because the inside was oily I was concerned about getting sand in there and not being able to get it out. So I wire brushed and POR-15 treated the outside of rear struts and painted them. The front struts were a lot worse and I wanted to sand blast them. I left the old inserts in to keep the sand out. Simply as that. Whoever owned my car previously took care of it. They oiled the previous inserts so there isn't any rust inside the strut tubes.
-
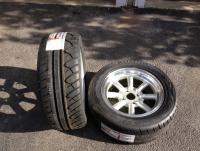
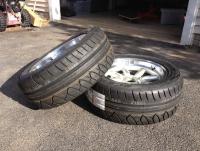
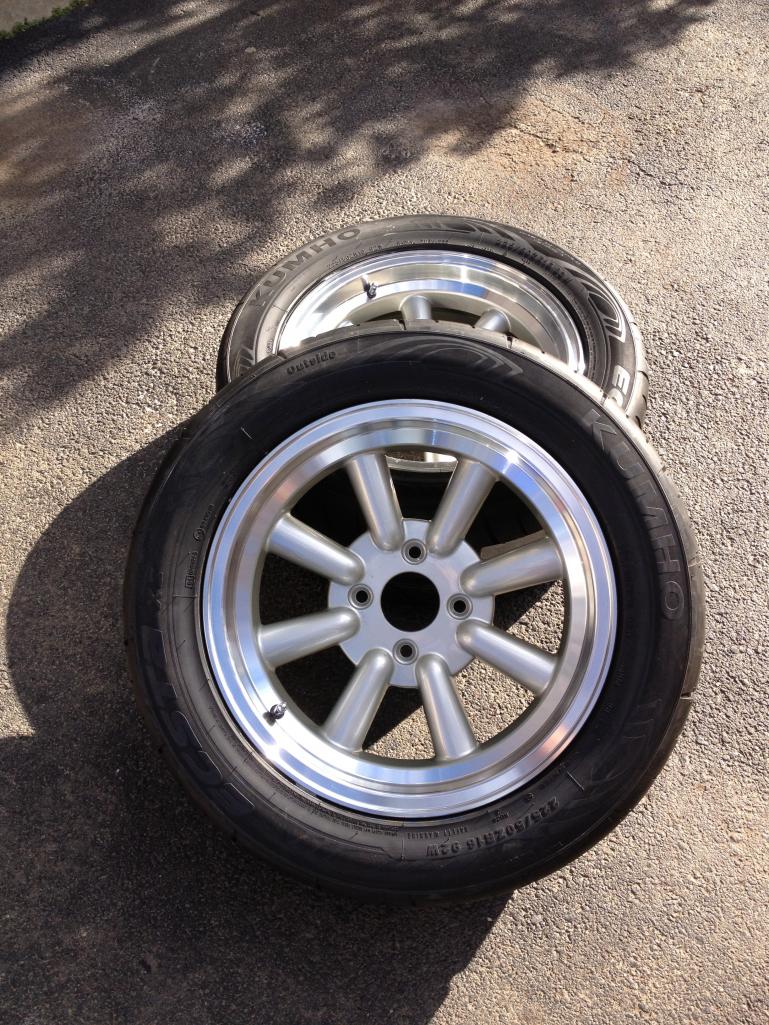
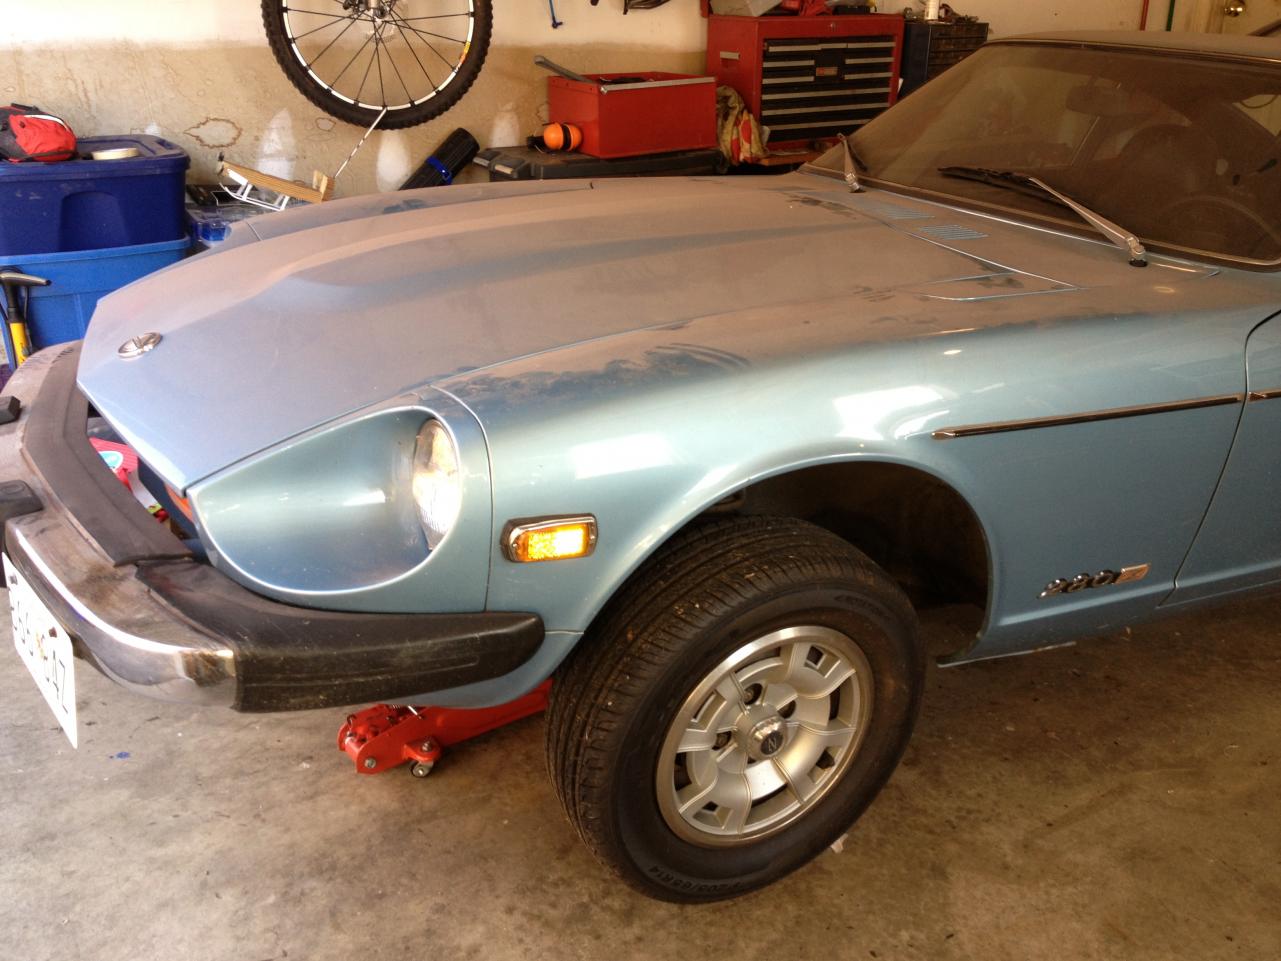
The tire shop called me last week and said my tires were in; Kumho Ecsta's 225/50R16. So Friday I dropped the wheels off and got them mounted. I'm pretty excited, but unfortunately my car has no front suspension and is on jackstands so I can't give you any pictures of them on the car. Here are a few teasers, though...

-
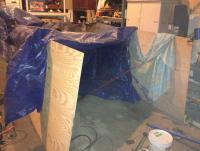
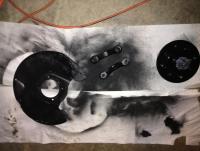
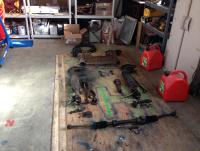
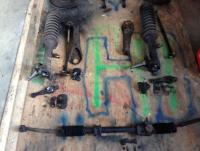
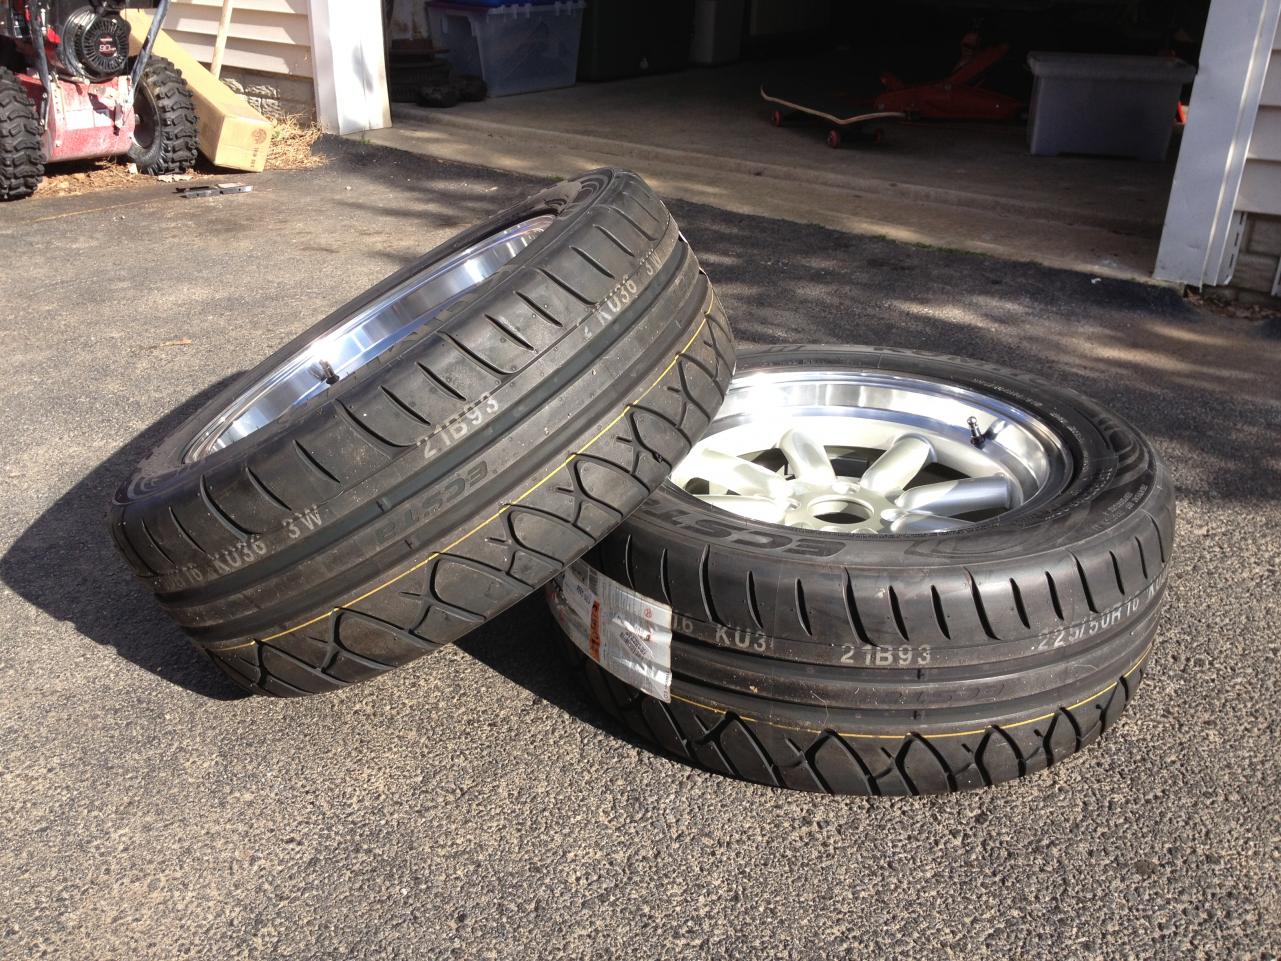
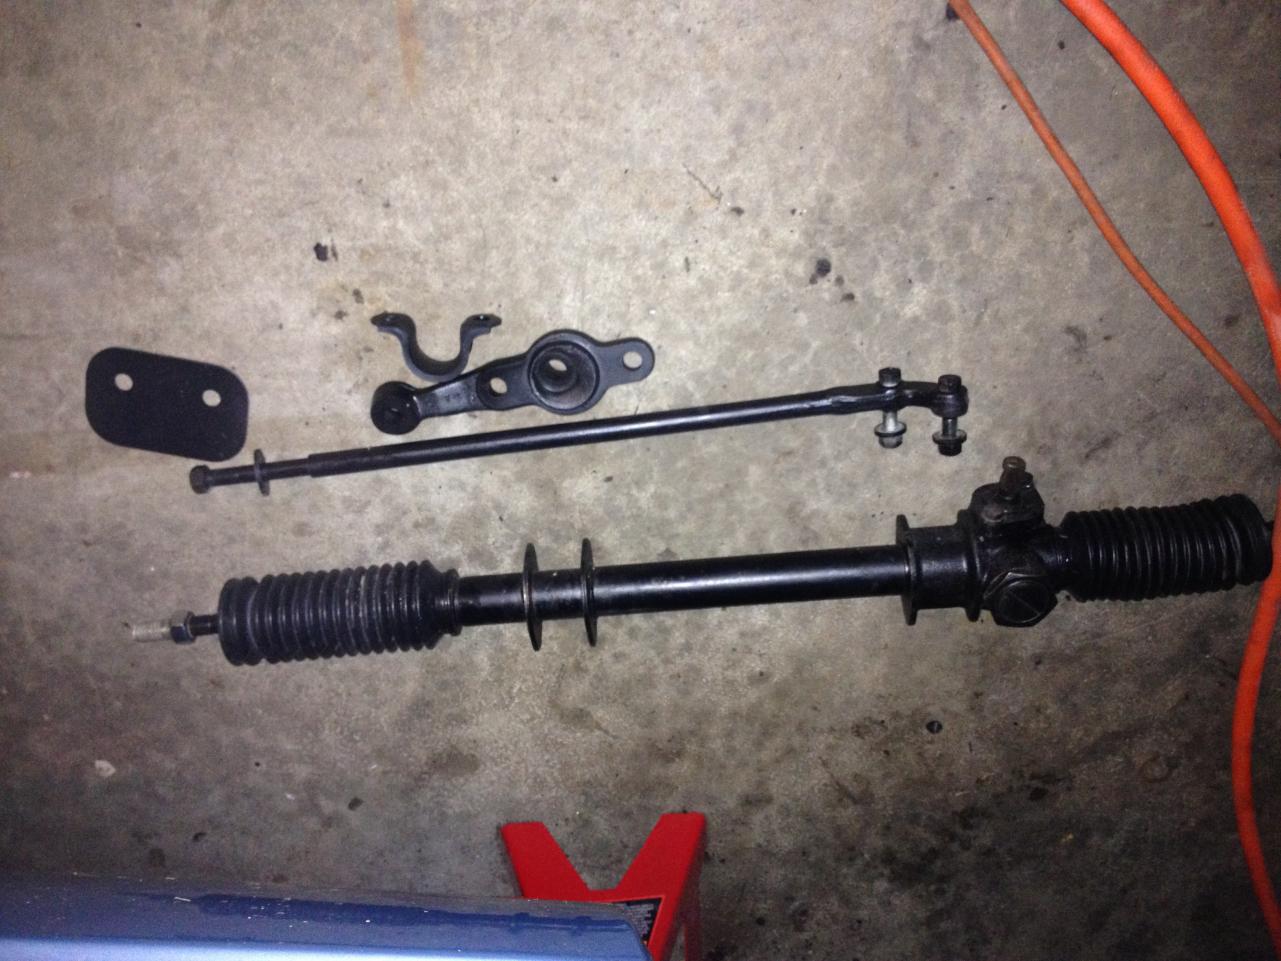
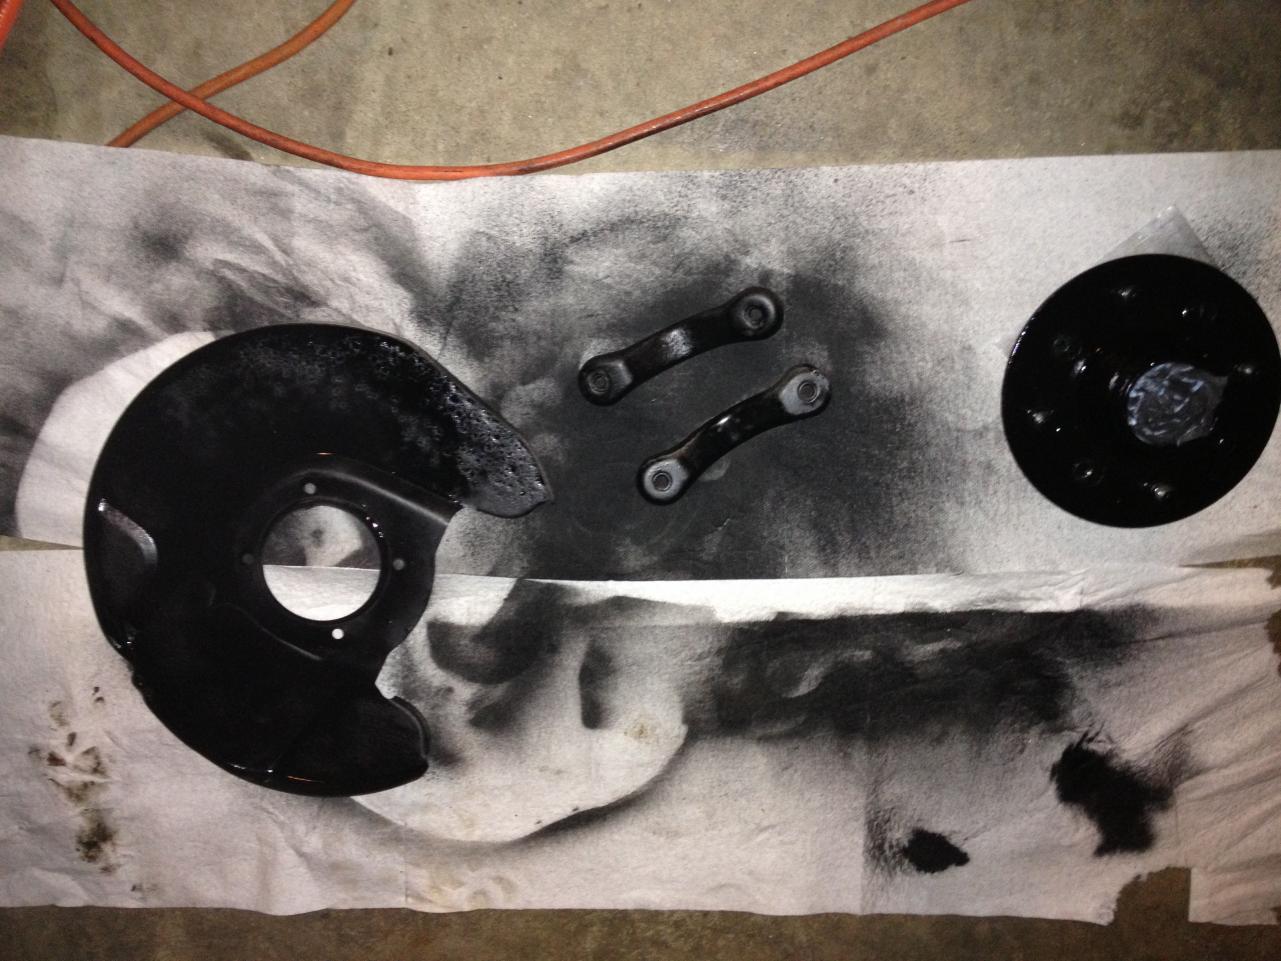
An update is in order. I have made some progress but have not been as good about taking pictures. I got my blasting media the other day and have been happily blasting away. I have a picture of my self named half-assed sand blasting booth. I crawl in there, pull the finding Nemo sheet closed behind me, and secure it with a C-clamp. Then I'm ready to go. Of course, I tape my cuffs closed, wear safetly goggles and a respirator. I'm no dummy! Besides that crap hurts! I cleaned up the steering gear as I said in my last post. Here's a picture (with some other parts thrown in): I have sandblasted and painted most of the parts from one side. Here are a few: Here is a comparison of one strut before clean up and the other (unpainted) after: I removed the old front bearings and pressed the new races in using a press at work. It took me about 10 minutes. I'm getting good at this! Next steps will be to burn the old bushings out and replace them. I will also reinstall the rack. Then I will remove the old strut inserts and put in the new. In between these tasks I will be blasting and painting the rest of the parts. Hopefully, I will be ready to start reassembly next weekend. Oh, almost forgot! My Konigs arrived and I am dropping them off to get some 225/50/R16 Kumho Ecsta tires installed tomorrow.
-
Thanks. That reverse thread one was a little harder to find and about 3X more expensive. I can't imagine what it must have been like to do one of these projects without the ability to google and order a darn near infinite variety of parts.
-
Gentlemen: Is there a schematic somewhere indicating bolt sizes associated with the steering rack. I searched the archive, but I am having some technical difficulties with the forum and my computer keeps locking up. Specifically I need to know what the size, pitch and class of the nuts are that lock the tie rod ends.
-
Steve: You make a good point, but I already dried the sand out. It's just crappy stuff.
-
I have a '76 280 that I just pulled the calipers off of. PM me if you are interested. They worked, but I have no plans to disassemble them so it would be "as is"
-
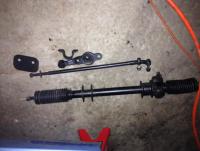
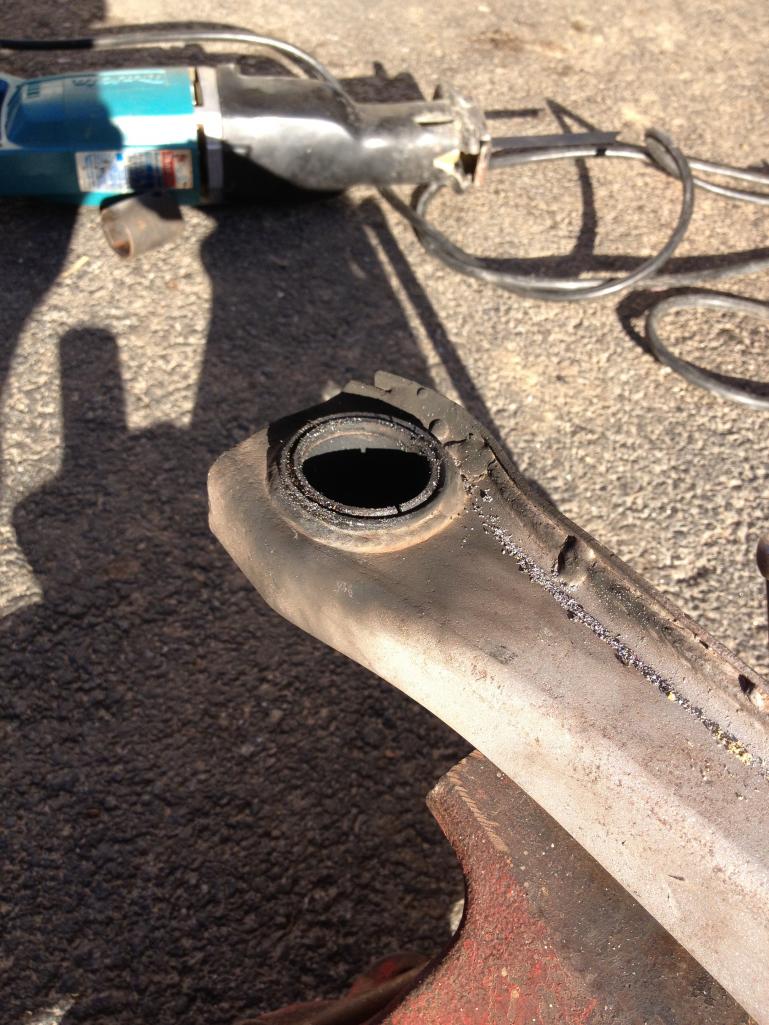
Sorry guys. I got a little stuck and needed to order some stuff. I was trying to sandblast the rust off of everything using this crappy high plans play sand I bought at Home Depot. I don't know what that stuff is, but it isn't sand! It actually is a decent abrasive but it turns into dust and clogs the heck out of the nozzle. So I blast for 10-30 seconds and then have to unscrew the nozzle and clean it out. I got one side done but gave into frustration. I ordered some garnet blasting media and also some steel blasting media. We'll see how that turns out. I also had to order the upper strut bearing and strut insulator. I missed the bearing in my first pass and the old insulator looks awful. So I focused my efforts on the front rack/pinion steering assembly. I removed the tie rod ends which was a piece of cake on one side and an absolute monster on the other. A Dremel with a cutoff wheel finally did the last bit of convincing. I also replaced the boots and painted the assembly but there really wasn't much else needed. That will be going back on soon. Sorry i didn't take any pictures of that one.
-
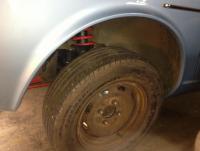
Ok, guys. Thanks for all of the replies. The Konigs arrived today. I'm going to get some rubber on them on Saturday. I will post pictures and all the specs as soon as I have them.
-
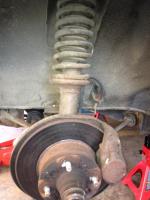
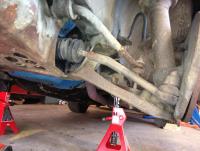
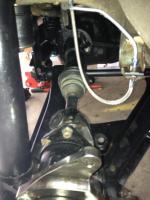
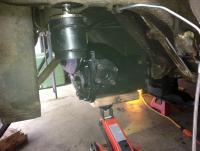
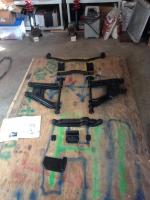
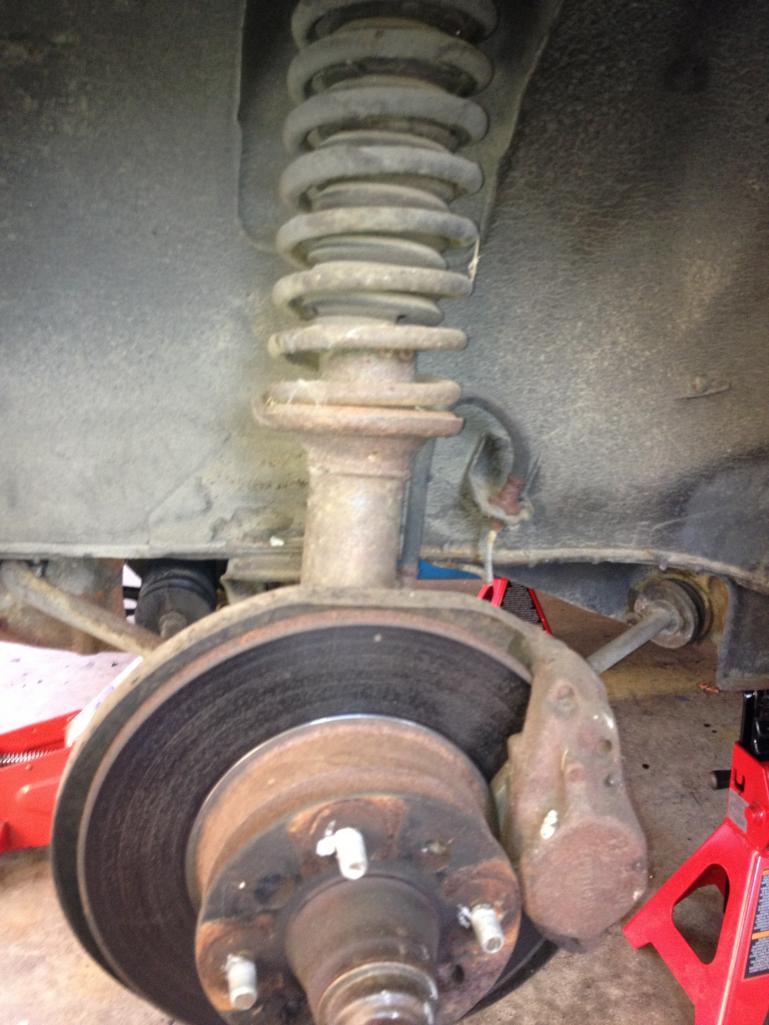
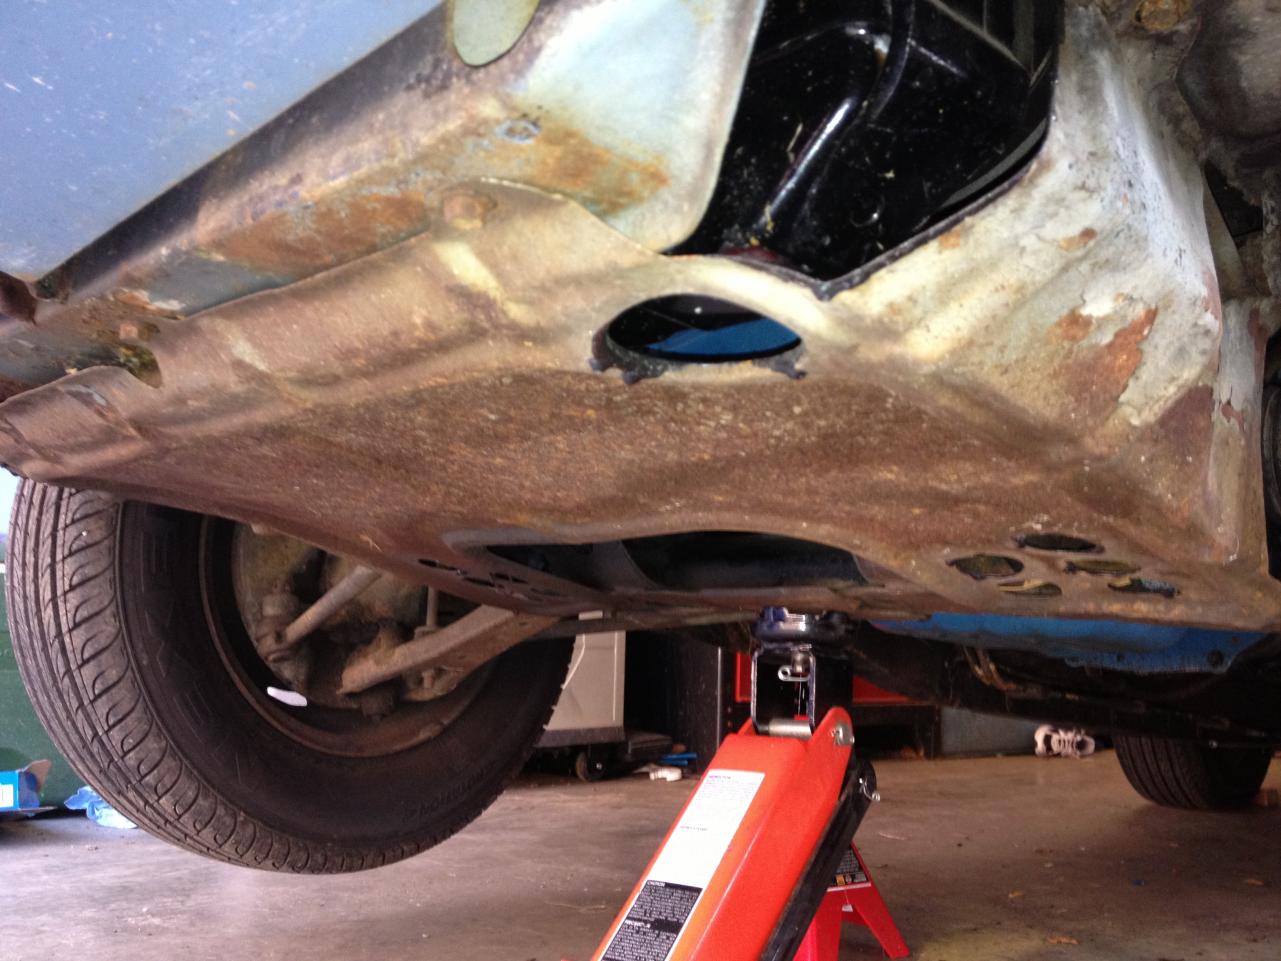
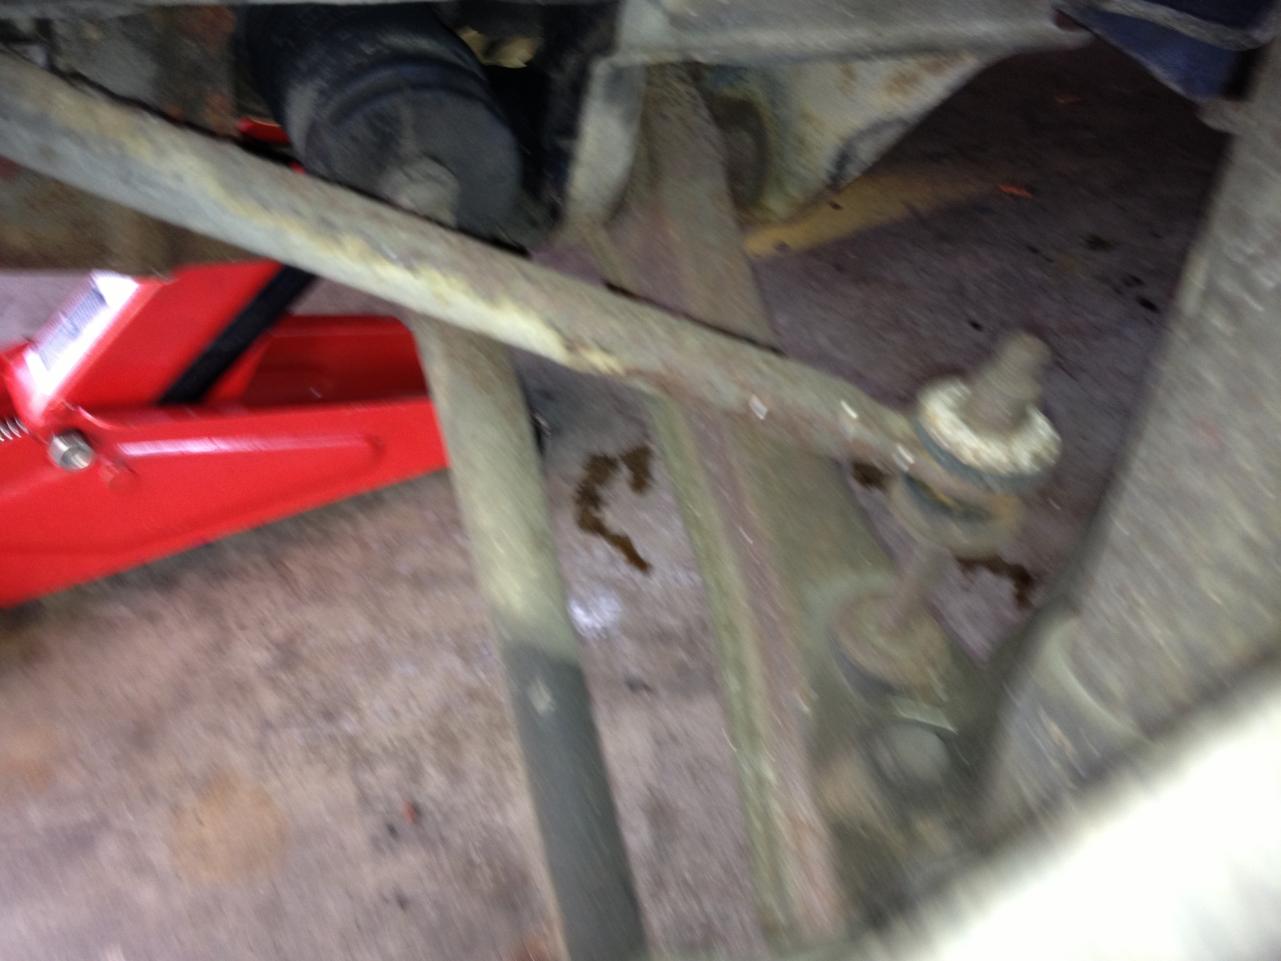
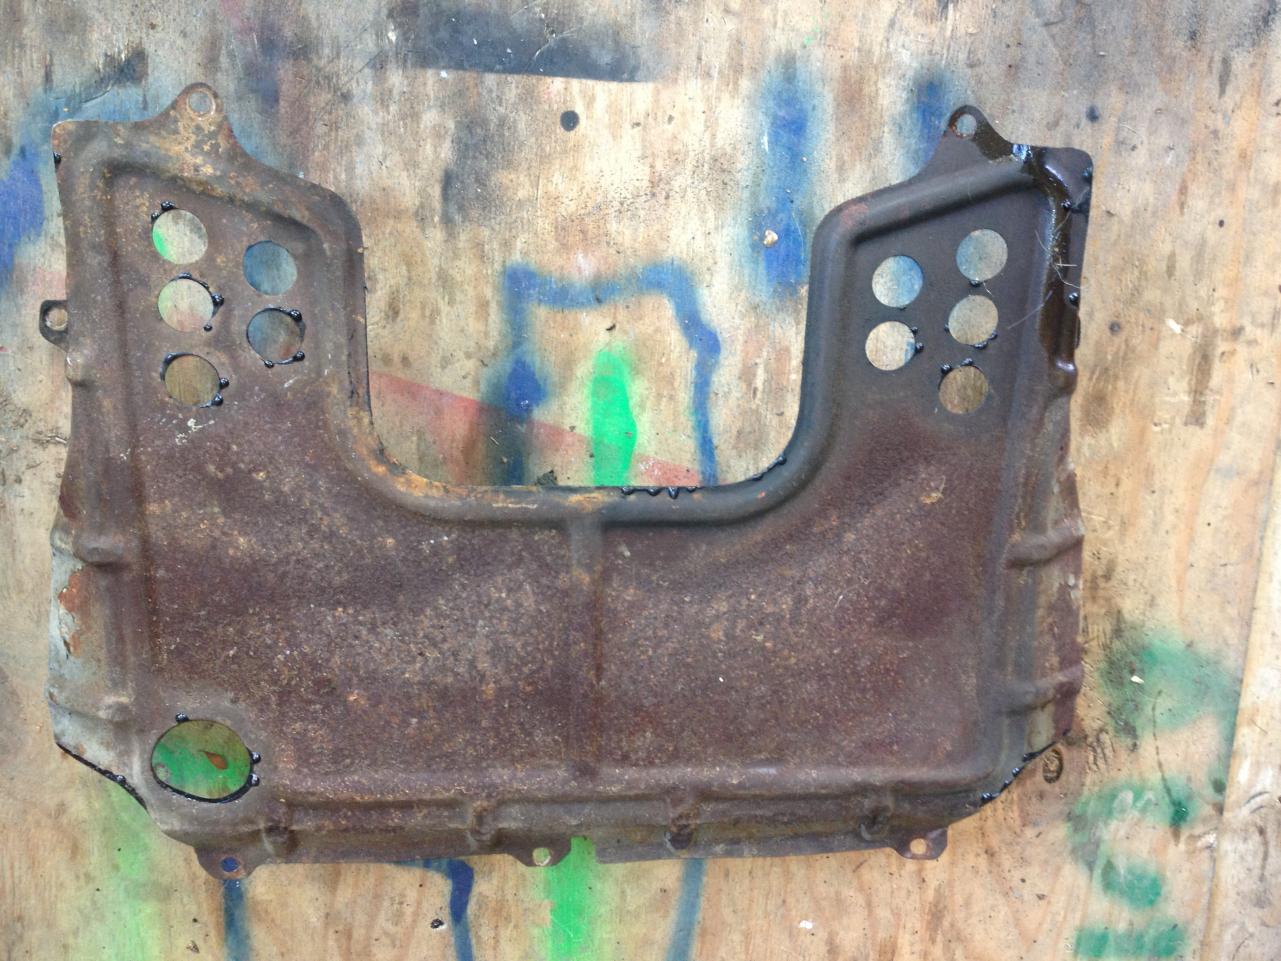
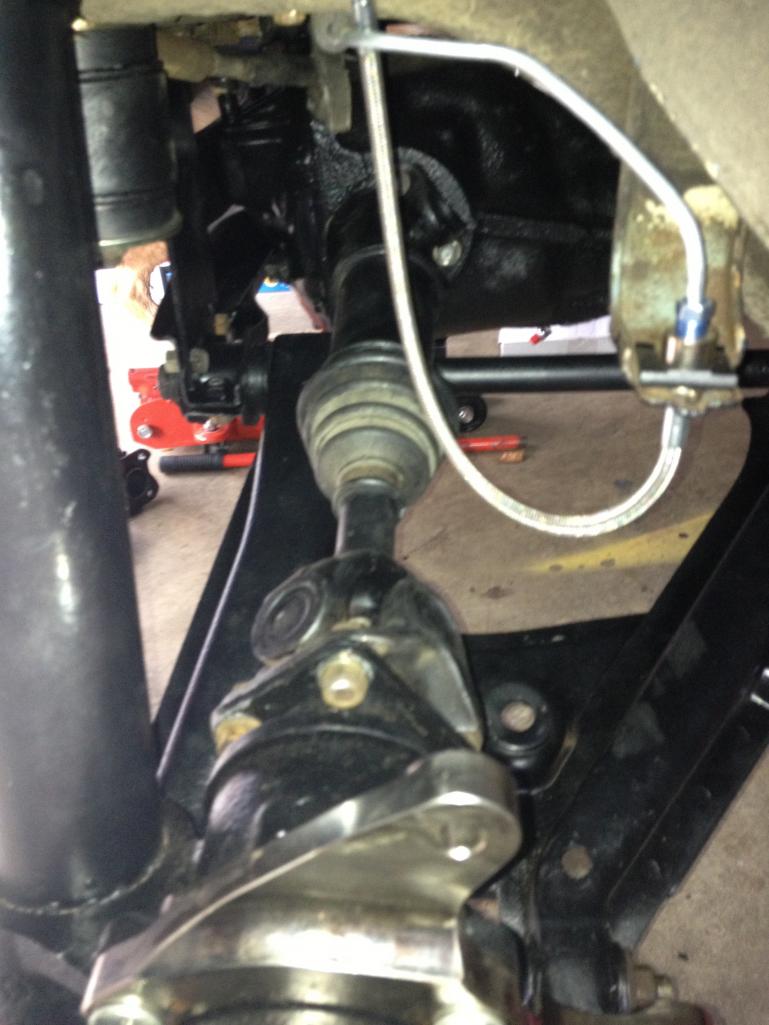
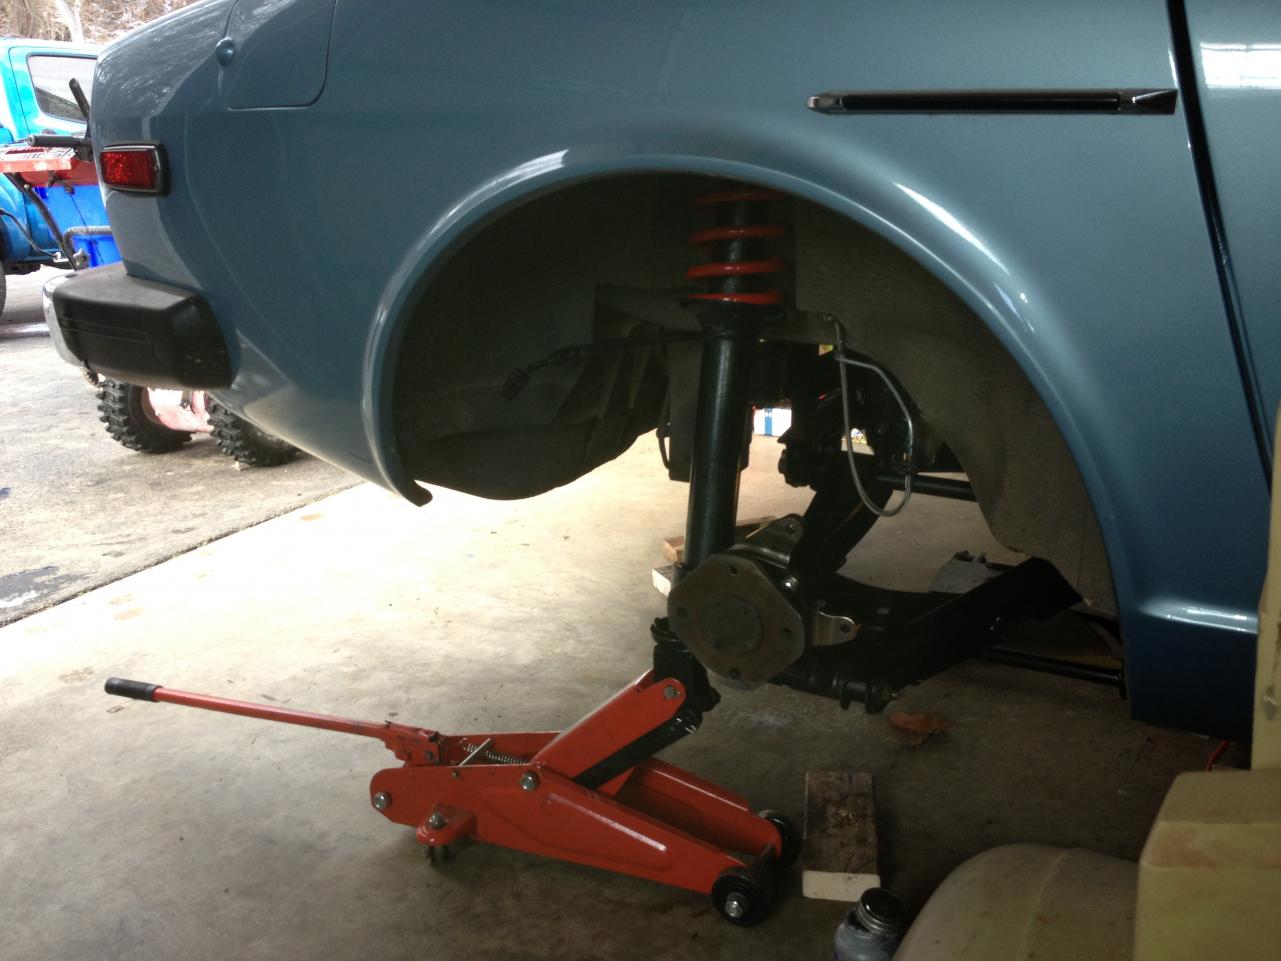
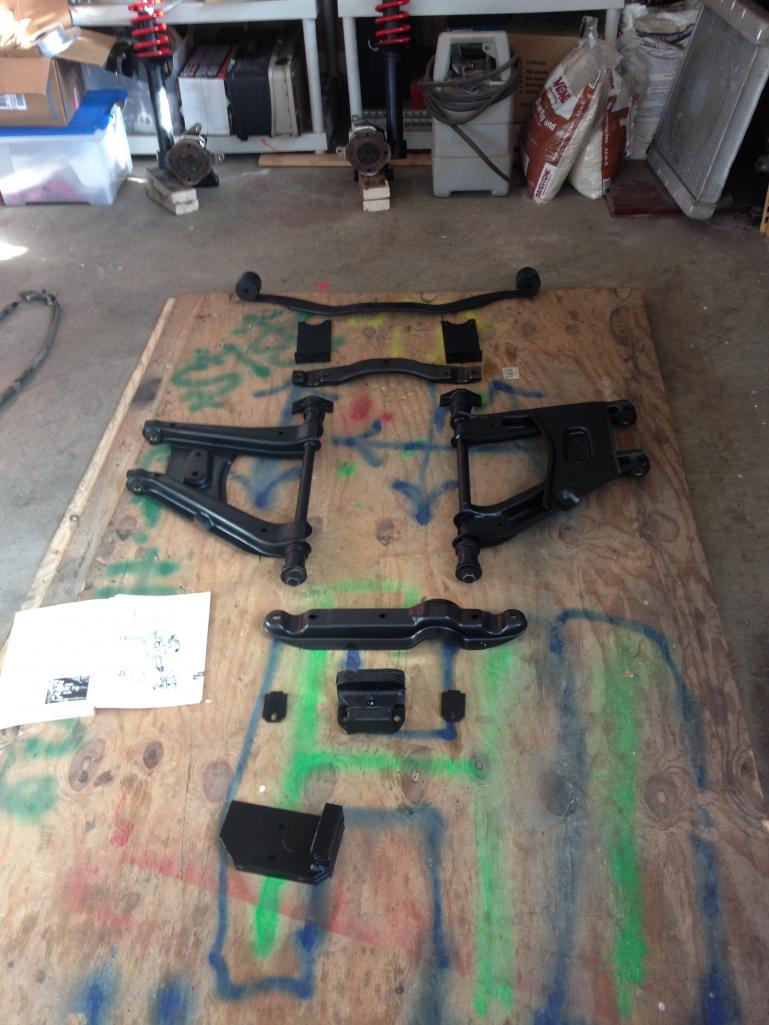
For those of you that stuck with me through my rear suspension rebuild, I have rolled right into the front end and this will be the thread. I would like to think that I am getting much better at this, but I'm not sure if that is the truth or not. The front end came apart much easier than the rear end. Tasks accomplished today are: Removal of front struts, removal of front hubs and wheel bearings, removal of all brake components, removal of rack and pinion, and removal of the front anti-sway bar. The objectives are: To rebuild the rack and pinion - it's stiff. To replace the wheel bearings and ball joints. To replace the anti-sway bar with a thicker one. To replace the front springs with eibach's. To replace the front struts with illumina's. To add 4-piston calipers and slotted rotors (non-suspension - I know). All of the parts will be sandblasted and painted or treated with POR-15 and painted where sandblasting is not feasible. Here are a few pictures of my progress so far:


-
I didn't think that you were supposed to put something as wide as a 225 on a 16X7. If that's ok, then I will use the 225's
-
Be careful using heat around that mixture!
-
I have studied this subject in the archives extensively and originally decided to go the 225/50/R16 on a 16X8 route. I have utterly failed in finding a wheel the I like in a 16X8 4-bolt pattern. I thought the Rota's where a lock but they are on indefinite back order. After some soul searching I have decided to go with the following: 16X7 Konig Rewinds with 215/50/R16 Kumho Exsta XS Here's the question. I don't want to rehash the sizing debate. I just want to make sure that combination of tire/wheel works. Does this sound like a decent combination? Thanks all in advance.
-
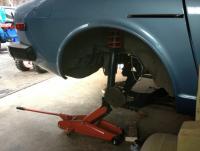
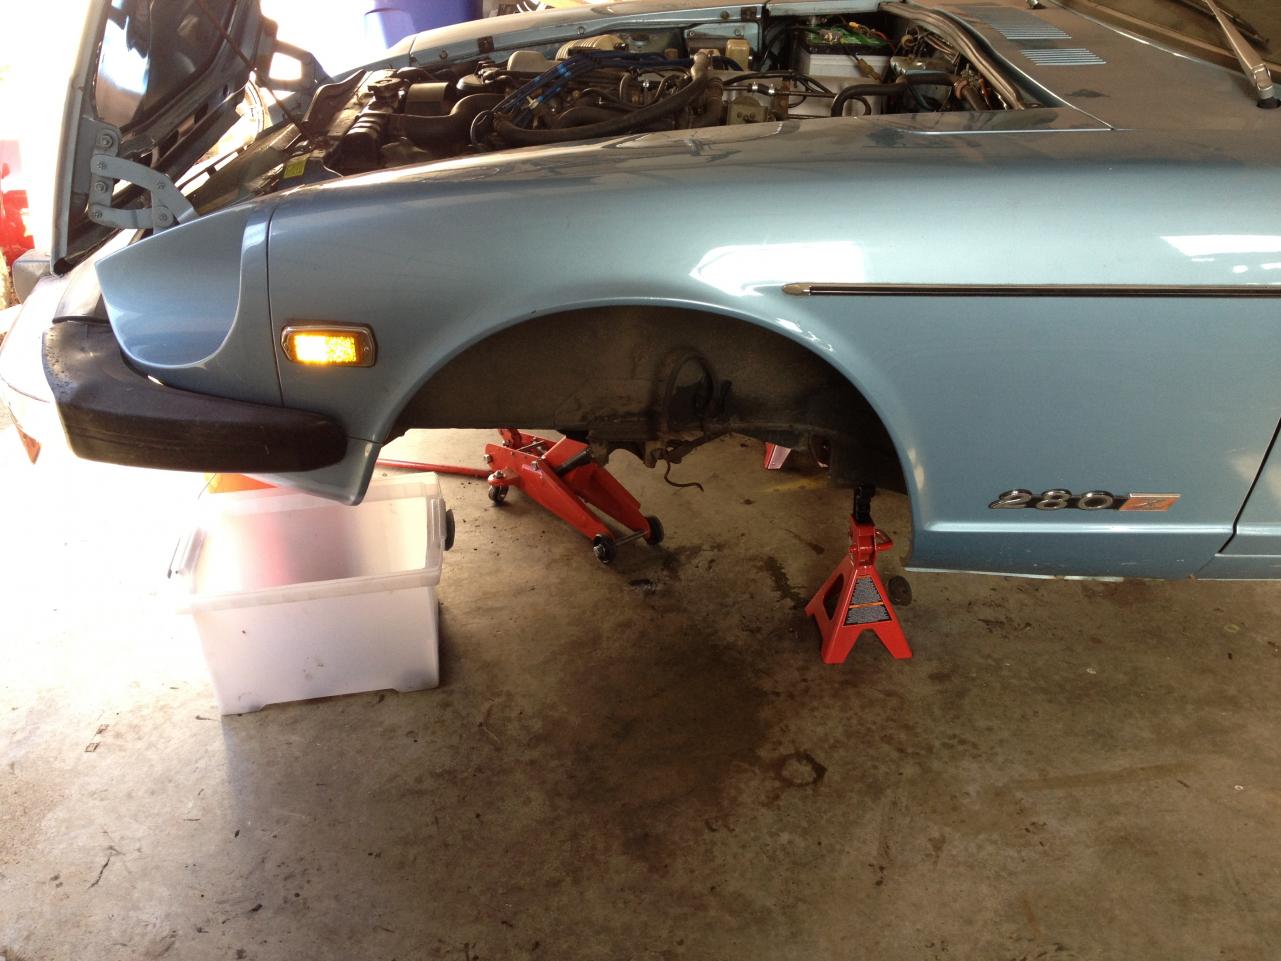
Well, there won't be too many more posts in this thread since I am almost done. On New Years Day, in finished (sort of) the installation. I was able to put the wheels back on the car and loaded it down with an assortment of bags of quickcrete, dog food and a couple of iron weights to simulate 2 - 150 lb passengers. Then I torqued the assorted bushing locations. Some were quite a challenge because of the combination of limited access, a one-handed grip and a high torque specification. The anti-sway bar is not installed yet and there are no brakes but everything else is done. I will put on the anti-sway bar next weekend. The brake calipers can not be installed until I get my new wheels. So that will get done whenever.

-
God, I can't even type the title right. It should have read, "Pain and pleasure kind of day". Typical to how my day is going, I typed most of this post out and my browser crashed and I lost it all. So I have to do it again. Same story with my work on the car today. Almost everything that I did I had to take apart and do again because something wasn't right. This about sums up the day: First I manhandled the differential into place. Does anyone see a problem with this picture? I'll give you a hint. The @#$! mustache bar is on backwards. This is how my stupid Hayes manual showed it. I guess maybe that's how the 240z is but not the 280z. I hated to do it, but I had to pull the differential back out and turn the mustache bar around and reinstall it. Then I put in the control arm. And I put in the strut and couldn't get the darn thing to line up with the control arm because the shoulder of the bushing was sticking out too much. So it all came out. I had to trim the bushing slightly which I am sure is not the ideal way, but that was the only path forward so I took it. Then I put the control arm and strut together and installed the spindle pin... backwards. So I took it out and did it again. See the theme for the day? I finally go it all together and installed on the car. I don't know what is wrong with me sometimes... But I did manage to get it together. I still need to torque the bolts once I sit the car down. That's probably going to carry over to next weekend.


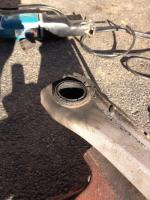
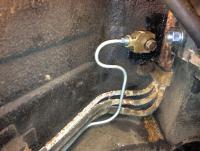
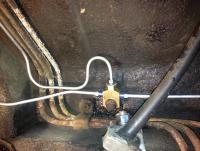
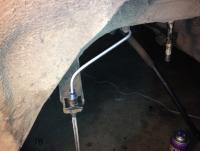
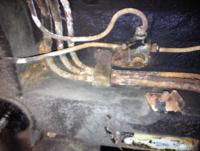
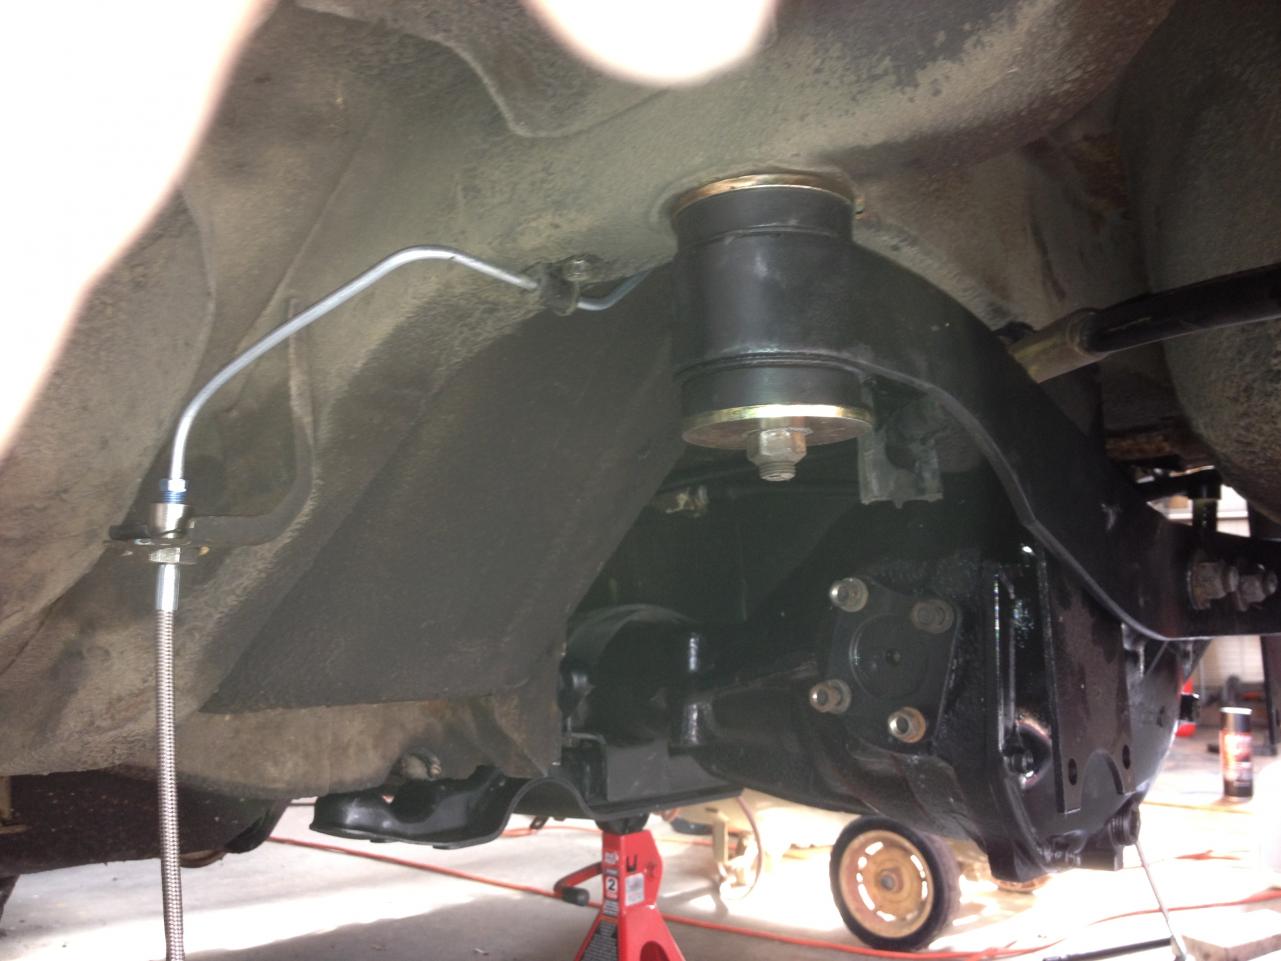
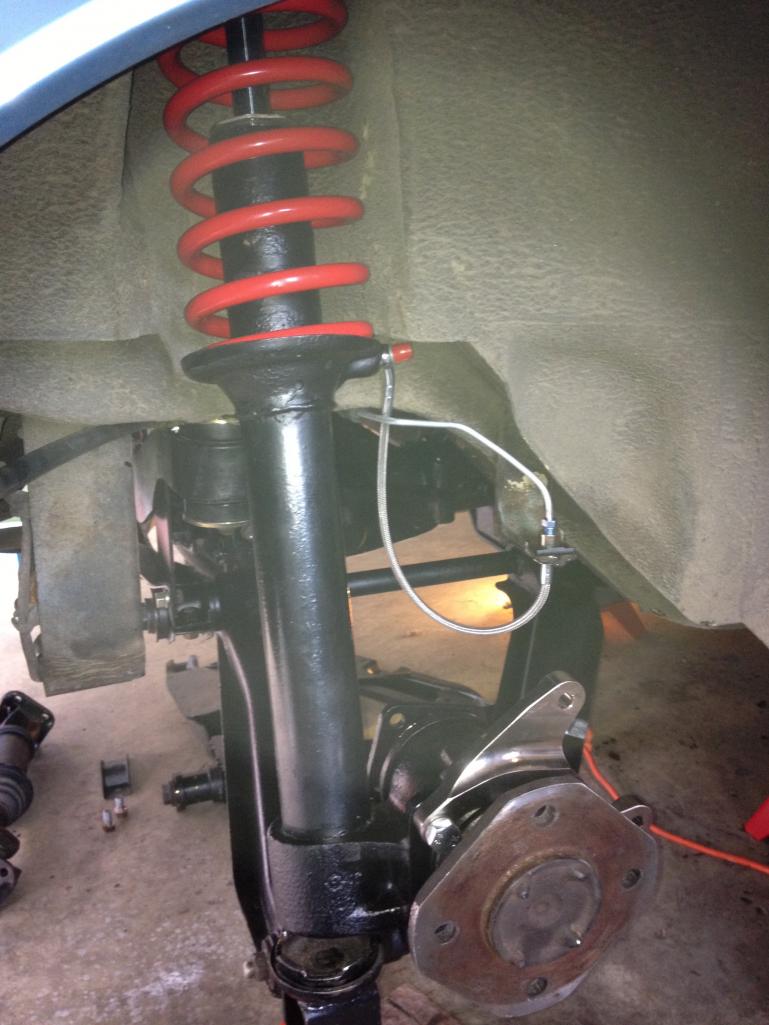
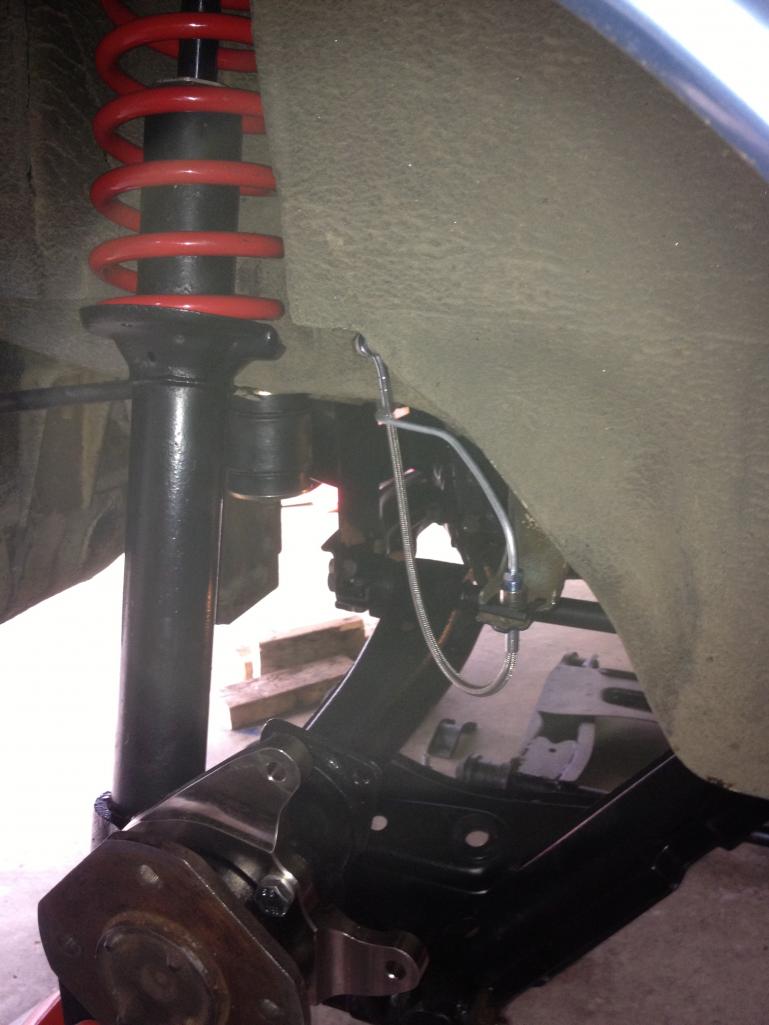
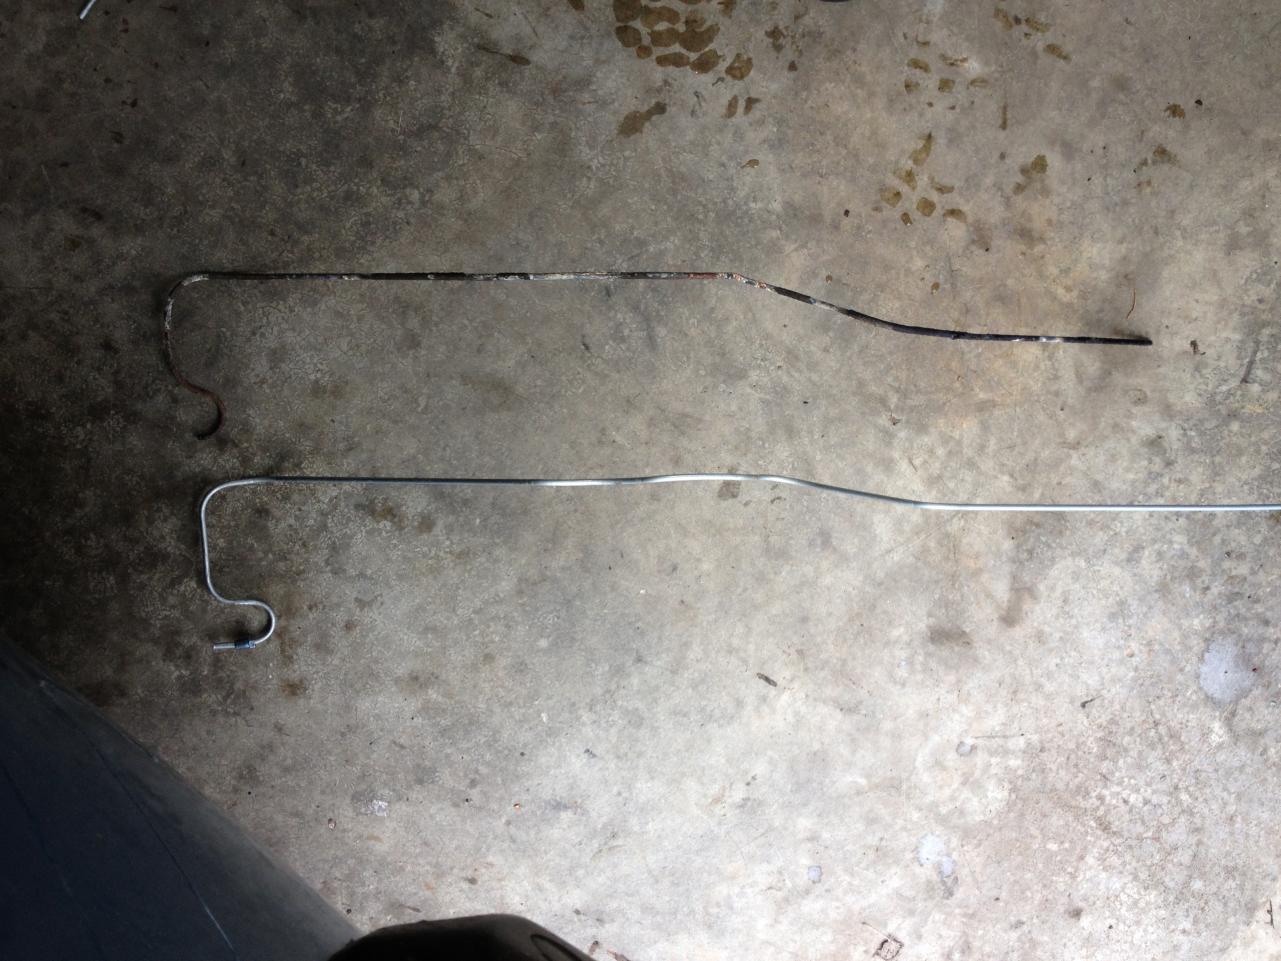
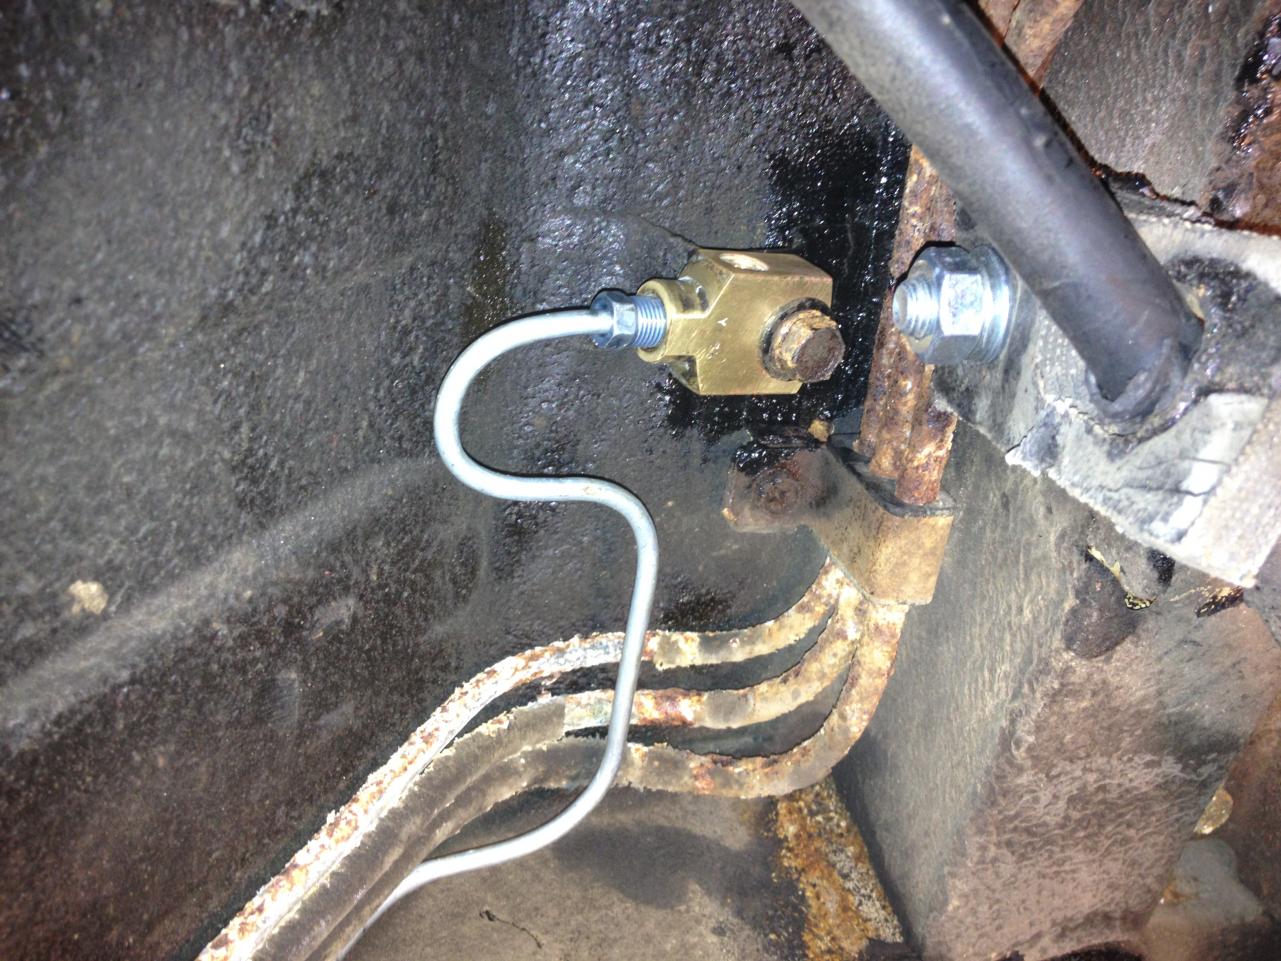
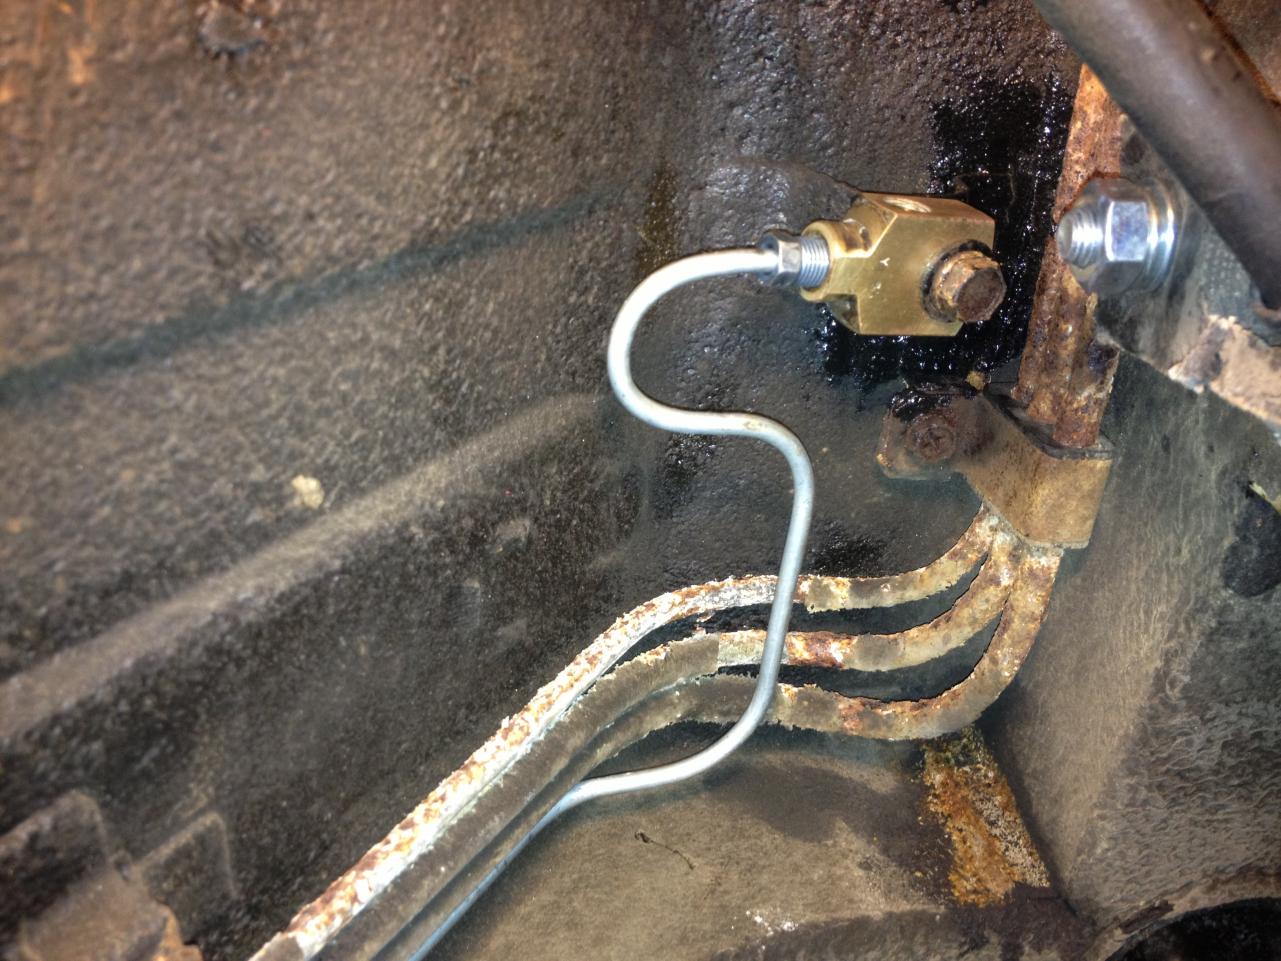
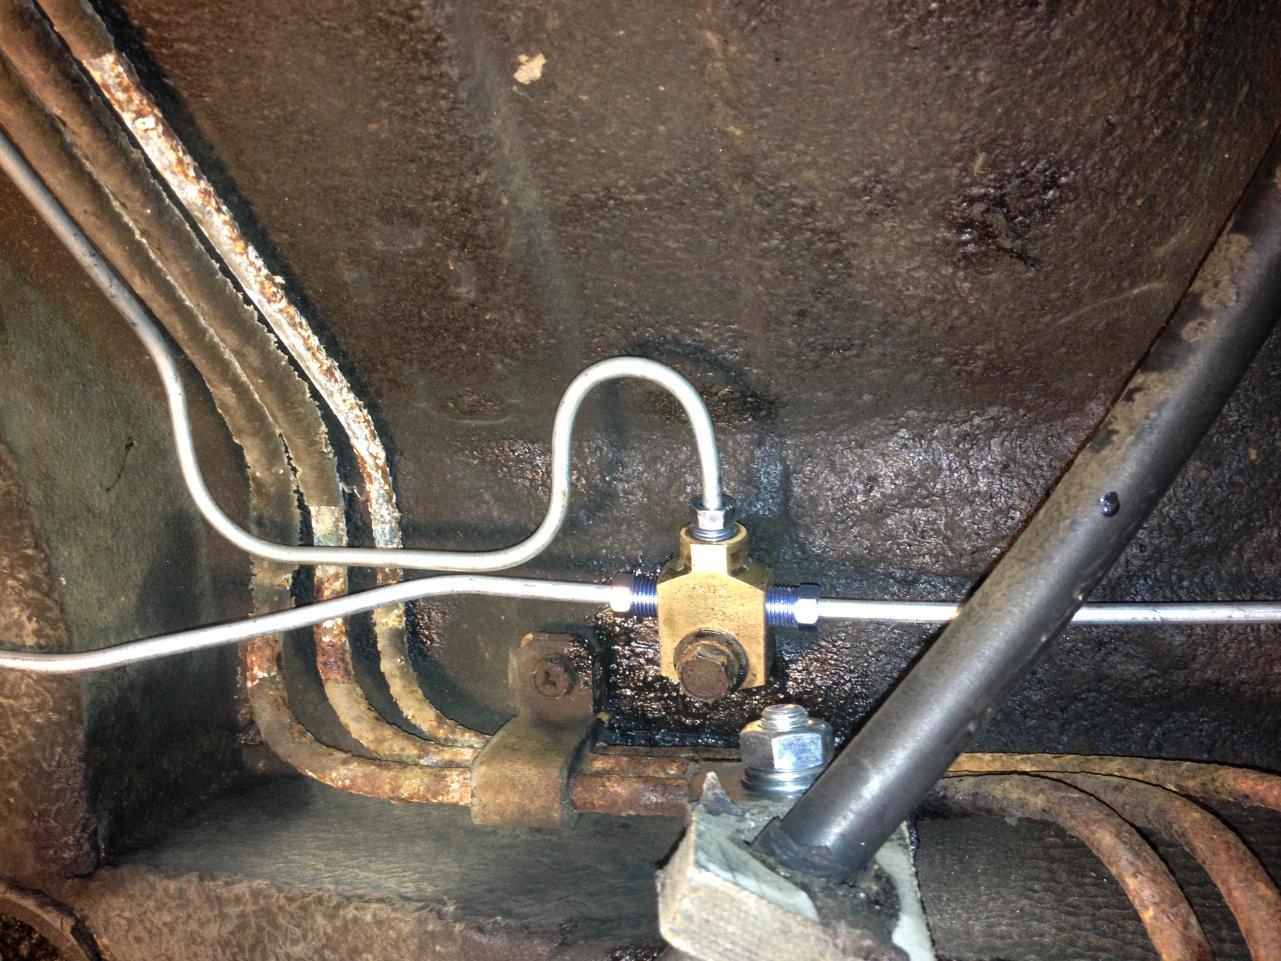
 I made some more progress. This doesn't really have anything to do with suspension per se, but since I'm under that part of the car and this is part of my rear suspension rebuild I will put it up in this thread. I have been agonizing about my rear brake lines. They were heavily corroded and I couldn't get the flair nuts off. Even with a lot of PB Blaster and waiting. They just wouldn't let go. After much soul searching and internal debate, I broke out the dremel and cut the lines at the nut. The I rebent new lines using the old ones as templates. Here are the results. I am pretty pleased with how it turned out. There was a lot of labor involved and lying on the floor which isn't fun because it's 30F here and snowing outside. The main line to the "T" old next to new: The new main line and cleaned up "T" The "T" and the new lines to the wheels: A view of the completed install from the rear driver's side wheel well: A little commentary is probably due here. There is a lot of stuff under there that I am leaving alone right now. I really had to resist the urge to pull the fuel lines because they look like heck. The brake line looked about that way when I started. It's hard, but I will be doing those later when I pull the gas tank and restore it. The only reason I am holding back is that I don't want to take my road-worthy car and turn it into a 2-year project that may never get done. My logic right now is to take small bites and finish the jobs completely. In the long run it makes more work, but in my own mind gives a higher chance of success and shorter intervals with a non-drivable car.

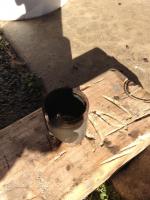
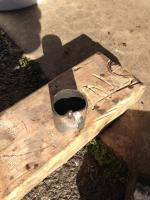
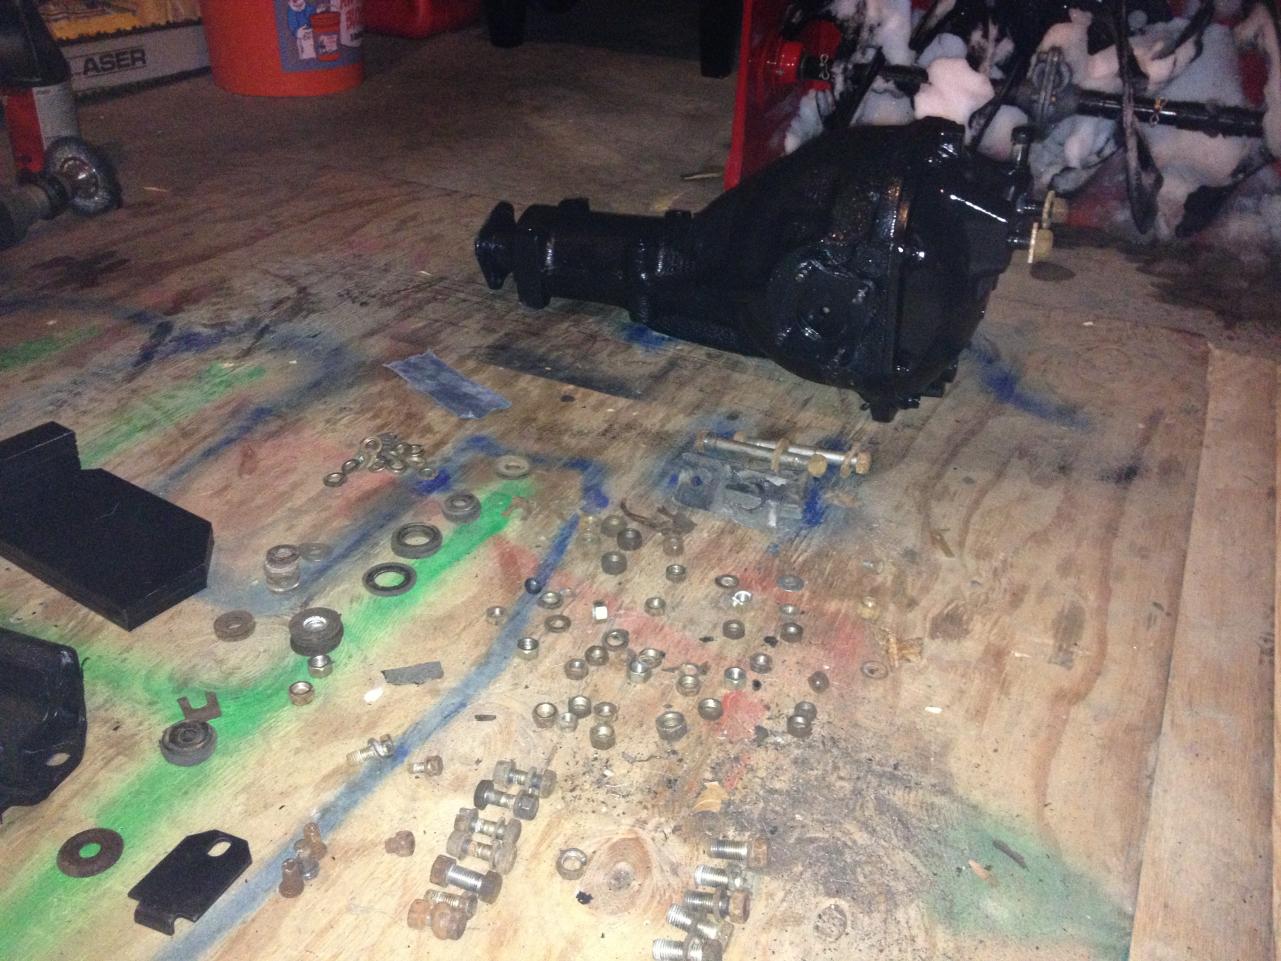
 EuroDat: Nope, I didn't change the seals. I thought about it, but the grime you see was from the u-joints slinging grease. The diffy actually looked really solid much to my surprise. I have a few more photos. Not making good progress over the holidays. I have a cold right now. I laid the parts out to prepare for reassembly and took a photo of my crappy brake lines. Most of what is shown in the photo has been pulled. I rebent new lines from the T-block tonight.
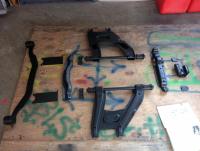


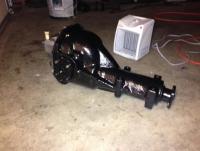
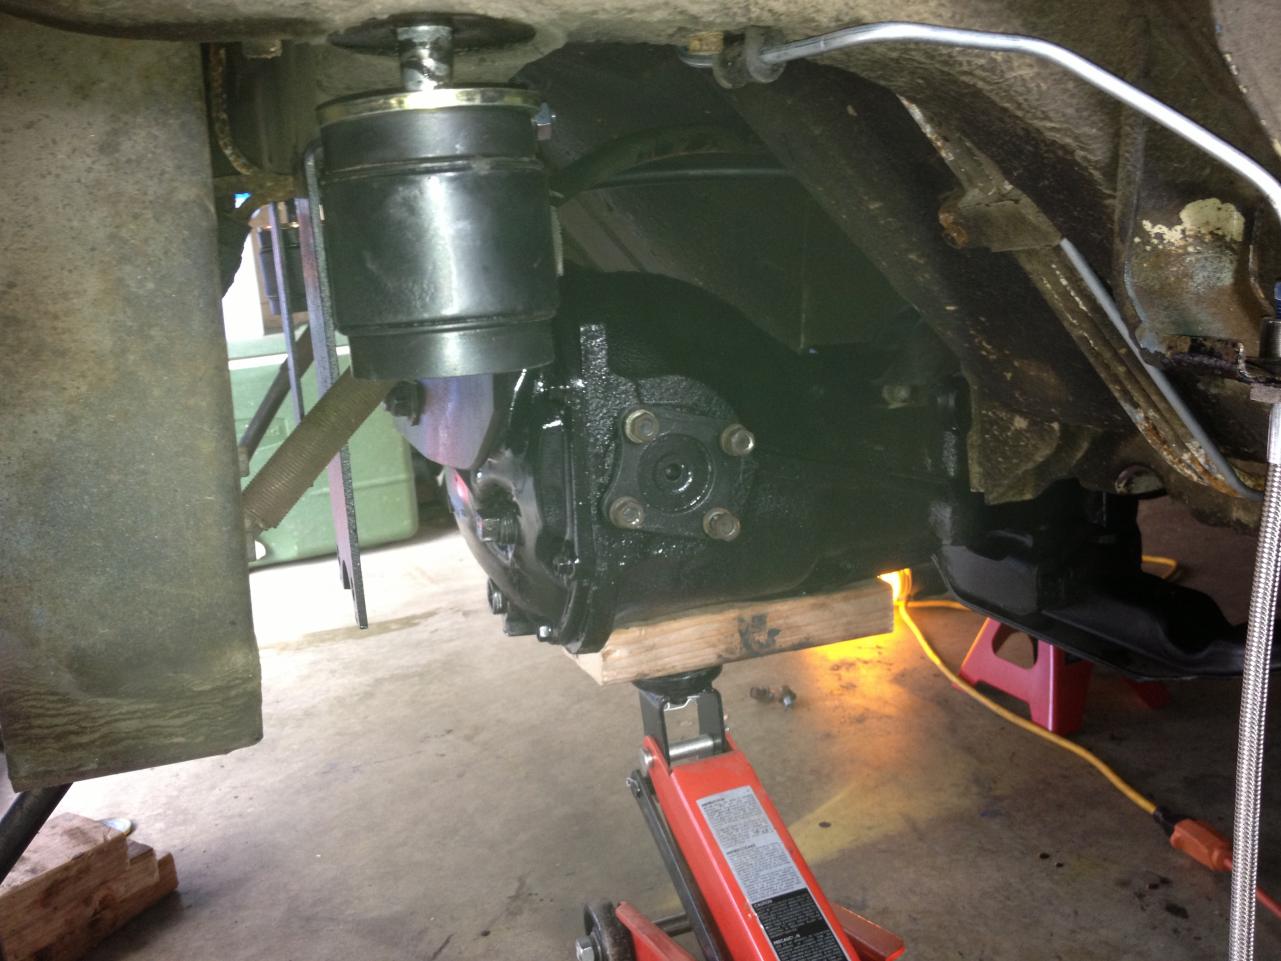
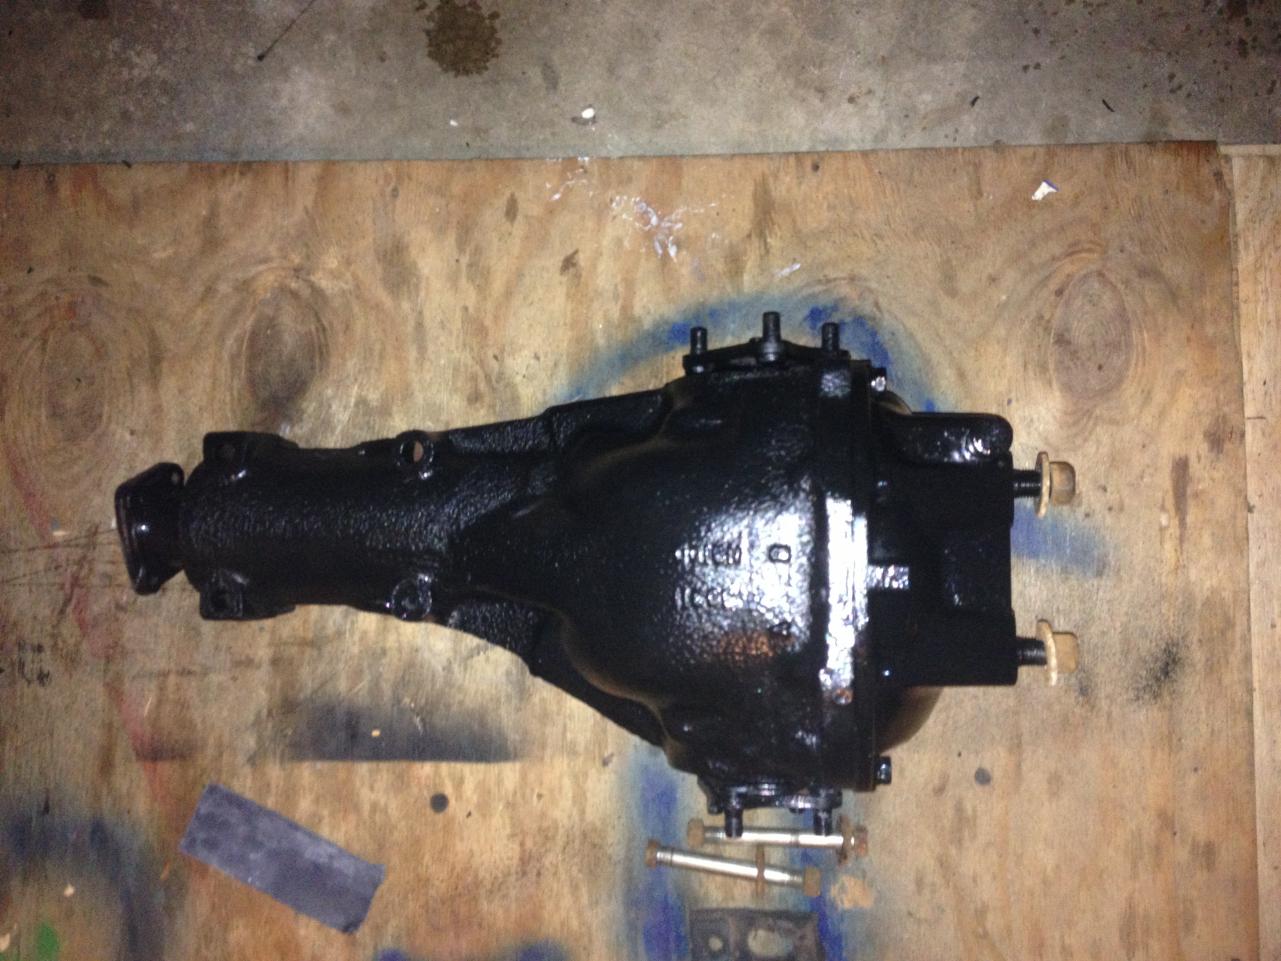
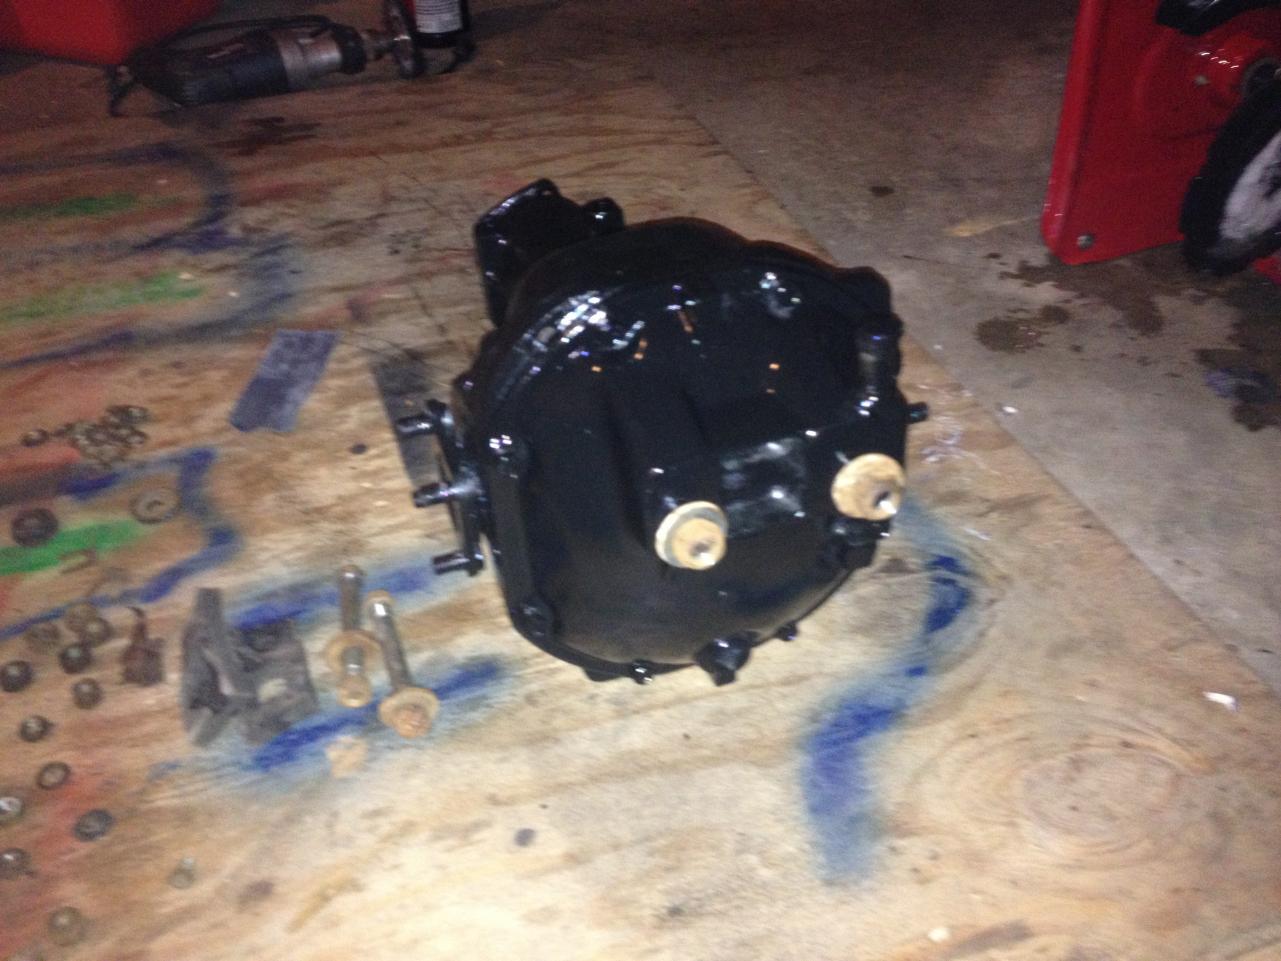
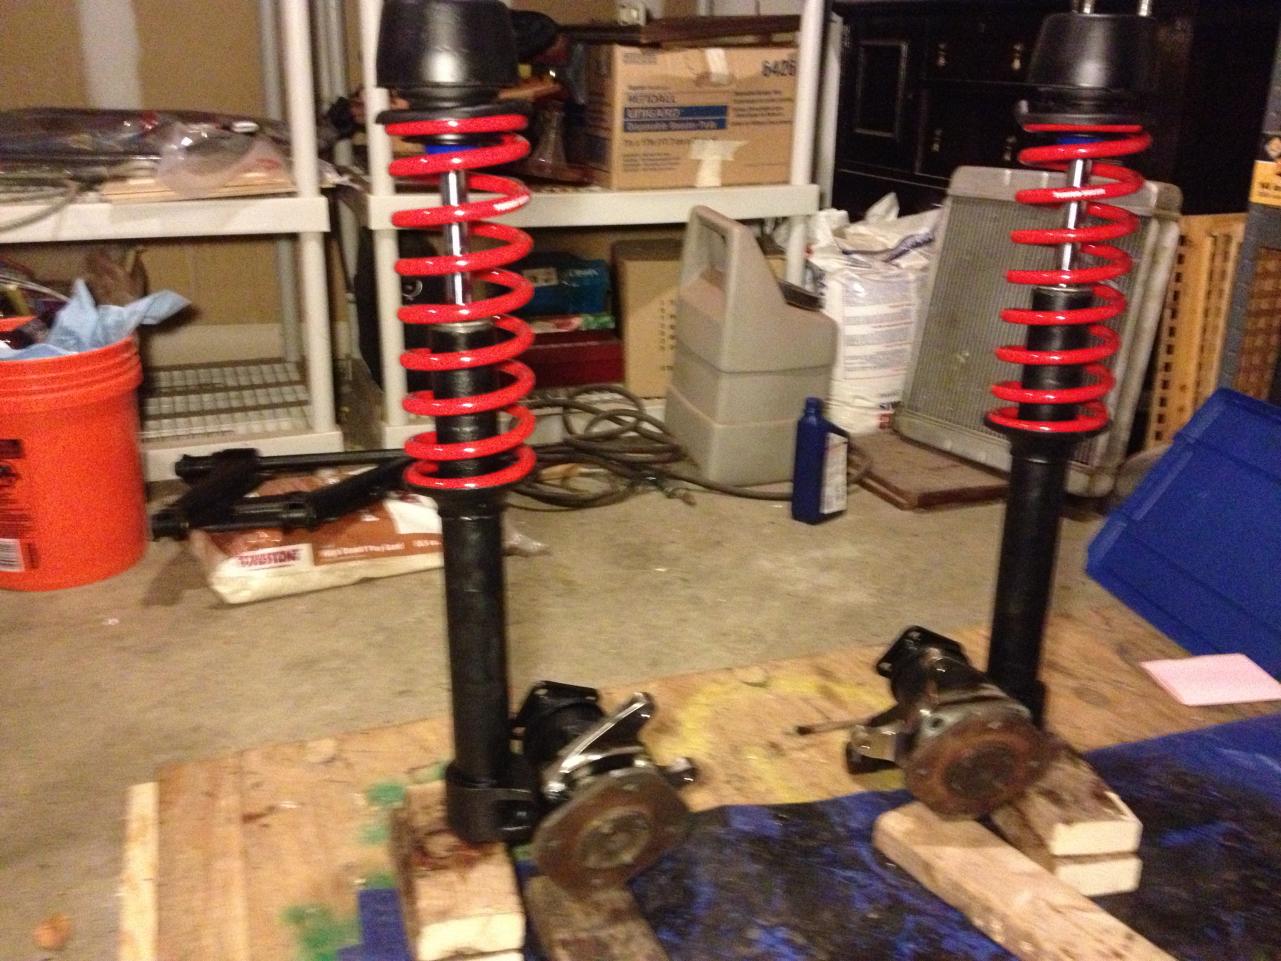
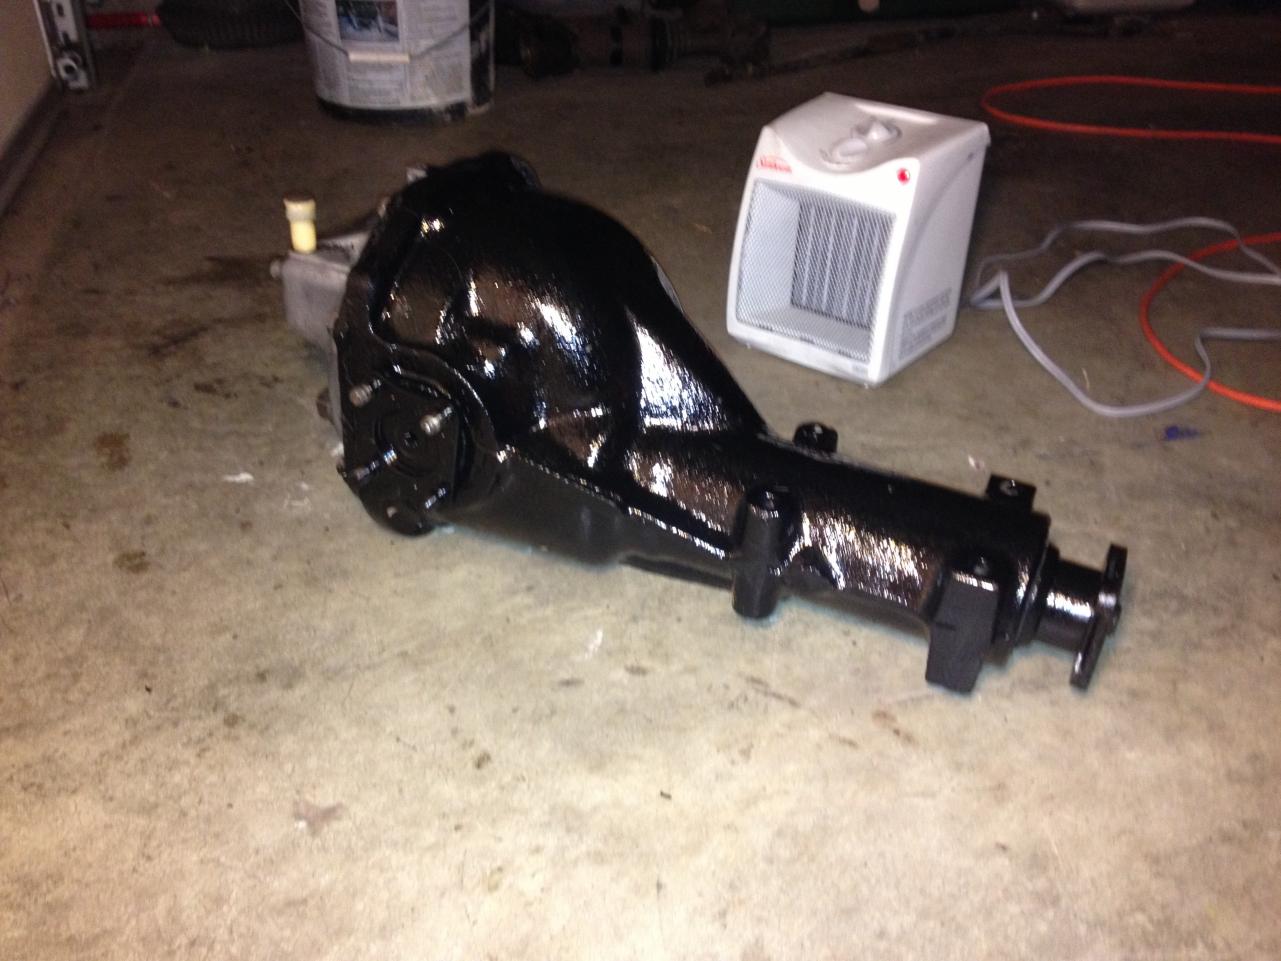
 I made some progress today despite the fact that we didn't have power until close to 1:00 pm. I cleaned up the differential and checked the fluid. It looked very good so I painted with POR-15. It will get a coat of flat black tomorrow. I also assembled the struts. Here's what they look like right now. Sooner or later I am going to have to solve my brake line problem. Everything is welded together and no amount of elbow grease and PB Blaster is gonna get them apart. Maybe I'll wrestle that monster tomorrow.
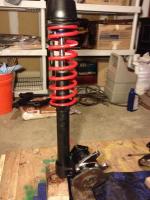
 Jeff, thanks for the help. I ordered some Rota RB-R's 16X8 with +4 offset. I hope they work out. My search of the board seemed to point in that direction. I was surprised how unhelpful so many of the tire vendors were. You'd think that a 16X8 4-bolt is something exotic. I will post pictures when I get them mounted up in hopes that it will help some other folks. I think I would be dead in the water with out the member support on this board.
Thanks all for the replies. Tomorrow is "differential day". I'm gonna clean it up and then see what the fluid looks like. If it is good I will leave it alone. If it looks bad then I guess I will rebuild. Wish me luck. I'm anxious to get all this stuff tucked back underneath the car where it belongs, but I don't want to do a half assed job!
Good job! Don't sell. It sounds like you still love it!
Hi all: In searching past threads I have found that there are a lot of different tire sizes and offsets in use. Being a little new to the game I wanted to ask before I buy if this combination would work 16X8 wheel with +4 offset and 225/50/16's. The car is lowered an inch. Should I offset more or will this fit in the fender if I roll the lip?
Jeff, thanks for the help. I ordered some Rota RB-R's 16X8 with +4 offset. I hope they work out. My search of the board seemed to point in that direction. I was surprised how unhelpful so many of the tire vendors were. You'd think that a 16X8 4-bolt is something exotic. I will post pictures when I get them mounted up in hopes that it will help some other folks. I think I would be dead in the water with out the member support on this board.
Thanks all for the replies. Tomorrow is "differential day". I'm gonna clean it up and then see what the fluid looks like. If it is good I will leave it alone. If it looks bad then I guess I will rebuild. Wish me luck. I'm anxious to get all this stuff tucked back underneath the car where it belongs, but I don't want to do a half assed job!
Good job! Don't sell. It sounds like you still love it!
Hi all: In searching past threads I have found that there are a lot of different tire sizes and offsets in use. Being a little new to the game I wanted to ask before I buy if this combination would work 16X8 wheel with +4 offset and 225/50/16's. The car is lowered an inch. Should I offset more or will this fit in the fender if I roll the lip?


Important Information
By using this site, you agree to our Privacy Policy and Guidelines. We have placed cookies on your device to help make this website better. You can adjust your cookie settings, otherwise we'll assume you're okay to continue.