ksechler
Free Member
-
Joined
-
Last visited
Everything posted by ksechler
-
 Thanks to all! I have installed the bearings in both struts and torqued them. Everything feels right this time. Is was a little tense rehabilitating the stub axle threads that I damaged. A steady hand and patience seems to have been the right combination. I have not peened the nuts yet. I know that as soon as I do there will be something I forgot so I'm going to hold off for now. I have the tabs for my discs installed also. Ready for another try All done Another lesson: It takes a lot longer to fix the things you screw up than it does to knock everything down solve the problem and reassemble.
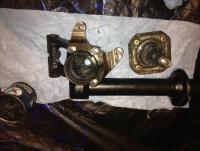
-
I know. The thought's crossed my mind. We'll see...
-
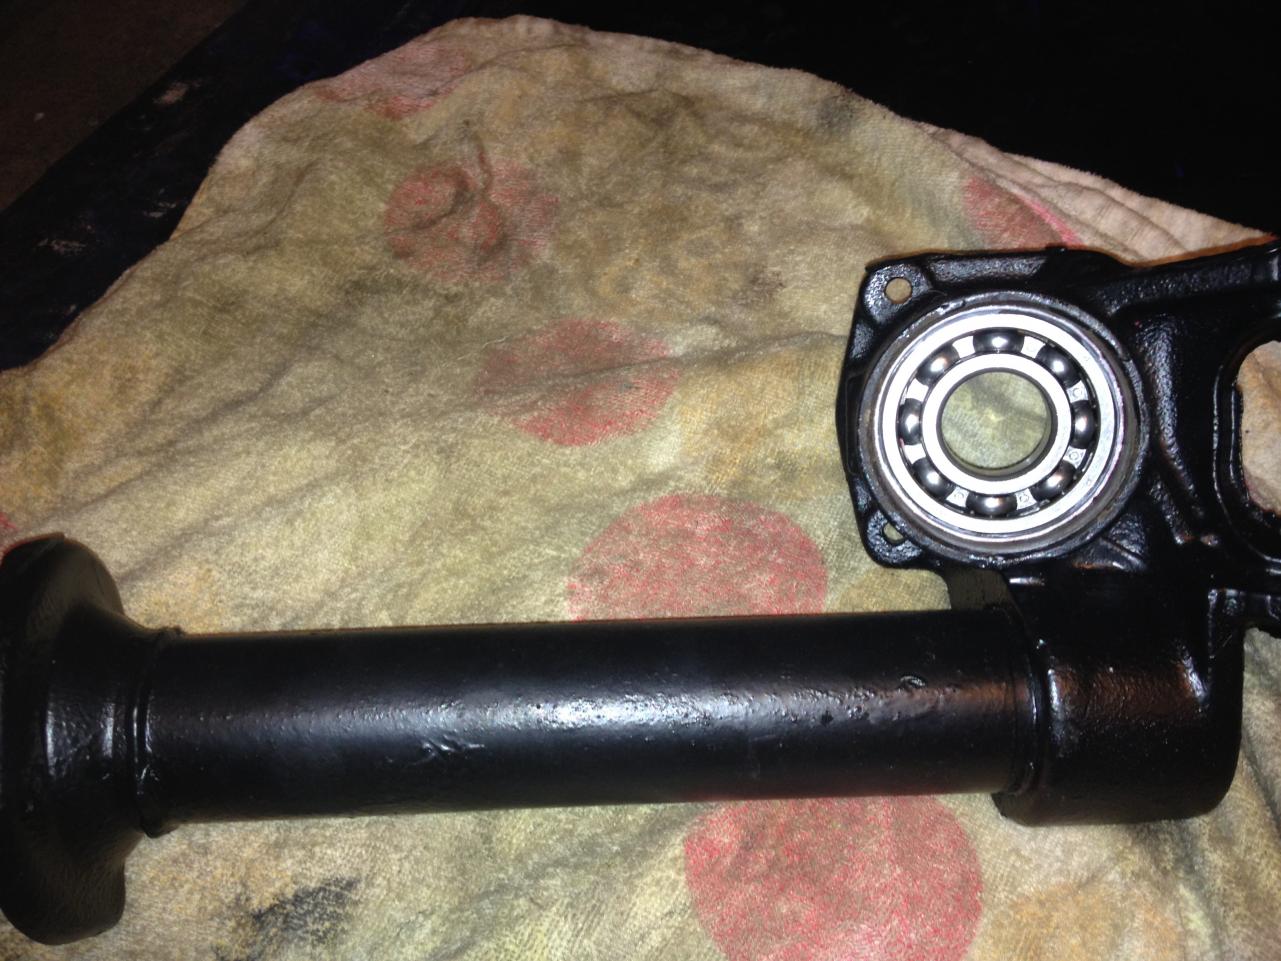
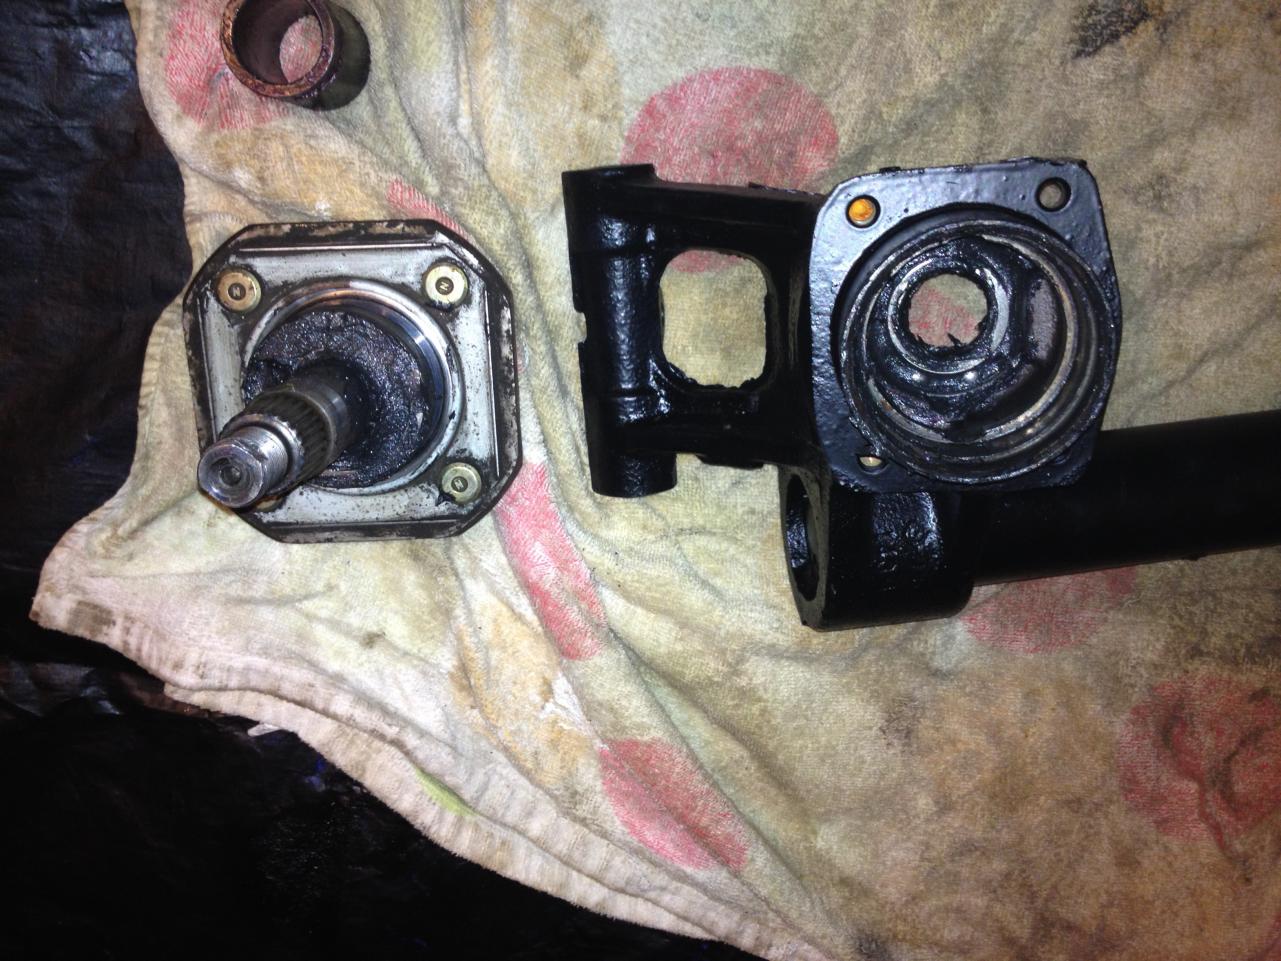
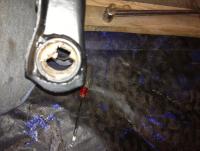
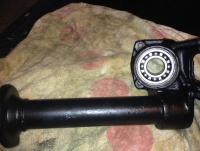
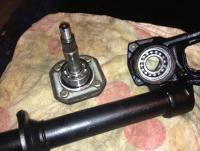
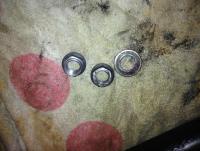
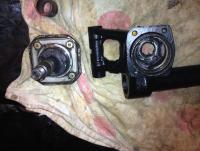
An update on my wheel bearings. I found my problem and corrected it. I'm going to fully disclose what I did wrong. I'm gonna sound stupid but I do this in the hopes that I can save others from making the same mistakes: When I first assembled the strut, the outer bearing was not fully pressed into place. As I tightened the stub axle nut the bearings began to bind because the weren't sitting on the spacer. Given enough torque the bearing probably would have seated, but given the circumsances I did one of the few smart things I did all weekend. I stopped, disassembled and tried to understand what was going on. I found the problem and was able to seat the bearing. Then I made mistake number 2. I was in a hurry because I was meeting a friend for dinner. I reassembled everything without the spacer. Now when I tightened everything up again the bearings bound. At this point I just gave up for a while. Today I took the whole thing apart, realized the spacer wasn't installed, installed the spacer and tightened the stub axle nut. The assembly feels fine. No play and it turns smoothly. So my lessons: 1). Don't rush 2). If it doesn't seem right, it isn't 3). Pay attention to what your doing. There's no such thing as "extras"!
-
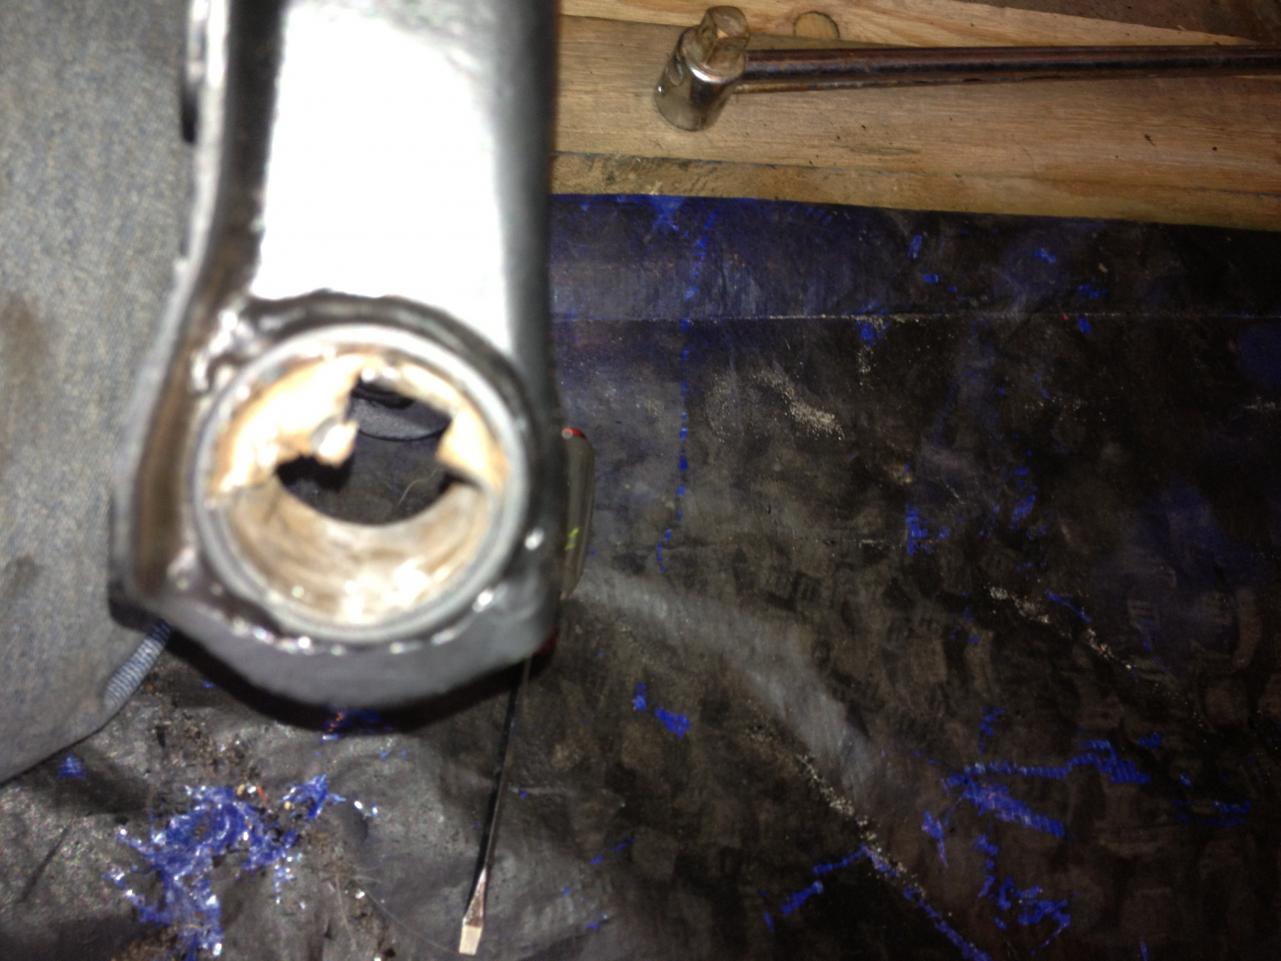
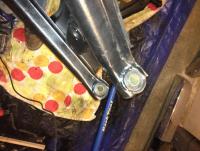
Incredibly frustrating weekend. It seemed like everything I touched I f'd up. Lets start with the wheel bearings. I assembled the strut and stub axles and tightened everything down. I couldn't even turn the darn hub it was so tight. Knocked the whole thing apart realized the outer bearing wasn't seated all the way. Convinced it to be more seated with several blocks of wood and a BFH. Put it back together and It is still way too tight. So I tried the other strut. Same darn problem. So I decided that I needed to take them back to work and use our hydraulic press to be sure the bearings are seated, and yes before anyone says it, I did remember to put the spacer in. Even worse I got pissed and a lot ham handed and mushroomed one of the stub axles slightly. So I can add repairing those threads to my list of things to do. So in effect I did negative work. That was Saturday. Today I decided to work on installing bushings. Let me tell you, I had a heck of a time getting the metal insert out that held the rubber bushing. I made a half-A$$ed attempt to cut a slit in it with a hack saw and then started pounding on it. 3 hours and many cuss words later it came out. I also wailed my thumb joint with a 1 pound sledge. That freaking hurt. So a word of advice, cutting a slit all the way though the sleeve is ABSOLUTELY mandatory. I did a better job on the second one and it came right out. So after two whole days of work I managed to install 2 bushings.

-
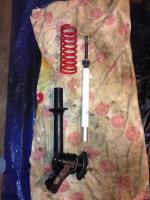
I did a little more work tonight greasing wheel bearings and testing the fit Ready to go: Together again: The illumina shock, spring and strut exploded and ready to go together:

-
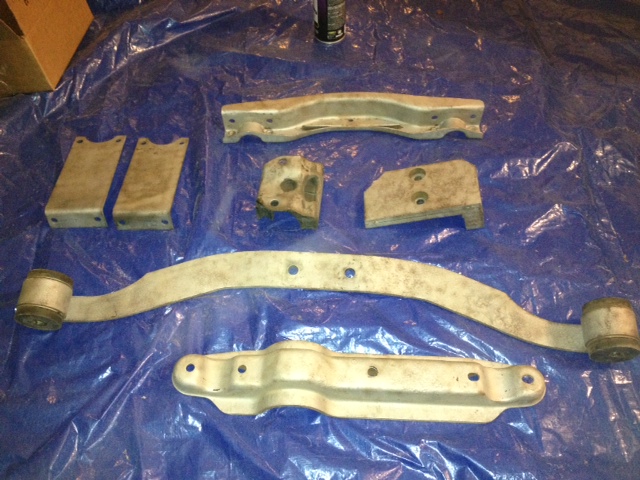
Yes, you are correct, I meant strut tower brace. You can see it in my parts picture. I am using Urethane. I want this car to handle. This will not be a daily driver so comfort is a lower priority.
-
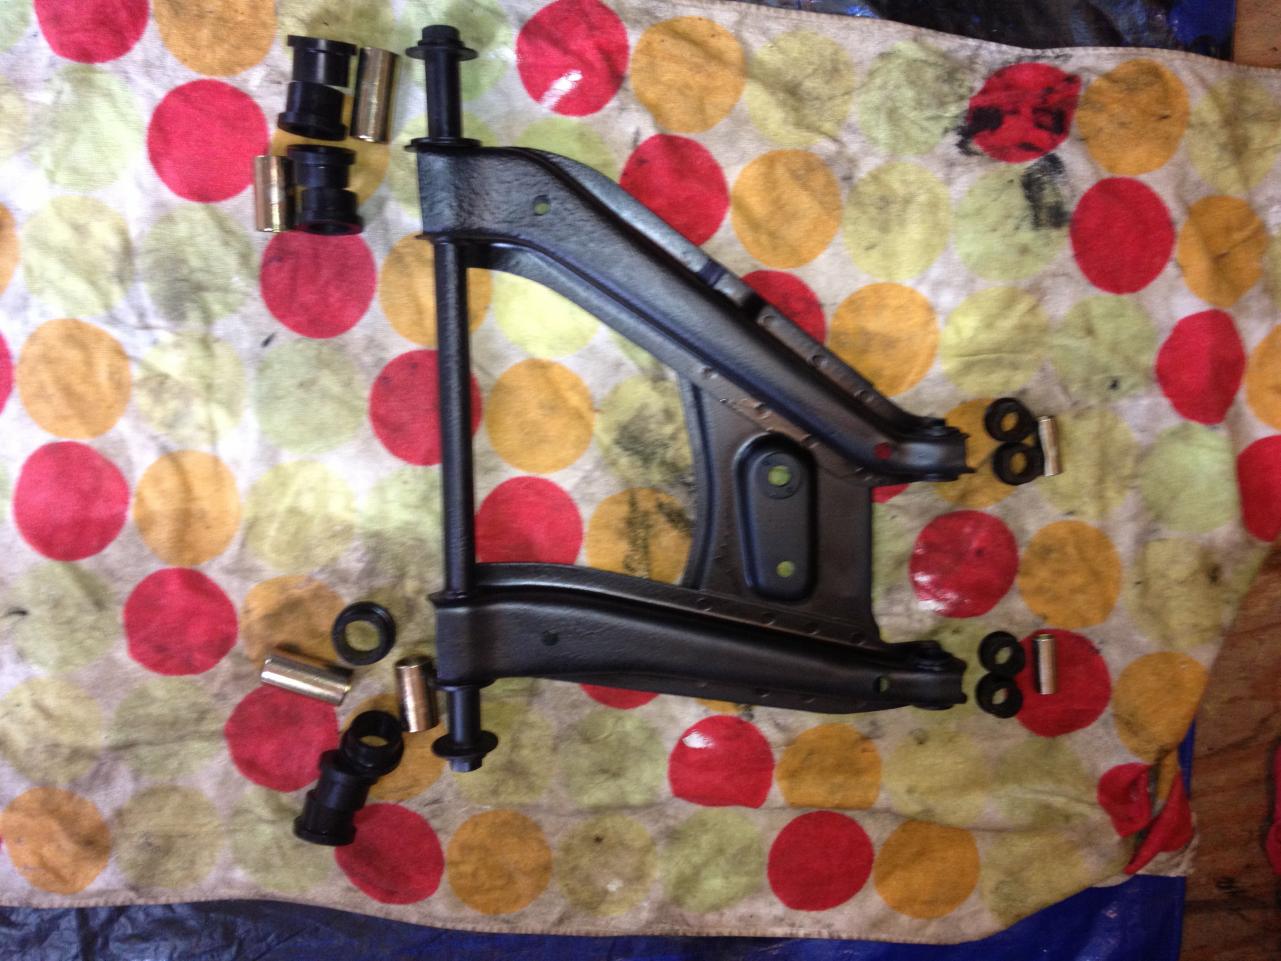
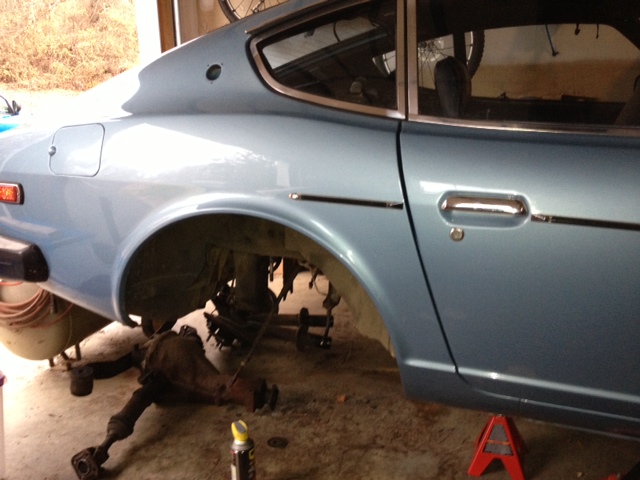
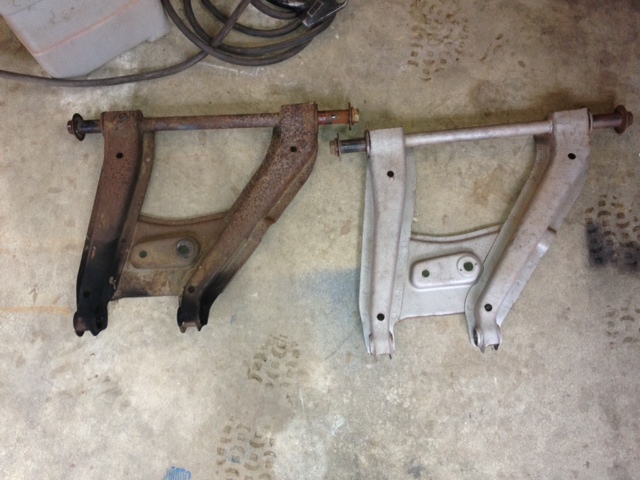
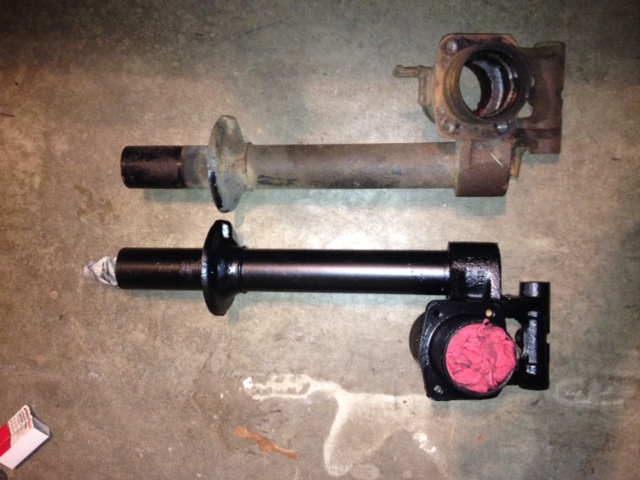
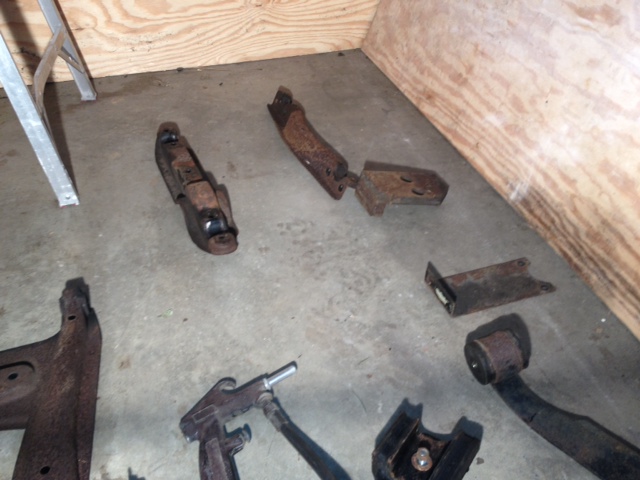
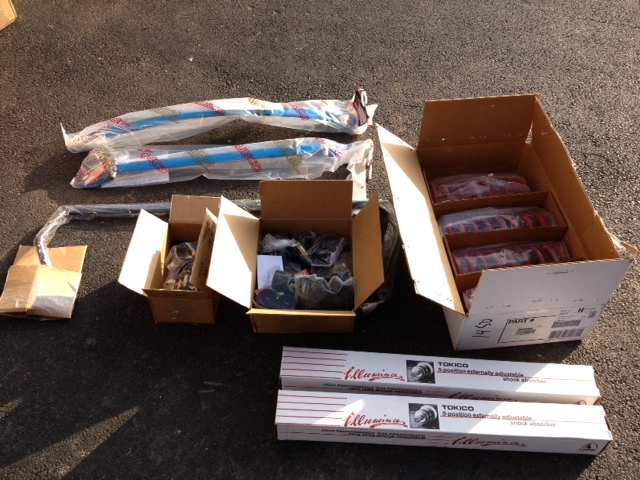
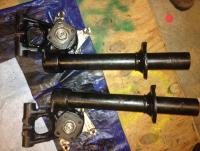
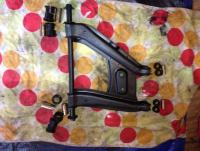
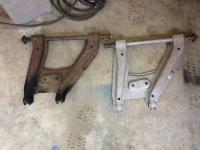
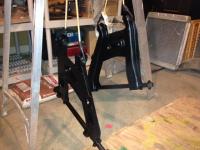
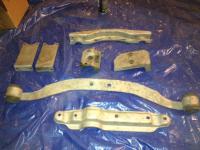
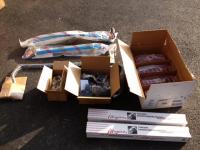
I was planning to wait until I had more done to start this thread, but what the heck... Here's what I am starting with. It is a '76 280z. Completely stock and road worthy. It feels every bit it's age. The intention of this restoration is to replace the bushings, springs, struts, sway bar and rear brakes. I will be lowering the car 1" and will also add a strut tower. When I'm done with all of my work (which will include the front end and motor) I want a classic with modern performance that I can take to the track once or twice a year (just for fun). Here are the parts (front struts arrived later): Before disassembly: and after (see the spray can of penetrating oil? I used quite a bit!): The disassembled parts as they came off the car: And after I sandblasted them: Control arms before and after sandblasting: Painted control arms: Here is a comparison of the struts. One is finished and the other not started. Yesterday I pressed in new bearings and I have installed the outer bearings on the stub axles. This weekend I will either press in new bushings or attack the differential (yuck!)


-
Good luck, but I'm not sure that you have a choice in the matter. I think you have to take the spindle pin out.
-
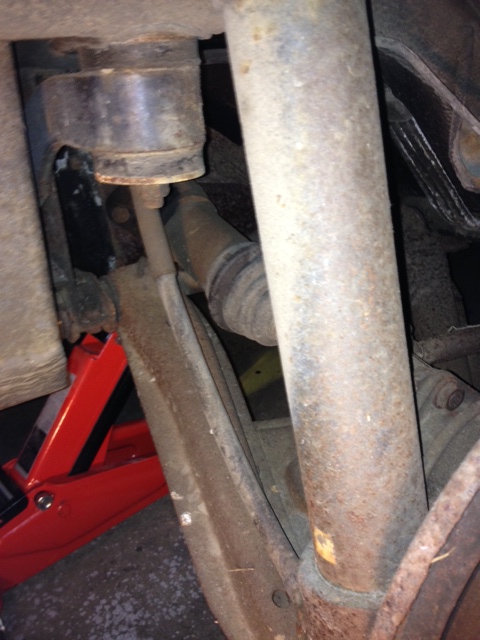
Oh, oh, call on me! I can actually help here. First, courtesy of Leonv check the following: http://atlanticz.ca/zclub/techtips/suspension/rearend/index.html Bookmark this site: http://atlanticz.ca/index.php/tech-tips.html Getting at those struts is not a trivial task. This worst part is the spindle pin. I mushroomed mine getting it out and had to replace it. The locking bolt for the spindle pin is also hard to get out. You can find spares here if you need them: http://www.thezstore.com/page/TZS/CTGY/SSSC01C02 Disconnect the brakes. You'll hate trying to get the struts out while attached to you car.
-
Cool video. Really a good example of how good our cars are. The 280z didn't need a whole lot of attention. The Jenson was a piece of crap.
-
Stanley: Without a dyno you're fighting an uphill battle. Maybe someone here can help. Steve: I still concur. What type of engineer are you? ME? I'm an AE.
-
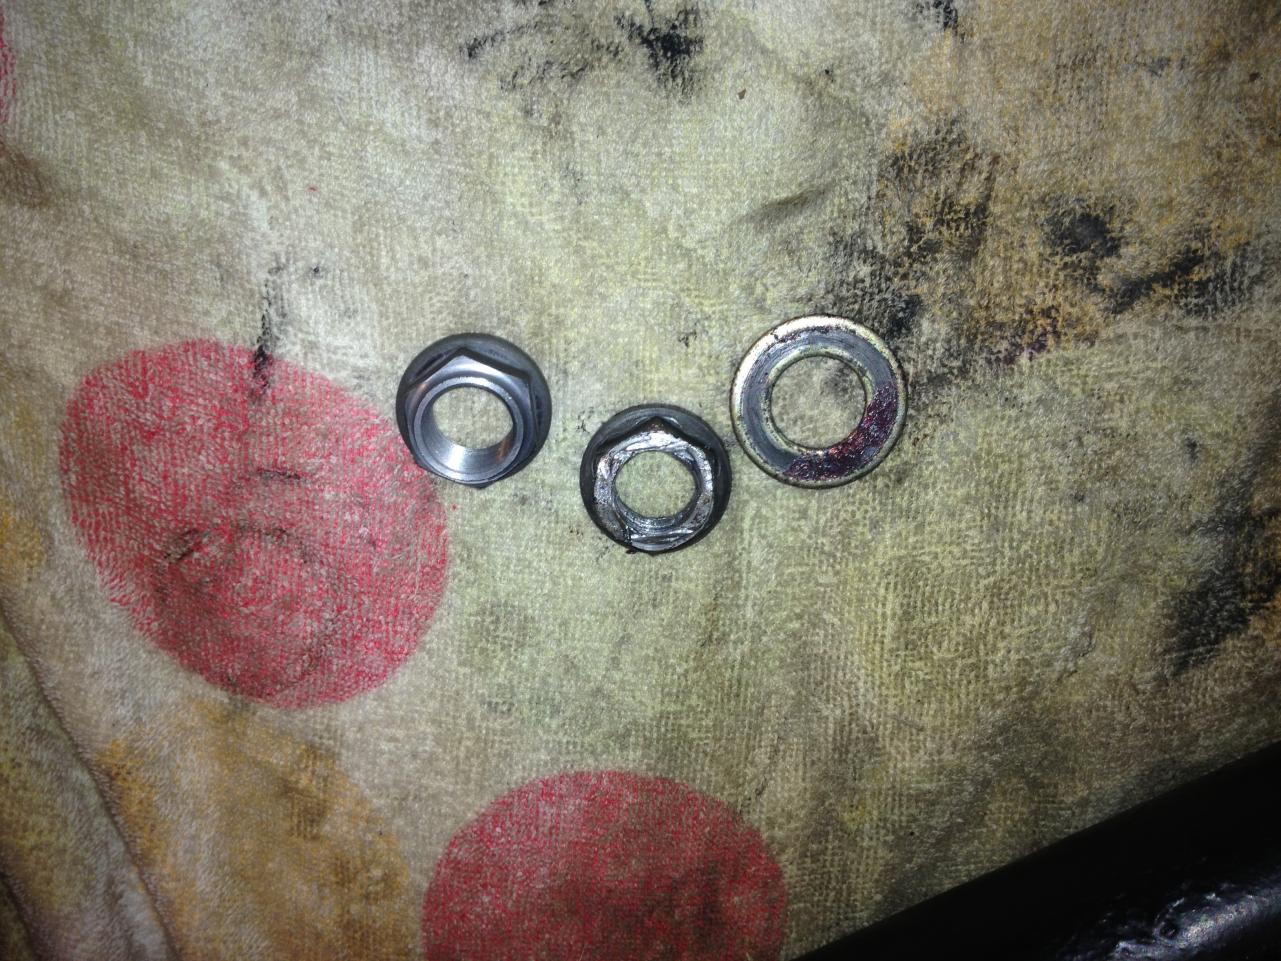
The first nut I cut the peened part off, but I was really worried about damaging the threads. I consulted my manual and it said not to unpeen the nut because THAT will damage the threads. So I did not cut the second one. They both came off without damaging the threads. Now I am confused about which was the right approach, but in this case my luck held.
-
Steve's right. The problem with these types of discussion is that the terms power, torque, work, energy, etc. get misused. I'm also an engineer and pulled one of my texts on Engineering mechanics, and quickly got bored and put it away. I will say this. The argument could probably be better made by using energy not power. Moment of inertia figures into that which means (over simplified) that if the moment of inertia is smaller (i.e. lighter flywheel/driveshaft, whatever) there will be more energy available to do work at the wheels. The car will accelerate faster.
-
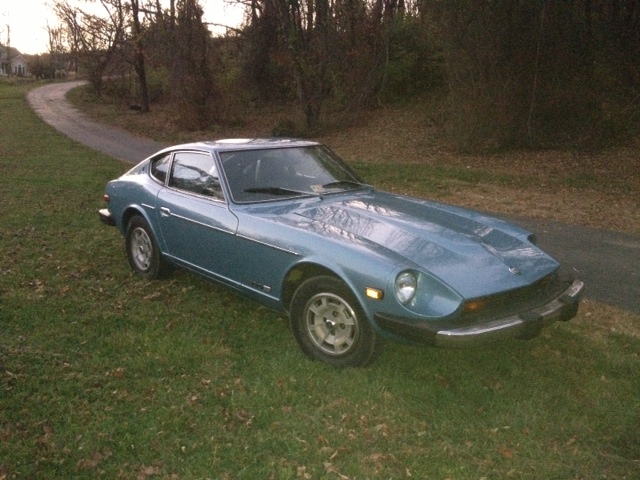
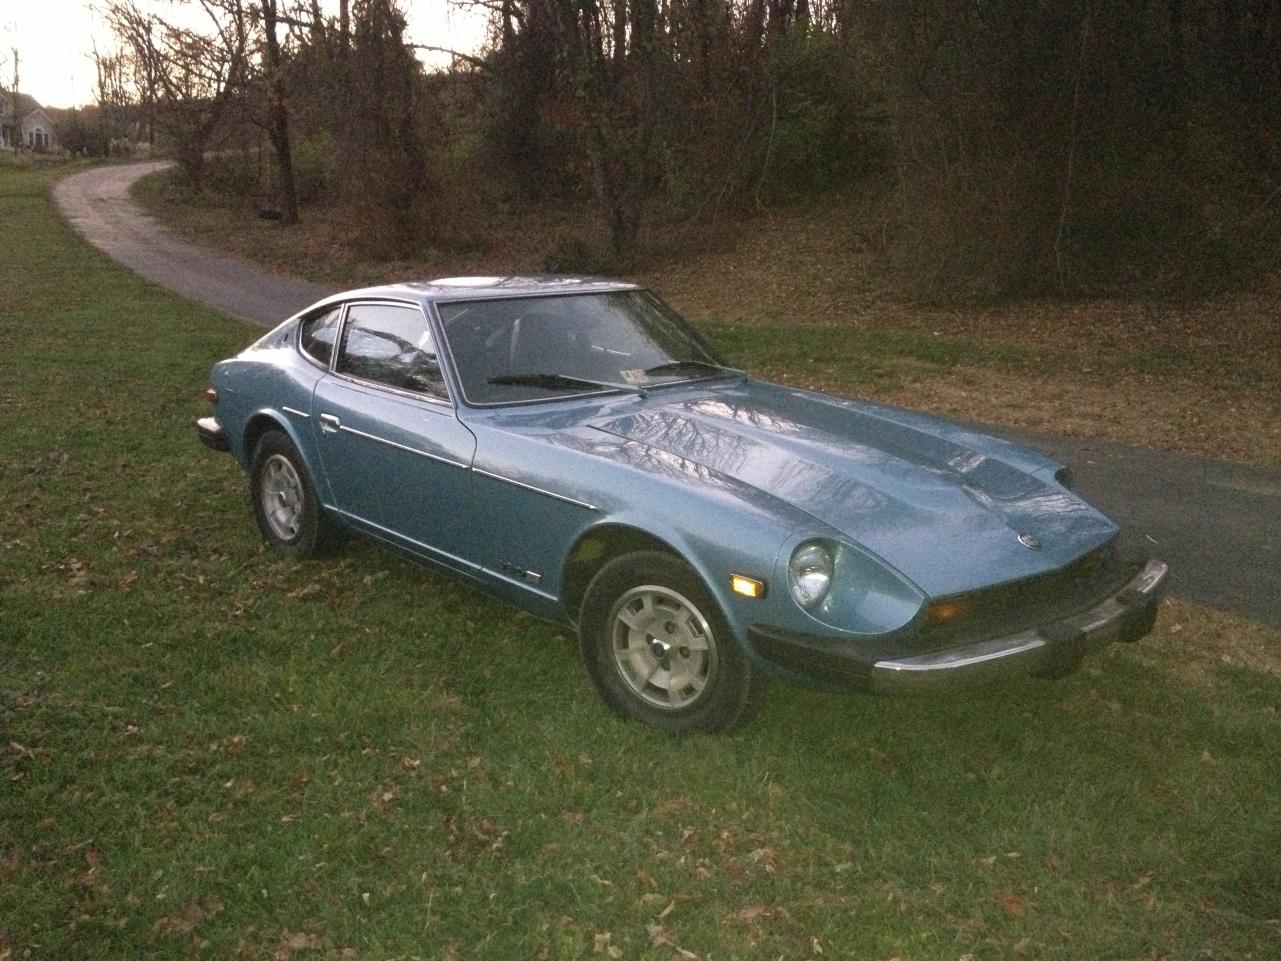
You will never get the money out of the car if you sell it to justify all the parts you have put on in your thread. So it'd be a huge financial loss without even considering all of the hours of hard work. That car's going to be about perfect mechanically when your done. Finish the job. Get it back road worthy, drive it for a while then strip it down and paint it. For what it's worth, I like the color, and I have been enjoying the resto-thread.
-
That's a nice car. I'd drive it!
-
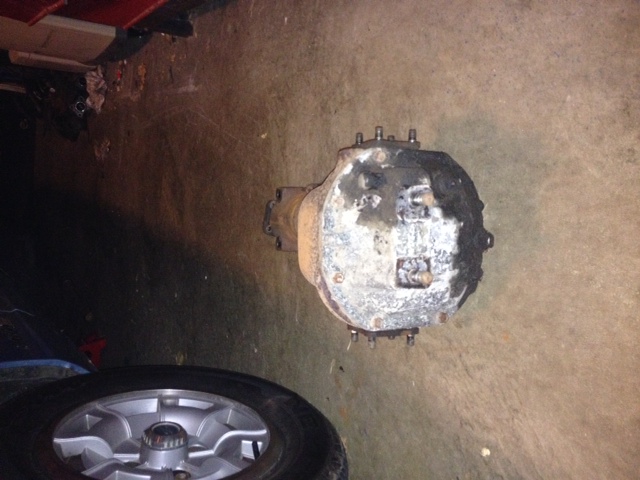
I've been searching and got a little frustrated so I'm going to ask directly. I am still a little new to S-30 ownership -sorry. I am planning to rebuild my differential. The bearings are very noisy and I have it out so now's a good time. I thought that it was an R-180 but I have confirmed that it is an R-200. Would you expect to see that on a '76 280 with a 4spd?
-
The rear stub axle nuts are off! What a chore that was. After fighting with them for hours in my garage with various arrangements including my small impact wrench, hammers, etc. I uncharacteristically (for me) asked for help. I brought them to work and our facilities manager let me borrow a real impact wrench. They came off instantly. The lesson is that the right tools can make the most impossible tasks relatively (!) easy. Wish I had asked sooner. In hindsight, I would have broken them with the struts still on the car. That way I could have used a huge lever without the darn axles spinning.
-
I'm not sure I am a big fan of the styling. Mostly the front canard (?) looks a little goofy to me, but I admire the fact that this guy wasn't afraid to dream big. From the photos his workmanship looks pretty awesome, too.
-
Leon: Thanks alot. That was just what I needed. With your (and Blue's) help I was able to get a large portion of the rear end torn apart. I got the old struts out, dropped the differential and removed a lot of other odds and ends. What a mess. I am taking pictures and will start a thread when I get a little more work done. Thank god I bought an impact wrench and penetrating oil!
-
I'm looking for some help. Before I get flamed, I was not lazy and tried the search function. It is possible, though, that I missed something. Here goes: I'm rebuilding my rear suspension (right now) and have illumina struts and the Tokico springs (1" lowering). Has anyone done a rear suspension rebuild thread (hopefully with photos) that I might reference. If not, I guess I will start one... Thanks for any replies.
-
Do you have any idea how much of a weight difference there is? If there is a significant difference then it might be worth it (in my mind). This is not a static component, it's rotating so there would be an added benefit. I have a feeling, though, that this is the type of component upgrade you make when you are going for a track car and have already tweaked everything else. If you do make the change please post some results. I'd be interested to know how it works out.
-
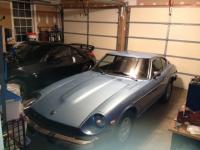
Sorry it's not the best picture. In front, 1976 280z. In back, 2008 350 NISMO.
-
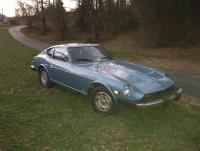
I'm still processing. I expected to look longer before finding a good car, but the right one popped up so I bought it. In the long run, I'm going to tear it down to bare metal and do a resto-mod with a lot of effort to retain the original flavor of the car. My thoughts at this point are to modernize the brakes to four-wheel discs, rebuild the suspension and possible drop it down an inch. It wallows in turns right now probably because the shocks and bushings are worn out. I also want to pull the motor, and transmission and do a complete rebuild. I want to keep the original inline 6 but modify it to get the output near the 300 hp mark. I don't know if that is realistic. I need to do more research. I will need to get some fatter tires to handle the power and give the right stance. I will flare the fenders if I need to, but I intend to keep the body as close to original as possible. I will try to pull the bumpers in closer to the body and clean up a little here and little there, but at the end of the day I want it to continue to look like a 280z but kick the crap out the usual assortment of Mushtangs and Camaros. Right now the car only needs a little effort. There are the beginnings of rust on the passenger floor pan (no holes) and the temperature gauge doesn't work. That's it!
-
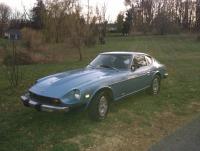
I found this nice '76 280 and now it is mine. It does have some issues as to be expected from a 36 year old car. I crawled all over it and did identify some rust, but not serious. No holes, good frame. It runs and is drivable, but I think the rack (steering) needs to be rebuilt. It is extremely stiff at the extremes and ambiguous in the middle. The brakes also need some work. They stop the car but lack authority. I'm really excited to have this car.
-
Guys, thanks for the replies. I am definitely on the look out for rust. I have a flashlight and my handy inspection mirror so I will be crawling all around the car. I have been following the western front as well. I just can't get past the concept of buying something (and some of the nice 240's are quite expensive) without looking at it. There are horror stories about ebay shysters galore. I have a lot of trouble swallowing the concept of buying sight unseen. That is why I have been looking "casually". I actually have a beautiful 2008 350Z NISMO so I already have one badass car. I can wait for the right one. I'm just in love with the first gen. body style. I'm hoping this one is nice. If it isn't then I'll just keep looking. Again, thanks for the replies. I greatly respect all who post on this board.